
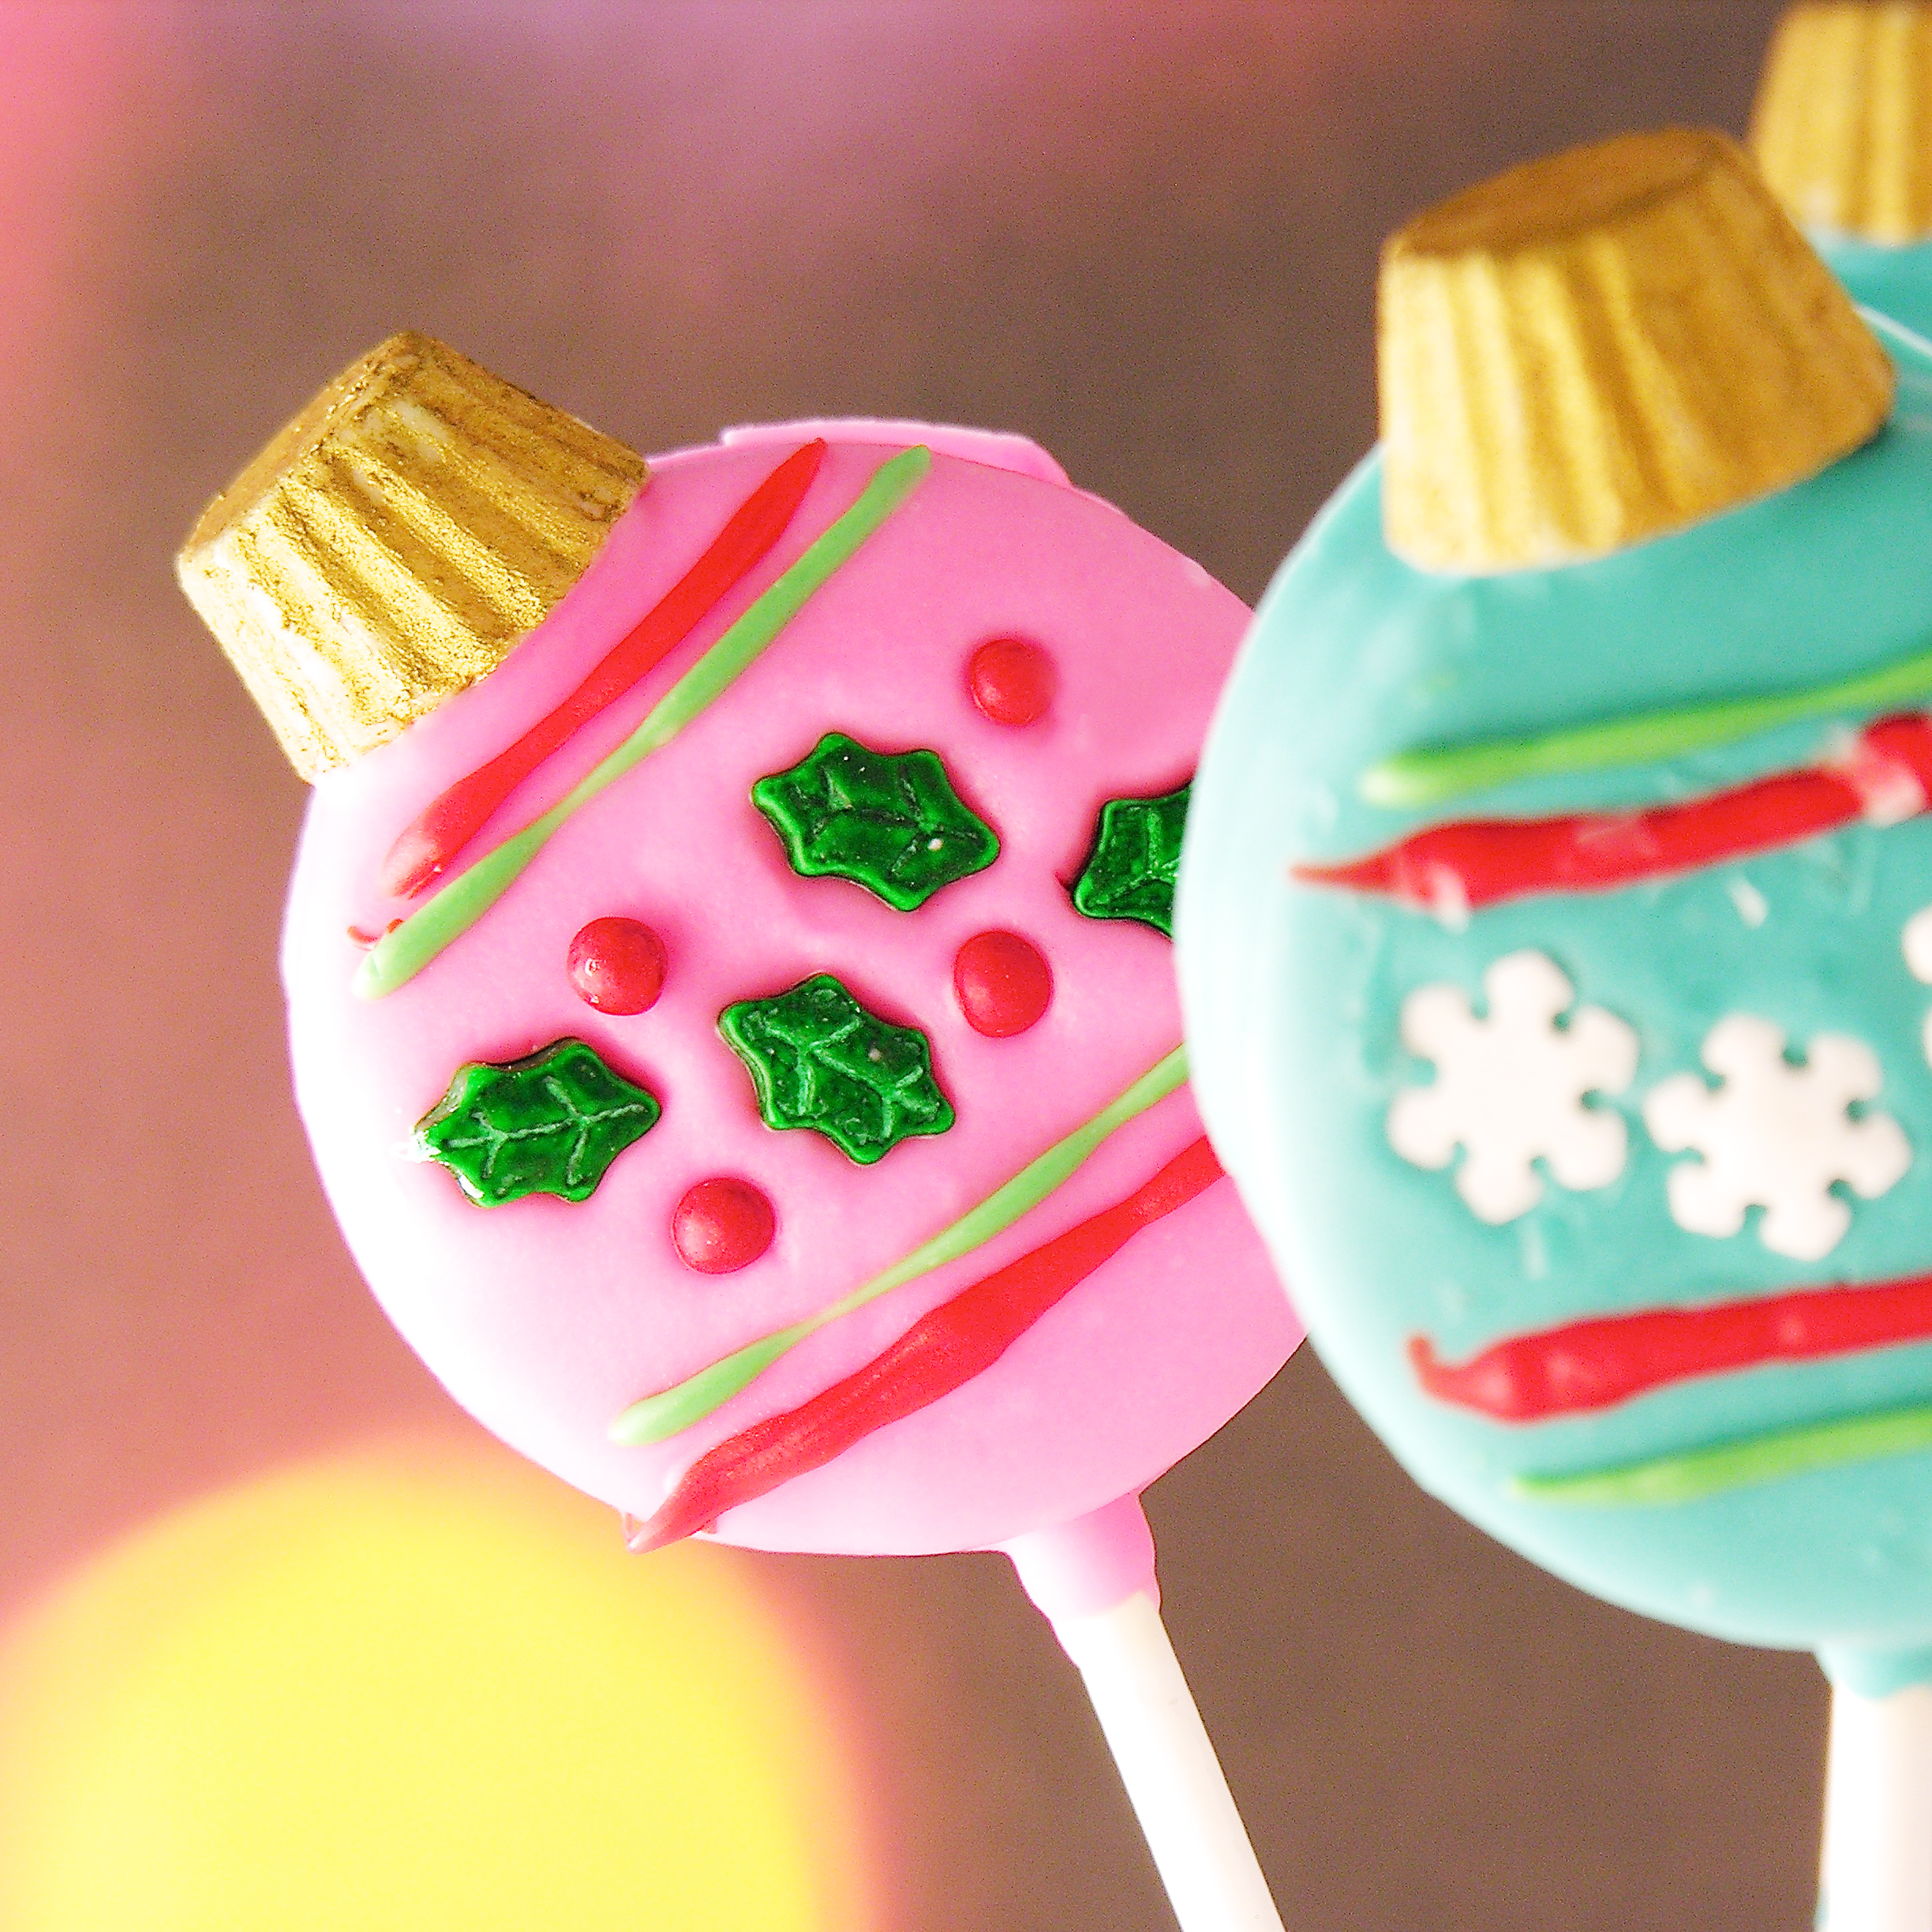
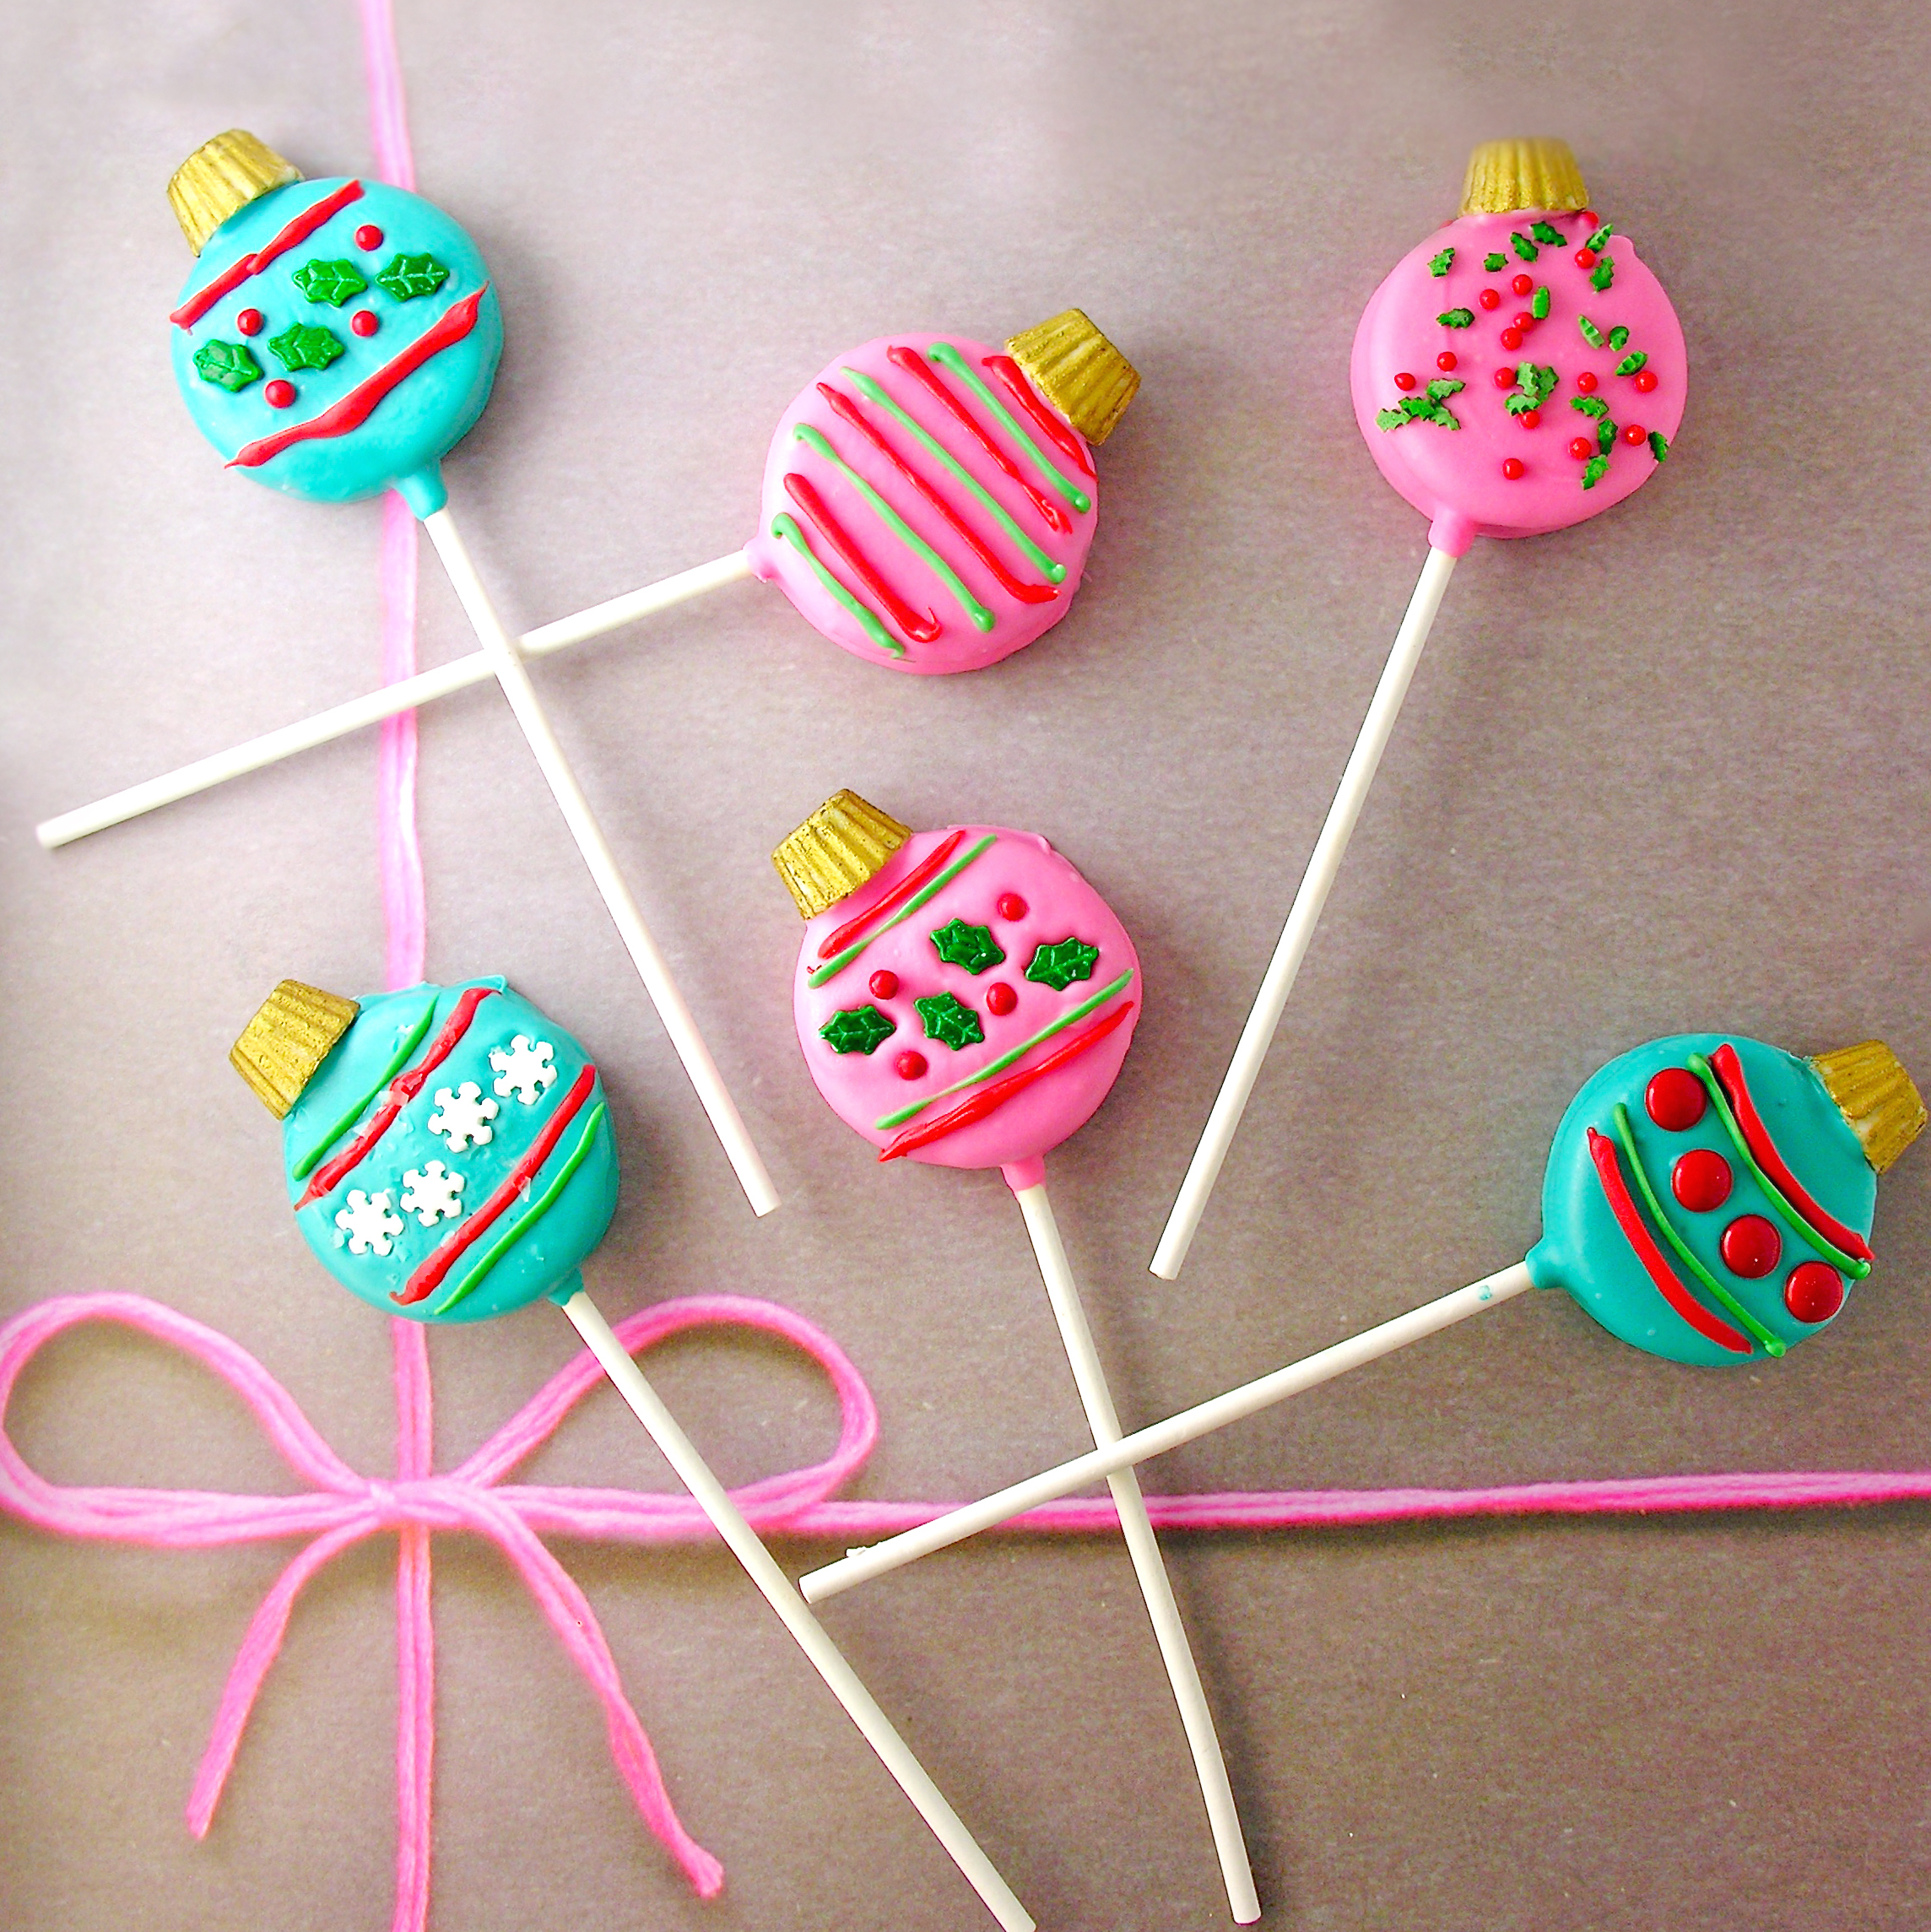
Celebrate the Christmas season with these fun ornament pops.
Made with Oreos, mini peanut butter cups and sprinkles, they are sure to make everyone in your family smile!
Goodness. I love cute Christmas cookies. These were SO fun to make, and decorating them is a blast. I pulled out all of those Christmas sprinkles and just went crazy. I highly recommend these for a fun project with your kids!!
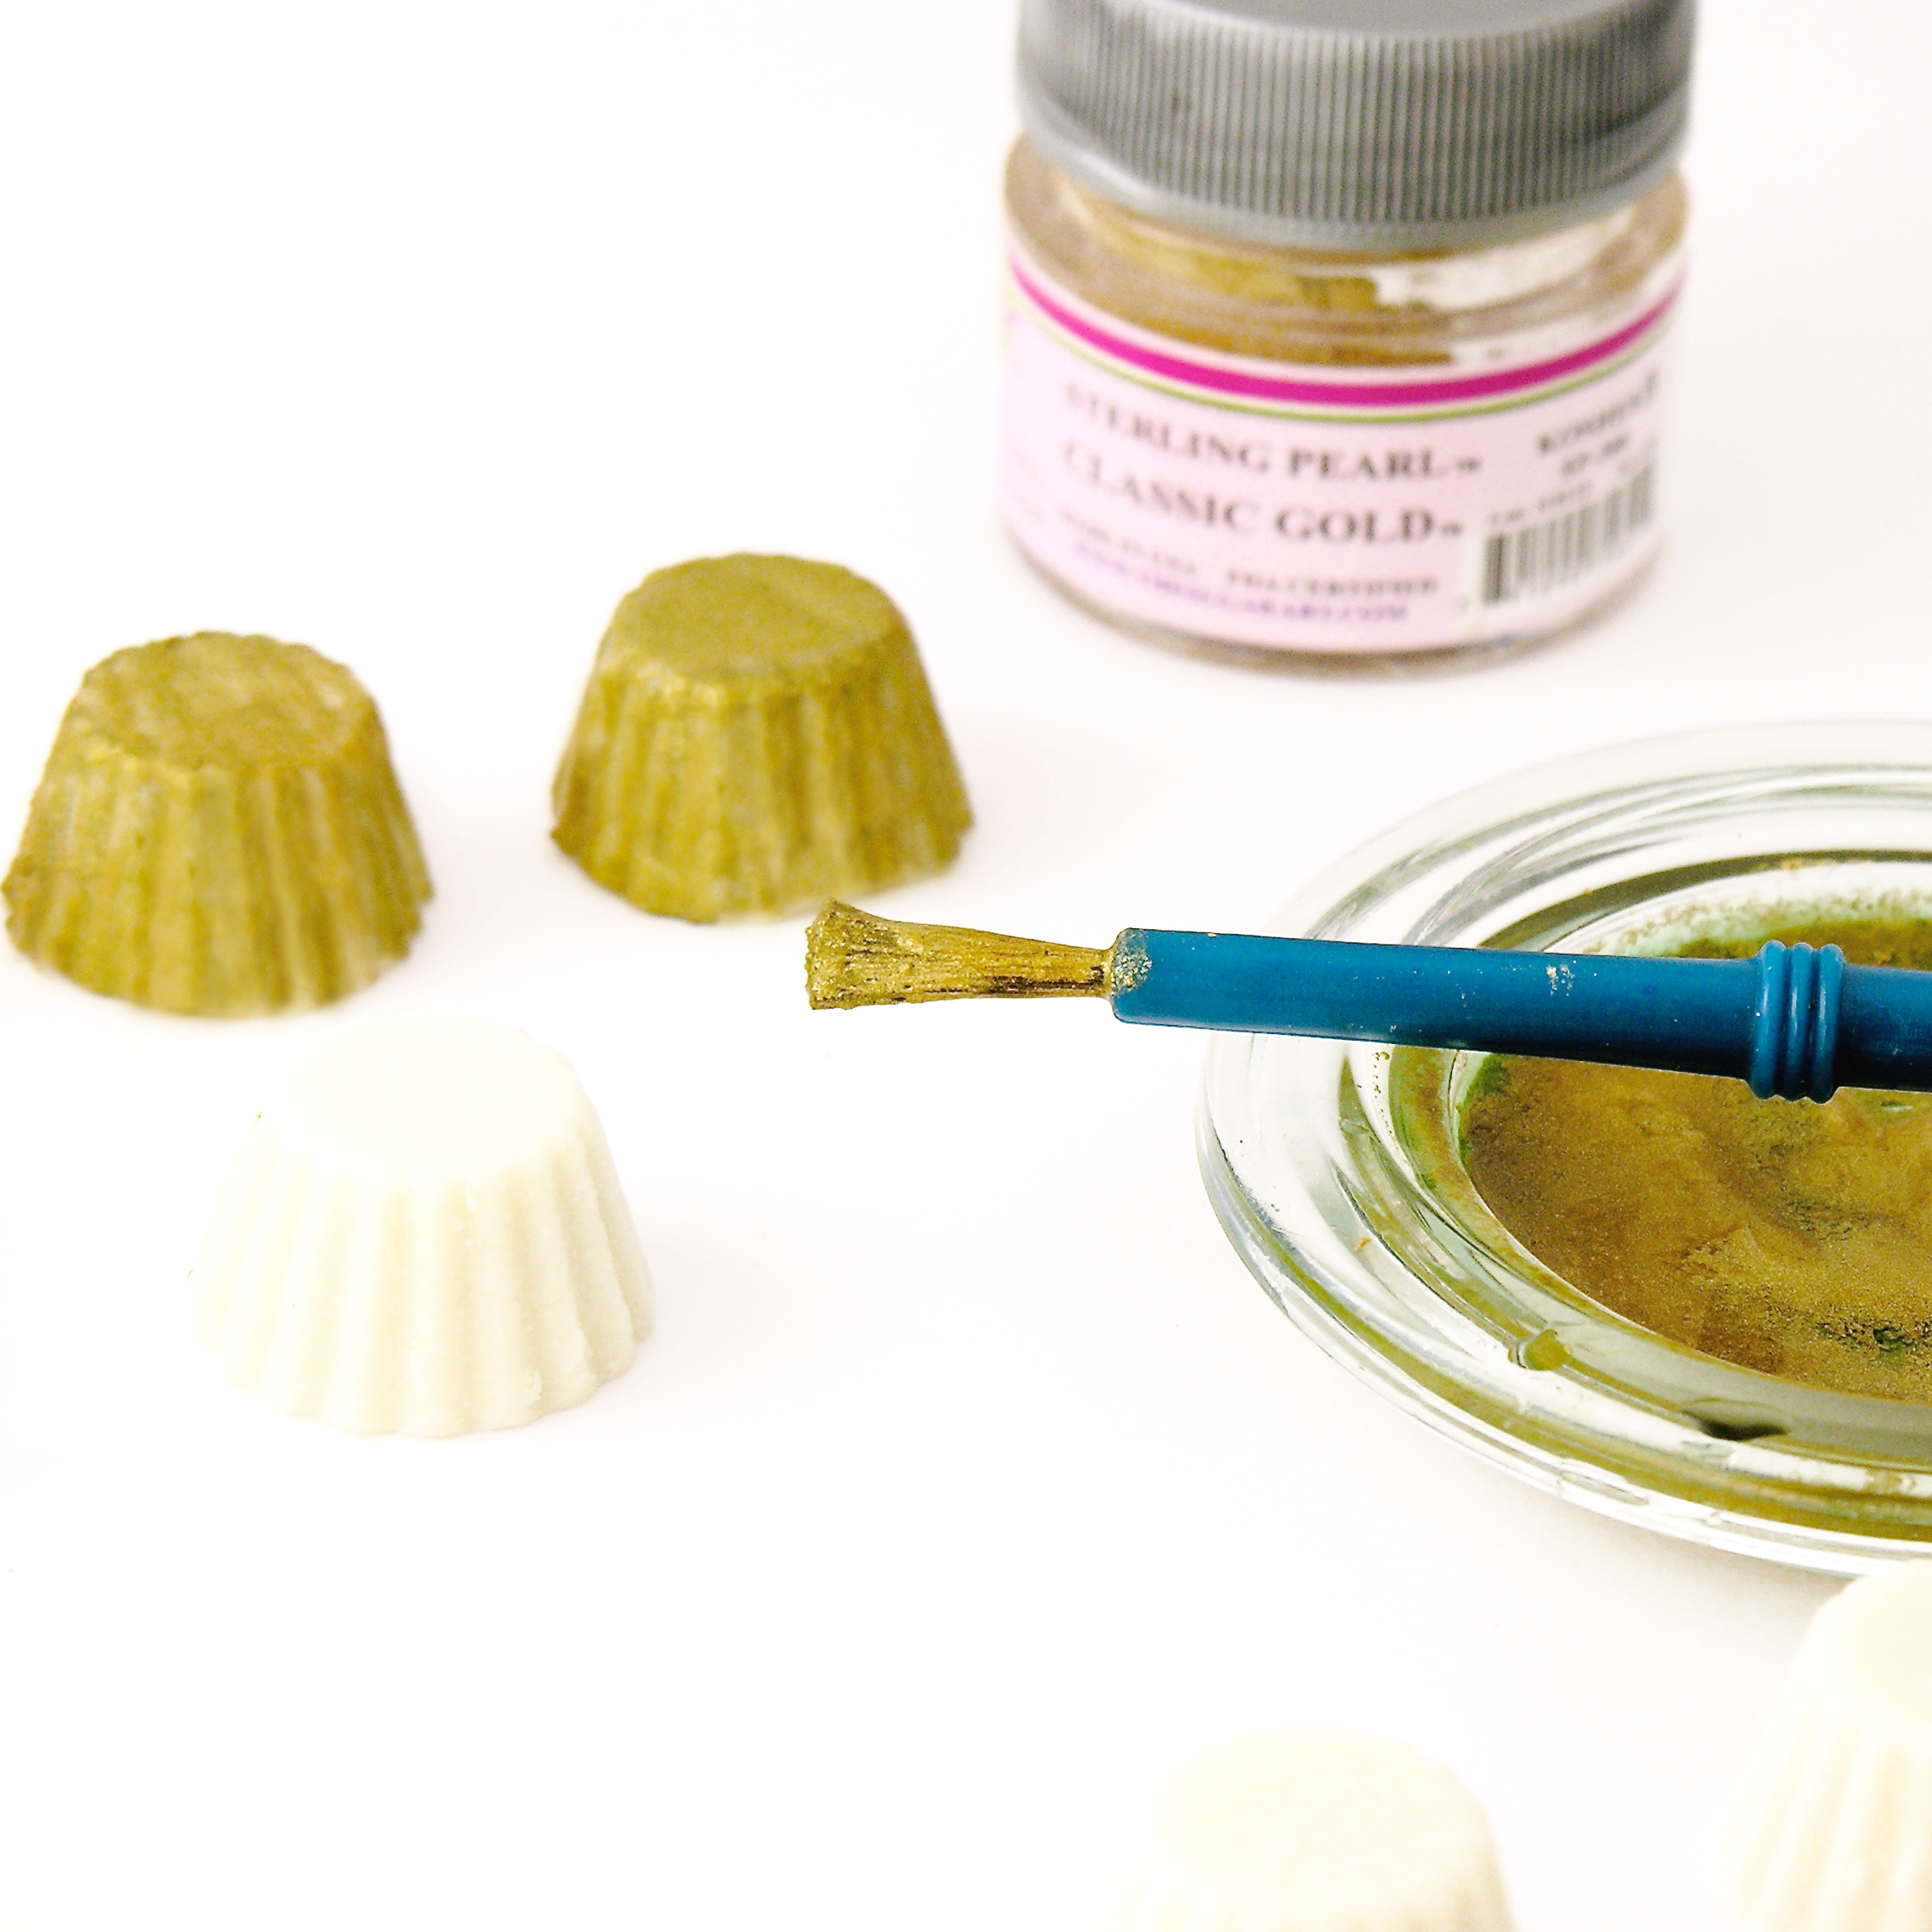
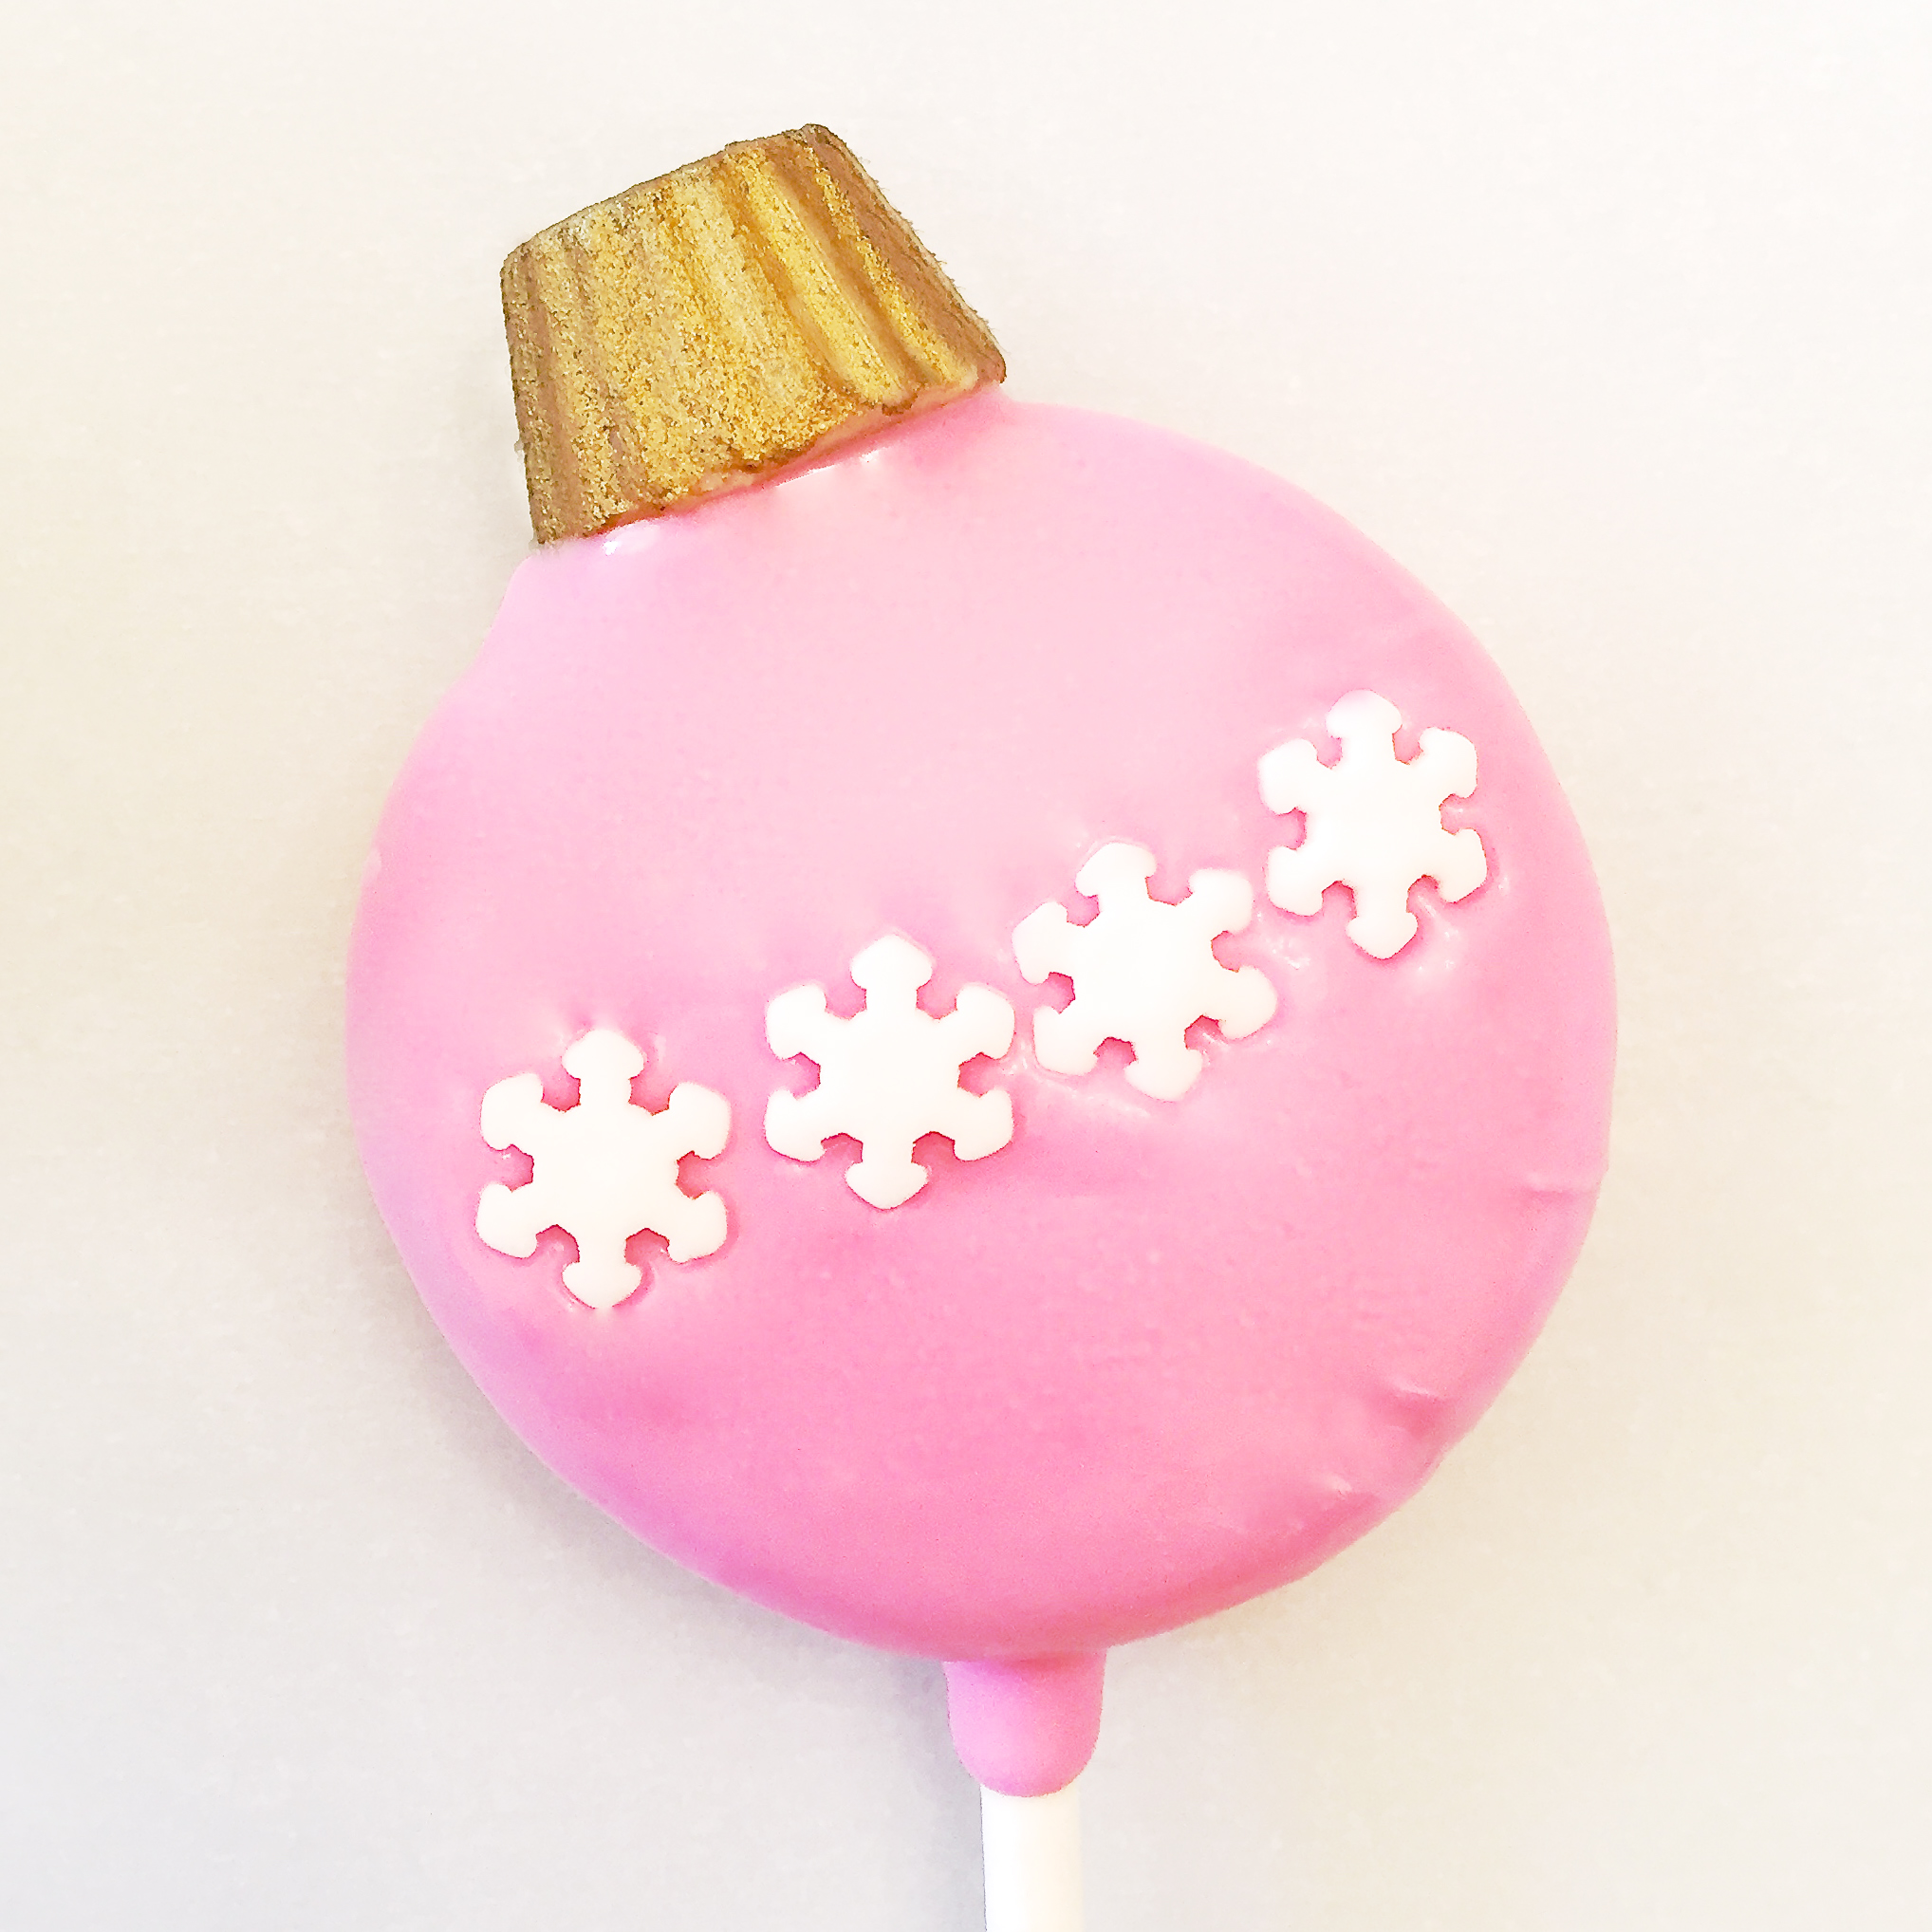
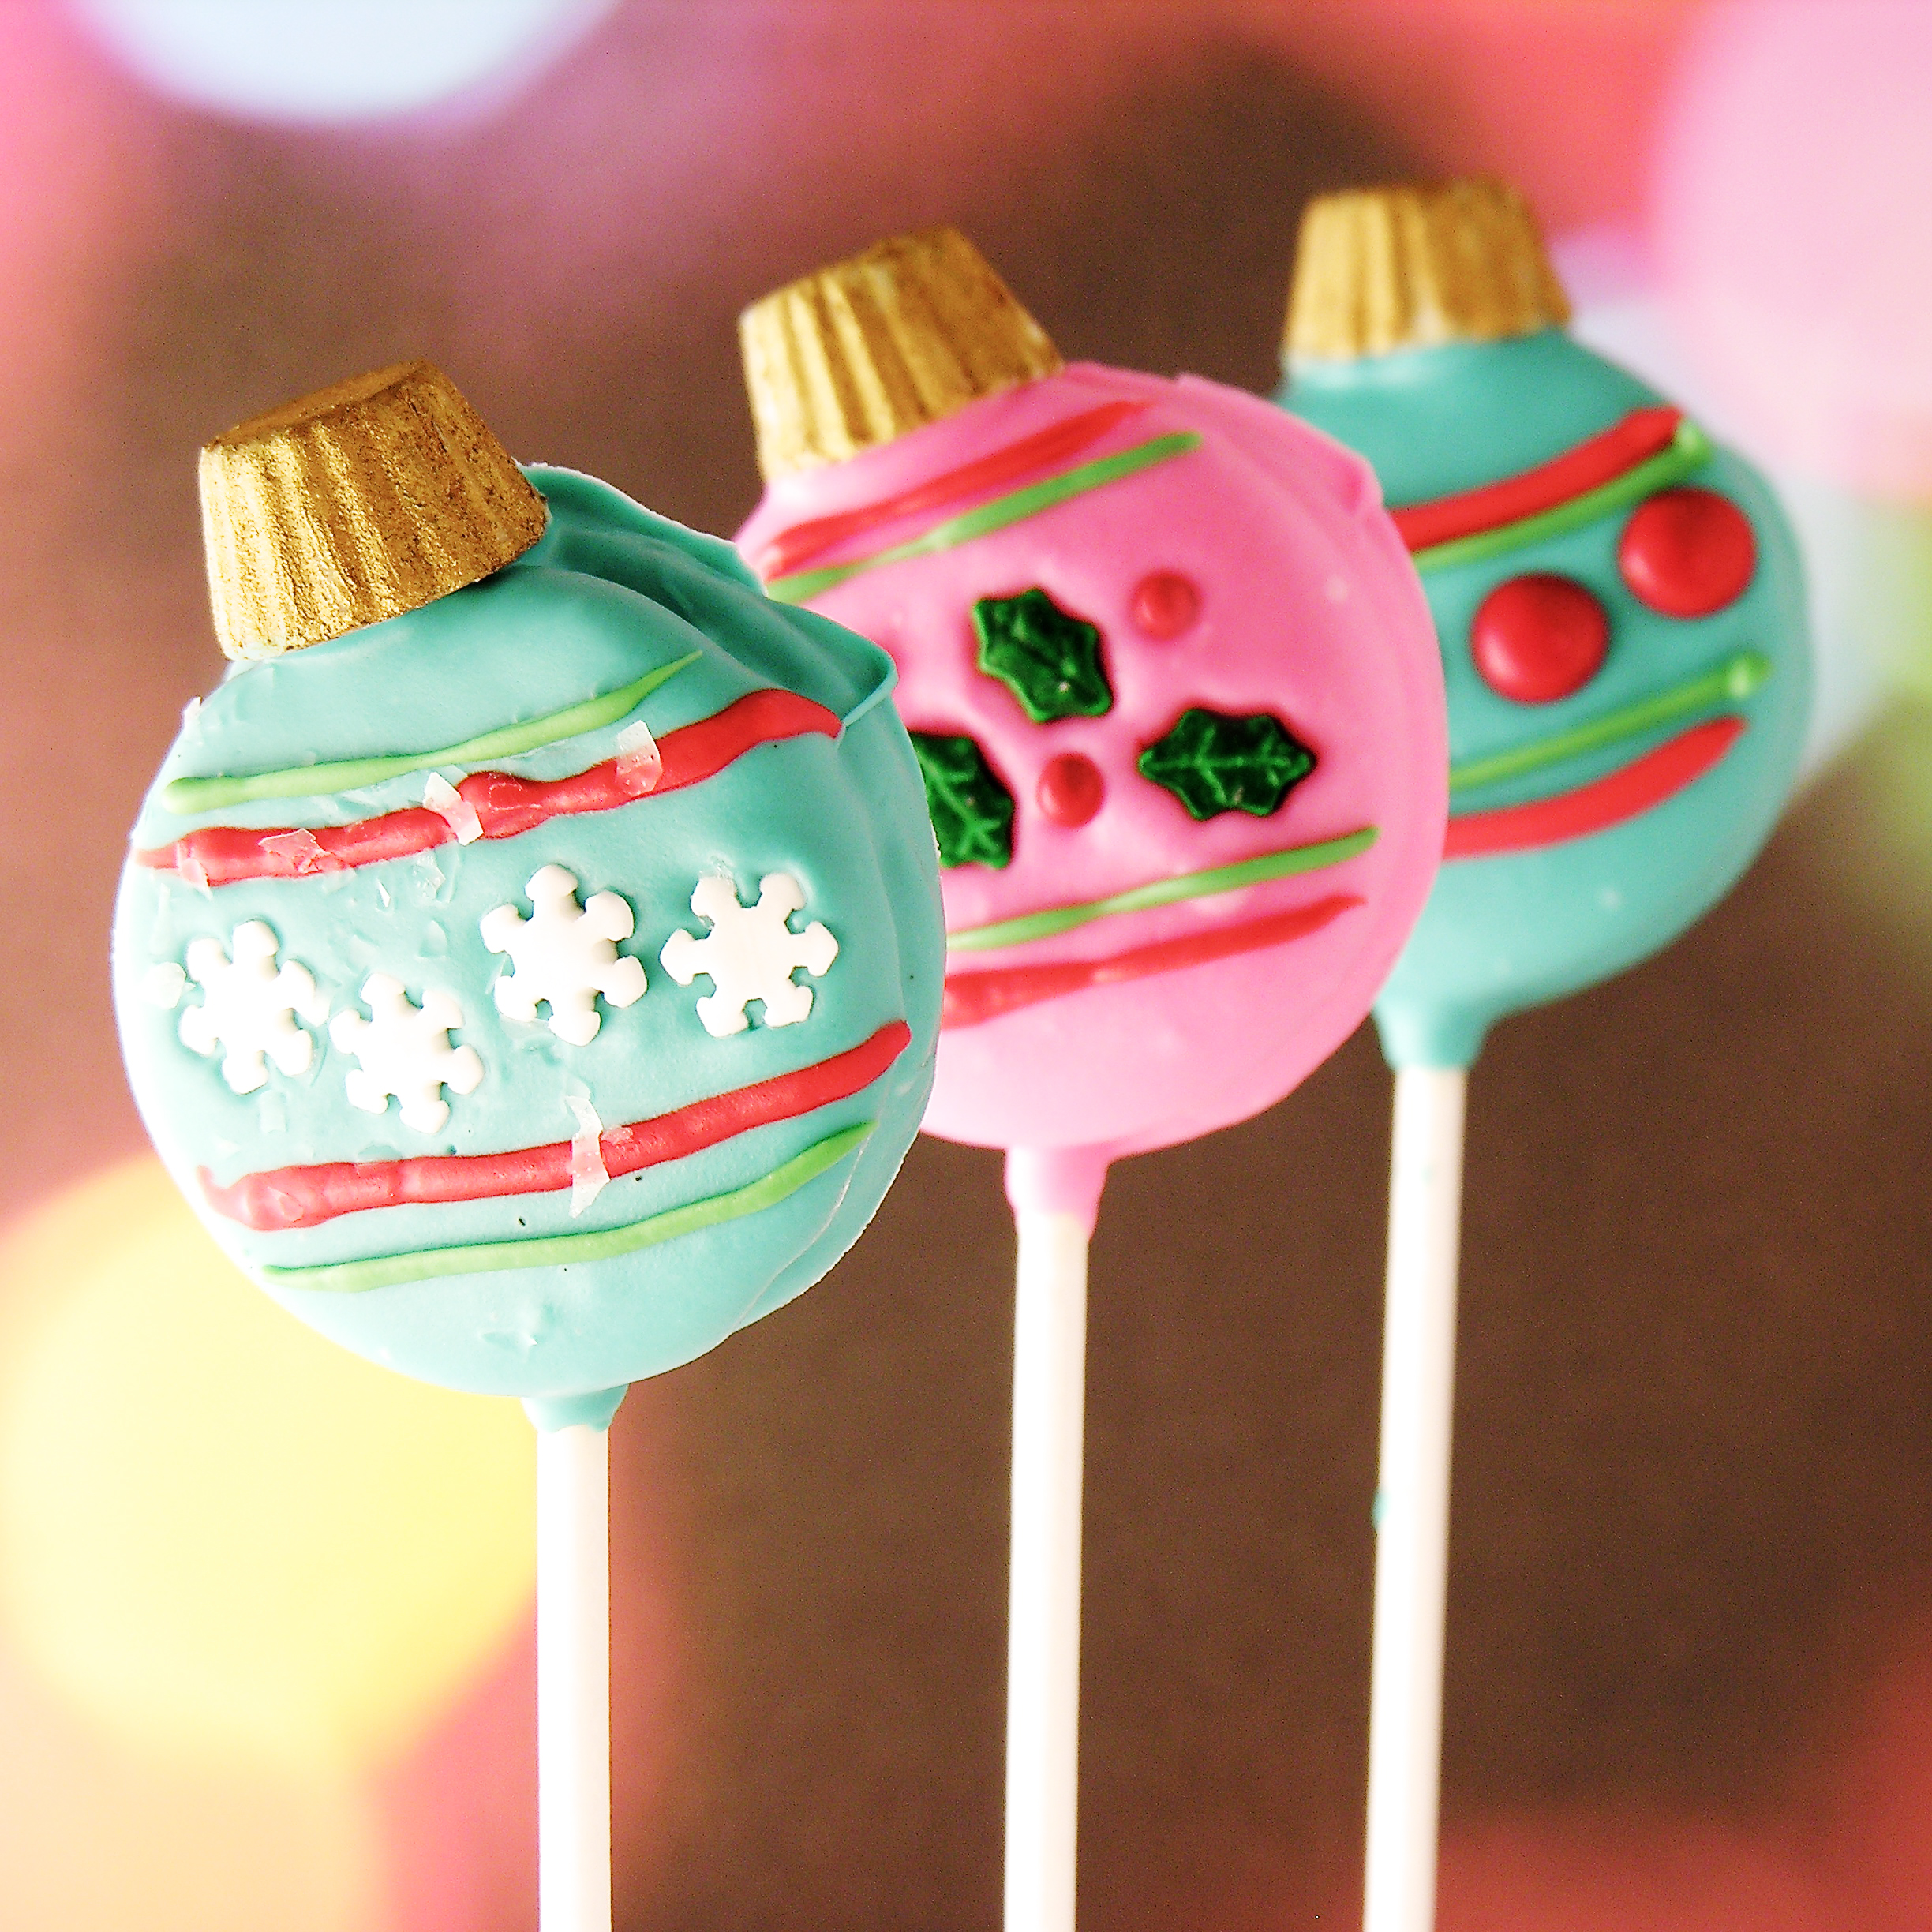
The dilemma for making an edible ornament is always that little cap. I solved the problem by painting mini peanut butter cups with a little bit of edible gold dusting powder (the same stuff I used on my shortbread cookies last week). I love how they turned out! Happy shiny tops for these!
Here is how we made them: (printable recipe here)
INGREDIENTS: (makes about 24-28 pops)
- One package of Oreo Double Stuff cookies.
- 2 bags of Wilton’s Candy Melts. As you can see, I used pink and aqua, plus I had a little green and red extra from other projects. You can use as many colors as you want- but you will need at least 2 full bags to cover the Oreos.
- One bag (8 oz) of Reese Peanut Butter Cup Minis- in white chocolate
- Edible gold dusting powder (I used this brand
)
- Fun Christmas sprinkles and jimmies
DIRECTIONS:
Make gold “caps” for ornaments first.
- Spoon a little of the gold powder into a small bowl or plate, and add a bit of water until it is the consistency of a thick paint.
- Use a food-grade brush to paint the gold on the bottom and sides of 24-28 peanut butter cups. Paint them all and then go back and give them a second coat to smooth out the parts that didn’t stick the 1st time.
- Set aside to dry.
Prepare Oreo Pops (there is a tutorial for these, if you have never done them, here)
- Twist apart all of your Oreos.
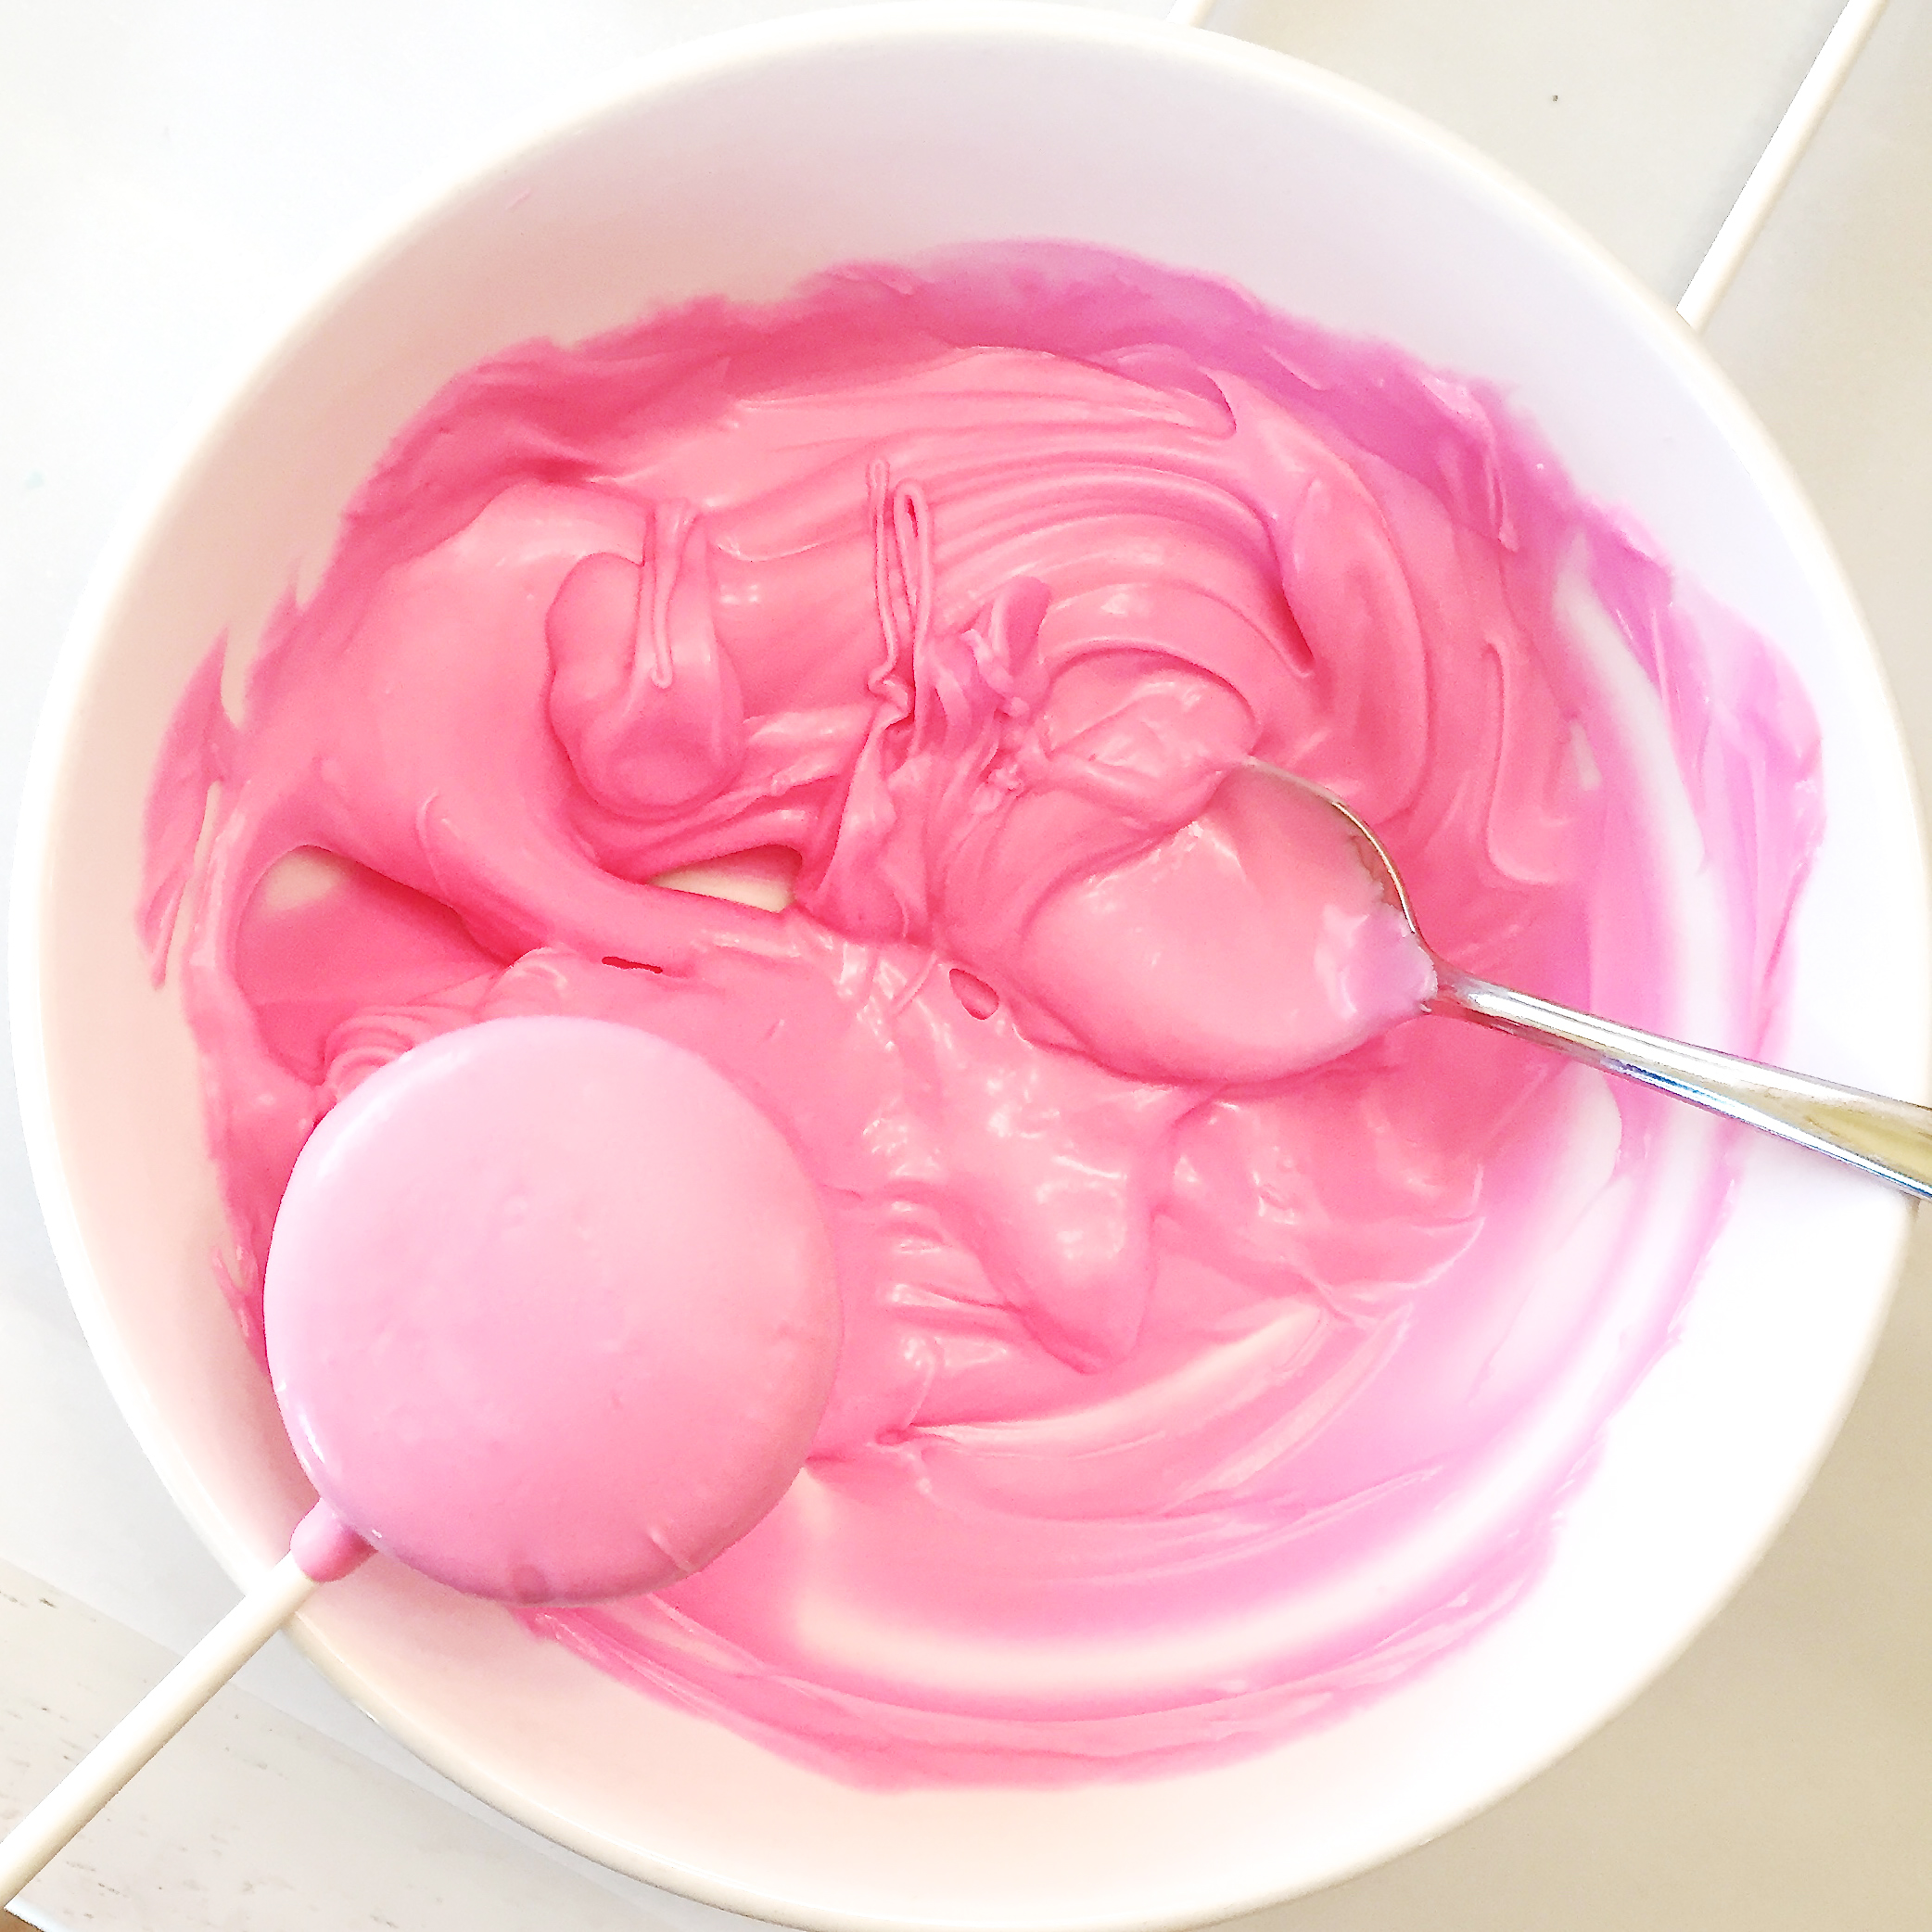
- Melt a small amount of Candy Melts (<1/4 cup) in the microwave in 3o second increments, stirring between until smooth.
- Dip the end of a lollipop stick into the melts, and press into white filling of Oreo. Place other half of cookie back on top and press together.
- Place Oreo and stick on a cookie sheet. Repeat this process with remaining Oreos, and then freeze all Oreos until firm (10-15 minutes).
- Melt remaining Candy Melts using method from above.
- Once Oreos are chilled, hold with stick and dip into Candy Melts until completely coated.
- Tap on side of bowl to get excess off, and drag across lip of bowl to scrape excess off back of cookie.
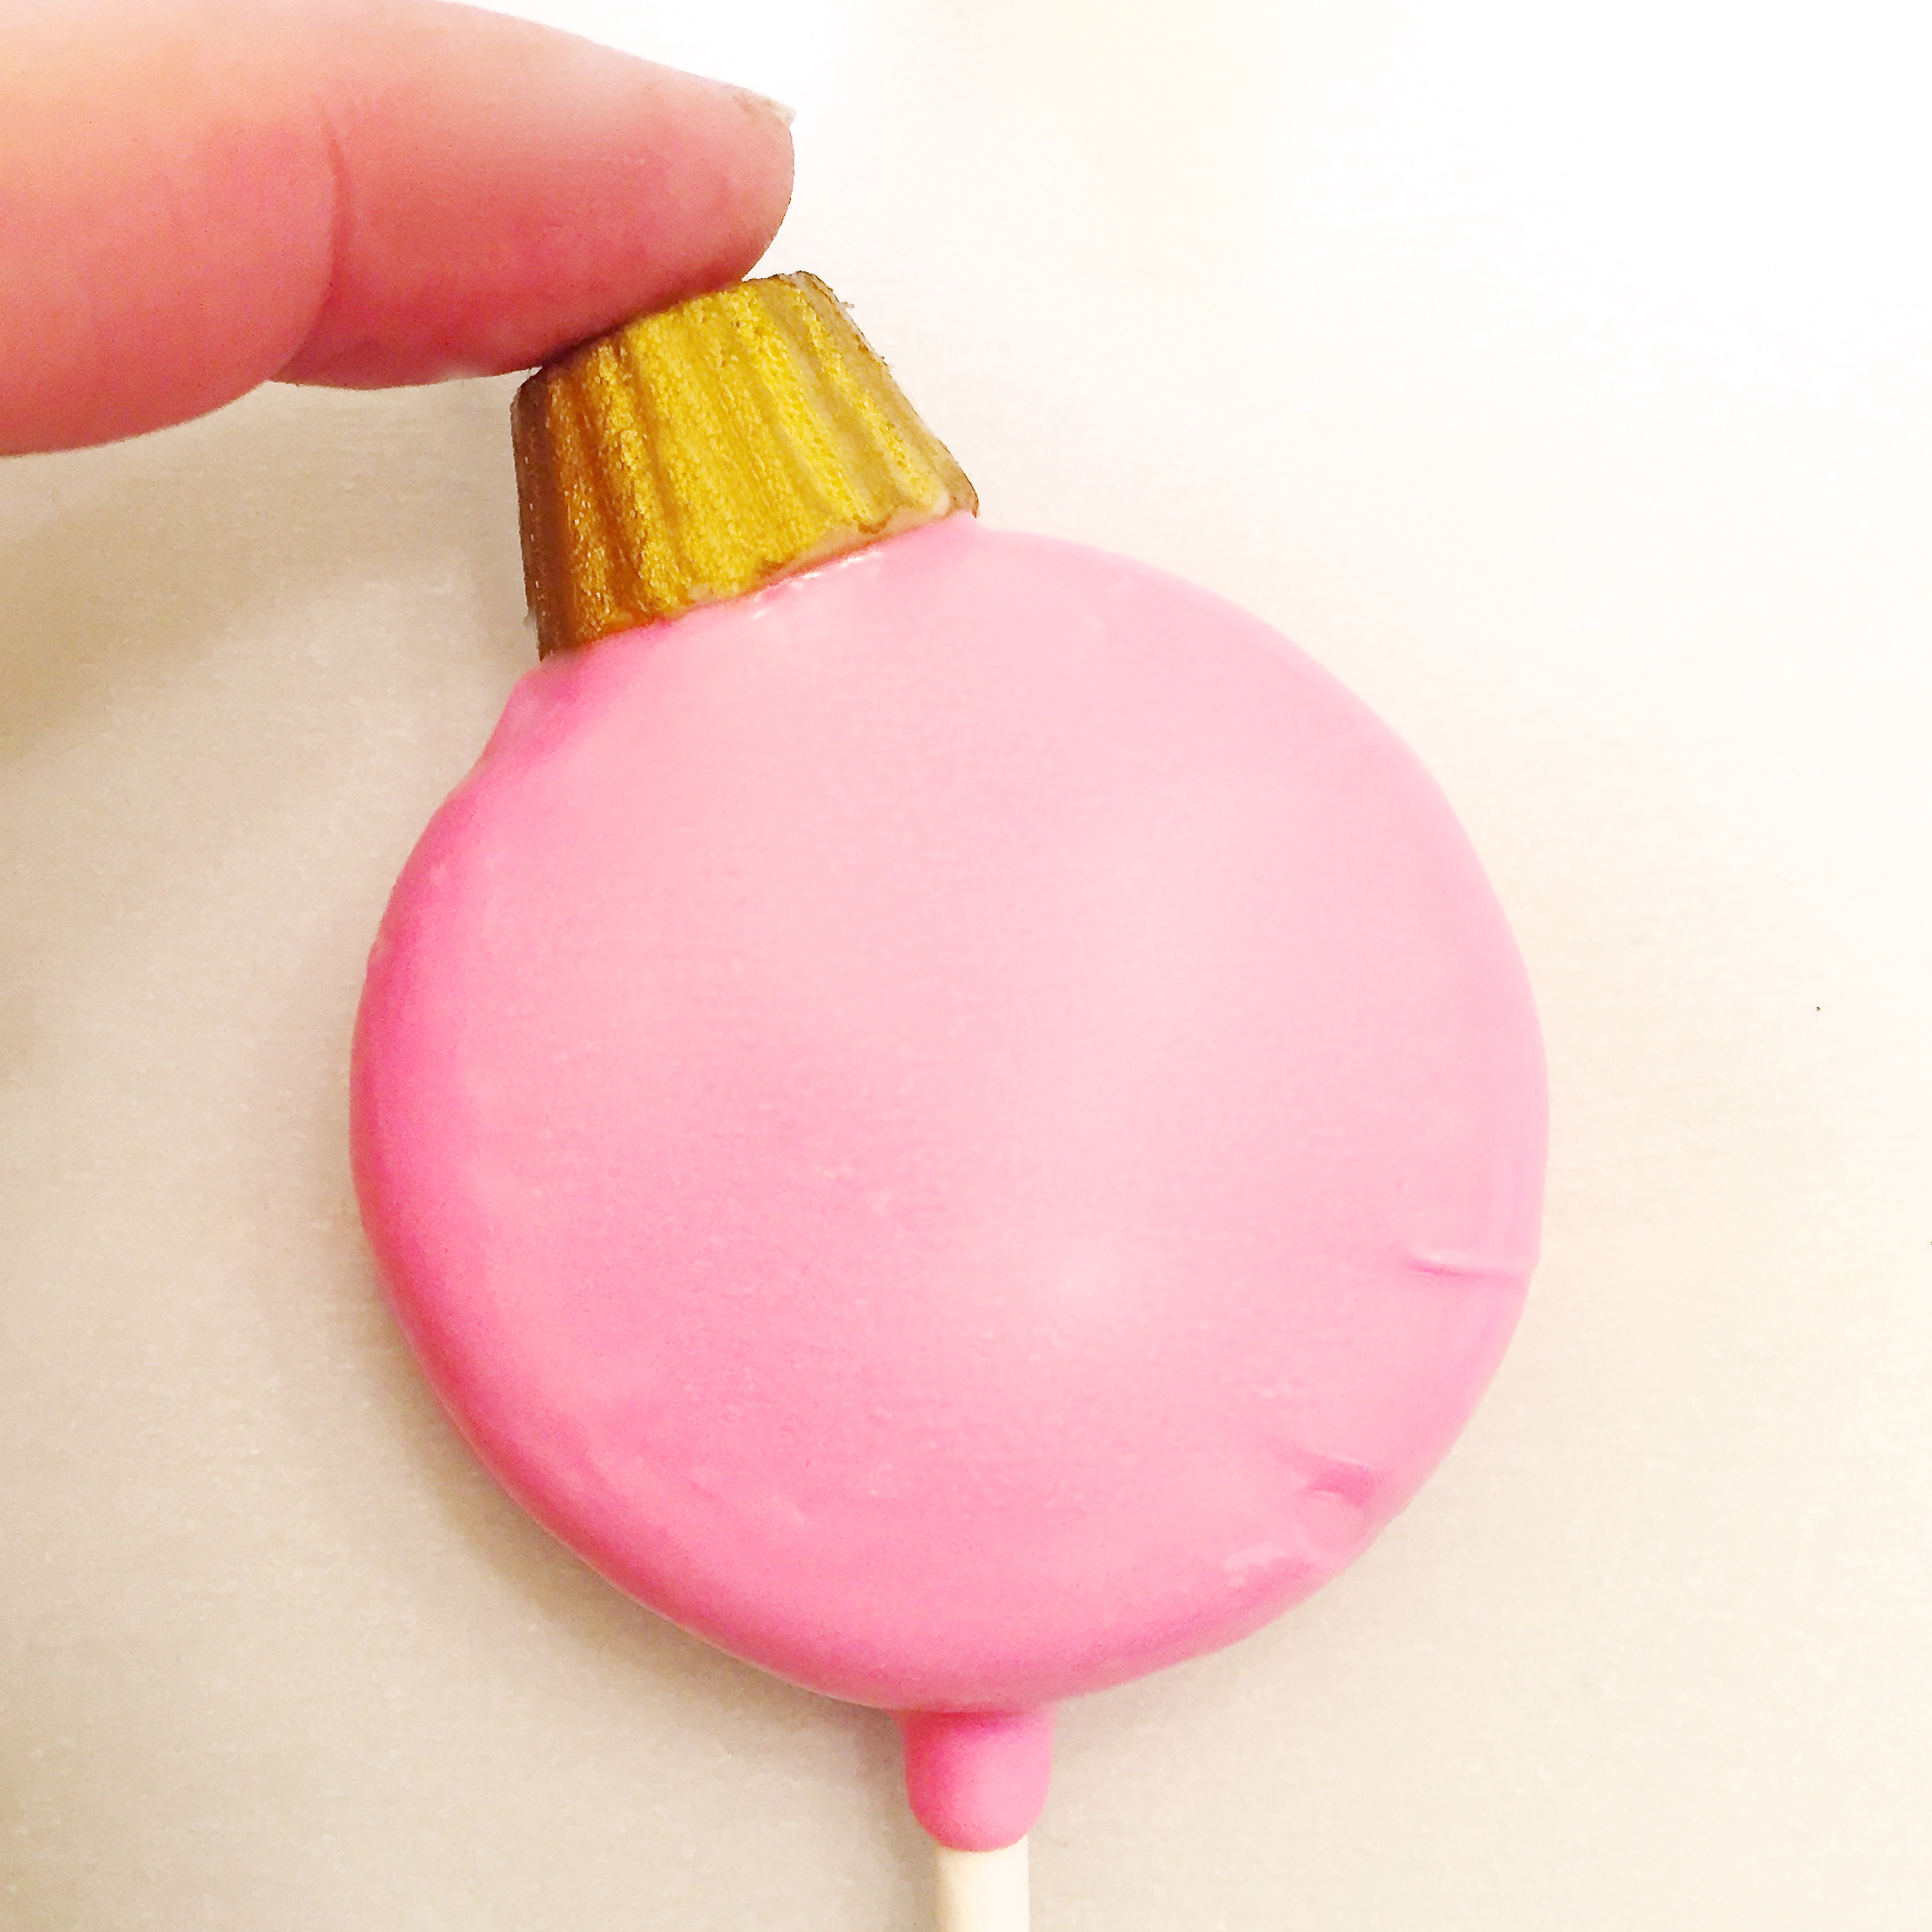
- Set on parchment paper and immediately set a gold “cap” on the top edge to harden there as the candy melts solidify.
- If you want to add sprinkles, do so before the Candy Melts get hard (stripes in other colors can be added later)
- Allow Oreo Pop to harden completely
- Decorate with other colors of Candy Melts, as desired. To make the stripes, I placed melted candy in a small zip top bag, clipped a corner and piped lines onto the Oreos.
- Once everything has completely hardened, place into individual cello bags, or into an air-tight bag or container. These will stay good for weeks when sealed up.
- Enjoy!
My thoughts: Well, by now you know how much I love my Oreo Pops! These were fun to make and a little peanut butter on top of that Oreo? Yes, please! 🙂 These make great little gifts and stocking stuffers! Enjoy! ~r
Don’t stop with just ornaments! We have two other fun Christmas Oreo Pops! (click on the photo to see the recipe)


