RSS Feed

Tag Archives: Christmas cookies

Sparkling Glass Christmas Cookies!

Stained glass Christmas Cookie

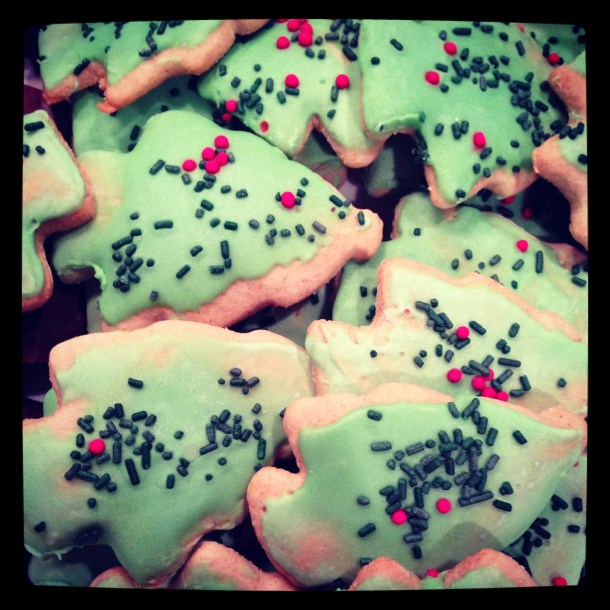
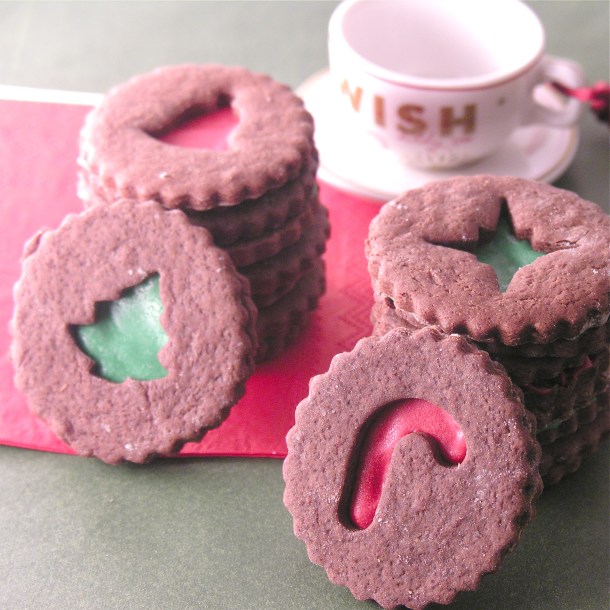
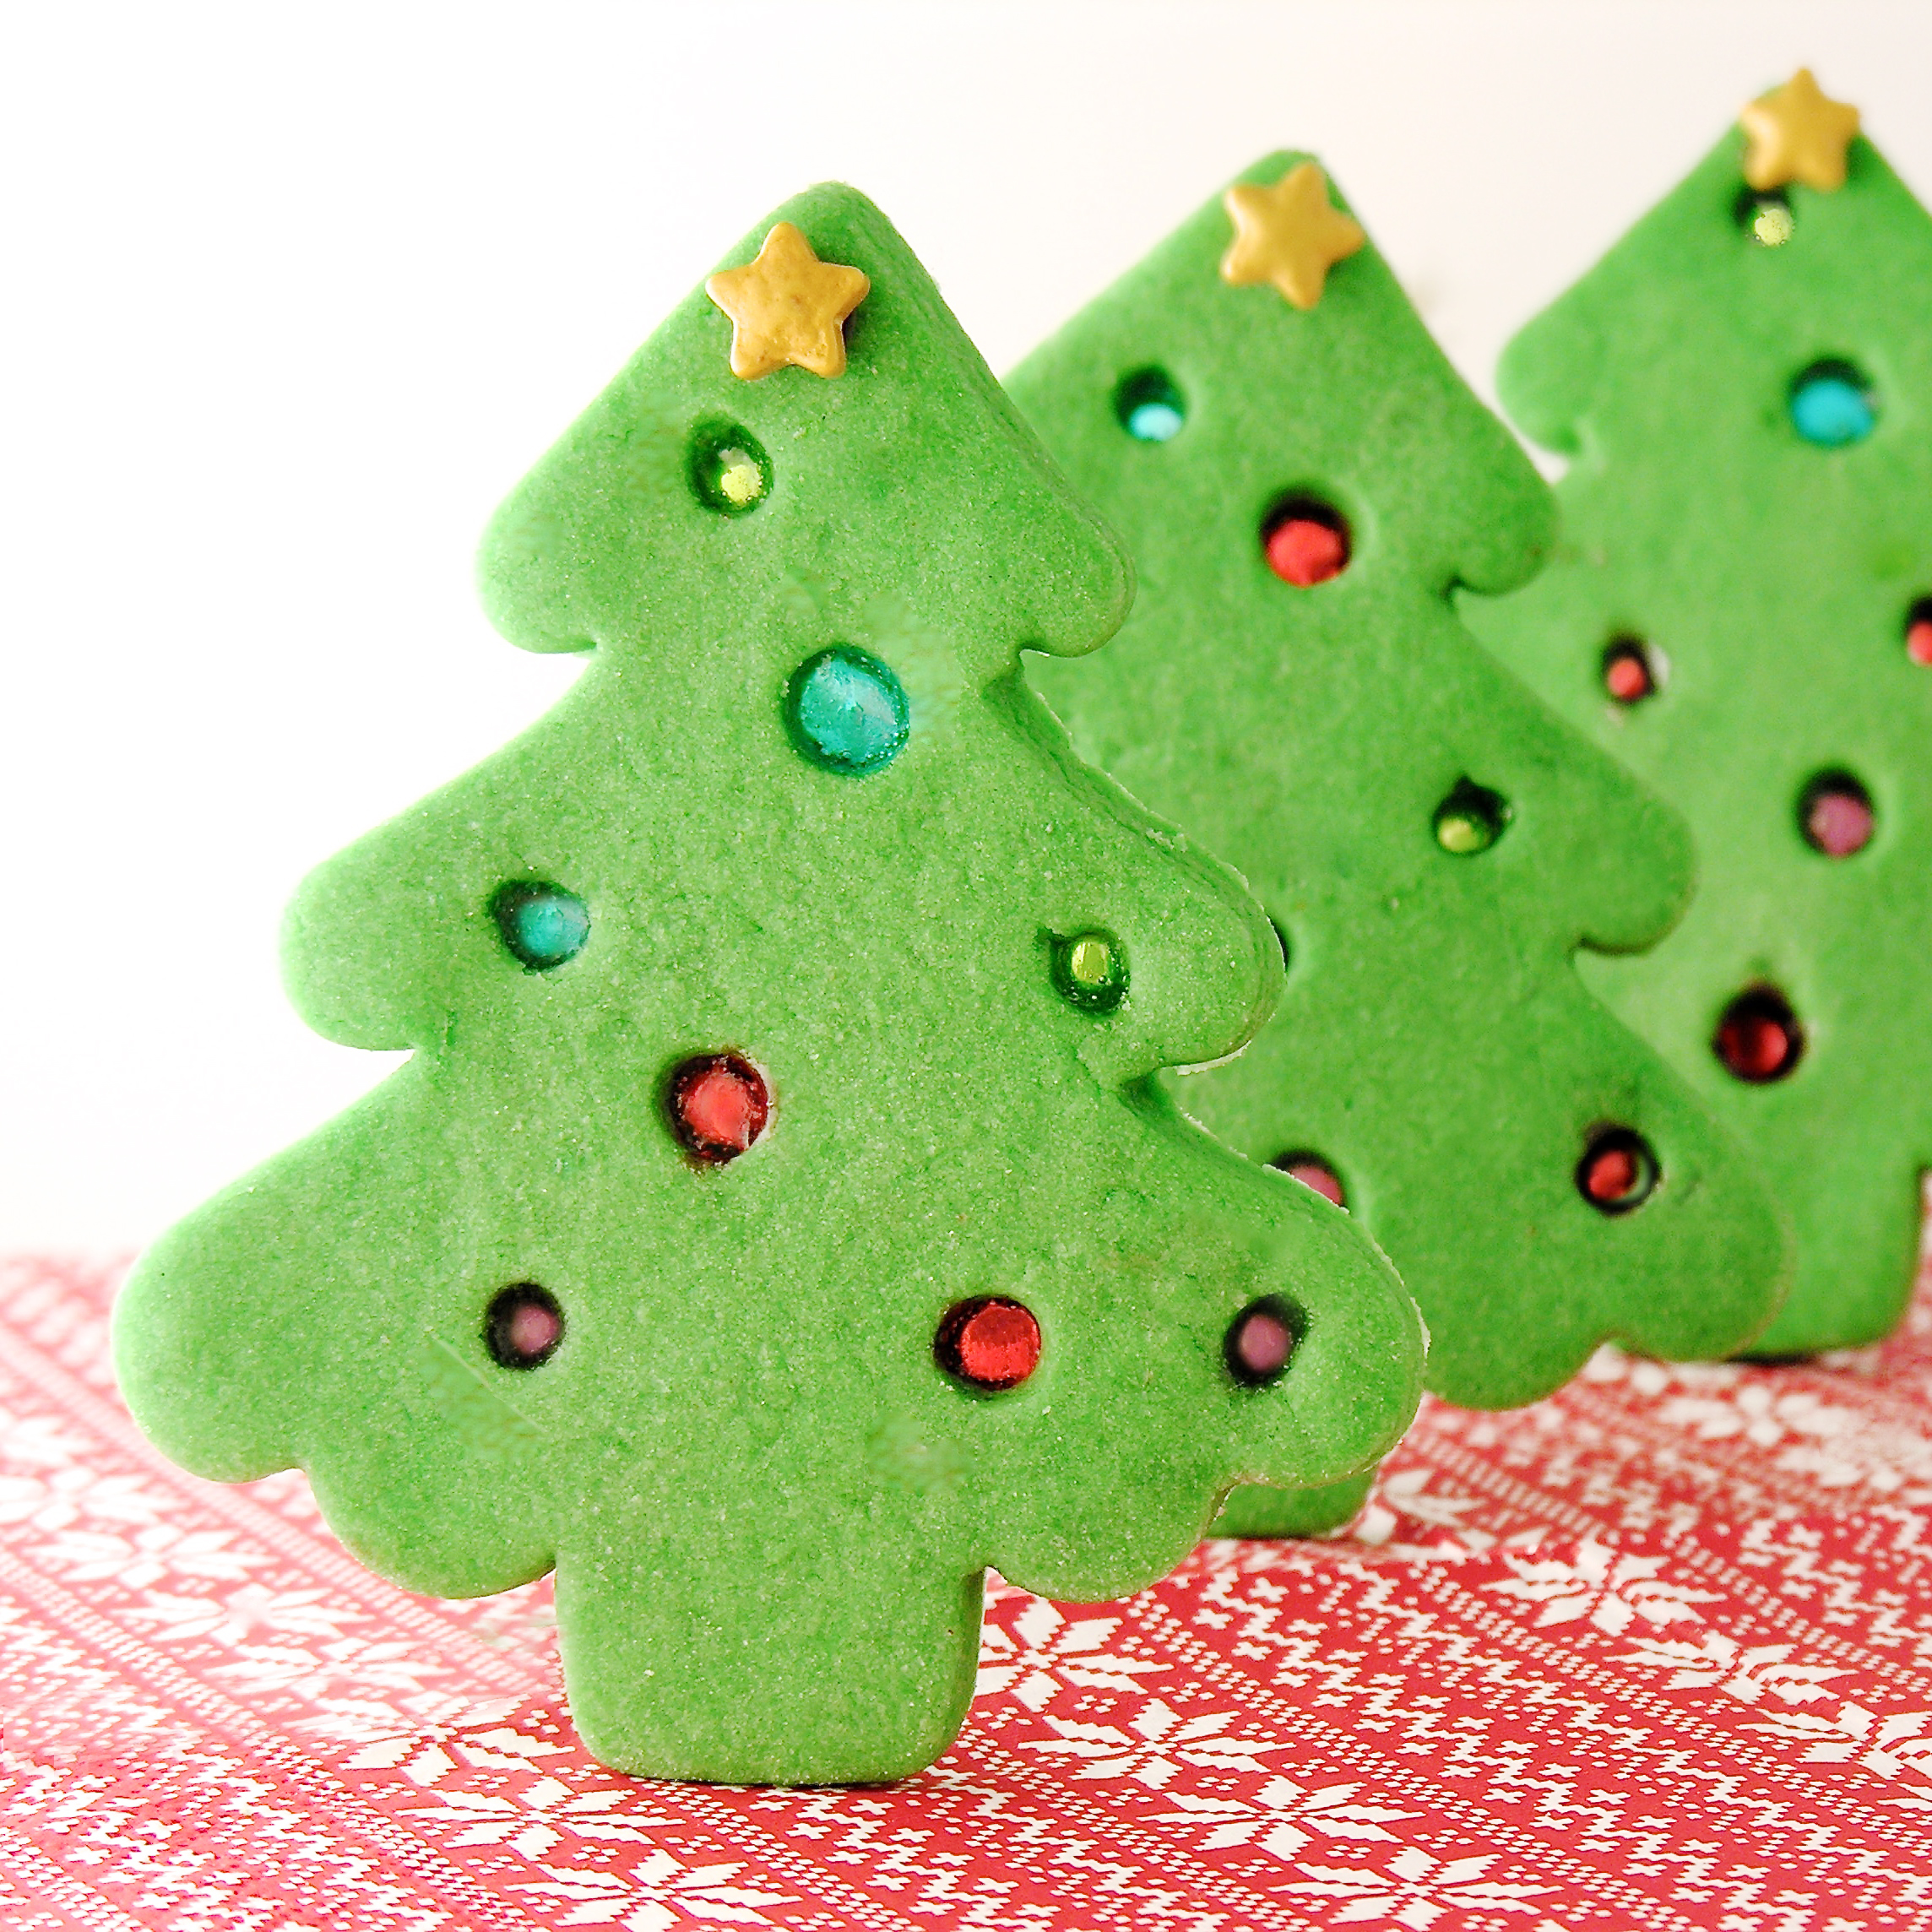
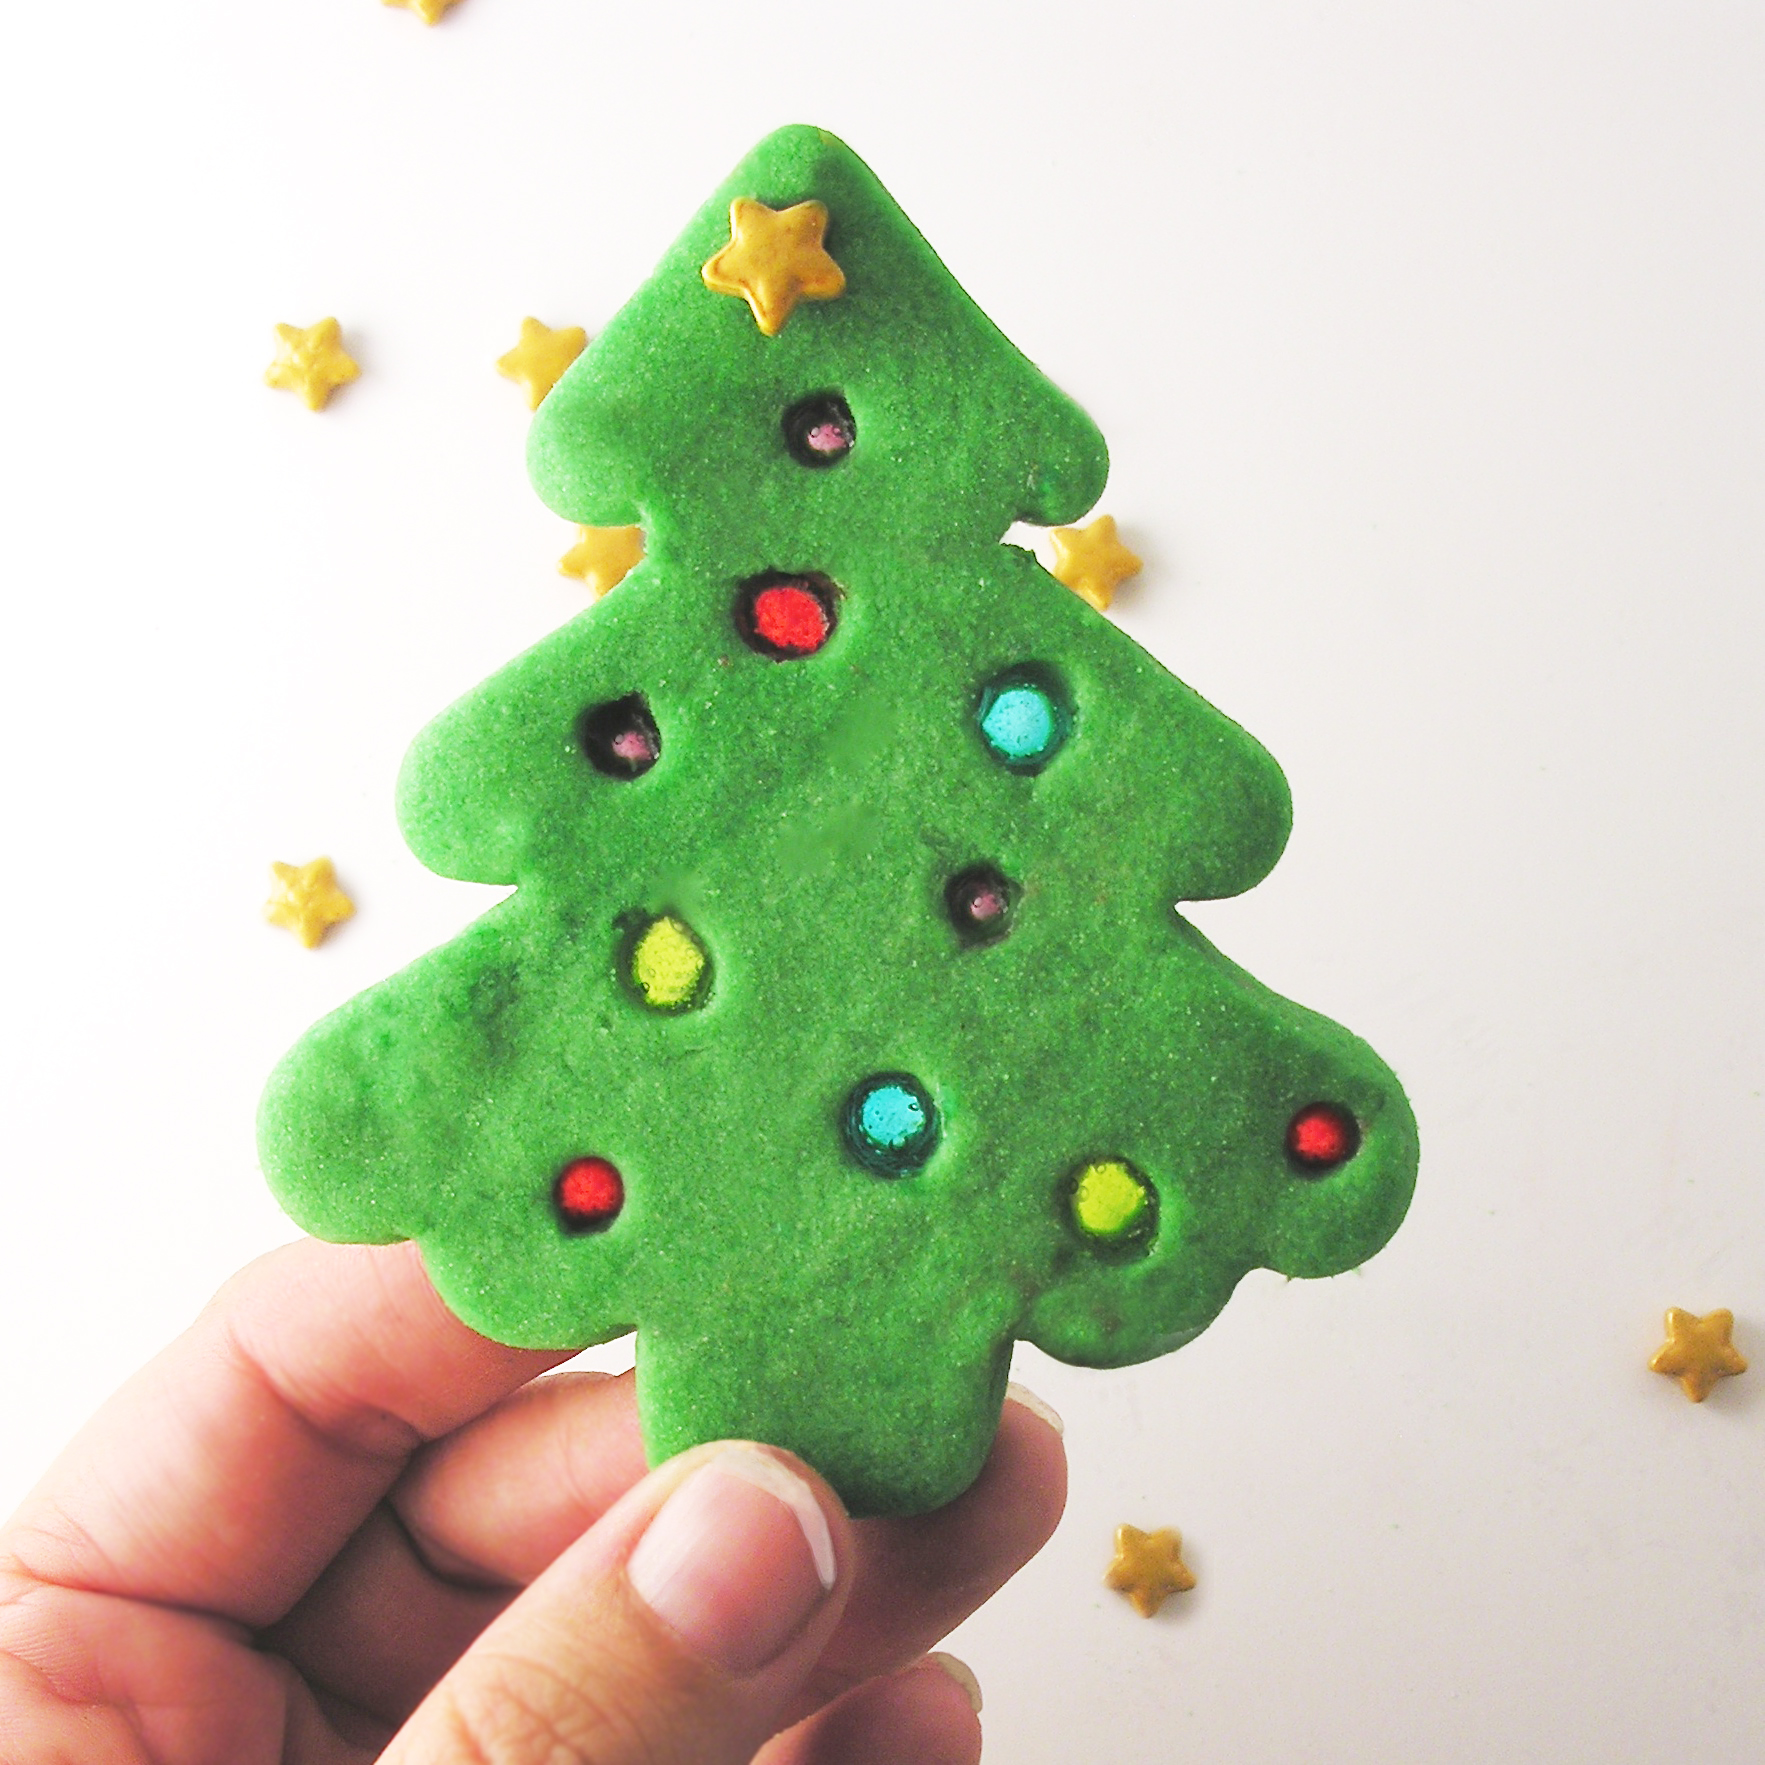
Buttery cut-out tree cookies with sparkling candy-glass ornaments! Not only beautiful Christmas treats- but delicious ones!

These fun candy-filled cookies are not an original idea- just an idea I’ve seen around for years and always wanted to try. These turned out great. You need a cut-out recipe that holds it’s shape and size well- otherwise when the cookie bakes, those little holes will expand shut and you won’t have any room to put candy. You also need a cookie that tastes AWESOME without icing. I think these accomplished both goals!!! These were just delicious 🙂

stained glass cookies

Here is how we made them: (printable recipe here)

 INGREDIENTS: (makes about 24 cookies- depending on the size cutter you use)

  • 2 sticks (1 cup) unsalted butter (softened)
  • 1 1/2 cups of granulated sugar
  • 2 eggs
  • 1 teaspoon of vanilla
  • 1 teaspoon of butter flavoring
  • 3 cups of flour
  • 1 teaspoon of baking powder
  • 1/2 teaspoon of salt
  • Green food coloring
  • 1 large bag of Jolly Rancher candies
  • Star sprinkles (if desired- plus a tiny bit of melted chocolate to attach them)

DIRECTIONS:

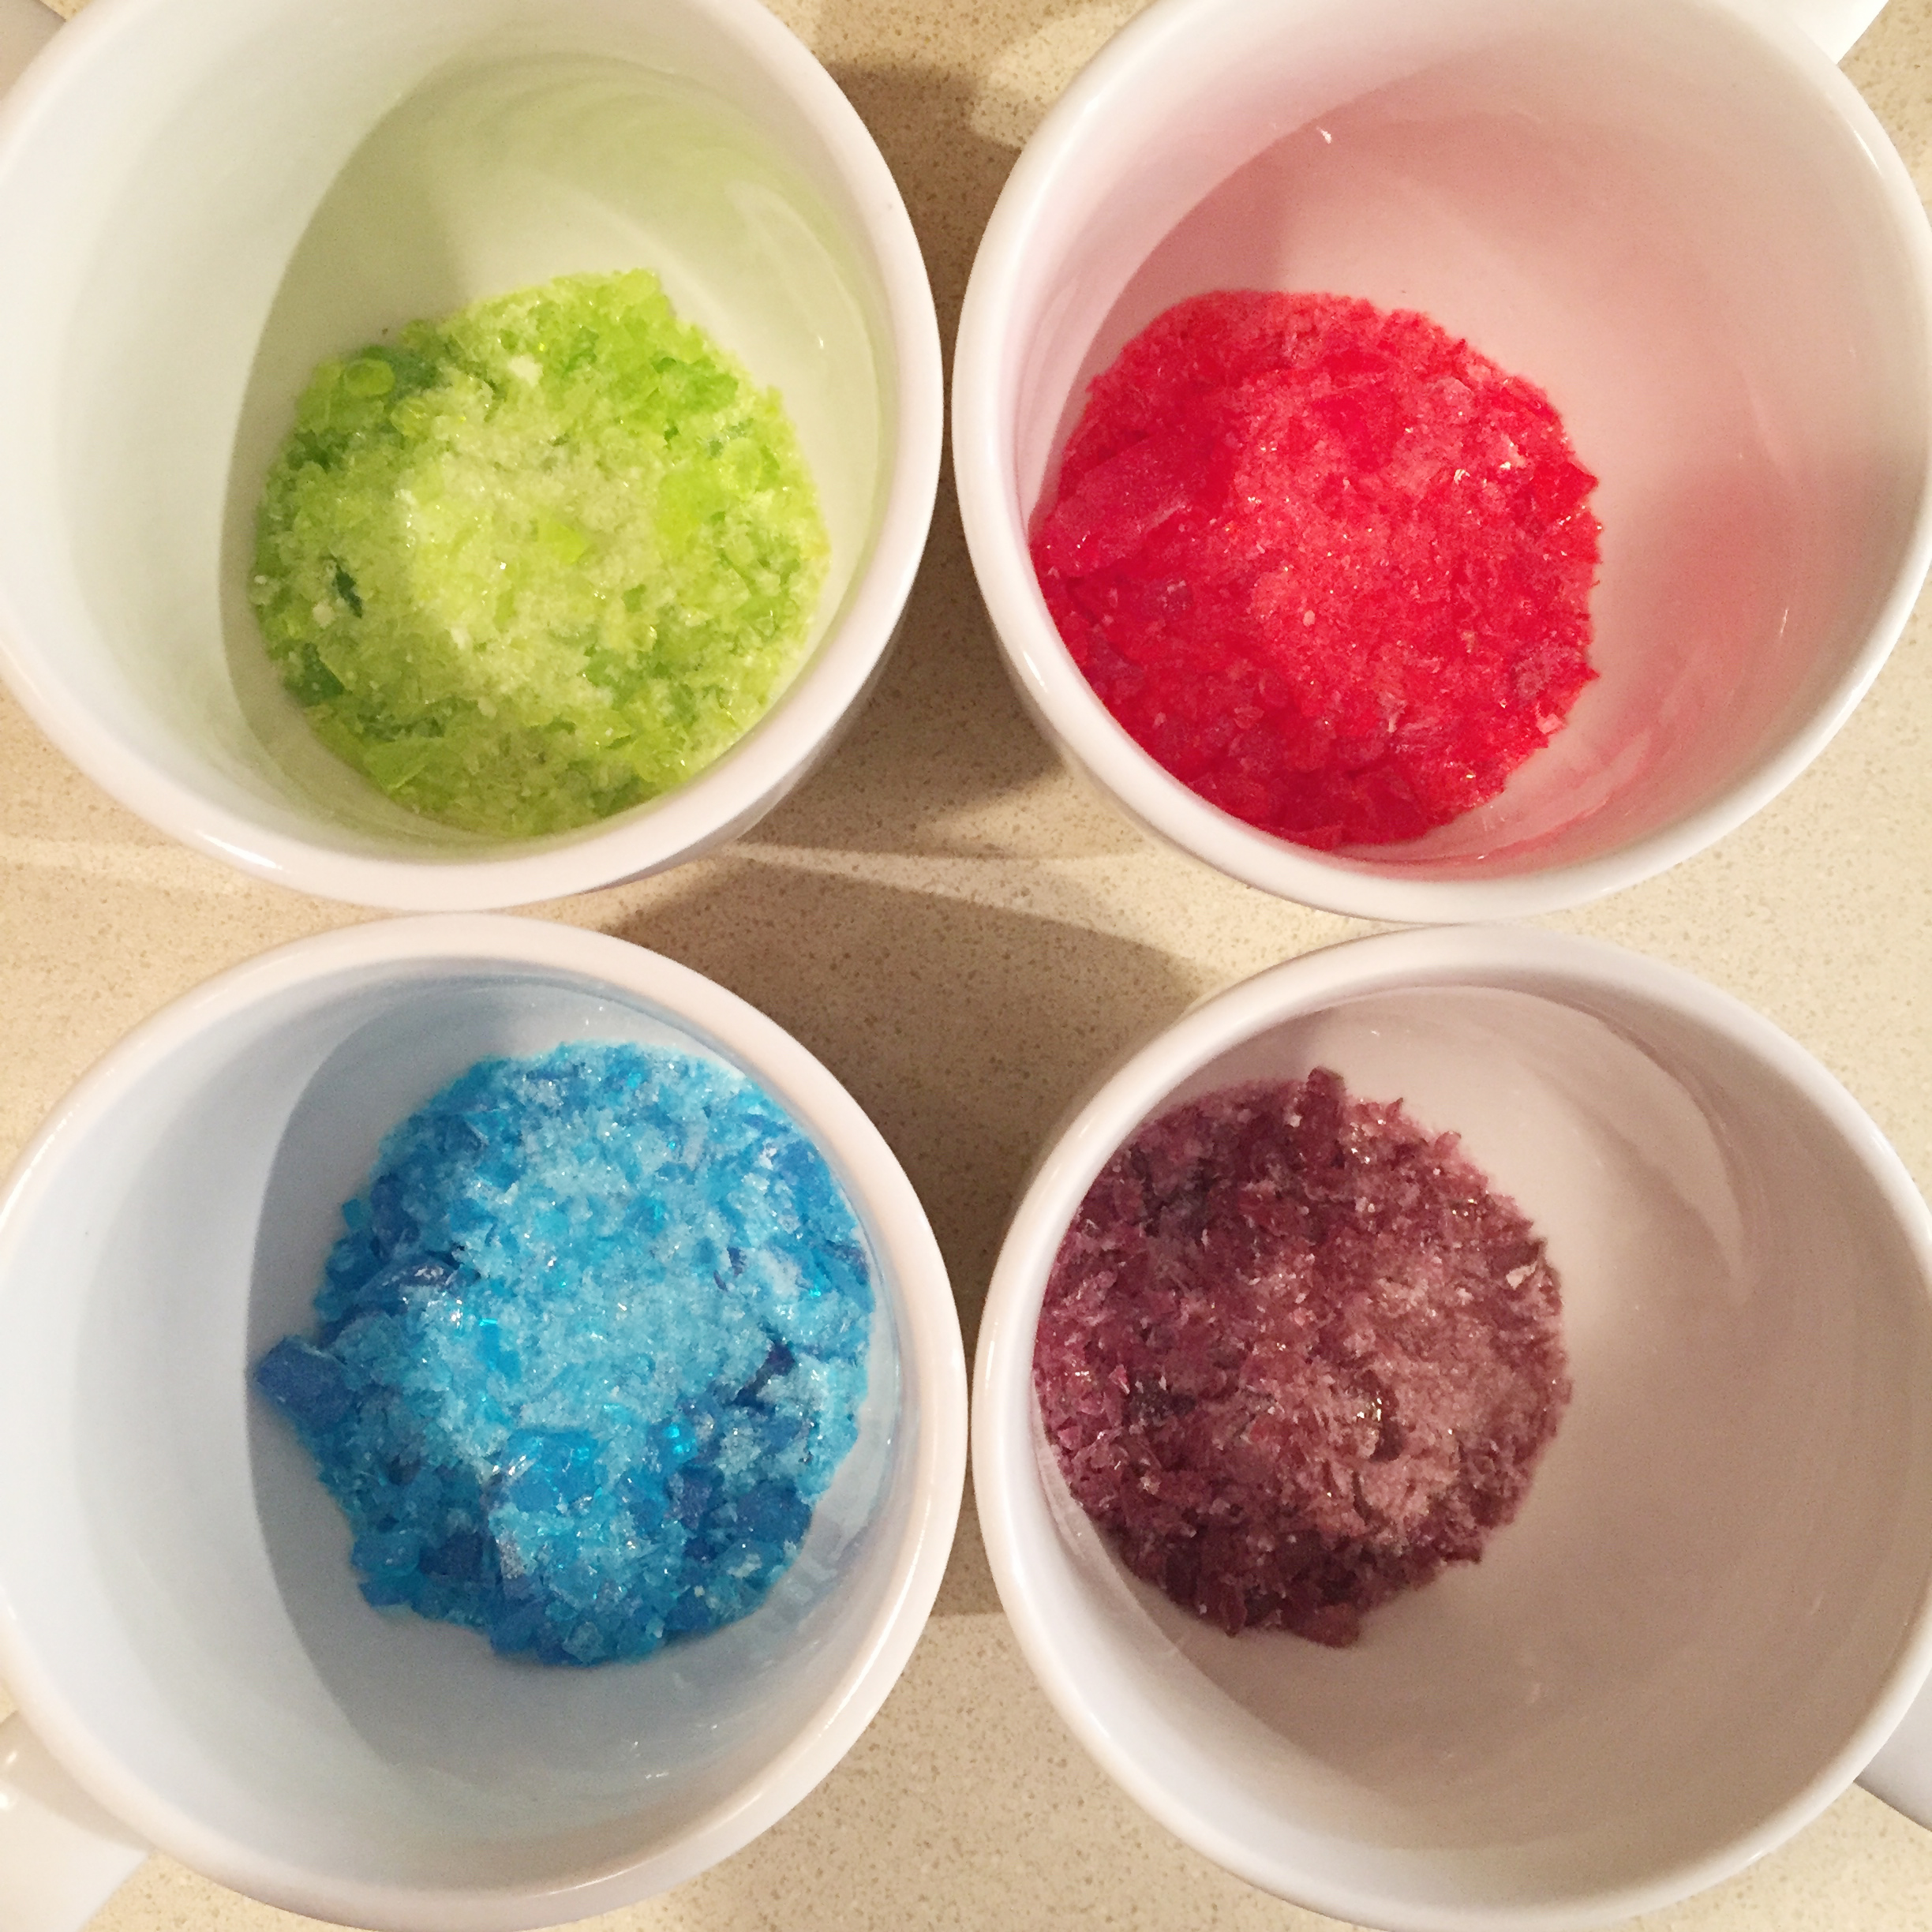
  • Unwrap candy and divide into colors.
  • Use a hammer on a solid surface (one that can’t be damaged by a hammer) to crush the candy. Crush it very finely- mine was a little big still, and it made it harder to spoon into the openings. Set aside.
  • Preheat oven to 350F degrees.
  • In a large mixing bowl, cream together butter and sugar until smooth.
  • Add eggs, vanilla and butter flavoring and mix well.
  • Add all dry ingredients and mix until able to knead into a firm ball of dough (add additional flour if necessary).
  • Add green food coloring and knead with hands until dough reaches desired shade. 
  • Roll out on a floured counter with a flour coated rolling pin to desired thickness (I made them fairly thick)
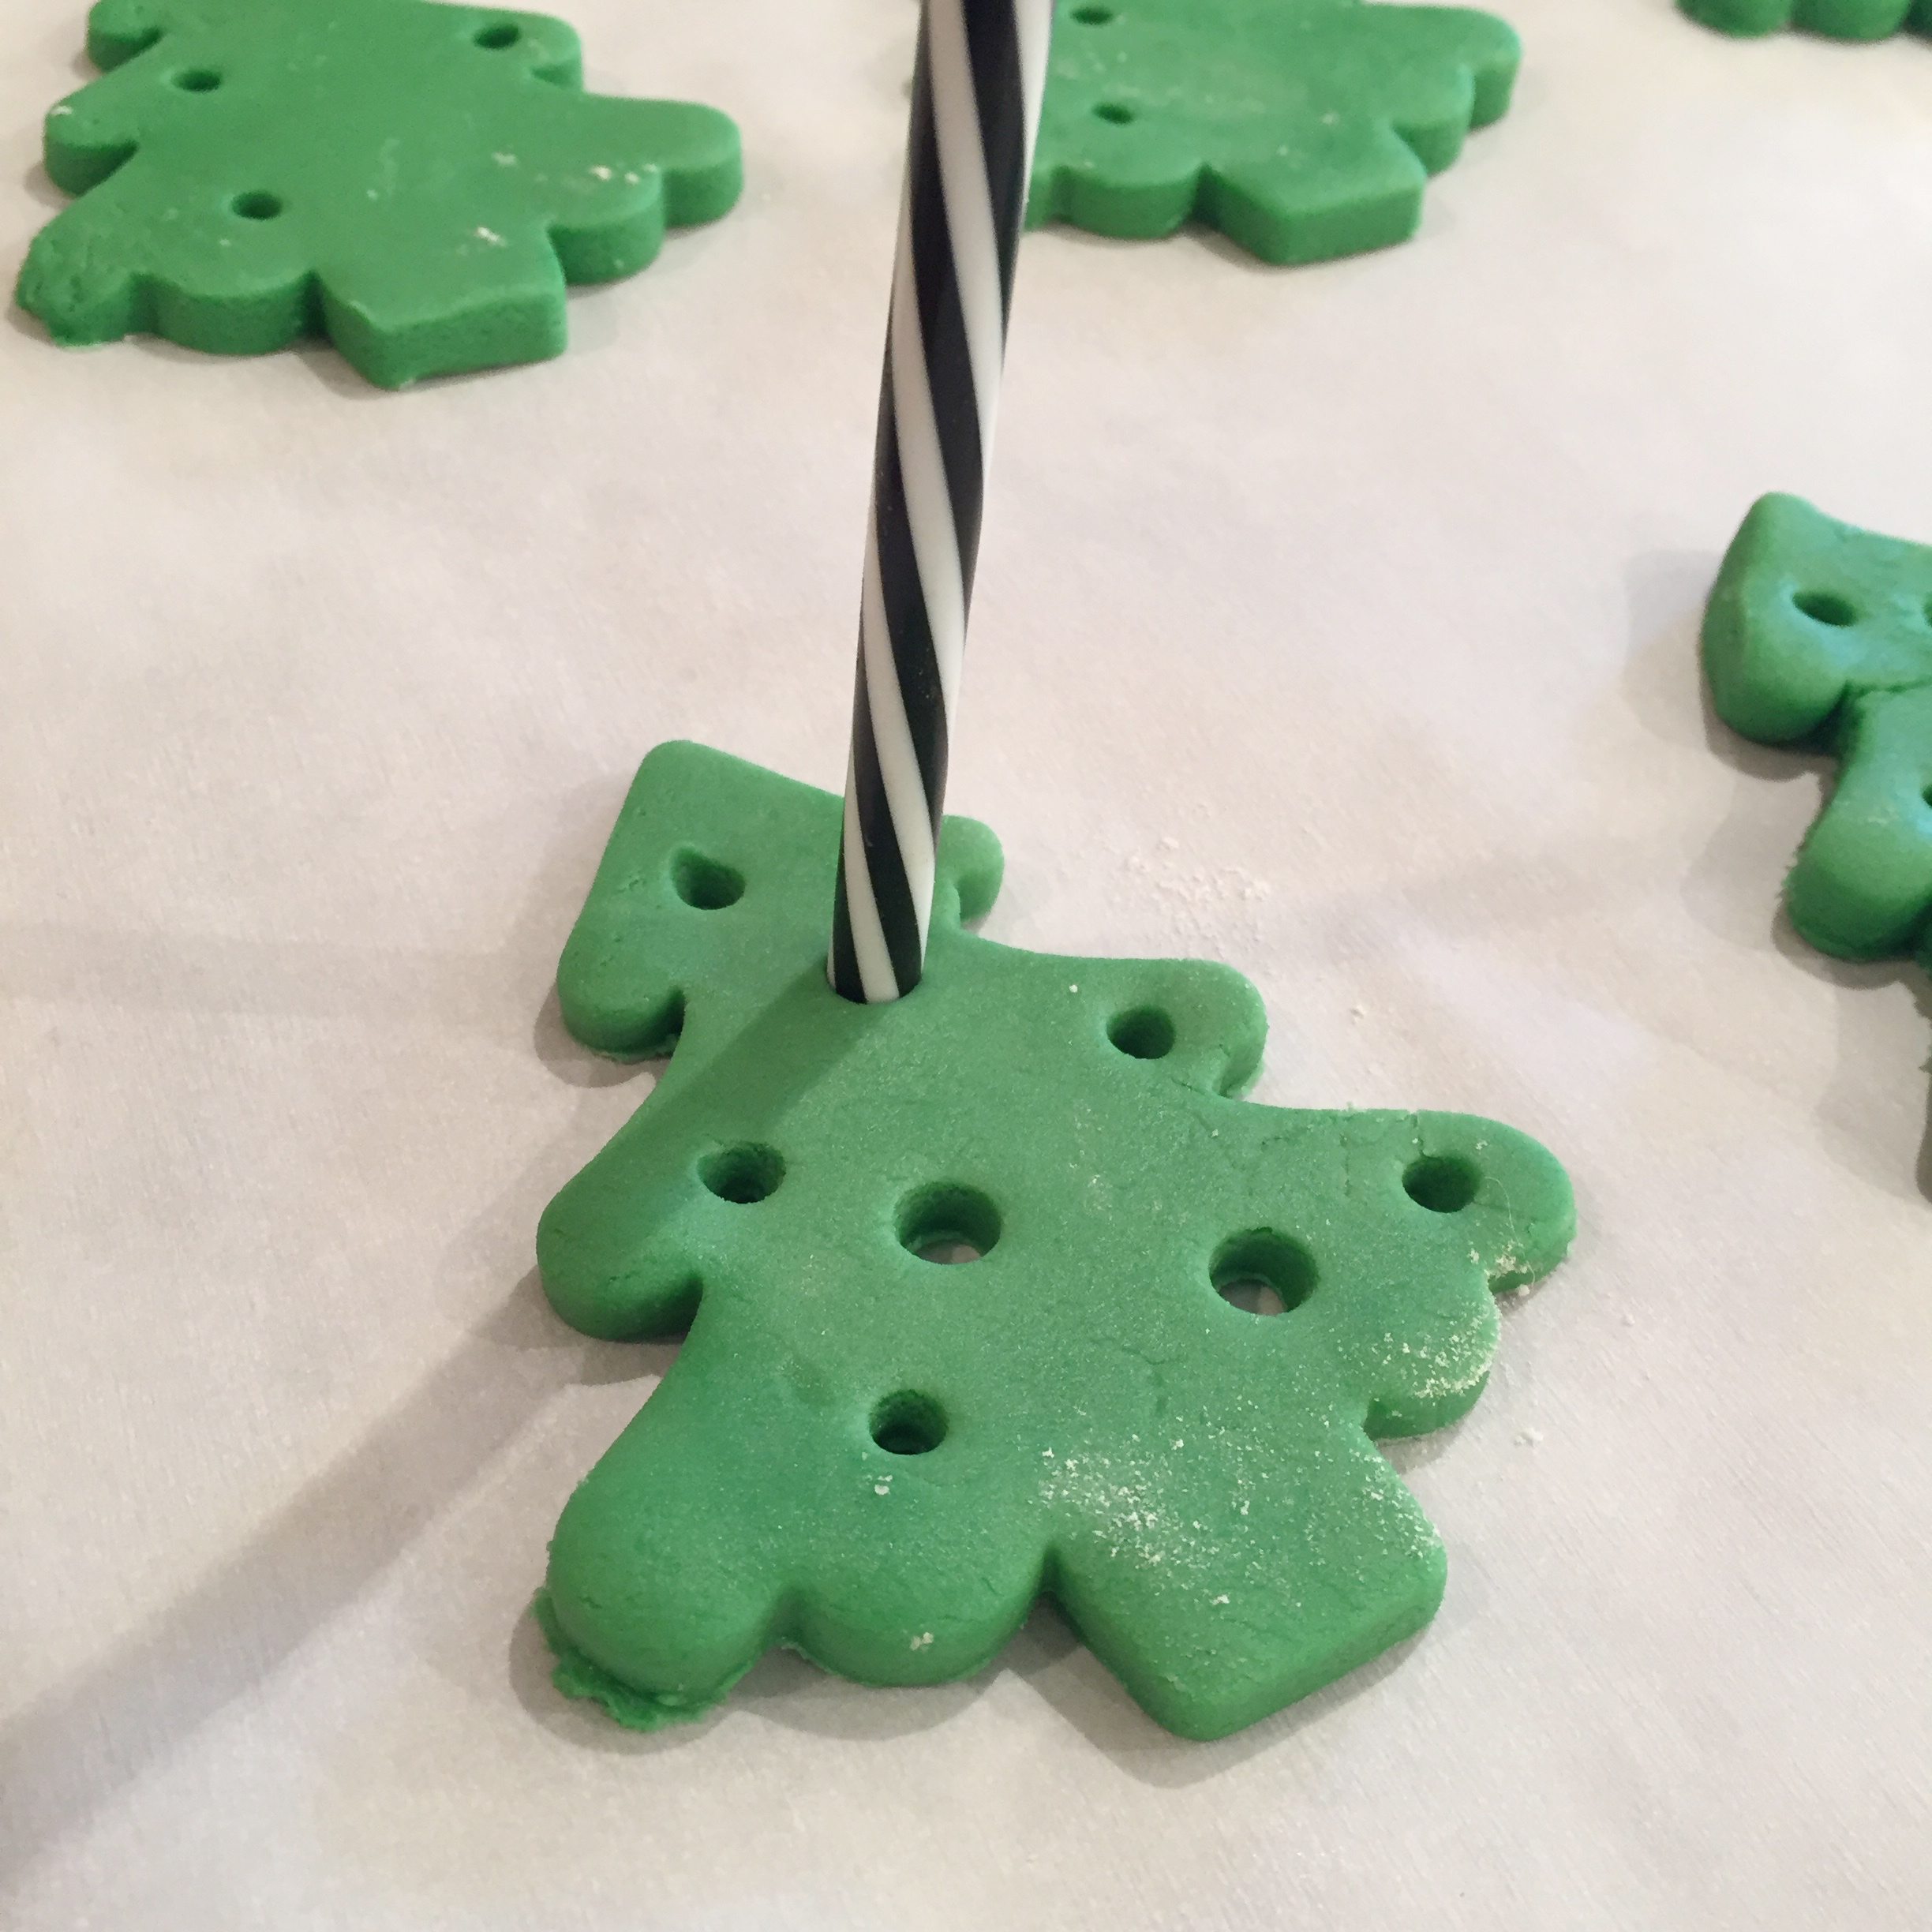
  • Cut into Christmas tree shapes
  • Place on a parchment paper-covered baking sheet.
  • Use a straw to poke “ornament” holes. I used a small straw and a jumbo one to give different sizes. 
  • Bake at 350F degrees for 4-5 minutes.
  • Remove from oven and use a small spoon (I used a tiny little appetizer spoon) to spoon candy colors into each hole.

sparkling-christmas-cookies4sparkling-christmas-cookies3

  • Bake at 350F degrees for an additional 4-5 minutes until candy is entirely melted. Check after 2-3 minutes and add a little candy if needed, as the pieces melt and settle. 
  • Remove cookies from oven and slide the parchment papers off the cookie sheet onto a counter to cool. 
  • Use a bit of melted chocolate to attach a star on top (if desired).
  • Enjoy!

sparkling-christmas-tree-cookies

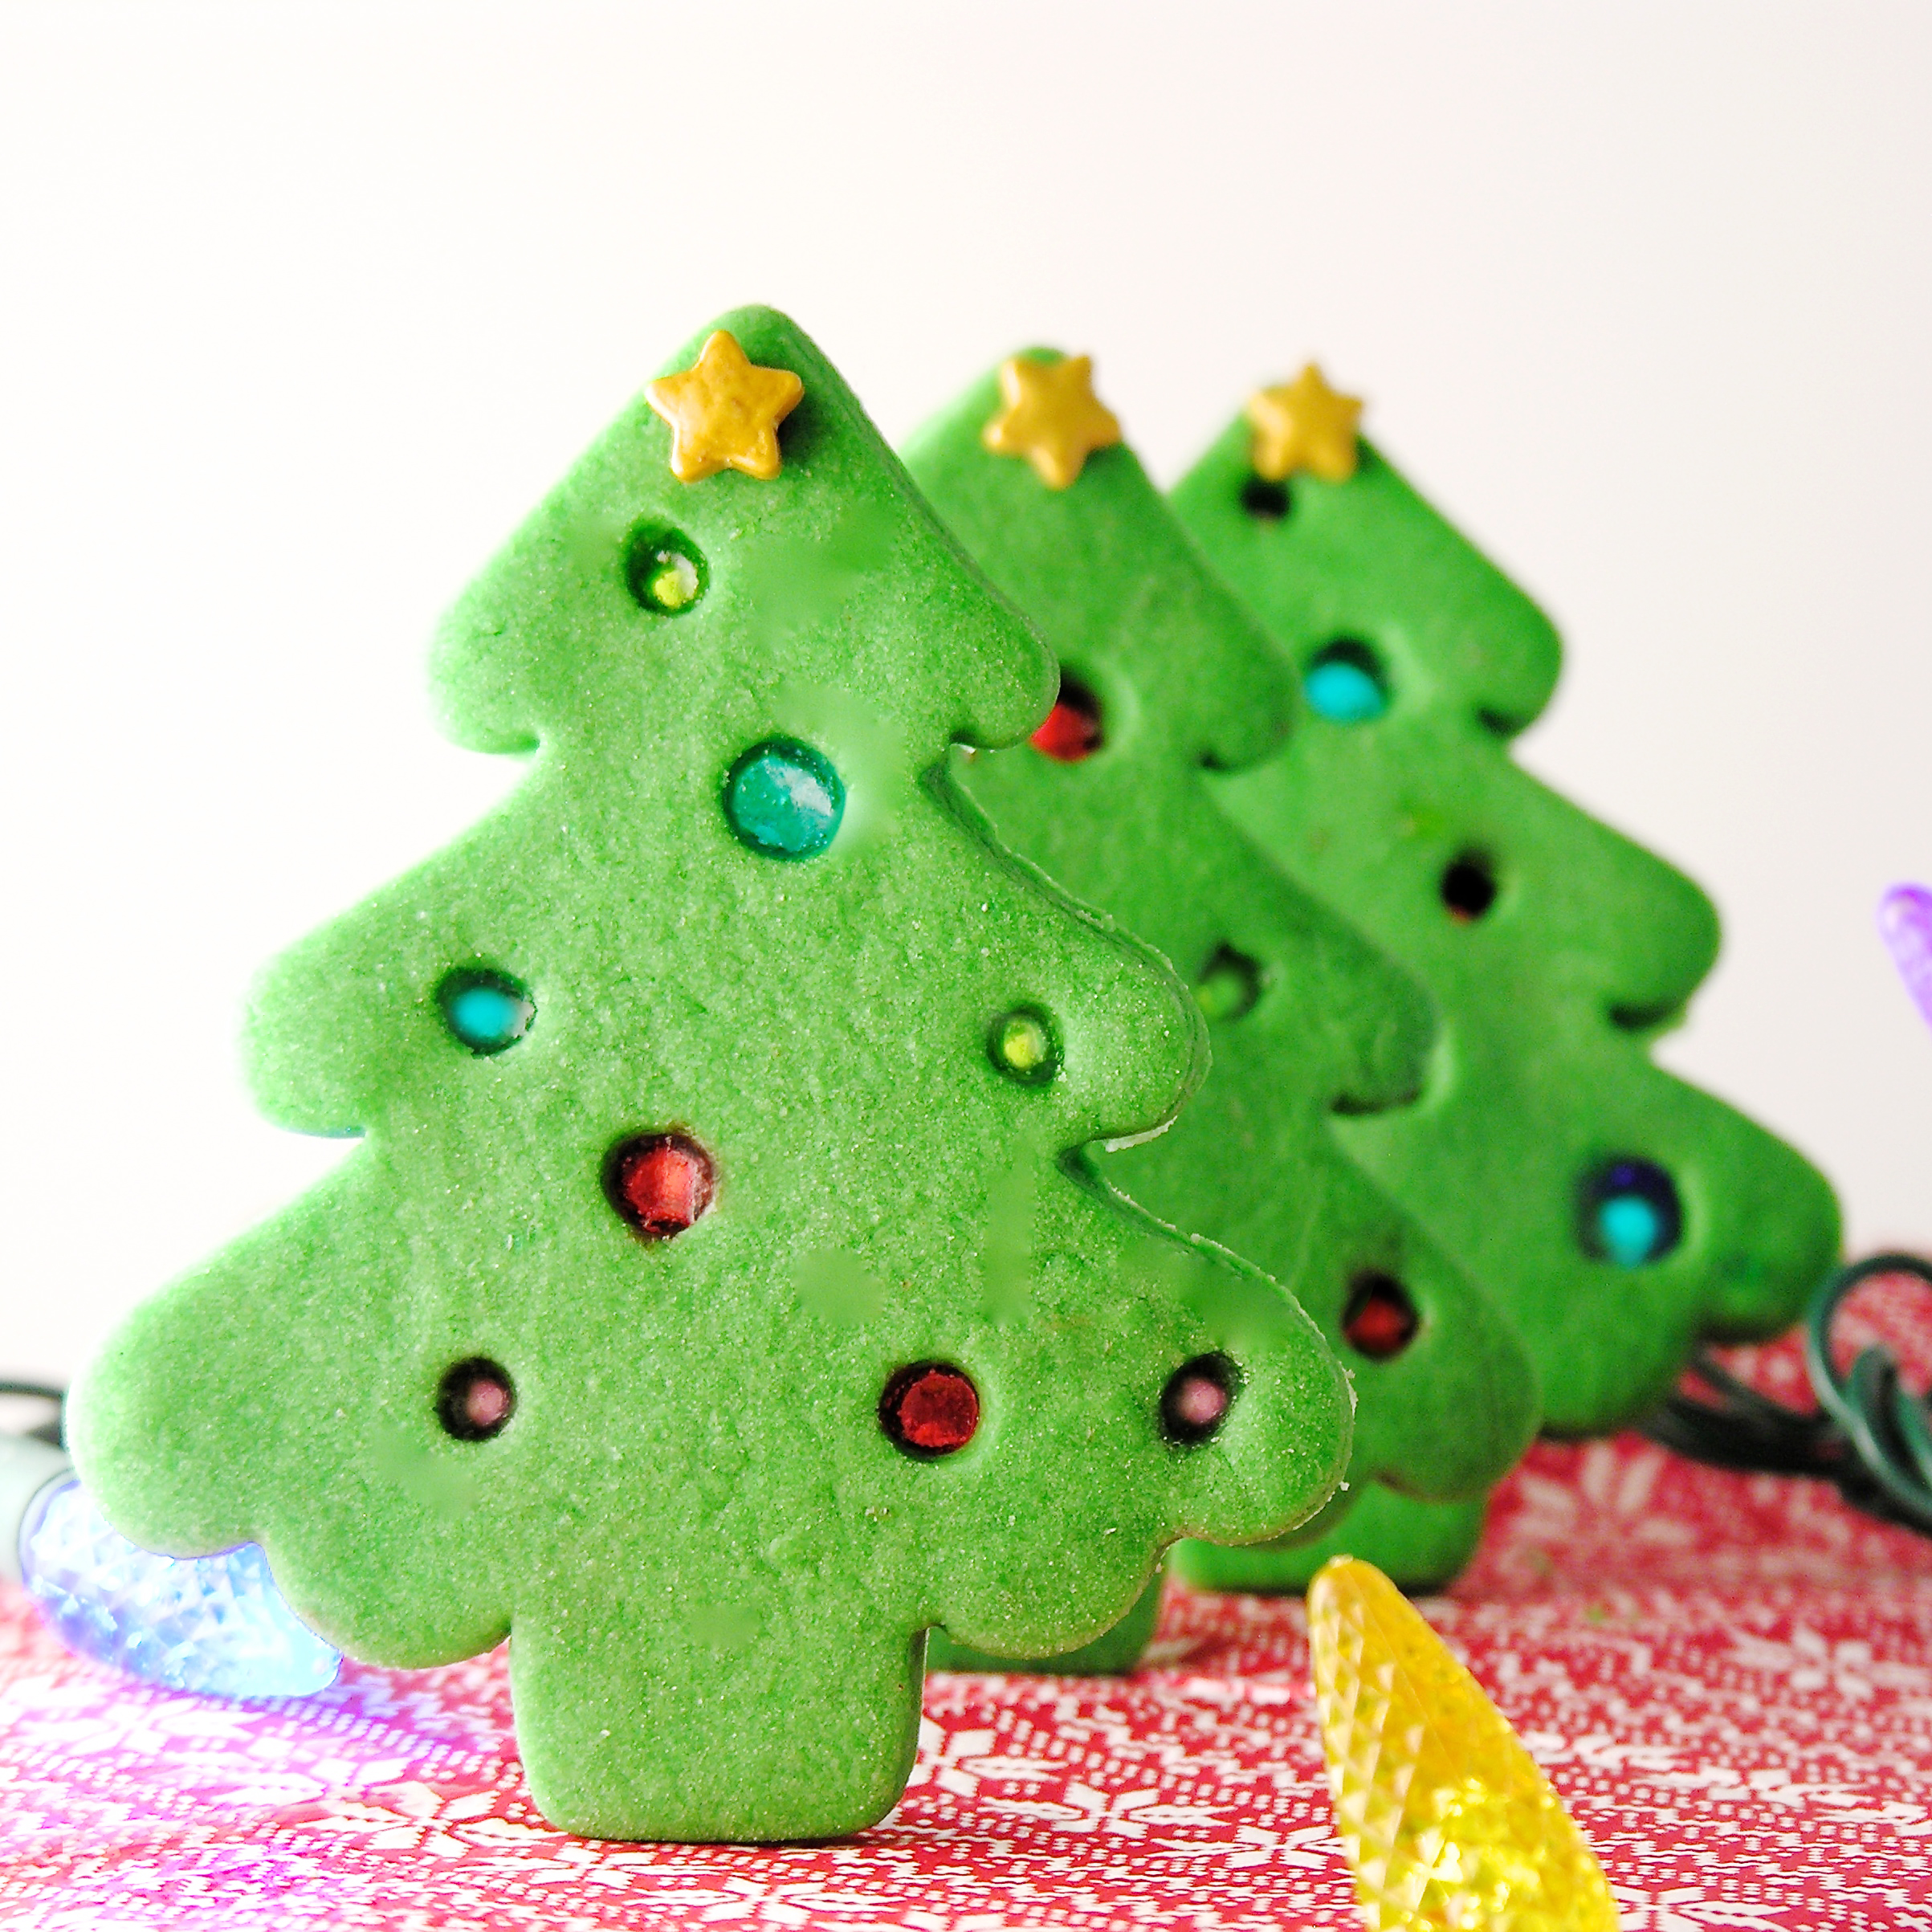
My thoughts: These were fun to make and they are just so cute and yummy! A few changes I will make the next time: I’d use bigger straws. The larger size was fine, but the mini size holes were hard to fill. I would also crush the candy to a sugar consistency. I had a few bigger pieces that made it harder to fill those tiny holes. I loved the flavor of those buttery cookies with the sweet fruity candy bits- I will definitely make these again!  Enjoy! ~r

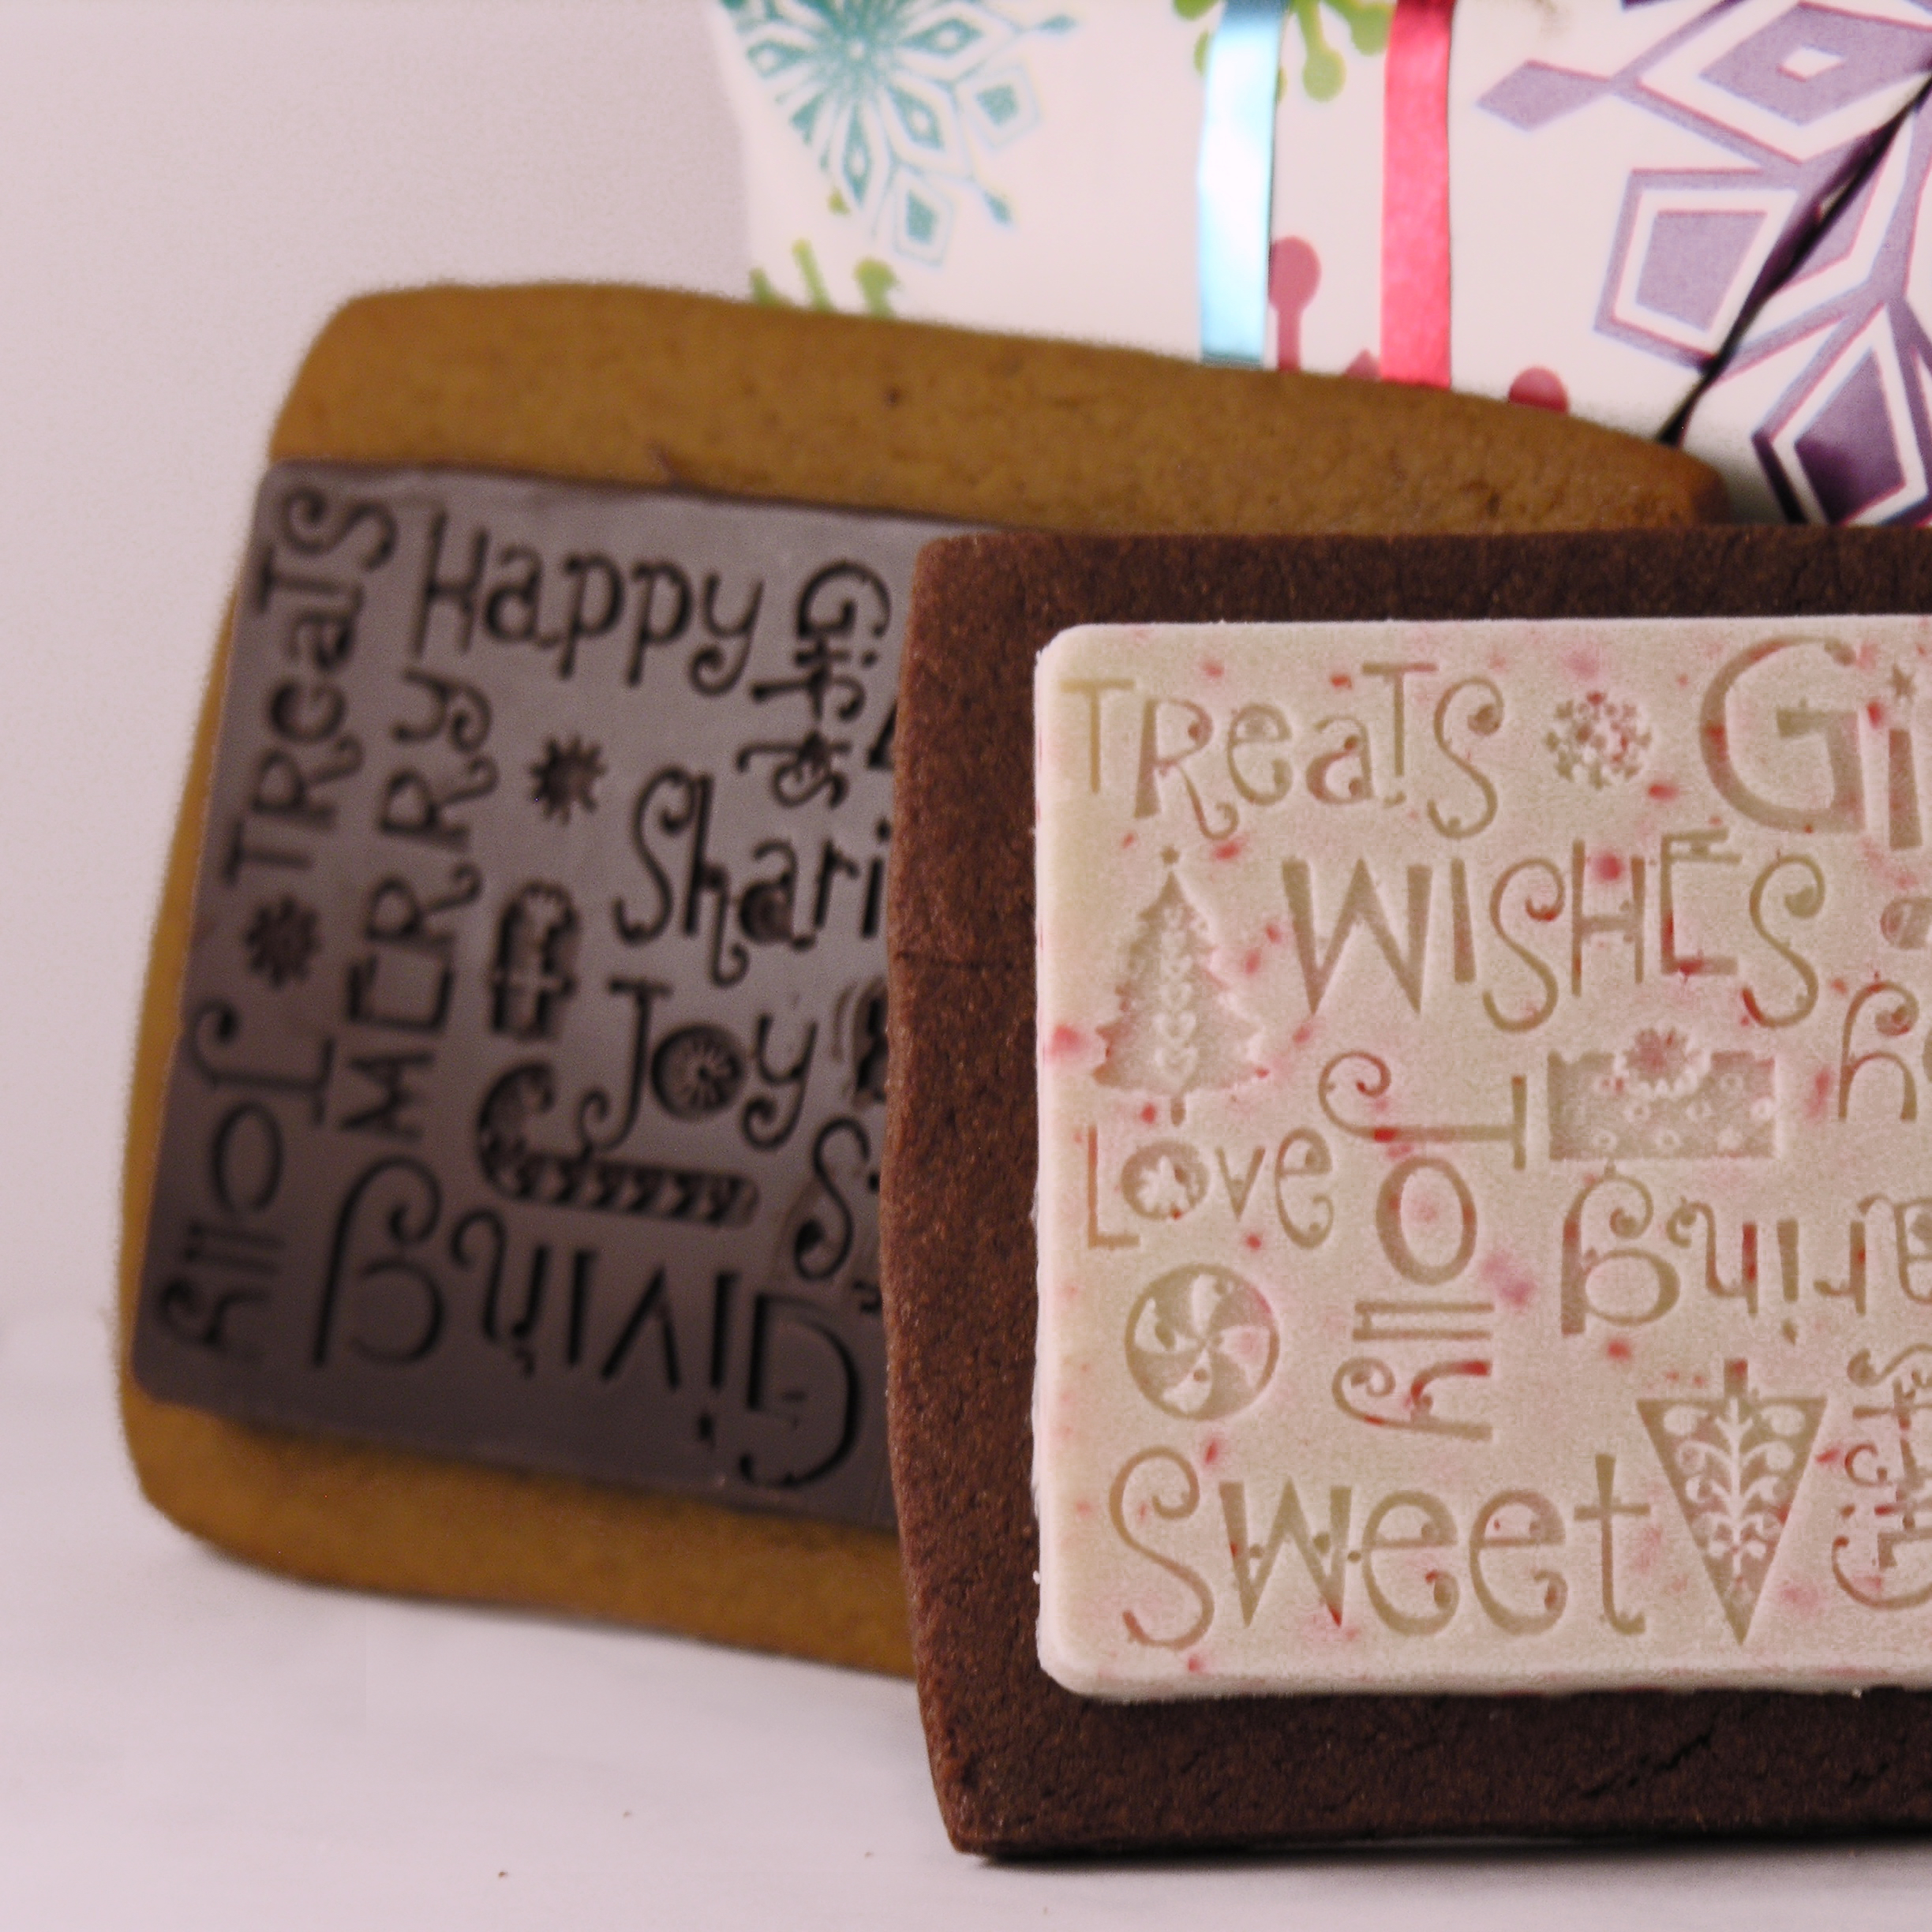
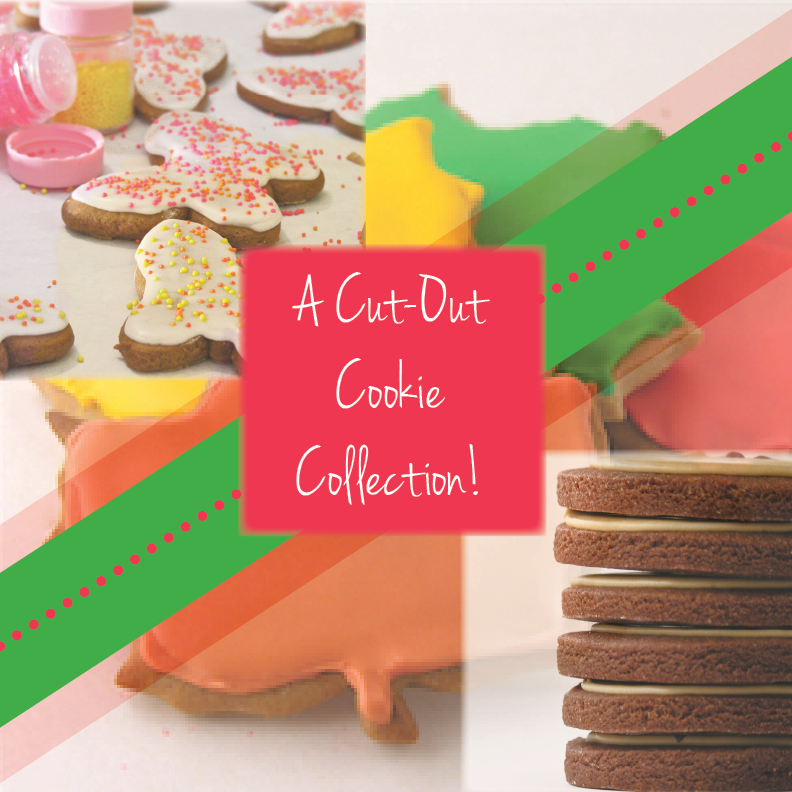
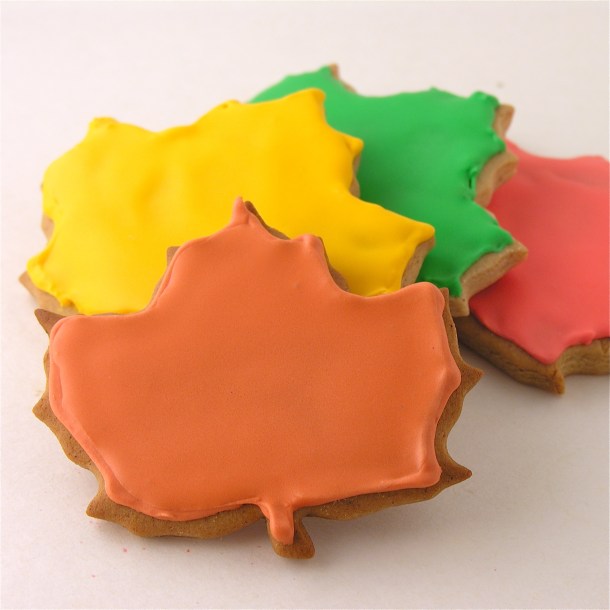
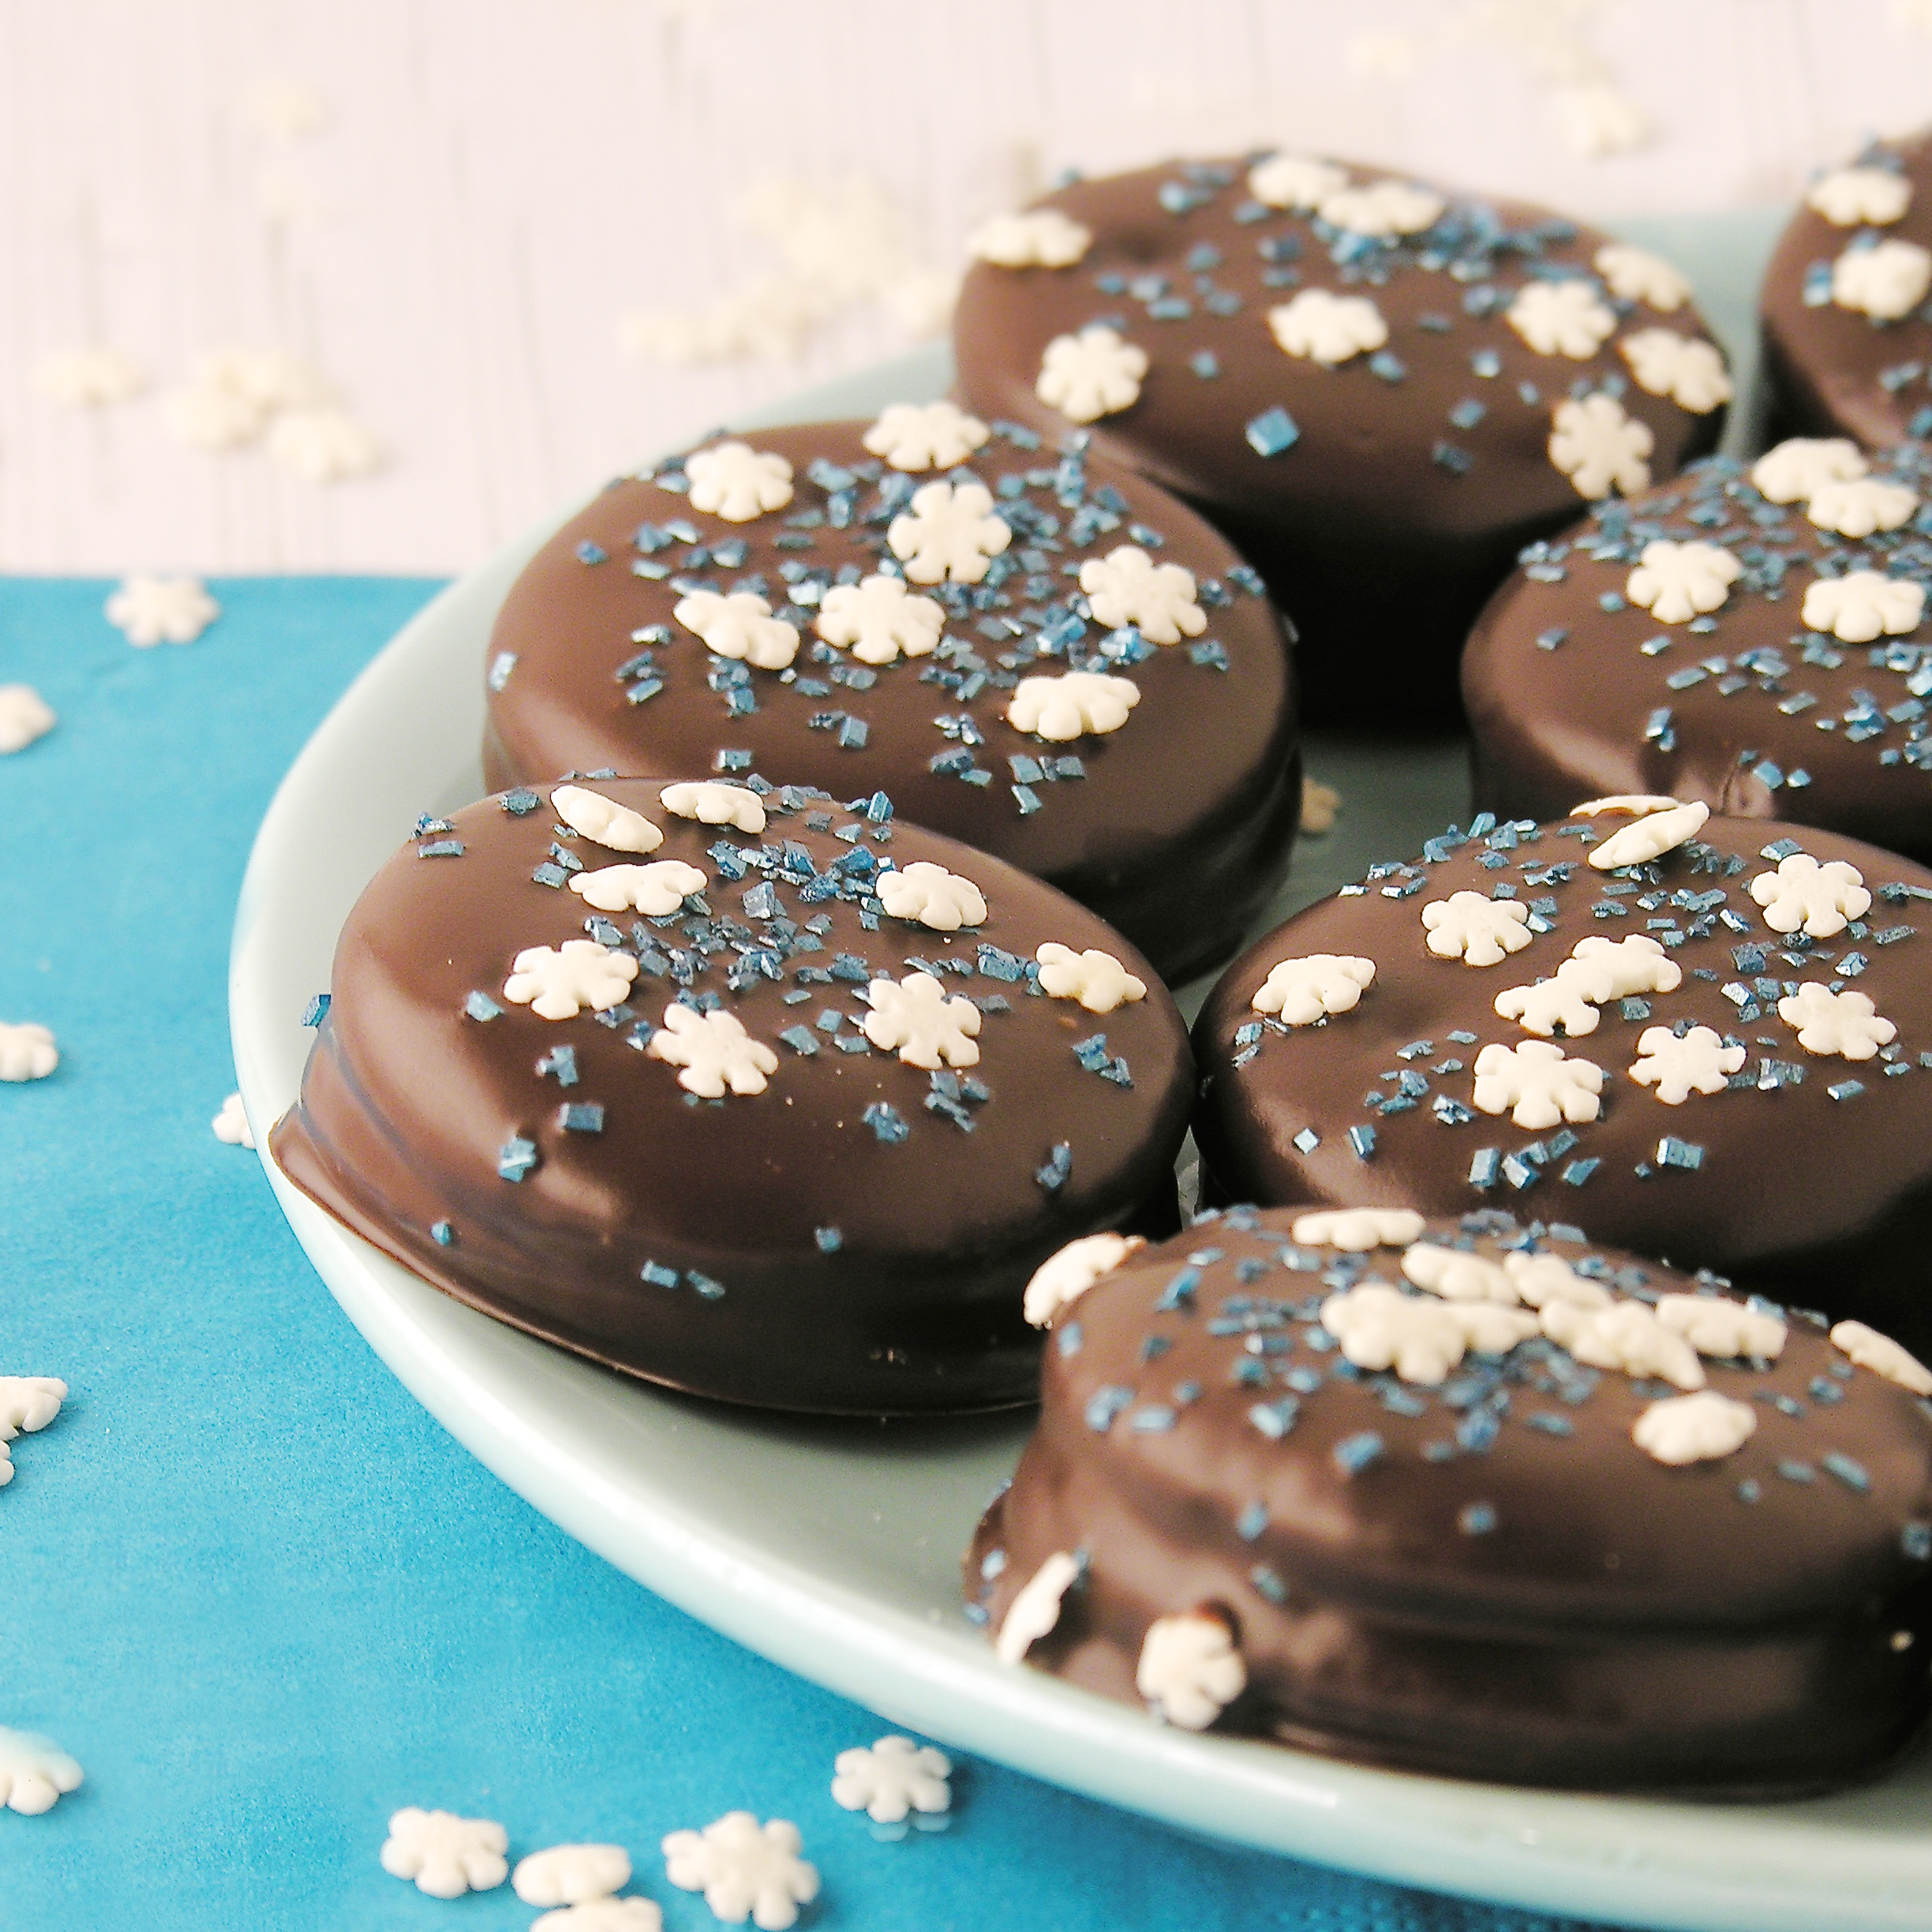
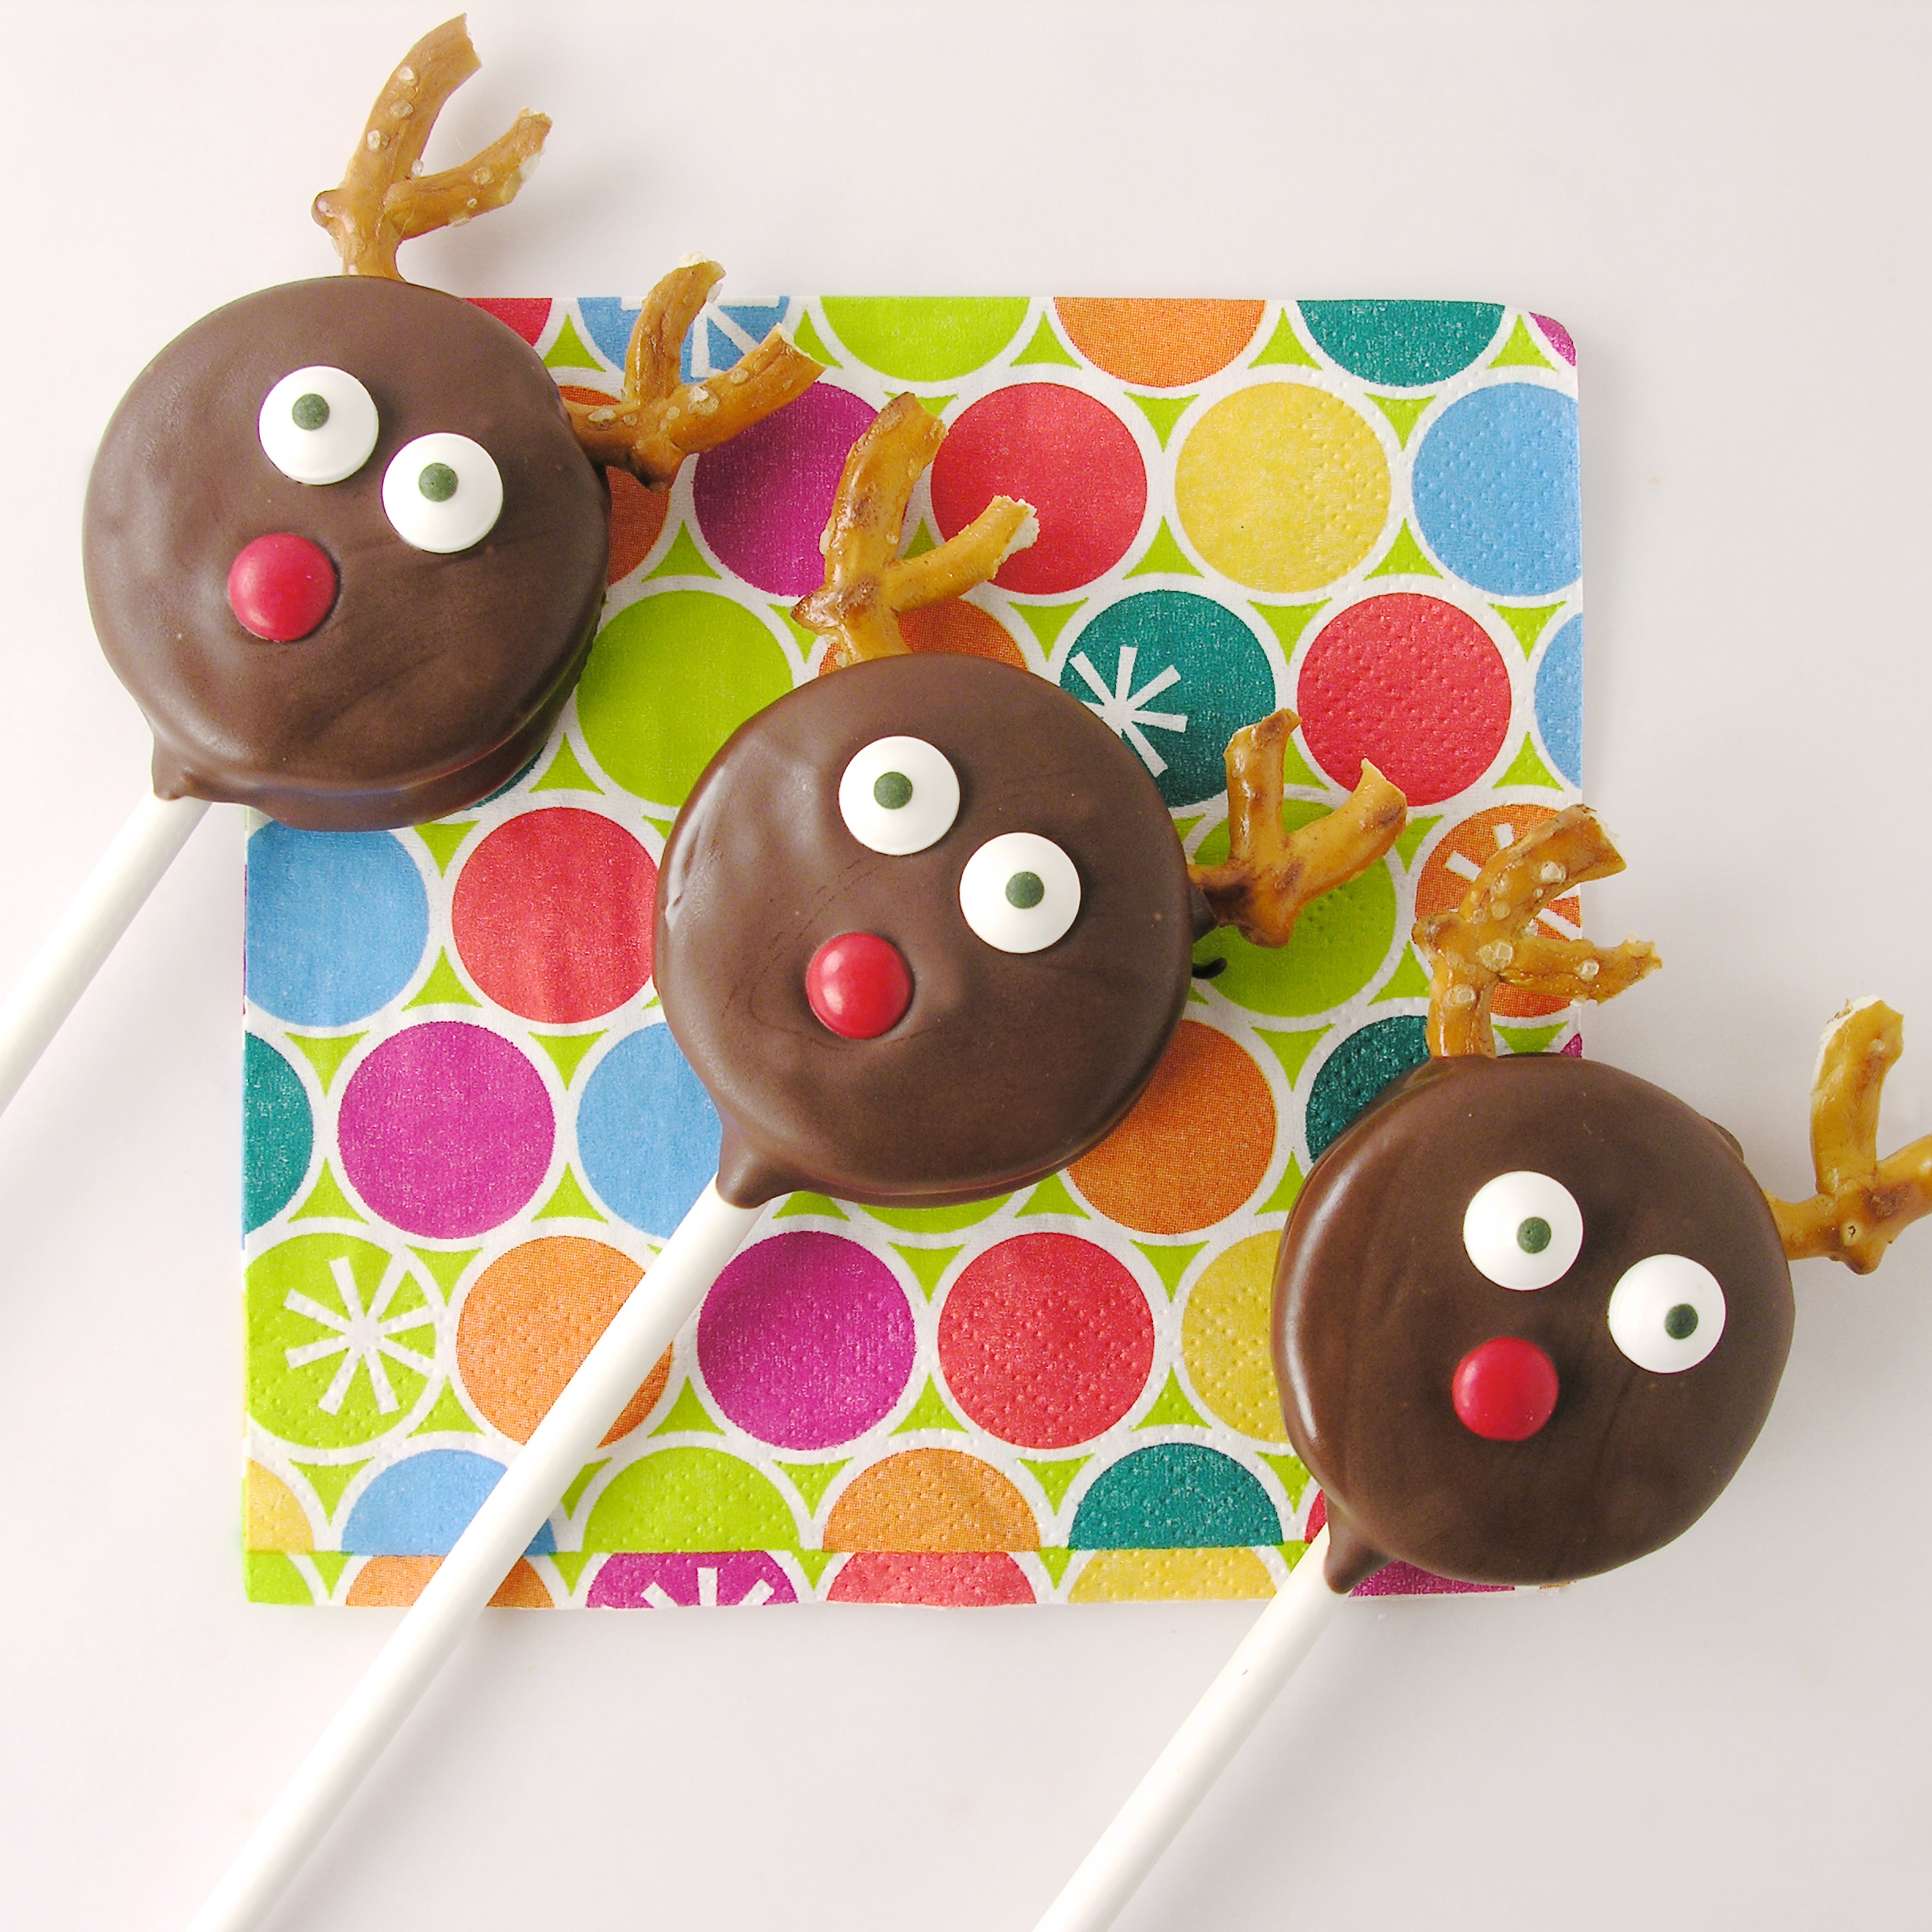
Other fun treats for Christmas: (click on a photo to see the recipe)

Opera Cream CandyPeppermint Hot Chocolate CupcakesChocolate Bon-bonsHot Chocolate Pops!

Advertisement

Oreo Ornament Pops!

Oreo Ornament Pops

Celebrate the Christmas season with these fun ornament pops.

Made with Oreos, mini peanut butter cups and sprinkles, they are sure to make everyone in your family smile!

Goodness. I love cute Christmas cookies. These were SO fun to make, and decorating them is a blast. I pulled out all of those Christmas sprinkles and just went crazy. I highly recommend these for a fun project with your kids!!

The dilemma for making an edible ornament is always that little cap. I solved the problem by painting mini peanut butter cups with a little bit of edible gold dusting powder (the same stuff I used on my shortbread cookies last week). I love how they turned out! Happy shiny tops for these!

Oreo Ornament Pops!

Here is how we made them: (printable recipe here)

INGREDIENTS: (makes about 24-28 pops)

  • One package of Oreo Double Stuff cookies.
  • 2 bags of Wilton’s Candy Melts. As you can see, I used pink and aqua, plus I had a little green and red extra from other projects. You can use as many colors as you want- but you will need at least 2 full bags to cover the Oreos. 
  • One bag (8 oz) of Reese Peanut Butter Cup Minis- in white chocolate
  • Edible gold dusting powder (I used this brand)
  • Fun Christmas sprinkles and jimmies

DIRECTIONS:

Make gold “caps” for ornaments first.

  • Spoon a little of the gold powder into a small bowl or plate, and add a bit of water until it is the consistency of a thick paint. 
  • Use a food-grade brush to paint the gold on the bottom and sides of 24-28 peanut butter cups. Paint them all and then go back and give them a second coat to smooth out the parts that didn’t stick the 1st time.
  • Set aside to dry.

Prepare Oreo Pops (there is a tutorial for these, if you have never done them, here)

  • Twist apart all of your Oreos.
  • Melt a small amount of Candy Melts (<1/4 cup) in the microwave in 3o second increments, stirring between until smooth.
  • Dip the end of a lollipop stick into the melts, and press into white filling of Oreo. Place other half of cookie back on top and press together.
  • Place Oreo and stick on a cookie sheet. Repeat this process with remaining Oreos, and then freeze all Oreos until firm (10-15 minutes).
  • Melt remaining Candy Melts using method from above.
  • Once Oreos are chilled, hold with stick and dip into Candy Melts until completely coated.
  • Tap on side of bowl to get excess off, and drag across lip of bowl to scrape excess off back of cookie.

Ornament OreosOreo Ornaments

  • Set on parchment paper  and immediately set a gold “cap” on the top edge to harden there as the candy melts solidify.
  • If you want to add sprinkles, do so before the Candy Melts get hard (stripes in other colors can be added later)

Oreo Ornamentoreo-ornament-pop

  • Allow Oreo Pop to harden completely
  • Decorate with other colors of Candy Melts, as desired. To make the stripes, I placed melted candy in a small zip top bag, clipped a corner and piped lines onto the Oreos. 
  • Once everything has completely hardened, place into individual cello bags, or into an air-tight bag or container. These will stay good for weeks when sealed up. 
  • Enjoy!

oreo-ornament-pops

My thoughts: Well, by now you know how much I love my Oreo Pops! These were fun to make and a little peanut butter on top of that Oreo? Yes, please! 🙂 These make great little gifts and stocking stuffers! Enjoy! ~r

oreo-ornament-pops

Don’t stop with just ornaments! We have two other fun Christmas Oreo Pops! (click on the photo to see the recipe)

Reindeer Oreo Pops!!!Snowman Oreo Pops

Cookie Butter Stuffed Oreos

cookie-butter-oreos3

A creamy layer of chocolate chip cookie butter is a wonderful surprise inside these easy chocolate cookies!

I may be out of the loop on things, but somehow I missed this whole craze over COOKIE BUTTER. When I was in the Czech Republic about a year ago, my friend Angie (the best gift-giver!) sent me home with a collection of European treats. Nestled in with the coffees and chocolates, there was this jar of “stuff” (all the labels were in Czech) and I wasn’t sure what to expect. I know that peanut butter is hard to find in Eastern and Central Europe- so I knew it wasn’t that- but it was close… it was butter- but not made out of peanuts..made out of COOKIES!!!!! Seriously. I fell in love.

Cookie Butter!

Then I found it at Wal Mart. Here. In Indiana. #smile!!!

So, I’ve been stuffing Oreo Thins with all sorts of things over the past few months. Marshmallows….Key Lime Pie…I can’t stop. I have A LOT more ideas. This is just one more. (Prepare yourself…)

Cookie butter stuffed Oreos

These are simply….delicious. I shouldn’t have been surprised that adding cookie butter to Oreos would create such a yummy combination- but I was. The combination is such a unique flavor- and I’m not kidding you- unbelievably good!

Plus they are SUPER easy to make.

Here’s how we did it: (printable recipe available here)

INGREDIENTS: (makes about 25 cookies)

  • One box of Oreo Thins Chocolate cookies
  • One jar of crunchy cookie butter (I’ve loved every brand I have tried, but I used Lotus for these)
  • One cup of mini chocolate chips
  • One and 1/2 bags of Wilton’s Candy melts in dark chocolate
  • A little bit of milk chocolate candy melts to make stripes on top (or any sort of sprinkles you’d like to add to make these for any season!)

DIRECTIONS:

  • Set half of Oreo cookies on a small tray or sheet that will fit in your freezer.
  • Mix jar of cookie butter and mini chips in a small bowl.
  • Scoop or spoon cookie butter on top of each Oreo and press a second Oreo on top to make a sandwich.

Cookie butter on Oreo Thins

  • Freeze for about 30 minutes.
  • Melt Candy Melts in microwave, in 30 second increments, stirring in between, until melted and smooth.
  • Take 3 or 4 cookies at a time out of freezer and carefully dip in melted chocolate, using a fork to tap excess chocolate off and sliding the bottom of the cookie along the edge of the bowl to remove excess from the bottom. 

Oreo Thins dipped in chocolateOreo Thins dipped in chocolate

  • Set on parchment paper to harden.
  • Add sprinkles (if desired) before chocolate hardens, or after it hardens, drizzle or pipe a little bit of contrasting chocolate across the top of each cookie.
  • Enjoy!

Oreo Thins dipped in Chocolate

My thoughts: Mmmmmmm! These cookies were eaten up so fast- and I got back so much positive feedback on them- everyone loved them! The only tricky part might be dipping them (if you haven’t dipped things in chocolate before). The trick is to tap off excess chocolate and to remove excess off the bottom. If you aren’t feeling confident in your dipping skills, try just dipping half of the cookie and leaving half of that yummy cookie butter visible! I hope you get a chance to try these!!!  Enjoy!!  ~R

Cookie Butter stuffed Oreo Thins

More delicious Oreo ideas! (Click on a photo to see the recipe)

Caramel Oreo Brownie BarBrownie Oreo Cookie CupMud Pie!Creamy Coconut Cheesecake

Marshmallow-filled Chocolate Cookies

Posted on

Marshmallow Cookies

Chocolate “Oreo Thins” cookies, stuffed with a marshmallow and covered in dark chocolate- such a delicious combination!

I haven’t given up making Oreo Thins less healthy! Just a few weeks ago, I posted a recipe using the vanilla Oreo Thins- stuffed with key lime pie (see it here). Today, I bring you chocolate Oreo Thins stuffed with marshmallows and covered in chocolate. They remind me of those yummy pinwheel cookies- the kind with cookie and marshmallow all swirled together!

Marshmallow Cookies4Yep. You will want to try these- promise! They are even better tasting than they look!

Here is how we put these together: (printable recipe)

INGREDIENTS: (makes 20 cookies)

  • 1 box of Oreo Thins in chocolate
  • 20 marshmallows (regular size)
  • 2 bags of Wilton’s candy melts in dark chocolate
  • 1/4 cup of Wilton’s candy melts in white chocolate

DIRECTIONS:

  • Preheat oven to 350F degrees
  • Set half of the Oreo Thins cookies on a cookie sheet that will fit in your freezer, set aside.
  • Place a sheet of parchment paper on a second small cookie sheet.
  • Set 20 marshmallows out on paper and place in oven for 3 to 4 minutes. Until they become soft- but not toasted.
  • Remove from oven and allow marshmallows to cool to a point where you can pick them up.
  • Gently use a knife or a skewer to pierce the bottom of the marshmallow (allowing some of the melted part to come out), and set this on top of an Oreo on the 1st cookie sheet.
  • Gently pierce the top of the marshmallow and set a second Oreo on it, gently pushing the melted marshmallow out to the edges (it will go a little beyond the edges and this is ok!

Marshmallow Cookies!

  • Continue with this process until all cookies have a marshmallow sandwiched between them.
  • Freeze for about 30 minutes- until marshmallow is hard.
  • Melt Candy Melts in the microwave in 30 second increments, stirring in between until melted and smooth.
  • Taking only 2-3 cookies out of the freezer at a time, dip them into the melted chocolate, covering top and sides.
  • Quickly remove on a fork, and tap on edge of bowl to remove excess chocolate.
  • Gently slide off fork onto parchment paper to harden.
  • Melt white Candy Melts in the same manner as the chocolate ones. Place in a small zip-top bag, clip a corner, and drizzle over finished cookies.
  • Allow these to harden up before serving.
  • Enjoy!

Chocolate Marshmallow Cookies

My thoughts: I was originally going to do these with graham crackers- like a s’mores cookie- but when I realized how well those Oreo Thins work for dipping, I went with those instead- and I’m glad I did! These are absolutely delicious. I really, really loved them! A unique addition to any cookie tray! In fact, I made cookie plates with my last 3 recipes here on Easybaked. I baked them all over one weekend and brought these to my neighbors and friends. Who says you can only do this at Christmas??? 🙂

Summer Cookies!

I hope you get a chance to try some of these fun summer cookie recipes before August disappears into fall!  Enjoy!!! ~r

Marshmallow Cookies!!!

One last shout-out to summer desserts! Click on a photo to see the recipe 🙂

Banana Split CupcakesKool Aid PiePina Colada Cupcakes!Heath Bar Ice Cream Dessert3


Christmas Card Cookies

Christmas Card Cookies

These adorable cookies don’t just taste yummy- they also bear Christmas words of cheer with every delicious bite!

I saw this fun silicone mold by Wilton at my local grocery, and I couldn’t resist! So fun!!!

I made two varieties of these little cookie cards: Peppermint mocha and Gingerbread chocolate. Both were delicious and so fun to make!

You can use any of your favorite cut-out cookie recipes partnered with any Wilton Candy Melt flavors on top, but I thought these two combinations were delicious!

Christmas Card Cookie1

Want to know how to make these? Let’s start with the “card” toppers.

  • You’ll need about 3 bags of Wilton Candy Melts to make 24 cookie toppers.
  • Melt them in the microwave, one bag at a time, in 30 second increments, stirring between until smooth.
  • Spoon about 2 tablespoons into each cavity and use a small spoon to spread into corners.
  • Tap mold on counter to remove bubbles and freeze for about 10 minutes.
  • Carefully peel the mold away from each bar and repeat this process until you have 24.

This process takes a little time, but it can be done ahead of time and the little bars can be stored in an airtight container in a cool spot until needed. Keep different flavors separated from each other, and put a little parchment or wax paper between layers.

Then you can make the cookies!

One of my favorite Christmas recipes (of all time) is my grandma’s gingerbread cookie recipe. It’s on this blog a couple of times, but you can get the original (in grandma’s handwriting!) by clicking here. I paired this cookie with dark chocolate Wilton’s candy melts.

Gingerbread Cookies!

The other recipe I used, with peppermint card toppers, was my espresso cutout cookies. There’s nothing like peppermint, coffee and chocolate all together! You can see this recipe originally published on Easybaked by clicking here.

Chocolate Espresso Cookies!!!

  • Make your cookie dough according to whatever recipe you desire and then use a cookie cutter to cut a large rectangle cookie. I used a 4.5″ x 3″ cutter that I found here.
  • Bake, cool and then take a little extra Candy Melt and a food-safe brush and brush melted candy on the back of each bar to attach it to the top of each cookie.
  • Press the bar down using a little wax paper on the top (if you touch it with your bare fingers you will get prints!)
  • Allow bar to harden onto the cookie and then serve! I placed each one in a little cello bag sealed with a sticker and gave them away with gifts.


Christmas Card Cookies6

So fun!!!!

Christmas Card Cookies

My thoughts: These are a fun, creative and easy way to say Merry Christmas! The variety of flavors you can use is limited only by your imagination- but I recommend you use a cookie recipe that doesn’t “puff up” too much. You can see in my photos that my gingerbread cookies puffed up a little- making my edges not as pretty and straight as those chocolate espresso ones that don’t expand much at all. The gingerbread/chocolate combination was so yummy that I got over the slightly curved edges though!  I hope you get a chance to try these- so fun!!  ~r

Christmas Card Cookies2

Other Christmas recipe ideas here at Easybaked: (click on a photo to see the recipe)

Spiced Mocha MixCreamy cheesecake with sour cream toppingReindeer Oreo Pops!!!Pecan Pie Cupcakes

.


A Cut-out Cookie Collection!

Cut-out Cookie CollectionIt’s nearly Christmas, and those cute bells, stars and tree cookie cutters are begging to be used!  This post is dedicated to our favorite cut-out cookie recipes featured here on Easybaked. We have everything from gingerbread to mocha, simple sugar cookies to international favorites! Make this year’s cookies your best yet!

Let’s start with the family favorite. My mom’s thick and cake-like cutout cookie recipe features a hint of cinnamon flavor and is truly a part of our Christmas (and Easter, and 4th of July, and back-to-school and GO PACKERS!) traditions. These are easy, and freeze well- so you can make them ahead. Go ahead and click on that photo to see the recipe.

IMG_1195


Next, is my personal favorite: GINGERBREAD!  These, too, have been a part of our family Christmas traditions. This recipe is my grandmother’s, and she faithfully made them every year, cut them as Christmas trees and decorated them with red-hots! Click on the photo to see her oh-so-yummy recipe!

Gingerbread Cookies!Similar to gingerbread are my Pumpkin Spice Cookies. These are sweeter and bake very flat and easy to decorate.

Pumpkin Pie Cutout cookies!Chocolate cut-out cookies that taste like the richest brownie but roll out and cut like a dream? Yes, please!  I love how the frosting colors really stand out on that dark chocolate! These chocolate cut-outs have been in our family awhile too- but as drop cookies that I tweaked to make cut-outs. Click the photo to see this delicious recipe:

Chocolate cut-out cookies

That chocolate cut-out recipe is so yummy that I experimented a little more with it to create a chocolate espresso cut out cookie and…oh my…one of my favorites!

Dark Chocolate Espresso Cookies!I’ve spent some time overseas and discovered a wonderful dessert in Prague called Medovnic. Then I found these wonderful little honey-filled cut out cookies called Medovniky that are often made at Christmas. I made them for autumn, but they are a delicious flavor for any season!!

Honey cookies cut into leaf shapes!

Speaking of international cookies, these Alfajores from Peru add a totally unique (and deliciously caramel-filled) flavor to the holidays.

Alfajores (Peruvian caramel cookie)!

When it comes to cut-out cookies, the cookie cutters make all the difference! I absolutely LOVE the look created by Linzer cookie cutters. Typically they are layered with a fruit filling, but I just used colored frosting and you have beautiful cookies with very little fancy frosting technique!

Linzer Christmas CookiesOne other thing you’ll need are some good frosting recipes, which I’ve compiled right here in a post called: Frostings, fillings and fun!

mmm......frosting!

I hope that these recipes inspire fun-filled cookie making times with your family this season.

Merry Christmas! 

~r

12/19/14: On a personal note: I blog my recipes ahead, and I prepared this post and my next one (very fun New Years cookies) several weeks ago. Since that time, my mom has been diagnosed with very, very aggressive cancer and admitted to Hospice. I just wanted to ask for all of you who have followed this little blog and enjoyed these recipes to keep our family in your prayers as we say good bye to her this Christmas. After next week’s post (which is already scheduled),  I will probably take a little break from sharing recipes here. Many thanks, friends! ~r

(My personal and ministry blog is at: www.thenavajojourney.com, if you want to keep up with me there.)

Caramel Crisp Cookies

Posted on

Caramel Ritz Cookies

These crisp, caramel- filled cookies are absolutely delicious, can be decorated for any season and are SO easy!

These cookies have made a bigger impression on people than almost any dessert I’ve made. Everyone LOVES these! I love them too and they really are one of the easiest cookie ideas I’ve ever posted. Plus they are cute, and cute always gets bonus points in my book!

Caramel Ritz Cookies

These are made by pressing melted Rolos between Ritz crackers and then dipping them in chocolate… as easy as that! You almost don’t need a recipe, but for those of you who like having one, here you go: (printable version)

INGREDIENTS: (makes about 50 cookies)

  • One box of Ritz Crackers
  • One bag of Rolo caramel candies
  • Two bags of Wilton’s Candy Melts in dark chocolate

DIRECTIONS:

  • Unwrap all those little Rolos…this is the hardest part of this recipe….booooring!
  • Preheat oven to 350F degrees.
  • Place Ritz Crackers, bottom side up, on a cookie sheet and set one unwrapped Rolo on each one.
  • Put these into the oven and leave them for one to two minutes until the Rolo is soft enough to press flat with another cracker- I actually just kept checking until they were soft enough.
  • Remove them from the oven and use another Ritz cracker to make a little sandwich of that soft Rolo.
  • Allow these to cool completely- I put mine in the fridge for 20 minutes or so until they were nice and firm
  • Melt Candy Melts in the microwave in 30 second increments, stirring in between until they are completely melted and smooth.
  • Cover each cookie with melted chocolate and use a fork to lift the cookie up. Tap the fork against the side of the bowl to allow excess chocolate to drain off, slide bottom of cookie along edge of bowl to remove extra off bottom, and tip gently off fork and allow cookie to slide onto parchment or wax paper. Sprinkle/ decorate as desired and allow cookie to harden completely.

Caramel Rolo Ritz CookiesCaramel Ritz Cookies

If you want to skip the chocolate-dipped part, these are still a fun and yummy treat:

Caramel Rolo Ritz Cookies

My thoughts: As I said earlier, these are really yummy. I like that you can decorate them any way you want for any season- they are like Oreo pops- and you ALL know how much fun I have decorating those here! Use any color of Candy Melt, use sprinkles or drizzles….sky is the limit! My dad tried them and said, “When you put these on your blog, tell people they are the best cookies I’ve ever had.” So there you go. The best ever. Thanks dad!

Caramel Rolo Ritz CookiesOther Christmas cookie recipes you’ll have fun trying~ just click on the photo to see the recipe:

Chocolate bonbonsChristmas Cut-outsSnowman Oreo PopsChocolate Espresso Cookies!!!

Need a fun and unique gift idea? Easybaked has adorable boxed sets of notecards. They have an Easybaked dessert photo on the front and a recipe on the back! The come in a cute box and the best part? They are ON SALE for Christmas, include free shipping and the site that is hosting them offers $10 off a $50 purchase! Enjoy!!! (Click on photo for more information)

Easybaked Card sale

Reindeer Oreo Pops!

Posted on

Reindeer Oreo Pops!!!
These chocolate covered Oreos are so full of holiday cheer!  Wrap them in little cello bags for a quick and fun Holiday gift!

I confess.  I am addicted to making Oreo pops.  I can’t stop.  They are so easy and fun.  They give me an excuse to buy a package of my favorite cookies.  They make people smile.

Original Oreo pops!!!!!Mummy Oreo Pops!Snowman Oreo PopsLadybug Oreo Pops!

I have the art of “stick-placing” and “dipping” Oreos to coat them in chocolate down.

Click here for a printable sheet that takes you through the basic process step by step.

INGREDIENTS:

  • 1 package of Double Stuff Oreos
  • 2 bags (12oz each) of milk chocolate candy melts (I use Wilton’s)
  • 24 lollipop sticks
  • 1 small bag of mini-pretzels
  • Candy eyes
  • Mini M&Ms

DIRECTIONS:

  • Gently twist apart Oreos.  Some will break.  No stress.  Eat them.
  • Break apart pretzels by using a sharp knife to carefully cut them top to bottom through the center.  Then cut the round tops off, leaving a “Y” shape.
  • Put eyes and red mini M&Ms into small bowls, ready to use.
  • Place candy melts into a bowl.
  • Melt candy melts in the microwave in 30 second increments, stirring between, until completely melted and smooth.
  • Press a lollipop stick into white filling, making an indentation.
  • Dip stick into melted chocolate and spread chocolate on top of white filling.
  • Place stick into indentation and set top of cookie back on, cementing the cookie back together around the stick.
  • Allow chocolate to harden.  If you set cookies on a large plate as you put them together, you can place the entire plate into the fridge to speed the hardening process up.
  • Once hardened, pick the cookie up using the lollipop stick and set into melted chocolate.
  • Spoon melted chocolate over the Oreo to coat it.
  • Gently tap the stick on the bowl’s edge to allow excess chocolate to drip off.
  • Slide bottom of cookie along edge of bowl to remove excess chocolate.
  • Set cookie on parchment or waxed paper.
  • Put pretzel “antlers” into the top of the Oreo, and set two eyes and a nose on the front of the Oreo.
  • Allow chocolate to harden completely.
  • Serve as-is, or tie up in cello treat bags to give as gifts!

Reindeer Oreo Pops!!!
My thoughts:  What to do you get when you combine an Oreo with melted chocolate and salty pretzels?  Deliciousness!!!!!!  Use them as place settings on each plate for Christmas! Make reindeer, snowmen and red/green sprinkle Oreo pops and create a bouquet of pops in a cute Christmas planter for your Christmas celebration!  Use them as stocking stuffers or teacher gifts….the possibilities are endlessly fun!  Enjoy!  ~r


Reindeer Oreo Pops

Chocolate Bonbons!!


Thanksgiving is past….shopping has begun…must be time for CHRISTMAS BAKING!!!!!  These fun little fudge cookies take advantage of all the great flavors of Hershey kisses available this time of year and they are SO beautiful on the table!

INGREDIENTS:

DIRECTIONS:

  • Soften Philadelphia cream cheese in microwave until completely smooth.
  • Melt chocolate chips in microwave in 30 second increments, stirring well in between.
  • Add cream cheese to melted chocolate and blend well.
  • Add flour and stir into a thick dough consistency.
  • Flatten about 1 tsp. of dough in your palm, place a kiss in the center and gently wrap the dough around the kiss until it is completely covered.
  • Roll cookie into a ball and place on an un-greased cookie sheet.
  • Bake cookies at 350 degrees for 8-10 minutes.
  • Remove warm cookies from cookie sheet and place on parchment paper.
  • Decorate as desired- like this:


From top to bottom:

1.  Mint truffle kisses: Dip 1/2 of cookie in green Wiltons candy melts, drizzle entire cookie with dark chocolate melts.

2. Coconut kisses: Dip top in white Wiltons candy melts, pipe a little bit of dark chocolate melts in the center and top with coconut.

3.  Caramel kisses:  To make a caramel color I mixed white melts with dark chocolate and added a bit of yellow food color.  Dip 1/2 of the cookie in this and drizzle with dark chocolate.

4. Cherry Cordial kisses: Dip top of cookie in white  melts, dab a tiny bit of green melt in the center and pull up to make a cherry stem and add a red sprinkle in the center.

5. (see top picture) Candy Cane kisses: Dip 1/2 of cookie in white melts and drizzle with red and green melts.

My thoughts:  I have become a Hershey Kiss Hoarder because of this recipe.  As soon as I see a new flavor I have to try it in these cookies– and then I buy like 5 bags so that I can have them for this recipe all year long.  All the flavors shown ARE available right now except for the coconut (EASTER, sorry…)…  One note:  the firm centered kisses (coconut, raspberry, mint truffle, candy cane etc.) work best in these cookies, as the soft centered ones tend to leak out a little (see my top picture- I’m missing some caramel 😦 )  These are the perfect bite-sized treat for any kind of occasion and kids have SO much fun wrapping dough around kisses!  ENJOY!!!!  r-

Gingerbread Cut-out Cookies

These gingerbread cookies are my favorite gingerbread cookies ever.  They are a recipe that I got from my grandma (a WONDERFUL cook and baker) many many years ago.  I never tried making them because, well, grandma always made them!  I have wonderful memories of arriving late at their house after a long drive through Christmas traffic and having a plate of these with milk before bed.  My dad and I pretty much ate these by the handful every Christmas season.

My grandma passed away suddenly last week.  When I got back home after the funeral I remembered this recipe and knew I finally needed to try my hand at it- even if it isn’t Christmas yet.  They turned out beautifully and taste just like grandma’s – tasting them reminded me of all the wonderful things I will miss about her.

So, in honor of grandma Ruth- the best gingerbread cookie recipe ever:

INGREDIENTS:

DIRECTIONS:

  • Cream together butter and sugar.
  • Beat in egg, molasses and vinegar.
  • Blend in sifted dry ingredients.
  • Chill 2-3 hours (this is important– the dough is very easy to roll after chilling)
  • Roll 1/8 inch to 1/4 inch thick on a floured counter or board and cut into shapes.
  • Place on greased cookie sheets.
  • Bake at 375 degrees for about 10 minutes.  Check often- take out when cookies have risen and are easily removed from sheet.
  • Frost as desired (I used royal icing from sugar cookies recipe)

My thoughts:  Thanks grandma- for all the fun and memories and yummy home cooked meals– and most of all for all the love though all of my years.  Someday we will all meet together again in heaven.  Love you…

%d bloggers like this: