Tag Archives: creative

Caramel Armadillos

Posted on

Caramel Armadillos1

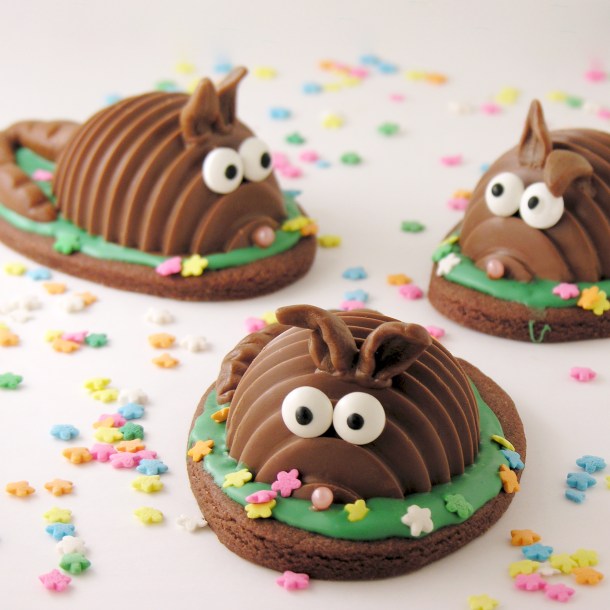
Caramel Armadillos. Because Caramel Turtles are soooooo yesterday.

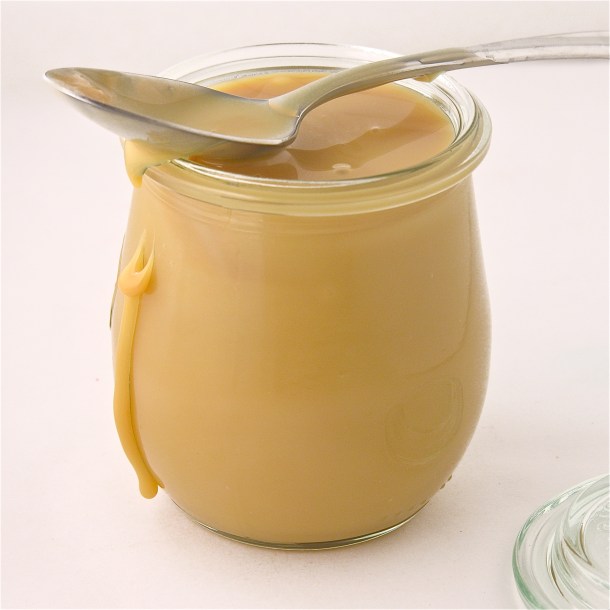
I have this great, really easy, caramel filling. It’s great on ice cream, in brownies, in cupcakes and even by the spoonful. I love it. I decided this week that I wanted to make turtle cookies with it, and I was struck by how boring and predictable caramel turtles are. Why turtles? Who started this trend? I turned to Wikipedia for answers. I was still bored.

I decided to make caramel armadillos instead. Not only are they WAY cuter than turtles, but it’s really fun to say “caramel armadillos”.

Try it… five times fast!

You know you want to… 🙂

Caramel ArmadilloA couple weeks ago I was waiting for a friend to meet me for coffee and I stumbled upon these cute little chocolate molds on Amazon. They are supposedly Easter eggs, but when I decided to make Armadillos they came to mind as the perfect thing to use! All I needed was a tail and ears… and a tootsie roll would suffice!

SO caramel armadillos were born- and they are neither boring nor predictable!

Armadillo3Here’s how I made them: (printable recipe)

INGREDIENTS: (makes about 20 armadillos)

  • 32 Kraft Caramels (unwrapped)
  • 1 can (14 oz.) of sweetened condensed milk
  • 1 stick (1/2 cup) of butter
  • Whole pecans- about 3 per armadillo
  • 1 bag (32 oz/2lbs) of Merckens Milk chocolate wafers. 
  • about 40 candy eyes
  • 20 pink candy balls for noses
  • at least 25 tootsie rolls, unwrapped

DIRECTIONS:

  • Make caramel in a large saucepan over the stove by heating together the caramels, condensed milk and butter. Stir constantly until melted and smooth.
  • Pour into a small bowl and allow mixture to cool a bit (so it doesn’t melt chocolate when poured in).
  • Melt chocolate wafers in the microwave in 30 second increments, stirring in between until melted and smooth.
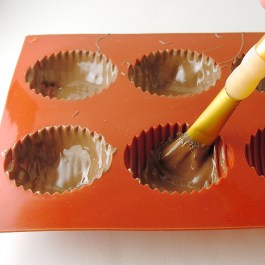
  • Use a food-grade brush, or pastry brush to “paint” the inside of the egg mold with chocolate. Paint two layers to make it nice and thick- you should not be able to see any of the mold showing through. 
  • Freeze until hard (5 minutes or so)
  • Place cooled caramel into a large zip-top bag, zip tightly closed and clip a corner off the bag using a pair of kitchen scissors.
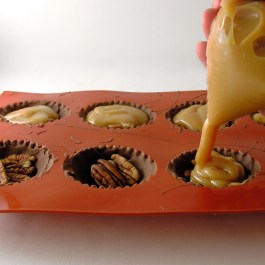
  • Squeeze a little bit of caramel in each cup, set three pecans on the caramel, pushing them gently into it, then fill the remainder of the cup up with caramel.

**Note: If you are making just armadillos, don’t fill to the top because you will add a layer of chocolate on top once the caramel is hard. If you are placing these on cookies, you can fill to the top and spread flat with a knife.

Caramel ArmadillosCaramel Armadillos

  • Place these in the freezer to harden (5-10 minutes) and then paint a layer of chocolate on the top of the hardened caramel and freeze again until hard.
  • Gently peel silicone mold away from chocolate and set on a plate to be decorated!
  • Unwrap 20 tootsie rolls and place for just a few seconds in the microwave to soften a little.
  • Pull and roll these into tails and use the side of a knife to press grooves along the length. Keep these on parchment paper until they harden up. 
  • Unwrap 4 to 5 tootsie rolls and cut them into little circles. Shape these into ears and keep with tails on parchment paper.

Caramel Armadillos!

  • To assemble, use dabs of melted chocolate to attach ears, candy eyes, nose and tails.

I made cookies for them to sit on. My original idea was for caramel turtle cookies, so I went ahead with the cookie plan and it does add stability to that tail (otherwise they are a little awkward to pick up!)

  • I used my favorite chocolate cookie cut-out recipe from here, and it made a few more cookies than I had armadillos for, but they are yummy cookies all alone!!
  • I used an egg-shaped cookie cutter a bit larger than the armadillo.
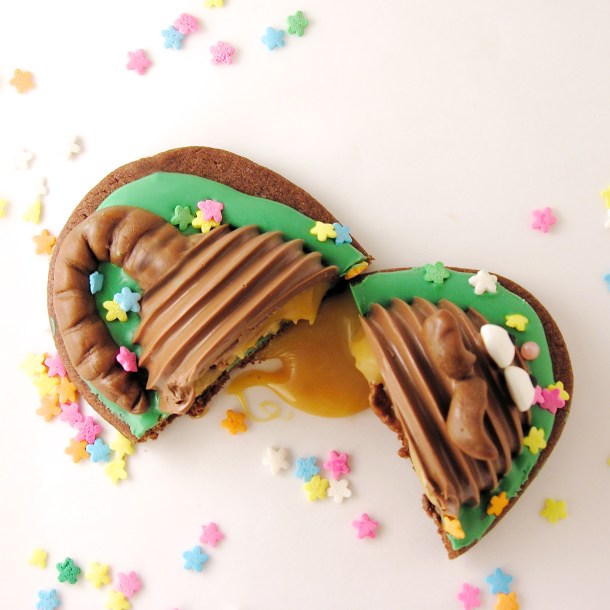
  • I added melted green candy wafers to the top- just spooned some on and spread it near the edges- and set a “open” caramel armadillo on top. The green wafers seal up the bottom and keep caramel from leaking out!
  • I set the tail on the melted green wafers and added flower sprinkles! Once everything hardened up I added the eyes, ears and nose.

Caramel Armadillo!

So….cookies??? Candies????  It’s up to you! I think they would be fun on a cake.

How awkwardly wonderful would a caramel armadillo cake be???

Caramel Armadillo Cookie

My thoughts: These are delicious. They are also a lot of work (being honest!). It would help to have your tails and ears shaped ahead of time and I was wishing SO hard for an additional mold. That would save time too. That said- I will totally make these again!!!! They were well- loved by adults and kids alike!  If this recipe seems like too much craziness for you, just make the caramel. Put it on ice cream and be happy!  Enjoy!!  ~r

Dulce de Leche caramel sauce form a can

Other recipes kids will love (click on a photo to see the recipe!):
Polka Dot Cake!!!Pile of Cupcakes!Hamburger Cookie!Edible Jello Earthworm Cupcakes

Leprechaun Truffles

Posted on

Green Apple Truffles

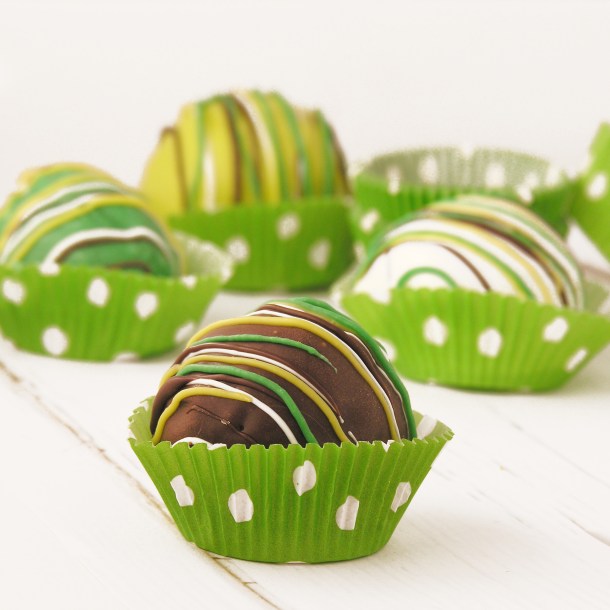
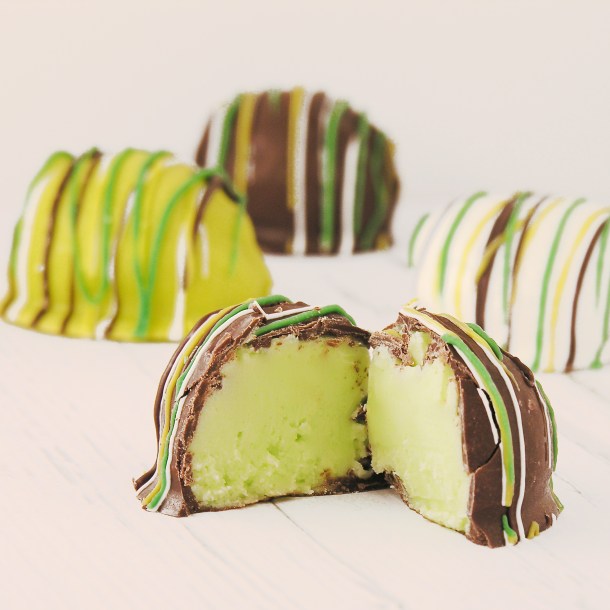
These fun truffles are made with green apple (or lime!) Kool Aid filling and they are SO yummy!

It’s the time of year when all things green are made. One of my favorite truffle fillings is made with Kool Aid, which makes the flavors limited only to what little packets of flavor you can find! I made these with green apple Kool Aid, but I’ve made them with lime before too- and they are delicious! This tart fruit filling is SO creamy and smooth. I absolutely love it!

Green Apple Truffles

Here’s how we made these delicious little green treats: (printable recipe)

INGREDIENTS:

  • 1 (8 oz) package of cream cheese (softened to room temperature!)
  • 3 cups of powdered sugar
  • 3 cups of white chocolate chips
  • 1 tsp vanilla
  • 1 (0.16oz) packet of Kool-Aid drink mix (any flavor- I used green apple)
  • 2 bags of Wiltons Candy Melts (in whatever colors you wish)

DIRECTIONS:

  • Cream together cream cheese, powdered sugar and Kool-Aid in a large mixing bowl.
  • Melt white chocolate chips in the microwave in 30 second increments (stirring in between) until smooth and creamy.
  • Add melted chips and vanilla to cream cheese mixture and combine until completely smooth.
  • Refrigerate for at least 30 minutes.
  • Remove mixture from refrigerator and use a small cookie scoop or melon baller to make small balls of filling (I placed these on a plate and put them back in the fridge to chill while I prepared my chocolate to dip)
  • Melt the Wilton’s Candy Melts in the microwave in 30 second increments, stirring until smooth and creamy.
  • Dip chilled balls of filling in the melted chocolate, draining away excess and placing on parchment paper to harden (if you want pictures of how I dip things click here for a previous recipe) The balls of filling need to stay cold, so keep them in the fridge until you are ready to dip them.
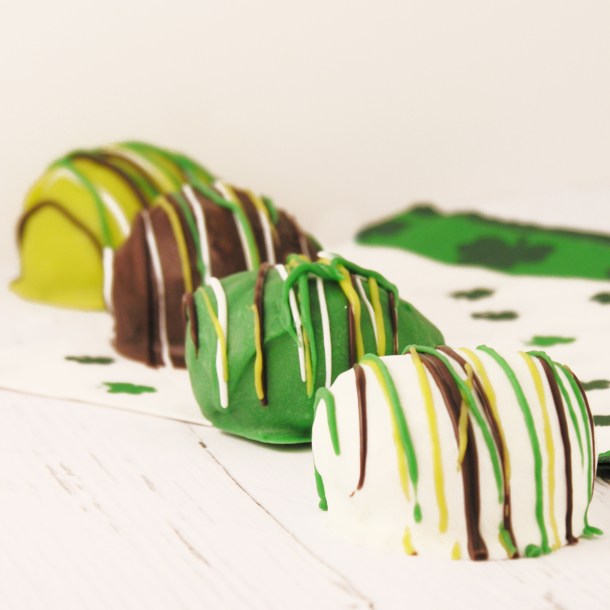
  • Decorate with drizzles of fun colored chocolate. 
  • Enjoy!

Green Apple Truffles

My thoughts: Aren’t they cute? They are SO yummy too… my only recipe tip is to make sure those balls of filling are chilled and your melted candy isn’t super hot. I allowed my candy melts to cool a bit before I dipped. You just don’t want that soft filling to start melting while you dip.

Green Apple Truffles

These are as fun as can be using all sorts of fillings, which makes them a good treat for any holiday!

Kool-Aid Truffles!!

Here they are in other fun flavors. Click on the photo to see how I did them!

Finally, one of our most popular recipes on Easybaked is a St. Patricks Day treat! Bailey’s cupcakes are everyone’s favorite! You should probably try them. 🙂 Again, click on the photo to see the (oh so yummy!) recipe:

Baileys Irish Cream Cupcakes

Caramel Crisp Cookies

Posted on

Caramel Ritz Cookies

These crisp, caramel- filled cookies are absolutely delicious, can be decorated for any season and are SO easy!

These cookies have made a bigger impression on people than almost any dessert I’ve made. Everyone LOVES these! I love them too and they really are one of the easiest cookie ideas I’ve ever posted. Plus they are cute, and cute always gets bonus points in my book!

Caramel Ritz Cookies

These are made by pressing melted Rolos between Ritz crackers and then dipping them in chocolate… as easy as that! You almost don’t need a recipe, but for those of you who like having one, here you go: (printable version)

INGREDIENTS: (makes about 50 cookies)

  • One box of Ritz Crackers
  • One bag of Rolo caramel candies
  • Two bags of Wilton’s Candy Melts in dark chocolate

DIRECTIONS:

  • Unwrap all those little Rolos…this is the hardest part of this recipe….booooring!
  • Preheat oven to 350F degrees.
  • Place Ritz Crackers, bottom side up, on a cookie sheet and set one unwrapped Rolo on each one.
  • Put these into the oven and leave them for one to two minutes until the Rolo is soft enough to press flat with another cracker- I actually just kept checking until they were soft enough.
  • Remove them from the oven and use another Ritz cracker to make a little sandwich of that soft Rolo.
  • Allow these to cool completely- I put mine in the fridge for 20 minutes or so until they were nice and firm
  • Melt Candy Melts in the microwave in 30 second increments, stirring in between until they are completely melted and smooth.
  • Cover each cookie with melted chocolate and use a fork to lift the cookie up. Tap the fork against the side of the bowl to allow excess chocolate to drain off, slide bottom of cookie along edge of bowl to remove extra off bottom, and tip gently off fork and allow cookie to slide onto parchment or wax paper. Sprinkle/ decorate as desired and allow cookie to harden completely.

Caramel Rolo Ritz CookiesCaramel Ritz Cookies

If you want to skip the chocolate-dipped part, these are still a fun and yummy treat:

Caramel Rolo Ritz Cookies

My thoughts: As I said earlier, these are really yummy. I like that you can decorate them any way you want for any season- they are like Oreo pops- and you ALL know how much fun I have decorating those here! Use any color of Candy Melt, use sprinkles or drizzles….sky is the limit! My dad tried them and said, “When you put these on your blog, tell people they are the best cookies I’ve ever had.” So there you go. The best ever. Thanks dad!

Caramel Rolo Ritz CookiesOther Christmas cookie recipes you’ll have fun trying~ just click on the photo to see the recipe:

Chocolate bonbonsChristmas Cut-outsSnowman Oreo PopsChocolate Espresso Cookies!!!

Need a fun and unique gift idea? Easybaked has adorable boxed sets of notecards. They have an Easybaked dessert photo on the front and a recipe on the back! The come in a cute box and the best part? They are ON SALE for Christmas, include free shipping and the site that is hosting them offers $10 off a $50 purchase! Enjoy!!! (Click on photo for more information)

Easybaked Card sale

Tepee Cupcakes!

Posted on

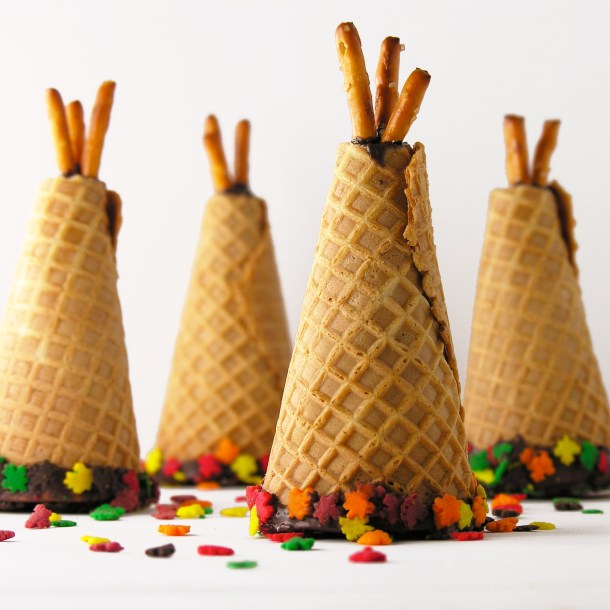
Tepee CupcakesThese adorable little tepees are filled with yummy chocolate cake and are sure to make everyone smile at YOUR Thanksgiving feast!

Since I spent 8 months on the Navajo Nation and learned to love their culture and traditions, I thought I’d skip the Pilgrim themes and go straight for the Indians this Thanksgiving. My first trip out to the reservation I wondered if Tepees were even used by the Navajo. They are- but only for special ceremonies. The Navajo traditionally lived in round or multi-sided structures called hogans.

AZ-92DSC_0815

Here is a picture of a ceremonial tepee and of my friend Rod by his family’s hogan.

I had quite a time making these cute little desserts, but I hope that my experimenting will help you make this perfectly the 1st time! They really aren’t difficult once you figure out what the best system is! I will give you my recipe 1st (that’s what you’re here for, right??) But after the recipe I will share my trials and tribulations in the process!

Teepee4

Here’s how to make these cute little treats: (printable recipe)

INGREDIENTS:

  • 24 pointed ice cream cones
  • One boxed cake mix in chocolate (or any flavor you like!), plus water, oil and eggs to make according to box.
  • One bag (12 oz) of Wilton Candy Melts in dark chocolate.
  • Leaf sprinkles (at least one to two cups of them)
  • Straight pretzel sticks
  • DIRECTIONS:
    Cover the entire top of a large springform pan with aluminum foil, wrapping it around several times.
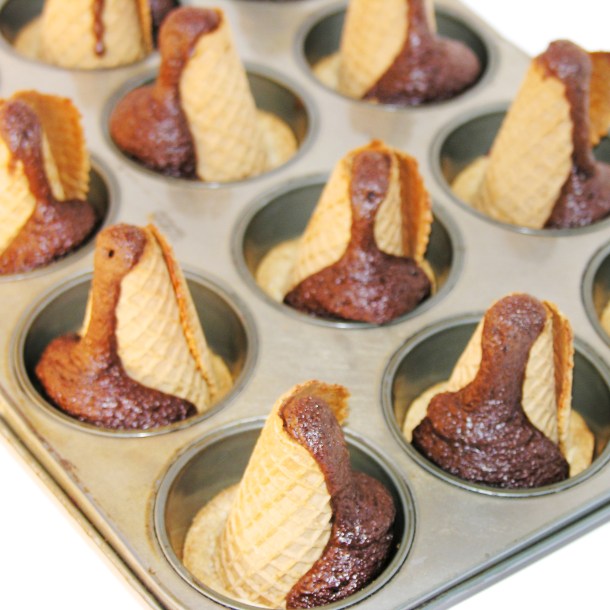
  • Use a small knife or scissors to make a tiny slit in the center.
  • Push the pointed tip of one ice cream cone through the slit until the tip rests on the inside bottom of the pan.
  • Repeat this with the rest of the cones (depending on the size of your pan you may need to bake these in two batches).

Baking pointed cones

  • Preheat oven to 350F degrees.
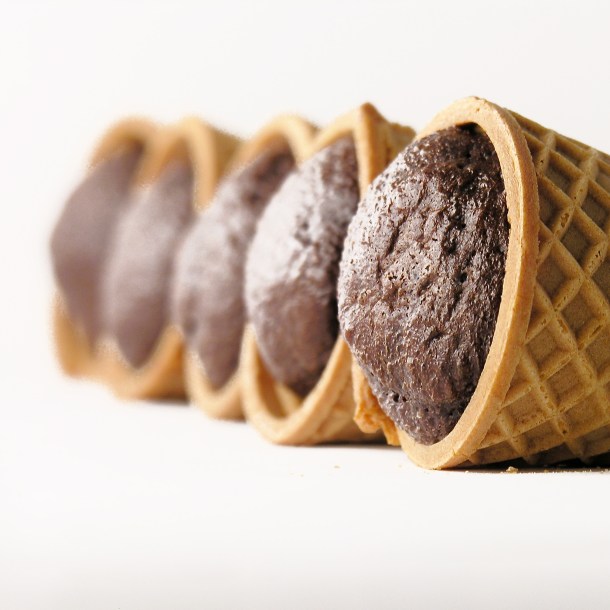
  • Make cake mix according to box, and spoon or pipe into cones, filling them about 2/3 full.
  • Bake at 350F degrees for about 15-20 minutes.
  • Allow them to cool before removing.

Ice cream cone cupcakes

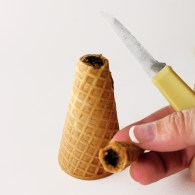
  • Use a knife to cut the points off of each cone. I scored around the edge with the knife and then just snapped the tip off with my fingers.
  • Trim off tops of cupcakes to make a flat “bottom”
  • Melt candy melts in microwave in 30 second increments, stirring in between, until melted and smooth.
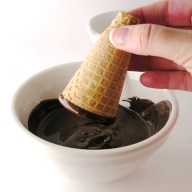
  • Dip the flat end of the cone into the chocolate, coating it completely.
  • Dip chocolate into a bowl filled with leaf sprinkles.
  • Set coated cone on parchment paper to harden up.
  • Place remaining chocolate into a small zip-top bag and clip a corner.
  • Pipe a bit of chocolate on the top of each tepee and then stick 3 pretzel sticks into the top.
  • After chocolate has hardened up, serve and enjoy!!!

Teepee cupcakeTeepee CupcakeTeepee Cupcake

Teepee cupcakesThe story behind the cupcakes:

These are the result of much experimenting. I saw a picture of tepee cupcakes on Pinterest and was intrigued by this idea, but I couldn’t imagine how you would bake cake batter into a pointed cup…? So I googled the idea and discovered that nobody really has any very good ideas for this…? I wondered if I could maybe cut the top point off 1st, stick the bottom into something like cookie dough and pipe batter in to bake upside down? I tried this with the following result:

Recipe fail!These really made the most beautiful exploding volcano-type effect in the oven. It was very entertaining, although not what I was hoping for!

Many sites recommended poking the cones into disposable tin foil pans, but they all said to watch them closely because they tip…and to be careful of the hot cake batter when righting them. Oh my. Not my sort of recipe. Sounds like one big mess in my oven!

Eventually I tried the foil and springform pan idea and it was not only easy but very sturdy. Nothing tipped even a tiny bit!

Teepee Cupcakes

My thoughts: YUM! These are just delicious and fairly easy to make once you know how to get those cupcakes baked. My only advice: make sure you cut enough off the top that all three of those pretzels fit into the opening. A few of mine were too tight, and I had to use the chocolate melts to cement them in place. I hope you have fun making these! I certainly did!  Enjoy!! ~r

Other fun fall recipes here on Easybaked (click on a photo to see the recipe):

Caramel Pecan CookiesPeanut butter Acorn Cookies!Honey cut-out cookiesPumpkin Pie Dip!

Fudge Stripe Cookie Cups

Posted on

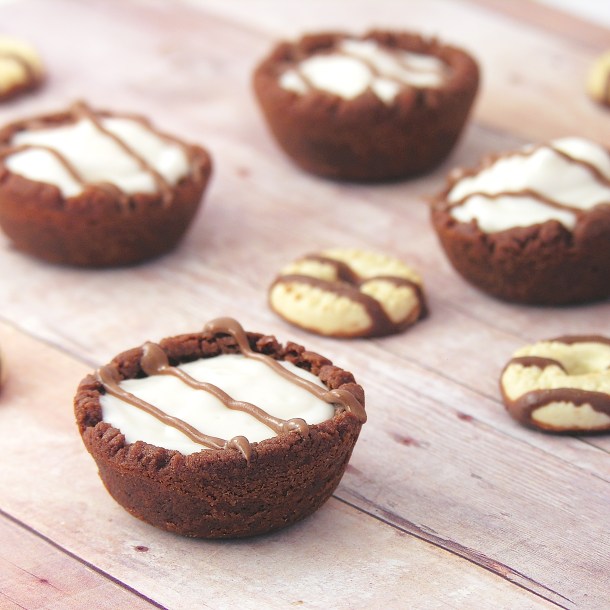
Fudge Stripe Cookie cups

These dark chocolate cups have a surprise inside: a crunchy little fudge stripe cookie!
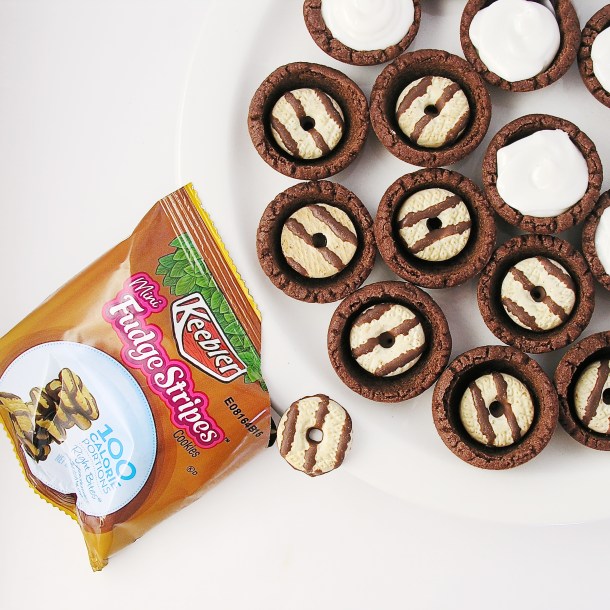
I just love those fudge stripe cookies.  Even when I am trying to watch my calorie intake, I get the little 100 calorie packs as a treat.  They are just soooo yummy!  Those little mini cookies were the inspiration for these cookie cups.  They fit perfectly inside, and make for a wonderful surprise when you bite into one!

Fudge Stripe Cookie Cups!

So much fun!  Best use of diet food  EVER!

Here’s how we made them: (for a printable recipe click here)

INGREDIENTS: (makes 44-48 mini cookie cups)

  • 1 stick (1/2 cup) butter, softened
  • 3/4 cup of granulated sugar
  • 1 egg
  • 1/2 teaspoon vanilla extract
  • 1/3 cup of unsweetened cocoa powder
  • 1 1/2 cups flour
  • 1/4 teaspoon salt
  • 1/4 teaspoon baking powder
  • One box of Keebler Mini Fudge Stripe cookies
  • One tub of vanilla frosting.
  • A little bit of melted chocolate to drizzle on top, if desired

DIRECTIONS:

  • Preheat oven to 350F degrees.
  • Make cookies by combining butter, sugar, egg, vanilla and cocoa powder and beating until completely combined.
  • Add other dry ingredients gradually, mixing with beaters until too heavy to beat. Use clean hands to knead dough into a soft ball.
  • Use a small cookie scoop (I used a scoop that holds 1/2 Tablespoon of batter) to portion out your dough into mini muffin tins that have been sprayed with non-stick spray.
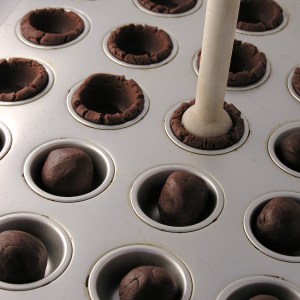
  • Use a tart shaper or a wooden spoon to press the dough into a cup shape (really, the tart shaper works best for this and you will use it again- I use mine all the time!)

Making cookie cups

  • Bake at 350F degrees for 7 to 8 minutes and remove from oven.
  • Press centers in a second time with the tart shaper and allow them to cool for just a couple of minutes.
  • Use a small paring knife to pop each cup out and allow them to cool completely on the counter.
  • Place one mini Fudge Stripe Cookie to each cup
  • Spoon frosting into a small bowl and microwave for 20-30 seconds, until soft.  Stir until smooth.
  • Spoon frosting into a sturdy zip-top bag and clip a corner off.  Pipe frosting over cookie to the top of each cup

Fudge Stripe Cookie Cups!

  • Pipe chocolate stripes on top to decorate.
  • Allow frosting to firm up.
  • Enjoy!

Fudge Stripe Cookie Cups

My thoughts:  These are SO easy to make and such cute little desserts.  I’m addicted to desserts that surprise you when you bite into them- and these do just that!  I hope you enjoy making and sharing these fun little treats!  Enjoy!! ~r

Fudge Stripe Cookies1

Other cookie cup dessert recipes:

Salted Caramel Cookie Cup!!!Pecan Pie cookie cups with dark chocolateSeven Layer CupsMelted Smores cup


Butterscotch Ice Cream Towers

Posted on

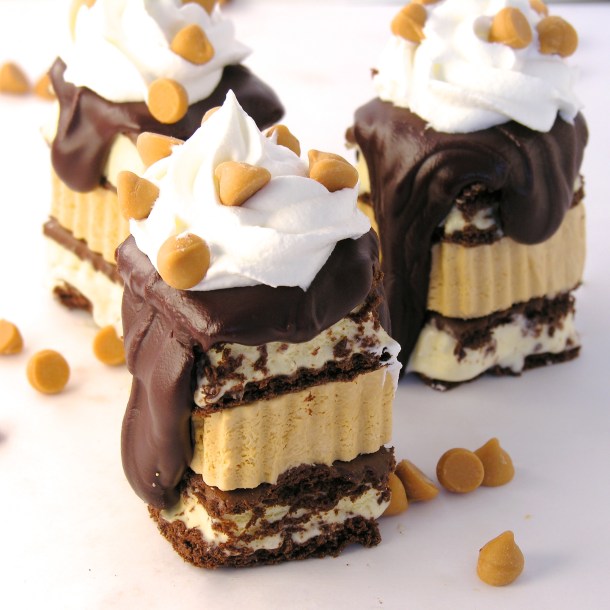
Butterscotch Ice cream towers!!!!

 These beautiful, stacked desserts have layers of ice cream sandwich and a creamy butterscotch filling.  Topped with melted chocolate, they make a fun and elegant summer dessert!

Butterscotch Ice cream towers!

I’ve been craving ice cream sandwiches.  These little desserts were a combination of that craving and an extra box of butterscotch pudding in my cupboard.  I love how they turned out!  They require some hands-on time and an overnight in the freezer, so they aren’t a last minute idea- but I think the extra time is worth it!!  The end result is pretty and SO yummy!  Here’s the recipe:

INGREDIENTS: (printable recipe here)

  • One box of 12 ice cream sandwiches
  • 1 (3.4 oz) package of Jell-O Instant Butterscotch pudding mix
  • 1 1/2 cups of cold milk
  • 1 tub of Cool Whip topping
  • 1 cup of chocolate chips
  • 6 tablespoons of butter

DIRECTIONS:

  • Make butterscotch filling first, and freeze overnight
  • In a large bowl, beat together milk and pudding mix on high for 3 to 4 minutes until thick.
  • Fold in 1/2 of the container of Cool Whip topping
  • Put parchment paper in a small (I used a 9×9 square) pan, and spread pudding mixture evenly into container.
  • Freeze overnight.
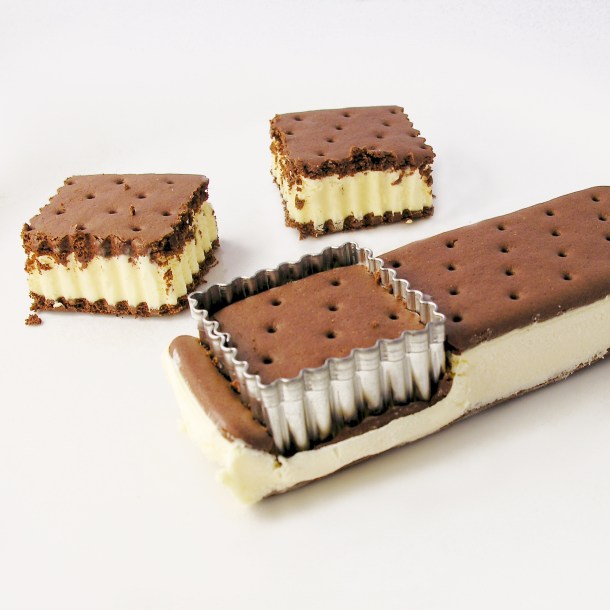
  • To assemble, use a fluted square (I used a 2″ inch square) cookie cutter to cut ice cream sandwiches.  I got 2 squares from each sandwich. Return to freezer after cutting.

Butterscotch Ice cream Towers

  • Remove pudding mixture from freezer, lift out of pan using edges of parchment paper, and lay on a clean counter.
  • Cut squares using the same cookie cutter (dip in warm water between cuts, if it becomes sticky), return to freezer as you cut them.
  • Assemble no more than one or 2 hours before serving, and keep frozen.
  • Melt chocolate chips and butter together in the microwave in 30 second increments, stirring in between, until melted and smooth.
  • Place an ice cream sandwich square on a plate, top with butterscotch filling square, top with a second ice cream sandwich square.
  • Drizzle with melted chocolate (and I added a few butterscotch chips).
  • Return to freezer and keep frozen until serving.


Butterscotch Ice Cream Towers!!

My thoughts:  These are the most spectacular dessert to serve (you should have heard the oohhh’s and ahhh’s!), and the most awkward dessert to eat.  The kids figured out that you need to just pick these up and eat them with your fingers!  I allowed mine to melt just a touch, and then it was perfect with a fork!  The flavors are so yummy! Butterscotch and chocolate?  Yes, please!!!!  Enjoy!  ~r

Other yummy frozen treats:

Mango Smoothie PopsPudding popsicles!Frosty Almond Joy Cups!Heath Bar Ice Cream Dessert3


Hole in One Cupcakes!!

Posted on

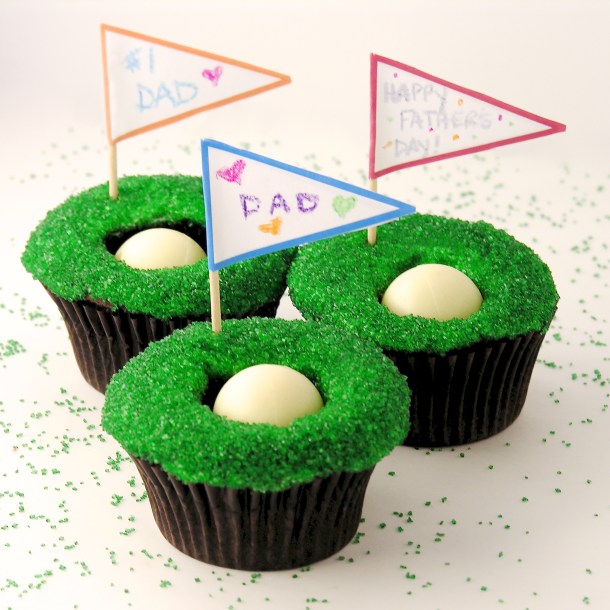
Hole in One Cupcakes!!What do you get if you cut a hole in a cupcake and fill it with a Lindt white chocolate truffle?   A perfect Father’s Day treat!!!

These are guaranteed to make any golf-loving Father smile on his special day!  This one’s for you dad!  I can’t wait to see you in 2 weeks and go “golfing” (aka losing cute golf balls in ponds).

How is such incredible cuteness created, you ask?  EASY!  Make a chocolate cupcake, cut a hole in the top, and pop a Lindt white chocolate truffle inside!

Golf Cupcakes!!How fun and easy is that?  Here are the details (Printable recipe)

INGREDIENTS:

  • One boxed chocolate cake mix (plus oil, water and eggs to make according to package)
  • One tub of white frosting
  • One container (about 1 cup) of green sugar sprinkles
  • 24 Lindt White chocolate Truffles (I got 2 (5.1oz) bags that each had 12 truffles)

DIRECTIONS:

  • Make cake according to package and divide evenly into 24 cupcake liners placed in muffin tins.
  • Bake according to package.
  • Use a cupcake corer or a small knife (use a corer to get that perfectly round cut!) to cut a hole in the center of each cupcake.
  • Use a knife to carefully frost the top of each cupcake around the hole.
  • Press top of frosted cupcake into green sugar to coat it.
  • Place a truffle into “hole”.

Golf CupcakeGolf CupcakeGolf Cupcake


  • Place a flag in each cupcake- you can print these on heavy paper and use double-sided tape to secure them to toothpicks.  Here are 2 files- Happy Father’s Day, and Blank (write your own message) flags.

Click on a picture to be taken to the printable pdf:

Father's Day FlagsGolf Cupcake- DIY Flags

My thoughts: I’ve used a cupcake corer on so many cupcakes to add fillings, and the last time I did it, this idea popped into my head!  I wasn’t sure how it would turn out, but as soon as I coated my 1st cupcake in that green sugar I knew it would be perfect!  Happy Father’s Day to all the dads out there- especially mine!!!!

Golf Cupcakes!!!!

Want another reason to get a cupcake corer? Here’s four……..

Key Lime Cupcakes!Cinnamon Roll Filling in a yummy cupcake!Radioactive Cupcakes filled with SLIME!Peppermint Hot Chocolate Cupcakes!!!

BBQ Cupcakes!!!

Posted on

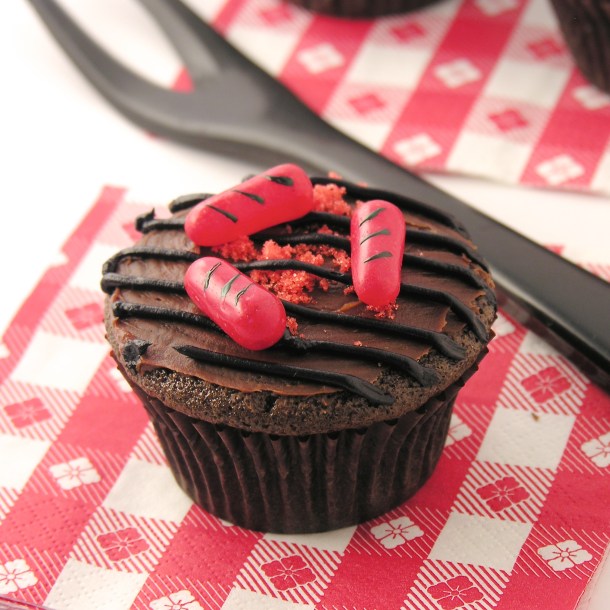
BBQ Grill Cupcakes!!These chocolate cupcakes are topped with all the fixings for a grill out!  A perfect treat for Father’s Day or even a tailgate party (and as a Packer fan, I have lots of experience with those fun events!!!)

My dad is the best at grilling things.  Some of my favorite times are our family cookouts with dad at the grill.  I guess that’s why I smiled when I saw these on Pinterest the other day.  There are a ton of variations on these- they are all over the web.  There are steaks and burgers made out of caramels and candy bars.  There are shish-kabobs made out of Dots candy and Starburst.  I even saw goldfish crackers on the “grill”!  LOVE IT!

I stayed with Hot Tamales as little hot dogs, and they make me smile.  These are easy and fun, fun, FUN!!

BBQ Grill Cupcakes!!!Want to know how to make them?  Here’s the recipe: (printable version)

INGREDIENTS:

  • 1 box of Hot Tamales candies (if you hate cinnamon, you can use Mike&Ikes candy, but you’ll have to pick out the cherry ones).
  • Black gel food coloring
  • 1 cake mix (plus water, oil and eggs needed to make it according to the package)
  • 1 tub of chocolate frosting
  • Red sugar crystals 

DIRECTIONS:

  • Make cake mix according to package and divide into 24 cupcake liners placed in muffin tins.
  • Bake according to package, remove from oven and cool completely.
  • While cake is baking, use a toothpick and black food color gel to draw grill lines on the hot tamales.  I placed them on a paper towel to dry, so they wouldn’t roll.
  • Take about 1/3 of frosting out of tub, place it in a separate bowl, and add black food coloring gel  to make the frosting black.  Place this frosting into a small zip-top bag fitted with a small round decorating tip.
  • Once cupcakes have cooled, use a knife to frost a thin, smooth layer of the chocolate icing onto each cupcake.
  • Sprinkle a little red sugar in the middle of the cupcake frosting.
  • Pipe black frosting on in even lines to make the grill.
  • Set Hot Tamales on the “grill” top.
  • Enjoy!

BBQ CupcakesBBQ Cupcakes!BBQ Hotdog Cupcakes!!!

My thoughts: These are SO easy to put together.  Adding other grill items would increase your time commitment, but with just hotdogs, these went together fast!  Of course, you can use your own favorite cupcake recipe and frosting recipe with these if you don’t want to go pre-made.  I was in a hurry this week, with lots of things on my plate: BIG NEWS coming soon!  So excited to tell you all what I’ve been up to!  In the meantime, make yourself (and your dad!) some little cupcake grills!  Enjoy!!!!  ~r

BBQ Grill Cupcakes!!!

You might also enjoy:

Hamburger Cookie!Malted Milk Cupcakes!!!New Zealand Chocolate cookiesChocolate molten lava cupcakes


Andes Mint Layer Cake

Posted on

Andes Mint Layer Cake!

This rich chocolate cake has a huge layer of Andes Mint whipped filling and is drizzled with fudge topping.  The perfect chocolate dessert!

Tah Dah!!!  One last melted frosting recipe…for now…This one has yummy melted chocolate frosting inside and poured all over the top.  YUM!!!!!!

I love making this cake in various forms.  It is SO quick and easy to put together and everyone loves it! This time I added Andes mint candies for a refreshing mint twist to this recipe.  I think you will love it!! Andes Mint Cake!!

Here’s the recipe:  (printable version)

INGREDIENTS:

  • 1 boxed chocolate cake mix (with oil/eggs/water to make according to directions)
  • 2 packets of Dream Whip  (found near the jello/pudding boxes at the grocery)
  • 3/4 cup milk
  • 1 teaspoon vanilla
  • 3 tablespoons cocoa powder
  • 3 tablespoons powdered sugar
  • Andes Baking Chips 10 oz
  • One container of pre-made chocolate frosting

DIRECTIONS:

  • Make cake mix according to box and bake in 2 – 8 or 9 inch round pans (I cut parchment paper to fit, spray the pan with non-stick spray, and place it in the bottom of each pan so that the cake comes out easier).
  • Cool cakes completely on a wire rack and while they are cooling make your whipped filling:
  • Put Dream Whip, milk, vanilla, cocoa powder and powdered sugar into a mixing bowl and blend together.
  • Using a mixer, beat until stiff peaks form (3-4 minutes)
  • Fold in Andes mint baking chips, saving aside a few for topping.
  • Scoop chocolate frosting into a microwave safe bowl and heat for only about 20-30 seconds in the microwave.  Heat until frosting is melted into a hot fudge consistency.
  • Use a large serrated knife to level your two cakes.
  • Place 1st cake on serving plate, leveled edge up.
  • Pour about 1/4 of melted frosting on top of cake and spread to cover (I put this layer in the fridge for about a minute just to cool the warm frosting down before adding the mousse layer)
  • Spoon all of the mousse on top of the cake and spread it ALMOST to the edges.
  • Top with second cake– put the leveled edge against the mousse…this keeps all the crumbs in the middle and leaves a nice flat surface on the top of your cake. Gently press top layer down to squeeze the mousse all the way to the edges.
  • Pour the rest of the melted frosting over the entire cake and let it drip over the edges.
  • Sprinkle the remaining Andes Mint bits on top.
  • Refrigerate until serving, this will make the middle layer firm and easy to cut.

Andes Mint Cake!!!!

My thoughts:  I love this cake.  It is a beautiful dessert that is just so quick and easy to put together!

That creamy mint filling….oh my. I hope you get a chance to try it!  Enjoy!  ~r

Andes Mint cake!!!!

Other yummy chocolate treats here on easybaked:

Brownie Oreo Cookie CupGerman Chocolate PieRich Chocolate Ganache Mini CupcakesCaramel Fudge Brownies!!

Toxic Slime-filled Cupcakes!

Posted on


Toxic Slime-filled Cupcakes!
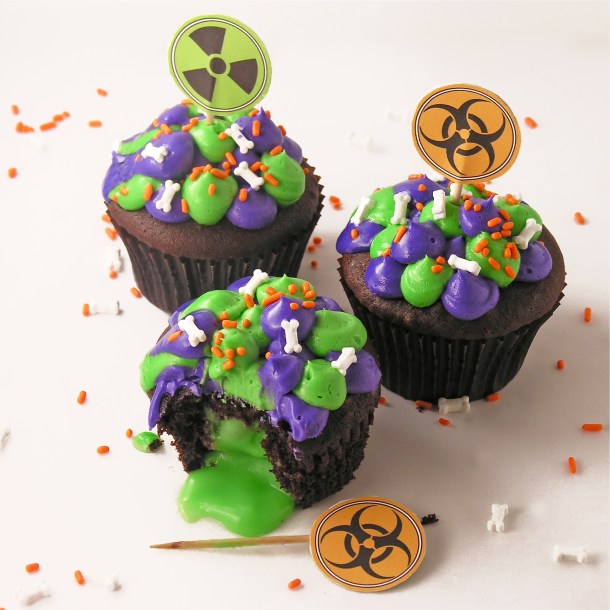
Fudge cupcakes filled with toxic green slime!  Yummy white chocolate pudding makes the slime and fun buttercream and bones complete this mad-scientist dessert.  Print some free radioactive cupcake toppers and you have such a fun October treat!!

These cupcakes are delicious…..  I know the green slime might throw you off, but that slime is the creamiest pudding filling….oh my.  It is like a custard filled doughnut…but better.

I’m a scientist in my day job, so when thinking creepy I tend toward the blood and guts variety more than ghosts and monsters.  I knew I wanted green slime, so I looked up recipes for ideas (realistic slime….it needed to be realistic….)  and I came across an adorable blog with the idea of using plain old pudding with green food coloring– easy! Plus I loved her frosting “blob” technique, so a few parts of this recipe are borrowed from ideas on Make Bake Celebrate.

I also created some free printable “radioactive” cupcake toppers for you.  Just click here for the link, print 2 pages on card stock, cut them out and use double-sided tape to stick them back-to-back over a toothpick.    Easy-peasy and a perfect finish on these!  Aren’t they fun?!???

Radioactive Cupcakes3
Lets make these cute little cupcakes together!  (printable recipe)

INGREDIENTS:

  • One boxed cake mix (plus water, oil and eggs to make according to box)
  • One box (3.3 oz.) Jello Brand White Chocolate Pudding (instant)
  • Milk (to make pudding according to package)
  • Green food coloring gel
  • Purple food coloring gel
  • 2 sticks (1 cup) salted butter
  • 2 sticks (1 cup) unsalted butter
  • 1 teaspoon clear vanilla
  • 3 cups powdered sugar
  • Sprinkles/ decorations for tops of cupcakes  (I used Wilton Bones Sprinkles)

DIRECTIONS:

  • Preheat oven to 350F degrees.
  • Make cupcakes according to box and divide evenly into 24 cupcake liners placed in cupcake tins.
  • Bake according to times given on boxed mix.
  • Remove from oven and cool completely.
  • Make pudding according to package and at the end add green food color gel (I used Leaf green by WIlton ) until it looks like radioactive slime!!!  Carefully spoon into a zip-top bag.
  • Core your cooled cupcakes- you can use a paring knife to just remove a core, but a cupcake corer is much faster and more uniform.  I use the Chicago Metallic Cupcake Plunger and it is cheap and small and perfect for the job!
  • Carefully clip a corner of your green slime (pudding) bag and fill each cupcake cavity about half full of “slime”.
  • Trim a little off the bottom of the “core” you removed and place it back on top of the filling- like a little cupcake cork!

Filling Cupcakes with Slime!Filling cupcakes with slime!

  • Make frosting by combining butters, powdered sugar and vanilla in a large mixing bowl and beating it on high until light and fluffy.
  • Divide frosting in half and mix green into one half and purple into the other half until fully combined.
  • Place each color of frosting in a bag that has been fitted with a Wilton 2A round decorating tip.  Pipe round dots of frosting in alternating colors all over each cupcake top.

Frosting creepy cupcakes!

  • Add sprinkles, bones, skulls, eyeballs…. any cool and creepy decorations you want!
  • Top each cupcake with a free printable topper and ENJOY!!!!

Radioactive Cupcakes filled with SLIME!
My thoughts:  I would make these again in a heartbeat.  I might make them again this weekend.  Yes, they are super fun, but the pudding is really SO good inside!  I feel like every cupcake should have pudding inside…!  I always love to watch the reactions when people bite into things for the first time– and these don’t disappoint!!!  Lots of laughter and smiles at this yummy green slime!  Enjoy!!!!!! ~r

Radioactive Cupcakes!!!

Other fun Halloween treats to try!!

Sweet Tart and Pixie Stix CakePeanut Butter Caramel SauceHalloween Bundt CakeFall acorn cupcakes!