Tag Archives: cake

Tres Leches Cupcakes

Posted on

If you’ve ever had tres leches cake, you already know you will love these little cupcakes! Soaked in a vanilla cream sauce, the dense cupcake is a not-too sweet base for delicious dulce de leche caramel and whipped cream. Add a little fruit and you have perfection! 

Ever since the stay-at-home rules have been in place, we are looking for anything (even little things) to celebrate. So Cinco de Mayo was a fiesta- complete with these little cupcakes. I made this recipe as a cake several years ago, but my husband had never tried it, so this was his 1st time trying these, and he declared them his favorite cupcakes I’d ever made.

So… there’s that endorsement for this recipe… 🙂

These are not too fussy to make, they keep for over a week in the fridge. I made half of this recipe, or 12 cupcakes, and it still took us the whole week to eat them all! Is anyone else sad that they can’t bring extra blog baked goods in to work or over to the neighbors?!?! Slowing packing on my quarantine 15… :/

Here is how to make these sweet treats: (printable recipe)

INGREDIENTS

Cupcake

  • 9 eggs, separated
  • 1 cup sugar
  • 1 tablespoon vanilla extract
  • 2 cups all purpose flour

Vanilla Sauce:

  • 1 (14oz) can sweetened condensed milk
  • 1 (12oz) can evaporated milk
  • 1/2 cup heavy cream
  • 1 tablespoon vanilla extract

Topping/filling

  • 2 cups heavy whipping cream
  • 1/4 cup confectioners’ sugar
  • fresh fruit for garnish
  • 1 (13.4 oz) can of La Lechera Dulce de Leche (or make your own here)

DIRECTIONS:

  • Preheat oven to 350F degrees and place 24 cupcake liners into baking tins.
  • Divide eggs into 2 bowls.  Put the egg whites into a large mixing bowl and the yolks into a medium bowl.
  • Beat the egg whites on medium-high until they form soft peaks.  Add sugar and beat on high until they form stiff peaks (this will take 4-5 minutes, depending on your mixer).
  • Beat the egg yolks on high for 5 to 6 minutes until they increase in volume and turn a creamy yellow.
  • Beat the vanilla into the egg yolks until combined.
  • Add the yolks to the whites and use a spatula or large spoon to gently fold them together.
  • Add flour and gently mix until completely combined.
  • Divide batter evenly between the 24 cupcake liners and bake for 15-20 minutes.  The tops should be golden and when a toothpick is inserted in the center, it should come out clean.
  • Remove from tin and cool completely on counter.
  • Make sauce by combining the 3 milks (condensed, evaporated and cream) together with the vanilla.
  • Poke (lots!) of holes in the top of each cupcake with a toothpick and use a pastry brush to spread vanilla cream over the top of each cupcake- letting it soak into the cake. I did this twice to use up the sauce and make my cupcakes super soaked and moist. 
  • Spread dulce de leche caramel over the top of each cupcake- spreading all the way to the edges.
  • Make frosting by beating together the whipping cream and powdered sugar, until stiff peaks form.
  • Pipe frosting on tops of cupcakes, and serve with fresh fruit. Refrigerate until serving, and store chilled.

My thoughts: If you like a cupcake that isn’t overly sweet, you’ll love this. The firm cake soaks up all that cream, and the dulce de leche caramel soaks into the top as these sit- so yummy! You don’t have to wait until the next Cinco de May to try them either- this is such a refreshing summer dessert! I hope you get a chance to try it!!! Enjoy ~r

Other fun and refreshing desserts for summer:

A New Year’s Collection of Top Recipes on Easybaked!!

new-years-collection

Happy New Year, friends! One of my favorite parts of marking the end of one year and the beginning of the next is looking back at all the things that made the previous year wonderful! One of the really fun things to look at is my statistics for this blog. A LOT of you visited us here this year!  Thank you!!!  I am always fascinated by which recipes really took off and became HUGE hits- and I’m always a tiny bit disappointed by the ones that I thought were AMAZING, that didn’t really catch anyone’s attention.

I have lots of fun recipes lined up to share with you in January, but this week- as we welcome 2017- here are the top picks from 2016.

Just click on a photo to see the recipe- and enjoy!!! ~r

new-years-collection2

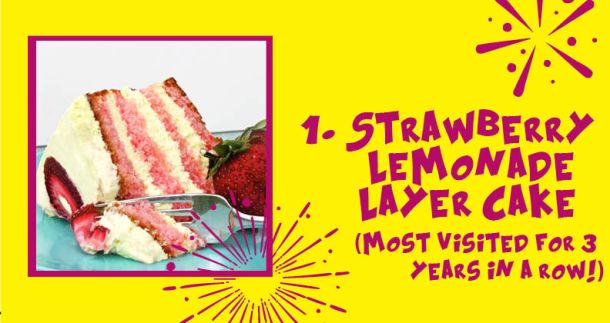
Strawberry Lemonade layer cake

Viewed 203,655 times in one month alone! The cupcake version of these is really popular too.

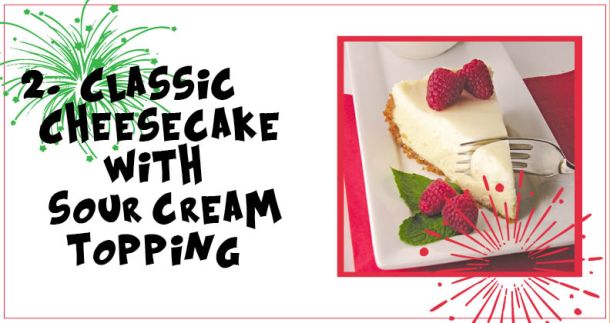
Classic Cheesecake with Sour Cream topping

Seriously, that cheesecake is maybe the best recipe on this blog. You have GOT to try it!!!! 🙂

Oreo pops

When this was 1st posted, there were NO other Oreo Pops on the internet- so I like to think that the Oreo Pop craze started here! We certainly have had fun creating all sorts of them for every holiday!

Bailey's Cupcakes

This recipe was from a failed audition for The Great American Baking Show, and a new friend!

Turtle Bundt

This is the most recent big hit on Easybaked- and it is really easy to make!

So, those were the top 5 in all-time views this year… but what were my favorites from 2016? These three!

new-years-collection8

new-years-collection9

This is the star of 2016. It is SO yummy and got rave reviews every time I made it. A massive layer of cookie dough in the middle of a cake? Does it get any better than that???

Marshmallow Stuffed Oreos

2016 was also my year to turn those healthy little Oreo Thins into amazing stuffed Oreos! These marshmallow ones… oh my! We also stuffed Oreos with Key Lime Pie, Pumpkin Pie and Cookie Butter!

Cookie Monster Oreos!

These win my personal “cutest” recipe award for 2016! I loved making them and making cute little stickers to seal the bags I gifted them in too! So fun!

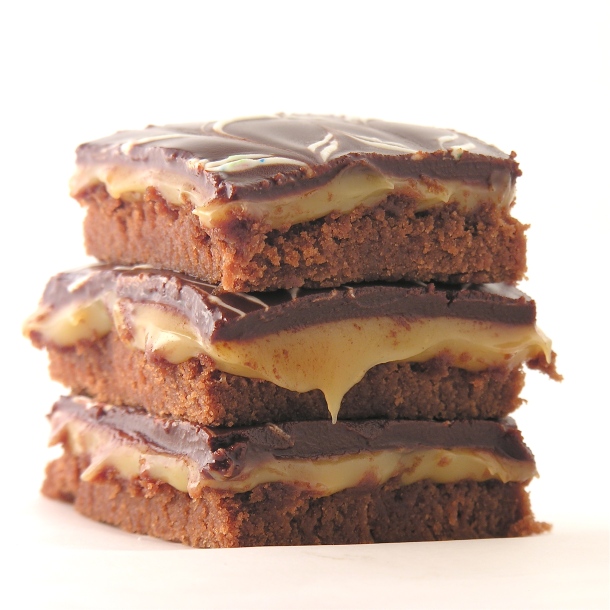
I’ve been asked many times what my all-time favorite recipe on Easybaked is. I’ve got SO many favorites- but if I had to pick one, it would be my Caramel Fudge Brownies. I love them because they are my mom’s famous mint brownies with my favorite caramel added in place of the mint- and they are just the BEST chocolate fix ever.

Caramel Fudge Brownies!!

I hope you have enjoyed this round-up of recipes!

HAPPY NEW YEAR!!!!!!


Fall Marshmallow Cakes

Posted on

marshmallow cake

These delicious little chocolate cakes are filled with creamy sweet marshmallow, and decorated to make everyone at your fall table smile!

I’ve been craving HoHos lately. Do they even still make those? Seems like Hostess went out of business awhile back…? Anyway- or those Little Debbie Swiss Cake Rolls. Both of those desserts remind me of high school lunches. My friends and I would sit at lunch, peel them apart in layers, and talk about boys and such while we ate them.

Anyway… so I started thinking about a way to do a grown-up version of these flavors. My friend Angie gave me SUCH a fun pan- it makes little cakes with a cavity in the center that holds filling. See what I mean HERE. I’ve used these pans before here on Easybaked and they seemed perfect for this idea. Instead of topping cake with cake—- I topped each cake with a thick layer of chocolate glaze that was decorated with chocolate transfers.

I love how they turned out! This was my 1st time using transfers, and they are a little fussy- but the wow factor….!!!!!

marshmallow cake

Mmmm……!! So there is some special equipment to make these exactly like I did (cake pans, silicone molds to make the top chocolate layer). If you hate to purchase the pans and chocolate mold, make these as cupcakes. Fill them with marshmallow and pour the glaze over the top. Or make this as a layer cake maybe- with the marshmallow in the middle and the glaze drizzled over the top?

However you choose to make it, the flavors are wonderful together!

Here’s how we put these together. (Printable recipe here)

Ingredients (makes 8 mini cakes)

Cake:

  • 1 chocolate cake mix (plus water, oil and eggs to make according to package)

Filling:

  • 2 cups marshmallow creme
  • 1/2 cup butter, softened
  • 1/4 cup powdered sugar

Topping:

  • 2 cups chocolate chips
  • 12 tablespoons of butter
  • 1 large (12″x16″) chocolate transfer sheet (here is where I got mine)

Directions:

  • Start with the chocolate toppers. To add a chocolate transfer on top, cut 8 circles in a 4 inch diameter. I traced the pans with a marker and the cut the transfer just inside the line. Place the smooth side down and the rough side up inside a 4 inch silicone cake mold (I got mine here, in the medium size).
  • Place chocolate chips and 12 tablespoons of butter into a microwave safe dish and melt in 30 second increments, stirring between until smooth.
  • Gently spoon chocolate over the top of each transfer until it is covered completely. 
  • Freeze for about 20 minutes- until completely hard.
  • Gently peel away the silicone mold, leaving the chocolate. Keep this chocolate in the freezer until use.

chocolate transferschocolate transfers

  • Repeat process (re-melt chocolate glaze if needed) until you have 8 toppers in the freezer.
  • Make cake according to mix and bake in 4 pans as directed on box. Only fill the pans 1/2 full, or they will overflow. And grease the pans generously!!! My 1st batch stuck a little.
  • You will need to bake two batches to get your 8 cakes. Cool completely.
  • Make filling by beating together the marshmallow creme and the butter until smooth and light (about 2 minutes).
  • Slowly add the powdered sugar, beating on low until it is fully mixed in, and then increasing to high and beating until light and fluffy (another 2 minutes or so).
  • Place filling into a zip top bag and zip it tightly closed. Clip a corner off and squeeze filling into each open cake cavity. 
  • Gently set a chocolate topper over the filling, pressing it lightly against the filling. As the topper warms to room temperature, it will soften and stick more firmly to the cake. 
  • Gently peel away the plastic from the top of the transfer.


marshmallow cakemarshmallow cake

  • Keep at room temperature until serving. Kept covered, these can be stored for two to three days.
  • Enjoy!

marshmallow-cake

My thoughts: If you don’t mind the extra equipment and a little bit of time, these are positively the most elegant and delicious little cakes! I had so much fun serving these as individual desserts- and everyone loved them. If what you are aiming for is extra special- this is your dessert. If you need your chocolate fix right now? Get those Little Debbies!!! 😉 ~r

Other fall treats here on Easybaked:

Pecan Pie CupcakesPumpkin Pie Cutout cookies!Honey cookies cut into leaf shapes!Acorn Candy

Mom’s Amazing Coffee Cake!

Posted on

Coffee Cake

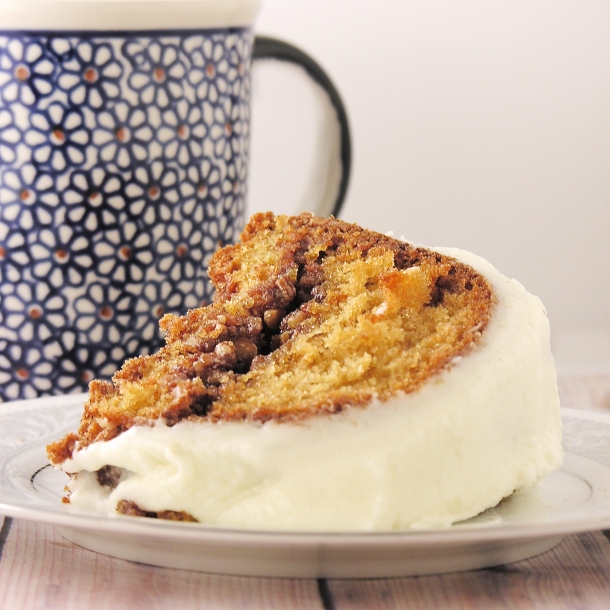
This delicious coffee cake has hidden layers of cinnamon and pecans- and a yummy cream cheese frosting!

My mom used to make this delicious coffee cake whenever my grandparents (her mom and dad) would come to visit. I have great memories of sitting around the table having this with all of them and listening to all the “grown-up” talk. They were from Wisconsin, so a visit always meant a couple of days with us in Michigan. I’d get up early and take a long walk with grandpa and our overweight basset hound Max before breakfast, and return to a kitchen table full of family, laughter, and this coffee cake.

My grandparents lived very active and adventurous lives until they left us for heaven several years ago.

Mom, as those of you who keep up with this blog know, left us for heaven about a year and a half ago.

A friend sent me an article last week about 8 ways to celebrate Mother’s Day if your mom is in heaven. They were great ideas, and the very 1st one was, “Make her favorite recipe”. I think her favorite recipe was my grandma’s recipe for German Sauerbraten, but since desserts are my specialty, I decided on this coffeecake as my “remembering mom” recipe.

As my kitchen filled up with the smell of this baking, it made me smile. And remember.

Coffee Cake recipe

Here’s how to make it: (printable recipe)

INGREDIENTS:

Cake:

  • 1 stick of butter, softened
  • 1 cup of sugar
  • 3 eggs
  • 2 cups of flour
  • 1 teaspoon of baking soda
  • 1/8 teaspoon of salt
  • 1 cup of sour cream
  • 1 teaspoon of vanilla

Filling:

  • 1 cup of finely chopped pecans
  • 1 1/2 cups of brown sugar
  • 4 tablespoons of butter, melted
  • 4 tablespoons of flour
  • 2 teaspoons of cinnamon

Icing:

  • 4 oz. (half a package) of cream cheese
  • 4 tablespoons of butter, softened
  • 1/2 teaspoon of vanilla
  •  Dash of salt
  • 2 cups of powdered sugar
  • 1/2 cup of white chocolate chips, melted

DIRECTIONS:

Cake:

  • Preheat oven to 350 degrees and grease/flour a bundt cake pan.
  • Cream butter and sugar together.
  • Add eggs and beat well.
  • Add flour, soda and salt. Mix well.
  • Add sour cream and vanilla and mix well. Set aside.

Filling:

  • Combine all ingredients until completely coated in melted butter.
  • Assemble cake: pour about 1/2 of batter into prepared bundt cake pan, sprinkle more than 1/2 of filling on batter, pour remaining batter over filling and then sprinkle remaining filling over the top.
  • Bake at 350 degrees for one hour. Cool and tip out of pan onto serving plate.

Icing:

  • Combine all ingredients except chocolate in a large mixing bowl and beat on high until smooth and fluffy.
  • Add melted chocolate and beat until smooth.
  • Spread over the top of the cooled coffee cake.
  • Enjoy!

Coffee Cake!

My thoughts: Warm this up for a few seconds in the microwave before serving and YUM!!!  You can keep this cake in an airtight container in the fridge and serve it for several days. I hope your family enjoys this recipe as much as ours did over the years!!  ~r

Coffee Cake

Whether you are celebrating your mom in person, or thanking God for wonderful memories of her today, Happy Mother’s Day to you and to your family!

This one’s for you mom!

10178025_10152079947252513_4311481539876989298_n

Other recipes from my mom: (click on photo to see recipe)

Chocolate Chip CakeChocolate drop cookies!Pumpkin RollMint Creme Brownies

No, seriously…you have to try that 1st one…best. cake. ever. 🙂

Cookie Dough Layer Cake


Cookie Dough Layer Cake4Creamy cookie dough filling surrounded by rich chocolate cake and topped with a delicious chocolate glaze. An easy, beautiful and oh-soo-yummy dessert!

I’m in love with cookie dough. When I go to those fancy yogurt shops where you make your own sundae I am always tempted to skip the yogurt and just fill my dish with those little cookie dough bites. This easy (super, super easy) layer cake is filled with my favorite creamy cookie dough. I’ve used it to top cupcakes and to fill brownies— and now to fill cake. I love it. I think you will too!

As in most of my recipes, this dessert is made simple with the use of a cake mix (I used a Duncan Hines Dark Chocolate Fudge here), but you can substitute your favorite cake recipe instead. More work… but that’s up to you!

Cookie Dough Layer Cake2

Here is how we put this cake together: (printable recipe)

INGREDIENTS:

Cake/Filling:

  • One boxed chocolate cake mix (plus water, oil and eggs to make according to package)
  • 2 sticks (8 oz.) unsalted butter(softened)
  • 2 sticks (8 oz.) salted butter(softened)
  • 2 c. powered sugar
  • 1 c. brown sugar (packed)
  • 3 T. vanilla
  • 1/3c. flour
  • 1 (12 oz) bag of mini chocolate chips.

Glaze:

  • 1 1/2 sticks of salted butter
  • 1 12 oz. package of semi-sweet chocolate chips

DIRECTIONS:

  • Make cake mix (or your favorite cake recipe) and bake according to box/recipe in 2- 8 or 9 inch round pans.
  • Cool cakes completely.
  • While cakes are baking and cooling, make your filling.
  • Place all filling ingredients except mini chips into a large mixing bowl and beat with mixer on low until combined and then high until light and fluffy.
  • Add mini chips (keep about 1/3 of a cup aside to sprinkle on sides and top of cake) and beat on low until fully combined.
  • Make glaze by melting butter and chips together and set aside.
  • Once cakes are cool, trim the tops so they are flat.
  • Place 1 cake on serving plate, cut side up, and spread a little of the glaze on top. 
  • Spoon all of filling on top and spread all the way to the edge of the cake.
  • Place second cake on top, cut side down, and use a knife to smooth edges of filling flat between the two cake layers.
  • Sprinkle edges of filling with extra chocolate chips, and then pour glaze over the top and add the rest of the chips.
  • Refrigerate until firm.

Cookie Dough Layer Cake3

My thoughts: I wondered if the filling layer was too thick (it’s a lot of filling!) I knew that I would love all that cookie dough, but would others? They did. It got rave reviews and even a 2 thumbs up from a frosting-hater 🙂 You could make half of the filling recipe if you want- but it is honestly soooo yummy to have a big bite of cookie dough with every bite of cake. Wish I had some left…!  Enjoy!  ~r

Cookie Dough Layer Cake1


Other fun layered caked here at Easybaked (click on a photo to see the recipe):

Grandma's Chocolate Cream CakeKey Lime Cake!Strawberry Lemonade Birthday CakePolka Dot Cake!!!!!!

Fourth of July Dessert Ideas!

Posted on

Bomb Pop Cupcakes!!!


Bomb Pop Cupcakes!

Oh my, I love the fourth of July! I love the picnics, and pool parties, and cookouts, and fireworks…and the time with family!

My parents have always (like always, for as long as I can remember!) had a giant pool party for the fourth and invited our entire extended family for burgers and brats and volleyball and sunshine….and for a competitive display of our best “at home” fireworks we could find, later in the evening. I have so many fun memories of chasing fireflies and waving sparklers with my cousins (that are all grown with kids of their own now!). This year is different. For starters, mom isn’t here to orchestrate the complexities of the celebration. The house is in boxes and bags- ready to show to whomever might be interested in buying, and the pool and yard are immaculately kept. Pool toys and floats are all deflated and either sold or put away. Sometimes I sit on the back porch and watch the fireflies and remember all the laughter and fun.

I know that these times are not forever over. This year is different, but once dad settles into his new place there will be other celebrations and family times over the fourth. This year though…my heart wasn’t in the “create something new and fun” place. So instead, I thought you might enjoy a collection of some of my previous red-white-and-blue recipes. You can click on the photo or the title, to be taken to the recipe.

American Flag Oreo Pops!!!!

American Flag Oreo Pops

Patriotic Polka Dot Cake!!!!

Patriotic Polka Dot Cake!!!

Patriotic Flip Flop Cookies!!!!

Flip Flop Cookies for the Fourth!

Patriotic Tie-Dye Cake!!!!

Patriotic Tie-Dye Cake!

Stars!!

Stars and Stripes Brownies!

Patriotic Bundt Cake!!!!

Red White and Blue Bundt Cake!

And if you are grilling out for the Fourth, you might need these…

BBQ Grill Cupcakes!!

BBQ Grill Cupcakes!

Hamburger Cookie!

Grilled Burger Cupcakes!

However you celebrate this summer, I hope you have fun making memories with your friends and family~ and I hope you enjoy trying fun, new recipes that become a part of your family traditions! ~r

73090_461339542512_3894329_n

Mud Pie!

Posted on

Mud Pie!

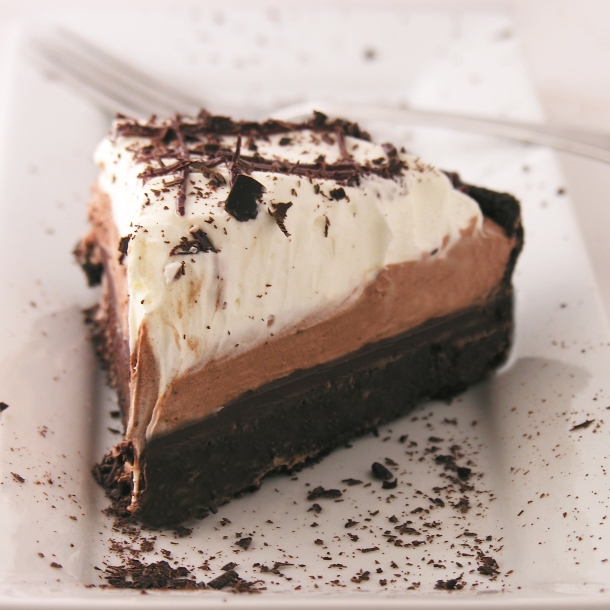
A layer of dense cake, topped with fudge, chocolate mousse and whipped cream. Yum.

Life is mud right now. At least if you live in the midwest and regularly walk a dog. My pup’s little white paws and belly are just caked in mud after every trip down our walking trail. There’s one kind of mud I don’t mind though- the edible kind!

Have you ever tried Mississippi Mud pie? I feel like there’s not an “official” recipe for this pie- sometimes pudding, sometimes marshmallow…I just put several things I love into an Oreo crust and called it mud. And it is delicious. I really think you’ll like it!

Mud Pie

Here’s how we did it: (printable recipe)

INGREDIENTS:

  • One pre-made Oreo crumb crust

Cake layer:

  • 1/2 bag of Nestle dark chocolate chips (this ends up being just a little less than 1 cup)
  • 2 egg yolks
  • 2 Tablespoons vanilla
  • 3 Tablespoons of heavy cream
  • 3 Tablespoons of powdered sugar

Fudge layer:

  • remaining 1/2 bag of Nestle dark chocolate chips (this ends up being just a little less than 1 cup)
  • 1/2 cup of heavy cream

Chocolate Mousse Layer:

  • 1 Packet of Dream Whip
  • 1/3 cup milk
  • 1/4 cup cocoa
  • 1/2 cup powdered sugar

White whipped topping:

  • 1 packet of Dream Whip
  • 1/2 cup milk

DIRECTIONS:

Cake Layer:

  • Unwrap Oreo crust and preheat oven to 350F degrees
  • Melt chocolate chips in the microwave in 30 second increments, stirring in between until smooth.
  • In a separate bowl combine eggs, cream, vanilla and powdered sugar.
  • Add cream mixture to chocolate and blend well.  Pour into crust and bake for 20 – 25 minutes until center is set. Cool completely.

Fudge Layer:

  • Melt remaining chocolate chips and cream together in microwave in 30 second increments, stirring between until melted and smooth.
  • Pour all but about 1/8 cup over cooled cake and allow this layer to firm up (I placed it in the refrigerator while I made the remaining 2 layers).
  • Pour remaining 1/8 cup into a small zip-top bag to use later for drizzle.

Chocolate Mousse Layer:

  • Add all ingredients to mixing bowl and beat on high for 3-4 minutes until light and fluffy.
  • Spoon on top of fudge layer and spread to edges.

Whipped topping:

  • Add all ingredients to mixing bowl and beat on high for 3-4 minutes until light and fluffy.
  • Spoon on top and spread to edges.
  • Take your small bag with 1/8 cup chocolate fudge filling (The one you set aside earlier), clip corner of bag and drizzle over the top. (I added a little shaved chocolate too)
  • Enjoy!

Mud Pie!

My thoughts: This is really as good as it looks…dense fudge bottom topped with the creamiest chocolate toppings. I usually eat that one bite I take off for a picture and give every bit of the rest away. But I ate the whole piece. Bad day for the diet, but a wonderful day to really savor this rich chocolate dessert. This is on my list of “must-make-again” recipes! I hope you get a chance to try it and enjoy it as much as I did!!!! Enjoy! ~r

Mud Pie!!!

Is chocolate the only way to do dessert in your house? Here are some other incredible chocolate treats from Easybaked~ just click on the photo to see the recipe!

Chocolate Mousse CakeTriple Chocolate Cheesecake 2Brownie Oreo Cookie CupGerman Chocolate Pie

Caramel Turtle Bundt Cake

Turtle Bundt Cake

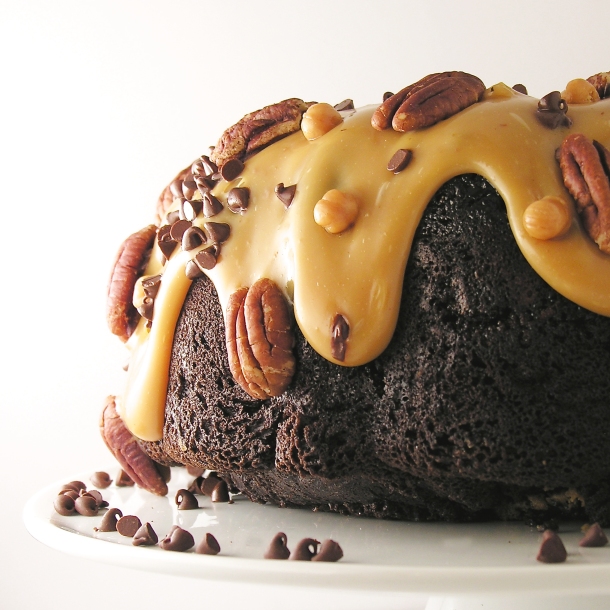
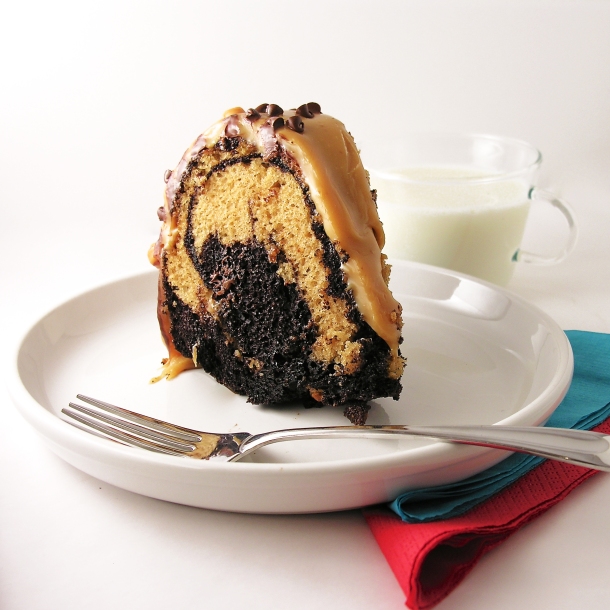
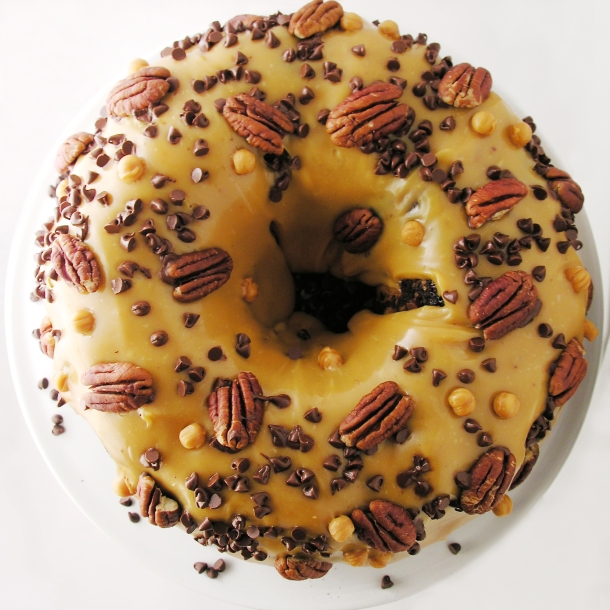
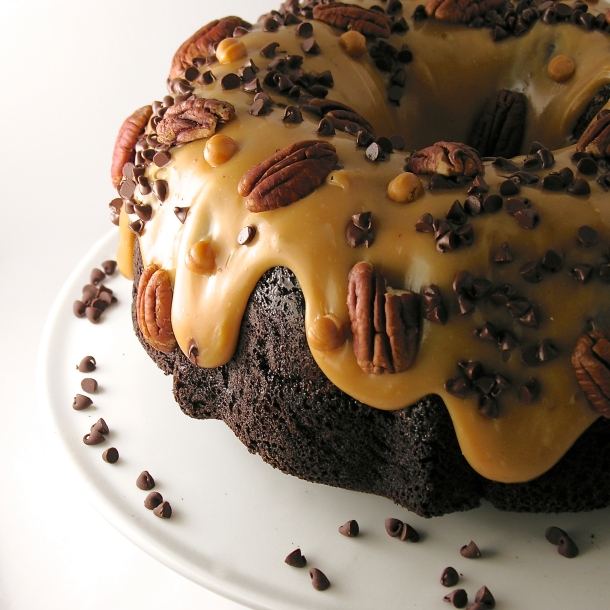
Swirls of caramel and chocolate cake, topped with caramel sauce and pecans, make this a beautiful and decadent dessert!

I love bundt cakes. They are just so pretty and fun to serve. This one is a combination of caramel and chocolate in a memorably beautiful and tasty display of yumminess!

Turtle Bundt3

This uses cake mixes and Kraft caramels, so it is a quick and easy dessert to put together, and it serves a ton of people, 14-16 at least.

Here’s how we made it: (printable recipe)

INGREDIENTS:

  • One box of chocolate cake mix (plus water, oil and eggs to make according to box)
  • One box of caramel cake mix- I use Duncan Hines- (plus water, oil and eggs to make according to box)
  • 32 Kraft Caramels (unwrapped)
  • 1 can (14 oz.) of sweetened condensed milk
  • 1 stick (1/2 cup) of butter
  • Whole Pecans (as many as you want to sprinkle on top)
  • Mini chocolate chips (as many as you want to sprinkle on top)
  • I also added some Kraft caramel bits as sprinkles because I had them and they sounded fun- those are the little round caramel bits you see in my photos.

DIRECTIONS:

  • Preheat oven to 350F degrees.
  • Make up both cake mixes according to package.
  • Alternate pouring them into a well-greased bundt pan. Fill the pan only 3/4 full. You will have a little cake mix left at the end, since both mixes don’t fully fit in the pan.
  • Place on a cookie sheet (just in case of overflow) and bake for 40-50 minutes. A cake tester or skewer should come out clean when cake is fully baked.
  • Allow cake to cool for 5-10 minutes in pan, and then tip onto a wire cake rack to finish cooling.
  • While cake cools, make caramel.
  • Place unwrapped caramels into a medium saucepan with sweetened condensed milk and butter.
  • Heat on medium/high, stirring constantly, until caramels are completely melted and smooth.
  • Place cake on serving plate.
  • Pour caramel sauce over the bundt cake, allowing it to run down the sides.
  • Immediately sprinkle with nuts and chocolate chips. If you wait these will not stick to the caramel as it hardens.
  • Allow topping to cool and firm up before cutting.
  • Enjoy!

Turtle Bundt5

My thoughts: This is such a moist cake, and if you aren’t a big fan of frosting this is perfect- no frosting at all- just a soft caramel. It’s a perfect fancy dessert that is so quick to make, and fun to serve!

Turtle Bundt2

One more…

Turtle BundtOther yummy caramel desserts you’ll love (just click on photo to be taken to recipe):

Caramel Fudge Brownies!!Salted Caramel Cookie Cup!!!Dulce de Leche caramel sauce form a canAlfajores- Peruvian Caramel Cookie!

Raspberry Fudge Layer Cake

Raspberry Fudge Layer Cake1Layers of pound cake, chocolate and raspberry are sure you make your Valentine smile this year!

You know those desserts that look incredibly difficult and are super easy? This is one of those. The cake is simply a frozen pound cake sliced and stacked with chocolate and raspberries. Makes you smile, doesn’t it?

Raspberry Fudge Layer CakeHere’s how we made it: (printable recipe)

INGREDIENTS:

  • One frozen pound cake
  • 1 bag of semi-sweet chocolate chips
  • 1 cup of red raspberry jam
  • 1 cup of sliced red raspberries
  • 1 stick of butter
  • 1/2 cup of whipping cream

IMG_0147DIRECTIONS:

  • Remove pound cake from packaging and use a large serrated knife to slice it into 3 or 4 layers
  • Divide the bag of chocolate chips into 2 separate microwave-safe bowls.
  • Add the stick of butter to one, and the whipping cream to the other.
  • Melt each bowl of chocolate, one at a time, in the microwave, stirring every 30 seconds until melted and smooth.
  • Set aside the butter/chocolate glaze.
  • Lay the bottom layer of the pound cake on a baking rack set over a cookie sheet.
  • Spread chocolate/whipping cream mixture generously on the top of this layer and sprinkle with fresh raspberries.
  • On the “bottom” of the next layer, spread raspberry jam and then gently place (jam side down) on top of the raspberries.

IMG_0150IMG_0153IMG_0156

  • Repeat this process until all layers are used.
  • Refrigerate until layers firm up a little (10 minutes or so)
  • Pour remaining chocolate/butter glaze over the top and sides of cake, allowing excess to run through the baking rack and onto the cookie sheet below.
  • Refrigerate until glaze firms up.
  • Cut into slices and enjoy!!!

Raspberry Fudge Layer Cake5My thoughts: This is so easy. A tiny bit messy with all of that melted chocolate, but once it is made, it stores well for a couple of days and makes a beautiful layered dessert. I think you could fill these layers with so many different things for different times of the year. Yum. Enjoy!!! Happy Valentine’s Day! ~r

Raspberry Fudge Layer Cake3

Other fun (and creative!) Valentine’s treats, just click on a picture for the recipe:

White Chocolate Strawberry Cookies!!Chocolate covered strawberry Cake roll!!Frog Oreos!!Creamy cheesecake with sour cream topping

Chocolate Chip Cake

Chocolate Chip CakeThis delicious chocolate chip cake recipe is a tried-and-true family favorite and a go-to for a winning bake-off recipe!

This recipe is my grandma’s, but my mom made it a lot when I was growing up. She didn’t tell me her secret ingredients until I loved it too much to care that there were dates in it. Man, do I hate dates. I’m not sure what happens to them in this recipe though- they are magically transformed into chocolatey goodness that doesn’t resemble dates in the slightest!

Chocolate Chip CakeIt’s an ugly cake. I mean, it’s just a plain old chocolate cake, and it’s sweet enough without frosting. I was hoping my photos could adequately convey how delicious it is. My mom used to lay paper lace doilies on top, just before serving, and sprinkle it with powdered sugar. When she removed the paper lace it really was pretty. Plus it routinely won our church bake-offs each year… I love beautiful desserts, but for this one it truly is the inside that counts! Plus it is ridiculously easy to make.  Here’s how: (printable recipe)

INGREDIENTS:

  • 1 cup of pitted and chopped dates
  • 1 cup of hot water
  • 1 teaspoon of baking soda
  • 1 cup of margarine
  • 1 cup of sugar
  • 2 eggs
  • 1 3/4 cups of flour
  • 2 teaspoons of cocoa powder
  • 1 teaspoon of salt
  • 1 bag of semi-sweet chocolate chips (I used mini- chips because it was all I had- and they worked great!)

DIRECTIONS:

  • Preheat oven to 350F degrees and spray a cake pan with non-stick spray.
  • In a medium bowl, combine the dates, water and baking soda, and allow the dates to soak while you put the rest of the ingredients together.
  • Cream together margarine and sugar. Add eggs and blend together.
  • Add dry ingredients (except for chocolate chips) and blend well.
  • At the end, add date and water mixture. Blend well and add chocolate chips.
  • Pour into cake pan and bake 40-50 minutes, until a tooth pick inserted in the center comes out clean.
  • Enjoy!

Chocolate Chip CakeOur family recipe made me smile. Oleo (??) is margarine… and bake “til done” is nice too. Gotta love the way grandmas bake! This is my mom’s recipe card and she graciously added  “40 minutes” at some point in the history of making this cake for us.

Chocolate Chip Cake My thoughts: Well, I love this cake. It is so moist and sweet (probably from those dreaded dates!) and it genuinely doesn’t need frosting. (As a frosting addict, that is saying something!) This is SO easy to put together and it is great served warm with a little ice cream! Yum… I hope you get a chance to try it and make it one of your family favorites!  Enjoy! ~r

Chocolate Chip CakeOther family tried-and-true recipes~ just click on a picture to see the recipe:

Creamy cheesecake with sour cream toppingHeath Bar Ice Cream Dessert3Peanut Brittle!!Grandma's Chocolate Cream Cake

Need a fun and unique gift idea? Easybaked has adorable boxed sets of notecards. They have an Easybaked dessert photo on the front and a recipe on the back! The come in a cute box and the best part? They are ON SALE for Christmas, include free shipping and the site that is hosting them offers $10 off a $50 purchase! Enjoy!!! (Click on photo for more information)

Easybaked Card sale