Tag Archives: layer cake

Toilet Paper Cake

Posted on

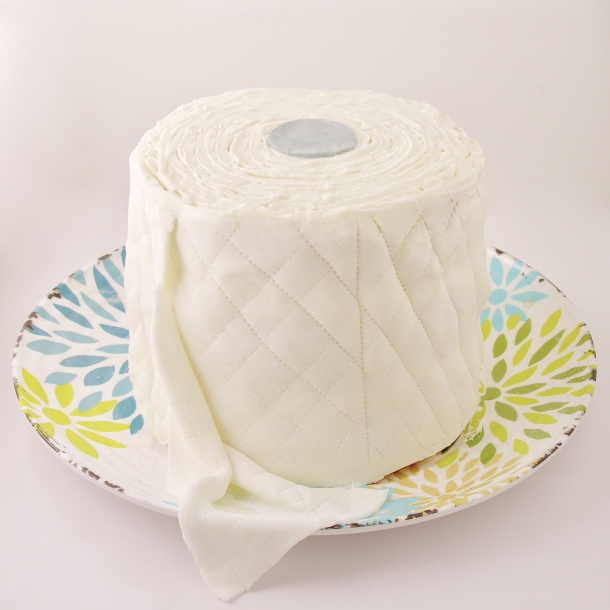
Can’t find TP at the grocery? This cake will NOT solve that problem for you, but it might make you and your family laugh- and that counts for a lot right now!

Well, here we are. About a month into this craziness called Coronavirus. First of all, for my readers and fellow bakers that have been directly affected by this pandemic- hugs to you. We all have been affected to some degree, but some of you have been ill with it, had family ill with it, and maybe even lost someone close to you. My husband and I were just talking about how numbing the numbers are each day. We keep saying things like, “oh- look only 14 deaths in our state today!” And then we remember that those 14 people were deeply loved members of families, and it hits home. This recipe is fun, and maybe even funny, but I don’t want to make light of the terrible situations that many of you are living through right now. 

Just a month ago, my husband and I celebrated our one year anniversary with a long weekend trip to Florida. We had a wonderful meal at a beach-side restaurant and walked the beach afterwards, picking up seashells. Yesterday was exactly one month later and it felt like 5 months had passed. So much has changed in one little month! I knew I wanted to make a cake for my hubby for our 13 month celebration (we celebrate everything!) and this little TP cake- celebrating a whole month of TP concern- made us both smile. 

Here’s the deal: I am NOT(!!!) a cake decorator! I cannot even frost a layer cake without it looking super homemade. Cupcakes? Yes. Cake? NO WAY. So I thought about just trying to frost the cake and adding the little cut-out for the center of the roll, but when it was all finished the frosting looked terrible. I’d made fondant for the little grey circle on top, so I rolled the rest of it out, cut it to the height and circumference of the cake, and slapped it on the outer edges. It looks messy- but in a genuinely toilet-papery kind of way 🙂 How’d I make the pattern on it? While sewing masks earlier this week, I caught a glimpse of my pattern marking wheel, and decided I could roll this over the fondant to make those little serration marks. 

The cake is coconut, with toasted coconut filling (YUM!!)- but you can use any flavor or type of cake with this. Here is how I did mine: 

INGREDIENTS: (cake/filling)

  • 1 white cake mix (with water, oil and eggs to make according to box)
  • 1 cup of toasted coconut
  • 1 stick of butter, softened
  • 1/2 cup powdered sugar
  • 2 teaspoons coconut flavoring
  • About 1/2 cup cream of coconut (optional- just makes cake moist and adds more flavor)


DIRECTIONS: (cake/filling)

Make cake according to package and bake in three 6″ pans according to package. 

Remove cakes from pans and cool completely.

Place butter, powdered sugar, and coconut flavoring in a mixing bowl and beat on high until light and very fluffy (about 2 minutes). 

Fold in the toasted coconut and set aside. 

When cakes are cool, place one on serving plate and drizzle with cream of coconut.

Top this with 1/2 of the filling mixture and spread to edges. 

Repeat this with the next layer, and set cake aside.

INGREDIENTS: (frosting)

  • 1 stick (1/2 cup) butter (softened)
  • 1/2 cup Crisco
  • 1 tsp clear vanilla (or any flavoring you might want!)
  • 4 c. powdered sugar
  • 1 Tablespoon of half-and half cream.

DIRECTIONS: (frosting)

Beat together butter, Crisco and vanilla with a mixer until smooth.

Add powdered sugar gradually and mix until combined and a little crumbly.

Add half and half cream and mix on low.  You might need to add a little more until frosting is a thick but smooth consistency.

INGREDIENTS: (fondant)

  • 4 cups mini marshmallows (half of a 16 oz. bag)
  • 4 cups powdered sugar- plus a little for dusting.
  • 2 tsp water
  • 1/2 teaspoon of clear vanilla
  • black gel color to make center of roll
  • brown gel color if you want to add a poo or two 🙂 

DIRECTIONS: (fondant)

Place your mini marshmallows and water into a large mixing bowl and microwave on high for about one minute- until they are puffy and melted.

Stir them together with a rubber spatula until they are completely smooth (if not melted completely, put them back in the microwave on high for 5-10 seconds).

Add clear vanilla and mix well.

Add about 1/4 of the powdered sugar, stir until smooth, add another 1/4 and stir.  It will become difficult to stir and very sticky.

Pour the rest of the powdered sugar onto a clean counter or cutting board.

Scrape the sticky fondant mixture out of the bowl and onto the powdered sugar and begin to knead it together with clean (powder sugar coated!) hands.  It will gradually become like a smooth clay consistency.  Use a metal scraper to keep it from sticking to the counter/ board.

This can now be colored with gel, rolled out and cut, or stored (tightly wrapped) in the fridge for about one week.  Want a picture tutorial of this process? Check out this post

Assembly: (the fun part!)

Use the frosting to place a thin, smooth layer over the entire cake. Let this harden a bit while you prepare your fondant. 

Color a small ball of fondant a grey color. Roll this out on a clean and powder-sugared counter and use a small circle cookie cutter to cut the center of the roll out. Set aside.

Roll the remaining white fondant out into a large flat rectangle. Measure your cake height and circumference and then trim the rectangle into this size using a ruler and knife. I made mine a tiny bit longer so it would drape off the end like TP does. 

Frost the cake again with a thicker layer, making sure it is as smooth as possible. Gently fold the fondant strip a couple of times so it is easier to handle, and then carefully press it against the sides of the cake, lining the top edge up with the top of the cake. Once you are all the way around, gently lay the extra across the front and on the plate. Mine wasn’t even close to perfect- it was bumpy, and wrinkly. Normally, I would smooth this out, but I left it because it looked more like TP — all messy! 

Place the grey center on the cake’s top, and use a toothpick to draw a spiral in the frosting out from the center to the edges. 

Finally, (if you have one!) use a pattern marking wheel to make the pattern on your fondant resemble TP. You could also use a toothpick- but that seems like a lot of work? Brainstorm ideas for an item you might have lying around that could do this otherwise. 

I had extra fondant, so I colored it brown, rolled it into a little poo and added it to the side of the cake- with a little flag. Then, I stepped back and laughed. Which was good for my soul 🙂 

My thoughts: There are ways to make this easier. You could buy fondant, you could skip the fondant entirely and decorate with frosting (if you are gifted in cake decorating skills), you can skip adding the little poo… I know this cake is a little more complicated that what I usually share, but it seems like we all have a little extra time these days to fuss over a cake- especially one that makes us all smile.

Enjoy! ~r

Other fun baking ideas for your shelter-in-place time: 


Tie Dye Slime Cake for Halloween!

Posted on

Slime Cake1

This deliciously scary layer cake has all the fun colors of Halloween, with green slime oozing out of the layers!

I think that of all the desserts I create all year long, the October ones are my favorite. There is just something fun about the purples and greens and oranges this time of year- and the “yuck” factor that actually tastes amazing. This cake has all the colors, all the feels, and that slimy green layer? It is actually white chocolate pudding that is absolutely delicious.

This filling is inspired by our Toxic Slime Cupcakes from a few years ago. I loved the flavor of the pudding slime so much that I wanted to use it in something else. The cake-of-many-colors is inspired by our Tie Dye cake recipe from a few years back. Put the two together and you have this Franken-dessert mash-up. Just in time for Halloween!

Slime cake3

Want to know how we made it? Here you go: (printable recipe)

Ingredients: 

  • One white cake mix (plus eggs, oil and water to make according to package)
  • One chocolate cake mix (plus eggs, oil and water to make according to package)
  • Food coloring gels in orange, green, purple and black 
  • Two large boxes of instant White Chocolate pudding mix (plus milk to make according to package)
  • 2 sticks of salted butter
  • 2 sticks of unsalted butter
  • 3 cups of powdered sugar
  • 2 teaspoons of vanilla
  • Halloween sprinkles 

Directions: 

  • Make two cake mixes according to package.
  • Use black food coloring gel to make chocolate cake a black color
  • Divide white cake batter into three bowls and add color gels to make them orange, green and purple.
  • Spray three 9 inch pans with cooking spray and cut a round piece of parchment paper to fit in the bottom of each. If you don’t have three pans, bake layers one at a time.
  • Starting with black, place a circle of batter in the middle of each pan. Tap it to make it spread out a bit (batter should not be at the edges yet). Add a circle of green in the center of the black, tap until both colors spread a little. Repeat with orange and then start again with black and repeat all colors, ending with black (because you have more batter in that color). 

Tie Dye Method1

  • Place cakes in a 350F degree oven and bake according to package (mine took about 25 min). 
  • Remove from oven, tip out of pan, and cool completely on a cake rack. 
  • Trim the top of each layer so that it is flat. 
  • Make 2 boxes of pudding according to package, and use green food color to tint it a slimy shade of green. 
  • Make frosting by placing the butter (at room temp), powdered sugar and vanilla into a large bowl and beating it on high until light and fluffy. 
  • Divide frosting into 3 bowls- one bowl for the purple should have about 3/4 of the frosting, the other two should have the rest split in two for orange and green. Use food color gels to color these. 

Assembly of the cake: 

  • Place purple icing in a large zip-top bag fitted with a large round (2A) Wilton decorating tip. Pipe icing around the top of a layer to form a “wall” to hold the pudding slime on the cake. 
  • Spoon 1/2 of the green slime pudding on top of the cake, and spread it to the frosting edges. 

  • Gently place a cake layer on top of the pudding and repeat the process once more, ending with the top layer of cake. 
  • Frost the entire cake in purple and then, using a round (2A) Wilton tip, pipe round dots all over the top of the cake in the 3 colors. 
  • Finish with a sprinkle of eyeballs and bones- or any other fun Halloween candy. 
  • Enjoy!

Slime cake4

My thoughts: YUM!!!  This cake is so good with that white chocolate pudding as a filling. Goodness. You could make this recipe easier by doing either one element or the other (make a purple cake with slime- or make a tie-dye cake with regular filling). Also- you will have a little left-over black batter. I went a little heavier on the black layers to make up the difference, but still had a little left. I really hope you get a chance to try this recipe! Enjoy!! ~r

Slime cake2

Other fun Halloween recipes to try:(click on photo to open recipe)

A New Year’s Collection of Top Recipes on Easybaked!!

new-years-collection

Happy New Year, friends! One of my favorite parts of marking the end of one year and the beginning of the next is looking back at all the things that made the previous year wonderful! One of the really fun things to look at is my statistics for this blog. A LOT of you visited us here this year!  Thank you!!!  I am always fascinated by which recipes really took off and became HUGE hits- and I’m always a tiny bit disappointed by the ones that I thought were AMAZING, that didn’t really catch anyone’s attention.

I have lots of fun recipes lined up to share with you in January, but this week- as we welcome 2017- here are the top picks from 2016.

Just click on a photo to see the recipe- and enjoy!!! ~r

new-years-collection2

Strawberry Lemonade layer cake

Viewed 203,655 times in one month alone! The cupcake version of these is really popular too.

Classic Cheesecake with Sour Cream topping

Seriously, that cheesecake is maybe the best recipe on this blog. You have GOT to try it!!!! 🙂

Oreo pops

When this was 1st posted, there were NO other Oreo Pops on the internet- so I like to think that the Oreo Pop craze started here! We certainly have had fun creating all sorts of them for every holiday!

Bailey's Cupcakes

This recipe was from a failed audition for The Great American Baking Show, and a new friend!

Turtle Bundt

This is the most recent big hit on Easybaked- and it is really easy to make!

So, those were the top 5 in all-time views this year… but what were my favorites from 2016? These three!

new-years-collection8

new-years-collection9

This is the star of 2016. It is SO yummy and got rave reviews every time I made it. A massive layer of cookie dough in the middle of a cake? Does it get any better than that???

Marshmallow Stuffed Oreos

2016 was also my year to turn those healthy little Oreo Thins into amazing stuffed Oreos! These marshmallow ones… oh my! We also stuffed Oreos with Key Lime Pie, Pumpkin Pie and Cookie Butter!

Cookie Monster Oreos!

These win my personal “cutest” recipe award for 2016! I loved making them and making cute little stickers to seal the bags I gifted them in too! So fun!

I’ve been asked many times what my all-time favorite recipe on Easybaked is. I’ve got SO many favorites- but if I had to pick one, it would be my Caramel Fudge Brownies. I love them because they are my mom’s famous mint brownies with my favorite caramel added in place of the mint- and they are just the BEST chocolate fix ever.

Caramel Fudge Brownies!!

I hope you have enjoyed this round-up of recipes!

HAPPY NEW YEAR!!!!!!


Cookie Dough Layer Cake


Cookie Dough Layer Cake4Creamy cookie dough filling surrounded by rich chocolate cake and topped with a delicious chocolate glaze. An easy, beautiful and oh-soo-yummy dessert!

I’m in love with cookie dough. When I go to those fancy yogurt shops where you make your own sundae I am always tempted to skip the yogurt and just fill my dish with those little cookie dough bites. This easy (super, super easy) layer cake is filled with my favorite creamy cookie dough. I’ve used it to top cupcakes and to fill brownies— and now to fill cake. I love it. I think you will too!

As in most of my recipes, this dessert is made simple with the use of a cake mix (I used a Duncan Hines Dark Chocolate Fudge here), but you can substitute your favorite cake recipe instead. More work… but that’s up to you!

Cookie Dough Layer Cake2

Here is how we put this cake together: (printable recipe)

INGREDIENTS:

Cake/Filling:

  • One boxed chocolate cake mix (plus water, oil and eggs to make according to package)
  • 2 sticks (8 oz.) unsalted butter(softened)
  • 2 sticks (8 oz.) salted butter(softened)
  • 2 c. powered sugar
  • 1 c. brown sugar (packed)
  • 3 T. vanilla
  • 1/3c. flour
  • 1 (12 oz) bag of mini chocolate chips.

Glaze:

  • 1 1/2 sticks of salted butter
  • 1 12 oz. package of semi-sweet chocolate chips

DIRECTIONS:

  • Make cake mix (or your favorite cake recipe) and bake according to box/recipe in 2- 8 or 9 inch round pans.
  • Cool cakes completely.
  • While cakes are baking and cooling, make your filling.
  • Place all filling ingredients except mini chips into a large mixing bowl and beat with mixer on low until combined and then high until light and fluffy.
  • Add mini chips (keep about 1/3 of a cup aside to sprinkle on sides and top of cake) and beat on low until fully combined.
  • Make glaze by melting butter and chips together and set aside.
  • Once cakes are cool, trim the tops so they are flat.
  • Place 1 cake on serving plate, cut side up, and spread a little of the glaze on top. 
  • Spoon all of filling on top and spread all the way to the edge of the cake.
  • Place second cake on top, cut side down, and use a knife to smooth edges of filling flat between the two cake layers.
  • Sprinkle edges of filling with extra chocolate chips, and then pour glaze over the top and add the rest of the chips.
  • Refrigerate until firm.

Cookie Dough Layer Cake3

My thoughts: I wondered if the filling layer was too thick (it’s a lot of filling!) I knew that I would love all that cookie dough, but would others? They did. It got rave reviews and even a 2 thumbs up from a frosting-hater 🙂 You could make half of the filling recipe if you want- but it is honestly soooo yummy to have a big bite of cookie dough with every bite of cake. Wish I had some left…!  Enjoy!  ~r

Cookie Dough Layer Cake1


Other fun layered caked here at Easybaked (click on a photo to see the recipe):

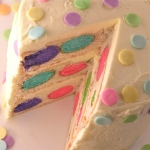
Grandma's Chocolate Cream CakeKey Lime Cake!Strawberry Lemonade Birthday CakePolka Dot Cake!!!!!!

Raspberry Fudge Layer Cake

Raspberry Fudge Layer Cake1Layers of pound cake, chocolate and raspberry are sure you make your Valentine smile this year!

You know those desserts that look incredibly difficult and are super easy? This is one of those. The cake is simply a frozen pound cake sliced and stacked with chocolate and raspberries. Makes you smile, doesn’t it?

Raspberry Fudge Layer CakeHere’s how we made it: (printable recipe)

INGREDIENTS:

  • One frozen pound cake
  • 1 bag of semi-sweet chocolate chips
  • 1 cup of red raspberry jam
  • 1 cup of sliced red raspberries
  • 1 stick of butter
  • 1/2 cup of whipping cream

IMG_0147DIRECTIONS:

  • Remove pound cake from packaging and use a large serrated knife to slice it into 3 or 4 layers
  • Divide the bag of chocolate chips into 2 separate microwave-safe bowls.
  • Add the stick of butter to one, and the whipping cream to the other.
  • Melt each bowl of chocolate, one at a time, in the microwave, stirring every 30 seconds until melted and smooth.
  • Set aside the butter/chocolate glaze.
  • Lay the bottom layer of the pound cake on a baking rack set over a cookie sheet.
  • Spread chocolate/whipping cream mixture generously on the top of this layer and sprinkle with fresh raspberries.
  • On the “bottom” of the next layer, spread raspberry jam and then gently place (jam side down) on top of the raspberries.

IMG_0150IMG_0153IMG_0156

  • Repeat this process until all layers are used.
  • Refrigerate until layers firm up a little (10 minutes or so)
  • Pour remaining chocolate/butter glaze over the top and sides of cake, allowing excess to run through the baking rack and onto the cookie sheet below.
  • Refrigerate until glaze firms up.
  • Cut into slices and enjoy!!!

Raspberry Fudge Layer Cake5My thoughts: This is so easy. A tiny bit messy with all of that melted chocolate, but once it is made, it stores well for a couple of days and makes a beautiful layered dessert. I think you could fill these layers with so many different things for different times of the year. Yum. Enjoy!!! Happy Valentine’s Day! ~r

Raspberry Fudge Layer Cake3

Other fun (and creative!) Valentine’s treats, just click on a picture for the recipe:

White Chocolate Strawberry Cookies!!Chocolate covered strawberry Cake roll!!Frog Oreos!!Creamy cheesecake with sour cream topping

Tres Leches Layer Cake

Posted on


Tres Leches Cake!!!!

This traditional sponge cake is soaked in a vanilla 3-milk sauce and layered with dulce de leche.  Topped with whipped cream and fresh fruit, it is a light and refreshing dessert.

It’s nearly Cinco de Mayo time!  I first tried Tres Leches cake in Mexico.  I had taken a group from our church down to a tiny village in Sinaloa.  We had spent the week building, painting, doing electrical work and laying cement.  It was my birthday while I was there, and some of the ladies from the church made me a HUGE tres leches cake.  It was DELICIOUS!  When I asked for the recipe, they all looked at me funny and said- it’s tres leches cake..? (like everyone knows how to make that!!!)

Tres Leche Cake in MexicoSince then, I’ve tried this cake at other places in Mexico and in the states.  I’ve noticed that there are two kinds:  The firm, sweet and moist kind, and the dripping with milk kind.  I really don’t like the dripping with milk kind…that consistency is really gross to me- and cake should never be gross!

I researched lots of recipes, and discovered that there are two varieties: a butter based sponge cake and an egg based sponge cake.  The egg based one is the one I liked.  It soaks up all that yummy sauce and stays firm, while the other just sits in a puddle of sauce…YUCK!

Tres Leches Cake!!!!All of that said, this is an egg based recipe that I found on a lovely blog called Pati’s Mexican Table.  My research paid off- this was a FABULOUS cake!  Here’s the recipe: (printable version)

INGREDIENTS

Cake

  • 9 eggs, separated
  • 1 cup sugar
  • 1 tablespoon vanilla extract
  • 2 cups all purpose flour

Vanilla Sauce:

  • 1 (14oz) can sweetened condensed milk (I used La Lechera brand)
  • 1 (12oz) can evaporated milk
  • 1/2 cup heavy cream
  • 1 tablespoon vanilla extract

Topping/filling

  • 2 cups heavy whipping cream
  • 1/4 cup confectioners’ sugar
  • fresh fruit for garnish
  • 1 (13.4 oz) can of La Lechera Dulce de Leche (or make your own here)

DIRECTIONS:

  • Preheat oven to 360F degrees and spray two 8 or 9 inch cake pans with non-stick spray.  Cut a circle out of parchment paper to place in the bottom of each pan to help these cakes come out of the pan cleanly.
  • Divide eggs into 2 bowls.  Put the egg whites into a large mixing bowl and the yolks into a medium bowl.
  • Beat the egg whites on medium-high until they form soft peaks.  Add sugar and beat on high until they form stiff peaks (this will take 4-5 minutes, depending on your mixer).
  • Beat the egg yolks on high for 5 to 6 minutes until they increase in volume and turn a creamy yellow.
  • Beat the vanilla into the egg yolks until combined.
  • Add the yolks to the whites and use a spatula or large spoon to gently fold them together.
  • Add flour and gently mix until completely combined.
  • Divide batter evenly between the 2 pans and bake for 20-25 minutes.  The tops should be golden and when a toothpick is inserted in the center, it should come out clean.
  • Cool completely, run a small knife around the edges and tip cakes over on a plate.  Remove parchment paper.
  • Make sauce by combining the 3 milks (condensed, evaporated and cream) together with the vanilla.
  • Poke (lots!) of holes in the top of each cake with a fork and carefully pour sauce over the top, dividing it evenly between the 2 cakes.
  • Place one cake on a serving plate, spread dulce de leche caramel over the top, stack second cake on top.
  • Make frosting by beating together the whipping cream and powdered sugar, until stiff peaks form.
  • Frost cake and serve with fresh fruit. Refrigerate until serving.

Tres Leches Cake with caramel and fruitMy thoughts:  I was so pleased with how yummy this cake was.  The sponge cake is very firm and easy to work with, even when it’s soaked with sauce.  You can make this in a 9×13 inch pan too- I just wanted the tall layer cake look~ and that caramel in the middle?  Oh my… take a look at my pictures- it partially soaks in to that bottom layer and gives it a rich caramel flavor.  I think you all are going to love this cake!!  I hope you get a chance to try it!!!  Enjoy!!!!  ~r

Tres Leches Cake!!!!Other cinco de Mayo recipe ideas:

Alfajores-- yummy dulce de leche filling!Confetti Cake Filled with CandyCreamy Mango Pops!Mexican Chocolate Milk

Andes Mint Layer Cake

Posted on

Andes Mint Layer Cake!

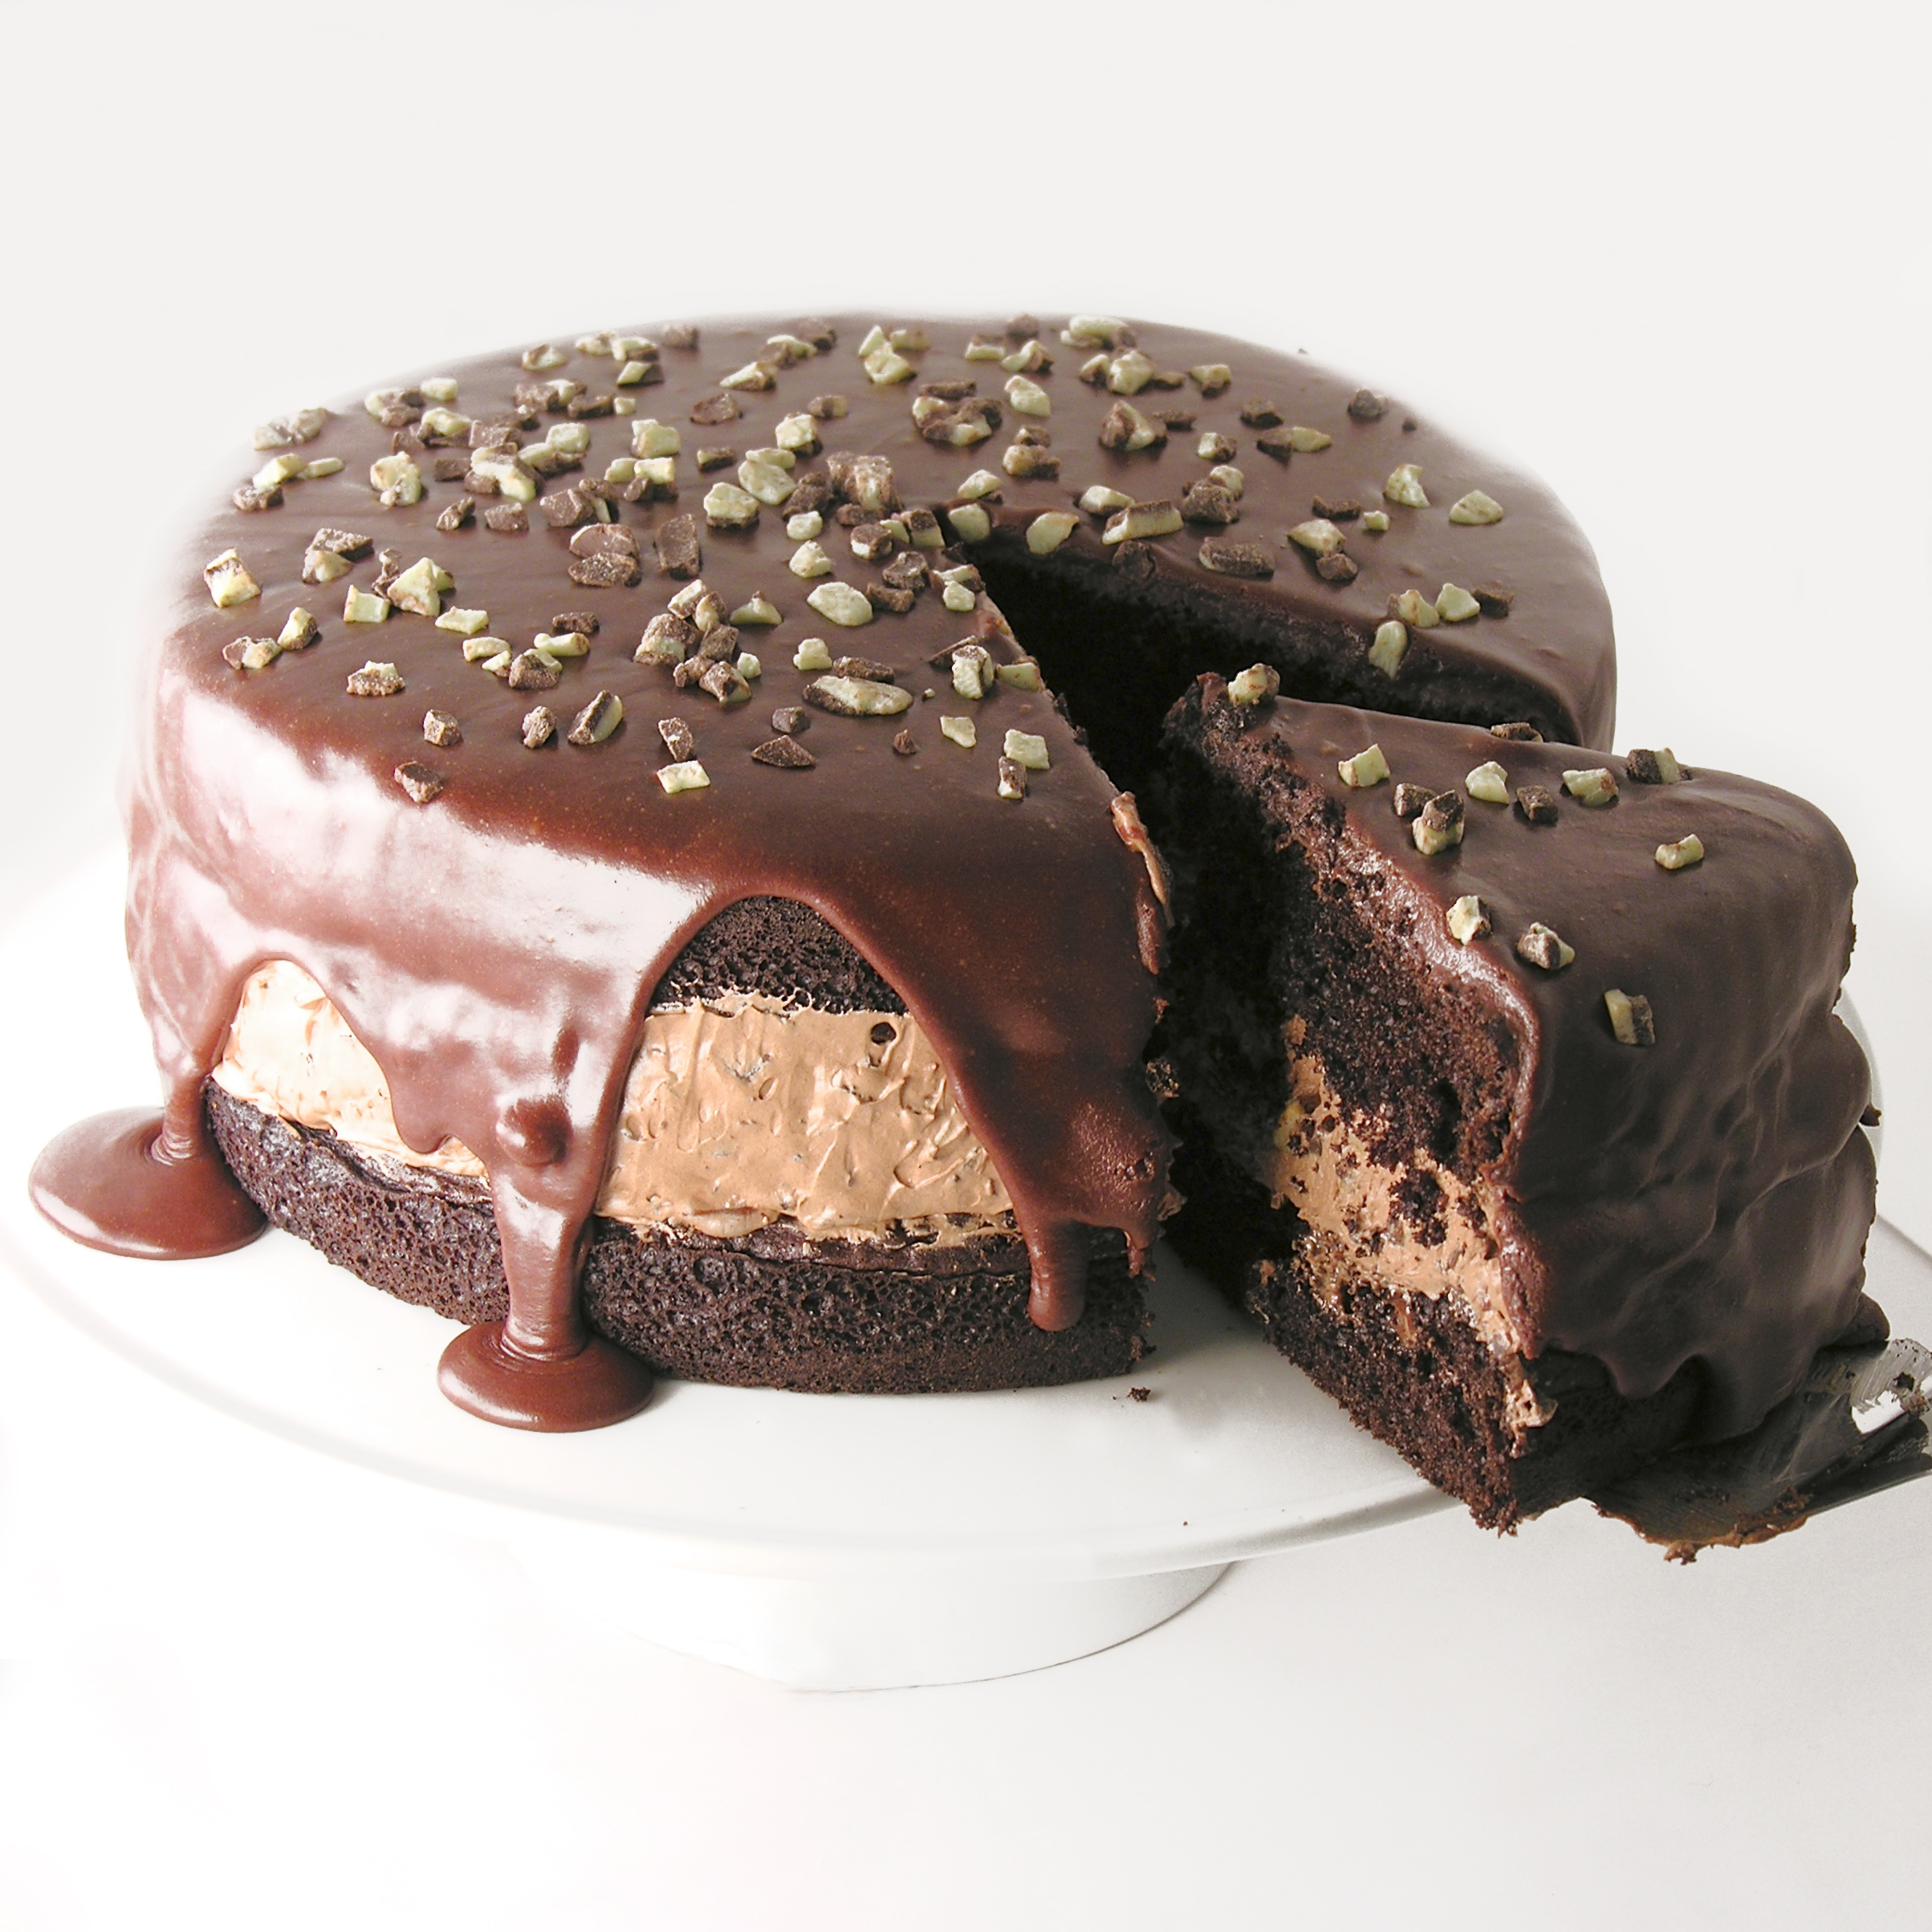
This rich chocolate cake has a huge layer of Andes Mint whipped filling and is drizzled with fudge topping.  The perfect chocolate dessert!

Tah Dah!!!  One last melted frosting recipe…for now…This one has yummy melted chocolate frosting inside and poured all over the top.  YUM!!!!!!

I love making this cake in various forms.  It is SO quick and easy to put together and everyone loves it! This time I added Andes mint candies for a refreshing mint twist to this recipe.  I think you will love it!! Andes Mint Cake!!

Here’s the recipe:  (printable version)

INGREDIENTS:

  • 1 boxed chocolate cake mix (with oil/eggs/water to make according to directions)
  • 2 packets of Dream Whip  (found near the jello/pudding boxes at the grocery)
  • 3/4 cup milk
  • 1 teaspoon vanilla
  • 3 tablespoons cocoa powder
  • 3 tablespoons powdered sugar
  • Andes Baking Chips 10 oz
  • One container of pre-made chocolate frosting

DIRECTIONS:

  • Make cake mix according to box and bake in 2 – 8 or 9 inch round pans (I cut parchment paper to fit, spray the pan with non-stick spray, and place it in the bottom of each pan so that the cake comes out easier).
  • Cool cakes completely on a wire rack and while they are cooling make your whipped filling:
  • Put Dream Whip, milk, vanilla, cocoa powder and powdered sugar into a mixing bowl and blend together.
  • Using a mixer, beat until stiff peaks form (3-4 minutes)
  • Fold in Andes mint baking chips, saving aside a few for topping.
  • Scoop chocolate frosting into a microwave safe bowl and heat for only about 20-30 seconds in the microwave.  Heat until frosting is melted into a hot fudge consistency.
  • Use a large serrated knife to level your two cakes.
  • Place 1st cake on serving plate, leveled edge up.
  • Pour about 1/4 of melted frosting on top of cake and spread to cover (I put this layer in the fridge for about a minute just to cool the warm frosting down before adding the mousse layer)
  • Spoon all of the mousse on top of the cake and spread it ALMOST to the edges.
  • Top with second cake– put the leveled edge against the mousse…this keeps all the crumbs in the middle and leaves a nice flat surface on the top of your cake. Gently press top layer down to squeeze the mousse all the way to the edges.
  • Pour the rest of the melted frosting over the entire cake and let it drip over the edges.
  • Sprinkle the remaining Andes Mint bits on top.
  • Refrigerate until serving, this will make the middle layer firm and easy to cut.

Andes Mint Cake!!!!

My thoughts:  I love this cake.  It is a beautiful dessert that is just so quick and easy to put together!

That creamy mint filling….oh my. I hope you get a chance to try it!  Enjoy!  ~r

Andes Mint cake!!!!

Other yummy chocolate treats here on easybaked:

Brownie Oreo Cookie CupGerman Chocolate PieRich Chocolate Ganache Mini CupcakesCaramel Fudge Brownies!!

Red Chocolate Cream Cake

Grandma's Chocolate Cream Cake


This dense chocolate cake is filled with a wonderful cream (think twinkies!) and covered in a rich fudge frosting.  Every bite is soooo delicious!

This recipe is a little slice of my past (no pun intended).  This is my grandmother’s Red Chocolate Cream Cake.  It is the cake I’ve had nearly every birthday of my life.  Every time I eat it I remember being a little girl at grandma’s house.  It is definitely an old-school recipe.  Don’t file this one under “easy”, but it is worth every minute of effort in putting it together.  I just love family recipes!

Red chocolate cream cake!

Ruthanne at 6!!Yep- that’s my cute little six-year-old self with a birthday cake from grandma!  Fun memories!

Want to know how to make this?  Here we go:   (printable recipe)

INGREDIENTS:

Cake

  • 1/4 cup Crisco
  • 1/4 cup salted butter (at room temp)
  • 1 1/2 cups sugar
  • 2 unbeaten eggs
  • 2 1/4 cups cake flour
  • 3/4 teaspoon salt
  • 1 cup buttermilk
  • 2 squares (1 oz. each) of unsweetened baking chocolate (melted and cooled)
  • 1 teaspoon red food coloring
  • 1 teaspooon baking soda
  • 1 Tablespoon vinegar

Cream Filling:

  • 2 Tablespoons flour
  • 1/2 cup milk
  • 1/4 cup Crisco
  • 1/4 cup salted butter (at room temp)
  • 3/4 cup sugar
  • 1/2 teaspoon vanilla
  • pinch of salt

Icing:

  • 1/2 cup milk
  • 1/4 cup salted butter (cut into cubes)
  • 1 cups semi sweet chocolate chips
  • 1 teaspoons vanilla
  • 2 1/4 cups powdered sugar

DIRECTIONS:

Cake:

  • Preheat oven to 350F degrees.
  • Cream shortening and butter together and add sugar.  Mix well.
  • Add eggs, one at a time, beating on low between each one.  Beat until creamy.
  • Sift flour and salt together.
  • Add flour/salt, alternating with buttermilk, beating on low speed.  Do not over-beat.
  • Add food coloring and warm (not hot!) melted chocolate.  Mix on low speed.
  • Lastly, in a small cup mix together baking soda and vinegar and add to the batter while foamy.
  • Mix but do not over-beat.
  • Divide into two 9-inch pans that have been sprayed with cooking spray and have a circle of parchment paper set in the bottom.
  • Bake at 350F degrees for 25-30 minutes.  Check at 25 by inserting a toothpick.  When it comes out clean, cake is finished.
  • Remove cakes from oven and allow them to set in pans for 5-10 minutes.
  • Tip cakes out of pans on a cake rack and cool completely.

Filling:

  • While cake is baking, start to make filling.
  • In a small saucepan, cook flour and milk together on stove, stirring often until thick and smooth. Cool completely.
  • Add the rest of ingredients to a mixing bowl and cream together.
  • Add cooled flour mixture and beat on high until a light whipped cream consistency (about 5 to 8 minutes).
  • Trim layers of cooled cake and place filling between the two layers.

Icing:

  • In a saucepan on the stove, heat milk, butter (cut into cubes) and chocolate until completely melted and smooth.
  • Cool completely.  Add powdered sugar and vanilla and beat on high.  Frost top and sides of cake.
  • Enjoy!!!

Grandma's Red Chocolate Cream Cake!
My thoughts:  I have a lot of thoughts… At the front of my mind is this:  My grandma Ann is 95 years old and she made this cake well into her late 80’s for us.  At age 42 I am barely able to keep track of all these steps…I am very impressed by her baking and multi-tasking abilities!!!  Wow.

Chocolate Cream Cake!

Ok- other thoughts:  This cake tends toward dry.  Mine turned out great this time, but sometimes it’s a bit dry.  Be meticulous with your measurements and err toward less rather than more with the dry ingredients.  I also read that you can add a bit of oil to any cake recipe to moisten it up.  Might be worth trying?  That said- the flavor of this cake is out of this world- really, no other cake I’ve had tastes like this one.  It’s wonderful!

The filling….beat it FOREVER.  The biggest mistake I’ve made with this cake over the years is the cream filling.  You really do need to beat it for 5-10 minutes.  For a girl without a stand mixer this is an ETERNITY of beating filling, but you really have to.  It is soooooooooo good.  I think I need to double it next time, I like it so much.

The frosting is a glaze-type frosting.  It is very soft at first.  The best thing to do is to refrigerate about half of it until it is spreadable, frost the tops and sides, and then pour the remaining soft frosting over the top and just smooth it over the whole thing.  Eventually all of it hardens into a spectacular smooth fudge icing.  You will love it!

Grandma's chocolate cake!!

I hope you get a chance to try this incredible cake!  

Many thanks to grandma Ann for the wonderful recipe (and for celebrating my birthday by making this cake for so many years!)~  Love you!!

Grandma!

Celebrating grandma’s 95th birthday this year!

Cakes!!!  Other fun cake recipes!!!

Tie-Dye Cake with Blue Raspberry Frosting!Key Lime CakeStrawberry layer cakeChocolate Mousse Cake

Key Lime Layer Cake

Posted on

Key Lime Cake

Moist cake layered with buttercream and tart key lime filling.  A perfect summer treat!

Key lime pie is one of my favorite desserts.  It’s just so refreshing and fun!  Whenever I am pondering the question of what dessert to try in a restaurant I am always caught between chocolate and anything key lime.

I’ve already done a few key lime recipes here on Easybaked, but never a cake.  Until today…..

Key Lime Cake

The key lime filling is tart, but the sweet buttercream layered with it makes each bite a refreshing treat!

Here’s how to make it: (printable recipe)

INGREDIENTS:

  • One boxed yellow cake mix (with eggs, oil and water to make according to package)
  • 1 cup of key lime juice
  • 1 can (14 oz) of sweetened condensed milk
  • 1 egg
  • 2 sticks (8 oz.) of salted butter
  • 2 sticks (8 oz.) of unsalted butter
  • 3 cups of powdered sugar
  • 2 teaspoons of clear vanilla
  • 1/4 cup crushed graham crackers

DIRECTIONS:    (make filling 1st to save time)

Cake:

  • Make cake mix according to package and bake in two 8 or 9 inch round pans.
  • Turn cakes out of pans onto a cooling rack and cool completely.

Filling:

  • In a medium mixing bowl blend together key lime juice, sweetened condensed milk and egg until combined.
  • Pour into a small casserole dish and bake at 325F degrees for 15-20 minutes until center is set.
  • Cool completely (I make this 1st and place it in the fridge while I make the cake and frosting)

Frosting:

  • In a large mixing bowl, add softened butters, powdered sugar and vanilla.
  • Beat on high for several minutes until frosting is light and very fluffy.

Putting the cake together:

  • Trim the tops of cakes to make them flat using a large serrated knife.
  • Cut each cake into 2 layers using the same serrated knife.
  • Place 1st layer on a serving plate and lightly layer with frosting.
  • Spread 1/3 of the cooled key lime filling over layer
  • Place 2nd layer on top and repeat until last layer has been placed on top.
  • Frost entire cake (top and sides) with buttercream frosting.
  • Crush a few graham crackers and gently press the crumbs along the sides of the cake.
  • Decorate as desired.  I used little dollops of extra frosting and little lime green chocolates.

Key lime cake!!!(Aren’t they cute?!?)

Key Lime Cake!!

Key Lime Cake!!

Key Lime Cake!! 

My thoughts:  I love this cake so much!  It’s not only one of my favorite flavors, but it’s pretty and it holds together so well and cuts beautifully!  If you love key lime like I do, this is the cake for you!  I hope you get a chance to try it!!!    Enjoy!  ~r

Key Lime Cake!!!

Other layer cake recipes you might enjoy:

Strawberry layer cakePeanut Butter Cup Layer CakeStrawberry-Lemonade Layer CakeMedovnik in Prague

Polka Dot Cake~ a recipe revisited!

Posted on

Revisited Recipes!Day #5 is here, along with our final revisited and recreated recipe.  I’ve really enjoyed remembering these recipes with all of you.  I hope you have found one to try for this upcoming holiday weekend!

Our final recipe is my personal favorite of the week, mainly because it brings the most smiles.  If you want to make a cake that will be a show-stopper at your holiday celebration, this is it.

Polka Dot Cake Revisited!This recipe was published recently, in January of 2013.  It is so incredibly fun to make.  I’ve made it 5 times now and each time I do, I love it more.  You can color the cake layers, you can color the polka dots…endless fun possibilities!

It is not a difficult recipe, but it is time consuming and it requires a cake ball maker (or, according to my commenters on the recipe, a mini muffin tin).

It takes two cake mixes and I made both mixes and simply divided them evenly into the three colors.  I made 12 cake balls in each color and one layer of each color.

The original blog post has detailed instructions and photos, so I recommend you visit there 1st if you want to make this cake.  The comments are also very helpful and full of tips on making this work well.

To see the original recipe and instructions click here.

To print the original recipe click here.

Patriotic Polka Dot Cake!!!!

Patriotic Polka Dot Cake!!!

Patriotic Polka Dot Cake!!!!Thank you so much for joining me this week for a trip down memory lane.  I hope it was as fun for you as it was for me.

Did you catch all of our recipe remakes this week?  If not, click on the ones you missed to be taken to the post!

Patriotic Tie-Dye Cake!!!!Patriotic Flip Flop Cookies!!!!Patriotic Bundt Cake!!!!Patriotic Oreo Pops- yum!!!