Tag Archives: buttercream frosting

Boston Cream Pie Cupcakes

Posted on

Boston Cream Pie Cupcakes3

Filled with cream and topped with rich chocolate, these cupcakes capture all the delicious flavor of a Boston Cream Pie in a single-serving form! Easy and soooo yummy!

I’ve never understood why they call it a pie, when it is SO obviously a cake, but Boston Cream Pie is one of my favorite desserts. There’s something about that filling that makes it so moist and flavorful!

These little creations are as easy as can be because they use a cake mix and instant pudding. Easy and delicious!!

Boston Cream Pie Cupcakes2

Here’s how we made them: (printable recipe)

INGREDIENTS:

  • One boxed yellow cake mix (plus water, oil and eggs to make according to package)
  • One packet of Jell-O White Chocolate Instant Pudding (plus milk to make according to package)
  • One cup of semi-sweet chocolate chips
  • 6 Tablespoons of butter
  • Cool Whip, or Butter Cream frosting (1 stick of (softened)butter with 3/4 cups of powdered sugar and 1 teaspoon of vanilla)
  • 24 red Sixlets candies (as desired for decoration)

DIRECTIONS:

  • Make cake mix according to package and divide into 24 cupcake liners placed in tins. Bake according to package, and cool.
  • Make pudding according to package and spoon into a large zip-top bag. Refrigerate until use.
  • Make chocolate sauce by melting chocolate chips and butter together in the microwave in 30 second increments, stirring between, until melted and smooth.
  • If you are making butter cream for the top (this gives you a swirl on top that is more firm for transporting than Cool Whip): Beat together the butter cream ingredients until they are light and fluffy.
  • Place either Cool Whip or butter cream in a zip-top bag fitted with a decorative tip.
  • To assemble: use a cupcake corer (or a knife) to remove a core out of the center of each cooled cupcake.
  • Cut the tip off the bag containing the pudding and pipe a dollop of pudding into the center of each cupcake.

Pecan Pie Cupcake1

  • Trim the “core” a little bit (makes room for the pudding) and place the top of the core back on, covering the pudding with cake.
  • Carefully spoon the warm chocolate over the top of each cupcake, gently pushing it toward the sides, but not over the sides.
  • Allow chocolate to cool. It will firm up.
  • Once it is completely cool, pipe Cool Whip or butter cream in a little swirl on top.
  • Decorate using sixlets (or any other sprinkles or decorations you like!)
  • Enjoy!

Boston Cream Pie Cupcakes1

My thoughts: These really are delicious… I try to only “taste” my treats and give the rest away, but you better believe I finished this little cupcake…with a cup of coffee. Yum!  I hope you get a chance to try them too! ~r


Boston Cream Pie Cupcakes

Here are some other fun uses for pudding! Click on a photo to see the recipe.

Heath Bar Ice Cream Dessert3Toxic Slime-filled Cupcakes!Mini Filled Boston Cream Pies!frozen s'more cups

Caramel Pecan Pie Cupcakes

Pecan Pie Cupcake3

If you like pecan pie, you will go nuts over these cupcakes! With caramel pecan pie filling in the middle and crisp pie crust decorating the top, these say Happy Thanksgiving in a fun new way!

There’s nothing more yummy than a warm caramel pecan pie in the fall. I have a favorite- and it’s here already on Easybaked as my Christmas Eve Caramel Pecan Pie. These cupcakes take that pie up a notch and they turned out better than I even imagined they would~yum!

Pecan Pie Cupcakes

There are a couple of steps to this recipe, so it is a little more time consuming, but well worth the effort~ I promise!

Here’s how we made them: (printable recipe)

INGREDIENTS:

Cupcakes:

  • One boxed caramel cake mix (plus water, oil and eggs to make according to box)

Pie filling:

  • 2/3 cup granulated sugar
  • 1/4 cup (1/2 stick) butter (melted)
  • 3 eggs (these are in addition to the eggs used for cake mix)
  • 1 (12 oz) jar of caramel topping
  • 2  cups chopped pecans (plus 24 pecan halves for decorating if desired)

Frosting and pie crust toppers:

  • One refrigerated pie crust
  • 1 cup (2 sticks) of salted butter
  • 1 cup (2 sticks) of unsalted butter
  • 3 cups of powdered sugar
  • 2 teaspoons of clear vanilla flavoring

DIRECTIONS:

Pie Filling:

  • Make pie filling 1st. Start by preheating oven to 350F degrees
  • In a large mixing bowl, beat 3 eggs together lightly with a fork.
  • Add sugar, stirring until dissolved
  • Stir in caramel topping and butter
  • Stir in chopped pecans
  • Pour into a greased casserole dish and bake for 50-60 minutes.
  • Cool completely (I placed this in the fridge to cool more quickly)

Cupcakes:

  • As the pie filling bakes, make cake mix according to directions on boxed mix and divide evenly among 24 cupcake liners placed in a tin.
  • Once pie filling is finished, bake cupcakes according to box.
  • Remove cupcakes from oven and tins and allow them to cool completely.

Frosting and pie crust toppers:

  • Unroll pie crust onto counter and use any cookie cutter you like to cut into 24 pieces. I used a fall leaf Linzer cookie cutter and added the leaf cut-outs on the cupcakes too.
  • Place pie pieces on a cookie sheet and spray lightly with non-stick spray.
  • Bake until slightly browned and crispy. Cool.

Pecan Pie Crust Cut-outs

  • Make frosting by combining butter, powdered sugar and vanilla in a large mixing bowl and beating on high for 3 to 4 minutes until light and fluffy.

Assembling Dessert:

  • To assemble cupcakes, make sure everything has cooled. Use a cupcake corer to remove a core out of the center of each cupcake.
  • Scoop or spoon some pie filling into each cupcake and replace the top of the core back on top of the filling.

Pecan Pie Cupcake1Pecan Pie Cupcake2

  • Place frosting into a zip-top bag fitted with a decorating tip and pipe swirls of frosting on the top of each cupcake.
  • Add a pie crust topper and a pecan half and ENJOY!!!!

Pecan Pie Cupcakes

My thoughts: These really do capture the delicious flavor of pecan pie. They were a big hit with everyone who tried them. I really liked the pie crusts on top- so yummy in that buttercream frosting! I hope you have a chance to try this recipe out!  Enjoy! ~r
Pecan Pie Cupcakes

Love pecans? We do too!  Here are some other yummy pecan recipes. Just click on a photo to see the recipe!

Turtle Cheesecake SquareCaramel Turtles!!!Caramel Pecan CookiesToffee Pecan Crunch!!!!!!

Need a fun and unique gift idea? Easybaked has adorable boxed sets of notecards. They have an Easybaked dessert photo on the front and a recipe on the back! The come in a cute box and the best part? They are ON SALE for Christmas, include free shipping and the site that is hosting them offers $10 off a $50 purchase! Enjoy!!! (Click on photo for more information)

Easybaked Card sale


Fall Apple Cupcakes

Posted on

Apple CupcakesCelebrate fall with these cute little apple cupcakes! Filled with a chocolate chip “seed” core, these are sure to make everyone smile!

Well. Fall is here. I just began to notice the changing leaves this week, and of course every morning it’s a little bit darker on my drive to work.

Every fall, our family makes a special trip to a local orchard to sample apples, doughnuts and cider. As the temperatures drop I find myself looking forward to pumpkins and rustling leaves and all the fun flavors that come with this new season! These little cupcakes don’t taste like apples, but they sure do look like them!  I even added a fun seeded core to these, using my trusty cake pop maker.

Apple cupcakes filled with seeds

How fun is that? Surprise chocolate chips are always a plus in my book! You can skip the “core” if you want- just make solid-colored cupcakes instead of using my added steps in the recipe. Either way, these are a lot of fun and easy to make!

Here’s the recipe: (printable recipe)

INGREDIENTS:

  • 1 boxed white cake mix (plus oil, water and eggs to make according to package)
  • Food coloring gels in desired colors.
  • 1/2 cup of mini chocolate chips (if making core)
  • 2 sticks (1 cup) salted butter, softened
  • 2 sticks (1 cups) unsalted butter, softened
  • 3 cups powdered sugar
  • 2 tablespoons of vanilla
  • Colored sugar sprinkles (in desired colors)
  • Fondant for stems and leaves (or use pretzel sticks for the stems and spearmint gummy leaves instead!)

DIRECTIONS:

  • Make cake mix according to package
  • Remove one cup of batter and place in a separate bowl.
  • Mix in mini chocolate chips.
  • Bake in cakepop maker (or use a small mini-muffin tin), making 24 cake pops (or mini-muffins)
  • Divide remaining batter into separate bowls and color using color gels. I did green, red and yellow apples, but you can do just one of those colors if you want.
  • Place cupcake liners into tins and spoon just a small amount of batter into each liner.
  • Use a cake pop to spread batter evenly into bottom of liner and then leave the cake pop in the center.
  • Spoon remaining batter evenly over the cake pops, covering each pop completely.

Cake pop apple coresCake pop apple cores

  • Bake at 350F degrees for 15-18 minutes.
  • Cool completely.
  • Make frosting by placing butters, powdered sugar and vanilla in a large mixing bowl and beating on high for 3-4 minutes until very light and fluffy.
  • Use a medium cookie scoop to scoop frosting on each cupcake, and then turn cupcake upside down into a bowl of decorating sugar, pressing until all of frosting is covered in sugar.
  • Decorate with fondant leaves and stems, or use pretzels and spearmint leaves.
  • To use fondant, you can buy it already made in white and color it with gel in green and brown, or you can make it from scratch and color it the same way. 
  • Use a leaf fondant cutter to make leaves and just roll and cut the stems.
  • If you are new to fondant, we did a tutorial on it here.  It is MUCH easier than it seems like it would be, and you can make such cute decorations with it!

Apple Cupcakes

My thoughts: These are such a happy fall treat! You can go all- out and make little chocolate chip cores, or just make plain cupcakes in various colors.  Either way, they are a yummy, easy, fall treat that look beautiful on a fall-themed table.  Hope you get a chance to try these!  Enjoy!! ~Ruthanne

Apple Cupcakes!

Other fun fall recipes here on easybaked:

Honey cut-out cookiesFall Acorn Cupcakes!German Chocolate CookiePeanut butter Acorn Cookies!

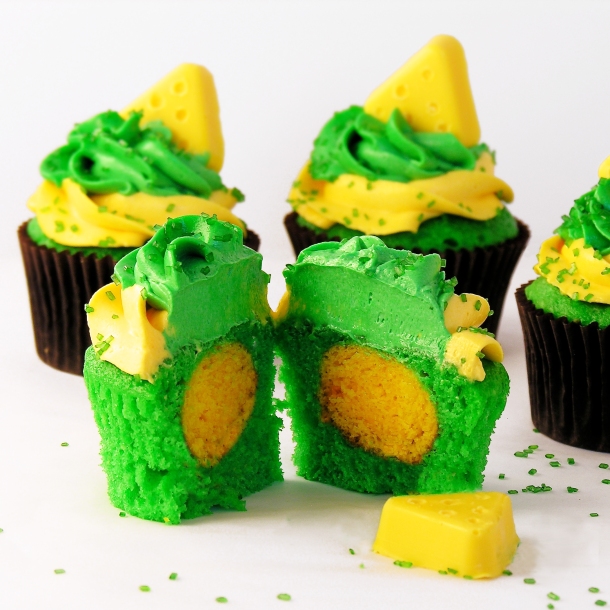
Cheesehead Cupcakes!

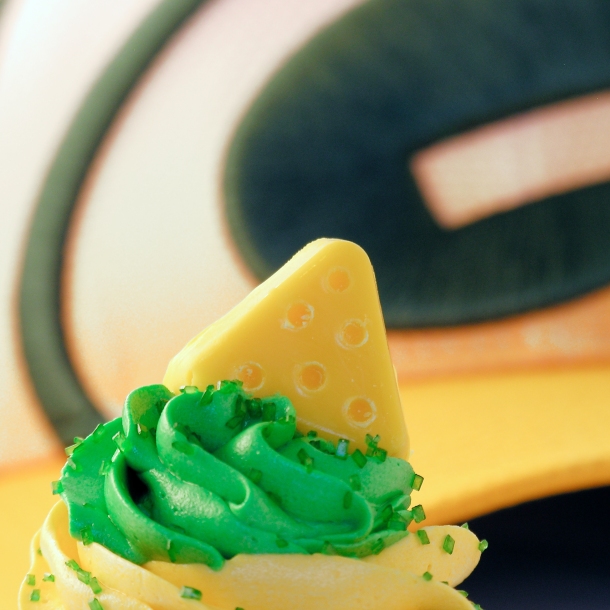
Cheesehead Cupcakes!!!!!These colorful Green Bay Packer CHEESEHEAD cupcakes are the perfect treat for game day!!!  Make them in YOUR team colors and start the season off with some fun!

Today is the day!!!!  NFL football season starts!!!!  Tonight it’s the Packers vs. Seattle (GO PACK GO!!!!!!!), and I had to add some cheese on these fun little cupcakes to make them just perfect!

Wait— what’s inside?  That’s what makes these so much fun!!!!!

Green Bay Packer Cupcakes!A little splash of team color hidden in the middle.  You can make these in any team colors you want- but if you make them for the Chicago Bears or the Detroit Lions you will need this tutorial here to make your cupcake toppers. 🙂

Here is how we made these: (printable recipe)

INGREDIENTS:

  • One boxed white cake mix (plus water, oil and eggs to make according to box)
  • Green and gold food color gels (or your team colors)
  • 2 sticks (1 cup) of salted butter, softened
  • 2 sticks (1 cup) of unsalted butter, softened
  • 3 cups of powdered sugar
  • 1 teaspoon of vanilla (or any flavoring you’d like to add to your frosting)
  • 1 bag of Wilton’s candy melts in yellow (if you want cheesehead toppers!!)  You will also need little triangle chocolate molds for these.

DIRECTIONS:

  • Make cake mix as directed on box, and take about 1/4 of the batter and mix it with yellow food color gel.
  • Using a cake pop maker or a small mini muffin tin, make 24 small, baked balls of cake in yellow. (click here for pictures of how to make these cake balls)
  • Color remaining batter with green food color gel.
  • Preheat oven to 350F degrees.
  • Spoon a little bit of green batter into 24 cupcake liners placed in muffin tins.
  • Place one cake ball in each cavity in the center of the green batter.

Cheesehead Cupcakes!!!

  • Carefully spoon more green batter over the top of each yellow cake ball, filling each cup only 2/3 to 3/4 full (be careful to not over-fill. That is easy to do when you are focused on covering up that cake ball!)
  • Bake at 350F degrees for 15-18 minutes.
  • Allow cupcakes to cool completely.
  • Make frosting by placing butters, powdered sugar and vanilla in a large bowl and beating on high for 3-4 minutes until light and fluffy.
  • Divide frosting in half and color one half gold and the other half green. Place each color in a zip top bag that has been fitted with a decorating tip.
  • Pipe yellow icing on 1st followed by green and top with a bit of cheese!!!!!

Cheesehead Cupcakes!!!!!To make little cheese head cupcake toppers:

Say Cheese!!!!

Yes, that is a tire pressure gauge…..

  • Melt yellow candy melts in a microwave-safe bowl, in the microwave, in 30-second increments, stirring in between.
  • Put candy melts into a sturdy zip top bag, clip a corner and pipe into triangle candy molds.
  • Tap on counter to remove bubbles, and place in the freezer for 5 minutes, or until completely hardened.
  • Turn mold upside down and tap on counter to remove chocolate.
  • Repeat this process.
  • Allow the triangle chocolates to return to room temperature, and use whatever you find handy to put “holes” in your cheese.  I used a (cleaned in hot soapy water) tire pressure gauge for mine.  Let’s hear it for problem solving in the kitchen!!!!!!

Green Bay Packer Cupcakes!

My thoughts:  These are just plain fun.  I recommend using a cake pop maker for the center circles.  It really does take less time and it makes the most adorably round little cake balls.  Plus you can make a Polka-Dot cake with it too!!!  I hope you get a chance to celebrate your team with these fun and colorful cupcakes!!!  IT’S FOOTBALL SEASON!!!!!!


Cheesehead Cupcakes!!!

Other fun cupcake recipes you might enjoy:

Peanut Butter Cupcakes!!Coconut Cupcakes!!!Brownie Oreo Cookie CupPile of Cupcakes!

Piña Colada Cupcakes!

Posted on

Pina Colada Cupcakes!

 These pineapple cupcakes are full of coconut and rum flavored happiness.  A perfect pool party treat!

Aren’t these just the cutest little things?  I love the flavor combination of coconut and pineapple, it is such a refreshing taste!  The light whipped frosting on these, combined with the crunch of toasted coconut makes them such a delicious summer treat!  I even added a cute little edible coconut drink topper that I found on Party Pinchers.  So. much. fun!!!!

Pina Colada Cupcakes!!

INGREDIENTS: (printable recipe here)

  • 1 boxed pineapple cake mix (I used Duncan Hines), plus water, oil and eggs to make according to box directions.
  • 5 cups of shredded, sweetened coconut
  • 3 teaspoons of rum flavoring (divided)
  • 2 teaspoons of coconut flavoring
  • 2 sticks (1 cup) salted butter (softened to room temperature)
  • 2 sticks (1 cup) of unsalted butter (softened to room temperature)
  • 3 cups of powdered sugar
  • Decorations (as desired)

DIRECTIONS:

  • Preheat oven to 325F degrees
  • Spread 5 cups of coconut out on a large baking sheet that has edges.
  • Toast in 5 minute increments, stirring with a big spoon to evenly toast (It usually takes me about 20 minutes)
  • Allow coconut to cool, then place in a large zip-top bag, and crush into smaller pieces.
  • Make cake mix according to directions on box, and after it is made, add one cup of crushed, toasted coconut and mix completely into batter.
  • Add 2 teaspoons of rum flavoring and stir completely into batter.
  • Divide batter evenly into 24 cupcake liners placed into tins.
  • Bake according to package directions and cool completely.
  • To make frosting, place butters, coconut flavoring, remaining rum flavoring, and powdered sugar into a large mixing bowl and beat on high for 3 or 4 minutes until very light and fluffy.  Add one cup of crushed, toasted coconut and stir until well blended.
  • Use a spoon or a cookie scoop to place a rounded scoop of frosting on the top of each cupcake.  
  • Place the rest of the crushed coconut into a small bowl, and turn each cupcake upside down into it, pressing coconut into the top and sides of each scoop of frosting.
  • Decorate as desired. I found these cute little edible “coconut cups” on a site called Party Pinching, and I couldn’t resist making them for my pina colada cupcakes!  You just cut the tops off of a Whoppers malted milk ball, put a dab of melted white chocolate and add little flower sprinkles and a bit of string licorice.  FUN!

Pina Colada Cupcakes!Pina Colada Cupcakes!

My thoughts: I really thought these captured the flavors of coconut and pineapple in a perfect combination.  I loved the little crunchy bits of coconut in the cake and frosting.  These are such a festive cupcake and make a perfect refreshing summer or vacation dessert for all ages! 
Pina Colada Cupcakes!Other fun cupcake recipes:

Malted Milkshake CupcakesKey Lime Cupcakes!Brownie Oreo Cookie CupButter beer cupcakes


Ladybug Cake!

Posted on

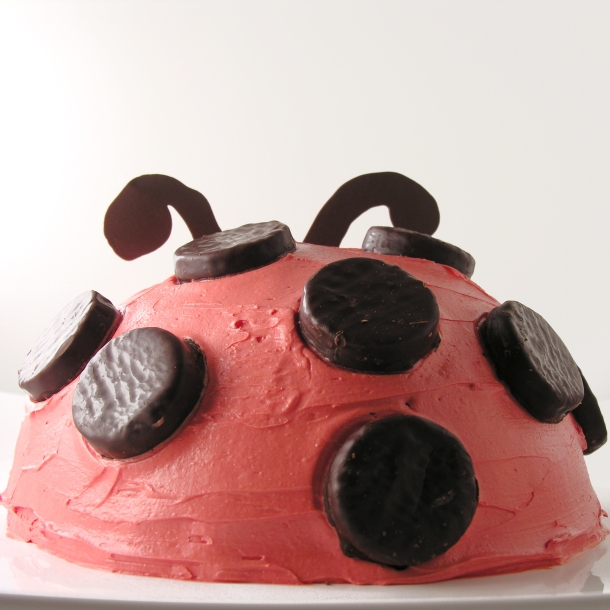
Ladybug Cake!!
It’s my Birthday today!  Yay!  Birthdays were always a huge celebration as I was growing up.  My mom had a big yellow box of recipe cards from Betty Crocker that had tons of fun ideas.  One of the categories was “Children’s Parties” and it was full of card-after-card of fun cakes.

Every year, mom would tell my brother and I that we could pick ANY cake out and she would make it for our birthday party (this, I believe, is where my great love of beautiful desserts began!)  I had all sorts of cakes- a Panda bear, an Igloo….and one year, a giant ladybug.  I loved it!

So, this year we are taking a trip down memory lane, back to the mid-70’s, for this retro recipe that made me smile then and now.

ThenNow

Betty Crocker 70's recipe card- Lady Bug Cake!

The Original Betty Crocker Recipe Card

INGREDIENTS: (original Betty Crocker recipe can be found here)

  • 1 box of cake mix, any flavor, plus water, oil and eggs to make according to package.
  • 2 sticks (1 cup) of salted butter
  • 2 sticks (1 cup) of unsalted butter
  • 3 cups of powdered sugar
  • 2 teaspoons of clear vanilla flavoring
  • Red food coloring gel
  • York Peppermint Patties
  • Wilton candy melts in red and dark chocolate (just a few!)
  • Mini M&MS

DIRECTIONS:

  • Preheat oven to 350F degrees
  • Generously grease and flour a 2 quart oven-proof bowl.
  • Make cake mix according to package, and pour into prepared bowl.
  • Bake at 350F degrees for 50-55 minutes, or until a toothpick inserted in the center comes out clean.
  • Allow cake to cool for a few minutes and then run a knife around edges and tip upside down on a cake rack to cool completely.
  • Make icing by combining butters, powdered sugar and vanilla and beating on high until light and fluffy, about 2-3 minutes.
  • Place cake on serving plate and spread a smooth layer of frosting over entire dome of cake.
  • Refrigerate about 10-15 minutes to harden 1st layer of frosting.
  • Use red food coloring gel to color about 2/3 of remaining frosting.
  • Frost over 1st layer with white over the front 1/3 of cake and red over the back 1/3.
  • Decorate with peppermint patties, icing and M&Ms.  You can use licorice for the antennae, nose and mouth, but I just piped colored candy melts into the shapes I wanted.
  • Enjoy!!

Ladybug Cake2
My thoughts:You really can use any items you want to decorate this cake.  You can see that Betty Crocker used gummy candies and black string licorice.  Making this cake brought back great memories of being a kid.  Many thanks to my wonderful mom for making childhood so much fun!  

One of my favorite parts of this site is being able to give you creative recipes to surprise your family with on their special days!  Here’s to many Happy Birthdays for you and yours in this coming year!  Enjoy! ~r

Ladybug cake!!!!!
Other fun birthday recipe ideas:

Polka Dot Cake!!!!!!Cookie Dough CupcakesPile of Cupcakes!Tie-Dye Cake with Blue Raspberry Frosting!

Polka Dot Cake~ a recipe revisited!

Posted on

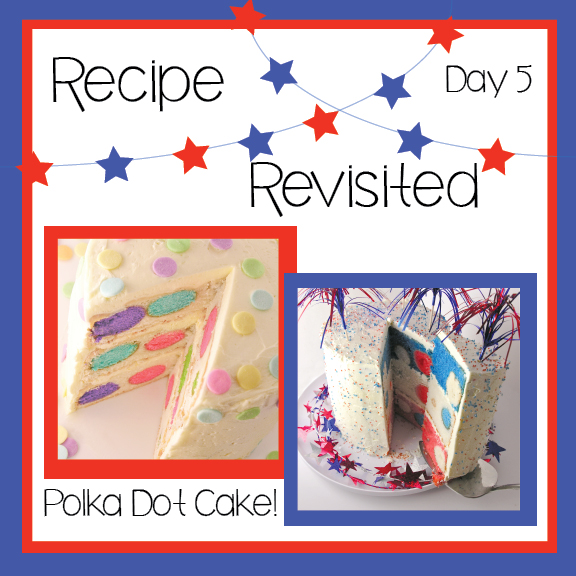
Revisited Recipes!Day #5 is here, along with our final revisited and recreated recipe.  I’ve really enjoyed remembering these recipes with all of you.  I hope you have found one to try for this upcoming holiday weekend!

Our final recipe is my personal favorite of the week, mainly because it brings the most smiles.  If you want to make a cake that will be a show-stopper at your holiday celebration, this is it.

Polka Dot Cake Revisited!This recipe was published recently, in January of 2013.  It is so incredibly fun to make.  I’ve made it 5 times now and each time I do, I love it more.  You can color the cake layers, you can color the polka dots…endless fun possibilities!

It is not a difficult recipe, but it is time consuming and it requires a cake ball maker (or, according to my commenters on the recipe, a mini muffin tin).

It takes two cake mixes and I made both mixes and simply divided them evenly into the three colors.  I made 12 cake balls in each color and one layer of each color.

The original blog post has detailed instructions and photos, so I recommend you visit there 1st if you want to make this cake.  The comments are also very helpful and full of tips on making this work well.

To see the original recipe and instructions click here.

To print the original recipe click here.

Patriotic Polka Dot Cake!!!!

Patriotic Polka Dot Cake!!!

Patriotic Polka Dot Cake!!!!Thank you so much for joining me this week for a trip down memory lane.  I hope it was as fun for you as it was for me.

Did you catch all of our recipe remakes this week?  If not, click on the ones you missed to be taken to the post!

Patriotic Tie-Dye Cake!!!!Patriotic Flip Flop Cookies!!!!Patriotic Bundt Cake!!!!Patriotic Oreo Pops- yum!!!

Tie Dye Cake~ a recipe revisited!

Posted on

RR Header
I miss my recipes sometimes…I didn’t realize when I started this blog that it would launch me into a world of constantly new and changing recipes.  If I’m asked to bring a dessert to something I rarely return to my favorites.  Instead I create something new that I can share with all of you!  This week I am revisiting some of my favorites in honor of the Fourth of July.  I chose some of my most colorful and fun recipes to recreate in Red White and Blue.  Each of these recipes can be tweaked to fit any color theme, but this week we are celebrating the USA with each recipe.  Here we go…..!

Tie Dye Cake!!

The original Tie Dye cake recipe was created October 10, 2012 in honor of my nephew Marshal.  It has gotten rave reviews for how easy it is to make.  It’s been the star dessert at birthday parties, Easter celebrations and even a Luau!  It was featured in the Huffington Post in an article celebrating all things tie dye.

Visit the original recipe to see how it was put together by clicking here.

Print the original recipe and try it for yourself by clicking here.

Stay tuned…I will be back tomorrow with another revisited recipe!

Enjoy!!  ~r
Patriotc Tie Dye Cake!!

Patriotic Tie Dye Cake!!

Patriotic Tie-Dye Cake!!!

Patriotic Tie-Dye Cake!!!!

Modifications to the original recipe:

Instead of rainbow colors, I used red and blue.  USE COLOR GELS if you want bright and vibrant color.  Liquid colors will not give you the deep colors you want.  I actually ran out of red and ended up a little more pink than I wanted!  I love my color gels– I use them a lot!

I used the buttercream from the original recipe but added vanilla instead of the raspberry flavoring, and I left it white with a few sprinkles.

Ruthanne’s top four favorite easybaked recipes:

Peanut butter cup cheesecakeCookie Dough CupcakesCaramel Fudge Brownies!!Cinnamon Roll Filling in a yummy cupcake!

Fondant…how to make it, use it and eat it!

Posted on

Fun fondant cupcake toppers

Homemade fondant that is easy AND tasty?  Here you go!!!

Every time I see cute cupcakes or cakes decorated in fondant I love them…and then I dismiss the possibility of making them for two reasons:

1. Fondant is really hard to make and use.

2. Fondant tastes bad and everyone just peels it off to get to the real frosting and cake underneath.

My good friend Megan from Happily Ever After Cakes set out to prove me wrong on both counts….and she did!

If you follow the comings and goings of easybaked, you know that I recently had a visit from my dear friend Megan for a weekend long baking extravaganza.  This is project #2 from that weekend.

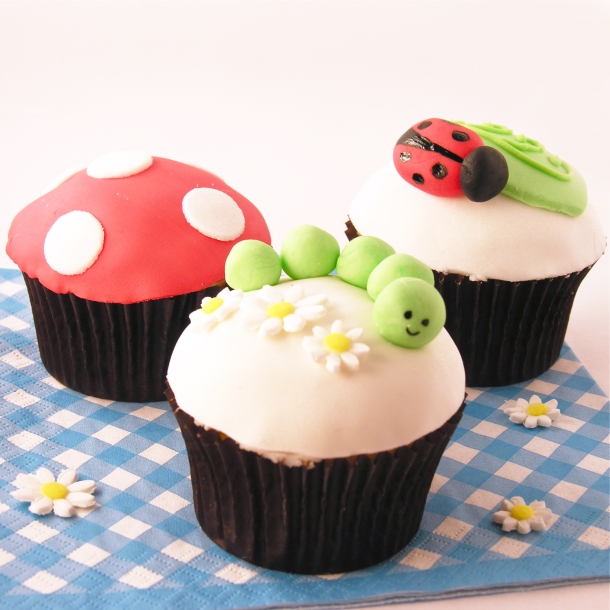
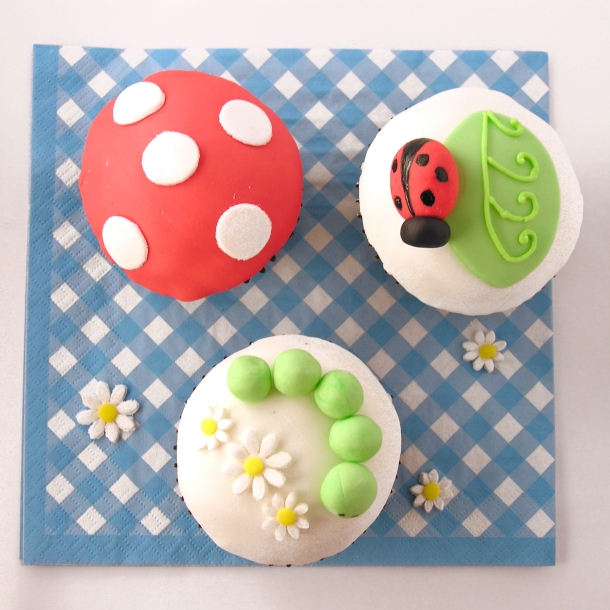
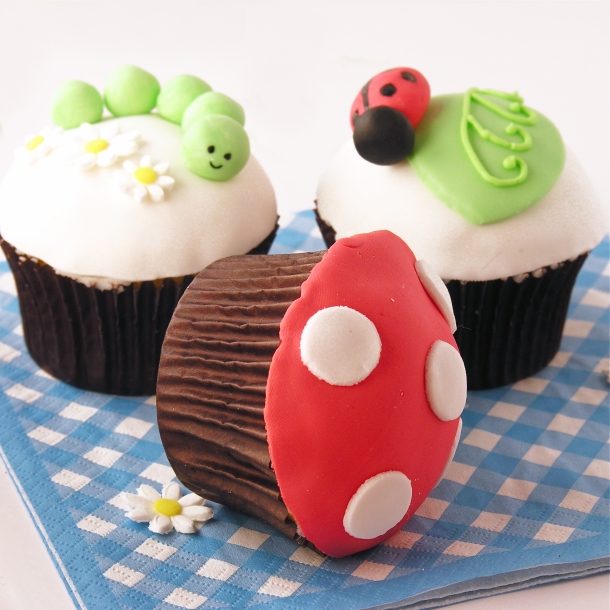
Before Megan came, I knew we would be tackling fondant cupcakes and we both went on an internet hunt for fun and easy ideas to try.  We saw these cute garden themed cupcakes on a Flickr site called Hello Naomi and decided to try them out!

The cupcakes are just plain white cupcakes (use your favorite flavor/recipe!)  What’s amazing is, of course, what’s on top.  There are two recipes involved~ a thick buttercream that acts like a glue on the top of each cupcake and the actual fondant recipe.

Let’s start with those two recipes and then I can tell you how we pulled it all together.

Thick Buttercream Frosting: (makes about 4 cups of frosting)

(printer-friendly recipe)

INGREDIENTS:

  • 1 stick (1/2 cup) butter (softened)
  • 1/2 cup Crisco
  • 1 tsp clear vanilla (or any flavoring you might want!)
  • 4 c. powdered sugar
  • 1 Tablespoon of half-and half cream.

DIRECTIONS:

  • Beat together butter, Crisco and vanilla with a mixer until smooth.
  • Add powdered sugar gradually and mix until combined and a little crumbly.
  • Add half and half cream and mix on low.  You might need to add a little more until frosting is a thick but smooth consistency.
  • Don’t beat frosting on high speed or for too long to prevent air bubbles that will keep it from spreading smoothly.
  • This frosting can be used to frost cupcakes or cakes that will have fondant laid over the top.  It has a sticky consistency that acts as a glue to attach the fondant.  It can be kept in a tightly sealed container in the refrigerator for about a week.

Marshmallow Fondant (recipe from about.com site)- they have a great video tutorial too!! (makes about 1 1/2 lbs of fondant.)

(printer-friendly recipe)

INGREDIENTS:

  • 4 cups mini marshmallows (half of a 16 oz. bag)
  • 4 cups powdered sugar- plus a little for dusting.
  • 2 tsp water
  • 1/2 teaspoon of clear vanilla
  • gel colors to color fondant as desired

DIRECTIONS:

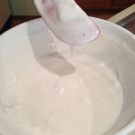
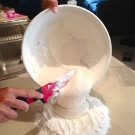
  • Place your mini marshmallows and water into a large mixing bowl and microwave on high for about one minute- until they are puffy and melted.
  • Stir them together with a rubber spatula until they are completely smooth (if not melted completely, put them back in the microwave on high for 5-10 seconds).
  • Add clear vanilla and mix well.
  • Add about 1/4 of the powdered sugar, stir until smooth, add another 1/4 and stir.  It will become difficult to stir and very sticky.
  • Pour the rest of the powdered sugar onto a clean counter or cutting board.
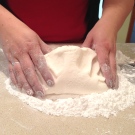
  • Scrape the sticky fondant mixture out of the bowl and onto the powdered sugar and begin to knead it together with clean (powder sugar coated!) hands.  It will gradually become like a smooth clay consistency.  Use a metal scraper to keep it from sticking to the counter/ board.
  • This can now be colored with gel, rolled out and cut, or stored (tightly wrapped) in the fridge for about one week.  Megan recommended refrigerating it overnight before use, so we did.
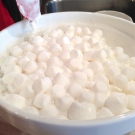
Melt marshmallowsMix until smoothPour onto counterKnead together with hands

Now comes the fun part….

  • Have your cupcakes or cake or cookies all made and cooled.
  • Make enough fondant to cover your item(s).  Here is a great chart by Wilton to help you determine how much you’ll need for various projects.
  • Make up some of that thick buttercream icing and you are ready to go!

We needed to cut circles to cover each cupcake and we used a circle cutter set, which was nice because we could choose the perfect size to cover our cupcake tops.  We simply powdered a cutting board and rolled out the fondant using a fondant rolling pin.   We cut out the cupcake tops in white  (we saved the red tops for later when we colored fondant).
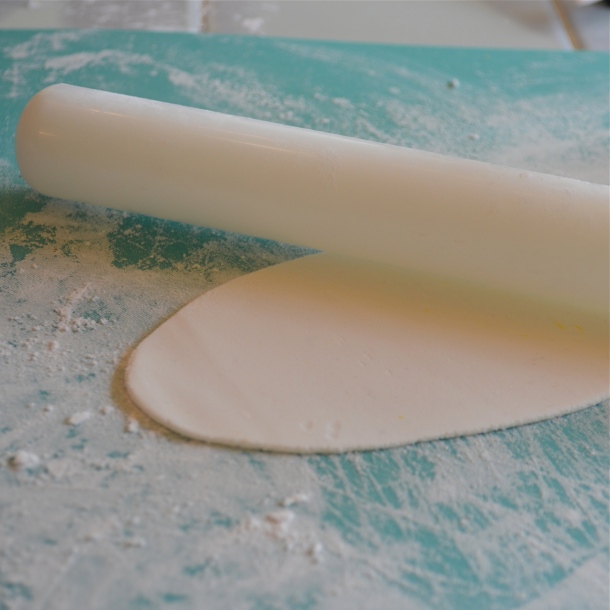
Rolling out fondant

Roll fondant out into a fairly thin layer and cut round pieces out to fit the tops of your cupcakes.

  • To place the fondant circles on top of the cupcakes just spread some of that sticky buttercream icing on top of a cupcake, smooth it as much as you can and place fondant circle on top.  
  • Gently press the edges down to touch the top of the cupcake liner and smooth it with your fingers.
  • We made daisies to go on top of the caterpillar cupcakes, so we cut out the white flowers before we colored anything.  Megan got me two cute daisy fondant cutters and they were SO fun to use!
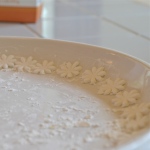
  • Roll your fondant out, cut out daisies and lie them on a powdered sugared curved edge to harden a bit.  I used a plate with a lip on it.
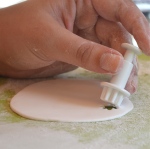
Cut daisies out of fondantSet daisies on curved edge to harden

Time to color a little fondant for those yellow centers:  

  • To color just add a little gel color to the center of a bit of fondant and mix it with your hands.  
  • Use a little powdered sugar to prevent the fondant from sticking to your hands.

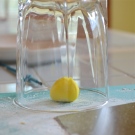
Tips:  keep fondant under a glass to keep it moist until you need it.  If it gets too dry you can add a little bit of Crisco to soften it up.  If it gets too sticky and the powdered sugar isn’t helping, you can use a little cornstarch to dry it up.

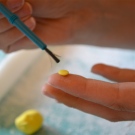
  • Roll a bit of yellow fondant into a small ball, press it flat and brush a tiny bit (just make it damp!) of water on it.  Press into center of white daisy—–so cute!

Water acts like glue with fondant…..something to remember as you start to decorate.

Add color gel to fondantKeep fondant under a glass to keep it moist.Use a little water on the fondant flower centerPress yellow center into daisy

Next, we colored some fondant green and rolled out little caterpillar body parts.  We let them set awhile and cut leaves out of the green as well– you can use that wonderful circle cutter set to make them– we “glued” them on white cupcake tops using water (just a little!).

The last colors we made were the red and black for the lady bugs and mushroom caps.  Both of these dark colors get ALL over your light colors if you aren’t careful about washing your hands– so make them up after you’ve already cut and shaped the lighter colored parts!  We just cut circles out for the mushroom caps and shaped ladybugs by hand….
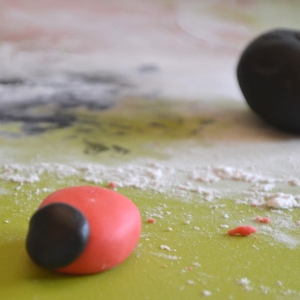
ladybugs!All of the shapes– the bugs and daisies and mushroom spots were “glued” on with a little water and the last step was to paint on little faces and ladybug spots.  We dipped right in to our black gel food color to do this– Megan got us a fine-tipped decorating brush that made short work of painting.

Ladybug and Caterpillar cupcakes!

Aren’t they fun?

My thoughts:  I realize this entire post is a far stretch from the “EASY” in “Easybaked”…but it was honestly not as difficult as I thought it would be.  I can see myself making fun embellishments for topping off regular cupcakes in the future now that I know how simple fondant is to make.

The best part?  It is honestly SO yummy.  The fondant isn’t rubbery or hard- you bite into the cupcake and the fondant is soft and tastes like marshmallow-y frosting.  I wasn’t tempted to peel it off at ALL! (promise!)  I even enjoyed snacking on the little critters and flowers on top.  Yum….!

ladybug and caterpillar cupcakes!Other fun and yummy cupcake ideas:

Butter beer cupcakesblackberry cream cupcakeAndes Mint CupcakesChocolate molten lava cupcakes

Key Lime Cupcakes

Posted on

Key Lime Cupcakes!
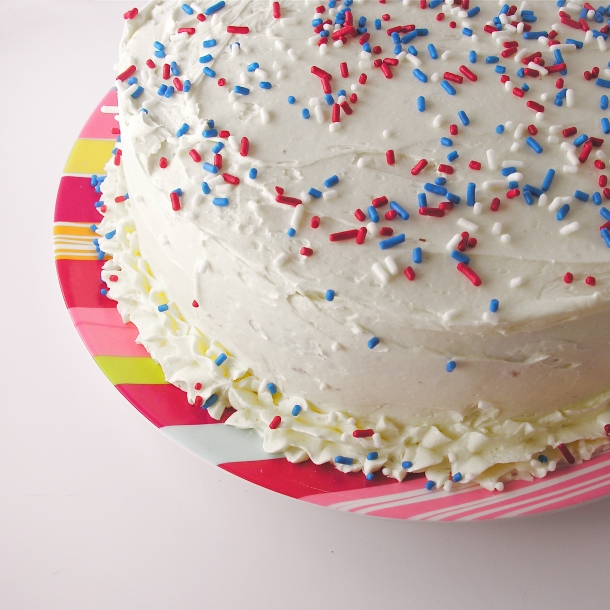
These cupcakes are filled with a sweet key lime filling and topped with key lime buttercream…what could be better than that?  Oh, how about a graham cracker crust on the bottom of the cupcake?  This dessert is as close to key lime pie as you can get…without it being a pie!  (printer friendly recipe)

INGREDIENTS: (makes 24 cupcakes)

Filling:

  • 1 cup key lime juice (a labor of love….!)
  • 1 can (14 oz.) sweetened condensed milk
  • 1 egg

DSC_0009

Cupcakes:

  • 2 cups of graham crackers (finely crushed)
  • 3 Tablespoons of butter (melted)
  • 1 boxed yellow cake mix (plus water, oil and eggs to make according to package)

Frosting:

  • 2 sticks (8 oz) salted butter (at room temp)
  • 2 sticks (8 oz) unsalted butter (at room temp)
  • 3 cups of powdered sugar
  • 2 teaspoons vanilla
  • 2 Tablespoons of key lime juice

DIRECTIONS:

Filling:

  • Mix together key lime juice, sweetened condensed milk and egg and pour into a small casserole.
  • Bake at 325F degrees for 15-20 minutes (until center is set)
  • Cool completely.

Cupcakes:

  • Mix crushed graham crackers with melted butter.
  • Spoon about 1 teaspoon of this mixture into 24 cupcake liners in muffin tins (you’ll have a little left to garnish with at the end)
  • Press crumbs firmly into bottom of cup (I find my Mini Tart Shaper to be very useful for this)
  • Make cake mix according to box, and divide batter equally between the 24 cupcake liners.
  • Bake according to directions on box
  • Remove from oven and cool completely.
  • Core cupcakes (I love my Cupcake Plunger– it is so quick to use and saves the core to place back on top of the filling- to see a picture of how it works, click here).
  • Spoon cooled  filling into a zip top bag and clip a corner off.

Spoon Key Lime Filling into a zip top bag!

  • Pipe filling evenly into each cupcake, saving about 1/4 of a cup of filling to drizzle on the top at the end.
  • Place top of core back in place (you can trim some of the bottom off to make room for the filling if you need to)

Frosting:

  • Place butter, powdered sugar, vanilla and 2 Tablespoons of key lime juice into a large bowl.
  • Using a mixer, beat on high until light and fluffy.
  • Pipe frosting on top of cupcakes and drizzle remaining filling on top.
  • Sprinkle with remaining graham crust crumbs and ENJOY!!!!

Key Lime Cupcakes!

My thoughts:  I created these for a graduation party.  The challenge was to create a key lime cupcake for someone who LOVES key lime pie.  Key lime pie is one of my favorite desserts, so it was a fun task.  These were a big hit.  I love the balance between the tart center and the sweet cupcake and frosting.  

It’s spring~ you NEED a key lime cupcake!!!

Key Lime Cupcakes!!

You might also like:

Chocolate molten lava cupcakesCaramel Fudge Brownies!!Sweet Lime TartsTriple Chocolate Cheesecake 3