RSS Feed

Tag Archives: best

Apple Oreo Pops!

Posted on

Apple Oreo Pops6

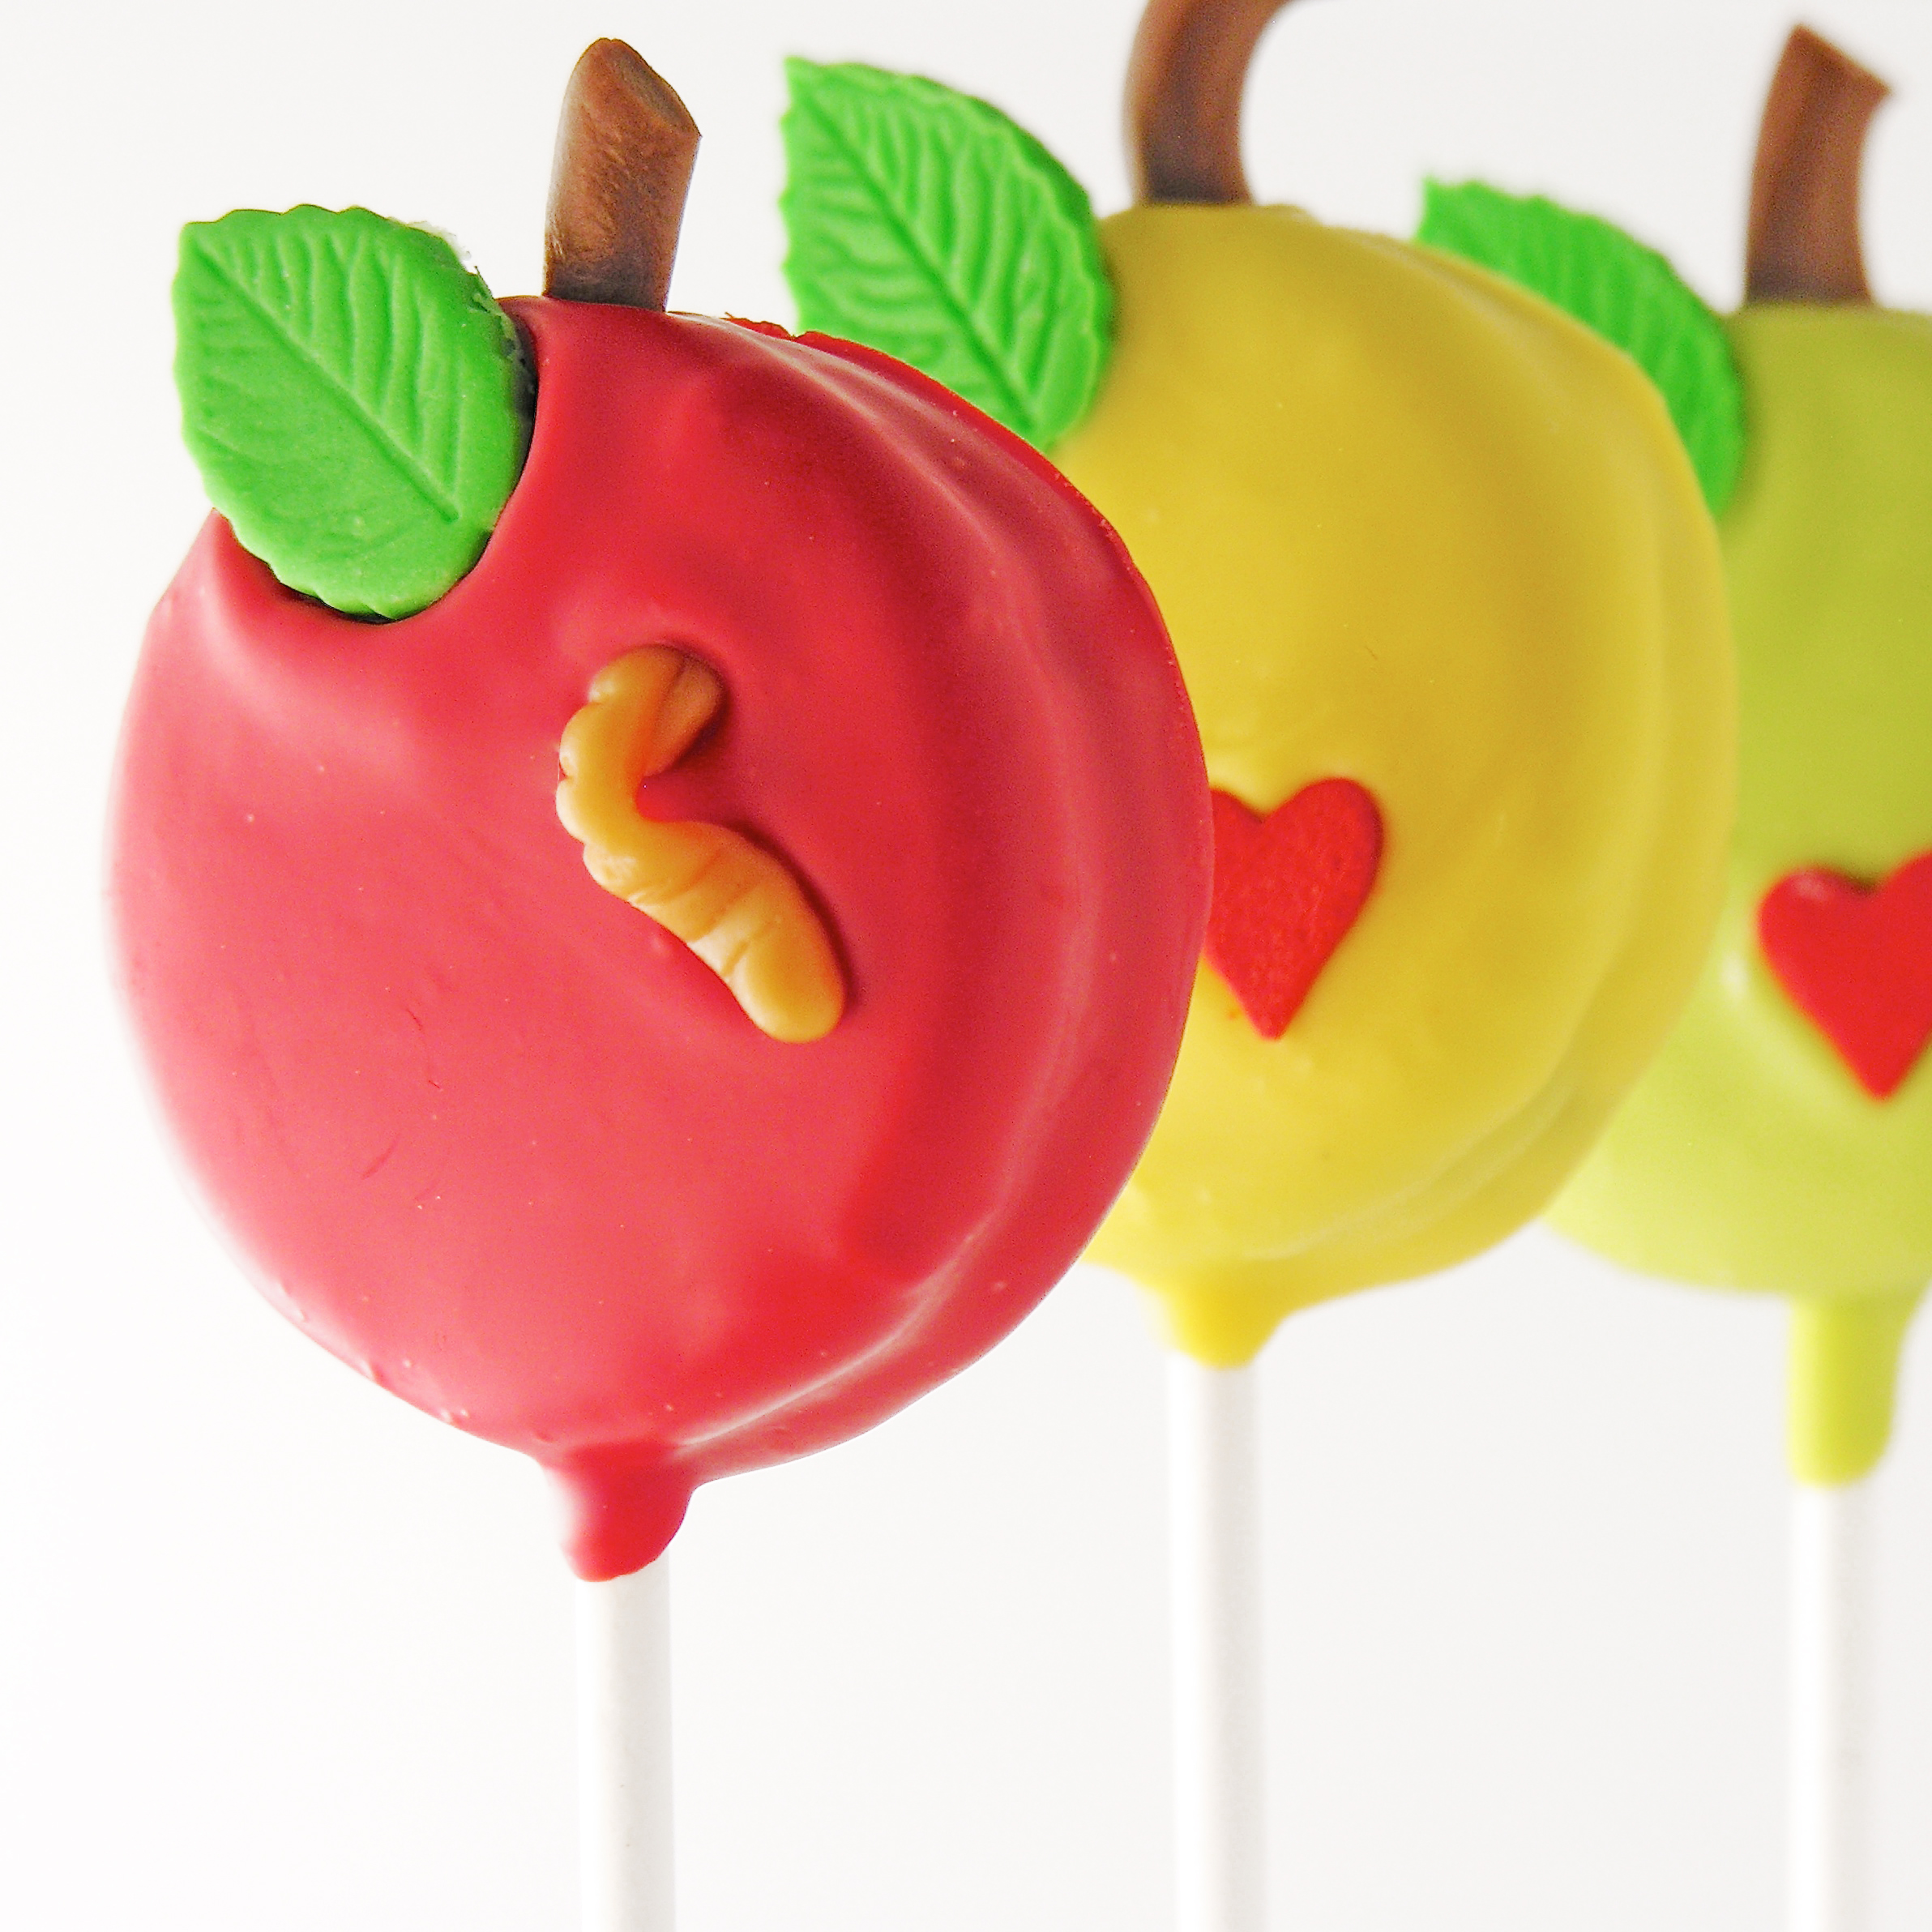
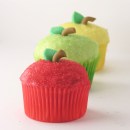
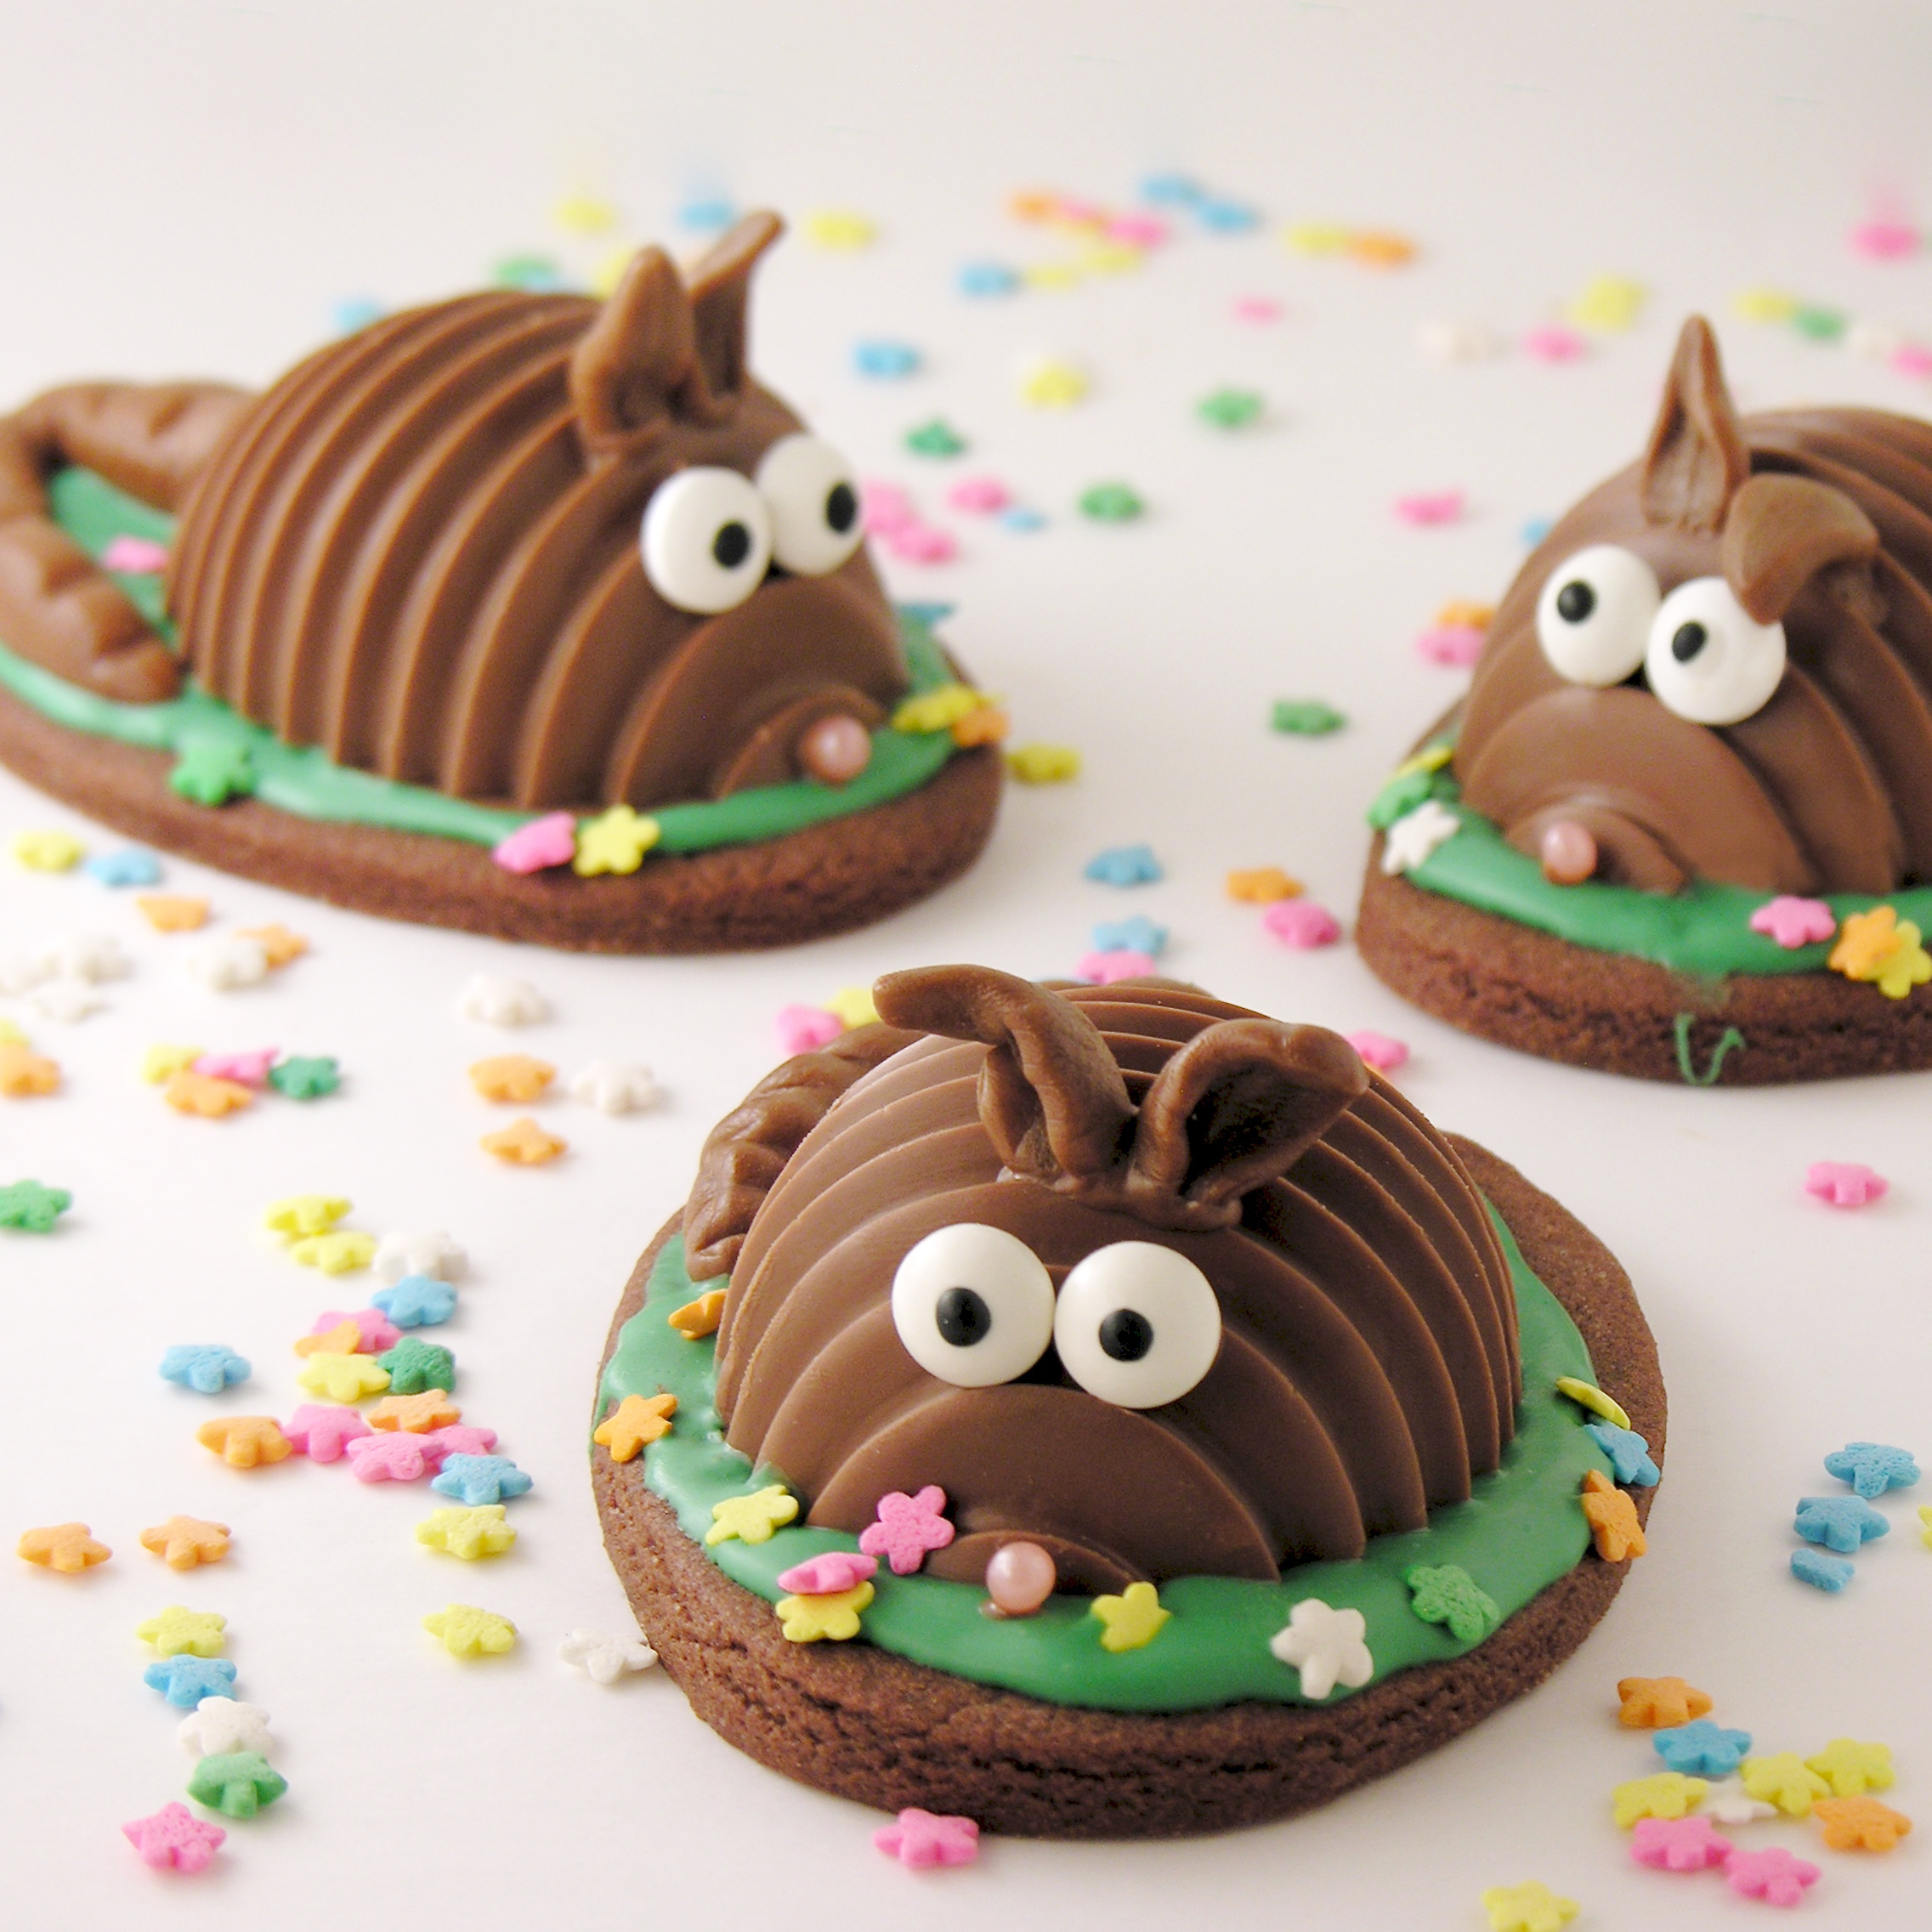
These adorable Oreo pops are a perfect back-to-school treat. Add hearts to send a little love in the lunchbox- or some worms to get a few giggles!

I hate to even say the words….but fall is coming. I love summer so much, that when I start to see school busses out on the roads I just cringe. Fall has some pretty fun foods though….! One of our family-favorites is apples. I grew up in Michigan, and we have the best fall apples. I loved trips to the orchard to get cider and doughnuts- and these little Oreo pops are perfect to kick off the fall season.

Apple Oreo Pops!

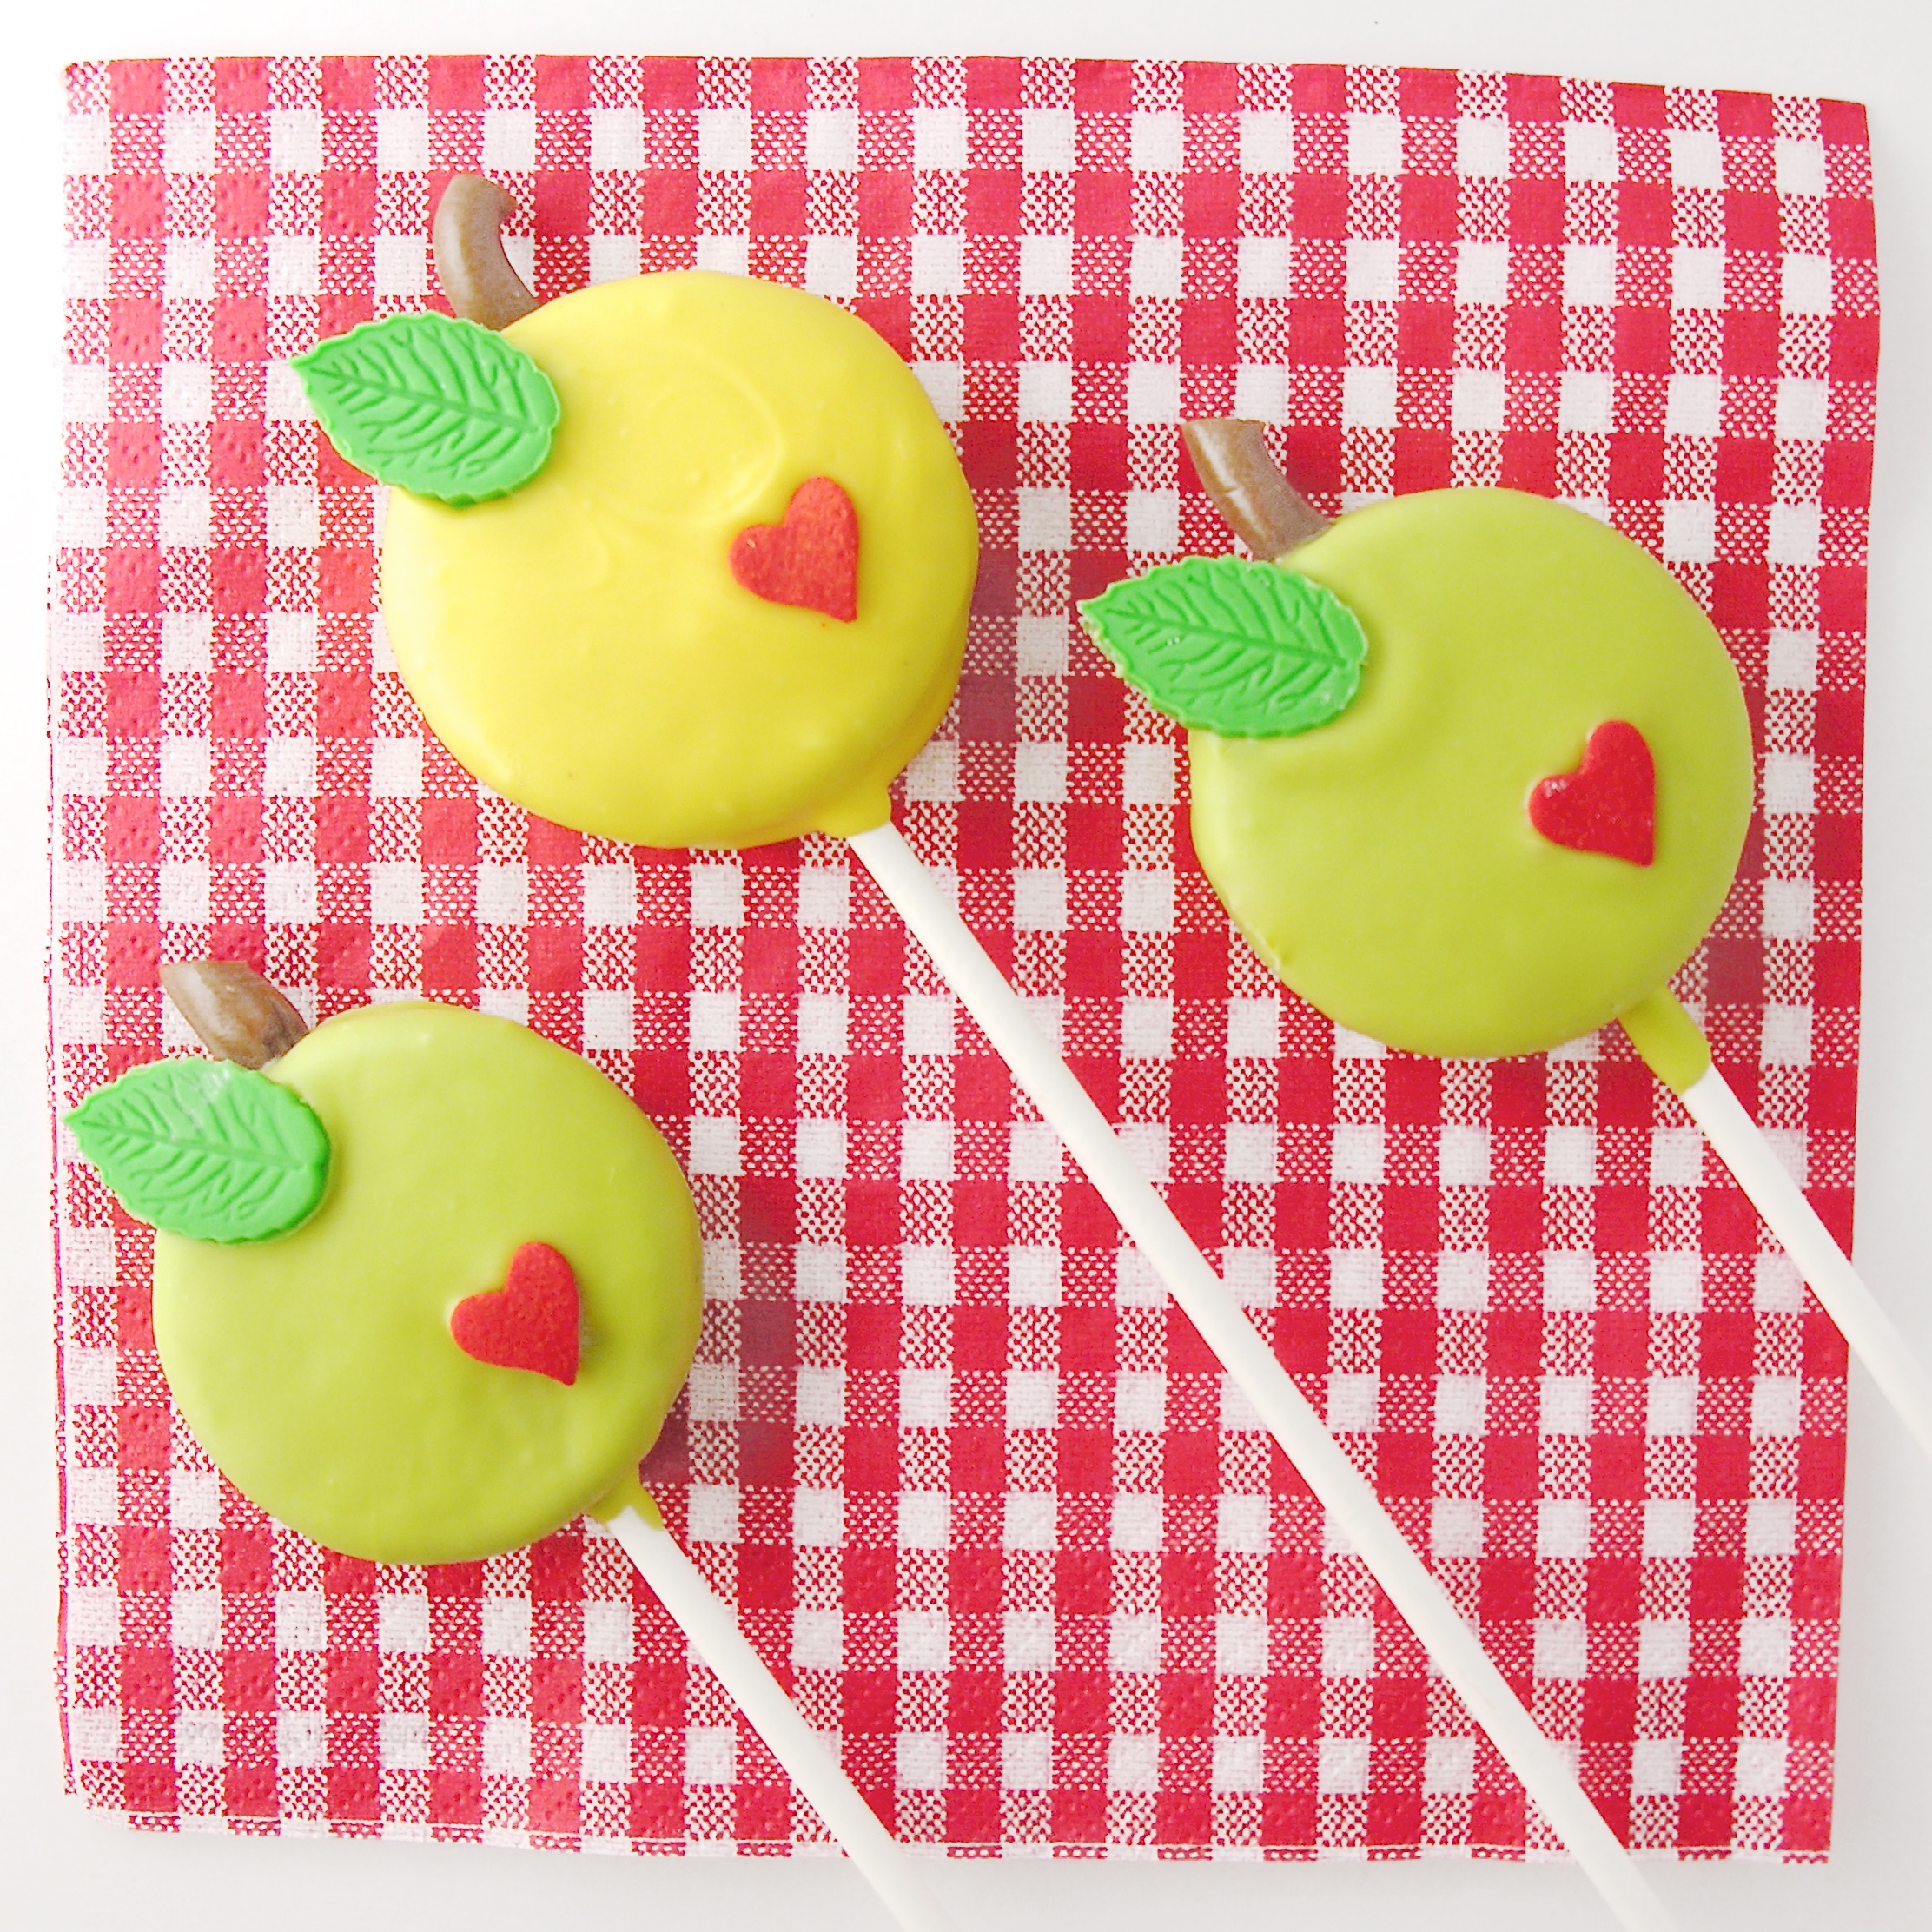
You can make them with hearts and tie them up in cello bags to send a little love…

Apple Oreo Pops with worms!

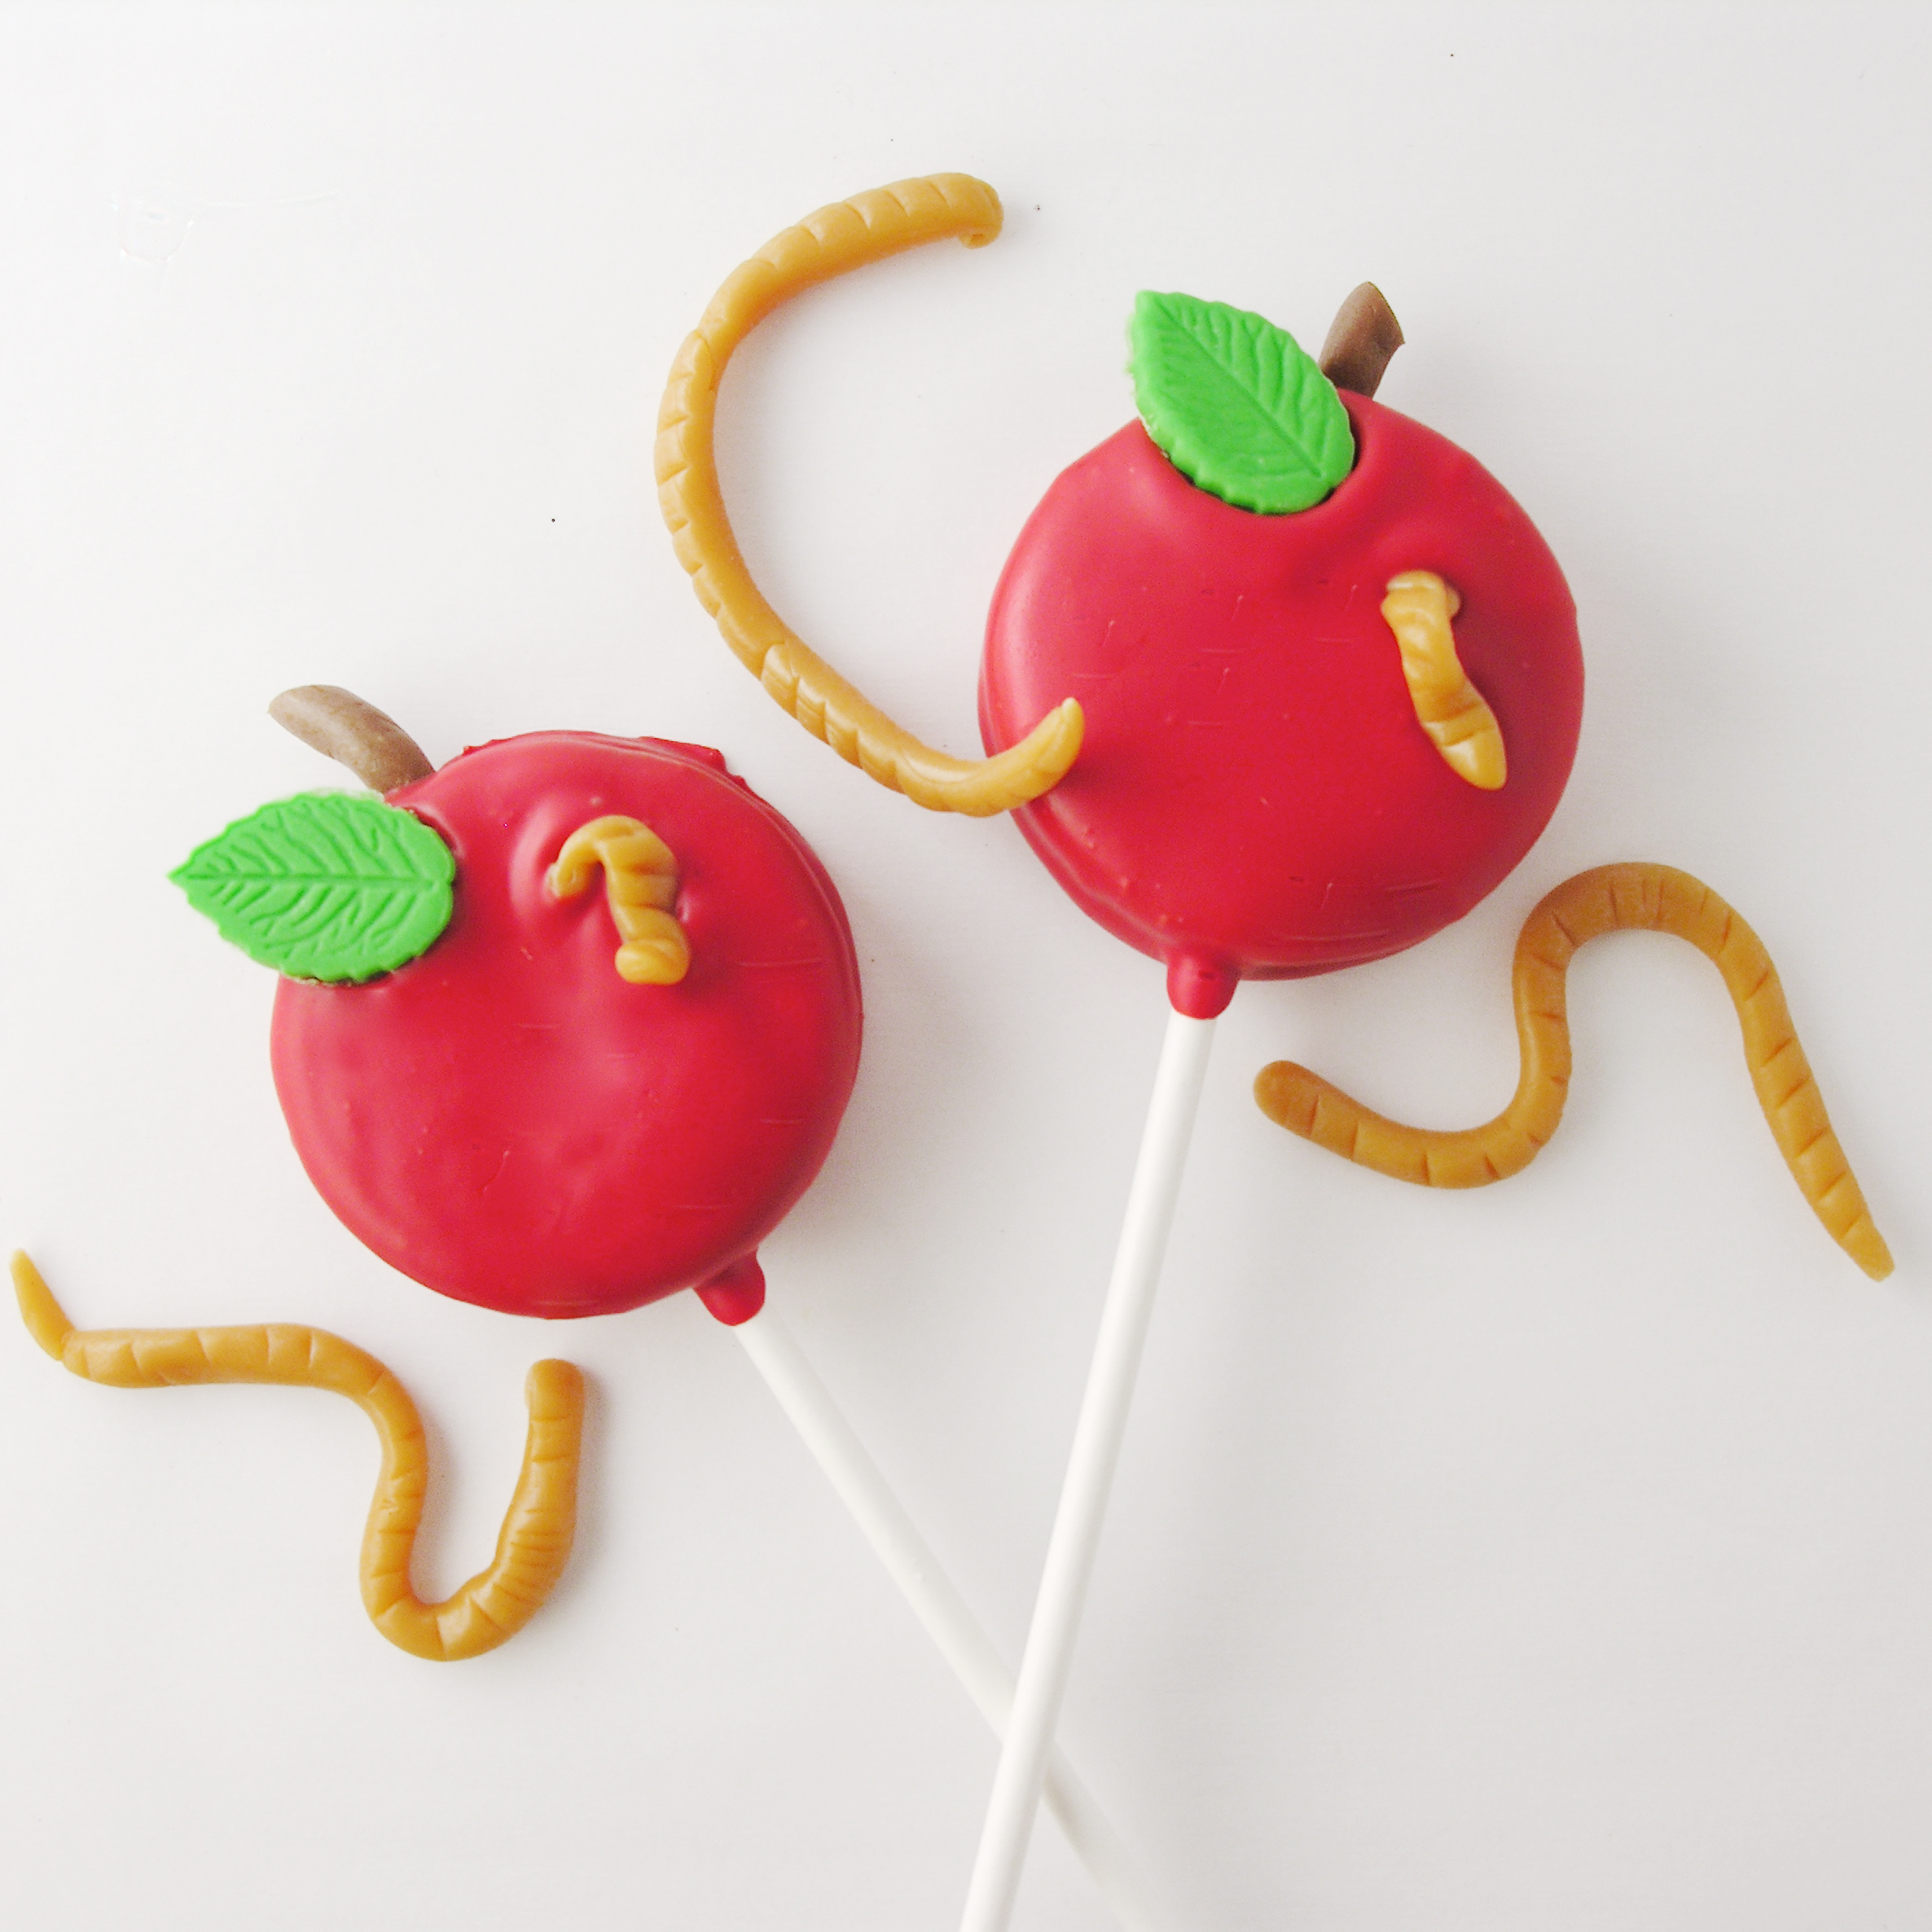
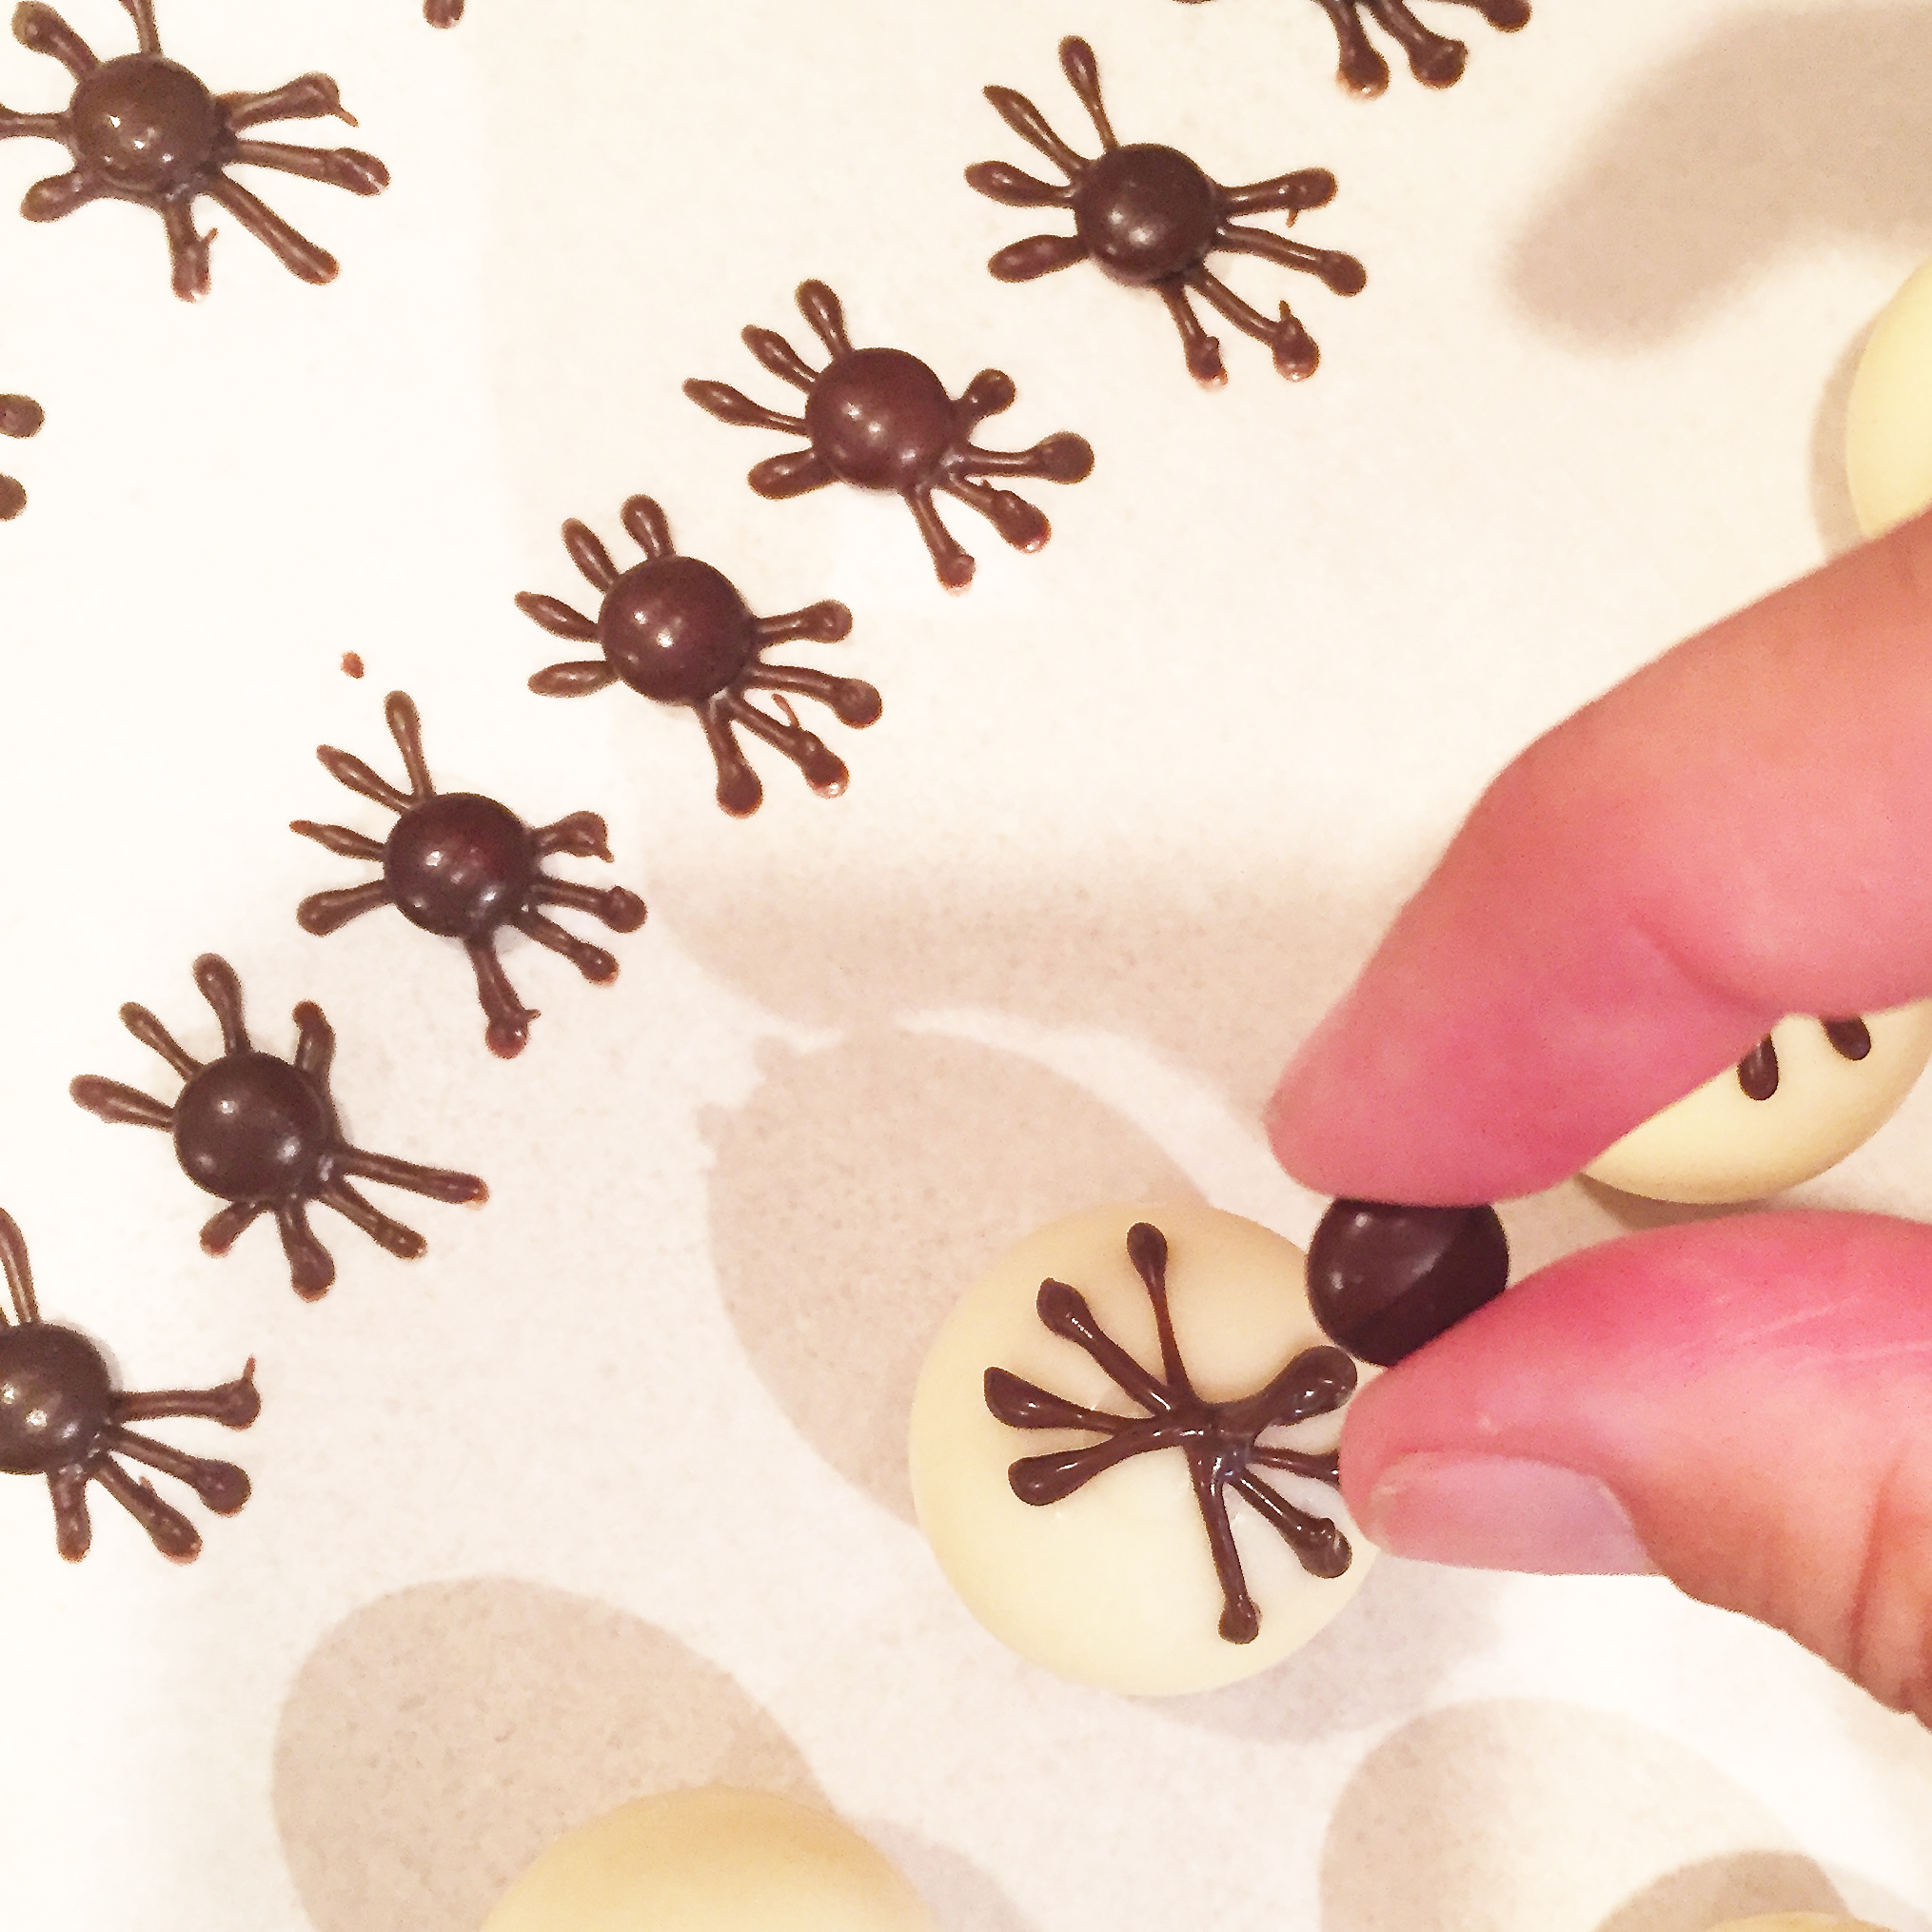
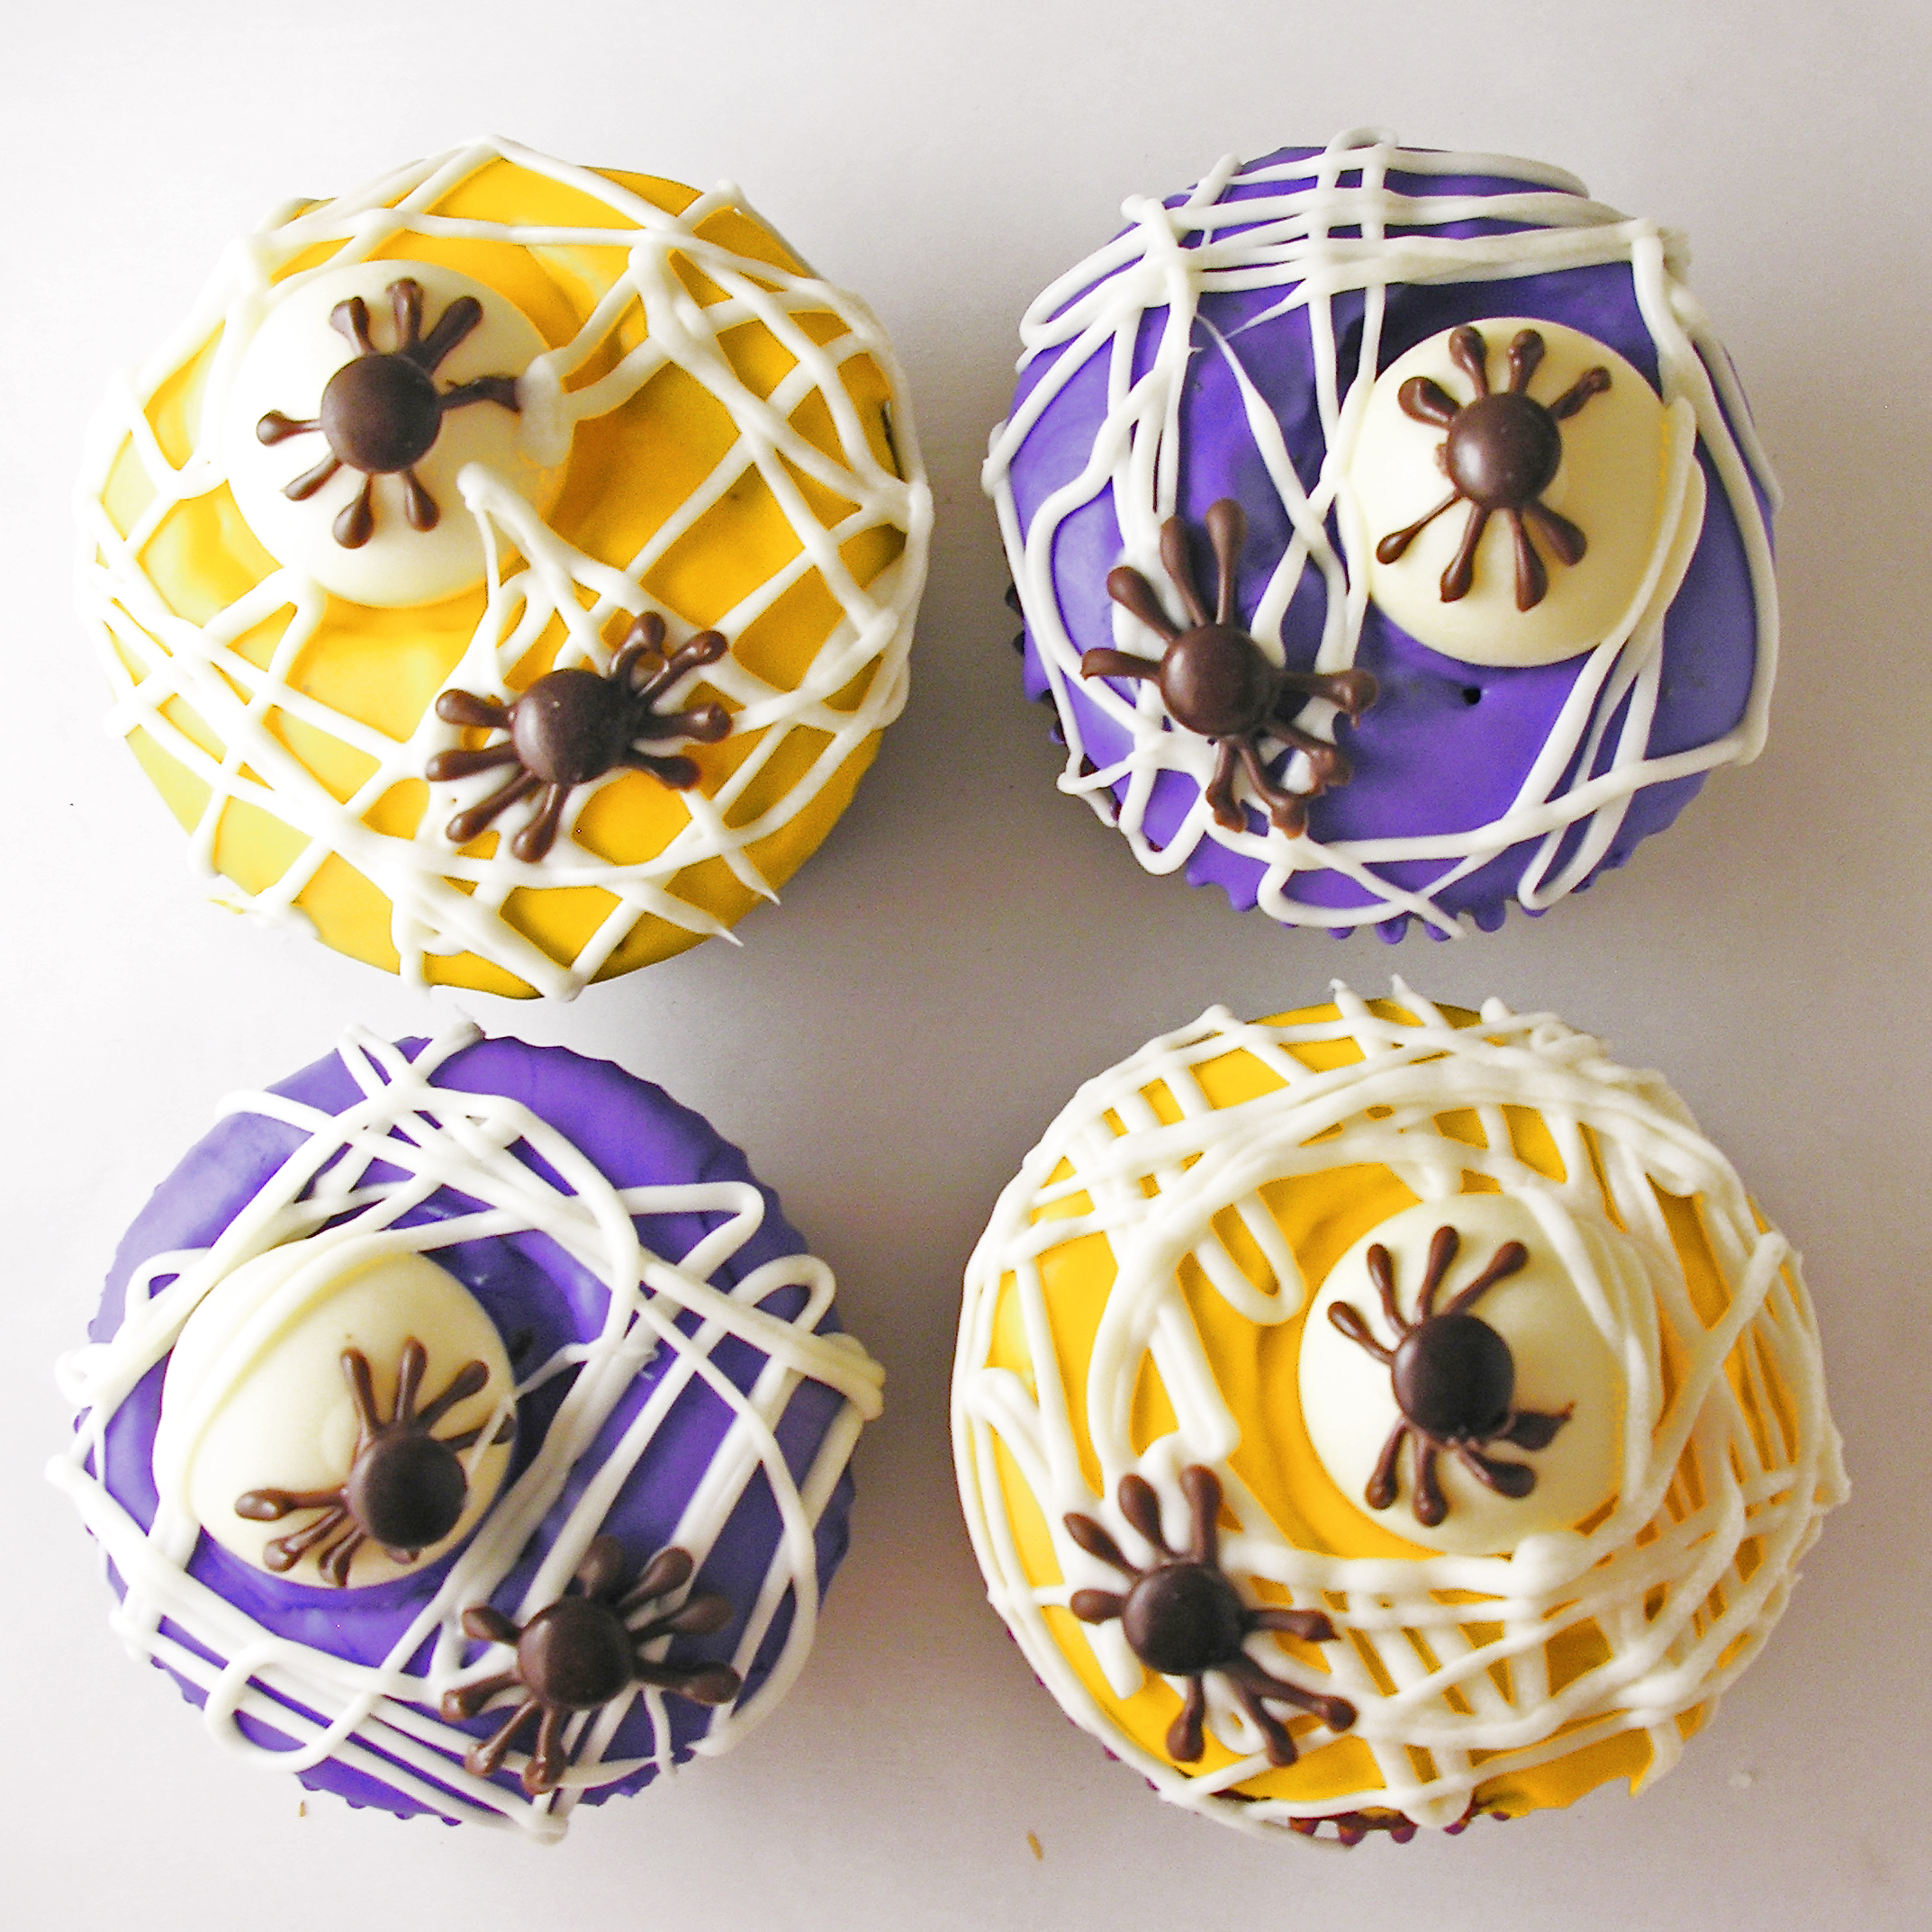
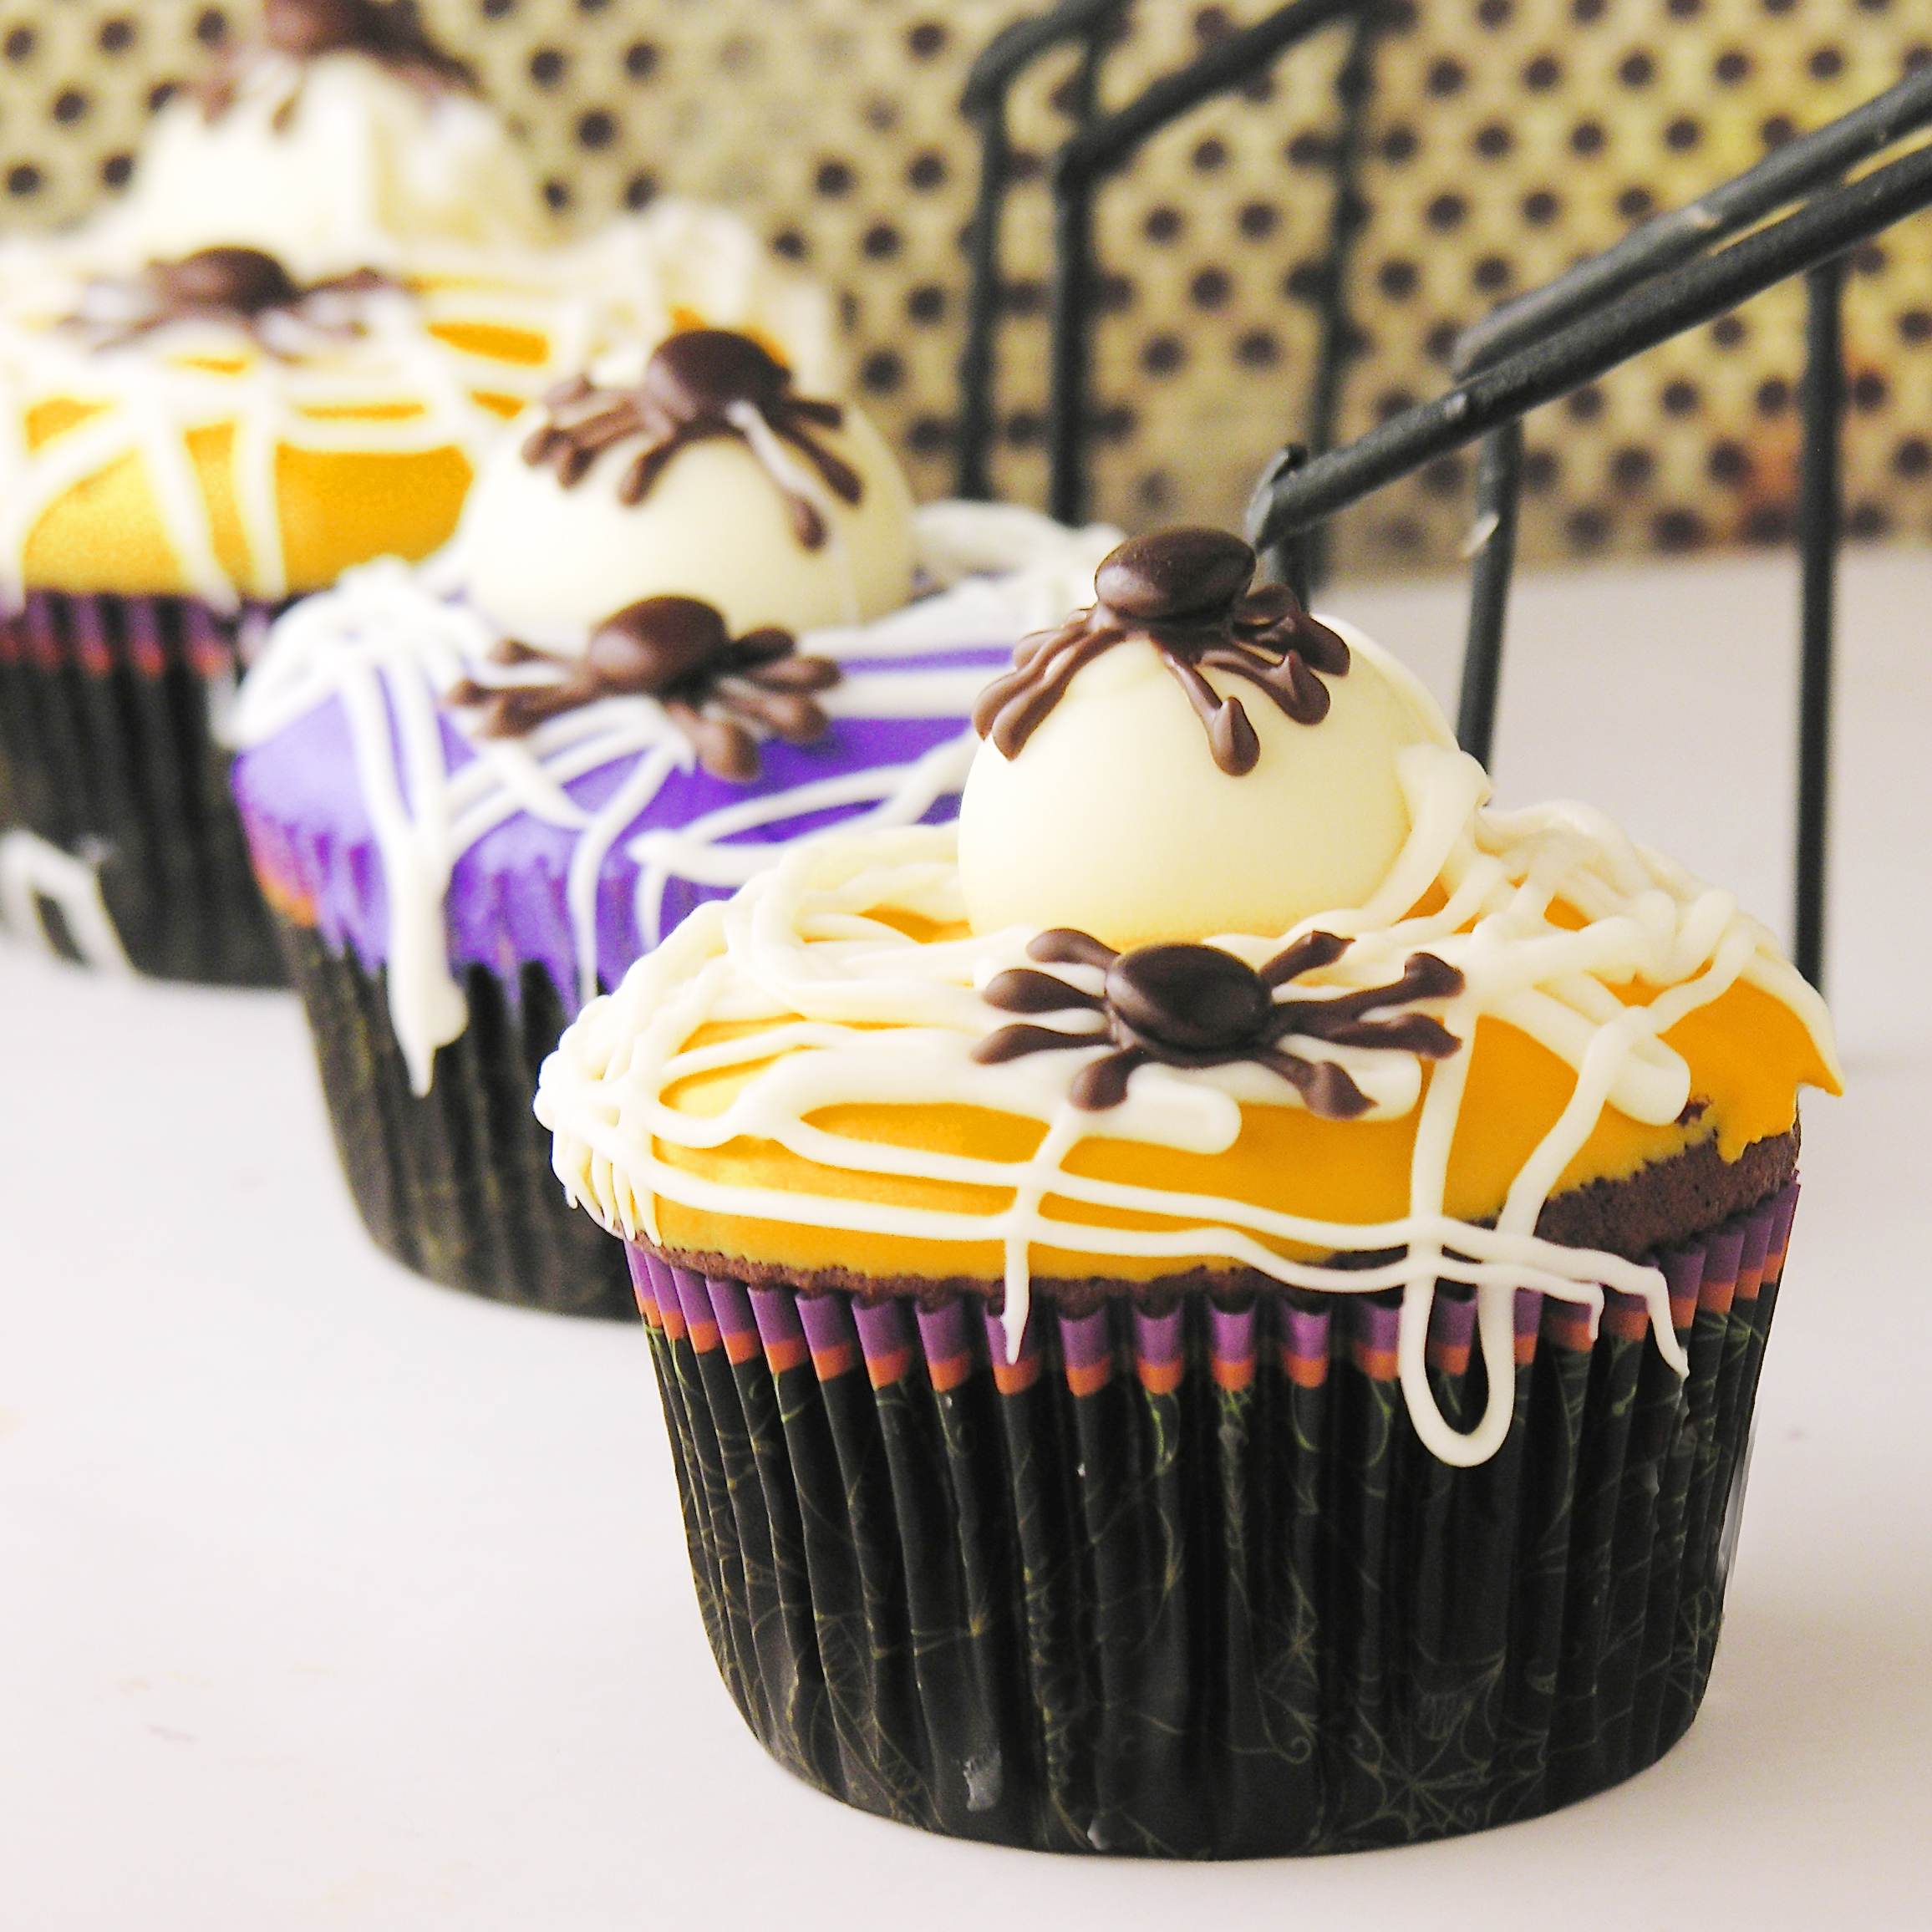
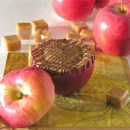
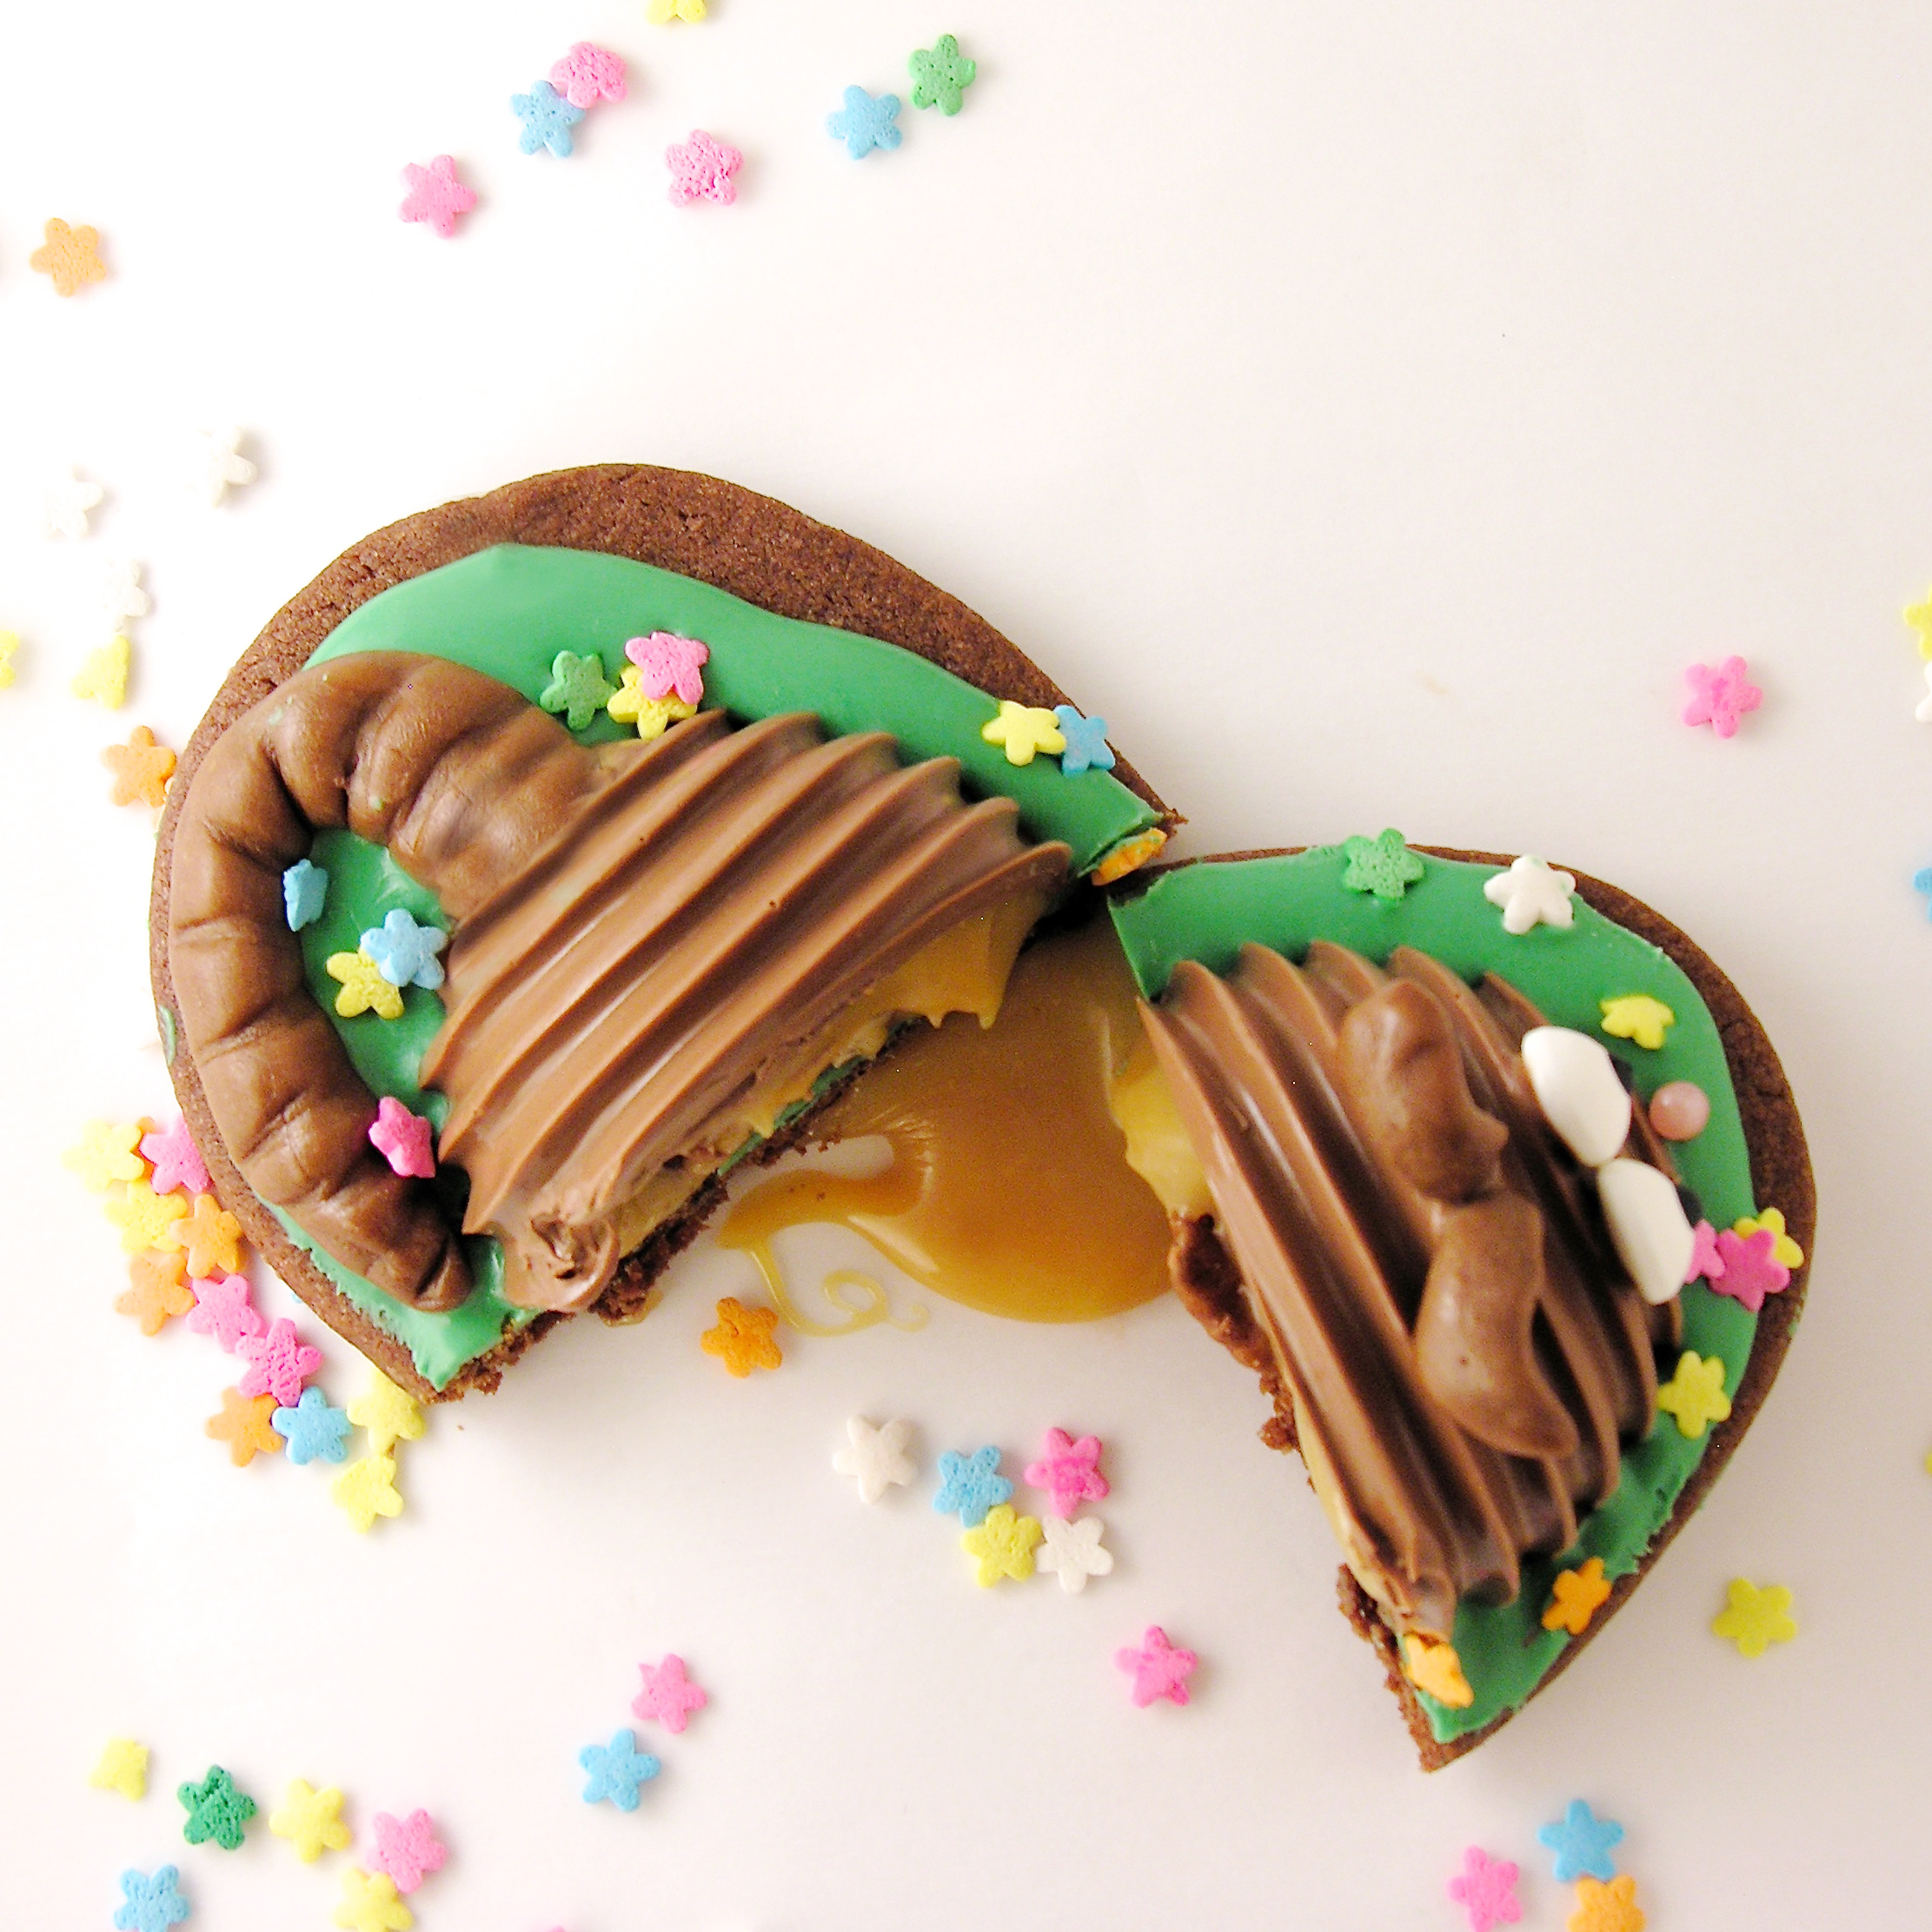
Or you can add a few caramel worms to your apples to give them an extra “Ewwww” feel- maybe for Halloween?? 🙂

Either way, these are an easy and fun fall treat that keeps for weeks when wrapped up in a cello bag.

Here’s how we made them: (printable recipe here)

INGREDIENTS: (makes about 24 pops)

  • One box of Double Stuf Oreos
  • 24 lollipop sticks
  • 2 bags of Wilton’s Candy Melts in red, yellow or green
  • About 5 tootsie rolls
  • About 1/4 cup of fondant, colored green (you can make a small batch of this or just purchase a box of Wilton’s)
  • leaf cookie or fondant cutter
  • Heart sprinkles (as desired to decorate)
  • 5-10 Kraft caramels to make worms if desired.

DIRECTIONS:

(if you have never made an Oreo Pop before, our how-to is here)

  • Twist apart all of your Oreos.
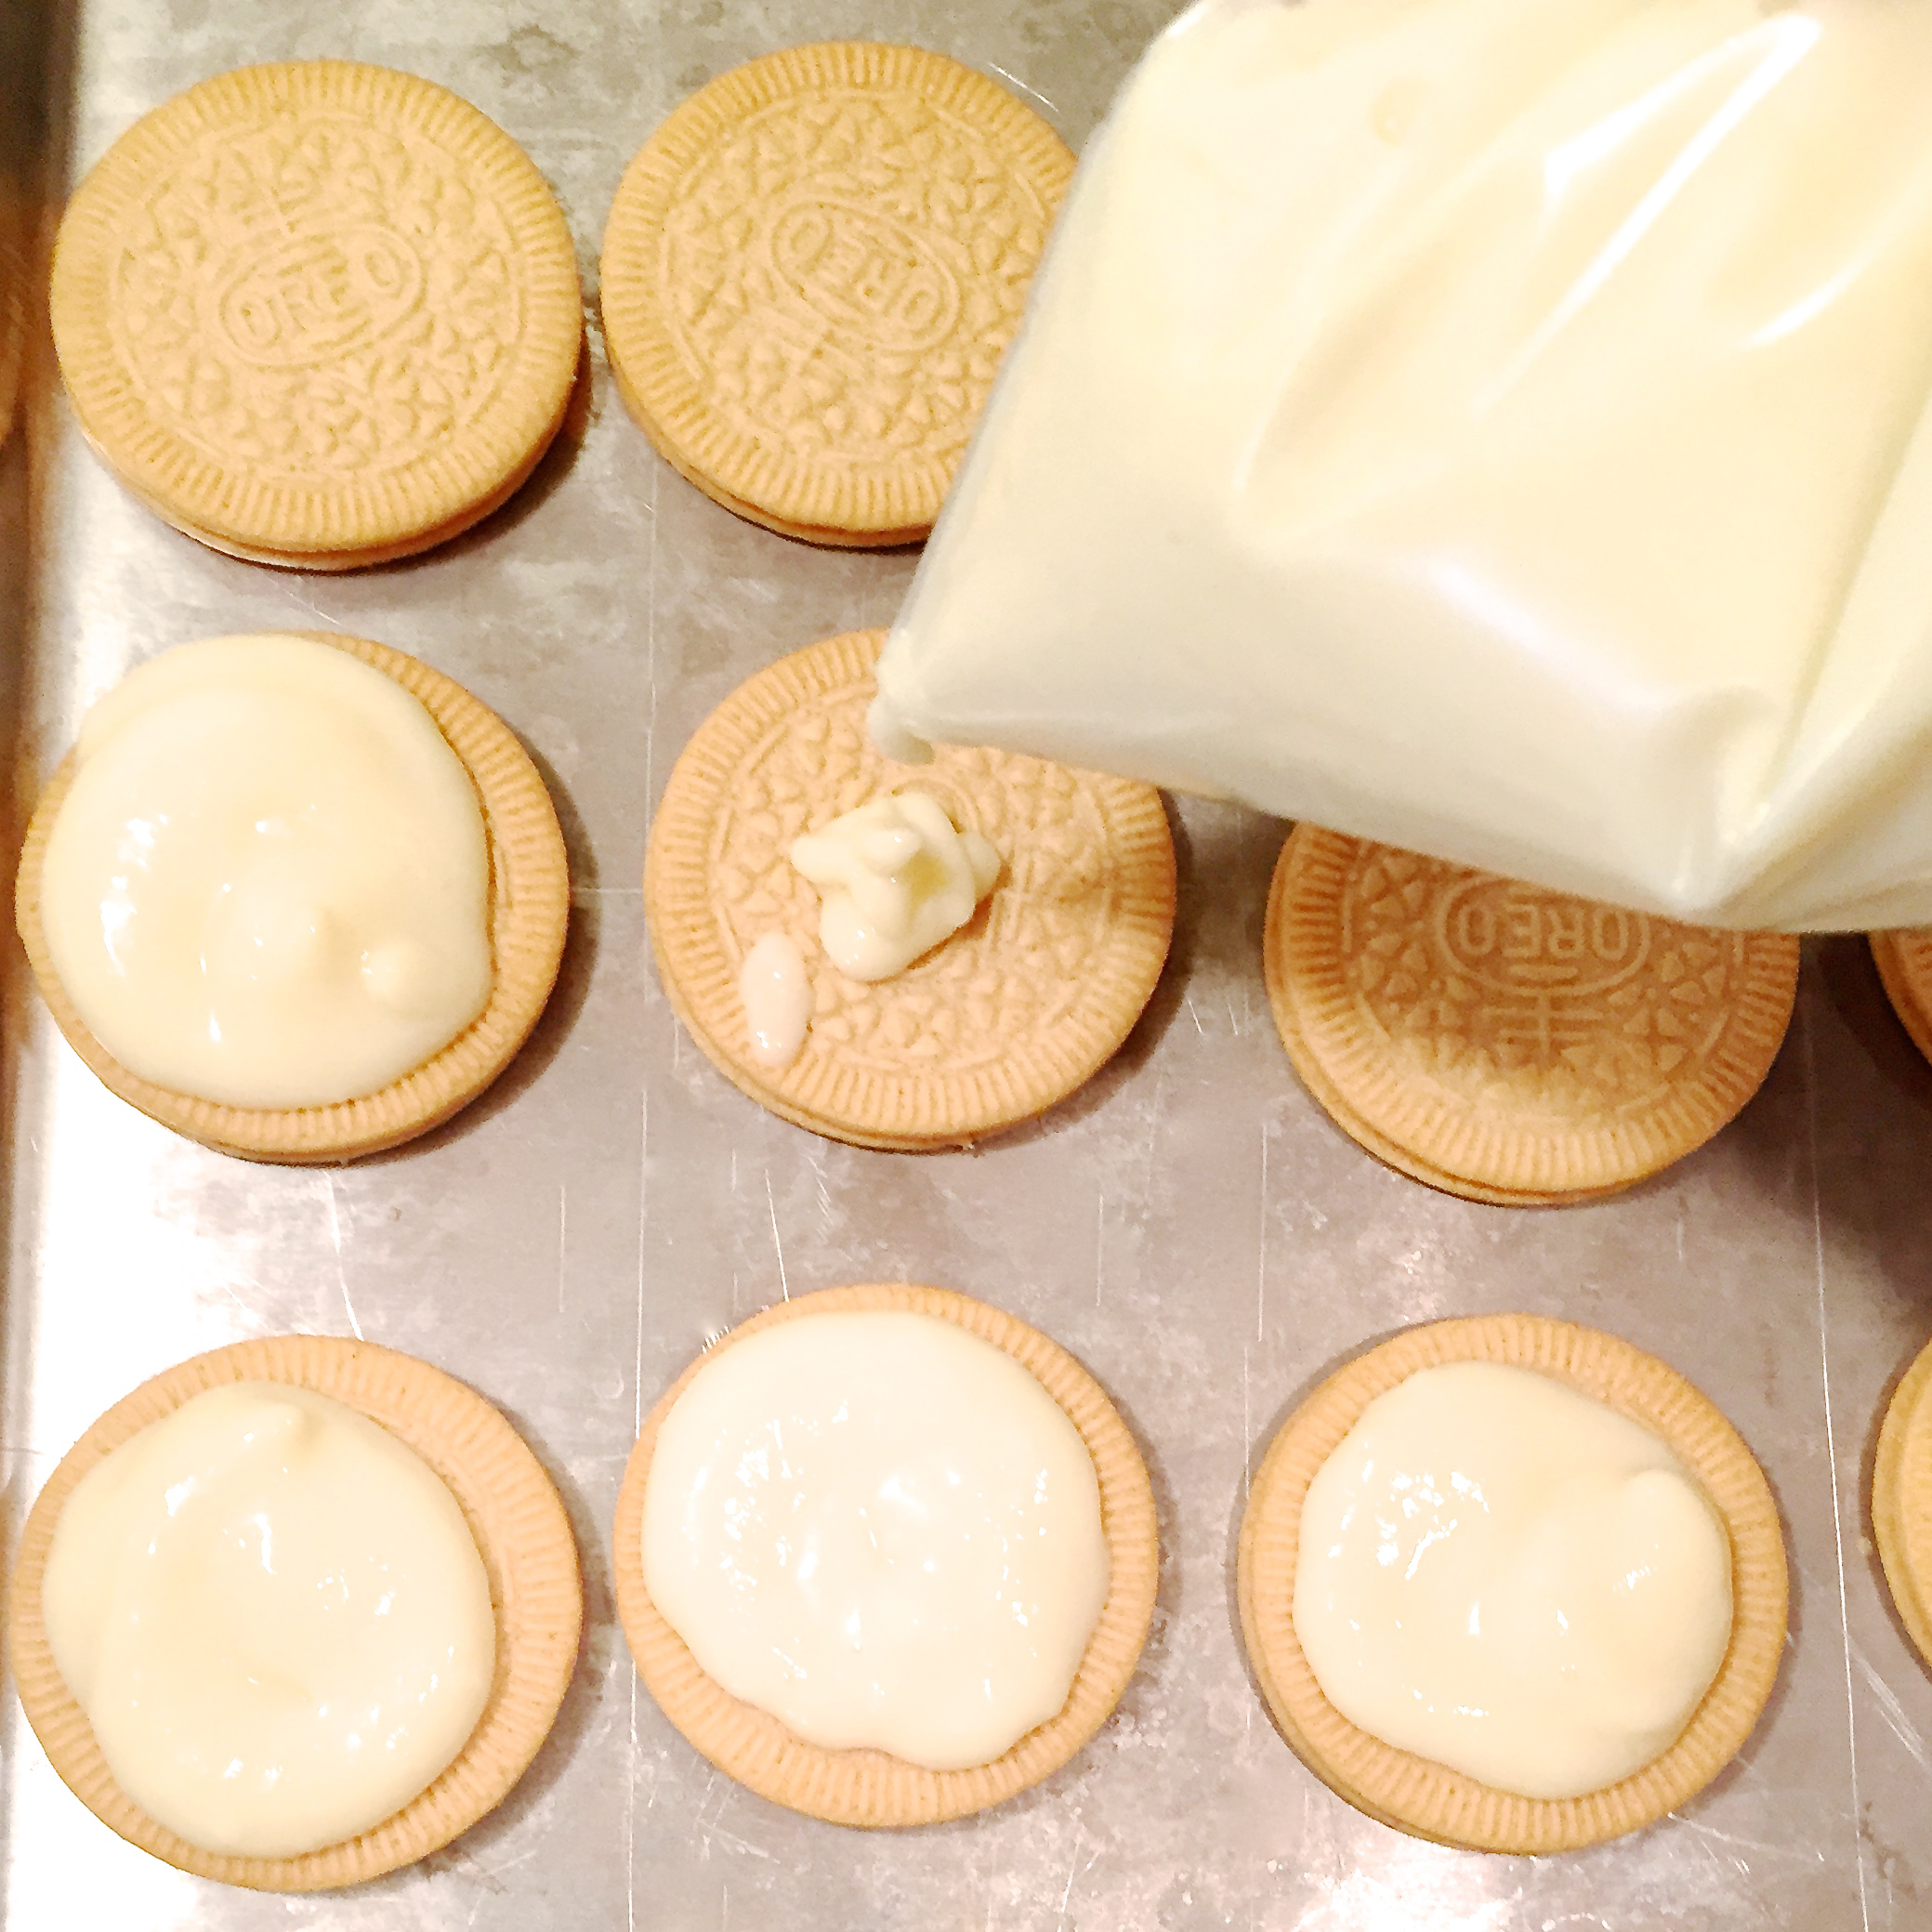
  • Melt a small amount of candy melts (<1/4 cup) in the microwave in 3o second increments, stirring between until smooth.
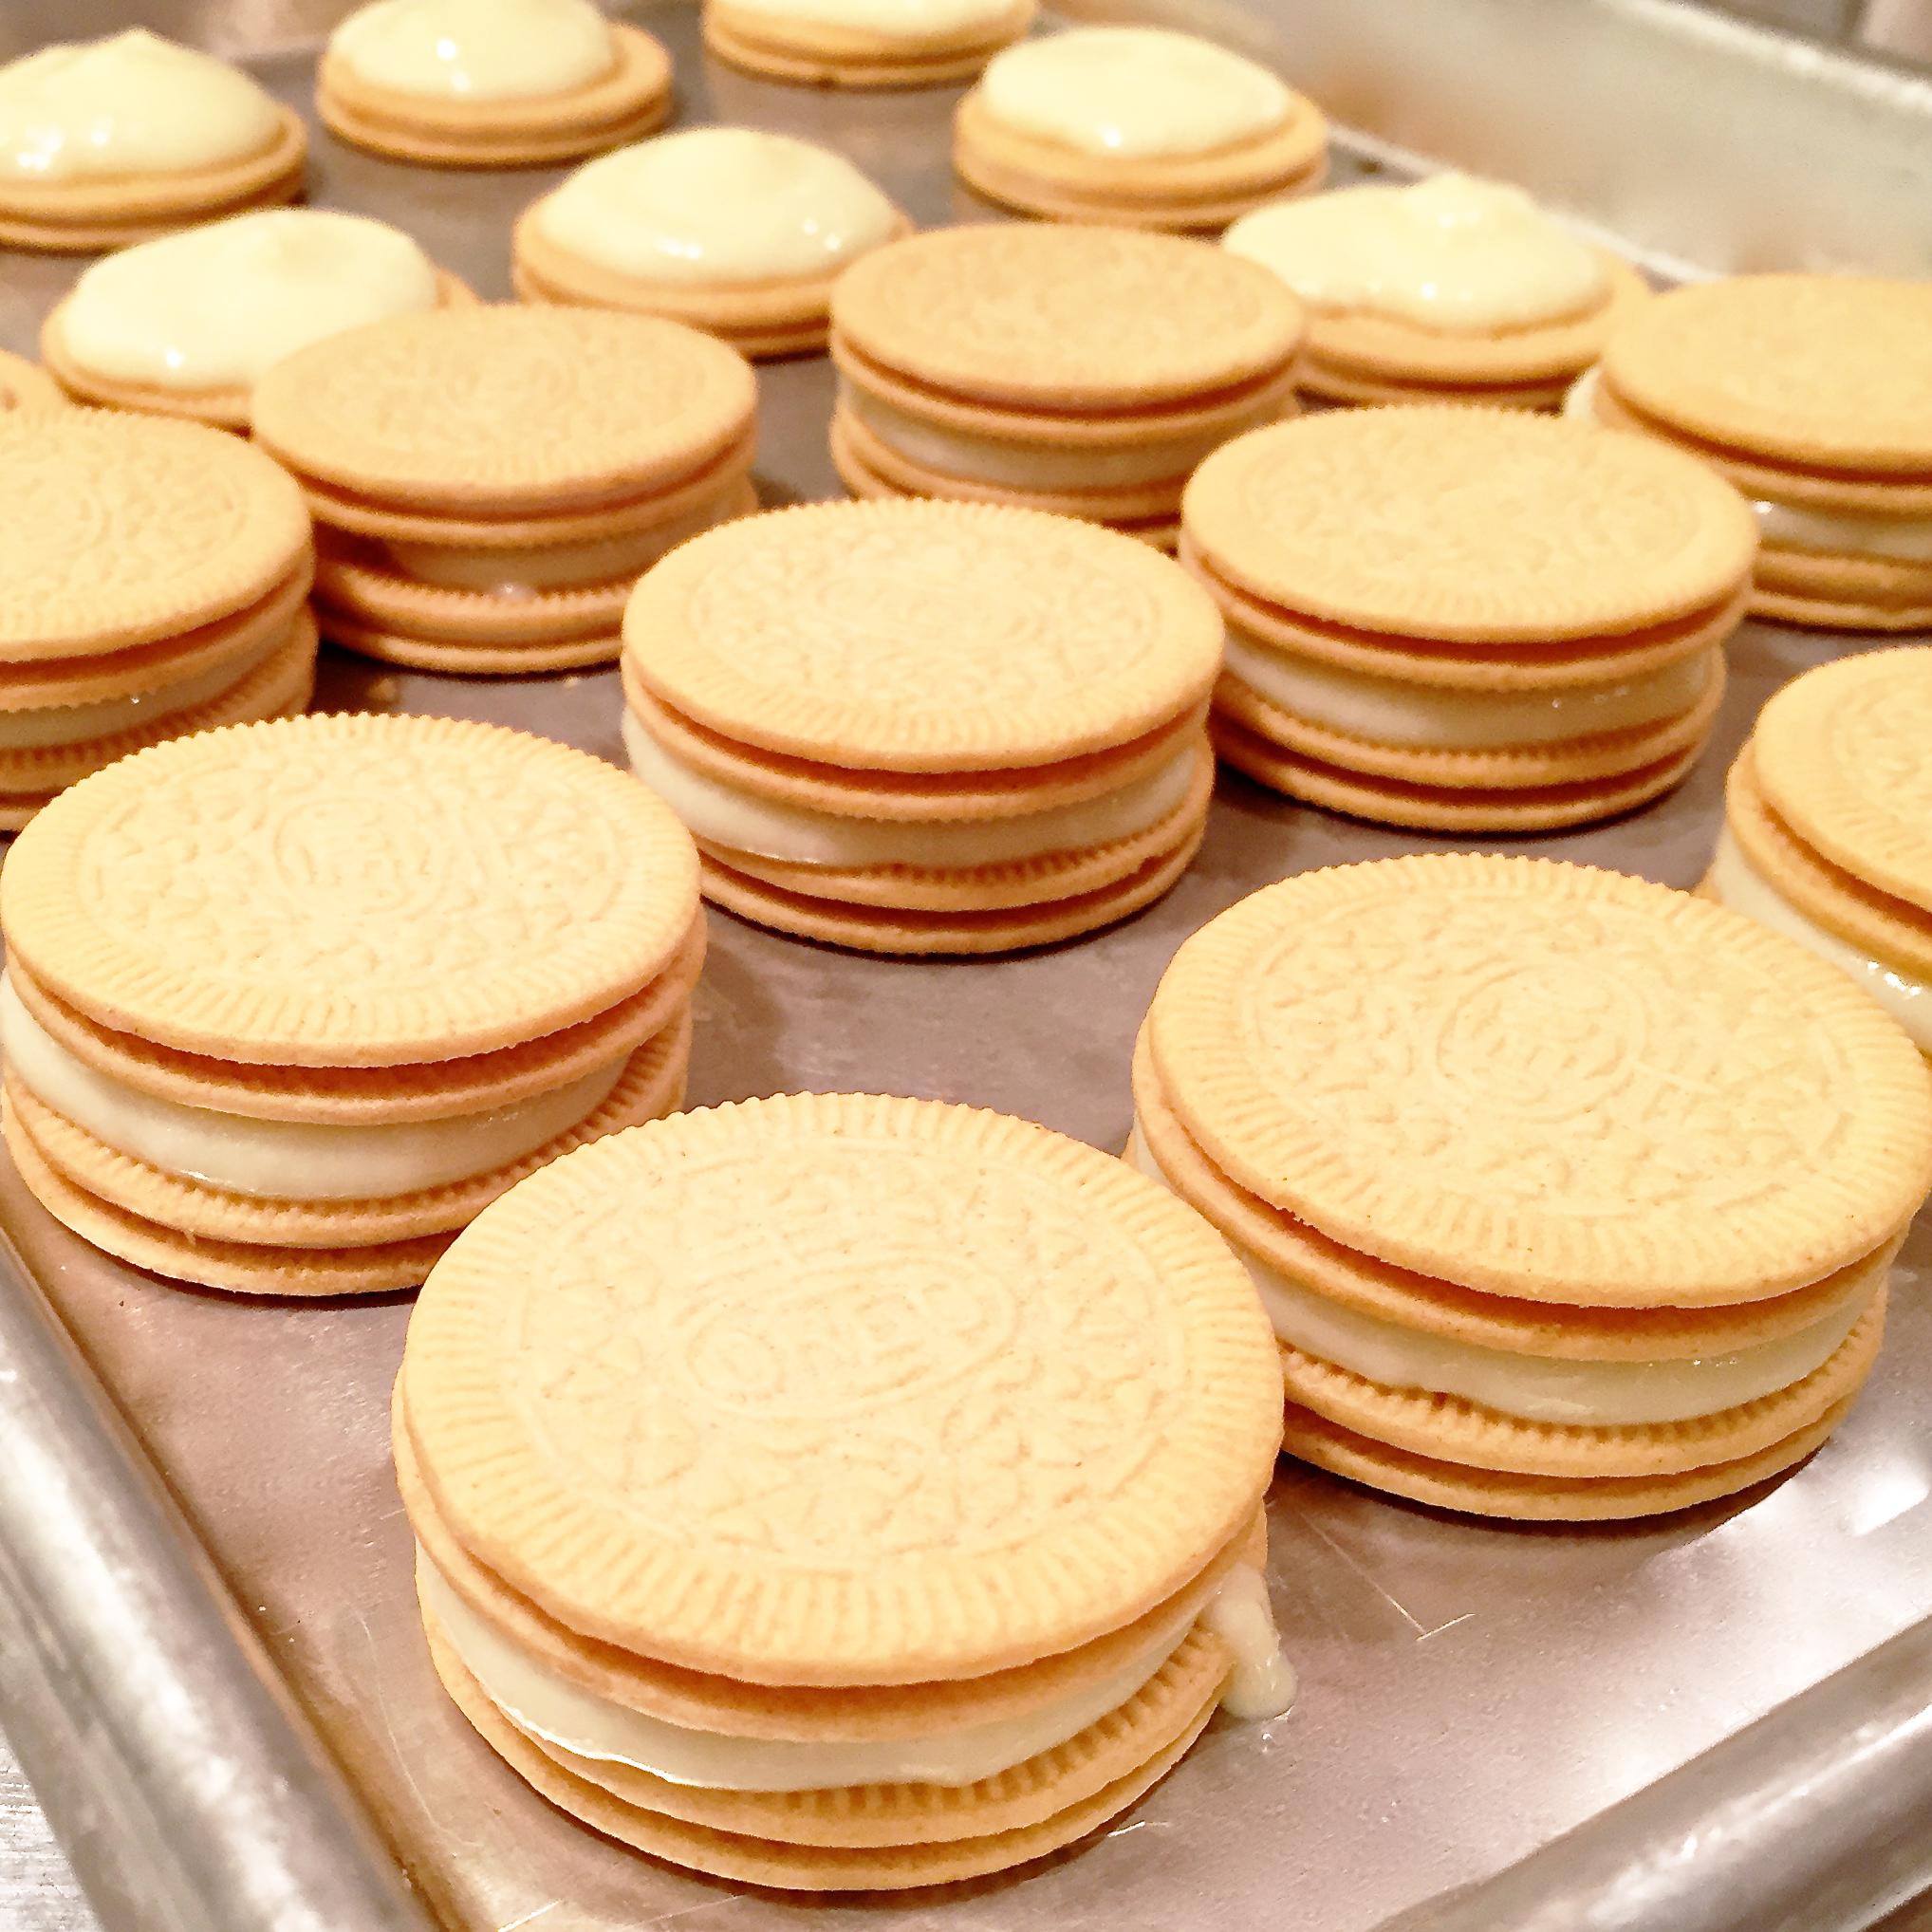
  • Dip the end of a lollipop stick into the melts, and press into white filling of Oreo. Place other half of cookie back on top and press together.
  • Place Oreo and stick on a cookie sheet. Repeat this process with remaining Oreos, and then freeze all Oreos until firm (10-15 minutes).
  • While Oreos chill, make stems, leaves and decorations.
  • Make stems by rolling tootsie rolls out and cutting into short pieces.
  • Take colored fondant and roll it out. Use leaf-shaped cutter to cut out 24 leaves.

Apple Oreo PopsApple Oreo Pops- adding leaves

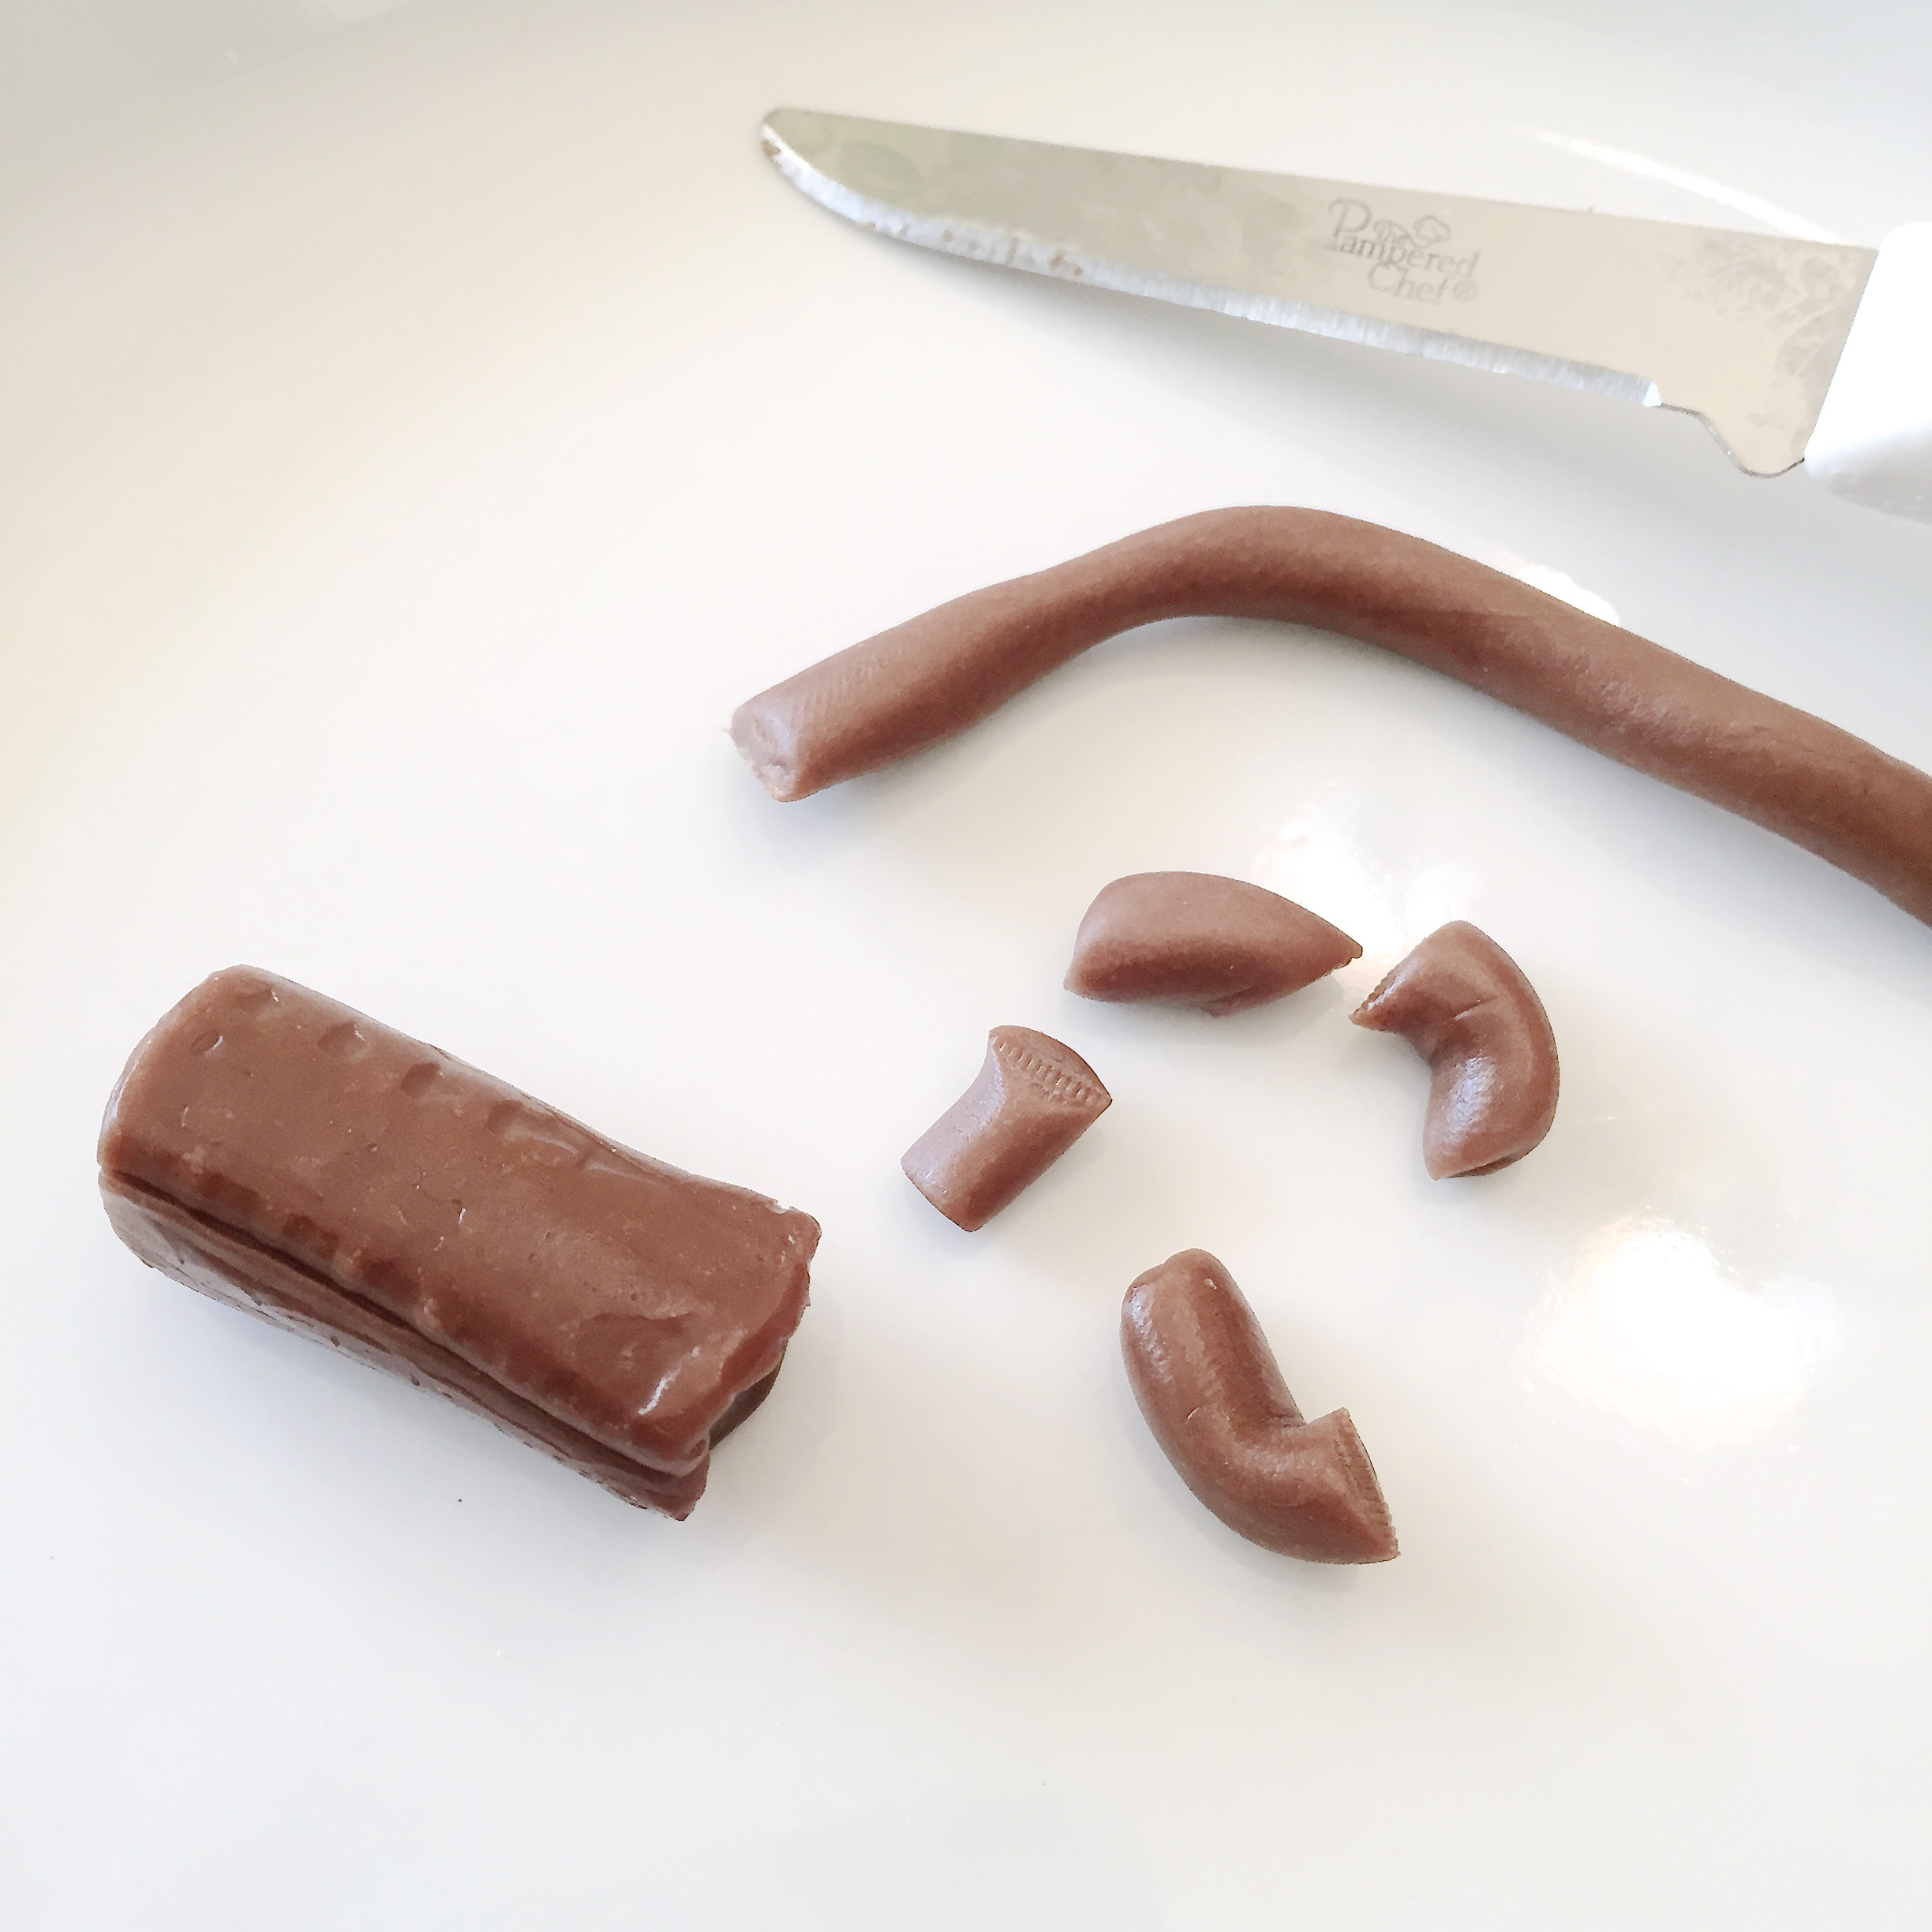
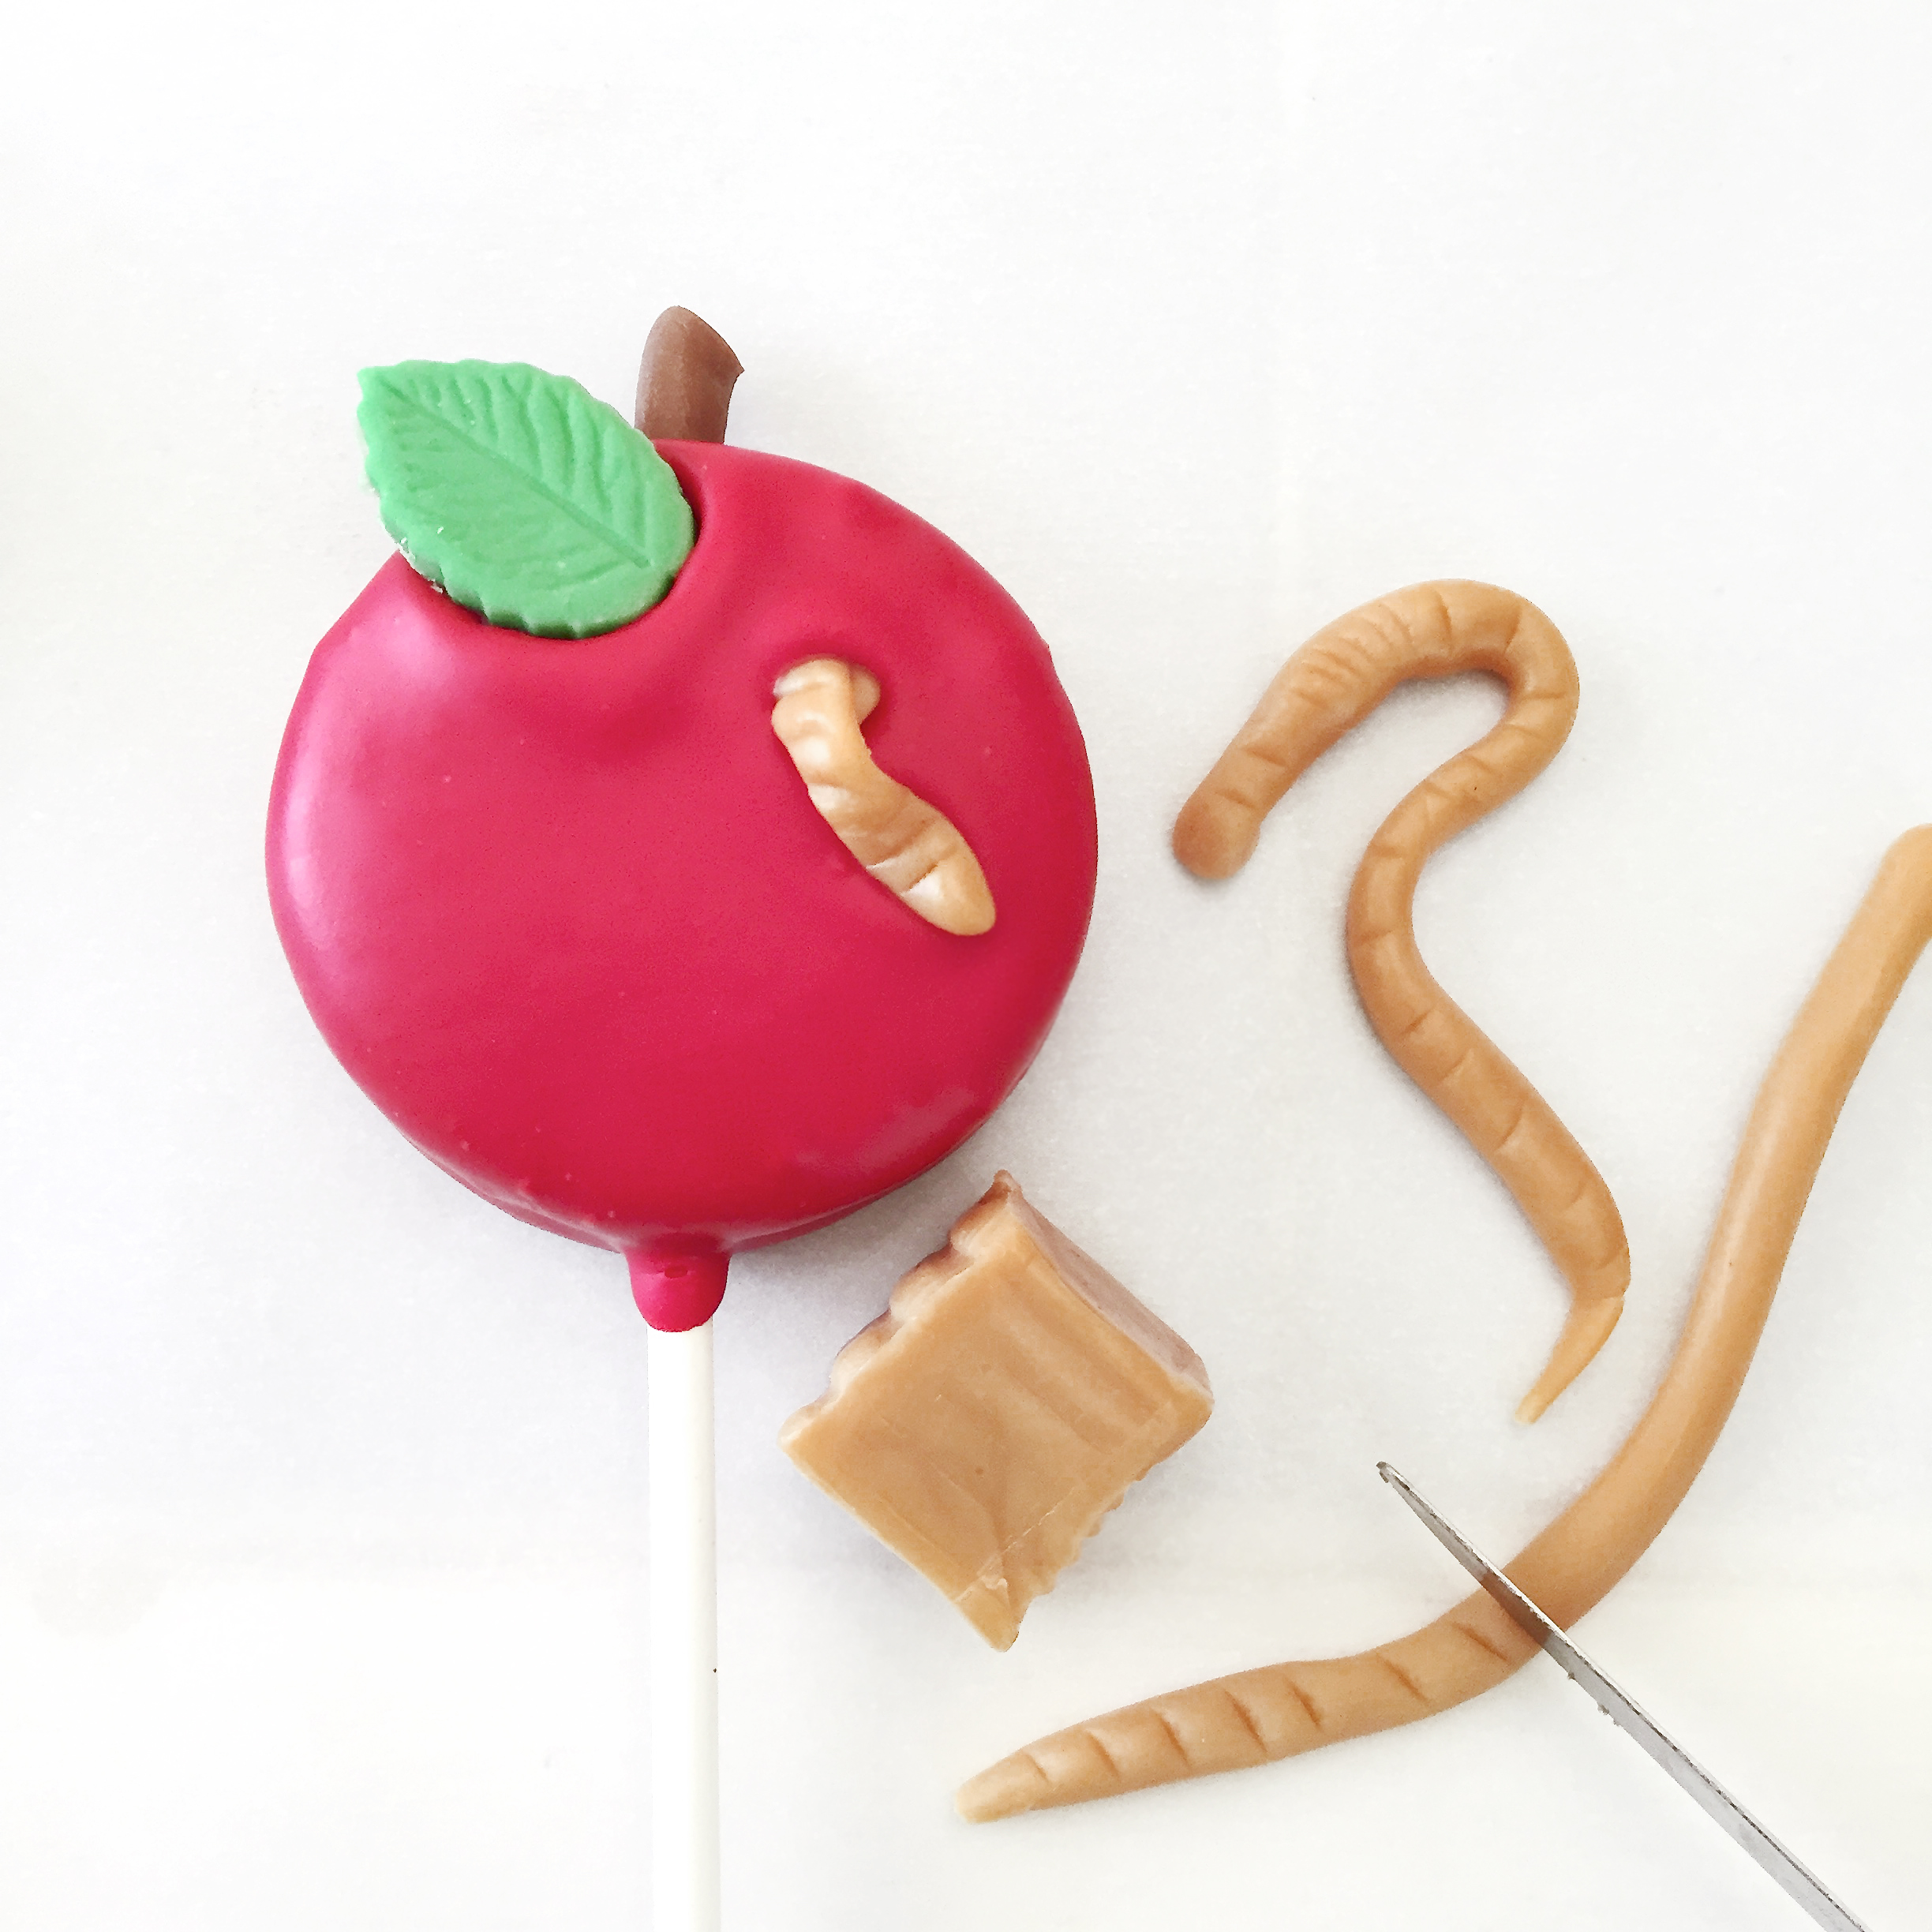
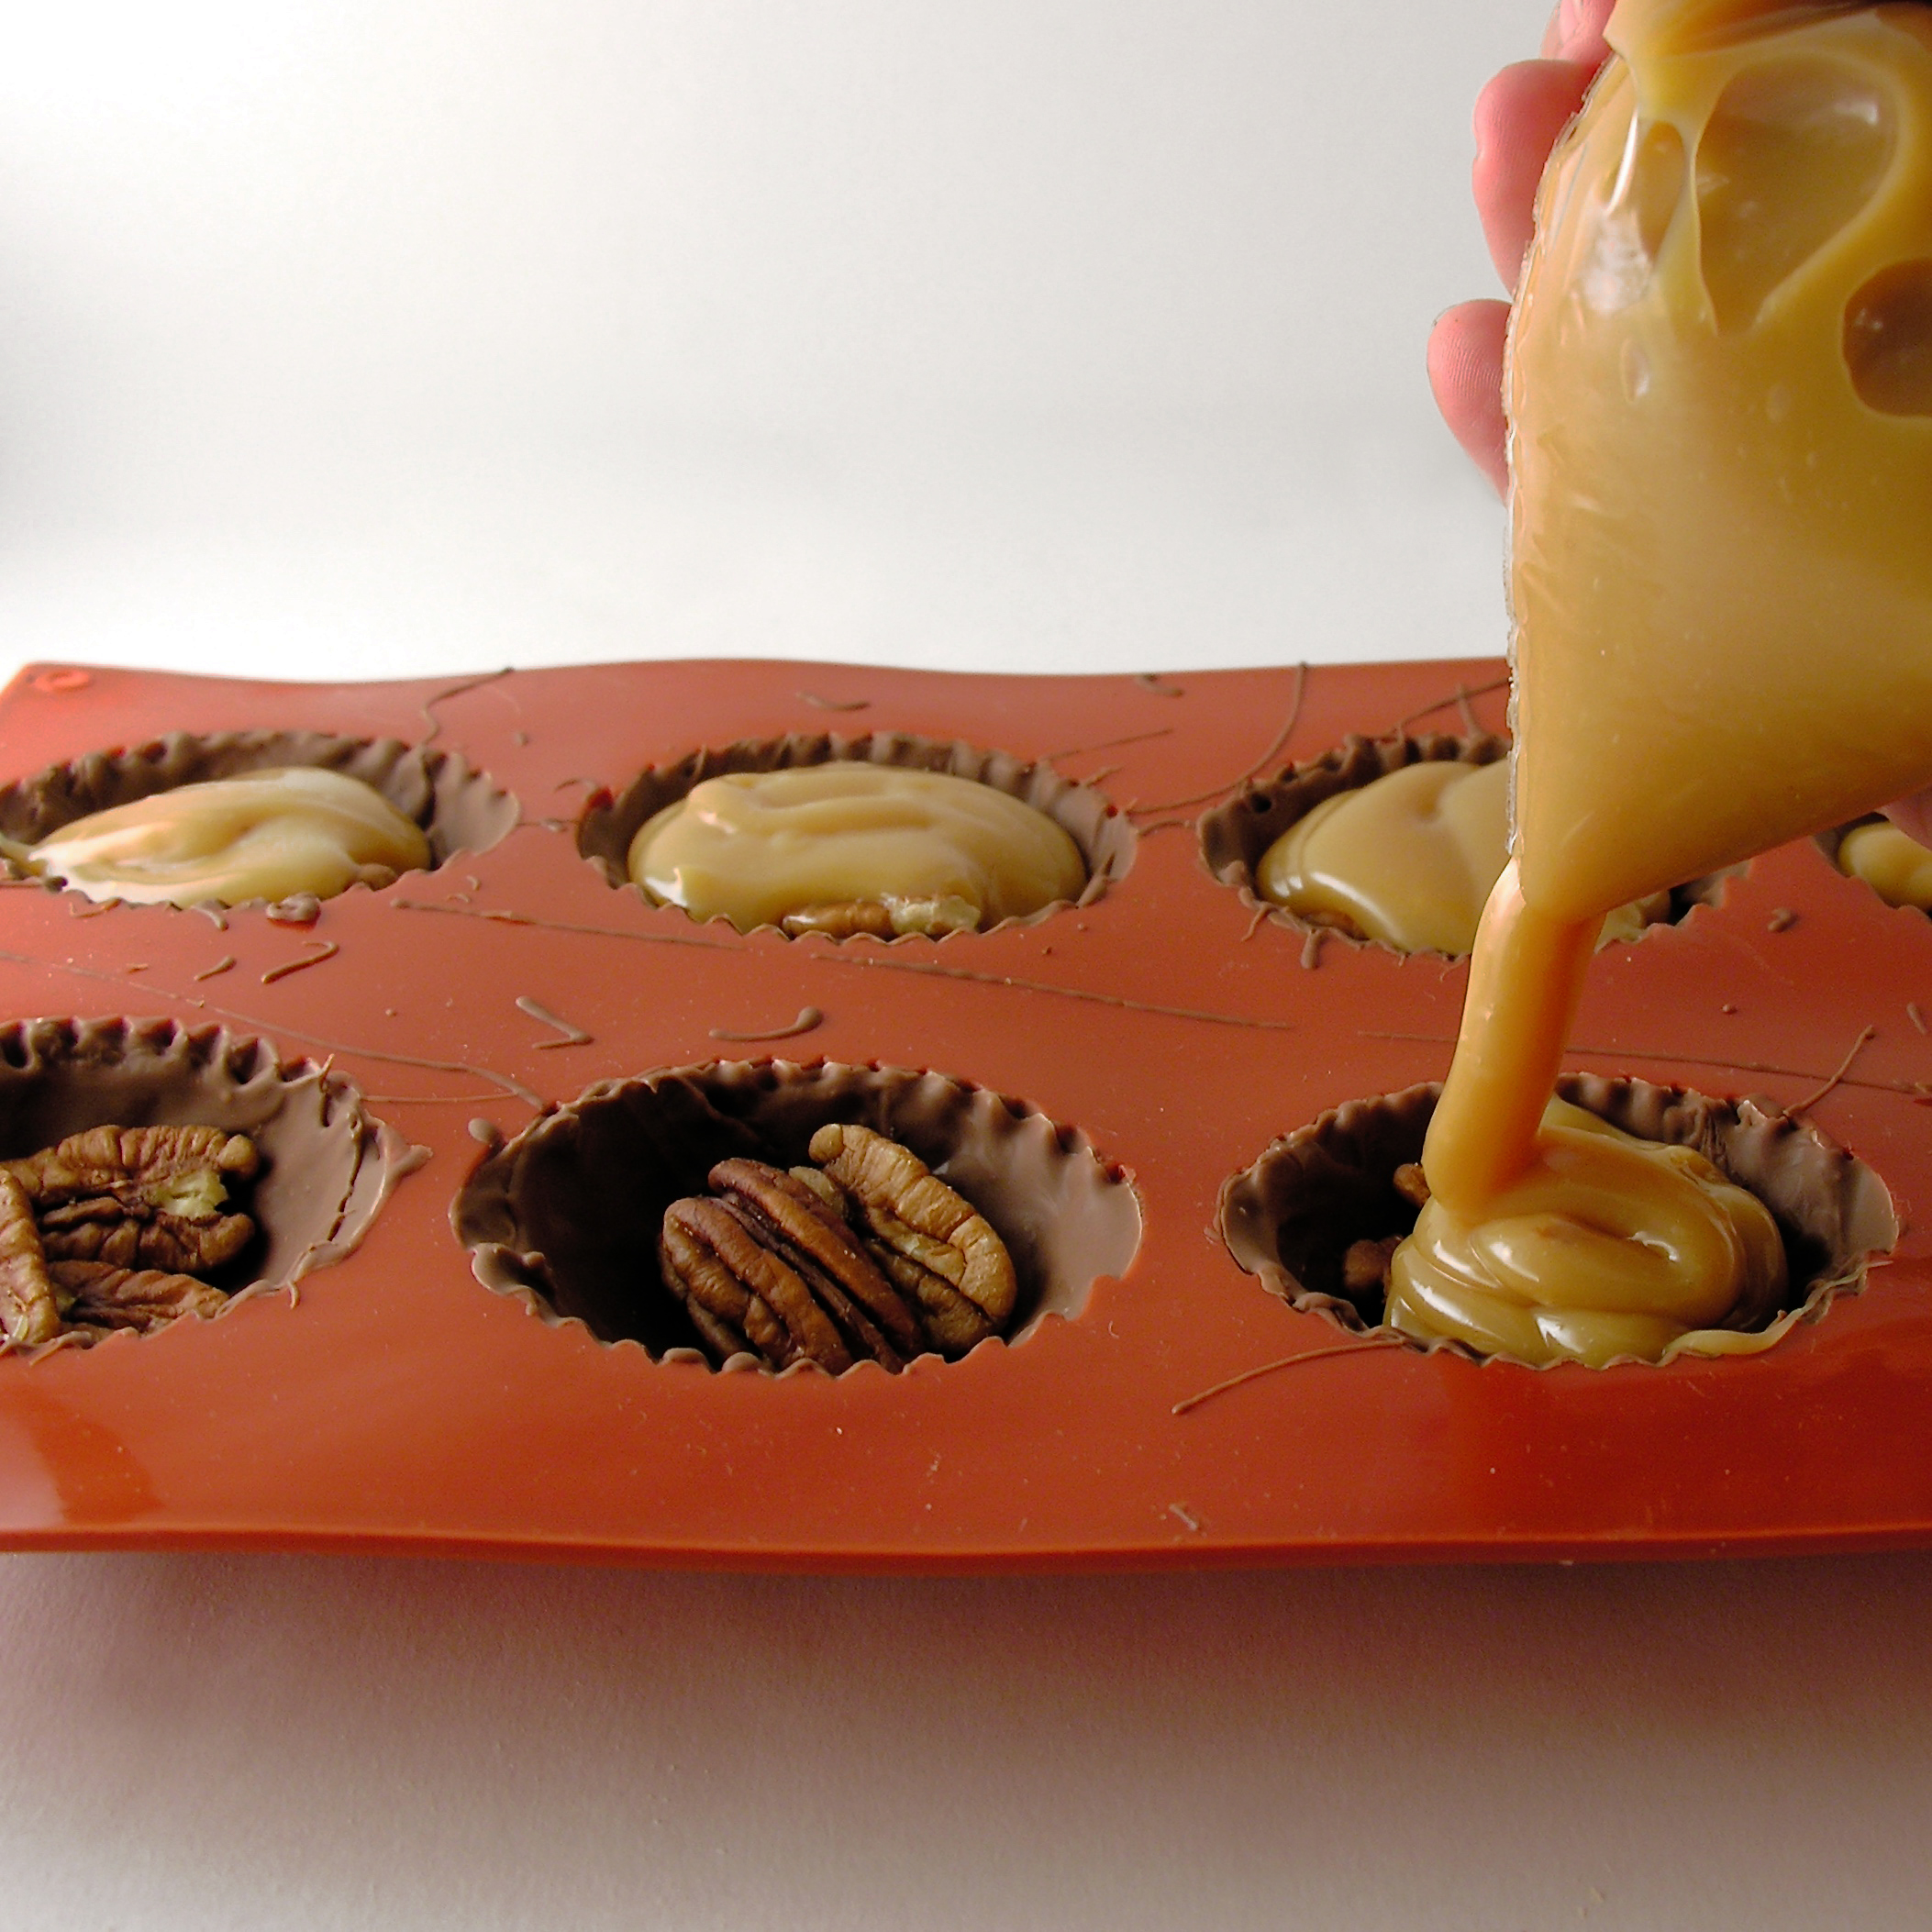
  • If you want wormy apples, simply unwrap a caramel, roll it out into a thin rope using clean hands, and press little lines in it using a small knife or toothpick. Cut them into little pieces to add as if they are crawling out of each apple.

Apple Oreo Pop- making caramel worms!

  • Melt one bag of Candy Melts using method from above.
  • Once Oreos are chilled, hold with stick and dip into Candy Melts until completely coated.
  • Tap on side of bowl to get excess off, and drag across lip of bowl to scrape excess off back of cookie.
  • Set on parchment paper to harden.
  • Immediately set a tootsie roll stem on the top, along with a leaf.
  • Add any other decorations (hearts? worms…?)
  • Melt and use second bag of Candy Melts when you are finished with the first one.
  • Allow Oreos to harden up (at least an hour) before tying each one up in a bag (or putting them in an air-tight container for storage).
  • Enjoy!


Apple Oreo Pops5

My thoughts: You just can’t go wrong with Oreo Pops. They are one of my favorite things to make because you have fun treats handy for awhile afterward!  These are pretty easy- you might hesitate a little with using fondant if you have never used it before- but you should just give it a try! I don’t cover cakes in it or anything crazy- but I like it for little decorations here and there. My recipe and some tips are here. Otherwise just buy a box of the white fondant! It doesn’t taste as good, but for the little bit you are adding here, it doesn’t matter. I really hope you get a chance to try these! Happy almost-fall to you! ~r

More apple-y ideas here on Easybaked: (click on the photo to see the recipe)

Apple Cupcakes!Inside-out Caramel Apple!!Caramel Apple CupcakesGreen Apple Truffles

Advertisement

Key Lime Layer Cookies

Posted on

Key Lime Cookies

Layers of cookie, key lime pie filling, and white chocolate make these an irresistibly refreshing summer treat!

So. You know those new “healthier” Oreo Thins cookies? I found a way to make them unhealthy. Still a reasonable indulgence, but not the super-low calorie tiny sliver of a cookie they were created to be.

I present: Key Lime Layer Cookies!!!!

Key Lime Cookies

Creamy Key Lime filling sandwiched between two Oreo Thins and dipped in white chocolate. YUM!!! These are incredibly easy to put together and such a delicious, creative, and beautiful treat!

Key Lime Cookies4

Here’s how we made them: (printable recipe)

INGREDIENTS: (makes 20 cookies)

  • 3/4 cup of key lime juice (I squeezed ’em!)
  • 1 can of sweetened condensed milk
  • 1 egg
  • 1 package of Oreo Thins in vanilla
  • 1 bag of Wilton’s Candy Melts in white
  • Colored sugar (if desired for decorating)

DIRECTIONS:

  • Preheat oven to 350F degrees.
  • Combine lime juice, condensed milk and egg together in a small mixing bowl.
  • Pour into a small baking dish and bake for 20 minutes.
  • Spoon into a cool bowl and chill in freezer for 30 minutes to cool.
  • While cooling, set 1/2 box of vanilla Oreo Thins out on a baking sheet that will fit into your freezer.
  • After lime filling is chilled, stir and spoon into a large zip-top bag. Clip a corner off and pipe filling on top of each Oreo- not quite going to the edges.
  • Gently set an Oreo Thin on top of the filling. Don’t press too hard or the filling will come out on the edges. Use up all the cookies in the box.

Key Lime Cookies6Key LIme Cookies7

  • Gently slide this baking sheet into the freezer and freeze for 1 hour.
  • Melt Wilton’s Candy Melts in microwave in 30 second increments, stirring between until smooth.
  • Take chilled cookie and place it into melted chocolate. Quickly spoon over the top and sides.
  • Lift the cookie with a fork and tap on side of bowl until excess drips away. Slide bottom edge of cookie along side of bowl to get rid of excess on bottom and set on parchment paper to harden.
  • Repeat with remaining cookies. You may want to keep cookies in freezer before dipping, and only take maybe 4 or 5 out at a time to work on.
  • Decorate as desired. If you want sugar sprinkles, add these before the candy melts harden back up. 
  • Enjoy!

Key Lime Cookies2

My thoughts: These are easy and fun to make, and they keep for up to a week in the fridge! You will have a little pie filling left at the end, but you could get a little more white chocolate and a few more cookies to use it up -if you want. I’d guess you would have enough filling for another 8-10 cookies. Another helpful hint- make sure these are cold when you dip them, and don’t linger and let them sit for a long time in that melted chocolate. Sprinkle sugar on top while they are still melted. I hope you enjoy these as much as I did!!  ~r

Key Lime Cookies5

Other key lime desserts here on Easybaked: (click on a photo to see the recipe)

Key Lime PieKey Lime CakeKey Lime Cupcakes!Key Lime Tartlets

Caramel Armadillos

Posted on

Caramel Armadillos1

Caramel Armadillos. Because Caramel Turtles are soooooo yesterday.

I have this great, really easy, caramel filling. It’s great on ice cream, in brownies, in cupcakes and even by the spoonful. I love it. I decided this week that I wanted to make turtle cookies with it, and I was struck by how boring and predictable caramel turtles are. Why turtles? Who started this trend? I turned to Wikipedia for answers. I was still bored.

I decided to make caramel armadillos instead. Not only are they WAY cuter than turtles, but it’s really fun to say “caramel armadillos”.

Try it… five times fast!

You know you want to… 🙂

Caramel Armadillo
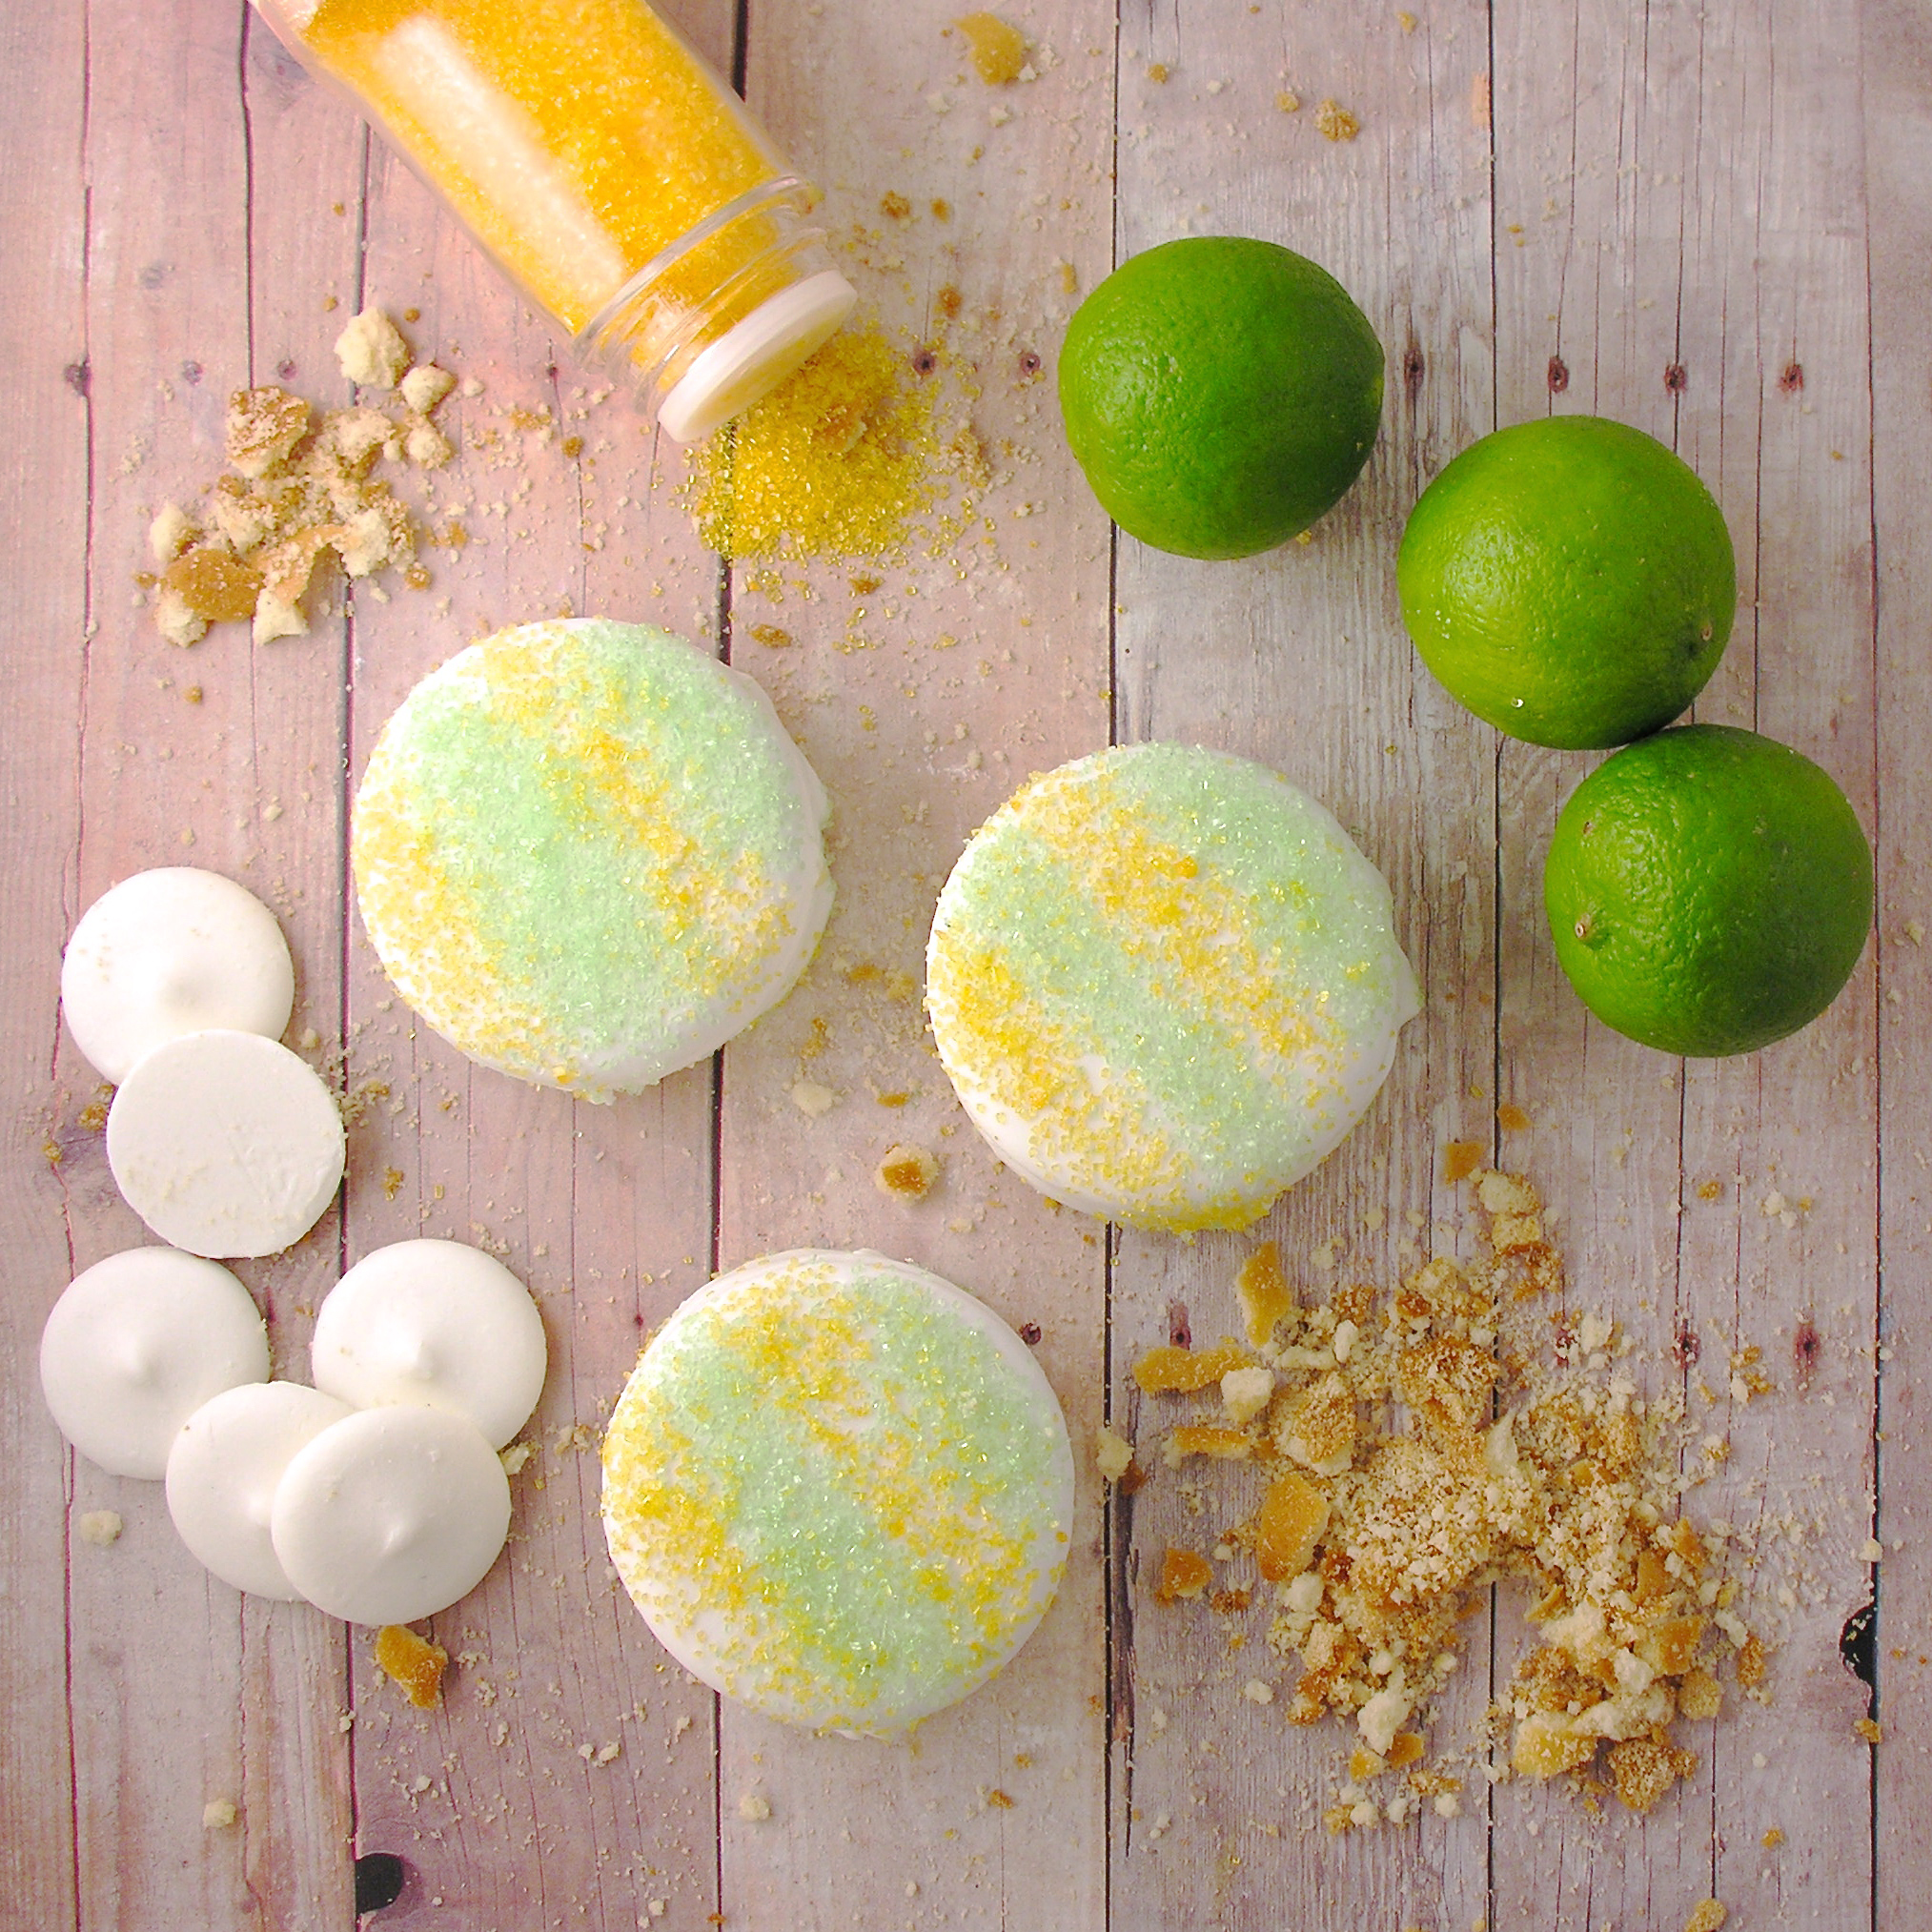
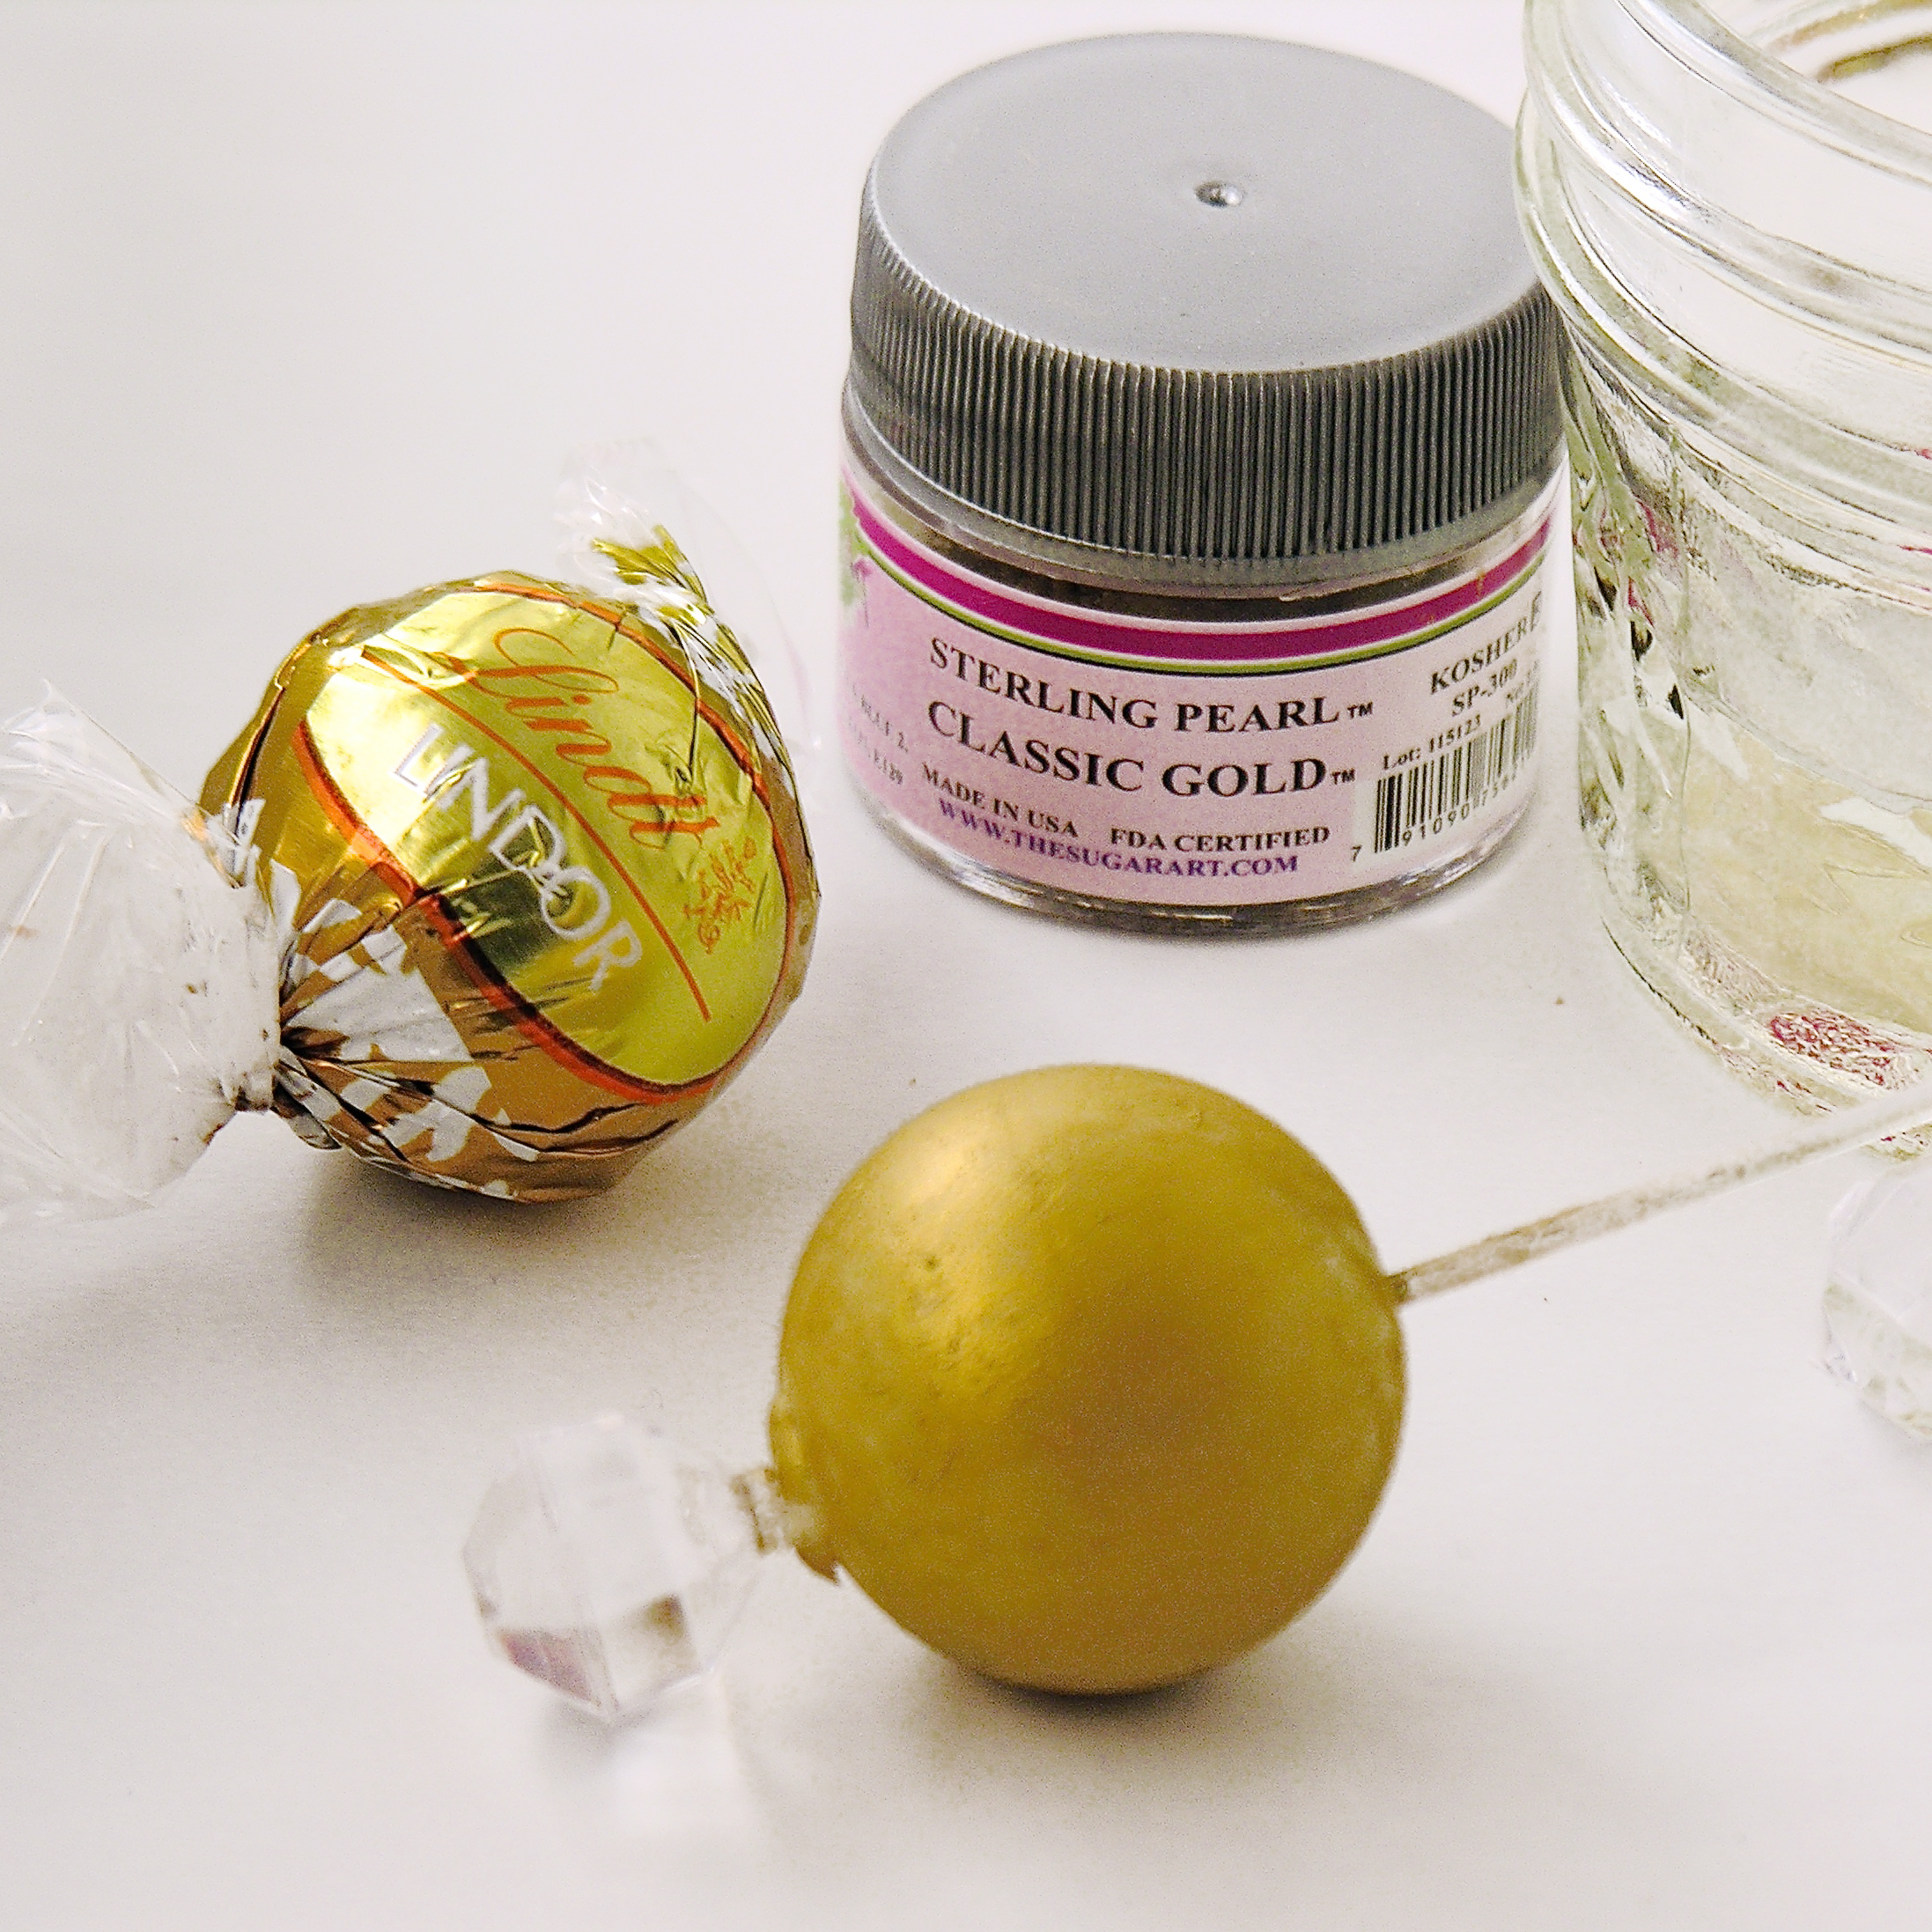
A couple weeks ago I was waiting for a friend to meet me for coffee and I stumbled upon these cute little chocolate molds on Amazon. They are supposedly Easter eggs, but when I decided to make Armadillos they came to mind as the perfect thing to use! All I needed was a tail and ears… and a tootsie roll would suffice!

SO caramel armadillos were born- and they are neither boring nor predictable!

Armadillo3Here’s how I made them: (printable recipe)

INGREDIENTS: (makes about 20 armadillos)

  • 32 Kraft Caramels (unwrapped)
  • 1 can (14 oz.) of sweetened condensed milk
  • 1 stick (1/2 cup) of butter
  • Whole pecans- about 3 per armadillo
  • 1 bag (32 oz/2lbs) of Merckens Milk chocolate wafers. 
  • about 40 candy eyes
  • 20 pink candy balls for noses
  • at least 25 tootsie rolls, unwrapped

DIRECTIONS:

  • Make caramel in a large saucepan over the stove by heating together the caramels, condensed milk and butter. Stir constantly until melted and smooth.
  • Pour into a small bowl and allow mixture to cool a bit (so it doesn’t melt chocolate when poured in).
  • Melt chocolate wafers in the microwave in 30 second increments, stirring in between until melted and smooth.
  • Use a food-grade brush, or pastry brush to “paint” the inside of the egg mold with chocolate. Paint two layers to make it nice and thick- you should not be able to see any of the mold showing through. 
  • Freeze until hard (5 minutes or so)
  • Place cooled caramel into a large zip-top bag, zip tightly closed and clip a corner off the bag using a pair of kitchen scissors.
  • Squeeze a little bit of caramel in each cup, set three pecans on the caramel, pushing them gently into it, then fill the remainder of the cup up with caramel.

**Note: If you are making just armadillos, don’t fill to the top because you will add a layer of chocolate on top once the caramel is hard. If you are placing these on cookies, you can fill to the top and spread flat with a knife.

Caramel ArmadillosCaramel Armadillos

  • Place these in the freezer to harden (5-10 minutes) and then paint a layer of chocolate on the top of the hardened caramel and freeze again until hard.
  • Gently peel silicone mold away from chocolate and set on a plate to be decorated!
  • Unwrap 20 tootsie rolls and place for just a few seconds in the microwave to soften a little.
  • Pull and roll these into tails and use the side of a knife to press grooves along the length. Keep these on parchment paper until they harden up. 
  • Unwrap 4 to 5 tootsie rolls and cut them into little circles. Shape these into ears and keep with tails on parchment paper.

Caramel Armadillos!

  • To assemble, use dabs of melted chocolate to attach ears, candy eyes, nose and tails.

I made cookies for them to sit on. My original idea was for caramel turtle cookies, so I went ahead with the cookie plan and it does add stability to that tail (otherwise they are a little awkward to pick up!)

  • I used my favorite chocolate cookie cut-out recipe from here, and it made a few more cookies than I had armadillos for, but they are yummy cookies all alone!!
  • I used an egg-shaped cookie cutter a bit larger than the armadillo.
  • I added melted green candy wafers to the top- just spooned some on and spread it near the edges- and set a “open” caramel armadillo on top. The green wafers seal up the bottom and keep caramel from leaking out!
  • I set the tail on the melted green wafers and added flower sprinkles! Once everything hardened up I added the eyes, ears and nose.

Caramel Armadillo!

So….cookies??? Candies????  It’s up to you! I think they would be fun on a cake.

How awkwardly wonderful would a caramel armadillo cake be???

Caramel Armadillo Cookie

My thoughts: These are delicious. They are also a lot of work (being honest!). It would help to have your tails and ears shaped ahead of time and I was wishing SO hard for an additional mold. That would save time too. That said- I will totally make these again!!!! They were well- loved by adults and kids alike!  If this recipe seems like too much craziness for you, just make the caramel. Put it on ice cream and be happy!  Enjoy!!  ~r

Dulce de Leche caramel sauce form a can

Other recipes kids will love (click on a photo to see the recipe!):

Polka Dot Cake!!!Pile of Cupcakes!Hamburger Cookie!Edible Jello Earthworm Cupcakes

Mom’s Amazing Coffee Cake!

Posted on

Coffee Cake

This delicious coffee cake has hidden layers of cinnamon and pecans- and a yummy cream cheese frosting!

My mom used to make this delicious coffee cake whenever my grandparents (her mom and dad) would come to visit. I have great memories of sitting around the table having this with all of them and listening to all the “grown-up” talk. They were from Wisconsin, so a visit always meant a couple of days with us in Michigan. I’d get up early and take a long walk with grandpa and our overweight basset hound Max before breakfast, and return to a kitchen table full of family, laughter, and this coffee cake.

My grandparents lived very active and adventurous lives until they left us for heaven several years ago.

Mom, as those of you who keep up with this blog know, left us for heaven about a year and a half ago.

A friend sent me an article last week about 8 ways to celebrate Mother’s Day if your mom is in heaven. They were great ideas, and the very 1st one was, “Make her favorite recipe”. I think her favorite recipe was my grandma’s recipe for German Sauerbraten, but since desserts are my specialty, I decided on this coffeecake as my “remembering mom” recipe.

As my kitchen filled up with the smell of this baking, it made me smile. And remember.

Coffee Cake recipe

Here’s how to make it: (printable recipe)

INGREDIENTS:

Cake:

  • 1 stick of butter, softened
  • 1 cup of sugar
  • 3 eggs
  • 2 cups of flour
  • 1 teaspoon of baking soda
  • 1/8 teaspoon of salt
  • 1 cup of sour cream
  • 1 teaspoon of vanilla

Filling:

  • 1 cup of finely chopped pecans
  • 1 1/2 cups of brown sugar
  • 4 tablespoons of butter, melted
  • 4 tablespoons of flour
  • 2 teaspoons of cinnamon

Icing:

  • 4 oz. (half a package) of cream cheese
  • 4 tablespoons of butter, softened
  • 1/2 teaspoon of vanilla
  •  Dash of salt
  • 2 cups of powdered sugar
  • 1/2 cup of white chocolate chips, melted

DIRECTIONS:

Cake:

  • Preheat oven to 350 degrees and grease/flour a bundt cake pan.
  • Cream butter and sugar together.
  • Add eggs and beat well.
  • Add flour, soda and salt. Mix well.
  • Add sour cream and vanilla and mix well. Set aside.

Filling:

  • Combine all ingredients until completely coated in melted butter.
  • Assemble cake: pour about 1/2 of batter into prepared bundt cake pan, sprinkle more than 1/2 of filling on batter, pour remaining batter over filling and then sprinkle remaining filling over the top.
  • Bake at 350 degrees for one hour. Cool and tip out of pan onto serving plate.

Icing:

  • Combine all ingredients except chocolate in a large mixing bowl and beat on high until smooth and fluffy.
  • Add melted chocolate and beat until smooth.
  • Spread over the top of the cooled coffee cake.
  • Enjoy!

Coffee Cake!

My thoughts: Warm this up for a few seconds in the microwave before serving and YUM!!!  You can keep this cake in an airtight container in the fridge and serve it for several days. I hope your family enjoys this recipe as much as ours did over the years!!  ~r

Coffee Cake

Whether you are celebrating your mom in person, or thanking God for wonderful memories of her today, Happy Mother’s Day to you and to your family!

This one’s for you mom!

10178025_10152079947252513_4311481539876989298_n

Other recipes from my mom: (click on photo to see recipe)

Chocolate Chip CakeChocolate drop cookies!Pumpkin RollMint Creme Brownies

No, seriously…you have to try that 1st one…best. cake. ever. 🙂

Cookie Dough Layer Cake


Cookie Dough Layer Cake4Creamy cookie dough filling surrounded by rich chocolate cake and topped with a delicious chocolate glaze. An easy, beautiful and oh-soo-yummy dessert!

I’m in love with cookie dough. When I go to those fancy yogurt shops where you make your own sundae I am always tempted to skip the yogurt and just fill my dish with those little cookie dough bites. This easy (super, super easy) layer cake is filled with my favorite creamy cookie dough. I’ve used it to top cupcakes and to fill brownies— and now to fill cake. I love it. I think you will too!

As in most of my recipes, this dessert is made simple with the use of a cake mix (I used a Duncan Hines Dark Chocolate Fudge here), but you can substitute your favorite cake recipe instead. More work… but that’s up to you!

Cookie Dough Layer Cake2

Here is how we put this cake together: (printable recipe)

INGREDIENTS:

Cake/Filling:

  • One boxed chocolate cake mix (plus water, oil and eggs to make according to package)
  • 2 sticks (8 oz.) unsalted butter(softened)
  • 2 sticks (8 oz.) salted butter(softened)
  • 2 c. powered sugar
  • 1 c. brown sugar (packed)
  • 3 T. vanilla
  • 1/3c. flour
  • 1 (12 oz) bag of mini chocolate chips.

Glaze:

  • 1 1/2 sticks of salted butter
  • 1 12 oz. package of semi-sweet chocolate chips

DIRECTIONS:

  • Make cake mix (or your favorite cake recipe) and bake according to box/recipe in 2- 8 or 9 inch round pans.
  • Cool cakes completely.
  • While cakes are baking and cooling, make your filling.
  • Place all filling ingredients except mini chips into a large mixing bowl and beat with mixer on low until combined and then high until light and fluffy.
  • Add mini chips (keep about 1/3 of a cup aside to sprinkle on sides and top of cake) and beat on low until fully combined.
  • Make glaze by melting butter and chips together and set aside.
  • Once cakes are cool, trim the tops so they are flat.
  • Place 1 cake on serving plate, cut side up, and spread a little of the glaze on top. 
  • Spoon all of filling on top and spread all the way to the edge of the cake.
  • Place second cake on top, cut side down, and use a knife to smooth edges of filling flat between the two cake layers.
  • Sprinkle edges of filling with extra chocolate chips, and then pour glaze over the top and add the rest of the chips.
  • Refrigerate until firm.

Cookie Dough Layer Cake3

My thoughts: I wondered if the filling layer was too thick (it’s a lot of filling!) I knew that I would love all that cookie dough, but would others? They did. It got rave reviews and even a 2 thumbs up from a frosting-hater 🙂 You could make half of the filling recipe if you want- but it is honestly soooo yummy to have a big bite of cookie dough with every bite of cake. Wish I had some left…!  Enjoy!  ~r

Cookie Dough Layer Cake1


Other fun layered caked here at Easybaked (click on a photo to see the recipe):

Grandma's Chocolate Cream CakeKey Lime Cake!Strawberry Lemonade Birthday CakePolka Dot Cake!!!!!!

Berry Bomb Cupcakes

Posted on

Berry Bomb Cupcakes1

These delicious cupcakes are topped with a dome of raspberry cream and a touch of black raspberry jam- a perfectly pink Valentine’s Day treat!

I love berries over vanilla cake- it reminds me of summer and makes me smile. I got a little creative with the presentation, but I think that makes them just perfect as a Valentine– don’t you?

Berry Bomb Cupcakes3

These are incredibly delicious and fun to make. They use a fun (and inexpensive) silicone mold that I got here and have used before on my Peanut Butter Bomb Brownies. I just love how beautiful the dome of white chocolate looks atop these cupcakes! There are so many possibilities for fillings….!

Want to know how we made these cute little desserts? Here you go: (Printable recipe)

INGREDIENTS:

  • One boxed white cake mix (with water, oil and eggs to make according to package)
  • 1 large jar of black raspberry preserves
  • 1 can of strawberry frosting
  • 2 packets of Dream Whip
  • 3/4 cup milk
  • 1 tablespoon of raspberry extract
  • 6 tablespoons powdered sugar
  • Pink food color gel (to desired shade)
  • 2 bags of Wiltons candy melts in bright white.

DIRECTIONS:

  • Make cake mix according to package and divide into 24-28 cupcake liners placed in a muffin tin. Fill only about 1/2 full so that they bake up flat and not mounded up and over edges. Bake according to package.
  • Make Berry Bomb filling by combining Dream Whip, milk, extract, and powdered sugar in a mixing bowl and blending together with mixer until stiff peaks form. Add coloring to desired shade of pink.
  • Melt Wiltons candy melts and use a brush to “paint” the melts into the inside of the silicone mold. Do two layers and then freeze until hard (5 minutes).
  • Place filling into a large zip-top bag and clip a corner. Pipe filling into hardened cups- about 3/4 full- and then top with a little jam. 
  • Use a knife to spread jam flat and freeze another 5-10 minutes.
  • Carefully remove berry bombs from mold and place, round side down and sticky jam side up, on a wax-papered plate. Keep these cool until all bombs are made.

Berry Bomb Cupcakes5

  • Open strawberry frosting and warm in the microwave for about 15 seconds- just until it softens a bit when stirred,
  • Spoon frosting over tops of cupcakes, allowing it to spread to edges.
  • Gently set a bomb on top of cupcake, pressing it into the soft frosting (I used wax paper to touch chocolate to prevent fingerprints)
  • Allow frosting to firm up and hold the bomb in place.
  • Drizzle with a little red or pink melted candy melts if desired. Keep refrigerated until serving.
  • Enjoy!!!!!!!

Berry Bomb Cupcakes2

My thoughts: These are a fun and refreshing twist on a berry-topped cupcake. The bombs take a little time to make- since you have to to do them in batches of 6. I recommend you start making them when you start the cupcakes. You can be in and out of the freezer while you are baking and save a little time. My other thought- serve these with a fork!!! When you bite into them and that white candy shell breaks it is too much to hold onto. I promise. Use forks 🙂  I hope you enjoy making and eating these as much as I did!!  ~r

Berry Bomb Cupcakes4


Other Valentines Day treats to try (click on a photo to see the recipe)

Chocolate covered Strawberry cupcakes1Frog Oreos!!Strawberry layer cakeCake balls filled with cream cheese frosting


NYE Ball Drop Cupcakes!

Ball drop Cupcakes7
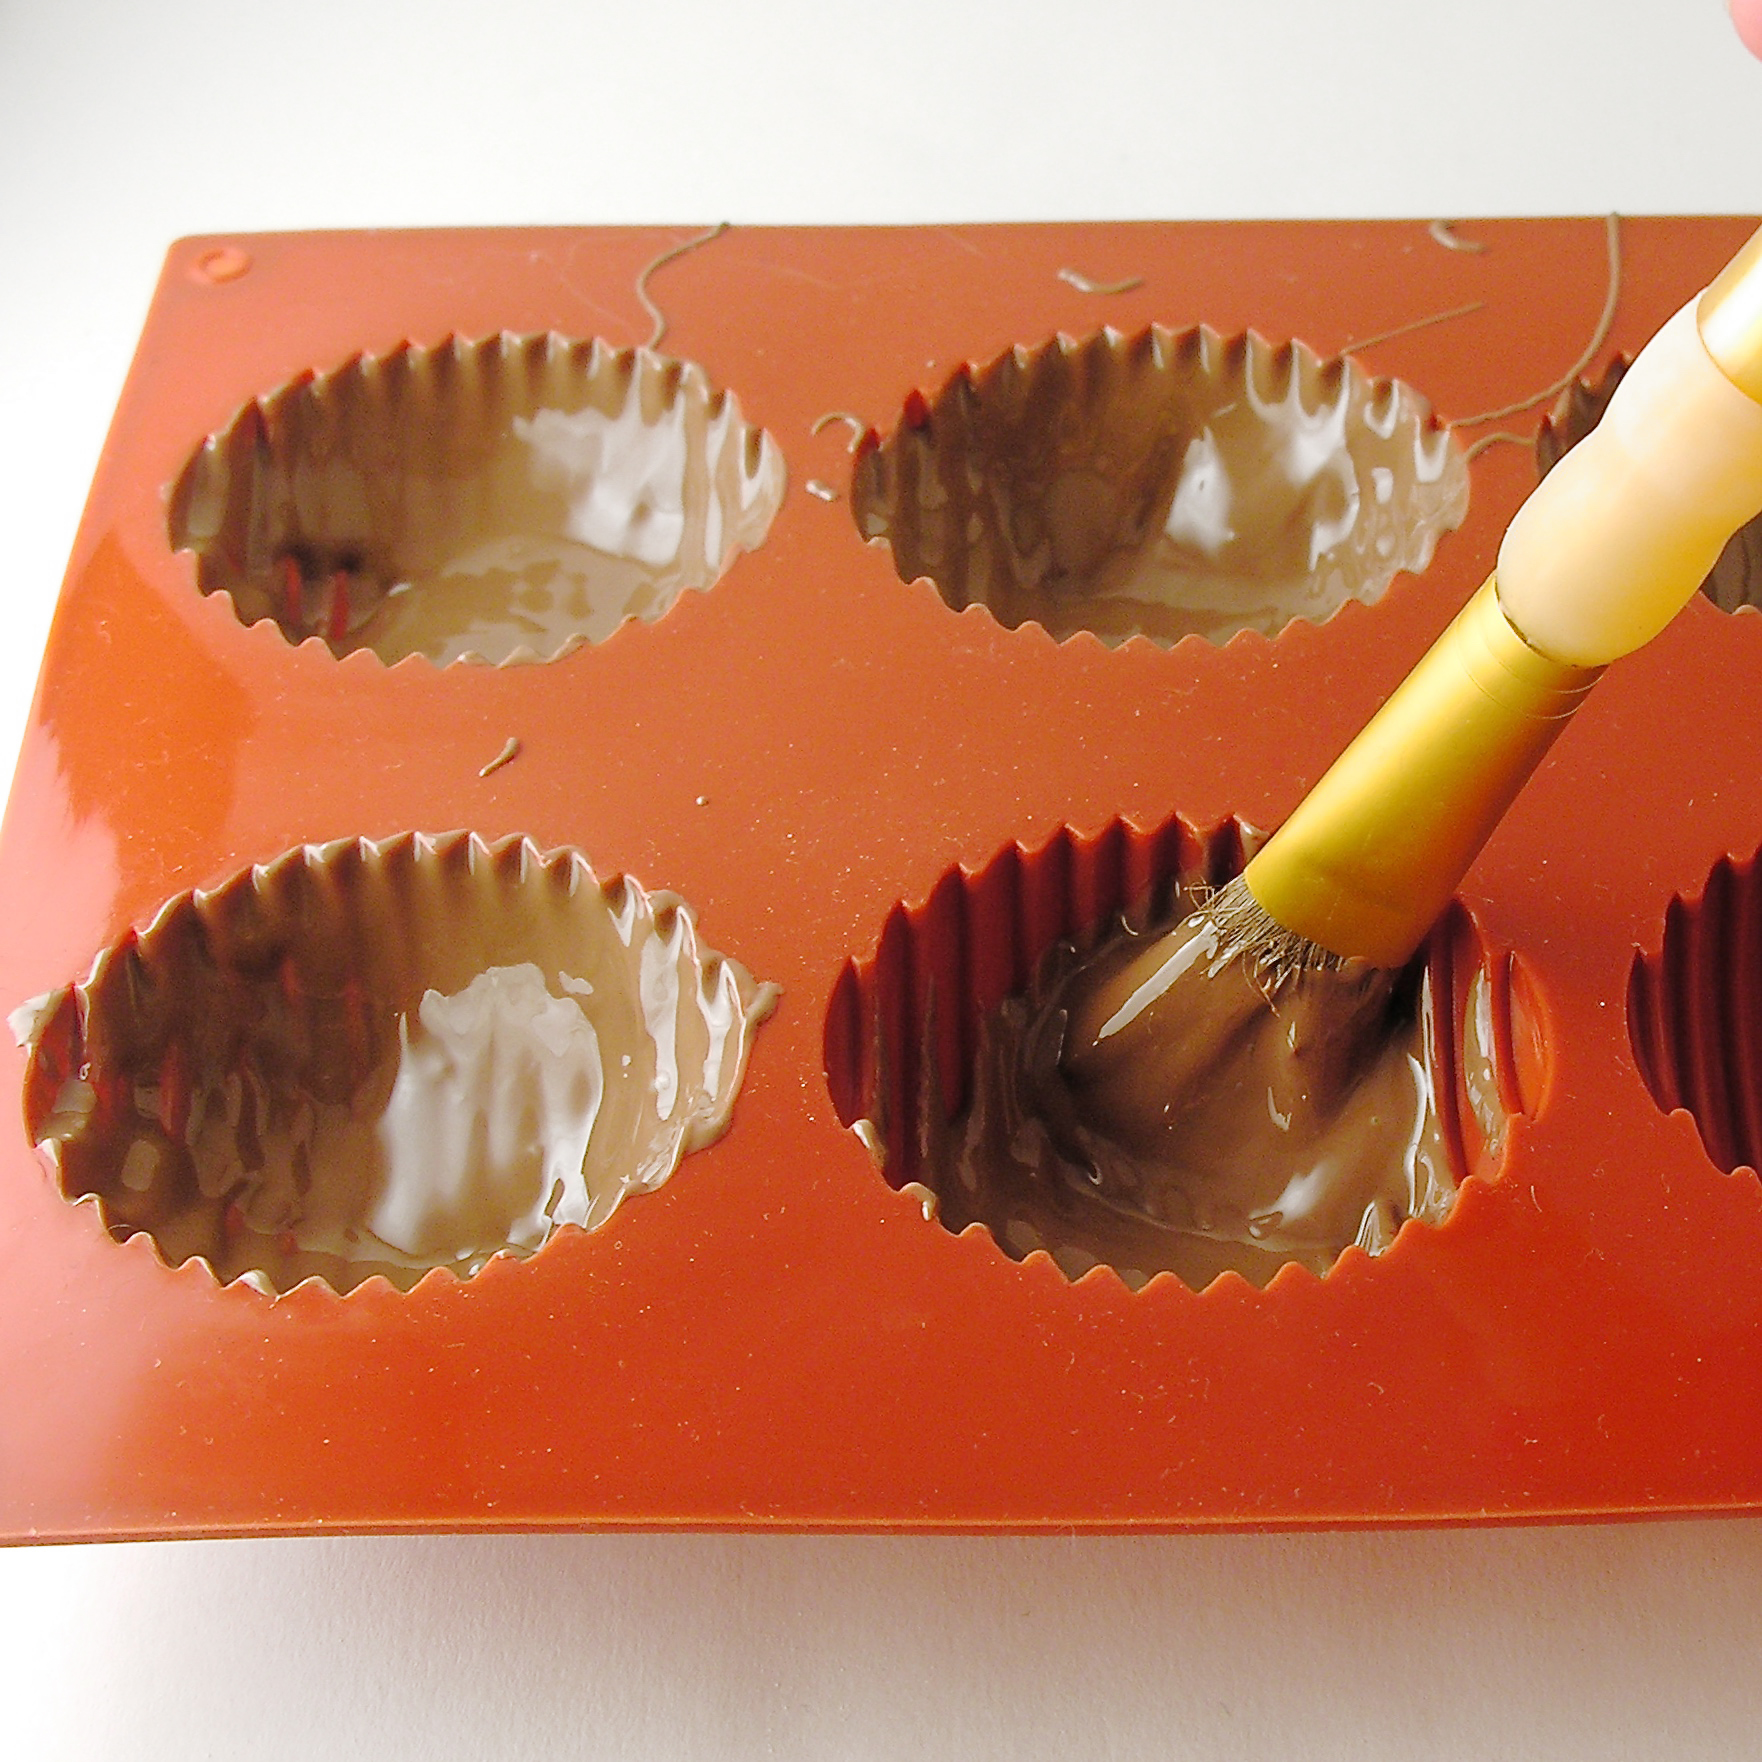
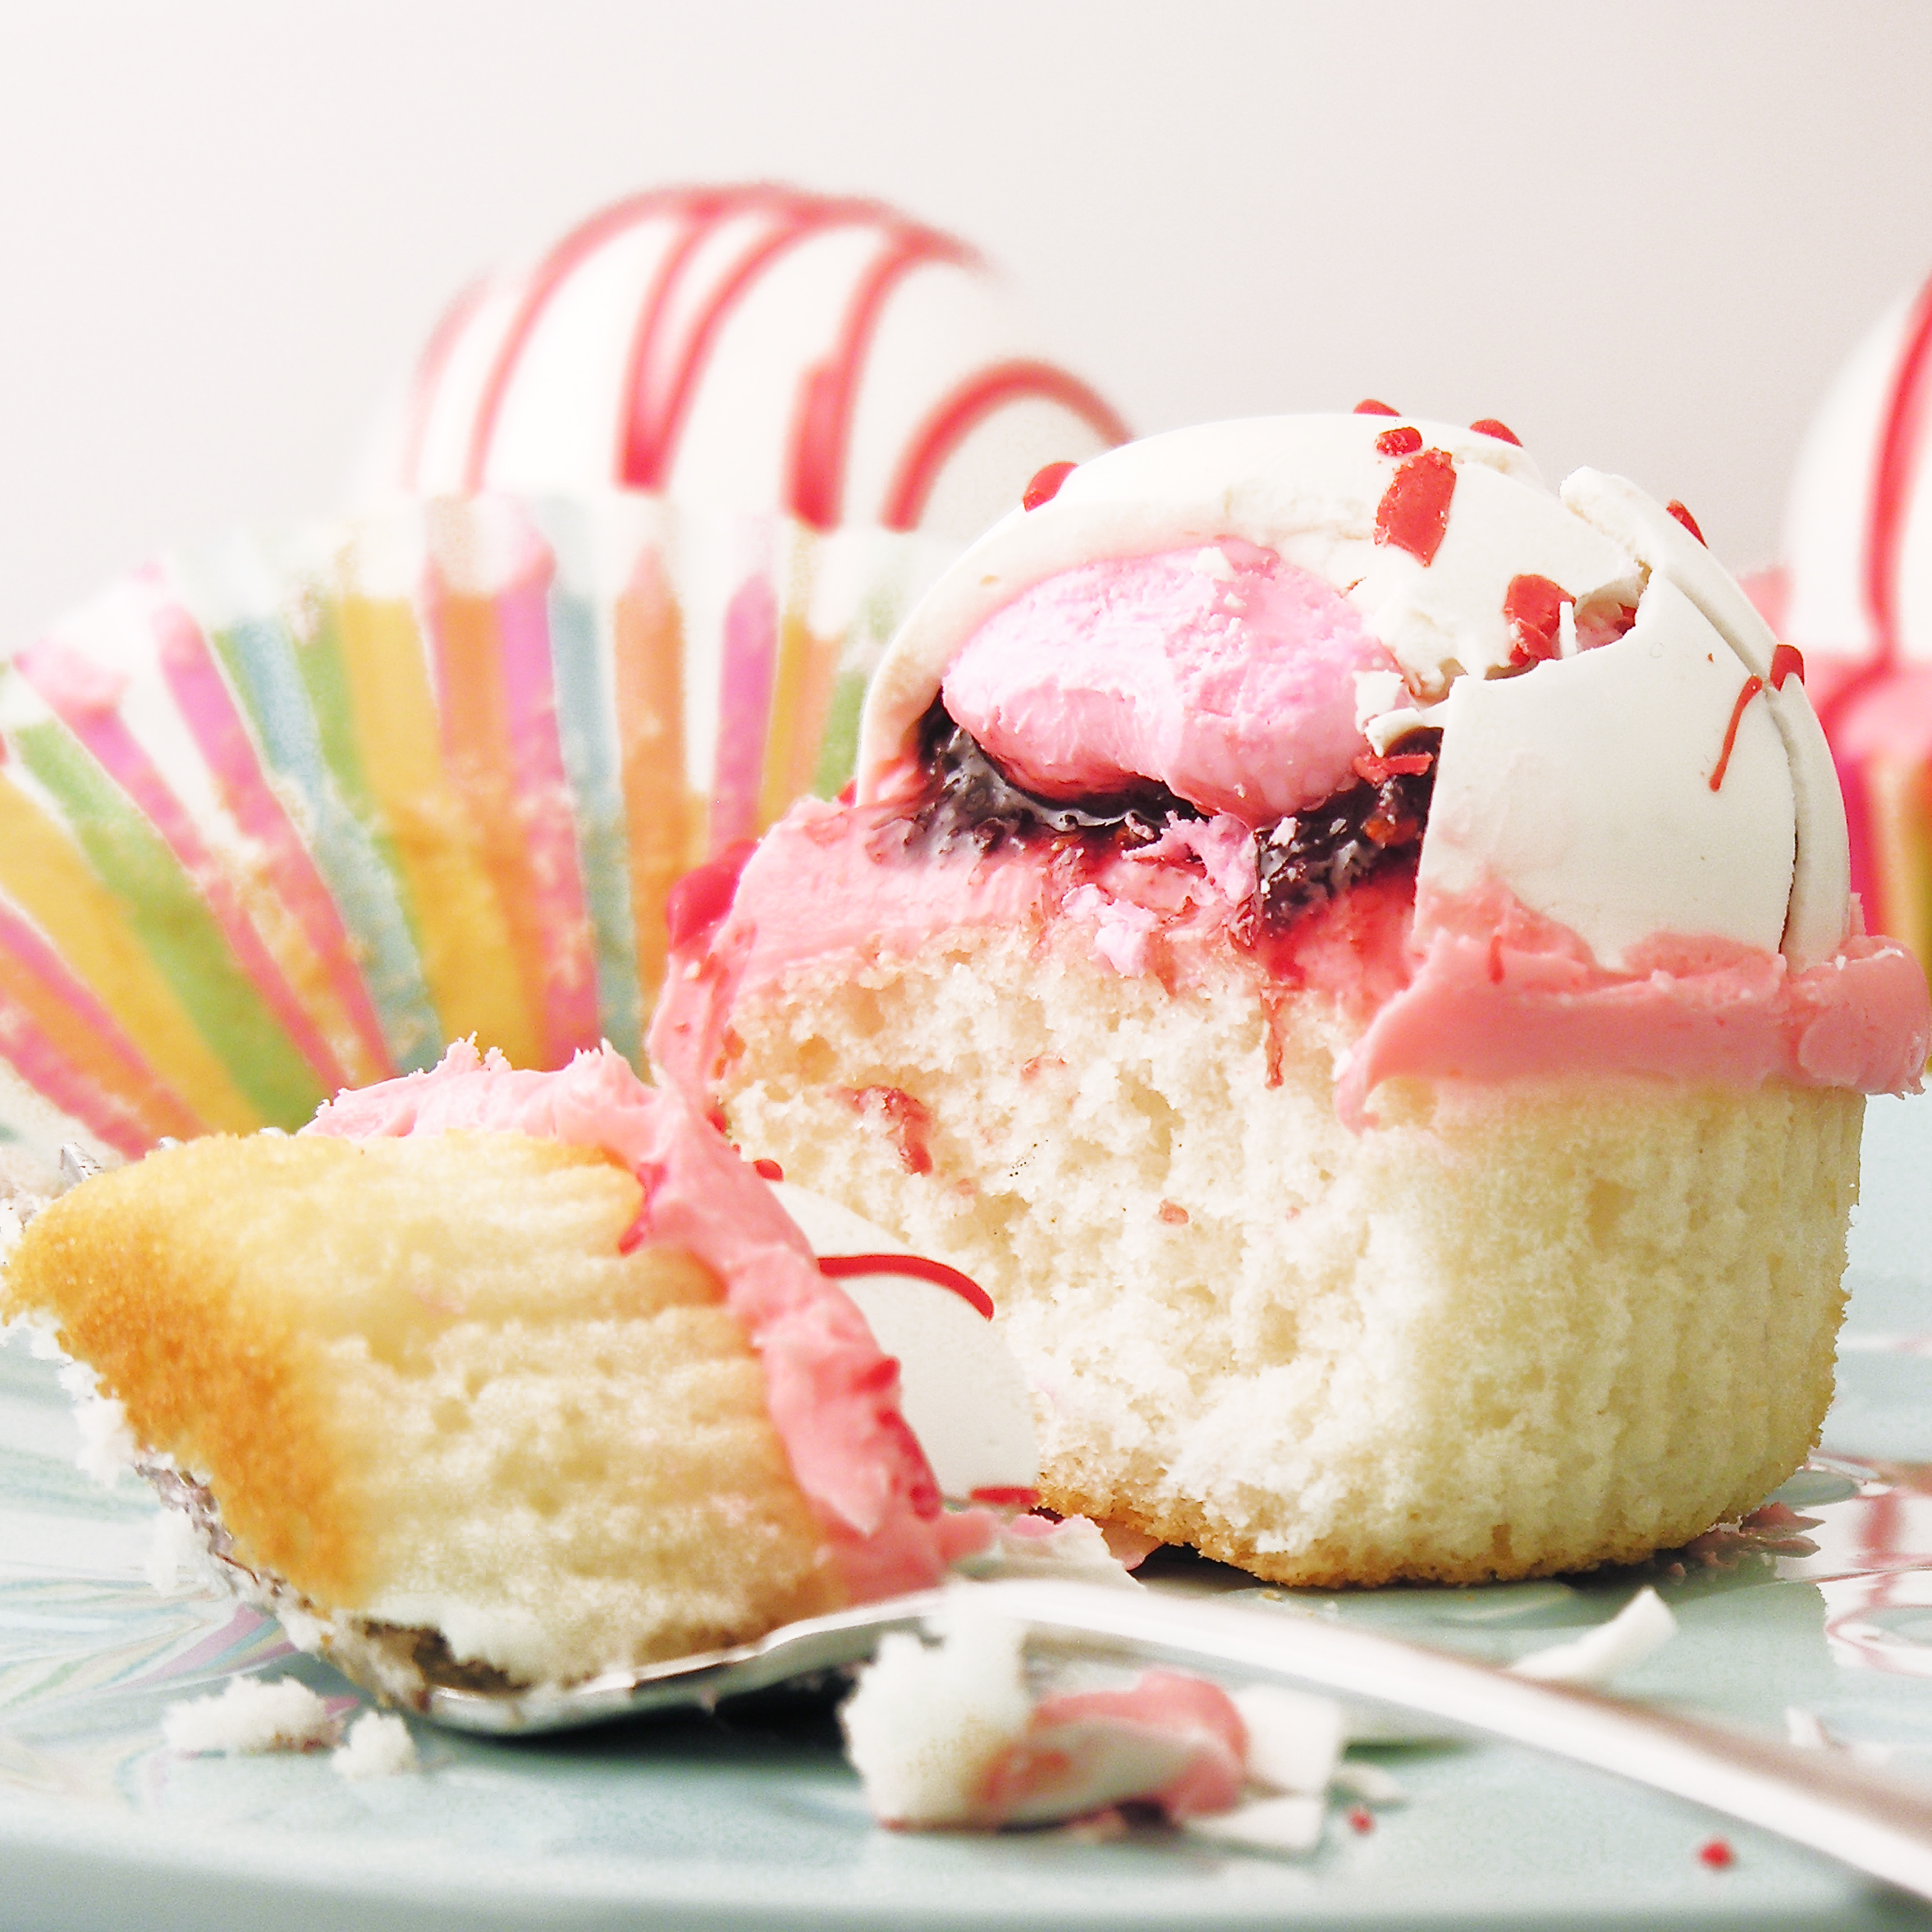
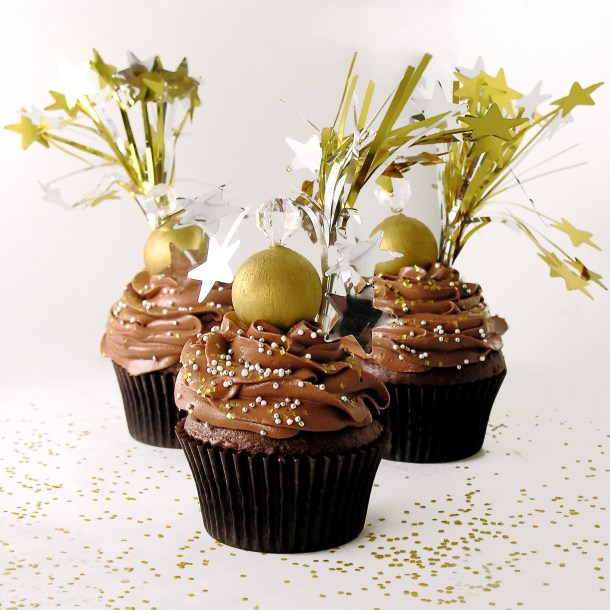
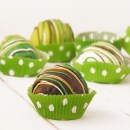
Delicious chocolate cupcakes topped with whipped chocolate buttercream and a white chocolate truffle all dressed up for New Year’s Eve! Happy New Year to you!

These fun little cupcakes are an easy and fun way to ring in the New Year. I used Lindt White Chocolate Truffles for the NYE ball, and my very yummiest chocolate buttercream. Aren’t they cute???

Ball Drop Cupcakes4

Here is how we put these fun little party desserts together:

INGREDIENTS:

  • One boxed chocolate cake mix (or your favorite recipe) plus eggs, water and oil to make according to package.
  • 2 sticks of salted butter, softened
  • 2 sticks of unsalted butter, softened
  • 3 cups of powdered sugar
  • 1/2 cup of cocoa powder
  • 24 Lindt white chocolate truffles
  • 24 decorative picks (I got mine at Target)
  • 24 New Year picks (I got mine at CK products)
  • Gold food coloring dust (I got mine at CK products)

DIRECTIONS:

  • Unwrap 24 Lindt truffles and put a decorative pick all the way through each one.
  • Use a clean (food only) paint brush and some water to paint the truffle gold using the coloring dust. Hold the truffle by the pick and mix dust with water until it forms a thick paste and can be painted onto the truffle. This may take two coats to smooth it out.
  • Allow painted truffle to dry on a plate or some parchment paper.

Ball Drop Cupcakes1  Ball Drop Cupcakes2  Ball Drop Cupcakes8

  • Make cake mix according to box instructions and divide evenly among 24 cupcake liners placed in a cupcake tin.
  • Bake according to box, and cool completely.
  • Make frosting by adding softened butter, powdered sugar and cocoa together in a large mixing bowl and beating on high until light and fluffy.
  • Place frosting in a large zip-top bag fitted with a decorating tip, and pipe frosting on each cooled cupcake.
  • Decorate with a truffle and with NYE cupcake picks.
  • Enjoy! (and remind everyone to NOT eat the picks!) 🙂

Ball Drop Cupcakes5

My thoughts: These are fun and yummy treats!!! It takes a little time to paint the truffles, but they are such a creamy and yummy addition to this cupcake!  

So, Happy 2016 to each of you!!! Enjoy!!!  ~r

Ball Drop Cupcakes3

Other fun New Year’s dessert ideas: (click on the photo to see the recipe)

Fruit Loop Confetti Cups!!Raspberry Confetti KissesCotton Candy Fizz Confetti cookies!

Praline Fudge Brownies

Posted on

Praline Fudge Brownies

A dense brownie covered in creamy praline filling and topped with chocolate fudge and pecans. This will satisfy the most demanding sweet tooth!!!!

I adore pralines. Especially around Thanksgiving and Christmas when anything with pecans is somehow better. Some people say they are just too sweet- and this filling is no exception! Paired with this not-too-sweet brownie, I think it is perfect though. These got rave reviews and several people exclaimed, “These taste like Christmas!”

Praline Fudge Brownies4So let’s make these yummy little treats! (printable recipe)

INGREDIENTS:

Brownie:

  • 1cup butter
  • 2 cups sugar
  • 3 eggs
  • 2 teaspoons vanilla
  • 2 cups flour
  • 1/2 cup cocoa
  • 1/2 teaspoon salt
  • 1 cup milk

Praline Filling:

  • 1 cup whipping cream
  • 12 Tablespoons of butter
  • 3 cups of brown sugar (packed)
  • 1 1/2 cup of finely chopped pecans (divided)
  • 3 cups of powdered sugar
  • 2 teaspoon of vanilla

Fudge Topping:

  • 12oz. semi-sweet chocolate chips
  • 12 tablespoons butter (do not substitute margarine here!)

DIRECTIONS:

Brownie:

  • Preheat oven to 350.
  • Cream butter and sugar together. 
  • Beat in eggs, cocoa, vanilla and salt.
  • Add flour and milk (alternating them and mixing well in between)
  • Spread evenly in greased jelly roll pan (12 1/2 x 17 1/2 x 1″).
  • Bake at 350 degrees for 15 minutes or until done in center and just starting to pull away from sides.
  • Cool.  

Praline filling:

  • In a large saucepan, mix cream, butter and brown sugar.
  • Cook over medium heat, stirring often, until mixture comes to a boil.
  • Cook for one minute, stirring constantly and then remove from heat.
  • Stir in powdered sugar, vanilla and 1 cup of pecans (you may need to do this in a separate bowl if your saucepan isn’t big enough)
  • Cool for 5 minutes, stirring often until it thickens up a bit.
  • Spoon mixture over cooled brownies and spread into a smooth layer over the top.

Praline Fudge BrowniesFudge Topping:

  • Melt butter and chocolate together in the microwave in 30 second increments, stirring in between until completely melted and smooth.
  • Pour over praline filling and spread evenly over top.
  • Sprinkle with remaining 1/2 cup of chopped pecans.
  • Chill until top layer is hard and cut into bars.

Praline Fudge Brownies7My thoughts: These aren’t hard to put together and they are oh-so-yummy!!! I froze about half of the batch in an air-tight container for several weeks and just pulled them out for a party I was having- they freeze GREAT. In fact, they are pretty yummy frozen. 🙂  I hope you get a chance to try these and enjoy them as much as I did!

Praline Fudge Brownies2

Other yummy Christmas desserts: (click on a photo to see the recipe)

Chocolate bonbonsHot Chocolate Pop!Snowman Oreo PopsPeanut Brittle!!

Spider Egg Cupcakes

Posted on

Spider Eggs4

These delicious little chocolate cupcakes are topped with terrifyingly cute little spiders, webs and egg sacs. A perfect Halloween treat!

There is nothing worse than finding spiders hatching somewhere in or around your house. Spiders are bad. Baby hatching spiders? Way worse. That’s what makes these fun little cupcakes so terrifying! That little egg sac? A Lindt white chocolate truffle. The spiders? Drizzled chocolate and mini M&Ms. Easy, fun and so cute that you almost start liking spiders! Almost.

Spider Eggs2Aren’t they fun??? All by themselves, on cookies, on cupcakes… so many ways you could use these.

Here’s the recipe: (printable version)

INGREDIENTS:

  • One boxed cake mix (plus water, oil and eggs to make according to package)
  • One tub of white frosting
  • 1/4 cup of Wilton’s candy melts in dark chocolate
  • 1 cup of Wilton’s candy melts in white chocolate
  • One bag of mini M&M’s (usually found by the chocolate chips)
  • Orange food coloring
  • Purple food coloring
  • 24 Lindt white chocolate truffles

DIRECTIONS:

  • Make spiders and egg sacs 1st, to give them time to harden up.
  • Melt the Wiltons dark chocolate candy melts in the microwave in 3o second increments, stirring in between until completely melted and smooth.
  • Clip a corner off a small zip top bag, and place a small round decorating tip in the corner.
  • Spoon melted chocolate into bag, and pipe spider “legs” onto parchment paper, topping each set with a brown mini M&M. Pipe spider legs directly on each Lindt Chocolate and add the M&M on top. You’ll need 24 Lindt truffles and 24 extra spiders. I made about 40, and I was glad I did because some of their legs fell off as I pulled them off the parchment paper.
  • Allow these to harden completely (you can put this in the fridge to speed this process up if needed)

Spider eggsSpider Eggs

  • Make cake mix according to package and bake in 24 cupcake liners placed in muffin tins. Cool completely.
  • Divide the frosting into two parts. Soften it a little bit (10 seconds or so) in the microwave, and color it with purple and orange food coloring.
  • (Optional) Cut a small, (the size of the Lindt Truffle) and shallow hole into the top of each cupcake.  I did this so that the truffle would settle a little “into” the cupcake rather than just perching on top. It makes frosting these a little messy with crumbs, but I liked the way it looked a little better.
  • Dip the top of each cupcake into frosting, covering the top (and inside the little “dent” on top) completely.
  • Place a spider “egg sac” on top of each cupcake.
  • Melt Wiltons White Candy Melts in the microwave in 30 second increments, stirring in between until completely melted and smooth. 
  • Place in a zip-top bag, clip a corner and drizzle liberally over the top of each cupcake in a web-like pattern.
  • Before the Candy melts firm up, place a couple of spiders on top.
  • Allow frosting and candy melts to firm up.
  • Enjoy!

SPider Eggs3

My thoughts: These are fun, easy and just a tiny bit creepy. A perfect October treat. The spiders take a little time and patience, but they can be made ahead of time and won’t hold you up when you go to make the cupcakes. I hope you have as much fun as I did with these! Enjoy!! ~r

Spider egg5

Other creepy and fun October treats you might enjoy: (click on a photo to see the recipe)

Edible Jello Earthworm CupcakesRadioactive Cupcakes filled with SLIME!Broken glass Cupcakes!!!Halloween Bundt Cake

Mile High Key Lime Pie

Posted on

Key Lime Pie3

A Nilla Wafer crust filled with a creamy key lime pie and topped with piles and piles of sweet whipped key lime topping. If you love key lime pie, this is your new favorite recipe for it!!

I adore key lime pie. I love that tart and smooth pie filling. Whenever I get the opportunity, I try key lime pies, and I can honestly say that this is the best I’ve had…so far! This recipe is courtesy of my friends Chuck and Heather Lane. They pinched it from a newspaper article years ago that claimed it as the recipe of one of the fancier restaurants in Fort Wayne. We were out for dinner one night not long ago, and they started talking about this pie and I (of course!) asked for the recipe. They had made a few “tweaks” to it, and I honestly think it is perfect. My only disappointment with this recipe is the pictures I took of it. I wish I’d waited to cut it until it had chilled completely. It is BEAUTIFUL when it is cut chilled. Perfect layers of happiness.

Anyway. I digress. Here’s the recipe~ I hope you love it as much as I do! (printable version)

INGREDIENTS:

  • 6 Tablespoons of butter, melted
  • 2 cups of finely crushed Vanilla Wafers
  • 2 3/4 cups of sweetened condensed milk (divided)
  • 3 egg yolks
  • 1 cup of key lime juice (divided)
  • 1 large (16 oz) tub of Cool Whip (softened in fridge)

DIRECTIONS:

  • Preheat oven to 350F degrees
  • Mix together crushed vanilla wafers and melted butter until well combined. Press into a greased pie pan.
  • Beat egg yolks and add 1 3/4 cups of sweetened condensed milk and 1/2 cup of key lime juice.
  • Mix well and pour into crust.
  • Bake at 350F degrees for 20-25 minutes. Cool completely.
  • Beat together Cool Whip, 1 cup sweetened condensed milk, and 1/2 cup of key lime juice until smooth. It should have a nice shiny look.
  • Refrigerate for at least 30 minutes.
  • Top cooled pie with whipped topping and chill for several hours before cutting and serving.
  • Enjoy!

Key Lime Pie1

My thoughts: With the exception of squeezing a million little key limes, this is such an easy recipe~ and oh so delicious! My only tip: don’t cut into it until it is cold! 🙂 Enjoy! ~r

Other bits of key lime joy (click on photo to see recipe)

Key Lime Cupcakes!Key Lime TartletsKey Lime Cake!!!Key Lime Cookie Bars2

%d bloggers like this: