Tag Archives: cream cheese icing

Mom’s Amazing Coffee Cake!

Posted on

Coffee Cake

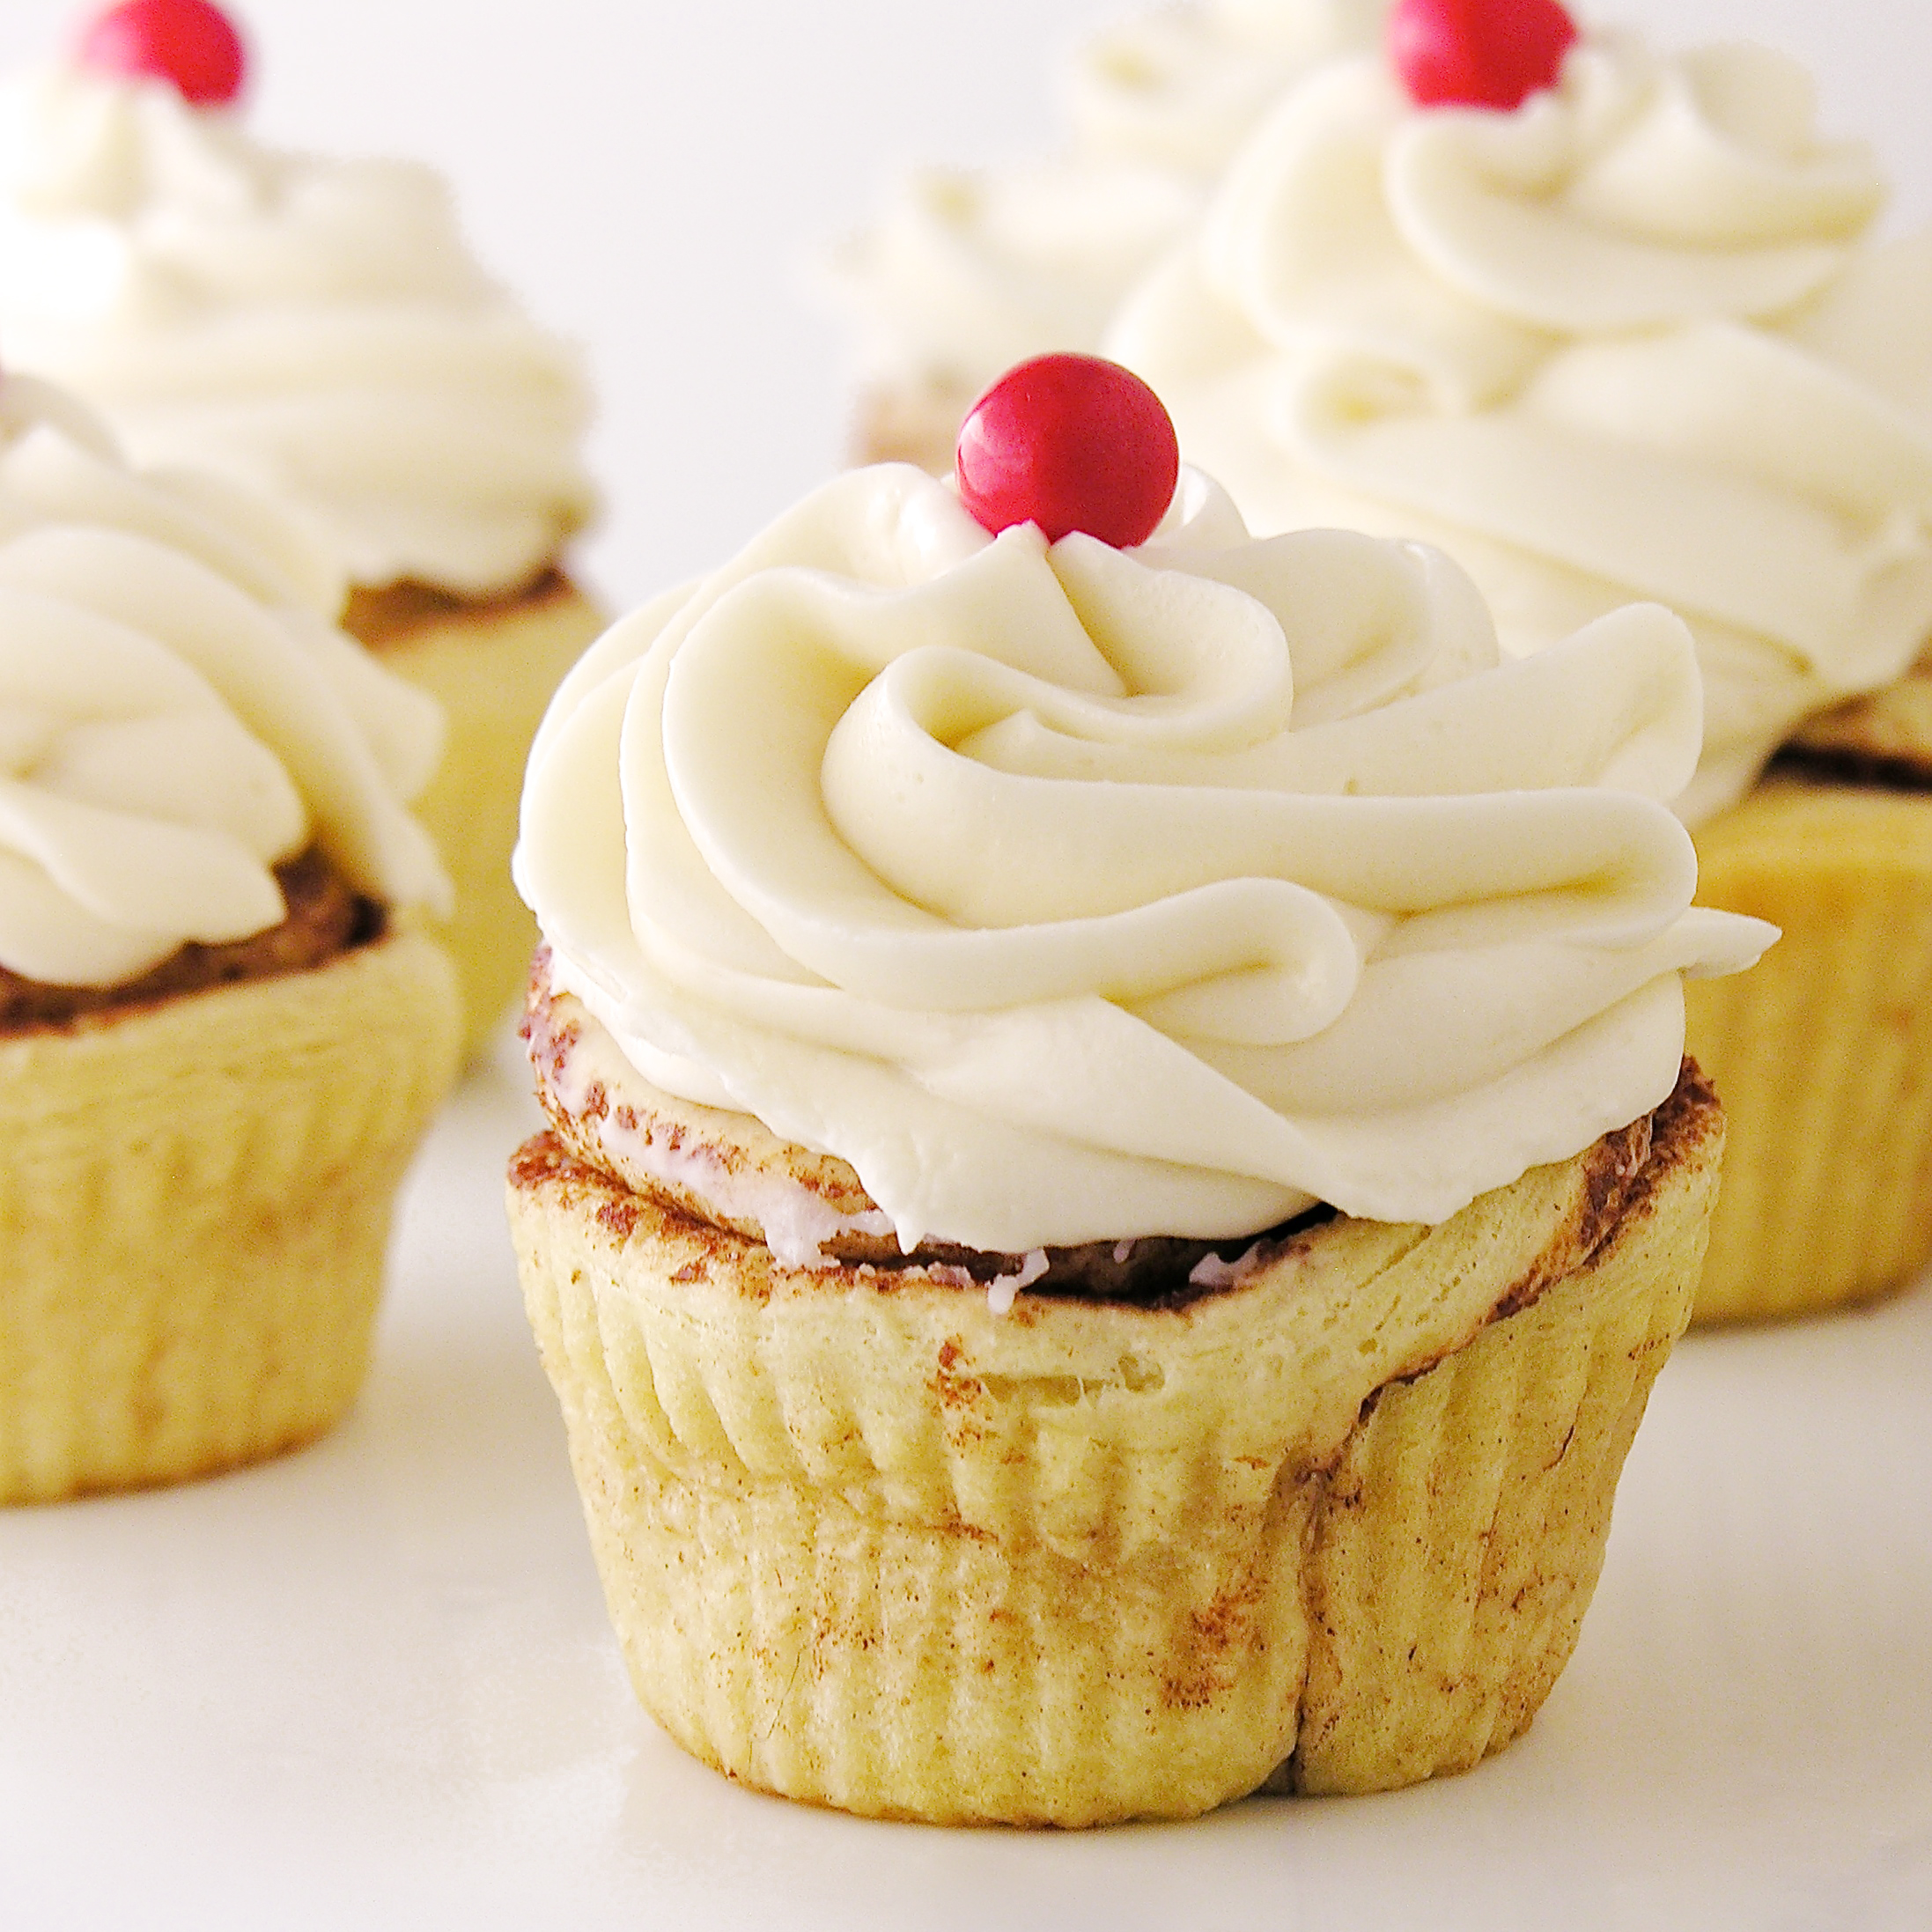
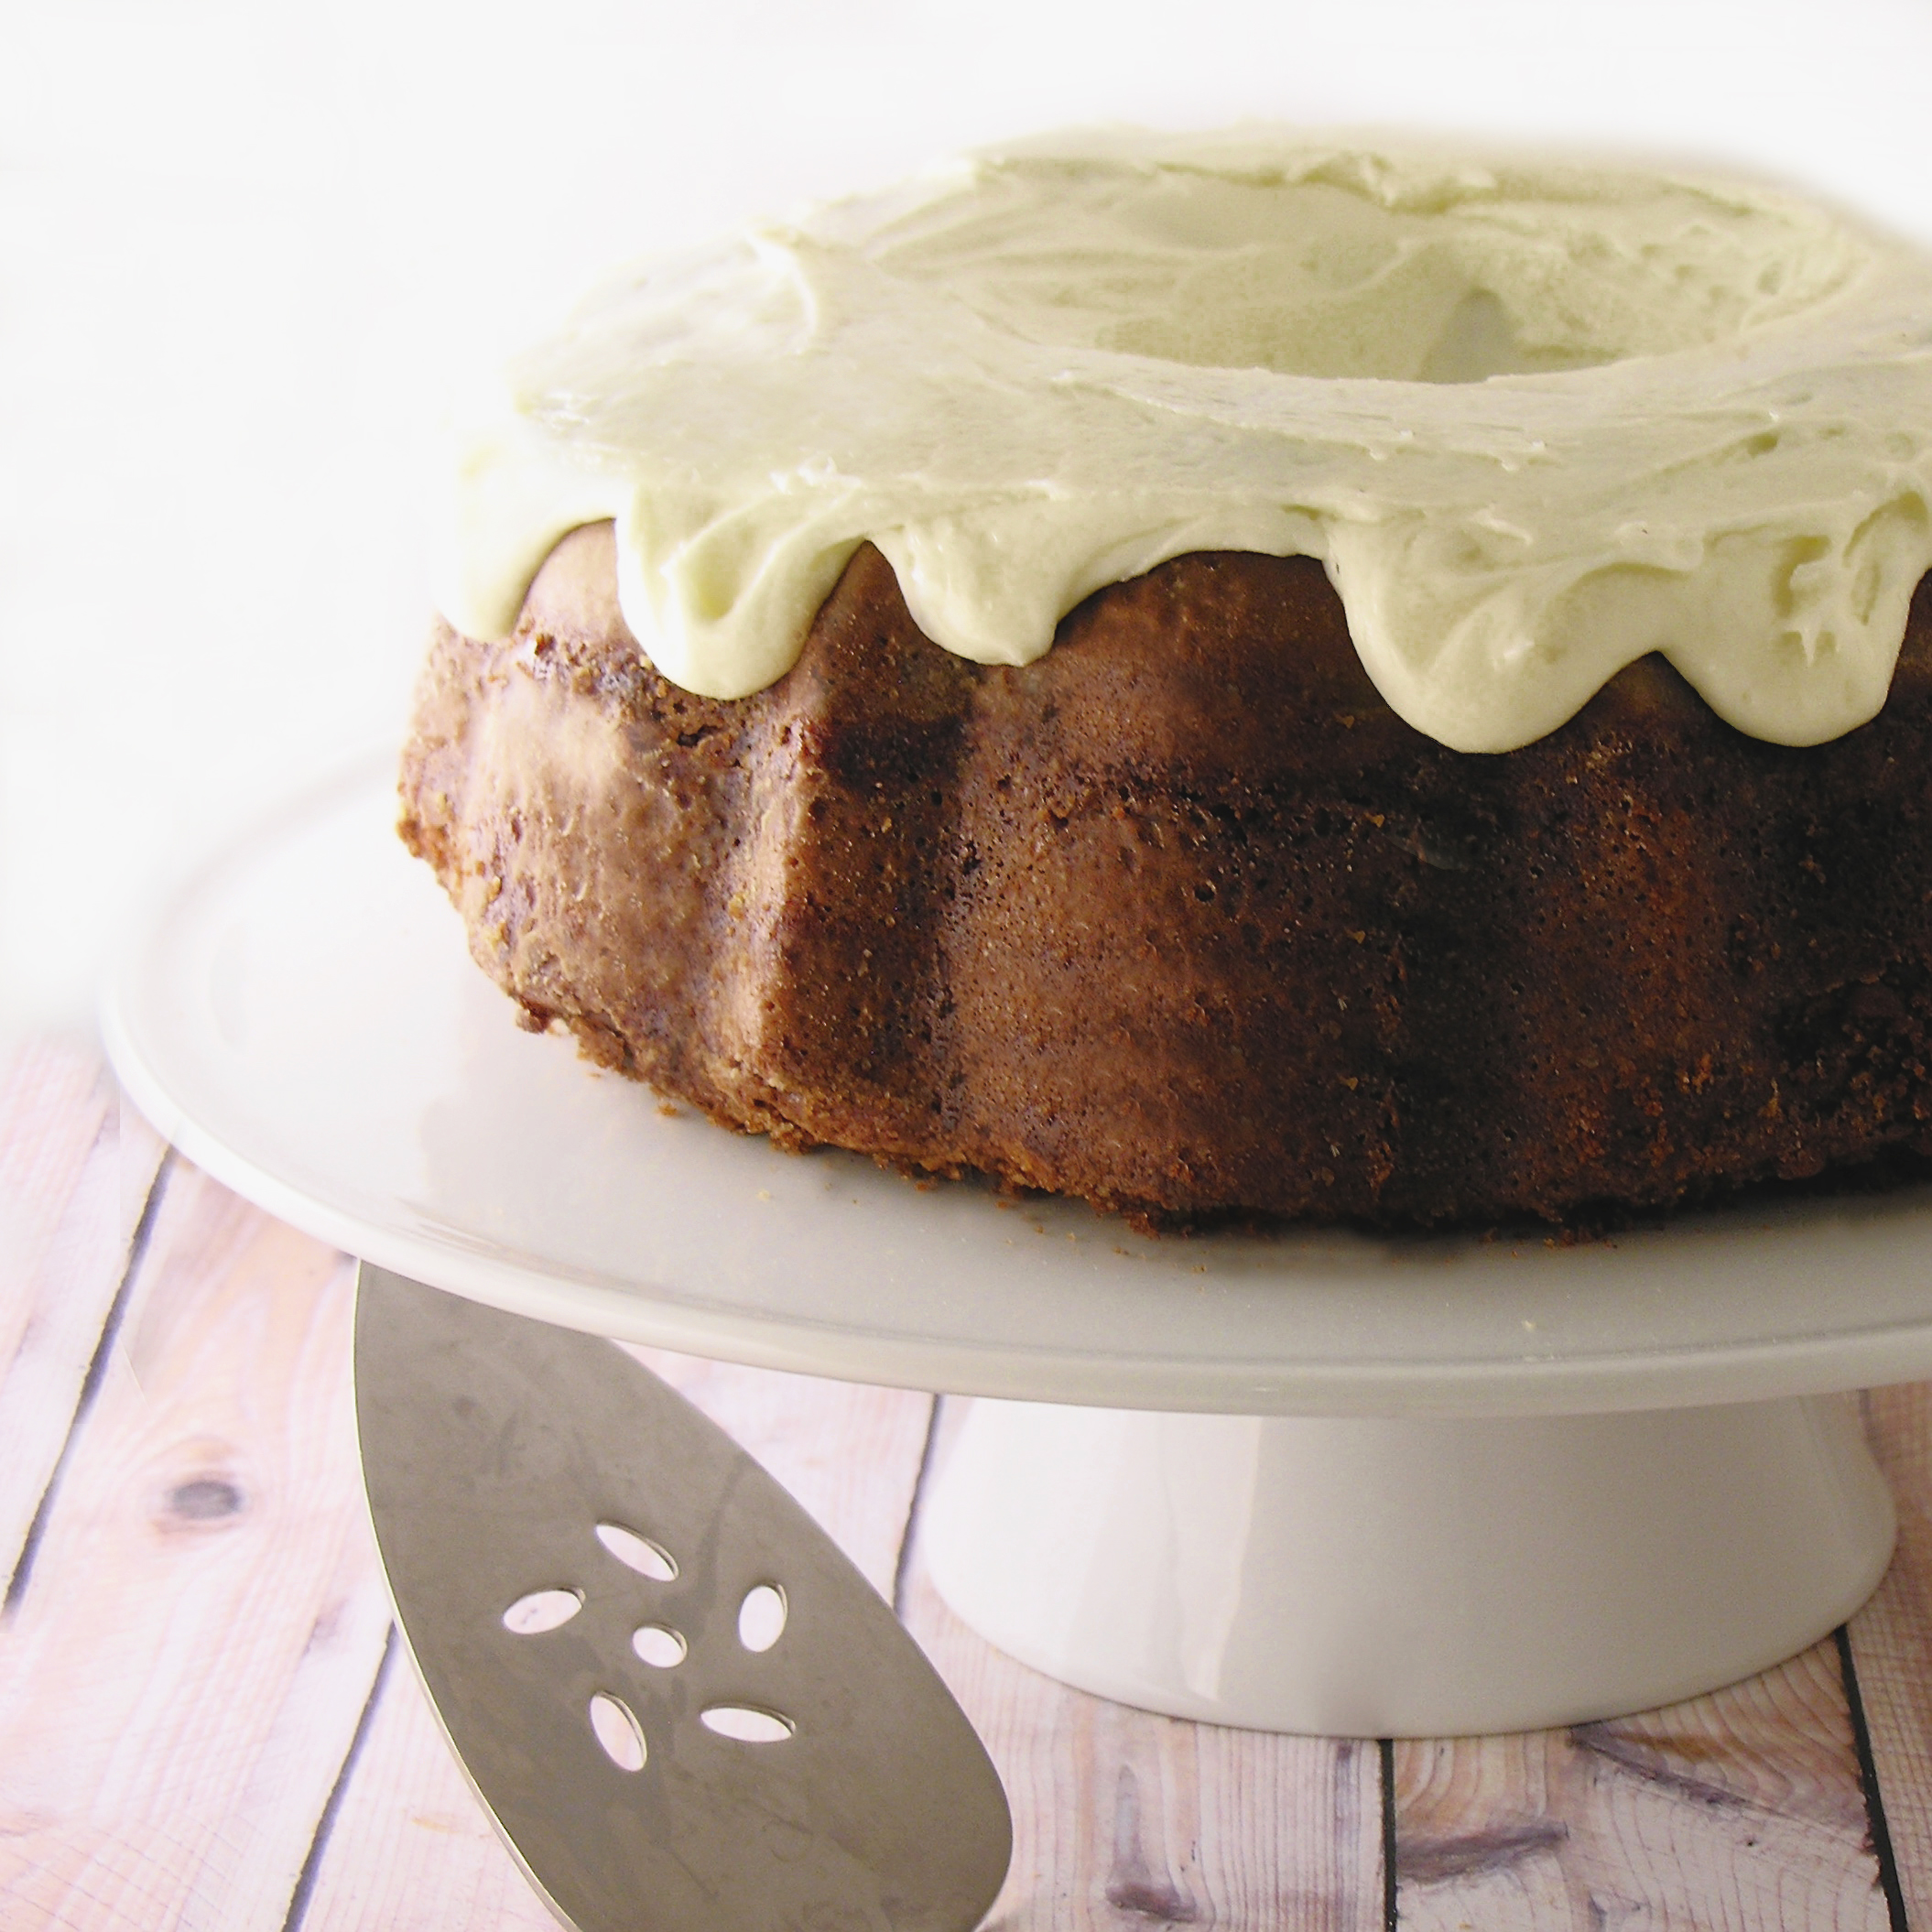
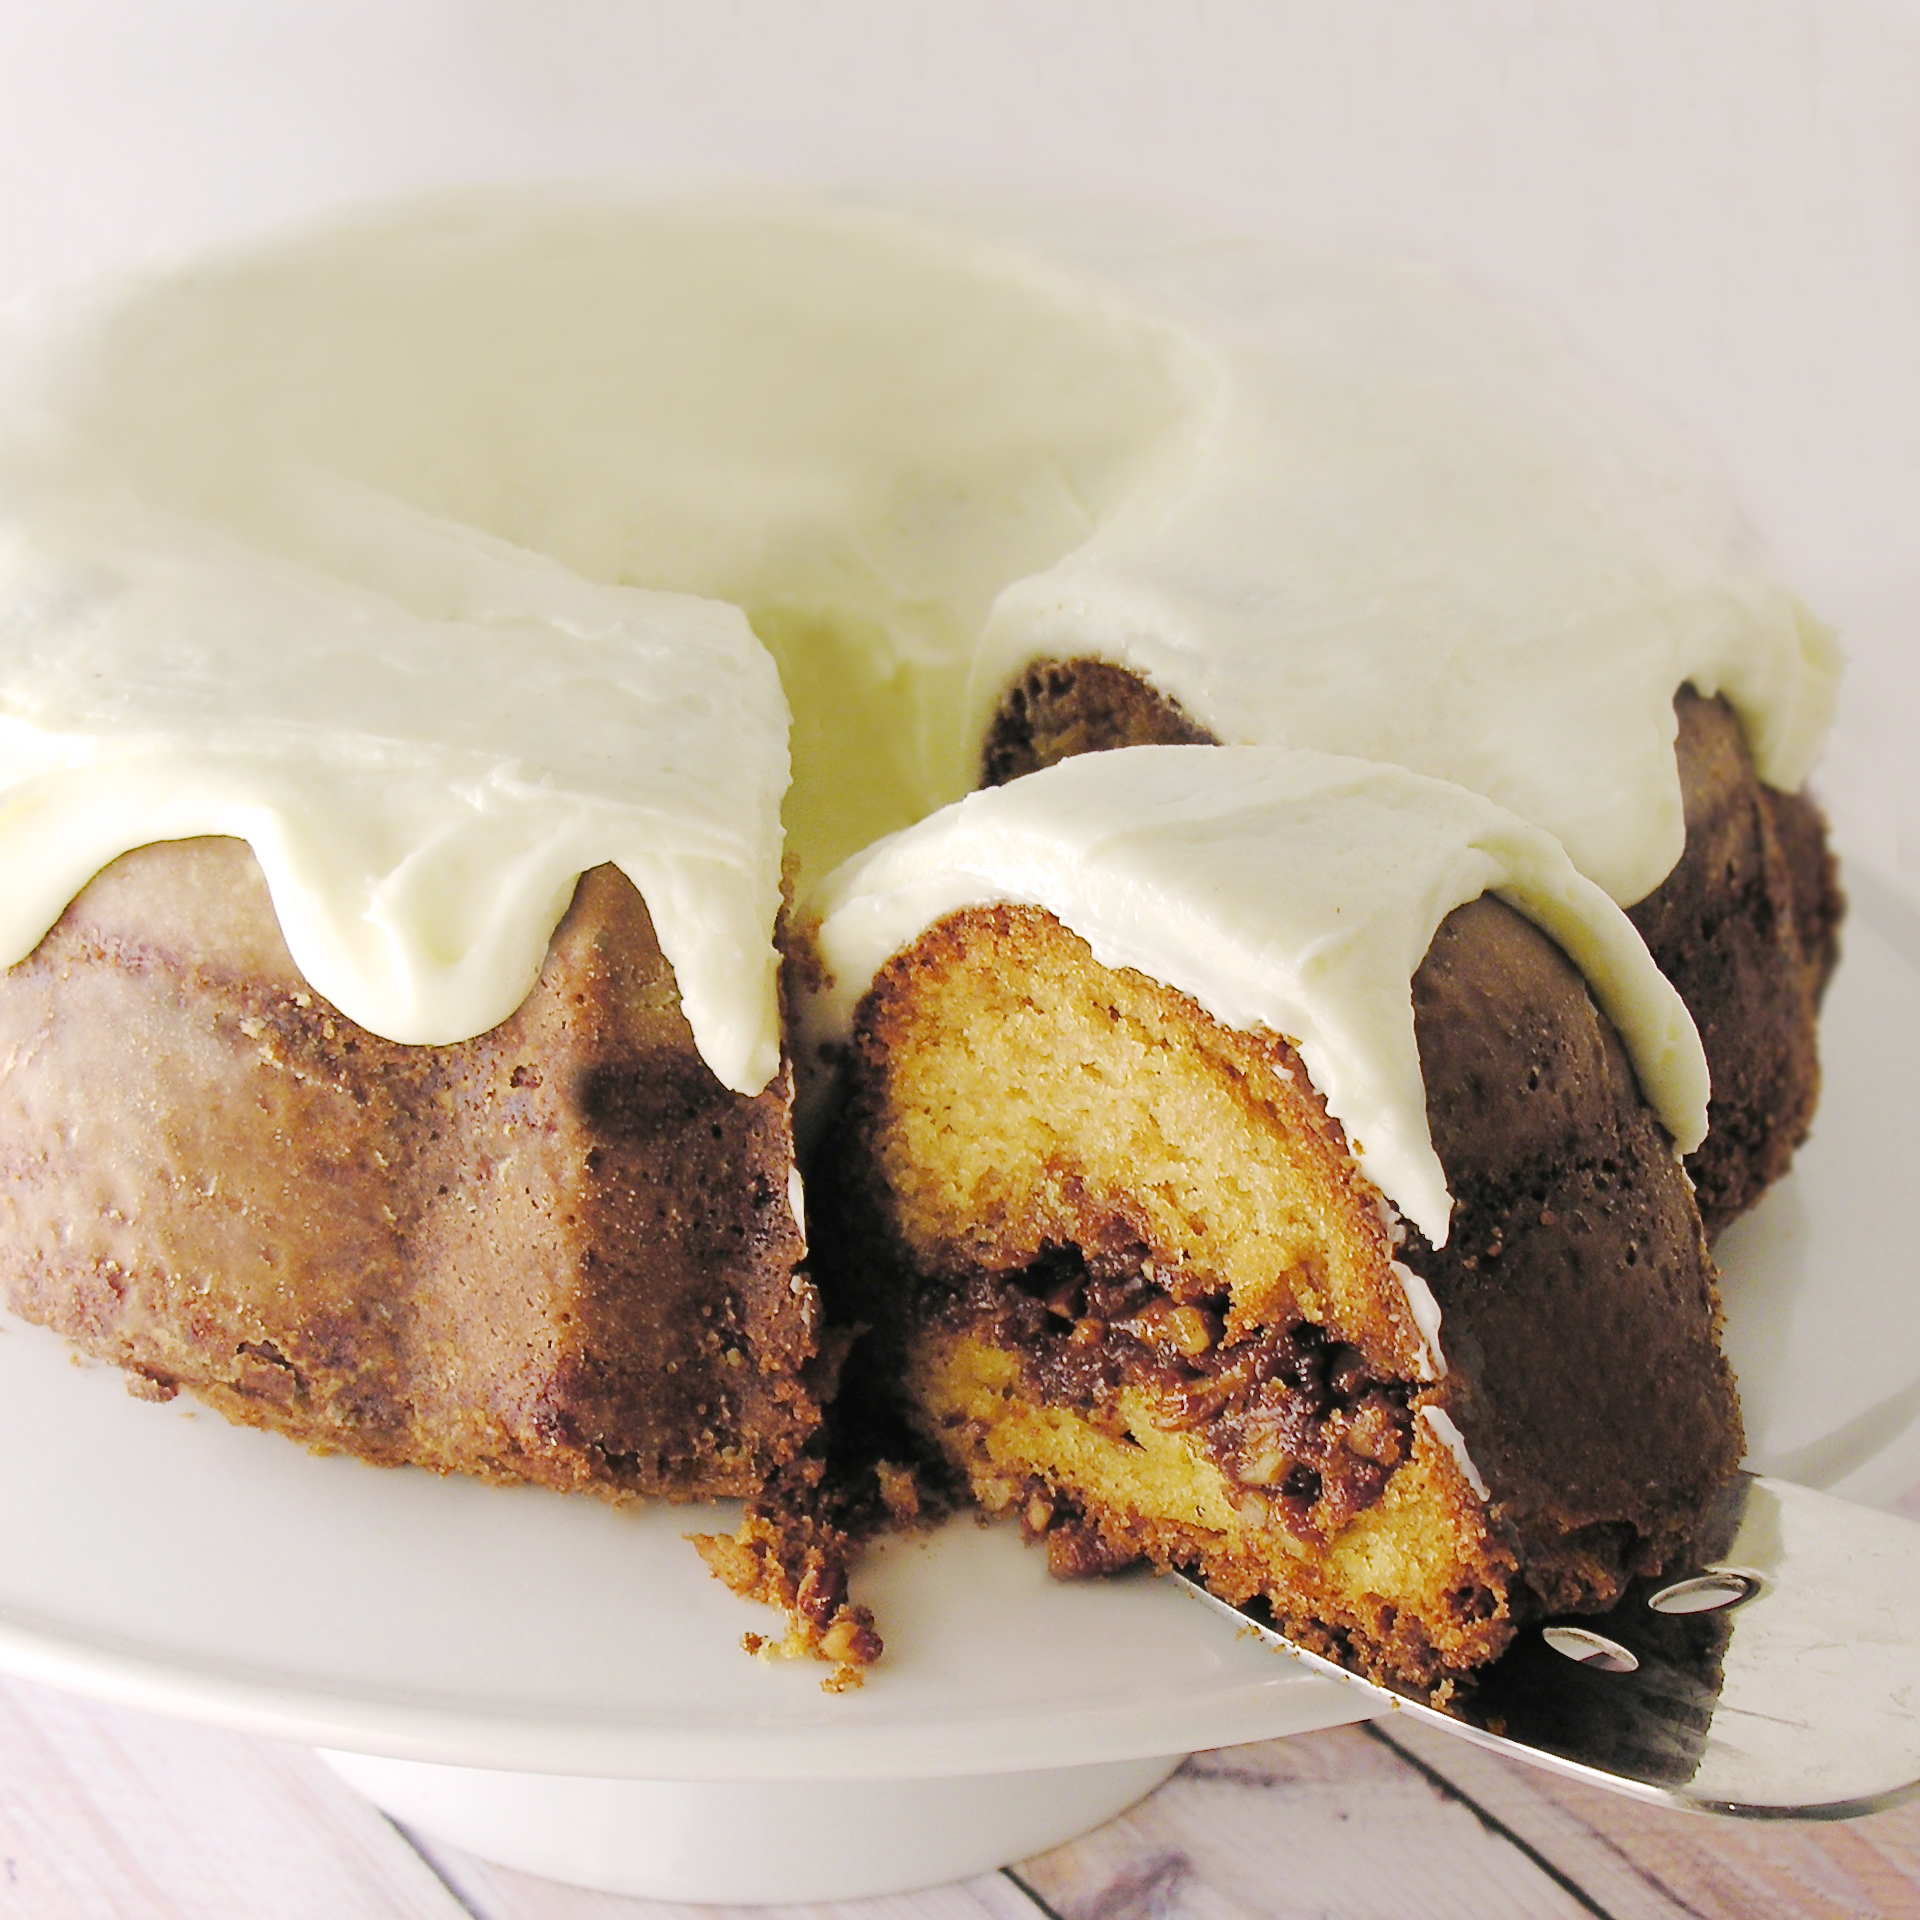
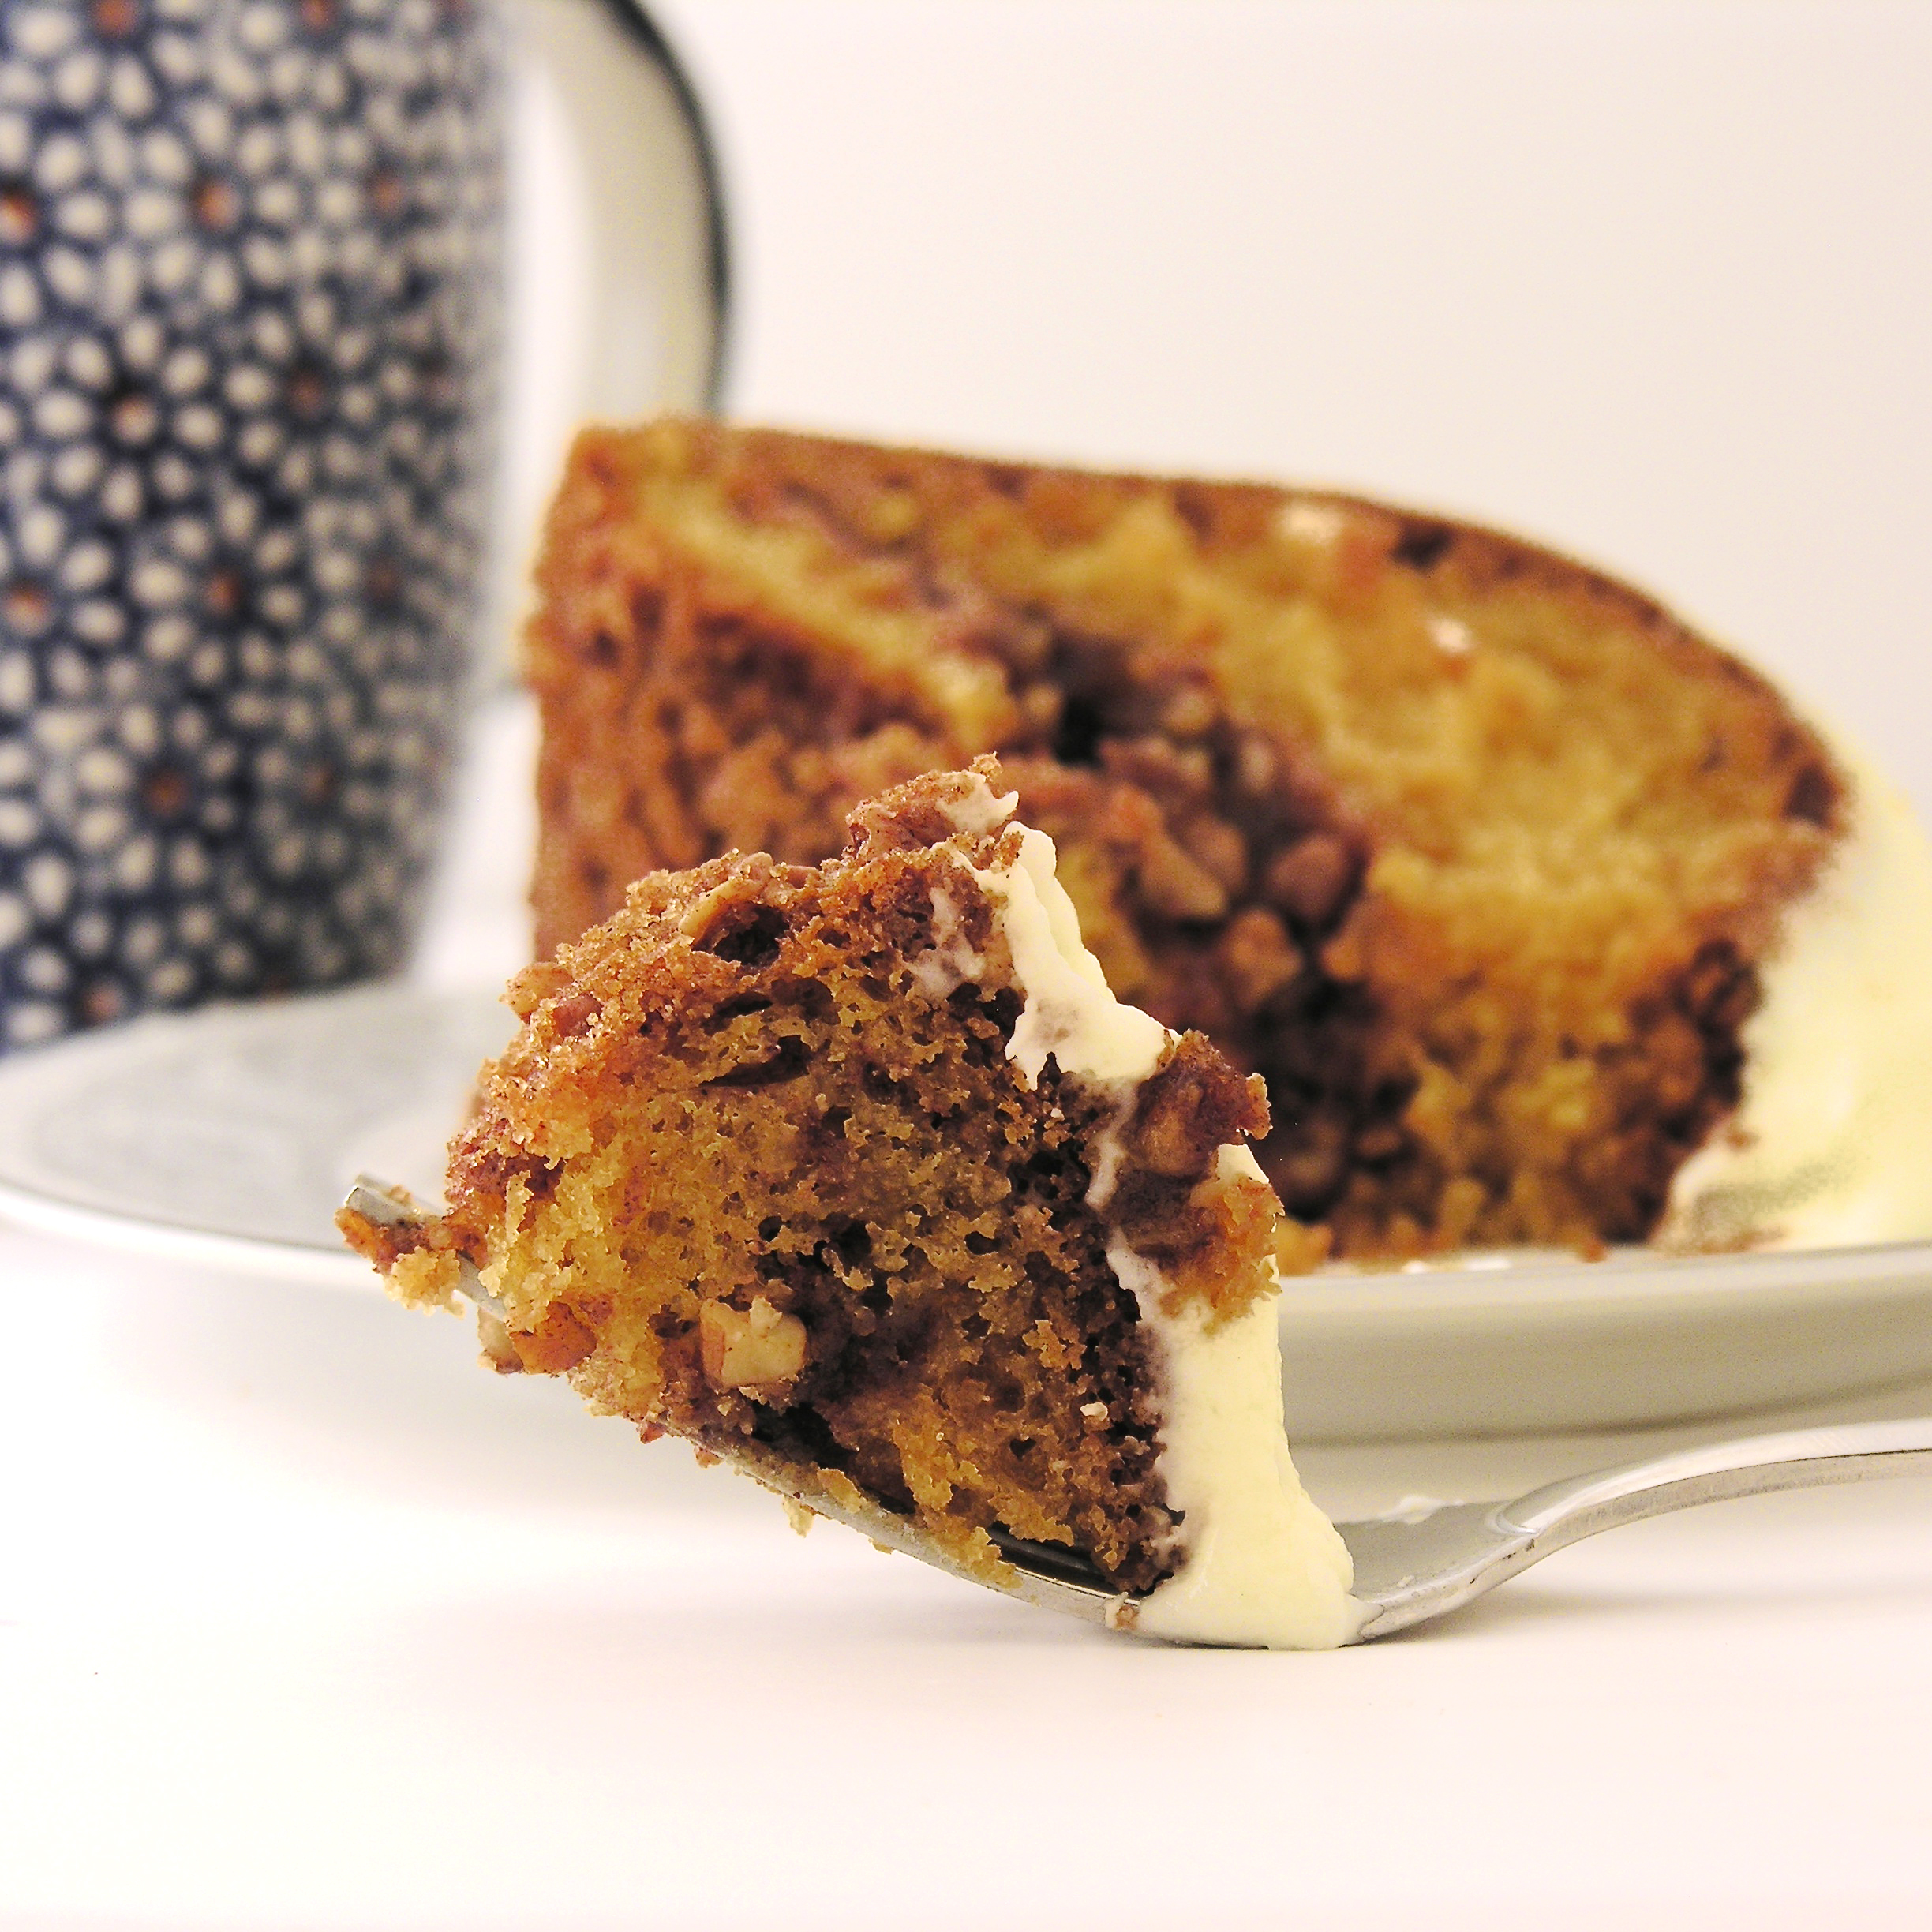
This delicious coffee cake has hidden layers of cinnamon and pecans- and a yummy cream cheese frosting!

My mom used to make this delicious coffee cake whenever my grandparents (her mom and dad) would come to visit. I have great memories of sitting around the table having this with all of them and listening to all the “grown-up” talk. They were from Wisconsin, so a visit always meant a couple of days with us in Michigan. I’d get up early and take a long walk with grandpa and our overweight basset hound Max before breakfast, and return to a kitchen table full of family, laughter, and this coffee cake.

My grandparents lived very active and adventurous lives until they left us for heaven several years ago.

Mom, as those of you who keep up with this blog know, left us for heaven about a year and a half ago.

A friend sent me an article last week about 8 ways to celebrate Mother’s Day if your mom is in heaven. They were great ideas, and the very 1st one was, “Make her favorite recipe”. I think her favorite recipe was my grandma’s recipe for German Sauerbraten, but since desserts are my specialty, I decided on this coffeecake as my “remembering mom” recipe.

As my kitchen filled up with the smell of this baking, it made me smile. And remember.

Coffee Cake recipe

Here’s how to make it: (printable recipe)

INGREDIENTS:

Cake:

  • 1 stick of butter, softened
  • 1 cup of sugar
  • 3 eggs
  • 2 cups of flour
  • 1 teaspoon of baking soda
  • 1/8 teaspoon of salt
  • 1 cup of sour cream
  • 1 teaspoon of vanilla

Filling:

  • 1 cup of finely chopped pecans
  • 1 1/2 cups of brown sugar
  • 4 tablespoons of butter, melted
  • 4 tablespoons of flour
  • 2 teaspoons of cinnamon

Icing:

  • 4 oz. (half a package) of cream cheese
  • 4 tablespoons of butter, softened
  • 1/2 teaspoon of vanilla
  •  Dash of salt
  • 2 cups of powdered sugar
  • 1/2 cup of white chocolate chips, melted

DIRECTIONS:

Cake:

  • Preheat oven to 350 degrees and grease/flour a bundt cake pan.
  • Cream butter and sugar together.
  • Add eggs and beat well.
  • Add flour, soda and salt. Mix well.
  • Add sour cream and vanilla and mix well. Set aside.

Filling:

  • Combine all ingredients until completely coated in melted butter.
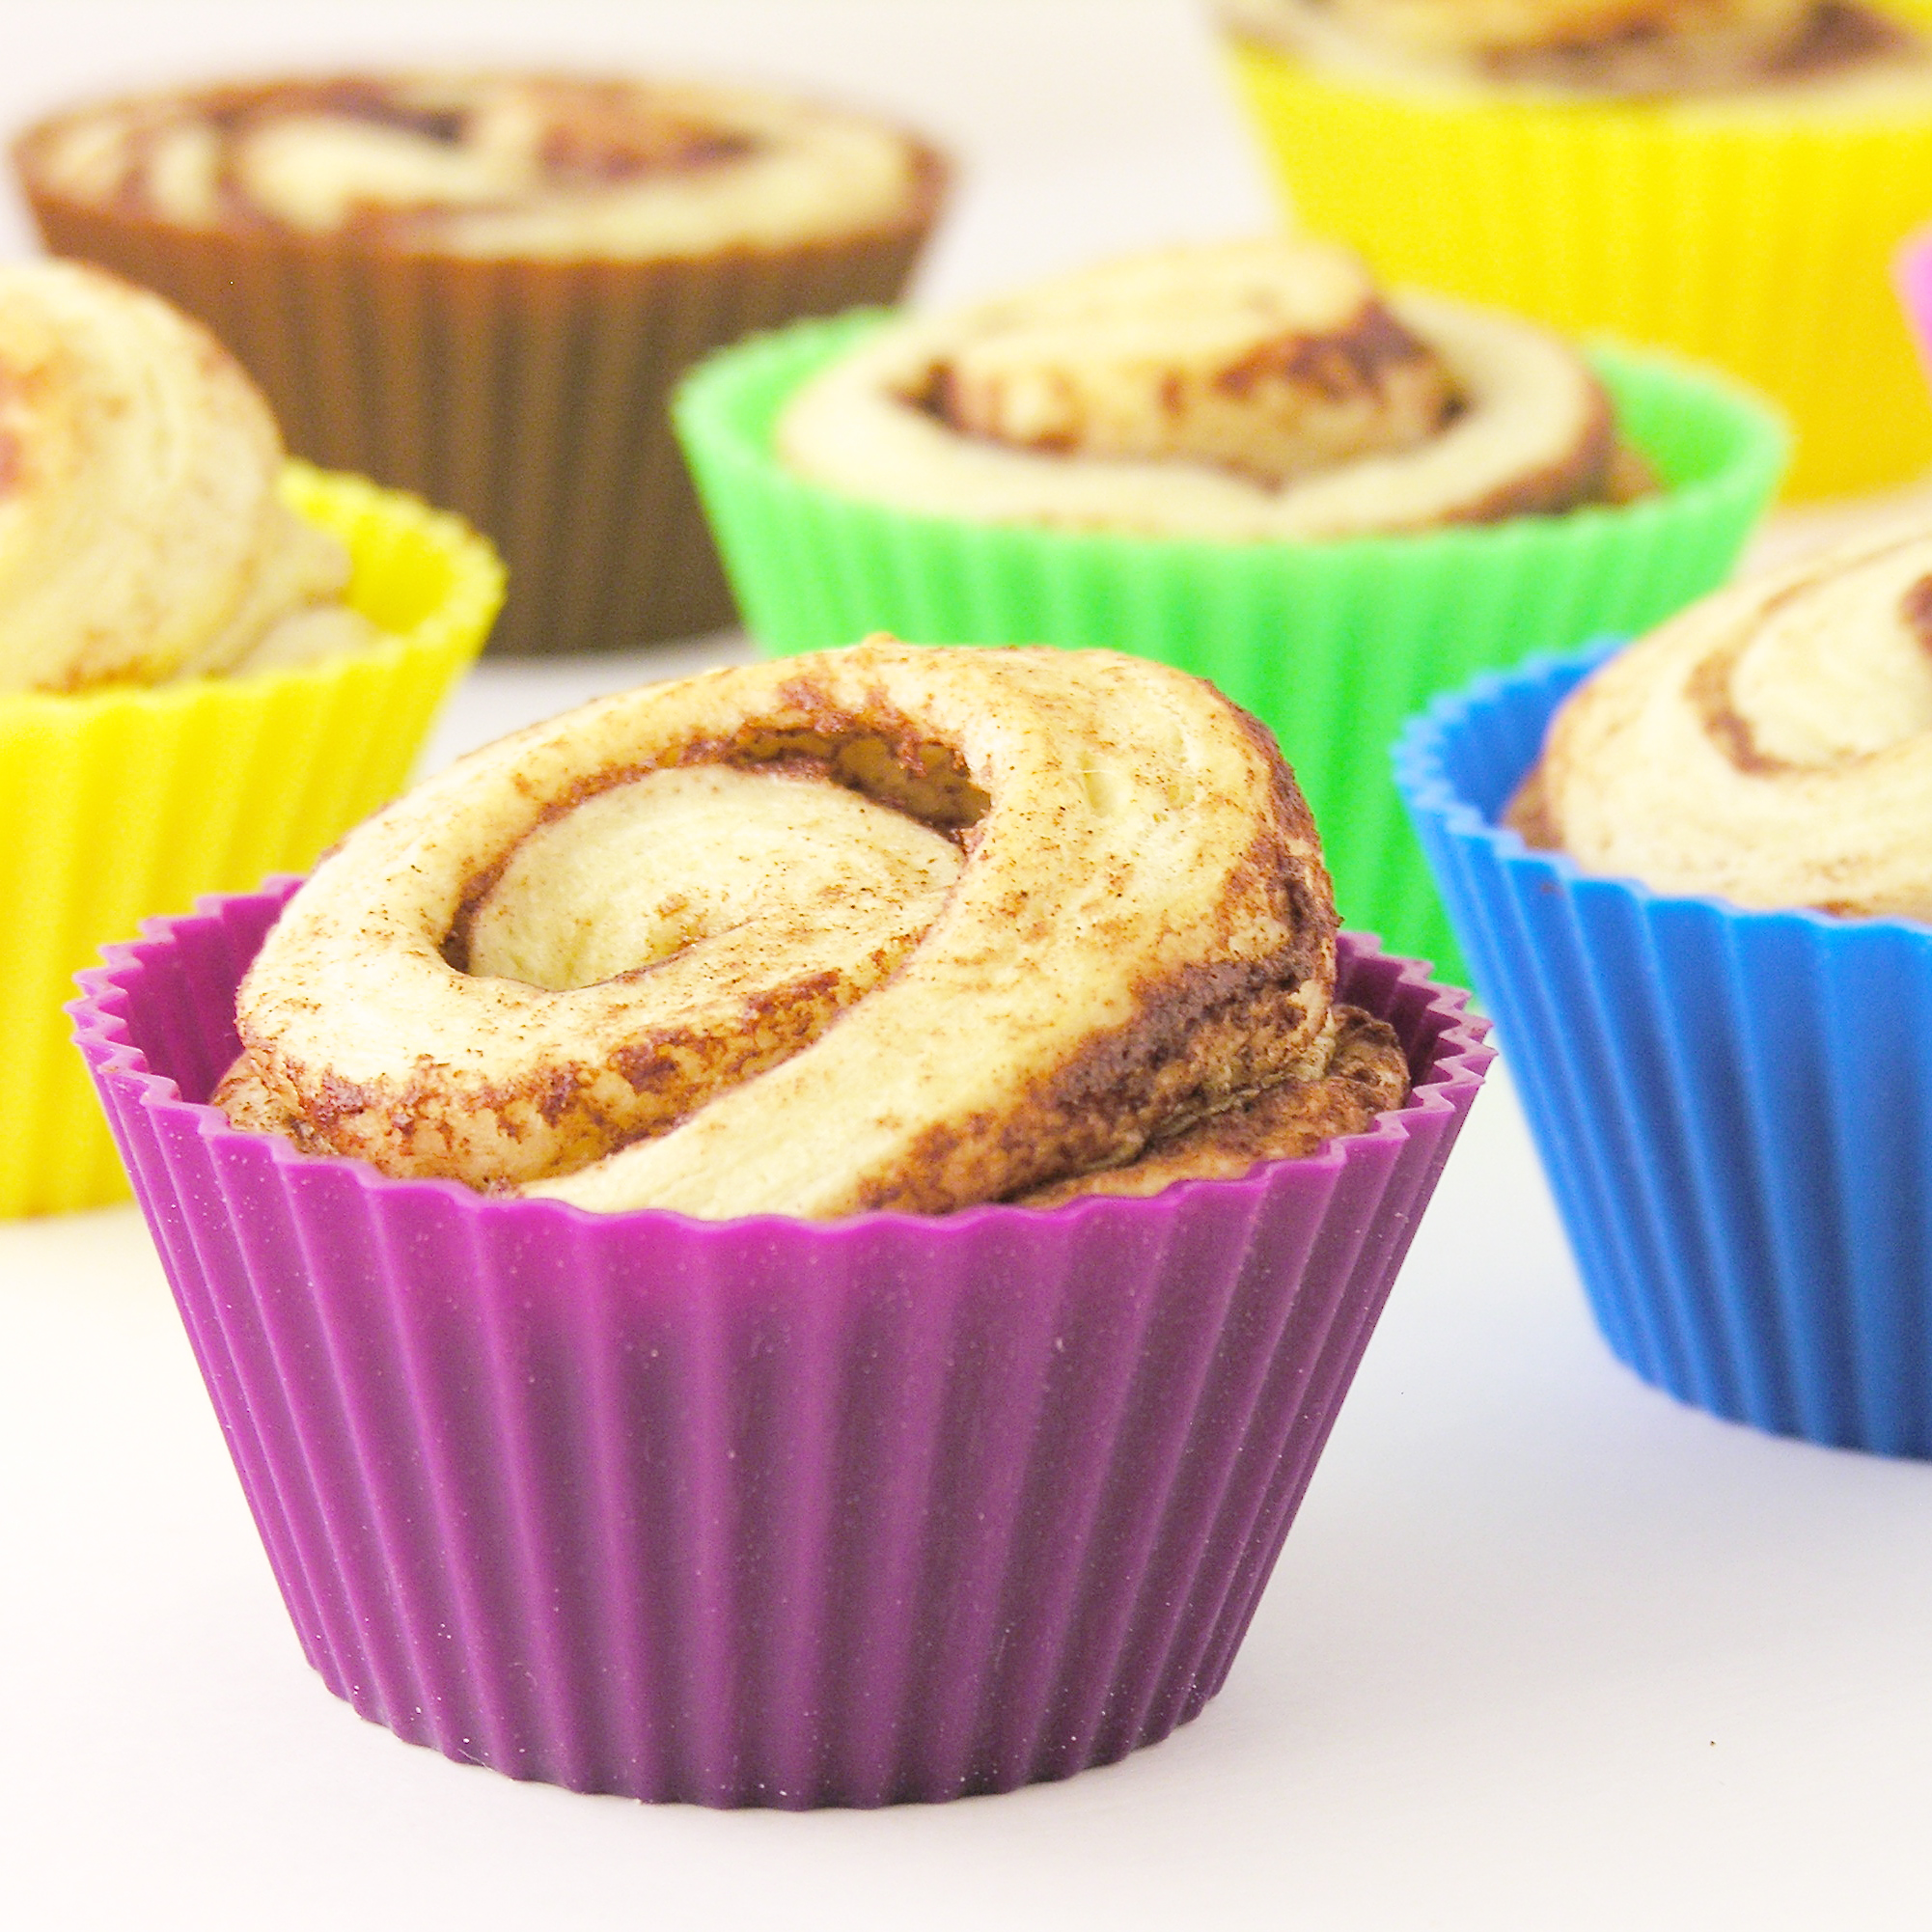
  • Assemble cake: pour about 1/2 of batter into prepared bundt cake pan, sprinkle more than 1/2 of filling on batter, pour remaining batter over filling and then sprinkle remaining filling over the top.
  • Bake at 350 degrees for one hour. Cool and tip out of pan onto serving plate.

Icing:

  • Combine all ingredients except chocolate in a large mixing bowl and beat on high until smooth and fluffy.
  • Add melted chocolate and beat until smooth.
  • Spread over the top of the cooled coffee cake.
  • Enjoy!

Coffee Cake!

My thoughts: Warm this up for a few seconds in the microwave before serving and YUM!!!  You can keep this cake in an airtight container in the fridge and serve it for several days. I hope your family enjoys this recipe as much as ours did over the years!!  ~r

Coffee Cake

Whether you are celebrating your mom in person, or thanking God for wonderful memories of her today, Happy Mother’s Day to you and to your family!

This one’s for you mom!

10178025_10152079947252513_4311481539876989298_n

Other recipes from my mom: (click on photo to see recipe)

Chocolate Chip CakeChocolate drop cookies!Pumpkin RollMint Creme Brownies

No, seriously…you have to try that 1st one…best. cake. ever. 🙂

Easy Cinnamon Roll Cupcakes with Cream Cheese Frosting~ and a GIVE AWAY!!!!

Posted on

Cinnamon Roll Cupcakes

The easiest “cupcakes” you’ll ever make- plus the yummiest cream cheese frosting ever!

This recipe has a story (and my very first give-away on easybaked!!!)

Awhile back, a lovely lady named Karin emailed me with a dilemma. She had recently started a business called Baketown Girls, making products for use in the kitchen. She hired a designer to create her logo and product labels, but a short time after receiving her product she was googling “cupcakes” and immediately saw a photo of our Strawberry Lemonade Cupcakes, and realized that her designer had stolen my photo for use on her product. Sigh. I cannot even tell you how many times that photo (in particular) has been stolen- people email me all the time about seeing it on products and logos. I’ve thought about slapping watermarks across all of my photos, but that’s just so SAD. I just shake my head and wish the world was a better, more honest place.

Strawberry Lemonade Cupcakes!!!!!Cinnamon Roll Cupcakes1

In any case, Karin felt bad, and offered to send me her product to try out. I’ve never use silicone cups (and actually never understood why you would use silicone cups), so I agreed.

About a week later, I got a box with 3 sets- one for me and 2 sets to give away to you all! More about that later.

I didn’t know how I would use them. I figured I could try making cupcakes in them, but (to be honest) my favorite part of cupcakes is matching fun liners with the cupcake recipe and these came in 6 colors which meant that no matter what, I’d be stuck with a variety of those colors. My other question- how do you give these away? I give away 99% of my blog desserts. Do I give away unwrapped cupcakes? That seems odd. And messy.

The day after I received this package of silicone cups I needed to make a batch of cinnamon rolls from one of those refrigerated tubes. I opened it (which is always a traumatic experience when it explodes open) and was ready to set them on a cookie sheet when I thought, “I should bake these in those silicone cups”. I sprayed 10 cups with non-stick spray and squeezed each roll into a circumference that would sit in the bottom of each cup and baked them according to the package.

Cinnamon CupcakesCinnamon Cupcakes

They were AMAZING! They came out looking like little cupcakes and they were so much more moist than when they are baked on a cookie sheet.

Cinnamon Roll Cupcakes

I was genuinely surprised. I removed them from the cups, drizzled them with the provided icing and took them along with me to the event I was attending. People loved them.

Cinnamon Cupcakes8

I knew that if I added my favorite cream cheese icing on top that they would be even better….

Cinnamon Cupcakes

They are cute in the colorful cups, but easily lift right out and can be served without the cups too. I’m a big fan of that, because I can bring them to events and not worry about tracking down my silicone cups.

Cinnamon Cupcake

Here’s how we made these cute little treats:

INGREDIENTS:

  • 2 tubes of refrigerated cinnamon rolls- just the basic kind- not the super-sized jumbo rolls (makes 16-20 rolls, depending on the brand you use. I tried 2 brands, Pillsbury and a generic store brand, and both worked great) 
  • 4 oz (1/2 package) cream cheese (softened)
  • 1/4 cup of butter (softened)
  • 1/2 teaspoon vanilla
  • dash of salt
  • 2 cups powdered sugar
  • 1/2 cup white chocolate chips (melted)

DIRECTIONS:

  • Preheat oven to temperature required by package of rolls.
  • Set appropriate number of silicone cups on a cookie sheet with edges, and spray lightly with non-stick  spray.
  • Open tubes of dough and squeeze each roll into a taller, smaller diameter size so that it will sit flat on the bottom of each cup.
  • Set each roll into individual cups.
  • Bake according to package (watch to make sure you don’t over-bake)
  • Serve warm with provided icing drizzled on top, OR cool and top with cream cheese icing:
  • On medium speed, beat together cream cheese, butter, vanilla, and salt until creamy.
  • Gradually add powdered sugar, beating until smooth.
  • Melt white chocolate chips in the microwave in 30 second increments, stirring between, until smooth.
  • Add melted white chocolate to icing and beat on low until completely combined.
  • Place in a zip-top bag fitted with a decorating tip and pipe frosting on top of cooled cinnamon rolls.

Cinnamon Cupcakes

Aren’t they fun?!?

Ok- so I have 2 extra sets of cups that I’d love to share with my readers! I looked into the various “raffle” sites available to host give-aways and they all seemed so complicated. I decided I will just do this myself.

Only 2 things I’d love to have you do (I can’t require them, but it would make me super happy!!):

1. Follow Easybaked here, by subscribing in the sidebar.

2. “Like” Easybaked on Facebook (here)- and COMMENT under this recipe. I will choose my winners (TWO of them) randomly from comments on Facebook under this recipe- so you actually do have to comment to be entered).

This is available for all readers in the United States (or readers who can have these cute little cups shipped to a US address).

The contest begins NOW and ends on Monday, 3-23-15 at 11pm.  Good luck!!

PLEASE NOTE: THIS CONTEST IS FINISHED 🙂 Cups have already been given away!

Cinnamon Cupcakes

A special thanks to Karin for providing us with these fun cups to give away. Stay tuned for another fun use of these next week here on Easybaked!

If you don’t end up winning, you can find them at this link on Amazon.com:Baketown Girls Silicone Baking Cups.

Love cinnamon? So do we! Try some of our other yummy cinnamon recipes by clicking on a photo:

Cinnamon Upside Down Cakes!!Cinnamon Roll Cheesecake!!Cinnamon Cheesecake SundaesCinnamon Roll Cupcakes!

Creepy Broken Glass Cupcakes!

Posted on

Broken glass Cupcakes!!!
These delicious Red Velvet cupcakes with smooth cream cheese icing are topped with all the makings of a horror movie (or, according to my friend Ricky, a Stephen King novel!).  These are just in time for your creepy October festivities!!

[and if you aren’t a fan of the decorations, they are an amazing cupcake all by themselves!]

Ok.  These were really fun to make.  I’d seen SO many examples of these online– this is not an original idea.  However, I made it my goal to create these in the easiest possible way, with the fewest steps and NO candy thermometers!  Not original, but EASY!!!

Broken glass Cupcakes 2
Note:  I did a cake mix fix by swapping out the water and oil for milk and butter and adding one extra egg.  It was SO good!  (Thanks for the idea Rex!) Heavy and moist cupcakes with exceptional flavor.  I highly recommend it, but you can certainly make the mix as directed for these cupcakes.

Here’s how they are made: (printable recipe)

INGREDIENTS:

The cupcakes:

  • One boxed Red Velvet cake mix
  • Milk (in the same amount as the water required by the mix)
  • Eggs (in the same amount as required by the mix PLUS one extra egg)
  • Butter (twice the amount of oil required by mix- for example if the box calls for 1/2 cup of oil you would use 1 cup of butter).  Measure and then melt before adding to mix.

The icing:

  • 1 package (8 oz) cream cheese (softened)
  • 1/2 cup of butter (softened)
  • 1 teaspoon vanilla
  • dash of salt
  • 4 cups powdered sugar
  • 1 cup white chocolate chips (melted)

The glass candy:

  • 1 cup of granulated sugar
  • 1/2 cup of light corn syrup
  • 1 teaspoon of clear flavoring (I used raspberry)

The edible blood:

  • 1 (14 oz.) can of sweetened condensed milk
  • Red gel food coloring
  • Black gel food coloring
  • 1 teaspoon of clear flavoring (I used raspberry)

DIRECTIONS:

I recommend making the decorations 1st (the glass and “blood”) and keeping them until just before your party to decorate with.  They will both keep for several days, so you can make them ahead of time.

Candy Glass:

  • Cover a cookie sheet with wax paper and spray the wax paper liberally with non-stick spray.
  • Place granulated sugar and corn syrup into a microwave safe bowl and mix them together.
  • Cover bowl with plastic wrap.
  • Microwave on high for 3 minutes.
  • Remove from Microwave and CAREFULLY remove plastic  wrap (beware of hot steam!)
  • Stir well and re-cover with fresh plastic wrap.
  • Microwave on high for another 3 minutes, but watch mixture after about 2 minutes. Because microwaves vary, you need to watch it to make sure it doesn’t start to turn color.  If you cook it too long it will be an amber color instead of the nice clear glass you want.  My microwave was perfect at 2 and 1/2 minutes.
  • CAREFULLY remove from microwave and CAREFULLY remove plastic wrap.
  • This is soooo hot and sticky– using caution to not touch any of the hot candy, pour it out over the greased wax paper and allow it to sit and harden completely (at least a couple of hours)

Candy Glass How-To Pics

  • When candy glass is hard, tap a knife tip into glass to break it into sharp pieces.  
  • Carefully (the pieces are actually sharp!) push pieces up off of wax paper and onto a plate.
  • Candy glass can be kept in a zip top bag or an air tight container for about a week. Moisture (including the moisture from the frosting on the cupcakes) will eventually start to break the glass down.

Candy Glass How-To

Edible Blood:

  • Place sweetened condensed milk into a small bowl and mix in red food color gel and flavoring until you get a brilliant red color.  Add a TINY bit of black (use a toothpick- black goes a long way!).
  • Mix and adjust until you get a nice dark red color.
  • Spoon “blood” into a zip-top bag and seal TIGHTLY.  Keep refrigerated until use.

Edible Blood!Cupcakes:

  • Make cake mix according to box (swapping in cake mix “fix” ingredients if desired)
  • Divide equally into 24 cupcake liners in cupcake tins.
  • Bake at 350F degrees according to times on box.
  • Remove cupcakes from oven and cool completely.

Frosting:

  • On medium speed, beat together cream cheese, butter, vanilla, and salt until creamy.
  • Gradually add powdered sugar, beating until smooth.
  • Melt white chocolate chips in the microwave in 30 second increments, stirring between, until smooth.
  • Add melted white chocolate to icing and beat on low until completely combined.
  • Place in a zip-top bag fitted with a decorating tip and pipe frosting on top of cooled cupcakes.

Decorating:

  • Put parchment paper on a counter to protect it from all that red food coloring. 
  • [or- use a large platter or tray that you will serve the cupcakes on- blood splatter and all!]
  • Place frosted cupcakes on protected surface and press 2 to3 pieces of glass into the top of each.
  • Clip the corner on the bag of edible blood and drizzle over the top of the glass and the cupcakes, allowing it to drip down the sides of both.
  • Serve the same day after decorating.
  • Use care transporting and serve with plates and forks, or you will all have red fingers!!

Broken Glass Cupcakes3

My thoughts: These are such yummy cupcakes all by themselves.  But the decorating was SO much fun!  My friend Amber helped and we both were a little in awe of how realistic they looked…and how yummy they tasted!  I wasn’t sure how the sweetened condensed milk would taste on the cupcakes, but I added a little raspberry flavor and oh my…so good!

Setting up for photos was fun too…splattering fake blood everywhere and letting it drip off my cupcake stand was interesting…not my typical cupcake photo shoot!

I really hope you get a chance to try these– even if you just go for the yummy cupcake recipe minus the drama!

I will leave you with a little insiders look at my picture-taking experience:

Broken glass cupcakes-- food photography at its finest....lol!

So fun!!!

Here are some other fun “creepy” October recipes to try:

Mummy Oreo Pops!Spider Cupcakes!MISfortune cookies with caramel apple cupcakesHalloween Bundt Cake

Red Velvet Cookies with Cream Cheese Icing

Posted on

Red Velvet Cookies!!

These rich red velvet cookies are covered in a smooth cream cheese icing.  Add a glass of milk and you have the perfect dessert!

I like to experiment in the kitchen.  Usually it takes a few tries before I get something exactly the way I like it (ok, sometimes more than a few tries!)  These cookies were perfect the 1st time.  They are just beautiful cake-like cookies right out of the oven, and they are sooo easy to make.  They honestly could stand alone if you aren’t an icing fan.  The cream cheese icing is incredibly yummy though….so if you are like me and want icing on everything you eat, be sure to try this one!

Red Velvet Cookies!!!

Here’s how to make these yummy cookies: (printable recipe)

INGREDIENTS: (makes 24 medium cookies)

Cookies:

  • 1 cup brown sugar
  • 1 stick (1/2 cup) of butter (softened)
  • 1 egg (beaten)
  • 1/2 cup evaporated milk
  • Red food coloring (to desired shade)
  • 2 cups flour
  • 1/2 teaspoon baking soda
  • 1/2 teaspoon salt
  • 2 squares (1 oz. each) of unsweetened baking chocolate (melted)
  • 1 teaspoon of vanilla

Icing:

  • 4 oz (1/2 package) cream cheese (softened)
  • 1/4 cup of butter (softened)
  • 1/2 teaspoon vanilla
  • dash of salt
  • 2 cups powdered sugar
  • 1/2 cup white chocolate chips (melted)

DIRECTIONS:

Cookies:

  • Preheat oven to 375F degrees.
  • Cream together butter and brown sugar.
  • Add egg and blend well.
  • Put evaporated milk into a small bowl and stir in food color until a deep shade of red.
  • Add dry ingredients, alternating with the red evaporated milk.  (I used a mixer at this point to fully incorporate the red)
  • After batter is well combined, add the vanilla and melted chocolate and blend on low speed until completely combined.
  • Cover cookie sheets with parchment paper and use a medium cookie scoop to spoon dough on sheets.
  • Bake at 375F degrees for 10 minutes.
  • Slide cookies off sheet with parchment paper and allow them to cool on paper completely.

Icing:

  • On medium speed, beat together cream cheese, butter, vanilla, and salt until creamy.
  • Gradually add powdered sugar, beating until smooth.
  • Melt white chocolate chips in the microwave in 30 second increments, stirring between, until smooth.
  • Add melted white chocolate to icing and beat on low until completely combined.
  • Place in a zip-top bag fitted with a decorating tip and pipe frosting on top of cooled cookies.

Red velvet cookies with cream cheese icing!!

My thoughts:  These are easy and really so moist and flavorful.  Perfect with a cold glass of milk or a cup of coffee!  Hope you enjoy them!  ~r

Other fun cookie ideas:

Chocolate Chip Oatmeal CookiesGerman Chocolate CookieGingerbread Cookies!New Zealand Chocolate cookies