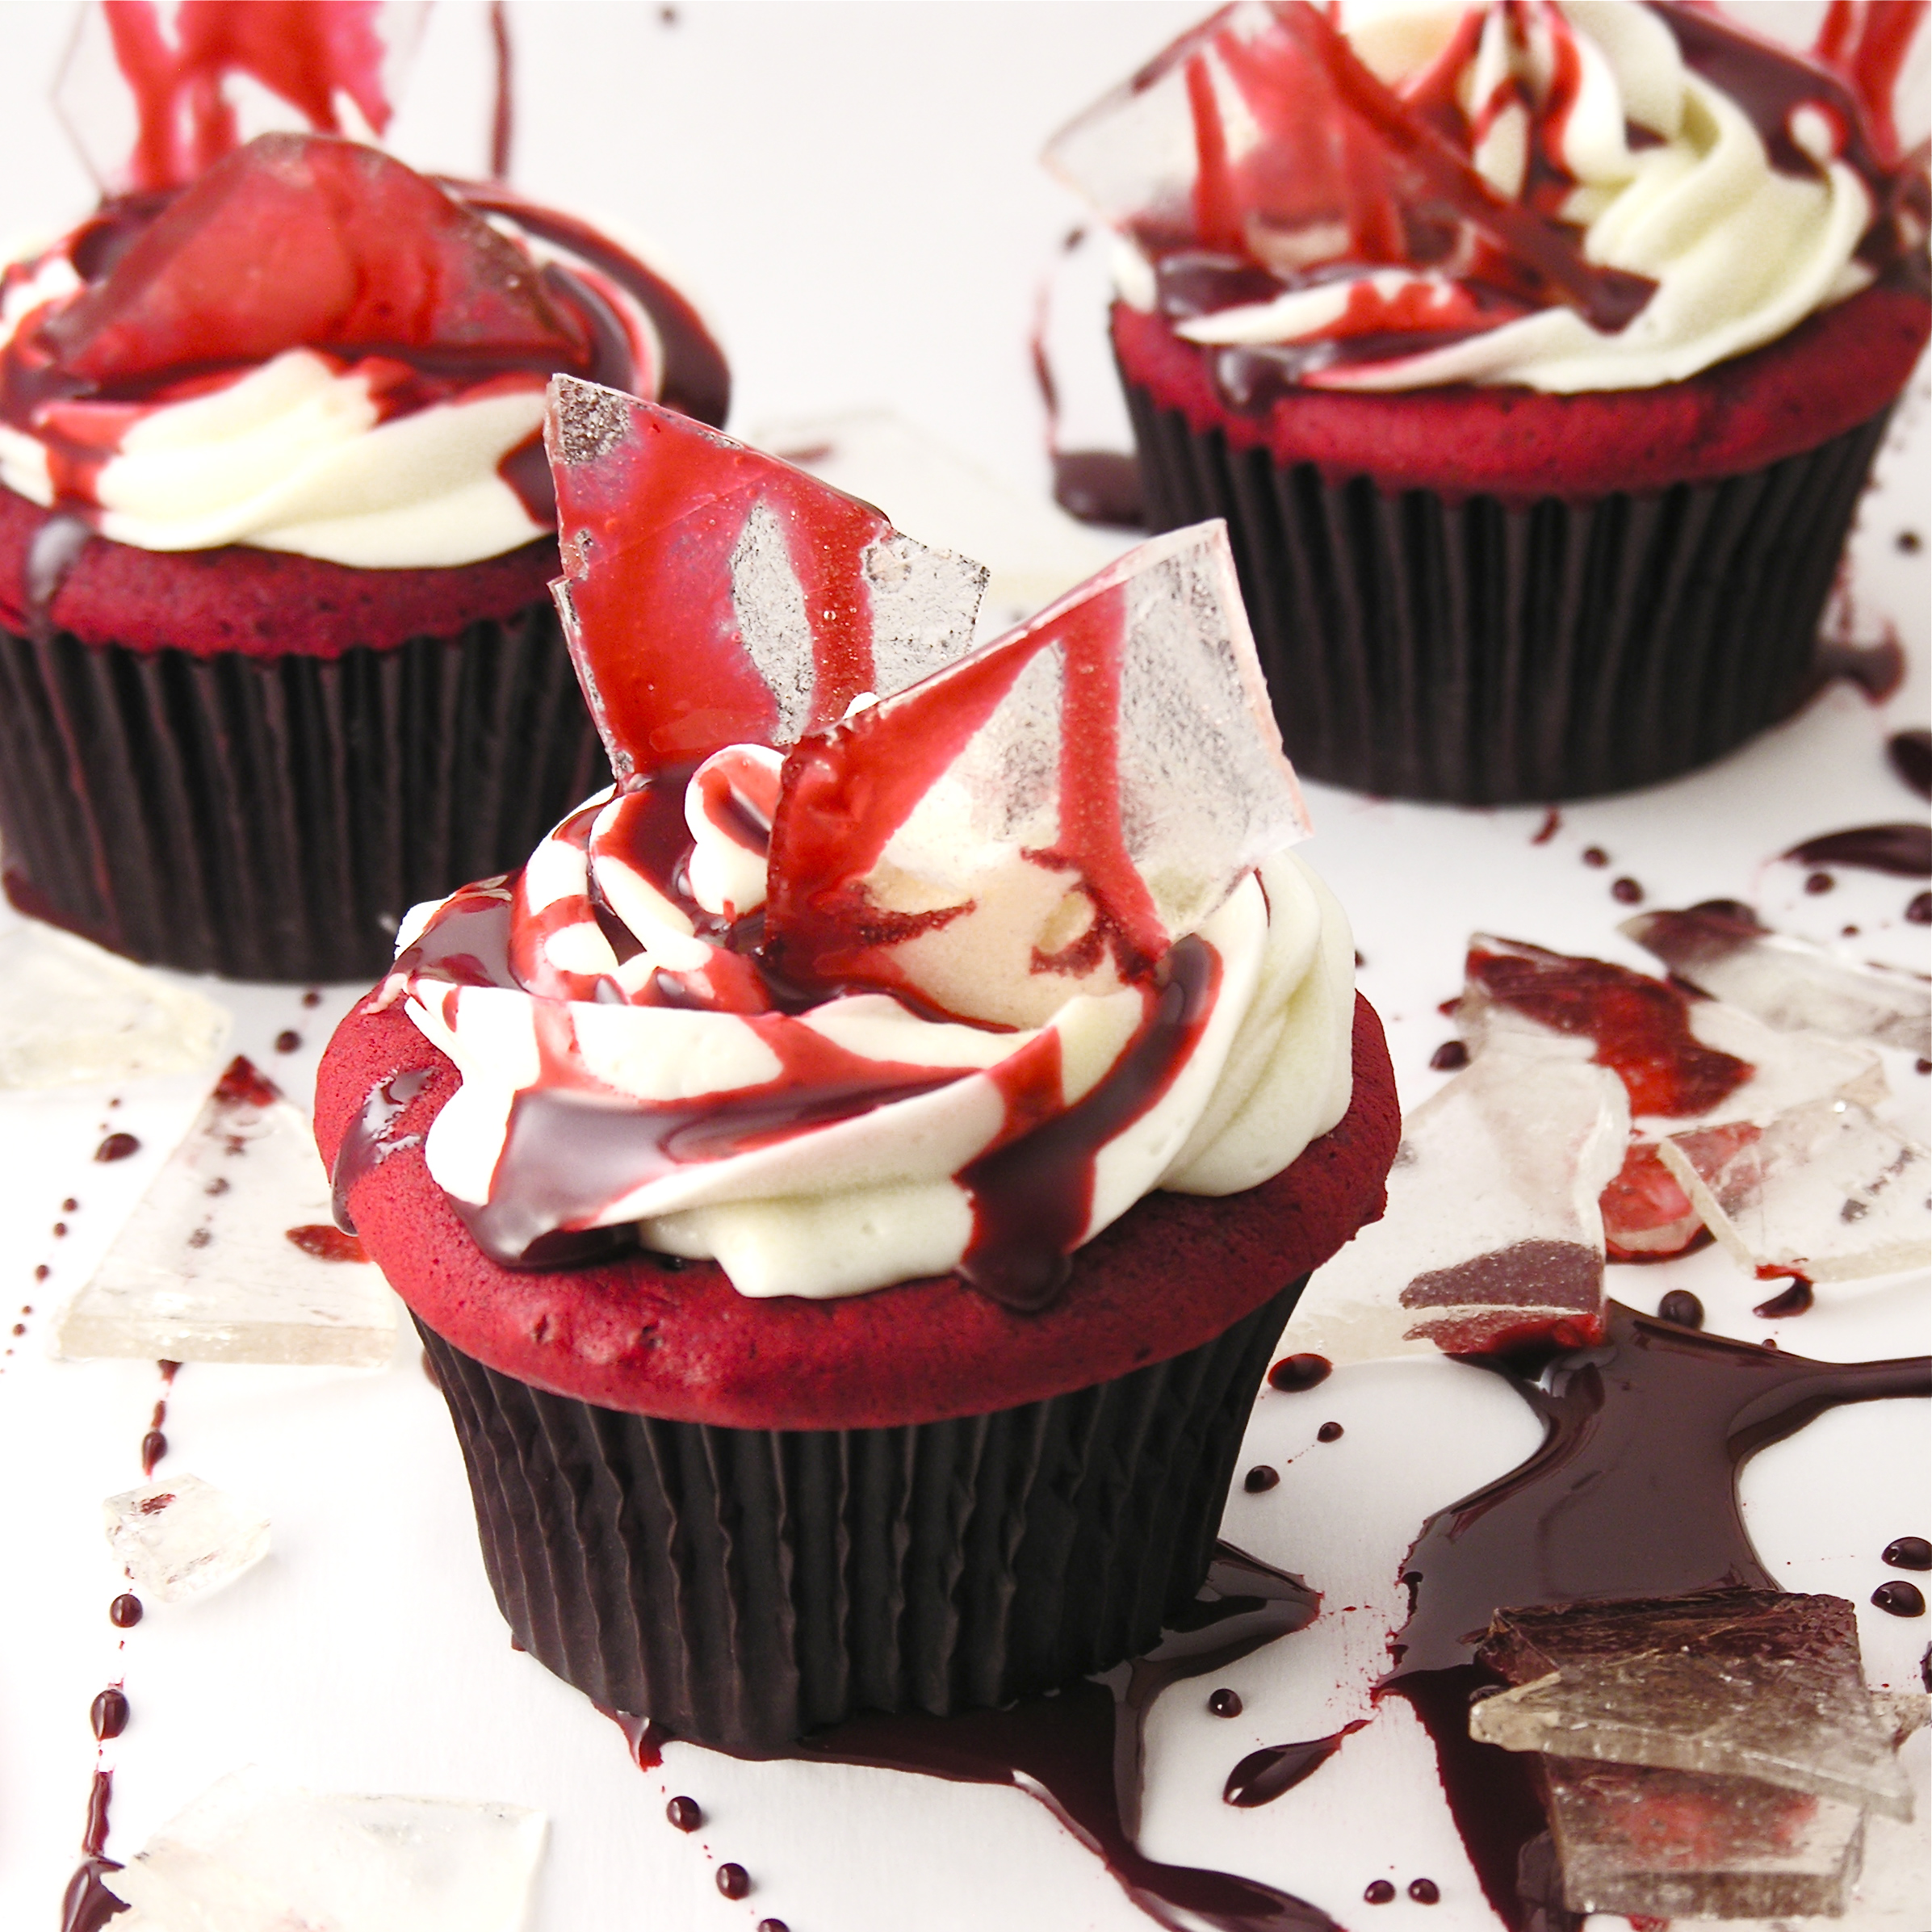

These delicious Red Velvet cupcakes with smooth cream cheese icing are topped with all the makings of a horror movie (or, according to my friend Ricky, a Stephen King novel!). These are just in time for your creepy October festivities!!
[and if you aren’t a fan of the decorations, they are an amazing cupcake all by themselves!]
Ok. These were really fun to make. I’d seen SO many examples of these online– this is not an original idea. However, I made it my goal to create these in the easiest possible way, with the fewest steps and NO candy thermometers! Not original, but EASY!!!

Note: I did a cake mix fix by swapping out the water and oil for milk and butter and adding one extra egg. It was SO good! (Thanks for the idea Rex!) Heavy and moist cupcakes with exceptional flavor. I highly recommend it, but you can certainly make the mix as directed for these cupcakes.
Here’s how they are made: (printable recipe)
INGREDIENTS:
The cupcakes:
- One boxed Red Velvet cake mix
- Milk (in the same amount as the water required by the mix)
- Eggs (in the same amount as required by the mix PLUS one extra egg)
- Butter (twice the amount of oil required by mix- for example if the box calls for 1/2 cup of oil you would use 1 cup of butter). Measure and then melt before adding to mix.
The icing:
- 1 package (8 oz) cream cheese (softened)
- 1/2 cup of butter (softened)
- 1 teaspoon vanilla
- dash of salt
- 4 cups powdered sugar
- 1 cup white chocolate chips (melted)
The glass candy:
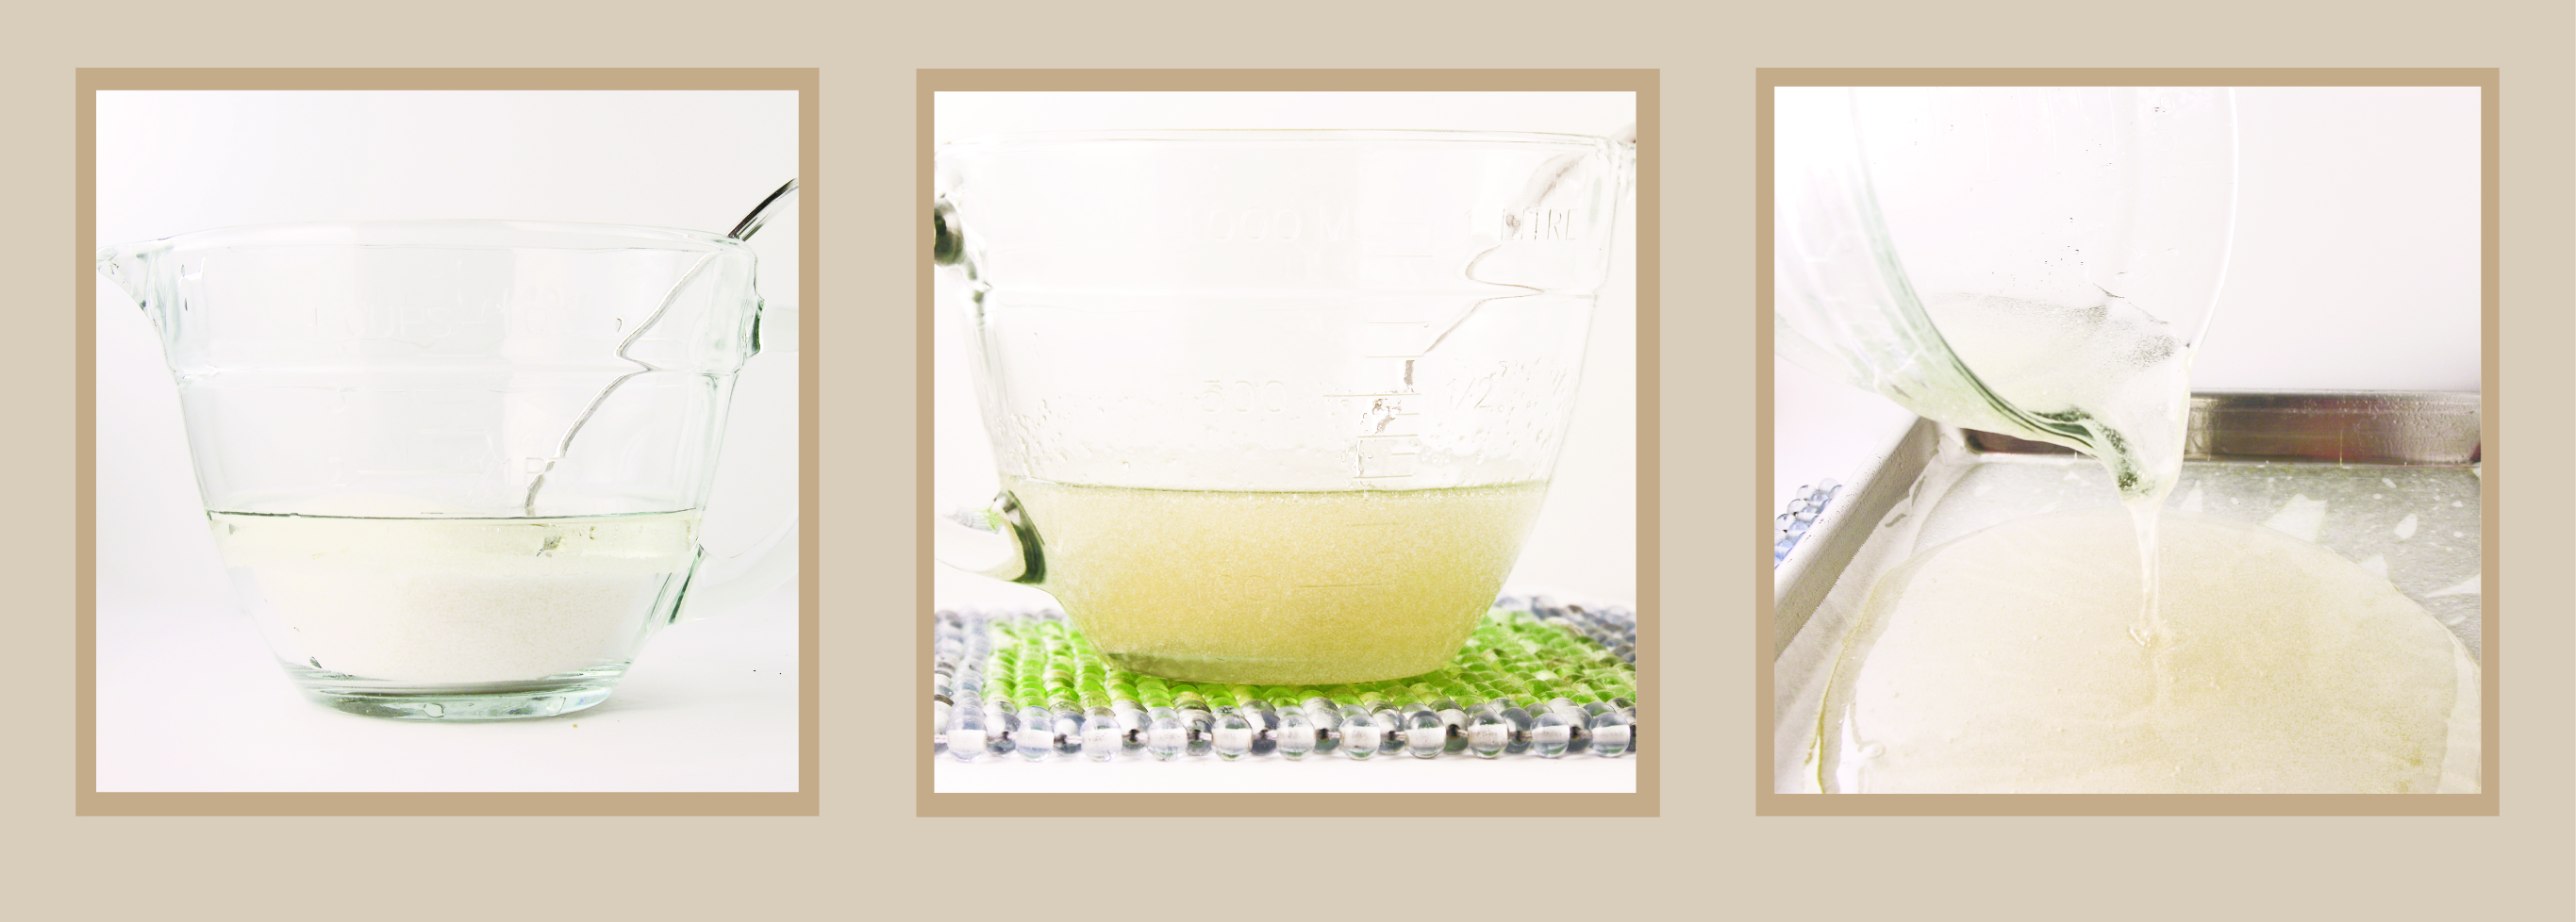
- 1 cup of granulated sugar
- 1/2 cup of light corn syrup
- 1 teaspoon of clear flavoring (I used raspberry)
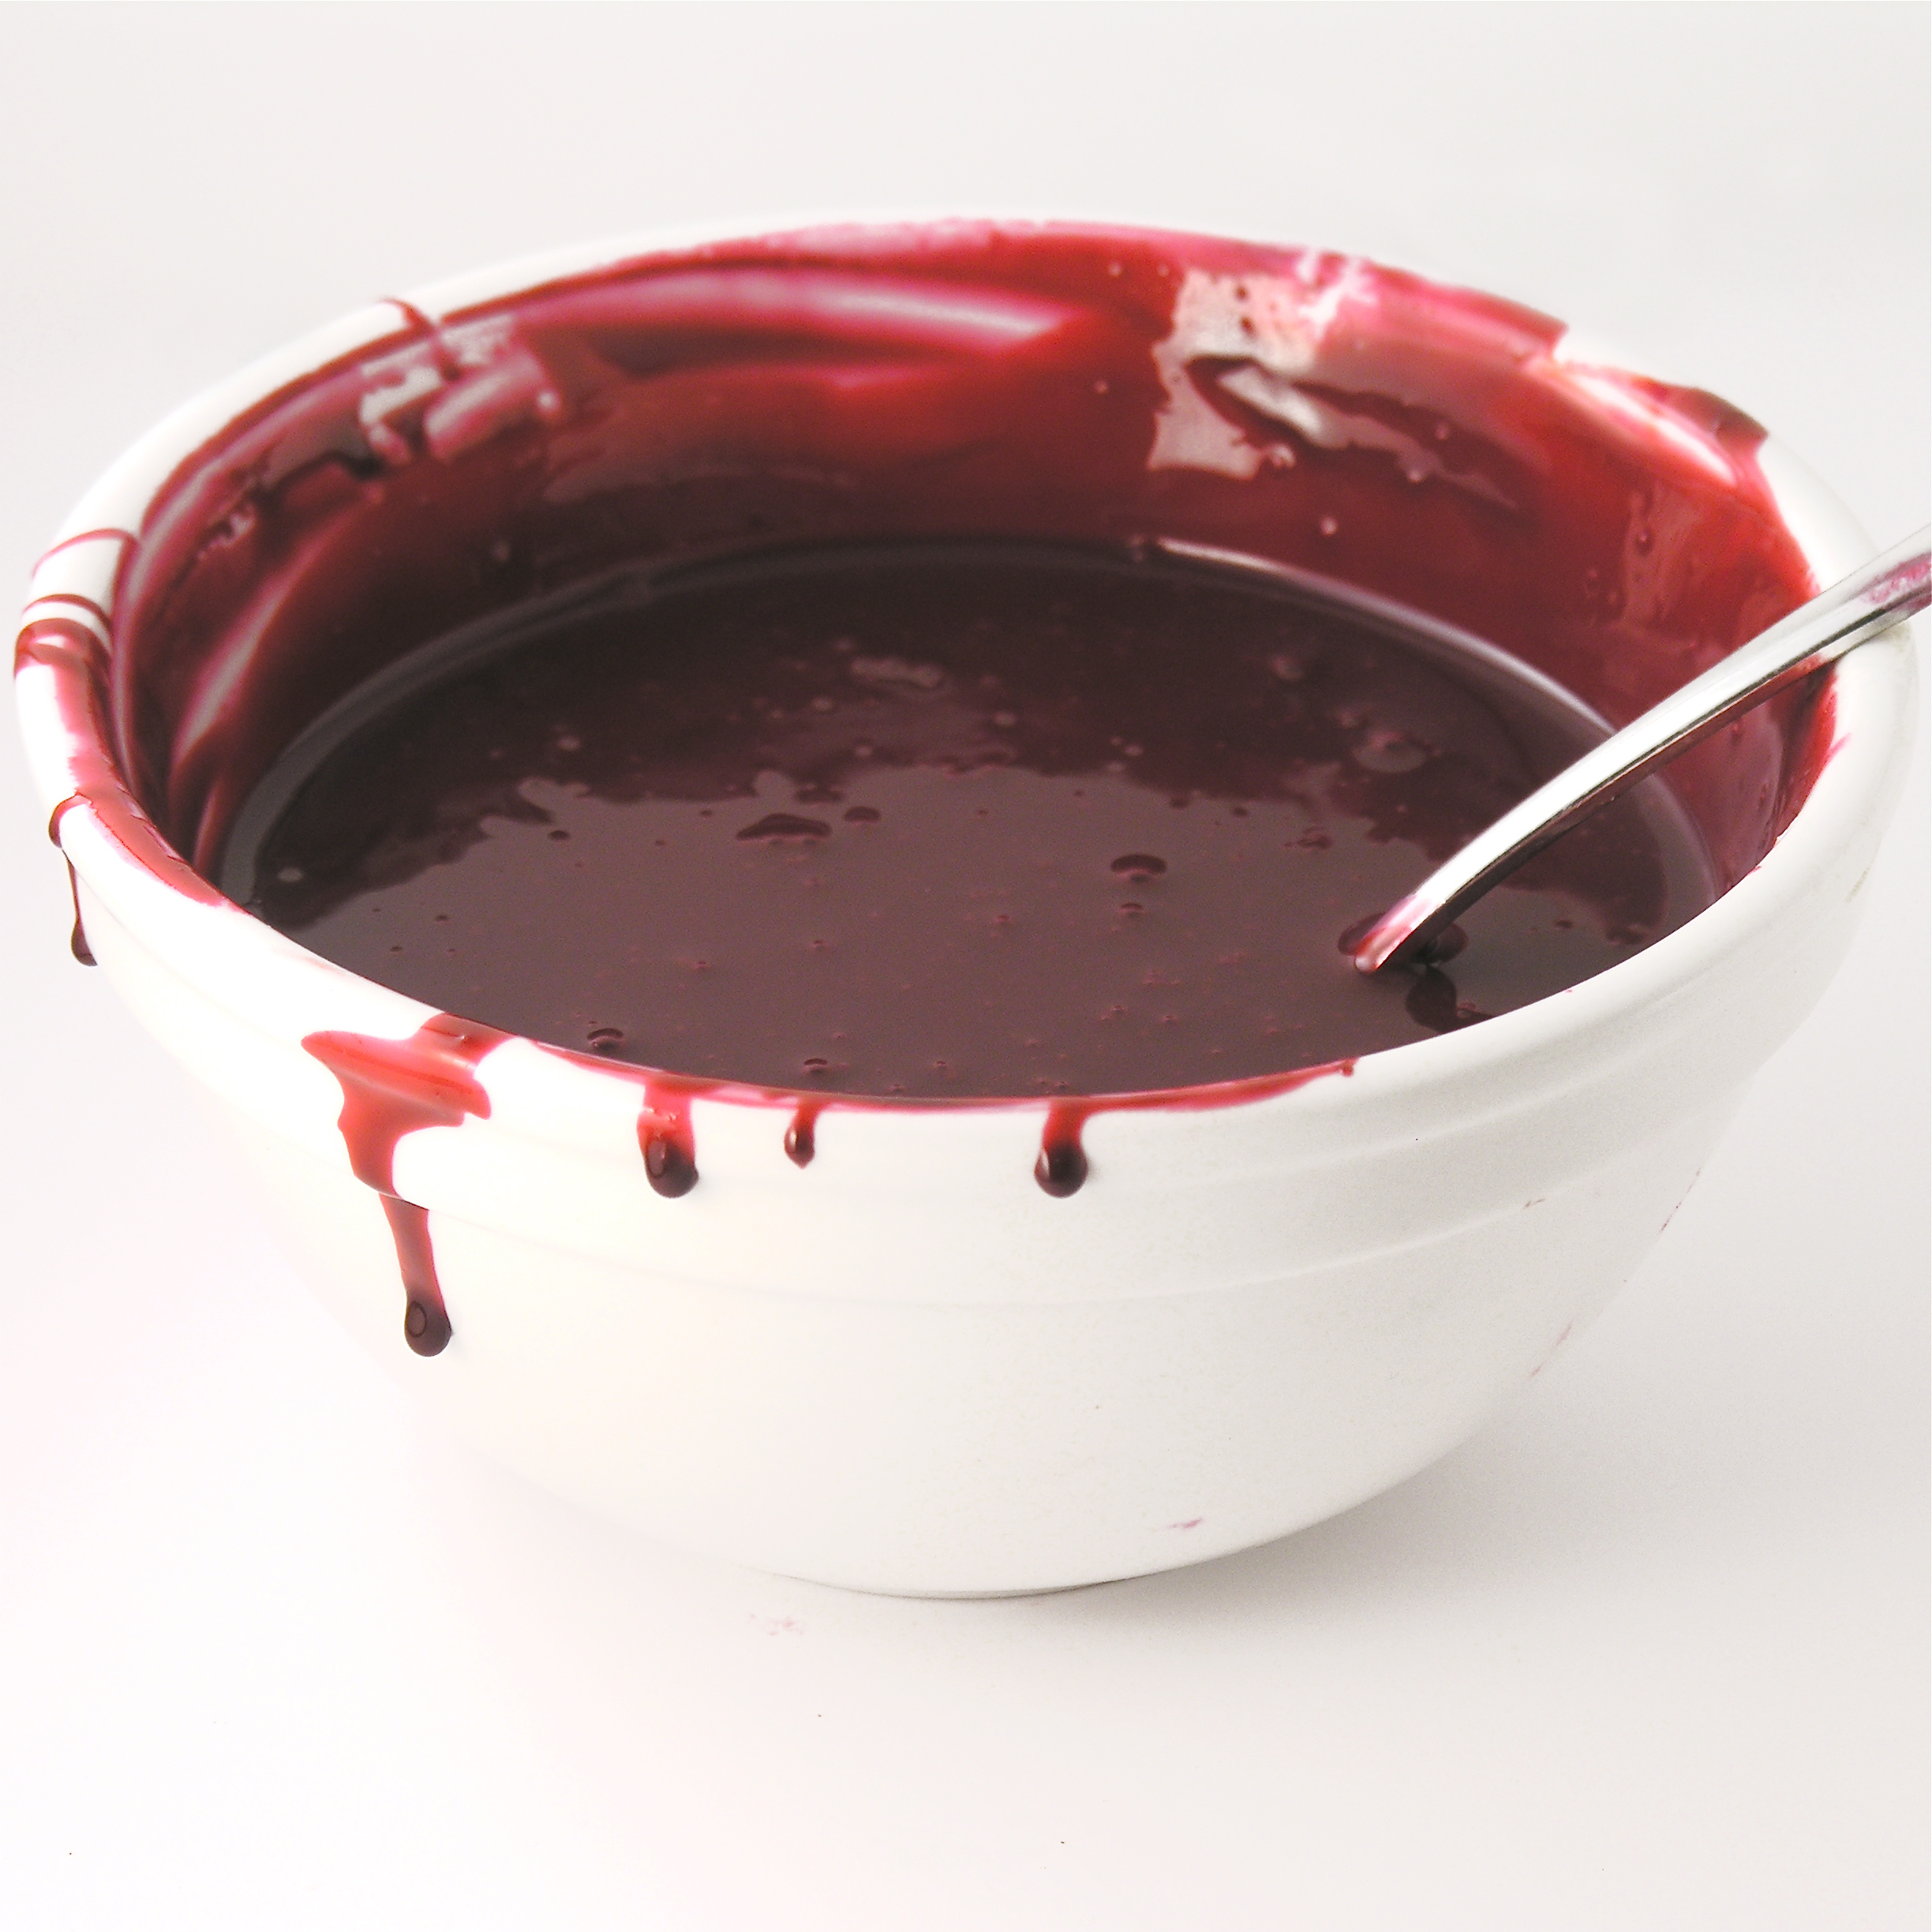
The edible blood:
- 1 (14 oz.) can of sweetened condensed milk
- Red gel food coloring
- Black gel food coloring
- 1 teaspoon of clear flavoring (I used raspberry)
DIRECTIONS:
I recommend making the decorations 1st (the glass and “blood”) and keeping them until just before your party to decorate with. They will both keep for several days, so you can make them ahead of time.
Candy Glass:
- Cover a cookie sheet with wax paper and spray the wax paper liberally with non-stick spray.
- Place granulated sugar and corn syrup into a microwave safe bowl and mix them together.
- Cover bowl with plastic wrap.
- Microwave on high for 3 minutes.
- Remove from Microwave and CAREFULLY remove plastic wrap (beware of hot steam!)
- Stir well and re-cover with fresh plastic wrap.
- Microwave on high for another 3 minutes, but watch mixture after about 2 minutes. Because microwaves vary, you need to watch it to make sure it doesn’t start to turn color. If you cook it too long it will be an amber color instead of the nice clear glass you want. My microwave was perfect at 2 and 1/2 minutes.
- CAREFULLY remove from microwave and CAREFULLY remove plastic wrap.
- This is soooo hot and sticky– using caution to not touch any of the hot candy, pour it out over the greased wax paper and allow it to sit and harden completely (at least a couple of hours)
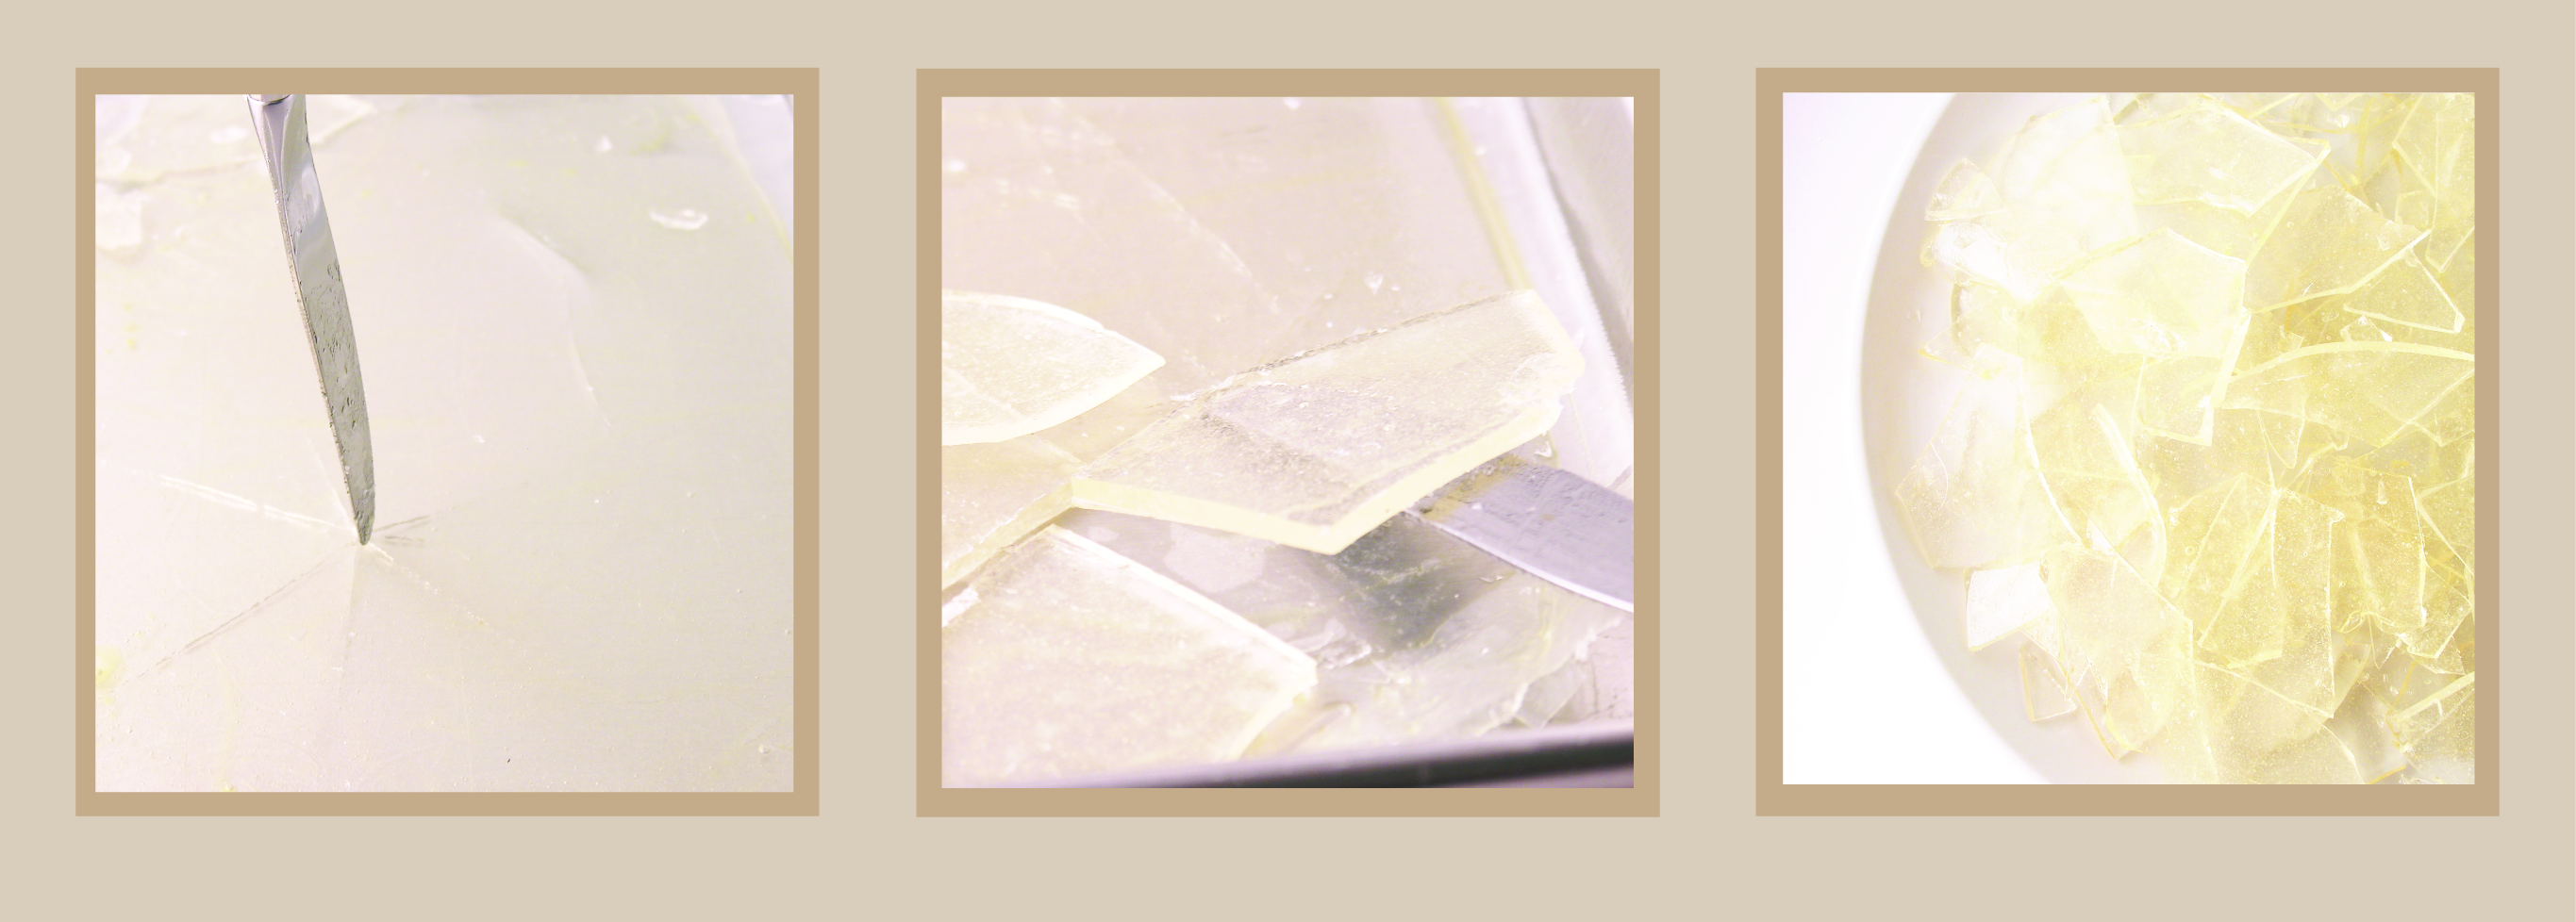
- When candy glass is hard, tap a knife tip into glass to break it into sharp pieces.
- Carefully (the pieces are actually sharp!) push pieces up off of wax paper and onto a plate.
- Candy glass can be kept in a zip top bag or an air tight container for about a week. Moisture (including the moisture from the frosting on the cupcakes) will eventually start to break the glass down.
Edible Blood:
- Place sweetened condensed milk into a small bowl and mix in red food color gel and flavoring until you get a brilliant red color. Add a TINY bit of black (use a toothpick- black goes a long way!).
- Mix and adjust until you get a nice dark red color.
- Spoon “blood” into a zip-top bag and seal TIGHTLY. Keep refrigerated until use.
 Cupcakes:
- Make cake mix according to box (swapping in cake mix “fix” ingredients if desired)
- Divide equally into 24 cupcake liners in cupcake tins.
- Bake at 350F degrees according to times on box.
- Remove cupcakes from oven and cool completely.
Frosting:
- On medium speed, beat together cream cheese, butter, vanilla, and salt until creamy.
- Gradually add powdered sugar, beating until smooth.
- Melt white chocolate chips in the microwave in 30 second increments, stirring between, until smooth.
- Add melted white chocolate to icing and beat on low until completely combined.
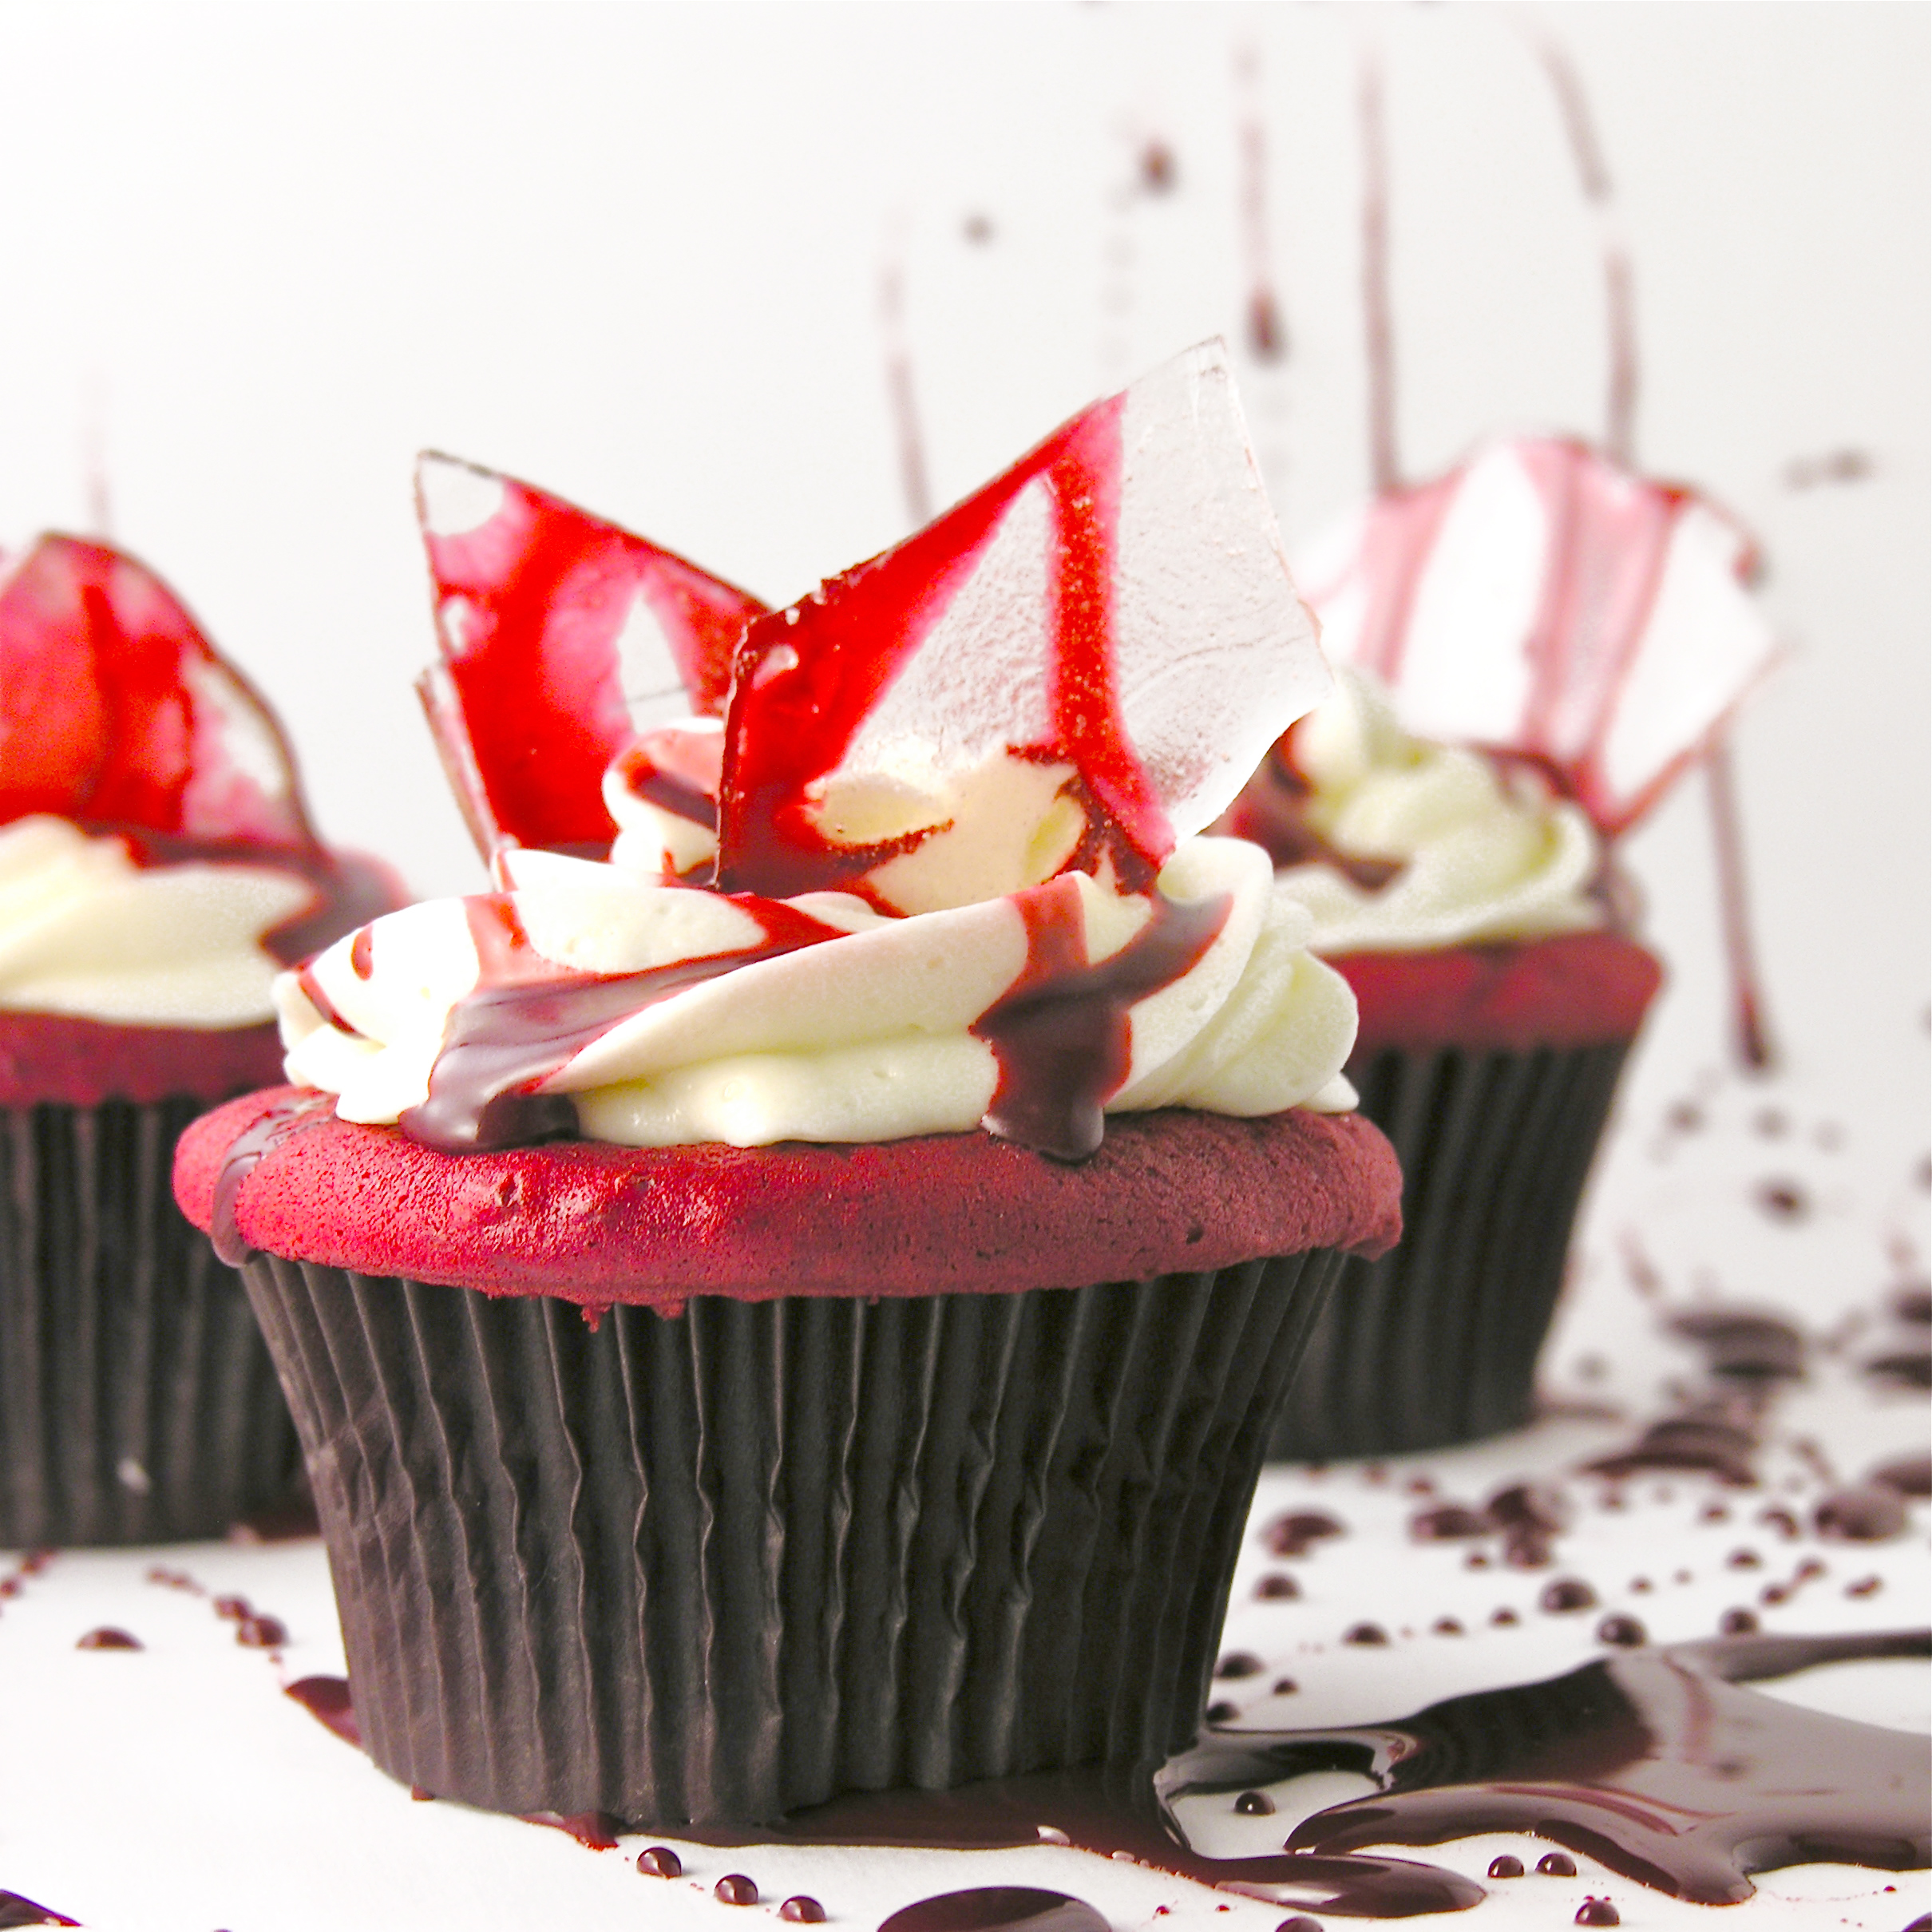
- Place in a zip-top bag fitted with a decorating tip and pipe frosting on top of cooled cupcakes.
Decorating:
- Put parchment paper on a counter to protect it from all that red food coloring.
- [or- use a large platter or tray that you will serve the cupcakes on- blood splatter and all!]
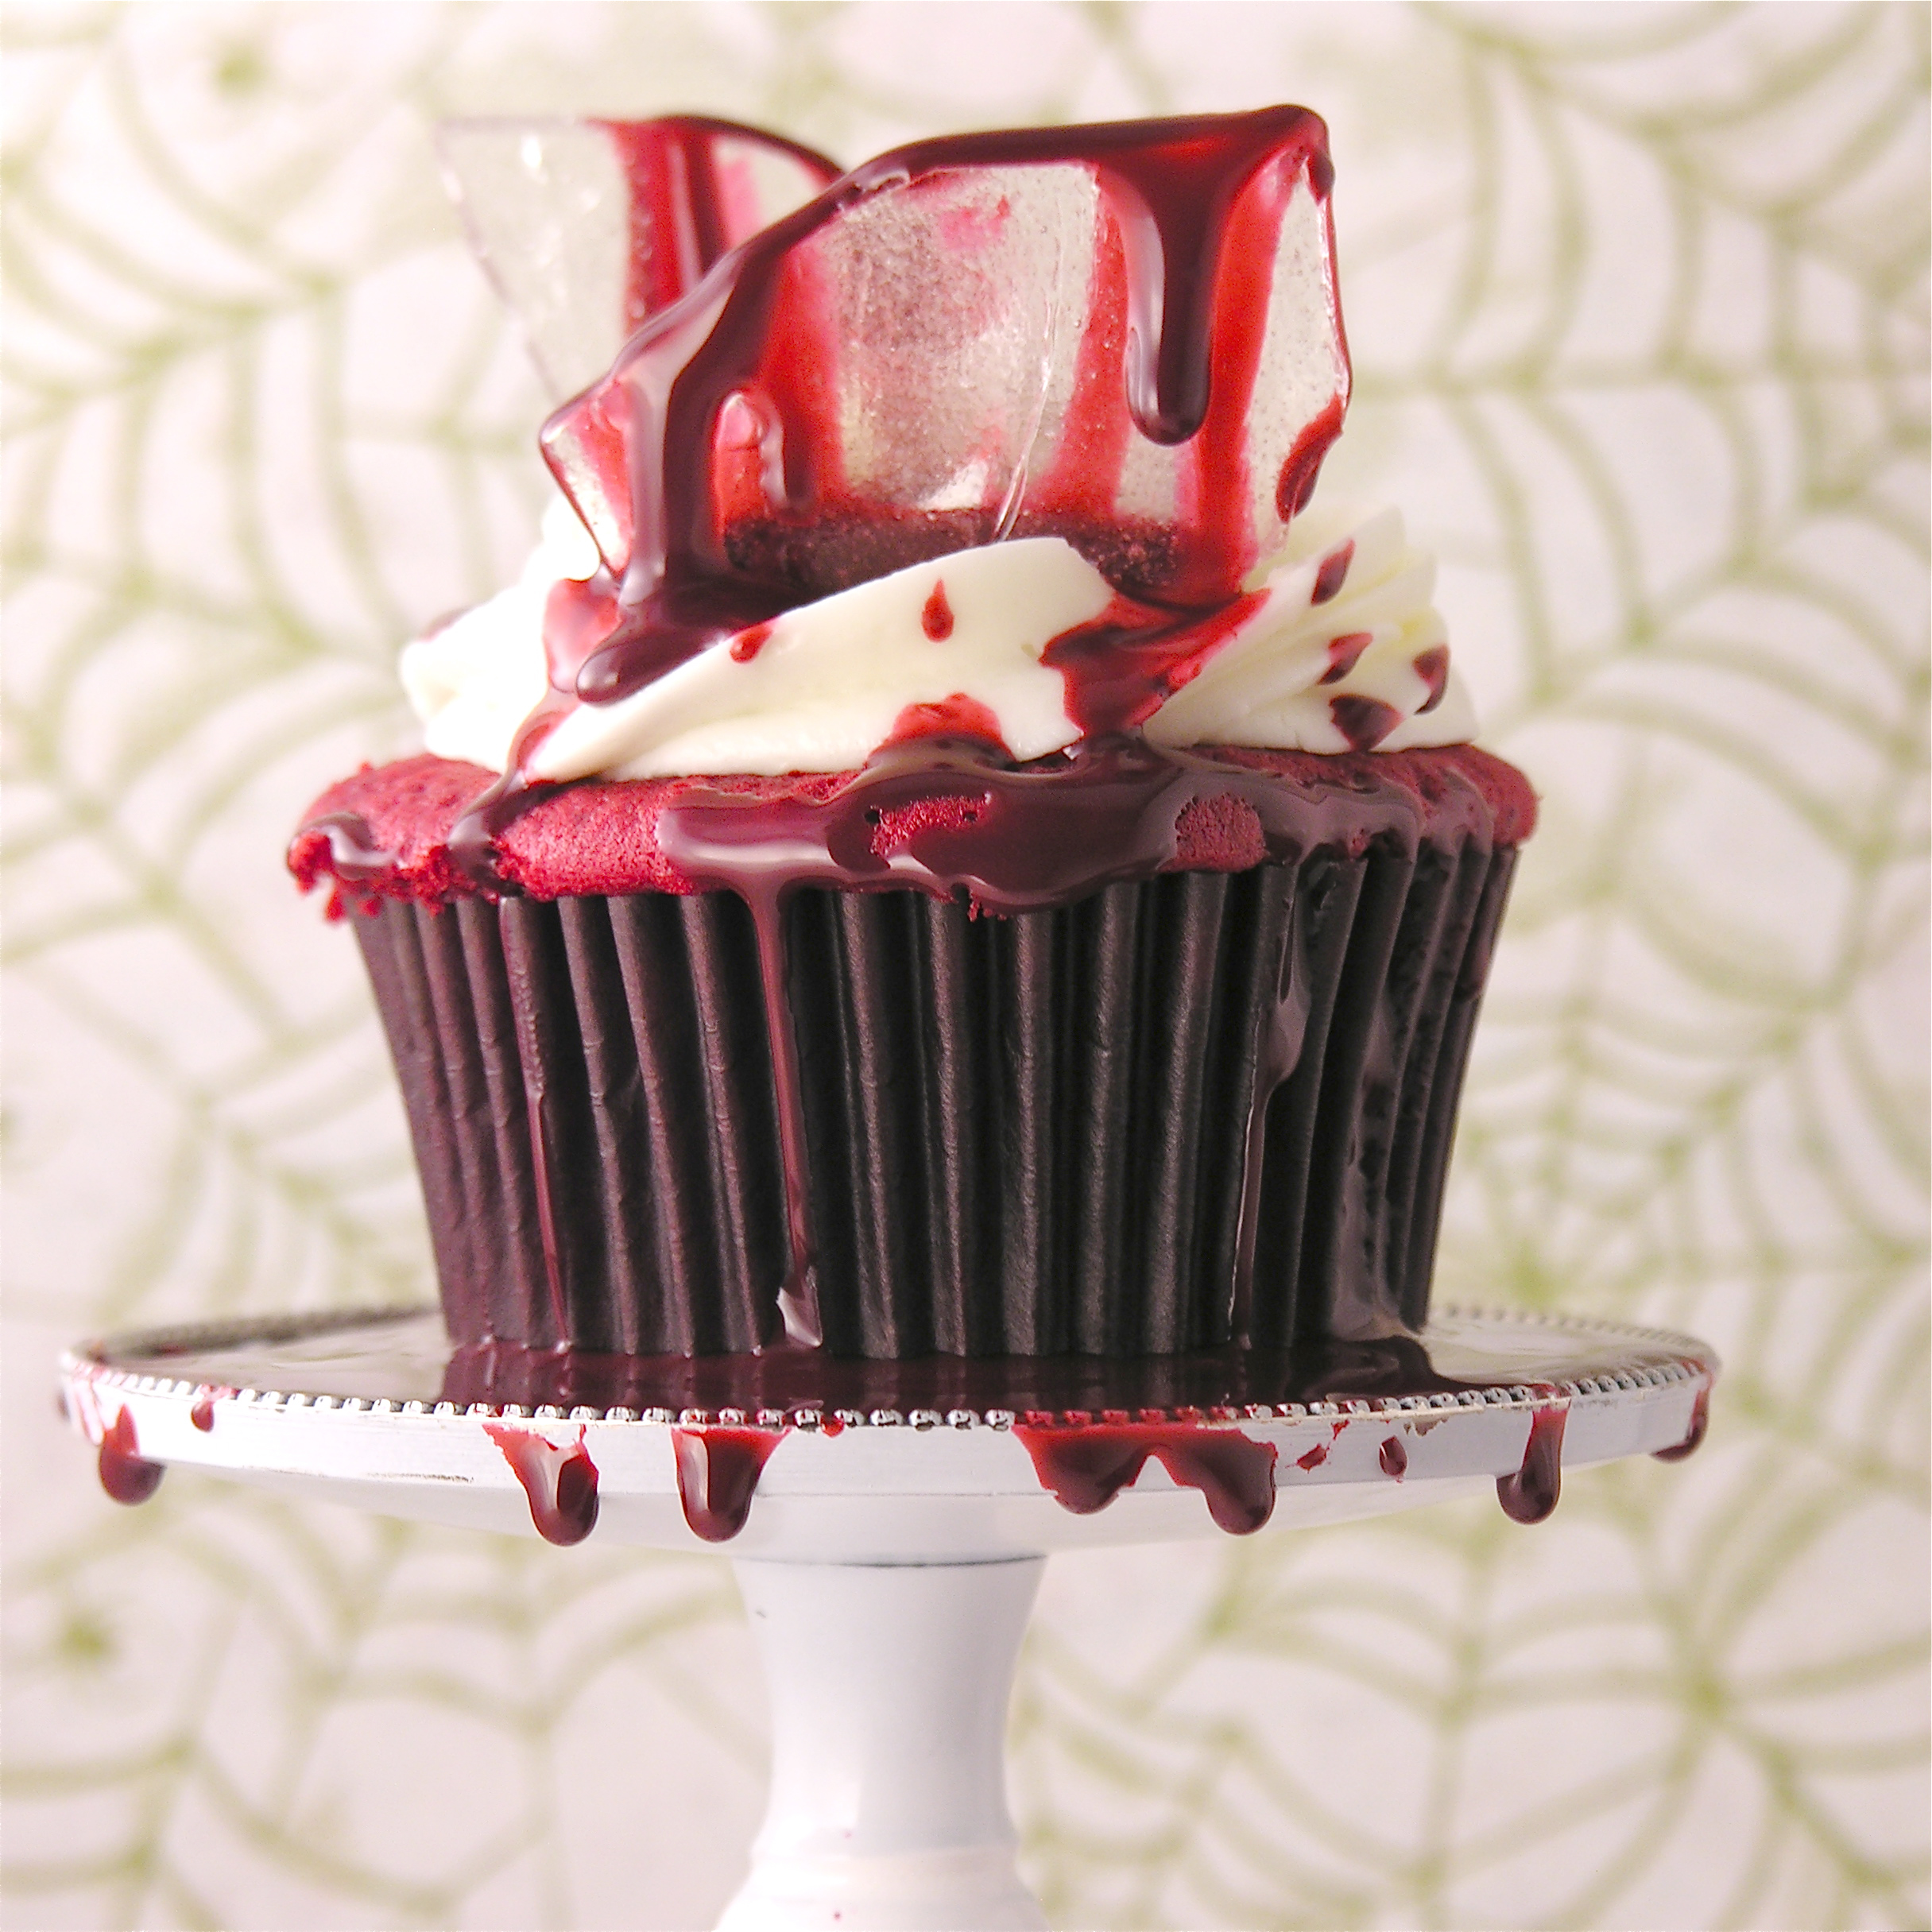
- Place frosted cupcakes on protected surface and press 2 to3 pieces of glass into the top of each.
- Clip the corner on the bag of edible blood and drizzle over the top of the glass and the cupcakes, allowing it to drip down the sides of both.
- Serve the same day after decorating.
- Use care transporting and serve with plates and forks, or you will all have red fingers!!

My thoughts: These are such yummy cupcakes all by themselves. But the decorating was SO much fun! My friend Amber helped and we both were a little in awe of how realistic they looked…and how yummy they tasted! I wasn’t sure how the sweetened condensed milk would taste on the cupcakes, but I added a little raspberry flavor and oh my…so good!
Setting up for photos was fun too…splattering fake blood everywhere and letting it drip off my cupcake stand was interesting…not my typical cupcake photo shoot!
I really hope you get a chance to try these– even if you just go for the yummy cupcake recipe minus the drama!
I will leave you with a little insiders look at my picture-taking experience:
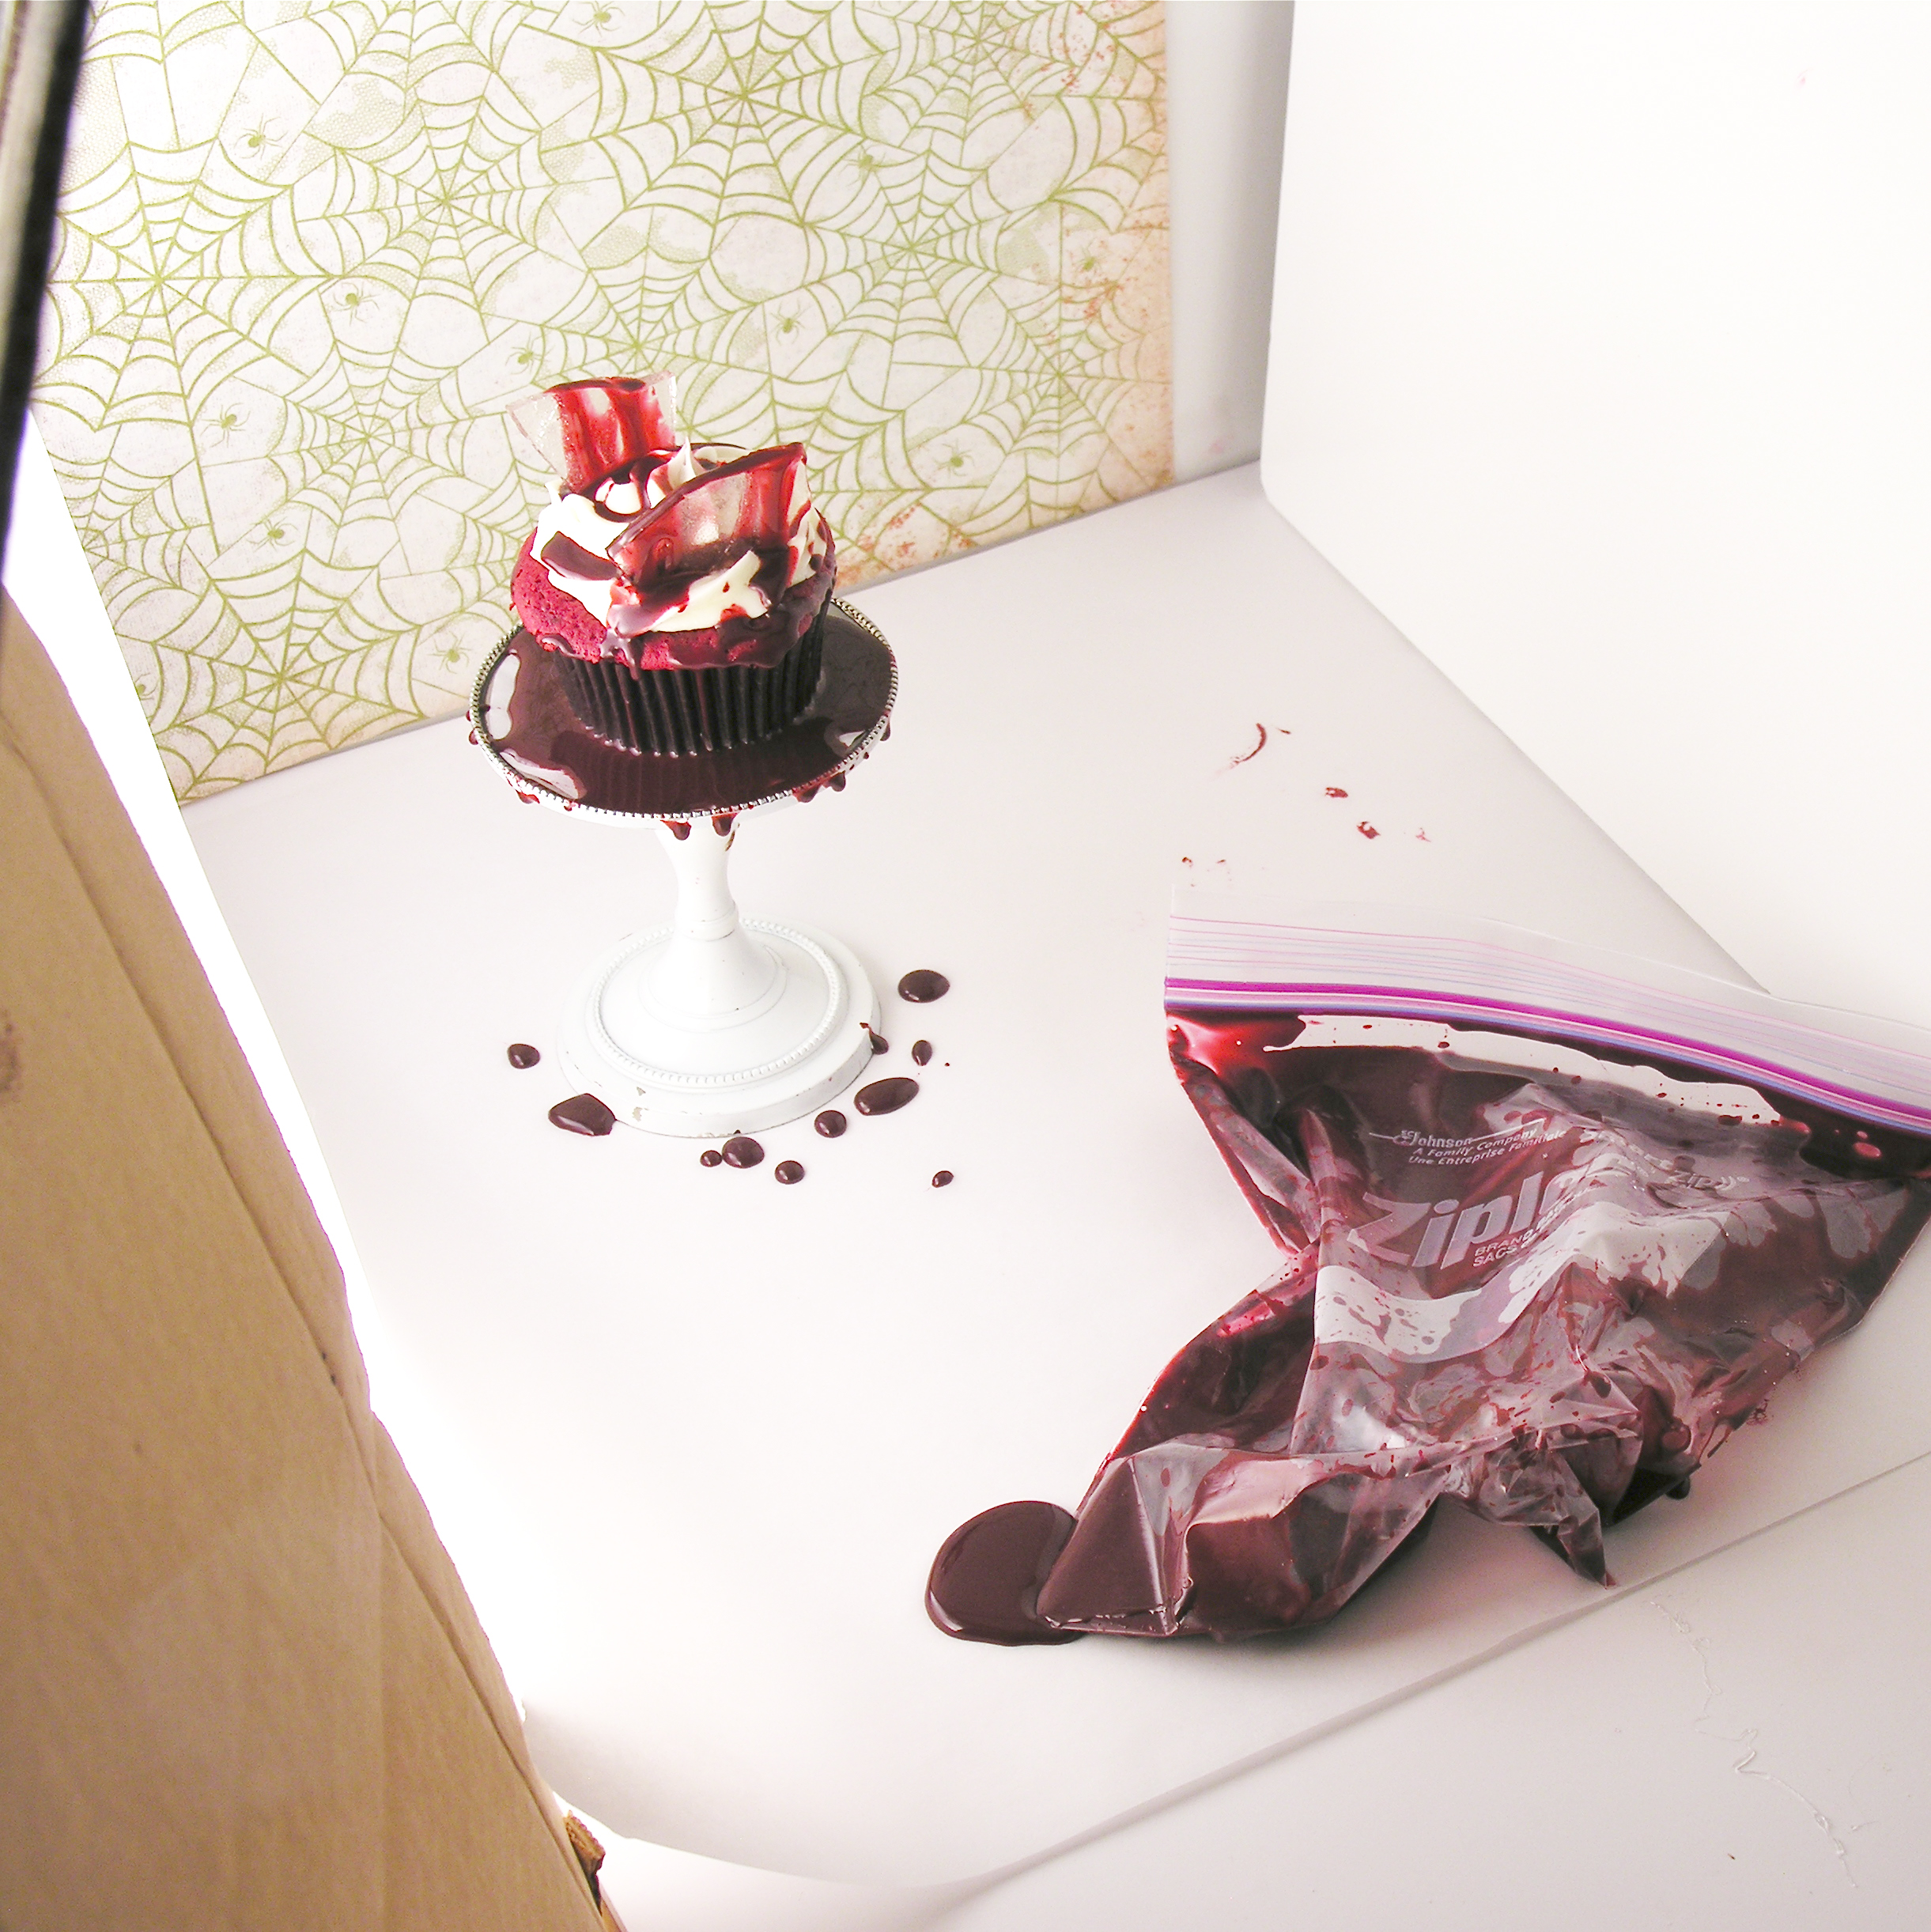

So fun!!!
Here are some other fun “creepy” October recipes to try:


