Category Archives: Cupcakes

Coconut Passion Fruit Cupcakes

Posted on

These pretty little cupcakes are a perfect spring treat! A delicious passion fruit filling inside the coconut cupcake puts them over the top with flavor, and it is SO easy to make (forget all those little passionfruit seeds!) These are a must-make recipe to celebrate the beginning of summer!

I already posted a recipe for this cupcake flavor combo a year or so ago, but then I noticed something in the freezer at Walmart recently. I was picking up frozen raspberries to have on my oatmeal in the mornings, and there it was: a bag of frozen passionfruit purée frozen into tiny cubes. I got some, used them on my oatmeal, and fell in love with this product! No seeds, so mess, just a sprinkle of cubes on my warm oatmeal and…. perfection! 

CM6

So… here’s a second go-around with these flavors except that this time it is WAY more real-fruity, and a totally different feel than the first time I combined these ingredients in a cupcake! The first time was more flavoring from a passion fruit syrup. This time it’s all fruit! My husband says they are like a fruit-filled doughnut and that the filling is “SO good!” I like the decorations on my first cupcakes better, but had no time to make meringues today. Check it out for inspiration though!

Want to know how to make these? Here you go (printable recipe): 

INGREDIENTS: 

Filling: 

  • 1 12oz bag of frozen passionfruit (available at Walmart). This is equal to about 1 1/2 cups or passionfruit purée, if you are unable to find the frozen. 
  • 1 cup granulated sugar (more or less to taste- you can decide how sweet you want these!)
  • 1 cup water
  • 1/2 cup cornstarch

Cupcake:

  • 1 boxed white cake mix
  • 1/2 cup unsalted butter (1 stick) – melted
  • 1 can (15-16oz) of coconut milk (not cream!)
  • 4 eggs (whites only!)
  • 1 cup shredded sweetened coconut

Frosting: 

  • 1 stick (1/2 cup) unsalted butter, softened to room temperature
  • 2 sticks (1 cup) salted butter, softened to room temperature
  • 2 1/2 cups of powdered sugar

DIRECTIONS:

Filling: make this first, so that it has time to chill before you need it.

  1. Mix water and cornstarch in a small bowl and set aside.
  2. Place entire package of frozen passion fruit cubes and sugar into a small saucepan.
  3. Heat and stir until all cubes are melted and edges are bubbling.
  4. Stir cornstarch slurry together again (it will settle) and gradually pour into fruit and sugar, stirring constantly. You may not need it all- so add it slowly, pause and stir. You want the sauce to be thick enough to not run out of the cupcake center (like the filling in a fruit pie). When it reaches this consistency, stop adding cornstarch, take off stove, pour into a bowl and pop into the refrigerator to cool.

Cupcakes: 

  1. Preheat oven to 350 F degrees.
  2. Place cake mix, eggs and melted butter in large mixing bowl and beat on low for about 1 minute until well-incorporated. 
  3. Add can of coconut milk and beat on low until incorporated, and then on high for about a minute more.
  4. Gently stir shredded coconut in using a spoon.
  5. Scoop batter into cupcake liners placed in a cupcake tin. 
  6. Bake at 350F degrees for 14-18 minutes. Check, and when an inserted toothpick comes out clean, they are done. 
  7. Cool completely. 

Frosting: 

  1. Place powdered sugar and softened butter into a large mixing bowl and beat on medium until well incorporated and starting to get fluffy (a couple minutes). 
  2. Add about half of the cooled passion fruit filling to the mixture and beat on high until light and fluffy. 
  3. Place in a zip-top bag fitted with a piping tip. 

Assembly: 

  1. Hollow out a little core in each cupcake using a knife or a cupcake corer, (affiliate link) and saving the top portion to use as a “lid”.
  2. Place remaining filling into a small zip-top bag and clip a corner off. 
  3. Pipe filling into each cupcake, and top with “lid”.
  4. Pipe icing on top of each cupcake, sprinkle with coconut, and top with a little drop of filling, if you have enough left.
  5. Enjoy!!!

My thoughts: I really enjoyed making these and sharing them with people. They are such cheery little cupcakes and that pop of flavor from the passionfruit in the middle is amazing! I really hope you get a chance to try these! ~r

Other fun summer cupcakes to try- just click on a photo to see the recipe! 

banana-split-cupcakes5 root-beer-float-cupcakes1 strawberry-lemonade-cupcake-7 pina-colada-cupcakes4

Coconut Cupcakes with Passionfruit Icing

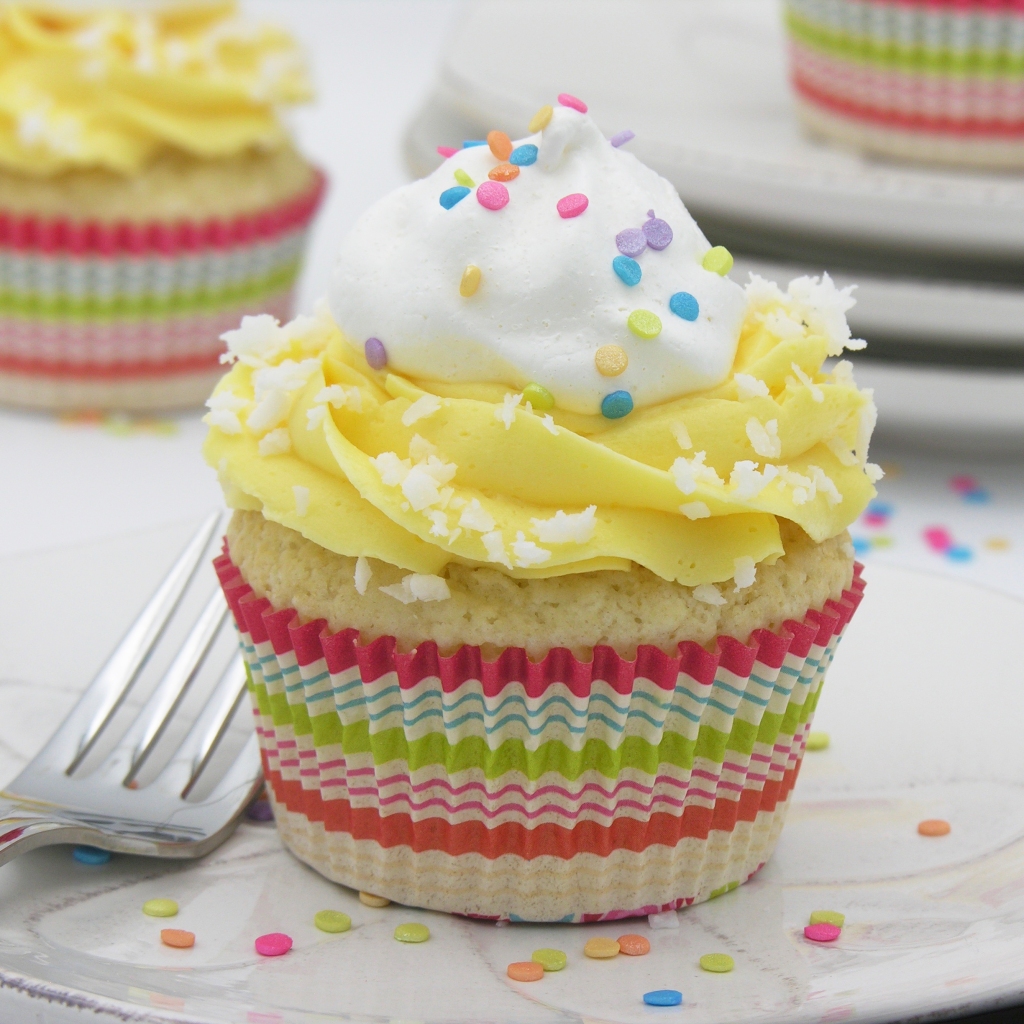
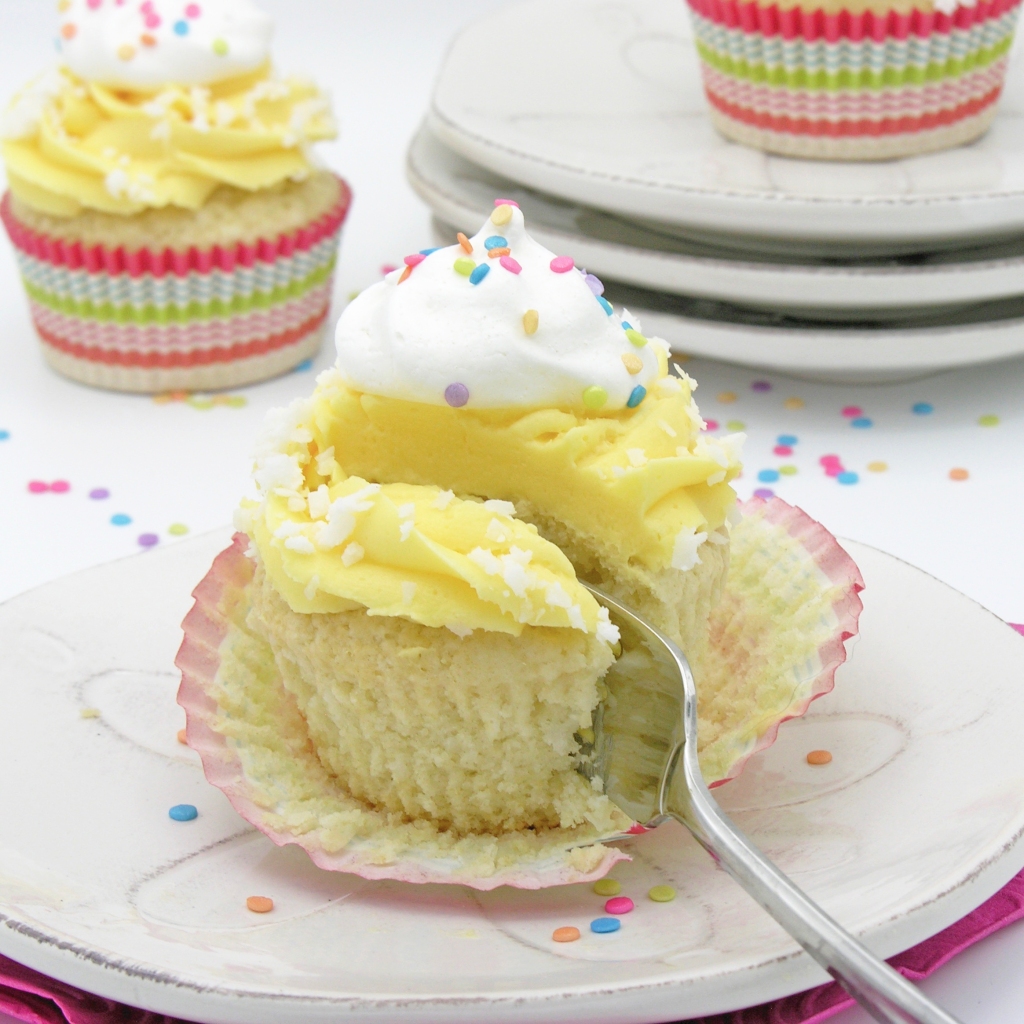
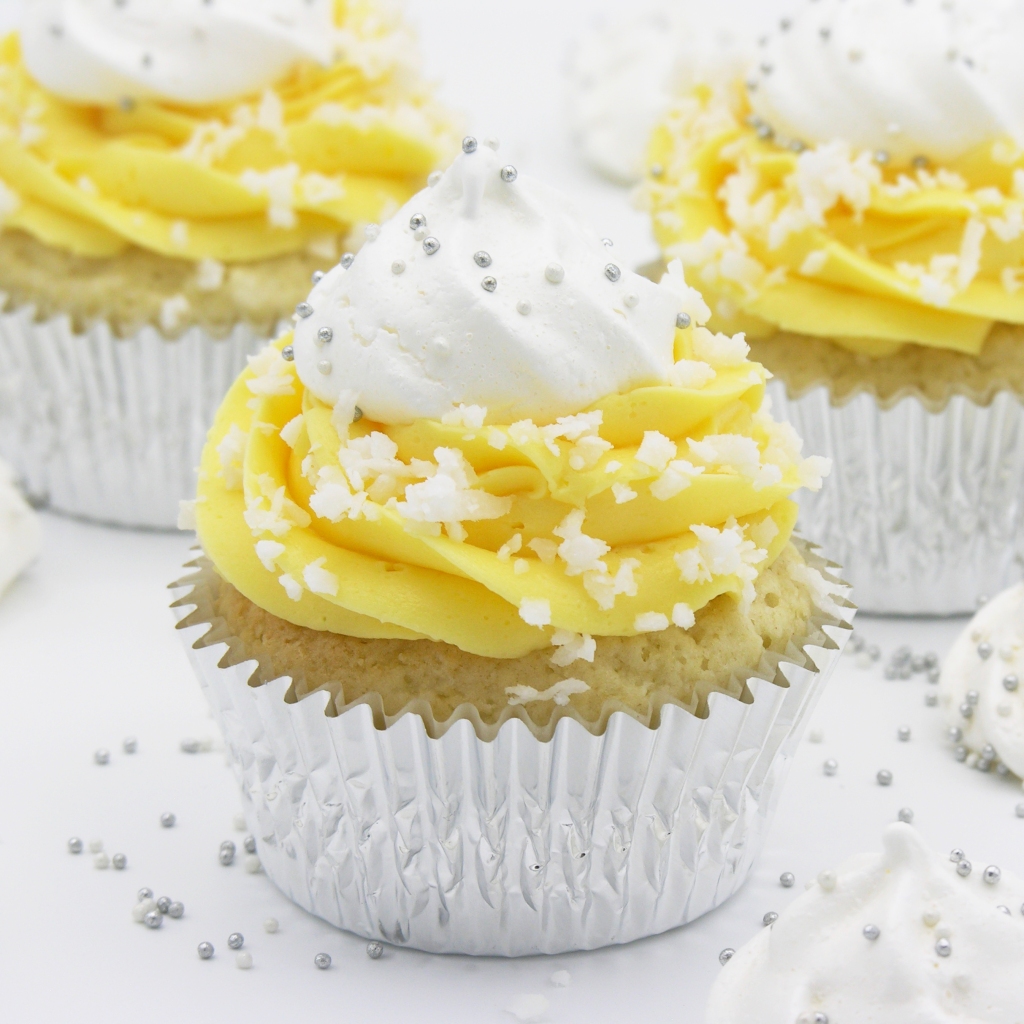
These deliciously dense coconut cupcakes are infused with passionfruit syrup and topped with passionfruit icing and a coconut meringue.

Anyone ready for sunshine?? Goodness, winter in Indiana always seems to last forever. I was craving tropical, sunshiny flavors, and that is what inspired these treats. I did two versions… the confetti version (above) and the classier silver sprinkle version:

I first fell in love with passionfruit in the country of Peru. I was visiting my friend Deb, and we had an incredible visit to both Machu Picchu and the jungles of the Amazon. In both places, we had maracuya juice and delicious desserts made with the same fruit. I later learned that maracuya is passionfruit and I began to search for it in every possible place in the US. Paired with coconut, it creates just the *best* tropical dessert.

I’ve been wanting to add little meringues to the top of cupcakes for awhile now, and these seemed like the perfect opportunity. For sure, they are decorative, and you would not *have* to do these, but they add a little bit of coconut crunch on the top, and make the cupcakes soooo cute!

Want the recipe?

Let’s start with the meringues. Feel free to skip these, if you want- you can simply add sprinkles to the frosting to save time! (Printable recipe)

Meringue Ingredients: (makes 24-30 meringues)

  • 4 large egg whites at room temperature
  • 1/2 teaspoon cream of tartar
  • 1 cup sugar
  • 1 teaspoon coconut extract
  • fun sprinkles

Meringue Directions:

  • Preheat oven to 225F and line a large cookie sheet with parchment paper. Set aside.
  • Combine egg whites, cream of tartar, and salt in a large bowl.
  • Use an electric mixer and mix on low speed until mixture becomes foamy.
  • Increase speed to high, and gradually add sugar, about 1 Tablespoon at a time, mixing after each addition until sugar is dissolved (about 15-20 seconds between each addition).
  • Beat until mixture is thick, shiny, and has increased in volume. Mixture should have stiff peaks and sugar should be completely dissolved.
  • Add coconut extract and mix until combined.
  • Fit a piping tip (I used a large star tip) into a piping bag or a large zip-top bag, and pipe meringues on parchment paper (close- they do not expand). Sprinkle with confetti sprinkles or silver balls.
  • Bake on 225F for 1 hour. Turn off the oven once the baking time is over, and do not open the oven. Leave the oven door closed and allow cookies to cool completely in the oven (1-2 hours) before removing. Once cooled, these can be stored in an airtight container for a few days before using.

Ready for that cupcake recipe? Here it is: (printable recipe)

INGREDIENTS:

Cupcakes: (makes 24 cupcakes)

  • 2 1/2 cups of flour
  • 1 cup of sugar
  • 4 teaspoons baking powder
  • 1/2 teaspoon salt
  • 1 cup of shredded coconut (finely chopped)plus a little to sprinkle on cupcakes at the end
  • 1 stick (1/2 cup) unsalted butter at room temperature
  • 4 egg whites and 1 egg yolk at room temp
  • 1 teaspoon clear vanilla extract
  • 1 teaspoon coconut extract
  • 1/2 cup cream of coconut, plus about 1/4 cup to brush over tops of cupcakes.
  • 2 tablespoons water

Icing:

  • 2 sticks (1 cup) salted butter
  • 1 stick (1/2 c) unsalted butter
  • 3 cups powdered sugar
  • 1 cup of passionfruit syrup

DIRECTIONS:

Cupcakes:

  • Preheat oven to 325F
  • Add flour, sugar, baking powder, chopped coconut, and salt to a large mixing bowl and using an electric mixer combine these dry ingredients well.
  • Melt butter in microwave and add to dry ingredients. Mix until combined.
  • In a smaller bowl, whisk together the rest of ingredients.
  • Slowly add half of liquid mixture to dry, while mixing on medium.  Mix until completely combined.
  • Slowly add the rest of the liquid and mix on high for about a minute until well combined.
  • Divide batter into 24 cupcake liners in cupcake tins.
  • Bake for 15-18 minutes until a toothpick inserted into middle comes out clean.
  • Allow cupcakes to cool in pan for about 5 minutes before transferring to a wire rack to cool completely.
  • Poke holes into tops of each cupcake and use a pastry brush to brush coconut cream on top of each cupcake. Be generous- this will make your cupcake nice and moist.
  • Allow coconut cream to soak in while you make icing.

Icing:

  • Add all ingredients into a mixing bowl and combine with a mixer on low.  Then whip on high until light and fluffy.
  • Frosting will be a pale yellow color. If you want it to be more vivid, add a little yellow food coloring.
  • Pipe icing on top of each cupcake using large star tip in a piping bag.  Evenly divide icing among the 24 cupcakes.
  • Place a meringue on the top of each cupcake, and sprinkle a little chopped coconut on the frosting.
  • Enjoy!

My thoughts: These are a little fussy with the meringues, but aren’t they SO cute??? We kept these covered in a cupcake container, and even almost a week later, the meringues were still crisp and delicious. I thought they might get a little soggy, but they really stored well. We also love the passion fruit syrup in lots of other things besides these cupcakes! It’s delicious in tea, we added some to our orange juice at breakfast, and I’m already thinking of other ways I can use this amazing flavor in other desserts! I hope you get a chance to try these delicious, tropical cupcakes soon! Enjoy! ~r

Looking for other tropical/ summery recipes to brighten your cold winter days? Here are a few we love (click on the title to see the recipe):

Love Bug Cupcakes

Posted on
These cute little bugs are filled with berry cream and jam. They sit on top of a dense, not-too-sweet brownie base, and are the *perfect* treat for your Valentine!

I feel like I am always on the lookout for something creative to make for Valentine’s Day. January is such a blah, grey month, and I miss having something to celebrate with colors and sprinkles. And along comes Valentine’s Day! Even as a single person (for WAY to many years!) I celebrated the day- just because you need SOMETHING in February to make you smile. In fact, if you are single and these love bugs make you want to roll your eyes, try my cute Frog Prince Oreo Pops instead! 🙂

These treats are a little on the fussy side. Obviously. Anything cute requires a little time. If you want a simple, delicious dessert- without the fuss- you can just pipe some topping on, add some sprinkles, and call it a day.

Want to know how to make these fun treats? Here is the recipe: (printable version)

Ingredients: (makes 24 love bug cupcakes)

Love Bugs: (make these 1st)- you will need a silicone chocolate bomb mold to make these:

  • 5 cups powdered sugar
  • 8 tablespoons (1/2 cup) melted butter
  • 2 teaspoons strawberry or raspberry extract
  • 1 cup of raspberry jam
  • Food color in pink
  • One bag of Wilton’s Candy melts in pink
  • About 1/2 cup of Wilton’s Candy melts in black
  • 48 candy eyes
  • Candy heart sprinkles

Brownie cups:

  • 1 cup butter
  • 2 cup sugar
  • 3 eggs
  • 2 teaspoons vanilla
  • 2 cups flour
  • 1/2 cup cocoa
  • 1/2 teaspoon salt
  • 1 cup milk

Chocolate Glaze:

  • 6oz. semi-sweet chocolate chips
  • 6 tablespoons butter (do not substitute margarine here!)
  • Green jimmies for grass!

DIRECTIONS:

Berry Love Bugs:

  • Melt pink candy melts in microwave in 30 second increments, stirring between until smooth.
  • Use a clean paint brush to brush melts into a chocolate bomb mold and freeze for a couple minutes until hard.
  • Make berry filling  by adding melted butter to sugar and extract.
  • Mix well, using water to bring it to a thick but spreadable consistency.
  • Add pink food coloring to make it a fun pink color.
  • Place filling into a large zip-top bag and seal tightly.
  • Cut a corner off bag and pipe berry filling into each pink shell- filling them about 1/4 full.
  • Place jam into a small zip-top bag, clip corner and pipe a little bit in the center of each pink shell.
  • Pipe more berry filling over the top until it is level .
  • Use a knife to spread berry filling to edges of shell.
  • Refreeze these for a few minutes before gently popping them out and setting them on a plate. 
  • Repeat this process until you have 24 berry bombs ready.

Brownie cups:

  • Preheat oven to 350F.
  • Cream butter and sugar together. 
  • Beat in eggs, cocoa, vanilla and salt.
  • Add flour and milk (alternating them and mixing well in between)
  • Spoon evenly into 24 cupcake liners in a cupcake tin.
  • Bake at 350F degrees for 15-18 minutes (don’t over bake- they will start to pull away from the liner)
  • Cool.  

Chocolate Glaze:

  • Melt butter and chocolate together in the microwave in 30 second increments, stirring in between until completely melted and smooth.
  • Set aside until cupcakes are ready to assemble.
  • Assemble the cupcakes by spooning a little chocolate glaze on top of a brownie and spreading to all edges.
  • Place a berry bomb in the center and sprinkle green jimmies around edge.
  • Allow this all to harden up (refrigerate to speed process up).
  • Melt black candy melts in microwave in 30 second increments, stirring between until smooth.
  • Use a clean paint brush to paint a black face on the front of each bomb, and immediately place eyes before candy melts harden. Place the rest of the melts in a plastic zip-top bag, cut a corner and pipe the center line down the bug’s back.
  • Melt just a few pink candy melts, and use a paint brush to stick each little candy heart “dot” in place.
  • Enjoy!

My thoughts: These are delicious. Think chocolate covered strawberries. I made half of mine with the love bug domes, and half with just the berry icing and chocolate glaze- just to save time. Either way, they are delicious and sure to make YOUR Valentine smile! Enjoy! ~r

Looking for other fun baking ideas for Valentine’s Day? Click on the title to see the recipe:

Tres Leches Cupcakes

Posted on

If you’ve ever had tres leches cake, you already know you will love these little cupcakes! Soaked in a vanilla cream sauce, the dense cupcake is a not-too sweet base for delicious dulce de leche caramel and whipped cream. Add a little fruit and you have perfection! 

Ever since the stay-at-home rules have been in place, we are looking for anything (even little things) to celebrate. So Cinco de Mayo was a fiesta- complete with these little cupcakes. I made this recipe as a cake several years ago, but my husband had never tried it, so this was his 1st time trying these, and he declared them his favorite cupcakes I’d ever made.

So… there’s that endorsement for this recipe… 🙂

These are not too fussy to make, they keep for over a week in the fridge. I made half of this recipe, or 12 cupcakes, and it still took us the whole week to eat them all! Is anyone else sad that they can’t bring extra blog baked goods in to work or over to the neighbors?!?! Slowing packing on my quarantine 15… :/

Here is how to make these sweet treats: (printable recipe)

INGREDIENTS

Cupcake

  • 9 eggs, separated
  • 1 cup sugar
  • 1 tablespoon vanilla extract
  • 2 cups all purpose flour

Vanilla Sauce:

  • 1 (14oz) can sweetened condensed milk
  • 1 (12oz) can evaporated milk
  • 1/2 cup heavy cream
  • 1 tablespoon vanilla extract

Topping/filling

  • 2 cups heavy whipping cream
  • 1/4 cup confectioners’ sugar
  • fresh fruit for garnish
  • 1 (13.4 oz) can of La Lechera Dulce de Leche (or make your own here)

DIRECTIONS:

  • Preheat oven to 350F degrees and place 24 cupcake liners into baking tins.
  • Divide eggs into 2 bowls.  Put the egg whites into a large mixing bowl and the yolks into a medium bowl.
  • Beat the egg whites on medium-high until they form soft peaks.  Add sugar and beat on high until they form stiff peaks (this will take 4-5 minutes, depending on your mixer).
  • Beat the egg yolks on high for 5 to 6 minutes until they increase in volume and turn a creamy yellow.
  • Beat the vanilla into the egg yolks until combined.
  • Add the yolks to the whites and use a spatula or large spoon to gently fold them together.
  • Add flour and gently mix until completely combined.
  • Divide batter evenly between the 24 cupcake liners and bake for 15-20 minutes.  The tops should be golden and when a toothpick is inserted in the center, it should come out clean.
  • Remove from tin and cool completely on counter.
  • Make sauce by combining the 3 milks (condensed, evaporated and cream) together with the vanilla.
  • Poke (lots!) of holes in the top of each cupcake with a toothpick and use a pastry brush to spread vanilla cream over the top of each cupcake- letting it soak into the cake. I did this twice to use up the sauce and make my cupcakes super soaked and moist. 
  • Spread dulce de leche caramel over the top of each cupcake- spreading all the way to the edges.
  • Make frosting by beating together the whipping cream and powdered sugar, until stiff peaks form.
  • Pipe frosting on tops of cupcakes, and serve with fresh fruit. Refrigerate until serving, and store chilled.

My thoughts: If you like a cupcake that isn’t overly sweet, you’ll love this. The firm cake soaks up all that cream, and the dulce de leche caramel soaks into the top as these sit- so yummy! You don’t have to wait until the next Cinco de May to try them either- this is such a refreshing summer dessert! I hope you get a chance to try it!!! Enjoy ~r

Other fun and refreshing desserts for summer:

Baseball Brownie Cups!

Posted on

Dense chocolate brownie cups topped with fudge and a dome of creamy peppermint topping! These baseball brownies are a perfect idea for Father’s Day!

Our day to celebrate dad is almost here! I happen to have a pretty incredible dad. By the time this posts he will be in Canada fishing with my uncles and cousins (does Father’s Day get better than that??) I’ve celebrated all of his various hobbies over the years…fishing, golfing, football (watching), setting off epic firework shows… but I hadn’t made anything baseball. Until now. Let me introduce to you, the YUMMIEST baseballs you will ever meet!

Seriously- they are almost too cute to eat!!

Now, these look difficult to make. Let me assure you that they are not- until you pipe those little laces on top. Then, if you have shaky hands like me, these are AGONY. Just being honest. 🙂 If you have a steady hand (or have a friend to help) you will zip through that piping like nothing though! Promise.

Here is how we made these (printable recipe here):

Ingredients: (makes 24 baseball brownies)

Baseballs: (make these 1st)- you will need a little chocolate bomb mold to make these:

  • 5 cups powdered sugar
  • 8 tablespoons (1/2 cup) melted butter
  • 2 teaspoons peppermint extract
  • Food color in white
  • One bag of Wilton’s Candy melts in white
  • About 1/2 cup of Wilton’s Candy melts in red.

Brownies: 

  • 1cup butter
  • 2 cup sugar
  • 3 eggs
  • 2 teaspoons vanilla
  • 2 cups flour
  • 1/2 cup cocoa
  • 1/2 teaspoon salt
  • 1 cup milk

Chocolate Glaze:

  • 6oz. semi-sweet chocolate chips
  • 6 tablespoons butter (do not substitute margarine here!)
  • Green jimmies for grass!

DIRECTIONS:

Mint Baseballs:

  • Melt white candy melts in microwave in 30 second increments, stirring between until smooth.
  • Use a pastry brush to brush melts into a chocolate bomb mold and freeze for a couple minutes until hard.
  • Make mint filling  by adding melted butter to sugar and extract.
  • Mix well, using water to bring it to a thick but spreadable consistency.
  • Add white food coloring to make it pure white (the butter gives it a slightly yellow color)
  • Place filling into a large zip-top bag and seal tightly.
  • Cut a corner off bag and pipe mint filling into each white shell- filling them about 3/4 full.
  • Use a knife to spread mint filling to edges. It will dip in at the center just a bit- and you want this. If it is full all the way across it doesn’t settle on the curved top of the brownie well (see the gap along the bottom in the below photo).
  • Refreeze these for a few minutes before gently popping them out and setting them on a plate. 
  • Repeat this process until you have 24 mint bombs ready.


Brownies:

  • Preheat oven to 350F.
  • Cream butter and sugar together. 
  • Beat in eggs, cocoa, vanilla and salt.
  • Add flour and milk (alternating them and mixing well in between)
  • Spoon evenly into 24 cupcake liners in a cupcake tin.
  • Bake at 350F degrees for 15-18 minutes (don’t over bake- they will start to pull away from the liner)
  • Cool.  
Chocolate Glaze:
  • Melt butter and chocolate together in the microwave in 30 second increments, stirring in between until completely melted and smooth.
  • Set aside until bombs ready to assemble.
  • Assemble the brownies by spooning a little chocolate glaze on top of a brownie and spreading to all edges.
  • Place a “baseball” in the center and sprinkle jimmies around edge.
  • Allow this all to harden up (refrigerate to speed process up).
  • Melt red candy melts in microwave in 30 second increments, stirring between until smooth.
  • Place melted candy melts into a bag or squeeze bottle fitted with a tiny writing tip (I used a Wilton’s 1.5 size).
  • Carefully pipe laces on top of baseballs (use photo as a guide) and allow these to harden.
  • Store in a lightly sealed container for 3-4 days.
  • Enjoy!

See how the center of each baseball needs to accommodate the dome-shaped top of the brownie? Here is what happens if you fill them too flat:

See along the edge how it doesn’t connect well? Yeah. Don’t do that. 🙂

My thoughts: Yes, these take some work. But they are SO CUTE!! I’ve spent way more effort on recipes that didn’t score this high in the fun/cute category. If you are going to waste time making something- waste it making these! Plus they are the BEST brownies… I promise. Delicious. 🙂 

My dad doesn’t play much baseball anymore- but he used to, and I have fond memories of playing hours of catch in the backyard with him. Just for fun, here’s a throwback to his baseball days:

That’s me in the 70’s bib 🙂 And here we are now:

Happy Father’s Day dad! Love you!!!!!!

I know you will probably stop right here on this idea, but just in case you are making TWO desserts for dad, here’s a few other ideas. Click on a photo to see the recipe:


Elderflower Lemonade Cupcakes

Posted on

Elderflower syrup and fresh mint leaves make these cupcakes unique. The lemonade frosting on top makes them unforgettably delicious!

Just a few weeks ago I made Elderflower Lemonade that was amazing. Seriously- you need to try it! After making many batches of it for friends and family, it occurred to me that these flavors would make such good cupcakes! I experimented a bit with the cupcakes, and topped them with my famous lemonade frosting and YUM! I really liked them. A lot!

Plus they are so fun and springtime-y! The only special ingredient you’ll need is Elderflower syrupI got mine on Amazon and you won’t want to skip this ingredient because it is the secret deliciousness behind this recipe. Plus, once you have it you can make the lemonade- and you will not regret it!!

Here is how we made these (printable recipe here):

INGREDIENTS: 

  • One boxed white cake mix (plus eggs and oil to make according to package)
  •  Elderflower syrup (about 1-2 cups depending on boxed mix)
  • 1/4 cup finely chopped mint leaves
  • 2- 8oz. packages of Philadelphia Cream Cheese (softened to room temp.)
  • 1 packet (0.23oz.) of Kool-Aid Lemonade
  • 1- 7oz. container Jet-Puffed Marshmallow Creme
  • 1/3 c. powdered sugar
  • 8 oz. Cool Whip Topping (refrigerator temp)

DIRECTIONS:

  • Preheat oven to 350F degrees
  • Make cake mix according to package, but replace 1/2 of the required water with elderflower syrup (so if the mix calls for one cup of water, use 1/2 cup of water and 1/2 cup of Elderflower syrup)
  • Bake according to package, until a toothpick inserted into the center of a cupcake comes out clean.
  • Cool on countertop.
  • Cream together cream cheese, lemonade and yellow food coloring until smooth.
  • Beat marshmallow creme and powdered sugar in and then fold in Cool Whip until completely smooth.  
  • Place frosting in a large zip-top bag, fitted with a decorating tip, and keep in fridge until ready to frost.
  • Before frosting, use a toothpick to poke holes into the top of each cupcake (6-8). Use a pastry brush to generously brush the top of each cupcake with elderflower syrup, allowing it to soak into the holes. 
  • Pipe lemonade frosting on the top of each cupcake and decorate as desired.
  • Keep in a loosely sealed container, refrigerated, for 2-3 days.
  • Enjoy!

My thoughts: These really are such a deliciously different flavor of cupcake. The mint with the lemon- and that yummy syrup… I love them! They are on my permanent list of spring cupcake options! I hope you get a chance to try them! 🙂 ~r

This lemonade frosting has been one of the biggest hits on this blog. It was originally created in 2011 for a Strawberry Lemonade Layer Cake, which is my most popular recipe- ever. This is a little sad to me since my photography in 2011 needed LOTS of improvement, and the photos are awful 🙂

I remade it (making the frosting a bit thicker) in 2012, and used it on cupcakes in 2013.

It is a go-to frosting recipe for sure. It actually tastes like lemonade, and as my friend Laura (the frosting-hater) says: “I love it- it tastes more like a creamy filling than a frosting.”

Spring recipes are SO FUN! Here’s a few more to try (click on photo to see recipe).


Maple Pecan Cupcakes

Posted on

maple-pecan-cupcakes

These rich, dense chocolate cupcakes are topped with a light whipped maple pecan frosting that is out-of-this-world delicious! 

I know. Maple pecan things are a dessert for the fall- not early summer! I just couldn’t resist. Maple and pecan are two of my favorite flavors together! I thought about saving this post for November and I couldn’t make myself wait to share it with you because it is just that good! These are delicious. So if you can’t bring yourself to make them, pin the recipe for later- but pin it. You will want this one someday!!! Promise.

Here is how we made these (printable recipe here)

INGREDIENTS: (makes 24 cupcakes)

  • One boxed chocolate cake mix plus oil and eggs to make according to box
  • Milk- enough to replace the water required by boxed mix.
  • 1 (3.9 oz.) box of chocolate pudding (instant)
  • 3 cups chopped pecans (divided)
  • 24 pecan halves
  • 2 sticks salted butter (softened)
  • 2 sticks unsalted butter (softened)
  • 3 cups of powdered sugar
  • 3 teaspoons of maple extract or flavoring

DIRECTIONS:

  • Preheat oven to 350F degrees
  • Mix 1 and 1/2 cups of chopped pecans with dry cake mix.
  • Add eggs and oil according to package, and add milk instead of water- in the same amount as listed on package.
  • Add box of instant chocolate pudding.
  • Beat on high for 2 minutes until smooth.
  • Scoop evenly between 24 cupcake liners placed in muffin tins and bake according to package- until a toothpick inserted into the center of a cupcake comes out clean.
  • Gently remove from tins and allow cupcakes to cool on countertop.
  • Make frosting by placing butters, powdered sugar and maple flavoring in a large mixing bowl.
  • Beat on high until light and very fluffy (2 to 3 minutes).
  • Fold in one cup of chopped pecans (this leaves 1/2 cup for sprinkling on top!)
  • Use a cookie scoop to place a dome of frosting on each cooled cupcake. Press a pecan half on top and sprinkle with a bit of chopped pecans. 

  • Store in a loosely sealed container for up to 3 or 4 days. Refrigerate to keep a day or two longer.
  • Enjoy!

My thoughts: You are going to love these! If you want to simplify, just make the boxed cake mix as-is plus nuts. The milk and pudding make the cupcakes more dense, rich and moist- but you could skip adding these extra ingredients to save time. It’s that frosting… even my friends who aren’t big frosting lovers were licking this stuff off the top of these cupcakes. Yum. Hope you get a chance to try them- now- this fall- whenever!! 🙂 Enjoy! ~r

Other maple and/or pecan recipes to try! (click on a photo to see instructions)


White Wedding Cupcakes (a white mix cake-over!)

Posted on

wedding-cake-cupcakes

These wedding cupcakes are made with a mix- but a “made-over” mix. They are the most dense, moist and delicious cupcakes ever- you’d never guess they aren’t 100% made from scratch!

Have you ever heard of a “cake-over”? It’s when a cake mix has a make-over into a recipe that tastes completely made from scratch. I’ve tried lots of these, and I actually love them- but I’d never found one for plain white cake that I liked. I was invited to bake wedding cupcakes for my friend Shanell this summer and I decided I’d better figure out a fix before then!

Here’s my secret: white chocolate pudding. I use this flavor all the time in other recipes, and it is AMAZING. I also have used pudding mix in cake-overs before, and this pudding is WHITE- so it doesn’t change the color of your cake!

wedding-cake-cupcakes

Shanell’s colors are teal and purple, so I practiced my decorating on these. Aren’t they fun??

Here is how we made these dense, delicious cupcakes: (printable recipe here)

INGREDIENTS:

  • One boxed white cake mix (I like Duncan Hines mixes the best- personal preference!)
  • One (3.3 oz) package of Jell-O brand white chocolate pudding
  • 1 cup of milk
  • 1/3 cup of oil
  • 4 egg whites
  • 2 sticks (one cup) of salted butter, at room temperature
  • 2 sticks (one cup) of unsalted butter, at room temperature
  • 2 teaspoons of clear vanilla flavoring
  • 3 cups of powdered sugar
  • Food coloring gels, and sprinkles as desired.

DIRECTIONS:

  • Preheat oven to 350F degrees.
  • Combine cake mix, pudding, milk, oil, and egg whites in a mixing bowl and beat on high for 2 minutes. 
  • Evenly divide into 24 cupcake liners placed in tins and bake for about 18-20 minutes at 350F degrees.
  • Cool completely.
  • Make frosting by combining butters, vanilla and powdered sugar in a large mixing bowl.
  • Beat on high until light and fluffy (3-4 minutes)
  • Add coloring if desired (if you want pure white frosting you’ll need to add white food coloring to off-set the yellow tinge given by the butter), and mix well. 
  • Place a decorating tip in the corner of a large zip-top bag, fill with frosting, seal well, and pipe frosting on top of each cupcake. 
  • I used these cupcake toppers (aren’t they SO cute?!?) and these sprinkles.
  • Enjoy!!!

wedding-cake-cupcakes

My thoughts: These taste like a made-from-scratch recipe. A really good one! BUT they are so much easier to make! 🙂 I’m really excited to make these in large quantities this summer!!! Maybe I will add some pictures from the wedding once I am back! For now, enjoy the cake-over 😉 ~r

wedding-cake-cupcakes

wedding-cake-cupcakes4

We have piles of favorites in the cupcake category here…! Hard to share just a few- but here are some other recipes you might enjoy: (click on a photo to see the recipe)

Root Beer Float Cupcakes!!!!Coconut Cupcakes!!Brownie Oreo Cookie CupDark Chocolate Ganache Cupcakes

Carrot Patch Cupcakes

Posted on

carrot-patch-cupcakes2

Delicious strawberry “carrots” buried in Oreo buttercream frosting- a perfect cupcake for Easter!

I saw these adorable strawberry carrots online the other day, and imagined them buried in the top of cupcakes for Easter. Ah- soooo fun! Plus a strawberry and chocolate combo is always a winner in my book! These are easy, fun and a perfect way to add carrots to your cupcakes- without actually using carrots 🙂

carrot-patch-cupcakes

Here is how we made these cute little treats: (printable recipe here)

INGREDIENTS:

  • One boxed cake mix (plus oil, water and eggs to make according to package)
  • One package of Oreo Thins, crushed into crumbs
  • 2 sticks (one cup) of salted butter at room temperature
  • 2 sticks (one cup) of unsalted butter at room temperature
  • 3 cups of powdered sugar
  • 2 teaspoons of vanilla
  • 1 cup of cocoa powder
  • 24 small strawberries
  • 1 package of Wilton’s Candy Melts in orange

DIRECTIONS:

  • Wash and thoroughly dry 24 strawberries.
  • Make carrots by melting Candy Melts in microwave in 30 second increments, stirring in between until melted and smooth.
  • Lay parchment paper or wax paper on countertop.
  • Grasping a strawberry by its stem and leaves, dip it into candy melts, spooning melts as close to stem as possible.
  • Set covered strawberry on paper to harden.
  • Once all berries are covered, spoon remaining melts into a zip-top bag and seal. Clip a corner and drizzle lines over the top.

carrot-patch-cupcakes

  • Preheat oven to 350F degrees.
  • Prepare cake mix as directed and divide evenly into 24 cupcake liners in tins.
  • Bake according to package and cool completely.
  • Make frosting by adding butters, powdered sugar and vanilla to a large mixing bowl and beating on high until light and fluffy (3-4 minutes). 
  • Add cocoa powder to frosting and beat on high until well- combined.
  • Use a cookie scoop, or ice cream scoop to place a scoop of frosting on top of each cupcake. 
  • Press this into a bowl of Oreo crumbs, turning the cupcake to make sure all edges are covered.

carrot-patch-cupcakescarrot-patch-cupcakes

  • Press a strawberry “carrot” into the center of each cupcake and spoon a few remaining Oreo crumbs over the bottom of the carrot, to cover it further.

carrot-patch-cupcakes5carrot-patch-cupcakes

  • ENJOY!!!!  

carrot-patch-cupcakes

My thoughts: These are delicious little cupcakes! I really love this chocolate buttercream recipe- plus they are so cute! Note that chocolate covered strawberries only stay fresh for a couple of days before they start to get a little soggy/sticky. These last a little longer because they still have their stems attached- but don’t make these cupcakes WAY in advance. I hope you get a chance to try these!!!  Enjoy! ~r

Other Easter treats you might like (click on a photo to see the recipe):

Chocolate Easter Eggs with Peanut Butter FillingEasy Easter cut out cookiesEaster Cheesecake CupsJelly Bean Cookies!!!!

Spaghetti and Meatball Cupcakes

Posted on

spagetti-and-meatballs-cucpakes1

Nothing says “April Fools’ Day!” like these fun spaghetti cupcakes with a yummy chocolate “meatball” on top!

“You put spaghetti on a cupcake?”

Direct quote from one of the kids I offered this cupcake to.

#win

I love April Fools’ Day! When I was little, my mom was always trying to fool us with food. I remember opening up my lunch at school one year and seeing green milk and a sandwich with no meat and an apple with little candy worms coming out of it. I’m sure she was laughing every year when she packed lunch on April 1.

So, I try to be original here on Easybaked. My favorite moments are when I have an idea, I google it, and NOTHING comes up. Believe it or not, that happened to me with Oreo Pops. Nobody had done them when I created my 1st batch!

THIS recipe is not an Easybaked original. It is one I saw all over the internet, and simply had to make for myself!

SO much fun- these just make me smile 🙂

spaghetti-cupcakes3

Here is how we made these little April Fools’ Day treats! (printable recipe here)

INGREDIENTS:

  • One boxed yellow cake mix, plus water, oil and eggs to make according to package
  • 2 sticks (one cup) of salted butter, at room temperature
  • 2 sticks (one cup) of unsalted butter, at room temperature
  • 3 cups of powdered sugar
  • 2 teaspoons of vanilla
  • Yellow food coloring
  • One can of raspberry pie filling
  • 24 Ferrero Rocher chocolates
  • 1/4 cup of white chocolate chips

DIRECTIONS:

  • Melt white chocolate chips in the microwave in 30 second increments, stirring in between until melted and smooth.
  • Spoon this into a small paper or disposable plastic cup and place in the freezer for later.
  • Make cake mix according to box, and divide into 24 cupcake liners in cupcake tins.
  • Bake according to package and cool. Place them into a couple of cake pans so you can move them easily into the fridge.
  • Place butters, vanilla, and powdered sugar into a large mixing bowl and beat on high until very light and fluffy (3-4 minutes).
  • Add a TINY bit of yellow food coloring. Your frosting will already be a touch yellow from your butter, but you want it to be the pale yellow of spaghetti noodles.
  • Place frosting into a large zip-top bag and seal. Clip a corner, or if you have one, add a round decorating tip to a corner before adding frosting to the bag. You can experiment with the size. I liked nice fat noodles better than thinner ones. They were more defined.
  • Pipe random swirls of noodles on the tops of each cupcake. Be careful to not touch the tip to anything or they will smudge and look like frosting rather than noodles! 
  • Place cupcakes into the refrigerator for 15-30 minutes. You want that buttercream to harden up before you place anything on top.
  • Open can of pie filling, and unwrap chocolates.

spaghetti-cupcakes spaghetti-cupcakes

  • Remove cupcakes from fridge and place a chocolate into the pie filling. Gently spoon it out and set it on top of frosting “noodles”. I experimented, and it looks more realistic if you leave just a meatball on top, and don’t mess with artistically spooning sauce anywhere else- extra sauce makes it look messy, and you notice that the color isn’t exactly right. You can see how I did this wrong in the photos below:

spaghetti-cupcake spaghetti-cupcakes

  • Once all cupcakes have a “meatball”, pull the cup of white chocolate out of the freezer. Tear away the paper cup- leaving a little circle of white chocolate.
  • Grate this over the top of each cupcake. This is the finishing touch- don’t skip this step 🙂 

spaghetti-cupcakes- parmesan

spaghetti-cupcakes4

My thoughts: I LOVE these!!!!!!!!!  They were so much fun to make and I was so surprised at how much they really look like spaghetti! Plus they are soooo yummy! Buttercream + raspberries + chocolate = yes please!!!!!! I hope you have a chance to fool someone you love with these delicious little treats this year!!!  ~r

spaghetti and meatball april fools cupcakes

Other fun April Fools’ ideas (click on a photo to see the recipe)

Fried Egg CookiesPoop cookies!Edible Jello Earthworm CupcakesHamburger Cookie!