Tag Archives: maple

Maple Pecan Cupcakes

Posted on

maple-pecan-cupcakes

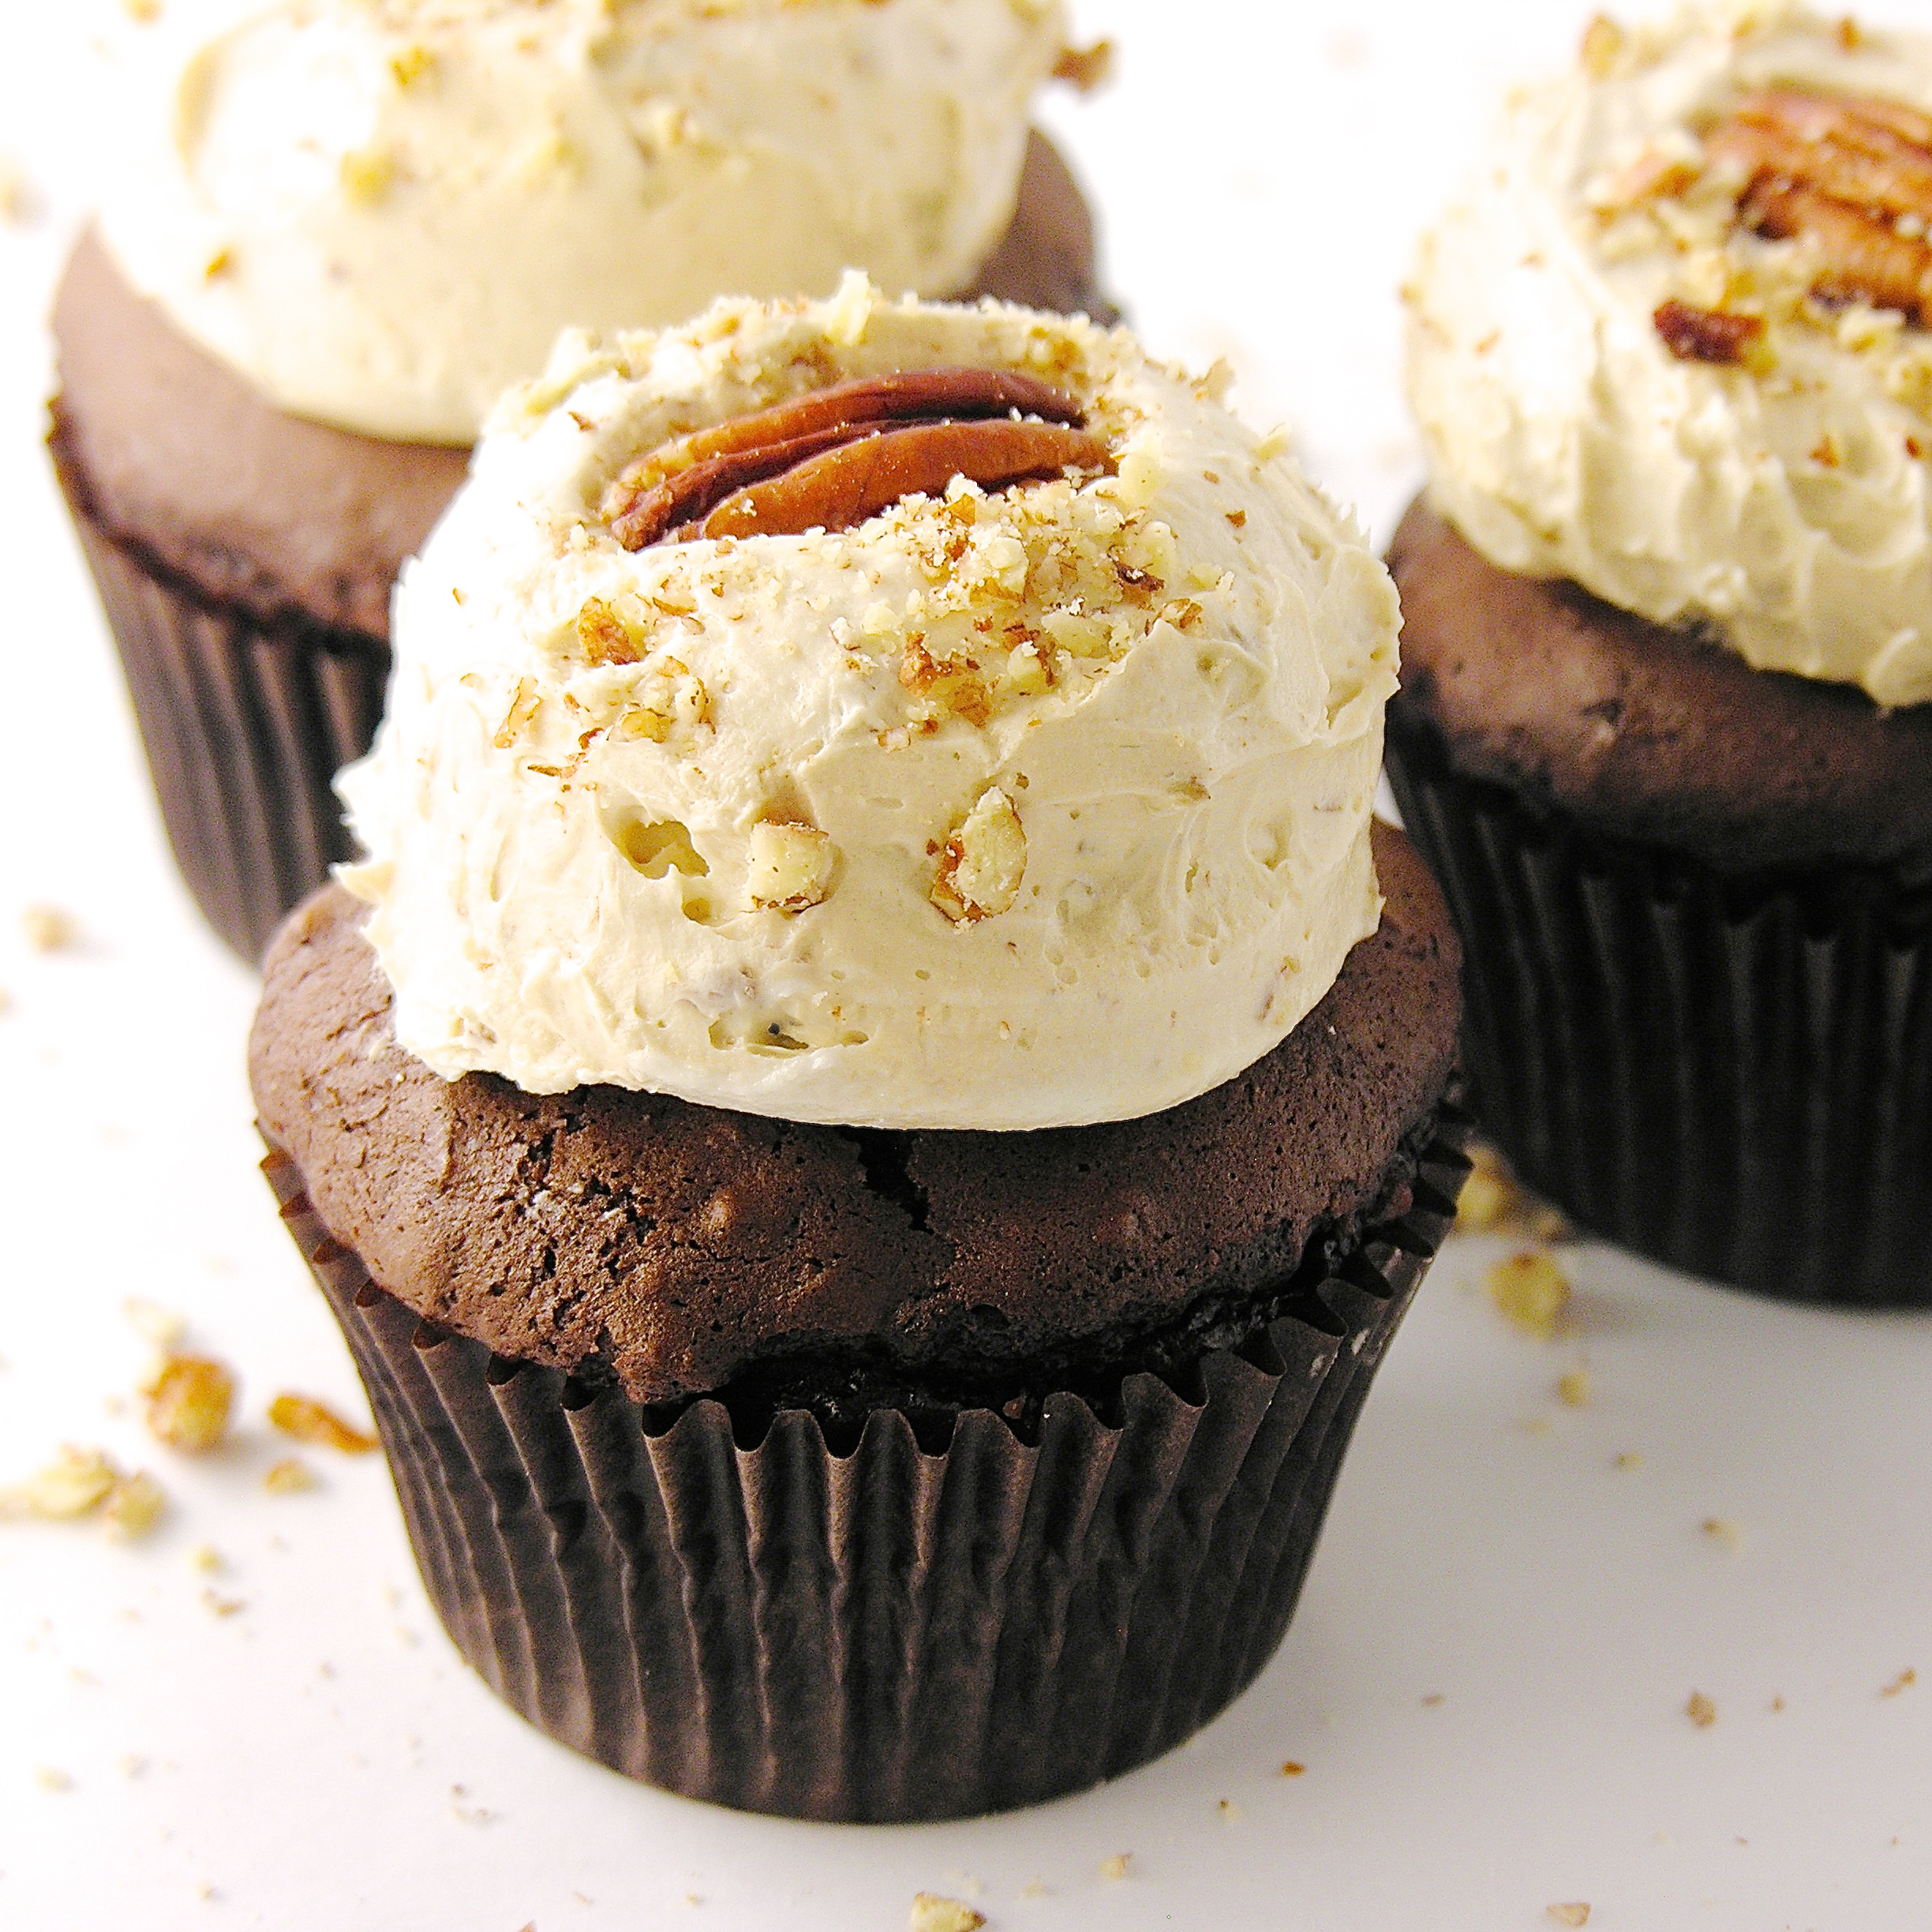
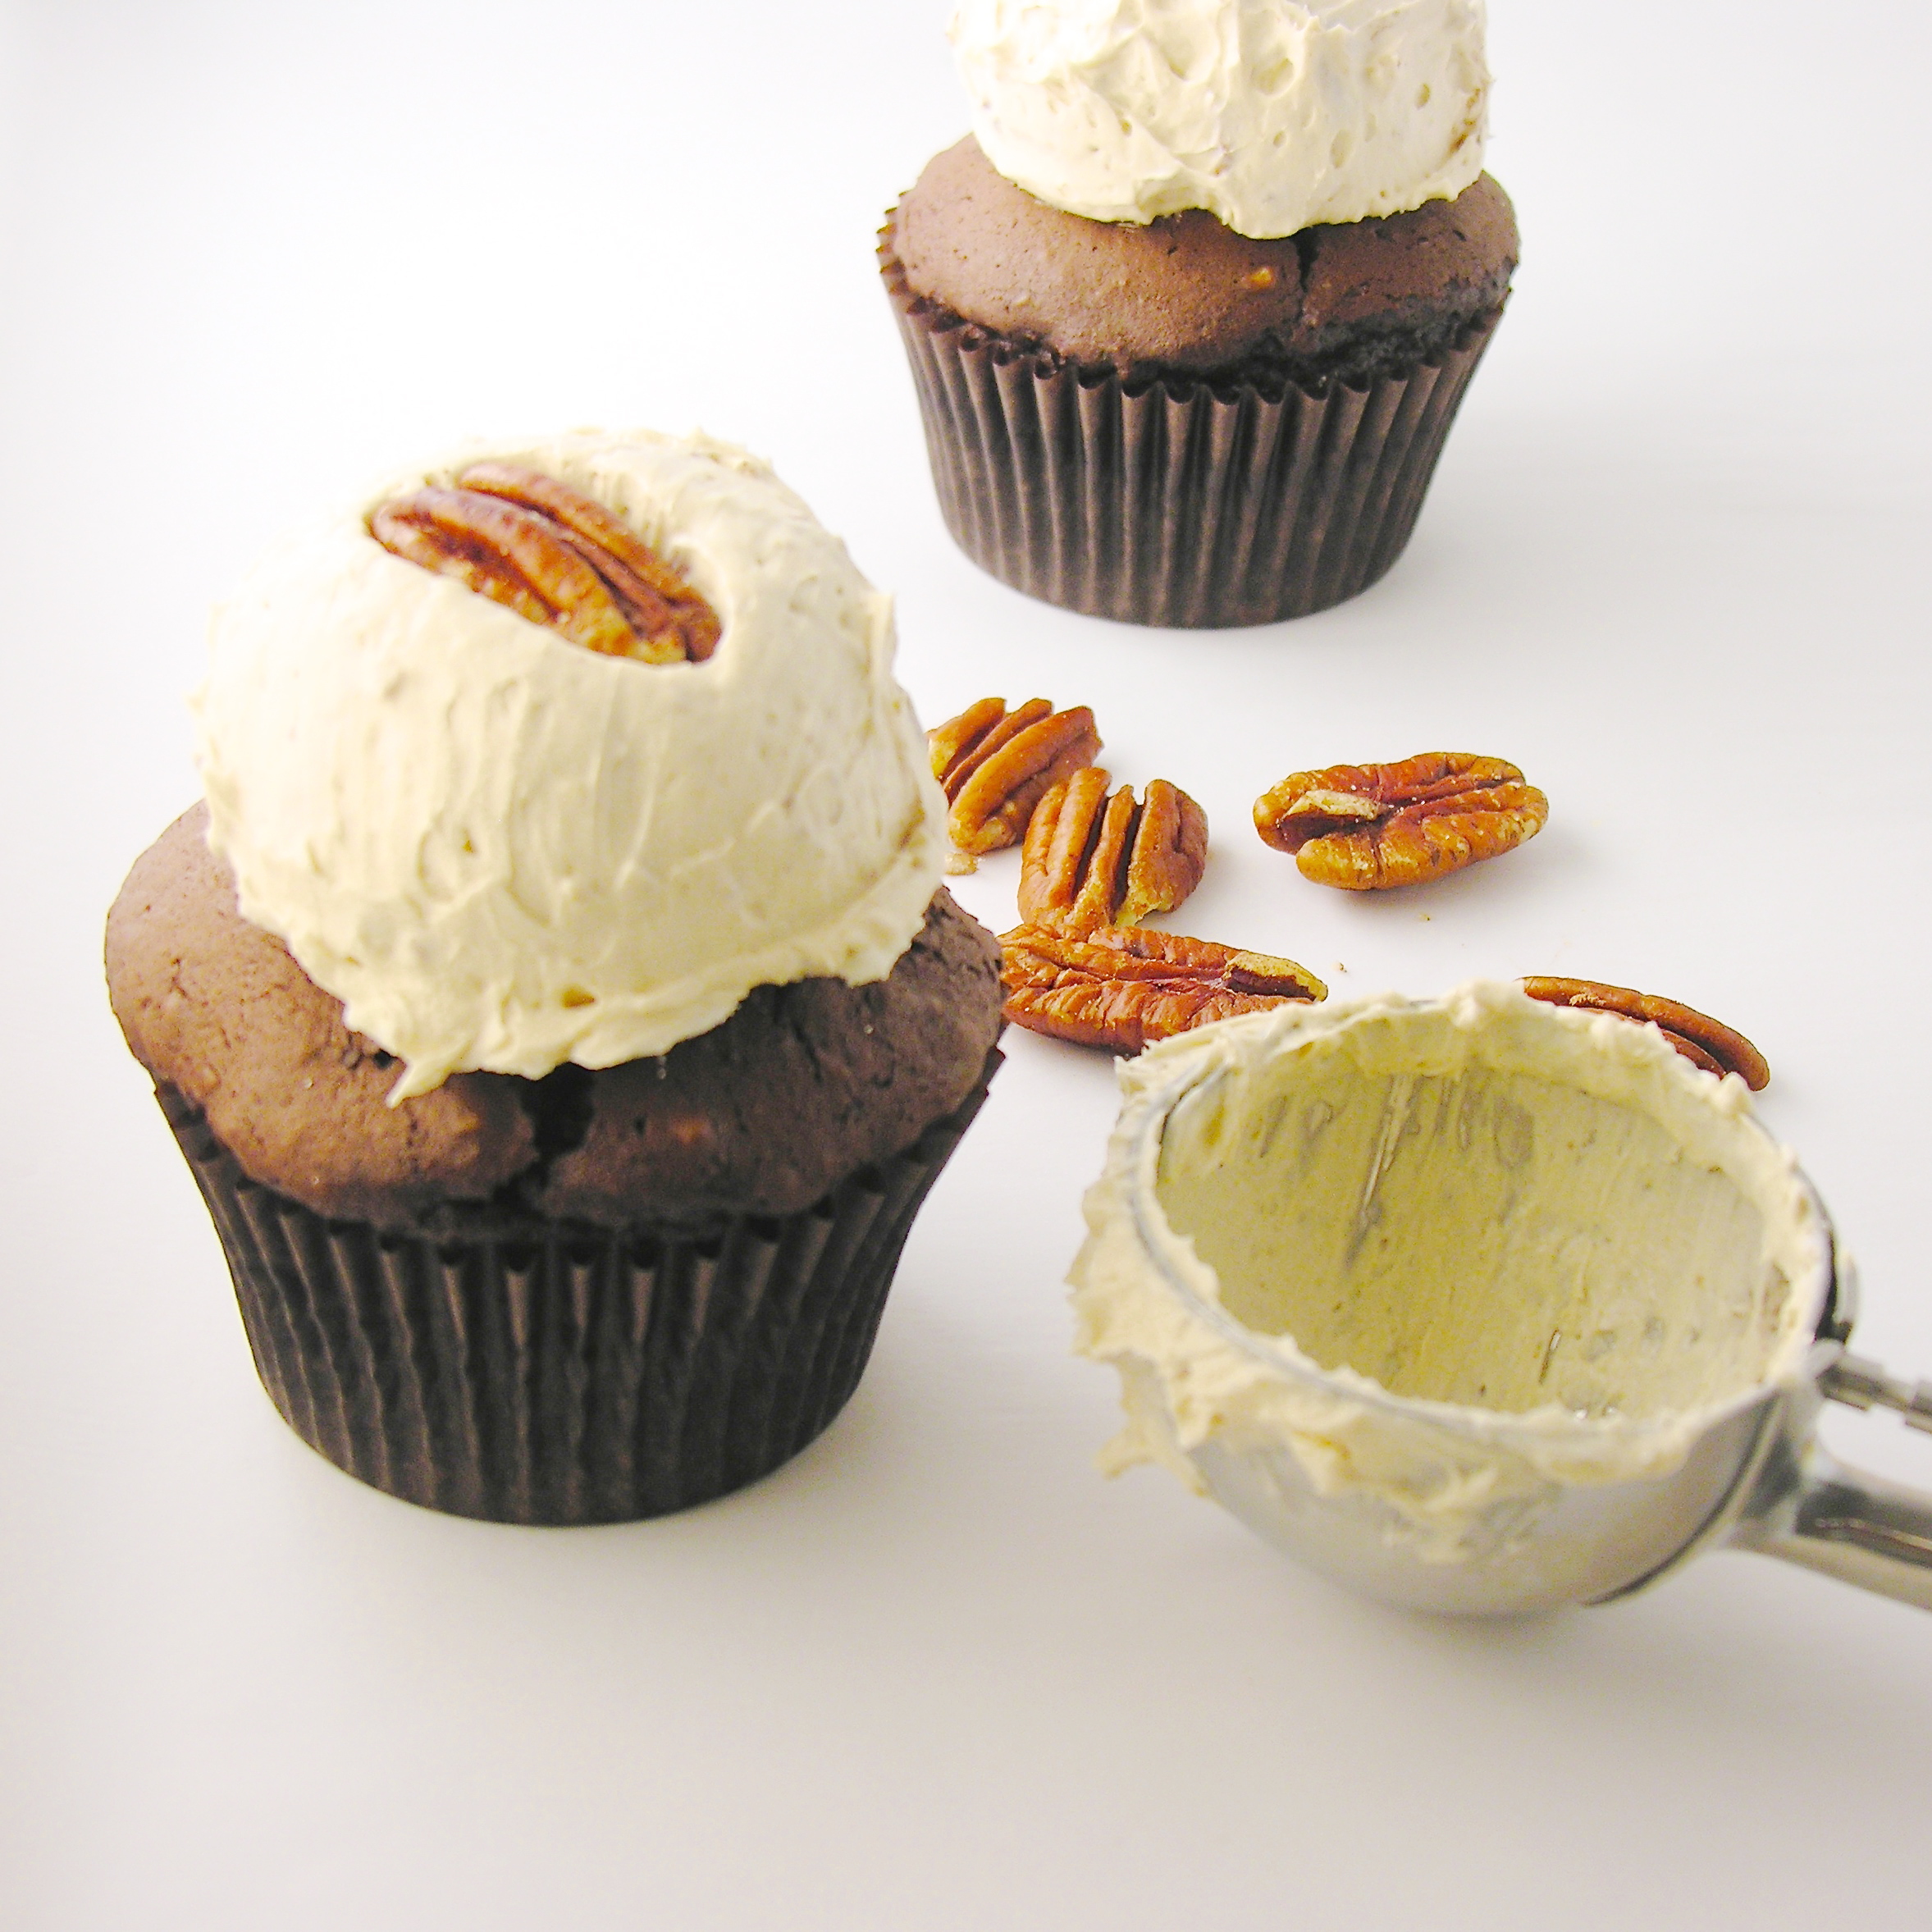
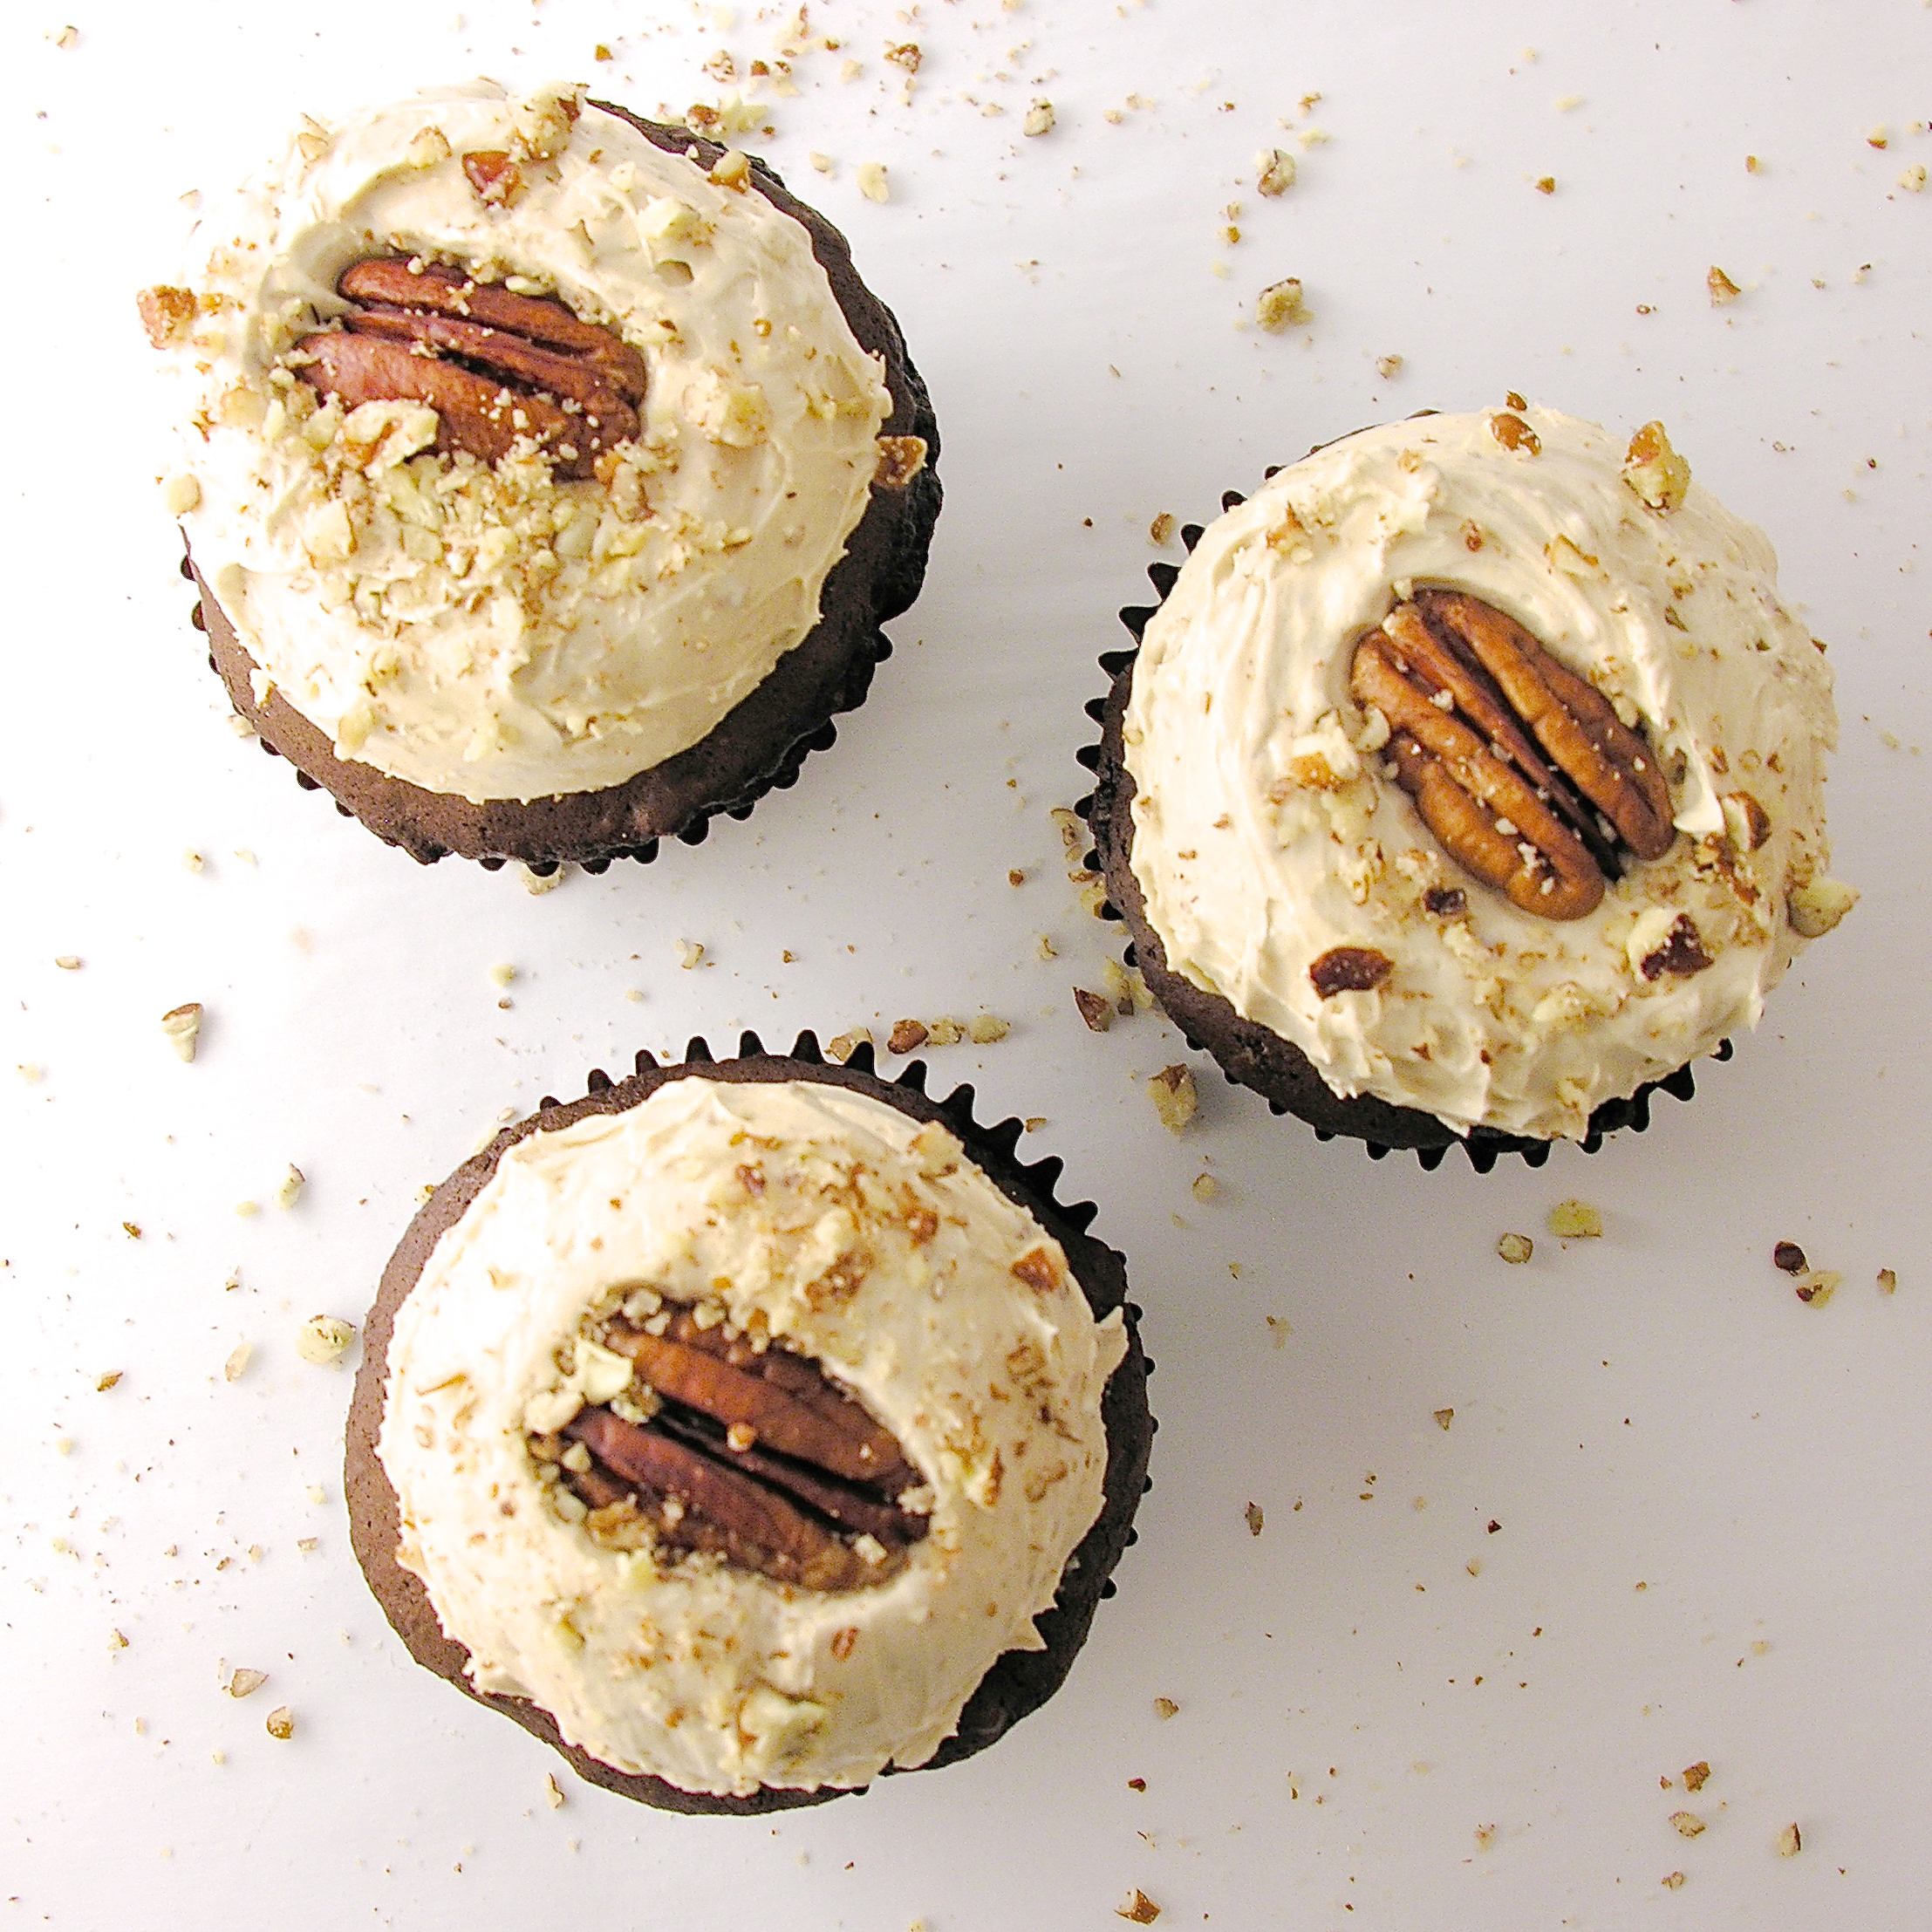
These rich, dense chocolate cupcakes are topped with a light whipped maple pecan frosting that is out-of-this-world delicious! 

I know. Maple pecan things are a dessert for the fall- not early summer! I just couldn’t resist. Maple and pecan are two of my favorite flavors together! I thought about saving this post for November and I couldn’t make myself wait to share it with you because it is just that good! These are delicious. So if you can’t bring yourself to make them, pin the recipe for later- but pin it. You will want this one someday!!! Promise.

Here is how we made these (printable recipe here)

INGREDIENTS: (makes 24 cupcakes)

  • One boxed chocolate cake mix plus oil and eggs to make according to box
  • Milk- enough to replace the water required by boxed mix.
  • 1 (3.9 oz.) box of chocolate pudding (instant)
  • 3 cups chopped pecans (divided)
  • 24 pecan halves
  • 2 sticks salted butter (softened)
  • 2 sticks unsalted butter (softened)
  • 3 cups of powdered sugar
  • 3 teaspoons of maple extract or flavoring

DIRECTIONS:

  • Preheat oven to 350F degrees
  • Mix 1 and 1/2 cups of chopped pecans with dry cake mix.
  • Add eggs and oil according to package, and add milk instead of water- in the same amount as listed on package.
  • Add box of instant chocolate pudding.
  • Beat on high for 2 minutes until smooth.
  • Scoop evenly between 24 cupcake liners placed in muffin tins and bake according to package- until a toothpick inserted into the center of a cupcake comes out clean.
  • Gently remove from tins and allow cupcakes to cool on countertop.
  • Make frosting by placing butters, powdered sugar and maple flavoring in a large mixing bowl.
  • Beat on high until light and very fluffy (2 to 3 minutes).
  • Fold in one cup of chopped pecans (this leaves 1/2 cup for sprinkling on top!)
  • Use a cookie scoop to place a dome of frosting on each cooled cupcake. Press a pecan half on top and sprinkle with a bit of chopped pecans. 

  • Store in a loosely sealed container for up to 3 or 4 days. Refrigerate to keep a day or two longer.
  • Enjoy!

My thoughts: You are going to love these! If you want to simplify, just make the boxed cake mix as-is plus nuts. The milk and pudding make the cupcakes more dense, rich and moist- but you could skip adding these extra ingredients to save time. It’s that frosting… even my friends who aren’t big frosting lovers were licking this stuff off the top of these cupcakes. Yum. Hope you get a chance to try them- now- this fall- whenever!! 🙂 Enjoy! ~r

Other maple and/or pecan recipes to try! (click on a photo to see instructions)


Pancake and Bacon Cupcakes!!!

Pancake Cupcakes!!!!These sweet maple pancake flavored cupcakes are topped with syrup-coated bacon and real mini-pancakes.  The only question remaining is, will you eat them for breakfast???

My answer to that question is a resounding YES, I will eat them for breakfast, and any other time of the day too!

Did you know that today is National Pancake Lovers Day???  There is no better way I know of to celebrate pancakes than by making these!  [Plus, Monday is National Coffee Day, and believe me these go GREAT with coffee!]

Pancake cupcakes with coffeeThese cupcakes were a complete experiment, and when they came out of the oven and I tentatively tasted one, I smiled. They taste like pancakes- they really do!  Here’s how we made them: (printable recipe)

INGREDIENTS:

Cupcakes:

  • 2 1/2 cups all-purpose flour
  • 3 teaspoons baking powder
  • ½ teaspoon salt
  • 1 cup sugar
  • ½ cup butter, melted
  • 1/4 cup whipping cream
  • 2 eggs
  • 3 teaspoons vanilla
  • 1/2 cup maple syrup (I didn’t use the real stuff– too expensive!)

Frosting and toppings:

  • 2 sticks (1 cup) of salted butter, softened
  • 2 sticks (1 cup) of unsalted butter, softened
  • 3 cups powdered sugar
  • 2 teaspoons of vanilla
  • 8 pieces of bacon, cooked until very crisp
  • 1/4 cup of maple syrup
  • Pancake batter- enough for about 50 mini pancakes (I used the add water and shake Bisquick bottle, and it took about 2 cups of batter to make these up.

DIRECTIONS:

Cupcakes:

  • Combine all dry ingredients and mix in medium bowl
  • In large bowl, whisk eggs, whipping cream and vanilla together, add melted butter slowly while whisking.
  • Alternately add dry ingredients and syrup to the egg mixture, whisking until thick and smooth.
  • Scoop evenly into 18-20 cupcake liners placed in muffin tins. Don’t overfill!
  • Bake at 350F degrees for 14-18 minutes, until a toothpick inserted into the center comes out clean.
  • Remove cupcakes from tin and allow them to cool completely.

Frosting and toppings:

  • Crumble bacon into small pieces and toss with maple syrup until completely coated.
  • Make mini pancakes on a hot griddle by using a small spoon and making just a tiny circle of batter.  Let these cool on a piece of parchment paper.
  • Make frosting by placing butters, powdered sugar and vanilla in a mixing bowl and beating on high for 3-4 minutes until very light and fluffy.
  • Place frosting into a large zip top bag that has a decorating tip fitted into one corner.
  • Pipe a circle of icing around the edge of the cupcake.
  • Sprinkle with bacon.
  • Place pancakes on top, using a small amount of frosting to stick them together into a stack.  
  • Add a dollop of frosting on top and add sprinkles or a red “cherry” sixlet, like mine.
  • ENJOY!!!!


Pancake Cupcakes!!!
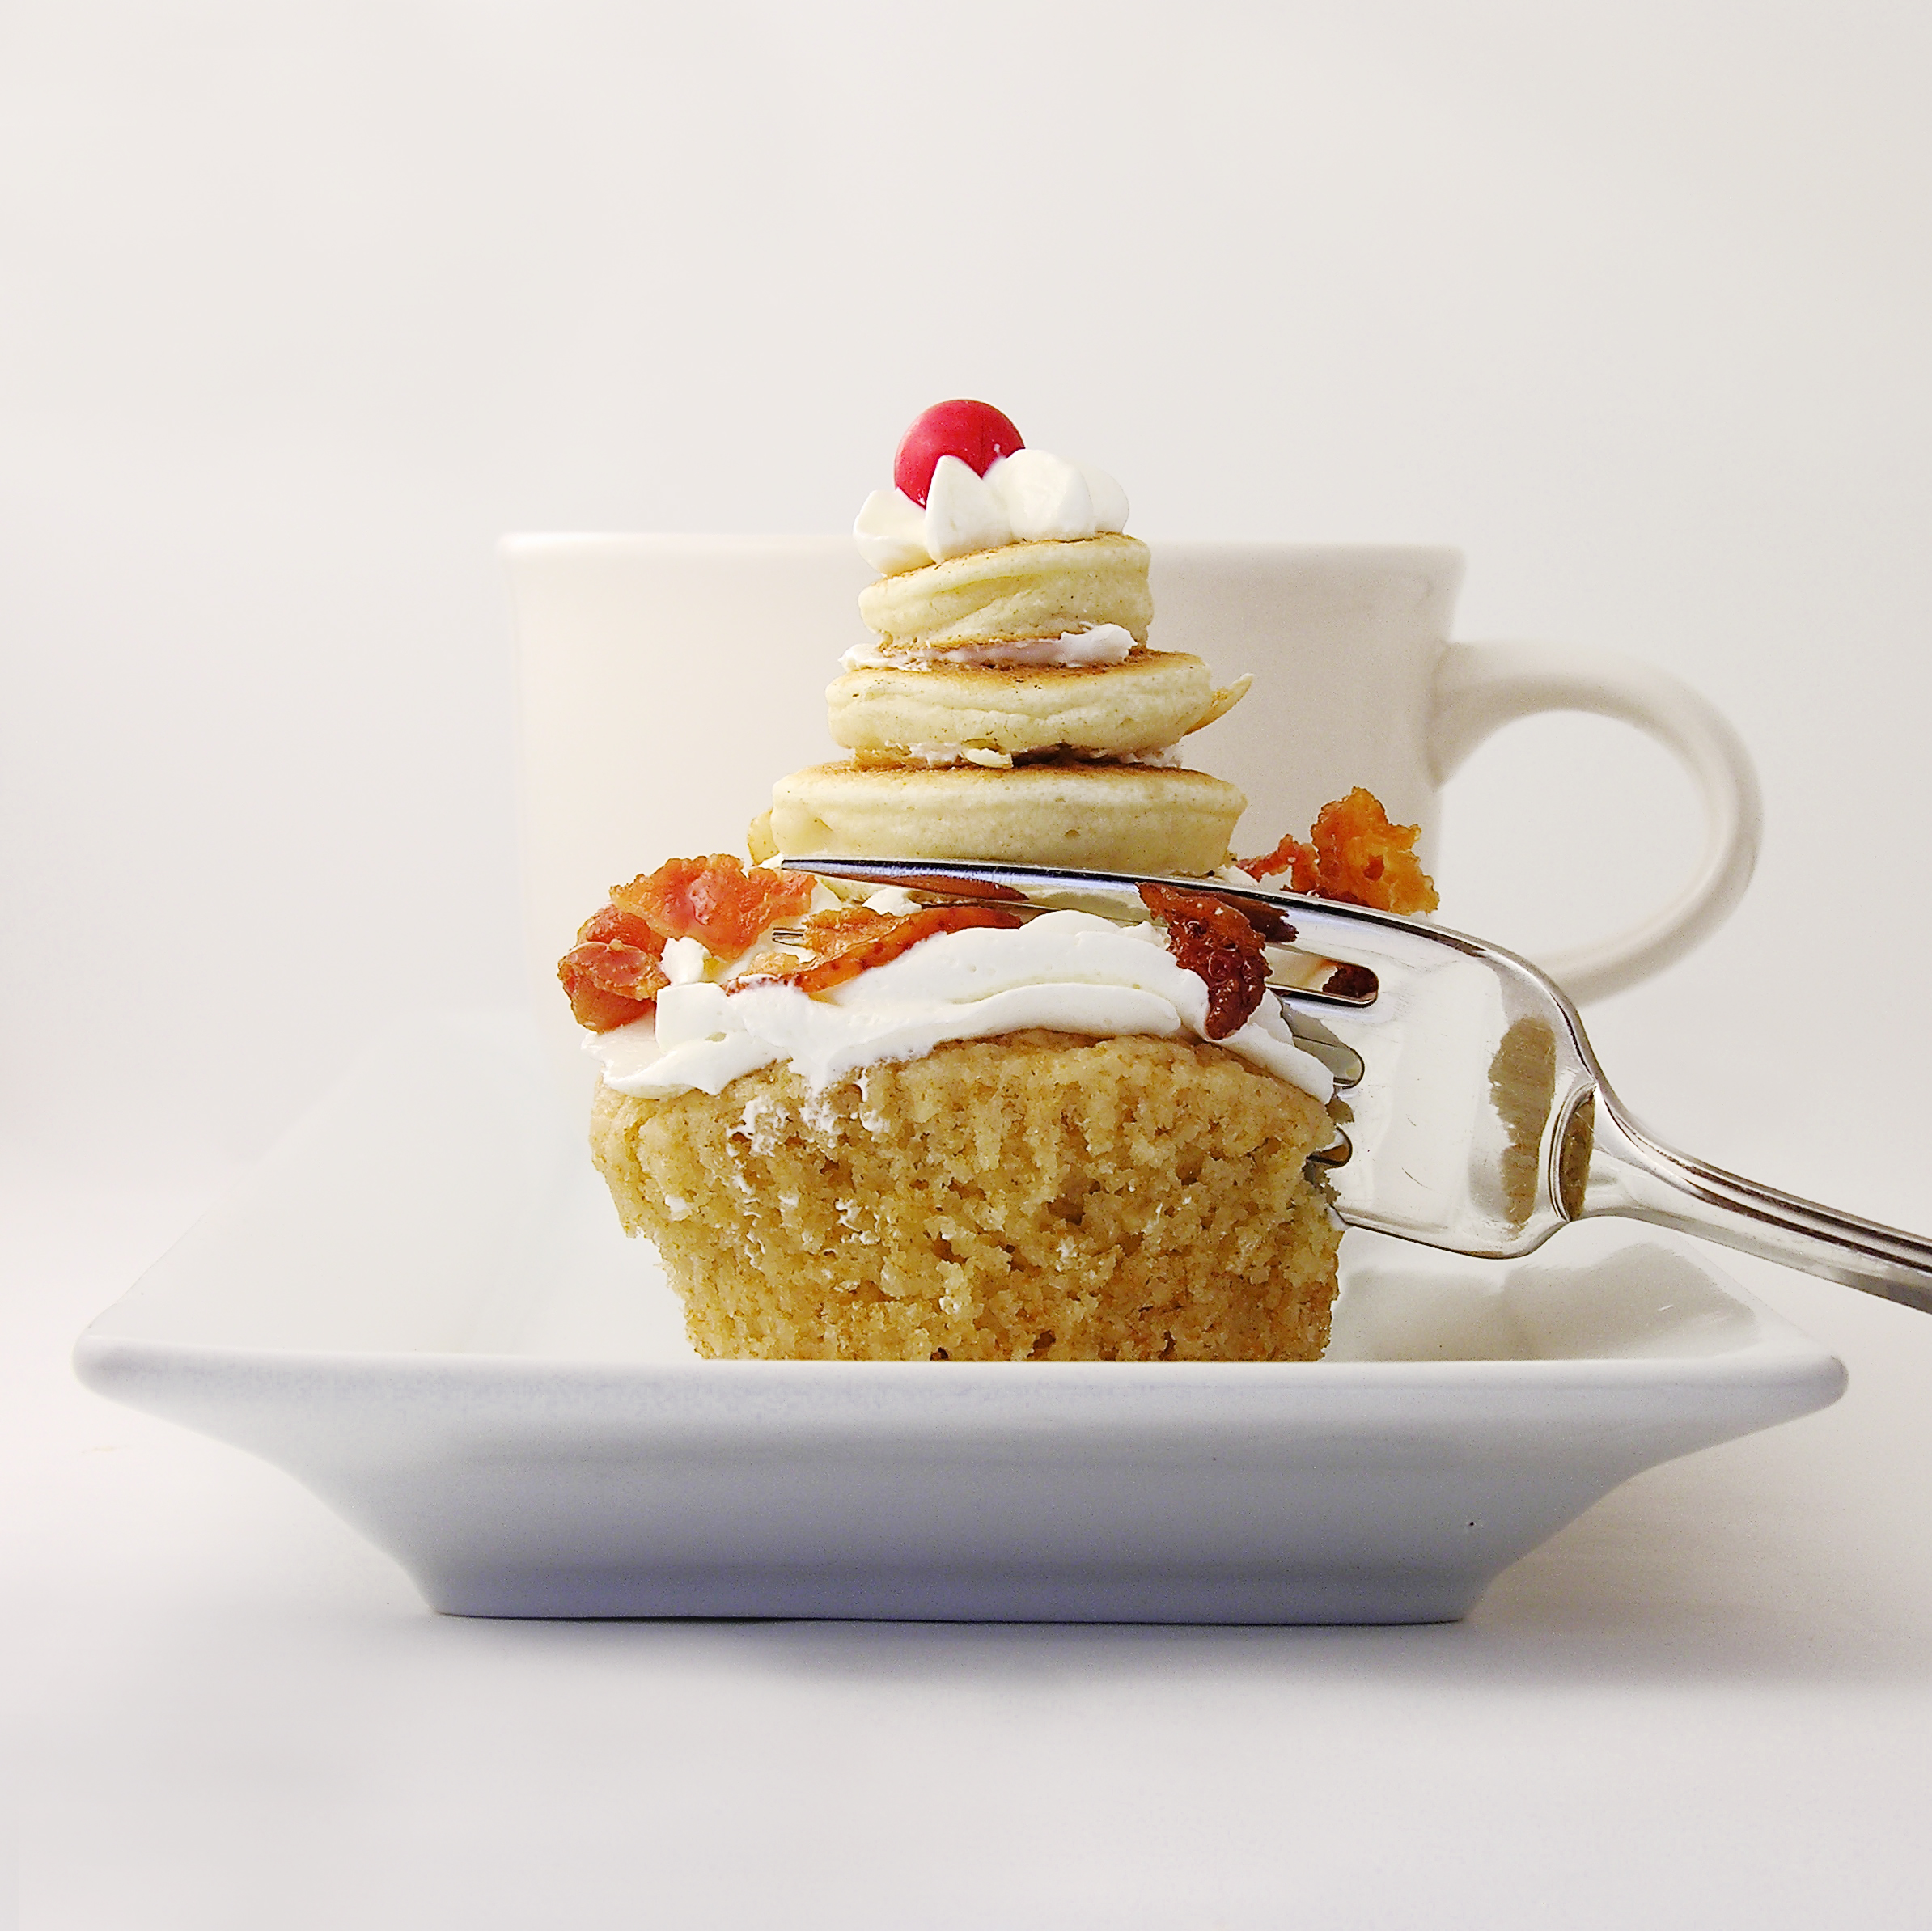
My thoughts:  These are really good.  The sweet cupcake with that salty bacon….yum!  I was a little skeptical about the bacon, but it really adds a wonderful flavor to these!  If you are short on time, skip the mini pancakes on top and just frost these and sprinkle them with bacon.  You could even use a bottle of those real bacon bits, but I suspect that the freshly cooked bacon tastes best.  Happy Pancake Day to YOU!!!  Enjoy!! ~r

Pancake and Bacon Cupcakes!

Other treats that you “could” eat for breakfast:

Tres Leches Cake with caramel and fruitRaspberry Lemon drop Cakes!!!Cinnamon Upside Down Cakes!!Mocha cupcakes in edible fondant mug

Maple Cream Ginger Snaps

Posted on

Tangy ginger cookies filled with sweet maple cream.  Cut them into fun fall shapes for your Halloween party!

INGREDIENTS:

Cookies:

  • 1 cup butter
  • 1 cup sugar
  • 1 egg
  • 1 cup dark molasses
  • 2 T. vinegar
  • 5 cups flour
  • 1 1/2 t. baking soda
  • 1/2 t. salt
  • 2 t. ground ginger
  • 1 t. cinnamon
  • 1 t. ground cloves

Maple cream:

  • 2 1/2 cups of powdered sugar
  • 1/4 c. melted butter
  • 1 t. maple flavoring
  • Food coloring

DIRECTIONS:

  • Cream together butter and sugar.
  • Beat in egg, molasses and vinegar.
  • Blend in sifted dry ingredients.
  • Chill 2-3 hours (this is important– the dough is very easy to roll after chilling)
  • Roll 1/8 inch to 1/4 inch thick on a floured counter or board (thinner is better!)
  • Cut dough into small, equally-sized cookies (if you want to make cookies with cute cut-outs on one side, I used Halloween Linzer Cookie Cutters)
  • Place on greased cookie sheets.
  • Bake at 375 degrees for about 7-10 minutes.  Check often- take out when cookies have risen and are easily removed from sheet.
  • To make maple cream, combine powdered sugar, melted butter and a little water until a thick frosting consistency is reached.
  • Add maple flavoring (you can add vanilla if you don’t like maple)
  • Divide cream into 2 bowls and color as desired with food coloring. (my maple flavoring added a brown tint to my filling, so I just experimented with coloring to reach the shade I wanted– use gels so that you don’t dilute it!)
  • Frost one cookie’s back and top with another cookie.  The filling will harden up and make these very easy to store and serve.
  • ENJOY!

My thoughts:  These are a really unique flavor.  I love them– ginger and maple– YUM!  The ginger cookies are my grandma’s recipe and they don’t rise much so I thought they’d be perfect for this type of cookie cutter.  Roll them thin though– thicker cookies don’t keep the inside cut-out shape as well.  I’ve never used a Linzer cookie cutter (I’ve no idea how its SUPPOSED to be used-  I will probably read the directions eventually!) but it worked just great with this cookie recipe and these make me smile 🙂