RSS Feed

Tag Archives: sweet

Pecan Praline Cupcakes

Posted on

Praline Cupcakes1
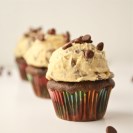
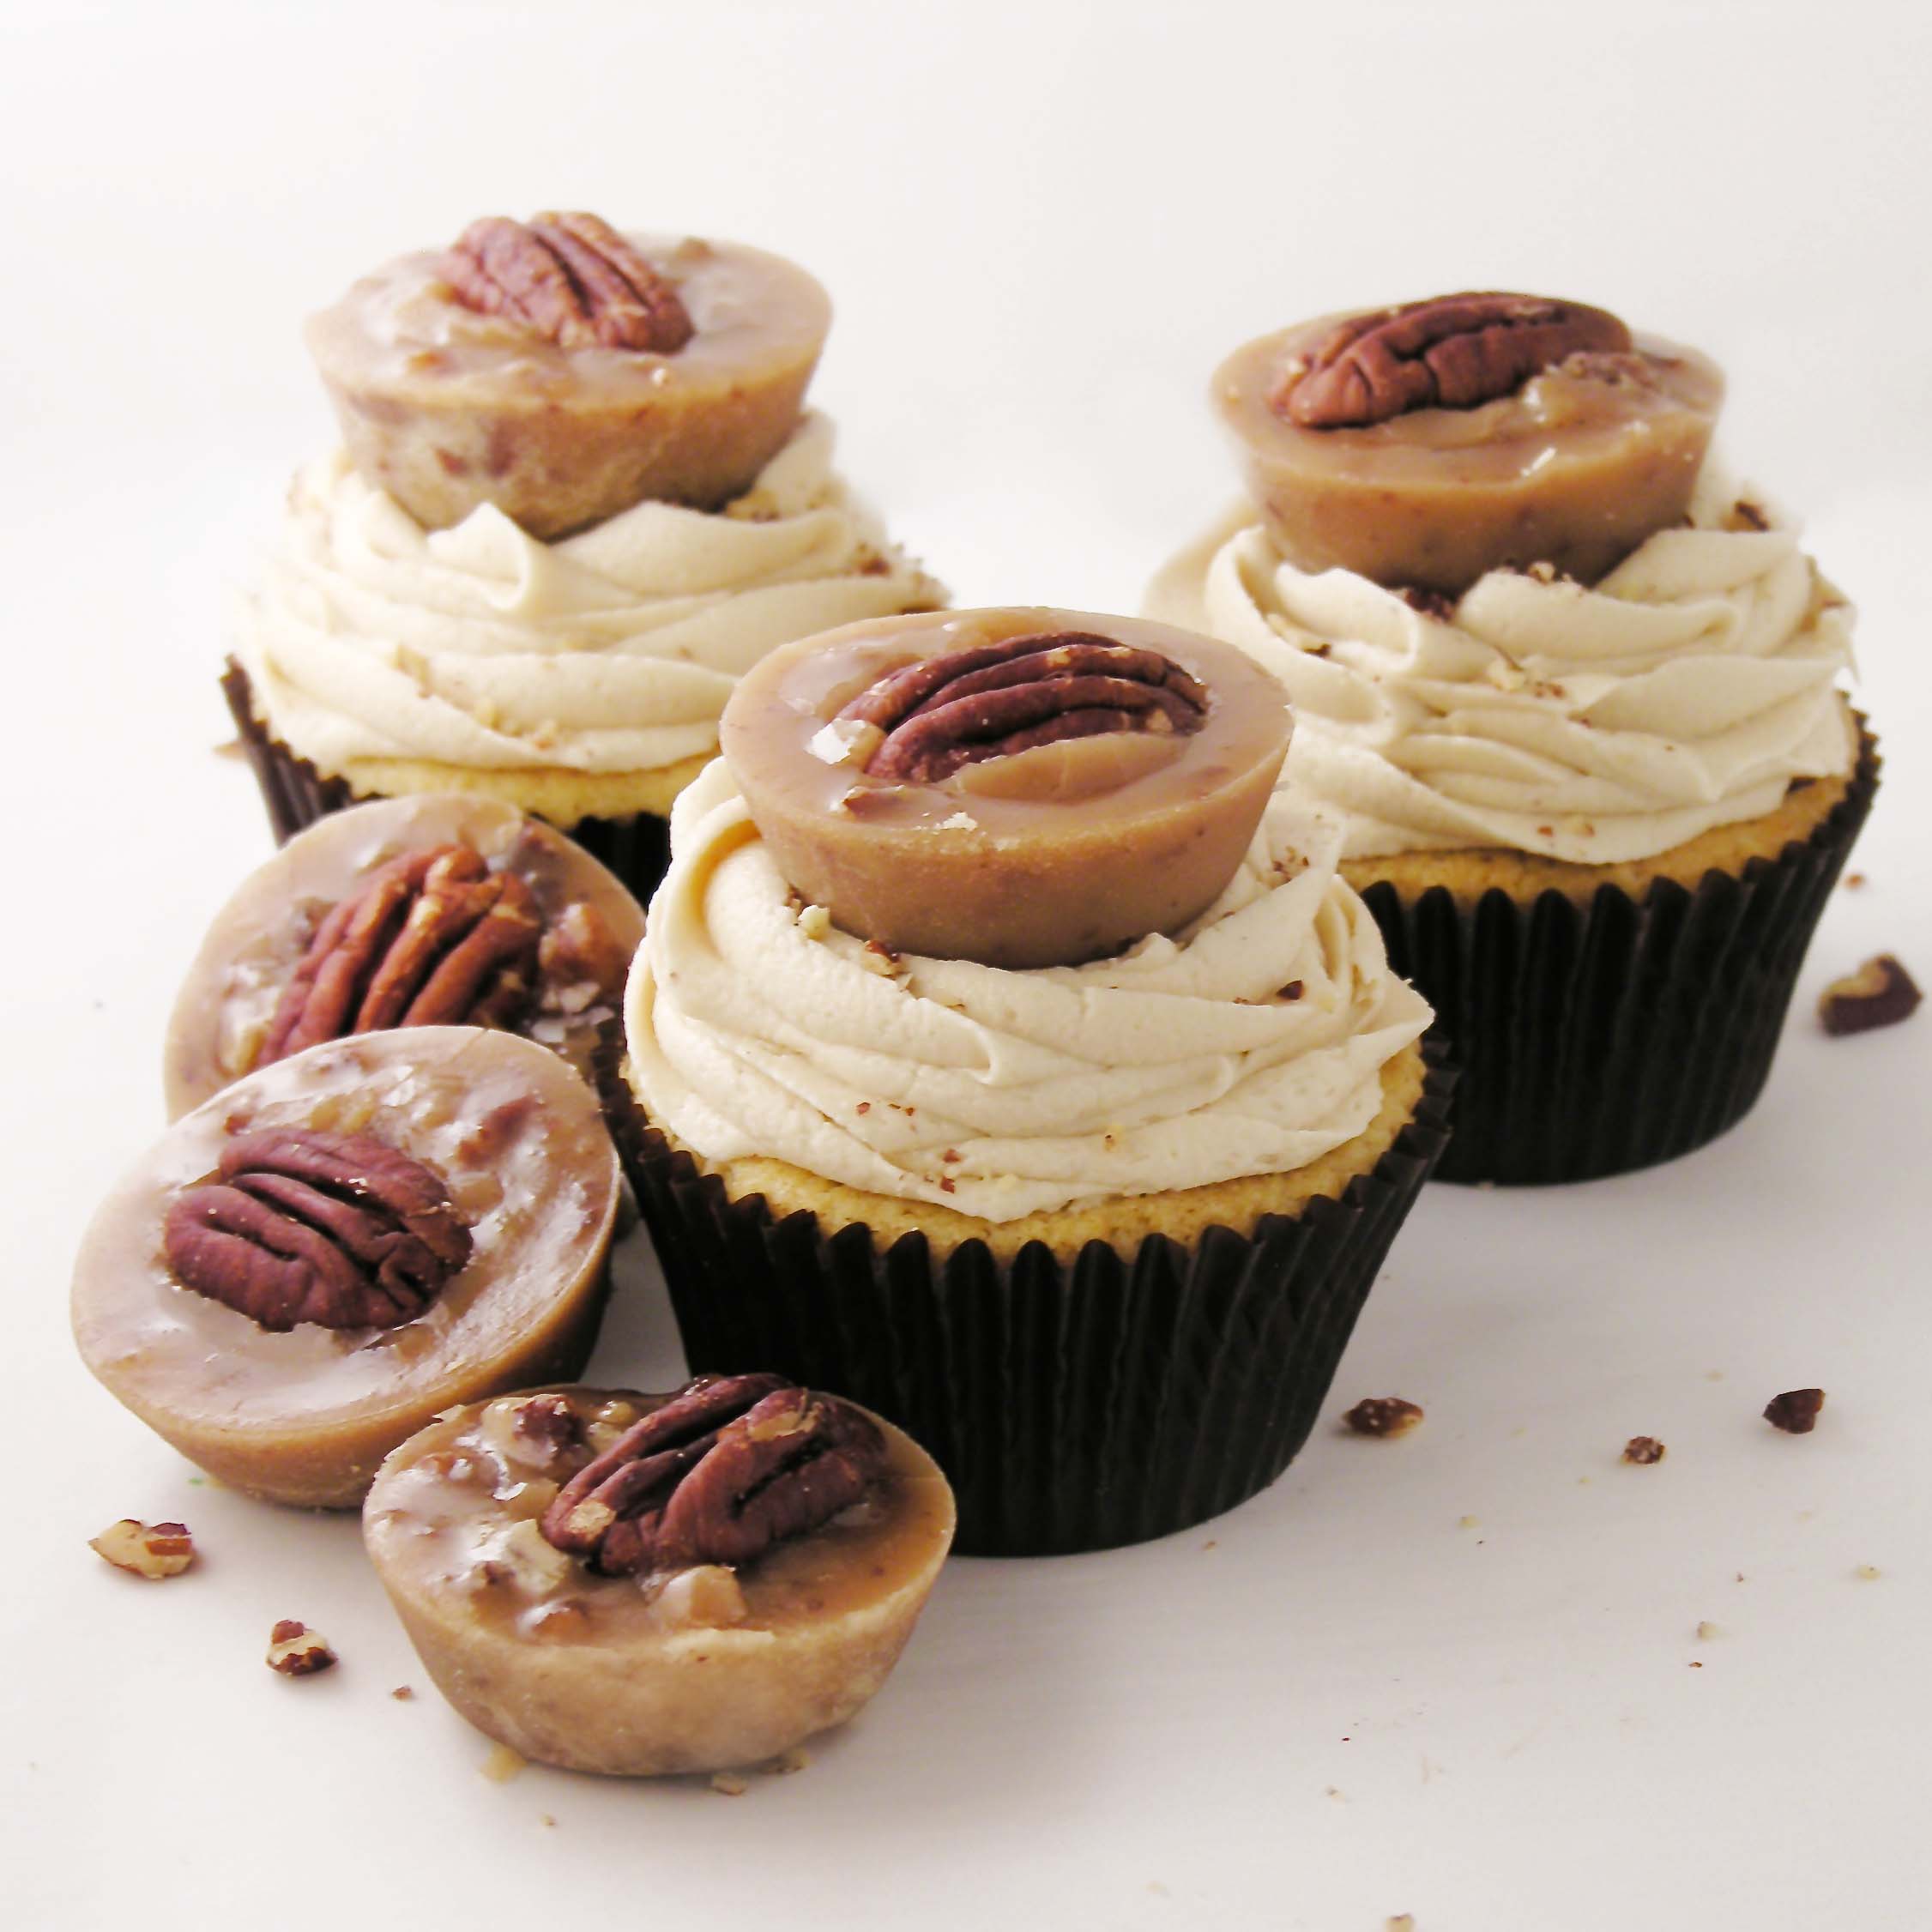
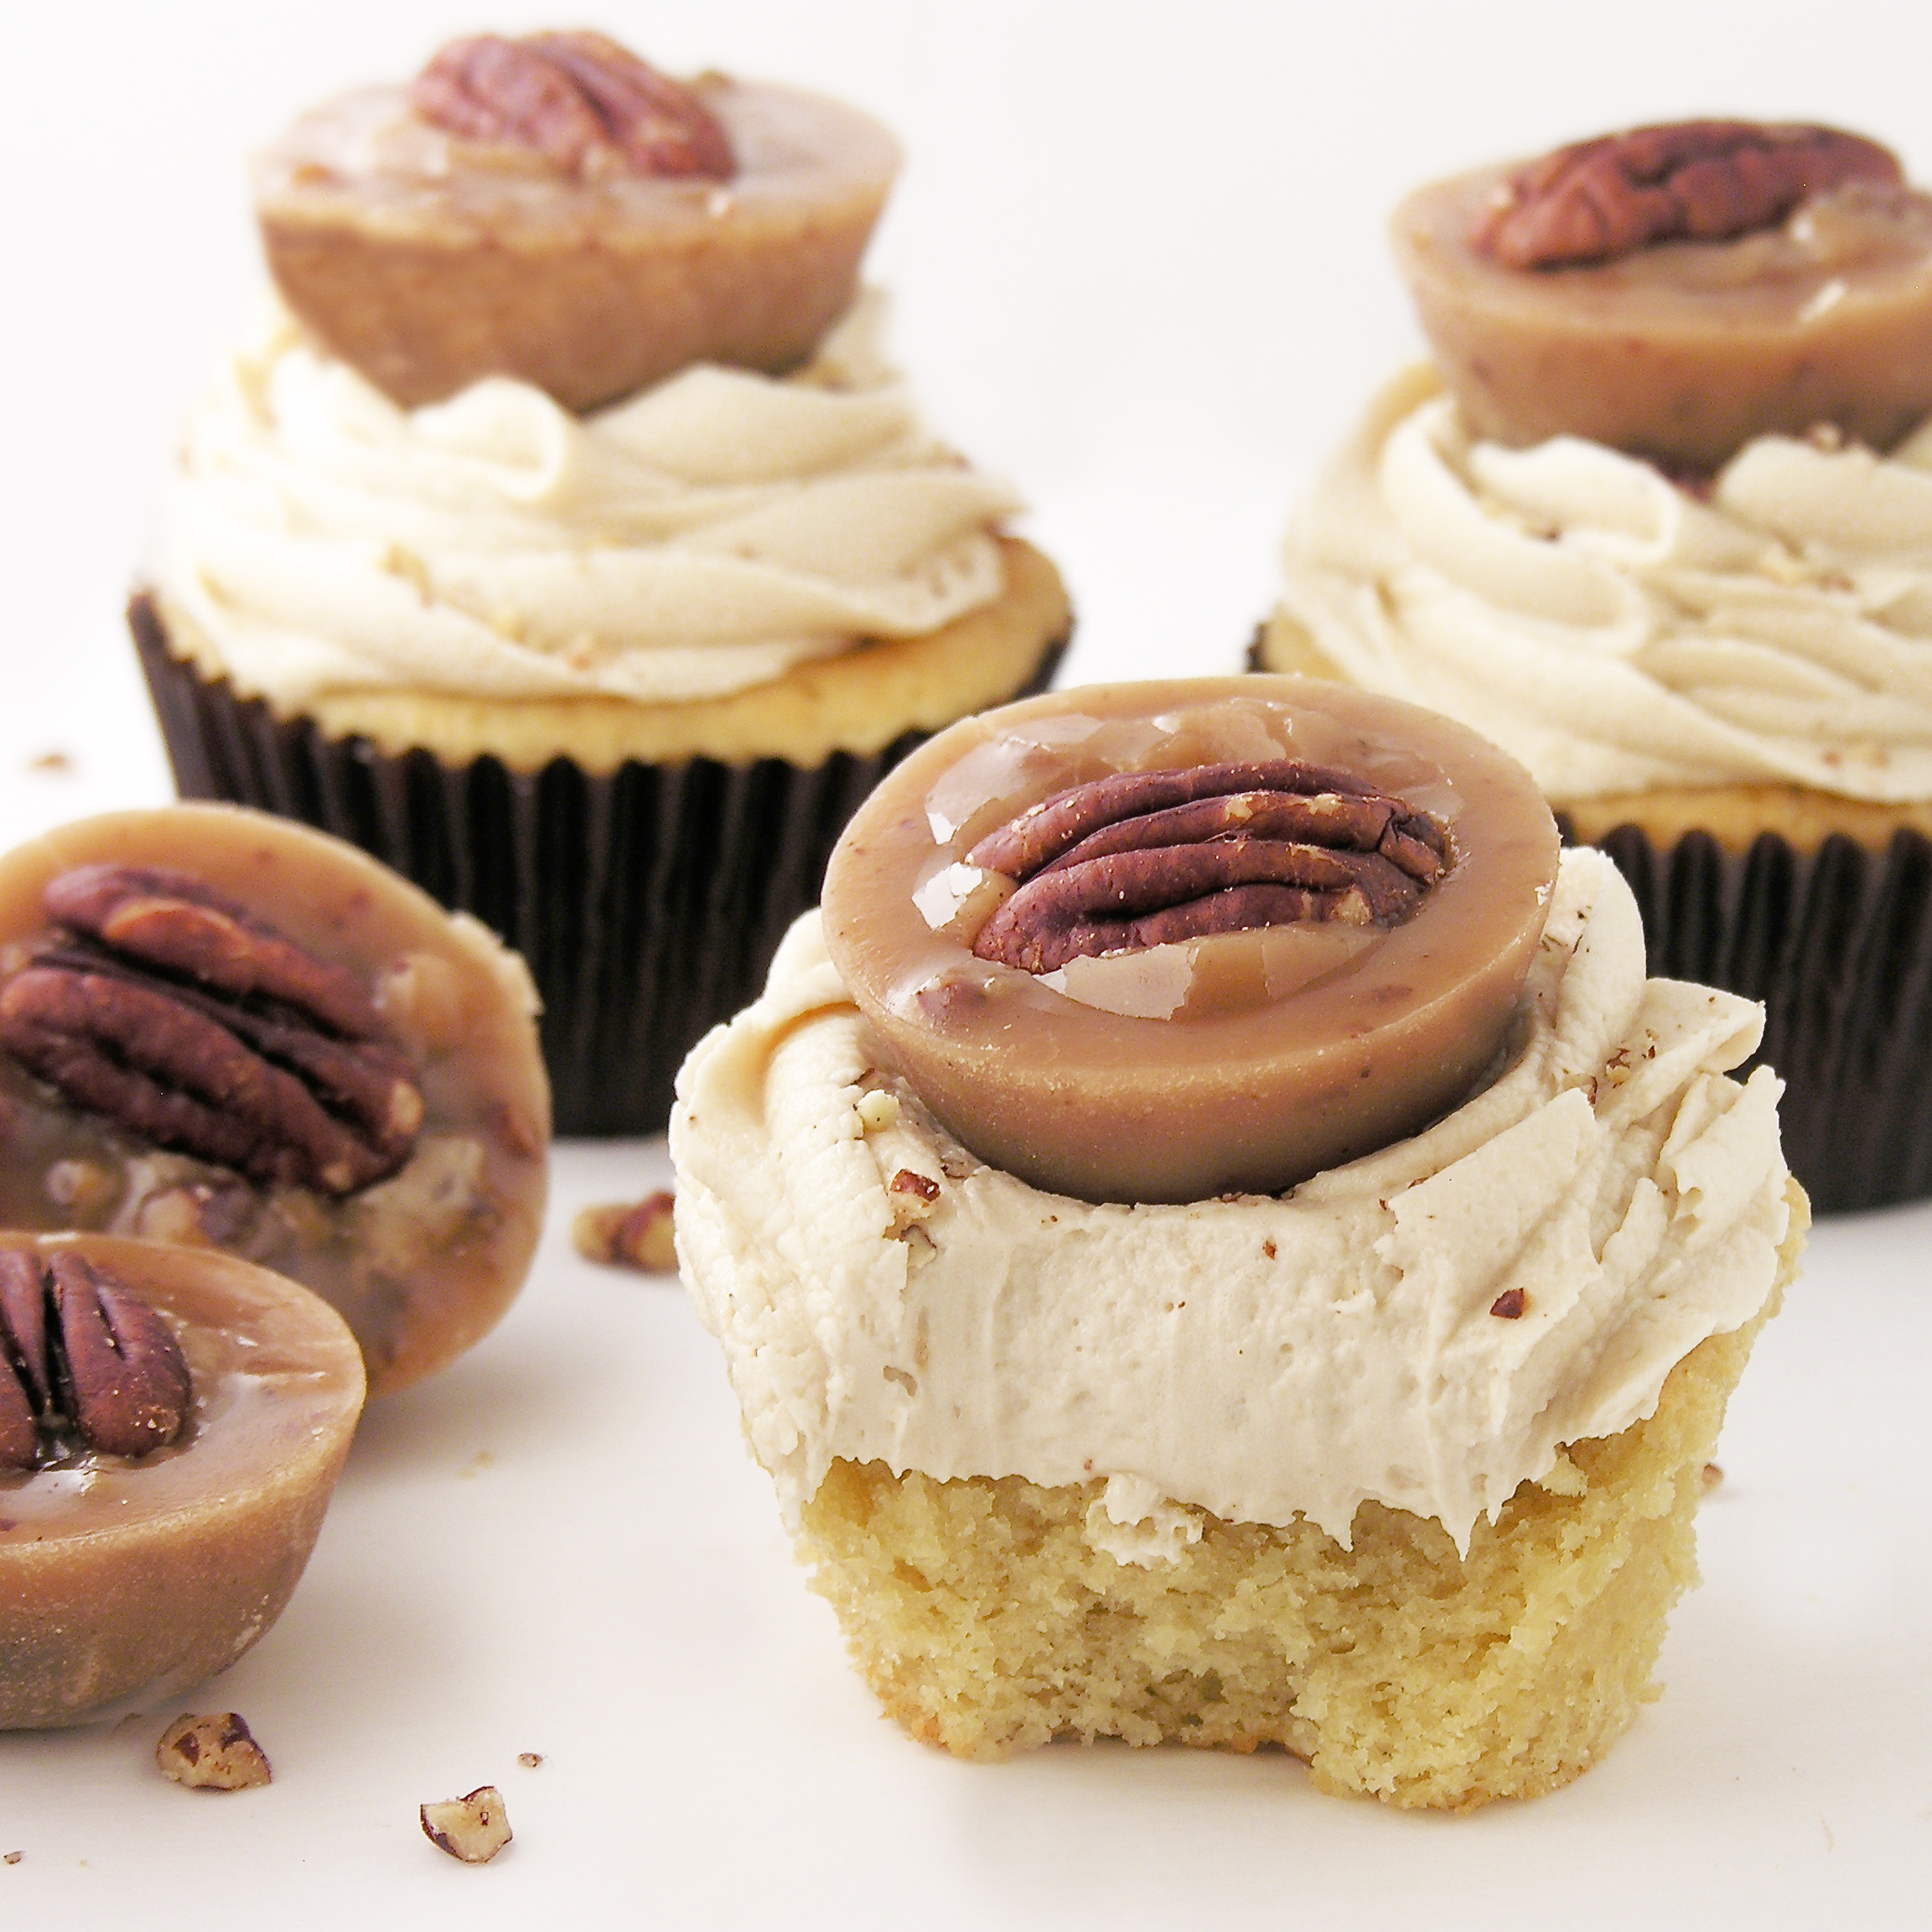
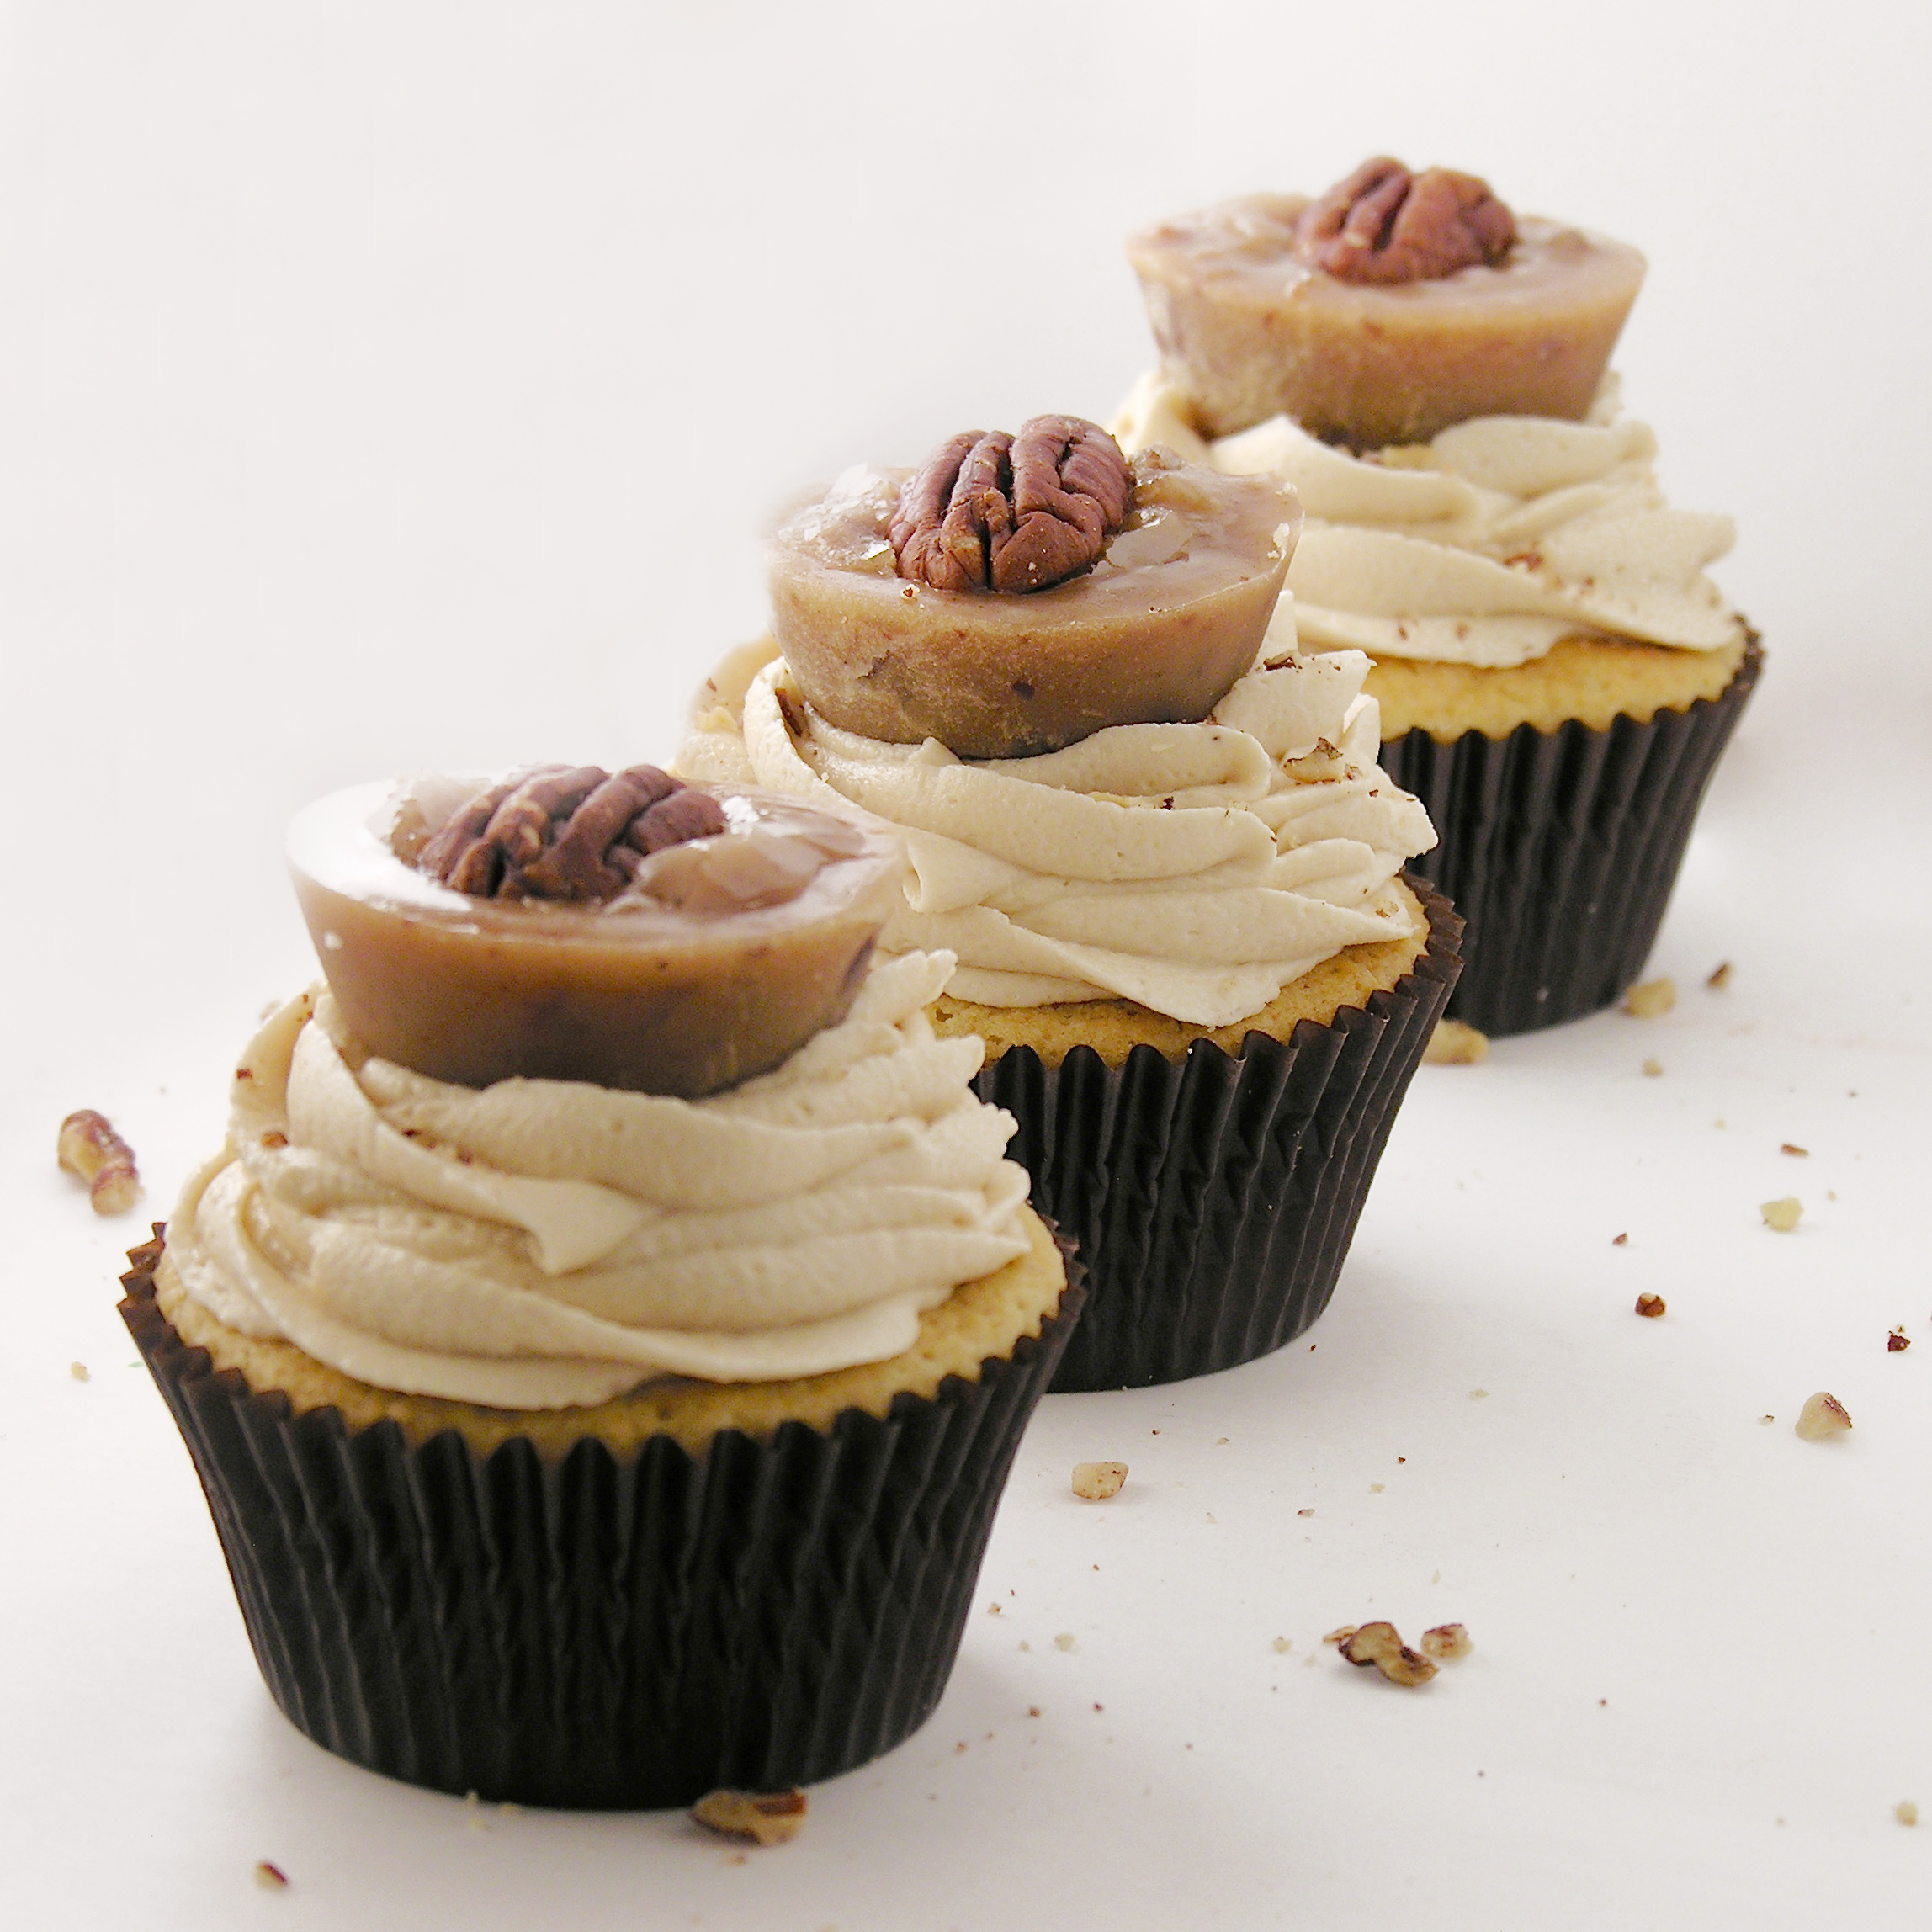
If you love pralines, you will love these pecan praline cupcakes with delicious homemade pralines on top!

Two desserts in one!

I’m a huge fan of pecan pralines. Our family has often traveled to the southeast part of the US and there’s just nothing better than a still-warm praline in Charleston or Savannah… YUM!  I’ve always wanted to try making homemade pralines, but I’ve never had a good recipe. Last month, we visited family friends, Dave and MaryAnne, and Dave told us he has the BEST pecan praline recipe. He whipped some up for us and oh my…. He shared his recipe and I had the idea to carry some of those flavors over into cupcakes.

Really, these two desserts stand alone, but are especially fun together!

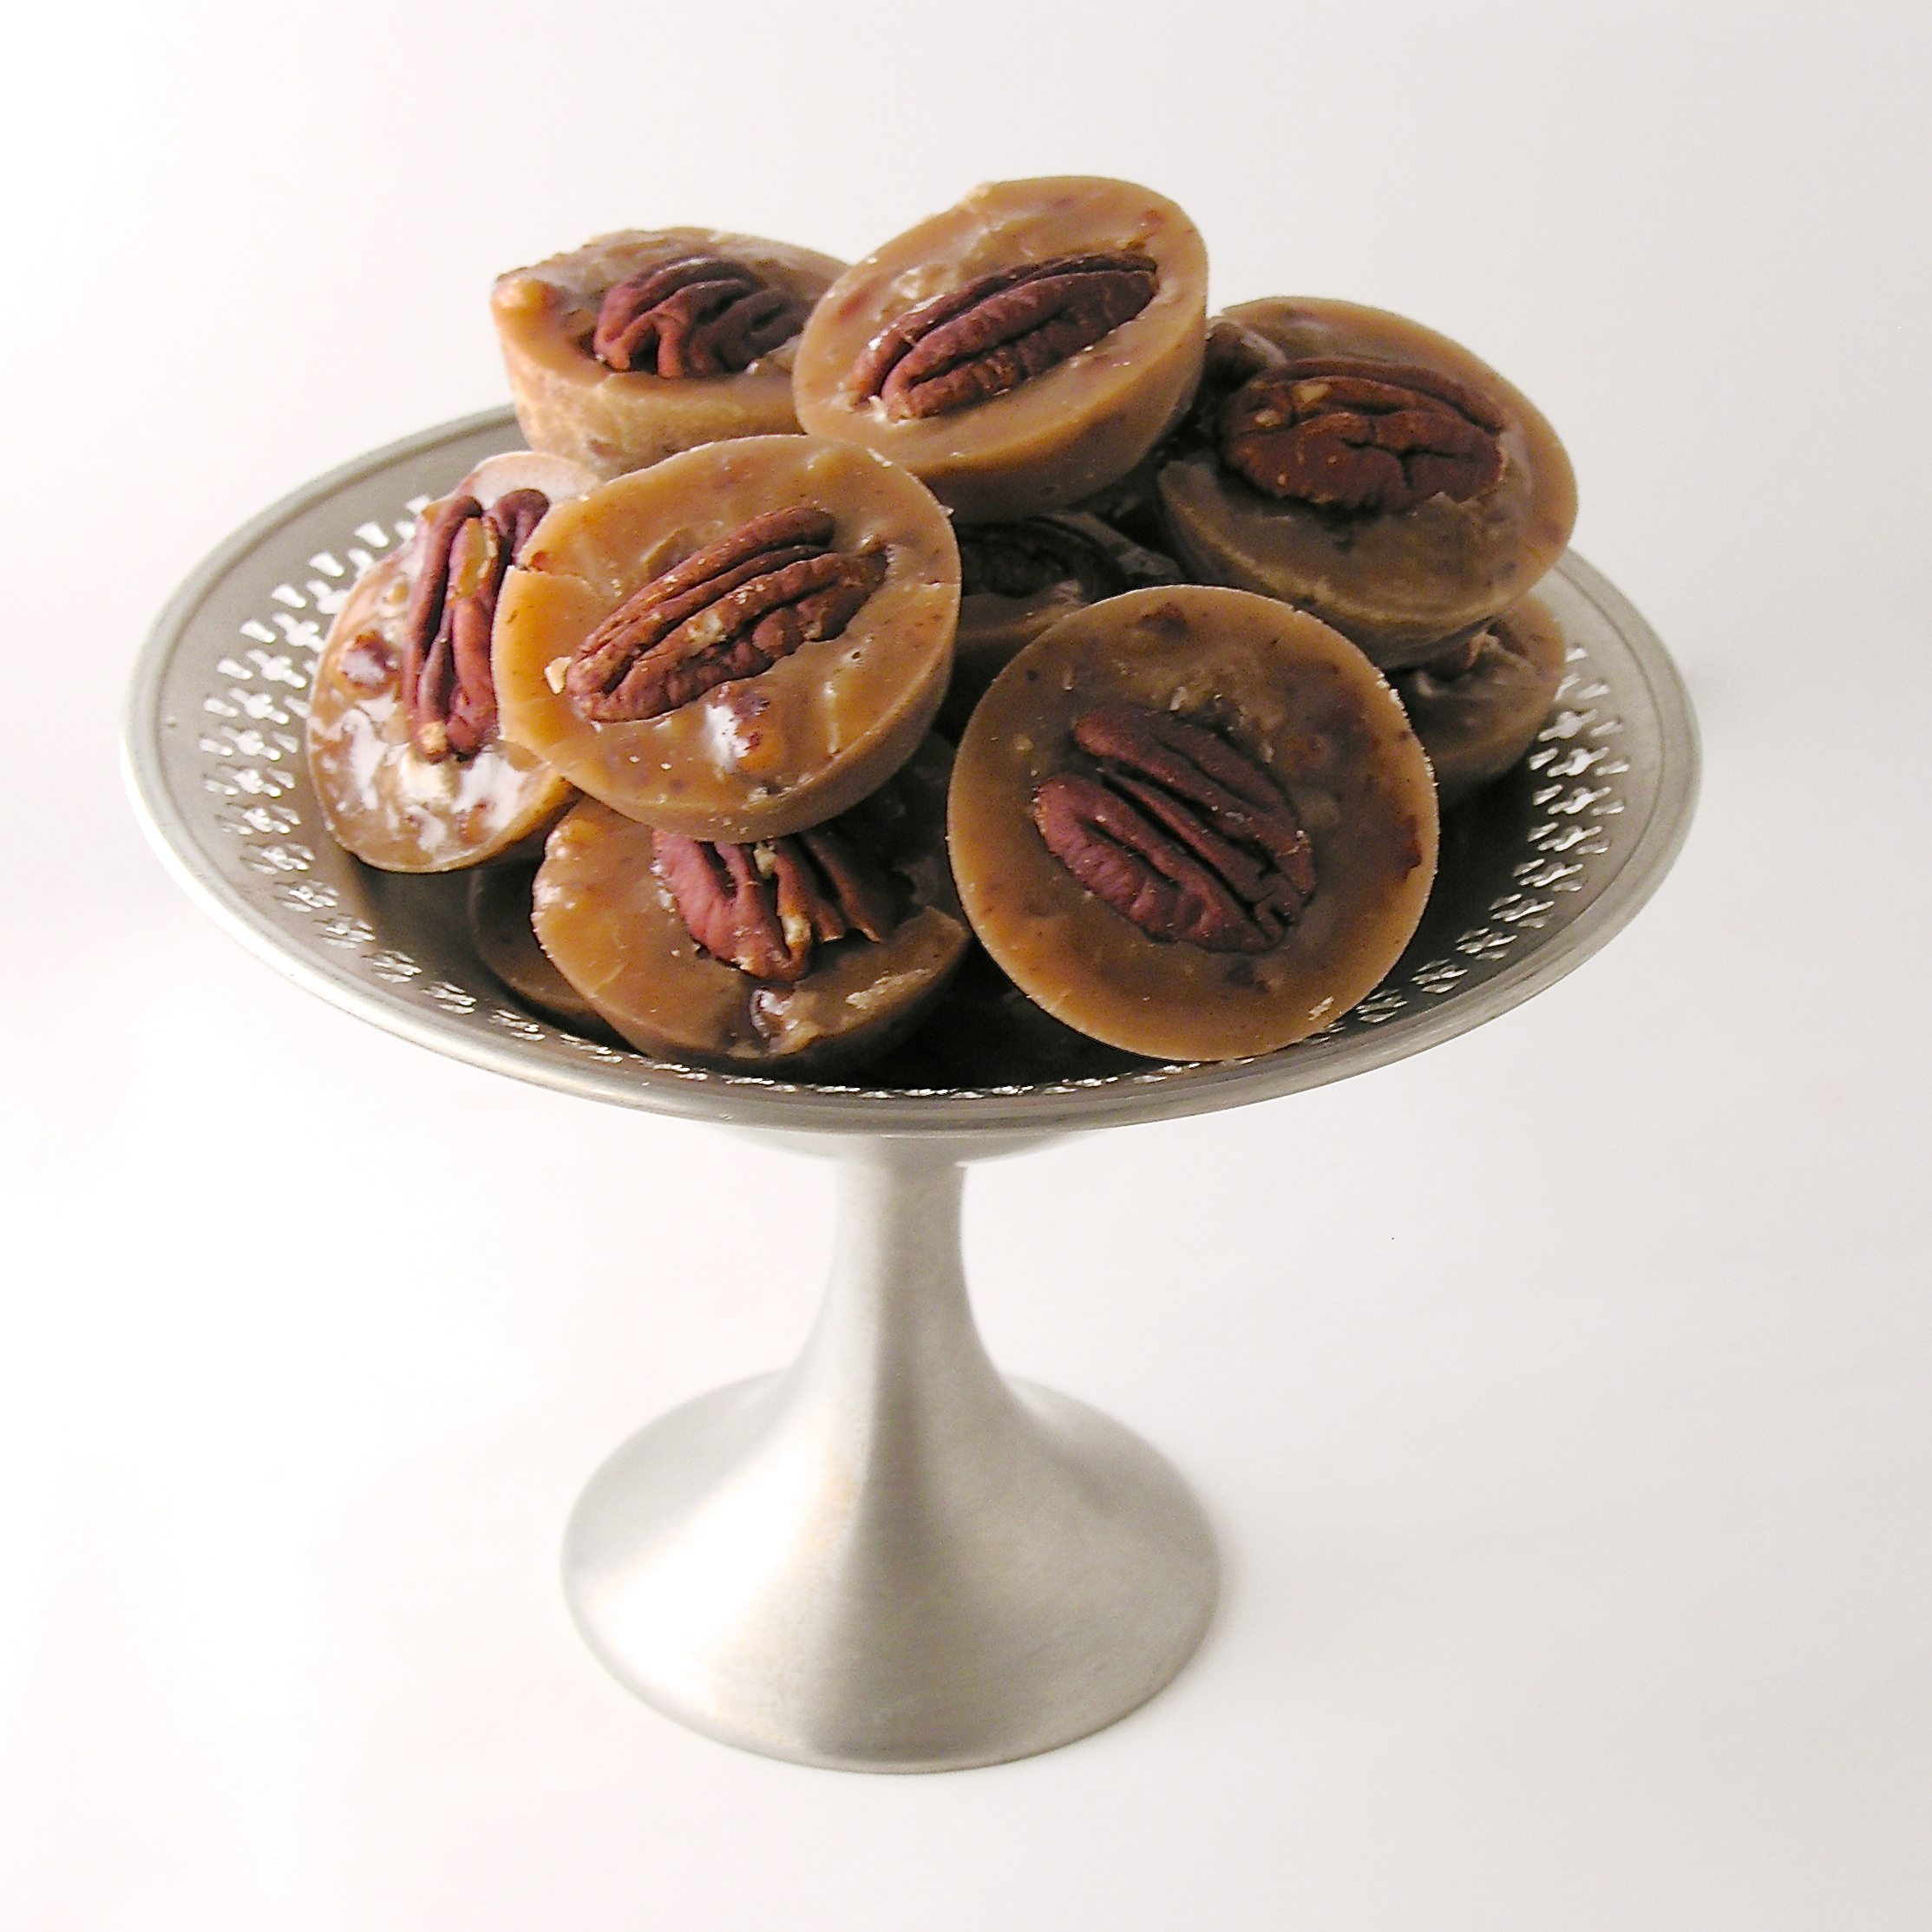
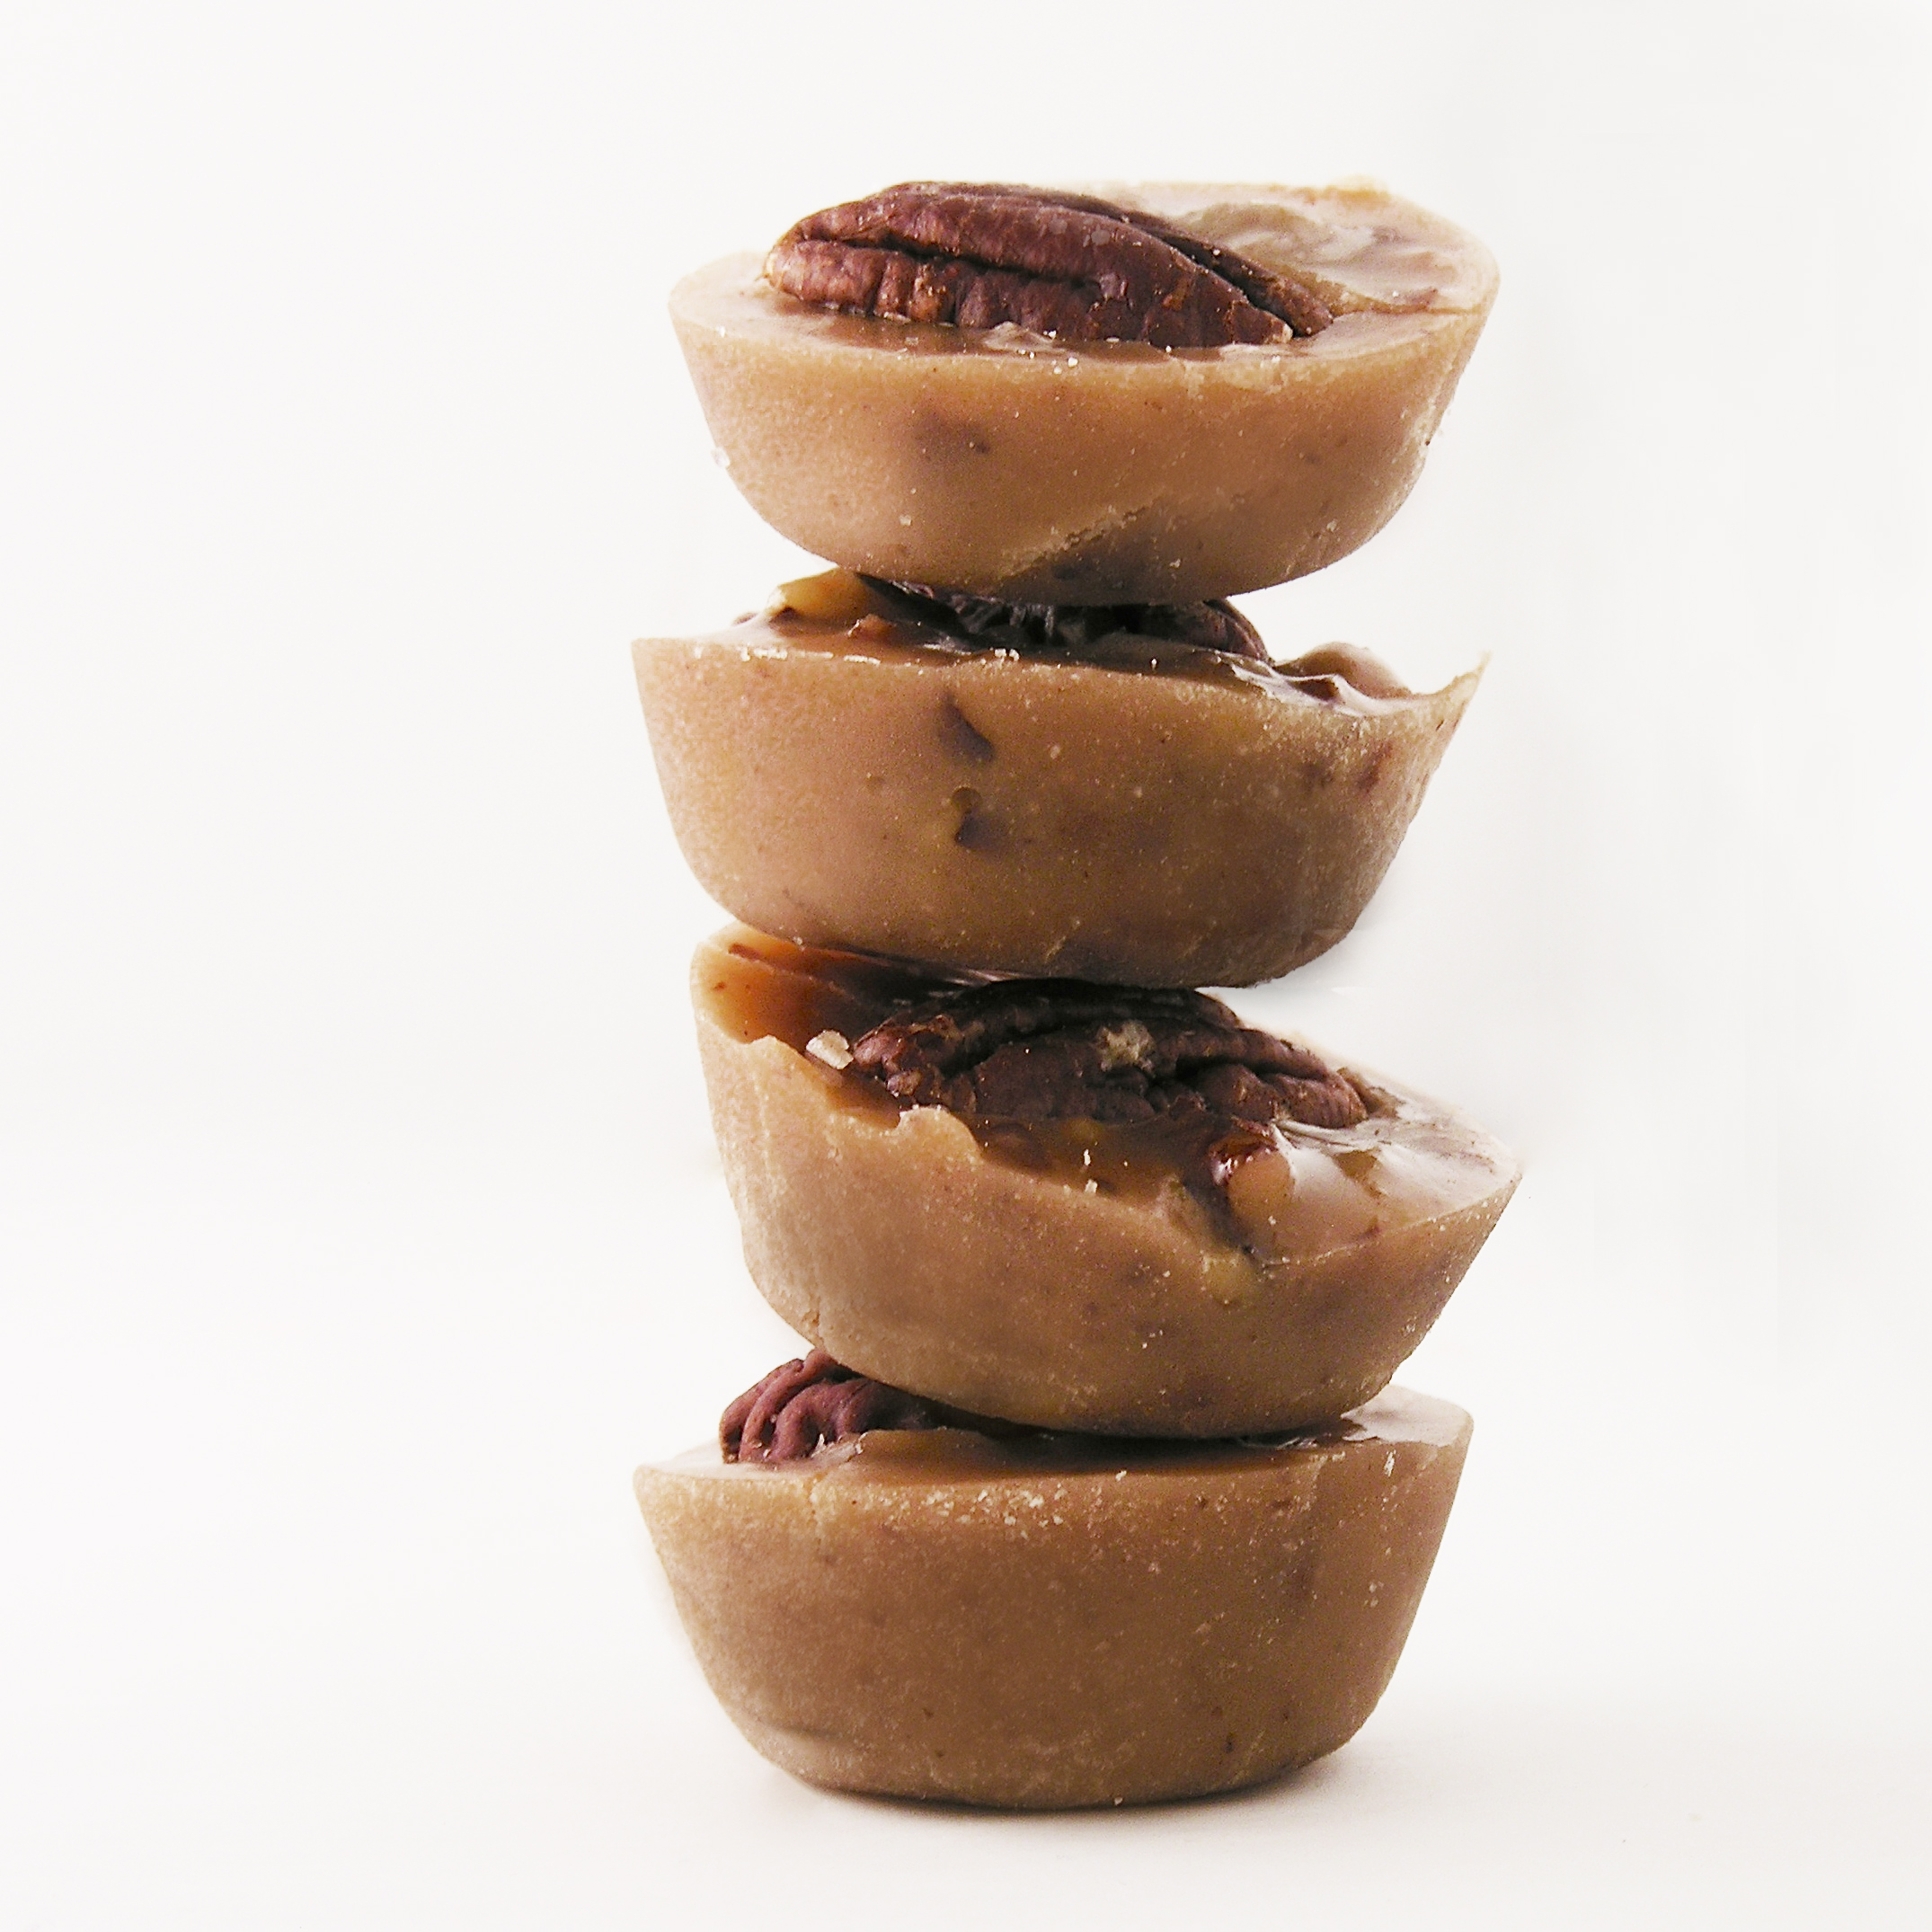
Let’s start with those pralines (printable recipe):

Pecan Pralines

INGREDIENTS:

  • 3 cups of sugar
  • 1 1/4 cups of hot water
  • 1 1/4 cups of chopped pecans
  • 24-36 pecan halves
  • 1/4 teaspoon of cream of tartar
  • 1 teaspoon of maple extract

DIRECTIONS:

  • Use oil or butter to coat a mini muffin tin well.
  • Place all ingredients (except the whole pecans) into a large saucepan and heat over stove, stirring occasionally, until it reaches 234F degrees.
  • Remove from heat and stir for 5-8 minutes until the candy loses it’s glossy look and gets more cloudy and granular.
  • Spoon (carefully!!!) into well- greased muffin tin.
  • Press a pecan half into the top of each praline and allow to cool.
  • When cooled, tip onto clean surface and ENJOY!

Pecan Pralines

Now for those cupcakes…..! (printable recipe)

INGREDIENTS:

Cupcakes:

  • 2 1/2 cups flour
  • 3 teaspoons of baking powder
  • 1/2 teaspoon of salt
  • 1 1/2 cups granulated sugar 
  • 3/4 cups unsalted butter, softened
  • 3 eggs
  • 1 teaspoons of vanilla
  • 2 teaspoons of maple flavoring
  • 1/2 cup whipping cream
  • 1/4 cup of chopped pecans (as desired)

Praline Buttercream frosting:

  • 1/2 cup brown sugar (firmly packed)
  • 1/2 cup whipping cream
  • 2 sticks (one cup) butter
  • 5 cups powdered sugar

DIRECTIONS: (start the frosting first, as it needs to cool before beating)

Cupcakes:

  • Preheat the oven to 350 degrees. Line muffin tins with 24-30 cupcake liners 
  • In a large bowl, use a mixer to cream together the sugar and butter for about 3 minutes until light and fluffy.
  • Add eggs once at a time until incorporated and then mix in vanilla and maple flavoring.
  • In a different large bowl mix together the dry ingredients: flour, baking powder, and salt.
  • Add flour mixture to the sugar and butter, alternating with the cream.
  • Stir in pecans.
  • Fill cupcake liners about 2/3 full and bake for 15-18 min. Be careful to not over-bake.
  • Cool in pan for a few minutes before removing to finish cooling on the counter.

Frosting:

  • In a small sauce pan, heat brown sugar, cream and 2 tablespoons of butter on medium heat, stirring often, until sugar dissolves. Remove from heat and cool completely.
  • In a large bowl, beat together the cooled brown sugar mixture with remaining butter until smooth.
  • Add powdered sugar and beat on high until light and fluffy.
  • Place in a zip-top bag fitted with a decorator’s tip, and pipe frosting onto cooled cupcakes.
  • Top with a praline- or even a pecan half instead.
  • Enjoy!!

Praline Cupcakes

My thoughts: These are perfectly wonderful together in one beautiful dessert, or they can be made as individual recipes. Either way, if you love pecan pralines, you will love these yummy treats! Enjoy! ~r

Praline Cupcake5

Other fun cupcake recipes from Easybaked (click on the photo to see the recipe):

Malted Milkshake CupcakesKey Lime Cupcakes!Coconut Cupcakes!!!Rocky Road Cupcakes!!!!!


Advertisement

Pancake and Bacon Cupcakes!!!

Pancake Cupcakes!!!!These sweet maple pancake flavored cupcakes are topped with syrup-coated bacon and real mini-pancakes.  The only question remaining is, will you eat them for breakfast???

My answer to that question is a resounding YES, I will eat them for breakfast, and any other time of the day too!

Did you know that today is National Pancake Lovers Day???  There is no better way I know of to celebrate pancakes than by making these!  [Plus, Monday is National Coffee Day, and believe me these go GREAT with coffee!]

Pancake cupcakes with coffeeThese cupcakes were a complete experiment, and when they came out of the oven and I tentatively tasted one, I smiled. They taste like pancakes- they really do!  Here’s how we made them: (printable recipe)

INGREDIENTS:

Cupcakes:

  • 2 1/2 cups all-purpose flour
  • 3 teaspoons baking powder
  • ½ teaspoon salt
  • 1 cup sugar
  • ½ cup butter, melted
  • 1/4 cup whipping cream
  • 2 eggs
  • 3 teaspoons vanilla
  • 1/2 cup maple syrup (I didn’t use the real stuff– too expensive!)

Frosting and toppings:

  • 2 sticks (1 cup) of salted butter, softened
  • 2 sticks (1 cup) of unsalted butter, softened
  • 3 cups powdered sugar
  • 2 teaspoons of vanilla
  • 8 pieces of bacon, cooked until very crisp
  • 1/4 cup of maple syrup
  • Pancake batter- enough for about 50 mini pancakes (I used the add water and shake Bisquick bottle, and it took about 2 cups of batter to make these up.

DIRECTIONS:

Cupcakes:

  • Combine all dry ingredients and mix in medium bowl
  • In large bowl, whisk eggs, whipping cream and vanilla together, add melted butter slowly while whisking.
  • Alternately add dry ingredients and syrup to the egg mixture, whisking until thick and smooth.
  • Scoop evenly into 18-20 cupcake liners placed in muffin tins. Don’t overfill!
  • Bake at 350F degrees for 14-18 minutes, until a toothpick inserted into the center comes out clean.
  • Remove cupcakes from tin and allow them to cool completely.

Frosting and toppings:

  • Crumble bacon into small pieces and toss with maple syrup until completely coated.
  • Make mini pancakes on a hot griddle by using a small spoon and making just a tiny circle of batter.  Let these cool on a piece of parchment paper.
  • Make frosting by placing butters, powdered sugar and vanilla in a mixing bowl and beating on high for 3-4 minutes until very light and fluffy.
  • Place frosting into a large zip top bag that has a decorating tip fitted into one corner.
  • Pipe a circle of icing around the edge of the cupcake.
  • Sprinkle with bacon.
  • Place pancakes on top, using a small amount of frosting to stick them together into a stack.  
  • Add a dollop of frosting on top and add sprinkles or a red “cherry” sixlet, like mine.
  • ENJOY!!!!


Pancake Cupcakes!!!
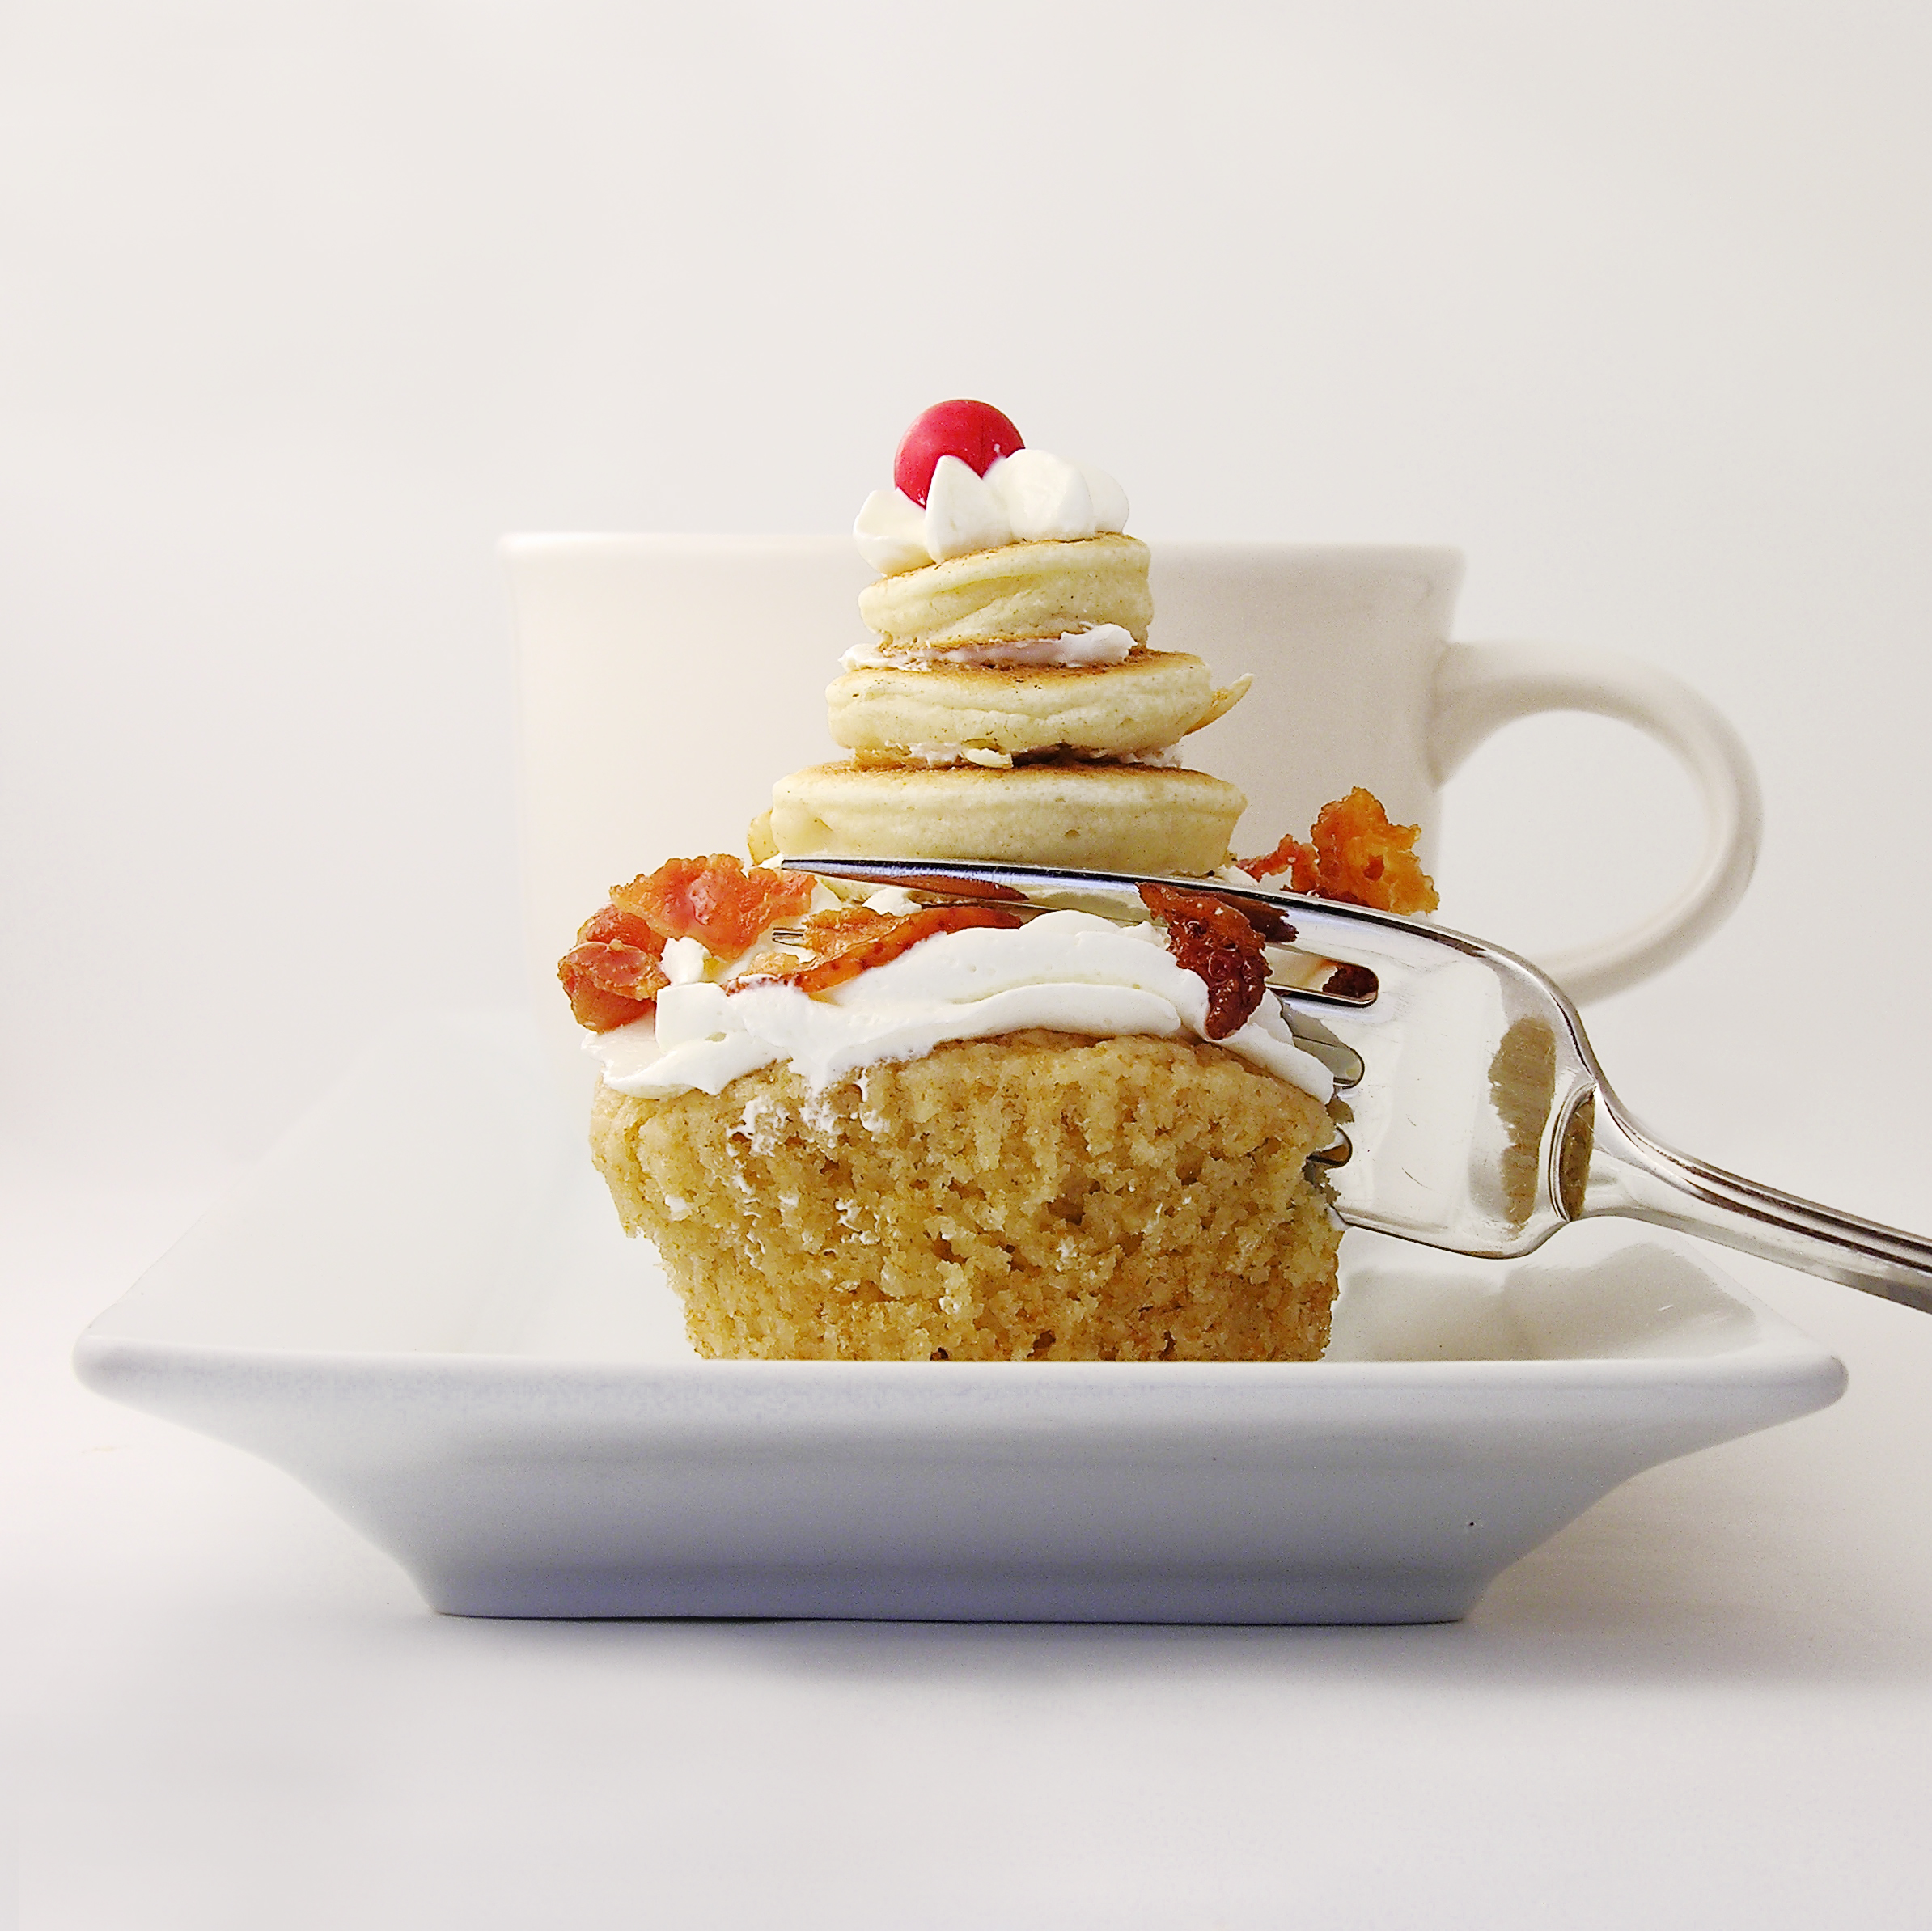
My thoughts:  These are really good.  The sweet cupcake with that salty bacon….yum!  I was a little skeptical about the bacon, but it really adds a wonderful flavor to these!  If you are short on time, skip the mini pancakes on top and just frost these and sprinkle them with bacon.  You could even use a bottle of those real bacon bits, but I suspect that the freshly cooked bacon tastes best.  Happy Pancake Day to YOU!!!  Enjoy!! ~r

Pancake and Bacon Cupcakes!

Other treats that you “could” eat for breakfast:

Tres Leches Cake with caramel and fruitRaspberry Lemon drop Cakes!!!Cinnamon Upside Down Cakes!!Mocha cupcakes in edible fondant mug

First Down Oreo Pops!!!

Football Field Oreo PopsThese cute little football field Oreo pops are the perfect snack for your next tailgating party or Sunday afternoon of football!

These are just fun little football treats…and the world has far too few fun little football treats– there’s always room for more!  These are made just like all of the other crazy Oreo pops on the Easybaked site.  Dipped in green, piped in white and topped with a cute football sprinkle!

Football Field Oreo PopsHere is how these fun little treats are made: (printable recipe)

INGREDIENTS:

  • One box of Double Stuff Oreos
  • One bag of Wilton’s candy melts in Green
  • One bag of Wilton’s candy melts in White
  • One jar of football sprinkles (I made my own, but there are some cute ones here)
  • 24-30 lollipop sticks

DIRECTIONS: (Need a visual?  Click here.)

  • Carefully twist apart all of the Oreo cookies
  • Using one of the lollipop sticks, make an indentation in the white filling of each cookie.
  • Melt the about 1/4 of the white Candy Melts in the microwave in 30 second increments, stirring until completely melted and smooth.
  • Dip the end of one stick into the melted white chocolate, drizzle a little in the center of the cookie filling and then gently press it into the indentation made.
  • Place the top of the cookie back on and allow white chocolate to harden (20 minutes or so), cementing the cookie back together with a stick inside. (Freeze for 5-10 minutes to speed this process up)
  • Melt green candy melts in the same manner that you melted the white.
  • Holding the stick, lower the entire Oreo into the bowl of melted green chocolate, spooning it over the top and sides to cover it completely.
  • Allow the excess green chocolate to drain off and gently place covered Oreo on a piece of parchment paper to harden and cool completely
  • Melt another 1/4 of the white candy melts, as before, and spoon into a small zip top bag.  Clip a tiny corner off and pipe lines and numbers on the top of each Oreo pop.
  • Place on a clean piece of parchment paper to cool, and immediately place a football sprinkle on top.
  • Allow pop to harden completely.
  • Remove from paper and serve- or place in a small treat bag, tied with a fun team ribbon.
  • Enjoy!

Football Field Oreo PopsMy thoughts:  Cute on the outside, Oreo on the inside… perfect!  Hope you get a chance to try these fun little football snacks!!!!!  Enjoy! ~r

Other treats to make your football feasts happy:

Salted Caramel Cookie Cup!!!Cookie Dough Cupcakes2Caramel Fudge Brownies!!Seven Layer Cups

Easter Egg Cups!

Posted on

 Cadbury Egg Cookie Cups!!These rich chocolate cookie cups are dipped in chocolate and filled with a rich cream “egg”.  A perfect Easter treat!!!

Cadbury Egg Cookie Cups!!!!

Do you love Cadbury Eggs?  I’m addicted.  That’s why I decided that there simply must be a chocolate cookie cup filled with Cadbury-like cream.  I used my favorite recipe for chocolate cut-out cookies and they baked just beautifully into firm little cups.  I dipped the tops in melted chocolate and piped yummy cream filling inside.  Fun and delicious!

Cadbury Egg Cookie Cups!!!!

Here’s the recipe: (printable recipe)

INGREDIENTS:

Cookie Cup:

  • 2 sticks (1 cup) butter, softened
  • 1 1/2 cups sugar
  • 2 eggs
  • 1 teaspoon vanilla extract
  • 2/3 cup unsweetened cocoa powder
  • 3 cups flour
  • 1/2 teaspoon salt
  • 1/2 teaspoon baking powder
  • 1 bag of Wilton’s dark chocolate candy melts.

Filling:

  • 3/4 cup light Karo syrup
  • 12 tablespoons of butter (softened)
  • 2 tablespoons vanilla
  • 4 cups powdered sugar
  • 1 to 2 tablespoons of water (for consistency)

DIRECTIONS:

  • Preheat oven to 350F degrees.
  • Add butter, sugar, eggs, vanilla and cocoa together in  large mixing bowl.
  • Blend on medium speed with a mixer until smooth.
  • Gradually add dry ingredients and mix until smooth (use clean hands at the end, to knead into a soft ball of dough)
  • Divide dough into 24 balls of equal size, and place each one in a muffin cup.
  • Press an indentation into each ball using a tart shaping tool (or the end of a wooden spoon)
  • Bake at 350F degrees for 8-10 minutes.  Press Tart shaping tool into center again, to reshape cups.
  • Allow the cups to cool for about 5 minutes in pan, then run a small paring knife around edge to pop cup out of pan.
  • Cool completely on counter.
  • Melt Wilton’s candy melts in microwave in 30 second increments, stirring between until completely melted and smooth.  Dip tops of cups into melted chocolate and allow them to harden completely.

Making cookie cupsDipping tops of cookie cups in chocolate

  • Make filling by adding all of the filling ingredients together except for the water and sugar.
  • Beat these on high until smooth and creamy.
  • Add sugar and beat on high until creamy
  • Add water until it is a nice spreadable, but not runny, consistency.
  • Beat until very smooth.
  • Take about 1/4 out and color with yellow food color gel.
  • Pipe white filling into cups 1st and then add a fun yellow “yolk” on top.
  • Enjoy!!

Cadbury Egg Cookie Cups!!!!My thoughts:  These are so0000  yummy.  If you want to save time, skip the chocolate dip on the edges.  This cookie recipe is just so tasty- and so versatile.  I’ve used it for so many things now.  Your family will gobble these up (once you convince the kids they aren’t really eggs!)  I hope you enjoy them! ~r

Other fun spring recipe ideas:

Strawberry Cookies with Sweet Tart FrostingChocolate cut-out cookiesStrawberry Lemonade Birthday CakeBubble Gum Cupcakes!


Jelly Bean Cookies

Posted on

Jelly Bean Cookies!!!!These cookies deliver a big Easter surprise~ jelly beans in the middle!  Pretty on the outside and sweet surprises on the inside?  These are a must-try Easter treat!

These really are just the cutest thing…but fair warning: I brought these to church and overheard the following conversation between an 8 year old and a 6 year old:

“There’s jelly beans in the middle!”
“And the cookie tastes like Play-Doh!!”
“I want another one!”

So…maybe this is a bigger hit with the under 12 set…?

I thought they tasted ok.  The cookies are very dense and full of white chocolate, but colored like Play-Doh…I can see the connection.  I really don’t like jelly beans either…so I wasn’t a very objective taste-tester.  But they are super cute…

Jelly Bean5In any case, if you are up for an adventure and you have lots of kids to entertain with something new….here’s the recipe: (printable version)

INGREDIENTS: (makes about 36 cookies)

  • One bag of Nestle white chocolate morsels.
  • One can (14oz.) of sweetened condensed milk
  • 2 teaspoons of vanilla
  • 2 cups of flour
  • Food coloring gels
  • One bag of large jelly beans (I used Brach’s Classic Jelly Bird Eggs)
  • One bag of Wilton’s white chocolate candy melts
  • Sprinkles

DIRECTIONS:

  • Carefully melt Nestle morsels in the microwave in 30 second increments, stirring between until completely melted and smooth.
  • Add sweetened condensed milk and vanilla, mixing until well combined.
  • Add flour and mix, eventually using clean hands to knead dough into a ball.
  • Divide dough into parts and knead in food color gels until you get the colors you want.
  • *Note* This dough is very oily, because of all that white chocolate.  This is ok.  Just keep a paper towel handy to wipe your hands on during this process.
  • Preheat oven to 350F degrees.
  • Take about a tablespoon of dough and roll it into a ball.  Then press it flat, lay two jelly beans on it and pull dough up around the jelly beans to cover them.  Pinch cracks and seams closed and then roll into a ball again to make it smooth.

Making jelly bean cookiesMaking Jelly Bean cookiesMaking Jelly Bean CookiesMaking Jelly Bean Cookies

  • Place on a cookie sheet that has been covered in parchment paper.  These don’t spread, so you can place cookies very close together.
  • Bake at 350F degrees for 10-12 minutes.
  • Remove from oven and slide parchment paper (cookies and all!) off the sheet and onto a counter to cool.  There will be oil from the white chocolate on the paper- this is ok.
  • After cookies have cooled completely, melt white candy melts in the microwave in 30 second increments, stirring between until completely melted and smooth.
  • Lay a fresh sheet of parchment paper on the counter, and get a clean paper towel.
  • If needed, dab the bottom of each cookie on the paper towel to remove any excess oils. Then, dip the top of the cookie into the candy melts, set on the clean parchment paper and sprinkle with decorations before the chocolate hardens.
  • Enjoy!!!

Jelly Bean Cookies!!!!

My thoughts:  I’m not sure what to say about these…I asked for honest opinions from the adults that tried them and they all said they loved them.  Then I caught one person chucking his out the back door….so much for honesty…!  If you like jelly beans (and apparently Play-Doh…) you should give these a try.  They are a little time consuming, but not difficult at all.  Who knows?  It might be a new family Easter favorite?  Or maybe just a good laugh…?  Enjoy!!!! ~r

Jelly Bean Cookies!!!

Other Easter treats I would wholeheartedly recommend:

Coconut Cupcakes!!Easy Easter cut out cookiesChocolate Easter Eggs with Peanut Butter FillingRaspberry Lemonade Truffles

Andes Mint Layer Cake

Posted on

Andes Mint Layer Cake!

This rich chocolate cake has a huge layer of Andes Mint whipped filling and is drizzled with fudge topping.  The perfect chocolate dessert!

Tah Dah!!!  One last melted frosting recipe…for now…This one has yummy melted chocolate frosting inside and poured all over the top.  YUM!!!!!!

I love making this cake in various forms.  It is SO quick and easy to put together and everyone loves it! This time I added Andes mint candies for a refreshing mint twist to this recipe.  I think you will love it!! Andes Mint Cake!!

Here’s the recipe:  (printable version)

INGREDIENTS:

  • 1 boxed chocolate cake mix (with oil/eggs/water to make according to directions)
  • 2 packets of Dream Whip  (found near the jello/pudding boxes at the grocery)
  • 3/4 cup milk
  • 1 teaspoon vanilla
  • 3 tablespoons cocoa powder
  • 3 tablespoons powdered sugar
  • Andes Baking Chips 10 oz
  • One container of pre-made chocolate frosting

DIRECTIONS:

  • Make cake mix according to box and bake in 2 – 8 or 9 inch round pans (I cut parchment paper to fit, spray the pan with non-stick spray, and place it in the bottom of each pan so that the cake comes out easier).
  • Cool cakes completely on a wire rack and while they are cooling make your whipped filling:
  • Put Dream Whip, milk, vanilla, cocoa powder and powdered sugar into a mixing bowl and blend together.
  • Using a mixer, beat until stiff peaks form (3-4 minutes)
  • Fold in Andes mint baking chips, saving aside a few for topping.
  • Scoop chocolate frosting into a microwave safe bowl and heat for only about 20-30 seconds in the microwave.  Heat until frosting is melted into a hot fudge consistency.
  • Use a large serrated knife to level your two cakes.
  • Place 1st cake on serving plate, leveled edge up.
  • Pour about 1/4 of melted frosting on top of cake and spread to cover (I put this layer in the fridge for about a minute just to cool the warm frosting down before adding the mousse layer)
  • Spoon all of the mousse on top of the cake and spread it ALMOST to the edges.
  • Top with second cake– put the leveled edge against the mousse…this keeps all the crumbs in the middle and leaves a nice flat surface on the top of your cake. Gently press top layer down to squeeze the mousse all the way to the edges.
  • Pour the rest of the melted frosting over the entire cake and let it drip over the edges.
  • Sprinkle the remaining Andes Mint bits on top.
  • Refrigerate until serving, this will make the middle layer firm and easy to cut.

Andes Mint Cake!!!!

My thoughts:  I love this cake.  It is a beautiful dessert that is just so quick and easy to put together!

That creamy mint filling….oh my. I hope you get a chance to try it!  Enjoy!  ~r

Andes Mint cake!!!!

Other yummy chocolate treats here on easybaked:

Brownie Oreo Cookie CupGerman Chocolate PieRich Chocolate Ganache Mini CupcakesCaramel Fudge Brownies!!

Blackberry Tart

Posted on

There’s nothing like fresh blackberries in August!  I grew up picking berries in the woods behind our house- 4 cups made a pie.  I loved berry picking and HATED the pie (I can’t stand my fruit cooked!)  When I was home visiting family a week ago my mom and I went picking and I came home with a big bowl of fresh blackberries.  I wanted to see if I could make a fresh (UNCOOKED!) berry pie with them and it turned out wonderfully!  YUM!!!!  I used a tart pan and had LOTS of filling left over since it was so shallow- I recommend making 2 tarts or a pie with this recipe.

INGREDIENTS:

  • Blackberries! (aren’t they beautiful?)- about 4 cups.
  • One refrigerated pie crust (for pie).  (Two pie crusts for tarts.)
  • One small box (3oz.) of Jello- I used Blackberry Fusion- it was amazing- I’m sure Raspberry would work just fine if you can’t find the Blackberry.
  • One small box (3.4oz.) of Jello instant vanilla pudding
  • 2 1/4 c. cold water
  • Cool Whip

DIRECTIONS:

  • Spread pie crust into the bottom of a pie plate or tart pan and cook as directed on package.  Cool completely.  (I really think this pie would taste great in a pre-made graham cracker crust if you want to make this recipe REALLY easy!)
  • In a medium saucepan mix together the jello, pudding and water.  Cook over medium heat.
  • Bring mixture to a boil, stirring constantly.
  • Cool in refrigerator until slightly set.
  • Add berries and mix until all berries are incorporated (save a few out to decorate the top!!)
  • Spoon pie filling into crust(s) and chill overnight.
  • Before serving, spoon cool whip on top and decorate with fresh berries.  YUM!!

My thoughts:  You are going to LOVE this pie 🙂  Our berries were fairly tart and this pie was so sweet and tangy it was perfect!  Since I had only prepared one tart crust I had left over filling that I spooned into cups.  Just added Cool Whip and granola for a yummy breakfast treat.  I love how firm the pie got– no runny cooked fruit here!

On a side note:  My new obsession with food photography makes me laugh sometimes.  I was trying to catch some natural light staying INSIDE (since it was hot enough to actually cook my fruit pie outside).   I cleaned my kitchen floor, found a pretty placemat and a patch of good light and started taking pictures.  When I finally looked up I had to laugh –and take a picture of my VERY obedient puppy:

Have a great weekend everyone!!!!!    -r

Fruit Loop Pie!!!

Posted on

Don’t wrinkle your nose at the name- this tart cream filling is perfectly balanced by a sweet fruity crust. Let your inner child rejoice– its FRUIT LOOPS in a PIE!!!!

INGREDIENTS:

Crust:

  • 3c. of crushed Fruit Loops (crush before you measure)
  • 1/2c. butter (melted)
  • 1/2c. sugar

Pie:

  • 8oz. Philadelphia Cream Cheese
  • 1 (0.22 oz.) packet Kool Aid- Ice Blue Raspberry Lemonade flavor
  • 2c. marshmallow fluff
  • 8 oz. Cool Whip (refrigerator temp).

DIRECTIONS:

  • Mix together Fruit Loops, butter and sugar.
  • Press mixture into an ungreased 9 inch pie plate.
  • Bake at 350 degrees for 10 minutes.
  • Cool completely.
  • Cream together Kool Aid and Philadelphia Cream Cheese
  • Add Marshmallow fluff and blend well.
  • Fold in 1c. of Cool Whip.
  • Spoon into cooled crust
  • Top with remaining Cool Whip
  • Sprinkle Fruit Loops over the top
  • Freeze for at least 2 hours.
  • Serve chilled.

My thoughts:  This recipe has been simmering in the back of my mind ever since I made my raspberry lemonade truffles for RWOP a few weeks ago.  Adding Kool Aid to Cream Cheese…using fun cereal as a crust…finally I just did it.  It won’t qualify for the contest as it really needs some time in the freezer to set properly– NOT within the one hour time limit!  What a fun and refreshing dessert this turned out to be– I hope you try it and love it!!  -r

This recipe was shared on these wonderful blogs:


Caramel Chip Bars!!!

Posted on

These chewy cookie bars are packed with 4 types of chips and a thick layer of soft caramel- YUM!!!


INGREDIENTS:

1 box of yellow cake mix

1/3c. oil

2 eggs

1c. each of white chips, semi-sweet chips, milk chocolate chips and butterscotch chips

1/2 c. margarine

32 unwrapped caramels

1 (14oz.) can of sweetened condensed milk


DIRECTIONS:

Preheat oven to 350 degrees.  Grease a 9x13pan.  Combine cake mix, oil and eggs.  Blend well and stir in all of the chips (mixture will be very thick).  Press half of the mixture into bottom of pan (it will press into a very thin layer).  Bake for 10 minutes.

While this is baking, in a medium saucepan, combine butter, caramels and condensed milk.  Cook over low/medium heat until melted and smooth (stir constantly!)  Spread caramel over partially baked cake mixture.  Top with remaining cake/chip mixture (it will not completely cover, but you can press the mixture flat with your fingers and lay it in sections over the caramel.  Bake and additional 25 to 30 minutes.  Cool 20 minutes.  Run knife around edges.  Cool completely before cutting. Makes about 20 bars.


My thoughts:  I’ve been making these bars for years and its fun to try them with different types of chips and flavors of cake mix.  These were inspired by a recipe given to me by a friend of a friend.  Her name is Lily and for years we called these Lily Bars in her honor :0)  They have evolved into this recipe (my personal favorite combination of ingredients) –but next time I am adding some coconut!  If you like experimenting with flavors, this is a perfect recipe for you!  Another note:  the caramel sauce used in this is SO good and wonderfully soft that I’ve incorporated it into many other desserts – so when you see this caramel appear in another post you’ll know– it all started here!   Have fun with this one– I hope you enjoy it!   -r


Black-bottom Peanut Butter Cookies!

Posted on

A new twist on the traditional peanut butter cookie!

INGREDIENTS:

DIRECTIONS:

  • Mix peanut butter, sugar and eggs together in a mixing bowl. Using a Large Cookie Scoop,  scoop batter onto cookie sheets and press with fork for surface design.   Bake at 350 degrees for 12-14 minutes.  Cool completely.
  • Melt chocolate candy melts in microwave in 30 second increments, stirring in between.
  • Spread parchment paper on a flat even surface
  • Spoon about 2 tsp of melted chocolate onto the parchment paper
  • Press a cooled cookie into the center of the chocolate.


  • Allow chocolate to cool and harden.  Drizzle chocolate over the top if desired.
  • When chocolate is cool and hard, peel cookies off the paper and serve!

Makes about 24 cookies.

My thoughts:  I love peanut butter cookies- and this recipe is incredibly simple (even kids would love making this!)  I had extra candy melts from another project and that was the inspiration for the “black-bottom” part of this cookie (that, and the fact that I am ADDICTED to Fudge stripe cookies!!!)  I wasn’t sure if the cookie and chocolate would stick together well- but they were inseparable!  The drizzle on top just adds to the gourmet feel of these cookies.  I hope you get a chance to try these– the “WOW’s” when you serve them are well worth the little extra time with the chocolate!  Enjoy!  r-


%d bloggers like this: