Tag Archives: fun cupcakes

Pecan Praline Cupcakes

Posted on

Praline Cupcakes1If you love pralines, you will love these pecan praline cupcakes with delicious homemade pralines on top!

Two desserts in one!

I’m a huge fan of pecan pralines. Our family has often traveled to the southeast part of the US and there’s just nothing better than a still-warm praline in Charleston or Savannah… YUM!  I’ve always wanted to try making homemade pralines, but I’ve never had a good recipe. Last month, we visited family friends, Dave and MaryAnne, and Dave told us he has the BEST pecan praline recipe. He whipped some up for us and oh my…. He shared his recipe and I had the idea to carry some of those flavors over into cupcakes.

Really, these two desserts stand alone, but are especially fun together!

Let’s start with those pralines (printable recipe):

Pecan Pralines

INGREDIENTS:

  • 3 cups of sugar
  • 1 1/4 cups of hot water
  • 1 1/4 cups of chopped pecans
  • 24-36 pecan halves
  • 1/4 teaspoon of cream of tartar
  • 1 teaspoon of maple extract

DIRECTIONS:

  • Use oil or butter to coat a mini muffin tin well.
  • Place all ingredients (except the whole pecans) into a large saucepan and heat over stove, stirring occasionally, until it reaches 234F degrees.
  • Remove from heat and stir for 5-8 minutes until the candy loses it’s glossy look and gets more cloudy and granular.
  • Spoon (carefully!!!) into well- greased muffin tin.
  • Press a pecan half into the top of each praline and allow to cool.
  • When cooled, tip onto clean surface and ENJOY!

Pecan Pralines

Now for those cupcakes…..! (printable recipe)

INGREDIENTS:

Cupcakes:

  • 2 1/2 cups flour
  • 3 teaspoons of baking powder
  • 1/2 teaspoon of salt
  • 1 1/2 cups granulated sugar 
  • 3/4 cups unsalted butter, softened
  • 3 eggs
  • 1 teaspoons of vanilla
  • 2 teaspoons of maple flavoring
  • 1/2 cup whipping cream
  • 1/4 cup of chopped pecans (as desired)

Praline Buttercream frosting:

  • 1/2 cup brown sugar (firmly packed)
  • 1/2 cup whipping cream
  • 2 sticks (one cup) butter
  • 5 cups powdered sugar

DIRECTIONS: (start the frosting first, as it needs to cool before beating)

Cupcakes:

  • Preheat the oven to 350 degrees. Line muffin tins with 24-30 cupcake liners 
  • In a large bowl, use a mixer to cream together the sugar and butter for about 3 minutes until light and fluffy.
  • Add eggs once at a time until incorporated and then mix in vanilla and maple flavoring.
  • In a different large bowl mix together the dry ingredients: flour, baking powder, and salt.
  • Add flour mixture to the sugar and butter, alternating with the cream.
  • Stir in pecans.
  • Fill cupcake liners about 2/3 full and bake for 15-18 min. Be careful to not over-bake.
  • Cool in pan for a few minutes before removing to finish cooling on the counter.

Frosting:

  • In a small sauce pan, heat brown sugar, cream and 2 tablespoons of butter on medium heat, stirring often, until sugar dissolves. Remove from heat and cool completely.
  • In a large bowl, beat together the cooled brown sugar mixture with remaining butter until smooth.
  • Add powdered sugar and beat on high until light and fluffy.
  • Place in a zip-top bag fitted with a decorator’s tip, and pipe frosting onto cooled cupcakes.
  • Top with a praline- or even a pecan half instead.
  • Enjoy!!

Praline Cupcakes

My thoughts: These are perfectly wonderful together in one beautiful dessert, or they can be made as individual recipes. Either way, if you love pecan pralines, you will love these yummy treats! Enjoy! ~r

Praline Cupcake5

Other fun cupcake recipes from Easybaked (click on the photo to see the recipe):

Malted Milkshake CupcakesKey Lime Cupcakes!Coconut Cupcakes!!!Rocky Road Cupcakes!!!!!


Baked Alaska Cupcakes

Posted on

Baked Alaska Cupcakes!!!!Rich chocolate cupcakes topped with a scoop of ice cream and a cloud of toasted marshmallow meringue. Best. Dessert. Ever!!!!!

Every year for Christmas our family goes out to an incredible restaurant near Marshall, MI called Win Schulers. They have the most amazing prime rib…oh my.  Anyway, within a week of Christmas it is my birthday, my mom’s birthday and my sister-in-law’s birthday.  Schuler’s gives you a Baked Alaska for your birthday….so it’s a feast of Baked Alaska and it is SO good.  About 2 weeks ago I was craving it and suddenly was struck by the idea of making it in cupcake form.  A.M.A.Z.I.N.G.  Just go and make these.  Use your favorite ice cream.  You will love them…!

Baked Alaska Cupcakes!

Here’s the recipe: (printable version)

INGREDIENTS:

  • One boxed chocolate cake mix (plus the oil, water and eggs to make according to package)
  • One quart of your favorite ice cream (I used mint chip)
  • 8 egg whites
  • 2 cups of granulated sugar
  • 1/4 teaspoon of cream of tartar

DIRECTIONS:

  • Make cake mix according to box directions and divide equally into 24 cupcake liners in cupcake tins.
  • Bake according to package.
  • Cool completely (I refrigerated mine to get them nice and cold before adding the ice cream)
  • While they are baking and cooling, make the marshmallow meringue (I got my recipe here)

(Don’t be afraid….I was afraid to try this, it sounded complicated, but it isn’t hard- it just takes time with a mixer in your hand if you are like me and not fortunate enough to have a stand mixer!  It is actually kind of fun!  Make sure your bowl and beaters are free of any oils.  I swiped mine with a little lemon juice 1st)

  • Place egg whites, sugar and cream of tartar in a medium heat-proof bowl that will set on the top of a sauce pan of boiling water without touching the water.  (I had to experiment a bit to find a good fit)
  • Bring water to a boil in the saucepan and set the bowl on top.
  • Whisk ingredients together for about 3-4 minutes.  Sugar will be dissolved and egg whites should be heated to 145F degrees.
  • Remove bowl from top of sauce pan and beat on low until the mixture thickens a little, then beat on high for about 10 minutes.  The meringue will become the most beautiful, white, glossy mixture.  It should form stiff peaks before you stop beating it.
  • Spoon all that wonderful marshmallow yumminess into a bag fitted with a decorating tip.
  • Assemble one cupcake at a time, and then pop it into the freezer immediately.
  • Take a cupcake, use a small cookie scoop or melon baller and place a scoop of ice cream in the center of the cupcake.  Pipe meringue all around it, being careful to seal up all the ice cream at the bottom and them working your way up to a swirled top!

Marshmallow Meringue!Marshmallow Meringue!Marshmallow Meringue!!

  • When all cupcakes are prepared and in the freezer, use a kitchen torch
    to toast the marshmallow just before serving.
  • These are best served within a couple of hours of making them.  

Since they are a fork-eating-cupcake anyway, I see no harm in adding hot fudge….

Baked Alaska Cupcakes!!My thoughts: I loved them.  They satisfied my craving for a baked Alaska plus they have the cute factor of a cupcake!  Fun, fun, FUN!!!!! Enjoy!!!  ~r

Baked Alaska Cupcakes!!!Other yummy cupcakes:

Peanut Butter Cupcakes!!Key Lime Cupcakes!Doughnut cupcakes!!Chocolate molten lava cupcakes

Malted Milkshake Cupcakes

Posted on

Malted Milkshake Cupcakes

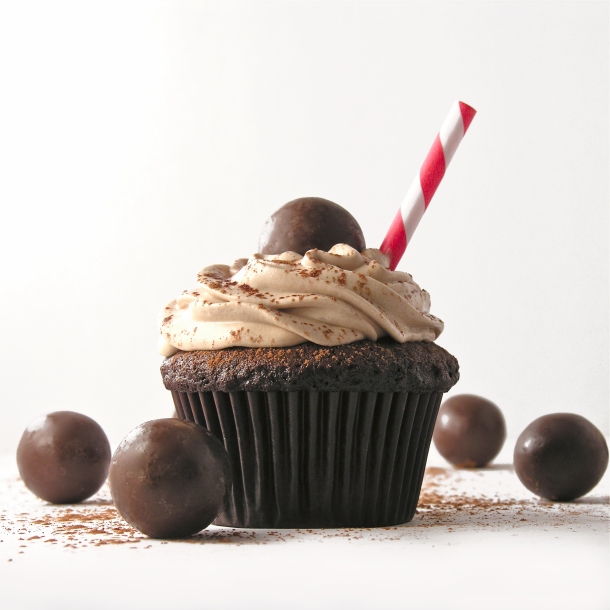
Dark chocolate cupcakes topped with the creamiest malt frosting ever.  Like a malted milkshake minus the cup!

I have an addiction to chocolate malts.  Not chocolate shakes, just malts.  The creamy, chocolatey kind that you drink through a striped straw at the pool.  My mom makes the best chocolate malts ever.  They are really simple to make, but there’s just something about her leaning out of the patio door and asking, “Anyone want a malt?” that makes me smile.  It’s one of our summer traditions.

Moms Malts!!{Her easy recipe? Ice cream, malt powder, cocoa and milk~ a blender full of ice cream plus cocoa and malt to taste, and milk to desired consistency}

I wanted to make a frosting that tastes like a malt.  It took me a couple of tries, but I finally hit the mark.  It’s wonderfully creamy and smooth.  It is also a very soft whipped icing that must be kept refrigerated because it has milk in it, and because it will not keep a pretty piped finish if it gets warm.

Believe me, the flavor and texture are worth it!

Malted Milk Cupcakes

Here’s how to make these yummy cupcakes! (printable recipe)

INGREDIENTS:

  • One boxed dark chocolate cake mix (plus water, eggs and oil to make according to box)
  • 4 packets of Dream Whip
  • 1 1/2 cups of cold milk
  • 6 Tablespoons of unsweetened cocoa powder
  • 6 Tablespoons of malt powder
  • 1/2 -1 cup of powdered sugar (to desired consistency)

DIRECTIONS

  • Make cake mix according to box and bake in 24 cupcake liners placed in muffin tins.
  • Cool cupcakes completely.
  • Put Dream Whip, milk, cocoa powder, malt powder and powdered sugar into a mixing bowl and blend together.
  • Using a mixer, beat until stiff peaks form (3-4 minutes) 
  • Add extra powdered sugar if needed, to desired consistency.  This is a soft whipped frosting, so it won’t be the consistency of a stiff buttercream~ even with lots of powdered sugar.  (believe me, I tried!)
  • Spoon frosting into a zip-top bag fitted with a decorating tip and pipe frosting on cupcakes.
  • Refrigerate until serving and just before serving add a malted milk ball and sprinkle with cocoa powder if desired for garnish.

ENJOY!!!

Malted milk cupcakes!!!!

My thoughts:  these are *almost* as good as my moms malts.  This frosting is really yummy.  It would be a great filling for a layer cake too~ or even a filling for cupcakes.  You could fill chocolate cupcakes with this and then just spoon some chocolate ganache over the top.  Oh the possibilities!  Hope you get to try these and enjoy them as much as we did!  ~r

Malted Milk Cupcakes!!!More recipes you might like:

Chocolate Mousse CakeStrawberry layer cakeMini chocolate chip cookie cheesecakesCake balls filled with cream cheese frosting

K-cup Cupcakes

Posted on

K-cup cupcakes!!

These  mini vanilla cupcakes are topped with the yummiest fondant and decorated like Keurig K-cups!  So fun!!!

My friend and coworker Mary just got a new job.  When I was thinking about her going-away party I just kept wondering how I could make a dessert that looked like a K-cup coffee pod.  Mary is known in our lab as the K-cup supplier.  Anyone who finds themselves without a coffee pod can find one in Mary’s supply…she literally orders by the case online and at any given time she has maybe 10 different flavors.  Now that she’s gone we really miss her (and her coffee!)
This is less of a recipe and more of an “idea” post.  It was a good chance for me to practice with the fondant recipe my friend Megan gave me a couple of months ago and a fun little art project to challenge my (terrible!) painting skills!
K-cup cupcakes!!!!

(It was also really a fun project to take pictures of!!!)
Want to know how to do this crazy edible art project?
Here it is:

  • Make thick buttercream icing and fondant first.  It’s easiest if I just send you to my original fondant recipe for the tutorial and directions.  Just click here to open that page.
  • For the cupcakes just use your favorite cupcake recipe (which for me was a white cake mix!)
  • I used little cocktail nut cups as my cupcake liners, because they look like the sides of the K-cup pods, but you could certainly use mini white cupcake liners.
  • Place the liners in mini muffin tins and fill about halfway up with cake batter (under-fill them a little, so that the tops bake relatively flat and not mounded up like a typical cupcake)
  • Bake according to your recipe.  My mini cupcakes baked for 12 minutes at 350F degrees.
  • Color fondant as desired and roll it flat.  Cut it into circles that are the size of the cupcake tops.  I used a small round cookie cutter.
  • Use thick buttercream to frost a smooth layer on the top of a cooled cupcake and then immediately press a fondant circle on top of the buttercream.
  • Cut colored fondant into any shapes you might need on top and use a small amount of water  to attach these  shapes to the top of the fondant circle.

K-cup cupcakeK-cup cupcakes!

  • Once those extra pieces are attached, use a small brush to wipe away excess powdered sugar and then use gel food coloring and a fine tipped brush to paint on the fondant.  I used an actual pod as a model to paint from.

Paint cupcake with food color gels.

(note: you might need to add a little white food coloring to the dark colors to make them show up- otherwise your dark blues and greens will look like black when used as paint.)

Be creative and use your imagination!  I just pulled all of my pod flavors out and tried to pick ones that were fun – but also ones I thought I could handle copying!  I wanted to do a Starbucks pod- but that logo…!  Yikes.  No way I could paint anything that looked like that!!

K-cup cupcakes!!!!K-cup cupcakes!!

My thoughts:  These aren’t what I would qualify as easy, but they are really a fun afternoon project.  Very relaxing.  I’m POSITIVE you all can paint better than I, and if you like to just create and paint and color you will love this project!  Take your time and enjoy the process. (and don’t actually try to brew one- lol!  I had someone ask me about that and I had to explain that the above picture is simply a creative presentation of a cupcake!!)

I’m dedicating this post to you Mary!!  I miss working with you and I hope your new coworkers realize how lucky they are to have you!!!

This is also a shout out to Keurig and the genius of those delicious little coffee pods– you make every morning so much happier for me!!!  Lots of love from Easybaked to all of you!  ~r

K- cup cupcakes!!!

Other mini desserts you might enjoy:

Cookie Dough CupcakesChocolate Raspberry Mini CupcakesRich Chocolate Ganache Mini CupcakesMint Creme Brownie Cups

Mocha Cupcakes (in edible coffee cups!)

Posted on

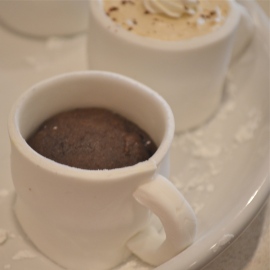
Mocha cupcakes in edible fondant mug

Rich chocolate cupcakes and mocha buttercream nestled in an edible marshmallow mug…how much fun is that??

The past two posts have been full of my adventures with my friend Megan from Happily Ever After Cakes.  We made chocolate cut-out cookie pops decorated with royal icing and fondant-covered cupcakes decorated with fun ladybugs and caterpillars.  This is the third and final project from that weekend and I just love how it turned out!

This project starts with easy mini mocha cupcakes with mocha buttercream frosting.  You can stop there and they are just wonderfully yummy –even without the mug!

The mug uses my new-found love of marshmallow fondant to add a little “wow” factor to the cupcakes.

Let’s start with the cupcakes: (printer friendly recipe)

Mocha Cupcakes with ButtercreamINGREDIENTS: (makes and frosts 48 mini cupcakes)

  • One box of chocolate cake mix (plus eggs, oil and water to make according to box)
  • 3 Tablespoons of instant coffee granules (divided)
  • 2 sticks (1 cup) of salted butter- softened to room temperature
  • 2 sticks (1 cup) of unsalted butter- softened to room temperature
  • 3 cups of powdered sugar
  • 2 Tablespoons of vanilla

DIRECTIONS:

  • Preheat oven to 350F degrees
  • Make cake according to box, but add 2 Tablespoons of coffee granules to the water required by cake mix first.
  • Allow granules to dissolve and then add to cake mix with eggs and oil according to box.
  • Place mini cupcake liners into mini cupcake pan and spoon batter into liners.
  • Bake for about 12 minutes until centers are firm.
  • Cool completely
  • Make buttercream by placing vanilla and remaining 1 Tablespoon of instant coffee into a small bowl to dissolve.
  • Add butters and powdered sugar to a large bowl and beat on high until light and fluffy.
  • Remove a small bit of this vanilla-free icing to garnish the tops of cupcakes and set aside.
  • Add vanilla/coffee mixture and beat again until well- combined.
  • To make plain cupcakes, just pipe coffee frosting on top of cooled mini cupcakes and then pipe a tiny bit of the white frosting at the tip of the cupcake.
  • Sprinkle with cocoa powder if desired.

Yum.

To make the cupcakes into little edible mugs, you will need to make fondant and a thick buttercream ahead of time. My previous post goes into great detail on making fondant and buttercream icing.  Click here to see the entire process.

If you’d like to print the recipes for these two things:

Printer friendly recipe for thick buttercream icing

Printer friendly recipe for marshmallow fondant

Once you’ve made both of these items, assembling the little mugs is fairly easy:

  • Unwrap the mini cupcakes you wish to use in mugs.
  • Spread thick buttercream icing around the sides of each cupcake.
  • Roll fondant out  fairly thick and trim into rectangles that wrap around mini cupcake and touch without overlapping. (You’ll need to grab a cupcake and experiment until you know how long and high to make these)
  • Also cut small strips of fondant to use as mug handles.
  • Wrap sides of mug around the frosted edge of each mini cupcake and seal the edges by brushing with a bit of water and holding together.
  • Attach the handle over the sealed edge with a bit of water.

Spread buttercream over sides of mini cupcakeCupcakes ready to be covered in fondantWrap fondant around mini cupcakeAdd handle over seam, using water to attach it.

  • Set mugs on a plate or dish with a lipped edge to hold the handle in place until it sets.
  • Once handle is dried in place, pipe mocha frosting on top of cupcake to fill mug in.
  • Spread frosting flat and pipe a tiny bit of the white frosting on top.
  • Sprinkle with cocoa powder if desired.

Allow handle to harden in place.Pipe frosting into top of mug

Megan (more artistic than I!) decorated some mugs to personalize them for us.  She used decorating brushes with gel food coloring to paint the cups….aren’t they cute????

Edible mug cupcakes!!!My thoughts:  These are really yummy cupcakes- even without the mugs.  The mugs are a little time consuming, but if you want something REALLY unique and fun they are both!  The marshmallow fondant got rave reviews from our friends– they loved it and ate the entire mug with the cupcake.  

When you bite in, it is quite the surprise….so fun!!!!  Enjoy!!!

Edible mug cupcakes
You might also enjoy:

Nutter Butter Flip FlopsBlack Bottom Peanut Butter CookiesRaspberry Lemonade TrufflesFudgy bonbon cookies

Fondant…how to make it, use it and eat it!

Posted on

Fun fondant cupcake toppers

Homemade fondant that is easy AND tasty?  Here you go!!!

Every time I see cute cupcakes or cakes decorated in fondant I love them…and then I dismiss the possibility of making them for two reasons:

1. Fondant is really hard to make and use.

2. Fondant tastes bad and everyone just peels it off to get to the real frosting and cake underneath.

My good friend Megan from Happily Ever After Cakes set out to prove me wrong on both counts….and she did!

If you follow the comings and goings of easybaked, you know that I recently had a visit from my dear friend Megan for a weekend long baking extravaganza.  This is project #2 from that weekend.

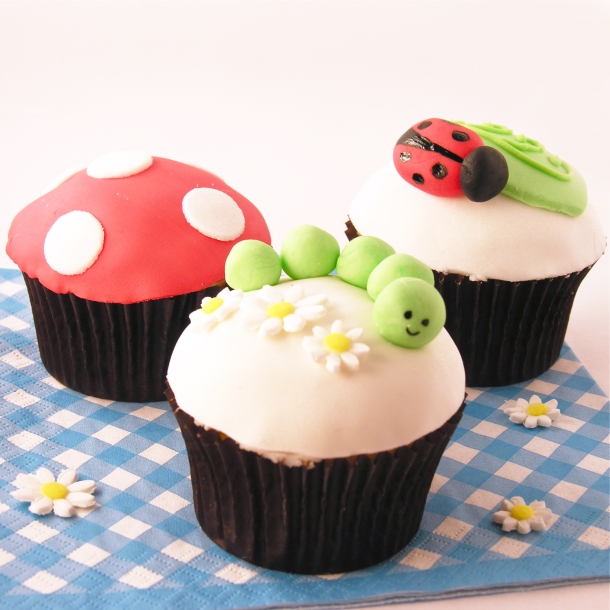
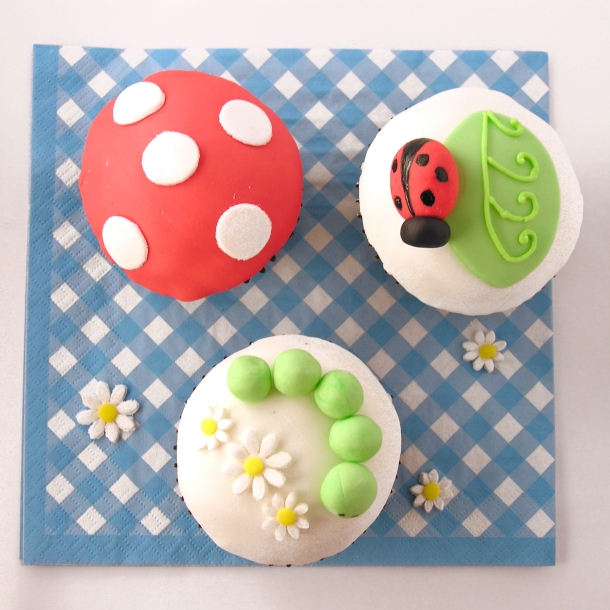
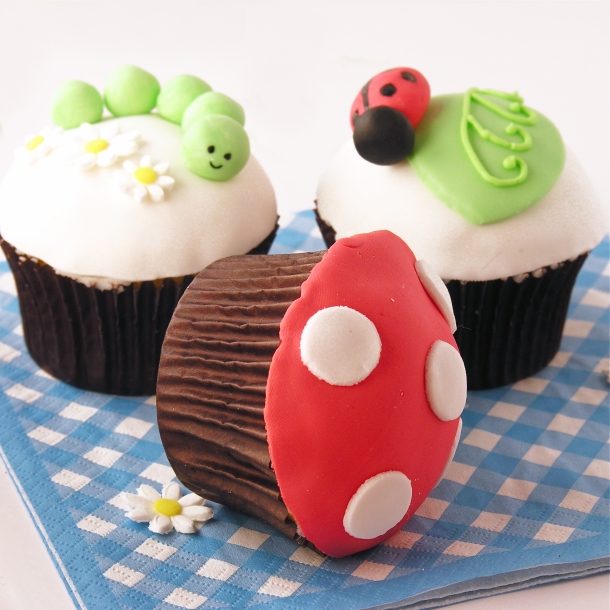
Before Megan came, I knew we would be tackling fondant cupcakes and we both went on an internet hunt for fun and easy ideas to try.  We saw these cute garden themed cupcakes on a Flickr site called Hello Naomi and decided to try them out!

The cupcakes are just plain white cupcakes (use your favorite flavor/recipe!)  What’s amazing is, of course, what’s on top.  There are two recipes involved~ a thick buttercream that acts like a glue on the top of each cupcake and the actual fondant recipe.

Let’s start with those two recipes and then I can tell you how we pulled it all together.

Thick Buttercream Frosting: (makes about 4 cups of frosting)

(printer-friendly recipe)

INGREDIENTS:

  • 1 stick (1/2 cup) butter (softened)
  • 1/2 cup Crisco
  • 1 tsp clear vanilla (or any flavoring you might want!)
  • 4 c. powdered sugar
  • 1 Tablespoon of half-and half cream.

DIRECTIONS:

  • Beat together butter, Crisco and vanilla with a mixer until smooth.
  • Add powdered sugar gradually and mix until combined and a little crumbly.
  • Add half and half cream and mix on low.  You might need to add a little more until frosting is a thick but smooth consistency.
  • Don’t beat frosting on high speed or for too long to prevent air bubbles that will keep it from spreading smoothly.
  • This frosting can be used to frost cupcakes or cakes that will have fondant laid over the top.  It has a sticky consistency that acts as a glue to attach the fondant.  It can be kept in a tightly sealed container in the refrigerator for about a week.

Marshmallow Fondant (recipe from about.com site)- they have a great video tutorial too!! (makes about 1 1/2 lbs of fondant.)

(printer-friendly recipe)

INGREDIENTS:

  • 4 cups mini marshmallows (half of a 16 oz. bag)
  • 4 cups powdered sugar- plus a little for dusting.
  • 2 tsp water
  • 1/2 teaspoon of clear vanilla
  • gel colors to color fondant as desired

DIRECTIONS:

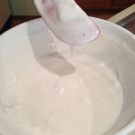
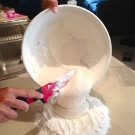
  • Place your mini marshmallows and water into a large mixing bowl and microwave on high for about one minute- until they are puffy and melted.
  • Stir them together with a rubber spatula until they are completely smooth (if not melted completely, put them back in the microwave on high for 5-10 seconds).
  • Add clear vanilla and mix well.
  • Add about 1/4 of the powdered sugar, stir until smooth, add another 1/4 and stir.  It will become difficult to stir and very sticky.
  • Pour the rest of the powdered sugar onto a clean counter or cutting board.
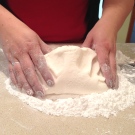
  • Scrape the sticky fondant mixture out of the bowl and onto the powdered sugar and begin to knead it together with clean (powder sugar coated!) hands.  It will gradually become like a smooth clay consistency.  Use a metal scraper to keep it from sticking to the counter/ board.
  • This can now be colored with gel, rolled out and cut, or stored (tightly wrapped) in the fridge for about one week.  Megan recommended refrigerating it overnight before use, so we did.
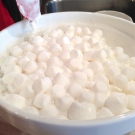
Melt marshmallowsMix until smoothPour onto counterKnead together with hands

Now comes the fun part….

  • Have your cupcakes or cake or cookies all made and cooled.
  • Make enough fondant to cover your item(s).  Here is a great chart by Wilton to help you determine how much you’ll need for various projects.
  • Make up some of that thick buttercream icing and you are ready to go!

We needed to cut circles to cover each cupcake and we used a circle cutter set, which was nice because we could choose the perfect size to cover our cupcake tops.  We simply powdered a cutting board and rolled out the fondant using a fondant rolling pin.   We cut out the cupcake tops in white  (we saved the red tops for later when we colored fondant).
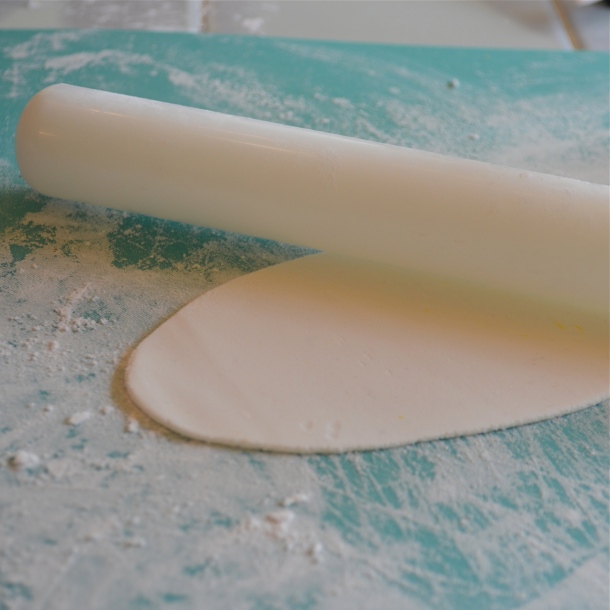
Rolling out fondant

Roll fondant out into a fairly thin layer and cut round pieces out to fit the tops of your cupcakes.

  • To place the fondant circles on top of the cupcakes just spread some of that sticky buttercream icing on top of a cupcake, smooth it as much as you can and place fondant circle on top.  
  • Gently press the edges down to touch the top of the cupcake liner and smooth it with your fingers.
  • We made daisies to go on top of the caterpillar cupcakes, so we cut out the white flowers before we colored anything.  Megan got me two cute daisy fondant cutters and they were SO fun to use!
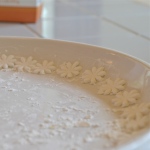
  • Roll your fondant out, cut out daisies and lie them on a powdered sugared curved edge to harden a bit.  I used a plate with a lip on it.
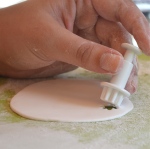
Cut daisies out of fondantSet daisies on curved edge to harden

Time to color a little fondant for those yellow centers:  

  • To color just add a little gel color to the center of a bit of fondant and mix it with your hands.  
  • Use a little powdered sugar to prevent the fondant from sticking to your hands.

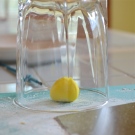
Tips:  keep fondant under a glass to keep it moist until you need it.  If it gets too dry you can add a little bit of Crisco to soften it up.  If it gets too sticky and the powdered sugar isn’t helping, you can use a little cornstarch to dry it up.

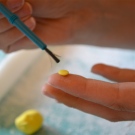
  • Roll a bit of yellow fondant into a small ball, press it flat and brush a tiny bit (just make it damp!) of water on it.  Press into center of white daisy—–so cute!

Water acts like glue with fondant…..something to remember as you start to decorate.

Add color gel to fondantKeep fondant under a glass to keep it moist.Use a little water on the fondant flower centerPress yellow center into daisy

Next, we colored some fondant green and rolled out little caterpillar body parts.  We let them set awhile and cut leaves out of the green as well– you can use that wonderful circle cutter set to make them– we “glued” them on white cupcake tops using water (just a little!).

The last colors we made were the red and black for the lady bugs and mushroom caps.  Both of these dark colors get ALL over your light colors if you aren’t careful about washing your hands– so make them up after you’ve already cut and shaped the lighter colored parts!  We just cut circles out for the mushroom caps and shaped ladybugs by hand….
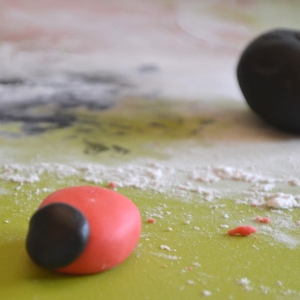
ladybugs!All of the shapes– the bugs and daisies and mushroom spots were “glued” on with a little water and the last step was to paint on little faces and ladybug spots.  We dipped right in to our black gel food color to do this– Megan got us a fine-tipped decorating brush that made short work of painting.

Ladybug and Caterpillar cupcakes!

Aren’t they fun?

My thoughts:  I realize this entire post is a far stretch from the “EASY” in “Easybaked”…but it was honestly not as difficult as I thought it would be.  I can see myself making fun embellishments for topping off regular cupcakes in the future now that I know how simple fondant is to make.

The best part?  It is honestly SO yummy.  The fondant isn’t rubbery or hard- you bite into the cupcake and the fondant is soft and tastes like marshmallow-y frosting.  I wasn’t tempted to peel it off at ALL! (promise!)  I even enjoyed snacking on the little critters and flowers on top.  Yum….!

ladybug and caterpillar cupcakes!Other fun and yummy cupcake ideas:

Butter beer cupcakesblackberry cream cupcakeAndes Mint CupcakesChocolate molten lava cupcakes

Bubble Gum Cupcakes

Posted on


A perfect dessert for kids! Fun blue cupcakes topped with creamy pink bubble gum frosting and a gum ball!

Remember bubble gum ice cream? When I was a kid, one of our summer treats was to go to Cornwell’s Turkey Farm near Marshall, MI. It wasn’t too far from home and you got turkey sandwiches (the chunky “thanksgiving left-over” kind of sandwich) for lunch and then an ice cream cone from their old-fashioned ice cream parlor. They had bubble gum ice cream back in those days. I rarely got it, but my younger brother always did. He’d spit all the pieces of gum into a pile on a napkin (soooooo gross..) and then chew all of them after the ice cream was gone.  Who thought to put gum in ice cream?  To my knowledge it is impossible to eat them together….?

Anyway, when I saw the flavors of Duncan Hines new Frosting Creations, “bubble gum” caught my eye.  What kid (and maybe adult!) wouldn’t want to try a bubble gum cupcake?

I want to try a bubble gum cupcake….!

Pair that thought with an incredibly busy week and you have SUPER EASY and QUICK bubble gum cupcakes that will make your kids cheer at their next party!!!
Here we go:

INGREDIENTS:

  • One boxed white cake mix (with oil, eggs and water to make according to package)
  • Blue food coloring- I use Wiltons icing colors for bright color that doesn’t change the consistency of things.
  • One packet of Frosting Creations Bubble Gum Flavor
  • 1 stick of salted butter
  • 1 stick of unsalted butter
  • 1 1/2 c. powdered sugar
  • 1 t. vanilla
  • 18-24 gumballs

DIRECTIONS:

  • Make cake mix according to package, add food coloring and fill 18-24 cupcake liners (in a cupcake tin) with batter. (most cake mixes say they make 24 cupcakes….I like big cupcakes so I usually aim for 18!)
  • Bake according to package and cool completely.
  • Beat together (softened!) butters with vanilla and powdered sugar.  Beat on high until light and fluffy frosting develops.
  • Add bubble gum flavor packet to frosting and beat until well combined.
  • Cut a corner off a large zip-top bag and press a large Star shaped decorating tip into the hole.  
  • Spoon frosting into bag and seal top.
  • Carefully pipe frosting evenly over cupcakes (this recipe frosts 18 cupcakes perfectly as pictured— you will need to use a little less to cover 24).
  • Top each cupcake with a fun and colorful gumball

My thoughts:  I loved serving these…. it made me smile to watch adults lick all of the frosting off the cupcake 1st.  When one of my friends exclaimed, “It tastes just like bubble gum ice cream!” I knew I’d hit the mark.  Note: I used the Duncan Hines flavor packet in my own buttercream frosting because I wanted light fluffy frosting that would pipe a pretty swirl on top.  The packets are made to be used with a special can of frosting made by Duncan Hines.  If you want REALLY easy just use that.  Either way, these are so much fun!!!!  Enjoy!