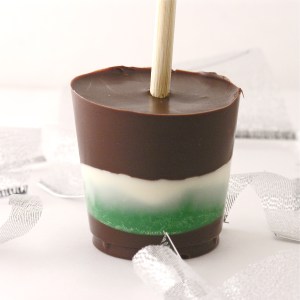
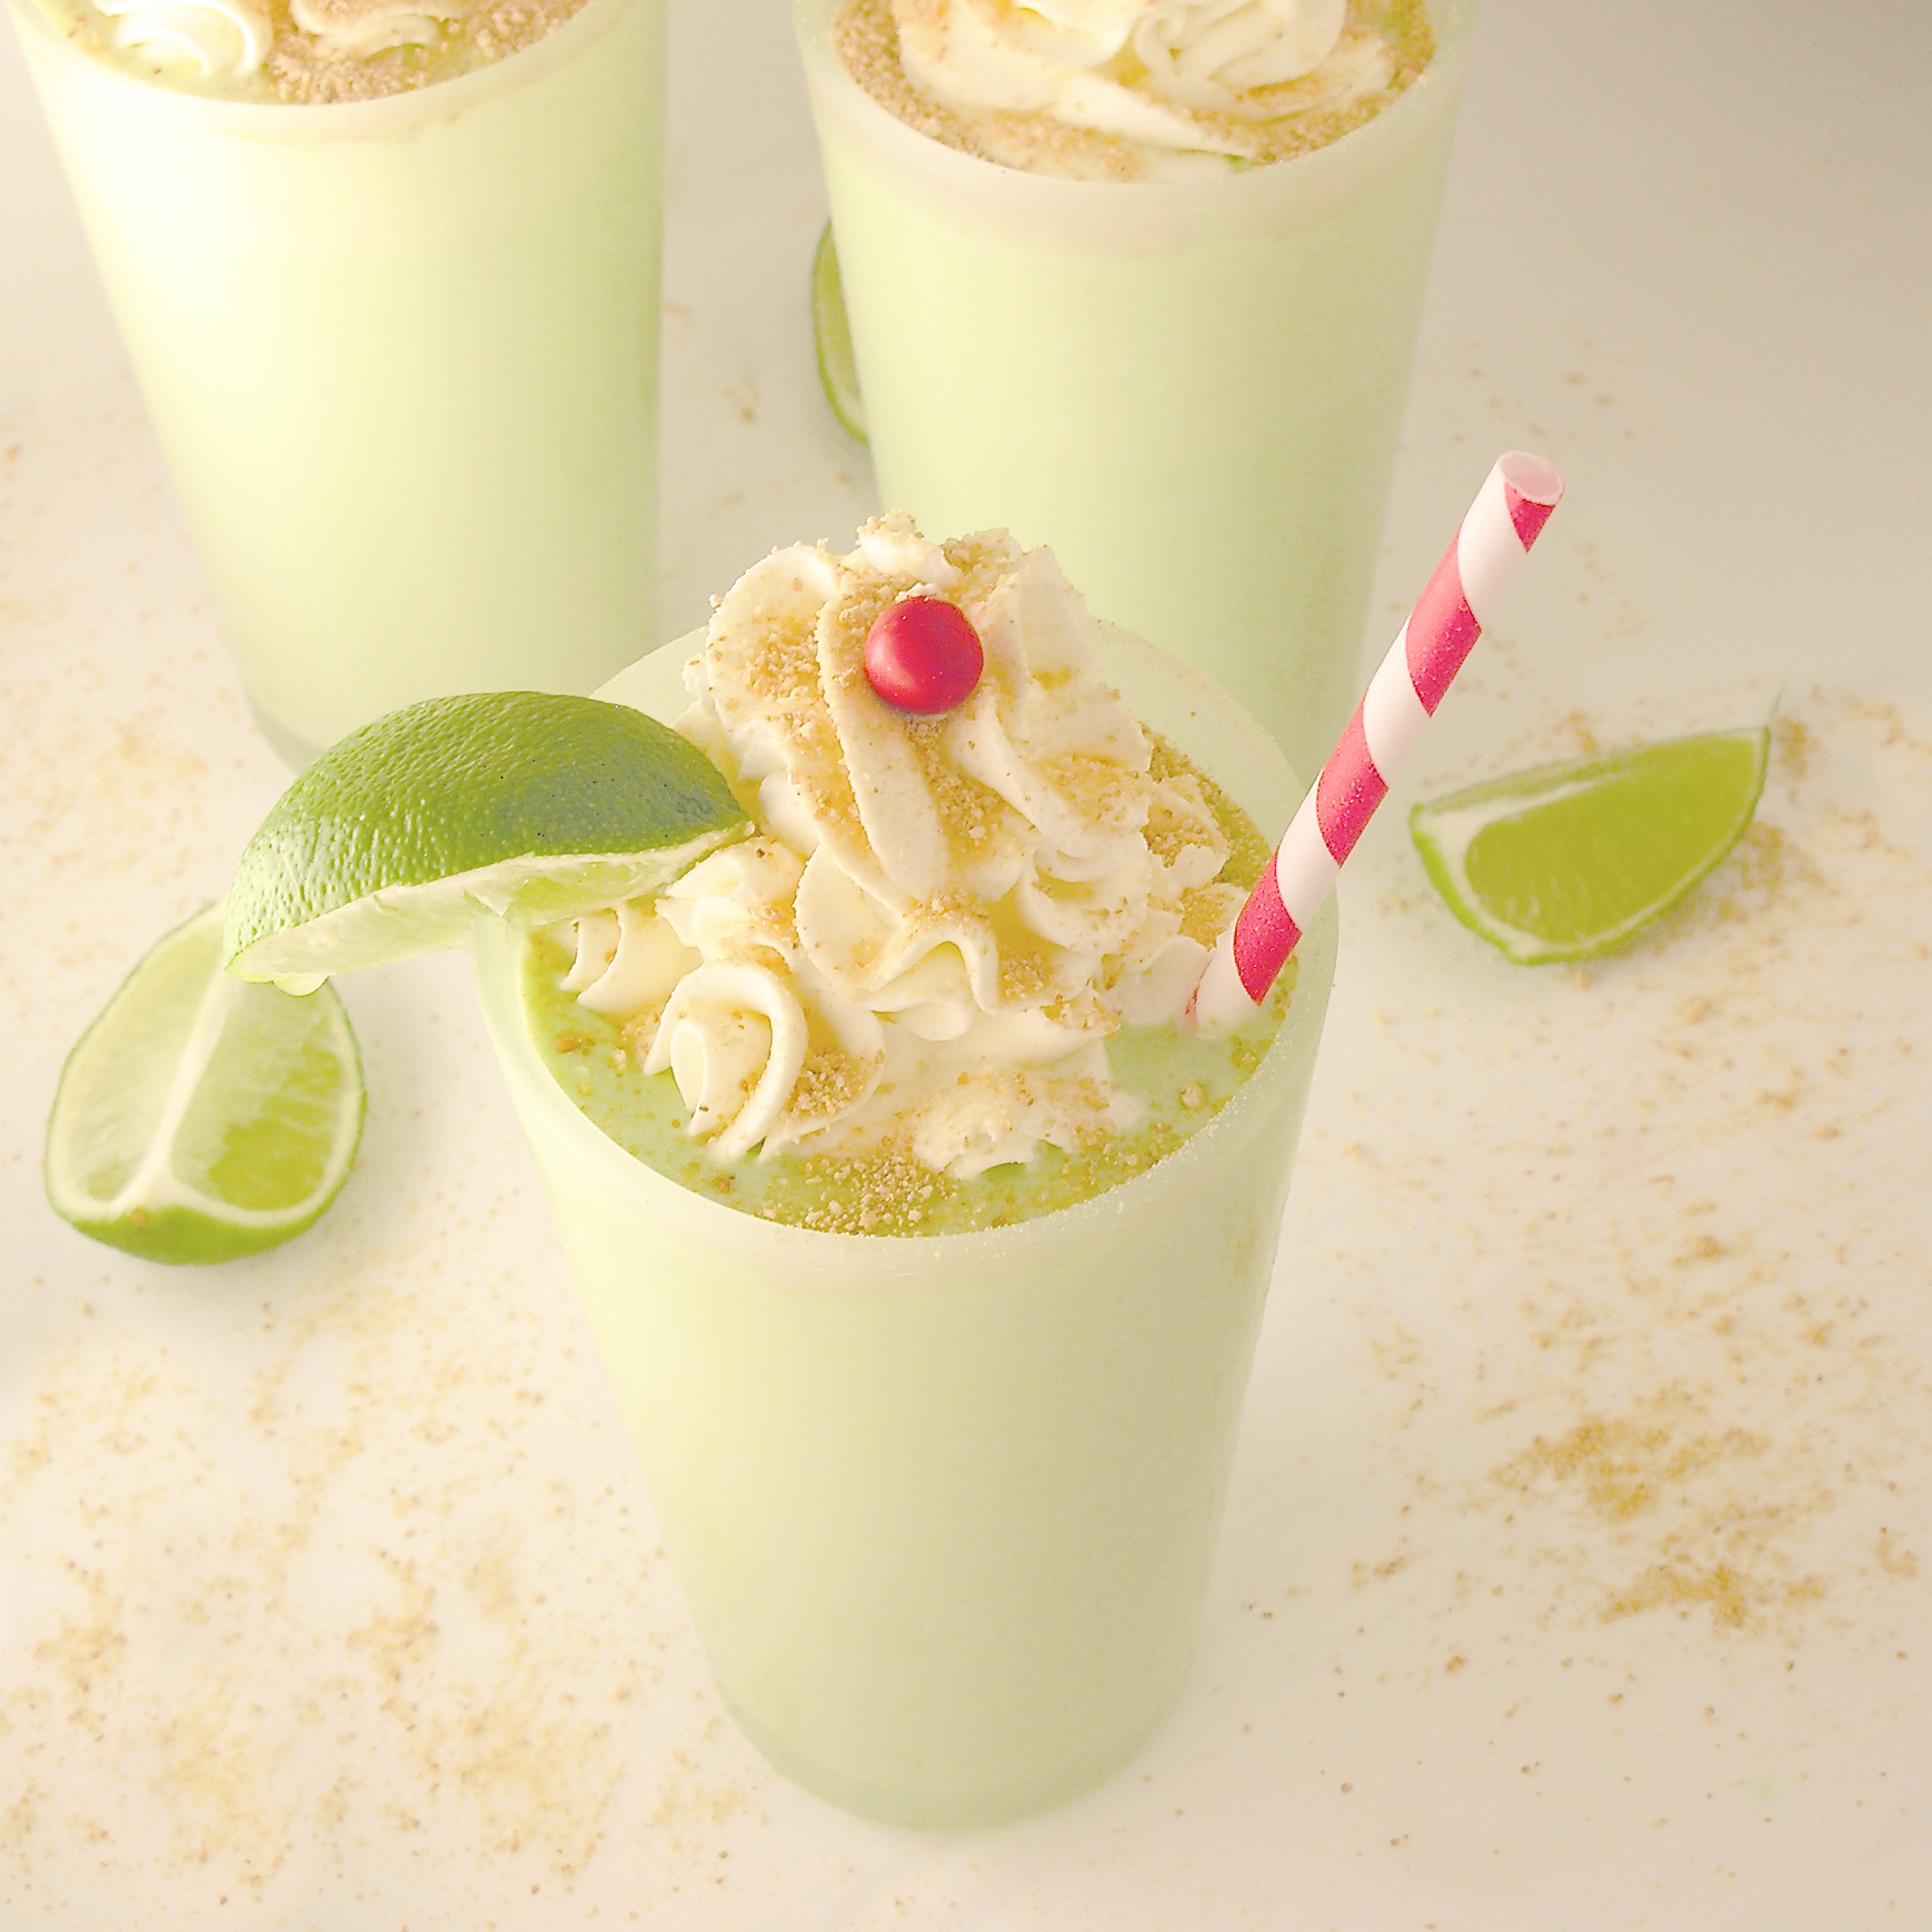
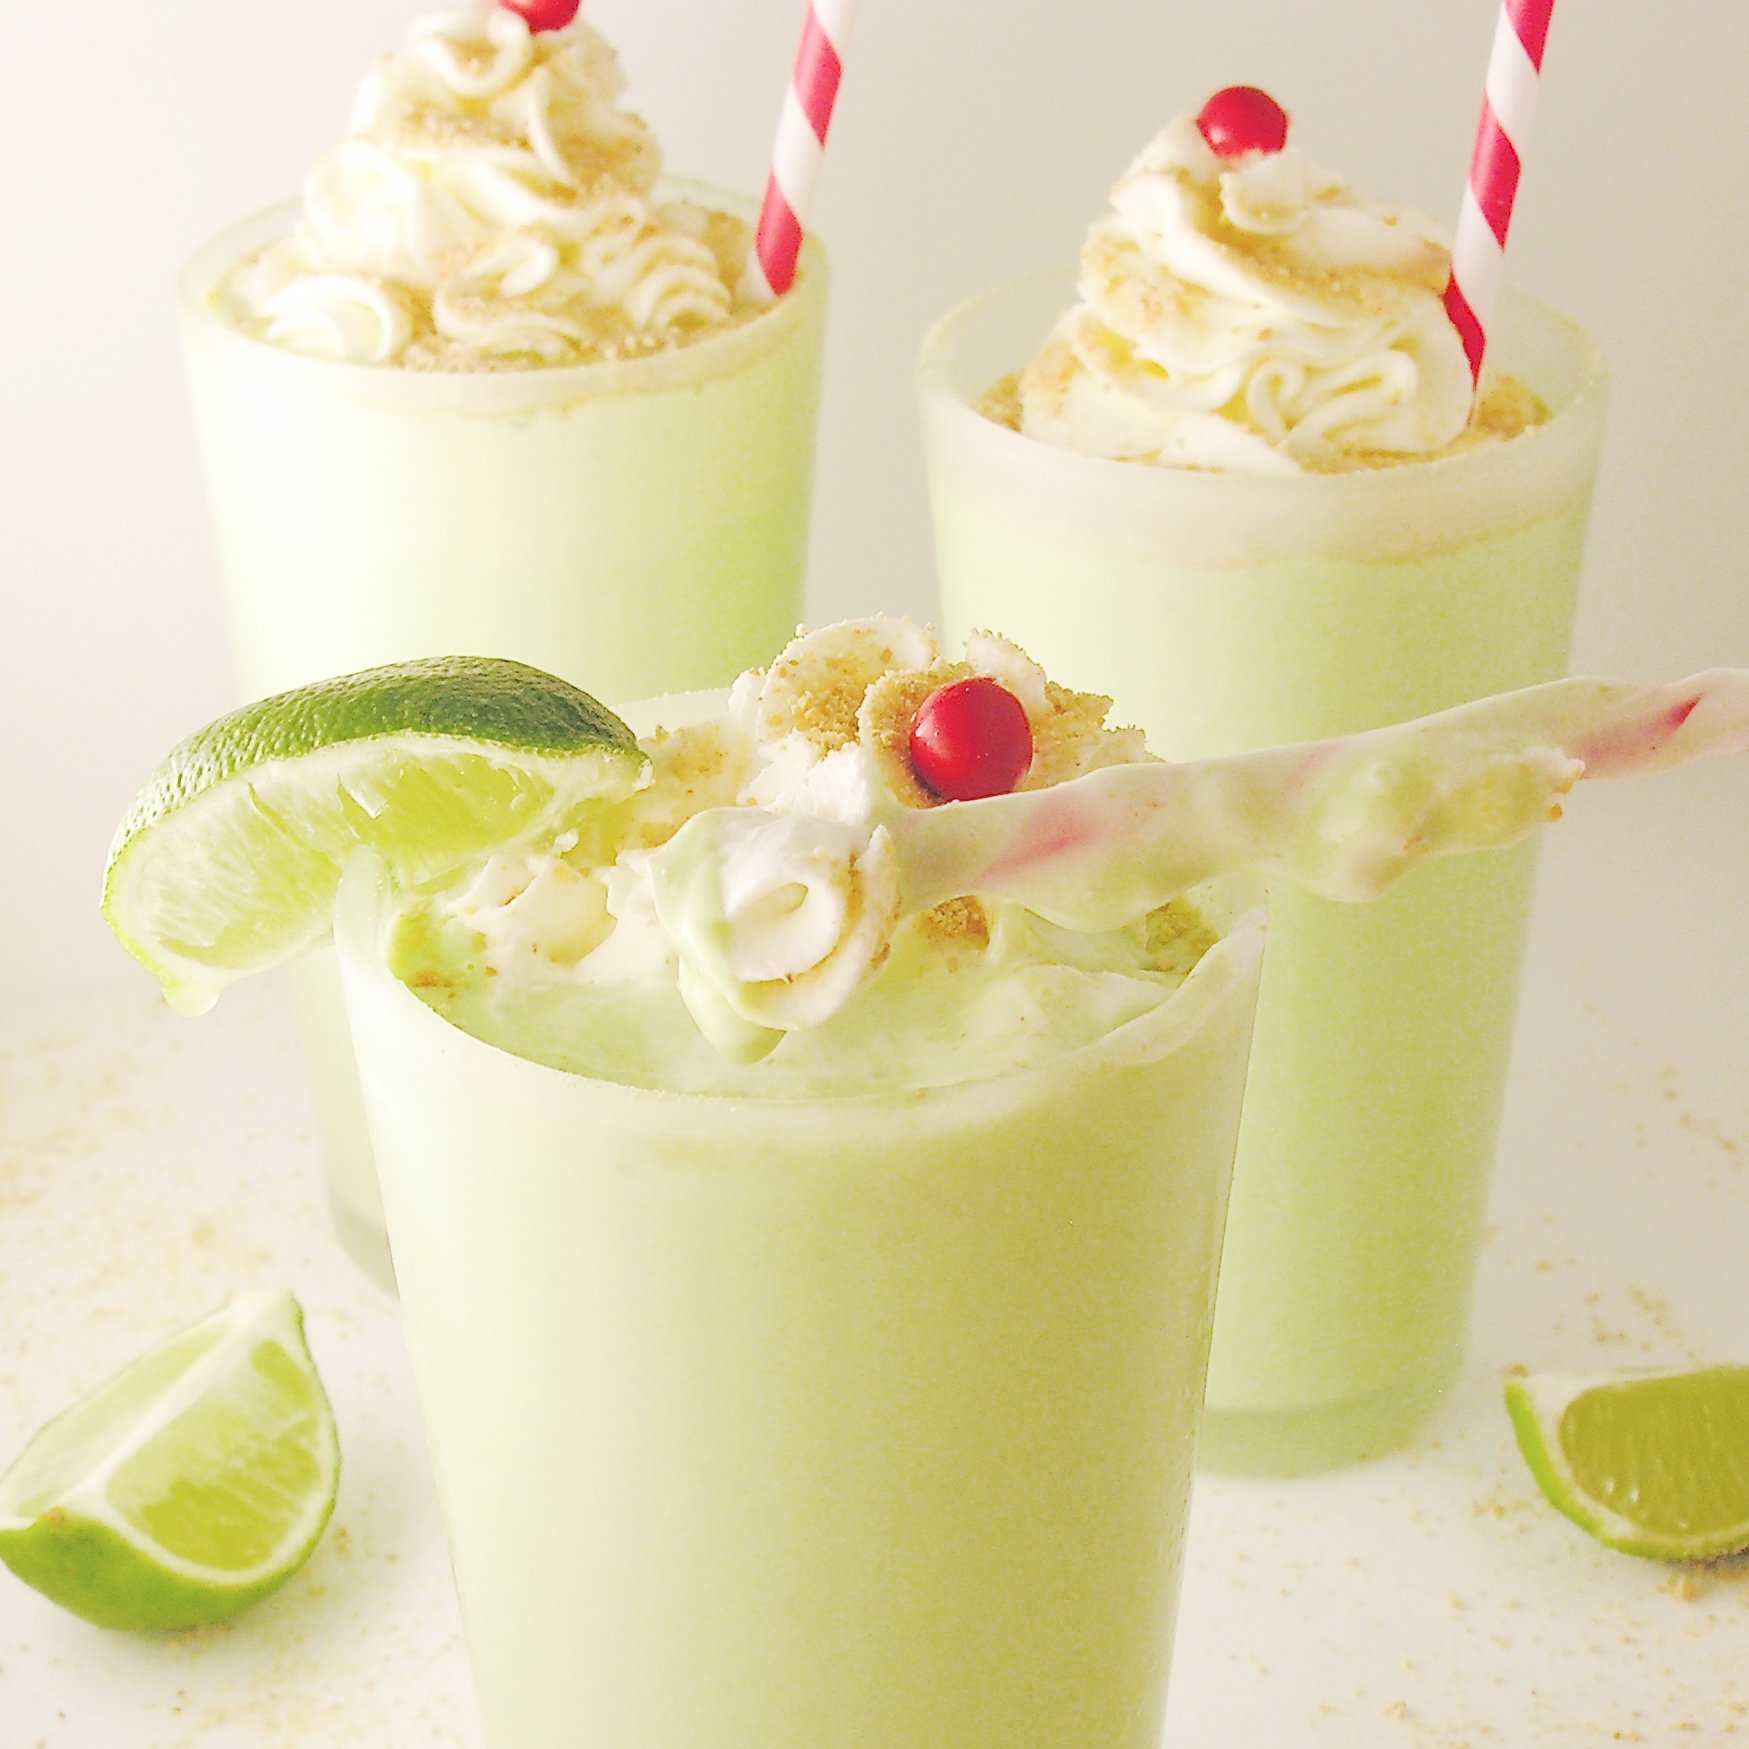
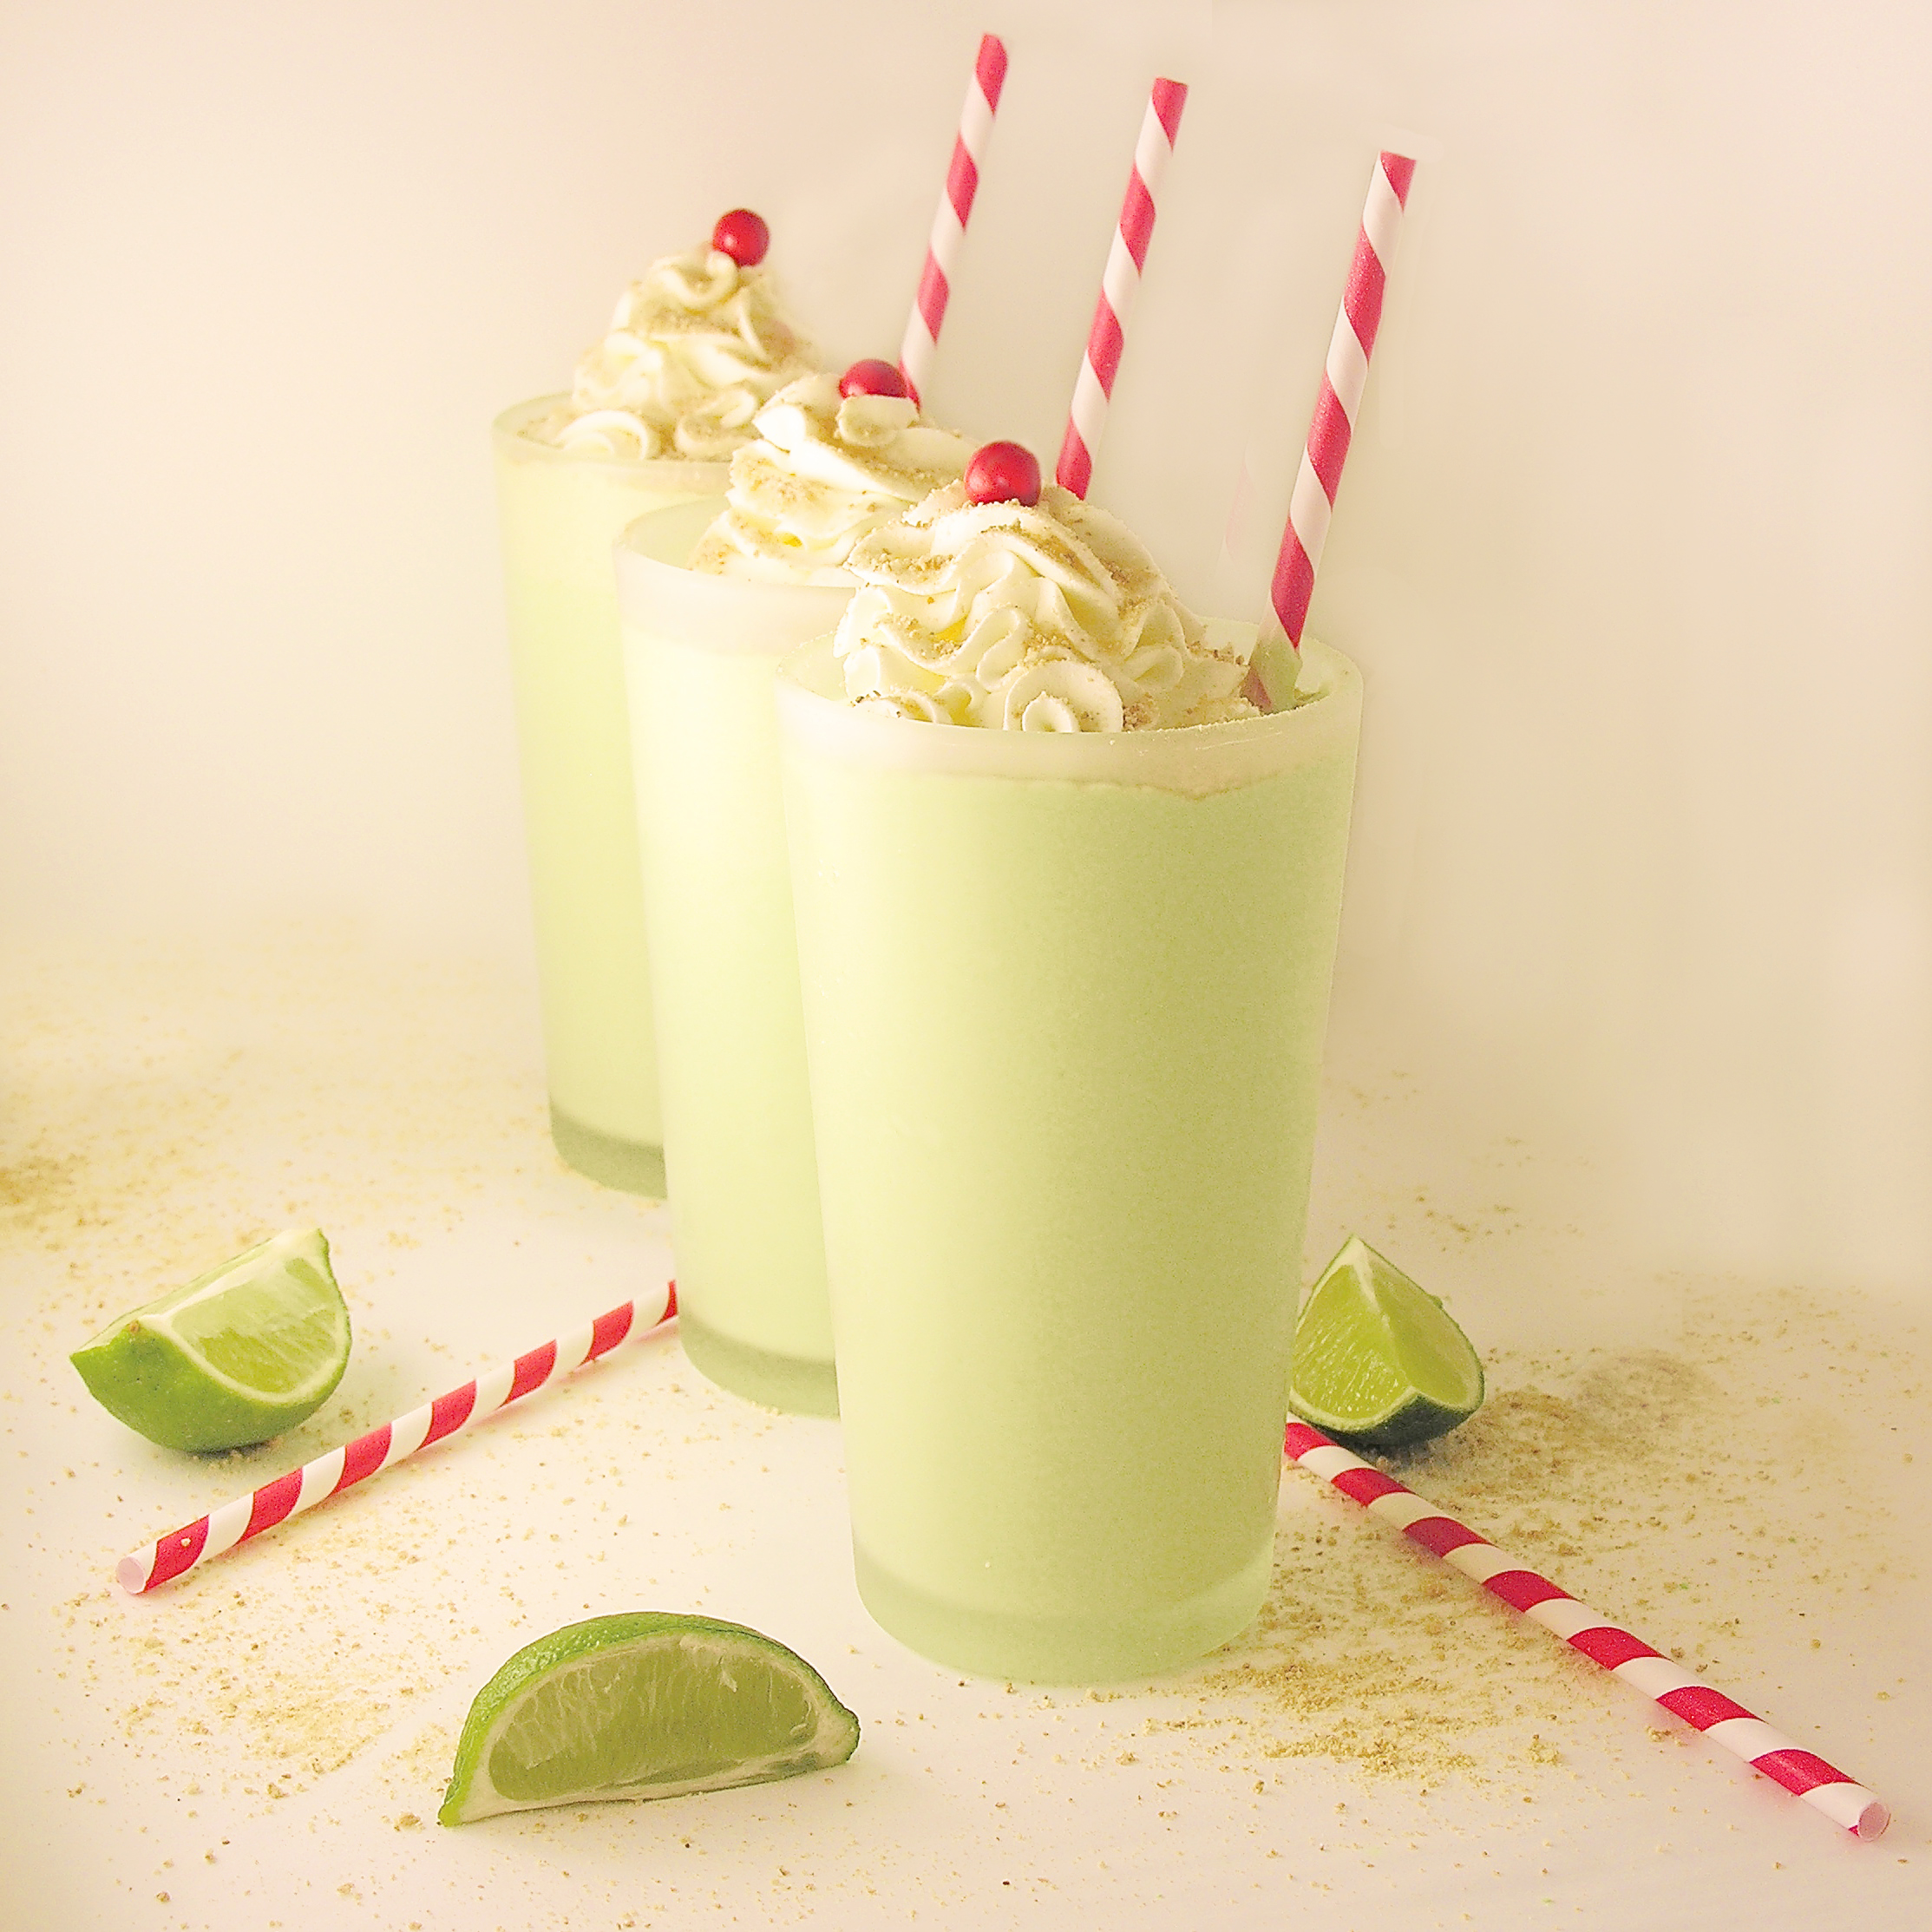
These cute punch pops are the perfect “drop off” gift for friends and family you can’t see in person this season. Keep them in the freezer until your virtual celebration and everyone can have some Christmas punch while they open gifts.
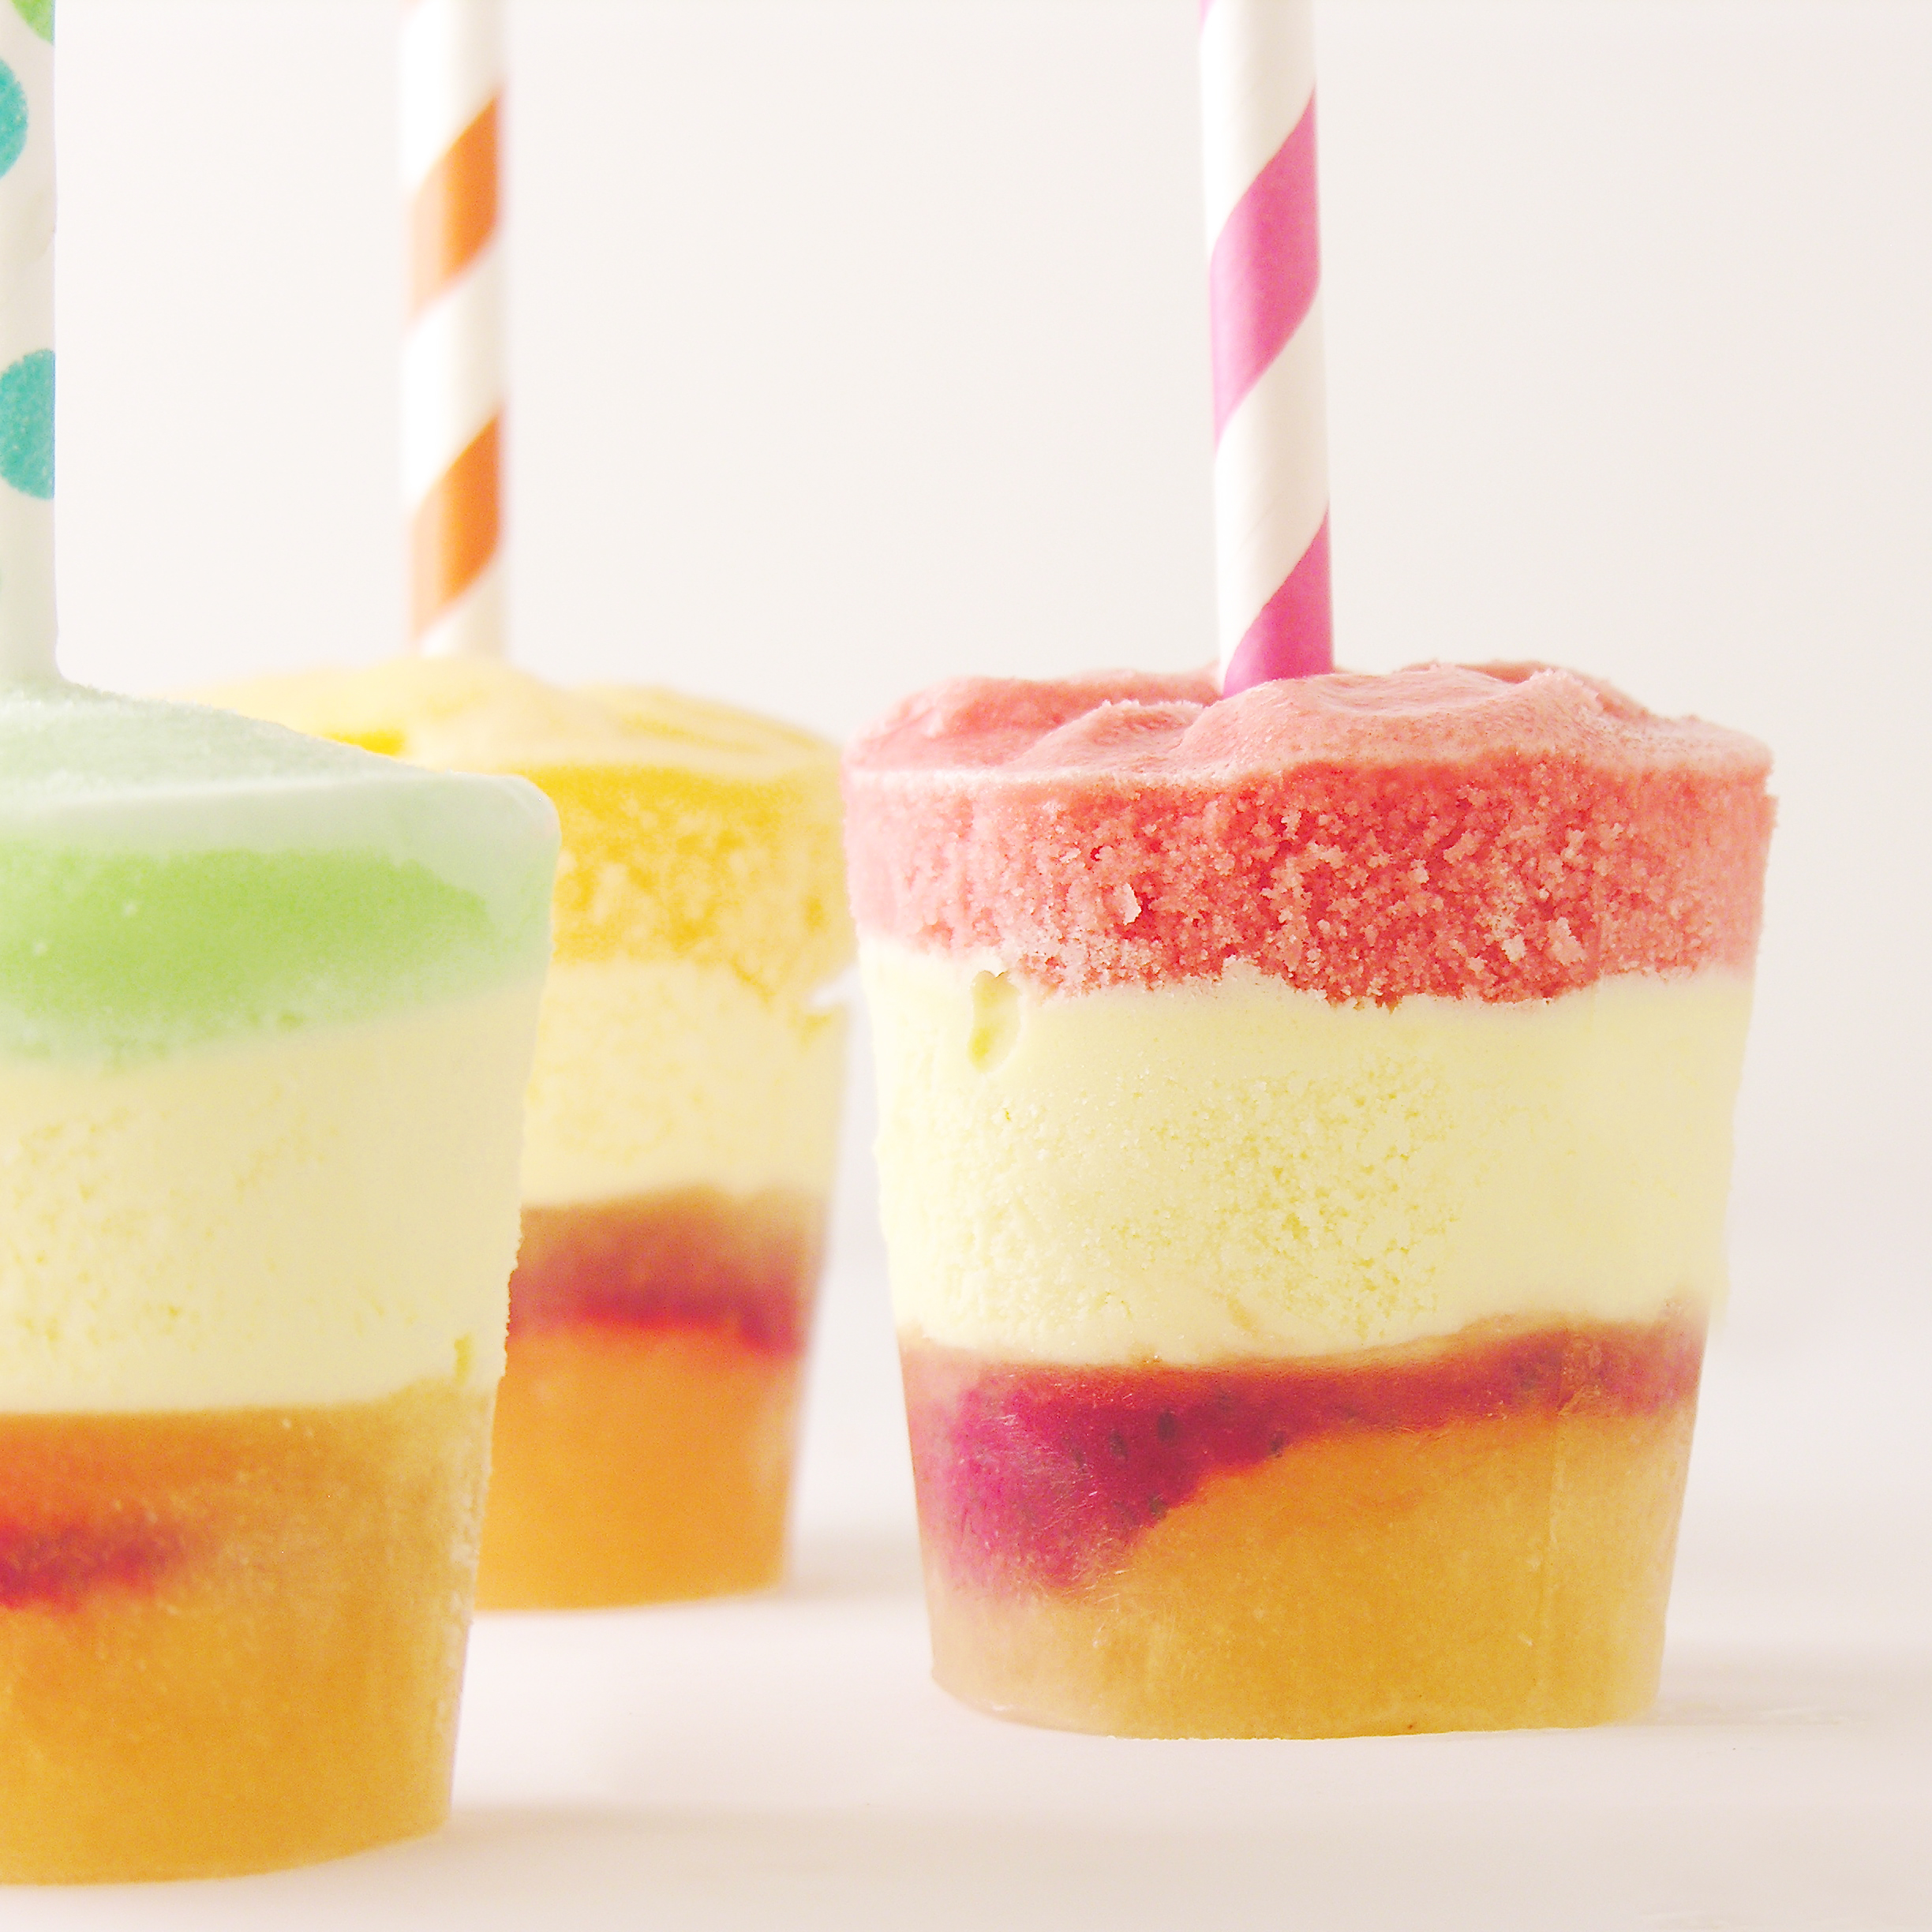
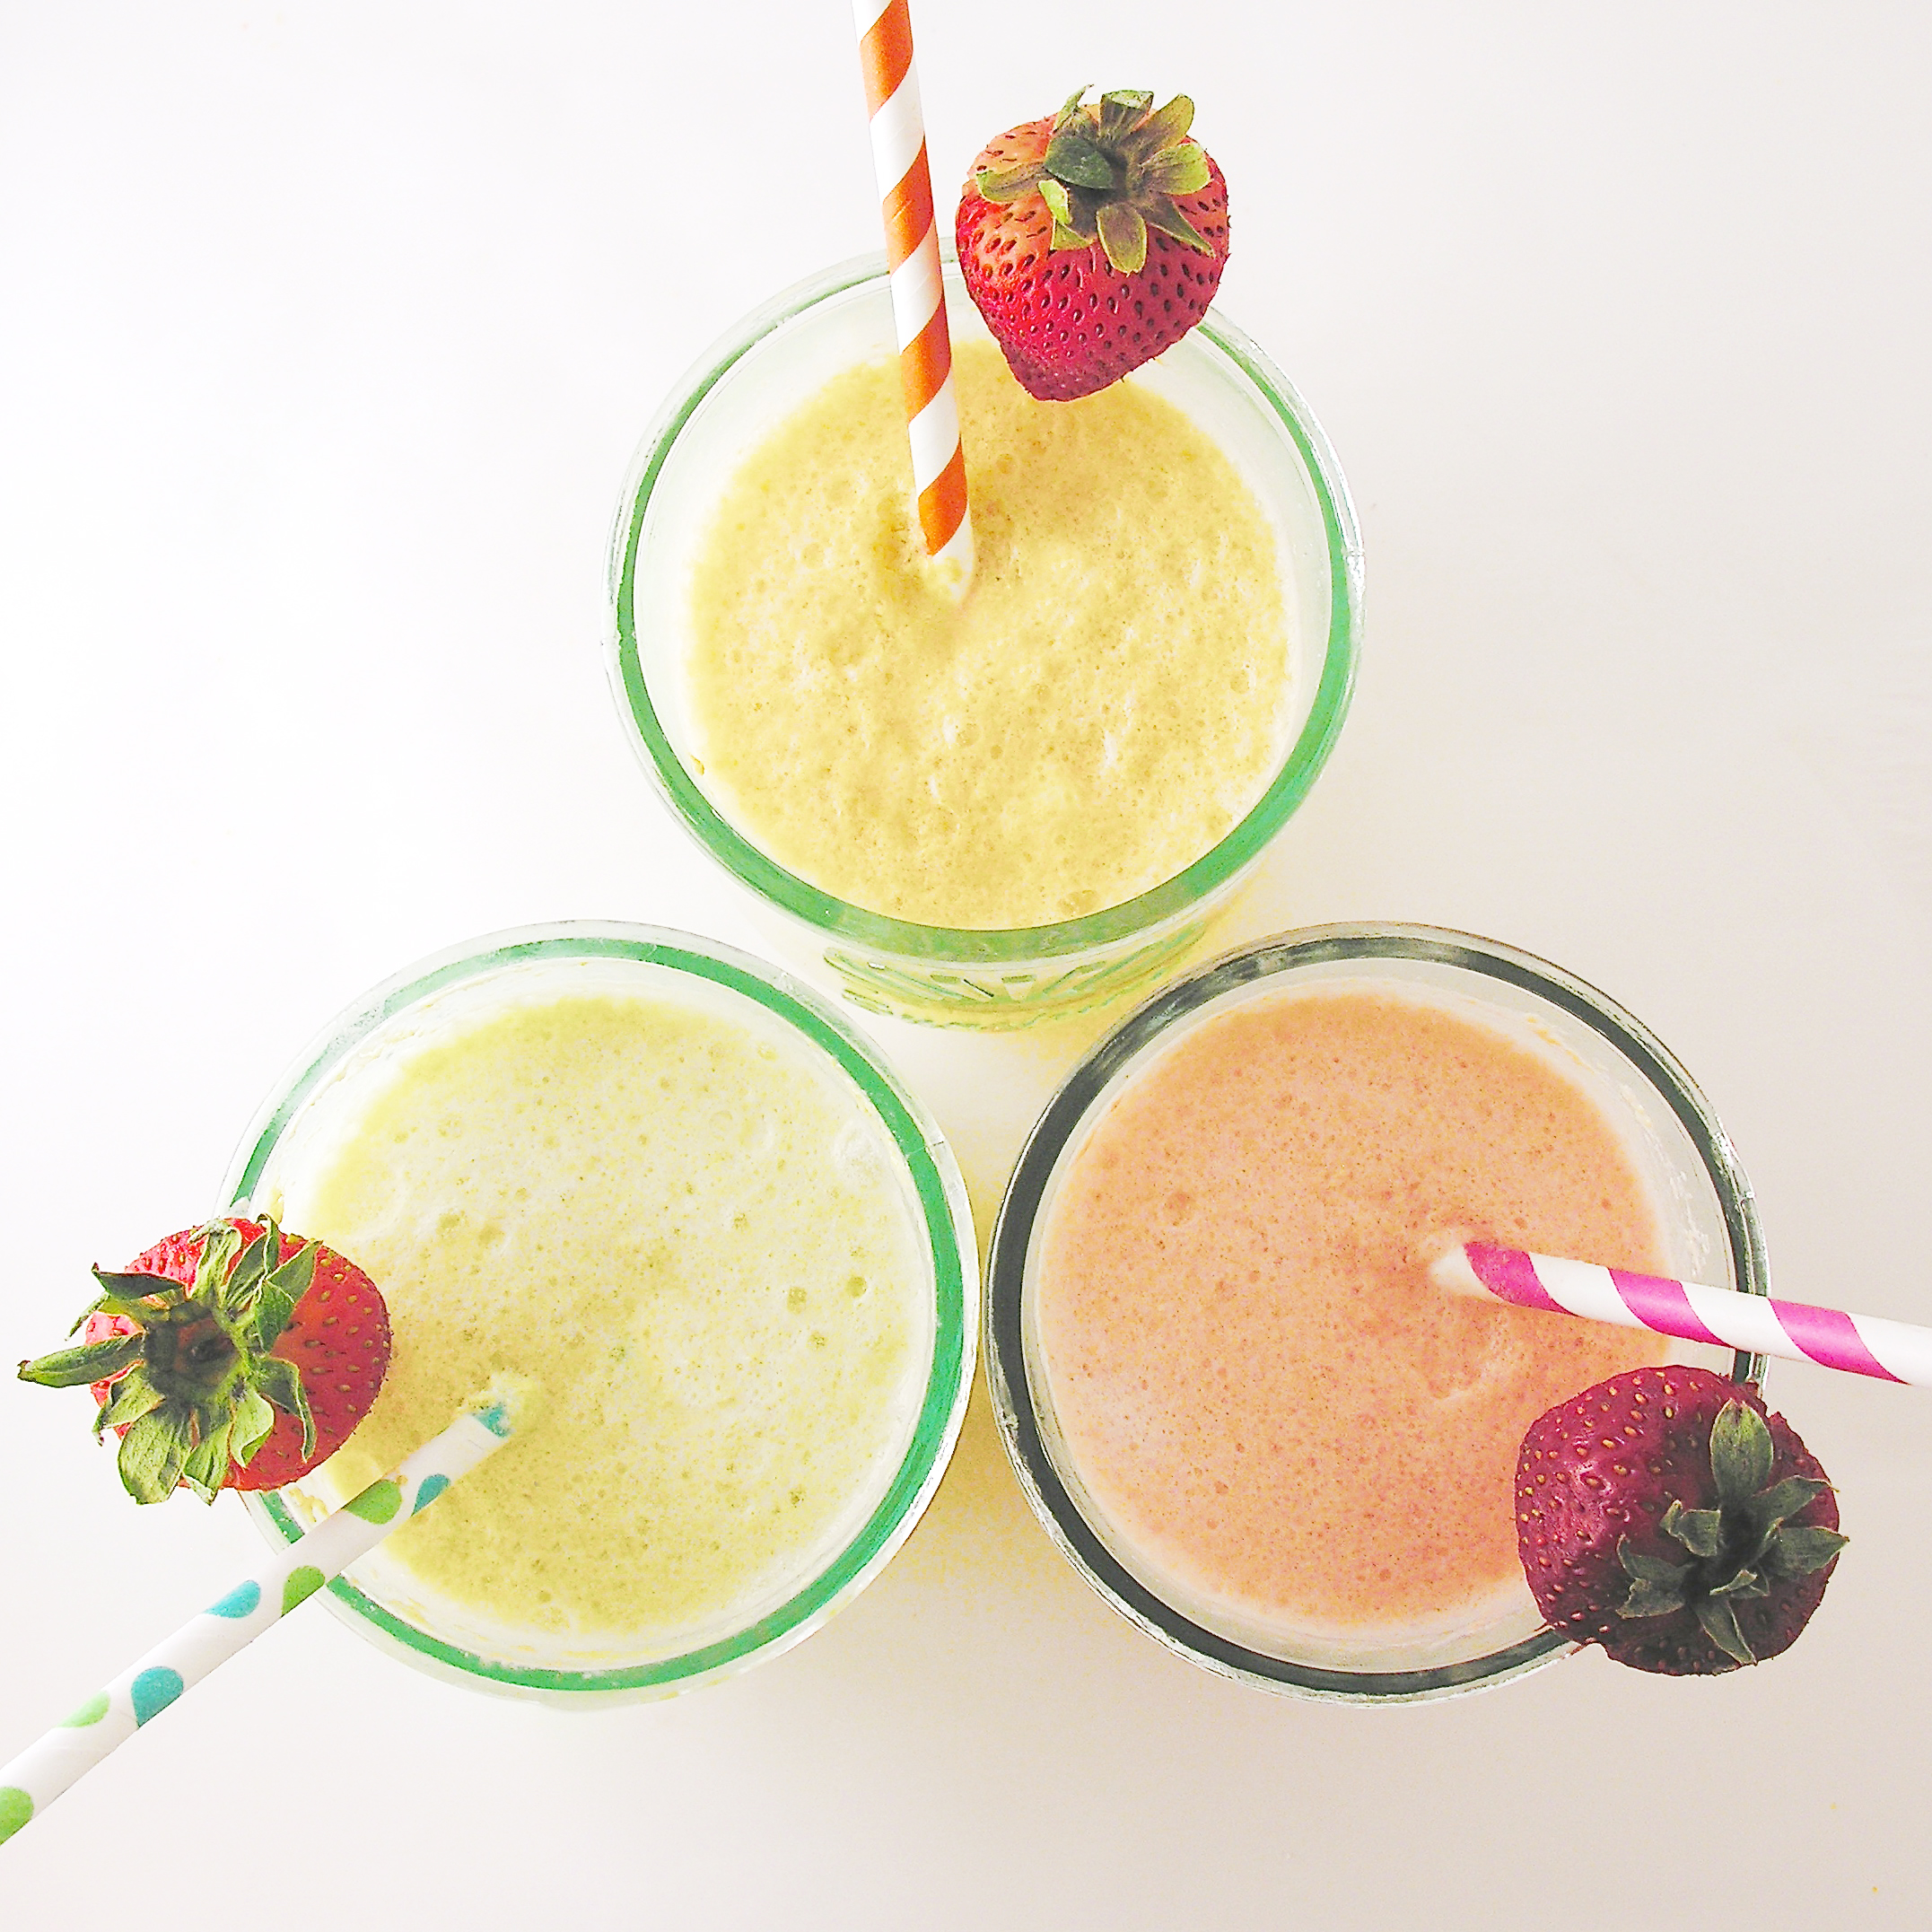
I grew up in Michigan, and I can’t remember a Christmas celebration with our family that did not involve absolutely delicious punch- served with Christmas cookies, of course! I’m not sure where I got this punch recipe, but I’ve been making it for as long as I can remember. A few years ago, I was craving this yummy, fruity, ice cream punch in the middle of summer, but didn’t want to fill an entire punch bowl with the ingredients- or waste ingredients by only making only one cup of it. So I invented…. PUNCH POPS! Once you add a little room temp ginger ale to these, you have a perfect one-person cup of punch!
As my husband and I are trying to decide how we will celebrate Christmas in the middle of this crazy COVID season, I knew I wanted something fun, festive, and unique to deliver to friends and family we won’t be able to see in person this year.
And I thought of these punch pops.
I’ve already shared this idea on Easybaked (here), but as I was putting my cute pops in bags this morning, I decided to share the recipe with you all again 🙂
Here it is!
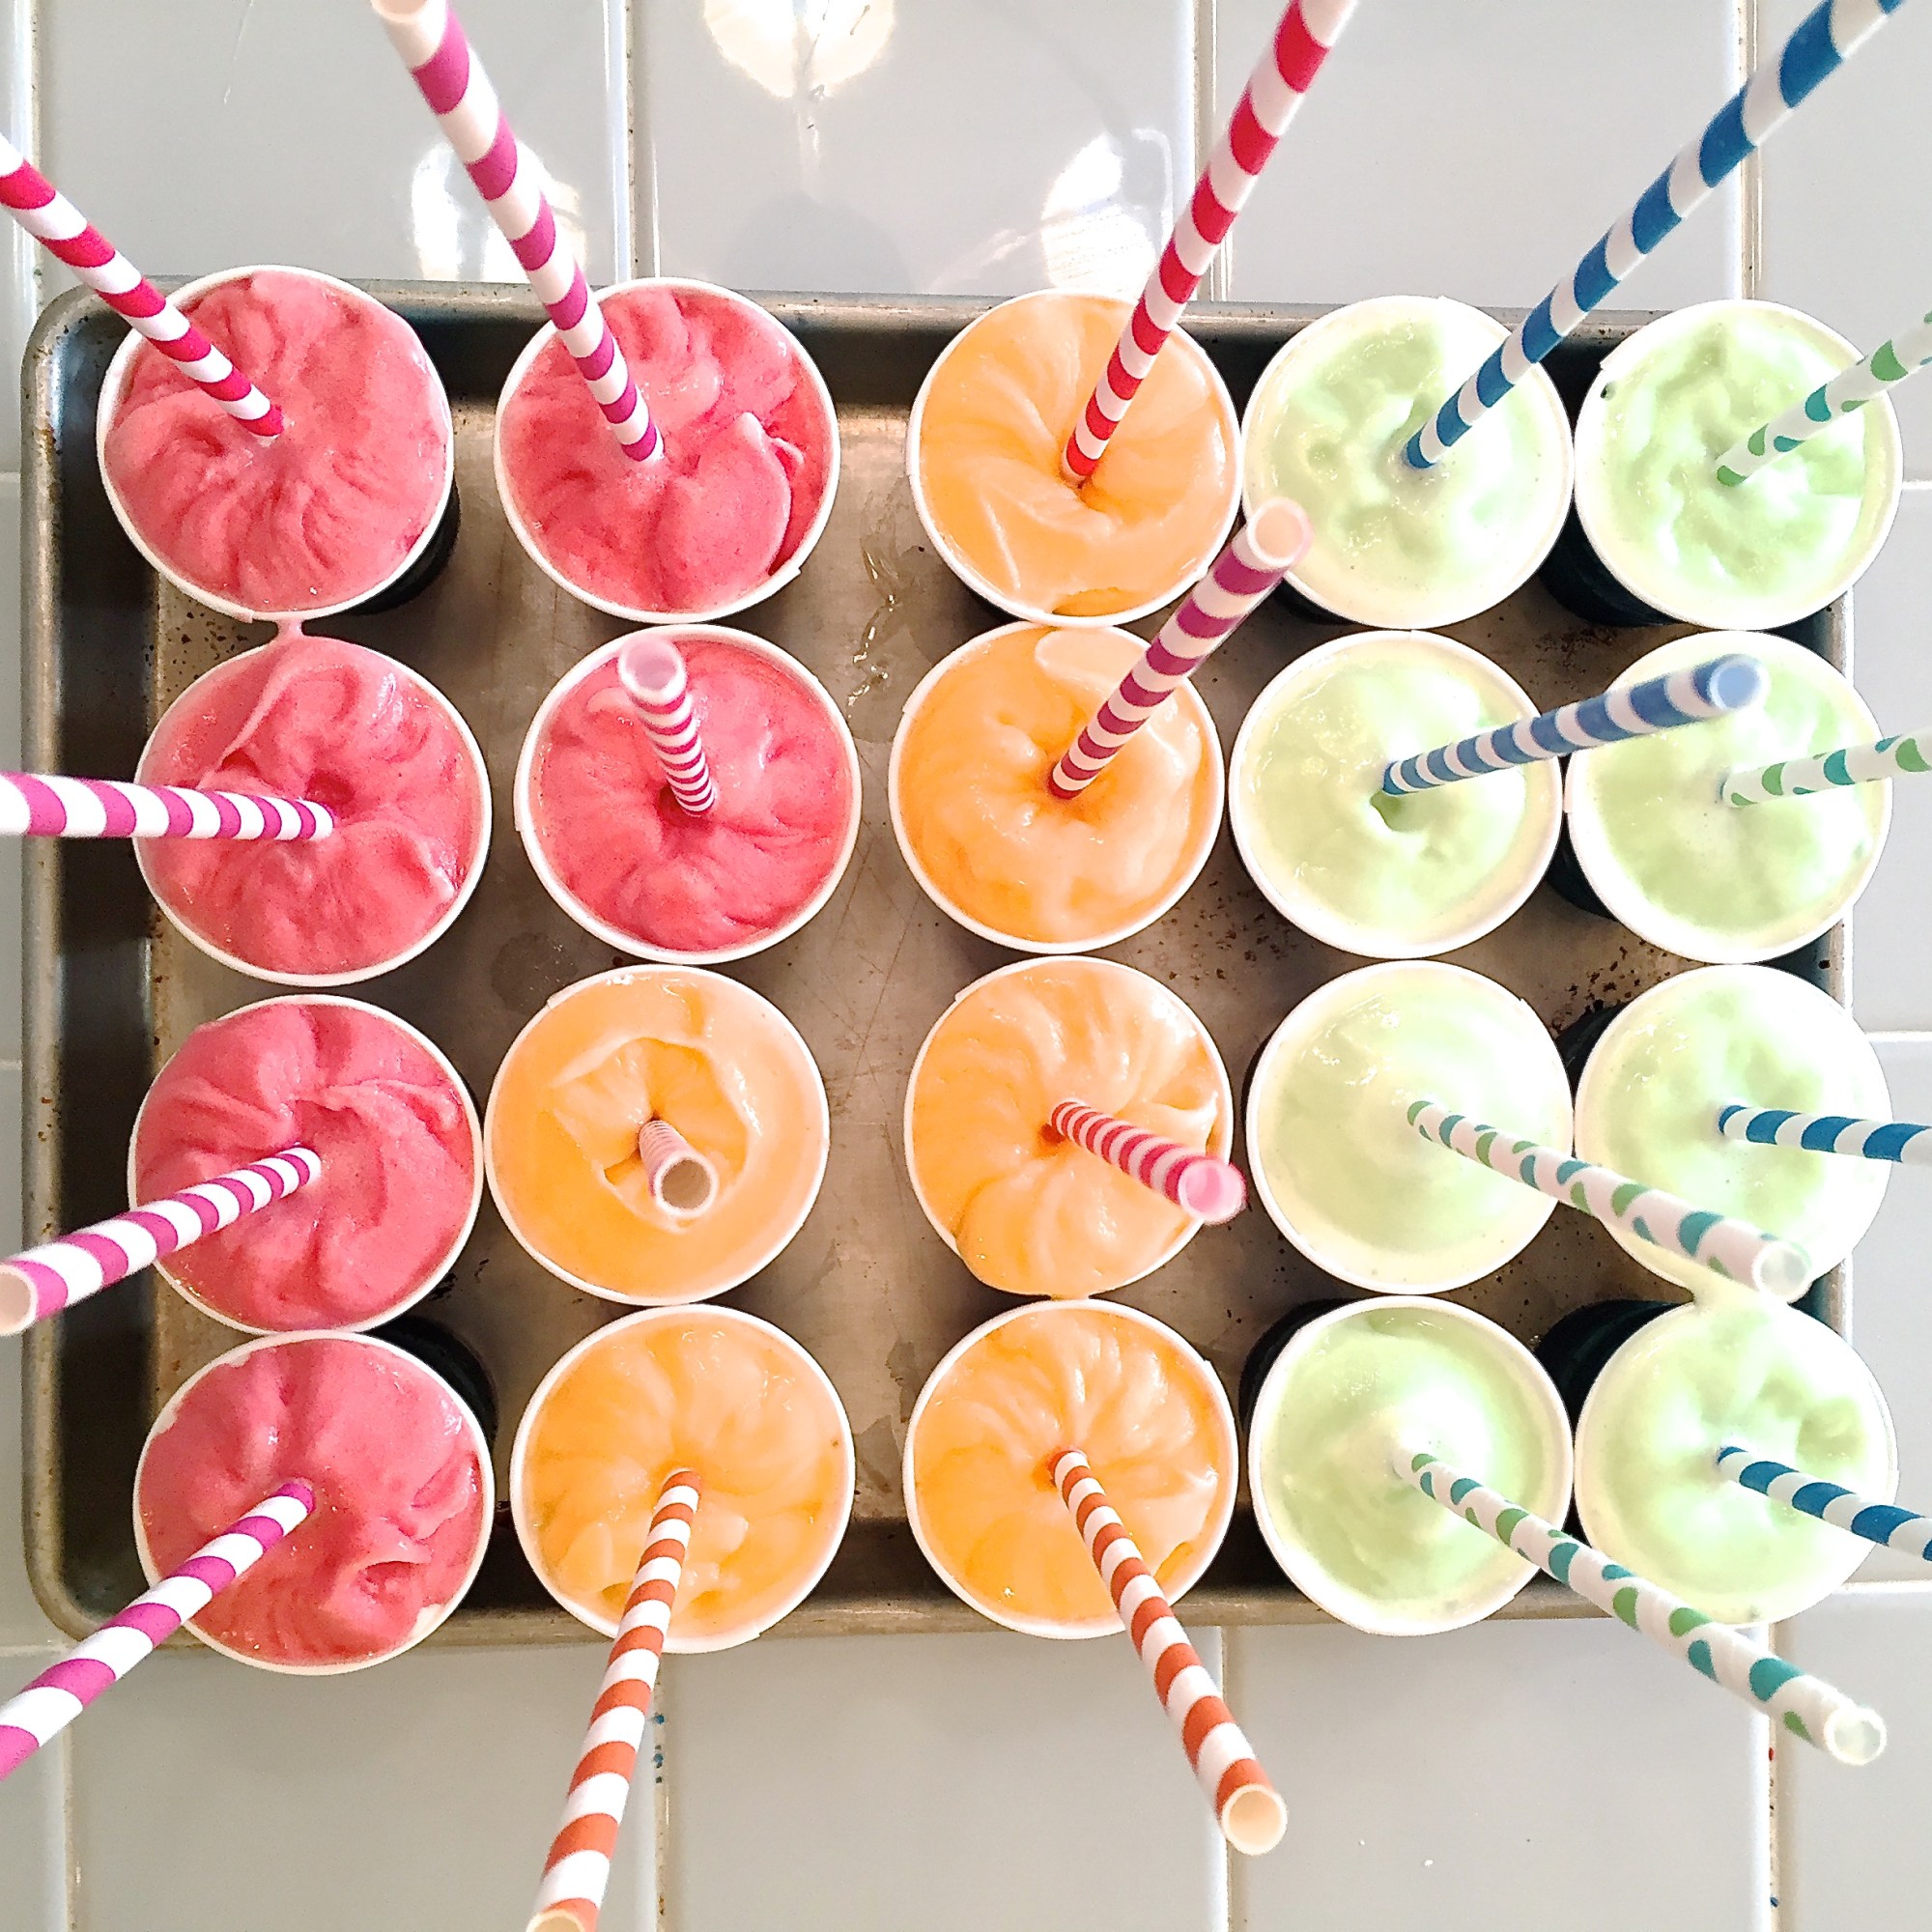
INGREDIENTS: (makes 20 pops)
A couple of notes before you start: This is an EASY recipe, but it takes some time and freezer space. You’ll need a day to assemble (freezing between layers) and one long overnight freeze before you can package them up. You’ll also need a freezer shelf with some height above it to allow the straws to fit while freezing.
- 18-24 oz of pineapple juice
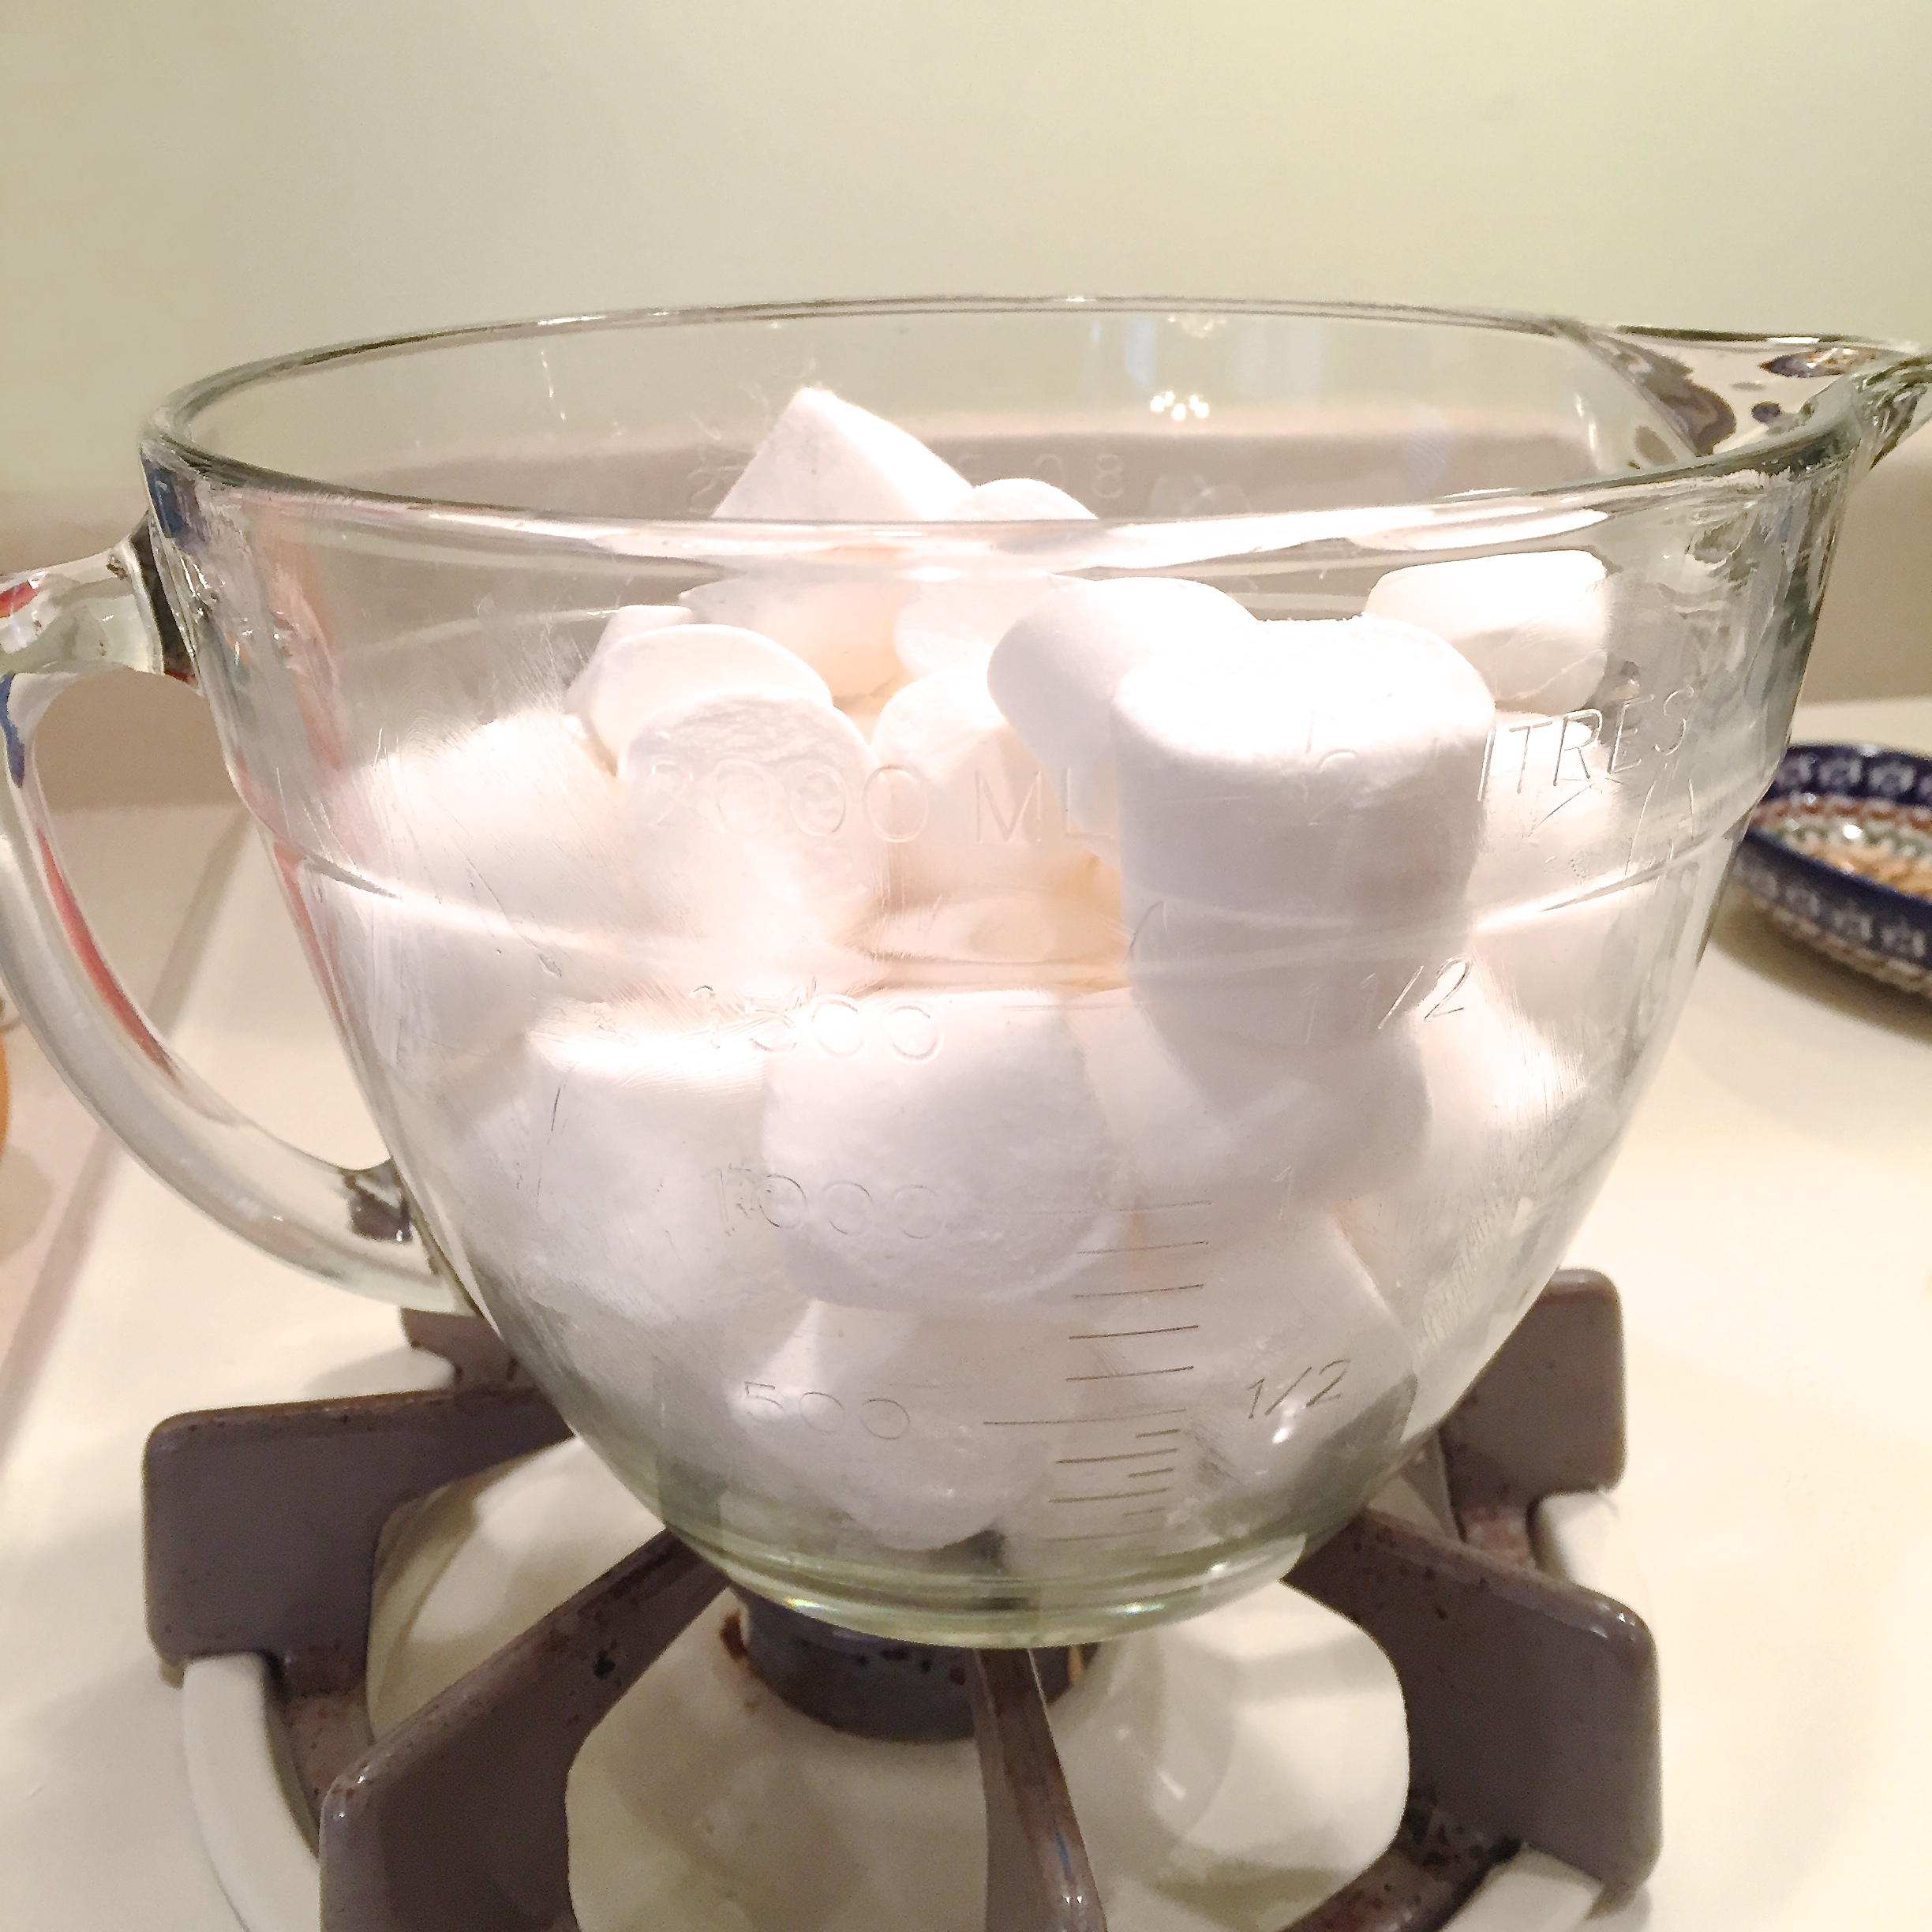
- ½ gallon vanilla ice cream
- 1 quart of fruit sherbet- any flavor (I used 2 flavors and only used 1/2 of each quart)
- 20 mini cans of Ginger ale (or if you are giving a family gift, a two liter)
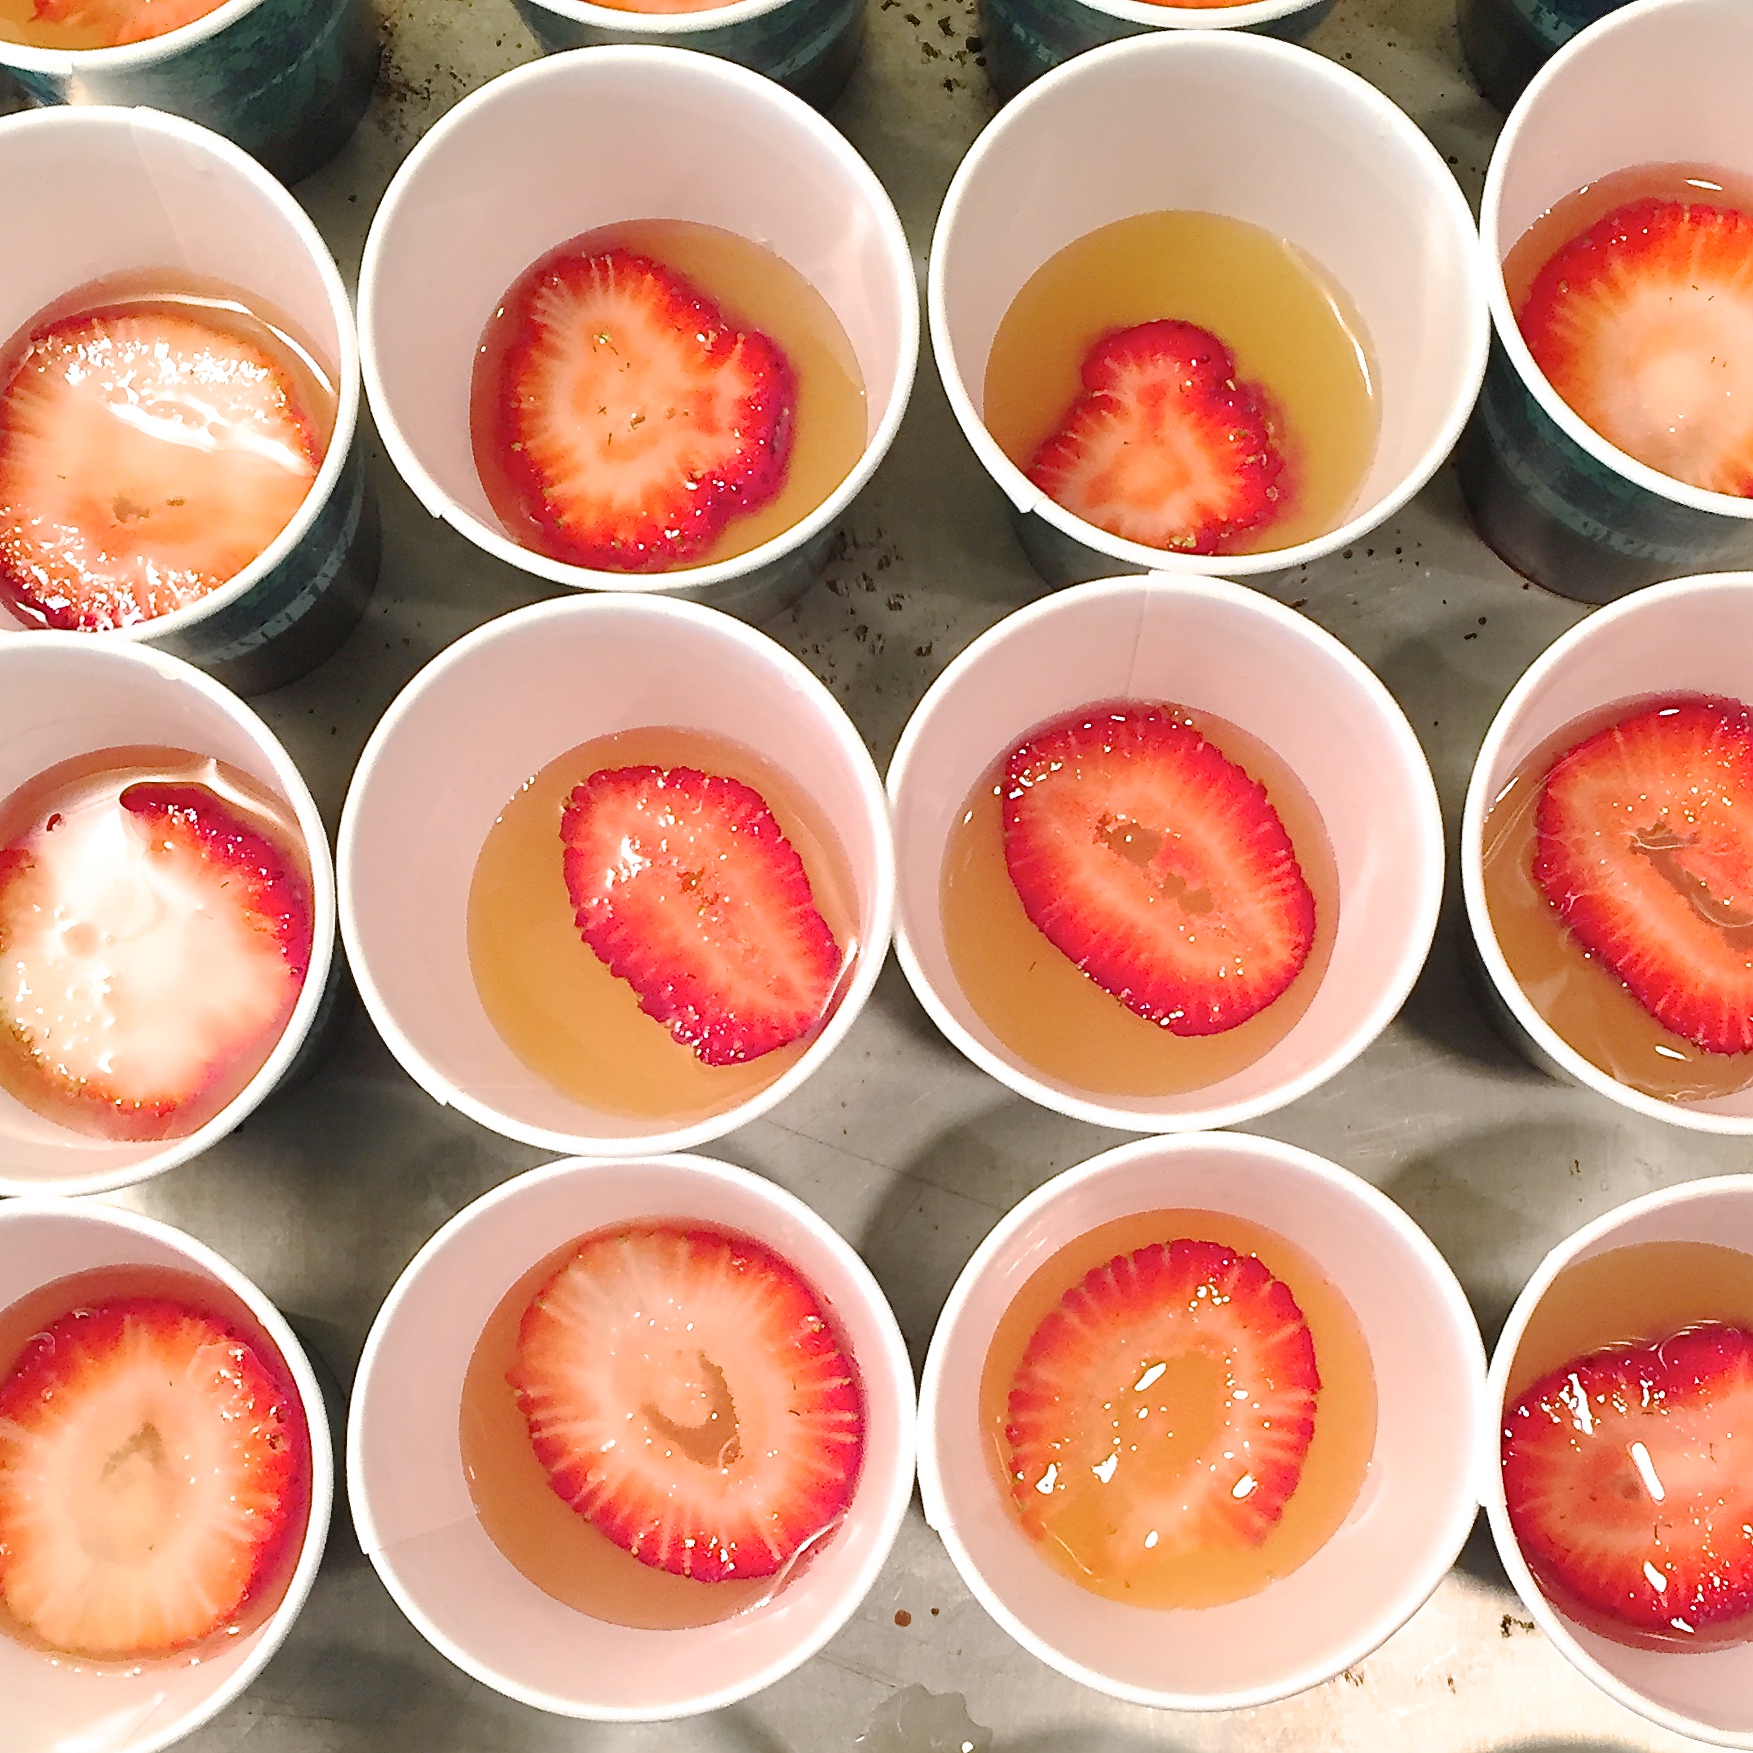
- About 40 raspberries, or 4-5 sliced strawberries.
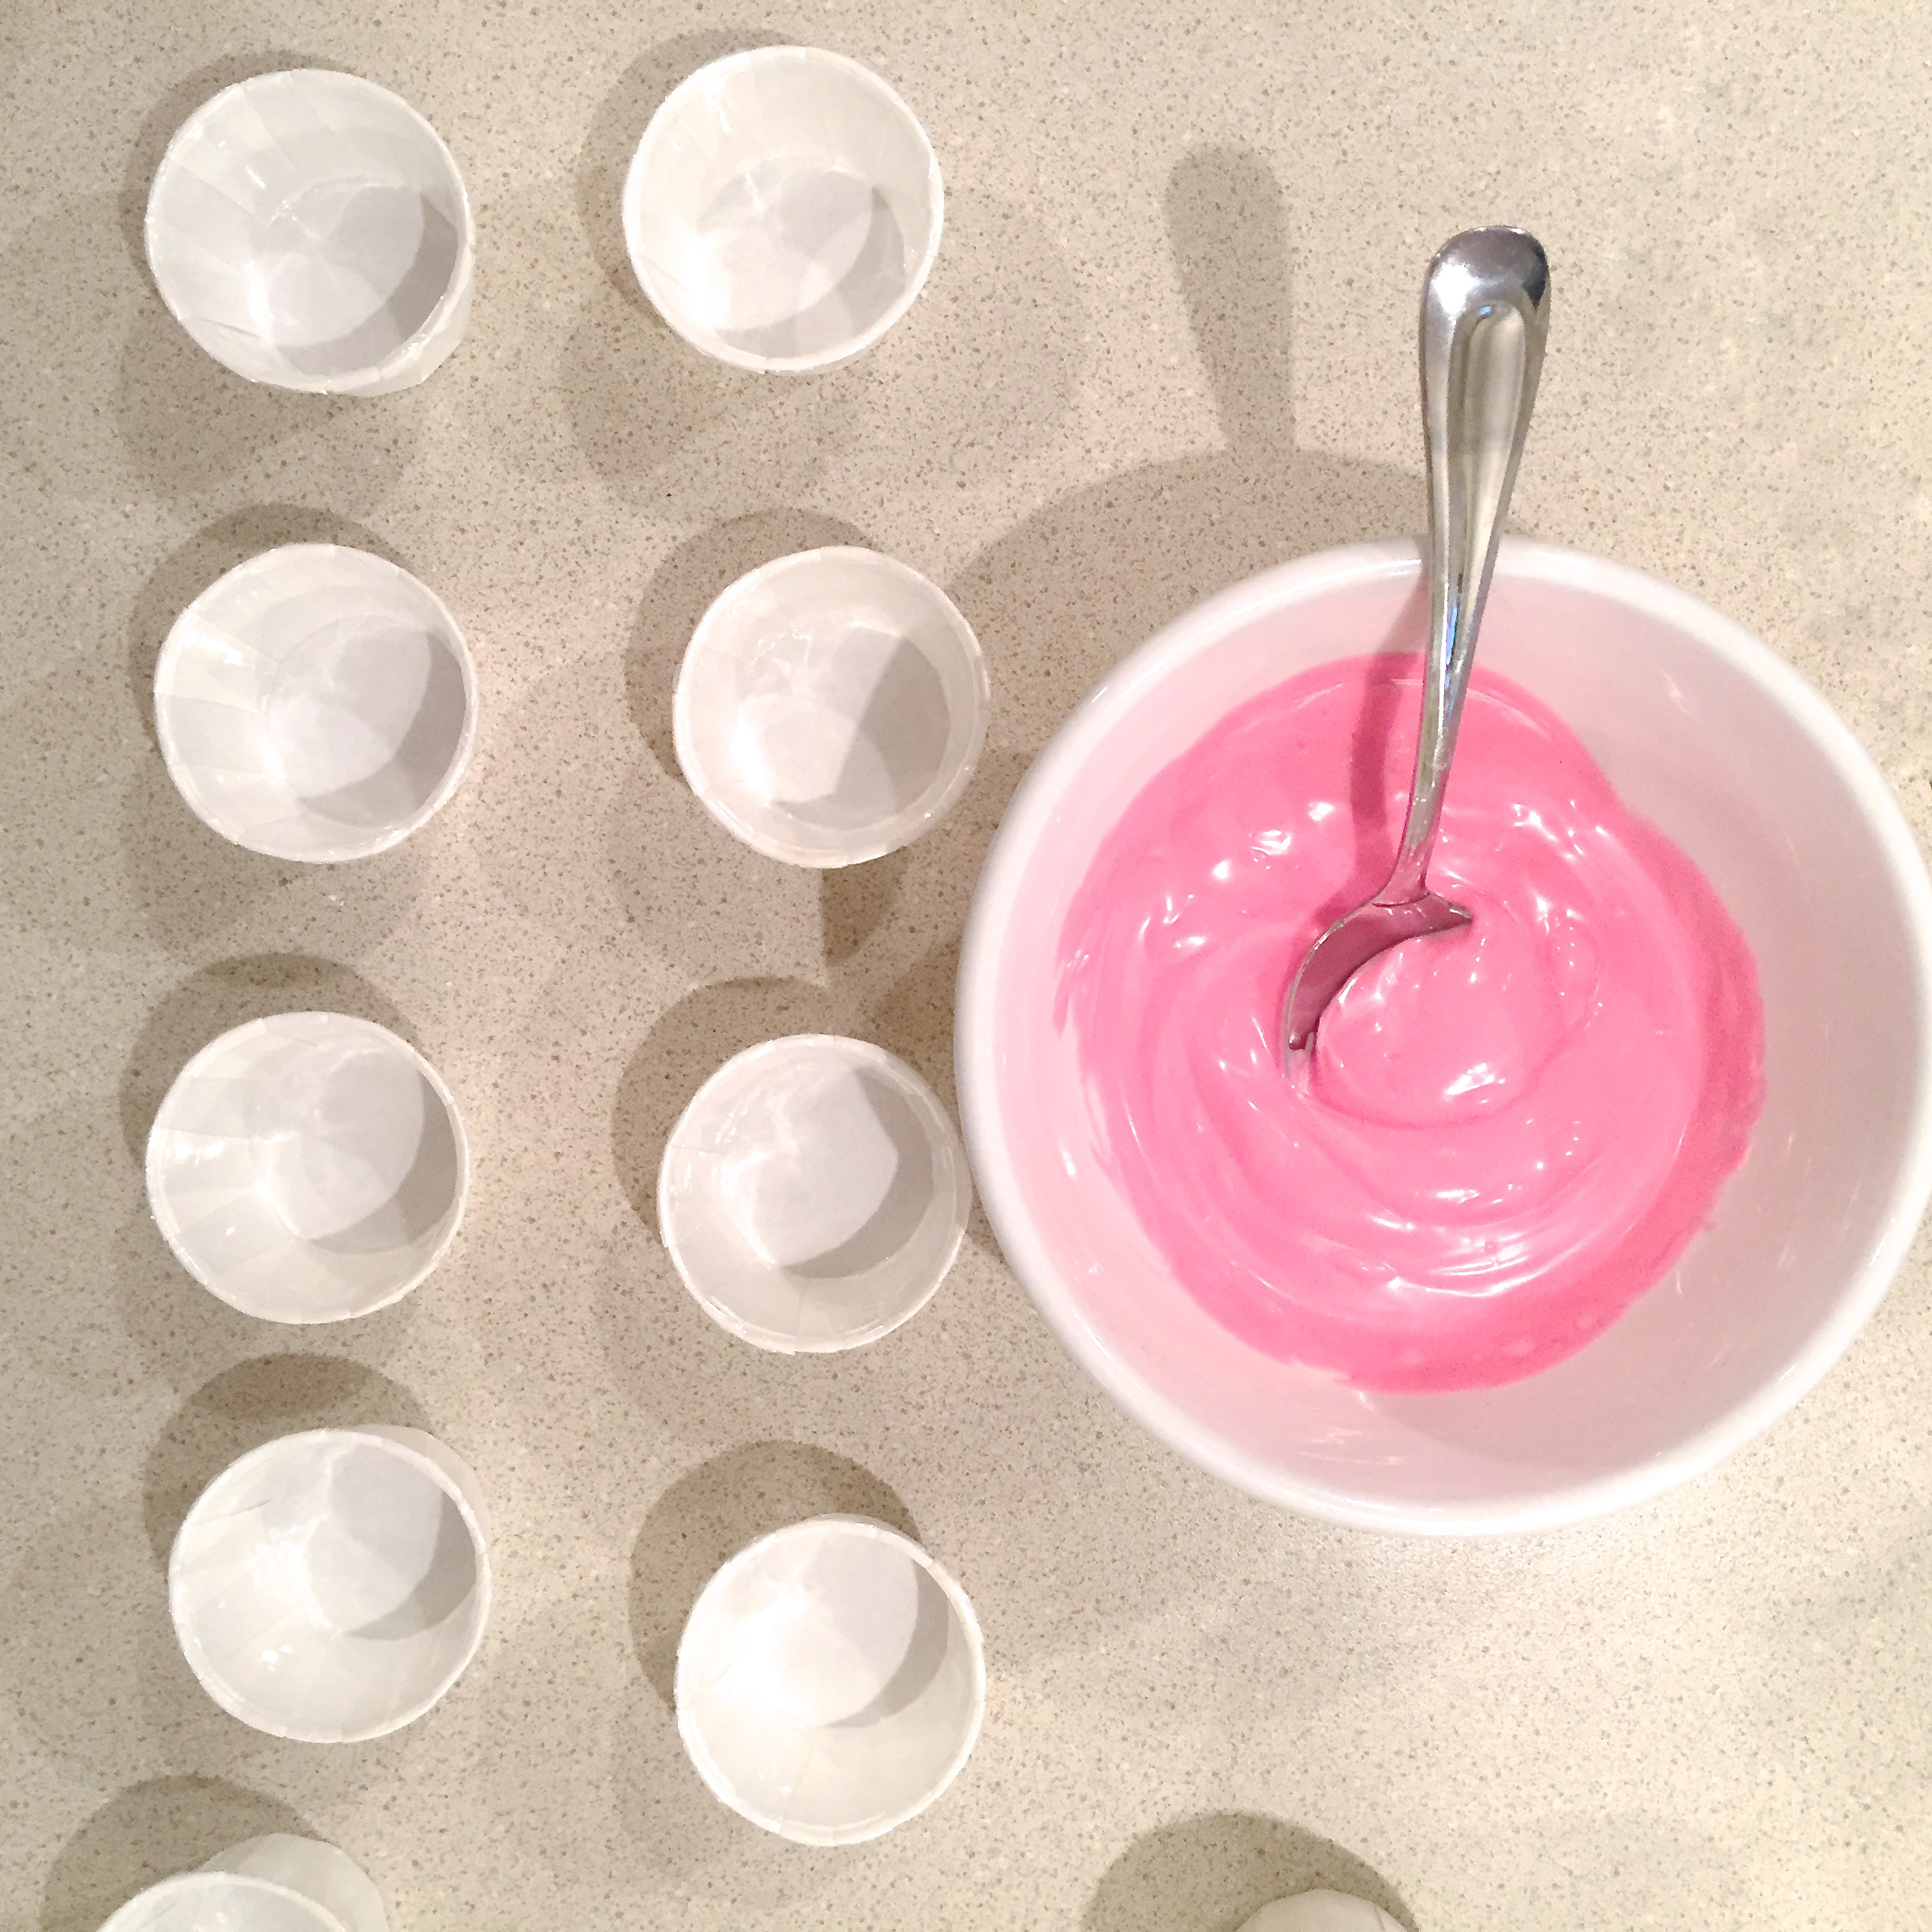
- 20 (3 oz) paper cups and 20 straws
- small cello bags and ribbon for tying them up
DIRECTIONS:
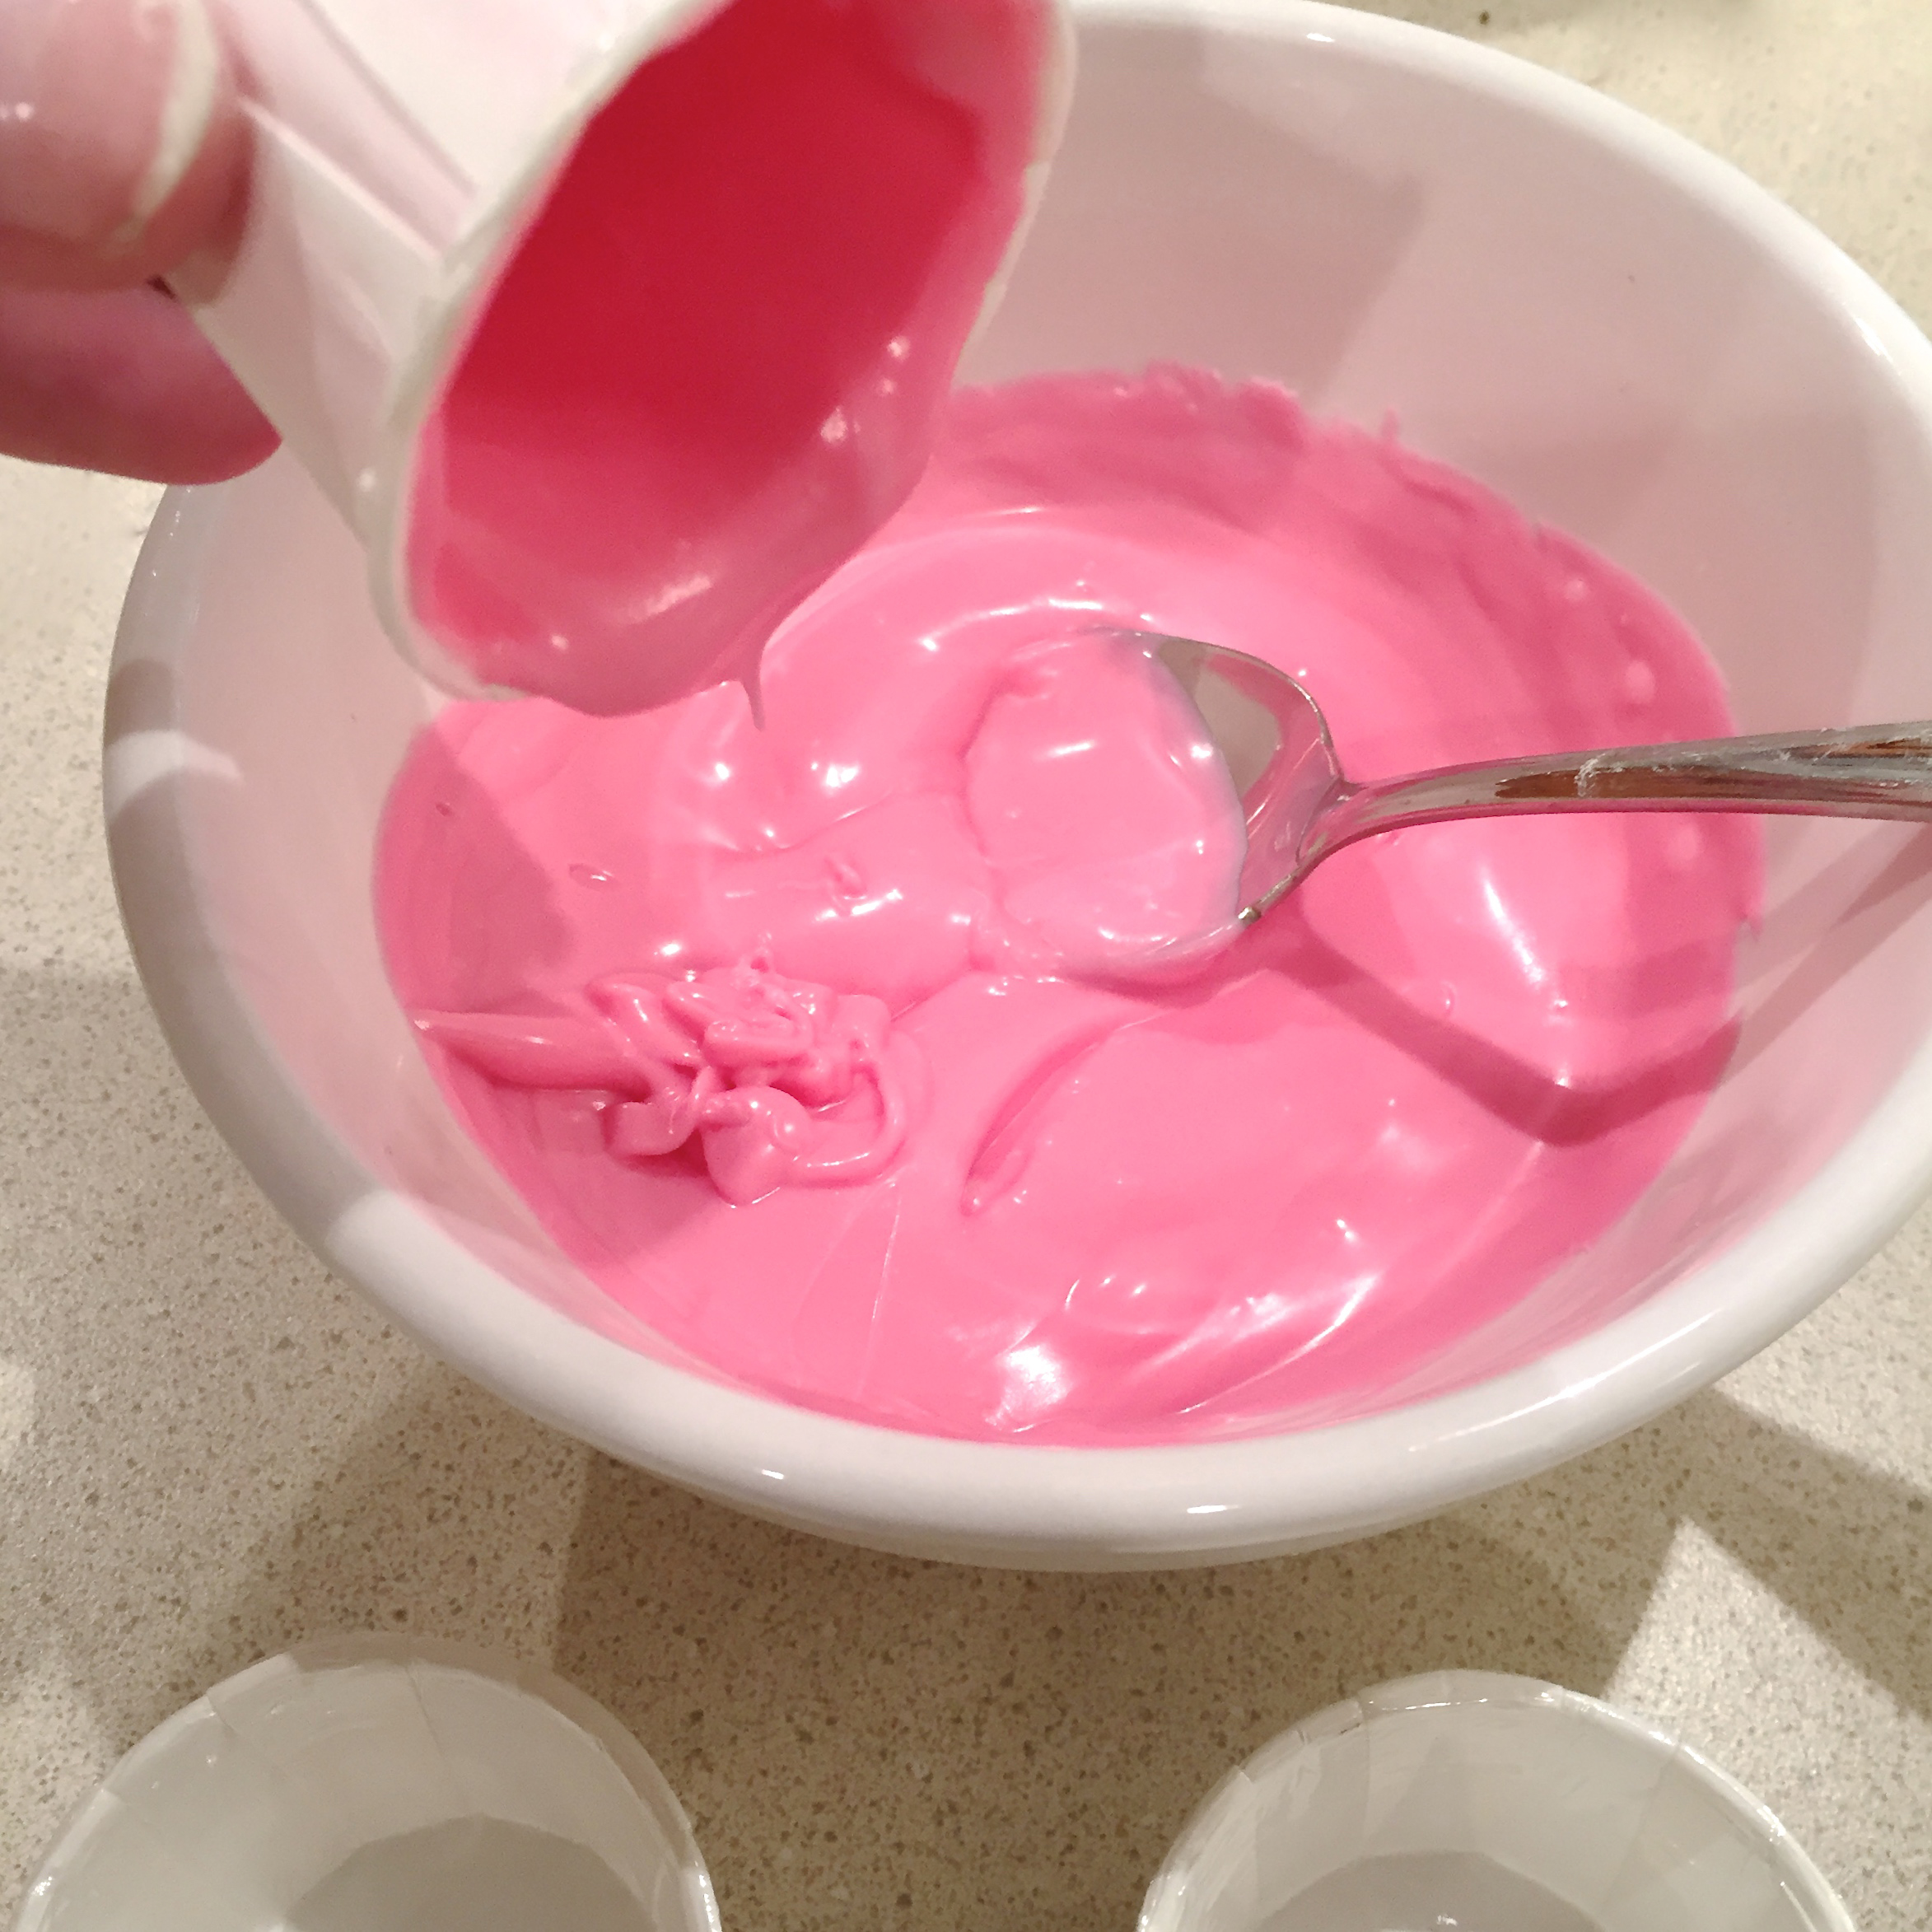
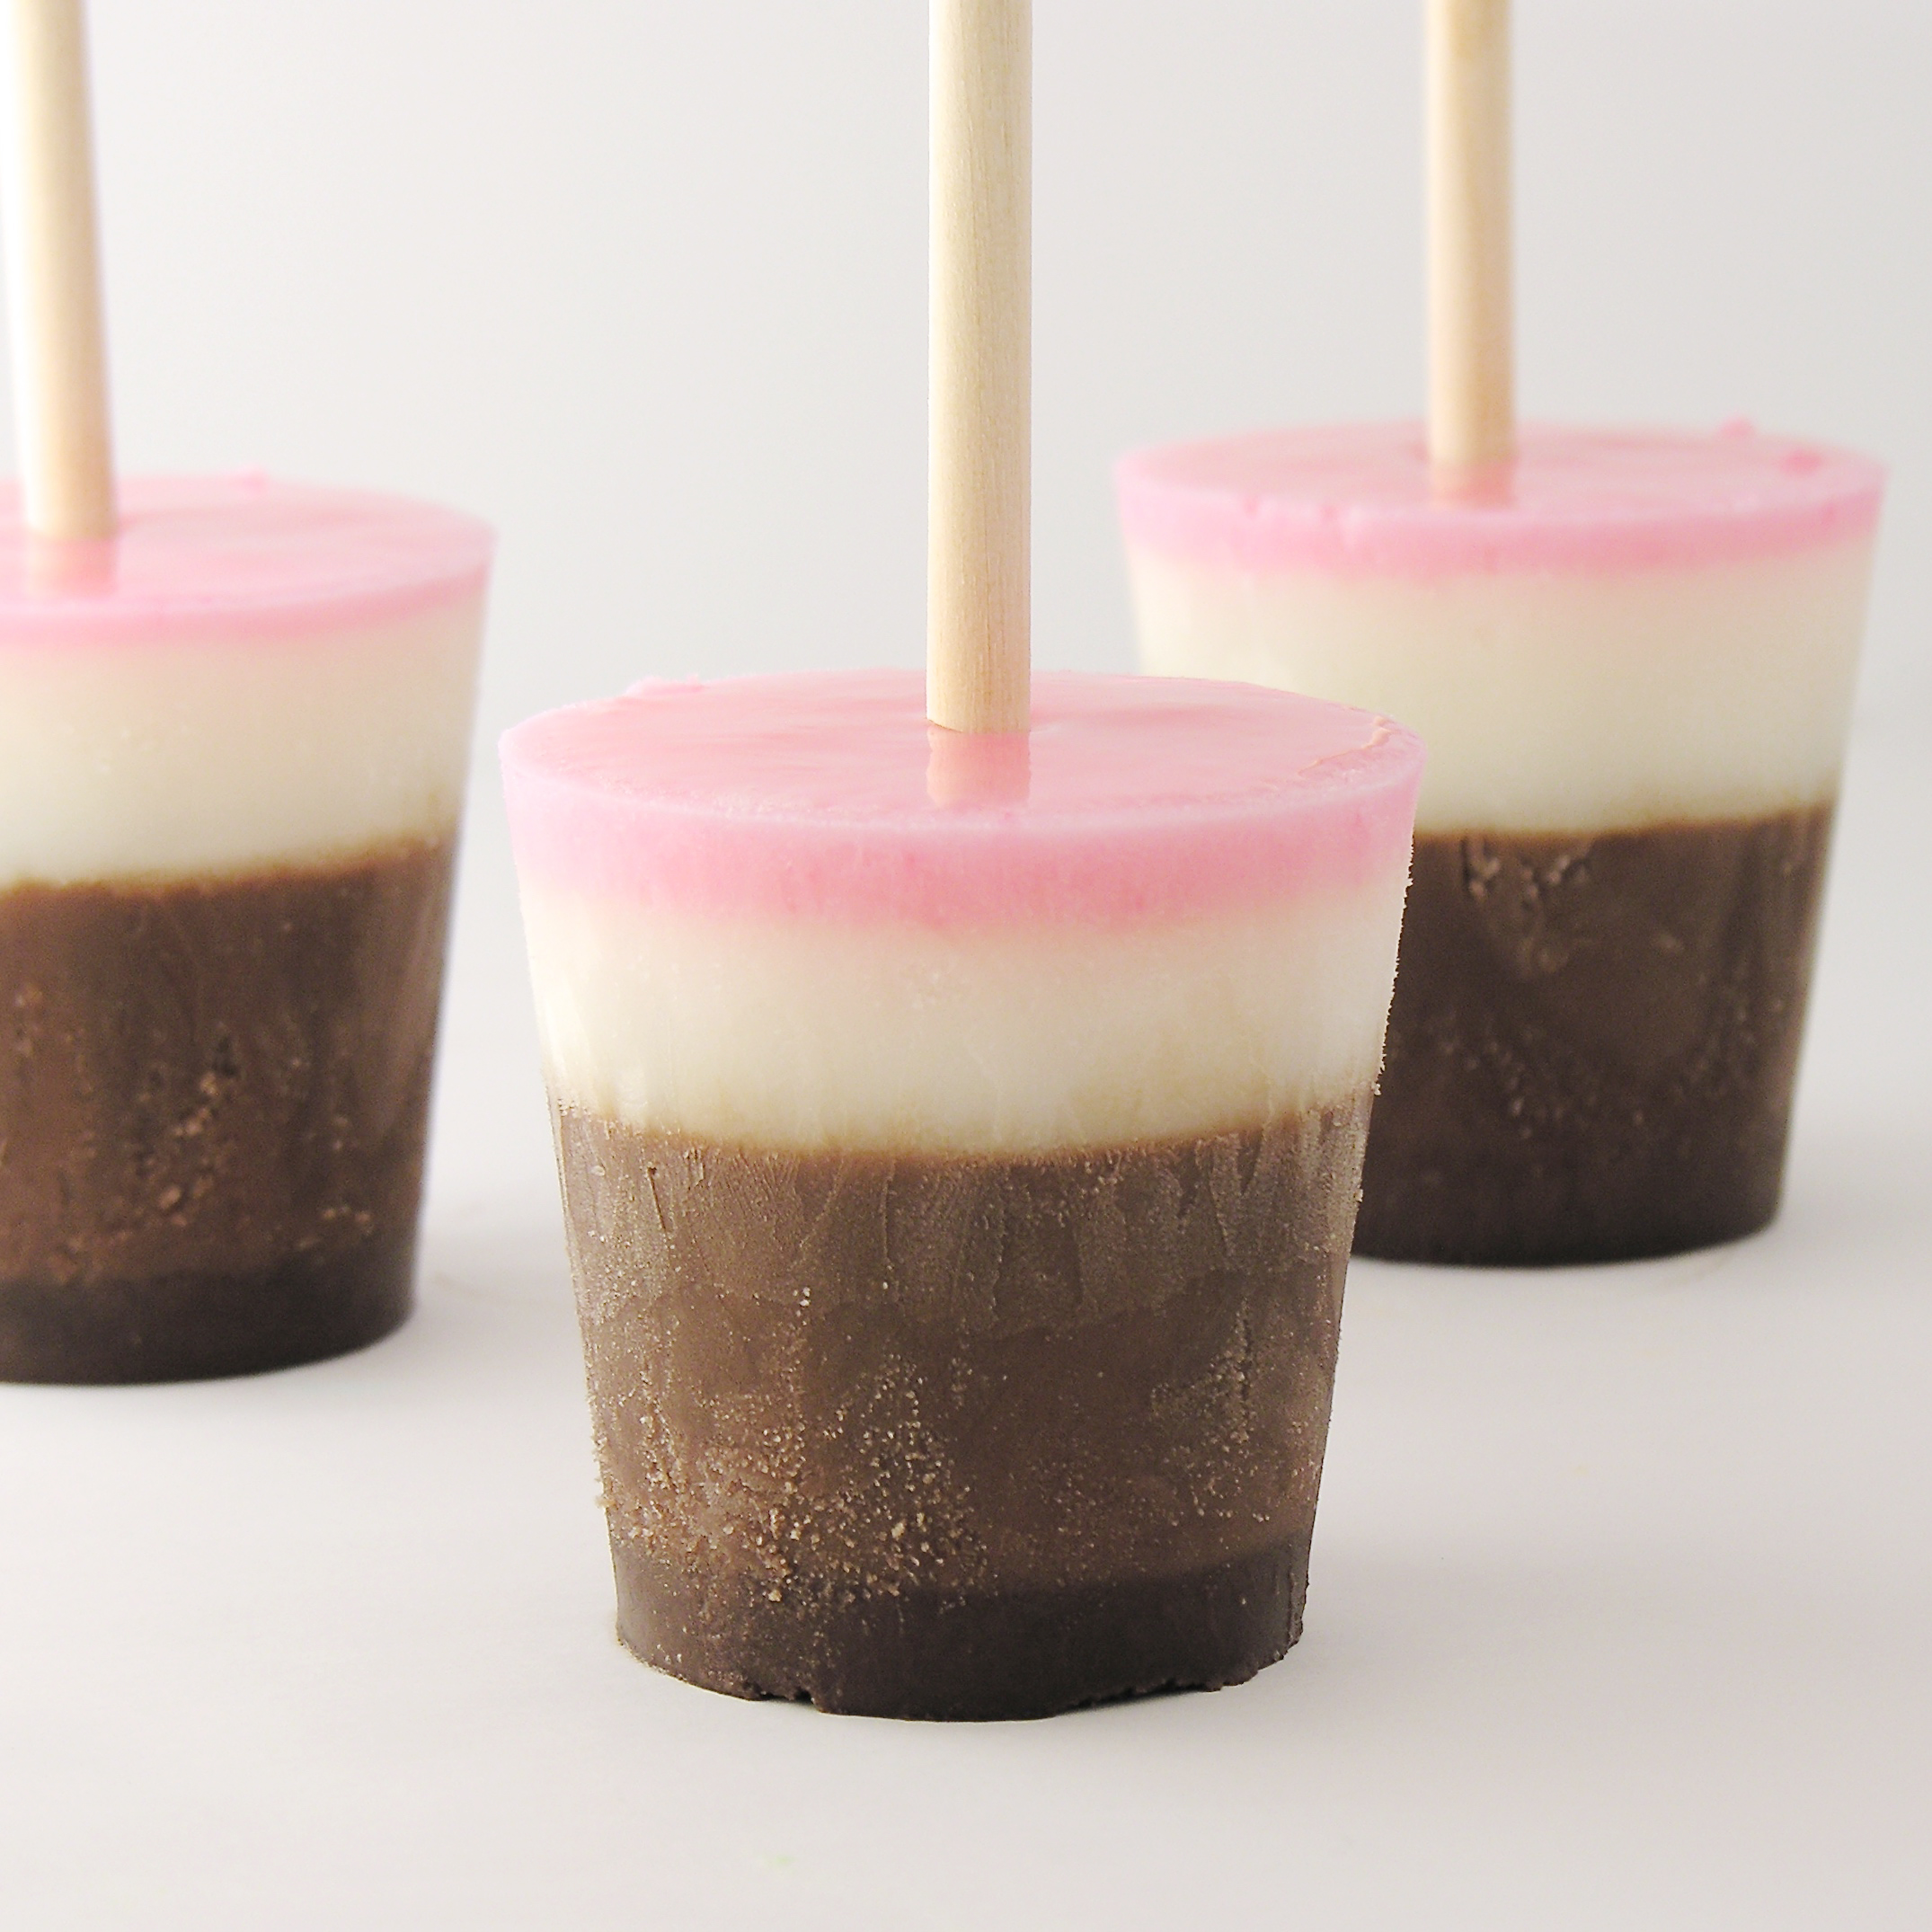
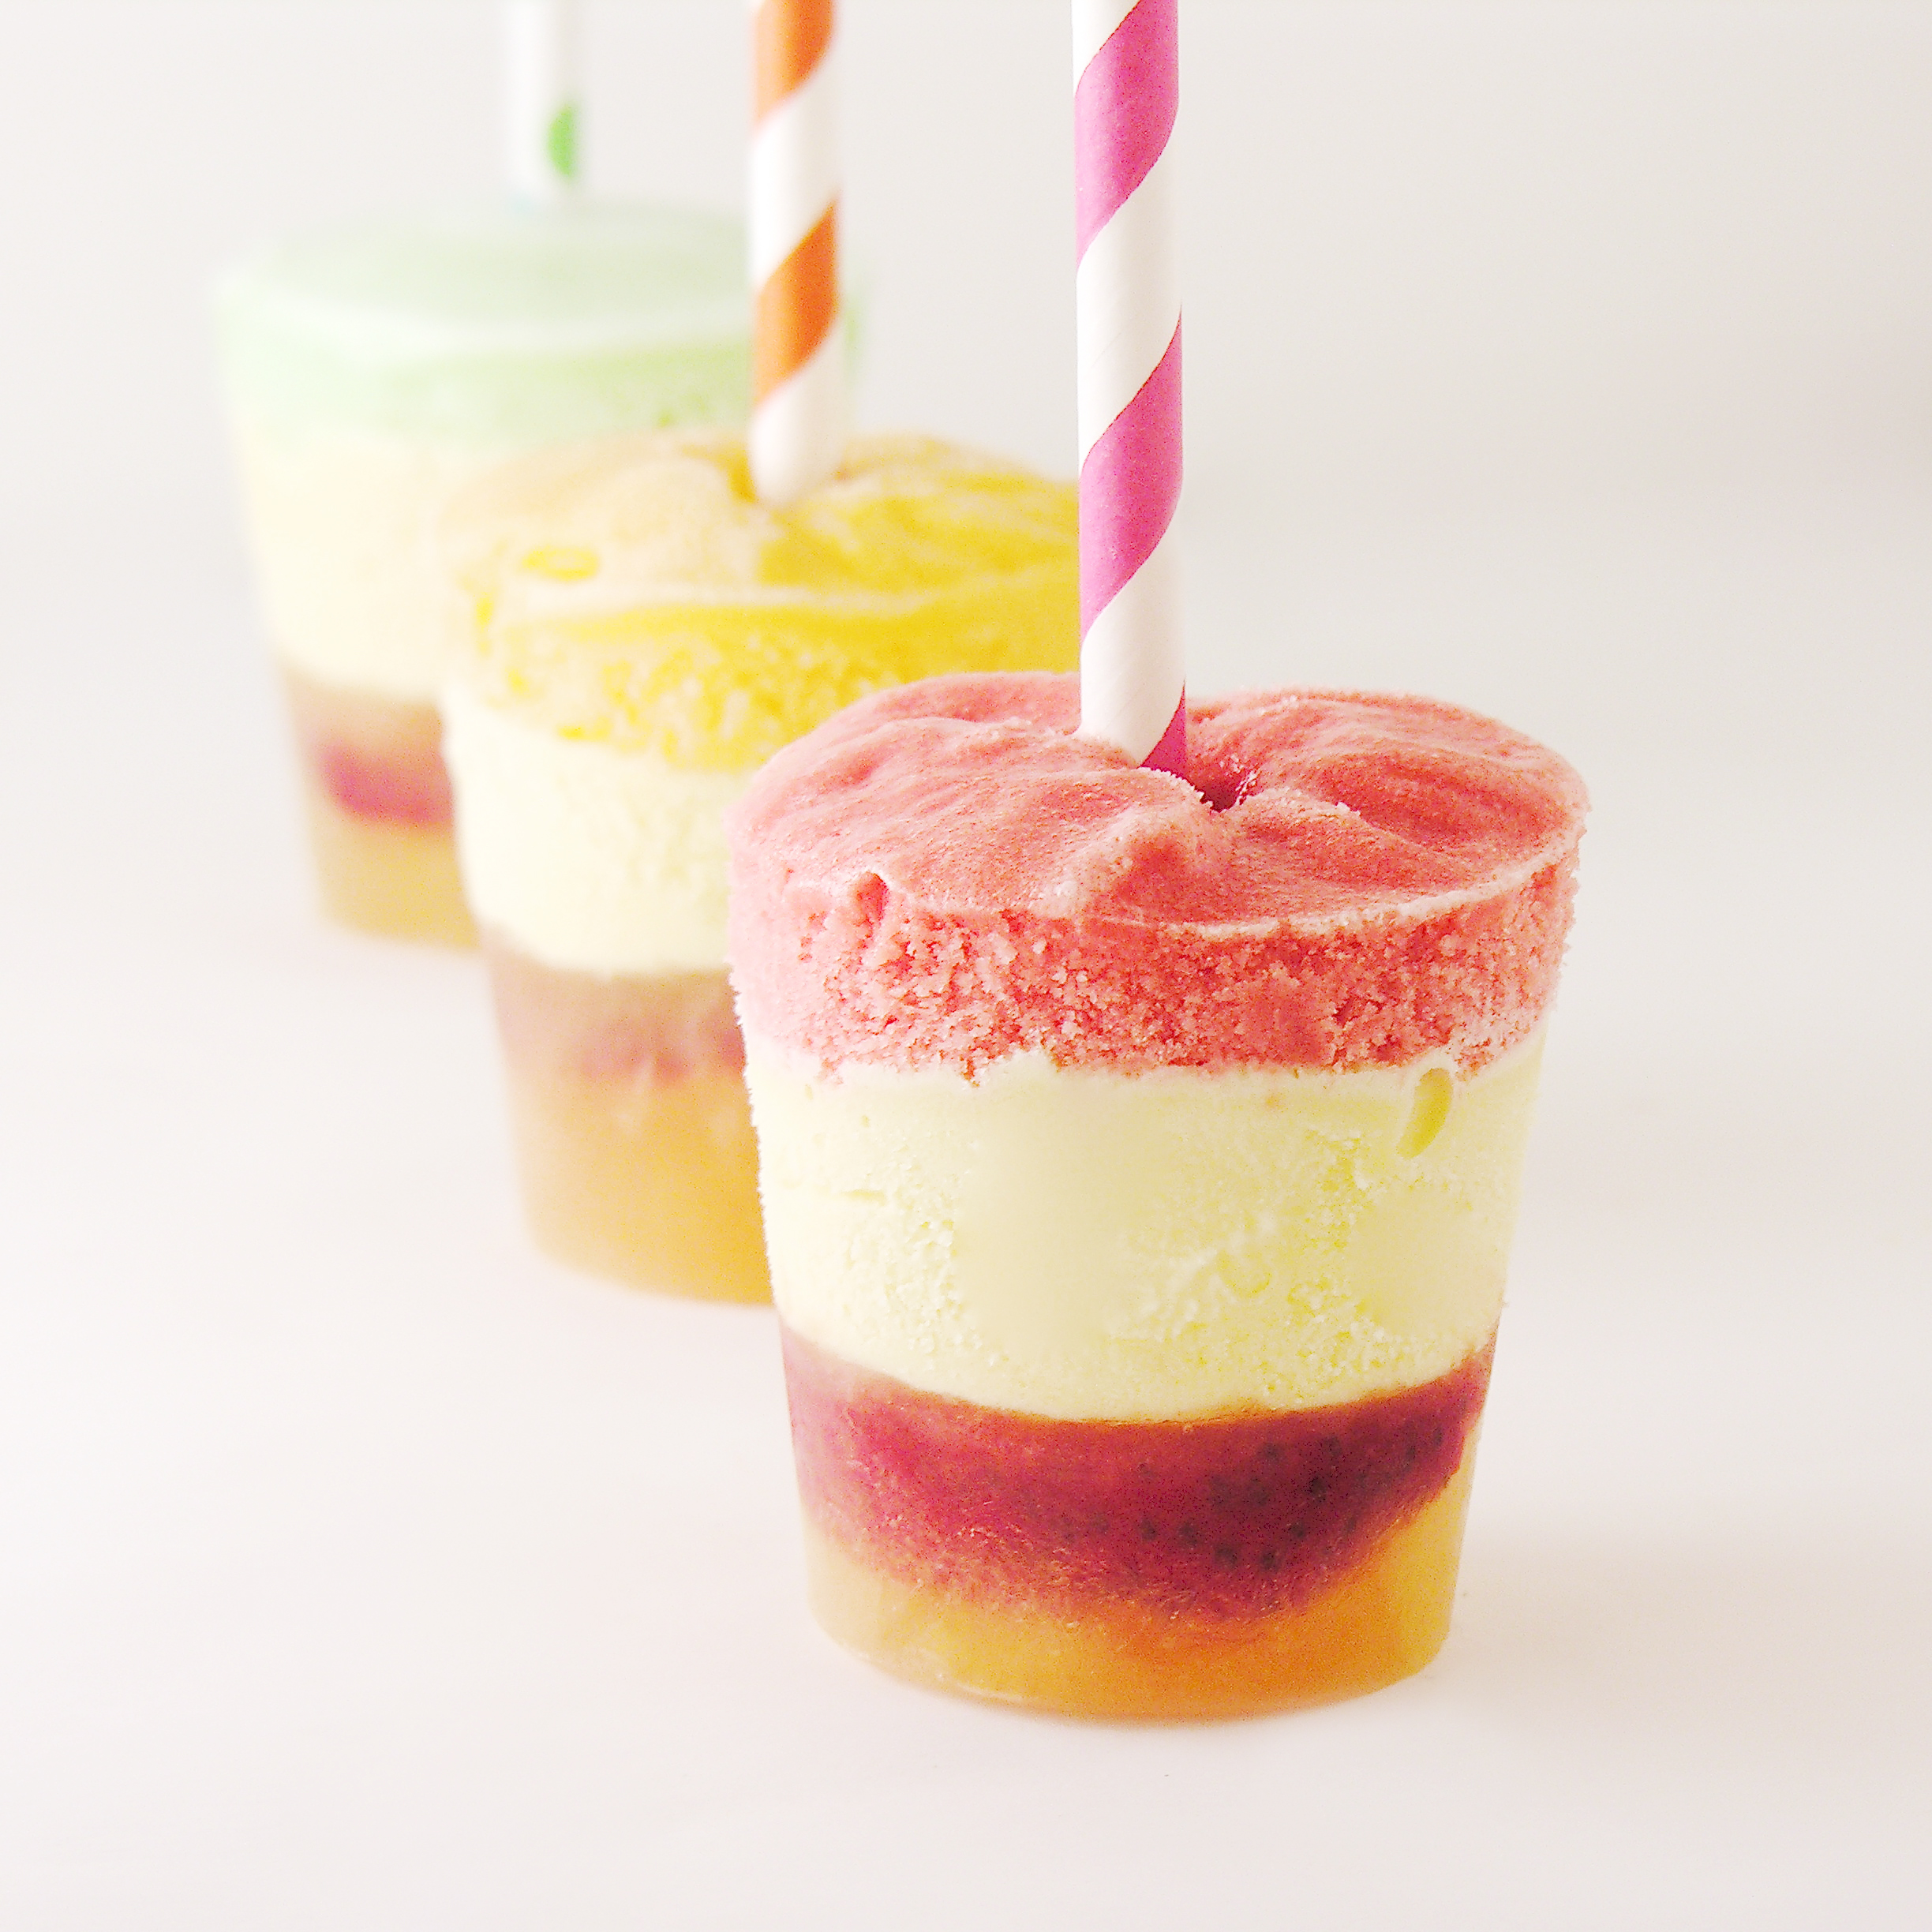
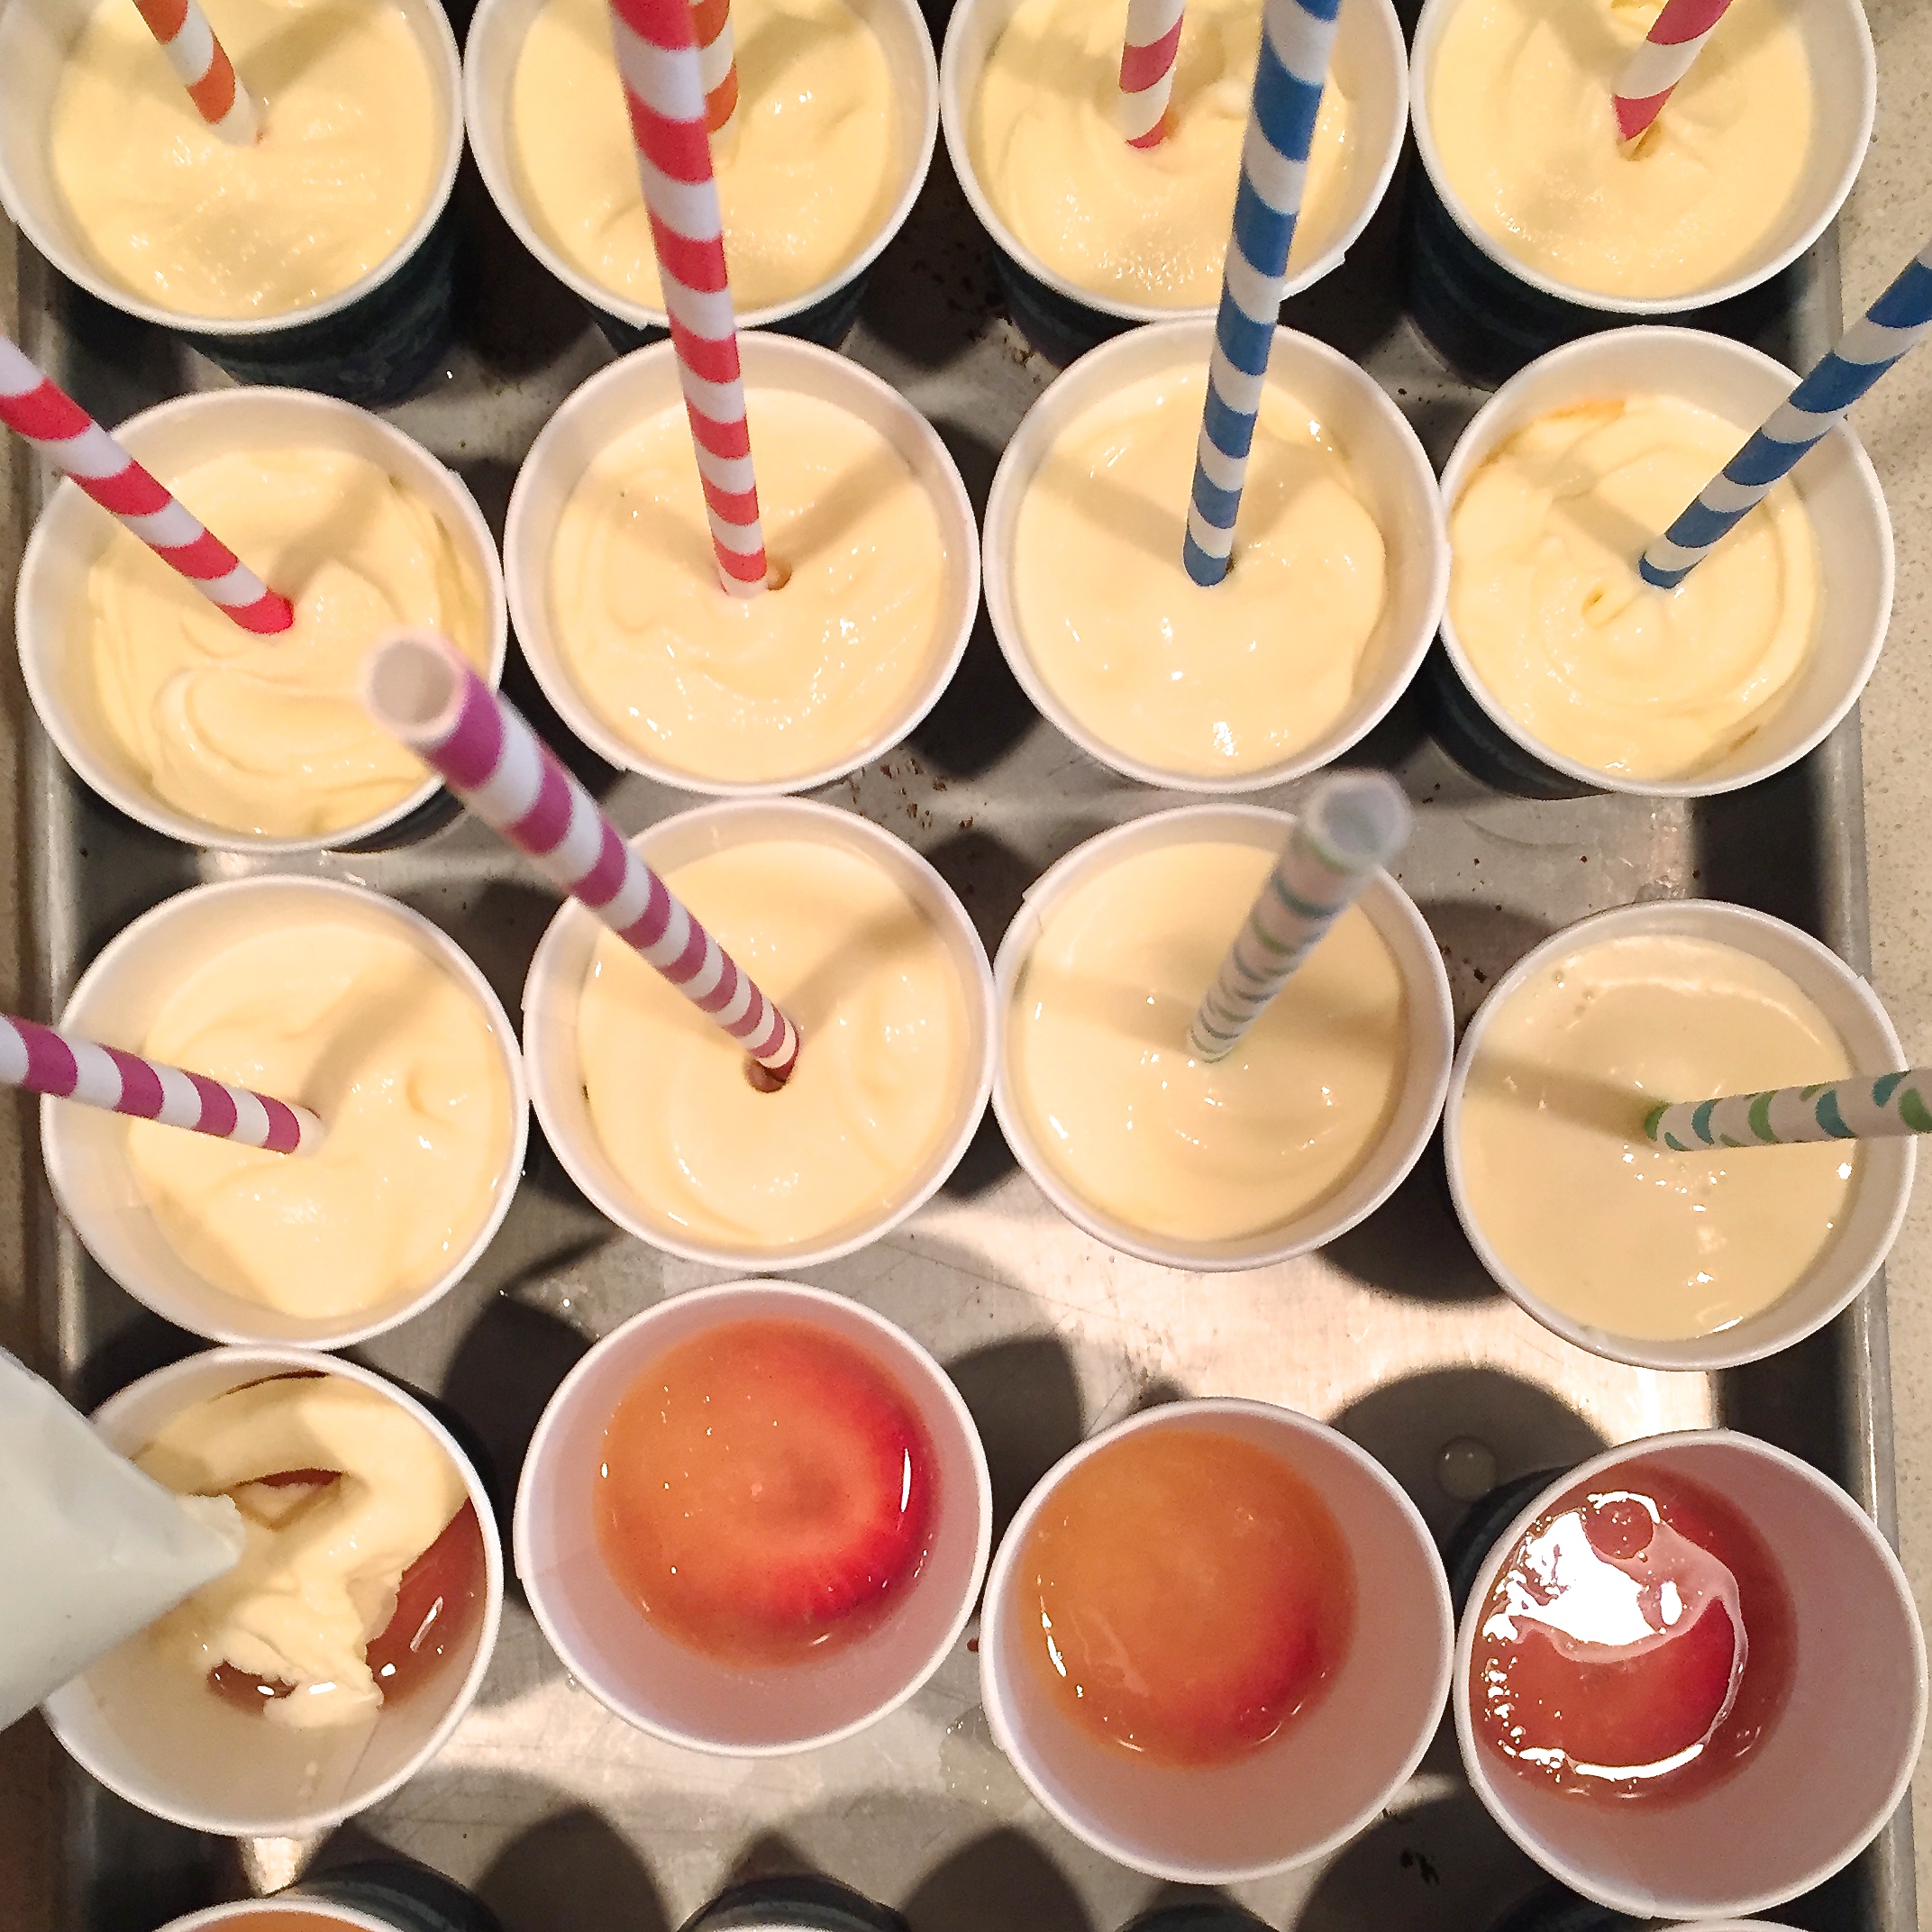
- In 20 small (3 oz) paper cups, measure about 1/8 cup of pineapple juice and add two raspberries or a slice of strawberry.
- Freeze until hard (4-6 hours)
Note: I did this on a small cookie sheet so that I could pop them all into and out of the freezer at once.
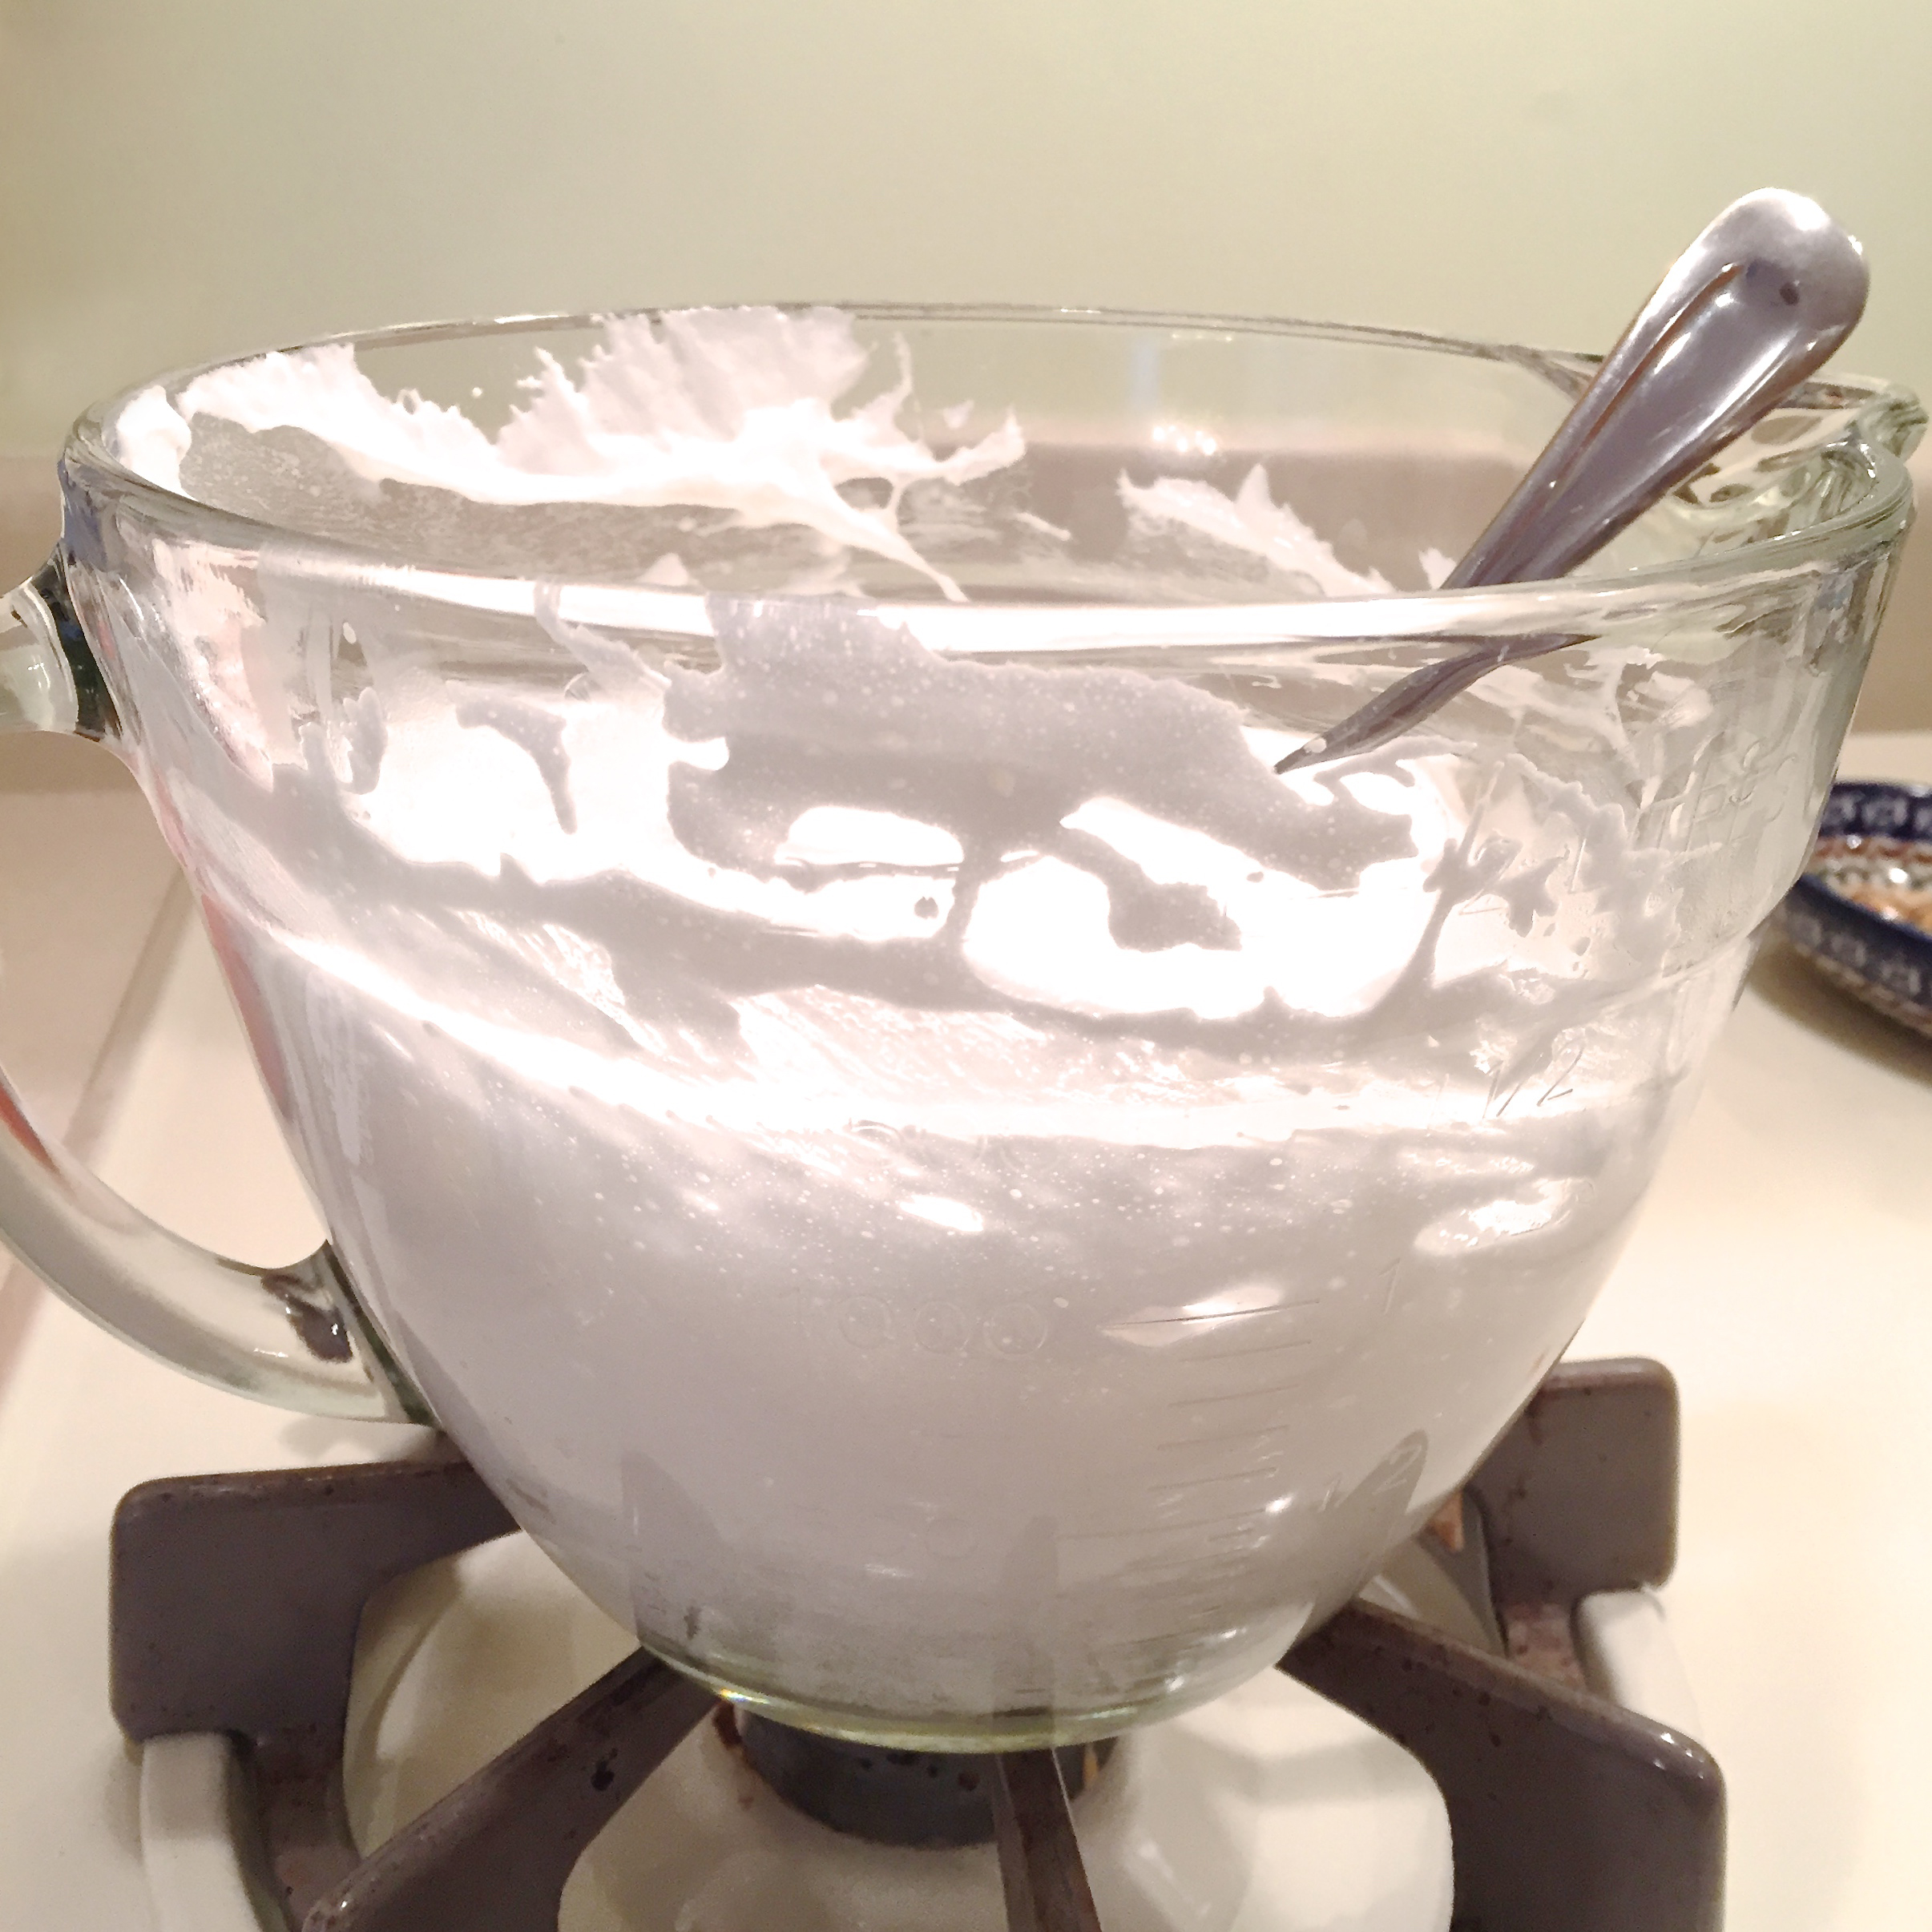
- Scoop ice cream into a large zip top bag and microwave in 10 second increments until soft-serve consistency. Mix bag by squeezing. (Tip: wear gloves to keep your hands warm!)
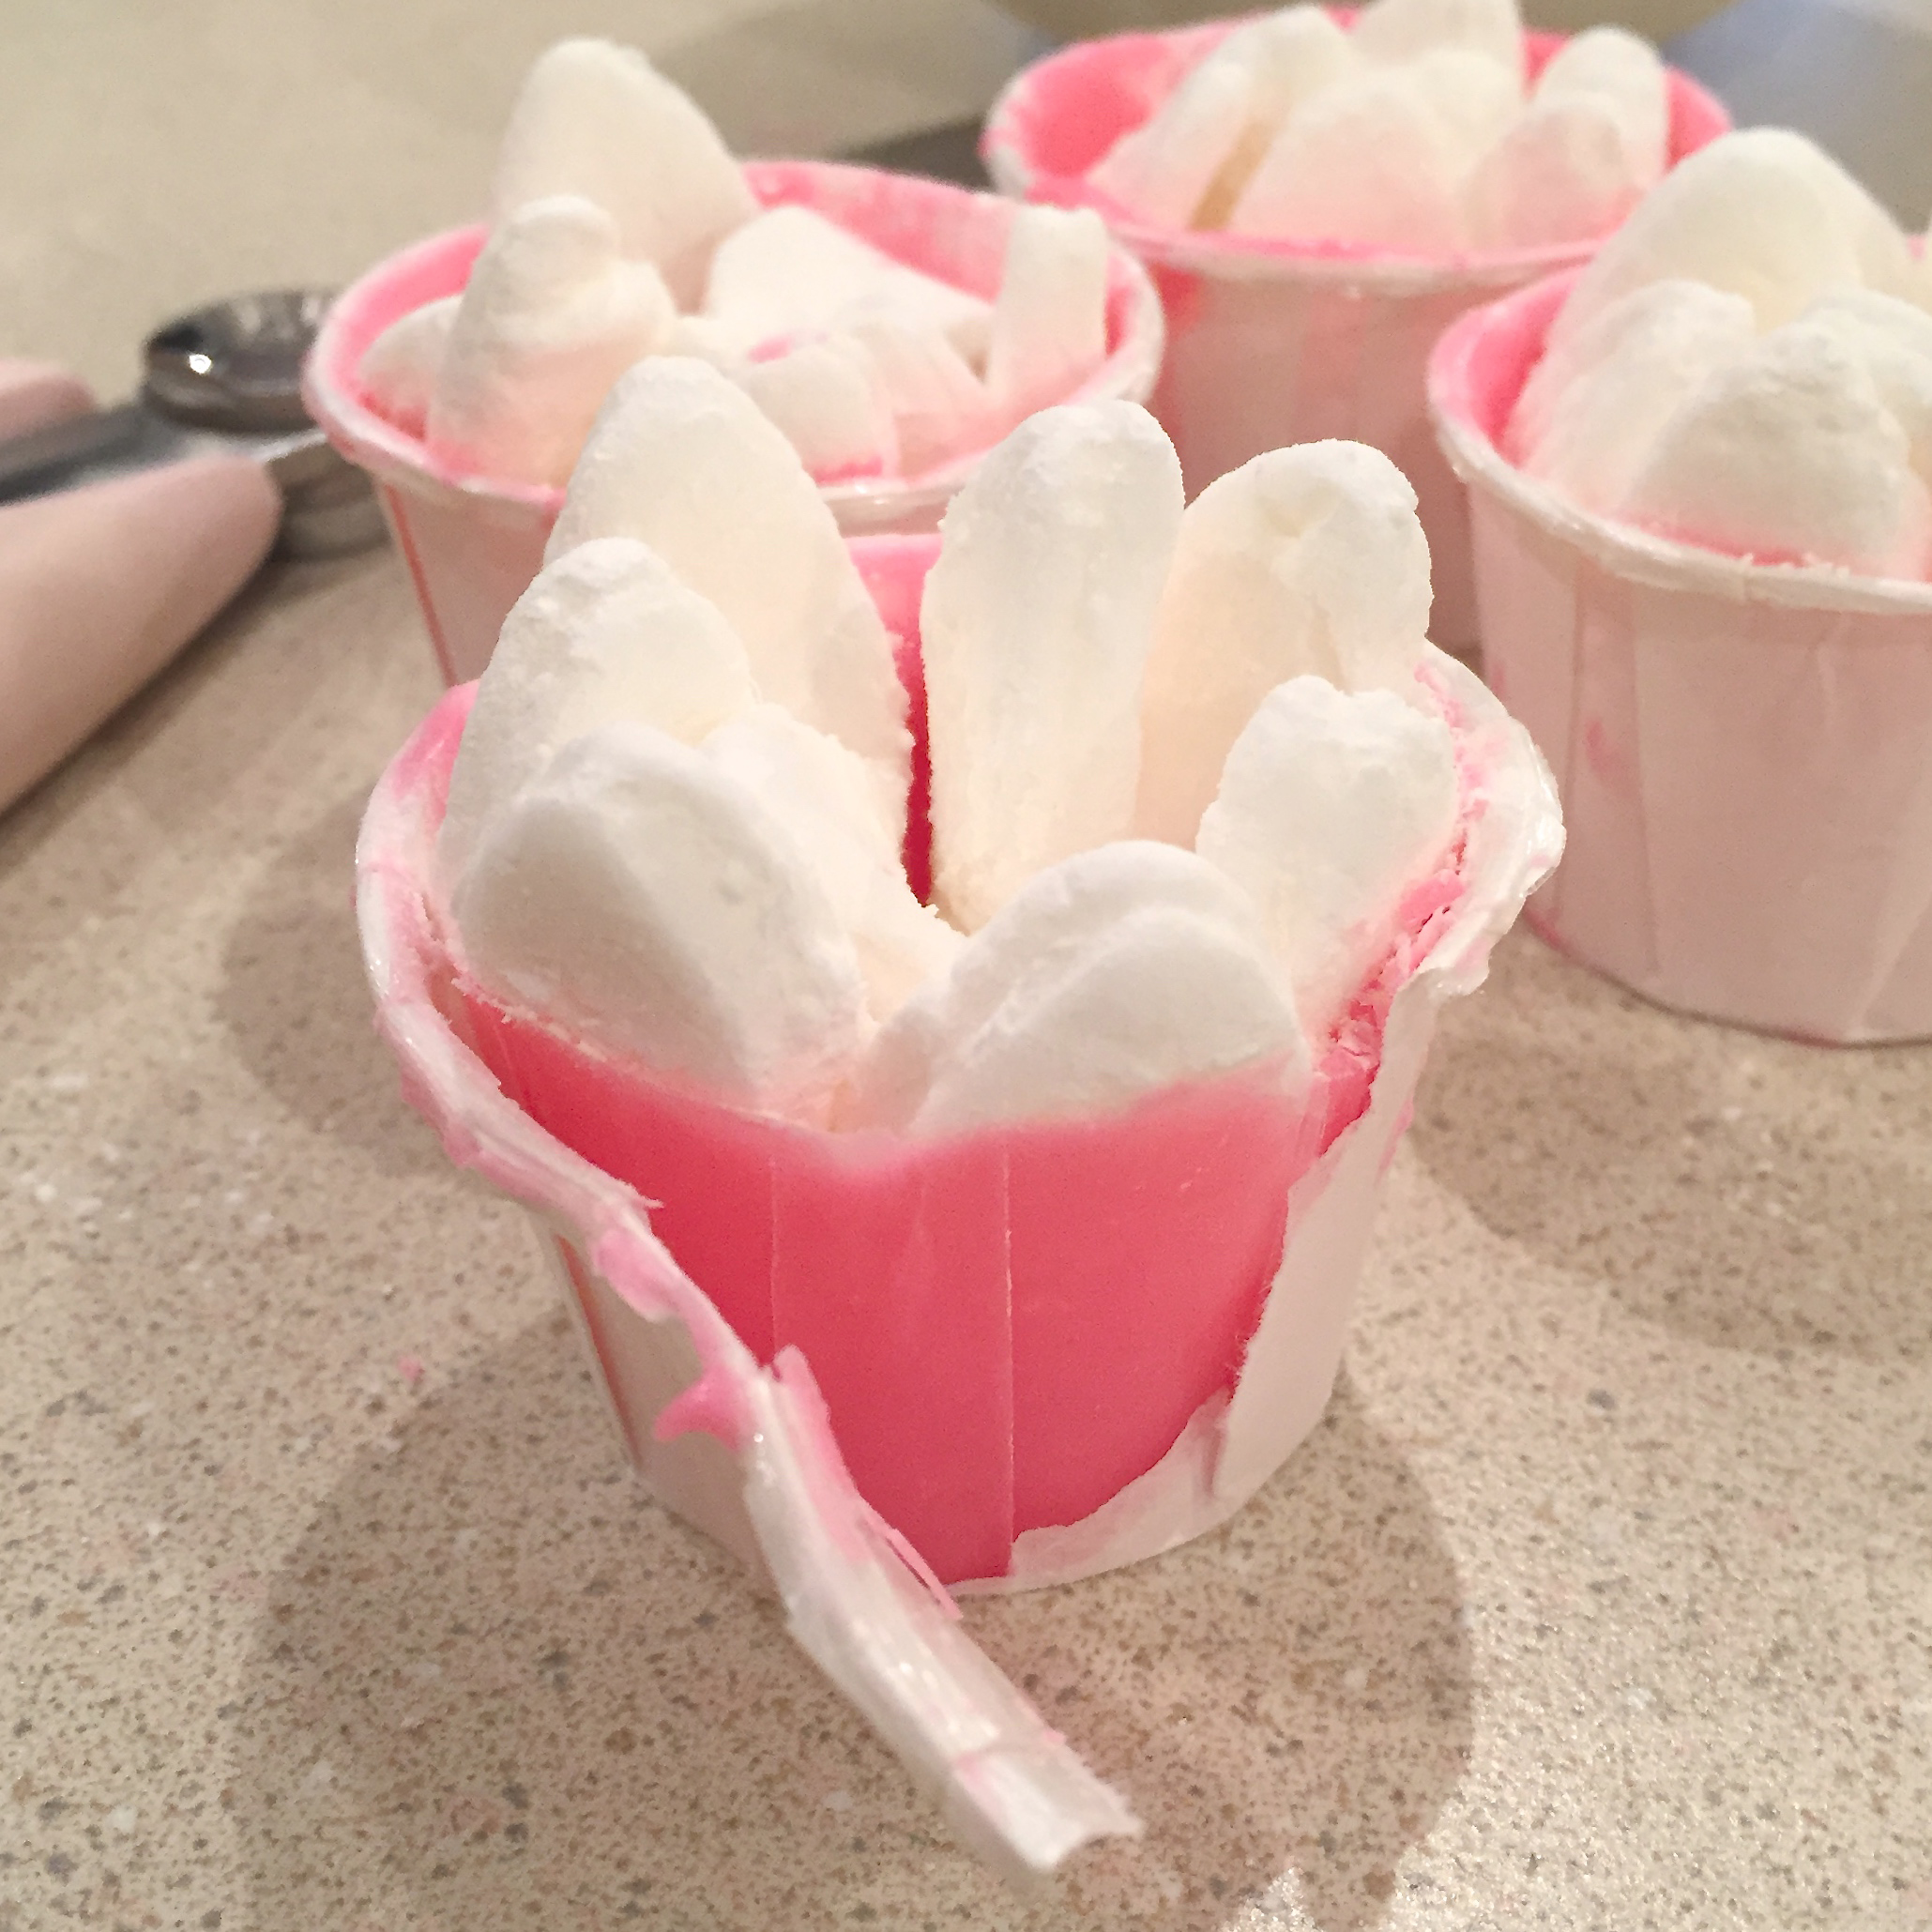
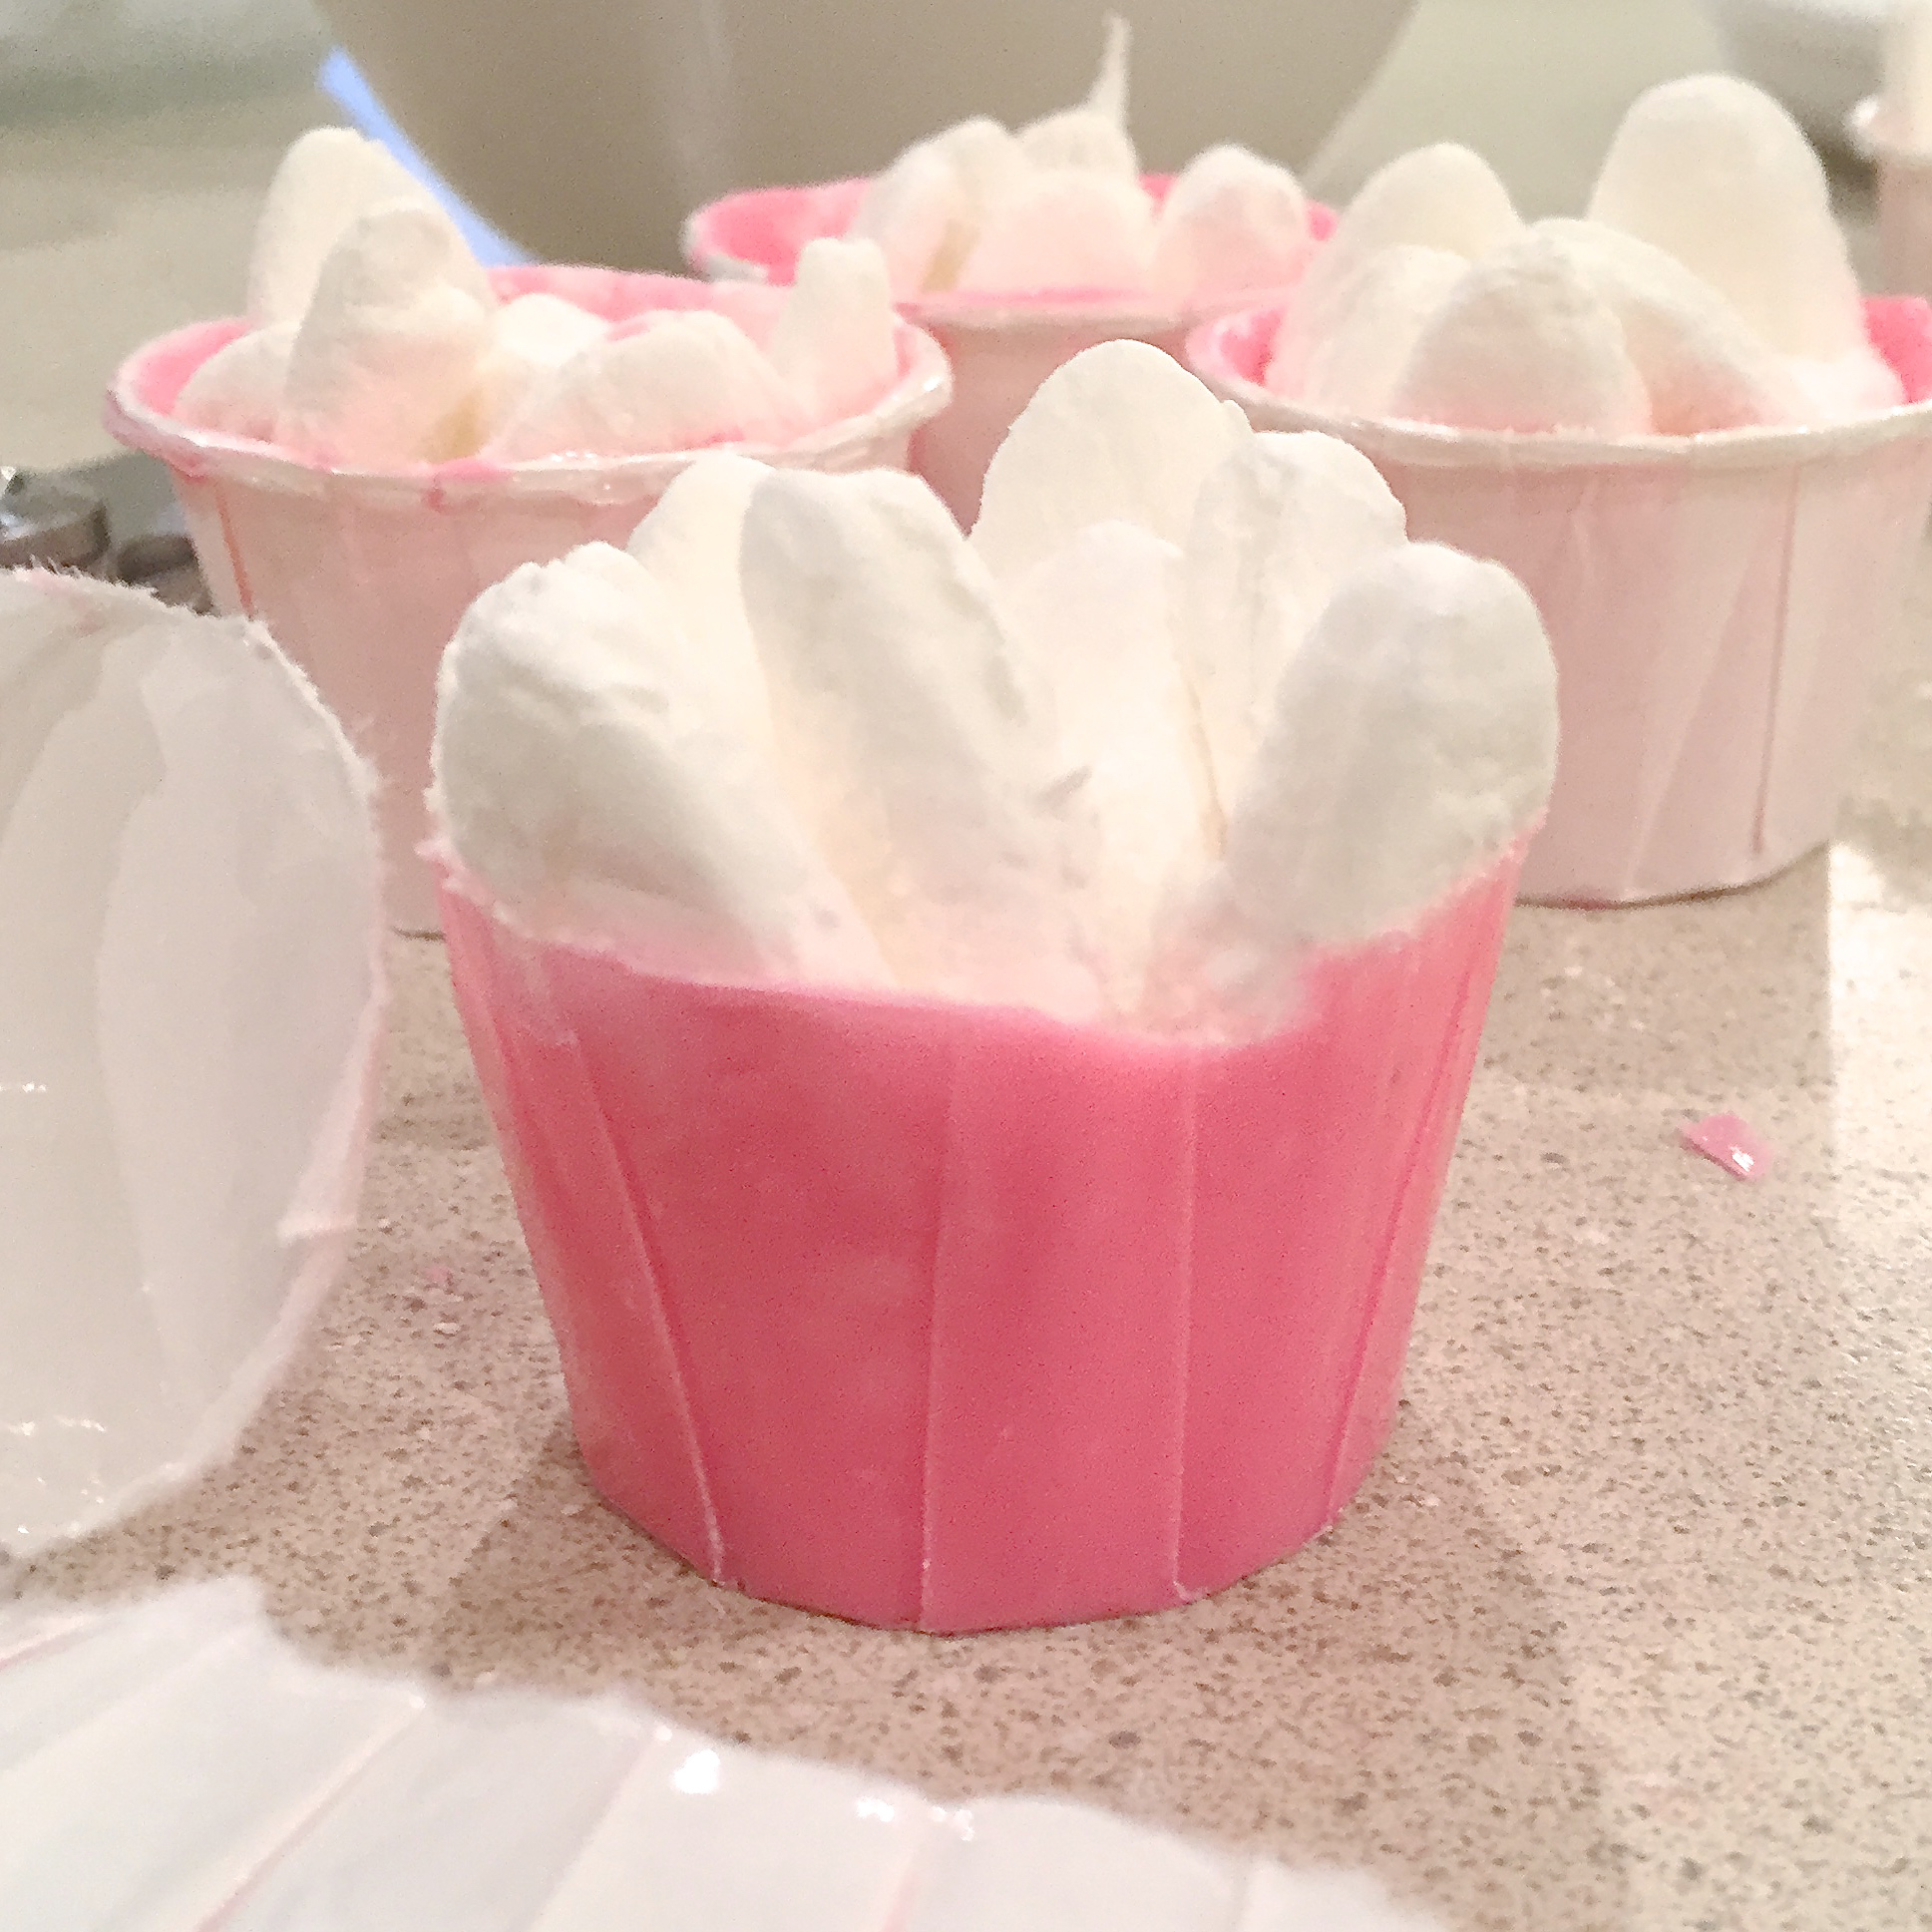
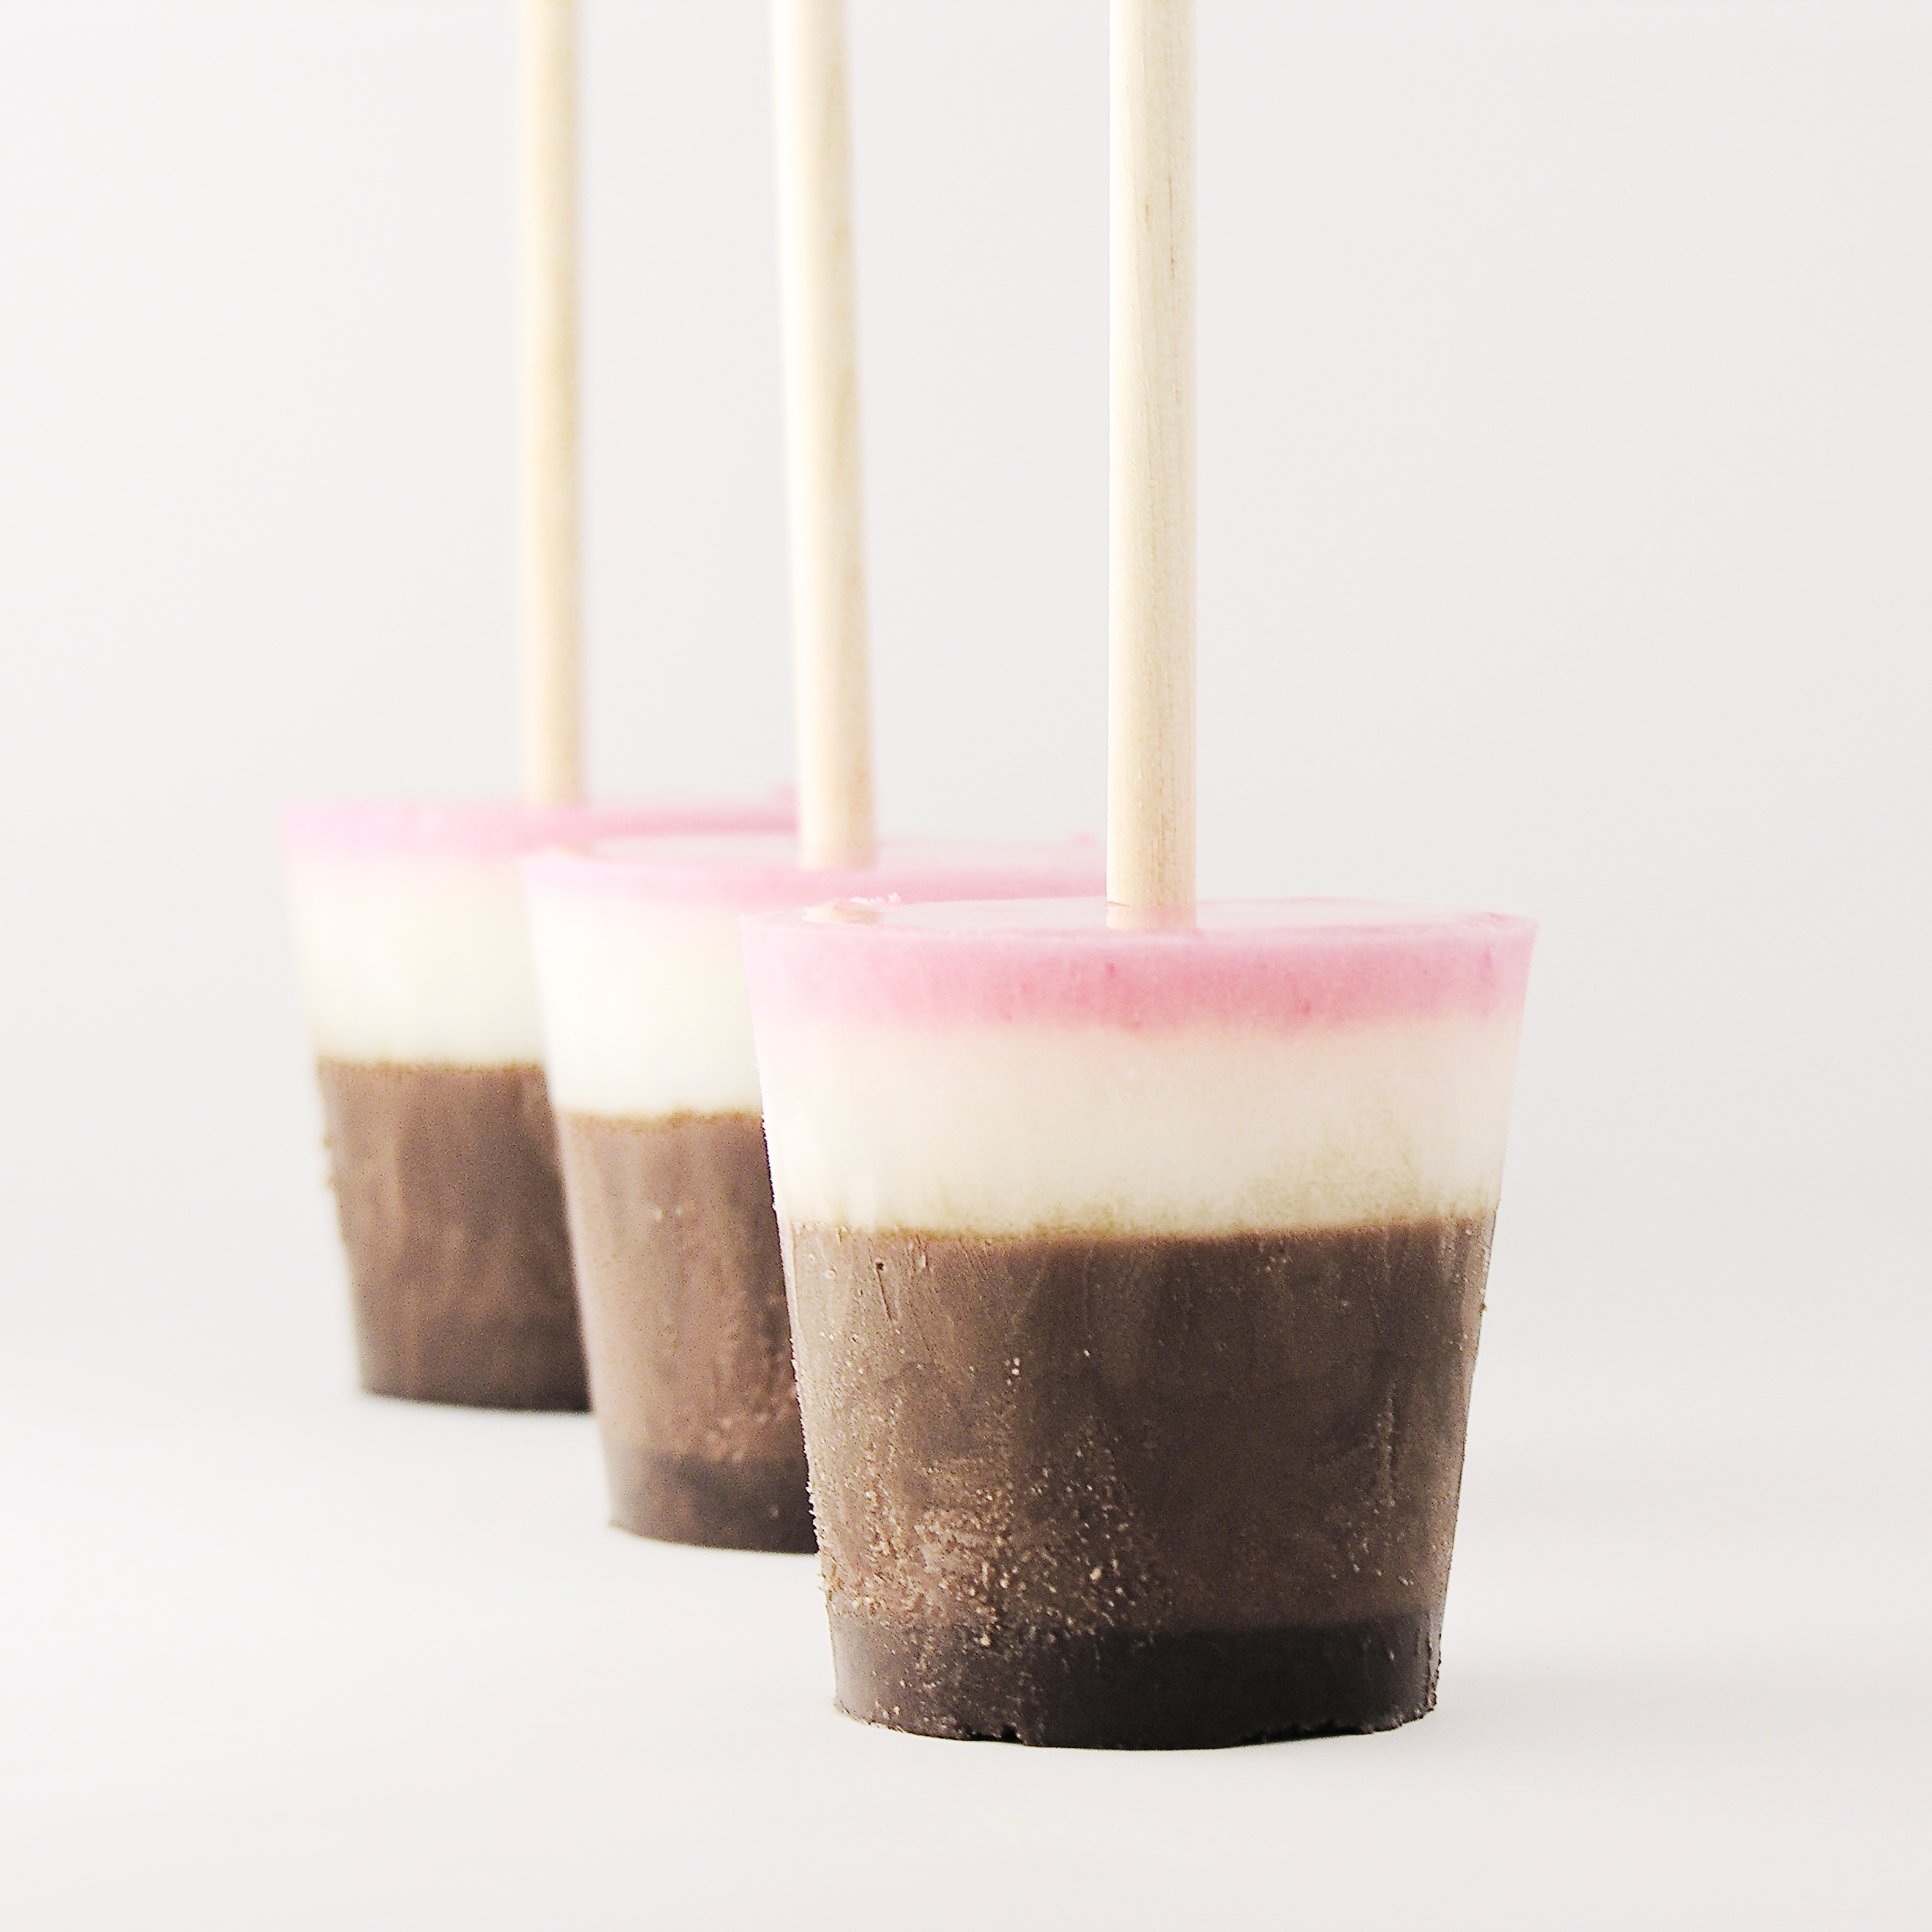
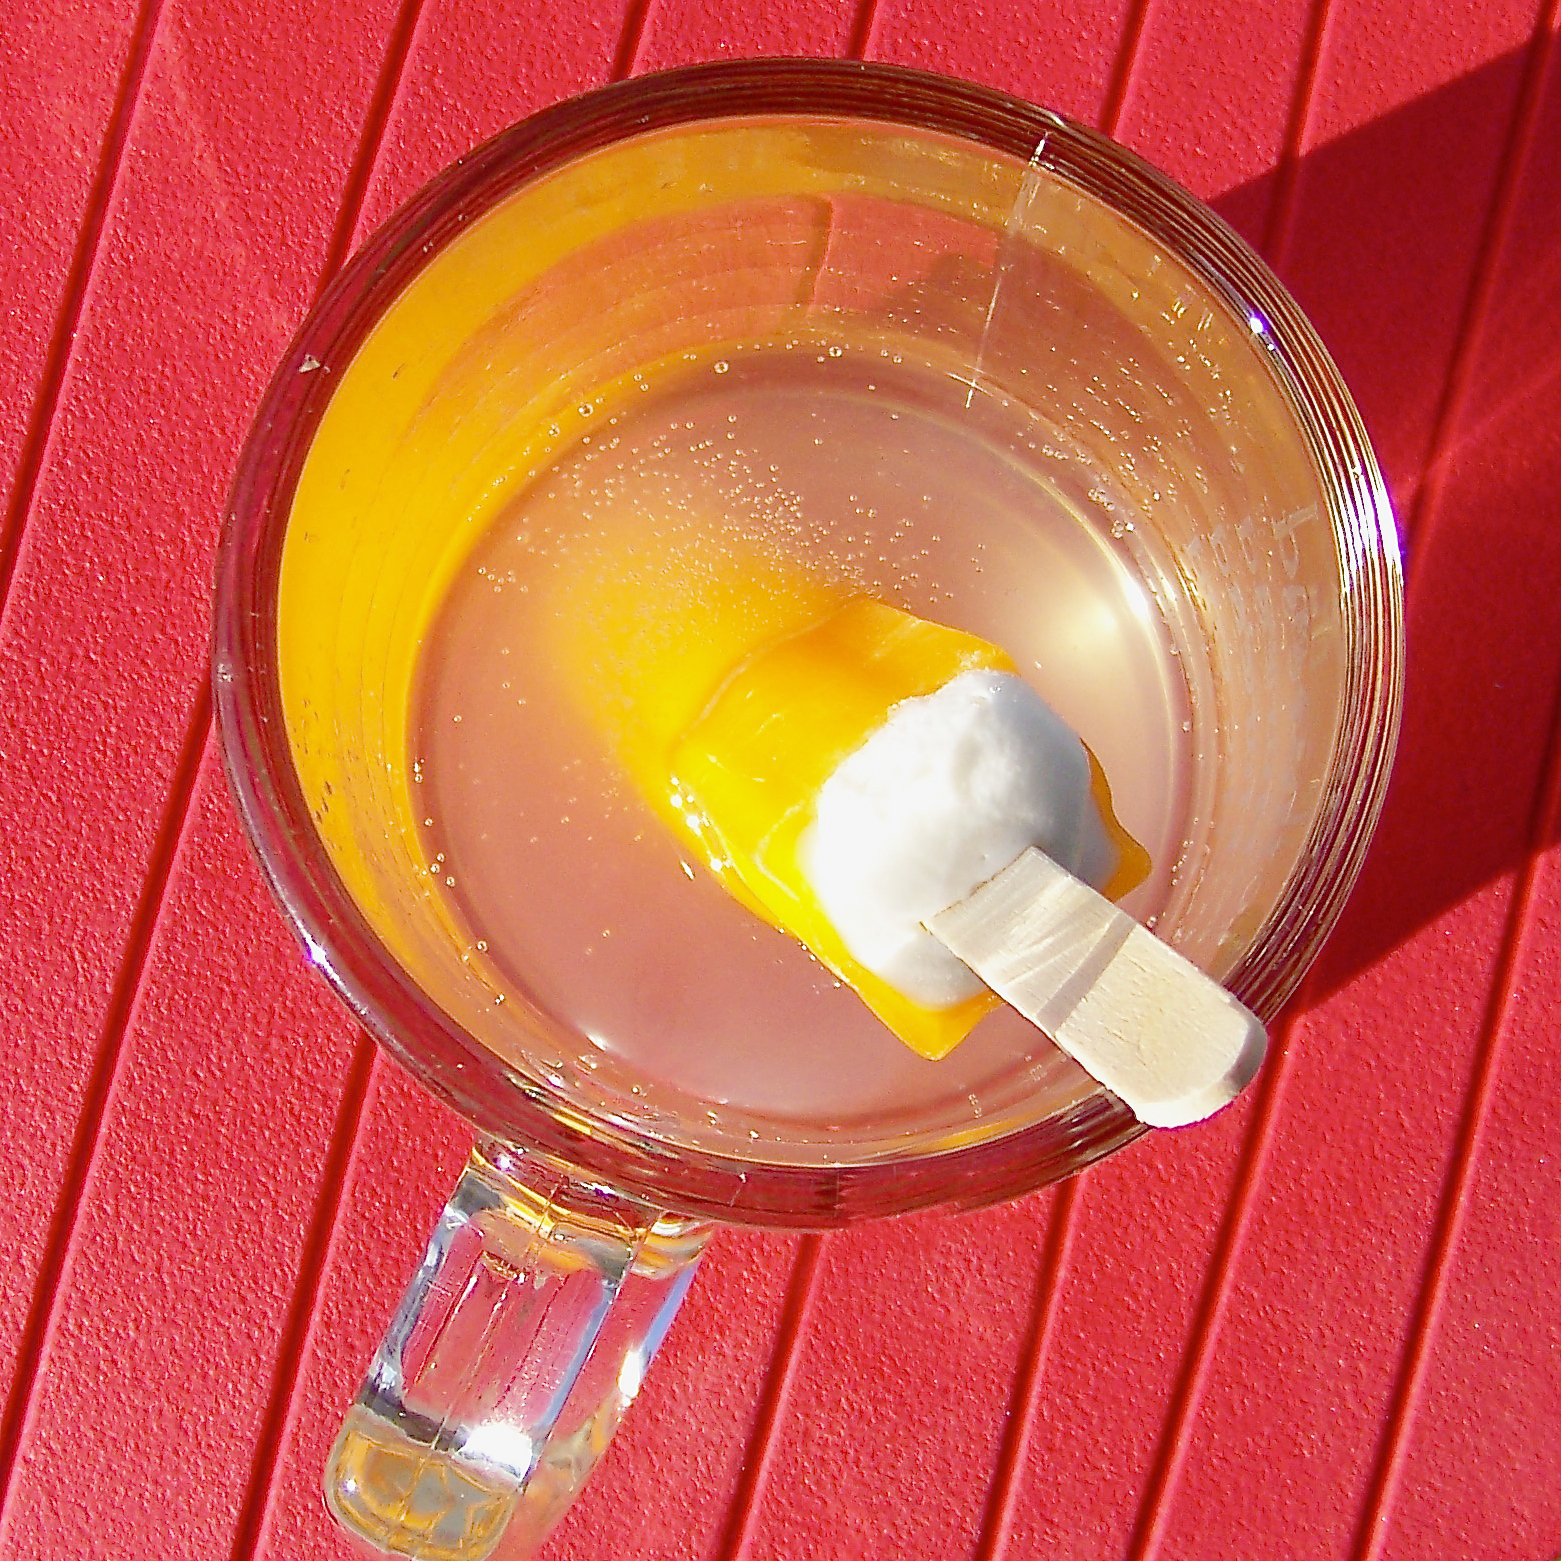
- Clip a corner off this bag and squeeze the softened ice cream over frozen juice, leaving room at the top for a layer of sherbet (you will add about twice as much ice cream as sherbet, and use almost all of the ½ gallon)
- Slide a straw into the center of each cup and re-freeze until ice cream layer is hard (2-3 hours)
- Scoop sherbet into a large zip-top bag and microwave/squeeze until a soft-serve consistency (this melts faster than ice cream, so be cautious)
- Clip a corner off this bag and squeeze the softened sherbet over the top of the frozen ice cream. Tap each cup against the counter to flatten the sherbet out a little bit on top.
- Re-freeze overnight (10-12 hours)

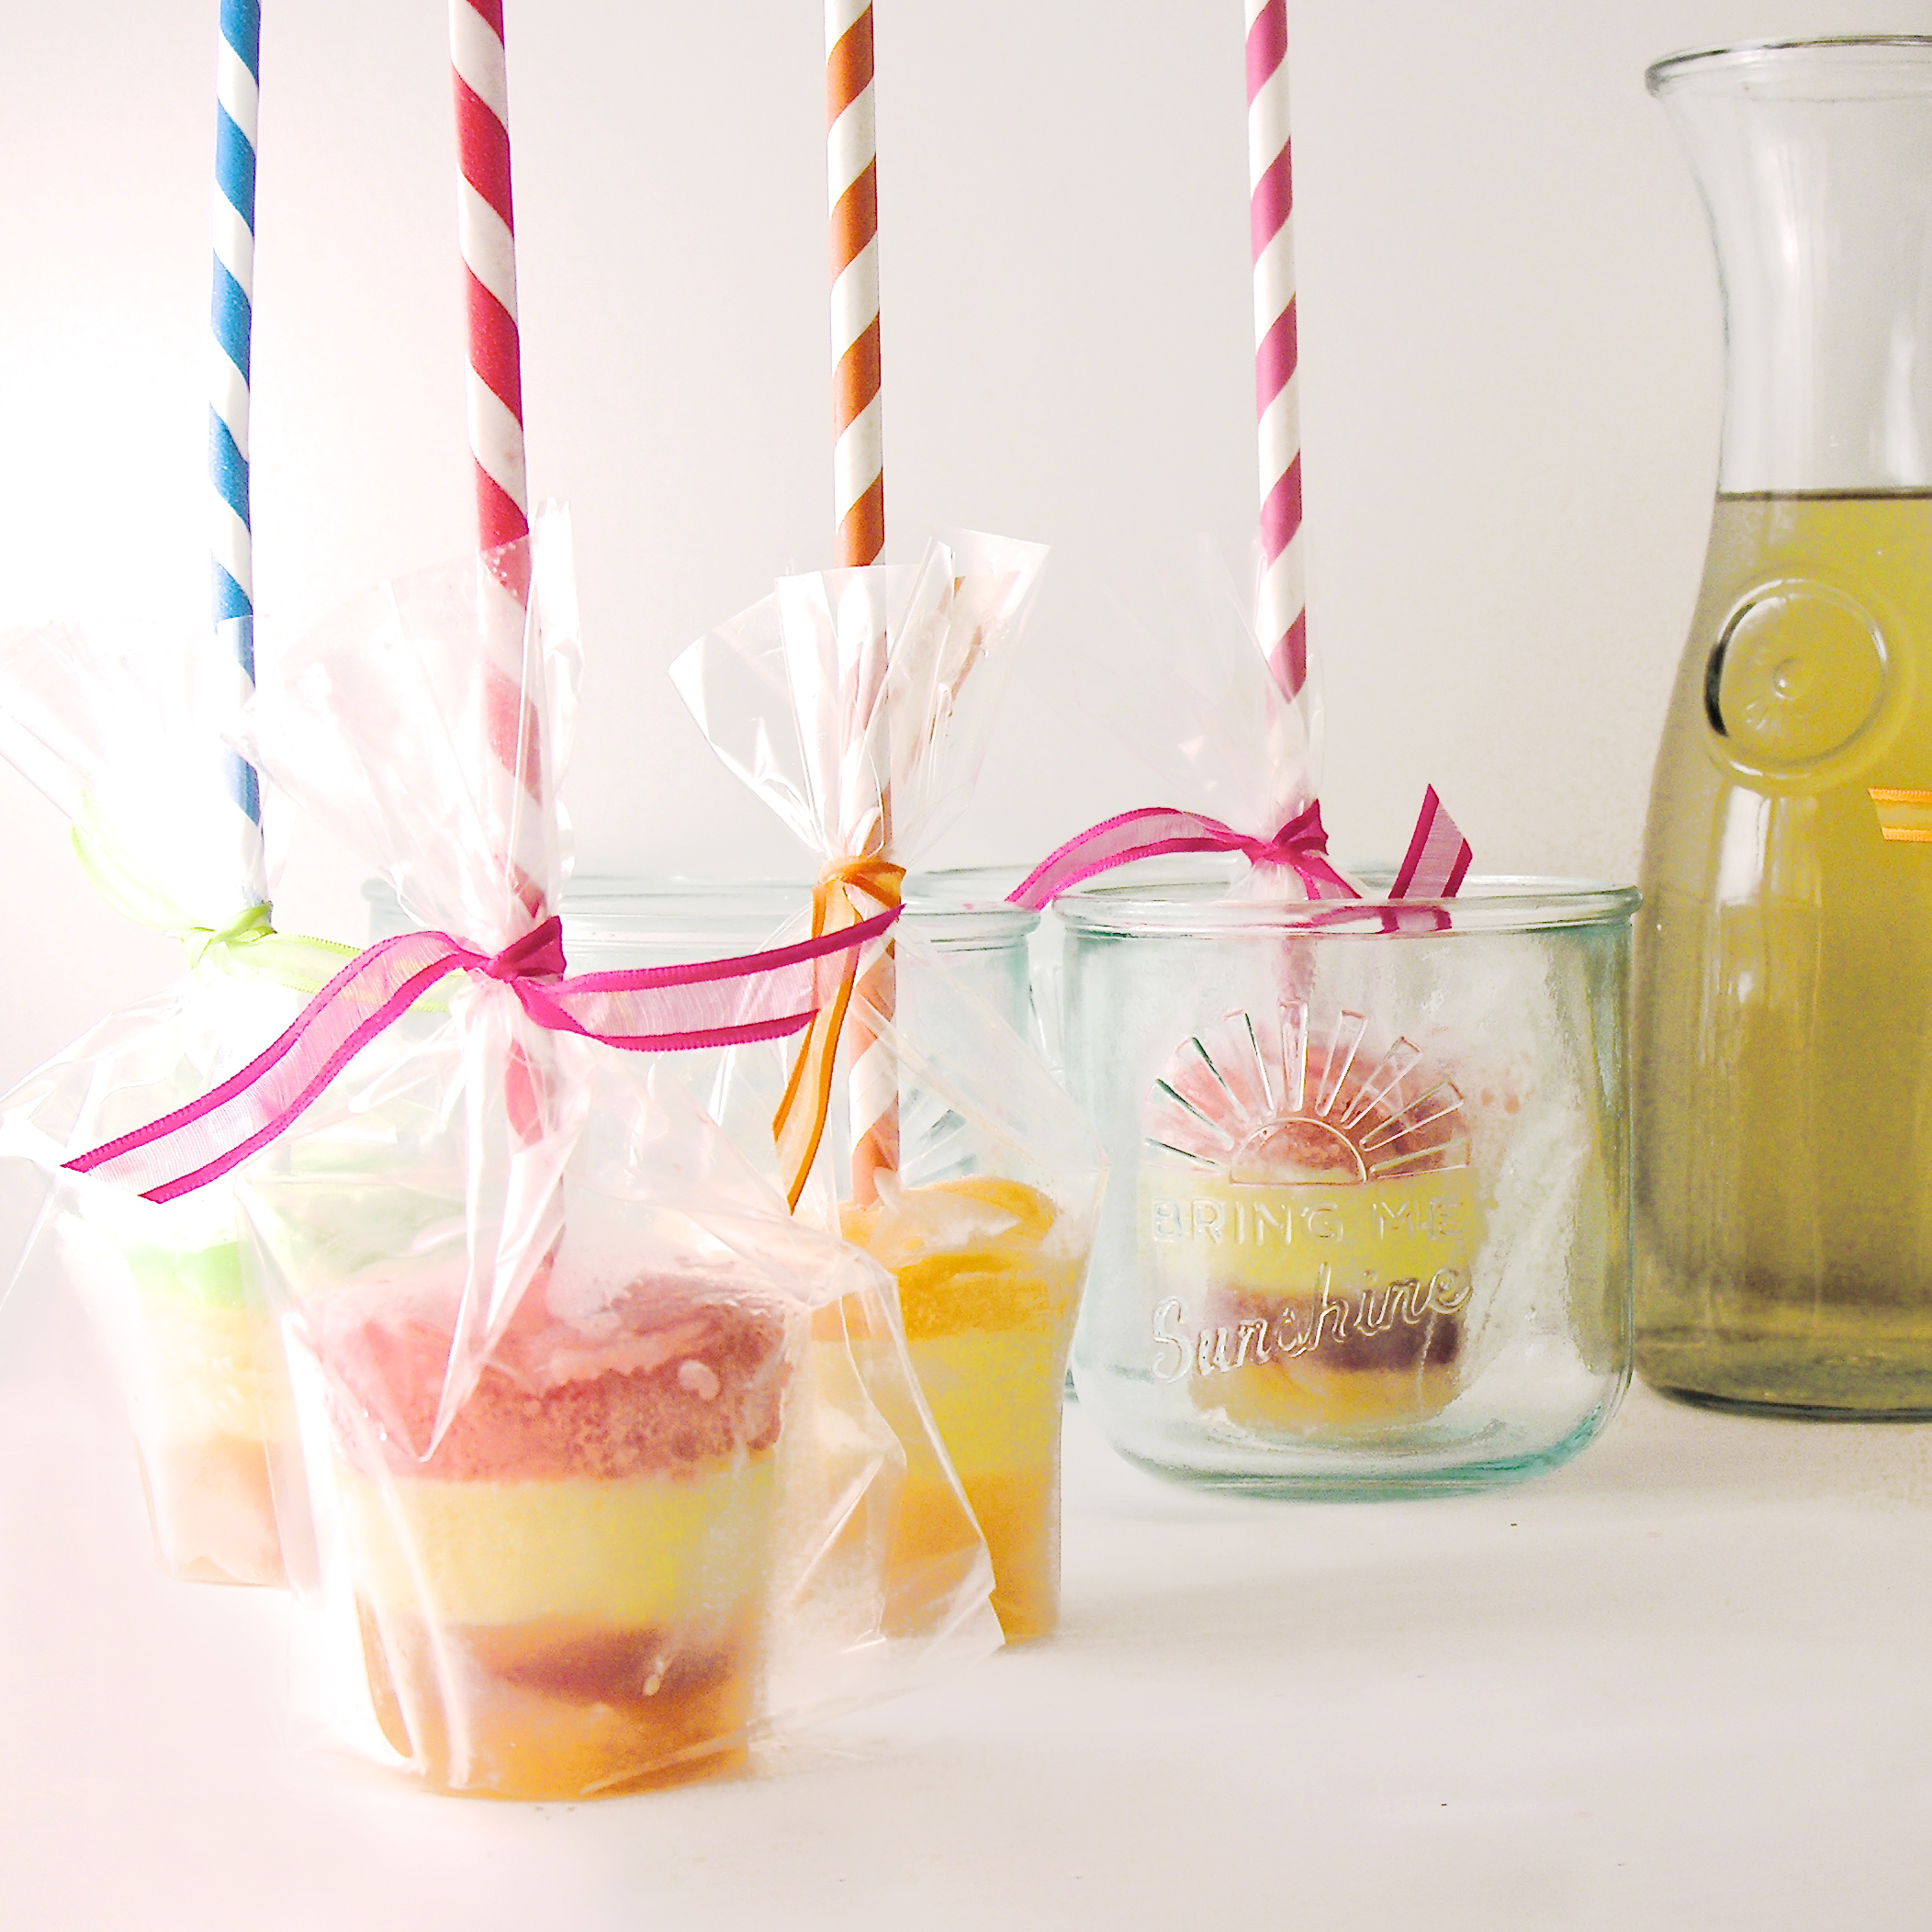
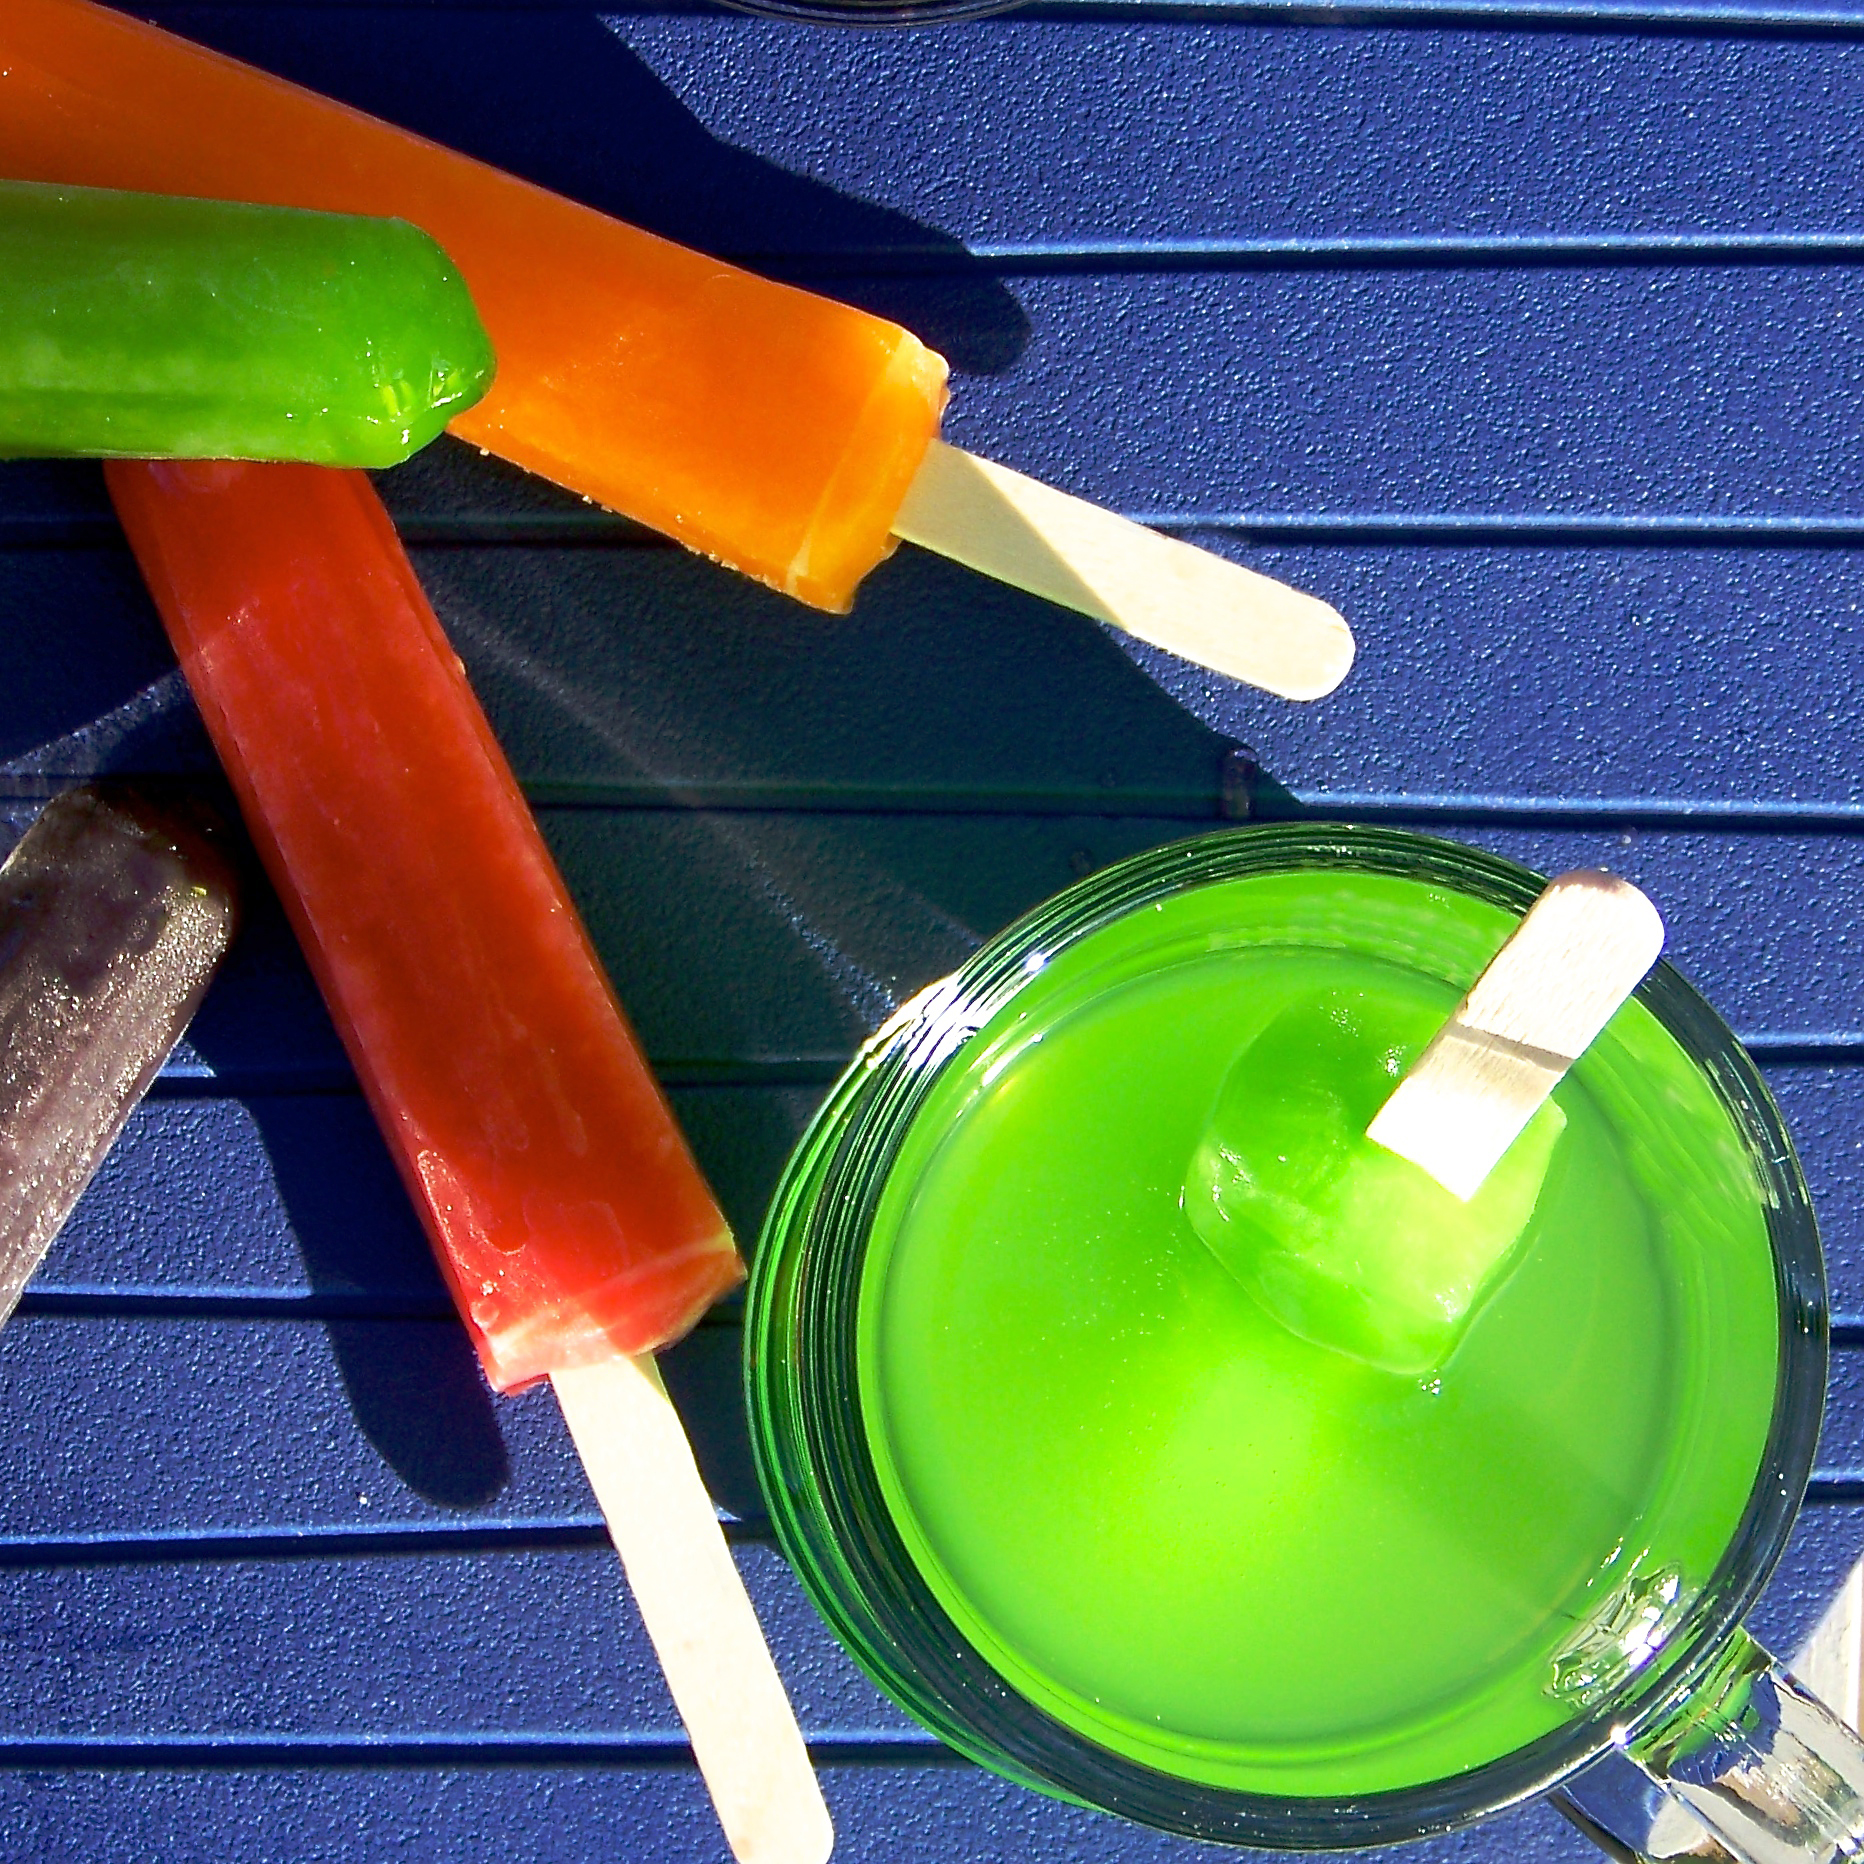
- To remove them from the cup, snip a tiny cut into one of the cup’s edges and tear the cup away.
- Set the pop on a small cookie sheet that has been covered with parchment paper and keep frozen until you are ready to bag them up.
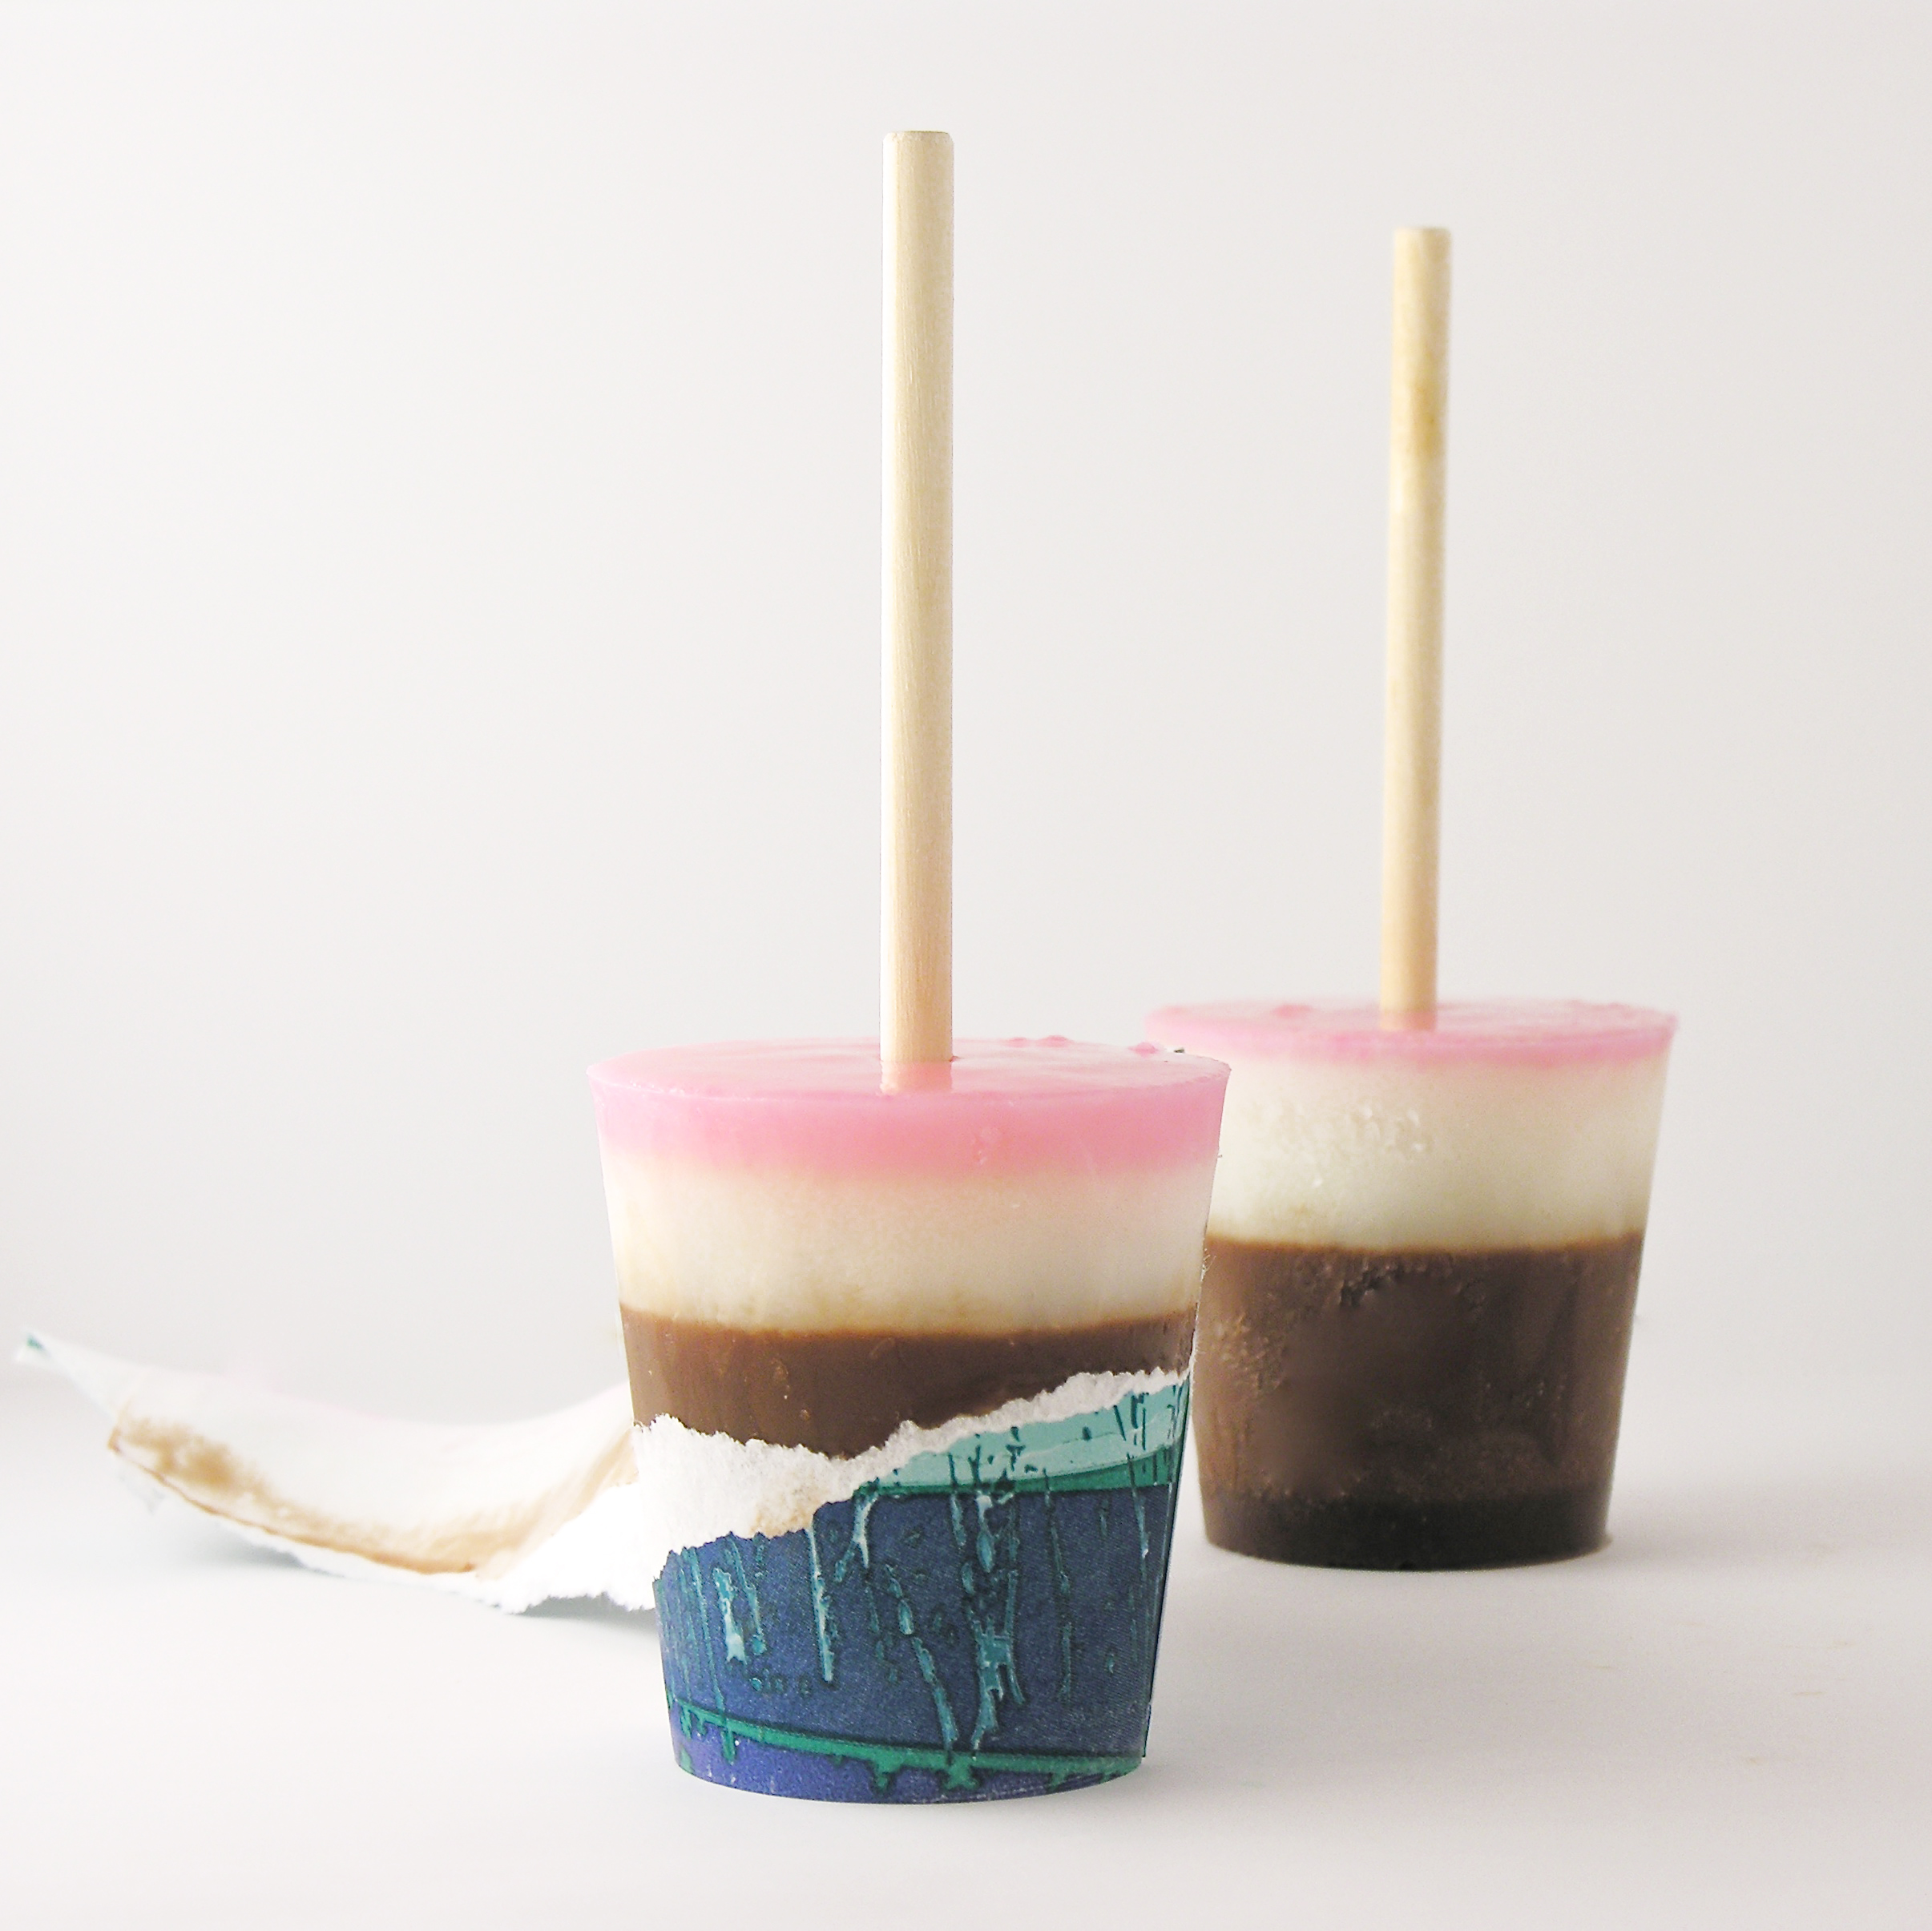
- To place them in individual bags, keep them frozen, and one at a time, slide into a bag, tie shut and refreeze.
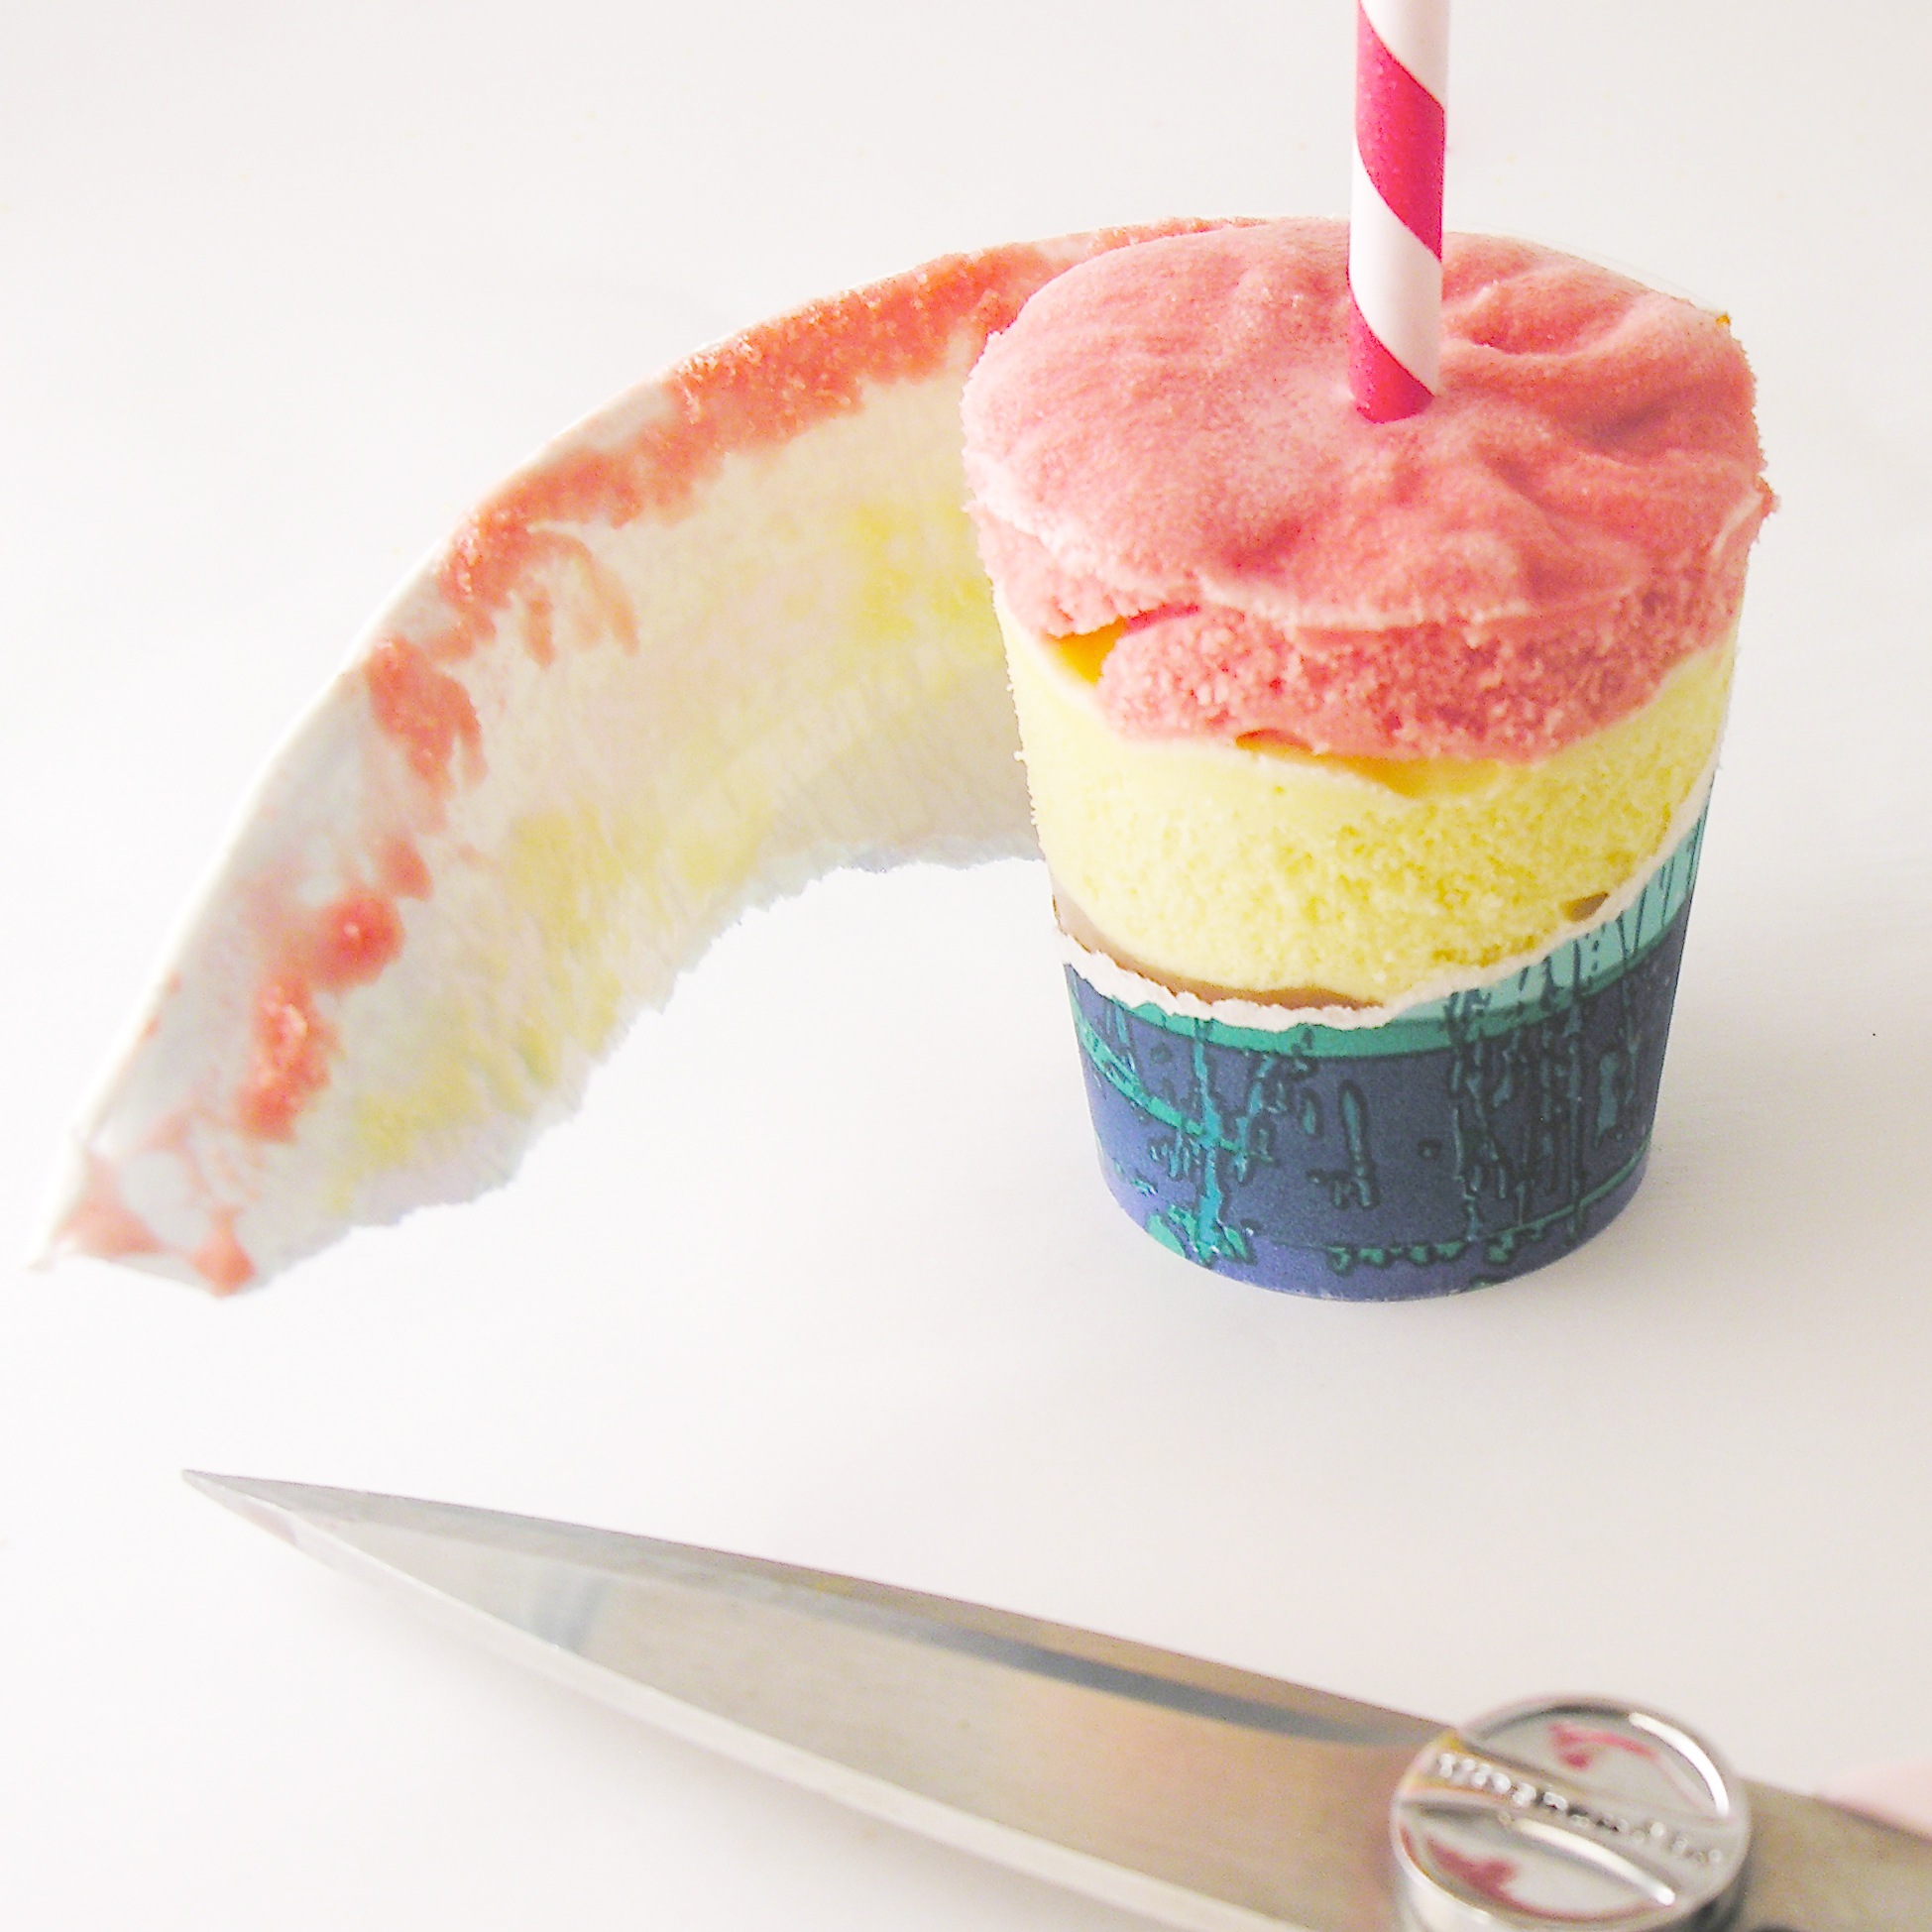


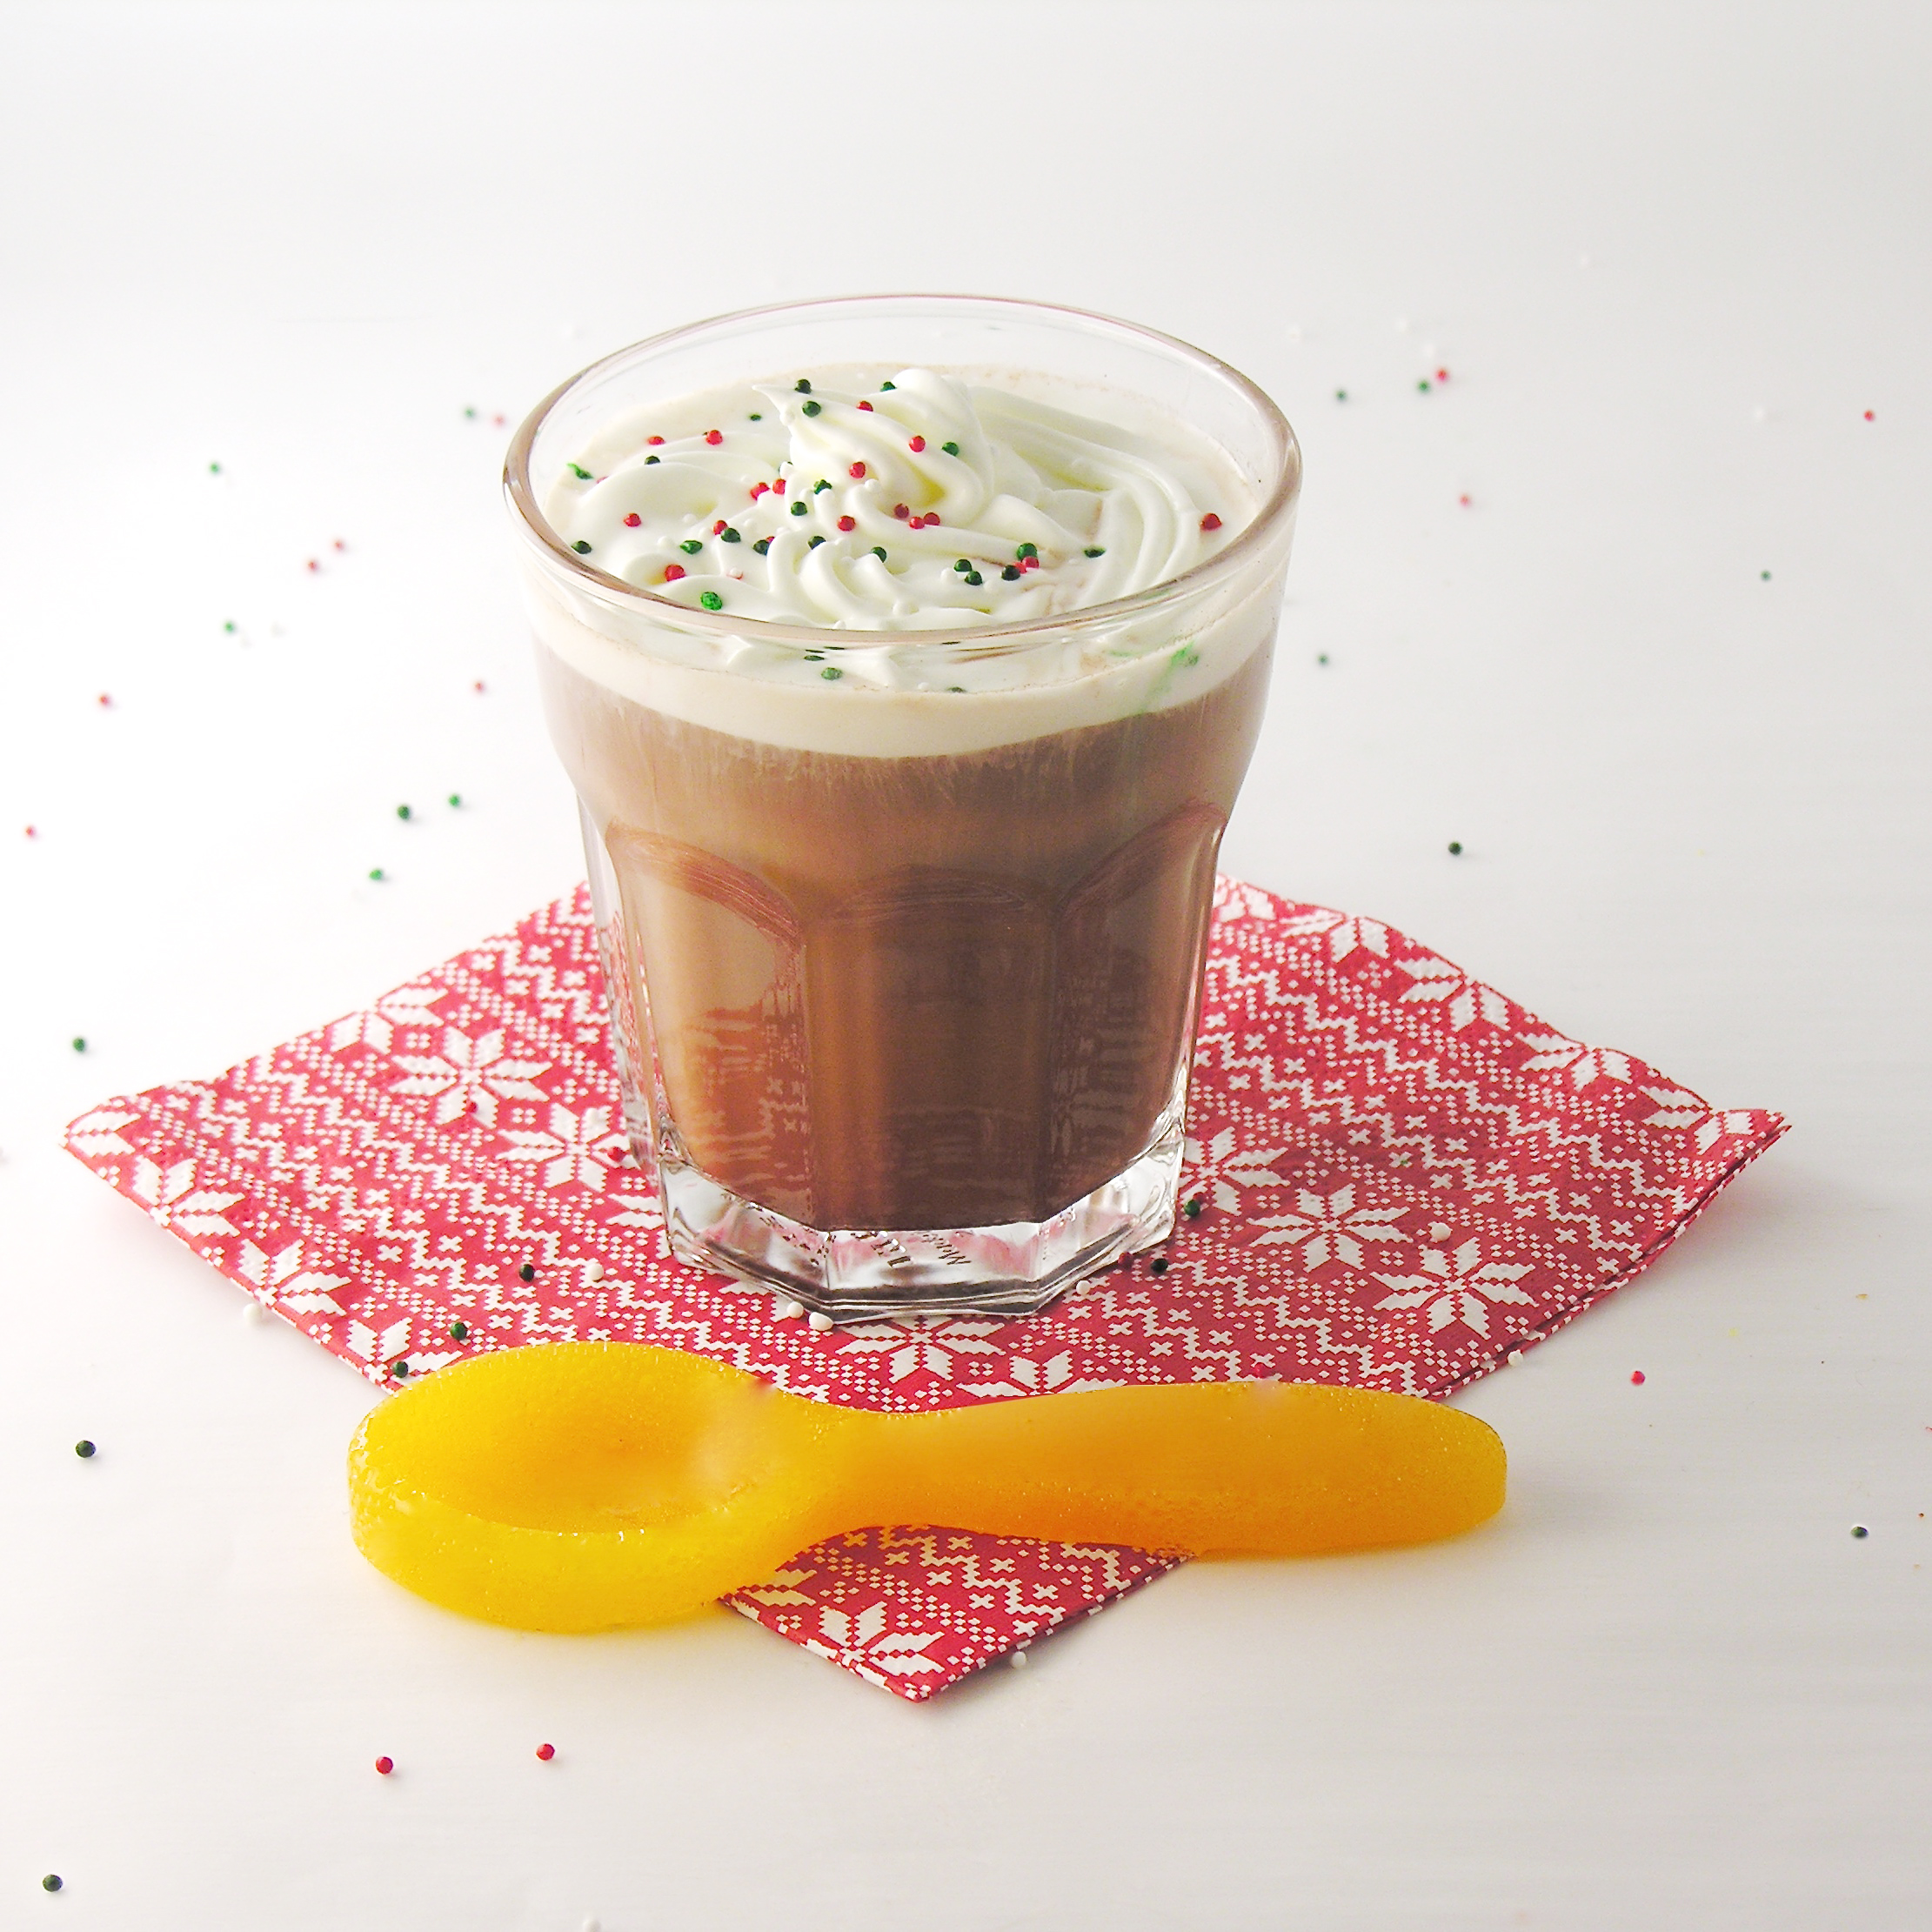
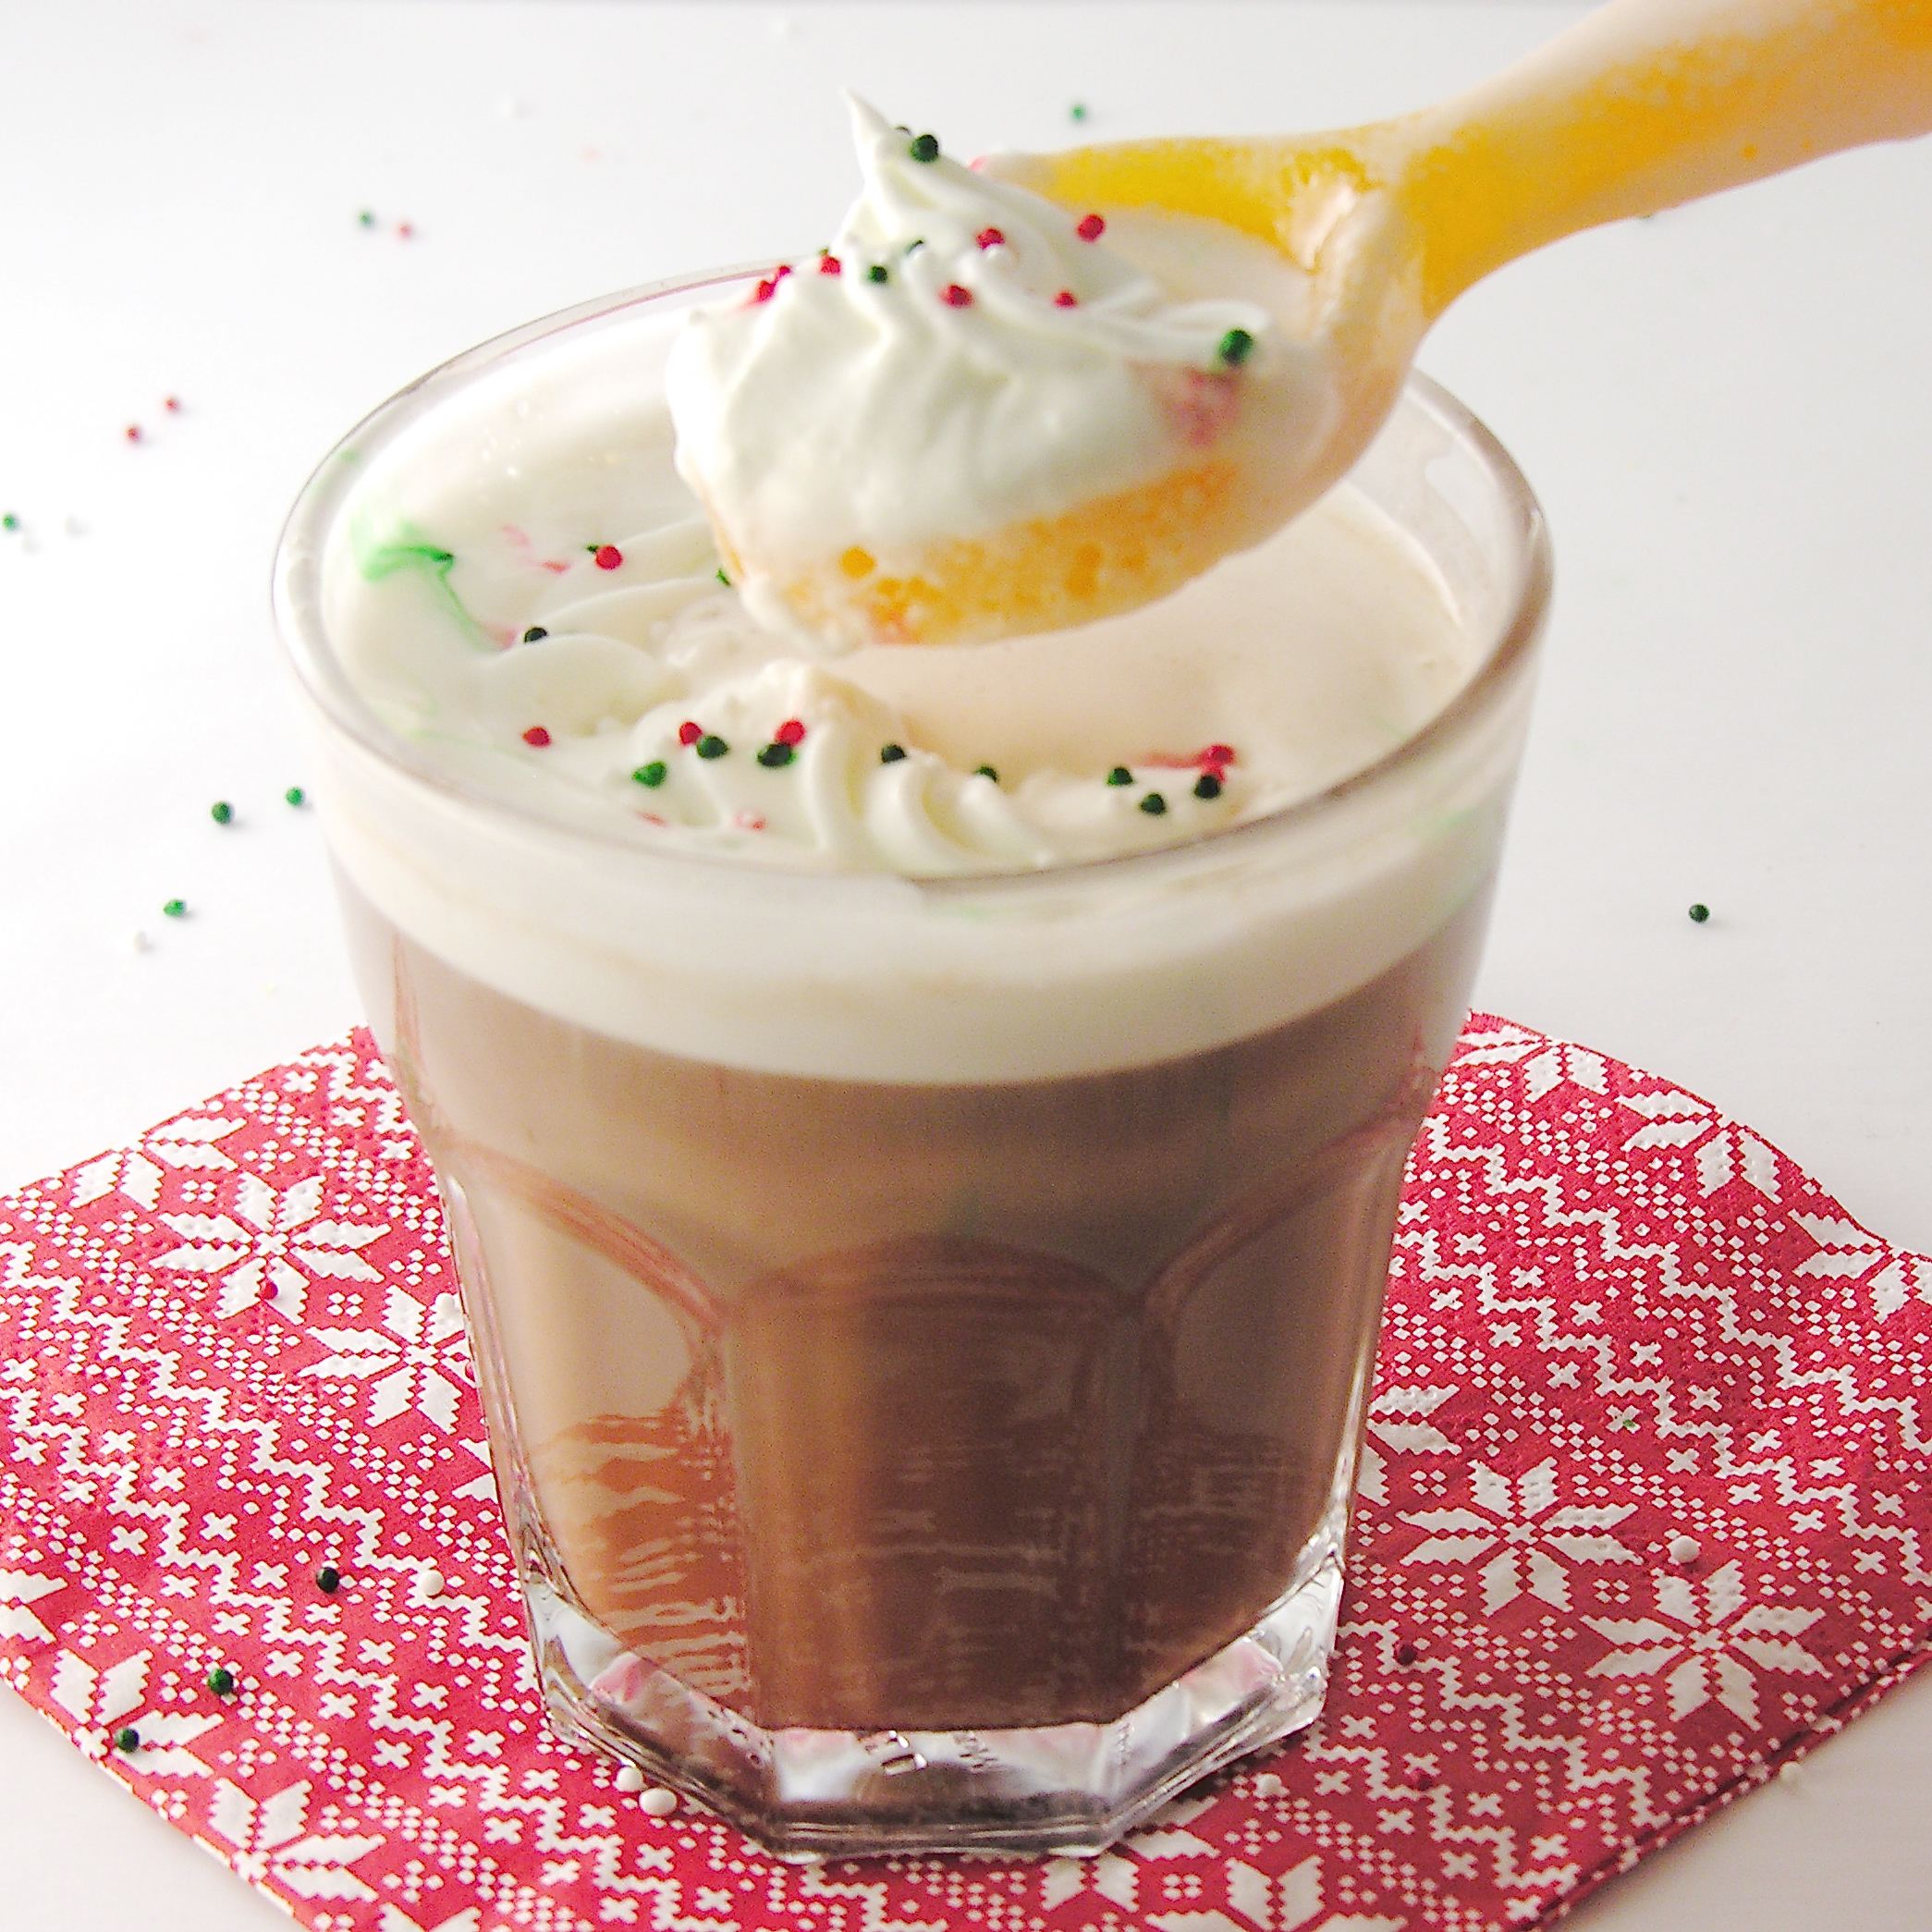
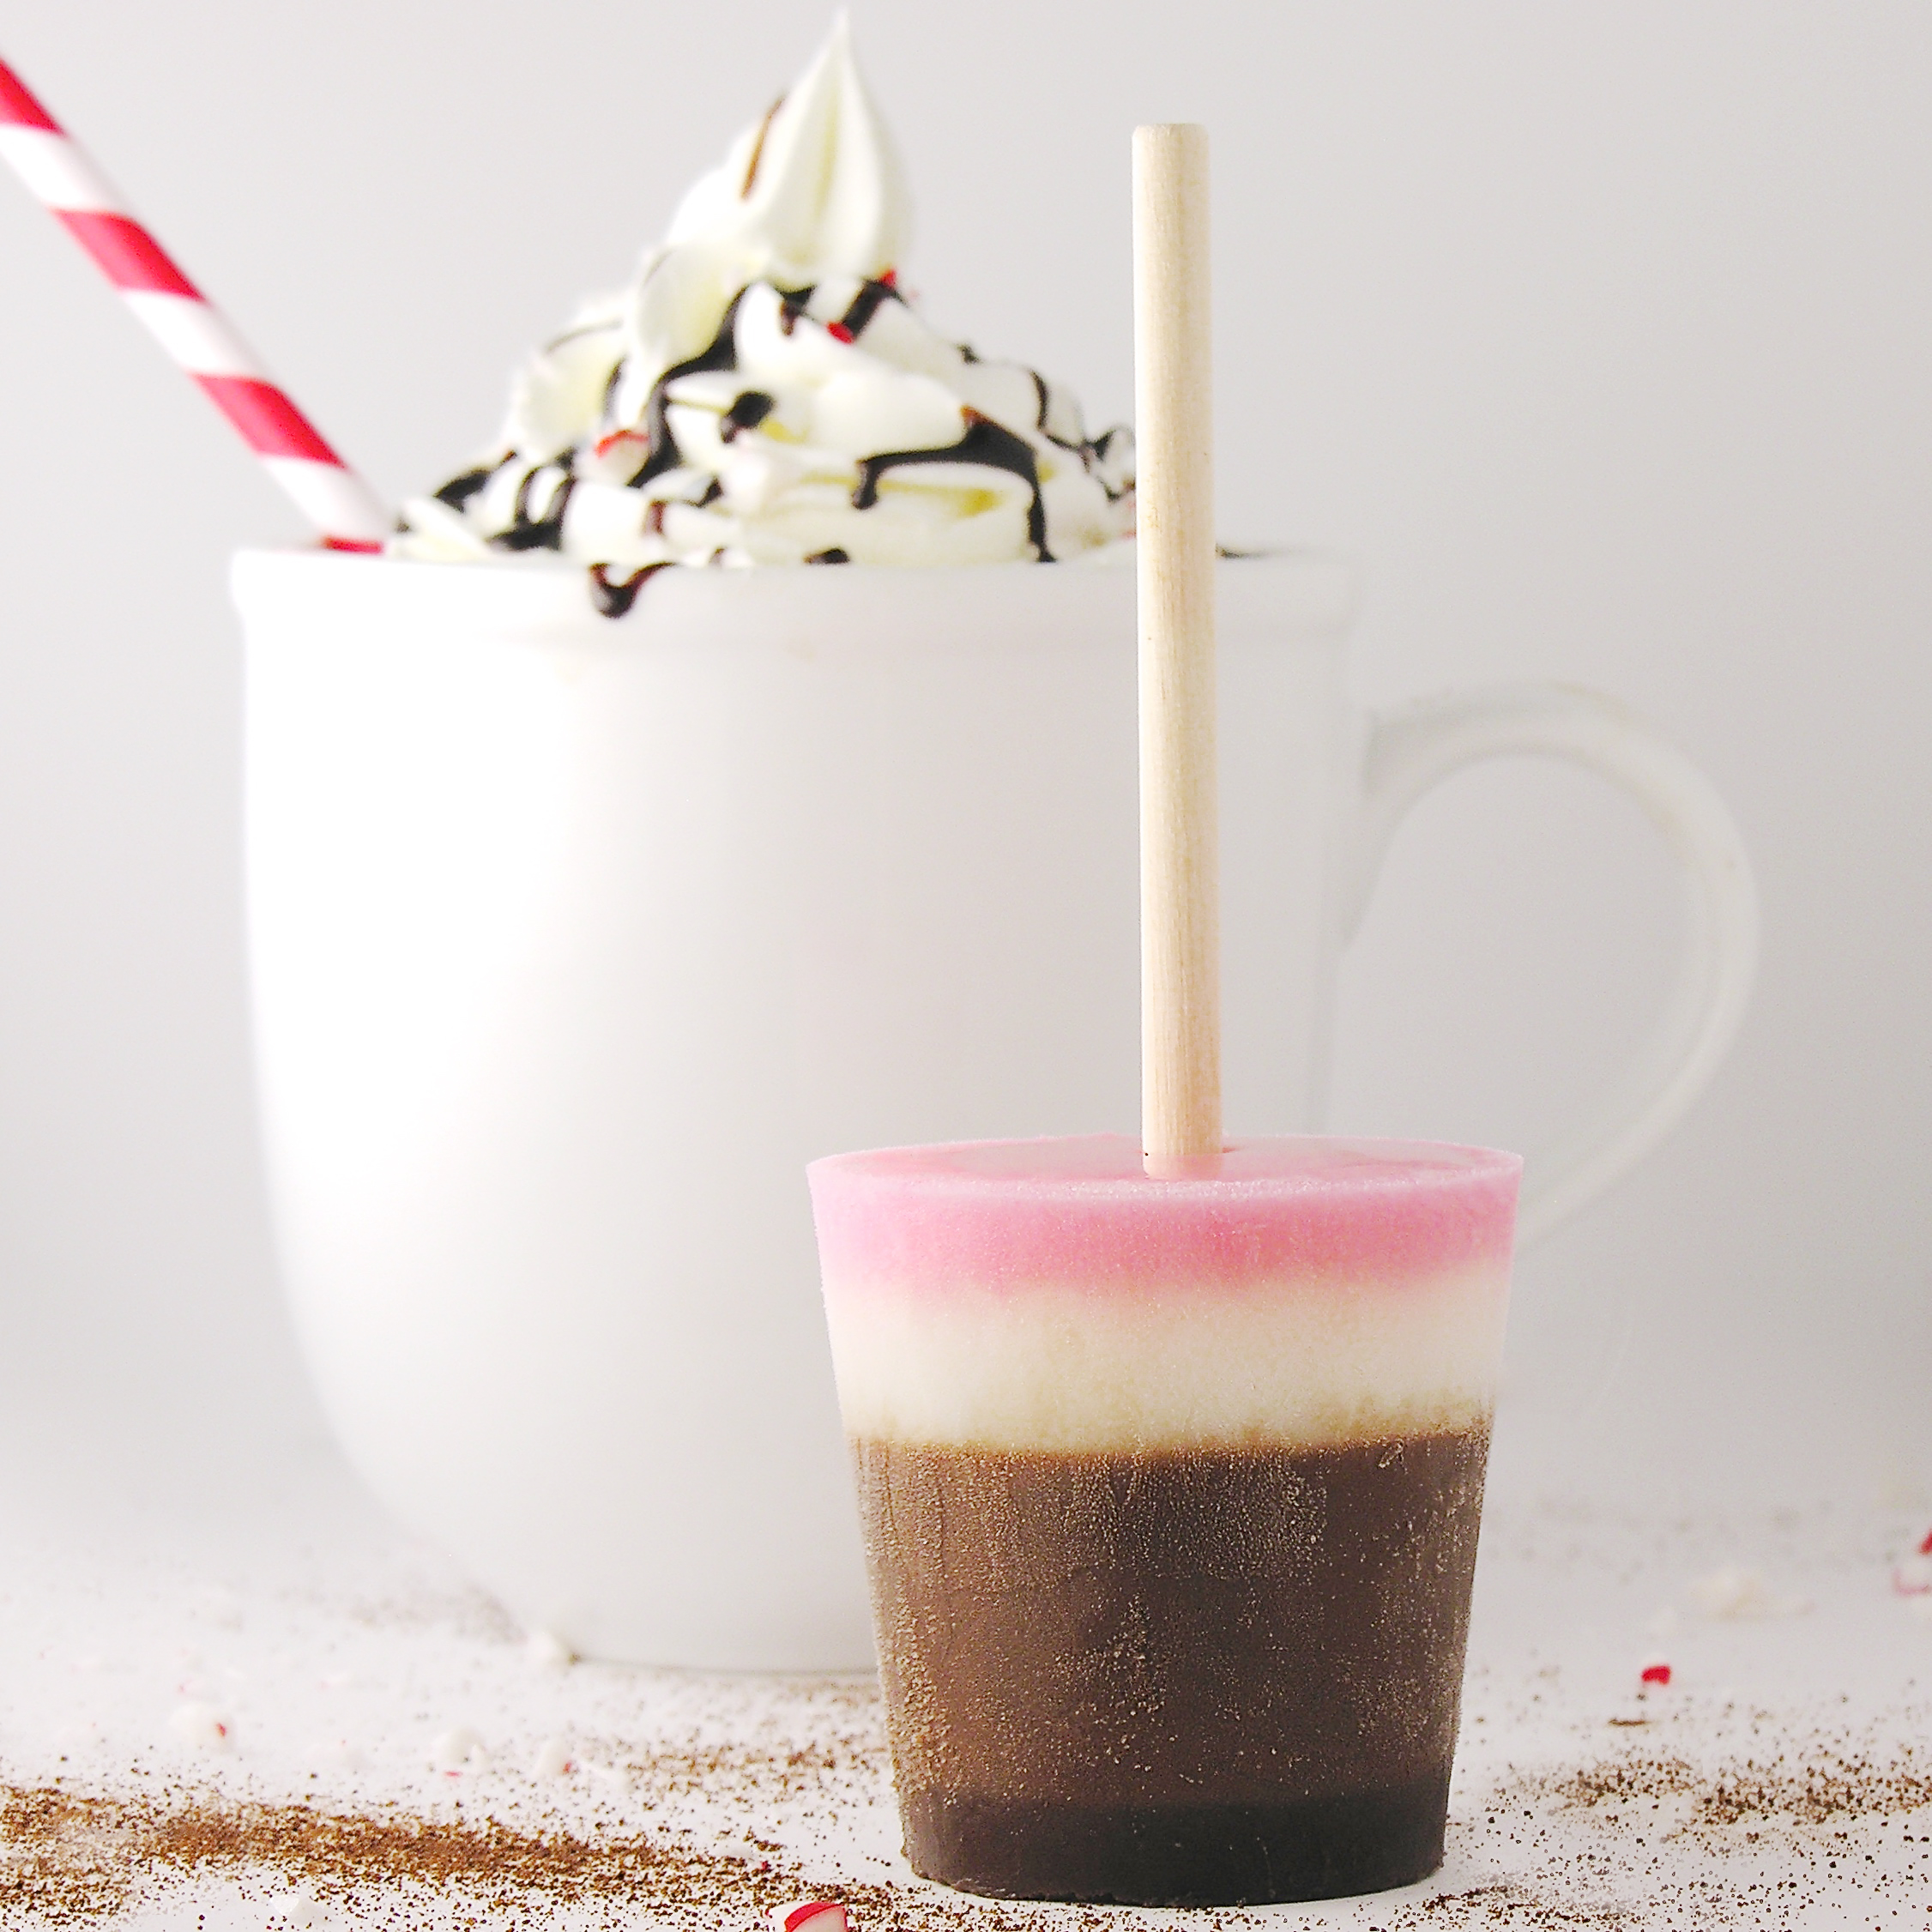
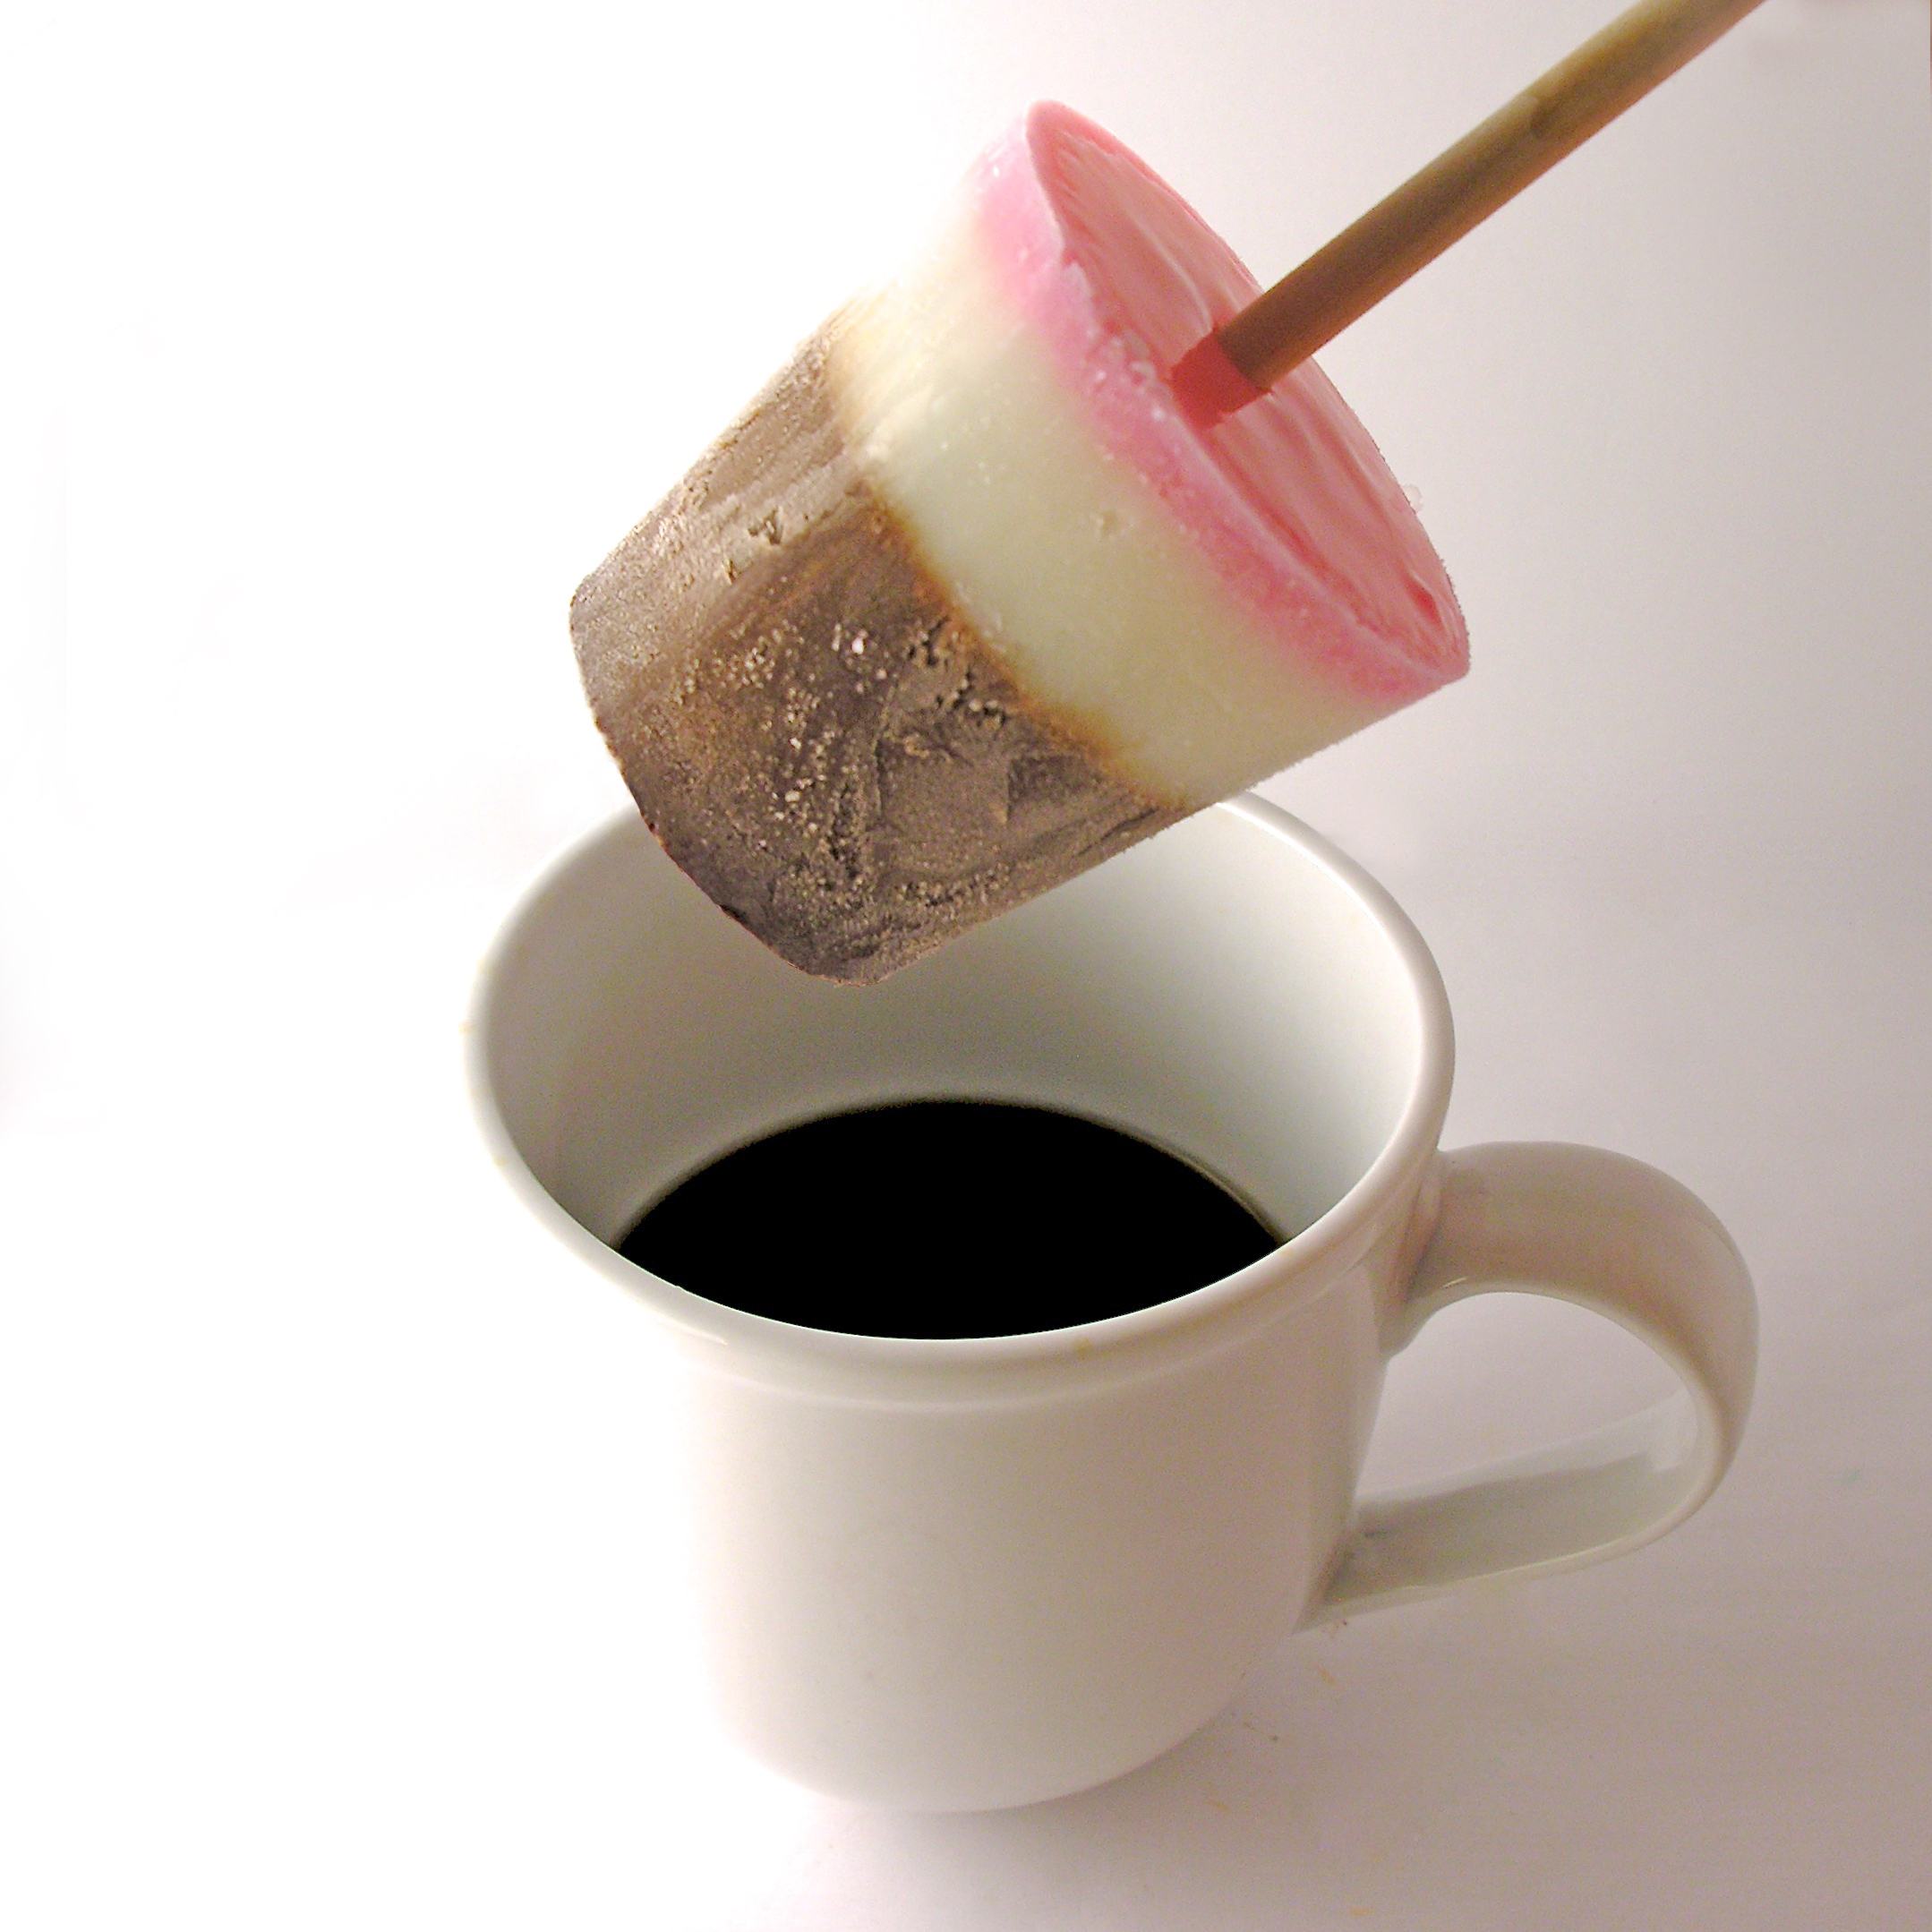
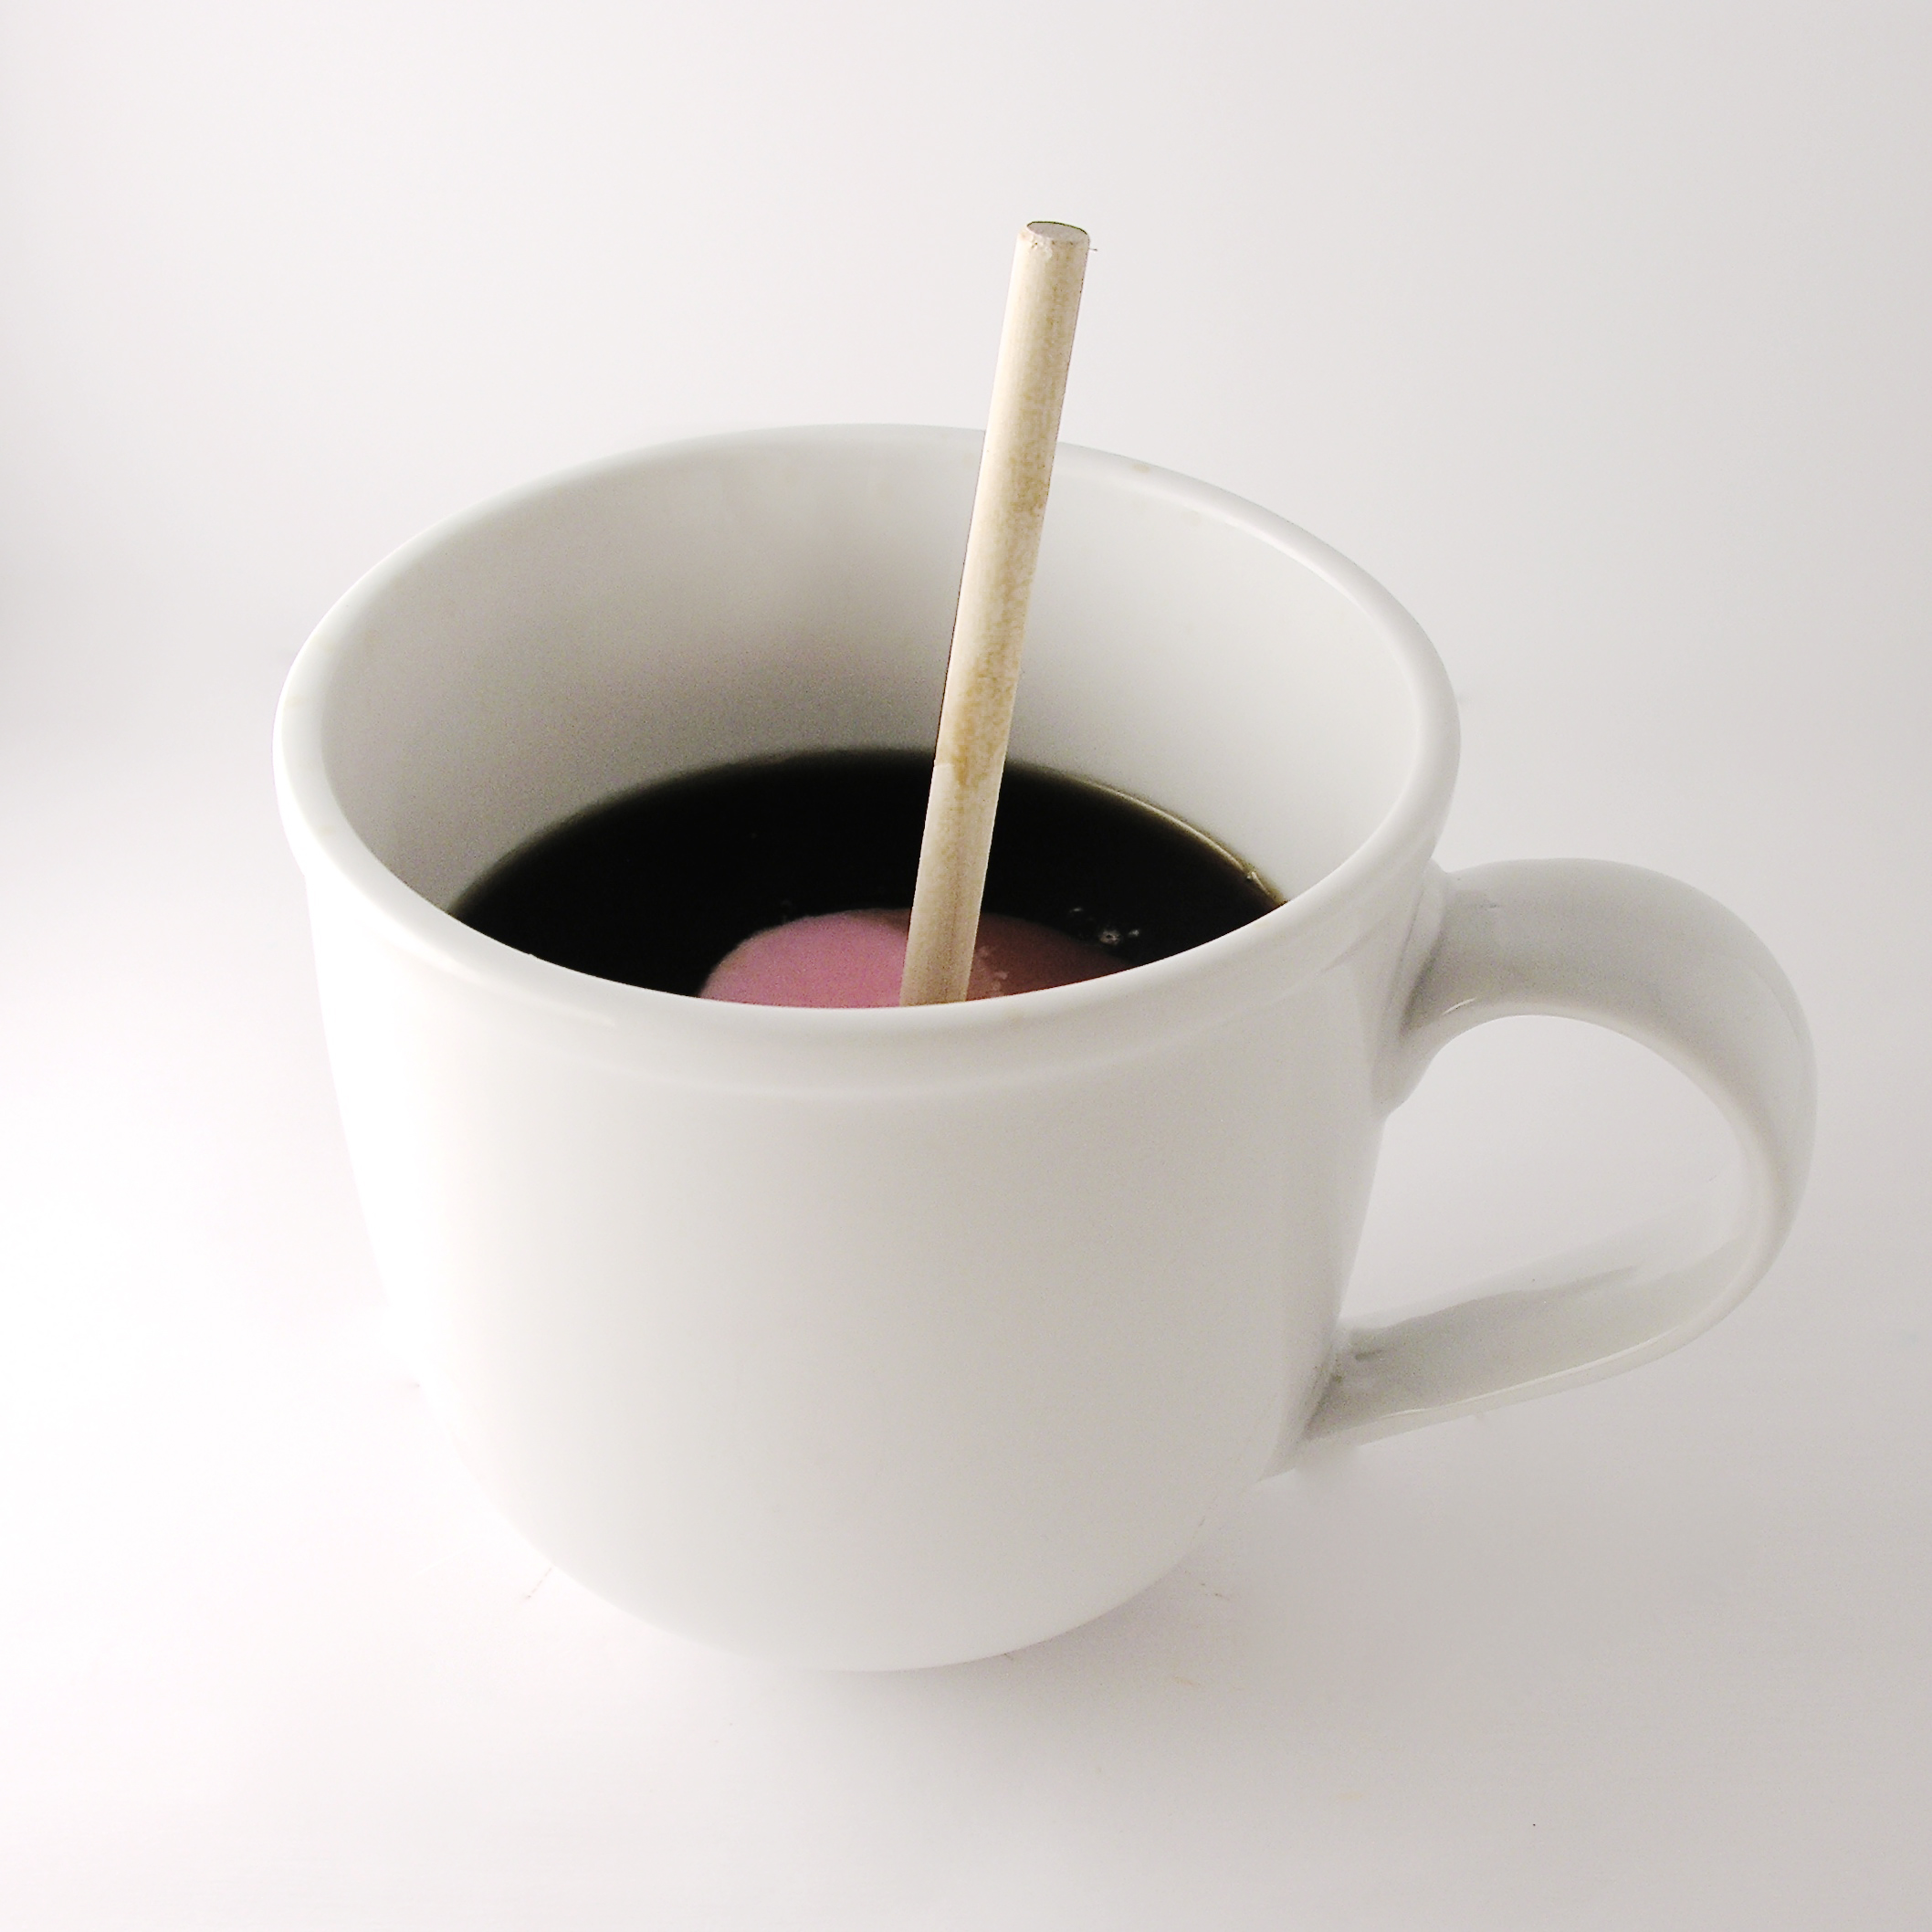
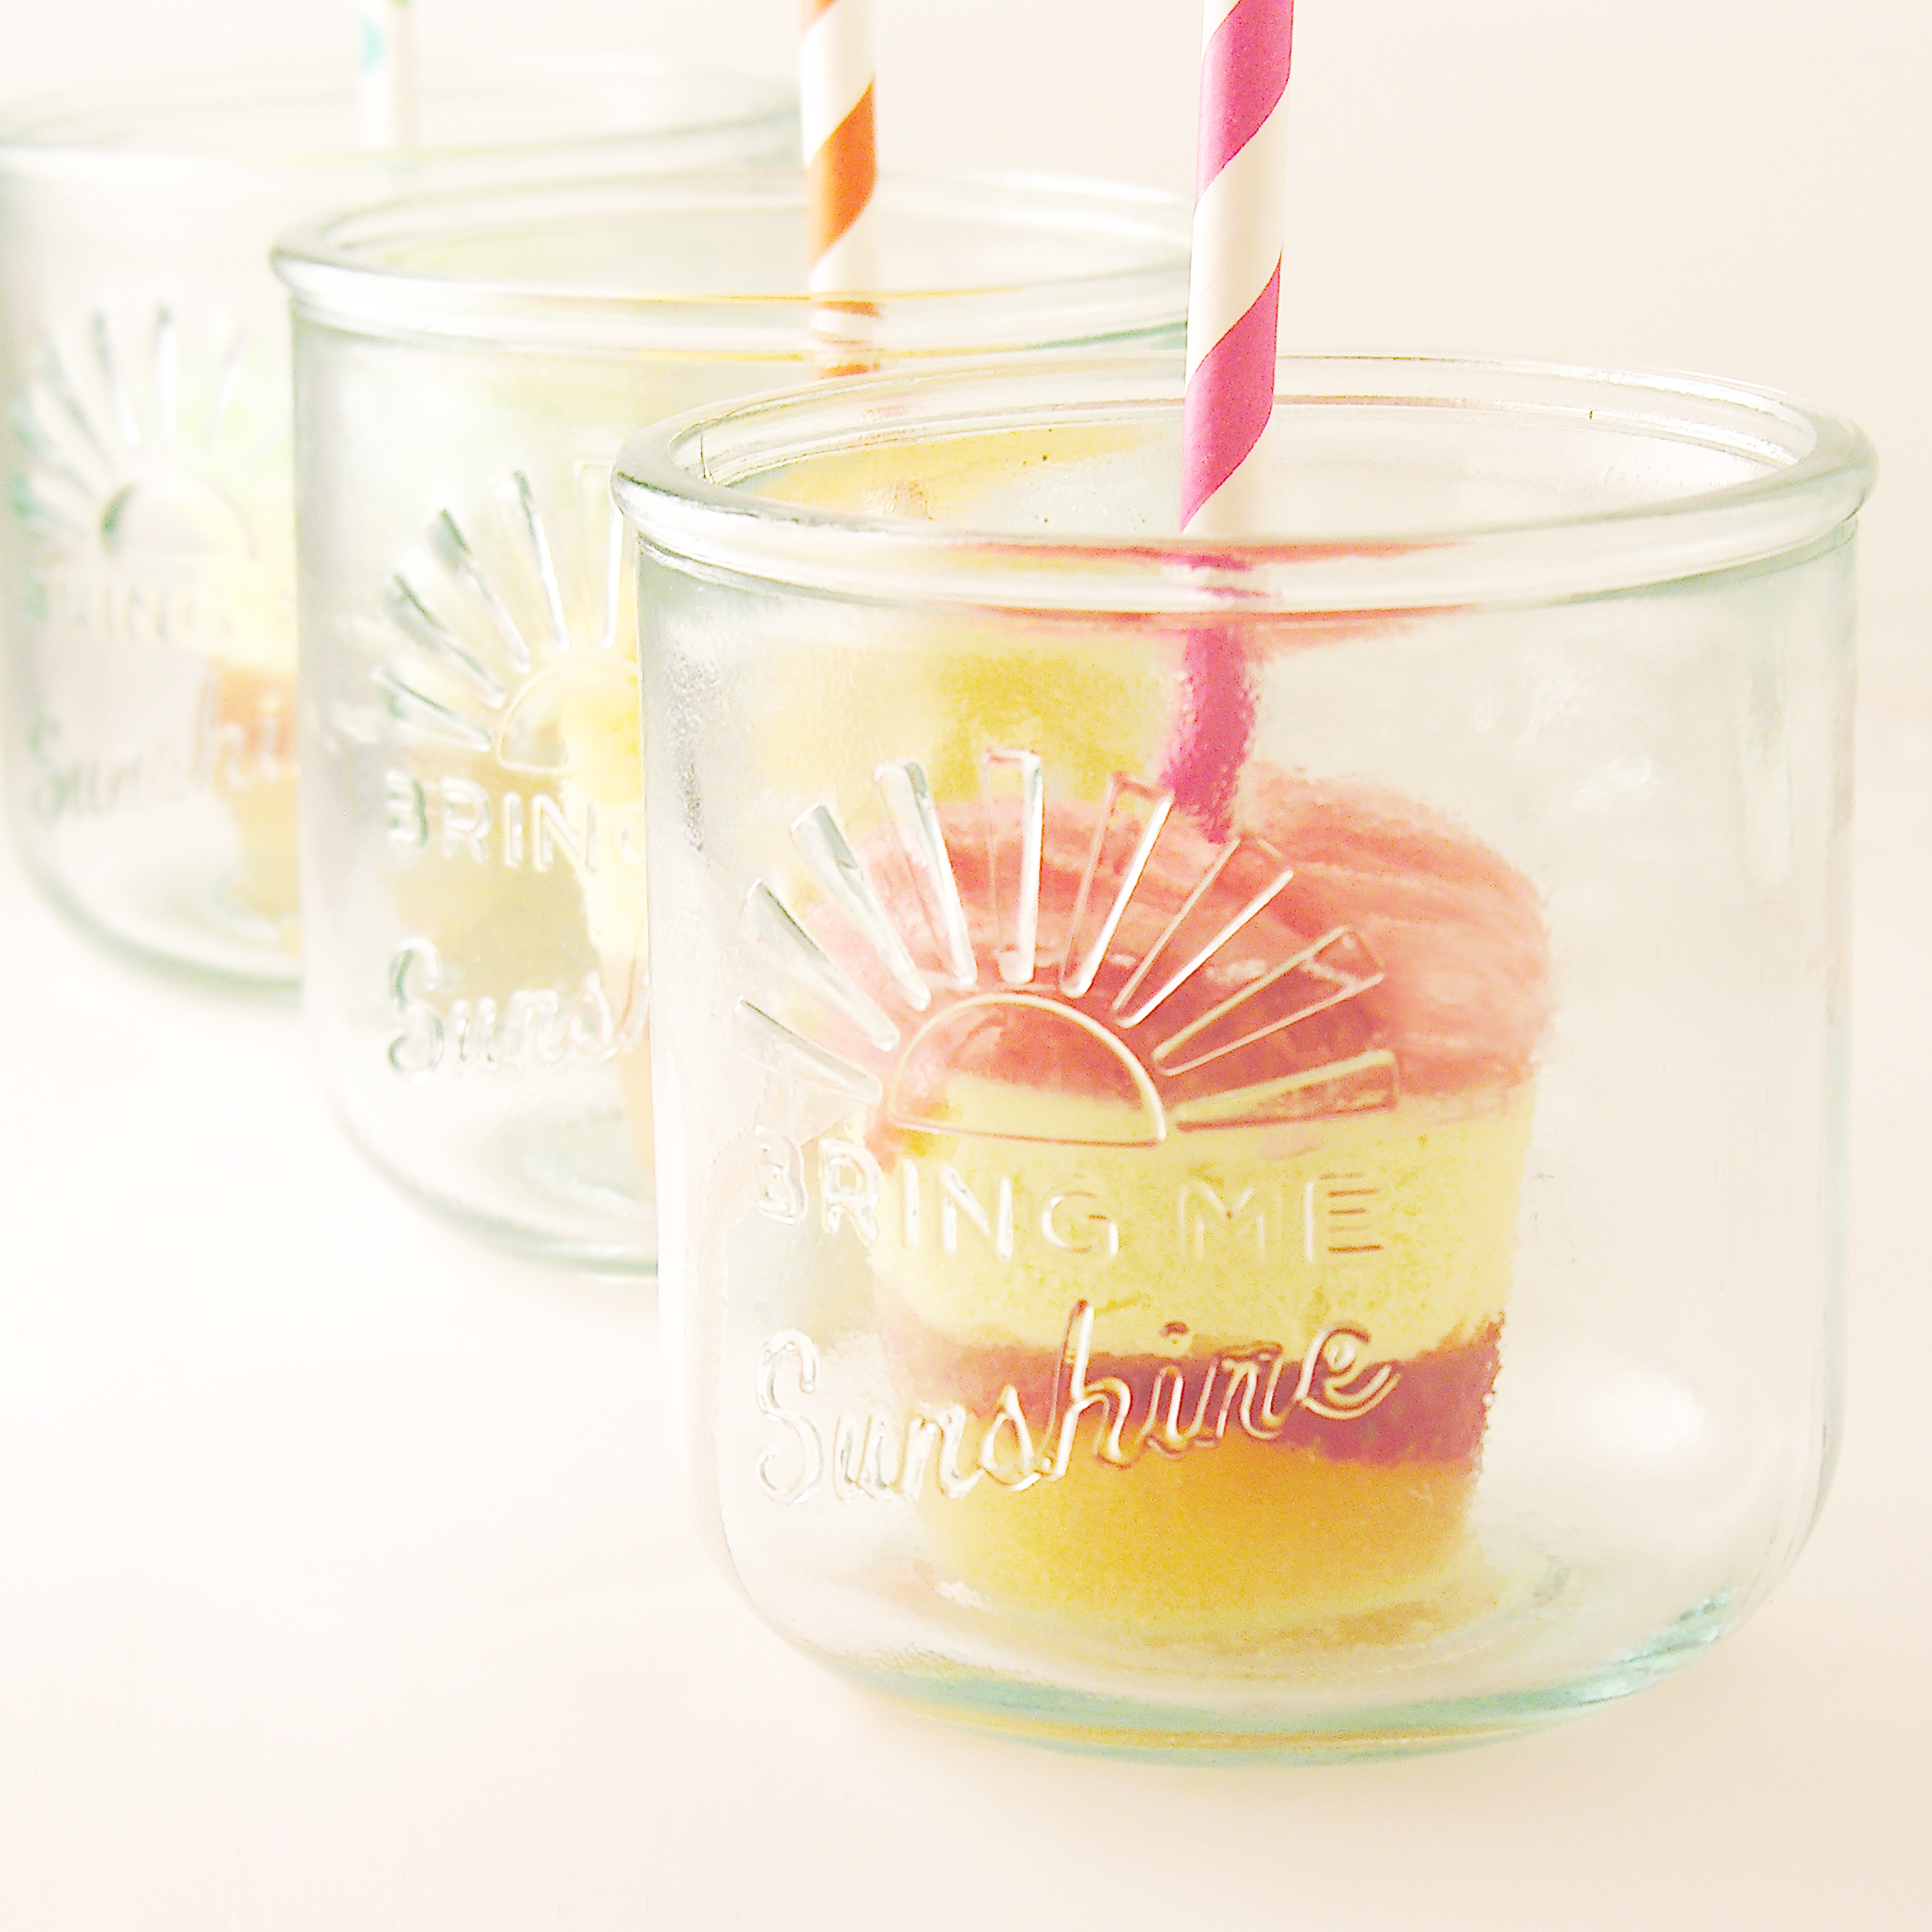
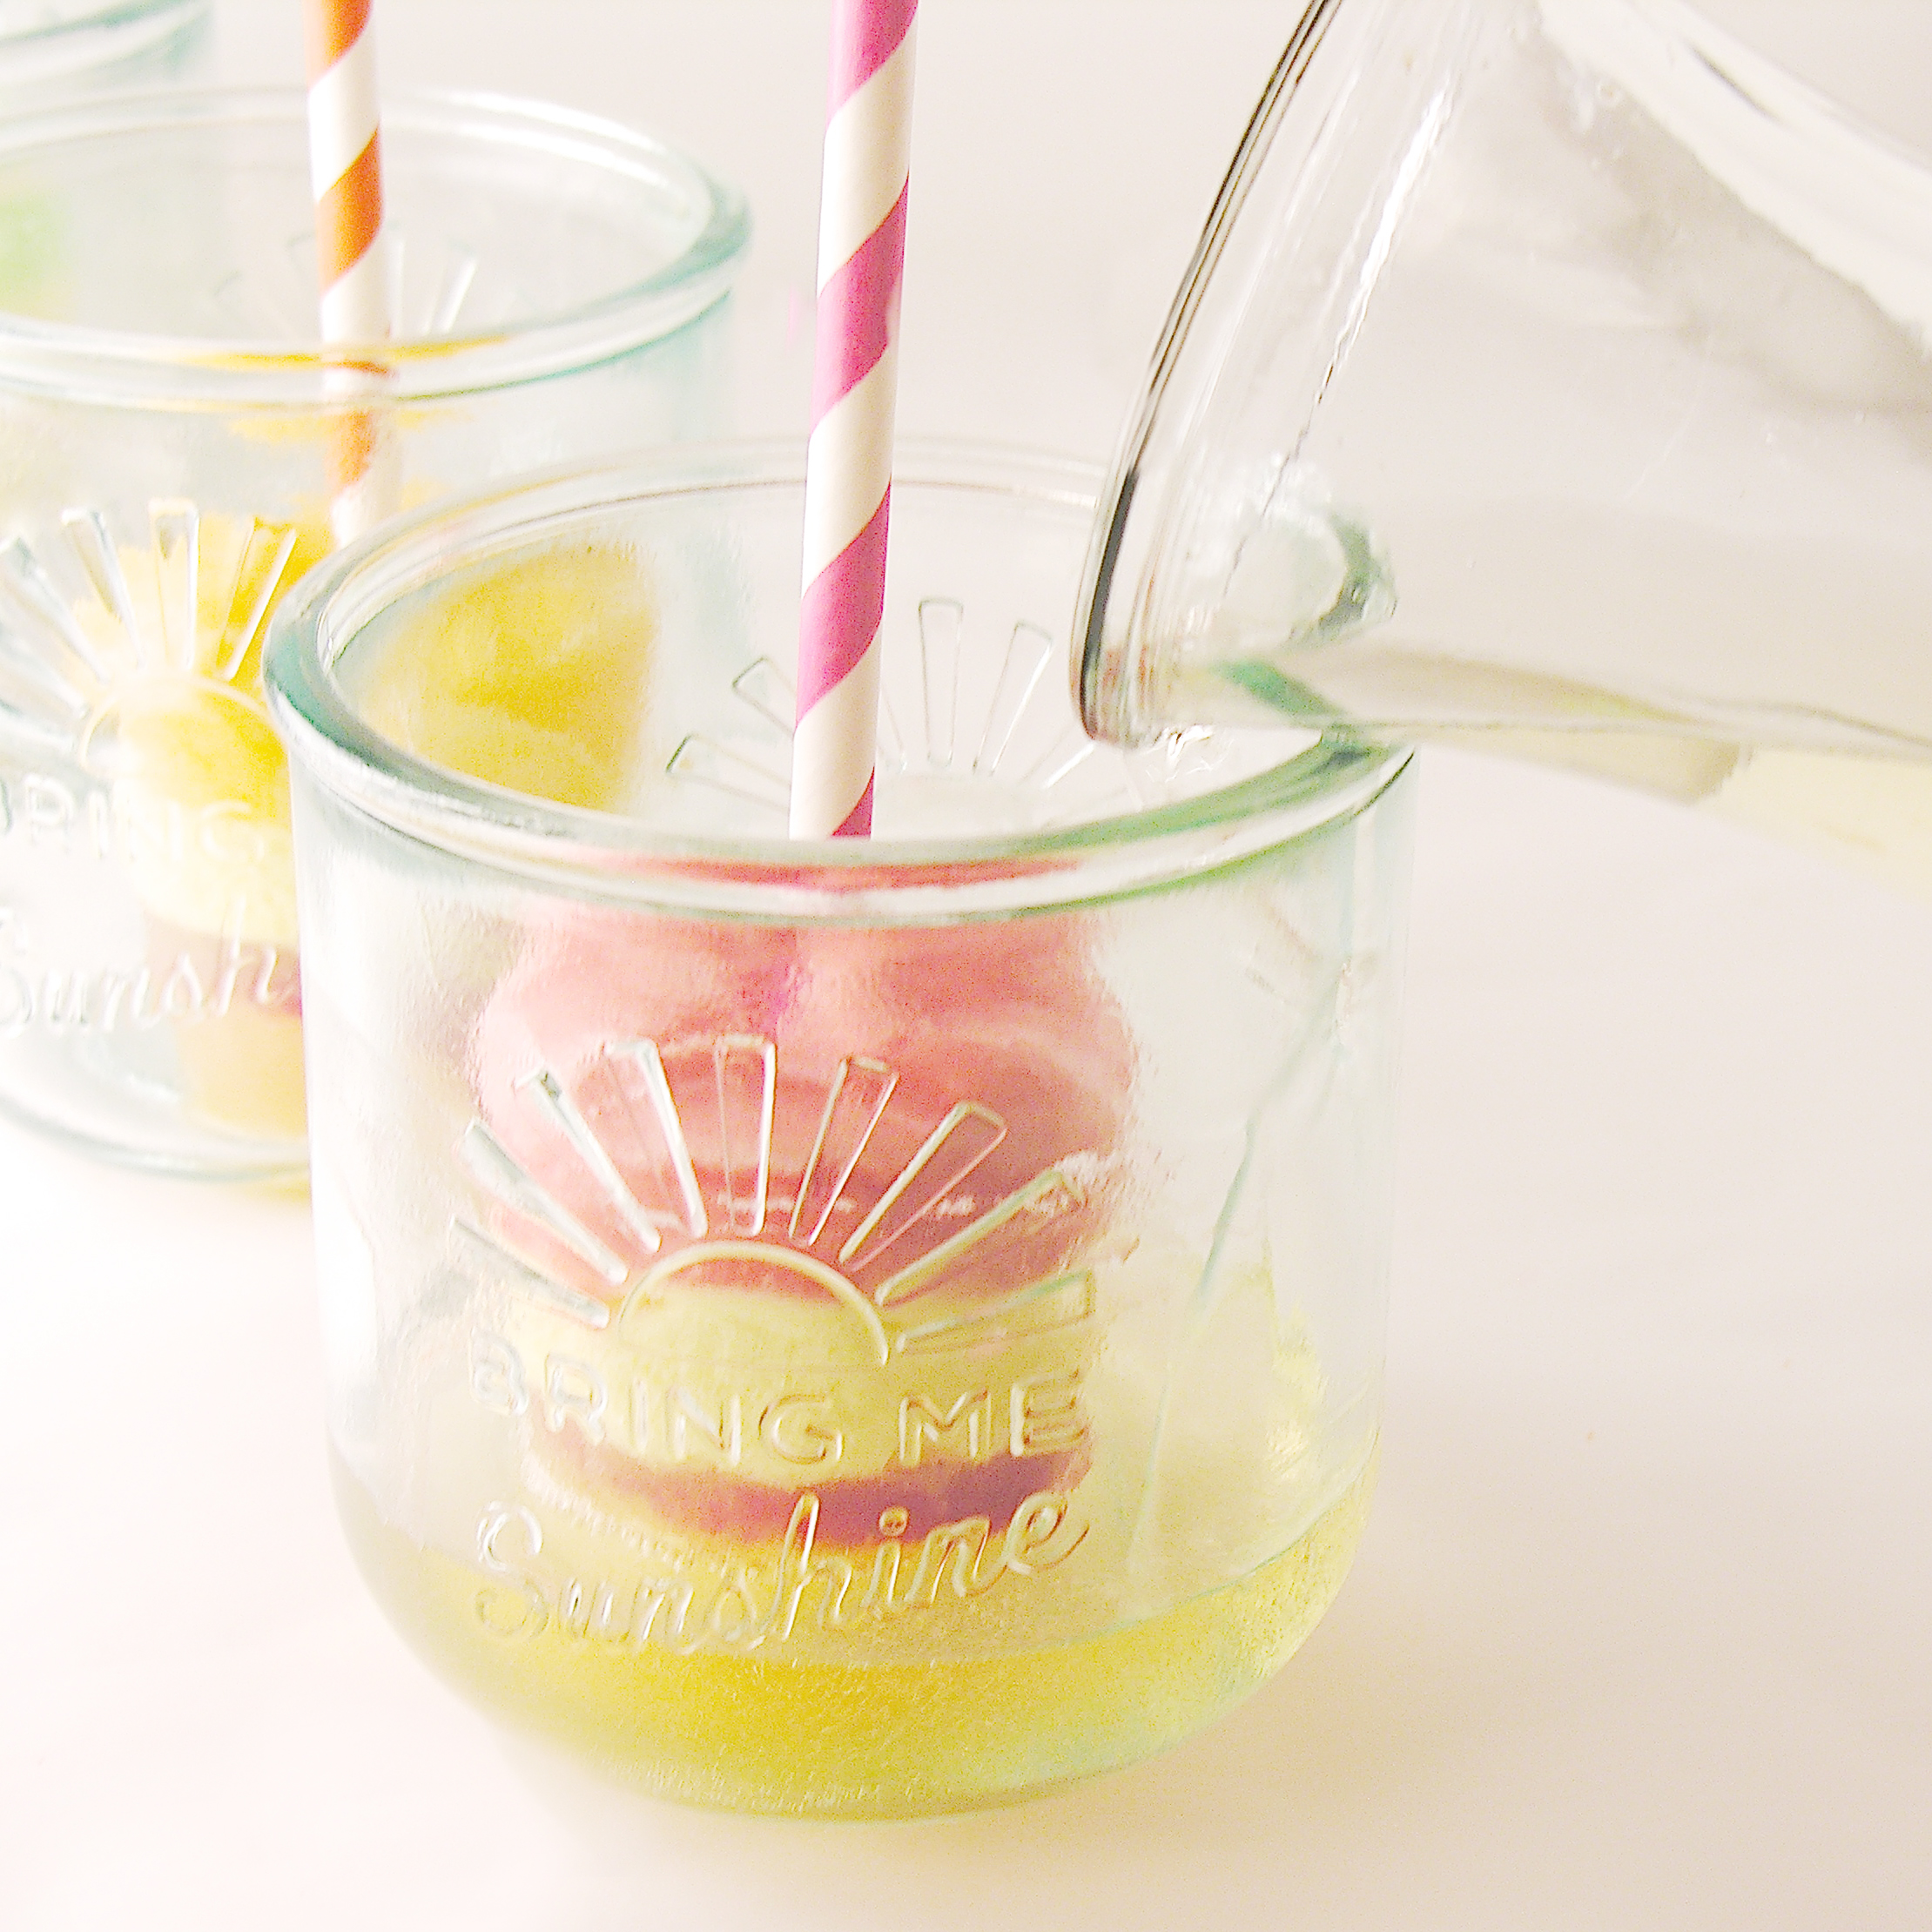
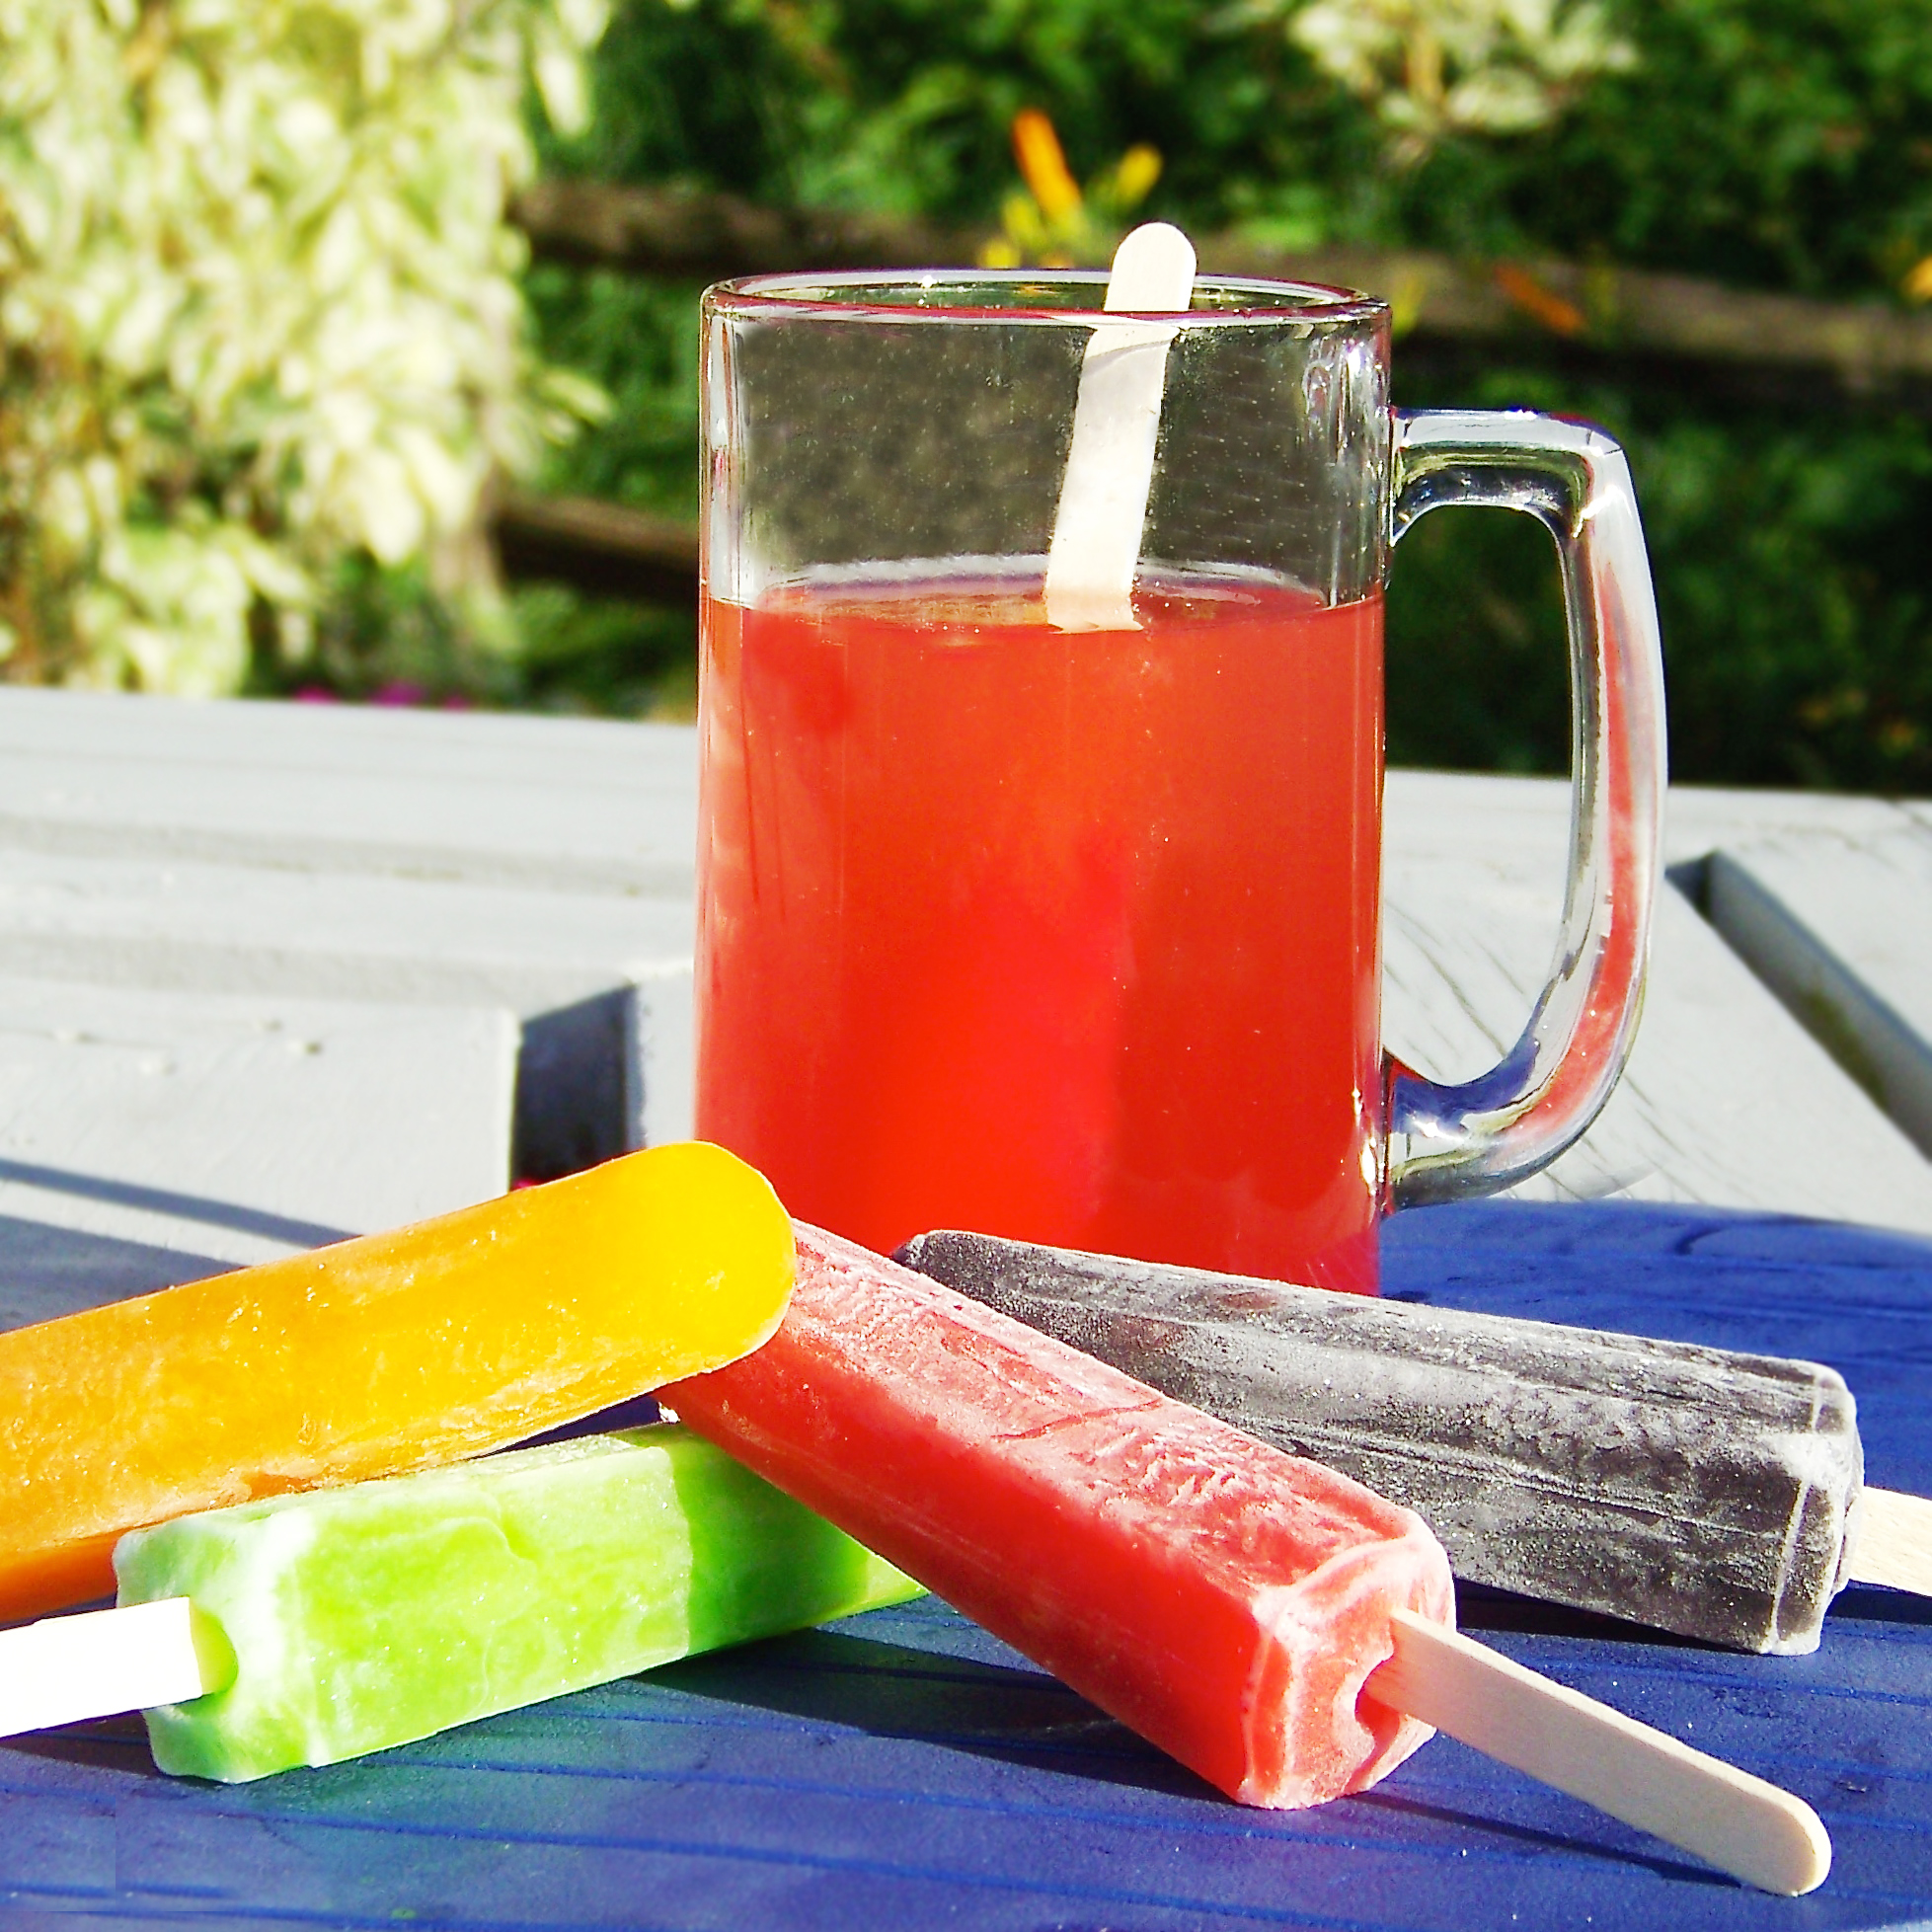
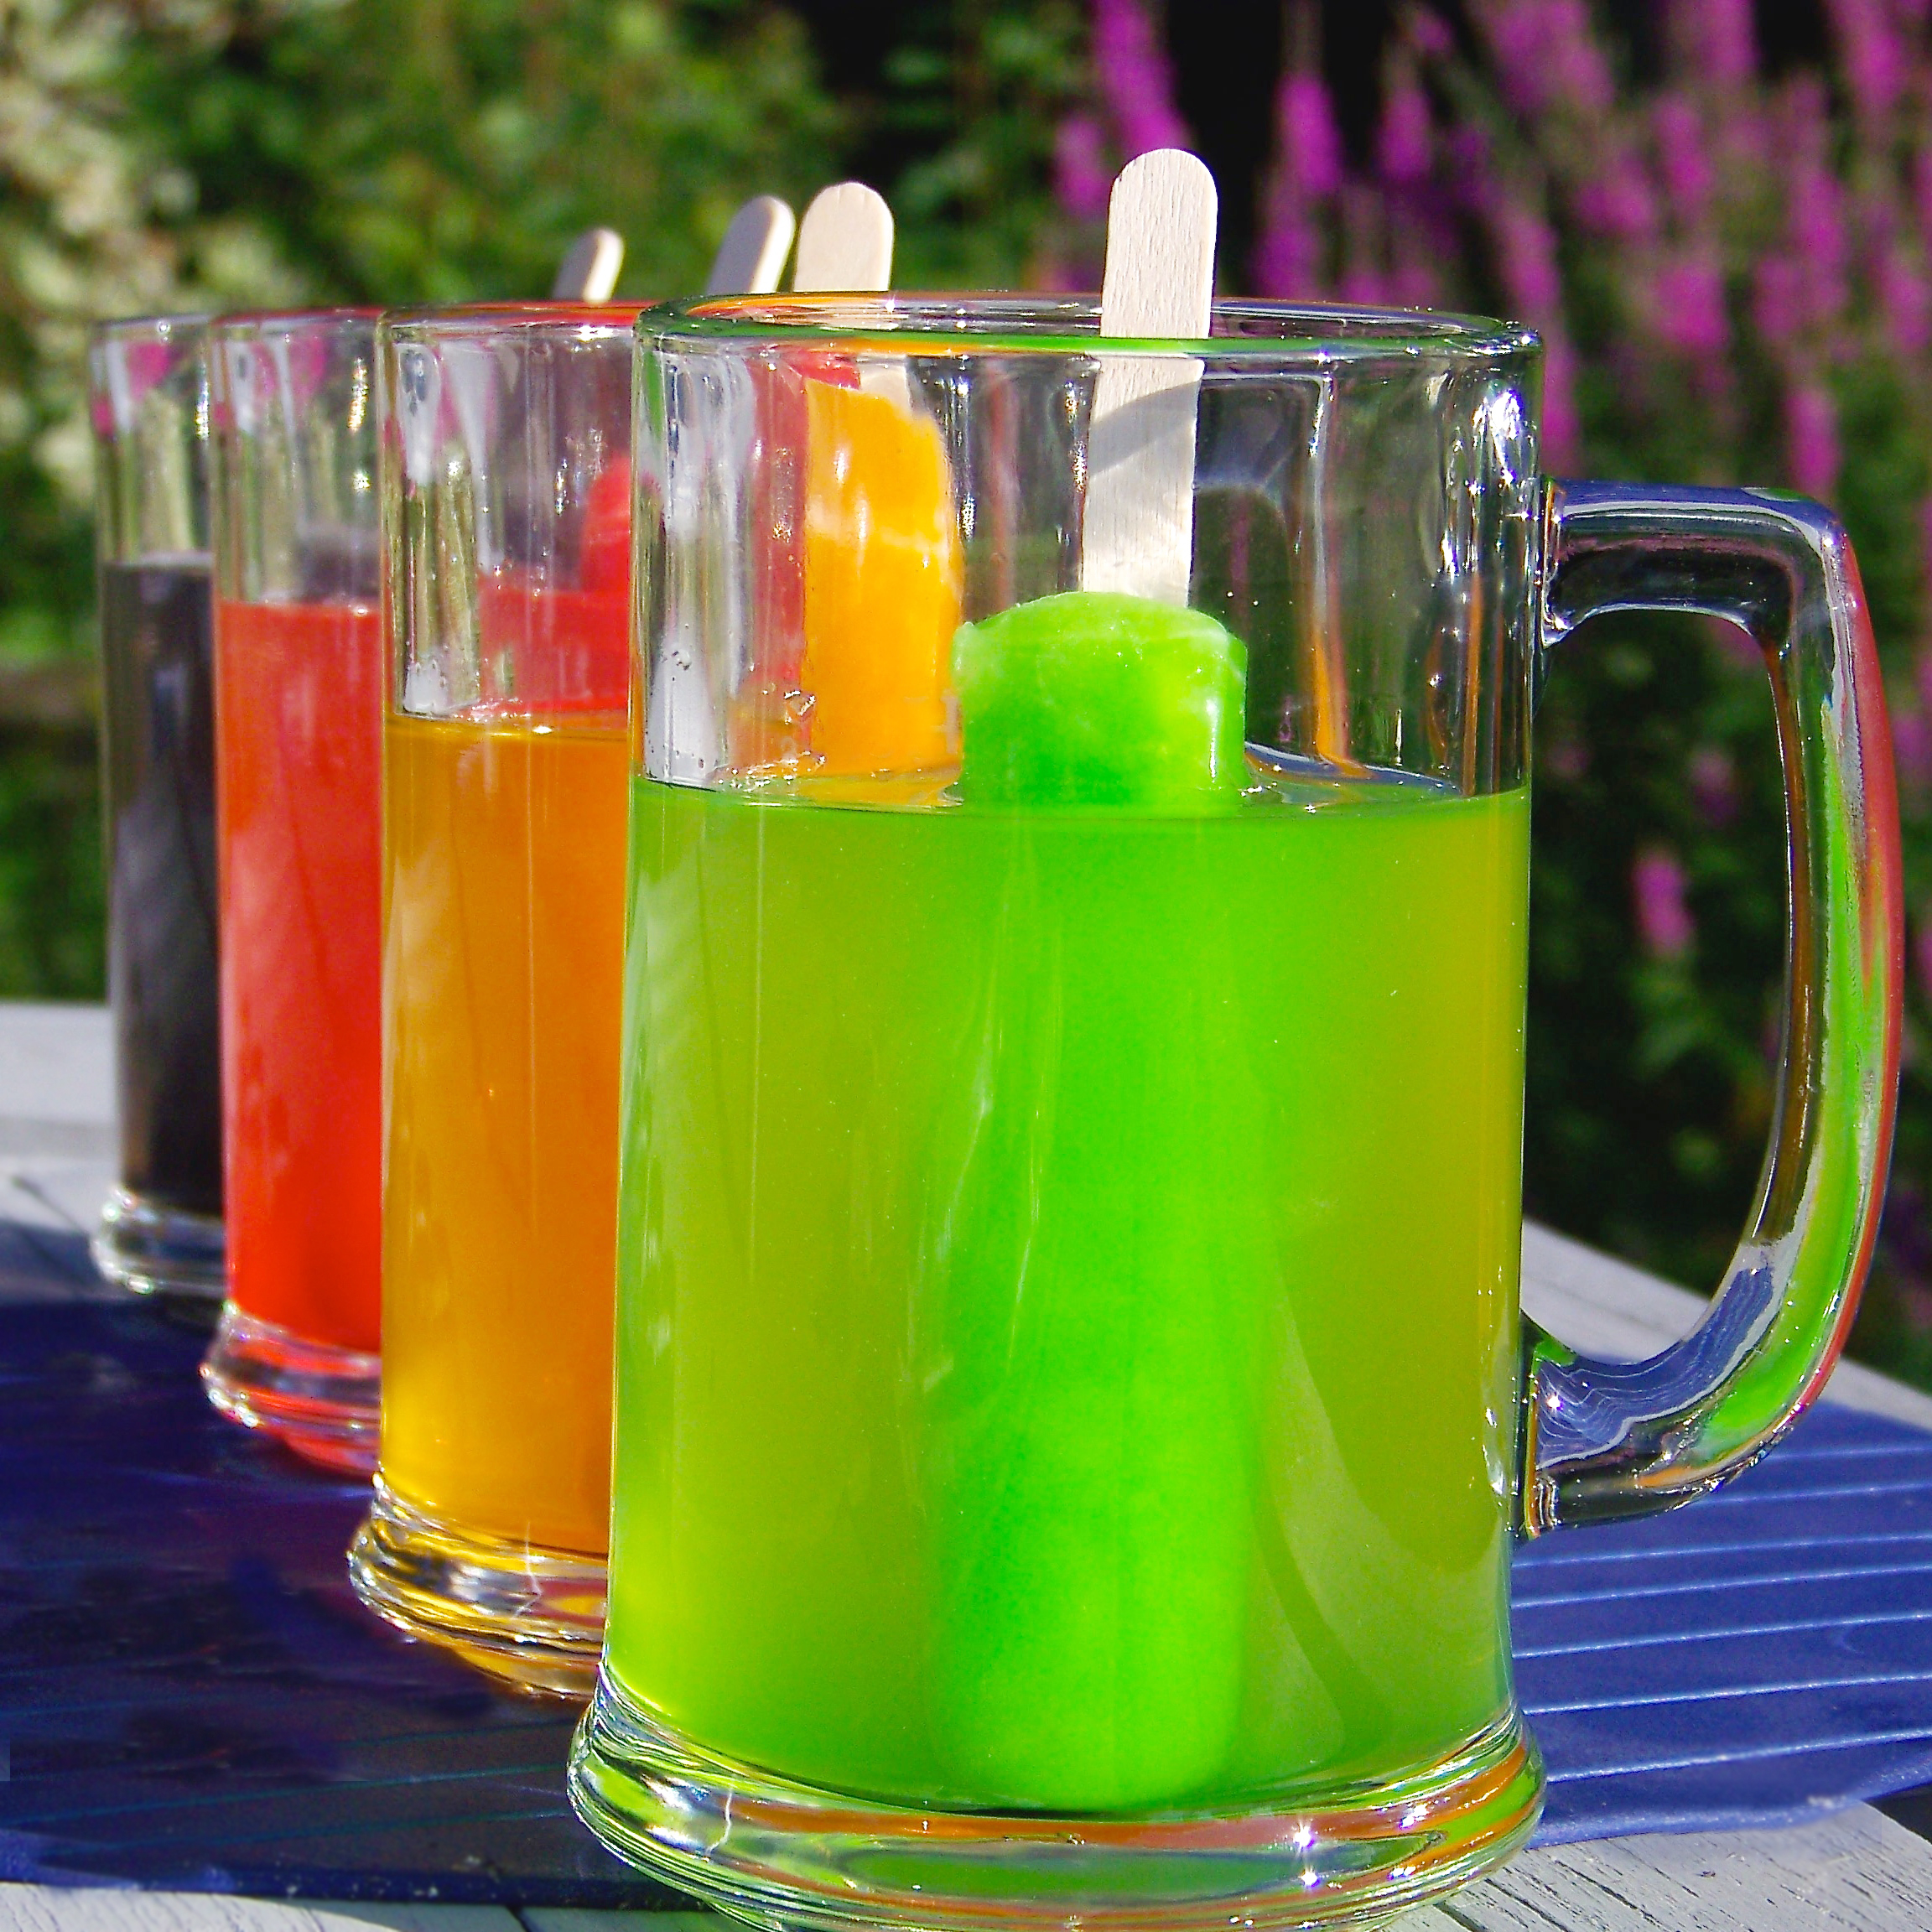
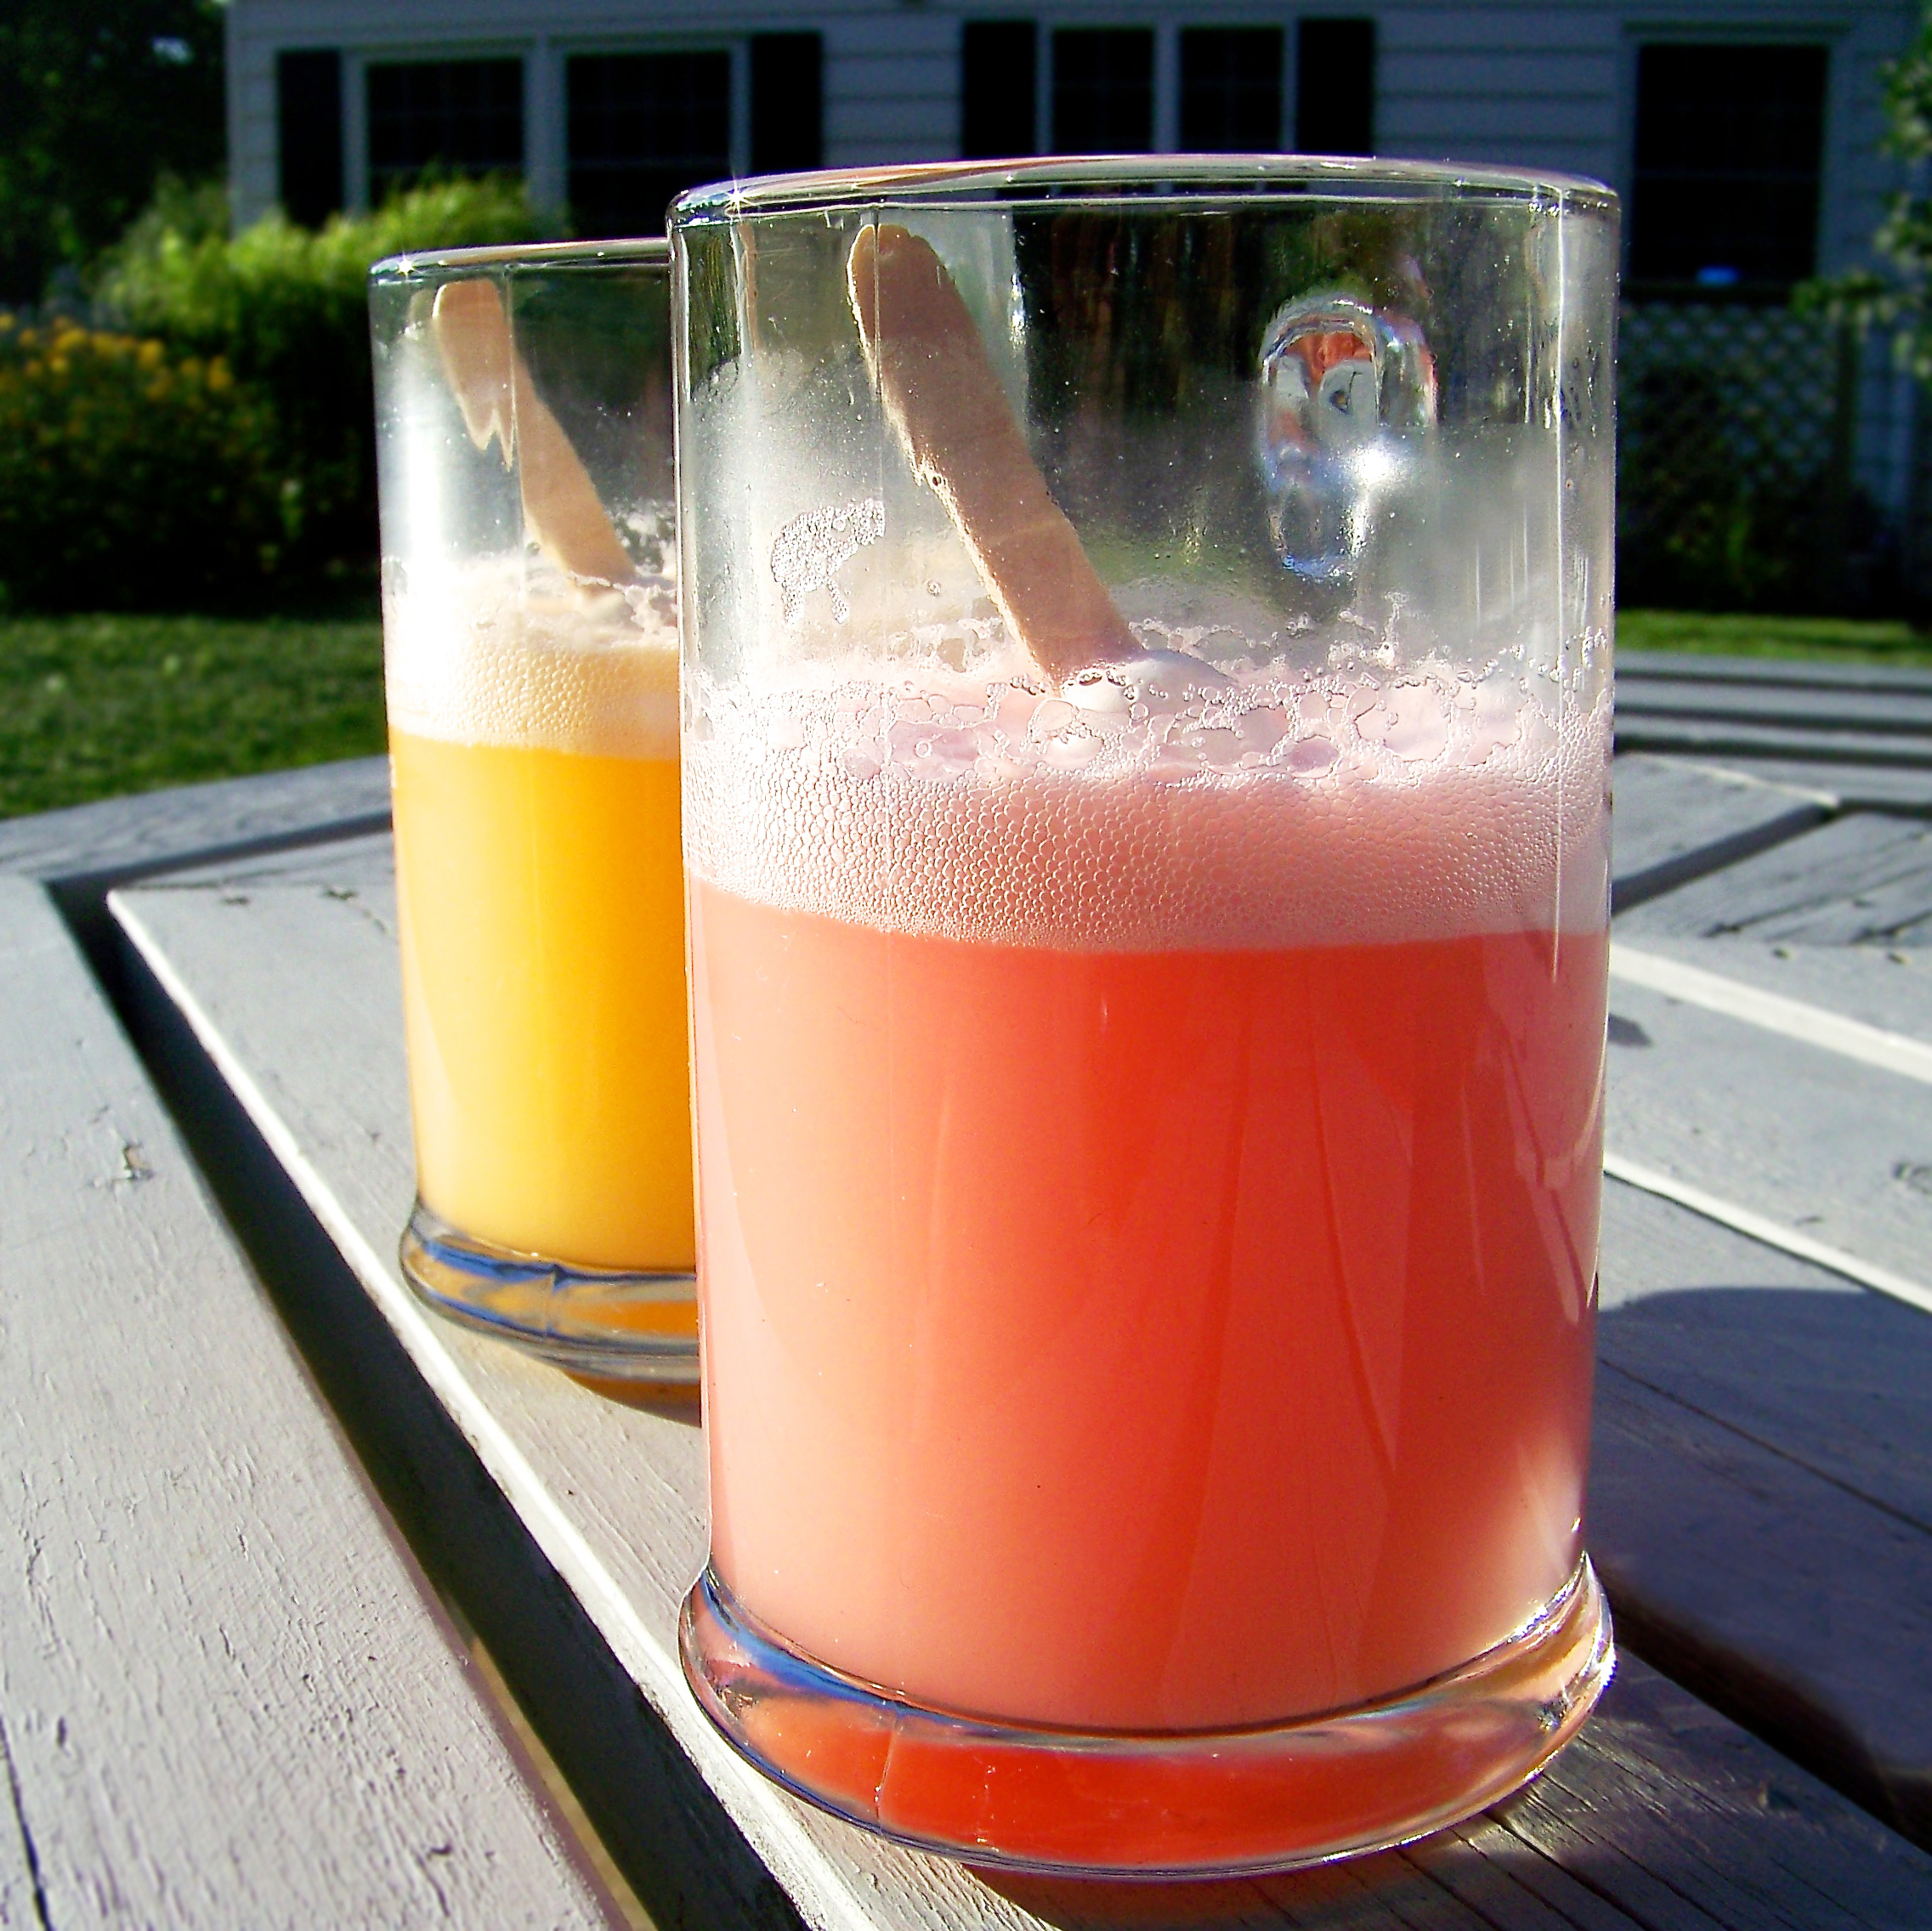
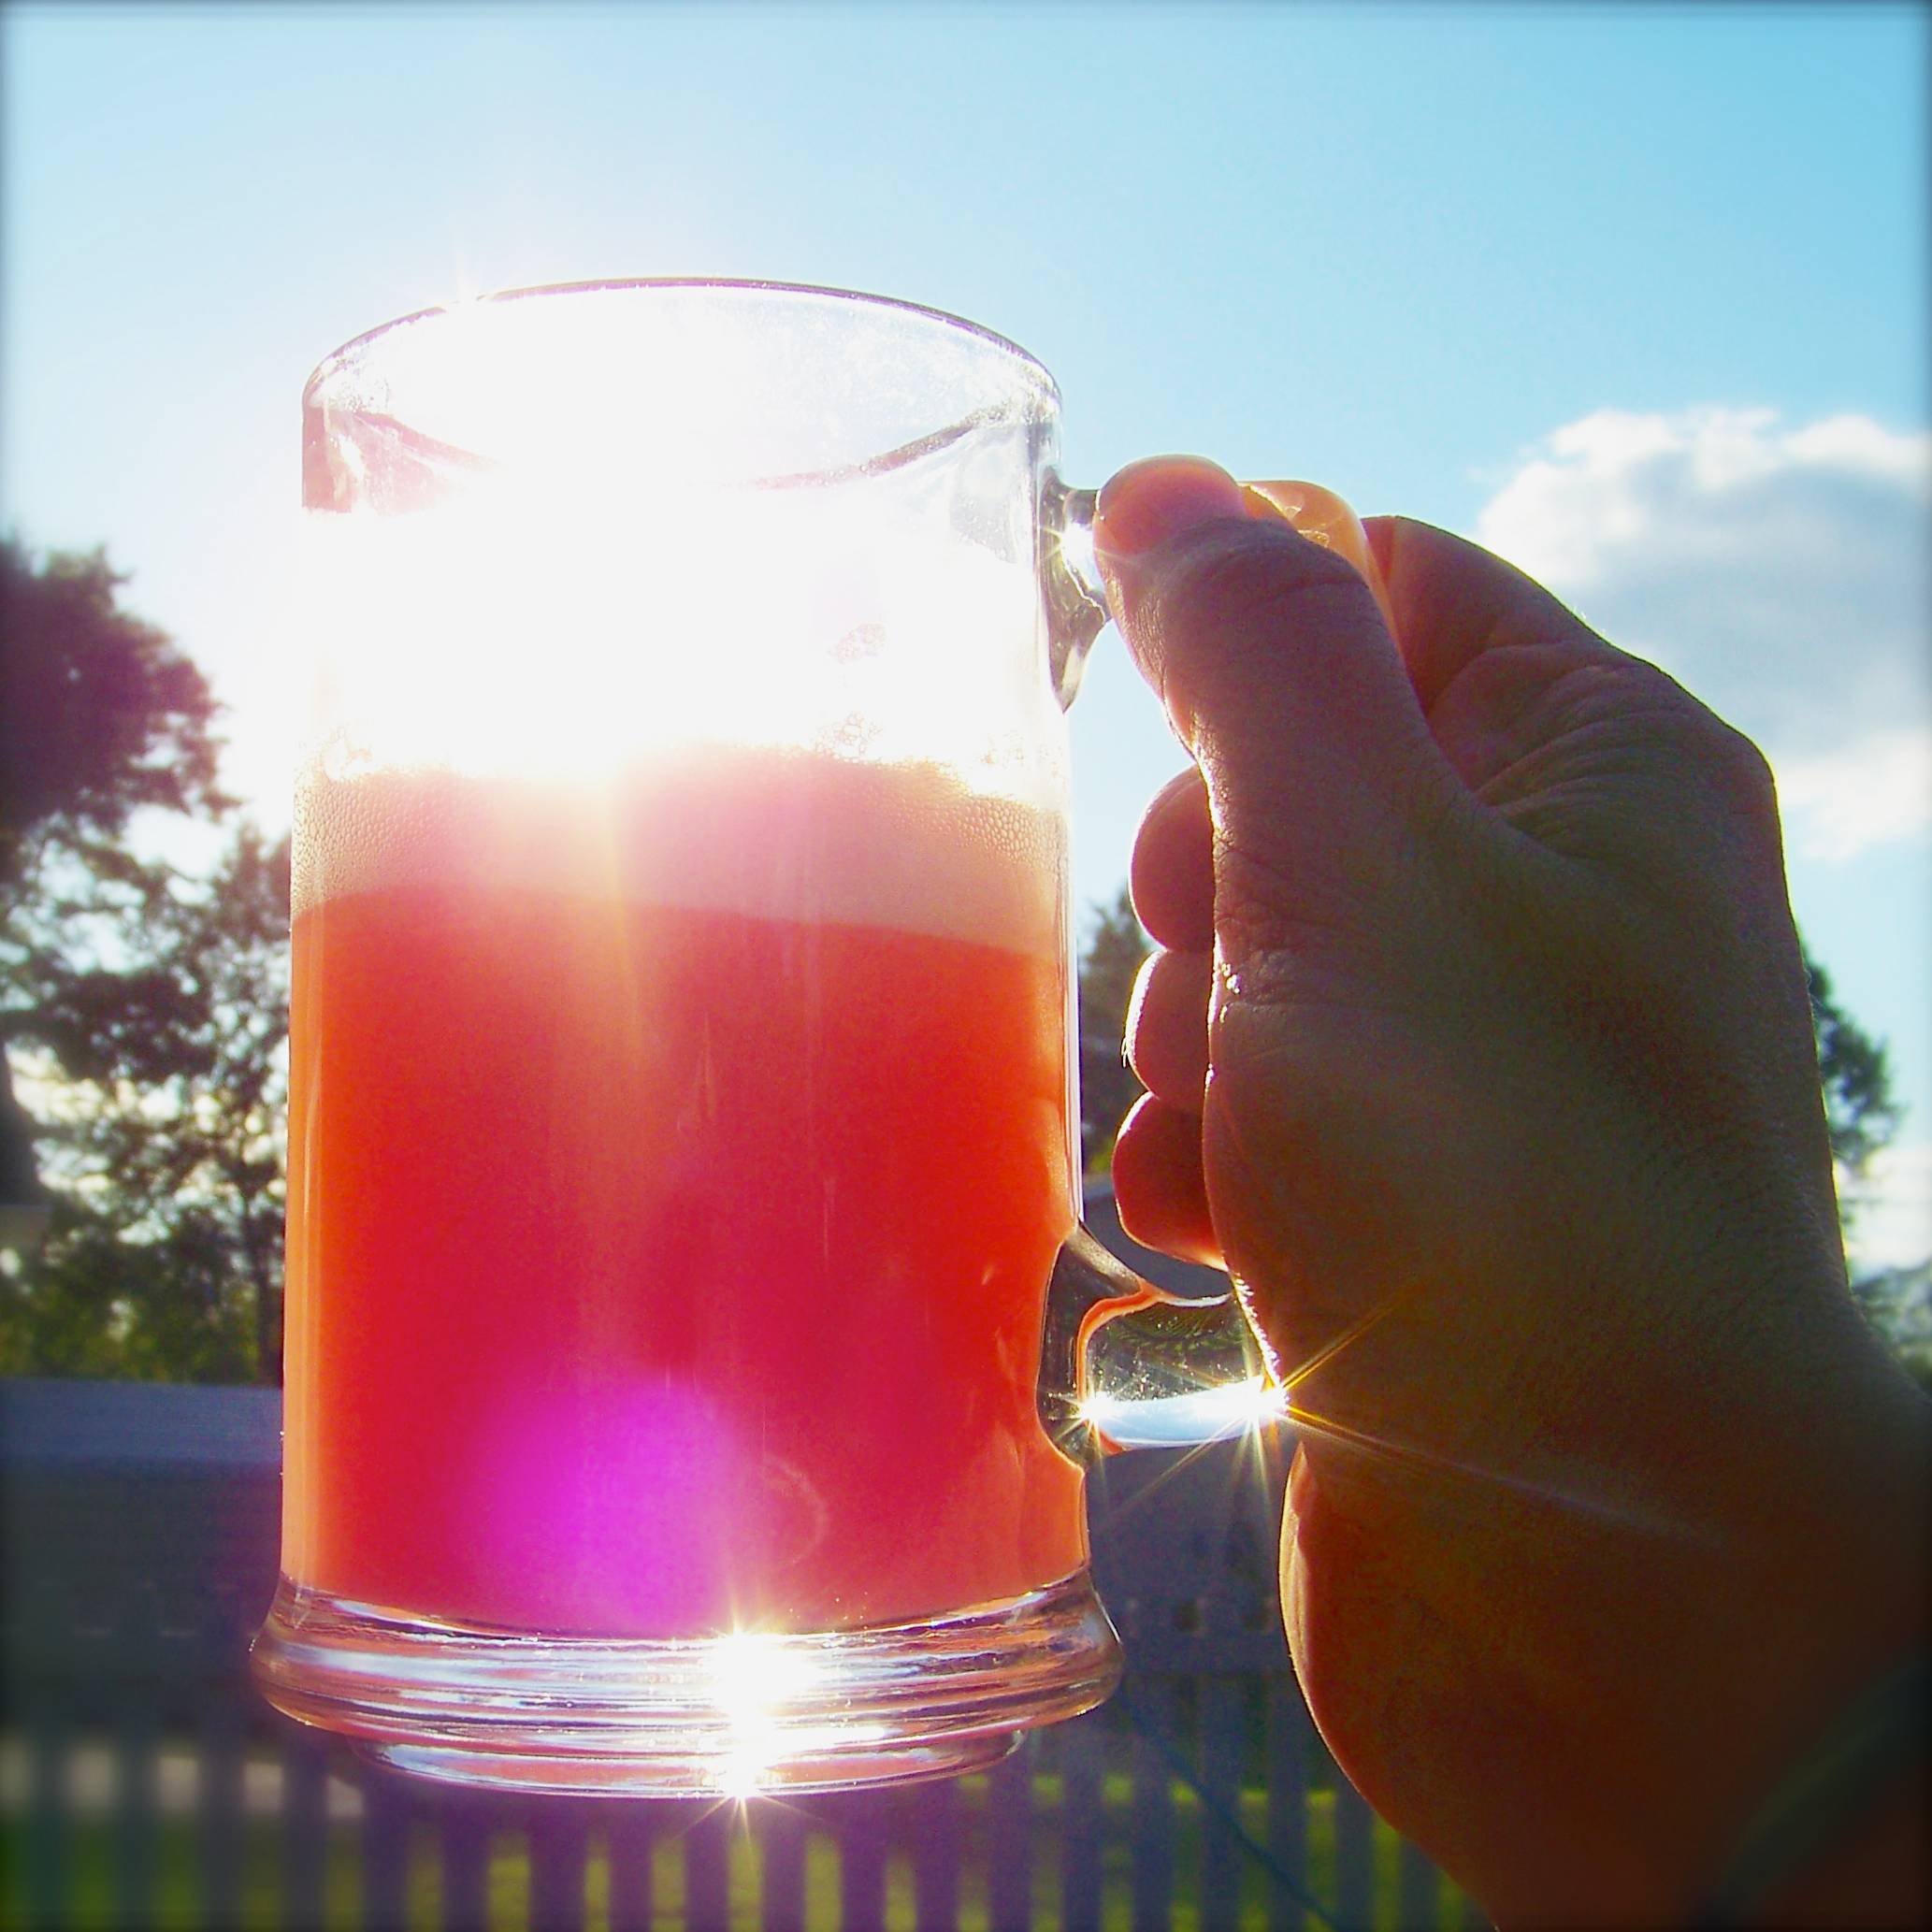
- To serve these cute little pops, simply place one in a glass that holds at least 12 ounces, and pour room temperature ginger ale over the top- just until the pop is covered.
- Stir your punch with the straw until it has melted into a cold frothy ice cream treat!

My thoughts: We all need a little extra cheer this Christmas season, and these punch pops are just a tiny way to make someone you love smile. You can make them in any flavor of sherbet you can find and add any type of fruit!
Be sure, when you hand them out, to tell the recipients to get them from their porch and freeze them right away! Then, have everyone make a cup of punch, get on Zoom, and make a toast to better days in 2021! Hugs to each of you as you navigate this Christmas season, and prayers for good health, and all the peace and joy God can fill you up with this year! ~Enjoy!

Other fun Christmas porch drop-off ideas (click on title to see recipe):