Tag Archives: fruit

Ice Cream Punch Pops!

Posted on

Punch Pops6

Add ginger ale to this cute frozen pop and you’ll have a cup of creamy, fruity, ice cream punch!  A perfect summer treat!

So I have this incredible punch recipe. It is soooooo yummy! I’ve made it for all sorts of parties, showers, picnics, and receptions. I’ve been asked for my recipe so many times that I’m actually surprised I haven’t added it here on Easybaked yet!

Last week I was craving it. I was headed to the pool and thinking about a cup of this creamy summer happiness- but you know punch…you have to throw all the ingredients into a big bowl and it is delicious for maybe an hour- and then it melts and you can’t save it for later. So I sat by the pool and thought about how to make punch in single servings, and these little ice cream punch pops came into being!

Punch Pops !

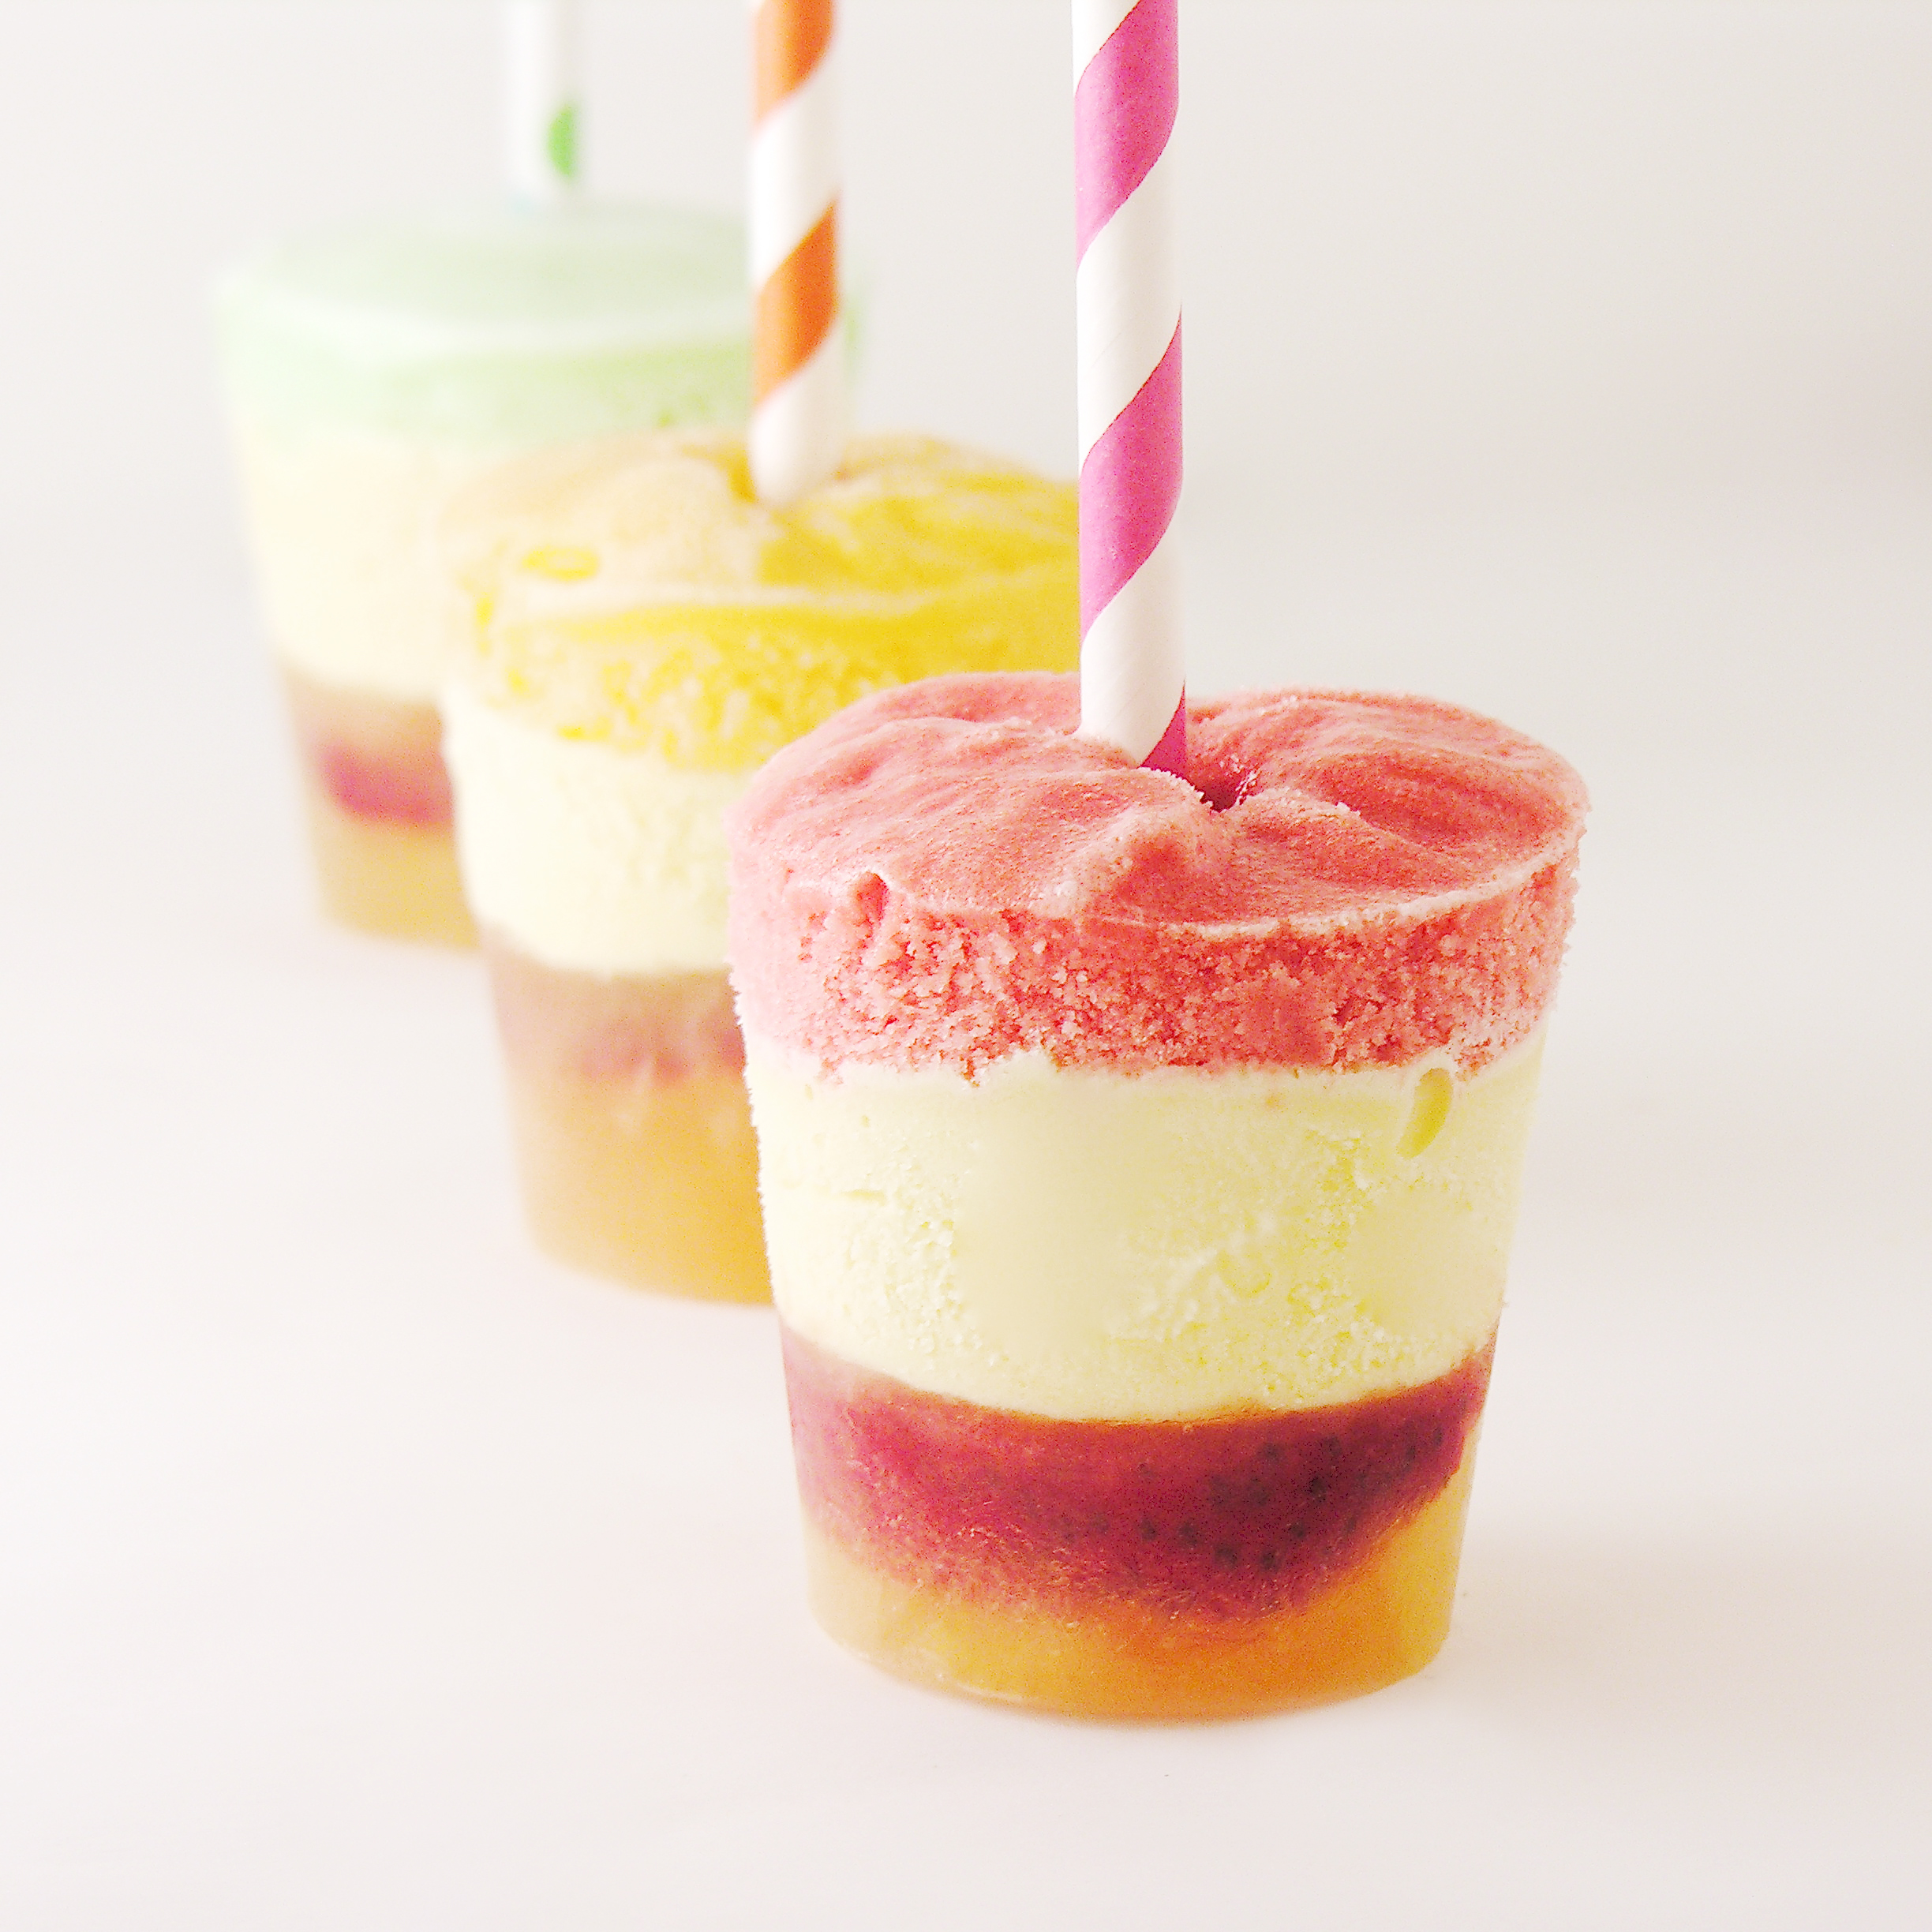
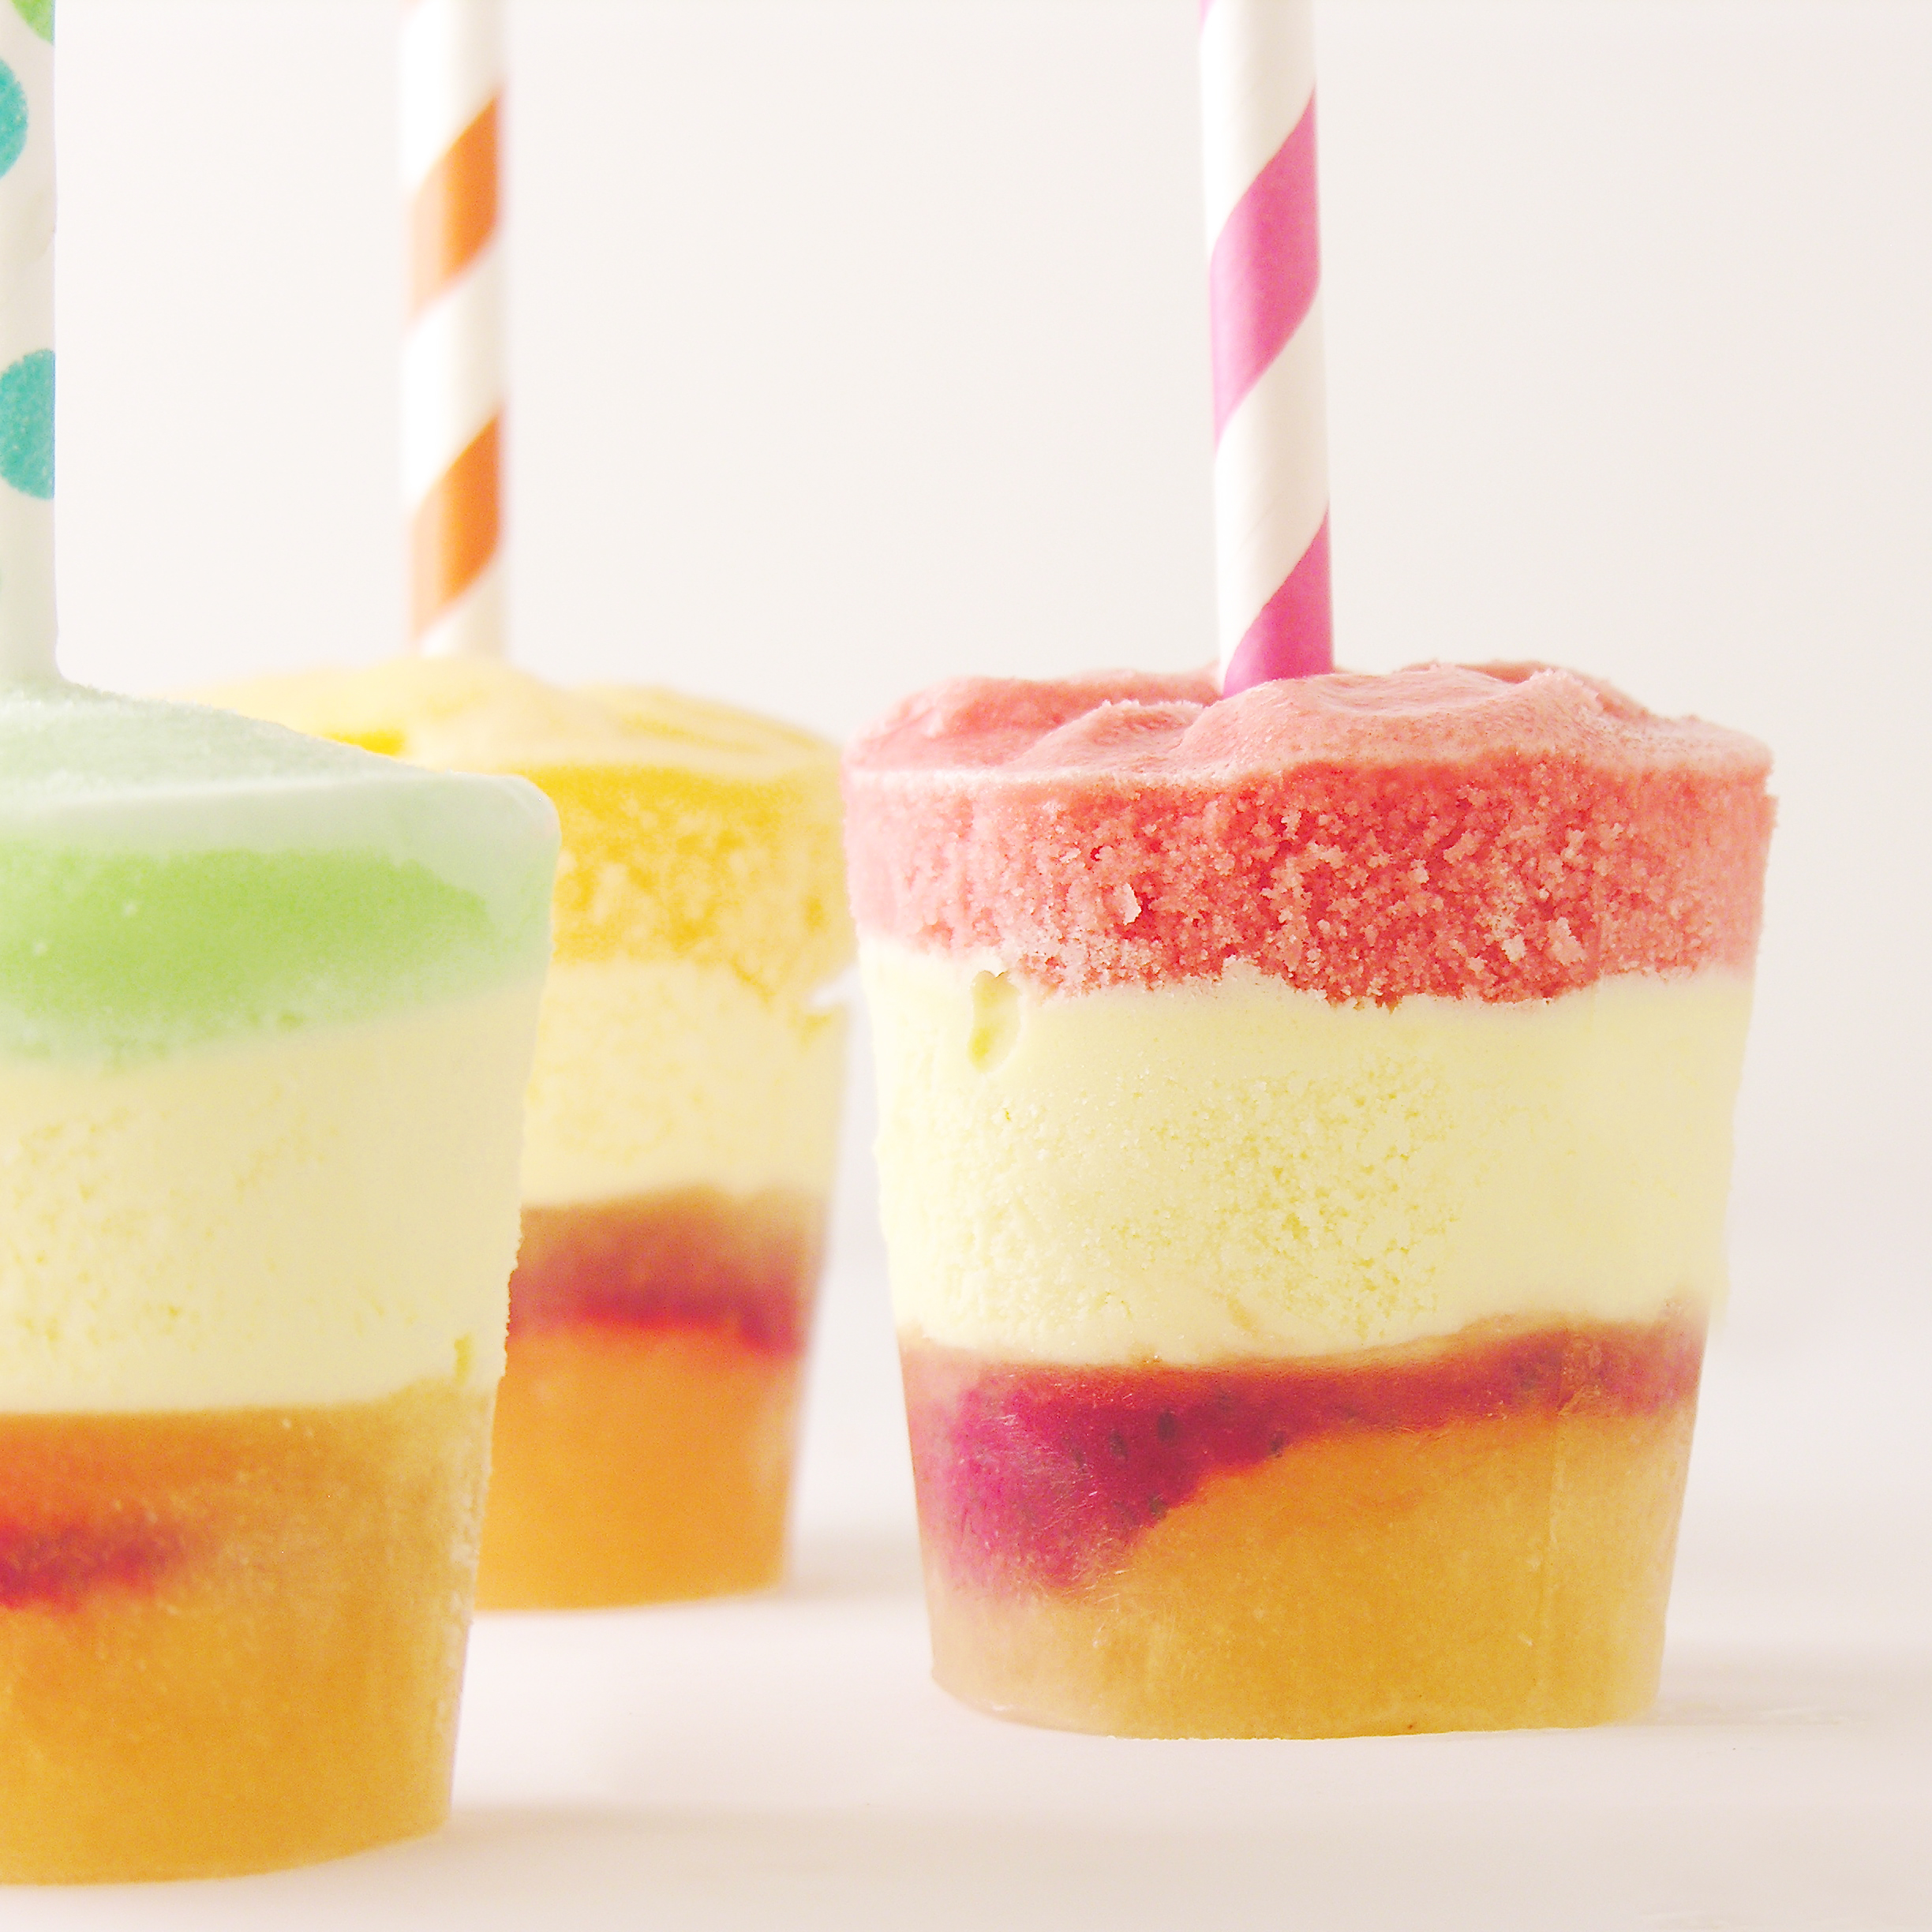
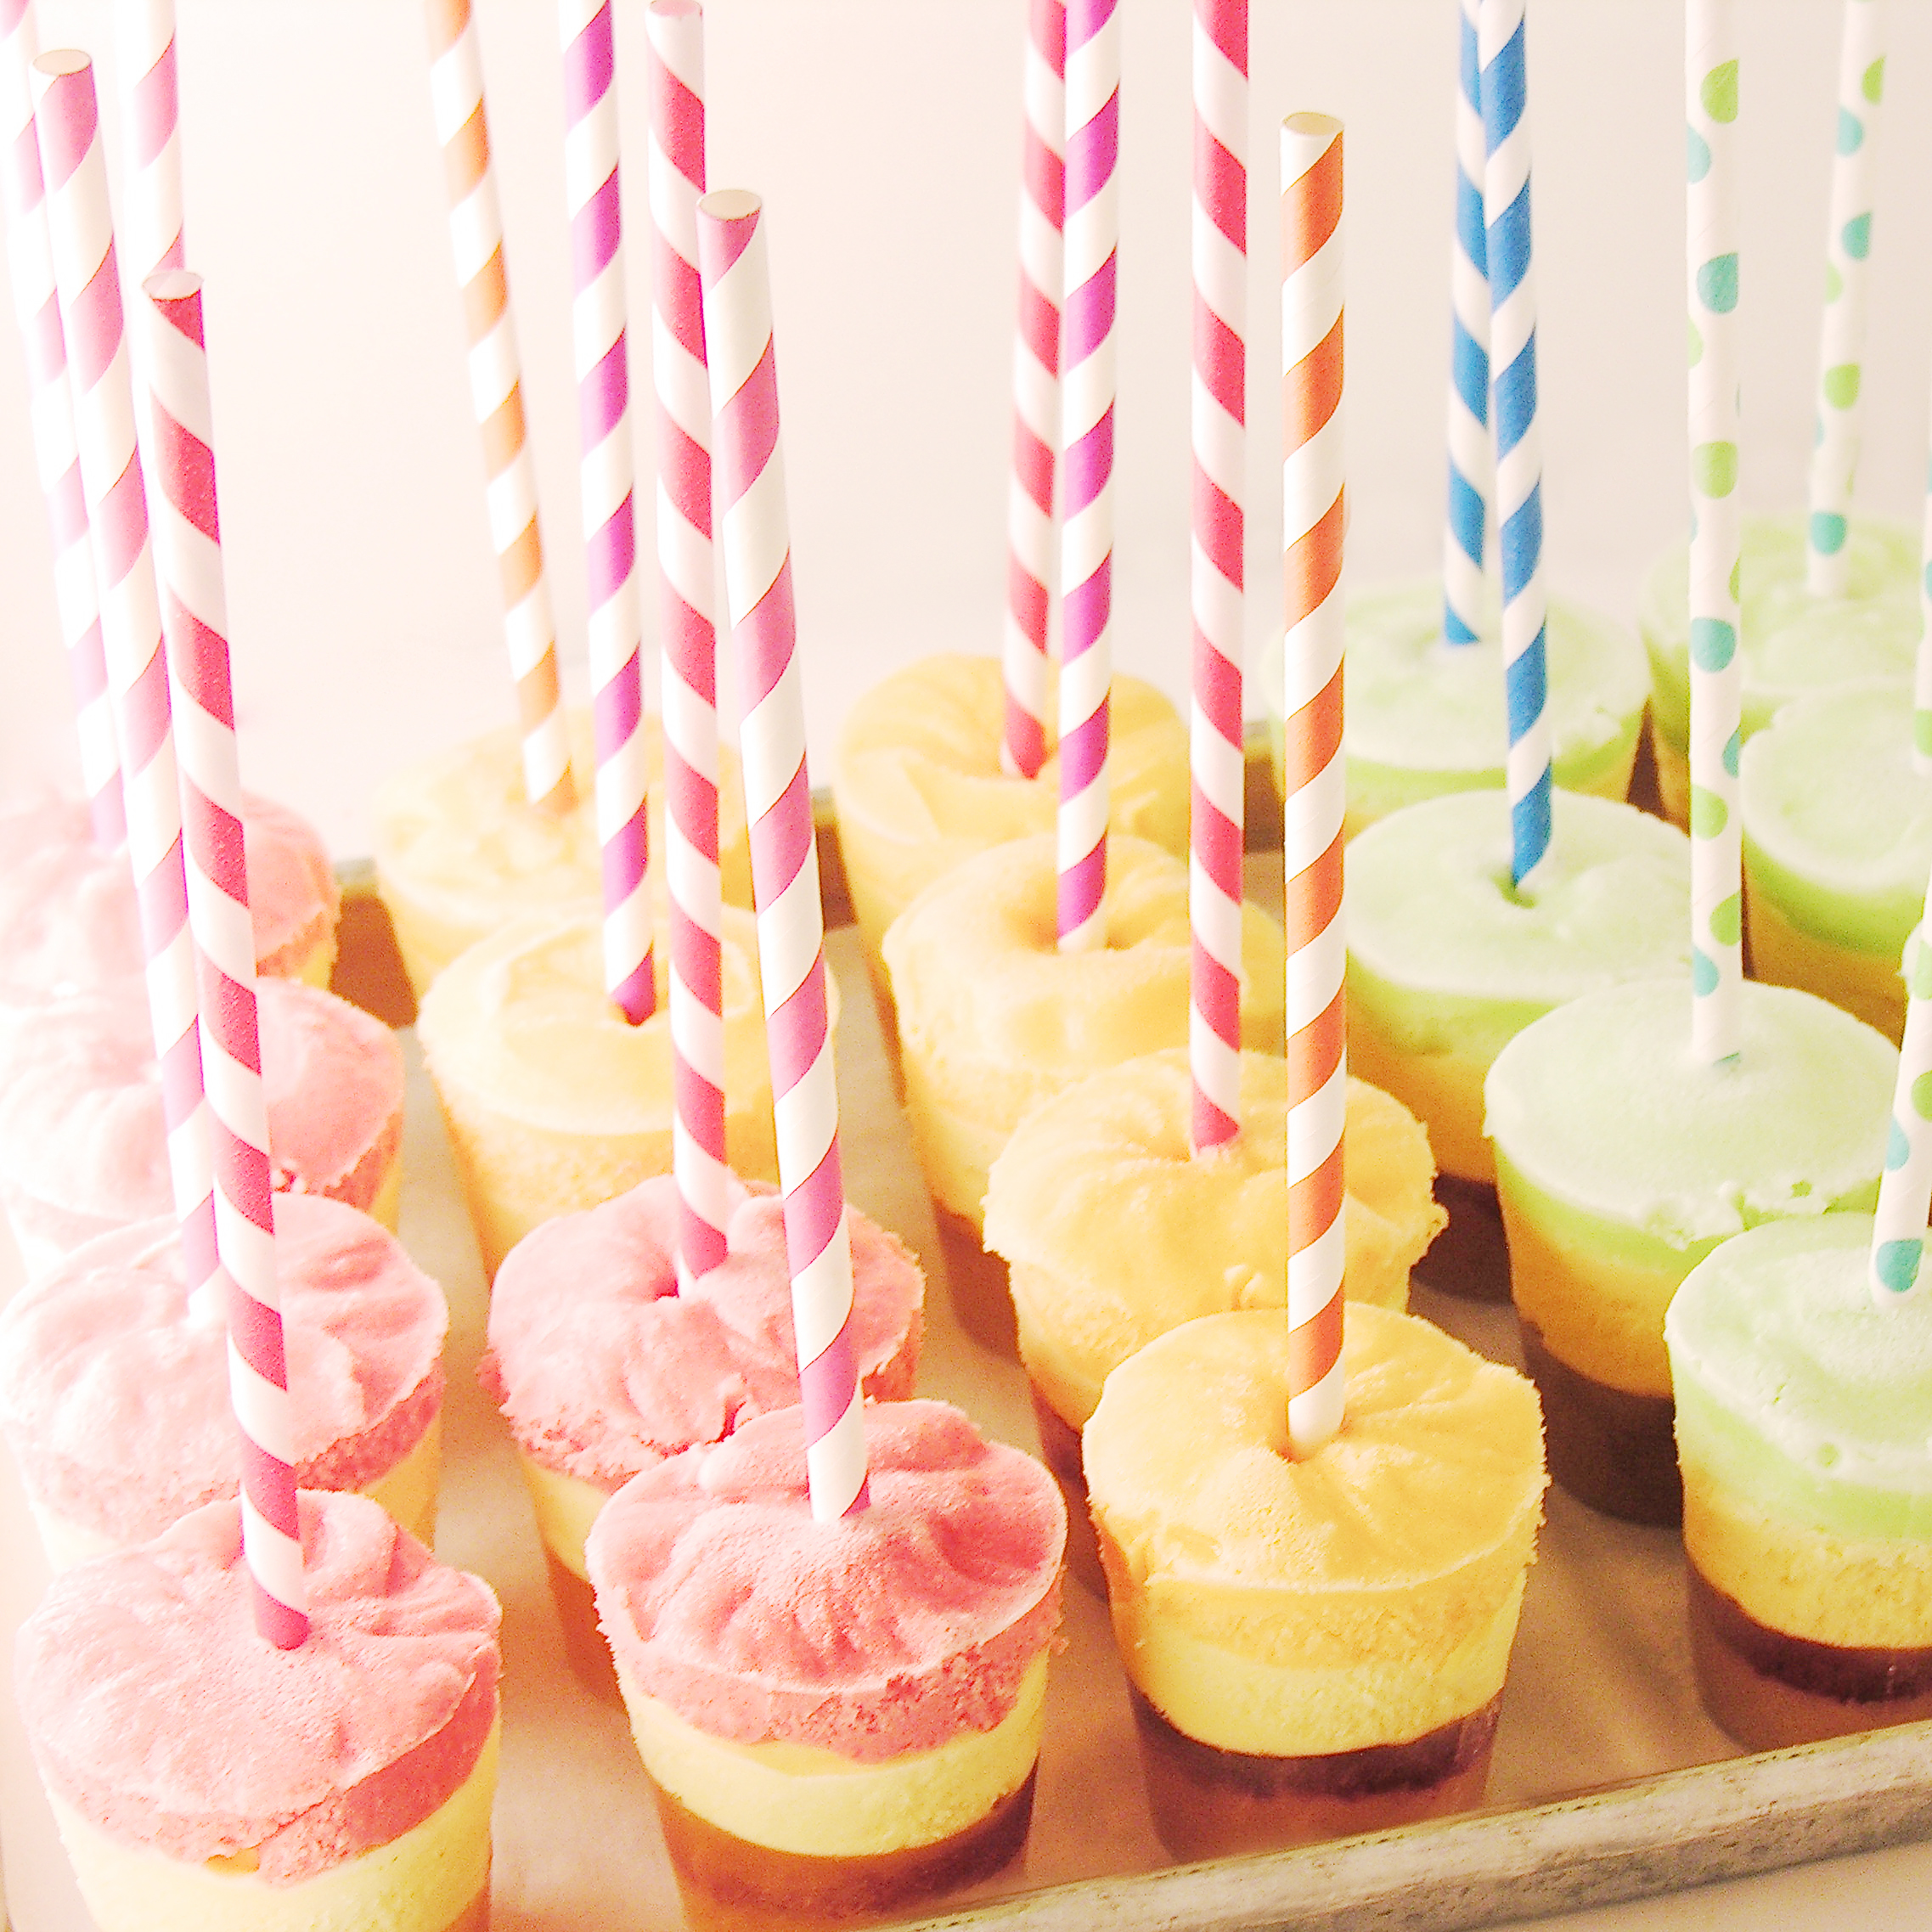
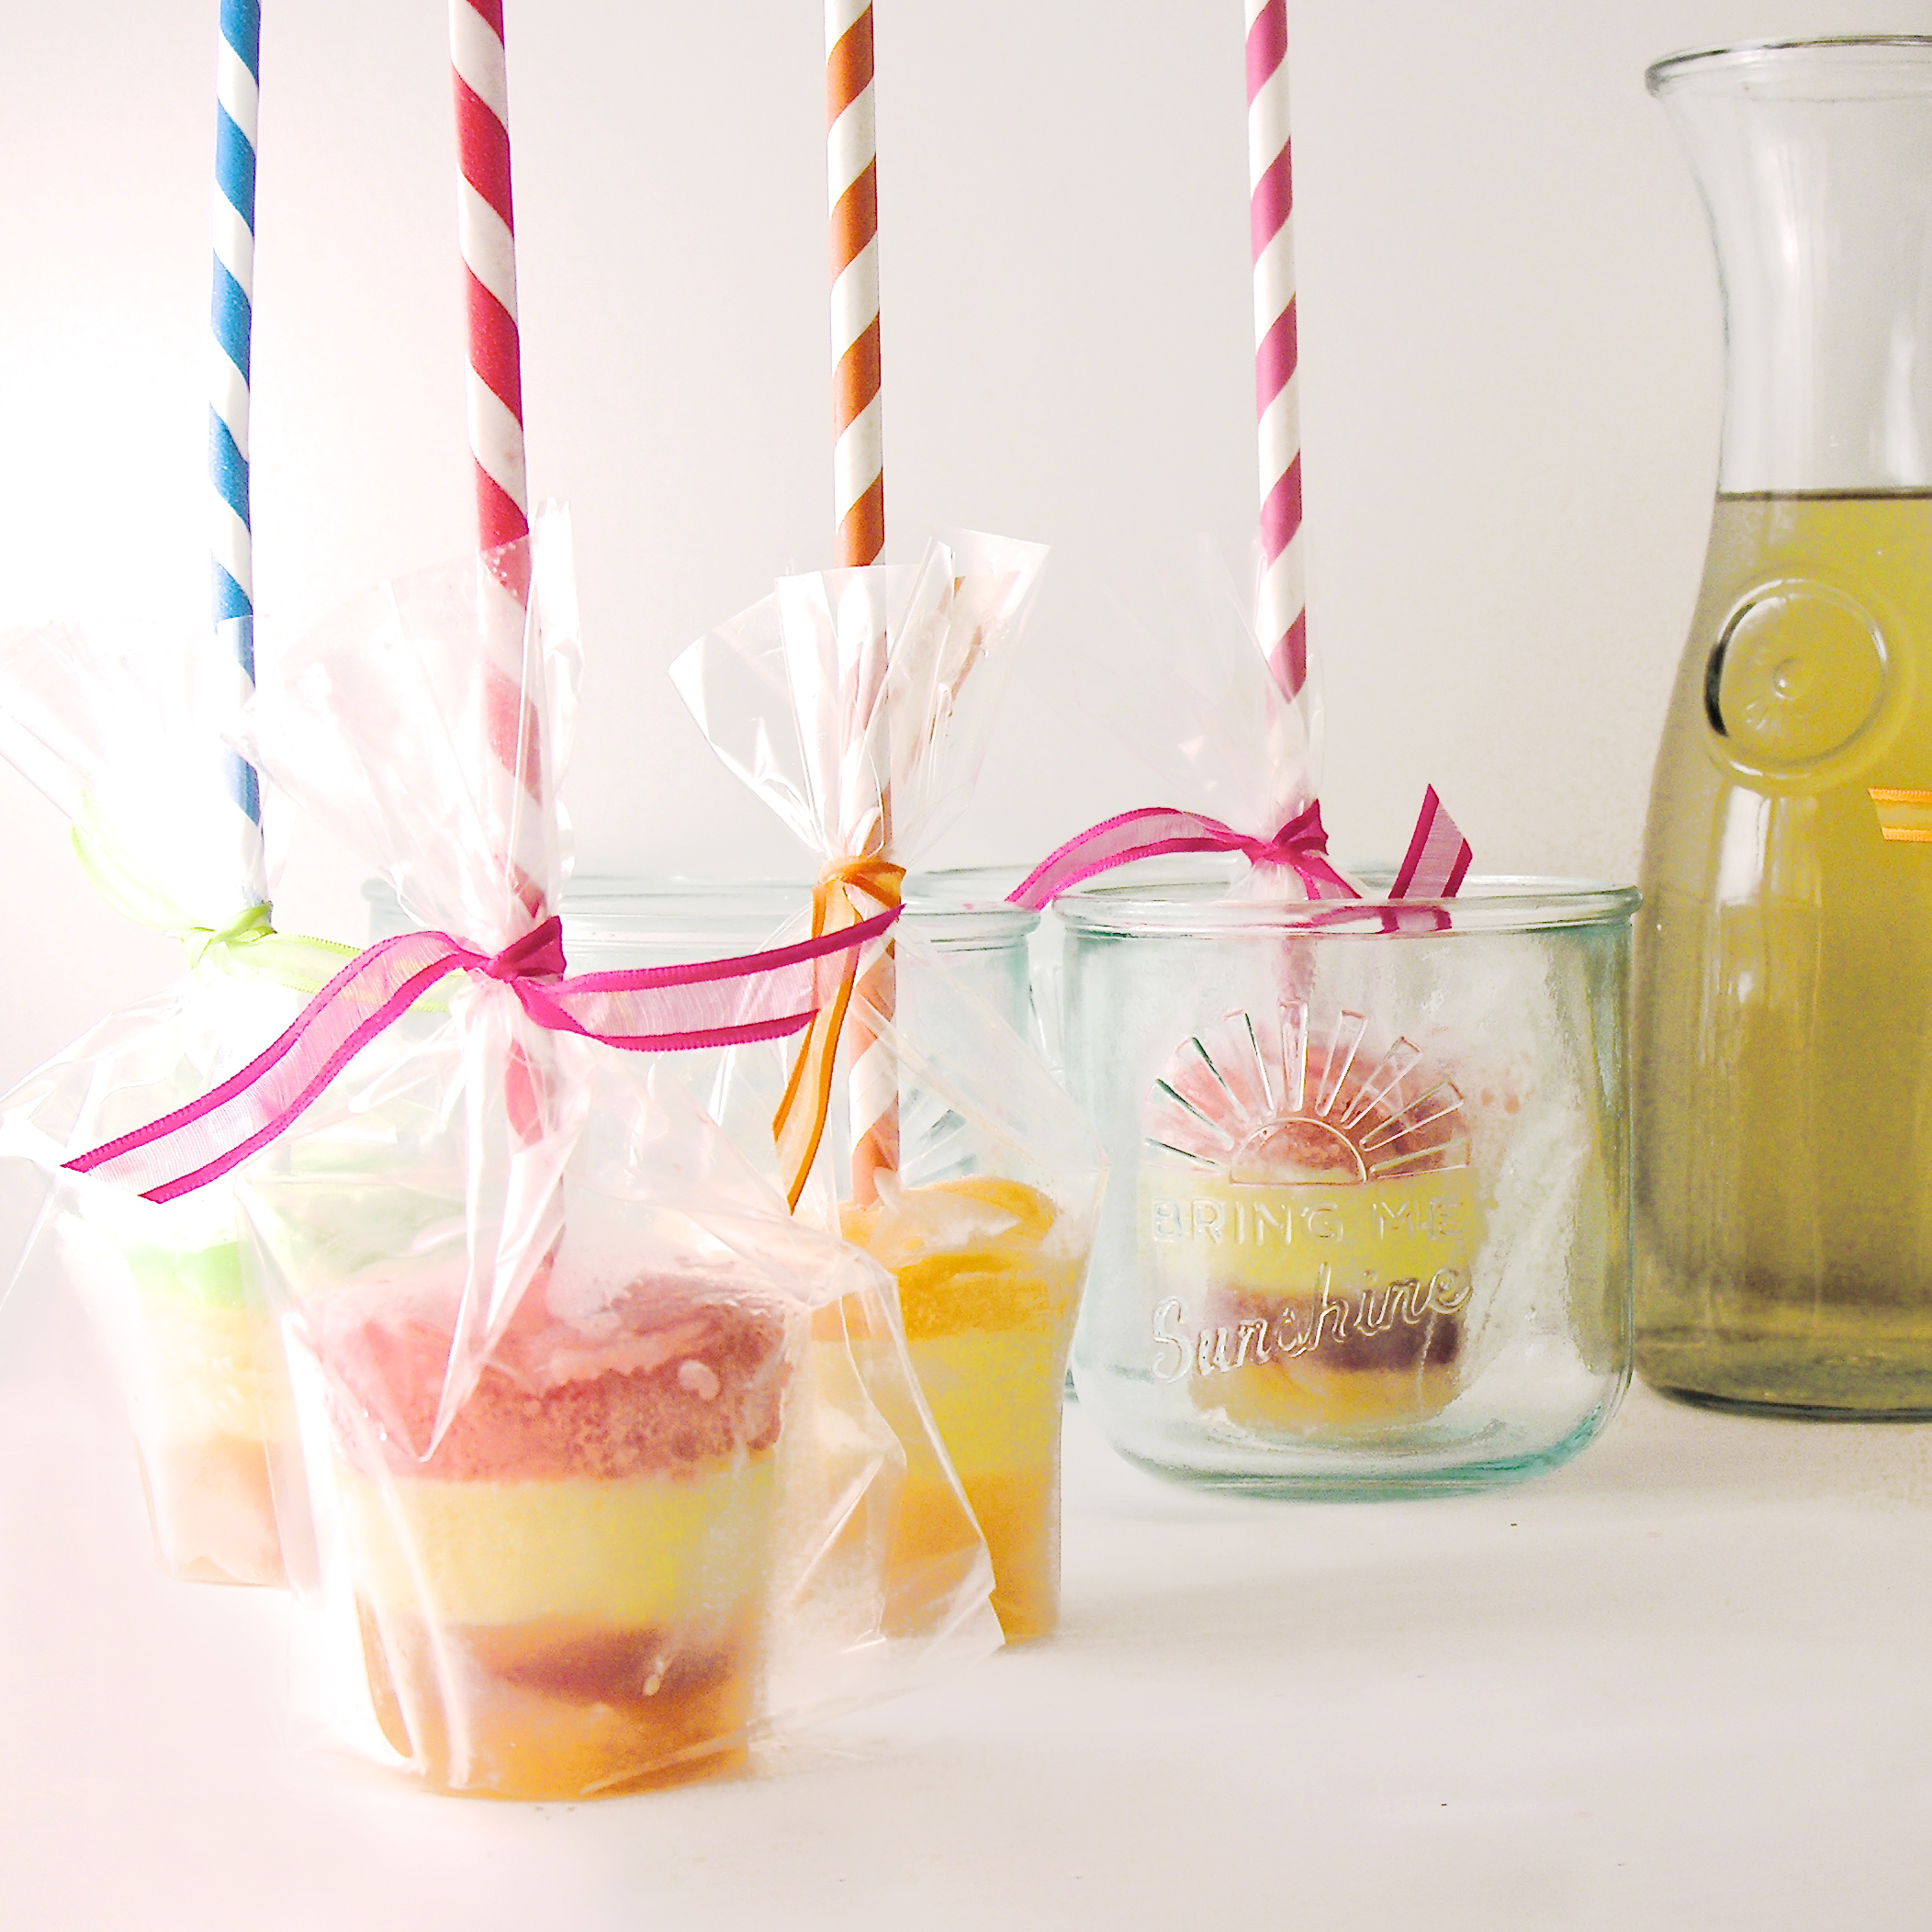
Aren’t they CUTE? I wrapped mine up in cello bags and tied them with ribbons. When anyone wants  cup of punch, all I need is some ginger ale to pour over the top. Stir….. and….

Punch Pops3

YUM! Punch in whatever fruit flavor you choose! One cup at a time!

These are fun and fairly easy to put together- they just take some freezer time. Make sure you have some freezer space available- and you need some height- so you can fit them in with those straws poking out of the top. Once they are made, you can place them in cake pop bags and tie them with cute ribbons. This makes storage in the freezer easier and keeps them fresh longer.

Here’s how I put these cute little pops together: (if you prefer a big bowl of punch, put all the ingredients in a punch bowl- but use a little less ginger ale).

INGREDIENTS: (makes 20 pops)

  • 24-30 oz of pineapple juice
  • ½ gallon vanilla ice cream
  • 1 quart of fruit sherbet- any flavor (I used 3 flavors and only used 1/3 of each quart)
  • 2 liters of ginger ale at room temperature
  • 6-7 strawberries, sliced 
  • 20 (3 oz) paper cups and 20 straws

DIRECTIONS:

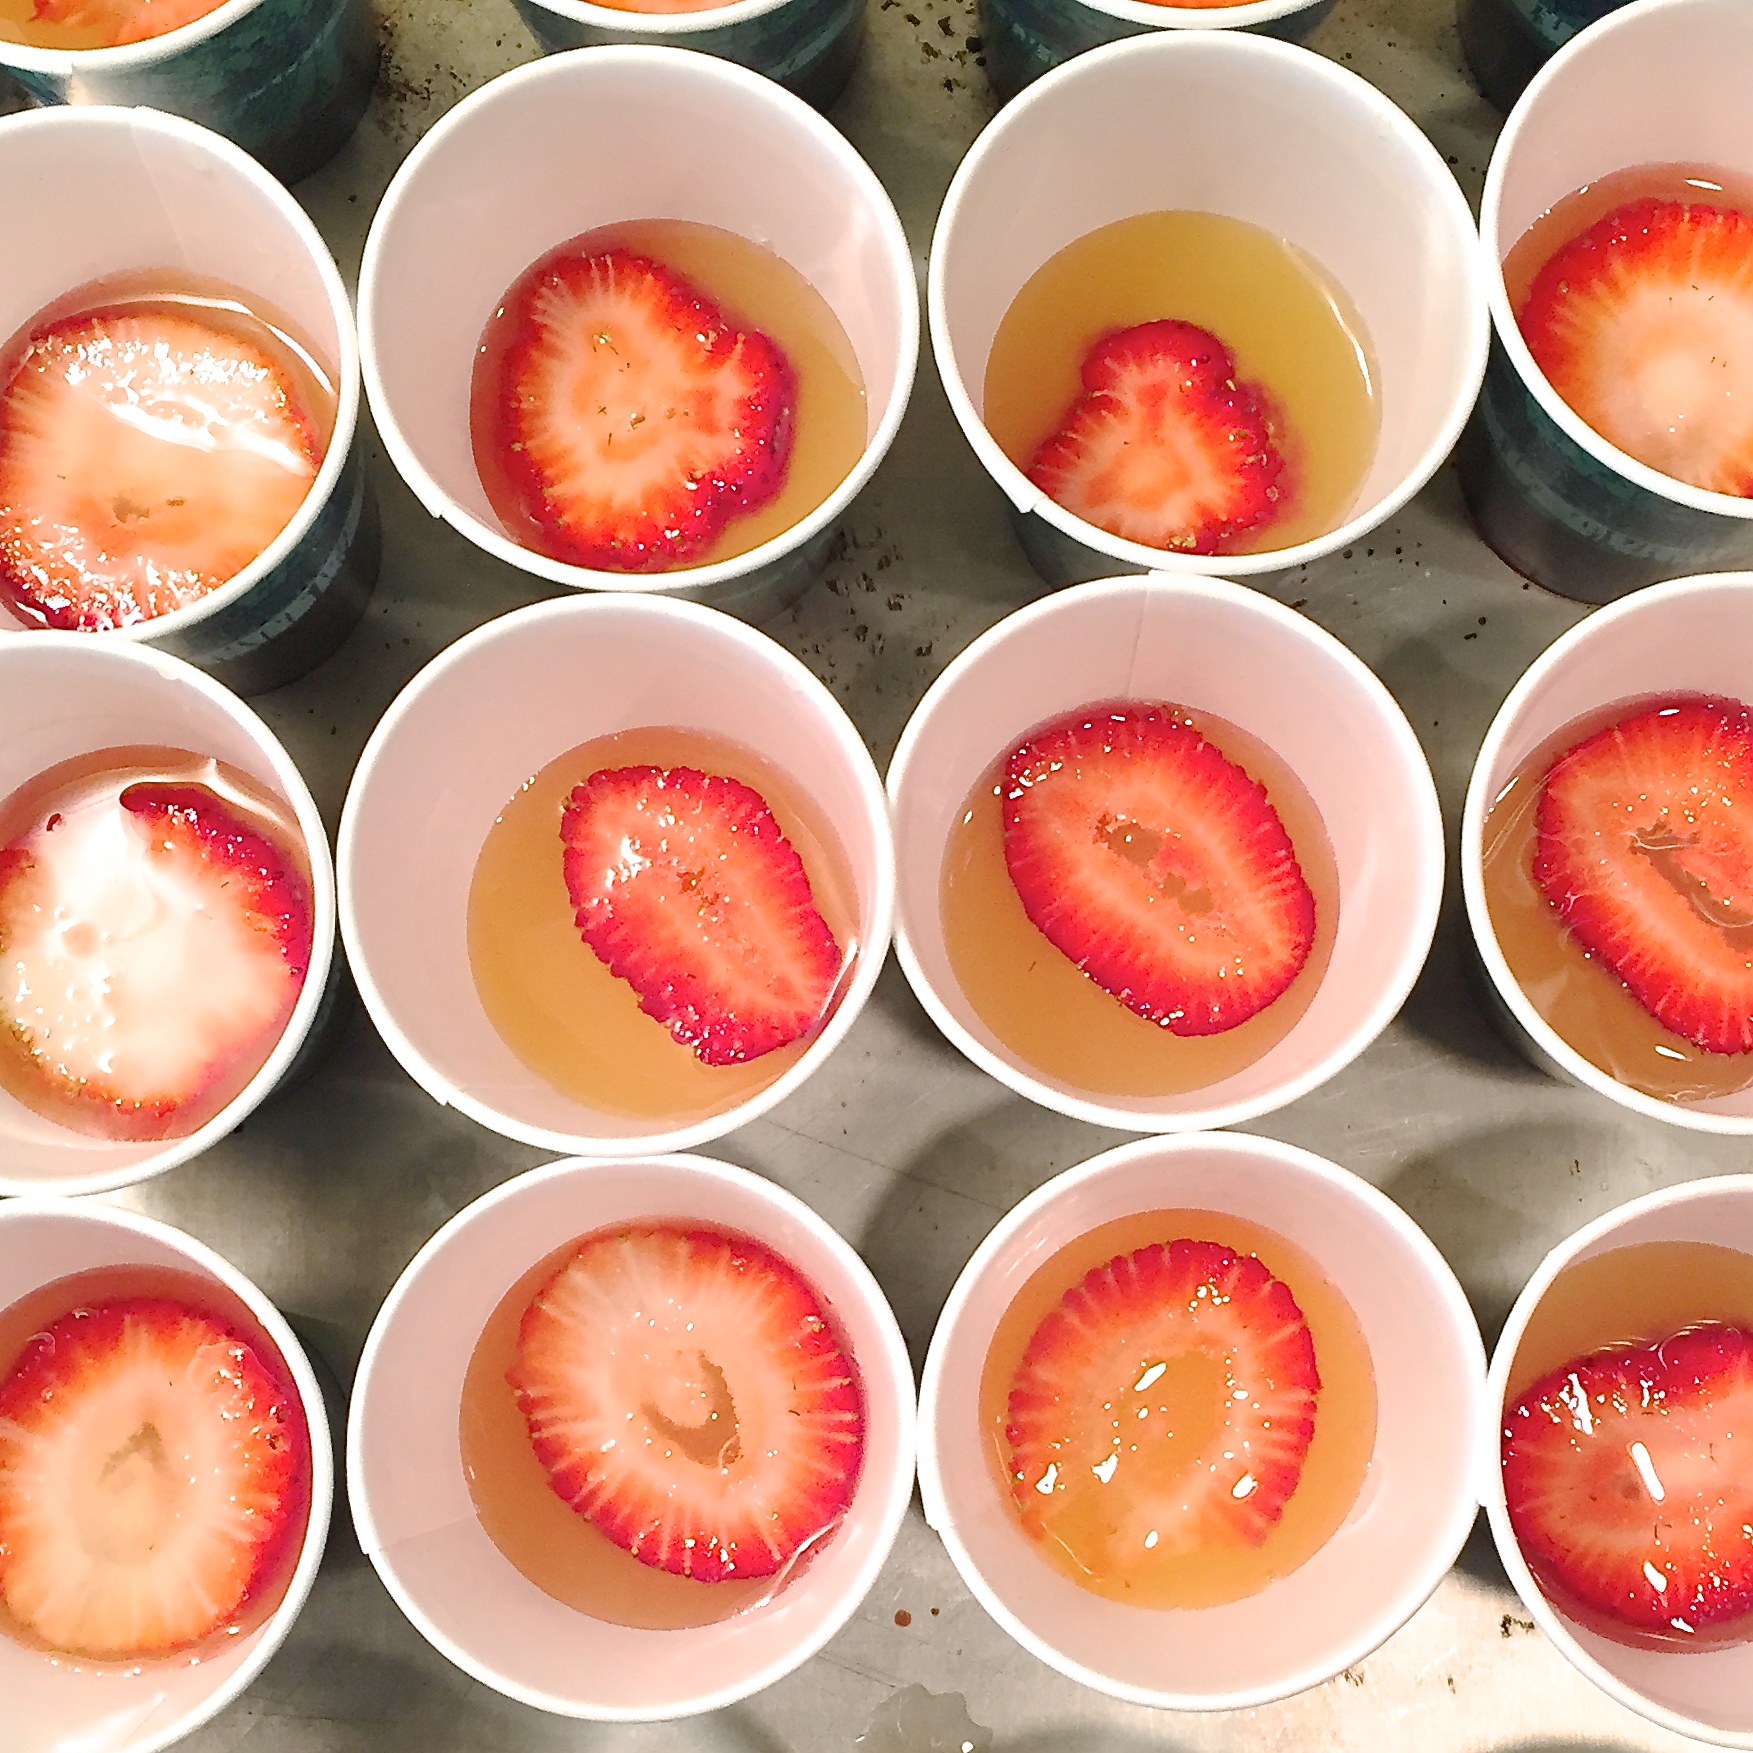
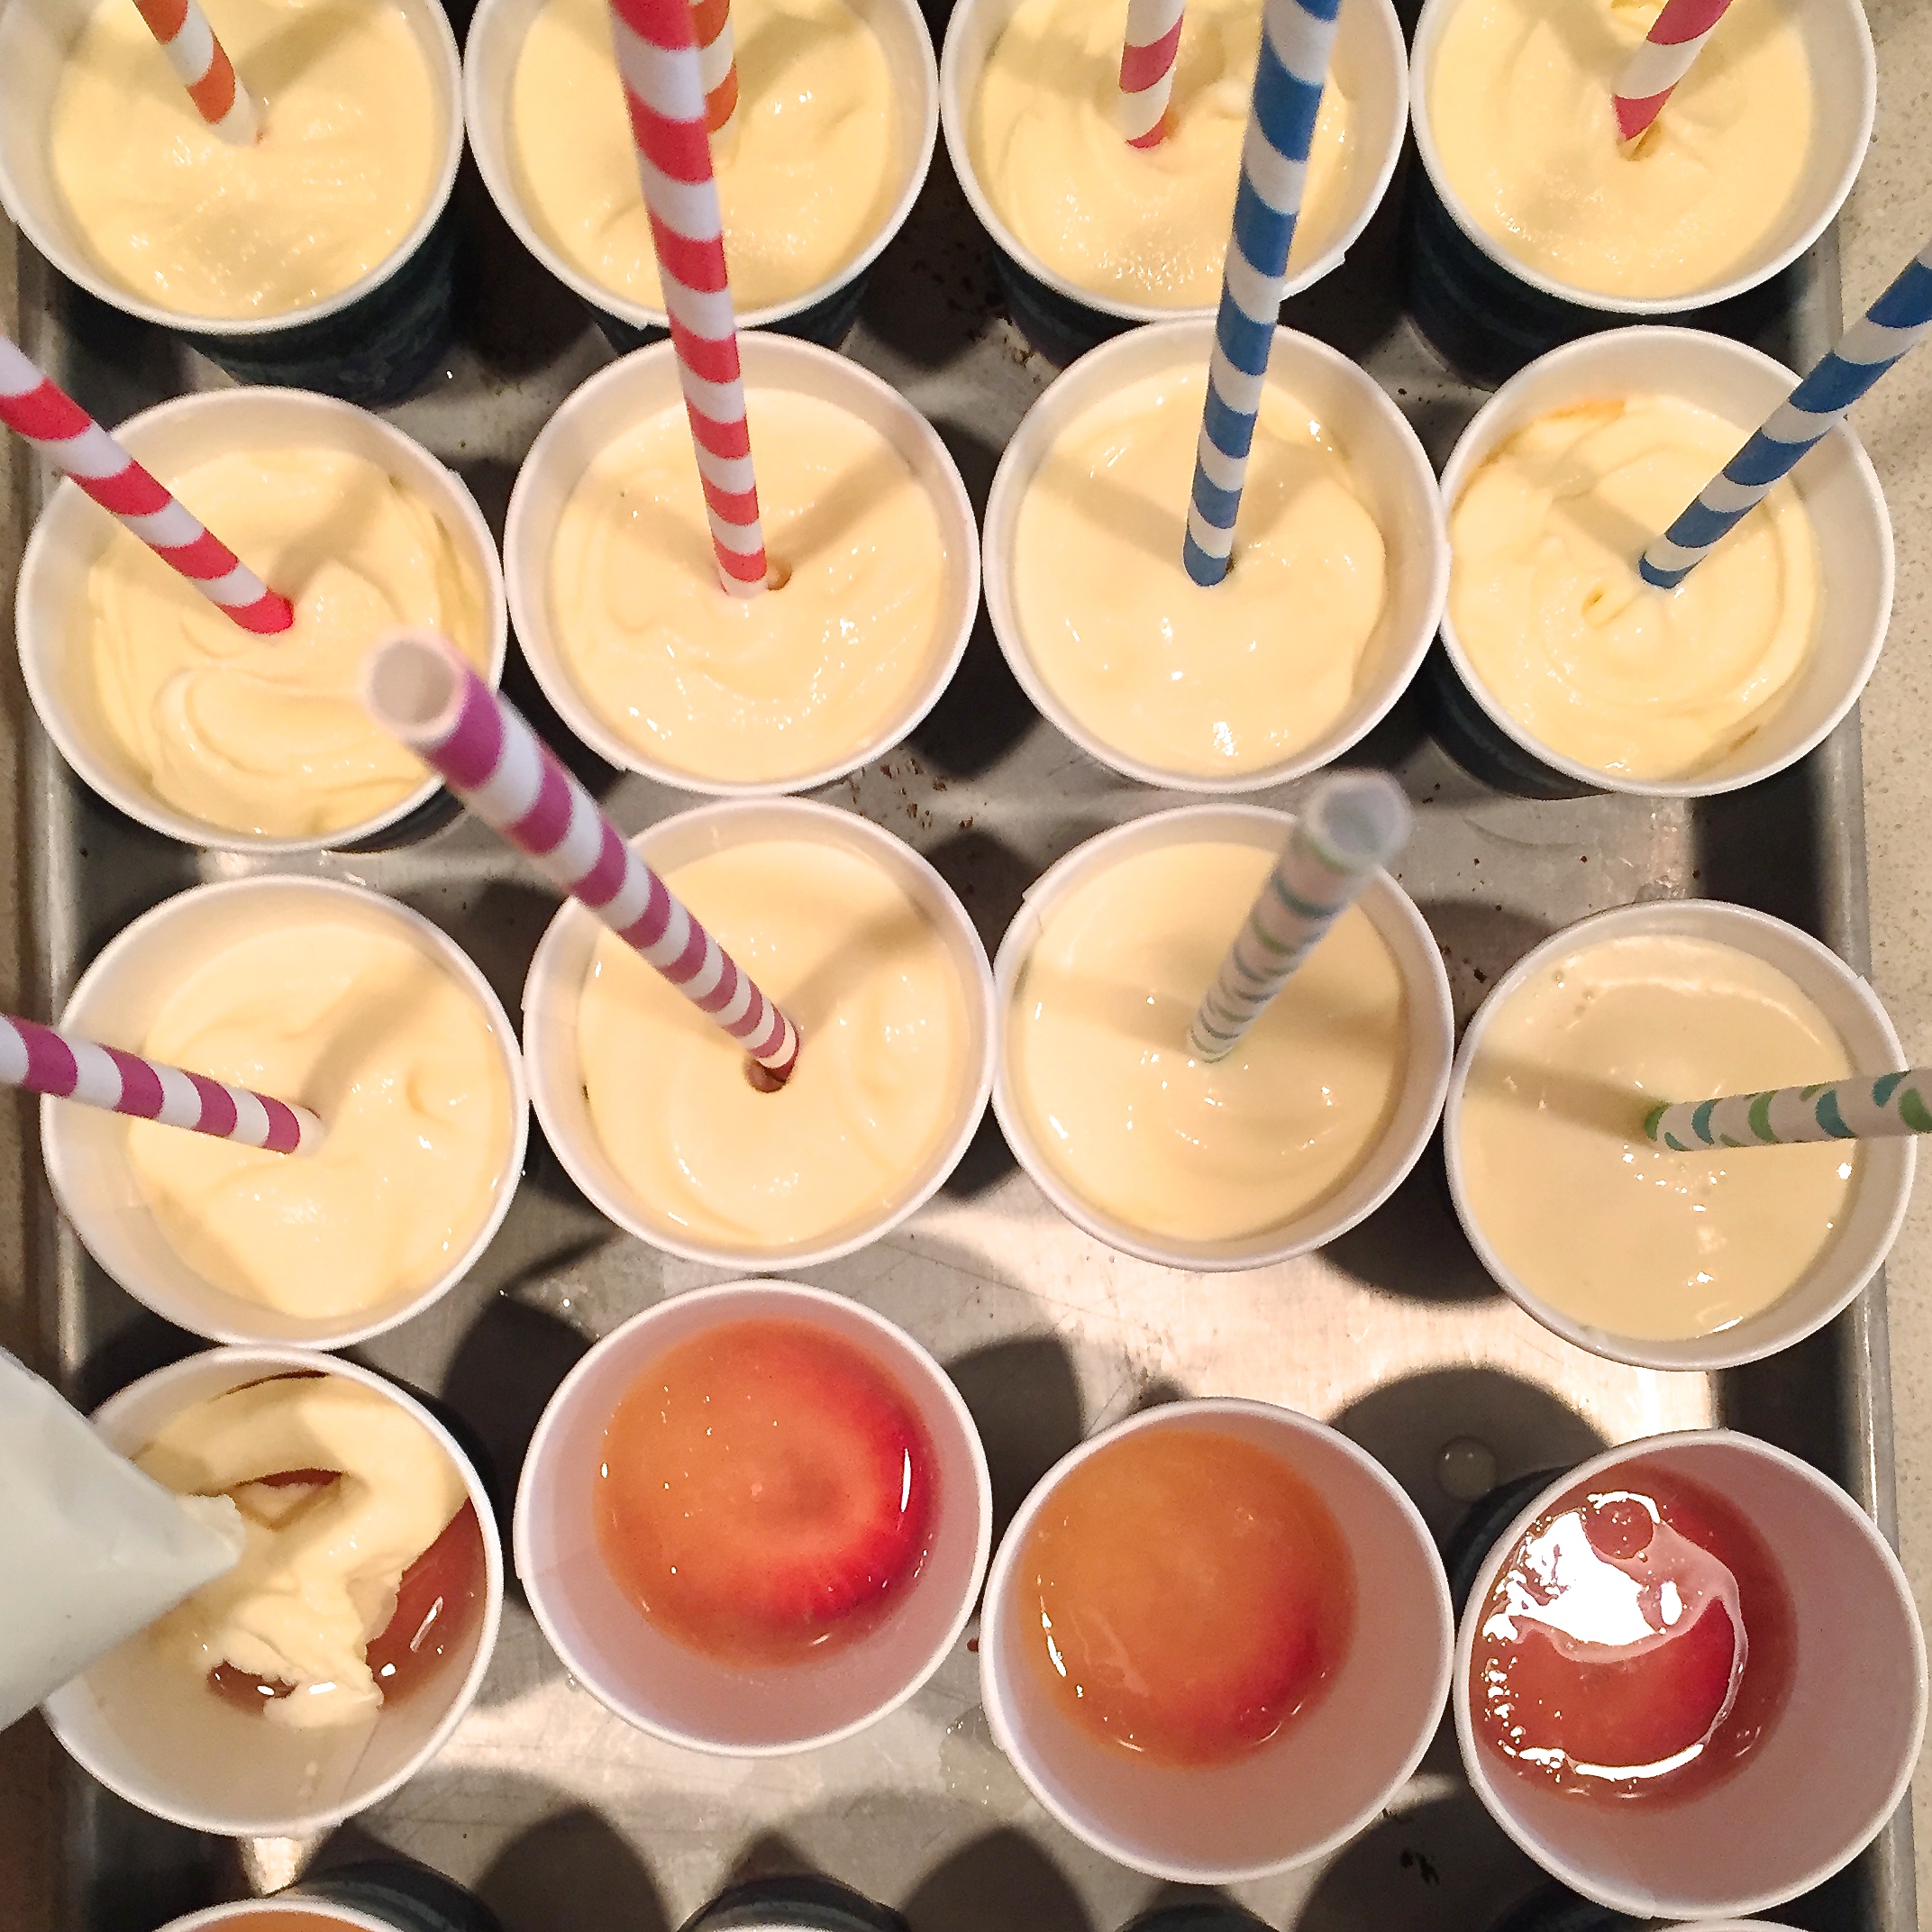
  • In 20 small (3 oz) paper cups, measure about 1/8 cup of pineapple juice and add a slice of strawberry
  • Freeze until hard (4-6 hours)

Note: I did this on a small cookie sheet so that I could pop them all into and out of the freezer at once.

  • Scoop ice cream into a large zip top bag and microwave in 10 second increments until soft-serve consistency. Mix bag by squeezing. (Tip: wear gloves to keep your hands warm!)
  • Clip a corner off this bag and squeeze the softened ice cream over frozen juice, leaving room at the top for a layer of sherbet (you will add about twice as much ice cream as sherbet, and use almost all of the ½ gallon)
  • Slide a straw into the center of each cup and re-freeze until ice cream layer is hard (2-3 hours)
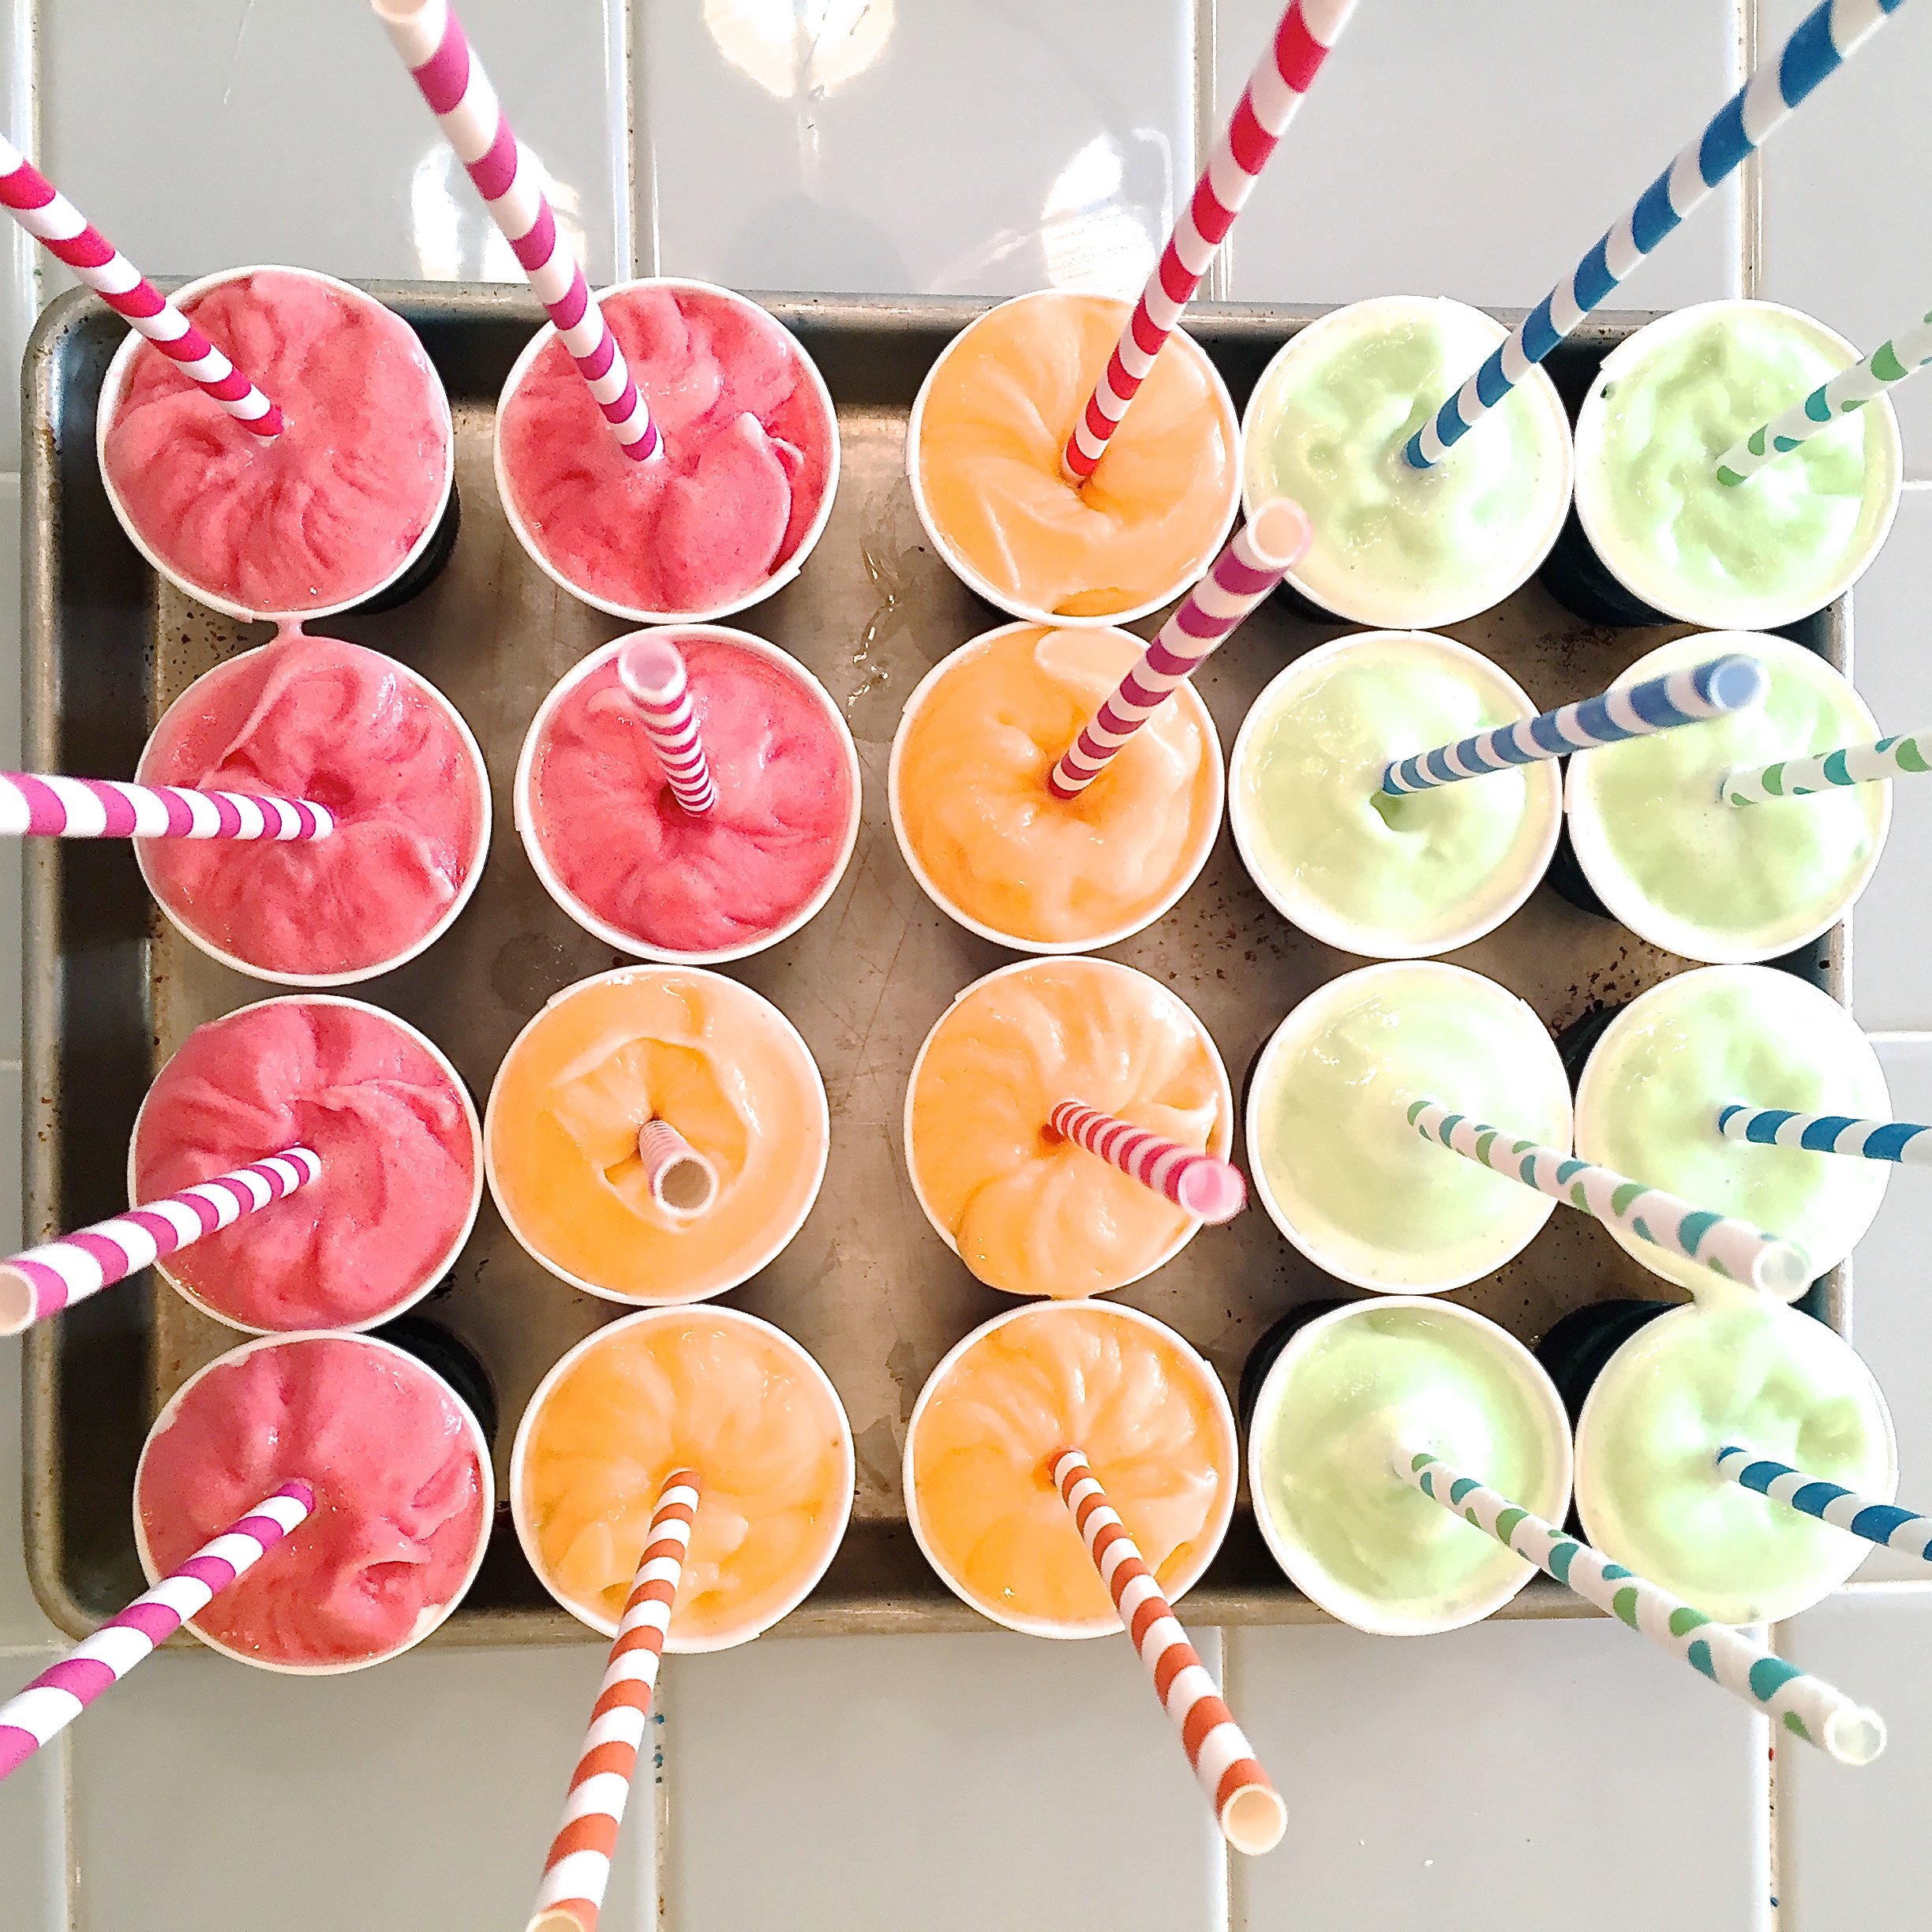
  • Scoop sherbet into a large zip-top bag and microwave/squeeze until a soft-serve consistency (this melts faster than ice cream, so be cautious)
  • Clip a corner off this bag and squeeze the softened sherbet over the top of the frozen ice cream. Tap each cup against the counter to flatten the sherbet out a little bit on top.
  • Re-freeze overnight (10-12 hours)

IMG_8489IMG_8496IMG_8500

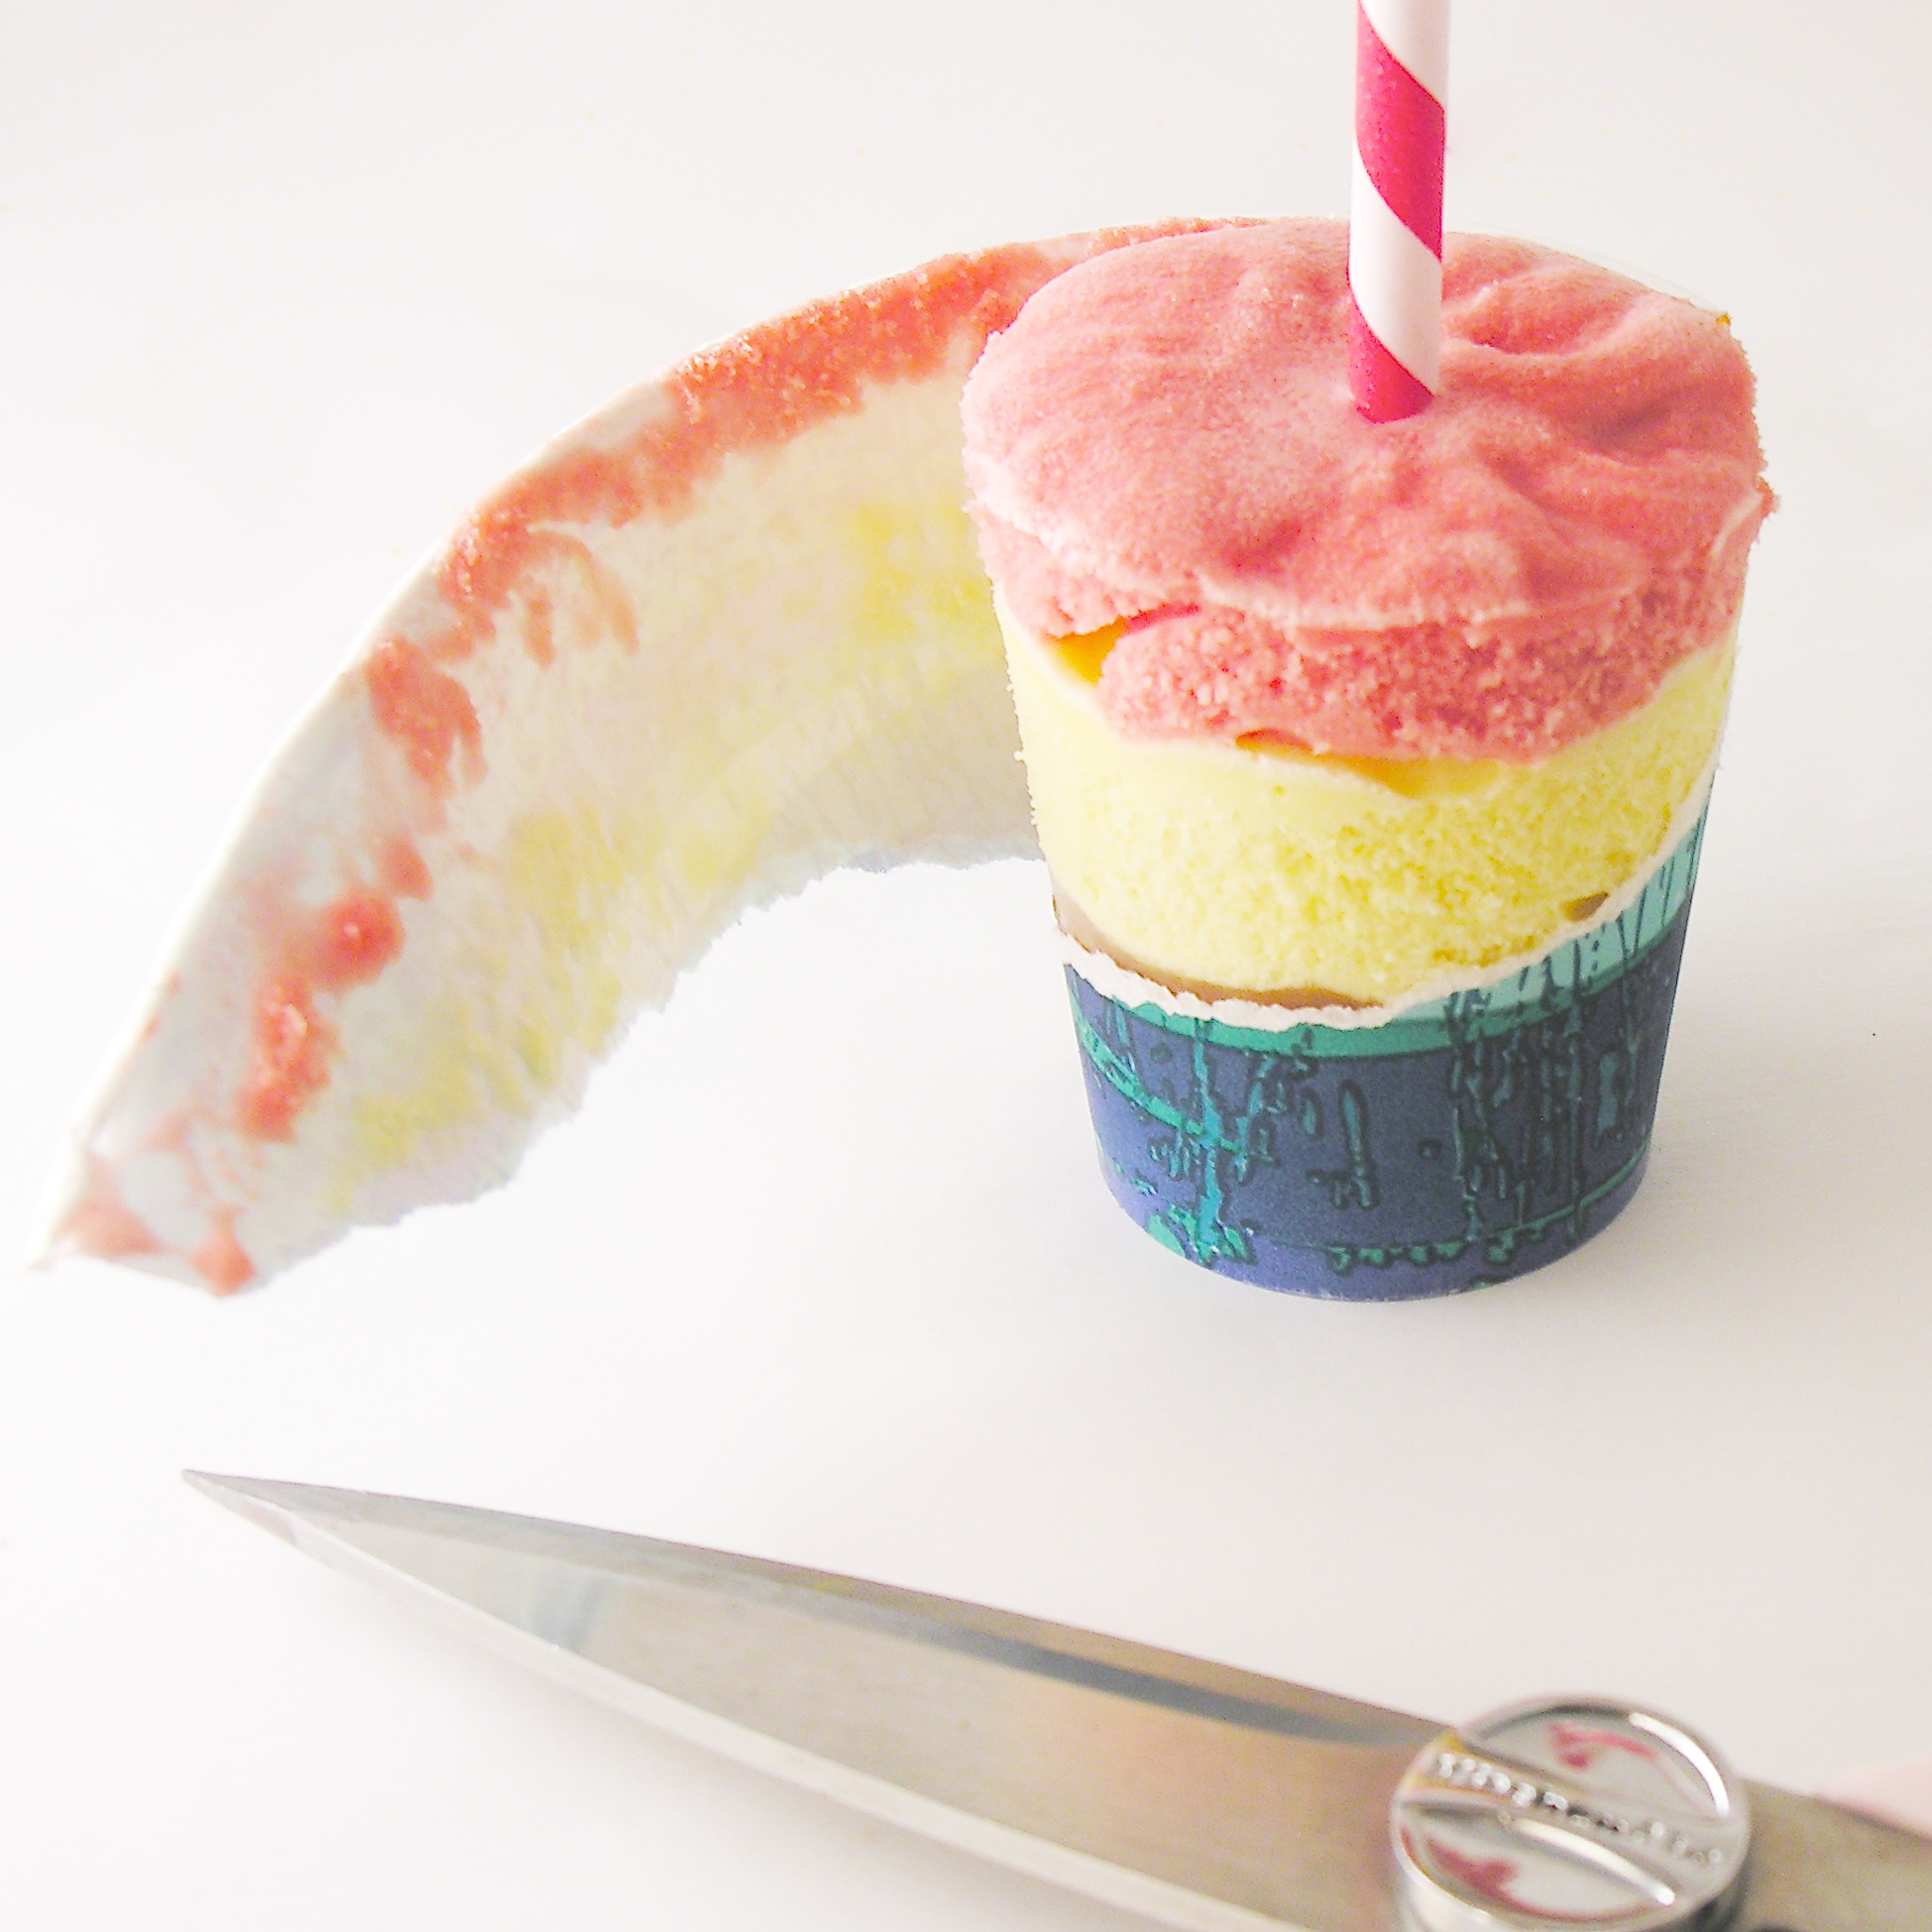
  • To remove them from the cup, snip a tiny cut into one of the cup’s edges and tear the cup away.
  • Set the pop on a small cookie sheet that has been covered with parchment paper and keep frozen until use.

Punch Pop1Punch Pops!

  • If you want to place them in individual bags, keep them frozen, and one at a time, slide into a bag, tie shut and refreeze.

Punch Pops 9

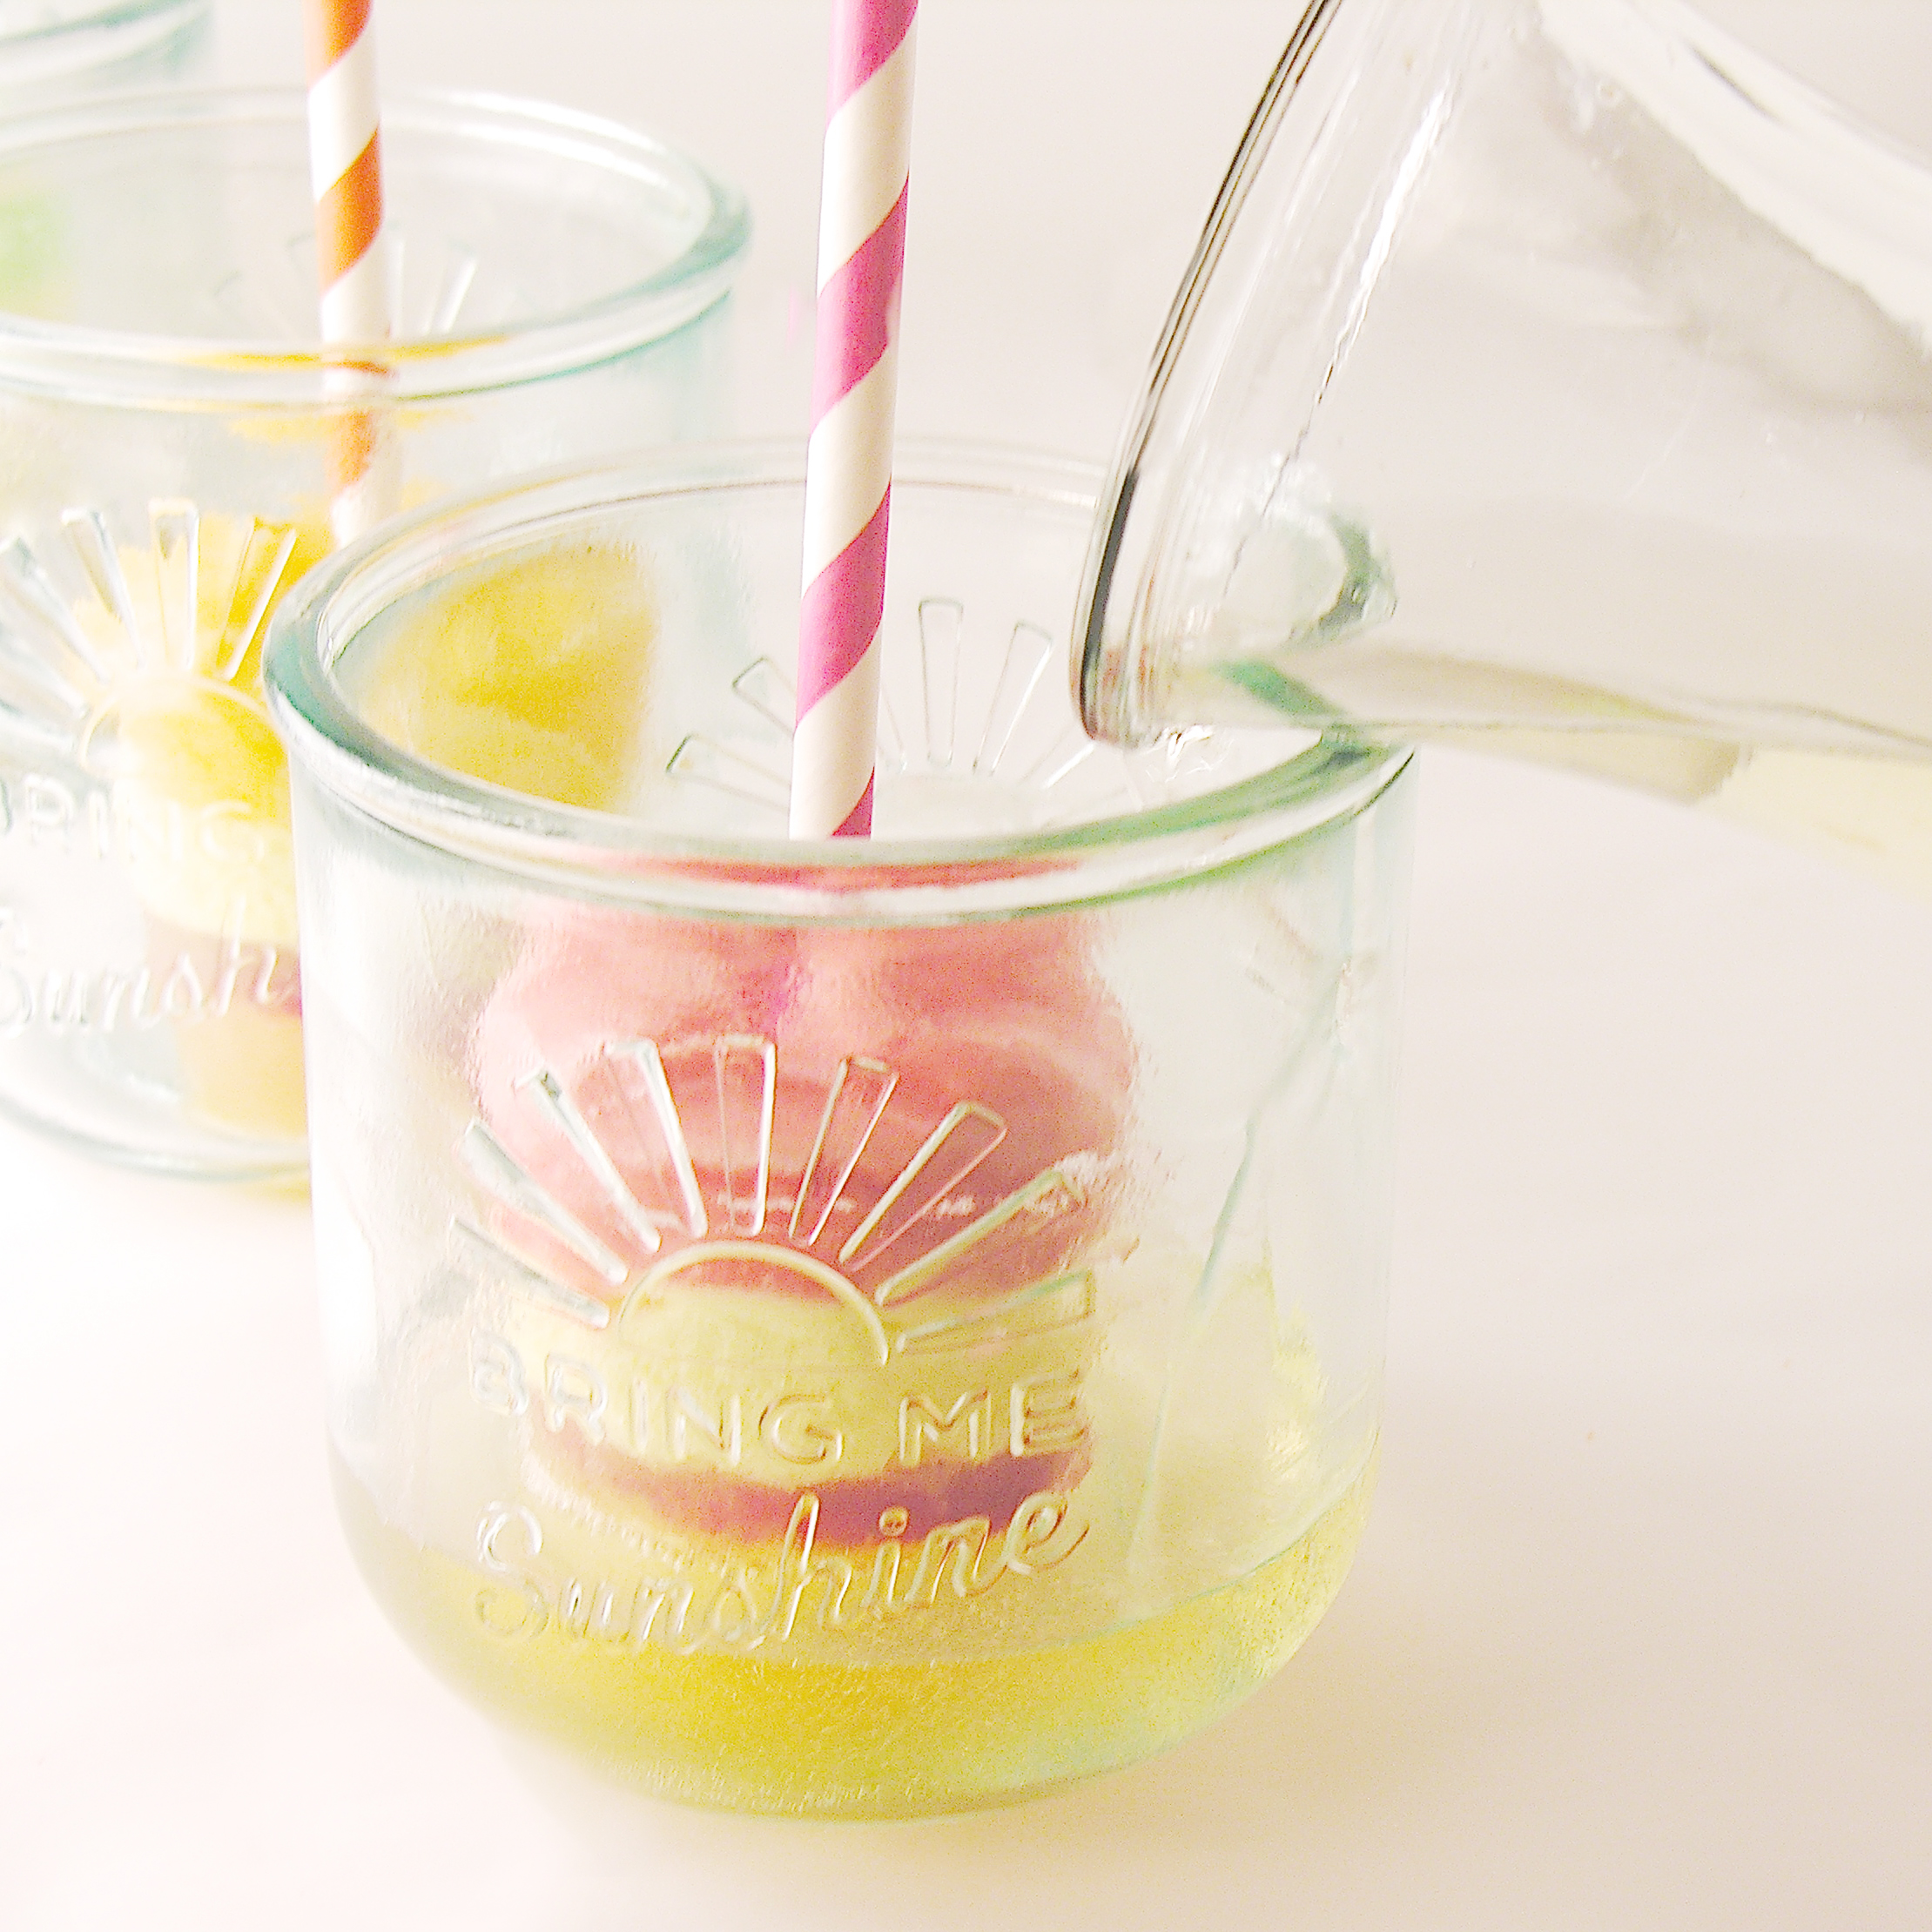
  • To serve these cute little pops, simply place one in a glass that holds at least 12 ounces, and pour room temperature ginger ale over the top- just until the pop is covered. 
  • Stir your punch with the straw until it has melted into a cold frothy ice cream treat!

Punch Pops!Punch Pops!

Punch pops!

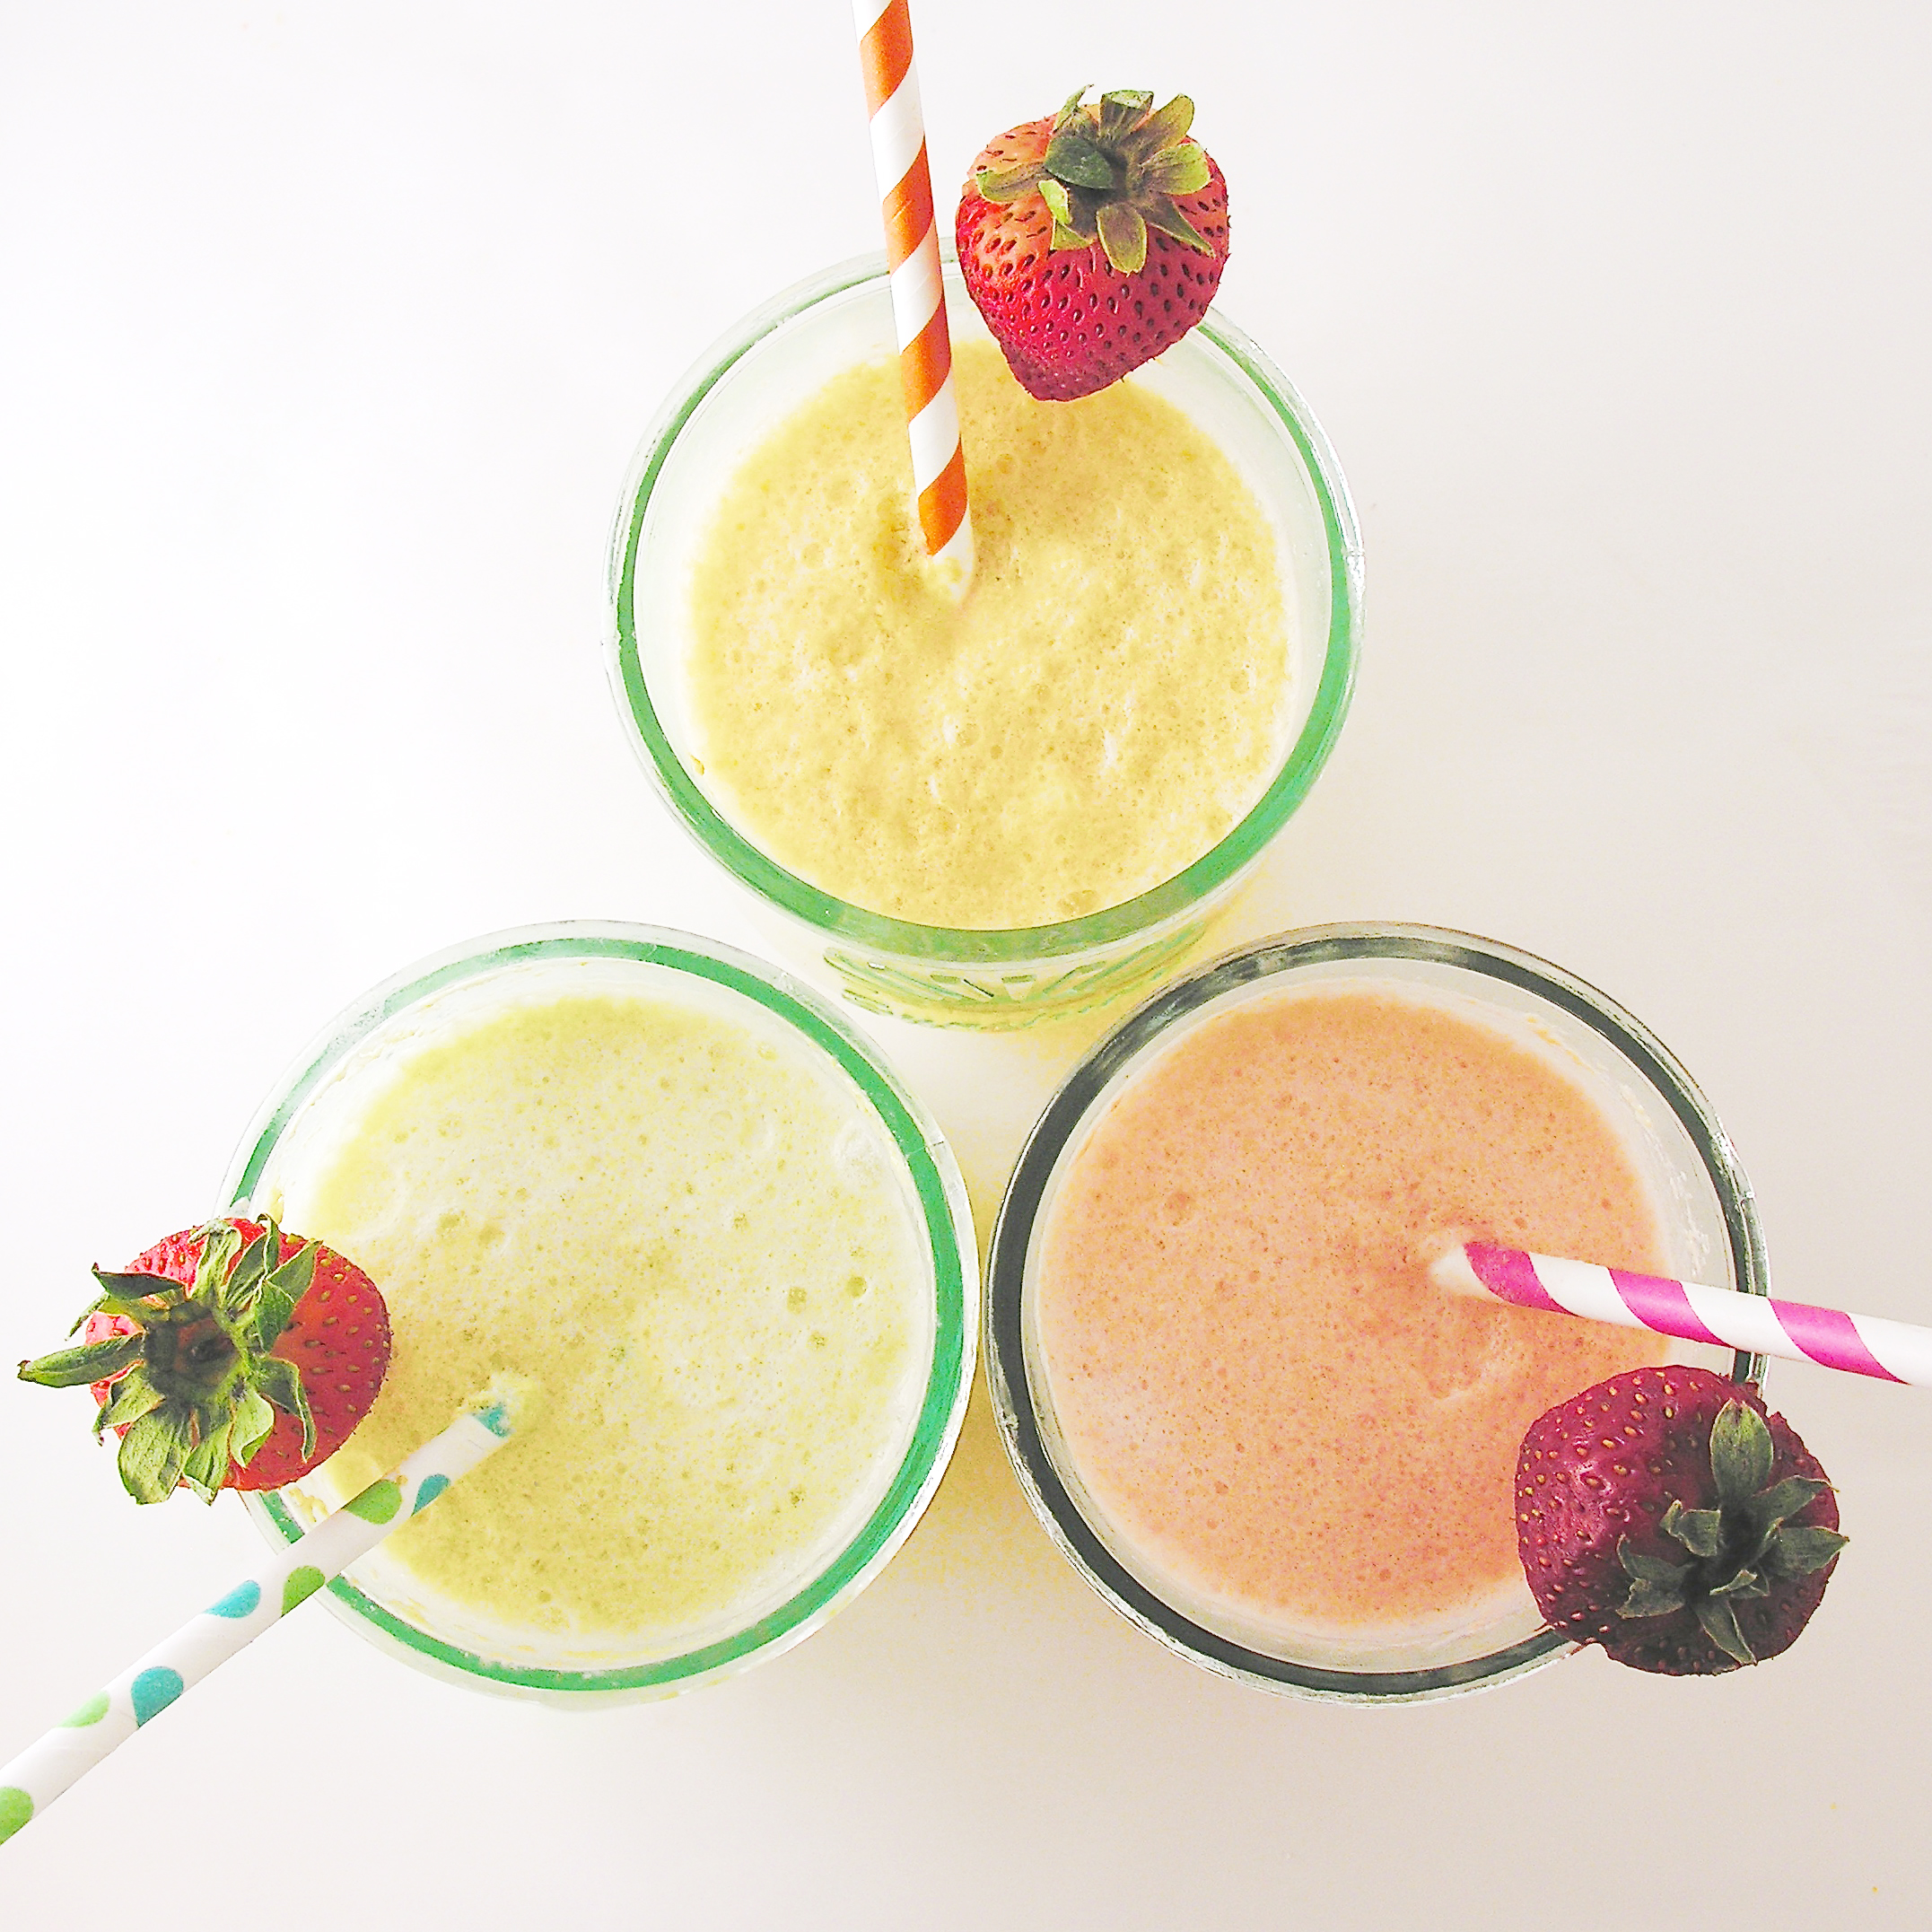
My thoughts: I love these! They taste exactly like my favorite punch and I love that I can have a cup of it whenever a craving strikes. I had a party a couple of days ago, and the guests enjoyed choosing a flavor (I made raspberry, lime and orange), and making their own punch! It’s just plain fun. 🙂

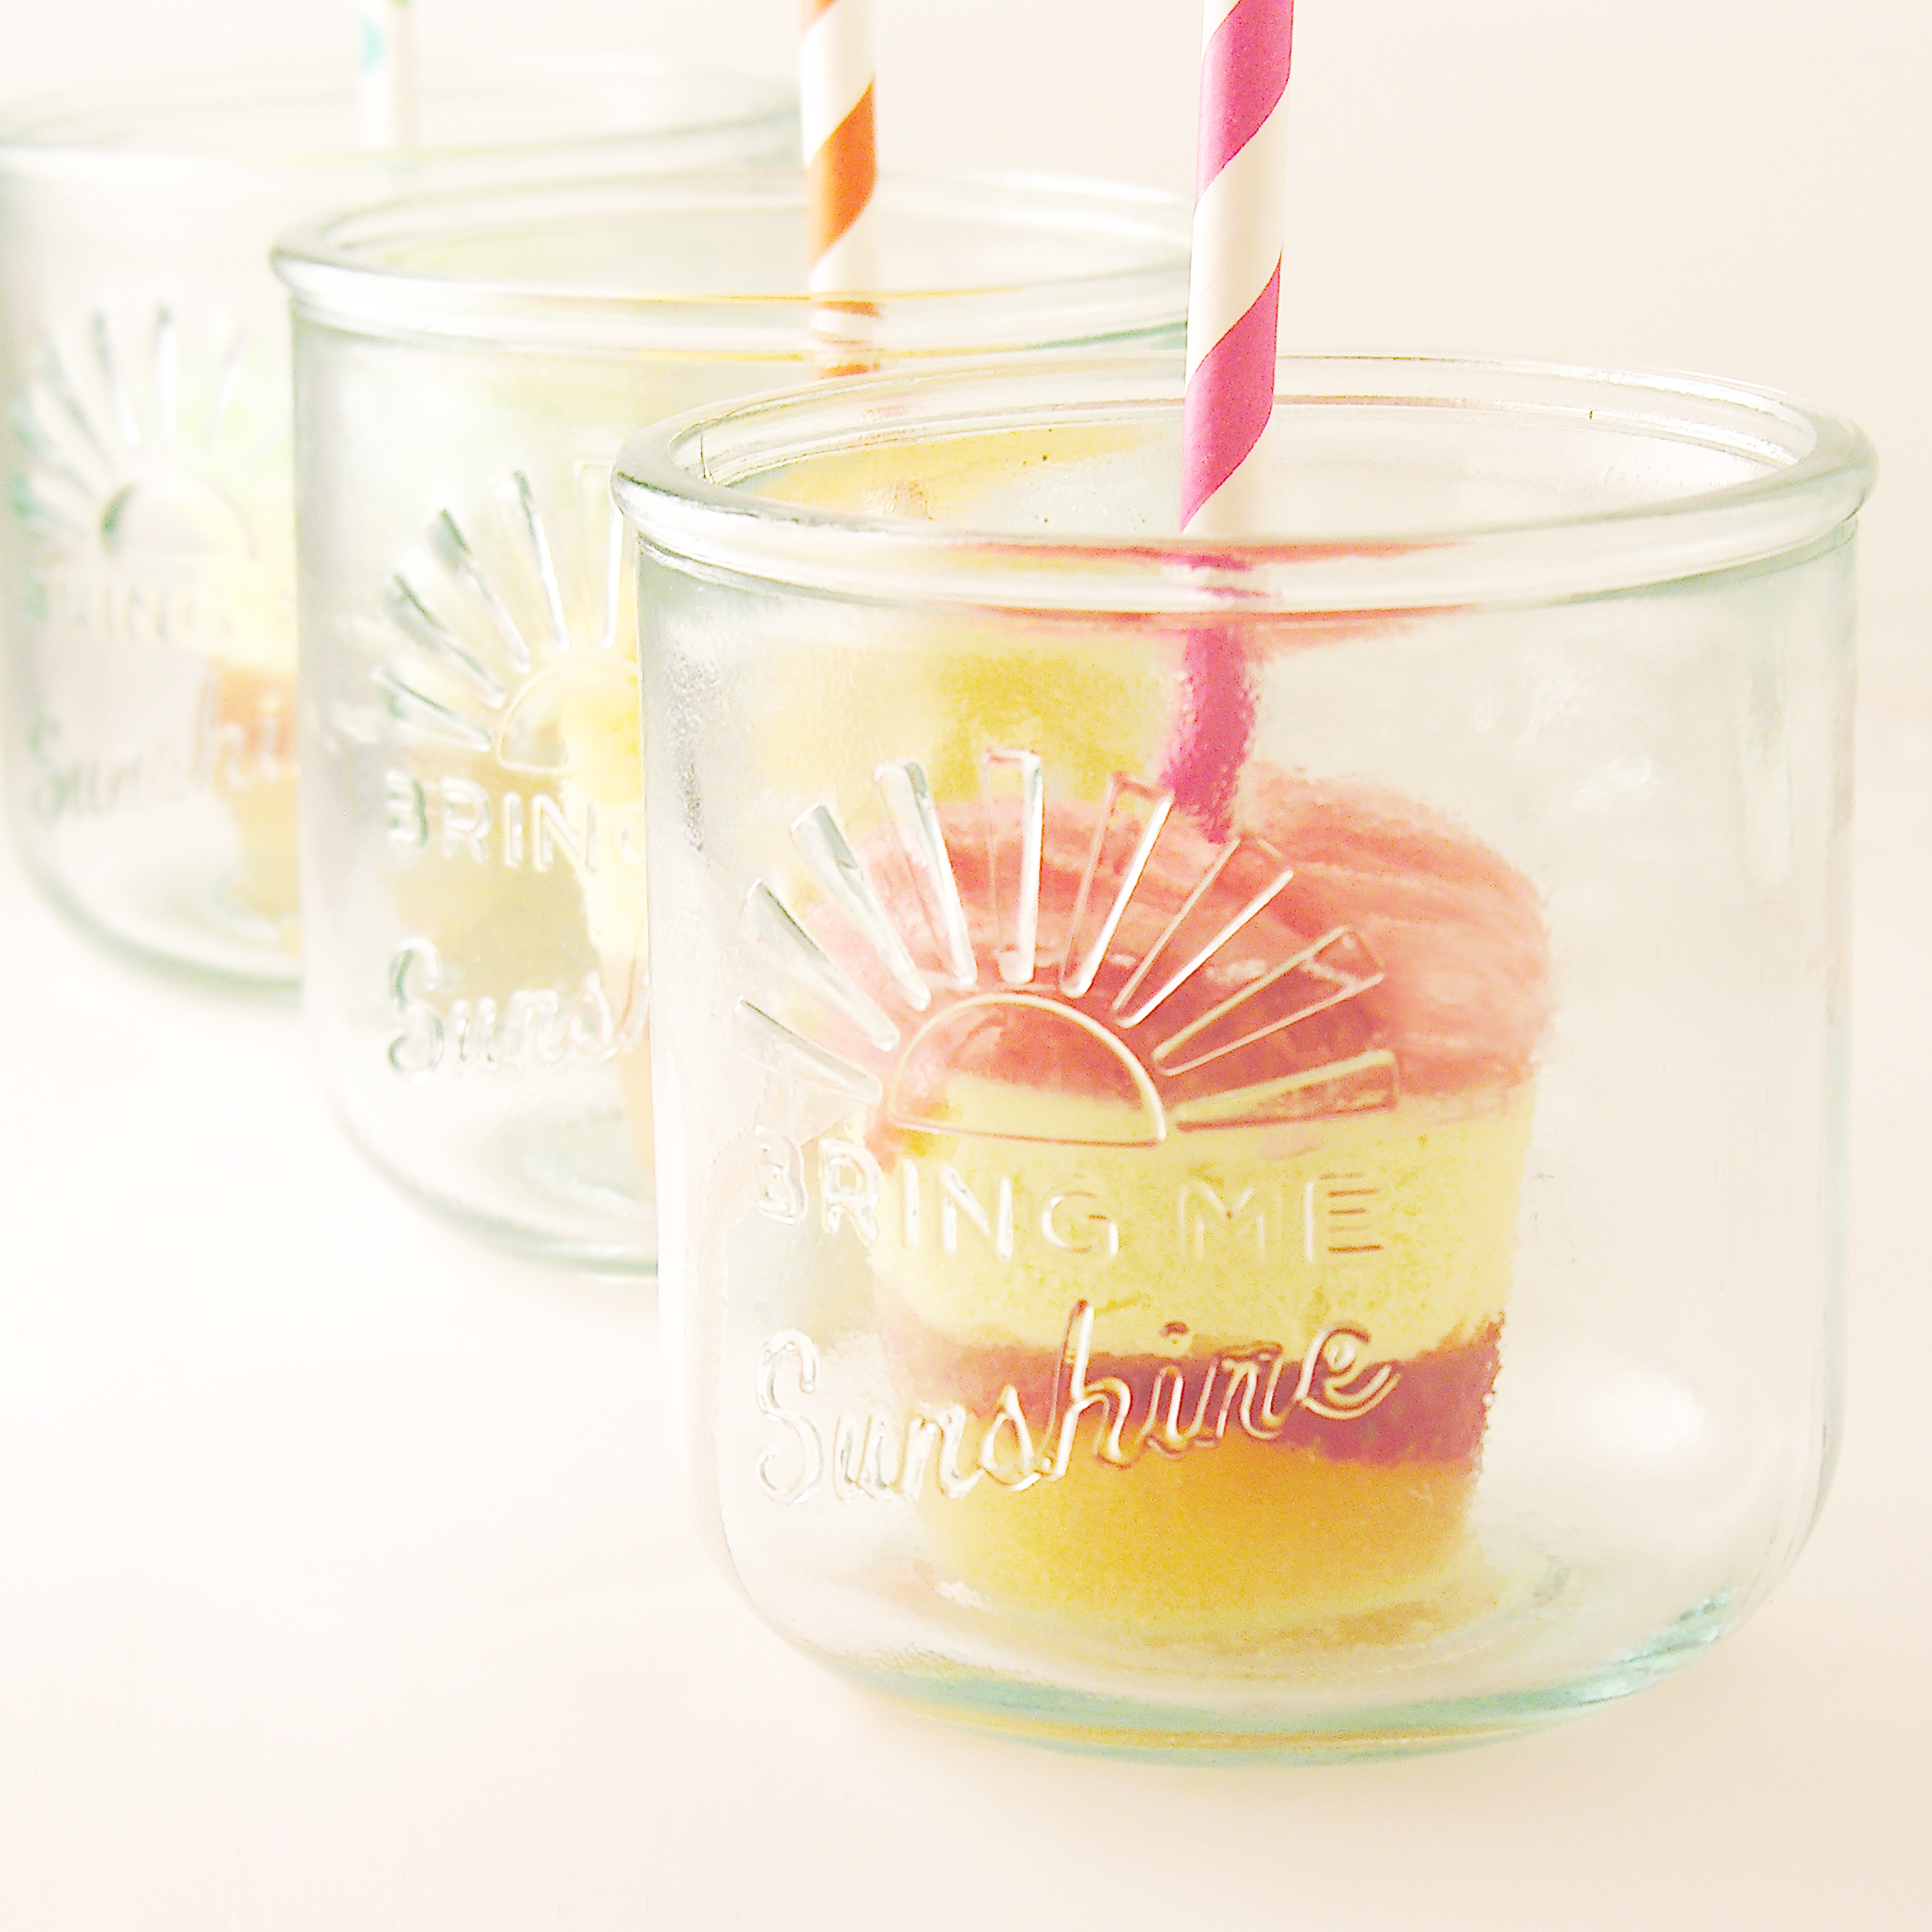
Oh- and don’t you love the glasses?!? I’m CRAZY about them! Bring me sunshine!!!!  I found them on Amazon while looking for something entirely different- and knew they would make perfect little punch glasses! They are actually intended to be candle holders- so if you use them you will have to wash by hand. I love them so much I will happily wash by hand every time! They are especially cheery with juice at breakfast! Click on the photo below if you want your own: 

I hope you get a chance to try these fun little punch pops- they really are one of my favorite ideas in awhile 🙂  ~r

Other frozen summer treats here on Easybaked:

Creamy Mango Pops!Frosty Almond Joy Cups!Raspberry Lemon Cream Cups!!!Heath Bar Ice Cream Dessert3


Learning to make Scones

Chocolate Chip Scone4These dense, rich scones can be made with a variety of flavors, and they are SO good!

One month ago I could say that I had never even tasted a scone before, much less made one. Today I made nearly 80 of them and they are one of my new favorite treats!

About a month ago, I offered to help with a baby shower for my friend Heather. I asked if they needed help with food, thinking cake or cupcakes or fancy cookies- typical shower requests. Heather’s mom Sharla explained that they were having an English tea for Heather and could I please make scones?

Scones…? I agreed and started to read up on scones. They sounded difficult. They sounded dry and crumbly and b-o-o-o-ring…. yawn.

Apricot Scones1

I started with a basic recipe for chocolate chip scones. I won’t tell you where I got it, because it wasn’t very good. At the time, I thought it must just be how scones are supposed to be (since I’d never tasted one before). Yuck.

I was explaining my dislike for scones in a group of friends one night, and one family started protesting that they make the best scones ever. The mom (my friend Beth), got the recipe from her mother-in-law, who sold them in a tea shop she ran years ago.

It sounded promising, and Beth sent me home armed with the recipe, tips and two scone pans (I didn’t even know those existed, but I LOVE them!).

I started with Apricot White Chocolate Scones, and the rest is history. I love them. They are easier than cookies and so much yummier!

Apricot Scone

Here is how to make them: (printable recipe)

You really need to have a pastry cutter (you can cut cold butter in with a knife, but it is SO much harder). You might also want to consider a scone pan. Those links will take you to products on Amazon, and if you get them I will get like 6% of what you spend. And then I will buy a scone pan for myself. *smile* If you want, you can cut the scones and bake them on a cookie sheet too- but they aren’t quite as moist and amazing that way.

 INGREDIENTS:

  • 2 1/2 cups of all-purpose flour
  • 2 tablespoons of sugar
  • 4 teaspoons of baking powder (fresh!)
  • 1/4 teaspoon salt
  • 1 cup of dried fruit, chocolate chips, nuts, or any combination of those three
  • 1 stick (1/2 cup) of cold butter
  • 2 eggs (beaten)
  • 3/4 cup of whipping cream
  • Milk (as needed)
  • Sugar/ Cinnamon to sprinkle on top.

DIRECTIONS:

  • Preheat oven to 400 degrees F, and spray pan (or sheet) liberally with cooking spray.
  • In a large mixing bowl combine flour, sugar, baking powder, and salt.
  • Add stick of butter and cut into crumb-like pieces using the pastry cutter.
  • Add nuts or chips (if using) and toss together with dry mixture until coated.
  • In a medium mixing bowl, mix together whipping cream and eggs until well combined.
  • Add dried fruit (if using) and toss together with wet mixture until coated.
  • Make a “well” in the center of the dry ingredients and pour the wet ingredients into it.
  • Combine and then gently knead with hands until it holds together in a ball. Add milk if mixture is too dry (this is most often the case when no fruit is added). Don’t over-knead this dough (you’ll melt all those little pieces of butter with the heat of your hands!)

IMG_0122IMG_0127IMG_0128

  • If using a scone pan, set aside about 1/4 of the dough to bake in a second batch. I overfilled my pan and they rose too high (as you can see in my pictures). When I made them for the shower, I used less dough and it was perfect!
  • Press remaining dough into a square on a floured counter and cut into triangles as shown (I used a pizza cutter and a knife- both worked fine).
  • Set into pan (or on cookie sheet) and brush tops with milk. Sprinkle with sugar (I used cinnamon and sugar).
  • Bake at 400 degrees F for 12-15 minutes.

IMG_0135IMG_0137IMG_0142

  • Allow them to cool in pan for about 5 minutes and pop out with forks.
  • Enjoy!!!

Apricot Scones3

My thoughts: Goodness…this sounds complicated, doesn’t it? I thought so too, but now that I’ve made a bunch of them I really do think they are easier than cookies! Today for the shower I made 4 kinds. I added white chocolate chips and apricots to the first (I cut the dried apricots into smaller pieces using kitchen scissors).  I added dried berried (cherries, blueberries and cranberries) to the second. I added mini chocolate chips to the third, and I added Hershey’s cinnamon chips to the fourth.

DSC_0894Here’s Heather, the beautiful mom-to-be at her English tea baby shower- SO much fun!  Enjoy!!~r

Other fun shower desserts here at Easybaked (click on a photo to see the recipe):

Gender reveal cookiesOriginal Oreo pops!!!!!Cotton Candy Fizz Gender reveal cupcakes

Tres Leches Layer Cake

Posted on


Tres Leches Cake!!!!

This traditional sponge cake is soaked in a vanilla 3-milk sauce and layered with dulce de leche.  Topped with whipped cream and fresh fruit, it is a light and refreshing dessert.

It’s nearly Cinco de Mayo time!  I first tried Tres Leches cake in Mexico.  I had taken a group from our church down to a tiny village in Sinaloa.  We had spent the week building, painting, doing electrical work and laying cement.  It was my birthday while I was there, and some of the ladies from the church made me a HUGE tres leches cake.  It was DELICIOUS!  When I asked for the recipe, they all looked at me funny and said- it’s tres leches cake..? (like everyone knows how to make that!!!)

Tres Leche Cake in MexicoSince then, I’ve tried this cake at other places in Mexico and in the states.  I’ve noticed that there are two kinds:  The firm, sweet and moist kind, and the dripping with milk kind.  I really don’t like the dripping with milk kind…that consistency is really gross to me- and cake should never be gross!

I researched lots of recipes, and discovered that there are two varieties: a butter based sponge cake and an egg based sponge cake.  The egg based one is the one I liked.  It soaks up all that yummy sauce and stays firm, while the other just sits in a puddle of sauce…YUCK!

Tres Leches Cake!!!!All of that said, this is an egg based recipe that I found on a lovely blog called Pati’s Mexican Table.  My research paid off- this was a FABULOUS cake!  Here’s the recipe: (printable version)

INGREDIENTS

Cake

  • 9 eggs, separated
  • 1 cup sugar
  • 1 tablespoon vanilla extract
  • 2 cups all purpose flour

Vanilla Sauce:

  • 1 (14oz) can sweetened condensed milk (I used La Lechera brand)
  • 1 (12oz) can evaporated milk
  • 1/2 cup heavy cream
  • 1 tablespoon vanilla extract

Topping/filling

  • 2 cups heavy whipping cream
  • 1/4 cup confectioners’ sugar
  • fresh fruit for garnish
  • 1 (13.4 oz) can of La Lechera Dulce de Leche (or make your own here)

DIRECTIONS:

  • Preheat oven to 360F degrees and spray two 8 or 9 inch cake pans with non-stick spray.  Cut a circle out of parchment paper to place in the bottom of each pan to help these cakes come out of the pan cleanly.
  • Divide eggs into 2 bowls.  Put the egg whites into a large mixing bowl and the yolks into a medium bowl.
  • Beat the egg whites on medium-high until they form soft peaks.  Add sugar and beat on high until they form stiff peaks (this will take 4-5 minutes, depending on your mixer).
  • Beat the egg yolks on high for 5 to 6 minutes until they increase in volume and turn a creamy yellow.
  • Beat the vanilla into the egg yolks until combined.
  • Add the yolks to the whites and use a spatula or large spoon to gently fold them together.
  • Add flour and gently mix until completely combined.
  • Divide batter evenly between the 2 pans and bake for 20-25 minutes.  The tops should be golden and when a toothpick is inserted in the center, it should come out clean.
  • Cool completely, run a small knife around the edges and tip cakes over on a plate.  Remove parchment paper.
  • Make sauce by combining the 3 milks (condensed, evaporated and cream) together with the vanilla.
  • Poke (lots!) of holes in the top of each cake with a fork and carefully pour sauce over the top, dividing it evenly between the 2 cakes.
  • Place one cake on a serving plate, spread dulce de leche caramel over the top, stack second cake on top.
  • Make frosting by beating together the whipping cream and powdered sugar, until stiff peaks form.
  • Frost cake and serve with fresh fruit. Refrigerate until serving.

Tres Leches Cake with caramel and fruitMy thoughts:  I was so pleased with how yummy this cake was.  The sponge cake is very firm and easy to work with, even when it’s soaked with sauce.  You can make this in a 9×13 inch pan too- I just wanted the tall layer cake look~ and that caramel in the middle?  Oh my… take a look at my pictures- it partially soaks in to that bottom layer and gives it a rich caramel flavor.  I think you all are going to love this cake!!  I hope you get a chance to try it!!!  Enjoy!!!!  ~r

Tres Leches Cake!!!!Other cinco de Mayo recipe ideas:

Alfajores-- yummy dulce de leche filling!Confetti Cake Filled with CandyCreamy Mango Pops!Mexican Chocolate Milk

Chocolate Raspberry Cheesecake

Chocolate Raspberry Cheesecake!!Creamy chocolate cheesecake topped with a layer of raspberry and sour cream. Unbelievably yummy!!!

If you follow my blog on a regular basis, you will remember this cheesecake from last fall.  It is my Aunt’s recipe and it is literally the best cheesecake I’ve ever eaten.  It is so creamy and smooth…oh my.

I decided to add a few twists to the recipe by making it chocolate and adding raspberries to the topping.  It worked beautifully and added so much flavor!  It is really quite easy to make.  I hope you enjoy it as much as I did!!!!

Here’s the recipe (printable version):

INGREDIENTS:

Crust:
  • 1 1/4 cups Honeymaid graham cracker crumbs
  • 5 tablespoons butter, melted
  • 3 tablespoons sugar 
Filling: 
  • 3/4 cup sugar
  • 3 (8 oz.) Philadelphia cream cheese bars (must be the Philadelphia brand)~ softened to room temperature.
  • 2 eggs
  • 1 teaspoon vanilla
  • 1 teaspoon lemon juice
  • pinch of salt
  • 1 cup of semi-sweet chocolate chips
Topping: 
  • 1 pint (2 cups) sour cream
  • 1/2 cup sugar
  • 1 tsp. vanilla
  • pinch of salt
  • 1/3 cup of canned raspberry pie filling

DIRECTIONS:

  • Preheat oven to 350F degrees.
  • In a medium bowl, combine crust ingredients together until well combined.
  • Press into a 9″ spring form pan, pressing crumbs into bottom and about 1 1/2″ up sides of pan.    
  • For the filling, combine the sugar and softened cream cheese in a large mixing bowl and beat together until smooth.
  • Add the eggs, one at a time, beating between each addition.
  • Add the vanilla, lemon juice and salt and beat until smooth and creamy.
  • Melt the one cup of chocolate until smooth, and add to cheesecake mixture, beating until completely incorporated.
  • Pour into crust.
  • Bake at 350F degrees for 35-45 minutes.
  • While cheesecake is baking, make topping by simply mixing together all of the topping ingredients.
  • After 35-45 minutes of baking, remove cheesecake from oven and turn oven down to 325F degrees.
  • Pour topping over hot cheesecake, gently spreading to edges.
  • Return cheesecake to oven and bake for an additional 12-15 minutes.
  • Remove cheesecake from oven and leave sides on pan while allowing cheesecake to cool to room temperature.  
  • Refrigerate several hours (or overnight)
  • Run a small knife around the edges of the pan and remove them before serving.
  • Serve with extra raspberry pie filling– YUM!
  • Enjoy!!!!


Chocolate Raspberry Cheesecake!!
My thoughts:  You can see in my pictures that I added a cup of raspberry pie filling over the crust before I poured the cheesecake batter in.  It was really yummy, but made it hard to remove the bottom of the springform pan (which I always do before pictures).  If you don’t mind leaving the bottom on, this is a yummy addition to the recipe!  Just gently spread it out over your graham crust and pour the cheesecake over the top.
Chocolate Raspberry Cheesecake!!

We love raspberries here at Easybaked!  Check out our other yummy raspberry recipes!

Raspberry Lemon Cream Cups!!!Raspberry Confetti KissesRaspberry Truffle TartRaspberry Lemon drop Cakes!!!

Raspberry Lemon Drop Cakes

Posted on

Raspberry Lemon Drop Cakes!!
Moist yellow cake bowls filled with lemon and topped with whipped raspberry cream.  These are such a unique and flavorful dessert- you are going to love them!

This is recipe #2 in my tribute to melted frosting.  Last week we used a chocolate frosting and this week- lemon frosting.  The plan for this recipe was chocolate cake bowls with chocolate filling and raspberry cream.  I caught myself half-way through making a yellow cake mix before I remembered I wanted to do chocolate though.

I have a lot on my mind these days!

SO, I sat down and thought about what flavors are good with yellow cake mix and I already had a tub of lemon frosting…and here we go! It was a fortunate mistake, because these are delicious.  One of my new favorites!  I even ate one for breakfast, and with a cup of coffee?  Perfection!

Here’s the recipe:  (printable version)

INGREDIENTS:

  • 1 box of yellow cake mix (plus oil, water and eggs to make according to package)
  • 1 tub of lemon frosting
  • 1 packet of Dream Whip
  • 1/3 cup cold milk
  • 1 tablespoon of powdered sugar
  • 1 teaspoon vanilla
  • 1/4 cup of raspberry preserves (more or less, to taste)

DIRECTIONS:

  • Preheat oven to 350F degrees.
  • Make yellow cake mix according to package.
  • Grease 4 Wilton fillable mini cake pans, and fill each one about 2/3 full.  This will use about 1/2 of the batter- so you will fill these pans again once the 1st set is through baking.
  • Bake at 350F degrees for 20-30 minutes, until a toothpick inserted comes out clean.
  • Tip cakes onto a cake rack to cool.  Trim bottoms flat, if needed.
  • Spoon tub of frosting into a microwave safe bowl and heat in microwave for about 30 seconds.  Stir.
  • Spoon melted lemon frosting into each cake “cup”, filling each to the top.

Raspberry Lemondrop Cakes1

  • Place remaining frosting into a small zip top bag.
  • Place Dream Whip, milk, powered sugar and vanilla into a large mixing bowl and beat on high for about 2 minutes, until a thick, whipped consistency.
  • Fold raspberry preserves in, and place into a zip top bag that has been fitted with a decorator tip.
  • Pipe whipped topping on top of each cake.
  • Clip a small corner off the bag of remaining frosting and drizzle liberally over the top of each cake. 
  • Top with a fresh raspberry if desired.
  • Keep these chilled until serving- and ENJOY!!! 

Raspberry Lemondrop Cakes4c

My thoughts: I’m not kidding you– these are amazing!  If you don’t want to use the pans (they are a really fun addition to your kitchen though!) you could do a layer cake:  2 round cakes with lemon icing and whipped topping in the middle and lemon icing poured over the top- see my Chocolate Mousse Cake for how to assemble.  These are a must-try recipe!!!  SO easy with that melted frosting– love it!!!
Raspberry Lemon drop cakes!!

One more picture:

Raspberry Lemon drop cakes!!!!
Want some other ideas for those cute little pans?  Here’s a couple- just click on the picture to see the recipe!

Mini Filled Boston Cream Pies!Heath Bar crunch filled mini cake

Ruthanne news:  I don’t often post about my personal life here, because my goal is to just get yummy recipes to you without a ton of personal commentary.  When I really want to just see a recipe, I hate scrolling through 3 pages of of kids and dog stories first, so I promised myself that this site would be more about recipes than about me!!!

I have a few really exciting things going on that I wanted to share with you though~

First, Warner Press Publishing contacted me about making a boxed set of greeting cards from my recipes and photos.  These are available now in many Christian bookstores or on their site.  Click here to check them out!

Second, I have a cookbook for kids coming out this summer!  I’m so excited about this project- there’s nothing better than time in the kitchen with your kids!  Details to follow on this!

Third, I lost my job in genetics.  Our hospital can “no longer invest in expensive cutting edge technology due to the affordable care act”.  Thats a quote.  I struggled with what comes next and eventually (after much soul searching and prayer!) decided to move out to Arizona for the next 8 months to work alongside a church in the Navajo Nation.  I’m writing this blog from the comfort of a motel in Tucumcari, New Mexico.  I’ve driven about 1200 miles from home and I’m about 6 hours from my new home in Rough Rock Arizona.  My car is literally packed to the ceiling with things- about half of those things are supplies for baking, blogging and photography!  I’m hoping to continue creating and posting for all of you!

Many thanks to each of you for being a part of the easybaked community!  I’m incredibly glad you are along for this journey!  ~r

Sunset over New Mexico

Sunset over New Mexico

Buchty

Posted on
This wonderful jam-filled bread is a traditional Czech/ Slovak recipe.  It was served to us at dinner as the meal and it is MUCH easier to make than I expected!!!
INGREDIENTS:
(these measurements are a little weird because they were converted from metric)
  • 5 1/2 cups all-purpose flour
  • 1 1/3 sticks of unsalted butter (room temperature!)
  • 5 T sugar (divided)
  • 1 1/2 cups of milk
  • 2 (7g.) packets of dried yeast
  • 1 pinch of salt
  • 3 egg yolks and one full egg(at room temperature!)
  • 2 T. lemon juice
  • 1/2 t. vanilla
  • 1 jar of fruit preserves (any flavor- we had prune, strawberry and apricot in Slovakia- I used red raspberry in this batch)
  • 1 c. powdered sugar
DIRECTIONS:
  • Set 3 eggs and butter out to come to room temperature.
  • In a small bowl, warm milk to lukewarm in microwave.  Add 1 T. of sugar and both packets of yeast to the milk and allow the yeast to rise for 10 minutes.
  • While you are waiting: in a large bowl place flour, sugar and salt and blend well.
  • Beat 3 egg yolks together in a small bowl and add vanilla.
  • Dice butter.
  • After 10 minutes beat the egg/ vanilla mixture into the yeast/ milk mixture and pour into flour.  Mix until combined.
  • Add room temperature, diced butter and blend.
  • Add lemon juice and knead dough until smooth (took me about 4-5 minutes)
  • Place dough in a ceramic or glass bowl, cover with a clean towel and place in a warm place (oven or microwave) for 1 hour.  It should double in size.
  • After one hour, punch dough and remove air.  Divide into 24 equal parts.
  • Roll each part out flat, place a scoop of preserves in the middle and then fold dough around preserves and seal by pressing dough together.  Place in a lined (foil or parchment paper) pan (I used two 9 inch square cake pans) with the sealed side down.
  • Cover pan with a clean towel and allow to rise for 10 minutes.
  • Preheat oven to 300 degrees F.
  • Remove towel from pan and brush rolls with a beaten egg
  • Bake for 30 to 40 minutes until golden.
  • Cool on a wire rack
  • Dust with powdered sugar and serve— enjoy (Dobrou Chut!!!!!)
My thoughts:  This was my 1st time trying a recipe with yeast in it and I was POSITIVE it wouldn’t rise- but it worked perfectly!  I searched the internet for a recipe for this and read many before I settled on this one– I did change several things as I went, but the basic recipe I used was from CzechUnderScope.com.  I was thrilled with how they turned out- they tasted exactly as I remembered them from our trip.  I hope you get a chance to try these- I’m excited to try this dough with some other things– cinnamon rolls maybe?  YUM!