Tag Archives: fancy dessert

Triple Chocolate Truffle Cups

Posted on


Triple Chocolate Truffle Cups

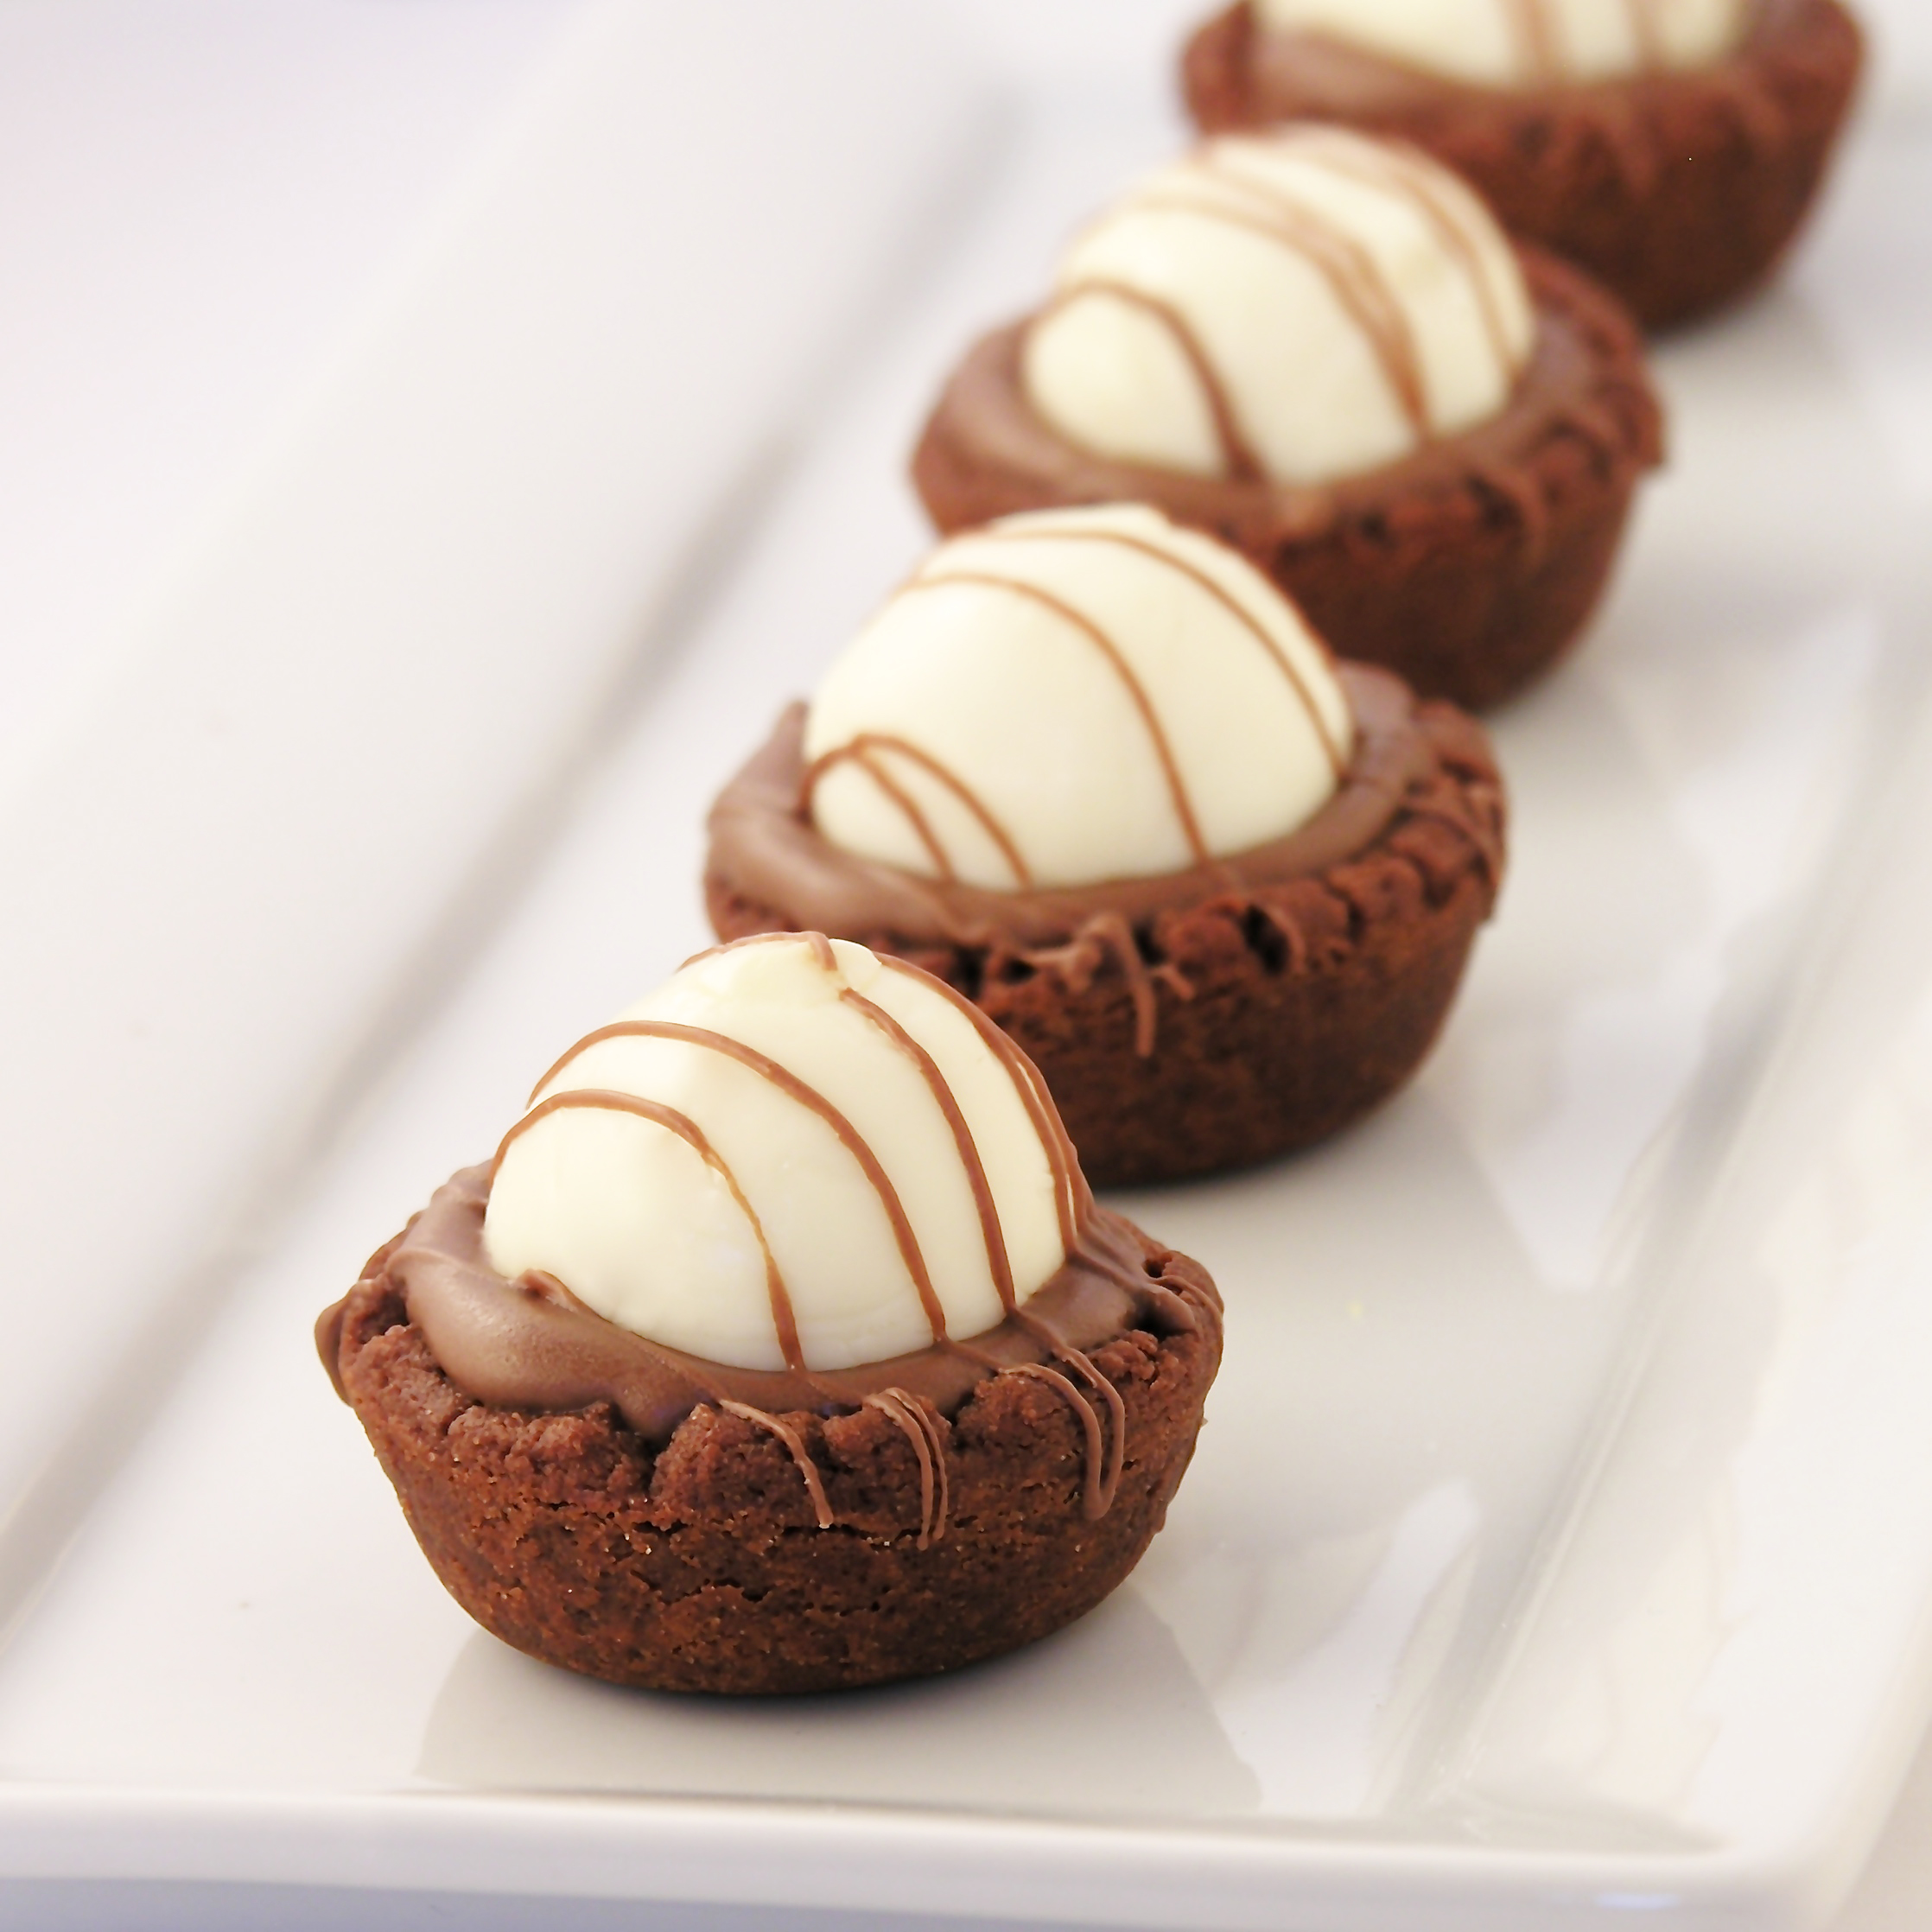
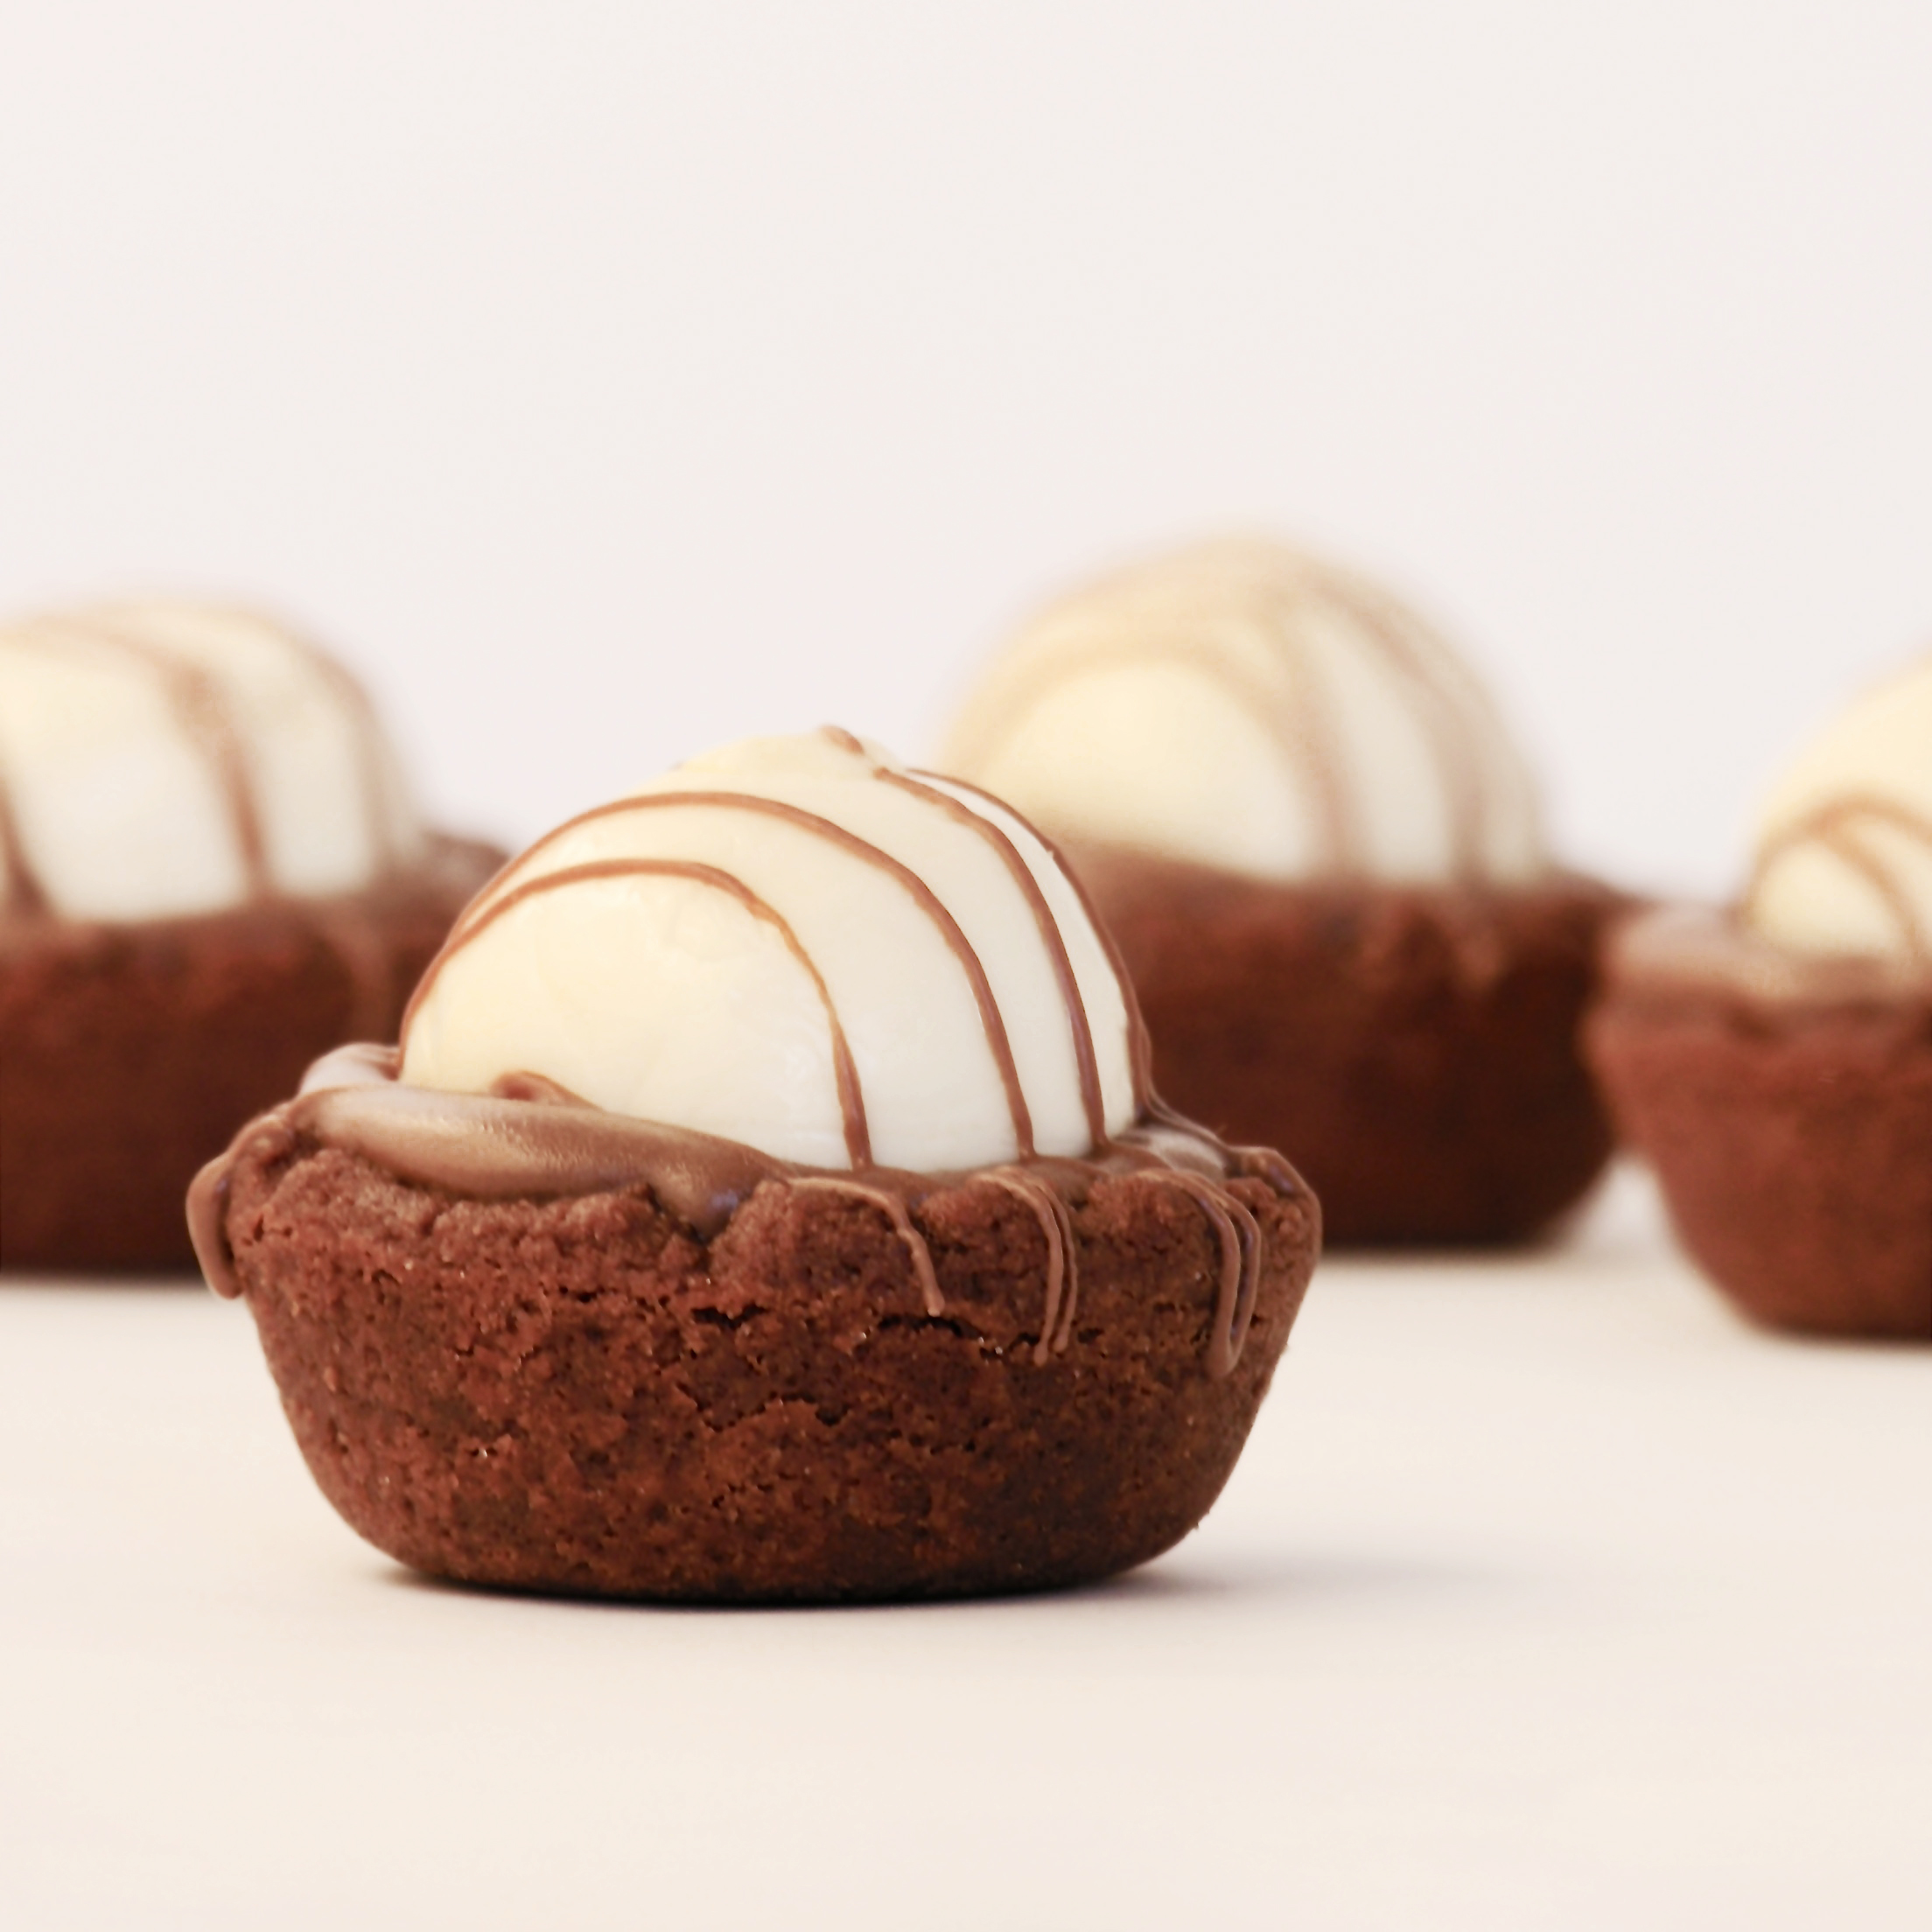
Delicious dark chocolate cookie cups filled with melted milk chocolate and a white chocolate truffle.  Yum.

I love little mini desserts.  I used to work for a hospital and they would have a big, fancy Christmas party every year.  My favorite part was all the adorable little desserts at the end.  You can try like 8 of them for the calorie price of one big dessert!

This is an adorable (easy to make!) mini dessert.  Perfect for showers, receptions, tea parties and any occasion that calls for a little bit of “fancy” dessert.

The cookie cups use my favorite chocolate cut-out cookie recipe (pressed into a cup!), melted chocolate and a Lindt White Chocolate Truffle. Quick, easy, and delicious!

Triple Chocolate Truffle Cookie Cups!

Here’s the recipe: (printable version)

INGREDIENTS: (makes about 48 mini desserts)

  • 1 stick (1/2 cup) butter, softened
  • 3/4 cup of granulated sugar
  • 1 egg
  • 1/2 teaspoon vanilla extract
  • 1/3 cup of unsweetened cocoa powder
  • 1 1/2 cups flour
  • 1/4 teaspoon salt
  • 1/4 teaspoon baking powder
  • 1 bag of Wilton’s milk chocolate Candy Melts (if you want to melt higher end chocolate for this, feel free!)
  • Approximately 48 Lindt White Chocolate Truffles (Walmart has them in large boxes of 60, for a reasonable price)

DIRECTIONS:

  • Preheat oven to 350F degrees.
  • Make cookies by combining butter, sugar, egg, vanilla and cocoa powder and beating until completely combined.
  • Add other dry ingredients gradually, mixing with beaters until too heavy to beat. Use clean hands to knead dough into a soft ball.
  • Use a small cookie scoop (I used a scoop that holds 1/2 Tablespoon of batter) to portion out your dough into mini muffin tins that have been sprayed with non-stick spray.
  • Use a tart shaper or a wooden spoon to press the dough into a cup shape (really, the tart shaper works best for this and you will use it again- I use mine all the time!)

Making cookie cups

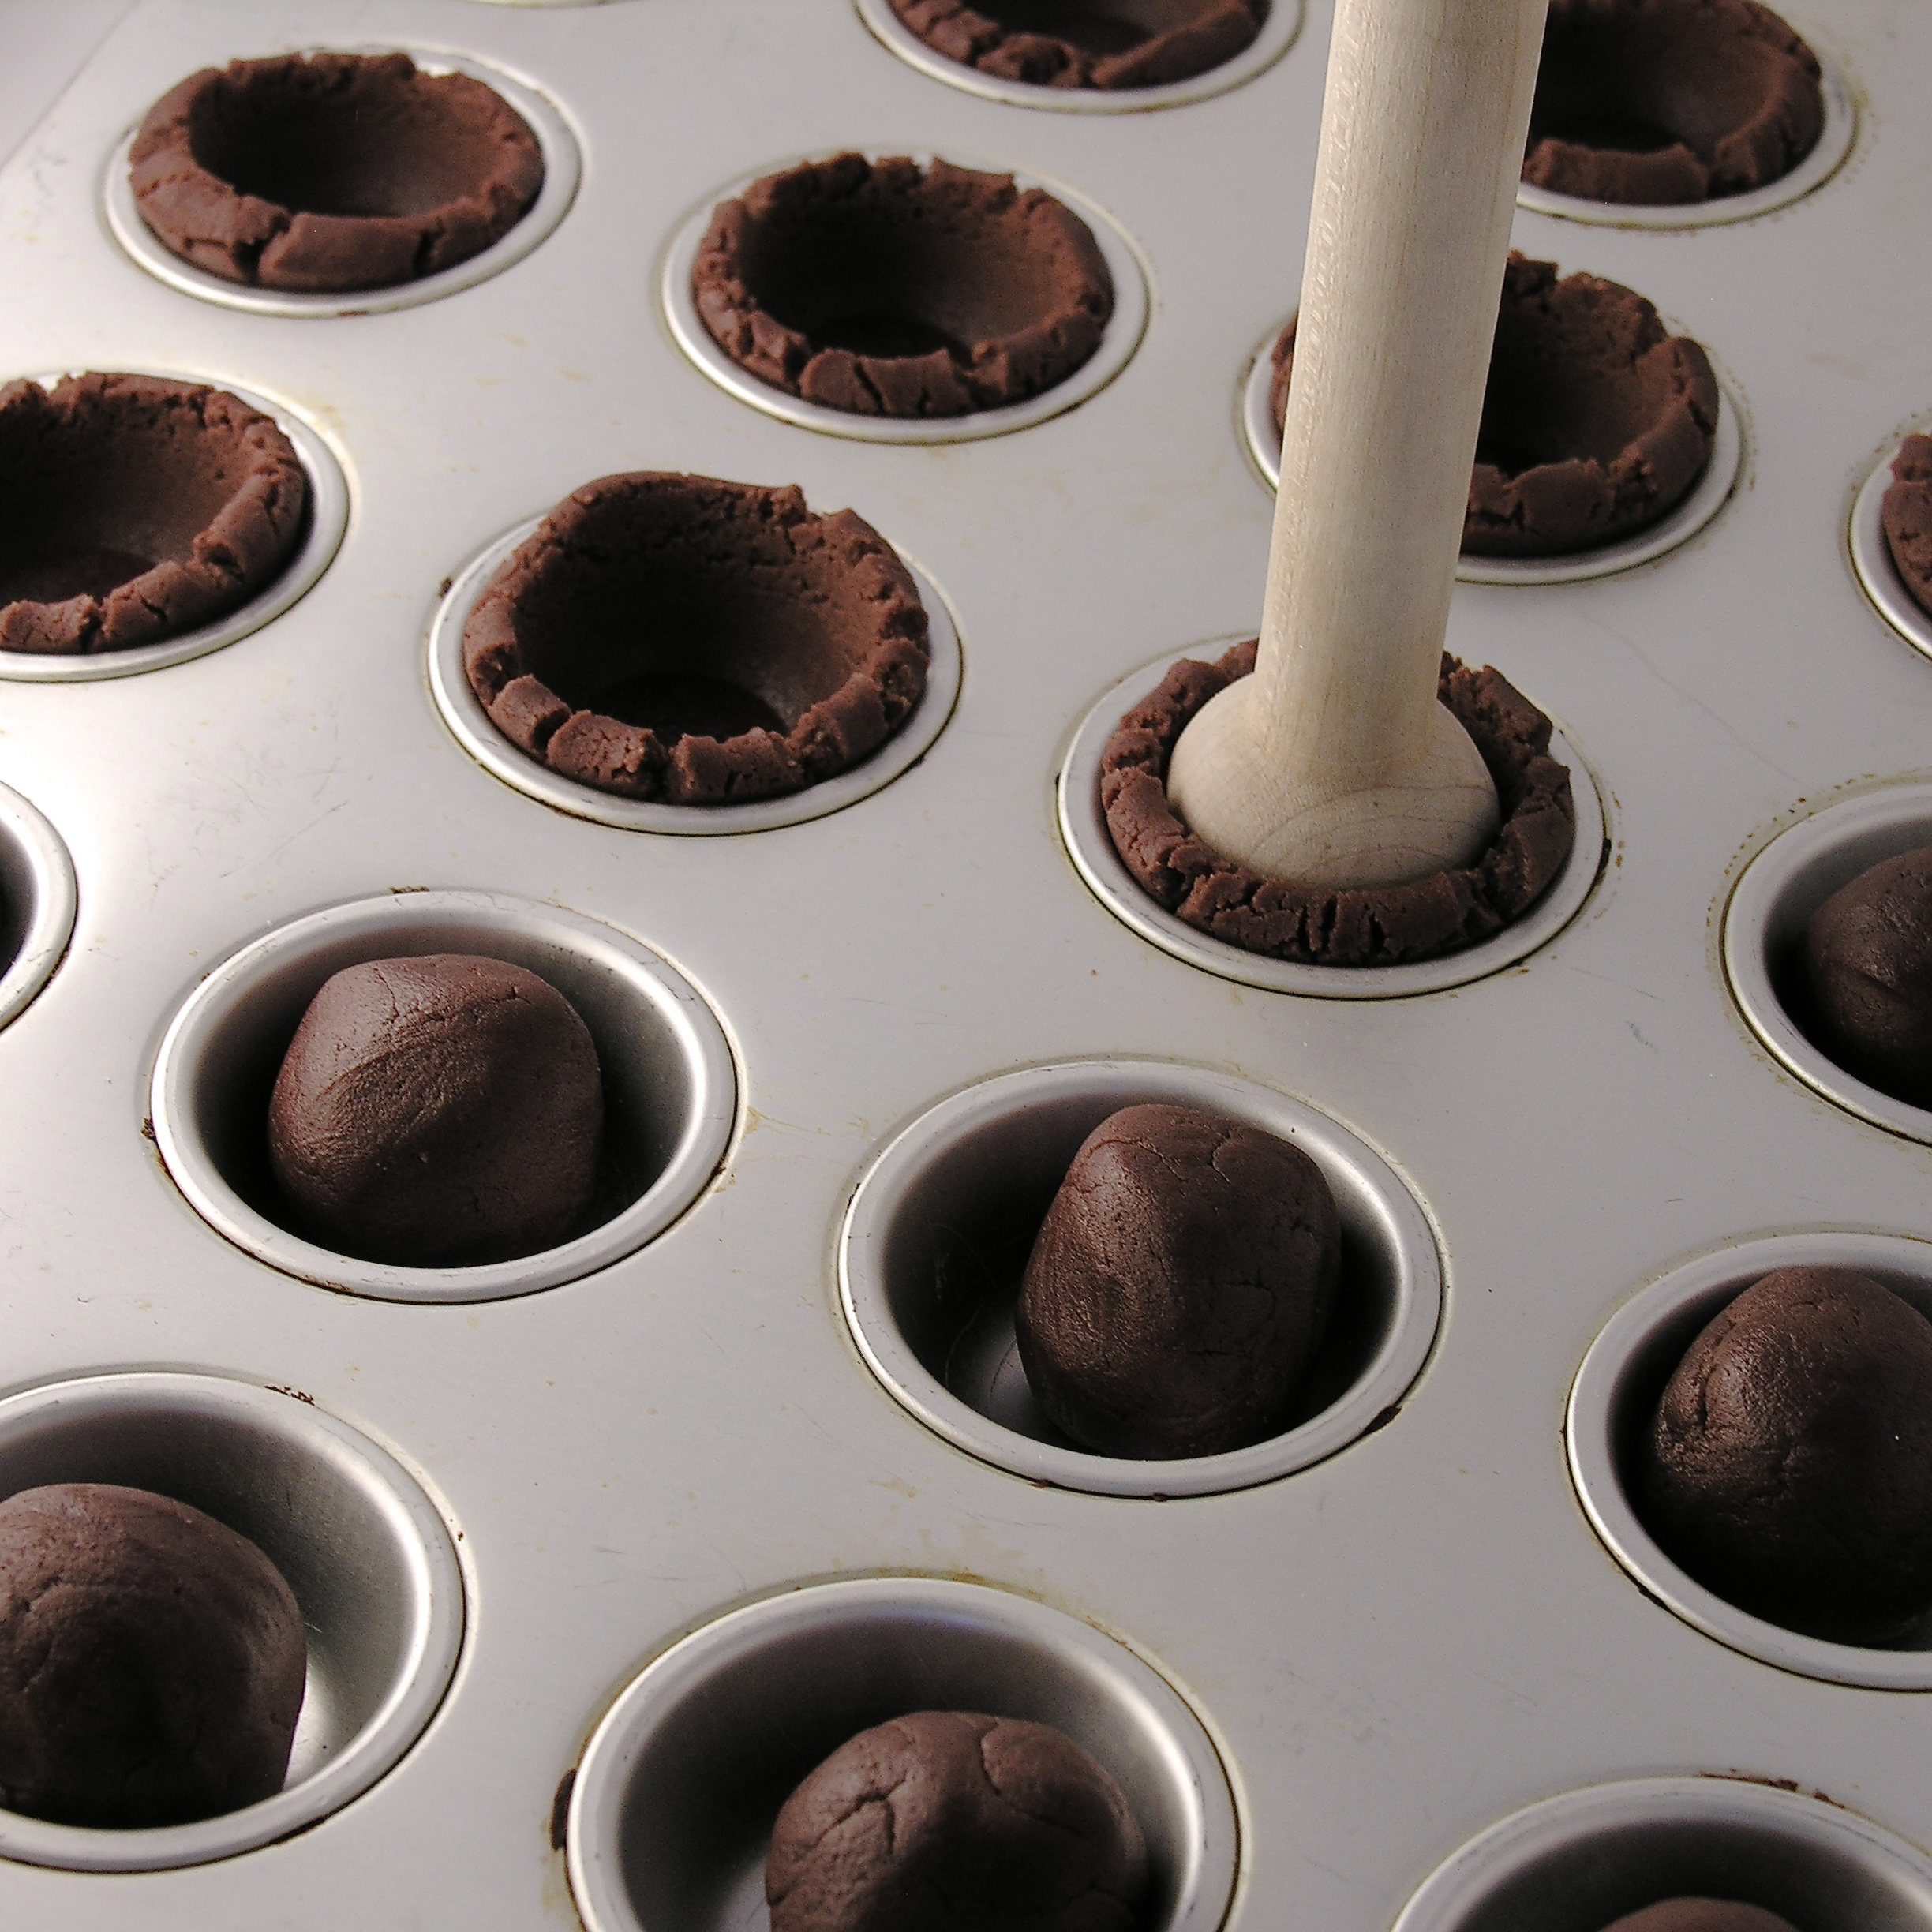
  • Bake at 350F degrees for 7 to 8 minutes and remove from oven.
  • Press centers in a second time with the tart shaper and allow them to cool for just a couple of minutes.
  • Use a small paring knife to pop each cup out and allow them to cool completely on the counter.
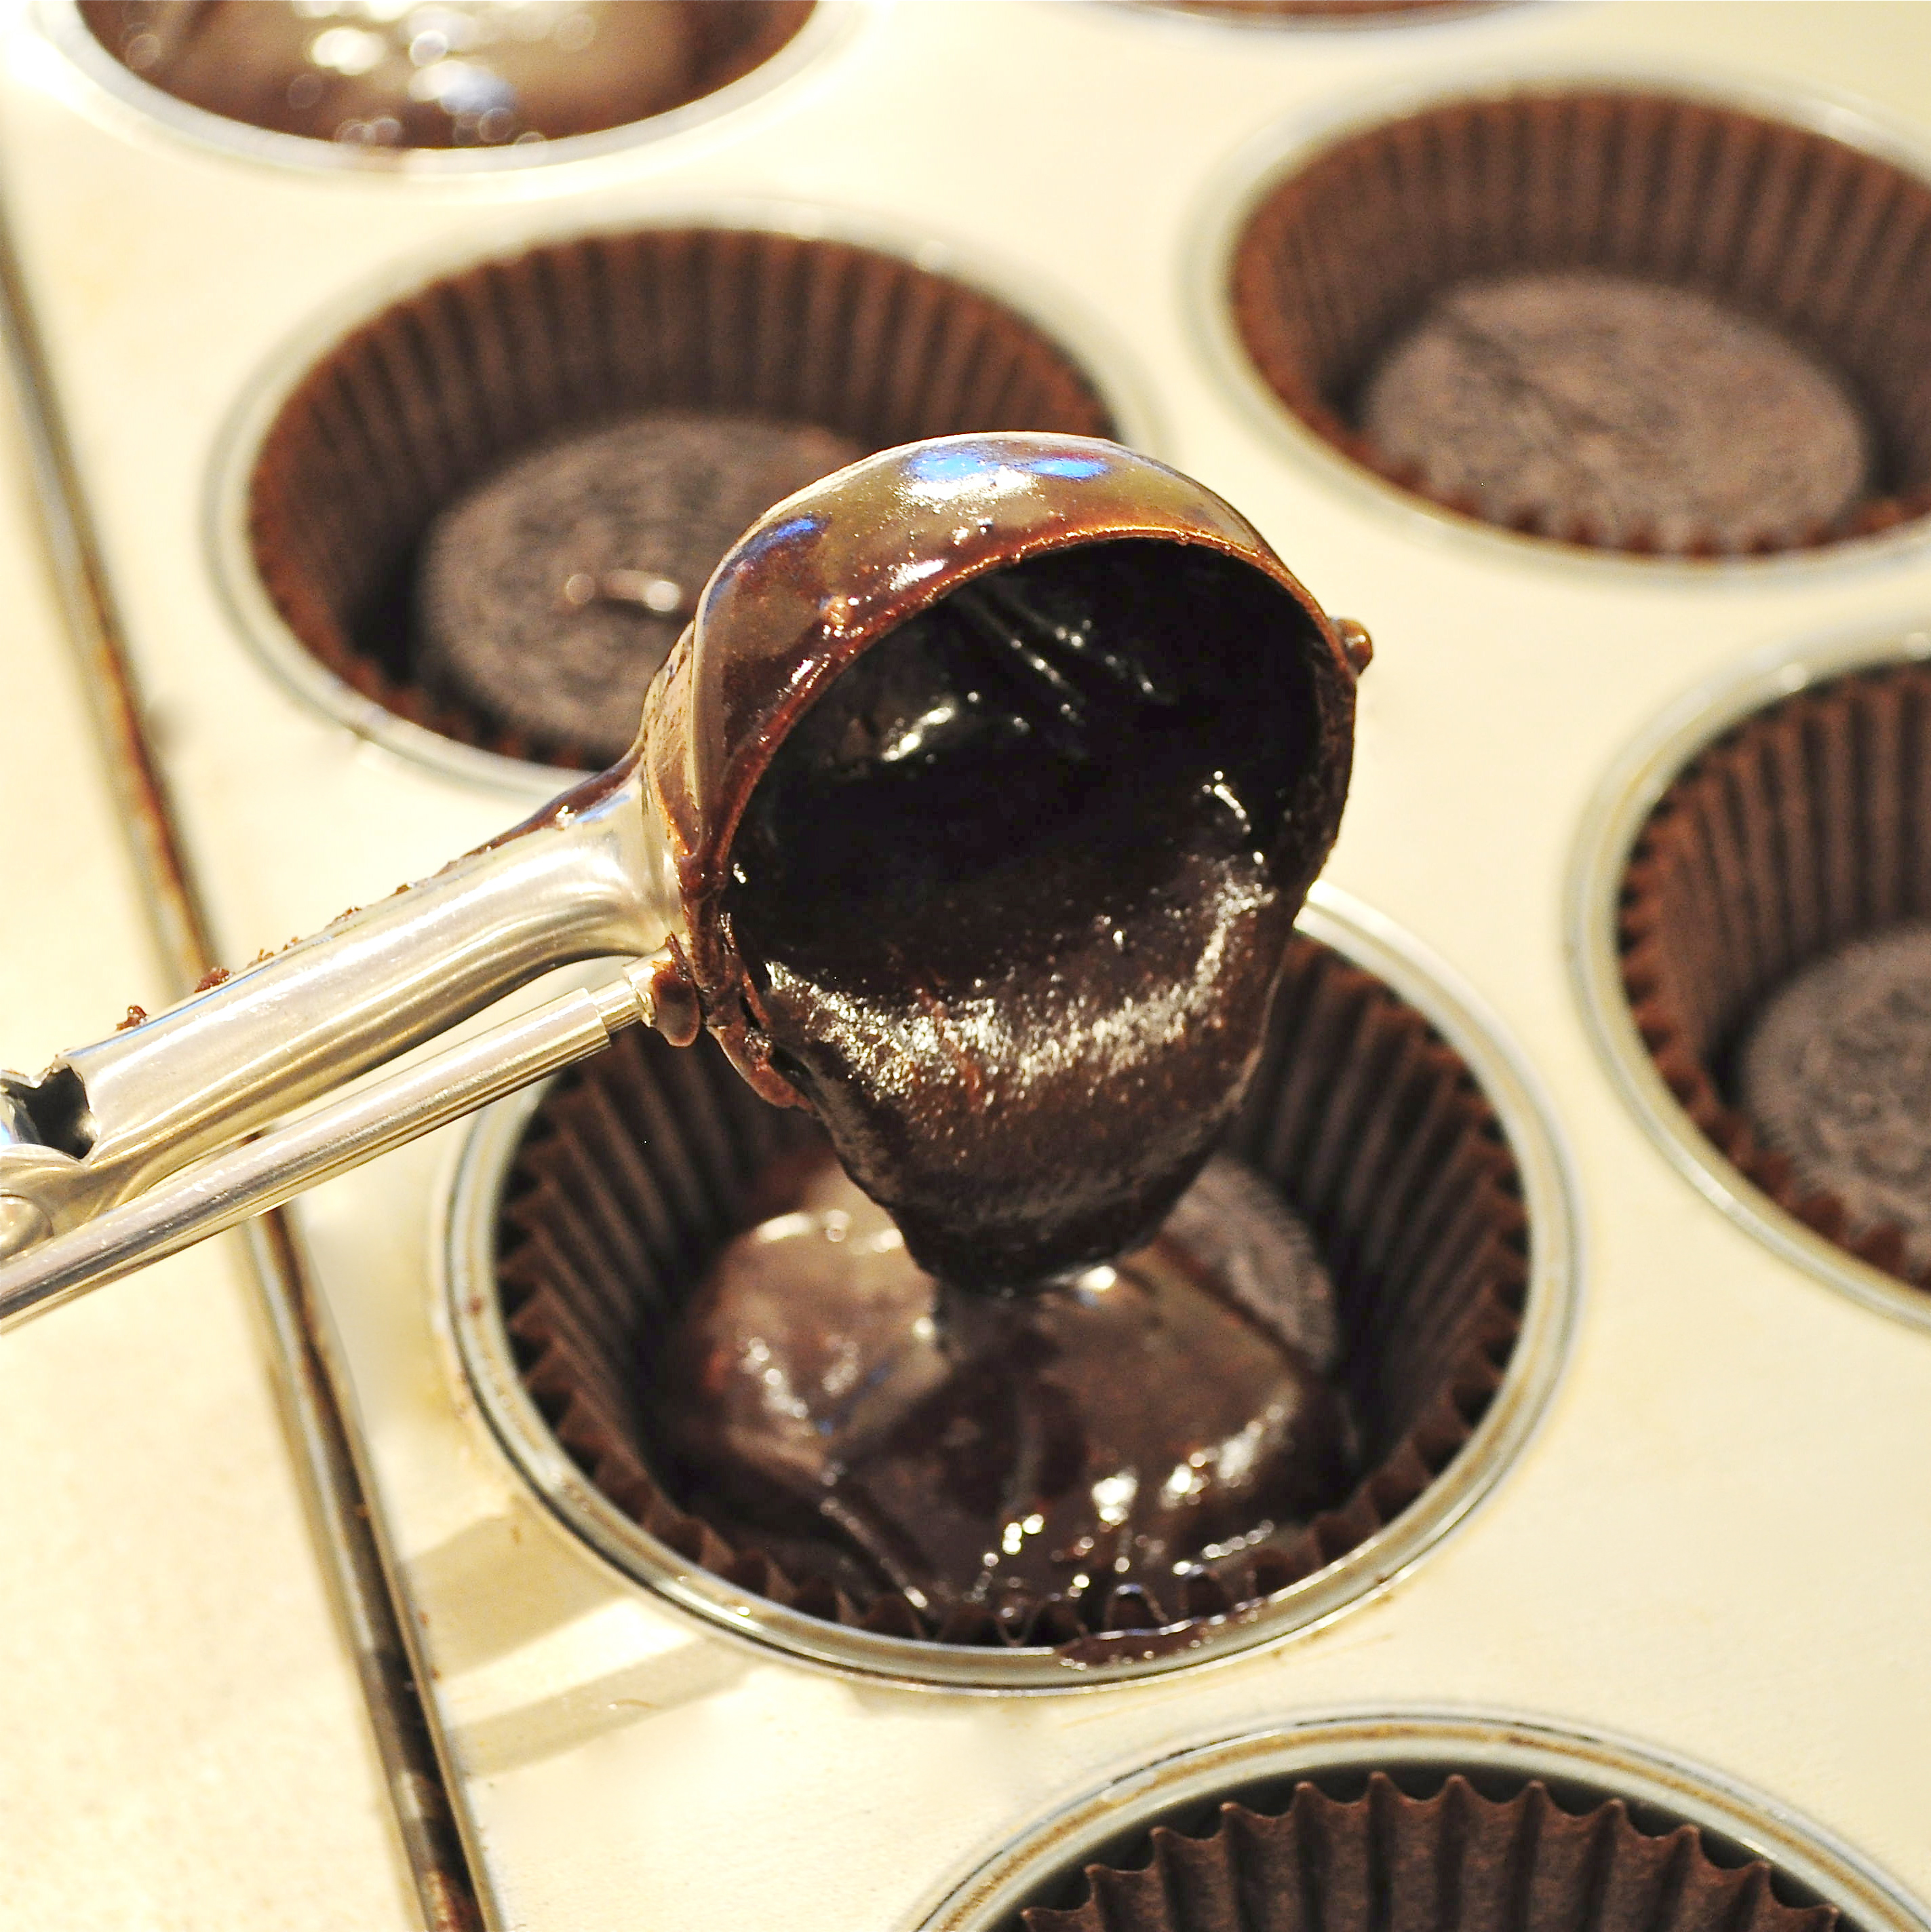
  • Melt candy melts in a microwave safe bowl, in the microwave, in 30 second increments, stirring in between until melted and smooth.  
  • Pour melted chocolate into a sturdy zip-top bag.  Zip it closed and clip a corner off.
  • Unwrap all of your Lindt truffles.
  • Carefully pipe warm chocolate into each cookie cup, filling each one about half way.
  • Gently press a truffle into the center of each chocolate-filled cup, allowing the warm chocolate to squeeze up around the edges (yum!)
  • Drizzle any left-over chocolate over the tops of the mini-desserts and allow them to cool and harden completely.
  • Enjoy!!!

Triple Chocolate Truffle Cookie Cups!!!
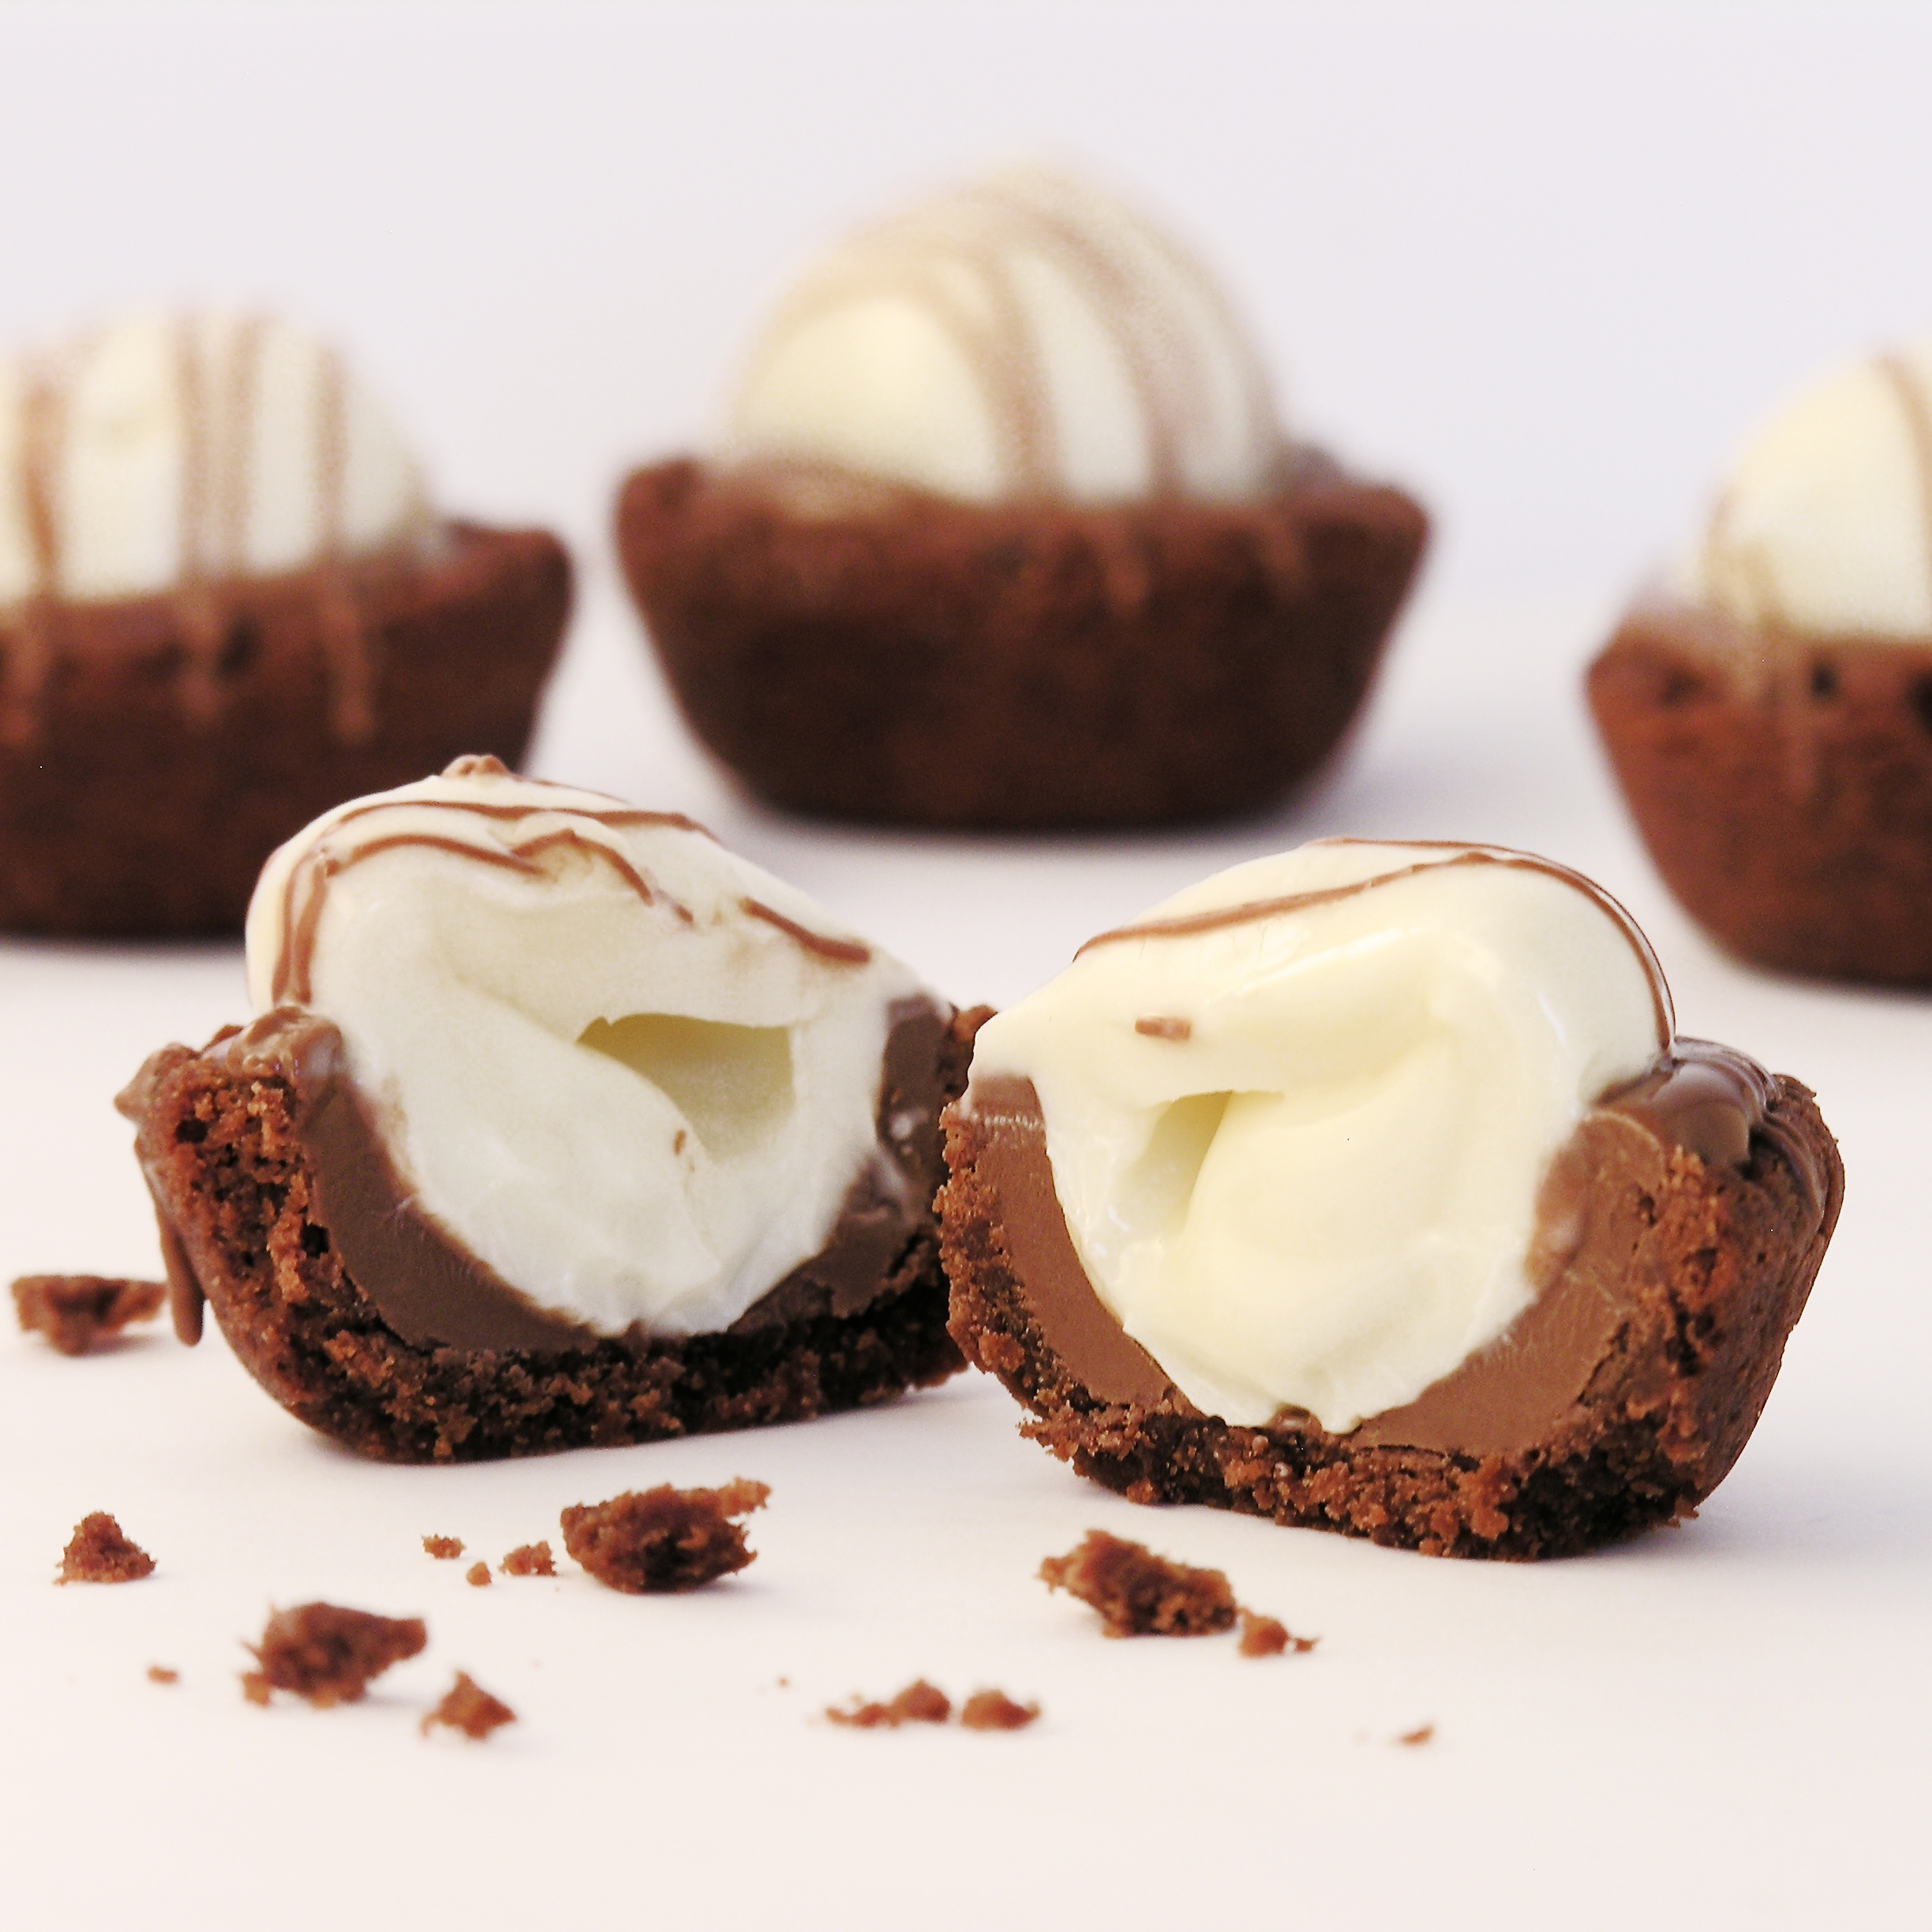
My thoughts: Well, you can see for yourself what happens when you bite into this little dessert. Pure deliciousness!!!! Those truffles are so good.  Mine got a little melted before I cut one in half– but all that soft white chocolate….!!! They make this dessert a touch pricey- but they are SO worth the cost!  If you want to make a smaller batch just cut the cookie recipe in half.  I hope you get a chance to try these- I am filing this recipe away for the next time I need something little for favors or a mini dessert table.  These are perfect for both!  Enjoy!!!!  ~r

Triple Chocolate Truffle Cups

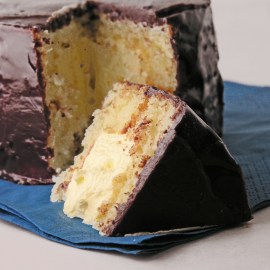
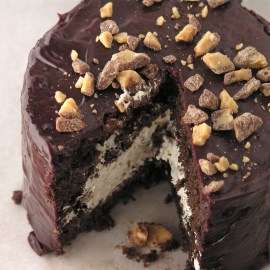
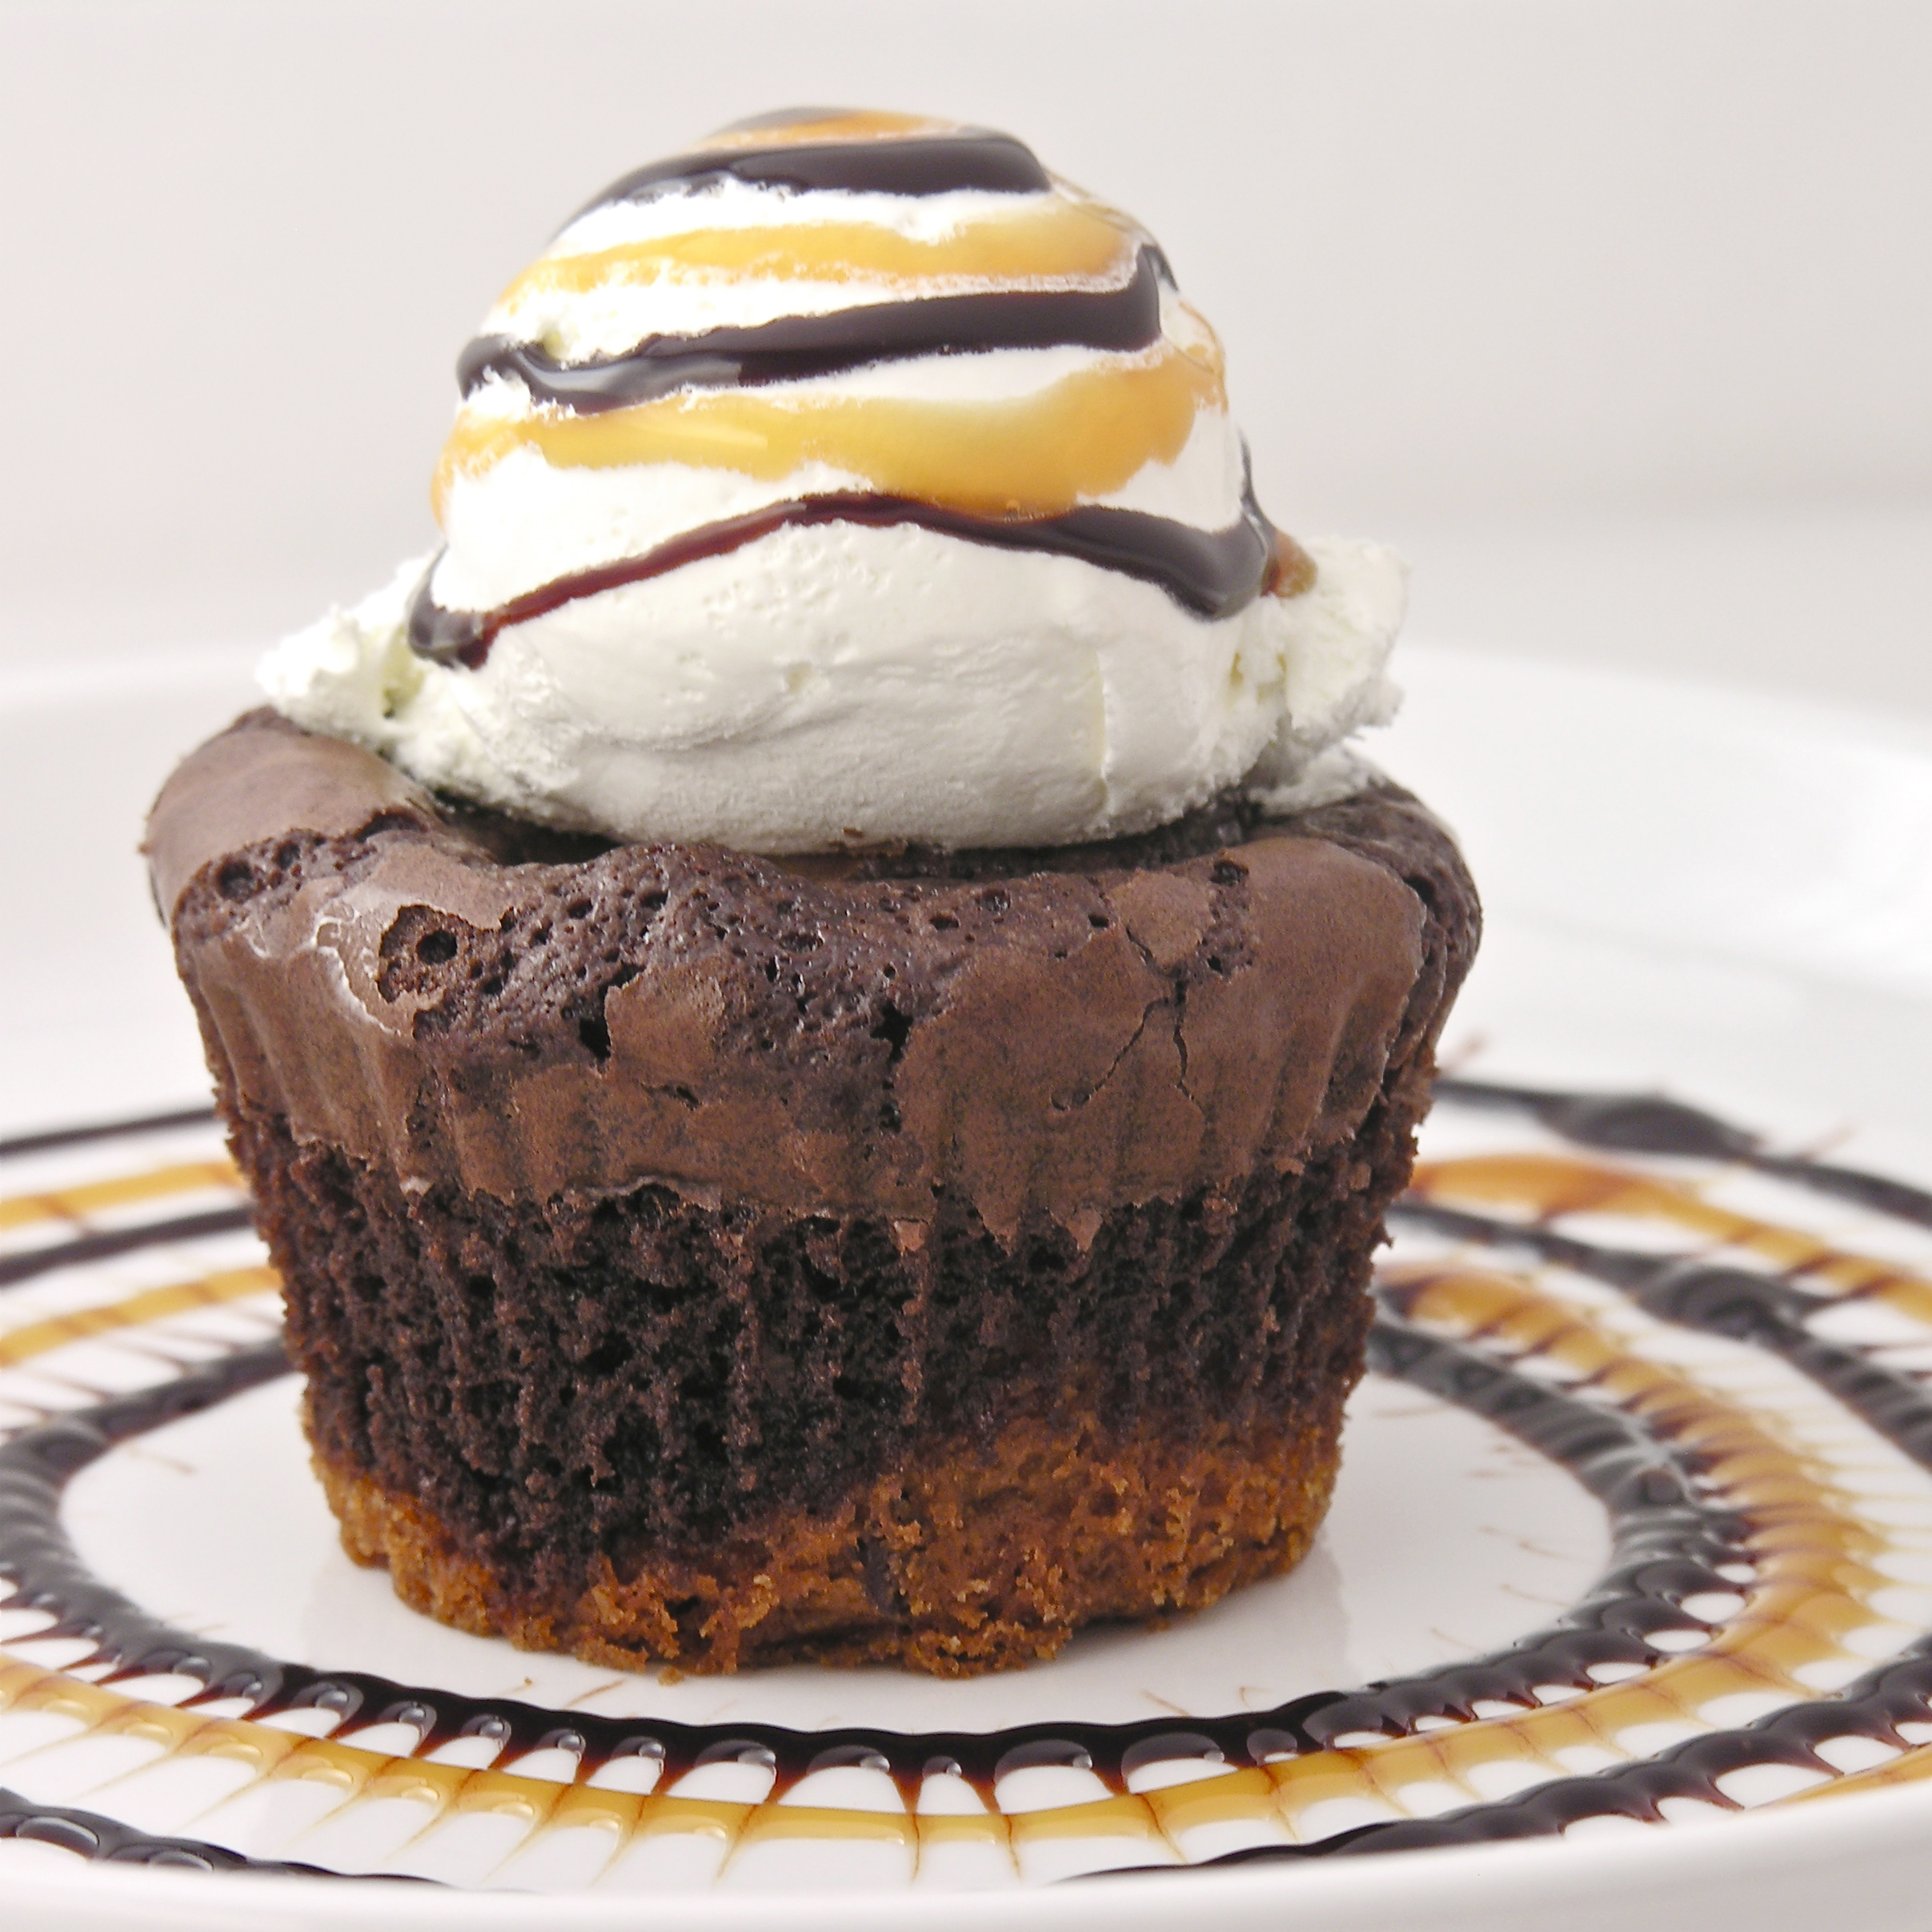
Other mini desserts you might enjoy:

Melted Smores cupDark Chocolate Ganache CupcakesKoolaid truffles!!Mini Pineapple Upside Down Cakes

Raspberry Lemon Drop Cakes

Posted on

Raspberry Lemon Drop Cakes!!
Moist yellow cake bowls filled with lemon and topped with whipped raspberry cream.  These are such a unique and flavorful dessert- you are going to love them!

This is recipe #2 in my tribute to melted frosting.  Last week we used a chocolate frosting and this week- lemon frosting.  The plan for this recipe was chocolate cake bowls with chocolate filling and raspberry cream.  I caught myself half-way through making a yellow cake mix before I remembered I wanted to do chocolate though.

I have a lot on my mind these days!

SO, I sat down and thought about what flavors are good with yellow cake mix and I already had a tub of lemon frosting…and here we go! It was a fortunate mistake, because these are delicious.  One of my new favorites!  I even ate one for breakfast, and with a cup of coffee?  Perfection!

Here’s the recipe:  (printable version)

INGREDIENTS:

  • 1 box of yellow cake mix (plus oil, water and eggs to make according to package)
  • 1 tub of lemon frosting
  • 1 packet of Dream Whip
  • 1/3 cup cold milk
  • 1 tablespoon of powdered sugar
  • 1 teaspoon vanilla
  • 1/4 cup of raspberry preserves (more or less, to taste)

DIRECTIONS:

  • Preheat oven to 350F degrees.
  • Make yellow cake mix according to package.
  • Grease 4 Wilton fillable mini cake pans, and fill each one about 2/3 full.  This will use about 1/2 of the batter- so you will fill these pans again once the 1st set is through baking.
  • Bake at 350F degrees for 20-30 minutes, until a toothpick inserted comes out clean.
  • Tip cakes onto a cake rack to cool.  Trim bottoms flat, if needed.
  • Spoon tub of frosting into a microwave safe bowl and heat in microwave for about 30 seconds.  Stir.
  • Spoon melted lemon frosting into each cake “cup”, filling each to the top.

Raspberry Lemondrop Cakes1

  • Place remaining frosting into a small zip top bag.
  • Place Dream Whip, milk, powered sugar and vanilla into a large mixing bowl and beat on high for about 2 minutes, until a thick, whipped consistency.
  • Fold raspberry preserves in, and place into a zip top bag that has been fitted with a decorator tip.
  • Pipe whipped topping on top of each cake.
  • Clip a small corner off the bag of remaining frosting and drizzle liberally over the top of each cake. 
  • Top with a fresh raspberry if desired.
  • Keep these chilled until serving- and ENJOY!!! 

Raspberry Lemondrop Cakes4c

My thoughts: I’m not kidding you– these are amazing!  If you don’t want to use the pans (they are a really fun addition to your kitchen though!) you could do a layer cake:  2 round cakes with lemon icing and whipped topping in the middle and lemon icing poured over the top- see my Chocolate Mousse Cake for how to assemble.  These are a must-try recipe!!!  SO easy with that melted frosting– love it!!!
Raspberry Lemon drop cakes!!

One more picture:

Raspberry Lemon drop cakes!!!!
Want some other ideas for those cute little pans?  Here’s a couple- just click on the picture to see the recipe!

Mini Filled Boston Cream Pies!Heath Bar crunch filled mini cake

Ruthanne news:  I don’t often post about my personal life here, because my goal is to just get yummy recipes to you without a ton of personal commentary.  When I really want to just see a recipe, I hate scrolling through 3 pages of of kids and dog stories first, so I promised myself that this site would be more about recipes than about me!!!

I have a few really exciting things going on that I wanted to share with you though~

First, Warner Press Publishing contacted me about making a boxed set of greeting cards from my recipes and photos.  These are available now in many Christian bookstores or on their site.  Click here to check them out!

Second, I have a cookbook for kids coming out this summer!  I’m so excited about this project- there’s nothing better than time in the kitchen with your kids!  Details to follow on this!

Third, I lost my job in genetics.  Our hospital can “no longer invest in expensive cutting edge technology due to the affordable care act”.  Thats a quote.  I struggled with what comes next and eventually (after much soul searching and prayer!) decided to move out to Arizona for the next 8 months to work alongside a church in the Navajo Nation.  I’m writing this blog from the comfort of a motel in Tucumcari, New Mexico.  I’ve driven about 1200 miles from home and I’m about 6 hours from my new home in Rough Rock Arizona.  My car is literally packed to the ceiling with things- about half of those things are supplies for baking, blogging and photography!  I’m hoping to continue creating and posting for all of you!

Many thanks to each of you for being a part of the easybaked community!  I’m incredibly glad you are along for this journey!  ~r

Sunset over New Mexico

Sunset over New Mexico

Chocolate Chip Oreo Brownie Cups

Posted on

Brownie Oreo Cookie CupChocolate chip cookie dough topped with an Oreo cookie topped with a chewy brownie… does dessert get better than this?  Plus they are just so cute- and fun to eat!

These little dessert cups are incredibly easy to make.  All you need is refrigerated cookie dough, Oreos and brownie mix (plus the oil water and eggs to make the brownies!)

Dessert Ingredients!They are so easy to put together:

DIRECTIONS:

  • Preheat the oven to 350F degrees.
  • Put 24 cupcake liners into cupcake tins.
  • Break apart refrigerated cookie dough (the Nestle brand comes already divided into 24 pieces)
  • Press cookie dough into the bottom of each cupcake liner so it covers the bottom of each cup (I thought that as the dough warmed a little bit to room temperature that this was easier).
  • Press an Oreo cookie on top of each bit of cookie dough.

Break apart cookie dough bits....Press Oreo on top of cookie dough..

  • Prepare the brownie mix as directed on box and scoop batter evenly into all 24 cups, covering the Oreo completely.


Scoop brownie batter over Oreo.

  • Bake at 350F degrees for 20-30 minutes.  Check often and be sure you don’t over bake the brownie.  They are much better a little chewy!
  • Remove from oven and serve warm or at room temperature.
  • I served with a little whipped topping and chocolate/ caramel drizzle.


Brownie Oreo Cookie Cup3

My thoughts: These are a really easy and yummy treat.  They are fun right out of the cupcake wrapper (eaten like a cupcake), or they are fun to dress up as a fancy dessert with pretty drizzles and toppings.  The three layers of different flavor and consistency make this a truly unique dessert!  Enjoy!! ~r

Brownie Oreo Cookie Cup2

Other dessert cup recipes you might enjoy: (click on the image to be taken to the recipe)

Fruit Loop Confetti Cups!!Salted Caramel Cookie Cups (2)Pecan Pie cookie cups with dark chocolateSeven Layer Cups

Kool-Aid Truffles

Posted on

These chocolate-dipped truffles have creamy sweet centers made with the unique flavors of Kool-Aid drink mixes!  Your kids will love them!!!

INGREDIENTS:

  • 1 (8 oz) package of cream cheese (softened to room temperature!)
  • 3 cups of powdered sugar
  • 3 cups of white chocolate chips
  • 1 tsp vanilla
  • 1 (0.16oz) packet of Kool-Aid drink mix (any flavor- see my choices below)
  • 2 bags of Wiltons Candy Melts in White chocolate or Dark chocolate
  • Sprinkles, cookie crumbles or colored candy melts (I used Blue and Red)

Blue Raspberry Truffle

Lemon-Lime and Graham Cracker Truffle

Chocolate-covered Black Cherry Truffle

White chocolate Mango-Peach Truffle

DIRECTIONS:

    • Cream together cream cheese, powdered sugar and Kool-Aid in a large mixing bowl.
    • Melt white chocolate chips in the microwave in 30 second increments (stirring in between) until smooth and creamy.
    • Add melted chips and vanilla to cream cheese mixture and combine until completely smooth.
    • Refrigerate for at least one hour.
    • Remove mixture from refrigerator and use a small cookie scoop to make small balls of filling (I placed these on a plate and put them back in the fridge to chill while I prepared my chocolate to dip)
    • Melt the Wilton’s Candy Melts in the microwave in 30 second increments until smooth and creamy.
    • Dip chilled balls of filling in the melted chocolate, draining away excess and placing on parchment paper to harden (if you want pictures of how I dip things click here for a previous recipe)
    • Decorate with sprinkles, cookie crumbles or drizzles of fun colored chocolate. 

My thoughts:  These are so much fun to make!!  I just love them.  I actually divided the recipe in half (and used just 1/2 of a packet of Kool-Aid) so that I could try lots of flavors and not make 4 full batches.  One batch makes quite a few truffles- about 40 if you use a small cookie scoop to measure them out.  

My warning????  These are SO sweet. (SOOOOOOOO sweet!)  They almost make your teeth hurt they are so sweet.  They are great with a cup of coffee though, and they will cure you of your sugar cravings fast!  

Dipping them in chocolate is always the hard part if you haven’t done much candy making.  Keeping the fillings chilled helps and (of course) practice helps.  They are MUCH easier to dip than cake pops though.  If you don’t want to dip them, I’d suggest chopping chocolate up fine (or cookie bits, or candy bits) and just rolling the finished truffle filling in toppings instead.  Be amazing and create your own flavor combinations– I’d LOVE to hear about what you and your family create!!!  Enjoy!  -r

Frosty S’more Cups

Posted on

Graham Crust topped with soft chocolate, mini marshmallows and creamy whipped pudding- all frozen in a cute individual cup!  YUM!

I’m back with a recipe using my Chicago Metallic Mini Cheesecake Pan  that I just love.  My Chocolate Chip Cookie Cheesecakes were my first experiment using this pan and these are my second experiment.  I’m just so impressed by how easy it is to make these using this pan- love it!  These frozen treats are rich and creamy and oh-so-yummy!  I hope you love them as much as I do!

INGREDIENTS:

  • 18 graham cracker squares (9 sheets or about 1 1/2 cups)
  • 1/3 c. butter
  • 1/2 c. milk chocolate chips
  • 1/4 c. whipping cream
  • 2 c. mini marshmallows
  • 1 1/2 c. cold milk
  • 1 box (4 servings, 3.9 oz)instant chocolate pudding
  • 1 (8 oz) container of Cool Whip (thawed in fridge)
  • 1/4 c. mini chocolate chips (as topping)

DIRECTIONS

  • Crush graham crackers into fine crumbs.
  • Melt butter and add to graham crackers, mixing until well combined to make crust.
  • Prepare pan by placing disks into the bottom of each cup.
  • Evenly divide crust mixture into all 12 cups, saving about 1/4 cup to use as topping later. (I used a Mini Tart Shaper to press crumbs firmly into the bottom of each cup).
  • Place milk chocolate chips and whipping cream into a small bowl and microwave in 30 second increments, stirring in between, until melted and smooth.
  • Spoon chocolate into a zip top bag, cut a tip off and evenly pipe chocolate into the center of each cup, on top of the crust.

  • Divide Marshmallows among cups.
  • Mix cold milk with pudding on medium speed for 2 minutes. Fold in 1/2 of the Cool Whip container (the rest will be used as topping).
  • Spoon filling into a large zip top bag (and ZIP it or you might have a mess!)  Clip a corner off and pipe pudding into each cup evenly.  Try to pipe it in between the marshmallows so that the whole cup is filled.  I did have a little left over (which was really tasty straight out of the bag!)
  • Use a knife to smooth the tops level with the top of the pan.
  • Freeze for at least a couple of hours.
  • Allow the pan to warm just a bit before popping each dessert cup out.  Poke a finger up through the hole in the bottom of the pan and grab that s’mores cup by its crust.  Remove the disk from the bottom and you are ready to add topping. 
  • For topping, I just piped a little bit of the left over Cool Whip on each dessert using a decorating tip.  Then I sprinkled the remaining crust and mini chocolate chips on top.
  • Serve cold right away– or put them in a sealed container and freeze until you are ready to serve.

My thoughts:  I love these so much.  They are ok at room temperature, but serve them frozen and they are amazing!  The pudding stays so creamy and that chocolate layer in the middle…. it is a miracle I didn’t just sit down and eat them all.  Seriously.  Enjoy!!!  -r

6-5-12: Check out this bloggers version using muffin cups: A Bunch of Bishops –so fun!

Chocolate Mousse Cake

Posted on

This wonderful cake recipe is courtesy of my Uncle John.  He has made this cake for family gatherings for years now and it is one of my favorites.  I think I’d have tried it sooner if I’d known how EASY it is.  There’s nothing better than a really easy dessert that looks this fancy!

INGREDIENTS:

  • 1 boxed chocolate cake mix- I like Duncan Hines!  (with oil/eggs/water to make according to directions)
  • 2 packets of Dream Whip (I’d never heard of this– it comes in a box and was near the jello/pudding boxes at the grocery.  There are 4 packets per box, and if you order them in a 6-pack at Amazon they are much cheaper than in the store.)
  • 3/4 c. milk
  • 1 t. vanilla
  • 3T. cocoa powder
  • 3T. powdered sugar
  • one container of pre-made chocolate frosting.

DIRECTIONS:

  • Make cake mix according to box and bake in 2 – 8 or 9 inch round pans (I cut parchment paper to fit and place it in the bottom of each pan so that it comes out easier).
  • Cool cakes completely on a wire rack and while they are cooling make your mousse.
  • Put Dream Whip, milk, vanilla, cocoa powder and powdered sugar into a mixing bowl and blend together.
  • Using a mixer, beat until stiff peaks form (3-4 minutes)
  • Scoop chocolate frosting into a microwave safe bowl and heat for only about 20-30 seconds in the microwave.  Heat until frosting is melted into a hot fudge consistency.
  • Use a large serrated knife to level your two cakes.
  • Place 1st cake on serving plate, leveled edge up.
  • Pour about 1/4 of melted frosting on top of cake and spread to cover (I put this layer in the fridge for about a minute just to cool the warm frosting down before adding the mousse layer)
  • Spoon all of the mousse on top of the cake and spread it ALMOST to the edges.
  • Top with second cake– put the leveled edge against the mousse…this keeps all the crumbs in the middle and leaves a nice flat surface on the top of your cake. Gently press top layer down to squeeze the mousse all the way to the edges.
  • Pour the rest of the melted frosting over the entire cake and let it drip over the edges.
  • Refrigerate until serving.

My thoughts:  WHO KNEW you could melt frosting and make such a wonderful fudge-like topping?  Learn something new every day.  Uncle John sometimes adds peppermint extract to the mousse– so yummy– and I had the thought while I was making this that a layer of raspberry preserves somewhere in the middle would be amazing.  I think you will just love this mousse.  It is so creamy and flavorful.  

If you live in Africa and cant find Dream Whip PLEASE don’t ask me what to substitute– I have no idea what this stuff is…it’s MAGIC 🙂 and I love it!   

Curiosity got he better of me…. here’s what Dream Whip is: click here  (I still think it’s magic.)

Enjoy this recipe friends!  Thanks for the inspiration Uncle John!!!   -r