RSS Feed

Tag Archives: mini dessert

White Chocolate Lemonade Cups

Posted on

Creamy, whipped, lemonade filling spooned into cute little white chocolate cups! A fun, fancy and delicious summer dessert!

Did you know that there are silicone molds for little shot glasses?!? You would think I’d have seen these somewhere along my road of dessert blogging, but I hadn’t. I stumbled on a clearance rack full of them and lightbulbs started going on in my head with ideas for fun ways to use this mold! SUCH a fun idea!

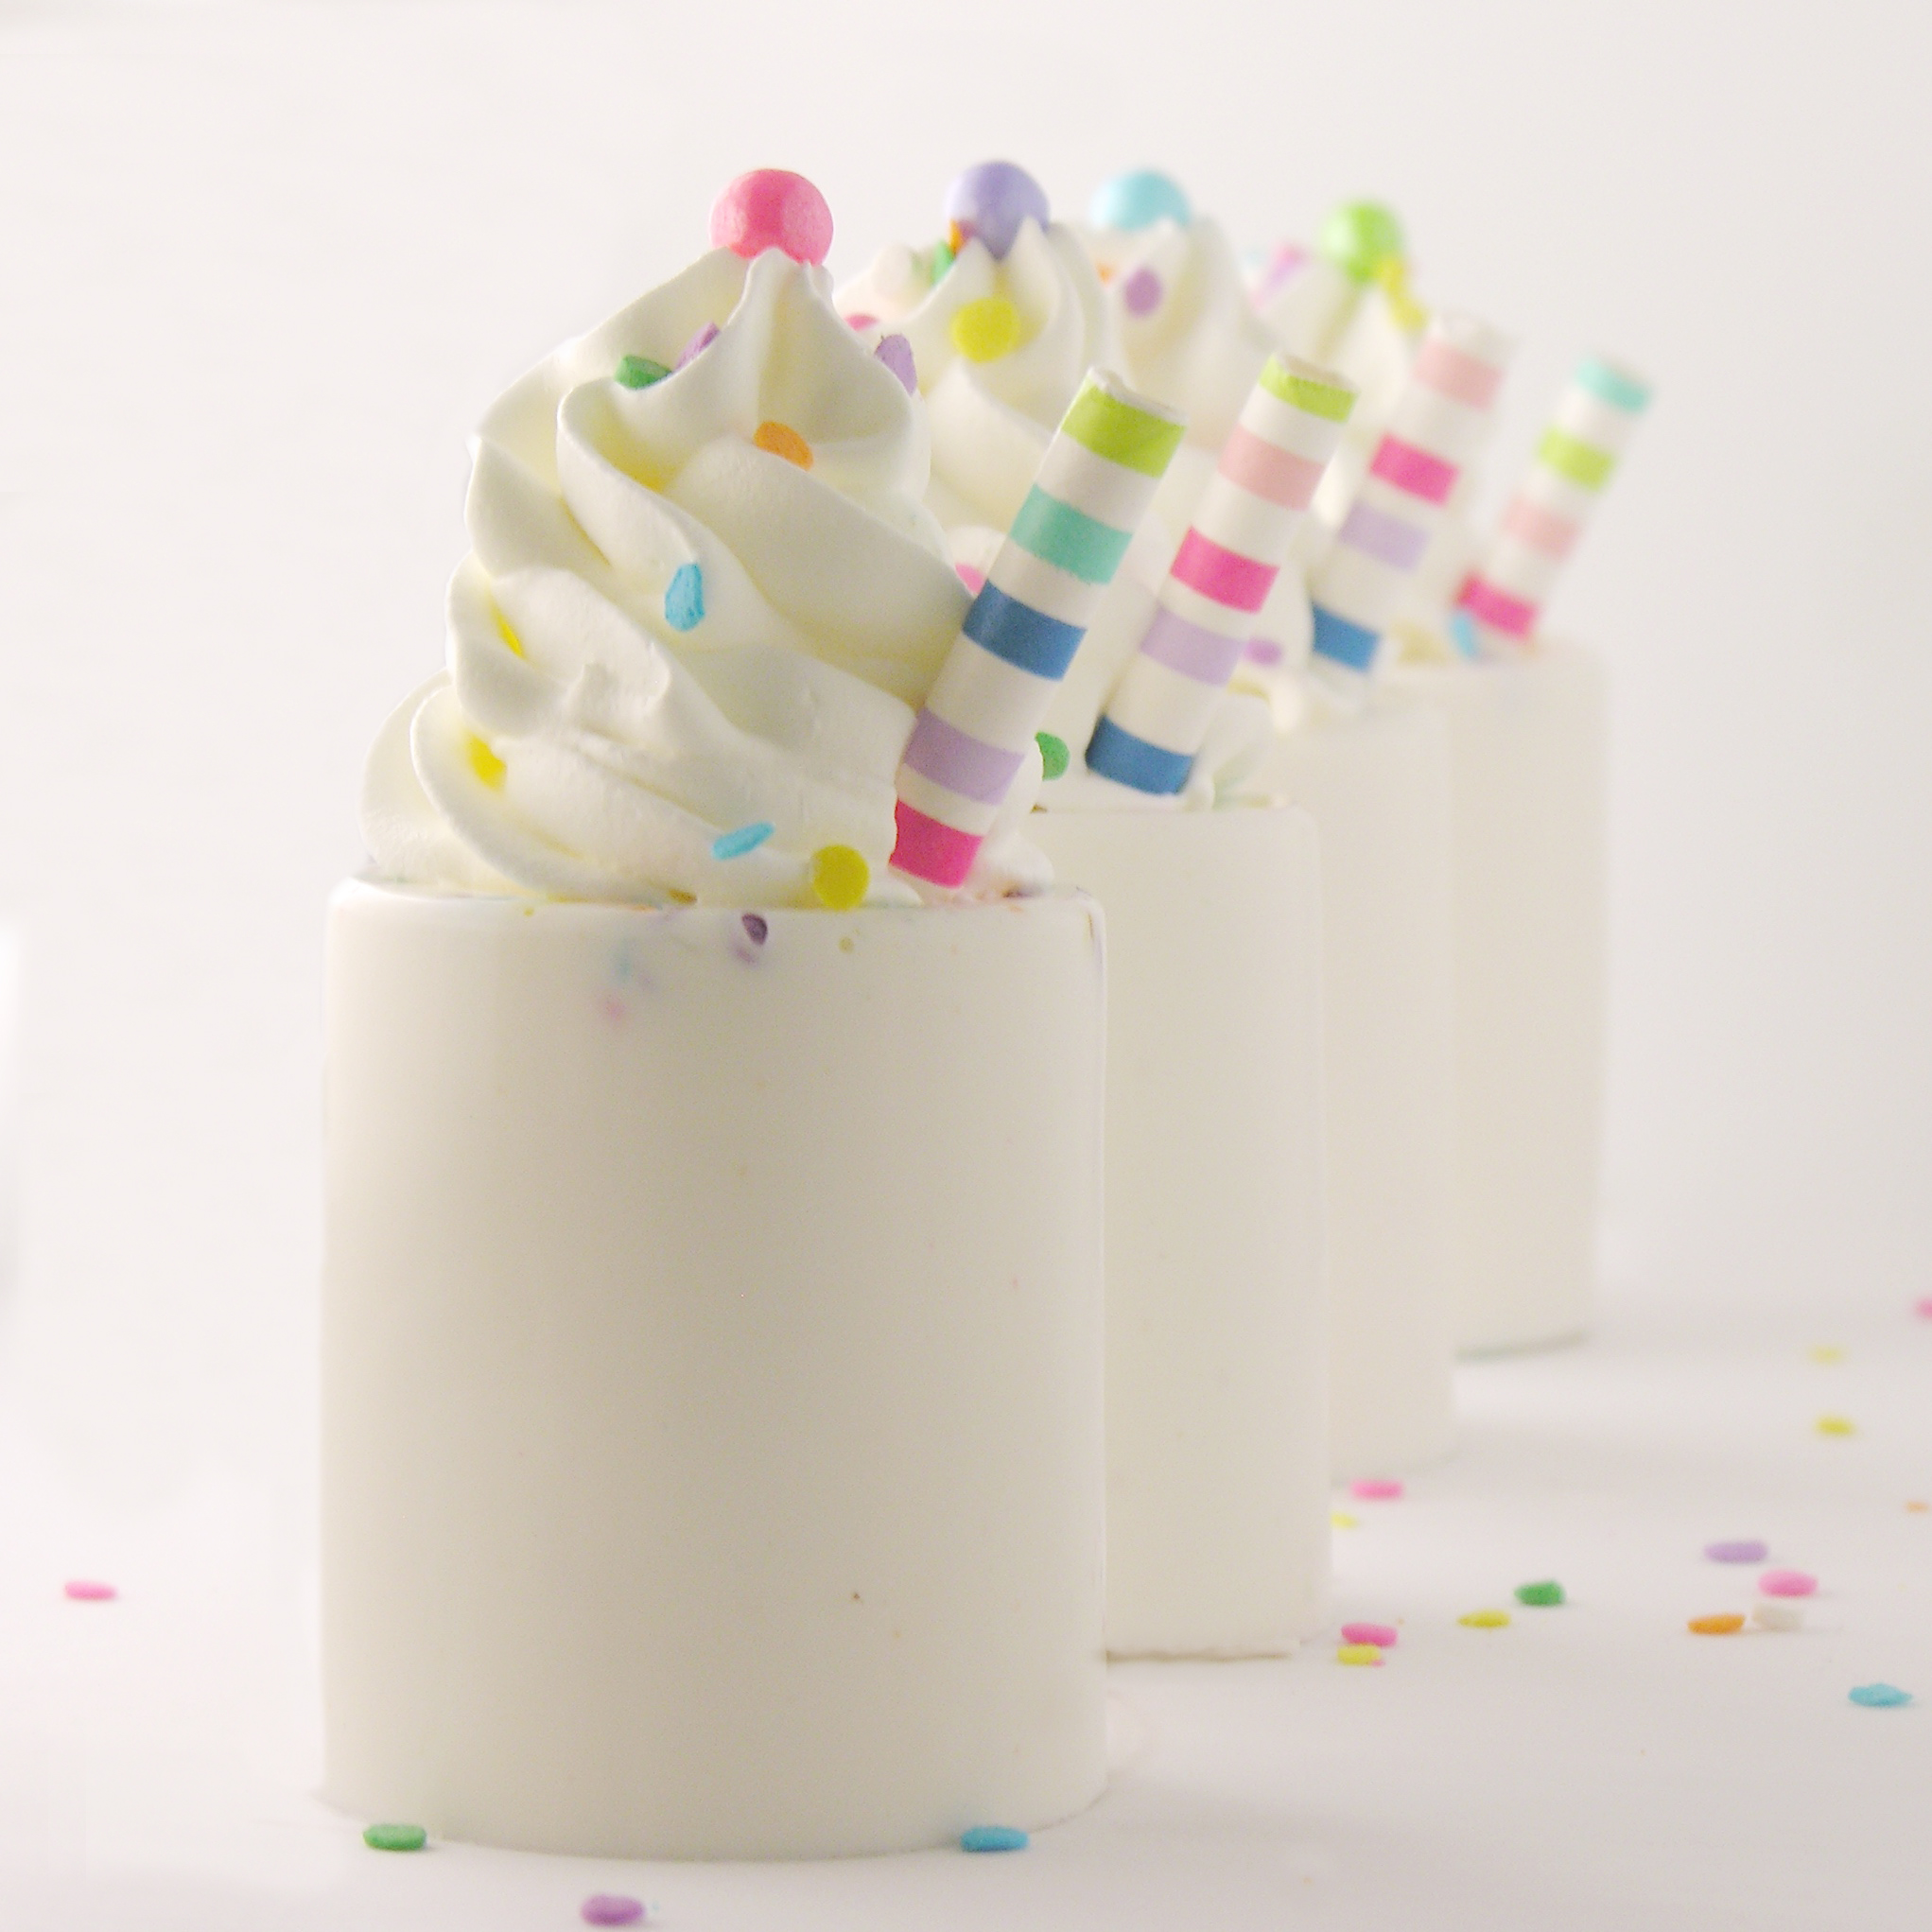
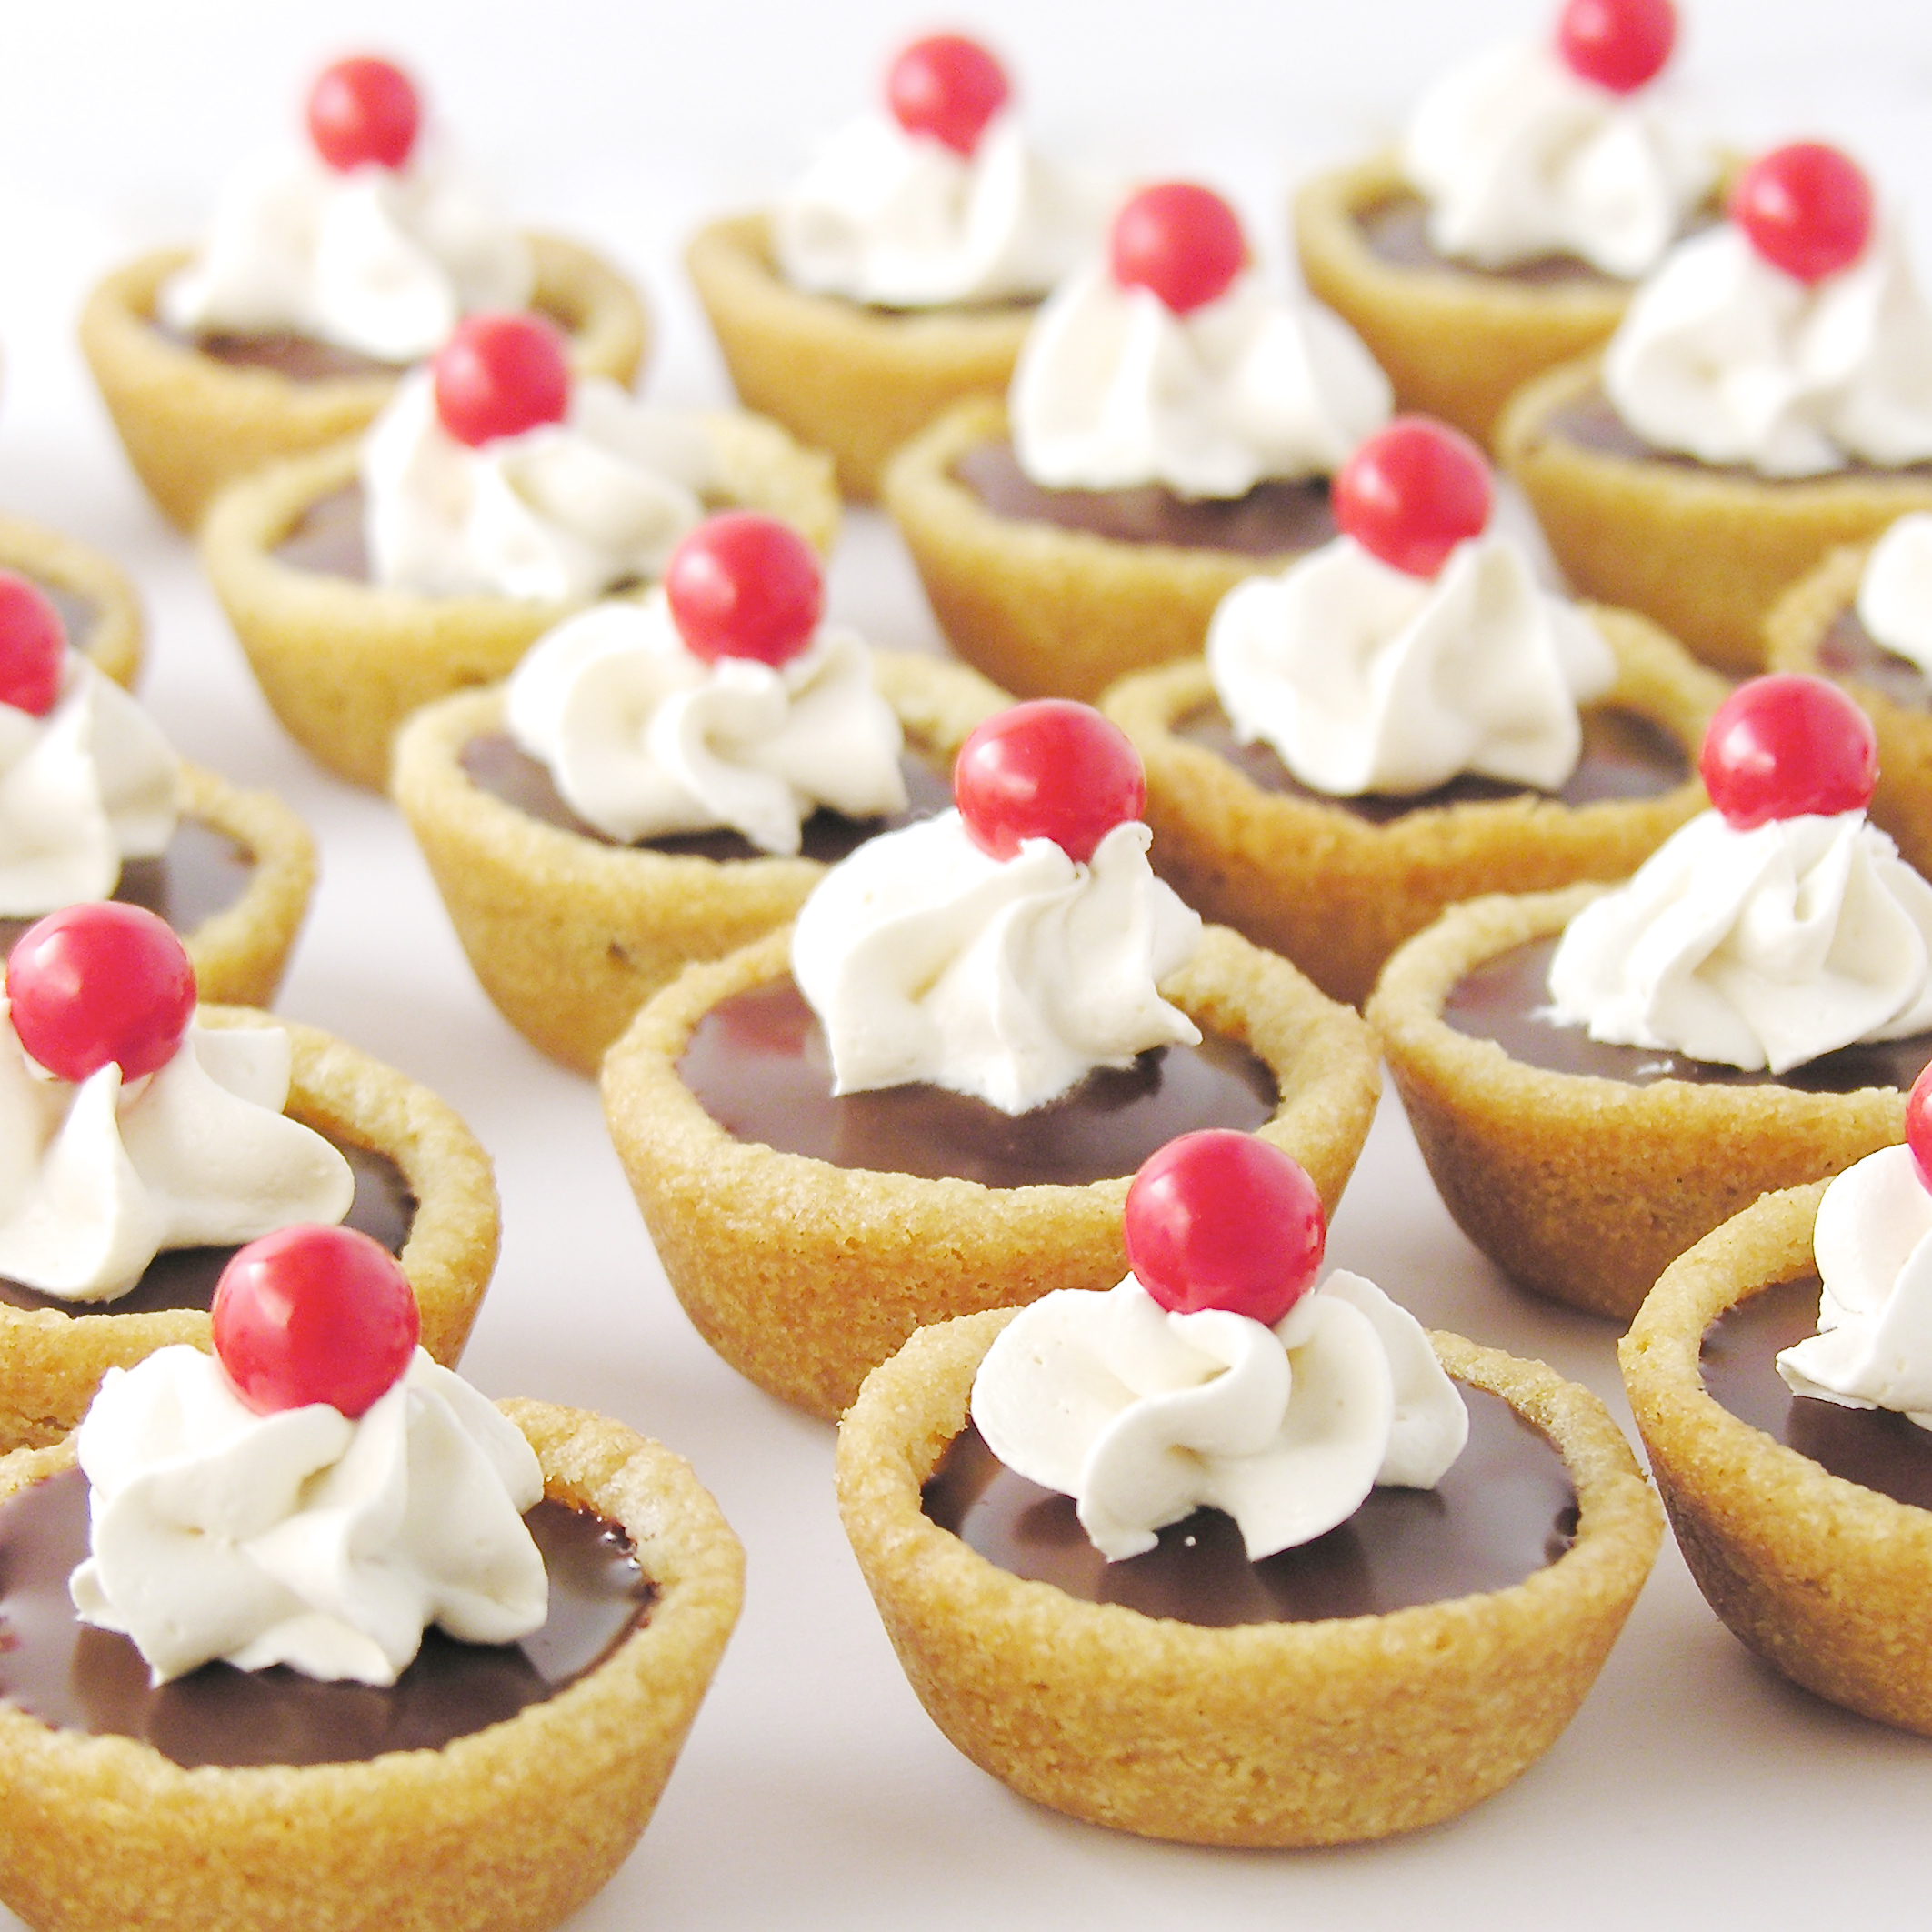
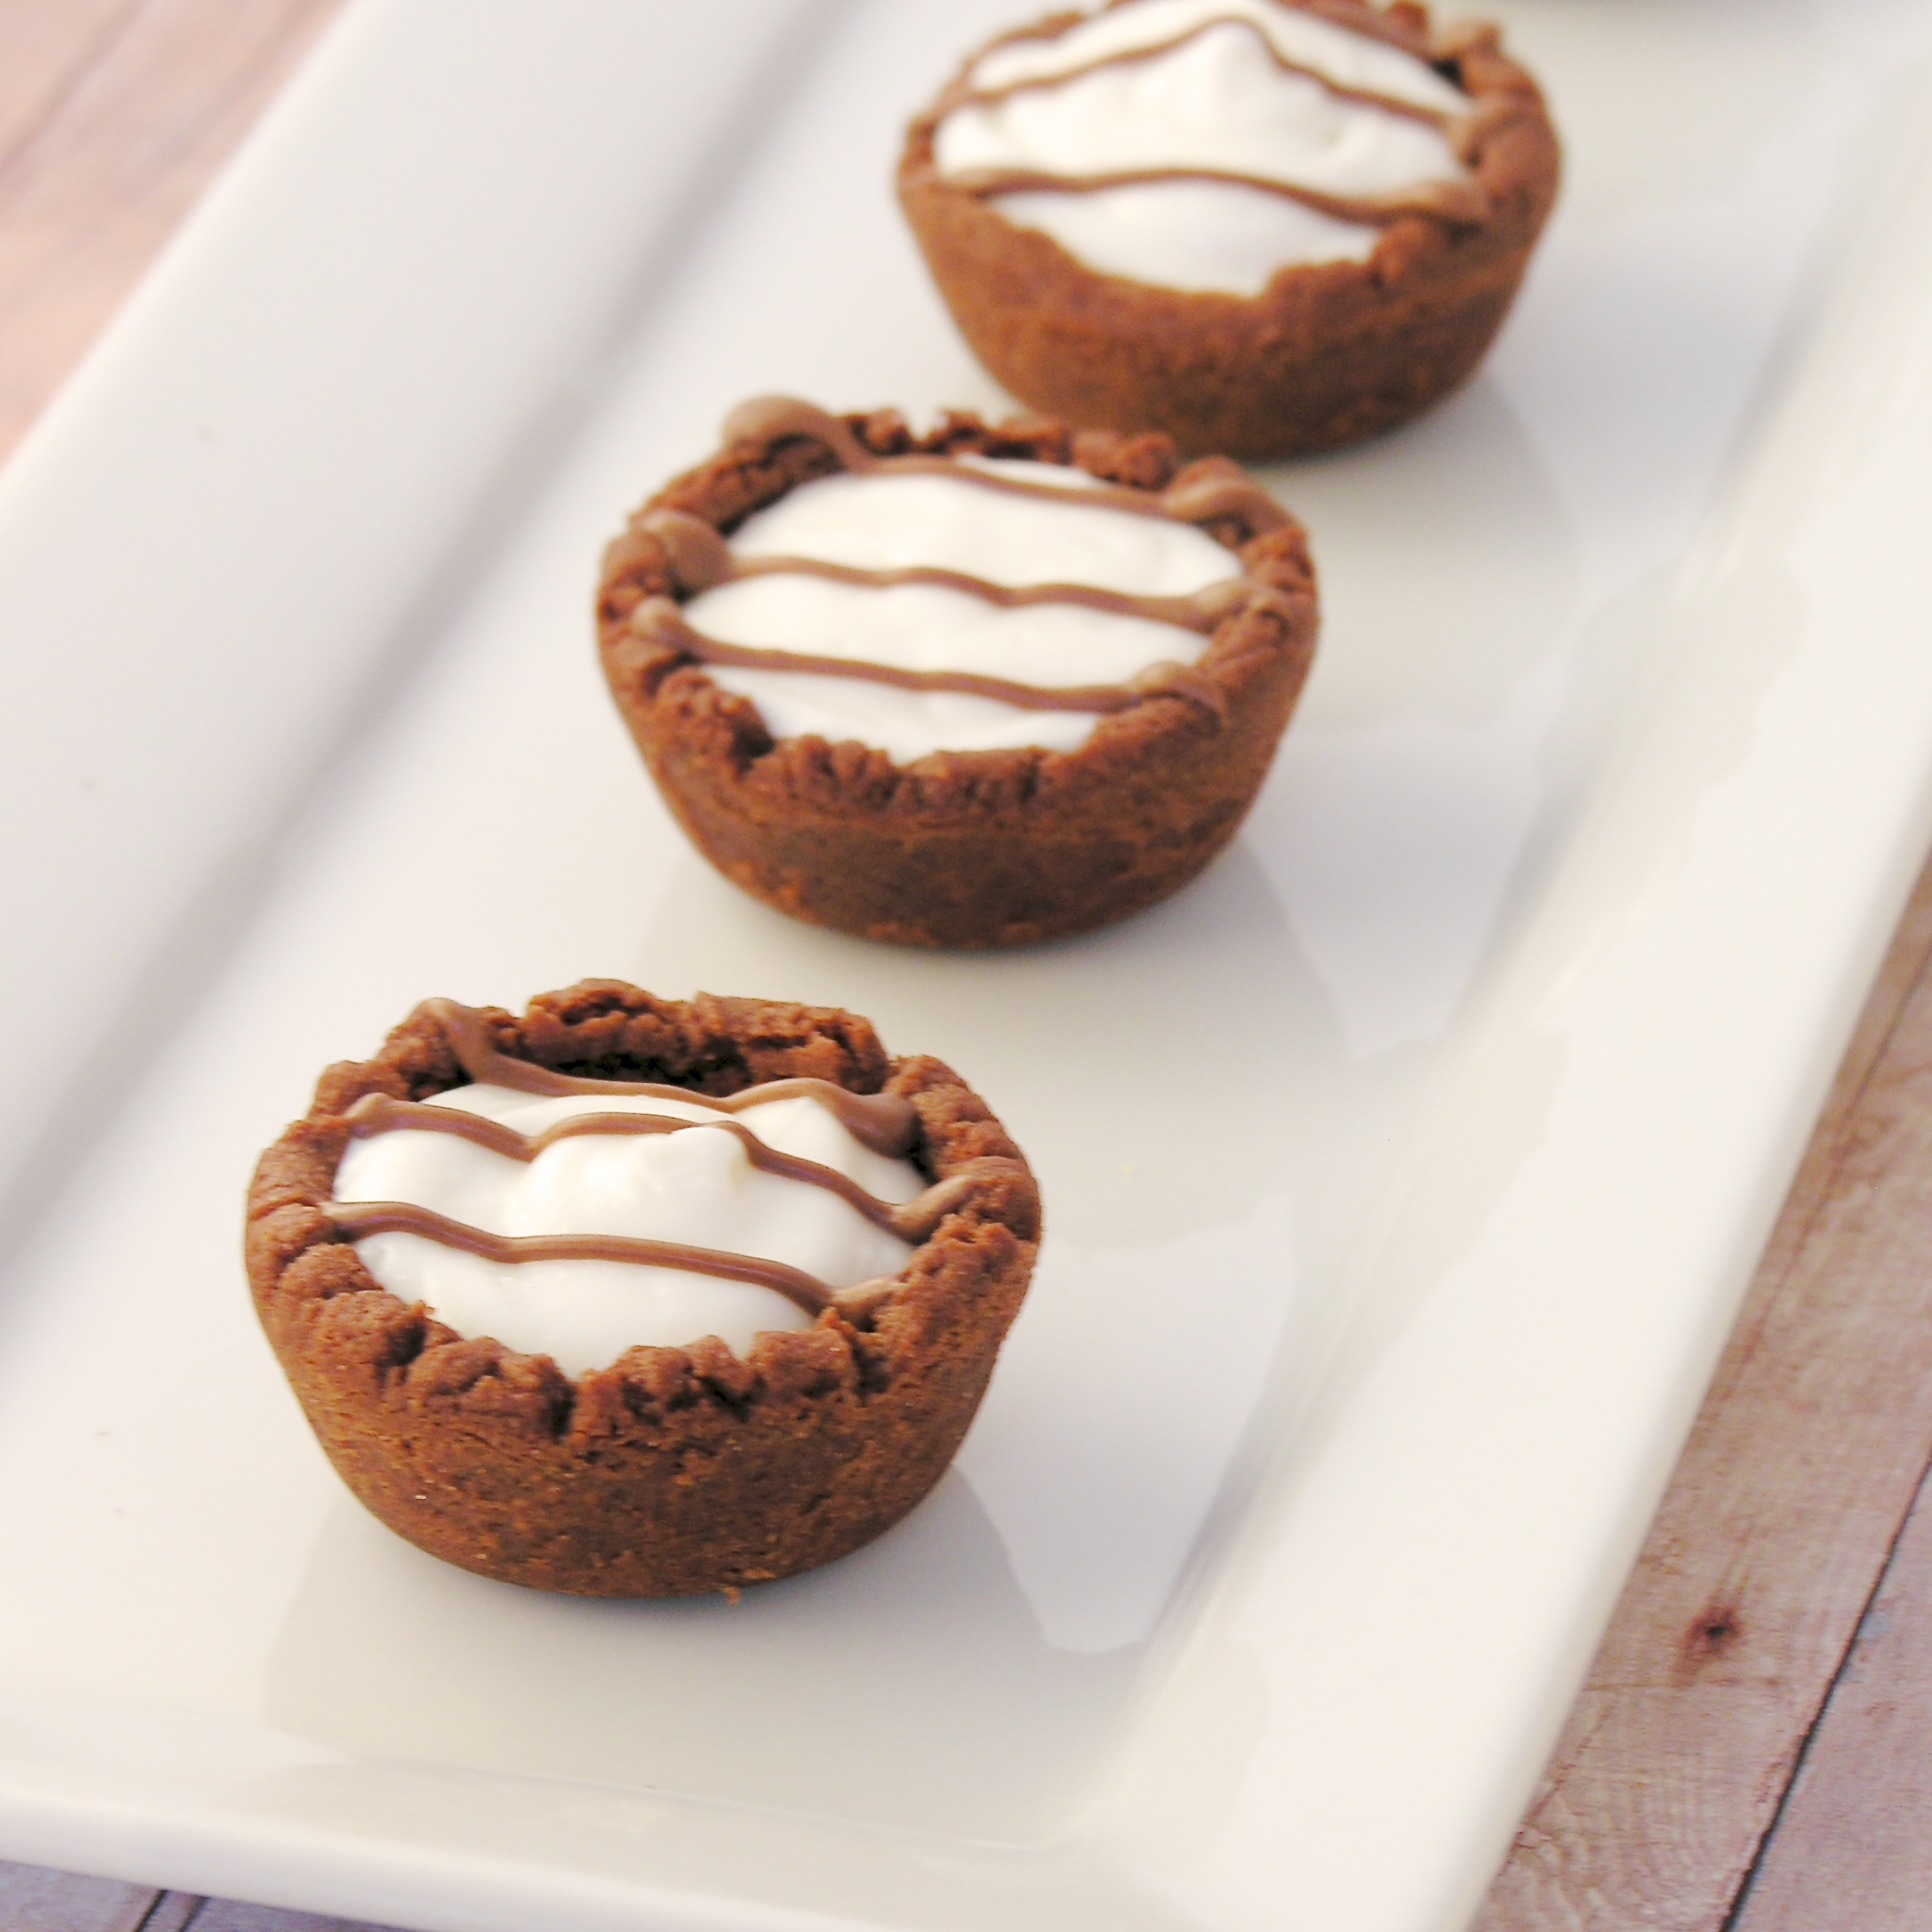
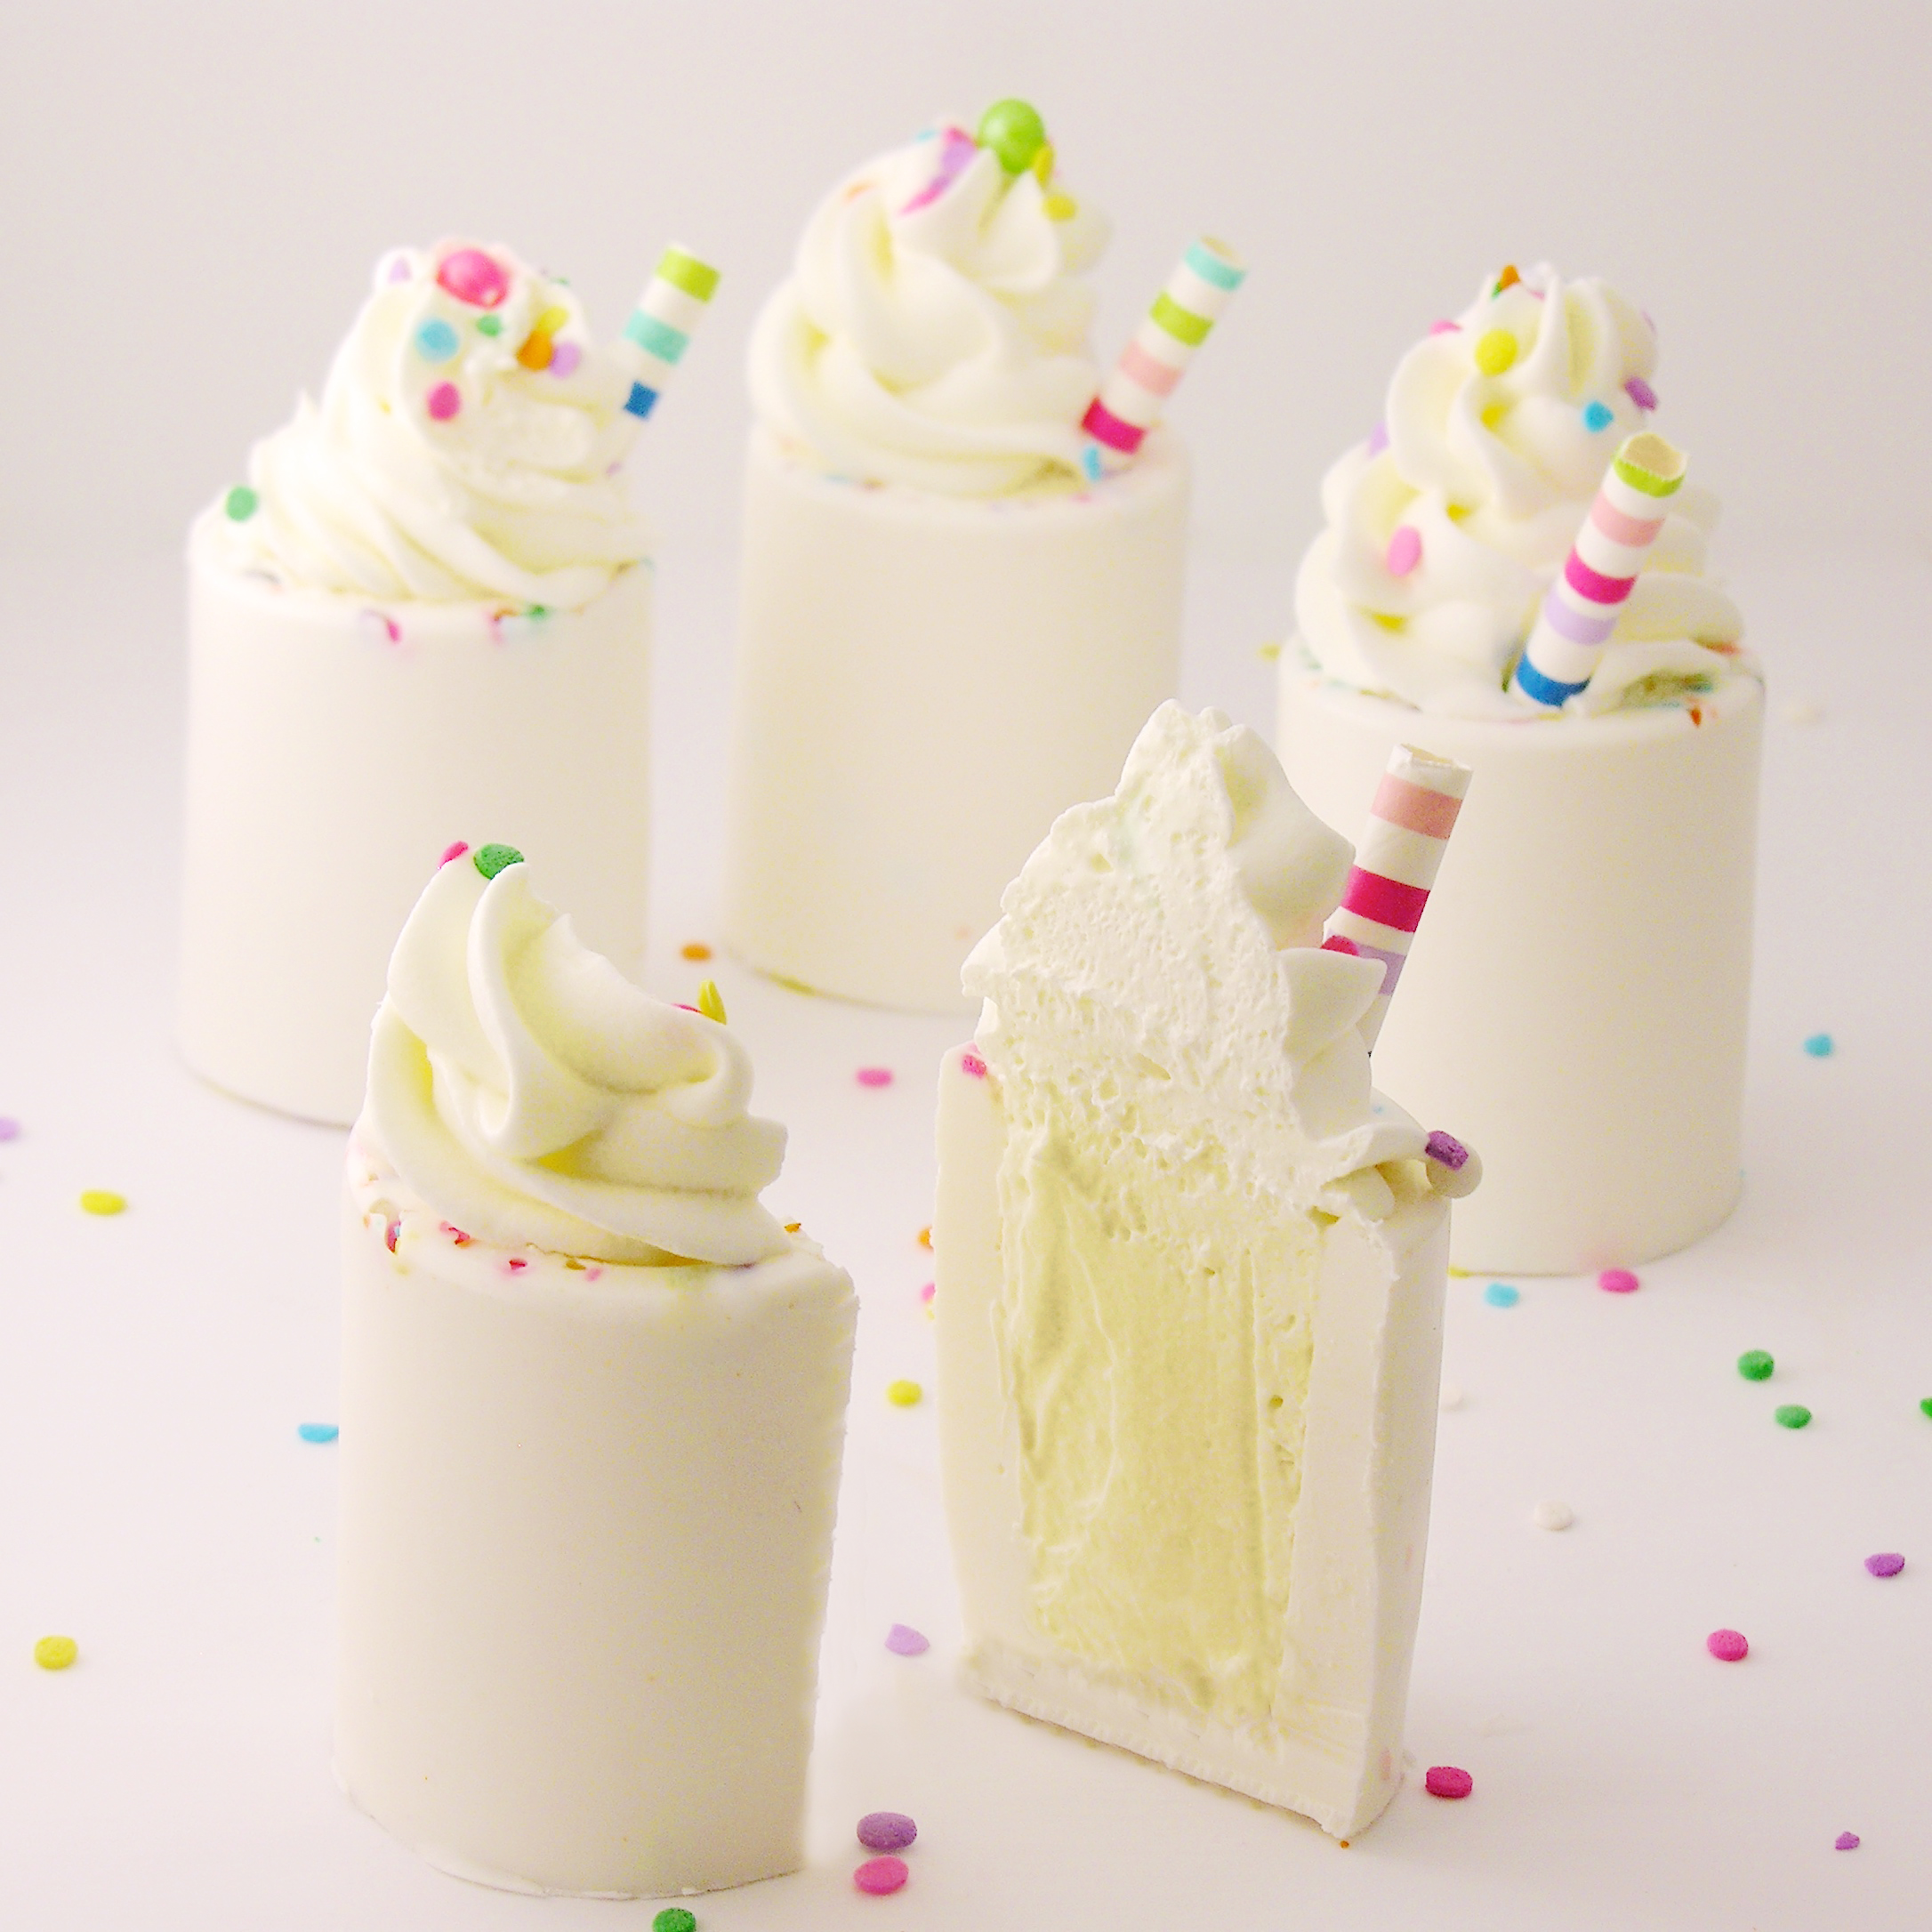
Aren’t they cute?!? I made my cups out of white chocolate and then filled these with a creamy lemonade filling that I use quite a bit here for various desserts. You can eat it straight (I may have sampled a bit as I was filling cups…), pipe it on cupcakes, layer it in cake, ooooorrrr serve it in tasty little chocolate cups! Fun….!!!!!

Here is how we made them (makes 8- 10 filled cups): (printable recipe here)

First of all, you need a Wilton’s shot glass mold (and if you get it from my link on Amazon I will get a small percentage of what you pay, making it possible for me to buy brownie ingredients, which is the next fun project I have in mind for these shot glass molds!)

INGREDIENTS: 

  • 2 bags of Wilton’s Candy Melts in bright white.
  • 1/2 package (4 oz) of Philadelphia Cream Cheese (softened to room temperature)
  • 1/2 packet of Kool Aid drink mix (any flavor~ if you use a lemonade, add it to taste, as it will be more tart than the other flavors)
  • 1 (7 oz) jar of Jet-Puffed Marshmallow Creme
  • 1 tub (8 oz) of Cool Whip (thawed in refrigerator, divided)
  • Fun sprinkles

DIRECTIONS:

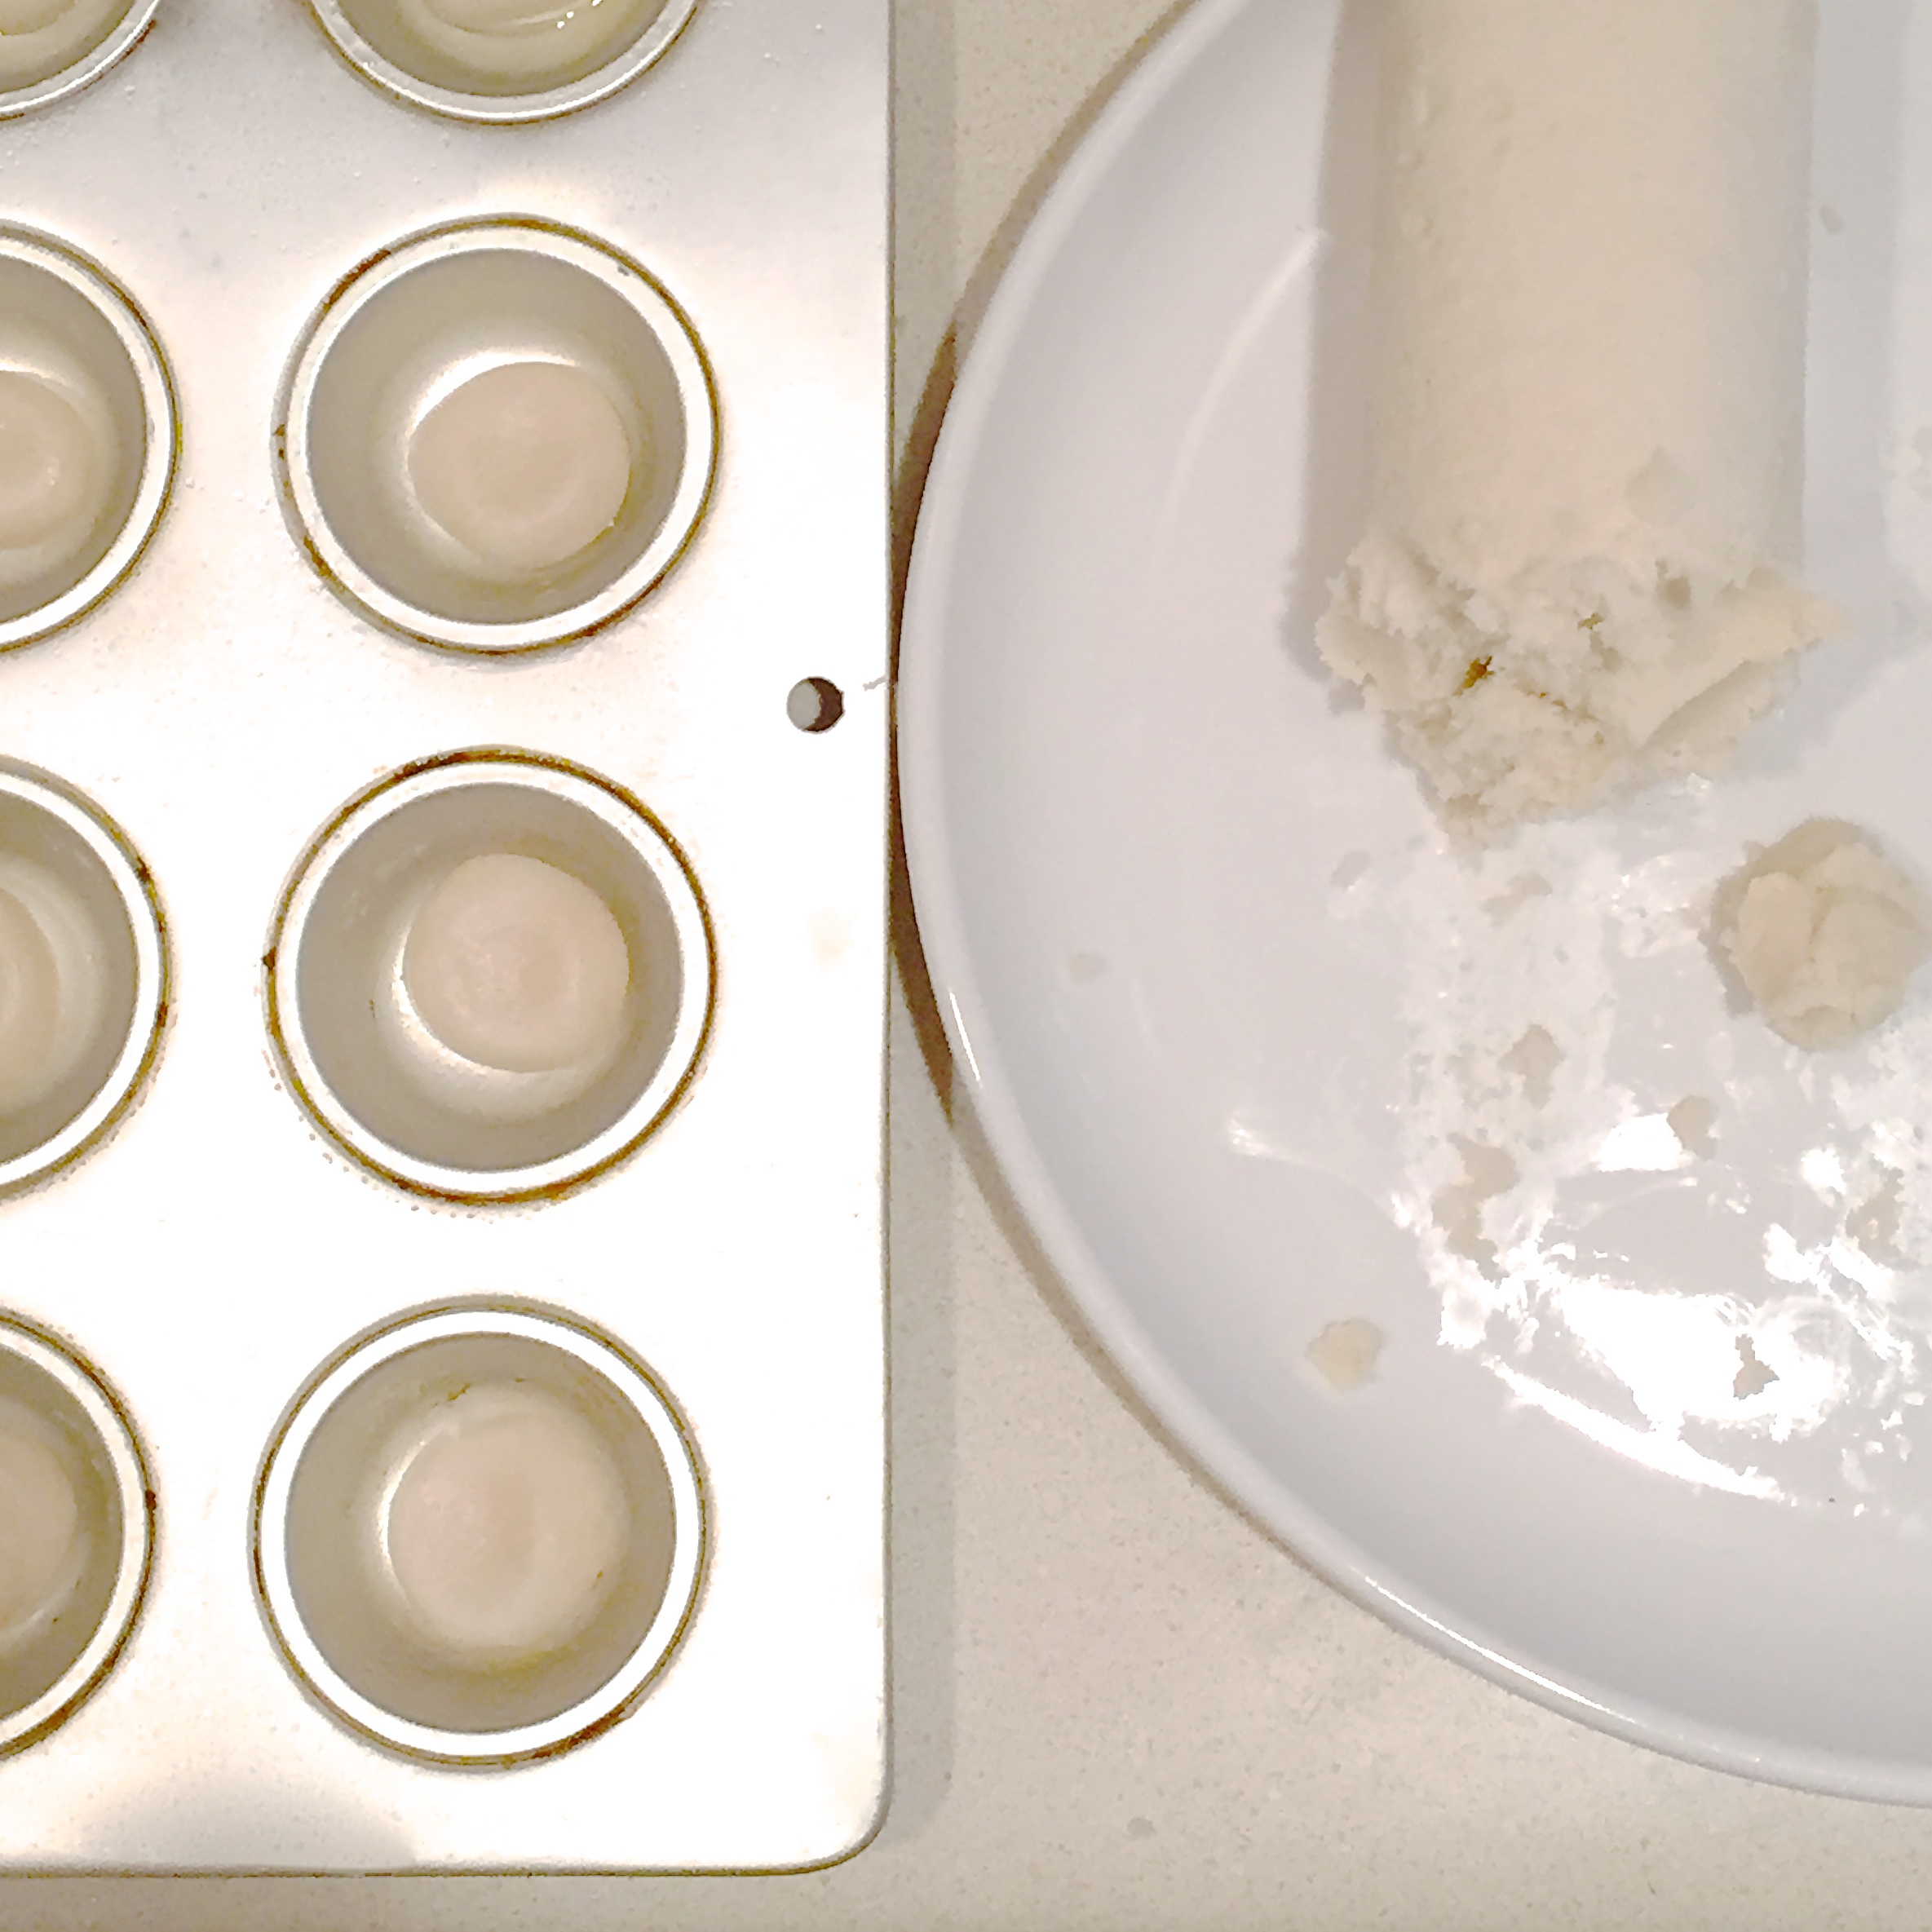
  • Melt Candy Melts in microwave in 30 second increments, stirring in between until melted and smooth.
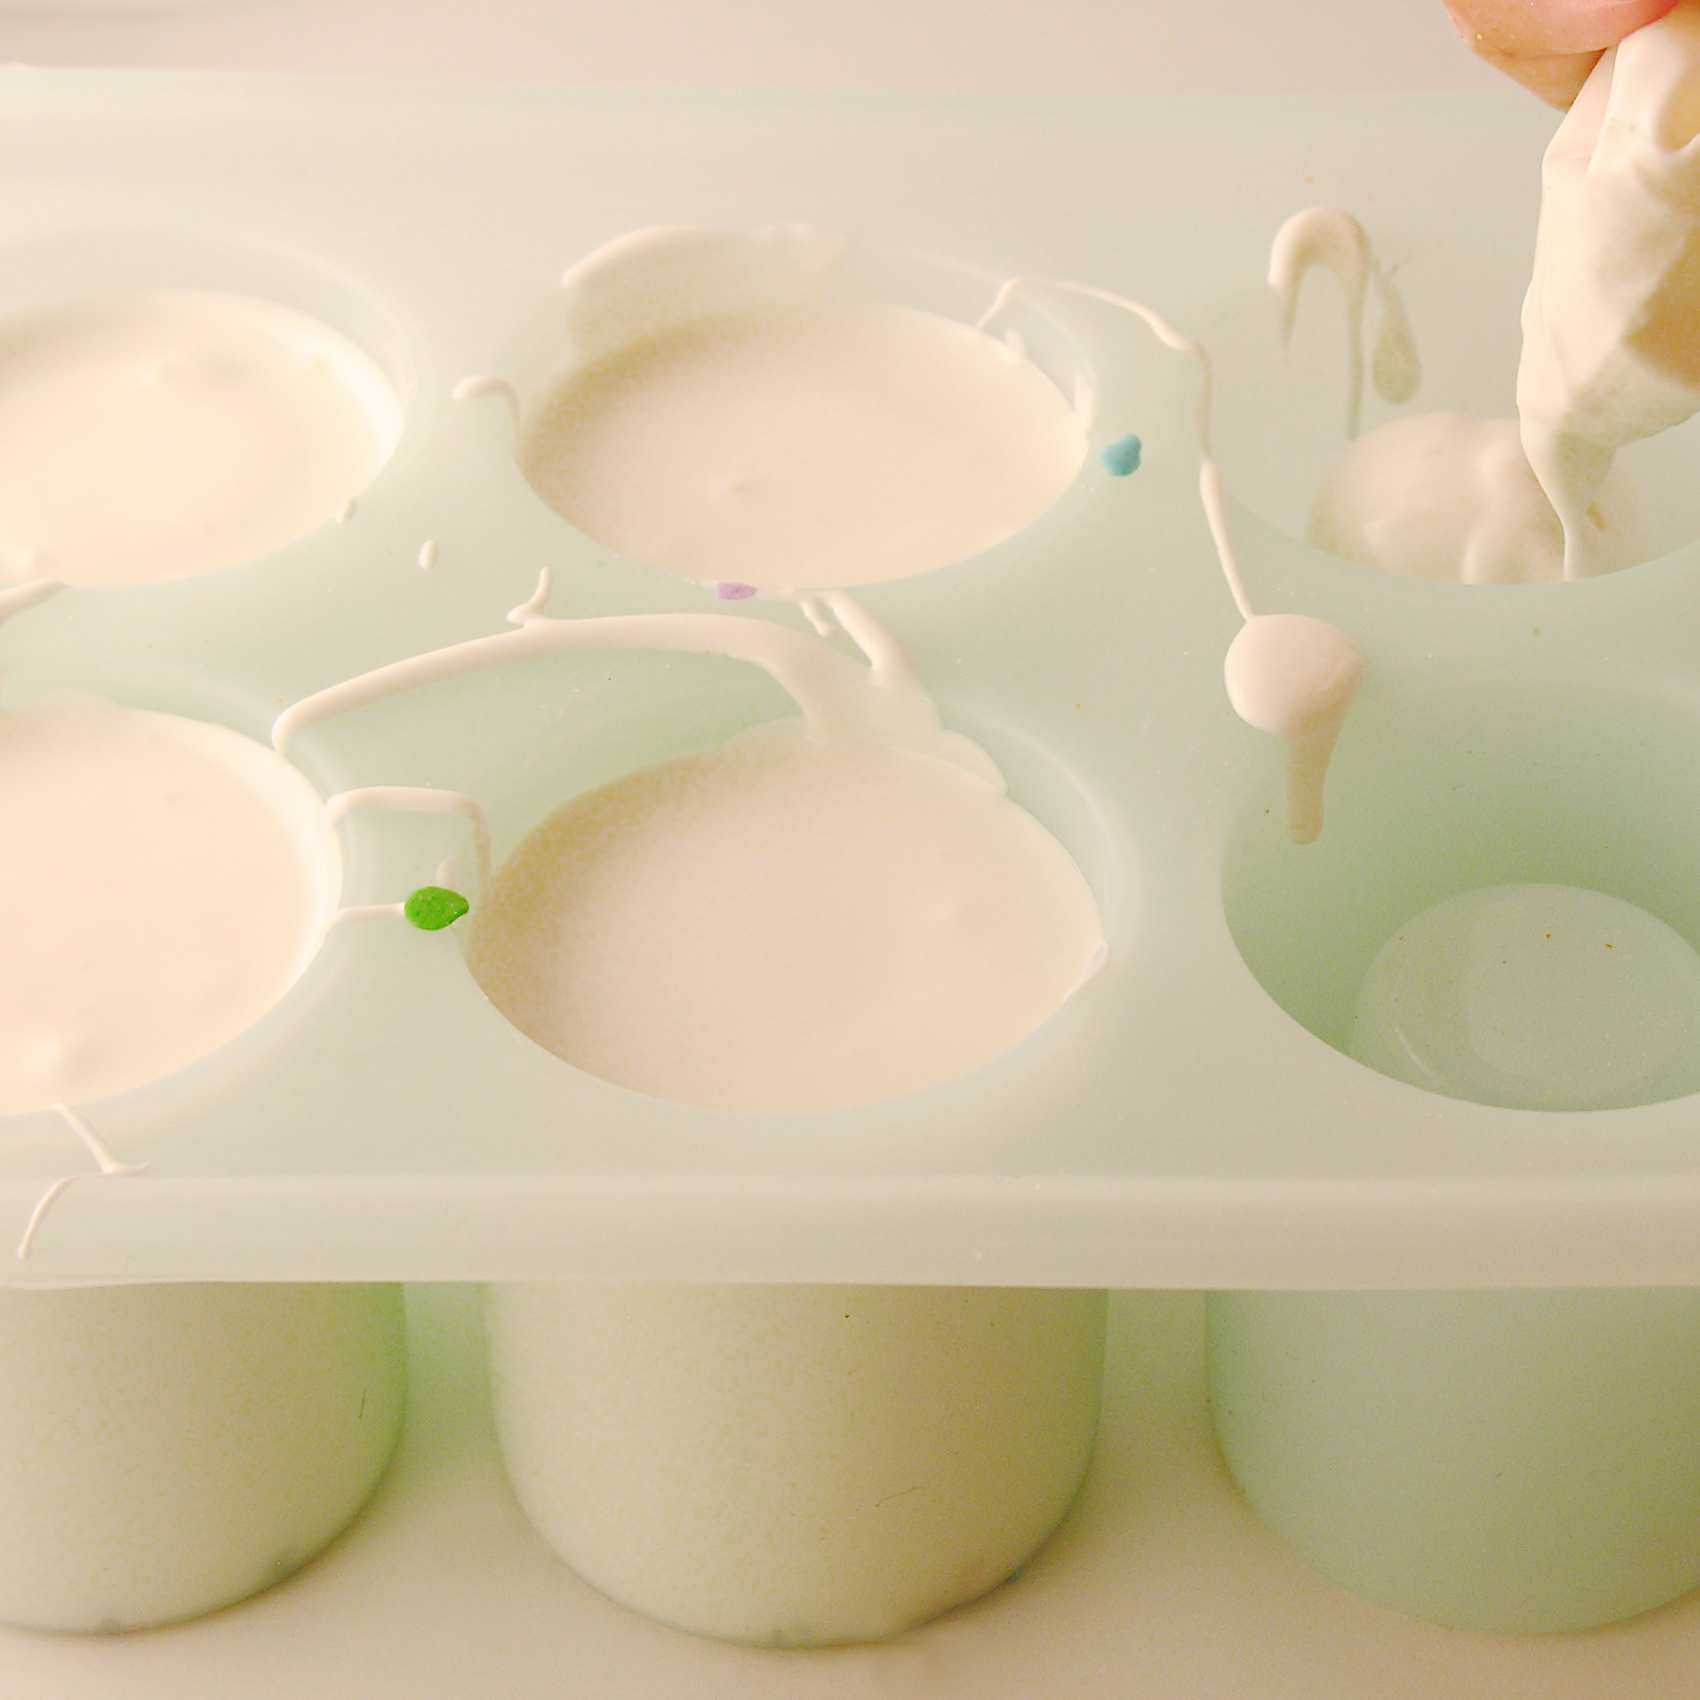
  • If desired, drop a few sprinkles into each cavity of the mold (that is how I got the colors at the rim of the “glass”).
  • Carefully spoon melted white chocolate into molds (I placed the melts in a zip-top bag, zipped it shut tight, clipped a corner and piped it into the molds to make sure I got it all the way to the bottom without bubbles). 
  • Tap on countertop and set (level!) in freezer for 10-15 minutes until hard.
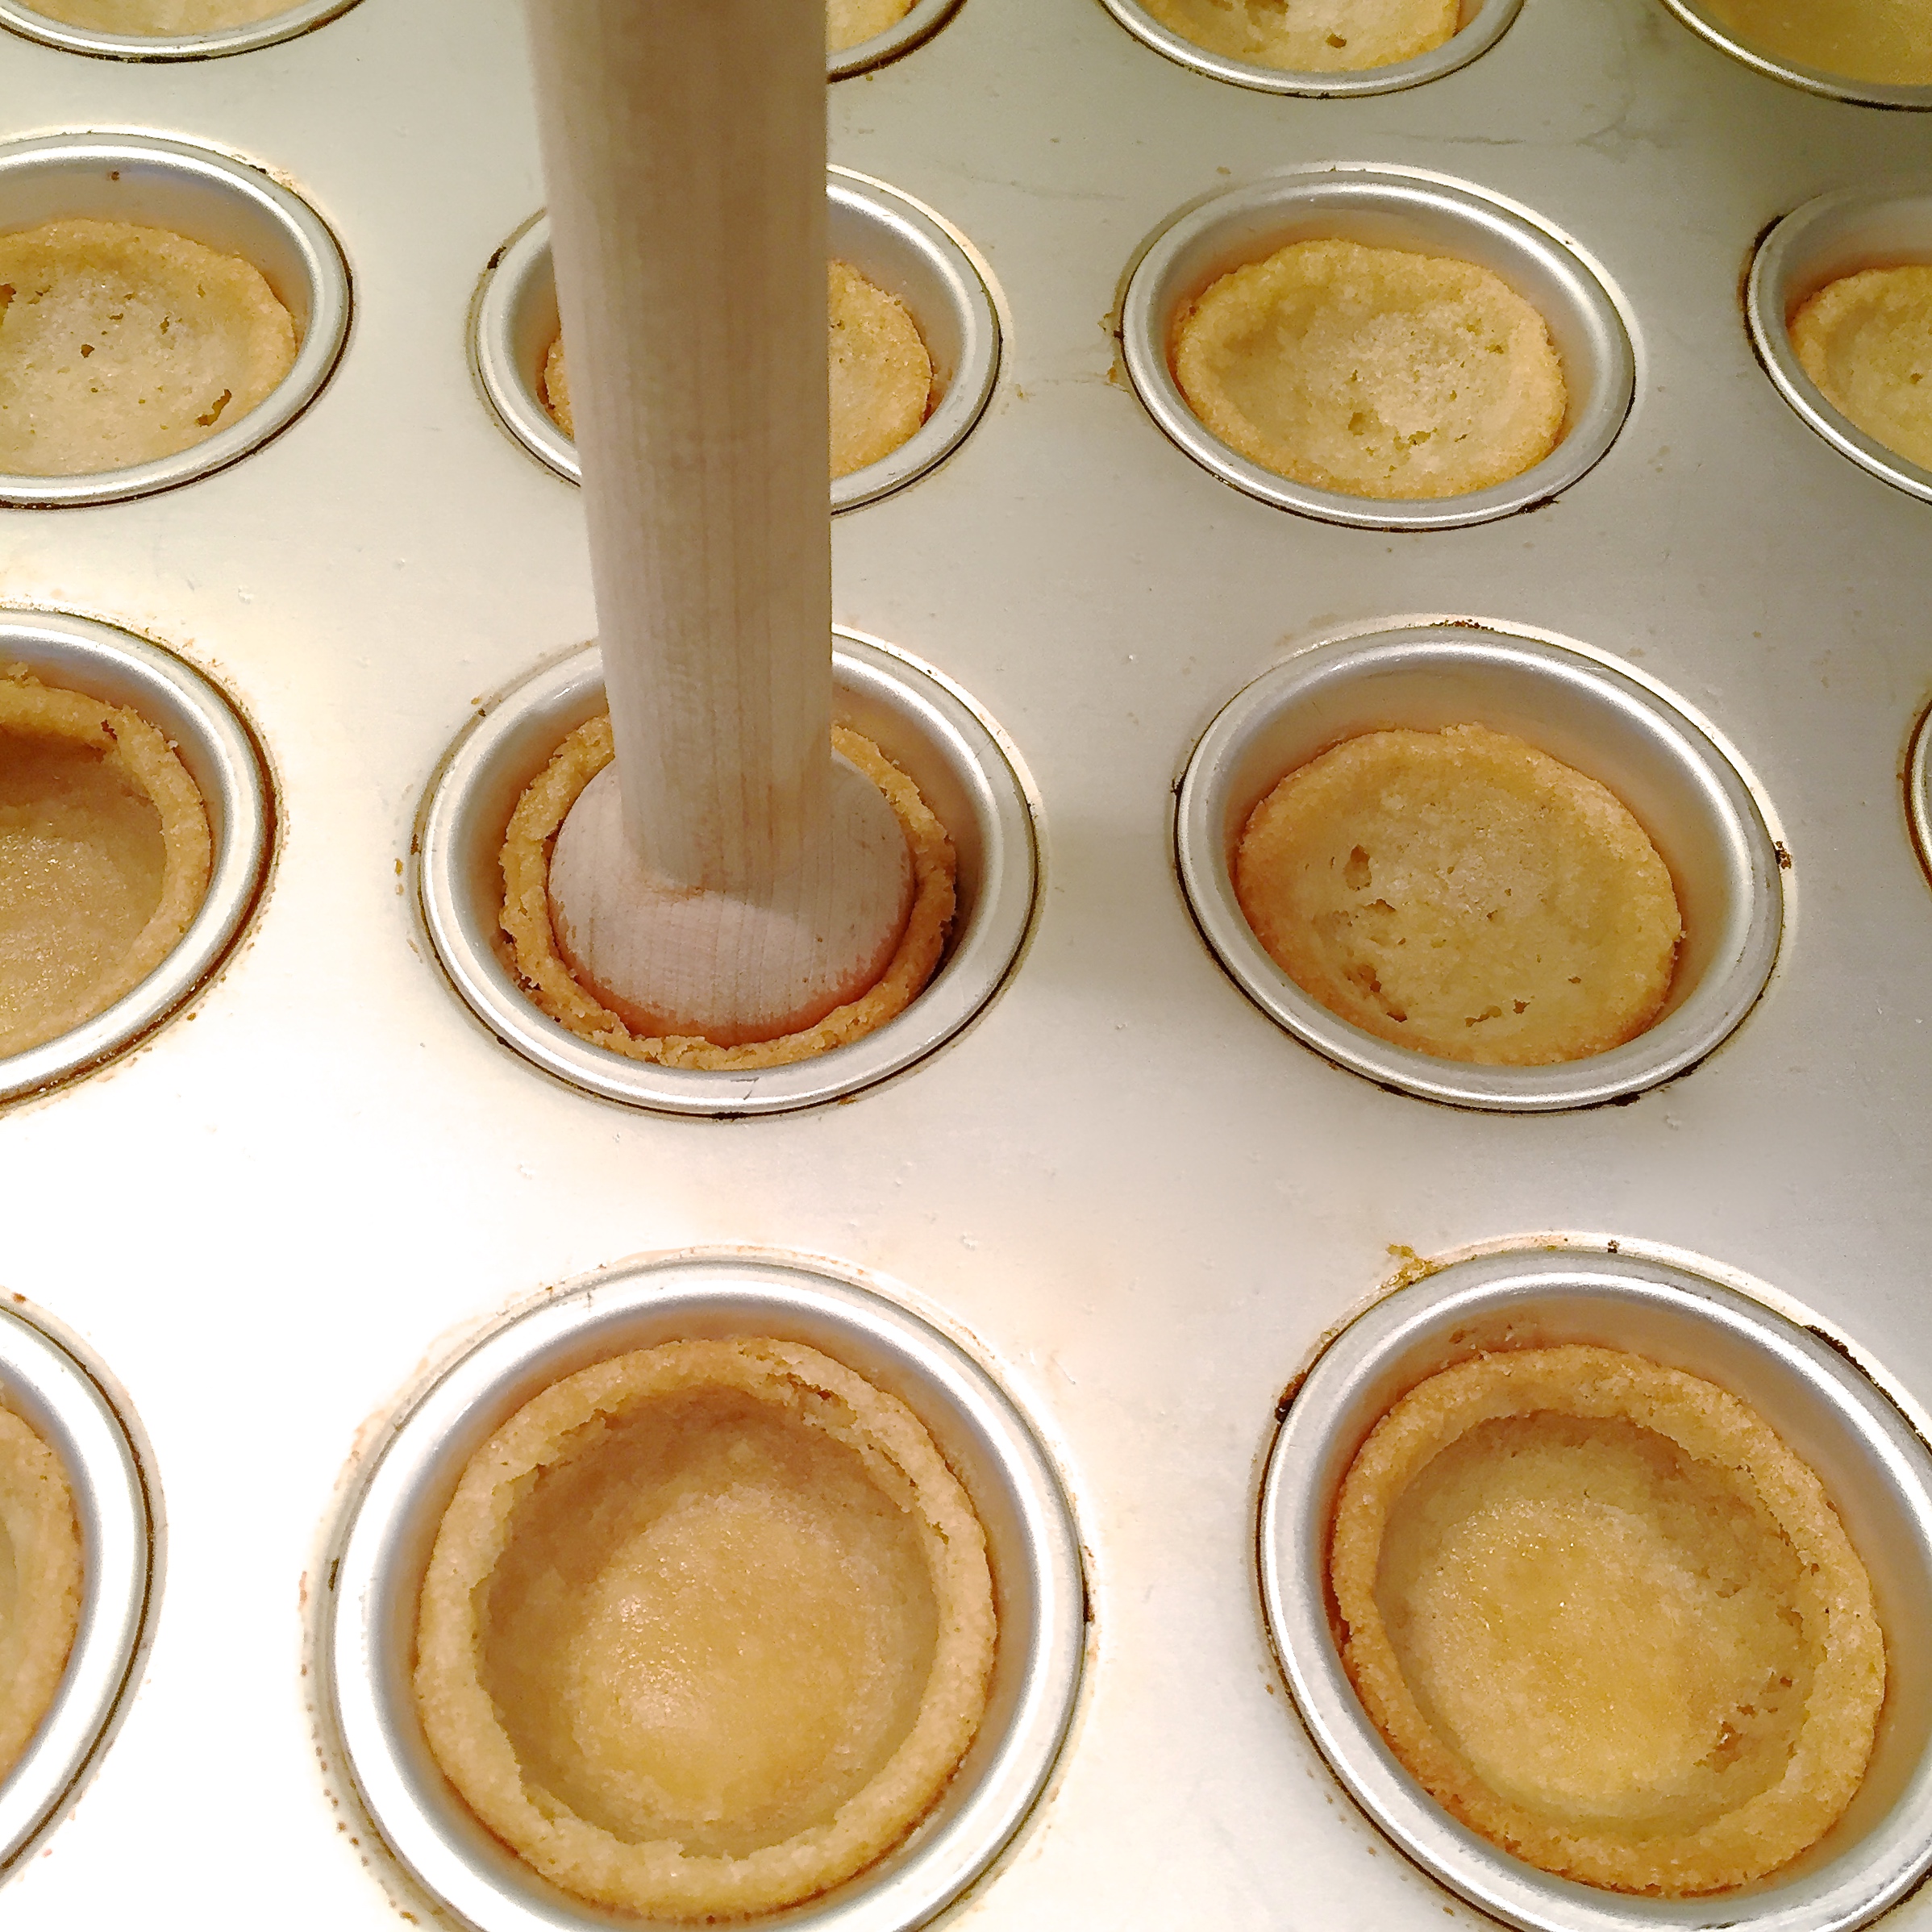
  • Pop cups out of molds and set aside. 
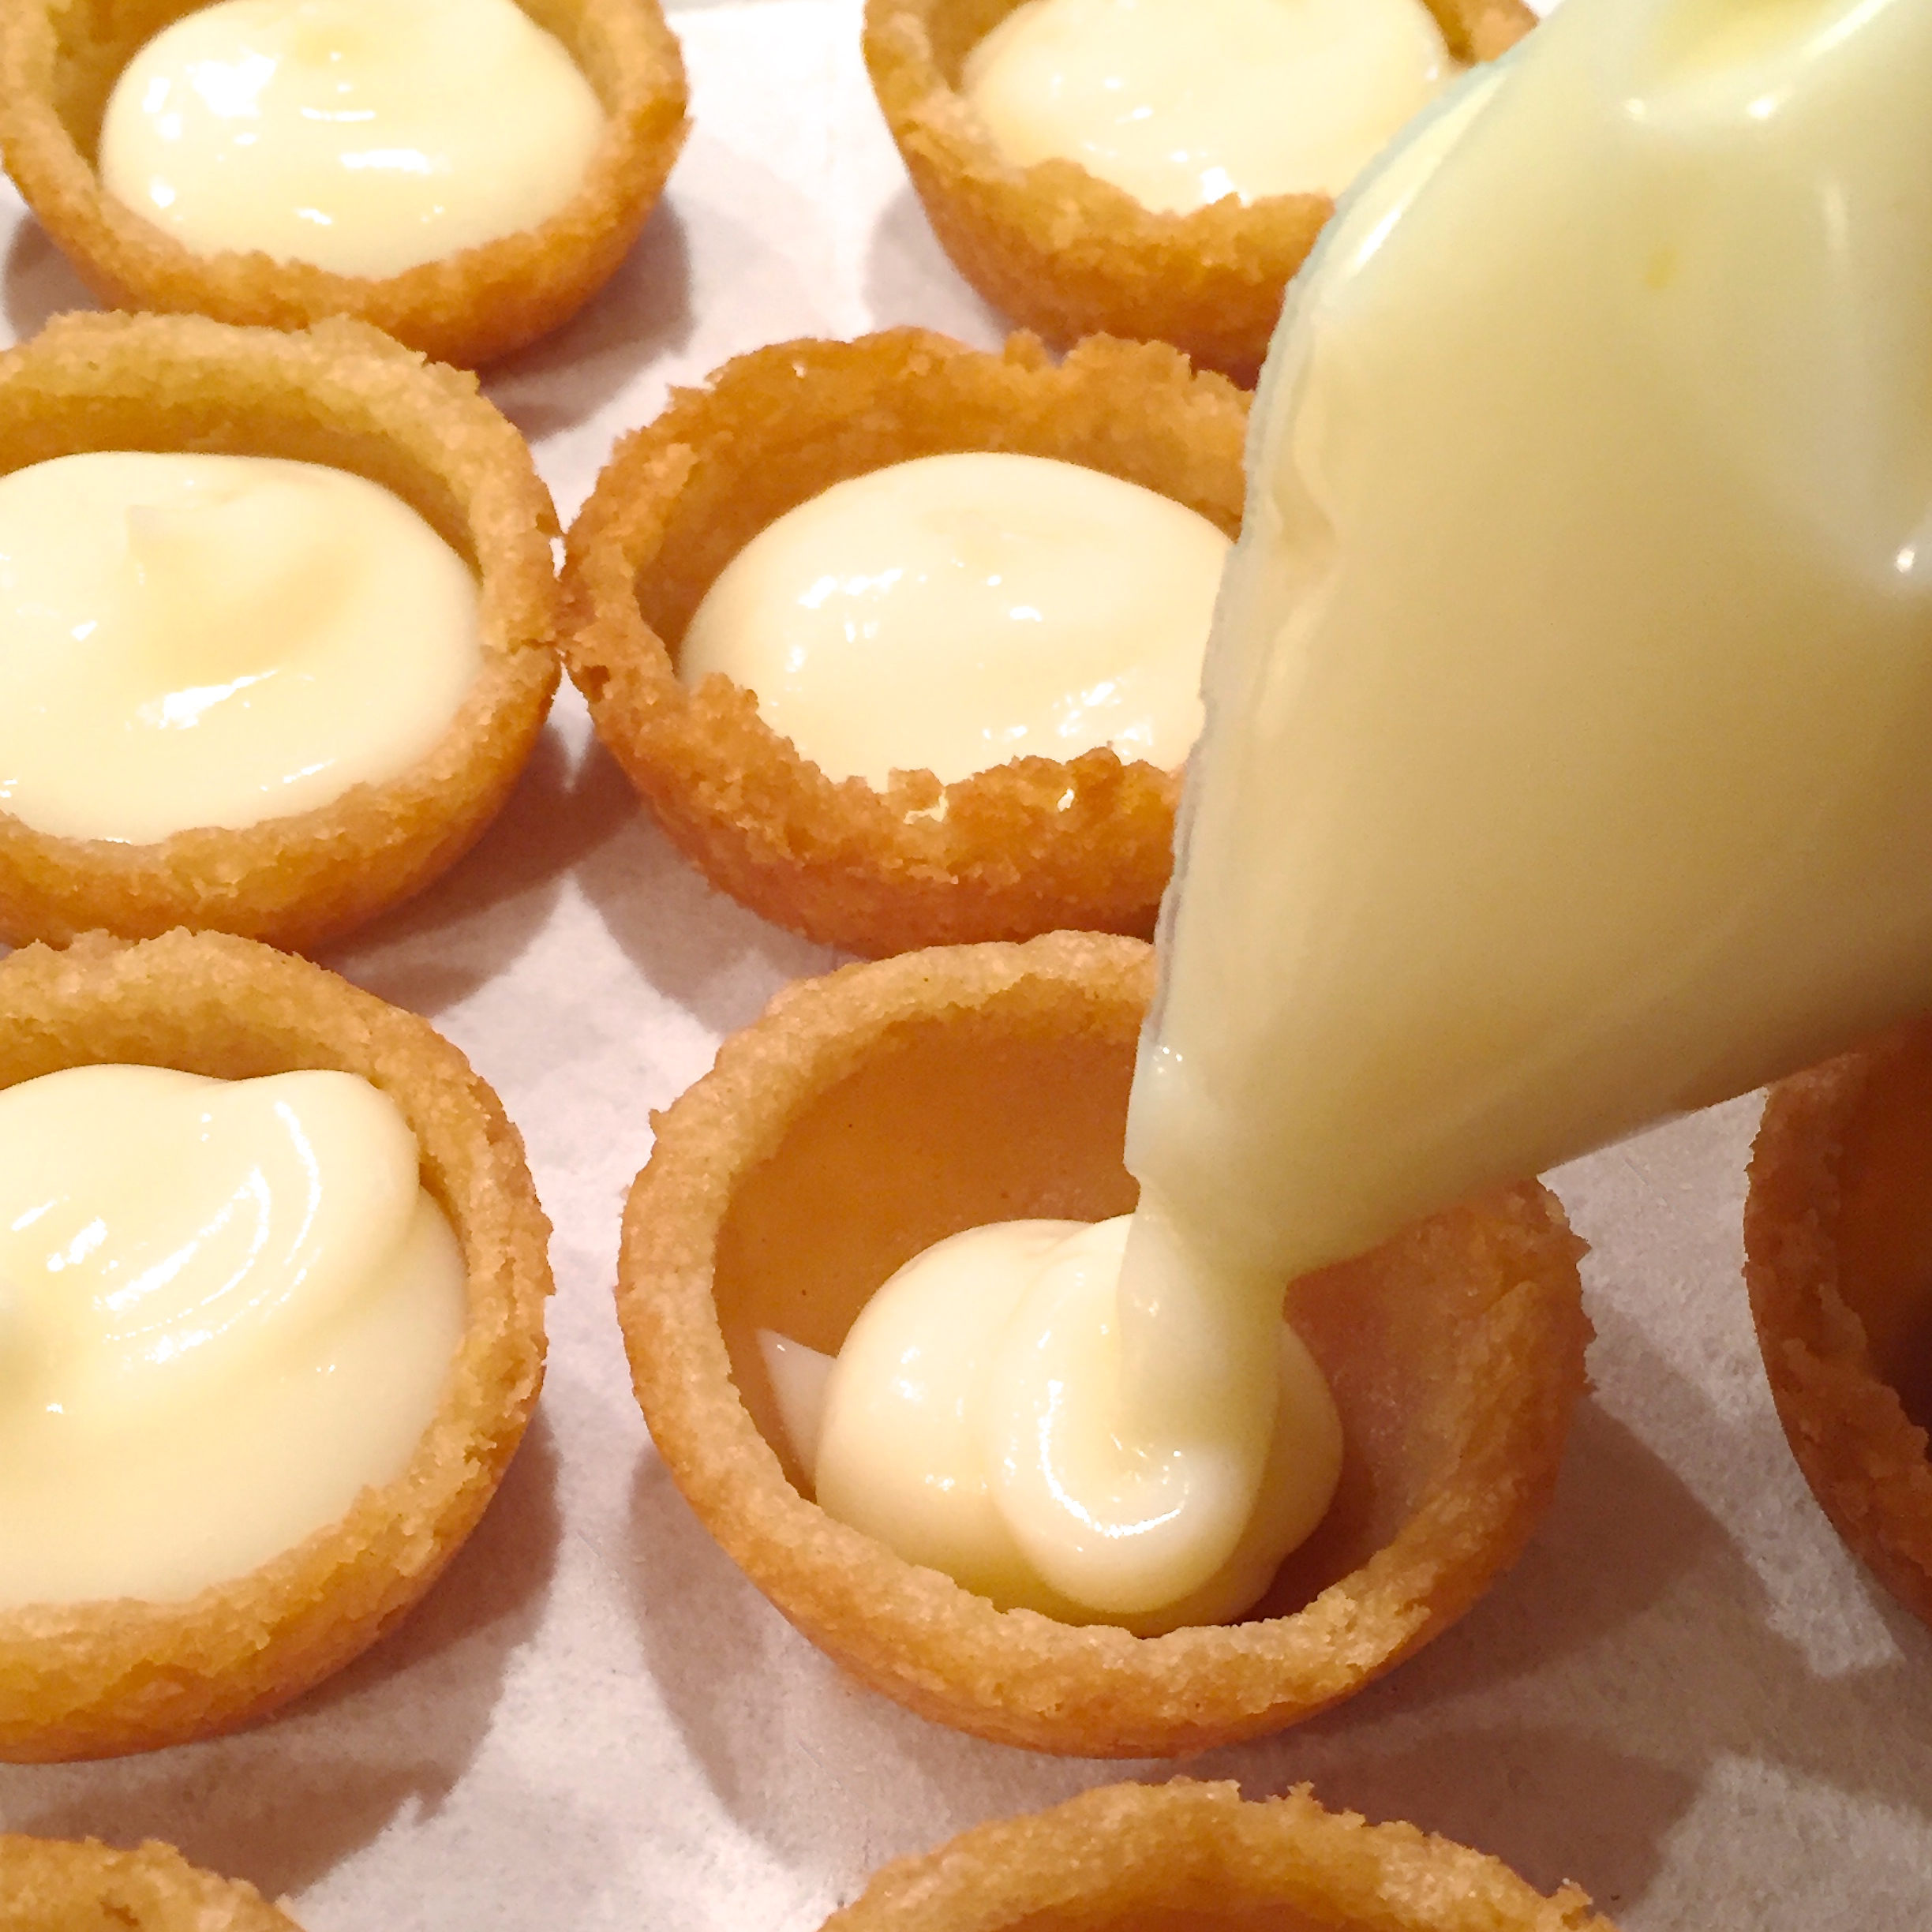
  • While cups are hardening, make filling by creaming together lemonade/other unsweetened drink mix flavor with cream cheese.
  • Fold in marshmallow and then fold in 1/2 of Cool Whip until smooth.
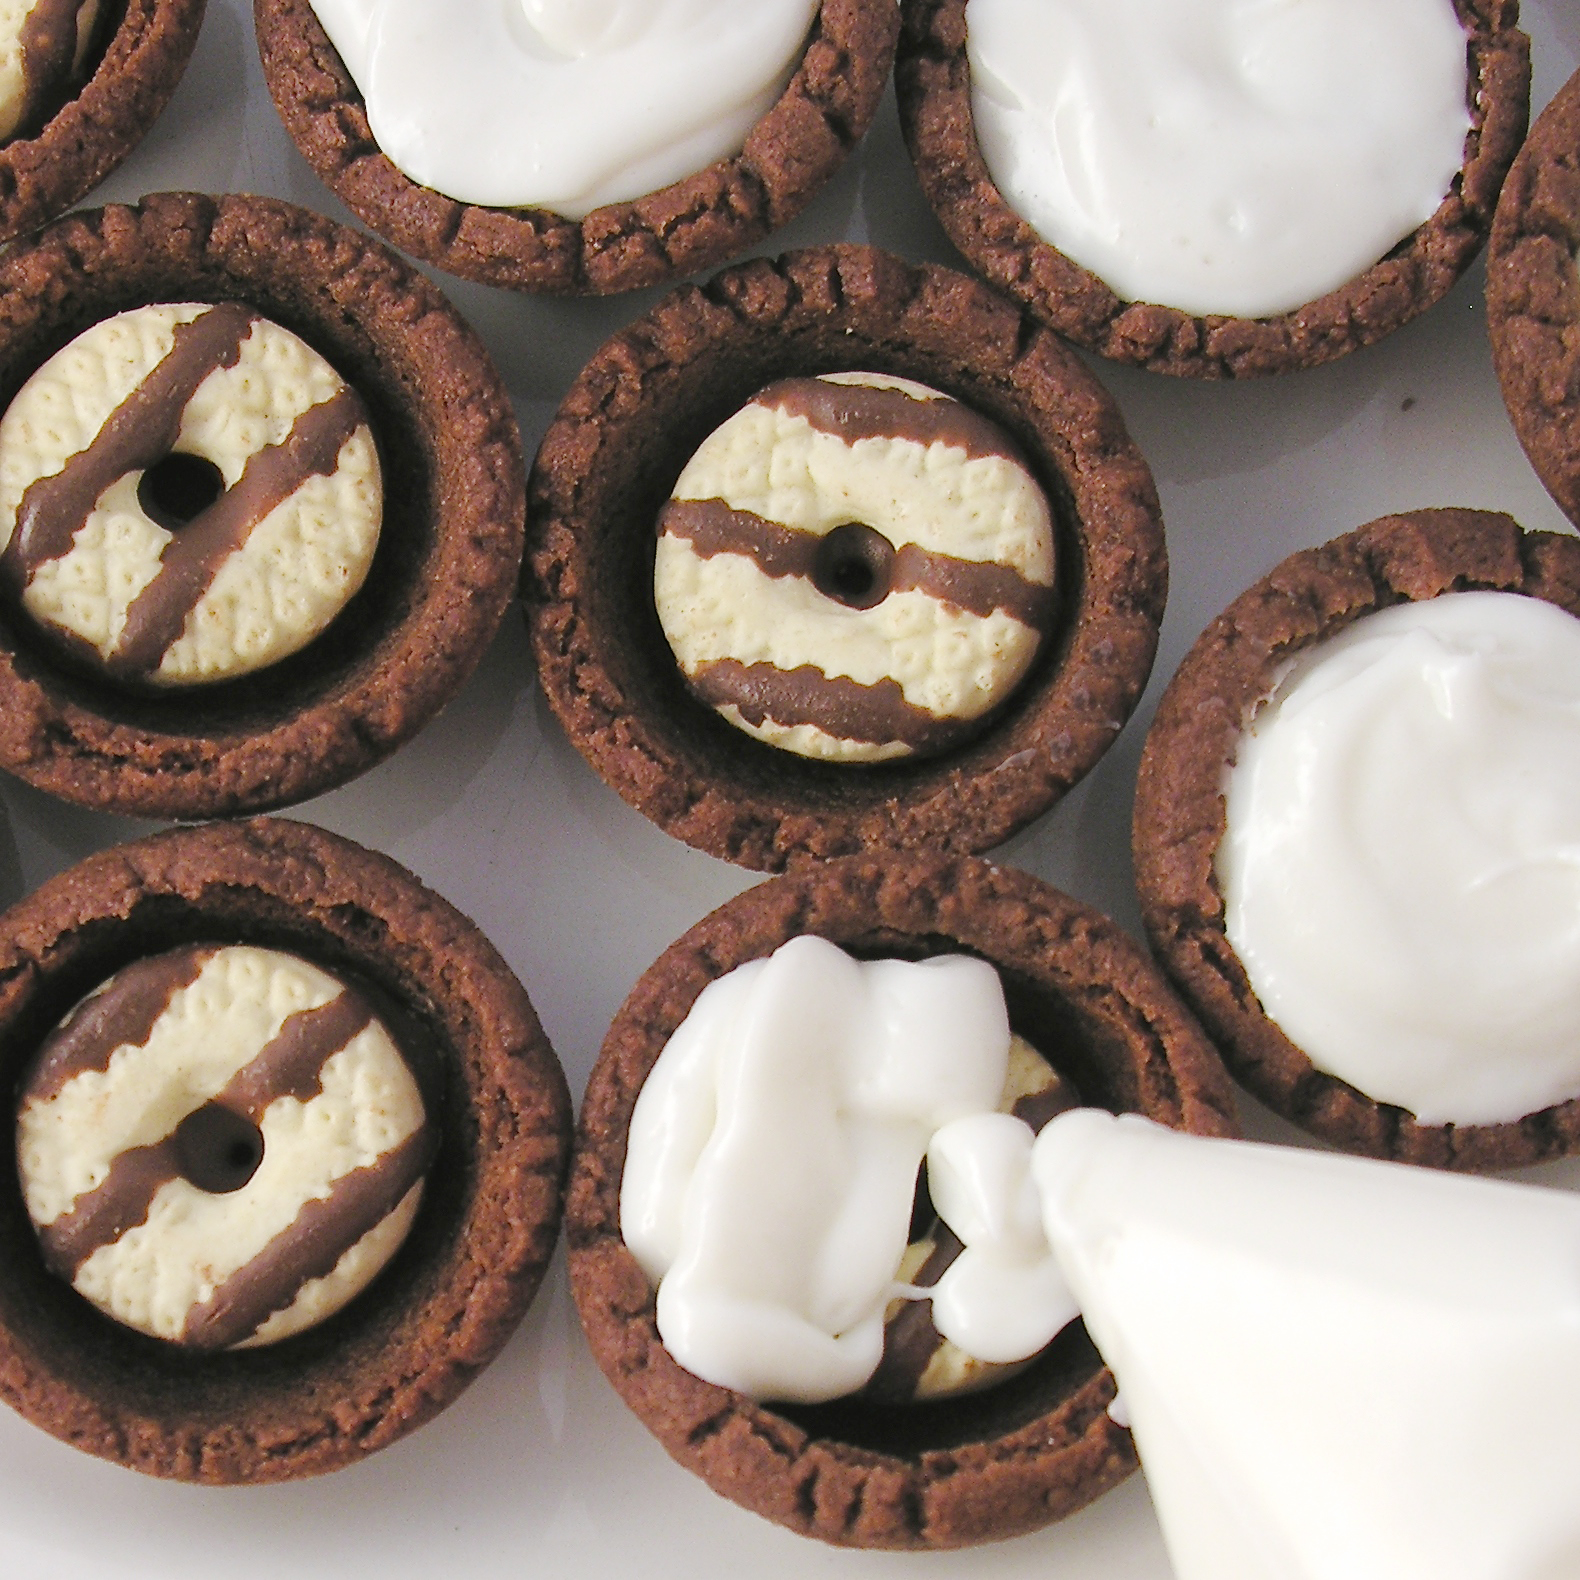
  • You could spoon this into the little cups, but I piped the filling in (again- to make it easy to get all the way to the bottom of each cup). 

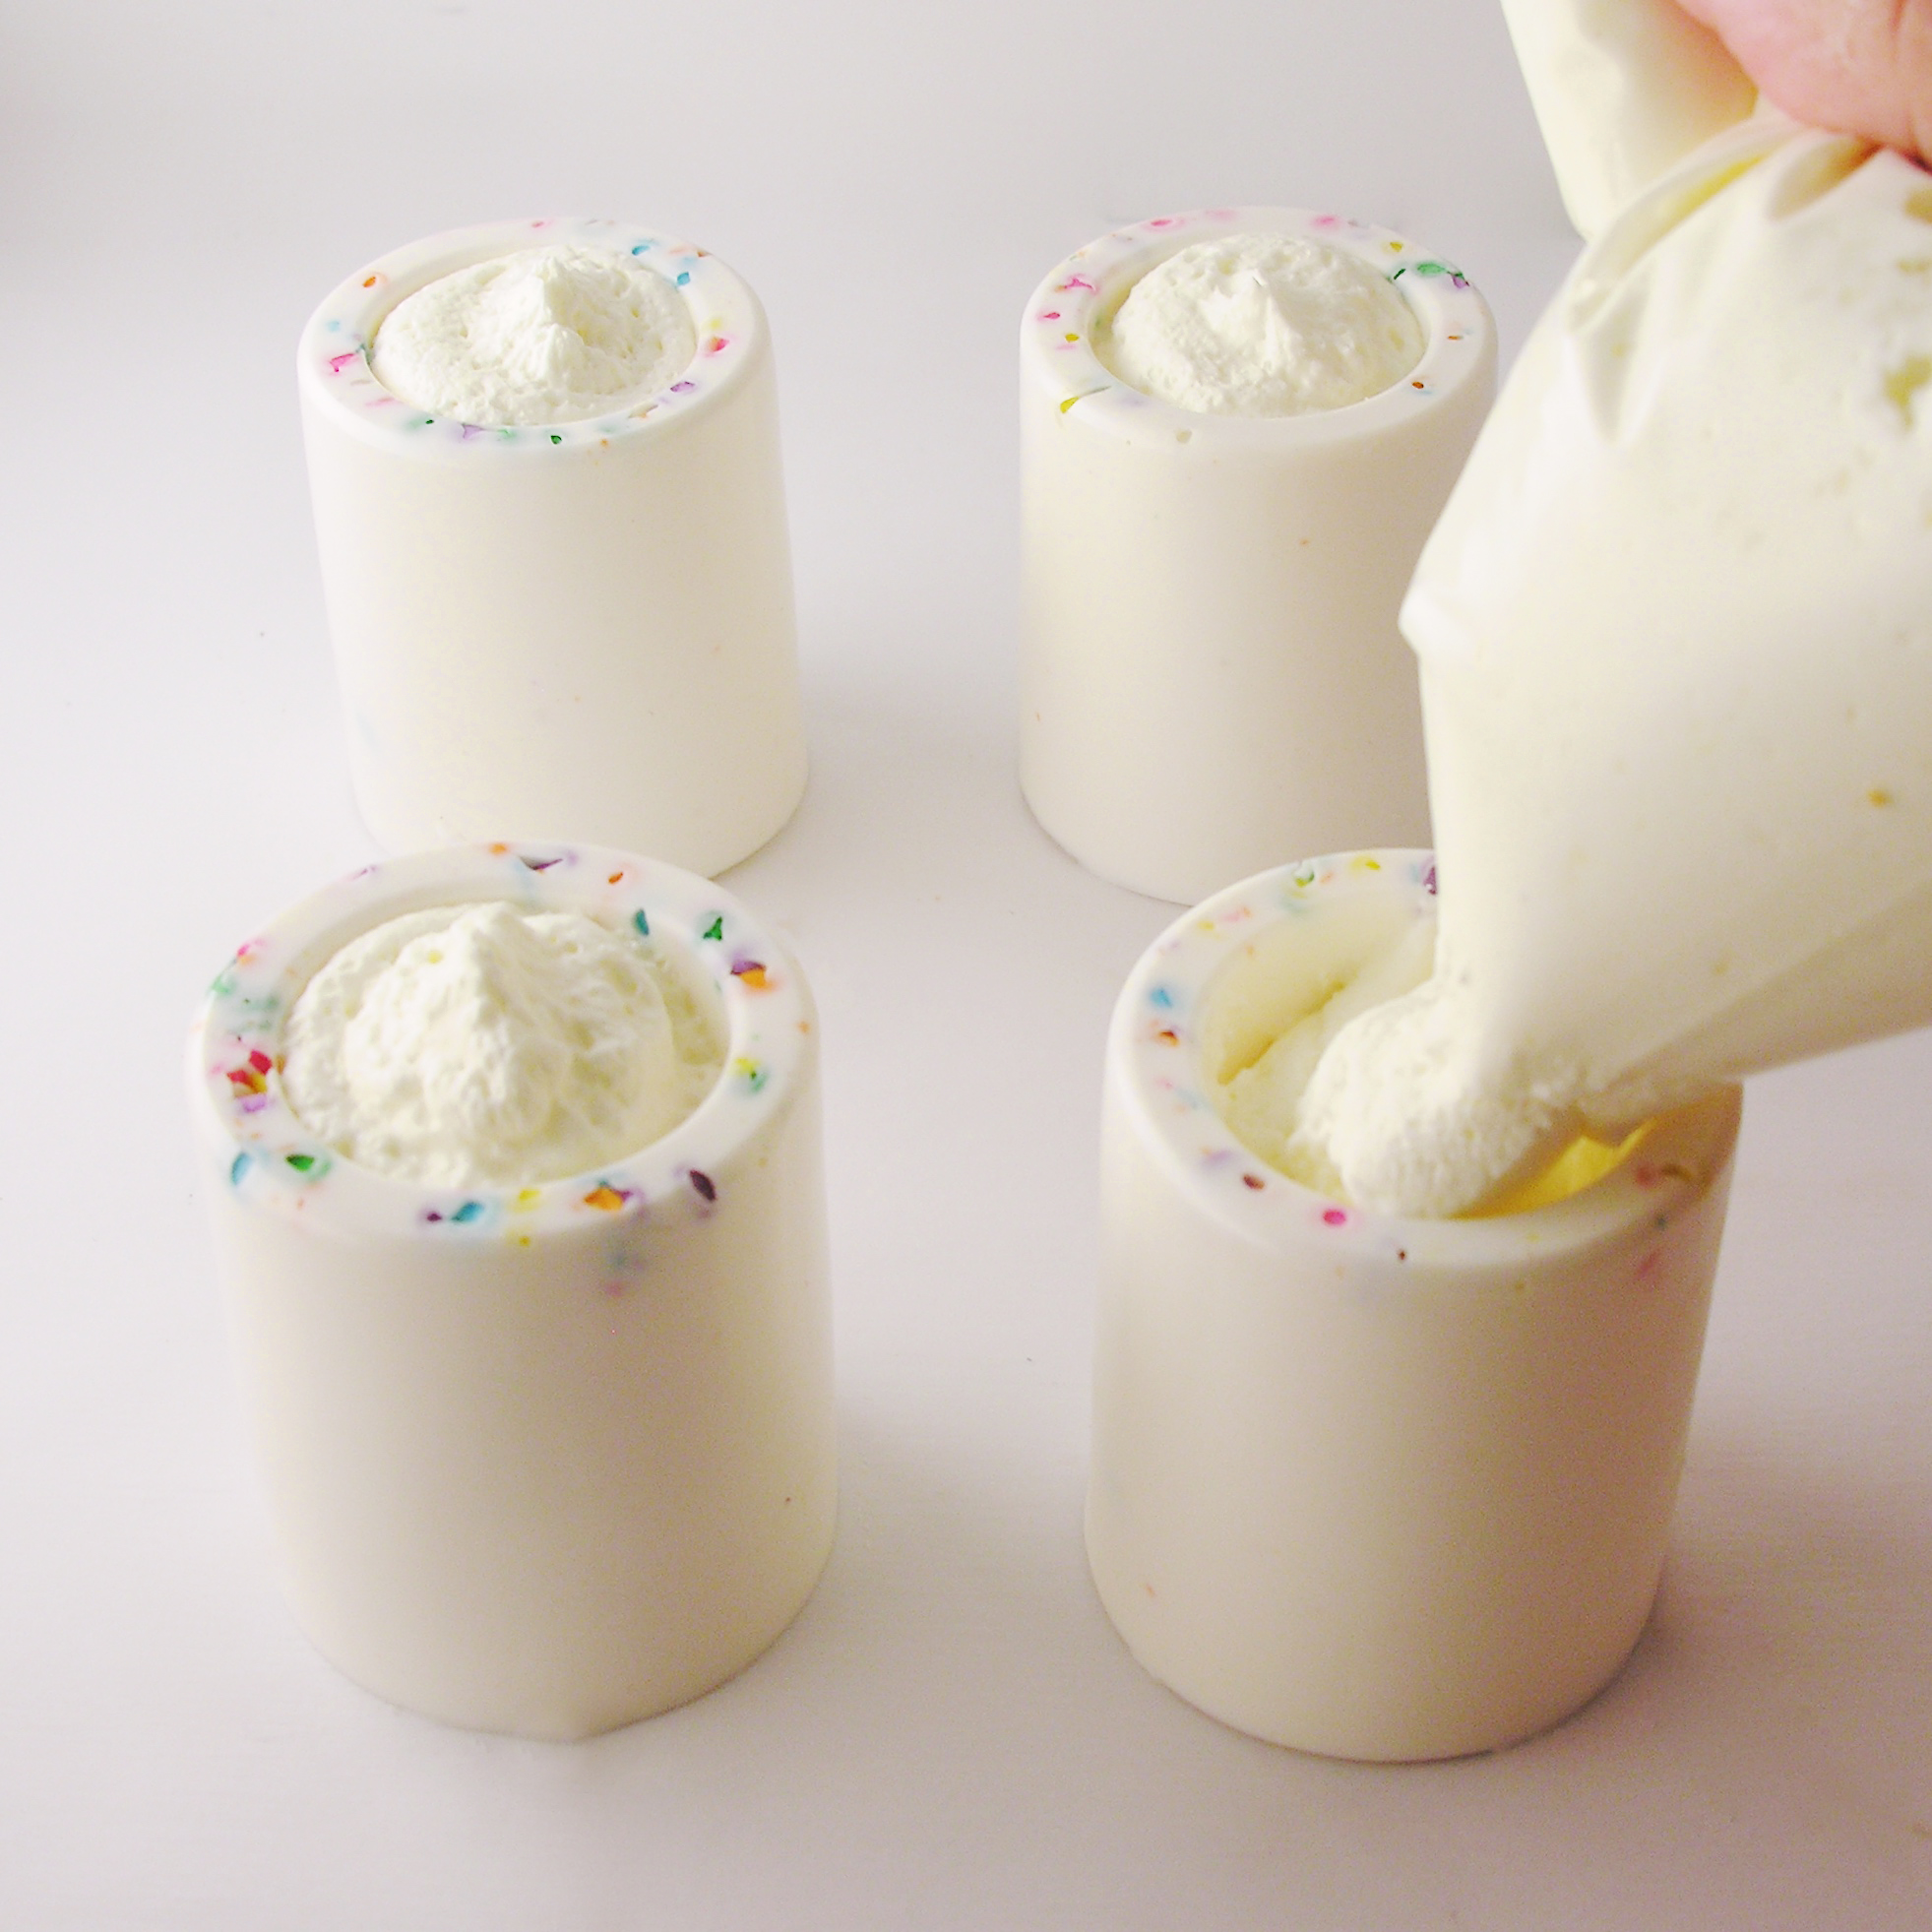
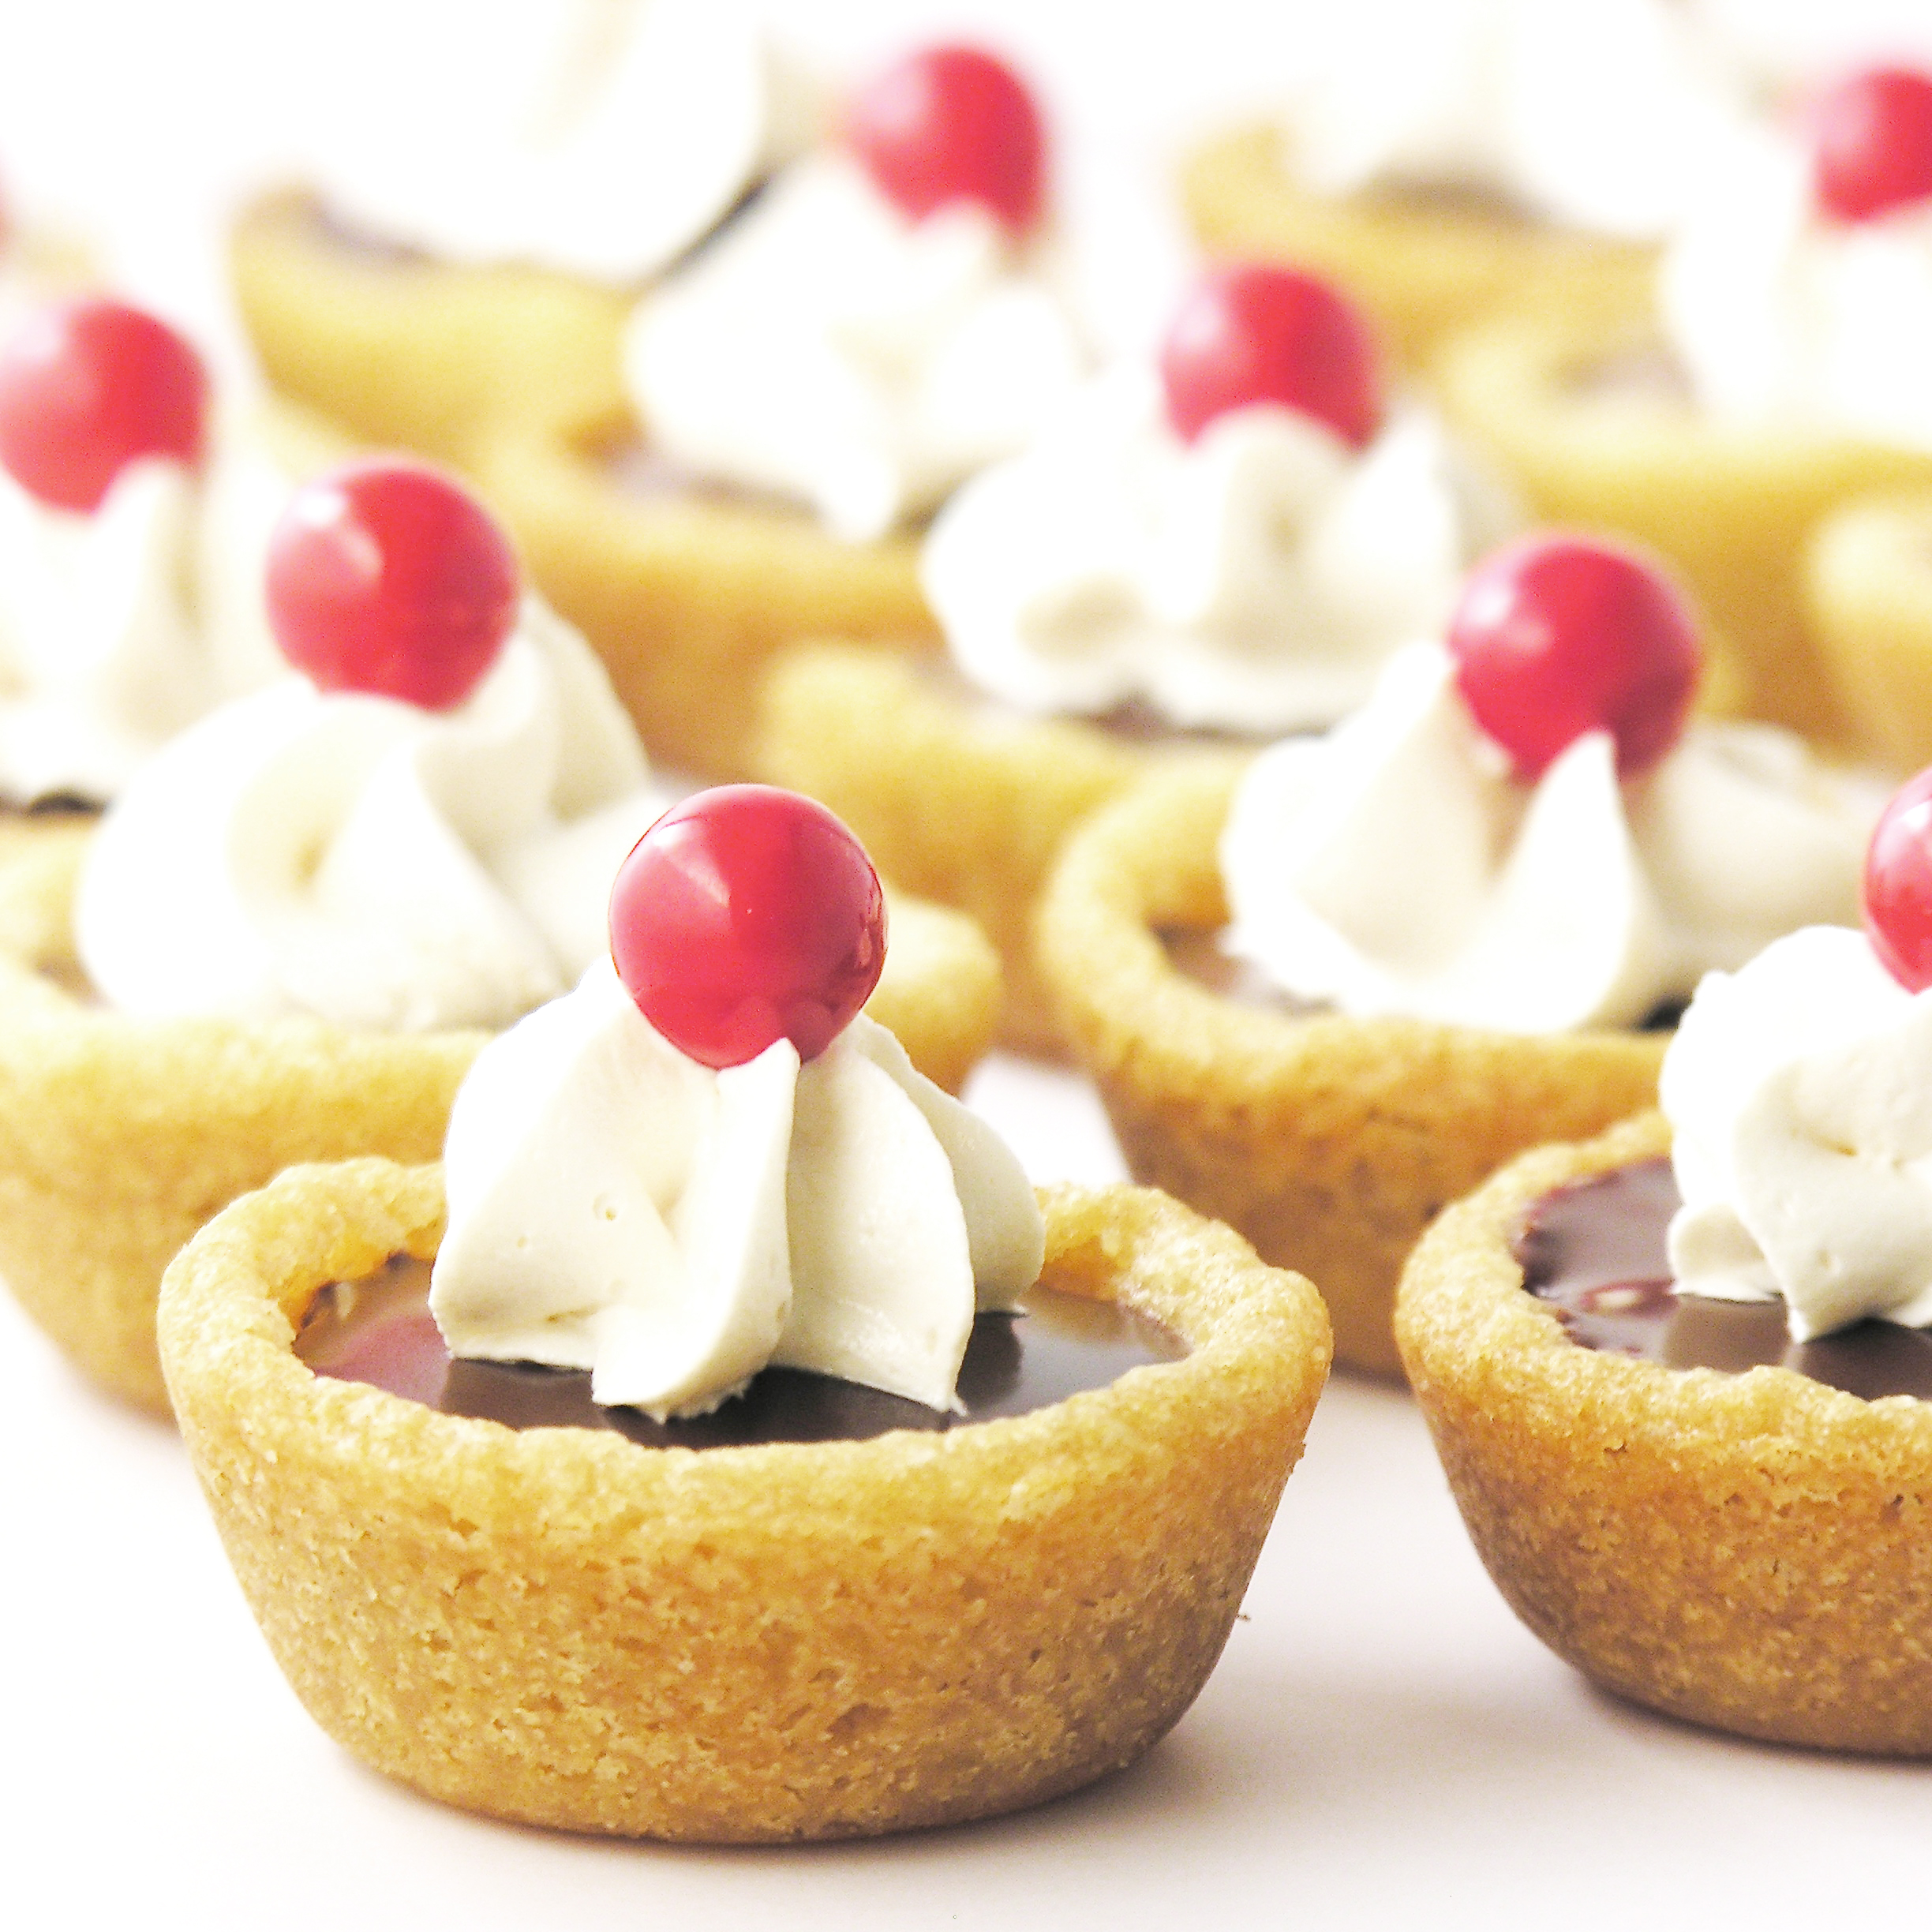
  • Spoon remainder of Cool Whip into a zip-top bag that has been fitted with a large decorating tip. Zip it tightly shut and pipe swirls on top of each cup. 
  • Add sprinkles (and I added a little bit of a straw to each one too, because….soooo cute! 🙂
  • Enjoy!

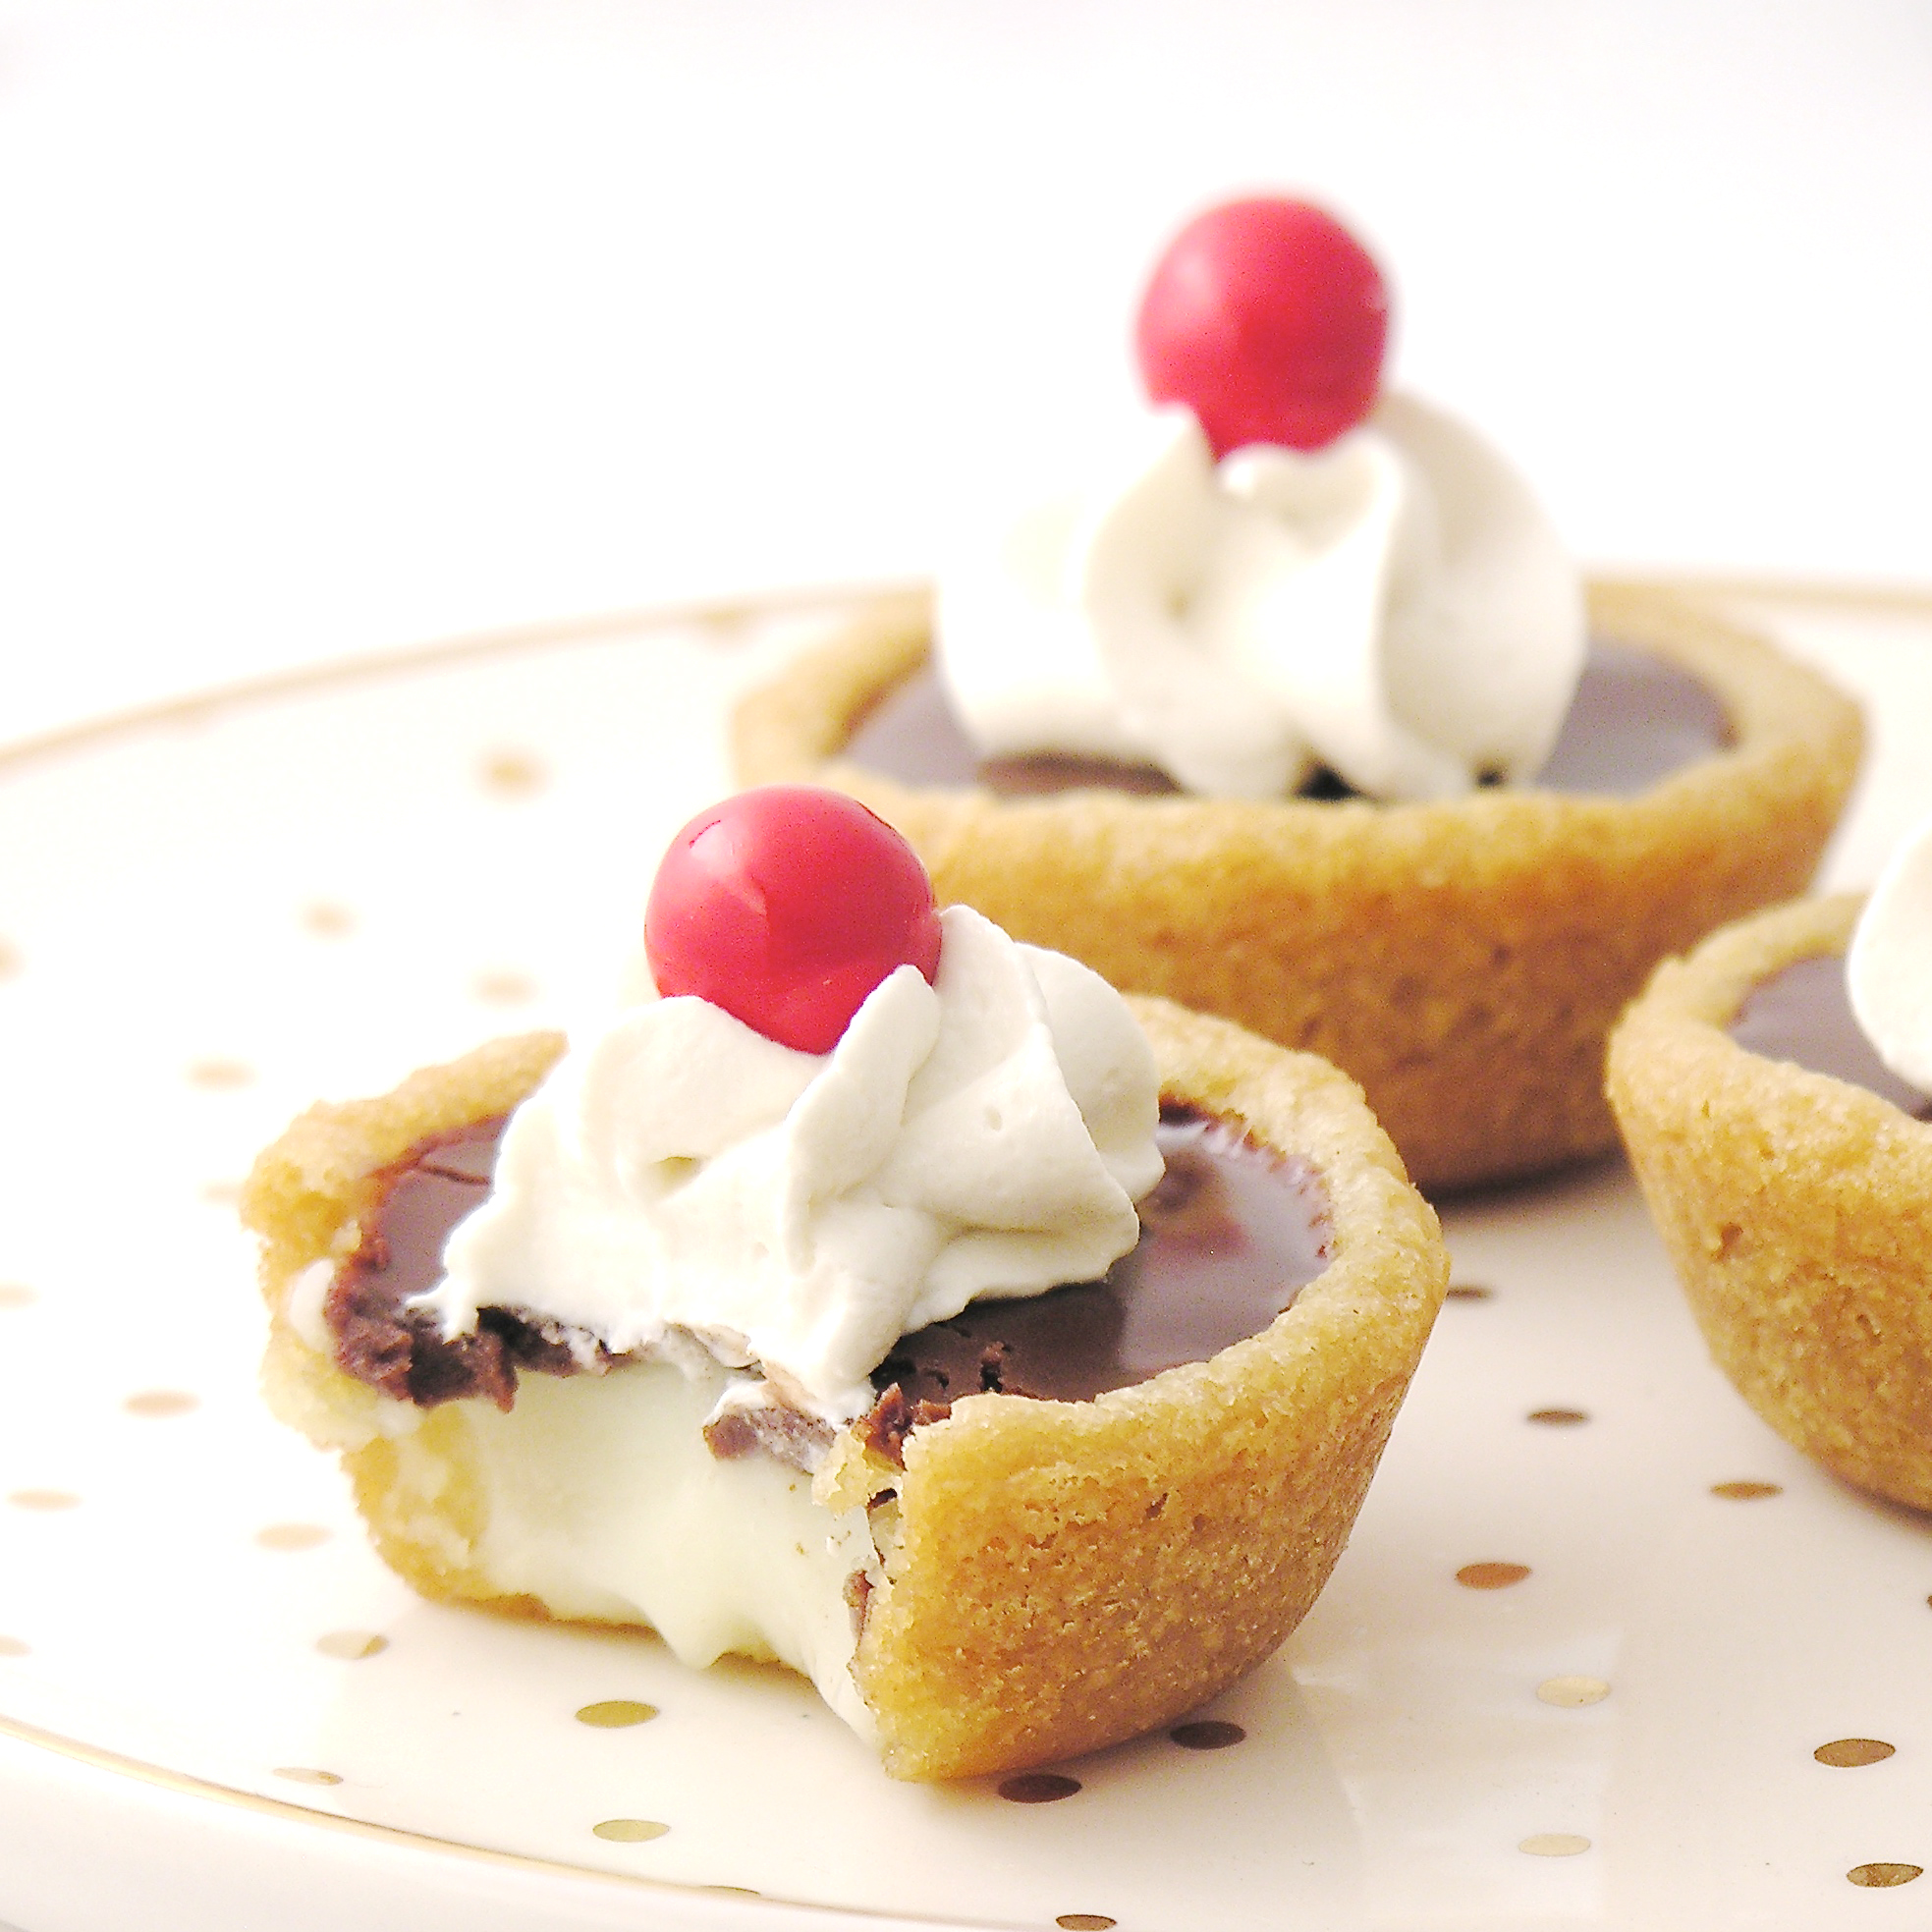
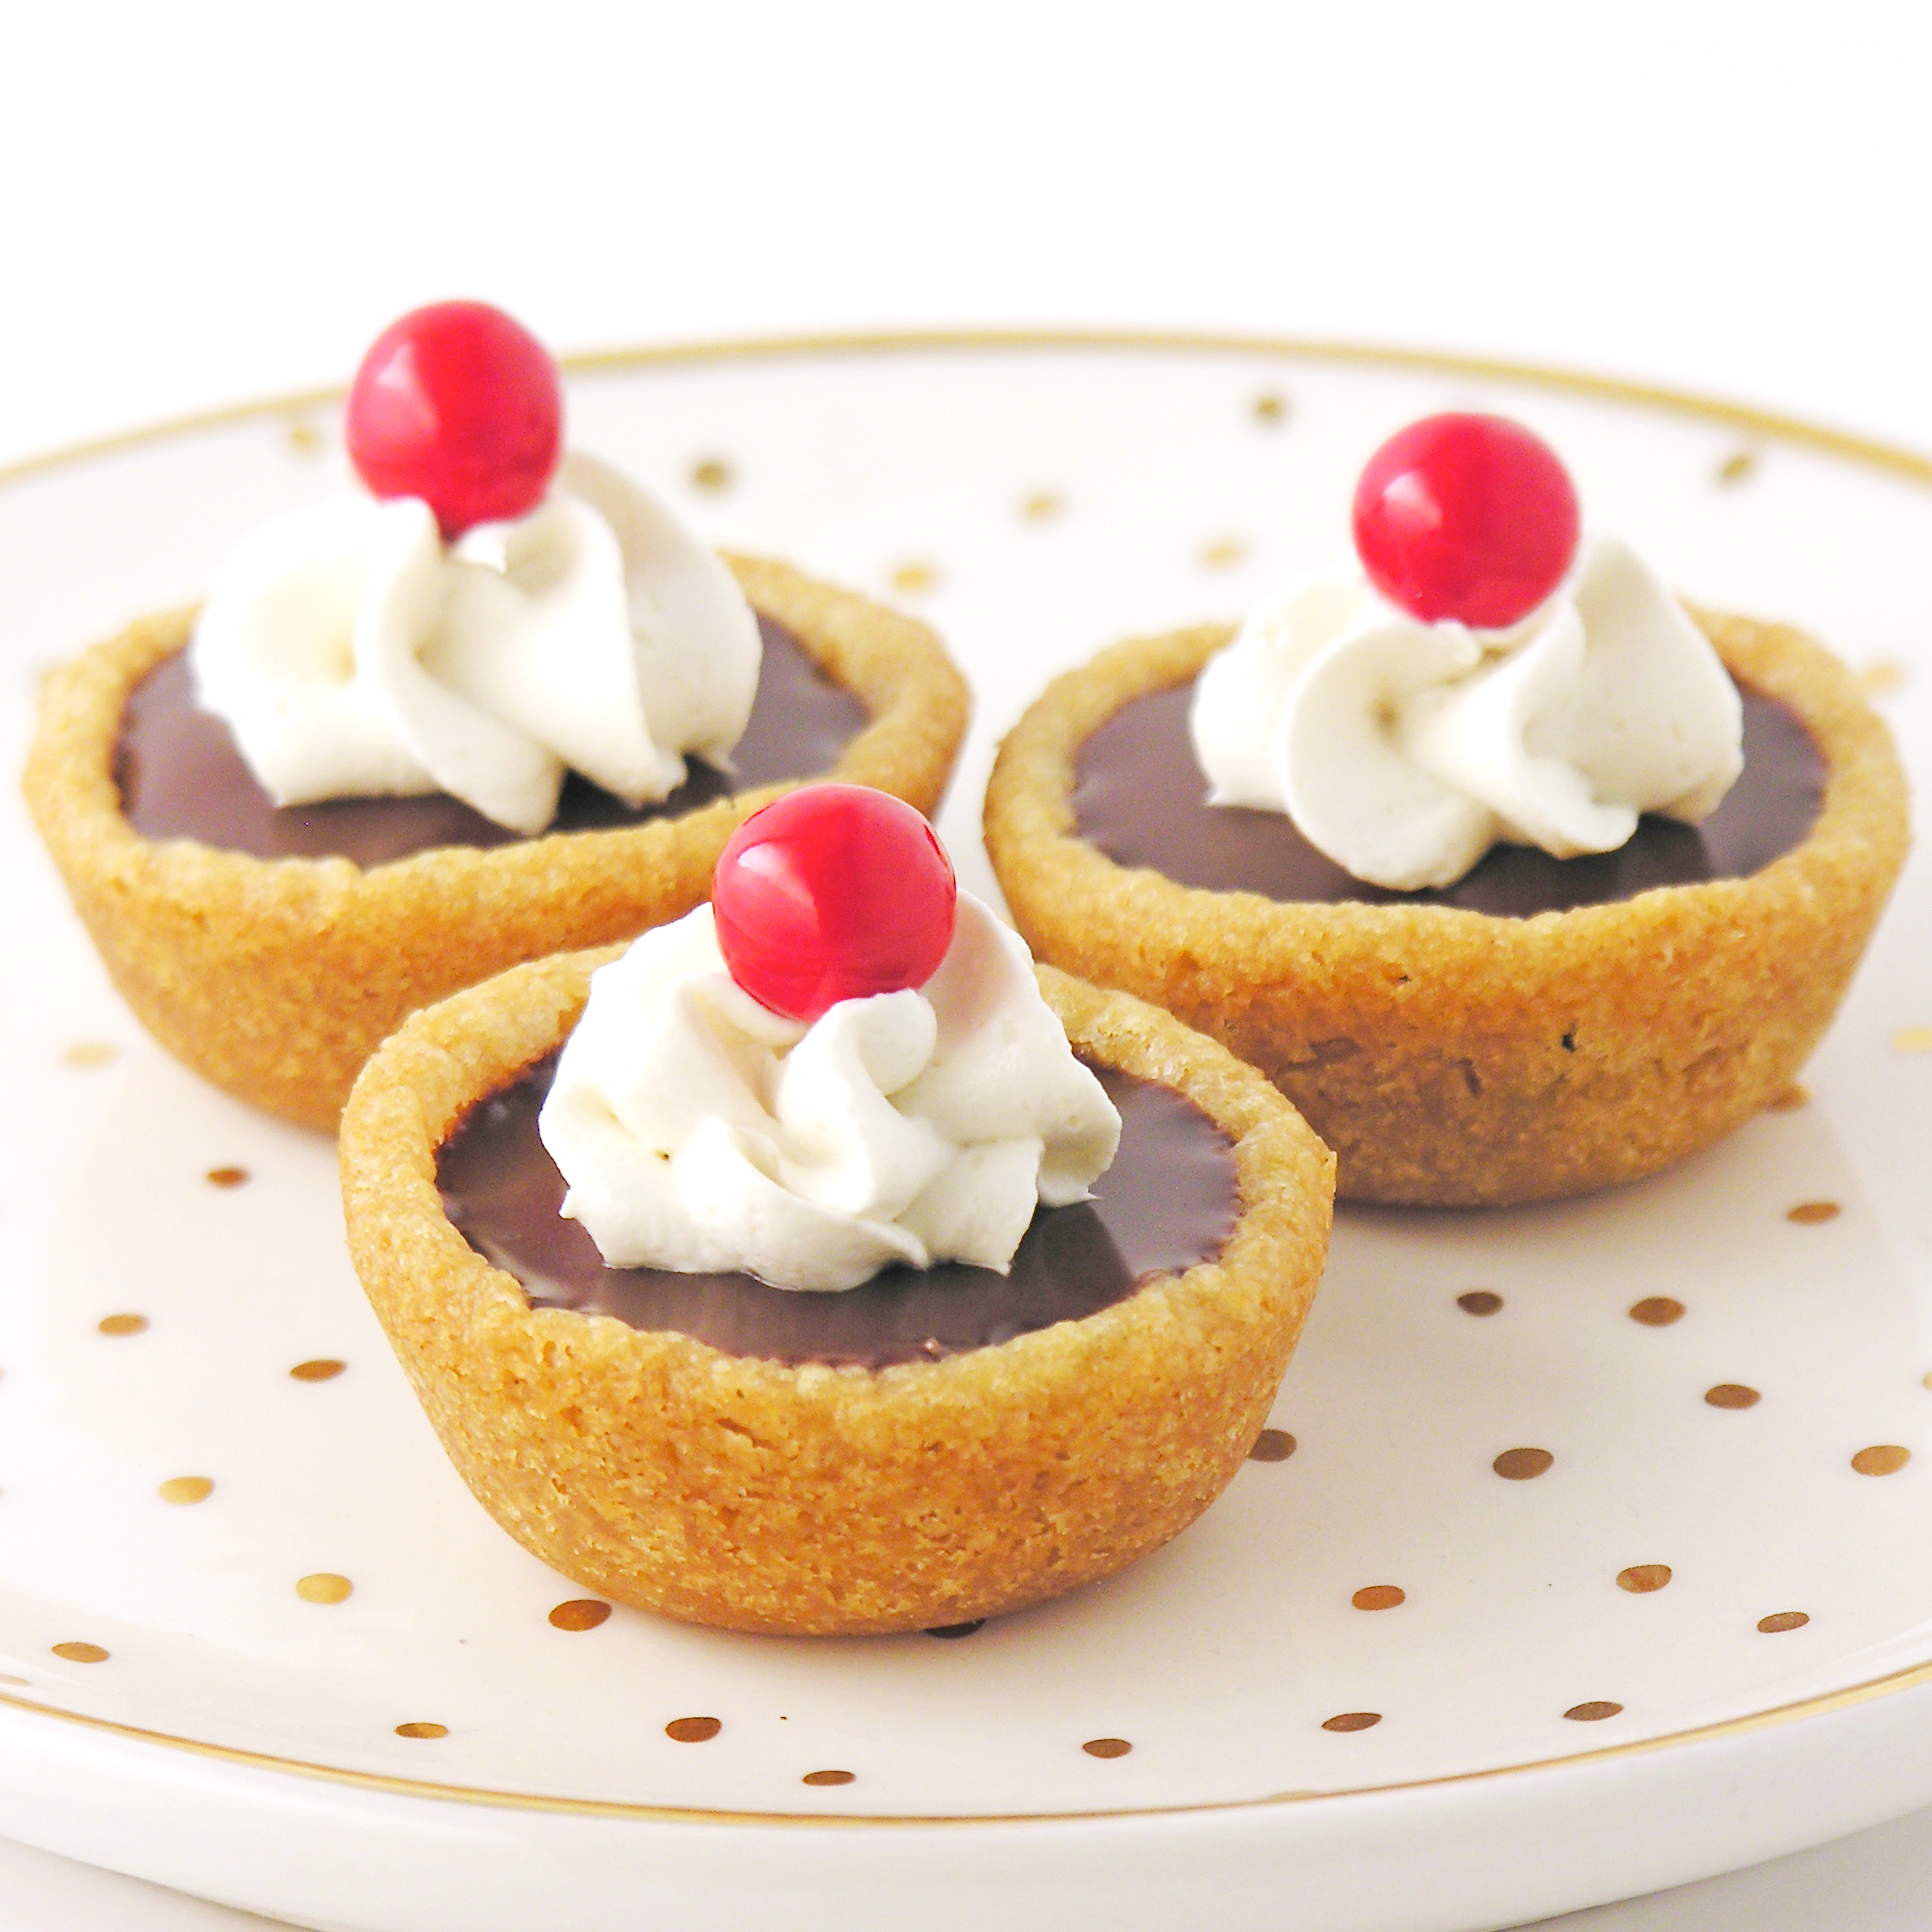
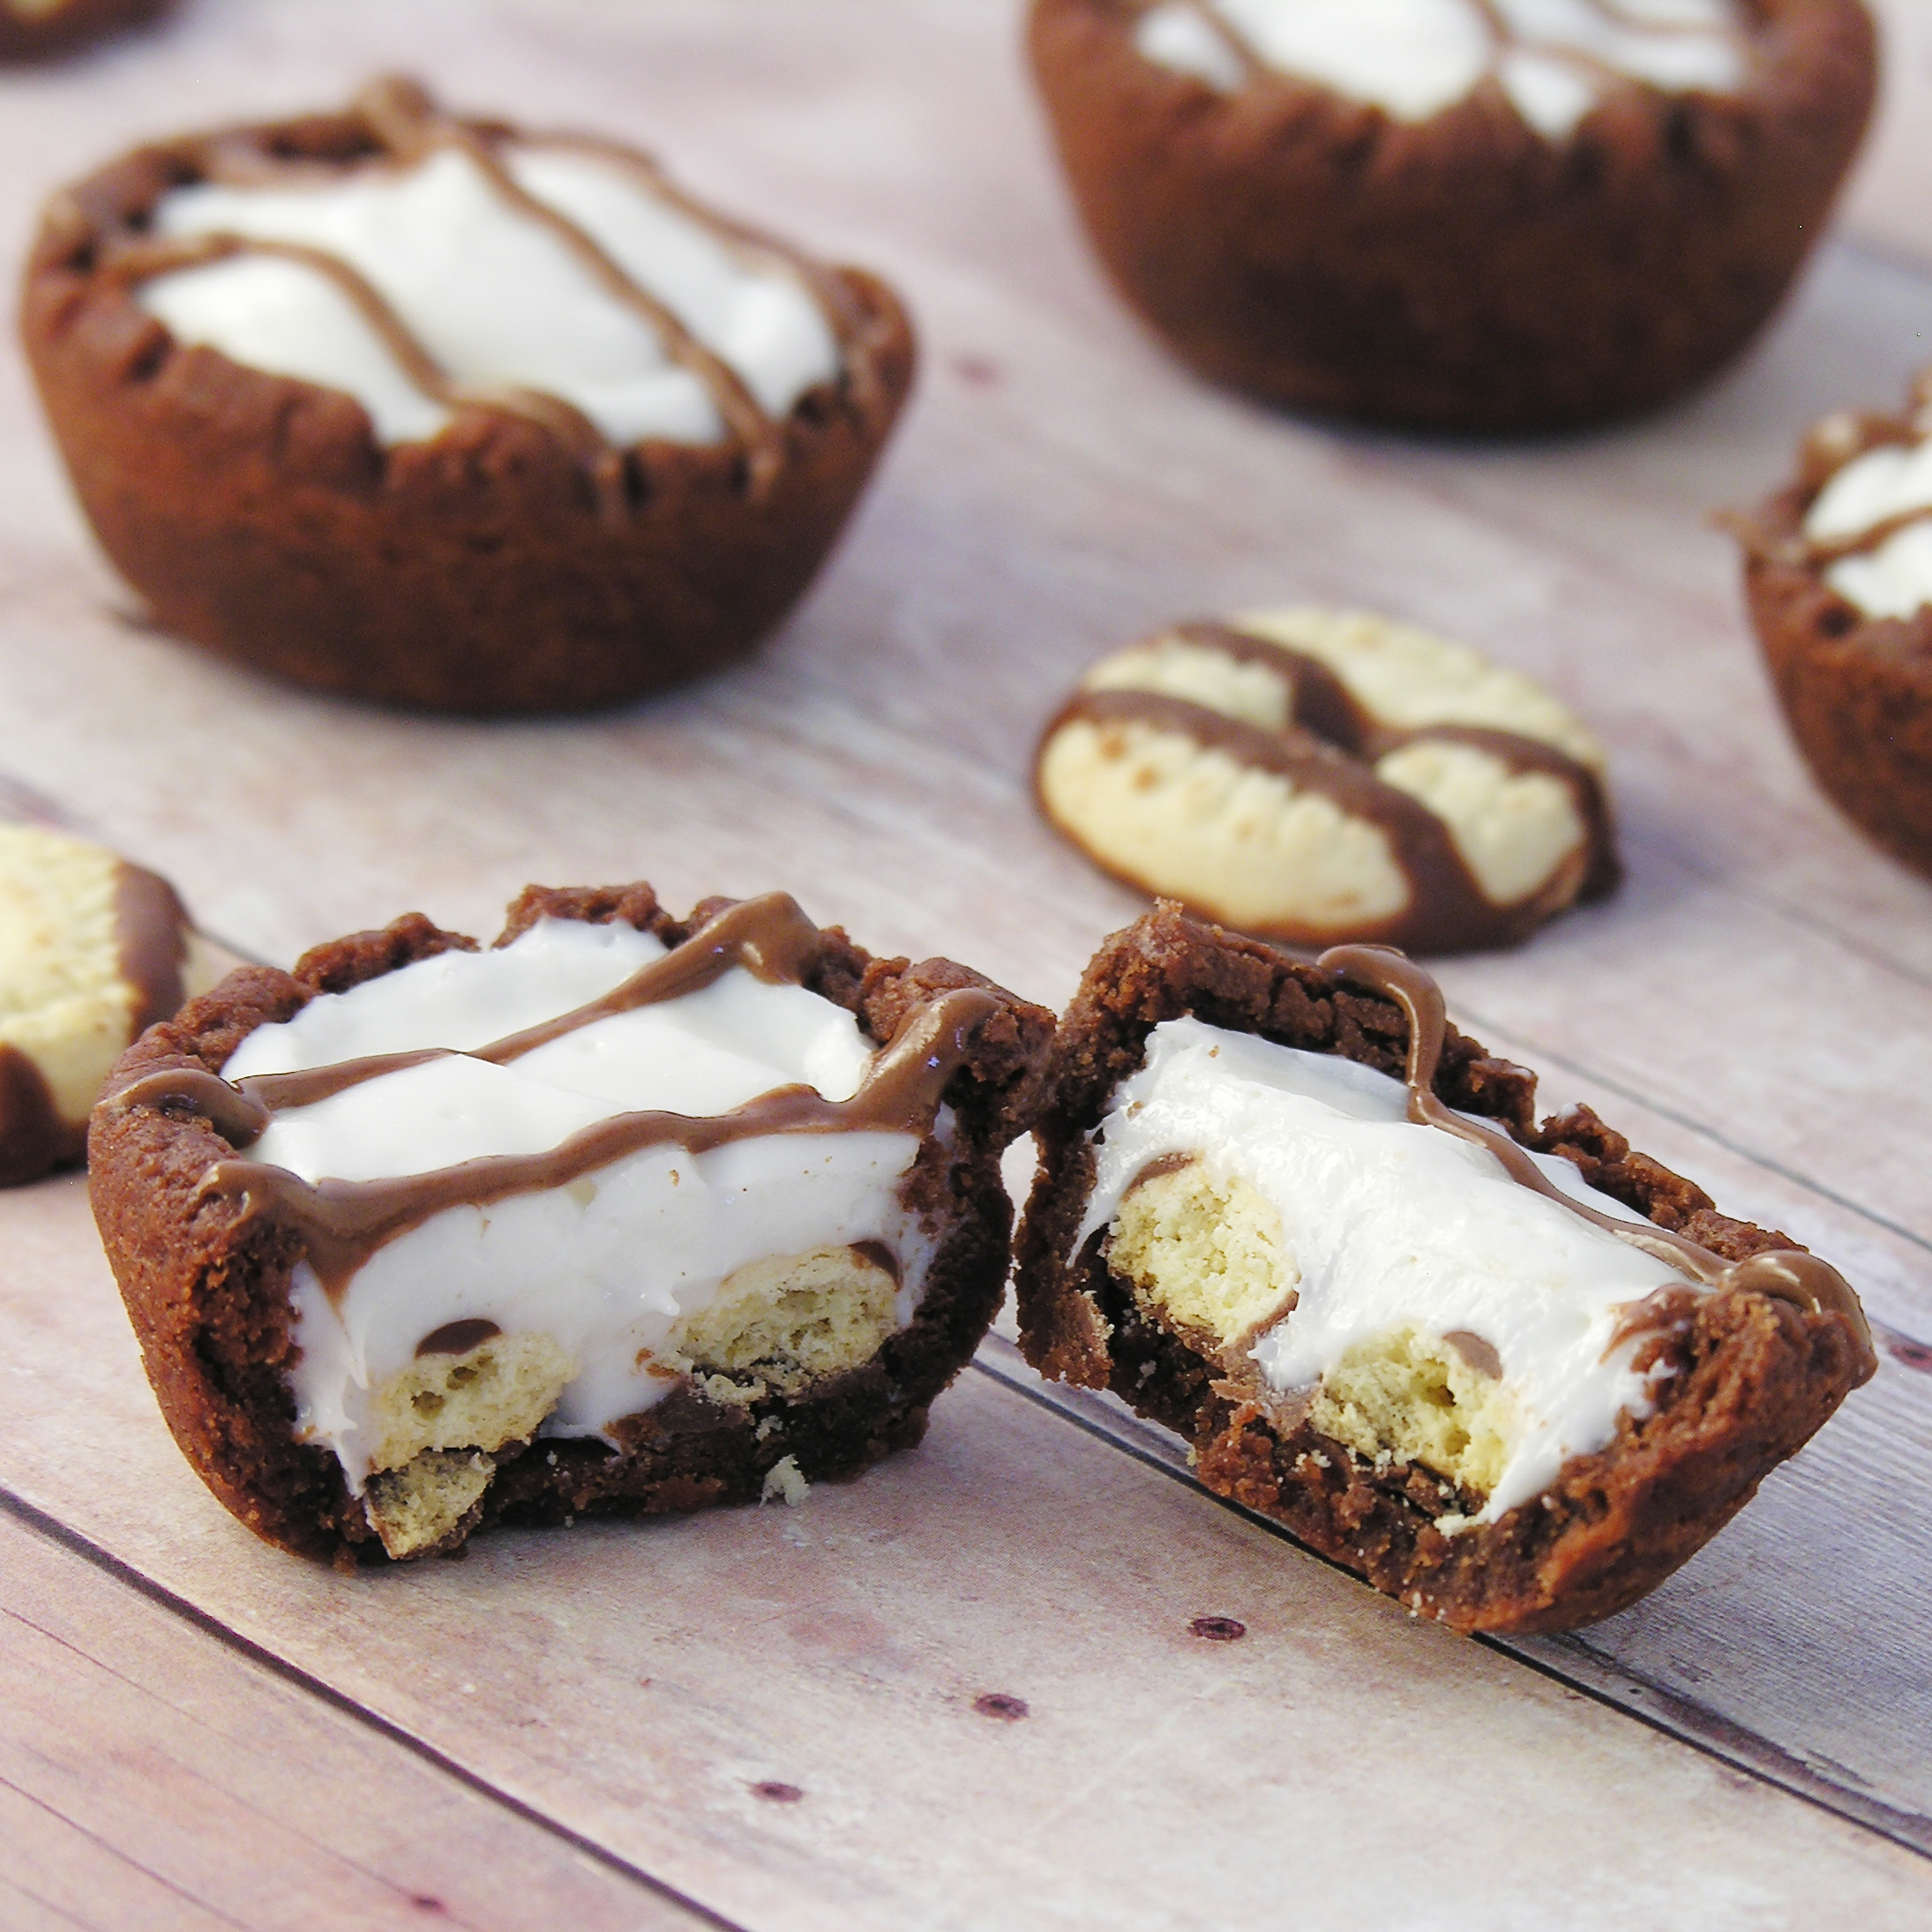
My thoughts: These are such a fun idea for showers and other celebrations that call for something unique and yet yummy! You’ll want to keep these refrigerated (cream cheese and Cool Whip) until you serve them, but pull them out and let them soften up before serving (the chocolate is really yummy to break apart and eat with the cream!!!) Enjoy! ~r

Other mini- desserts that are party-perfect! (click on a photo to see the recipe)

Advertisement

Boston Cream Cookie Cups

Posted on


boston-cream-cookie-cupsThese adorable cookie cups are filled with white chocolate pudding, and topped with rich chocolate and buttercream.

A perfect mini-dessert!

Let’s hear it for Boston Cream Pie! I’m not sure why they call it pie when it is so obviously cake… but that aside, it is wonderful! I love little bite-size mini desserts, and I’ve wanted to create a Boston cream pie one for some time. These turned out exactly like I wanted them to. Beautiful, bite-sized, and delicious! 🙂

boston cream cookie cups

Plus we use refrigerated cookie dough and instant pudding- so these are easy to make!

Here’s how we made these little guys (printable recipe here)

INGREDIENTS: (makes 48 cookie cups)

  • One tube of refrigerated sugar cookie dough
  • 1 box (3.3 oz.) of instant Jell-O brand white chocolate pudding (plus milk to make according to box)
  • 2 sticks of butter (divided)
  • 1 cup of semi-sweet chocolate chips
  • 1 cup of powdered sugar
  • 1 teaspoon vanilla
  • Red Sixlets candy or sprinkles

DIRECTIONS:

  • Preheat oven to 350F degrees and liberally spray a mini muffin tin with cooking spray.
  • Roll cookie dough into 48 small balls (about 1 heaping teaspoon in size)
  • Place balls into mini muffin cups and bake for 8-10 minutes.
  • Use a tart shaper or a wooden spoon to press centers of baked cookie into a cup.

img_1651 img_1653

  • Cool just slightly and then run a small knife around edges to free cup from tin. Cool completely.
  • Make pudding according to box and place into a large zip-top bag. Clip a corner and pipe evenly into all 48 cups.
  • Melt 1 stick of butter and chocolate chips in a microwave in 30-second increments, stirring until smooth.
  • Spoon into a zip-top bag, clip a corner and pipe over top of pudding.

img_1666 img_1671

  • Allow chocolate to harden.
  • Place stick of butter, powdered sugar and vanilla into a mixing bowl and beat on high until light and fluffy.
  • Spoon into a small zip-top bag that has been fitted with a decorating tip, and pipe a dollop of icing on top of each cookie cup.
  • Top with a Sixlet candy and ENJOY!!!

boston-cream-cookies

My thoughts: These are so yummy. A little extra work to make them into little mini-desserts, but aren’t they cute??? I love the cookie flavor with the filling and chocolate- it adds a different taste than your usual Boston Cream Pie 🙂 One note: make these just a day or so before serving them, as the pudding tends to make the cookie cups a little soggy after sitting a few days. Hope you get a chance to try these! ~r

boston-cream-cookie-cups

Other fun mini-desserts here on Easybaked (click on a photo to see the recipe):

Sweet Lime TartsMini Pineapple Upside Down cakeCookie Dough CupcakesTriple Chocolate Truffle Cups


Fudge Stripe Cookie Cups

Posted on

Fudge Stripe Cookie cups

These dark chocolate cups have a surprise inside: a crunchy little fudge stripe cookie!

I just love those fudge stripe cookies.  Even when I am trying to watch my calorie intake, I get the little 100 calorie packs as a treat.  They are just soooo yummy!  Those little mini cookies were the inspiration for these cookie cups.  They fit perfectly inside, and make for a wonderful surprise when you bite into one!

Fudge Stripe Cookie Cups!

So much fun!  Best use of diet food  EVER!

Here’s how we made them: (for a printable recipe click here)

INGREDIENTS: (makes 44-48 mini cookie cups)

  • 1 stick (1/2 cup) butter, softened
  • 3/4 cup of granulated sugar
  • 1 egg
  • 1/2 teaspoon vanilla extract
  • 1/3 cup of unsweetened cocoa powder
  • 1 1/2 cups flour
  • 1/4 teaspoon salt
  • 1/4 teaspoon baking powder
  • One box of Keebler Mini Fudge Stripe cookies
  • One tub of vanilla frosting.
  • A little bit of melted chocolate to drizzle on top, if desired

DIRECTIONS:

  • Preheat oven to 350F degrees.
  • Make cookies by combining butter, sugar, egg, vanilla and cocoa powder and beating until completely combined.
  • Add other dry ingredients gradually, mixing with beaters until too heavy to beat. Use clean hands to knead dough into a soft ball.
  • Use a small cookie scoop (I used a scoop that holds 1/2 Tablespoon of batter) to portion out your dough into mini muffin tins that have been sprayed with non-stick spray.
  • Use a tart shaper or a wooden spoon to press the dough into a cup shape (really, the tart shaper works best for this and you will use it again- I use mine all the time!)

Making cookie cups

  • Bake at 350F degrees for 7 to 8 minutes and remove from oven.
  • Press centers in a second time with the tart shaper and allow them to cool for just a couple of minutes.
  • Use a small paring knife to pop each cup out and allow them to cool completely on the counter.
  • Place one mini Fudge Stripe Cookie to each cup
  • Spoon frosting into a small bowl and microwave for 20-30 seconds, until soft.  Stir until smooth.
  • Spoon frosting into a sturdy zip-top bag and clip a corner off.  Pipe frosting over cookie to the top of each cup

Fudge Stripe Cookie Cups!

  • Pipe chocolate stripes on top to decorate.
  • Allow frosting to firm up.
  • Enjoy!

Fudge Stripe Cookie Cups

My thoughts:  These are SO easy to make and such cute little desserts.  I’m addicted to desserts that surprise you when you bite into them- and these do just that!  I hope you enjoy making and sharing these fun little treats!  Enjoy!! ~r

Fudge Stripe Cookies1

Other cookie cup dessert recipes:

Salted Caramel Cookie Cup!!!Pecan Pie cookie cups with dark chocolateSeven Layer CupsMelted Smores cup


Mini S’mores Pies

Posted on

S'mores Pie!!!Rich dark chocolate pie in a graham crust, topped with marshmallow meringue.  S’mores with a new, fun look!

Everyone loves these flavors together.

Don’t they?

It just occurred to me that someone might hate s’mores.

Ok, well I don’t personally know anyone who doesn’t just adore this flavor combination.  I LOVE them, and crave them, and sometimes cheat by making them in the microwave when it’s snowing and a campfire is out of the question!

These little pies capture the flavor of a s’more, but add a rich chocolate flavor that is incredibly delicious, and can’t be had with just 2 squares of Hershey’s chocolate.  Or four squares… sometimes I use four.  Don’t tell.

S'mores Pie!!!

Here’s how these simple little treats are made: (printable version)

INGREDIENTS: (makes 12 mini pies)

  • 12 pre-made mini graham cracker crusts.
  • 1 cup of Ghirardelli Bittersweet chocolate chips (melted)
  • 1 cup of Ghirardelli Semi-sweet chocolate chips (melted)
  • 8 eggs (divided)
  • 5 Tablespoons of heavy whipping cream
  • 2 Tablespoons of vanilla
  • 2 cups of granulated sugar
  • 1/4 teaspoon of cream of tartar

DIRECTIONS:

  • Preheat oven to 350F degrees.
  • Divide eggs, keeping ALL of the 8 egg whites and only 5 of the yolks.
  • Place the melted chocolate, 5 egg YOLKS, whipping cream and vanilla in a large mixing bowl and stir until well combined.
  • Evenly divide among all twelve mini pie crusts.
  • Bake (I put them all on a baking sheet) for 14-16 minutes, until the middle of each pie is set.
  • Make meringue while these bake, by adding all of the 8 egg WHITES, sugar and cream of tartar together in a medium heat-proof bowl that will sit on the top of a sauce pan of boiling water without touching the water.  (I had to experiment a bit to find a good fit.)
  • Bring water to a boil in the saucepan and set the bowl on top.
  • Whisk ingredients together for about 3-4 minutes.  Sugar will be dissolved and egg whites should be heated to 145F degrees.
  • Remove bowl from top of sauce pan and beat on low until the mixture thickens a little, then beat on high for about 10 minutes.  The meringue will become the most beautiful, white, glossy mixture.  It should form stiff peaks before you stop beating it.
  • Spoon all that wonderful marshmallow yumminess into a bag fitted with a decorating tip.
  • Once mini pies are removed from the oven, let them cool completely.
  • Pipe marshmallow meringue on the top of each pie and toast it with a kitchen torch.
  • Add a few graham cracker crumbs if you want, and enjoy!!!!


S'mores Pies!!!!My thoughts:  These are delicious. You can see from my pictures that I didn’t beat my meringue as long as I should have.  The are not the tall swirls of happiness I wanted them to be….  it was only my second time making meringue though, so I guess I won’t beat myself up too much.  My 1st time was perfect.  If you want to see how fluffy it SHOULD be, click here.  I LOVE this meringue.  When you read the instructions you might think it is too hard to make- but once you do it, you will realize that it isn’t hard at all.  Just a lot of time with a mixer in your hands.  I hope you get a chance to try this recipe out!  Enjoy! ~r
S'mores Pie!!!

We like our chocolate and marshmallow here at easybaked… here are other recipes that feature that yummy combo:

frozen s'more cupsMelted Smores cupRocky Road Cupcakes!!!!Baked Alaska Cupcakes!!


Triple Chocolate Truffle Cups

Posted on


Triple Chocolate Truffle Cups

Delicious dark chocolate cookie cups filled with melted milk chocolate and a white chocolate truffle.  Yum.

I love little mini desserts.  I used to work for a hospital and they would have a big, fancy Christmas party every year.  My favorite part was all the adorable little desserts at the end.  You can try like 8 of them for the calorie price of one big dessert!

This is an adorable (easy to make!) mini dessert.  Perfect for showers, receptions, tea parties and any occasion that calls for a little bit of “fancy” dessert.

The cookie cups use my favorite chocolate cut-out cookie recipe (pressed into a cup!), melted chocolate and a Lindt White Chocolate Truffle. Quick, easy, and delicious!

Triple Chocolate Truffle Cookie Cups!

Here’s the recipe: (printable version)

INGREDIENTS: (makes about 48 mini desserts)

  • 1 stick (1/2 cup) butter, softened
  • 3/4 cup of granulated sugar
  • 1 egg
  • 1/2 teaspoon vanilla extract
  • 1/3 cup of unsweetened cocoa powder
  • 1 1/2 cups flour
  • 1/4 teaspoon salt
  • 1/4 teaspoon baking powder
  • 1 bag of Wilton’s milk chocolate Candy Melts (if you want to melt higher end chocolate for this, feel free!)
  • Approximately 48 Lindt White Chocolate Truffles (Walmart has them in large boxes of 60, for a reasonable price)

DIRECTIONS:

  • Preheat oven to 350F degrees.
  • Make cookies by combining butter, sugar, egg, vanilla and cocoa powder and beating until completely combined.
  • Add other dry ingredients gradually, mixing with beaters until too heavy to beat. Use clean hands to knead dough into a soft ball.
  • Use a small cookie scoop (I used a scoop that holds 1/2 Tablespoon of batter) to portion out your dough into mini muffin tins that have been sprayed with non-stick spray.
  • Use a tart shaper or a wooden spoon to press the dough into a cup shape (really, the tart shaper works best for this and you will use it again- I use mine all the time!)

Making cookie cups

  • Bake at 350F degrees for 7 to 8 minutes and remove from oven.
  • Press centers in a second time with the tart shaper and allow them to cool for just a couple of minutes.
  • Use a small paring knife to pop each cup out and allow them to cool completely on the counter.
  • Melt candy melts in a microwave safe bowl, in the microwave, in 30 second increments, stirring in between until melted and smooth.  
  • Pour melted chocolate into a sturdy zip-top bag.  Zip it closed and clip a corner off.
  • Unwrap all of your Lindt truffles.
  • Carefully pipe warm chocolate into each cookie cup, filling each one about half way.
  • Gently press a truffle into the center of each chocolate-filled cup, allowing the warm chocolate to squeeze up around the edges (yum!)
  • Drizzle any left-over chocolate over the tops of the mini-desserts and allow them to cool and harden completely.
  • Enjoy!!!

Triple Chocolate Truffle Cookie Cups!!!My thoughts: Well, you can see for yourself what happens when you bite into this little dessert. Pure deliciousness!!!! Those truffles are so good.  Mine got a little melted before I cut one in half– but all that soft white chocolate….!!! They make this dessert a touch pricey- but they are SO worth the cost!  If you want to make a smaller batch just cut the cookie recipe in half.  I hope you get a chance to try these- I am filing this recipe away for the next time I need something little for favors or a mini dessert table.  These are perfect for both!  Enjoy!!!!  ~r

Triple Chocolate Truffle Cups

Other mini desserts you might enjoy:

Melted Smores cupDark Chocolate Ganache CupcakesKoolaid truffles!!Mini Pineapple Upside Down Cakes

Peanut Butter Fudge Cupcakes

Peanut Butter Fudge Cupcakes
These mini fudge cupcakes are topped with the creamiest peanut butter frosting ever!  If you like peanut butter and chocolate together you will LOVE this recipe!!

Ah peanut butter… I just crave it sometimes!  Add chocolate and you pretty much have achieved perfection in the dessert world (at least in my humble, not-allergic-to-peanuts, view).  These cupcakes are easy to make and they won’t last long!  Here’s how to make them: (printable recipe)

Peanut Butter Fudge Cupcakes!!!

INGREDIENTS: (makes about 40 mini cupcakes)

Cupcakes:

  • 1 1/2 cups of dark chocolate chips
  • 1 stick (4 oz.) salted butter
  • 2 T. cocoa powder
  • 4 egg yolks
  • 6 egg whites
  • pinch of salt
  • 1/2 c. sugar

Frosting:

  • 3 sticks (1 1/2 cups) butter (softened to room temperature)
  • 1 cup of creamy peanut butter
  • 3 cups powdered sugar
  • 1 Tablespoon vanilla 
  • One bag of mini Reese cups (optional for decoration)

DIRECTIONS:

  • Preheat oven to 350 degrees
  • In a microwave safe bowl, melt chocolate with butter in 30 second increments, stirring between until smooth and creamy.
  • Whisk cocoa powder into melted chocolate.
  • Add egg YOLKS and whisk until smooth.  Set aside.
  • Add a pinch of salt to the egg whites and whisk until foamy.
  • Add sugar gradually to egg whites while beating on high until medium peaks form.
  • Add 1/3 of egg whites to chocolate and mix well- until completely combined and smooth.
  • Add remainder of egg whites and fold in gently until completely incorporated.
  • Spoon batter into mini-cupcake liners in tins (fill about 3/4 full) and bake at 350 degrees for 10-12 minutes.
  • Remove from oven and cool completely.
  • To make frosting, place butter, vanilla, and peanut butter into a large bowl and mix on high until smooth (about a minute)
  • Add powdered sugar and beat on low until combined and then on high until light and fluffy.
  • Place frosting in a zip-top bag fitted with a decorating tip and pipe on top of each cooled cupcake.
  • Top each cupcake with a mini Reese Cup and a sprinkle of cocoa powder (as desired)
  • Enjoy!

Peanut Butter Fudge Cupcakes!!
My thoughts:  Yum….!  Yep, that pretty much sums up my thoughts…mmmmm….!  I hope you enjoy these as much as I am right now!!!

Other peanut butter-y recipes you will love:

Peanut Butter Cup Layer CakePeanut butter cup cheesecakePeanut butter Acorn Cookies!Peanut Butter Caramel Sauce

Sweet Lime Tartlets

Posted on


These tiny squares of graham crust filled with tart lime pie and whipped cream are a refreshing and fun party treat!

Yes, I finally got the Chicago Metallic Lift & Serve Squares Pan and I love it!  This recipe can be made as a plain lime pie in a pre-made graham crust (and it is really, really good)- but its just so CUTE made in these little squares– again, kudos to the creator of this pan- I love how the bottoms pop out and I’ve got so many fun ideas for this pan!

**Note: this recipe makes 24 squares.  Since the pan only makes 12 at a time you will need to use it twice.  I wanted to halve the recipe for you, but 1/2 a can of condensed milk AND 1/2 an egg???  Just easier to use the pan twice and have 24 pieces of yumminess!

INGREDIENTS: (double for a pie in a pre-made graham crust and eliminate crust ingredients)

  • 1 can of sweetened condensed milk
  • 1/2 c. lime juice
  • 1 egg
  • 9 full sheets of graham crackers (one sleeve or about 1 and 1/2 cups)
  • 1/4 c. sugar
  • 1/4 c. melted butter

DIRECTIONS:

  • Preheat oven to 325 degrees.
  • Crush graham crackers into fine crumbs and mix well with sugar and melted butter.
  • Place metal bottoms into each square opening in the pan and lightly spray with non-stick spray.
  • Scoop about 1 to 2 T of crumbs in each square well of the pan.  (You will have half left for your next batch).  Press into bottom and sides of each square using your fingers or a Mini tart shaper.
  • Mix together condensed milk, egg  and lime juice.  Spoon about 1 T of mixture into each crust (you should have half left).

  • Bake at 325 degrees for 15 minutes.  
  • Remove from oven, allow to cool, carefully press up on bottom- popping square dessert out of pan.  Remove metal bottom from crust. 
  • Repeat to make 24 total squares.
  • Chill several hours.  Top with whipped cream, graham crumbs, raspberries or other fruit— be creative!
  • Enjoy!!!

My thoughts:  This lime filling is simply delicious- the perfect blend of tart and sweet.  If you don’t mind the time involved, these squares are really cute– but if you just want a quick and easy dessert, buy a graham crust, double the filling recipe (2 cans of condensed milk, 2 eggs and 1 cup of lime juice).  Bake for 20 minutes instead of 15 and there you have it- yummy lime pie.  However you choose to make it, Enjoy!


%d bloggers like this: