RSS Feed

Tag Archives: easy dessert

Boston Cream Pie Cupcakes

Posted on

Boston Cream Pie Cupcakes3

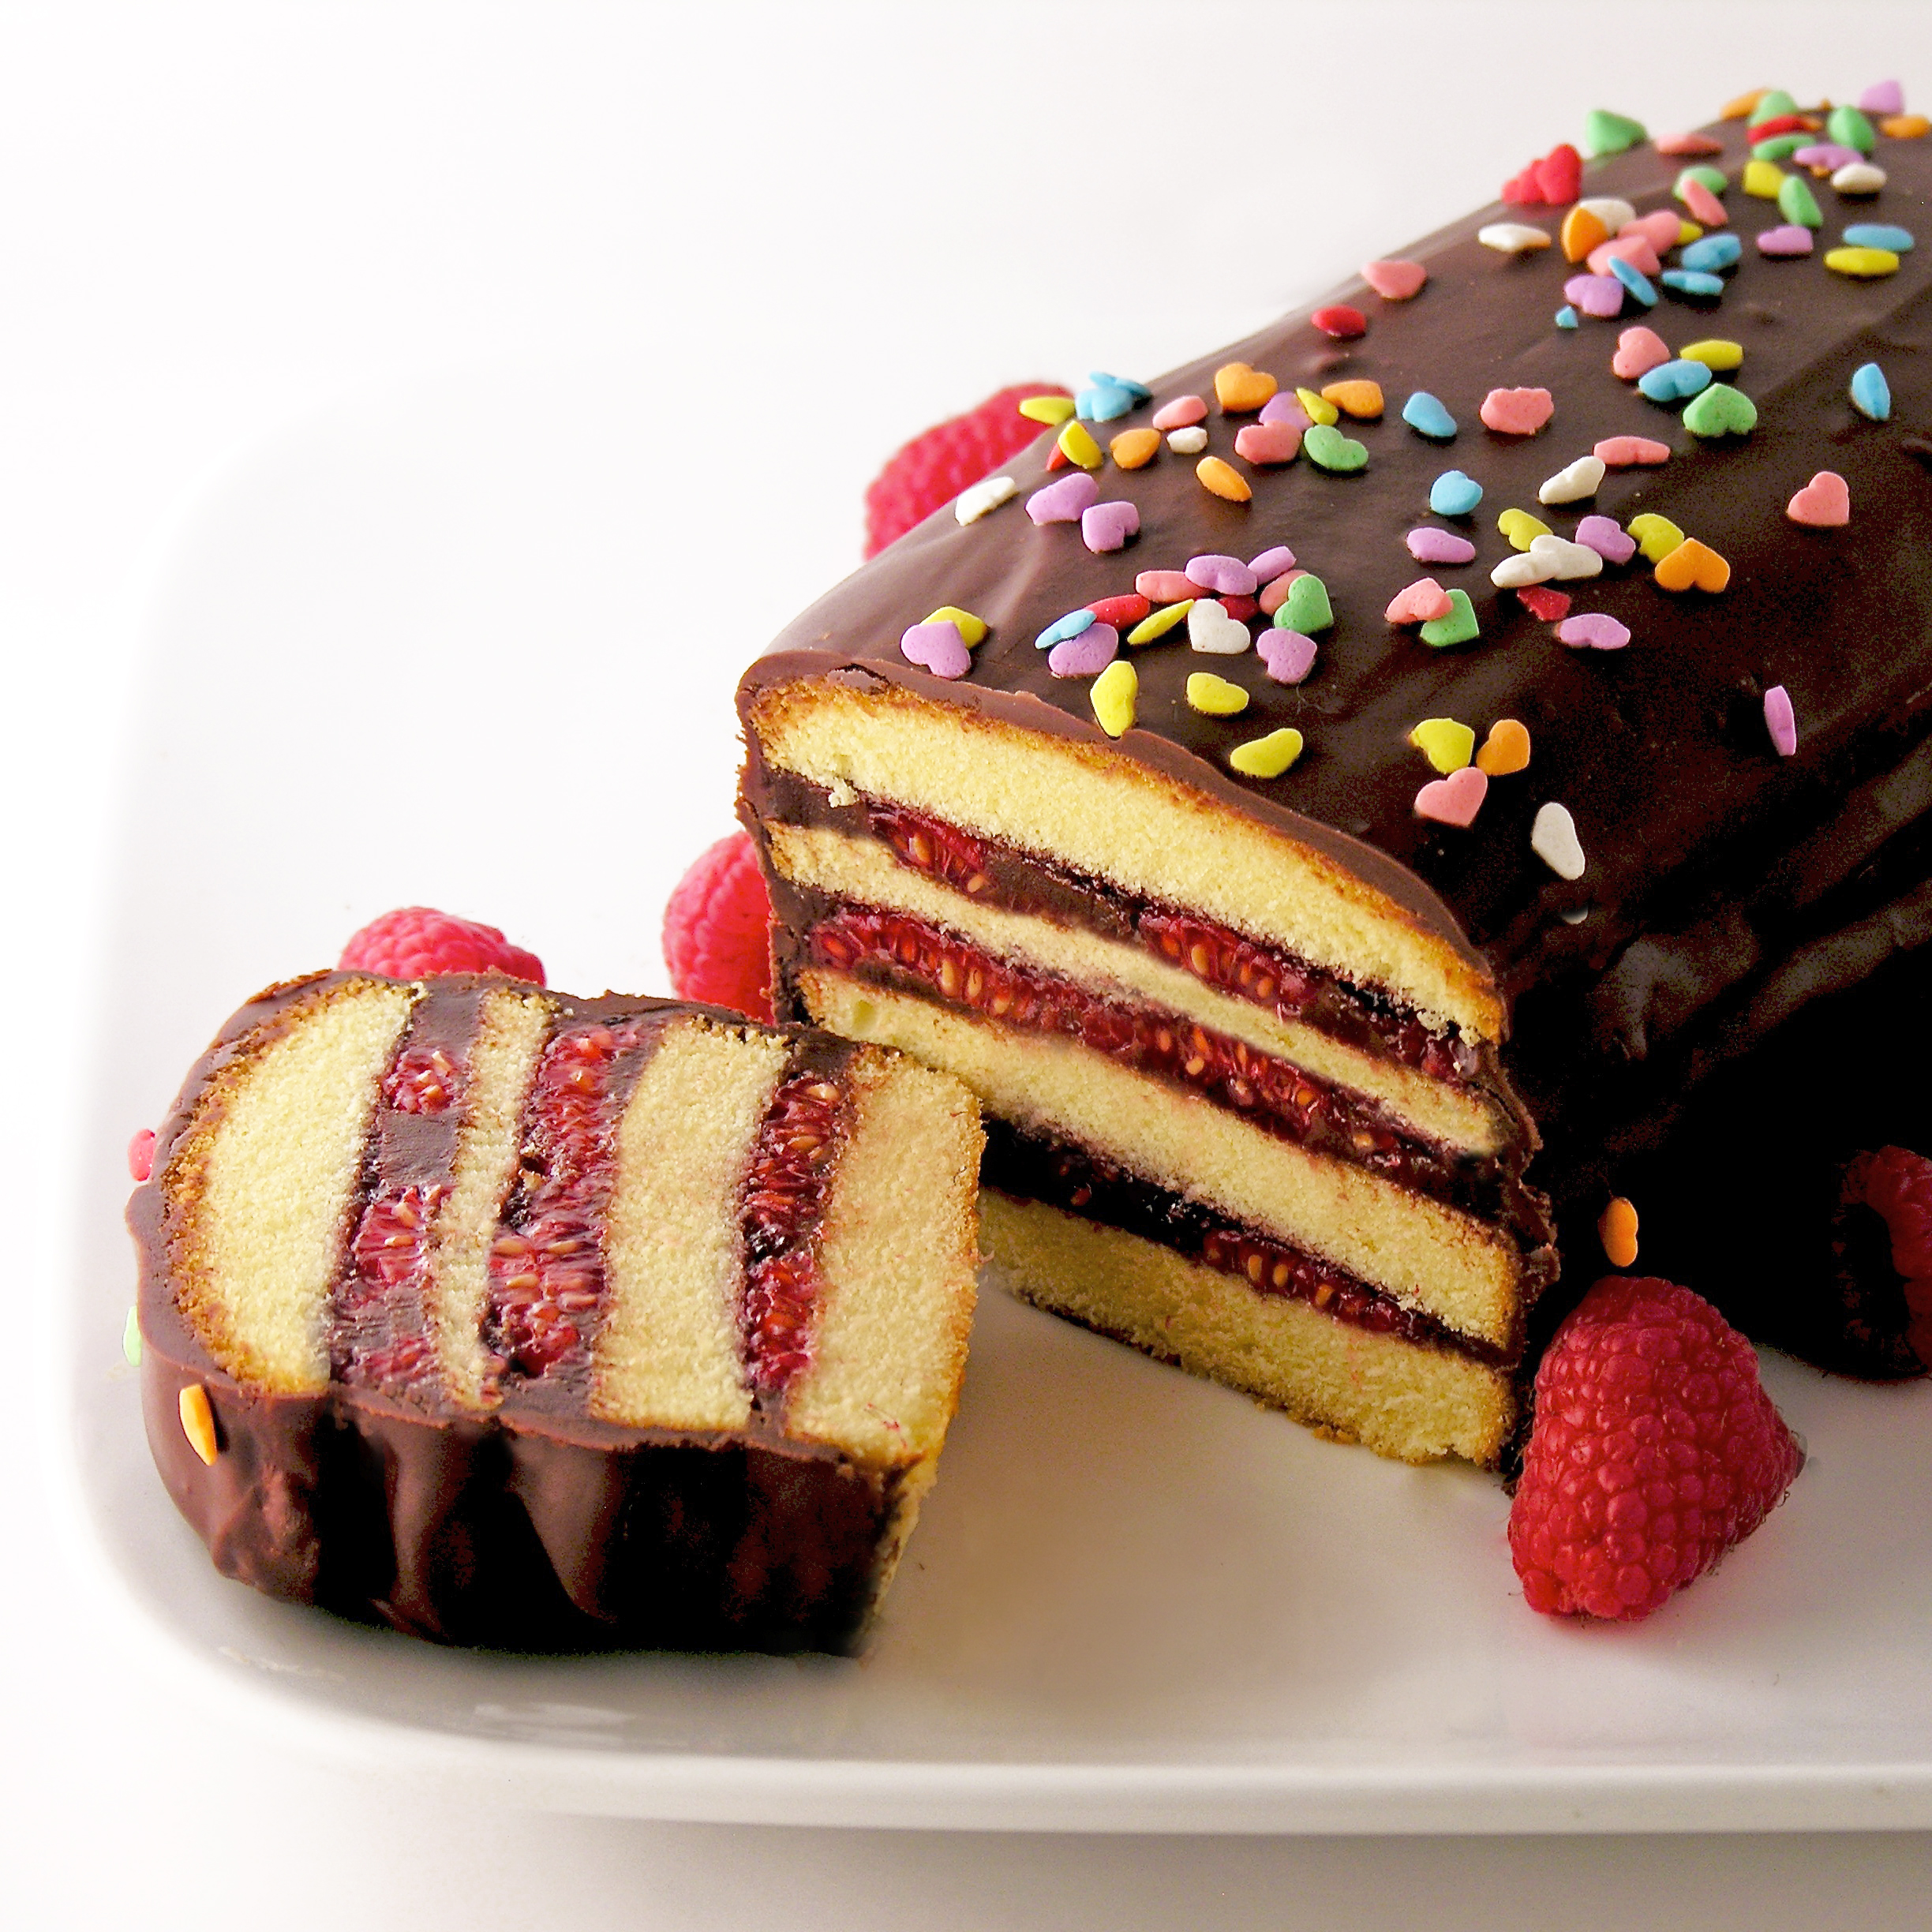
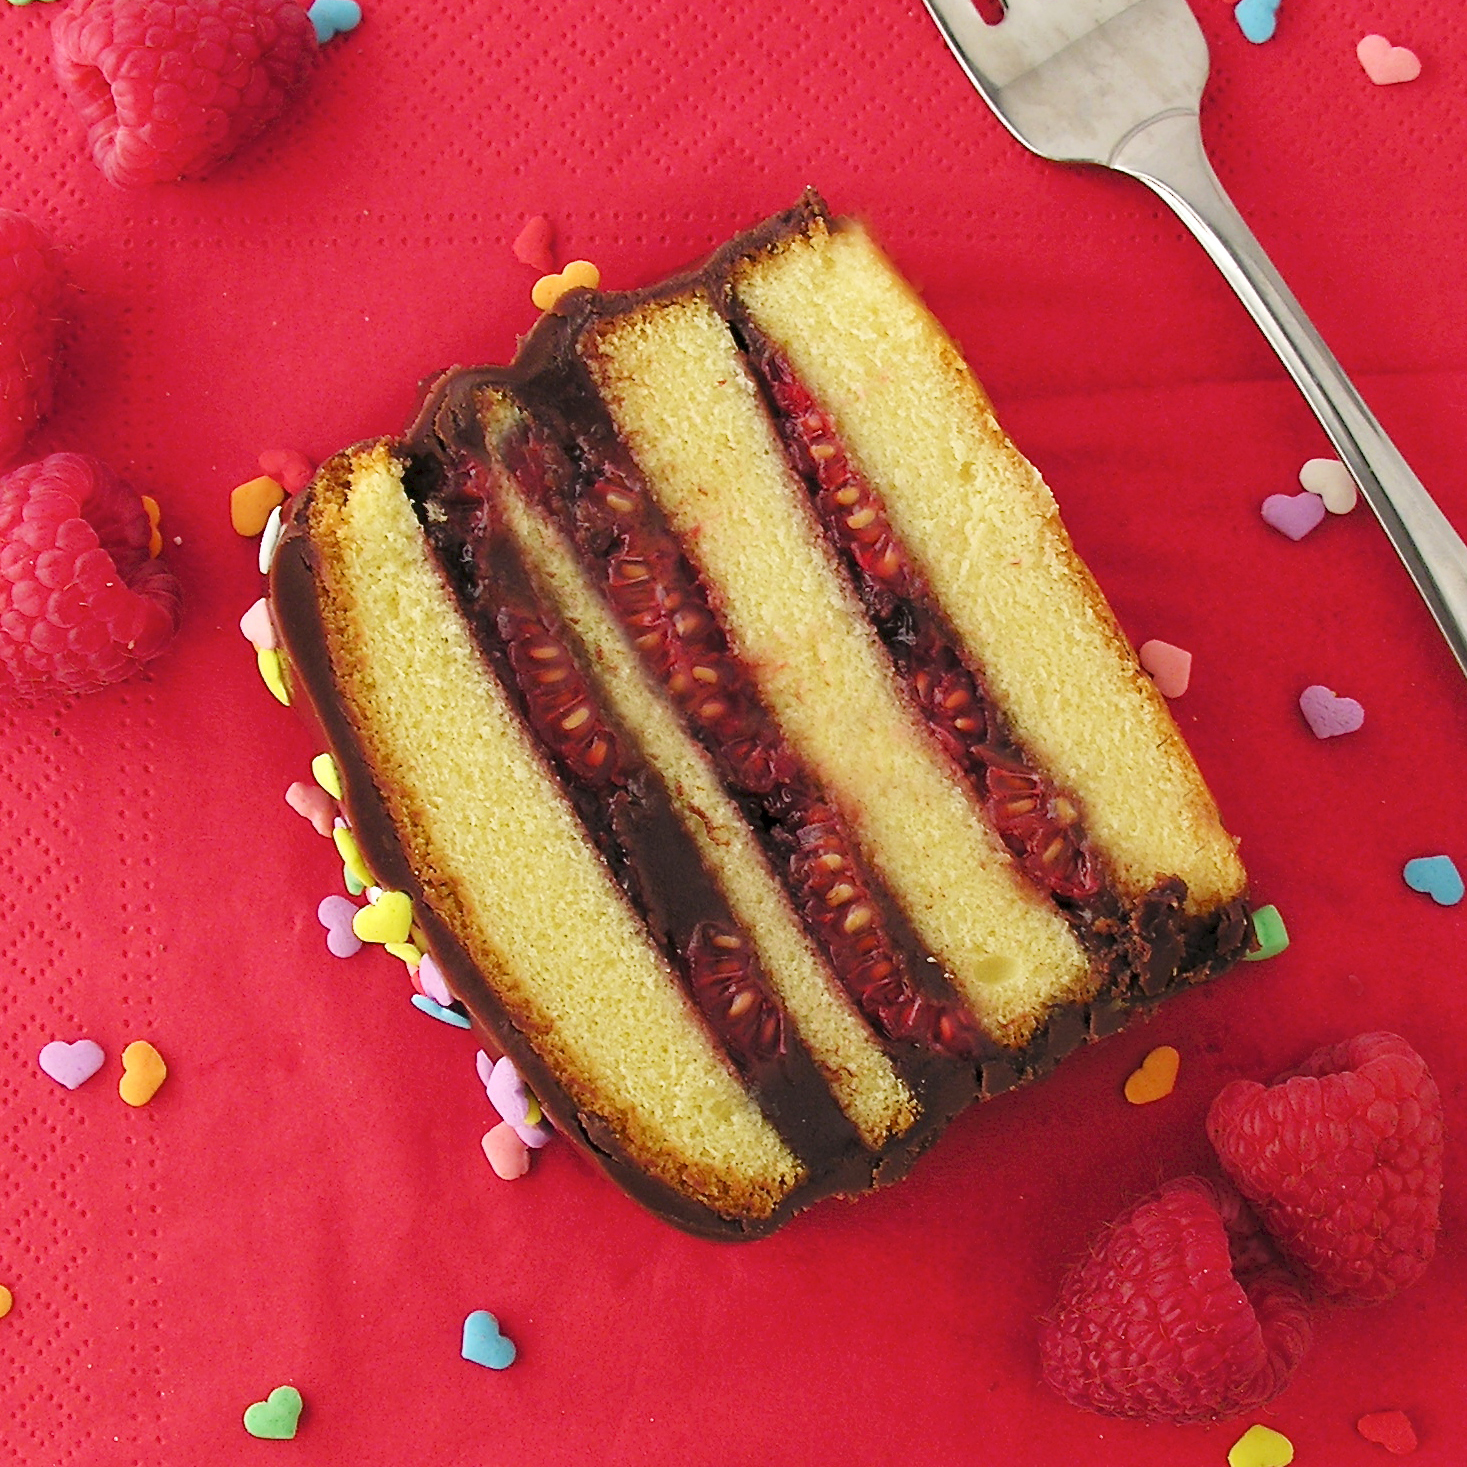
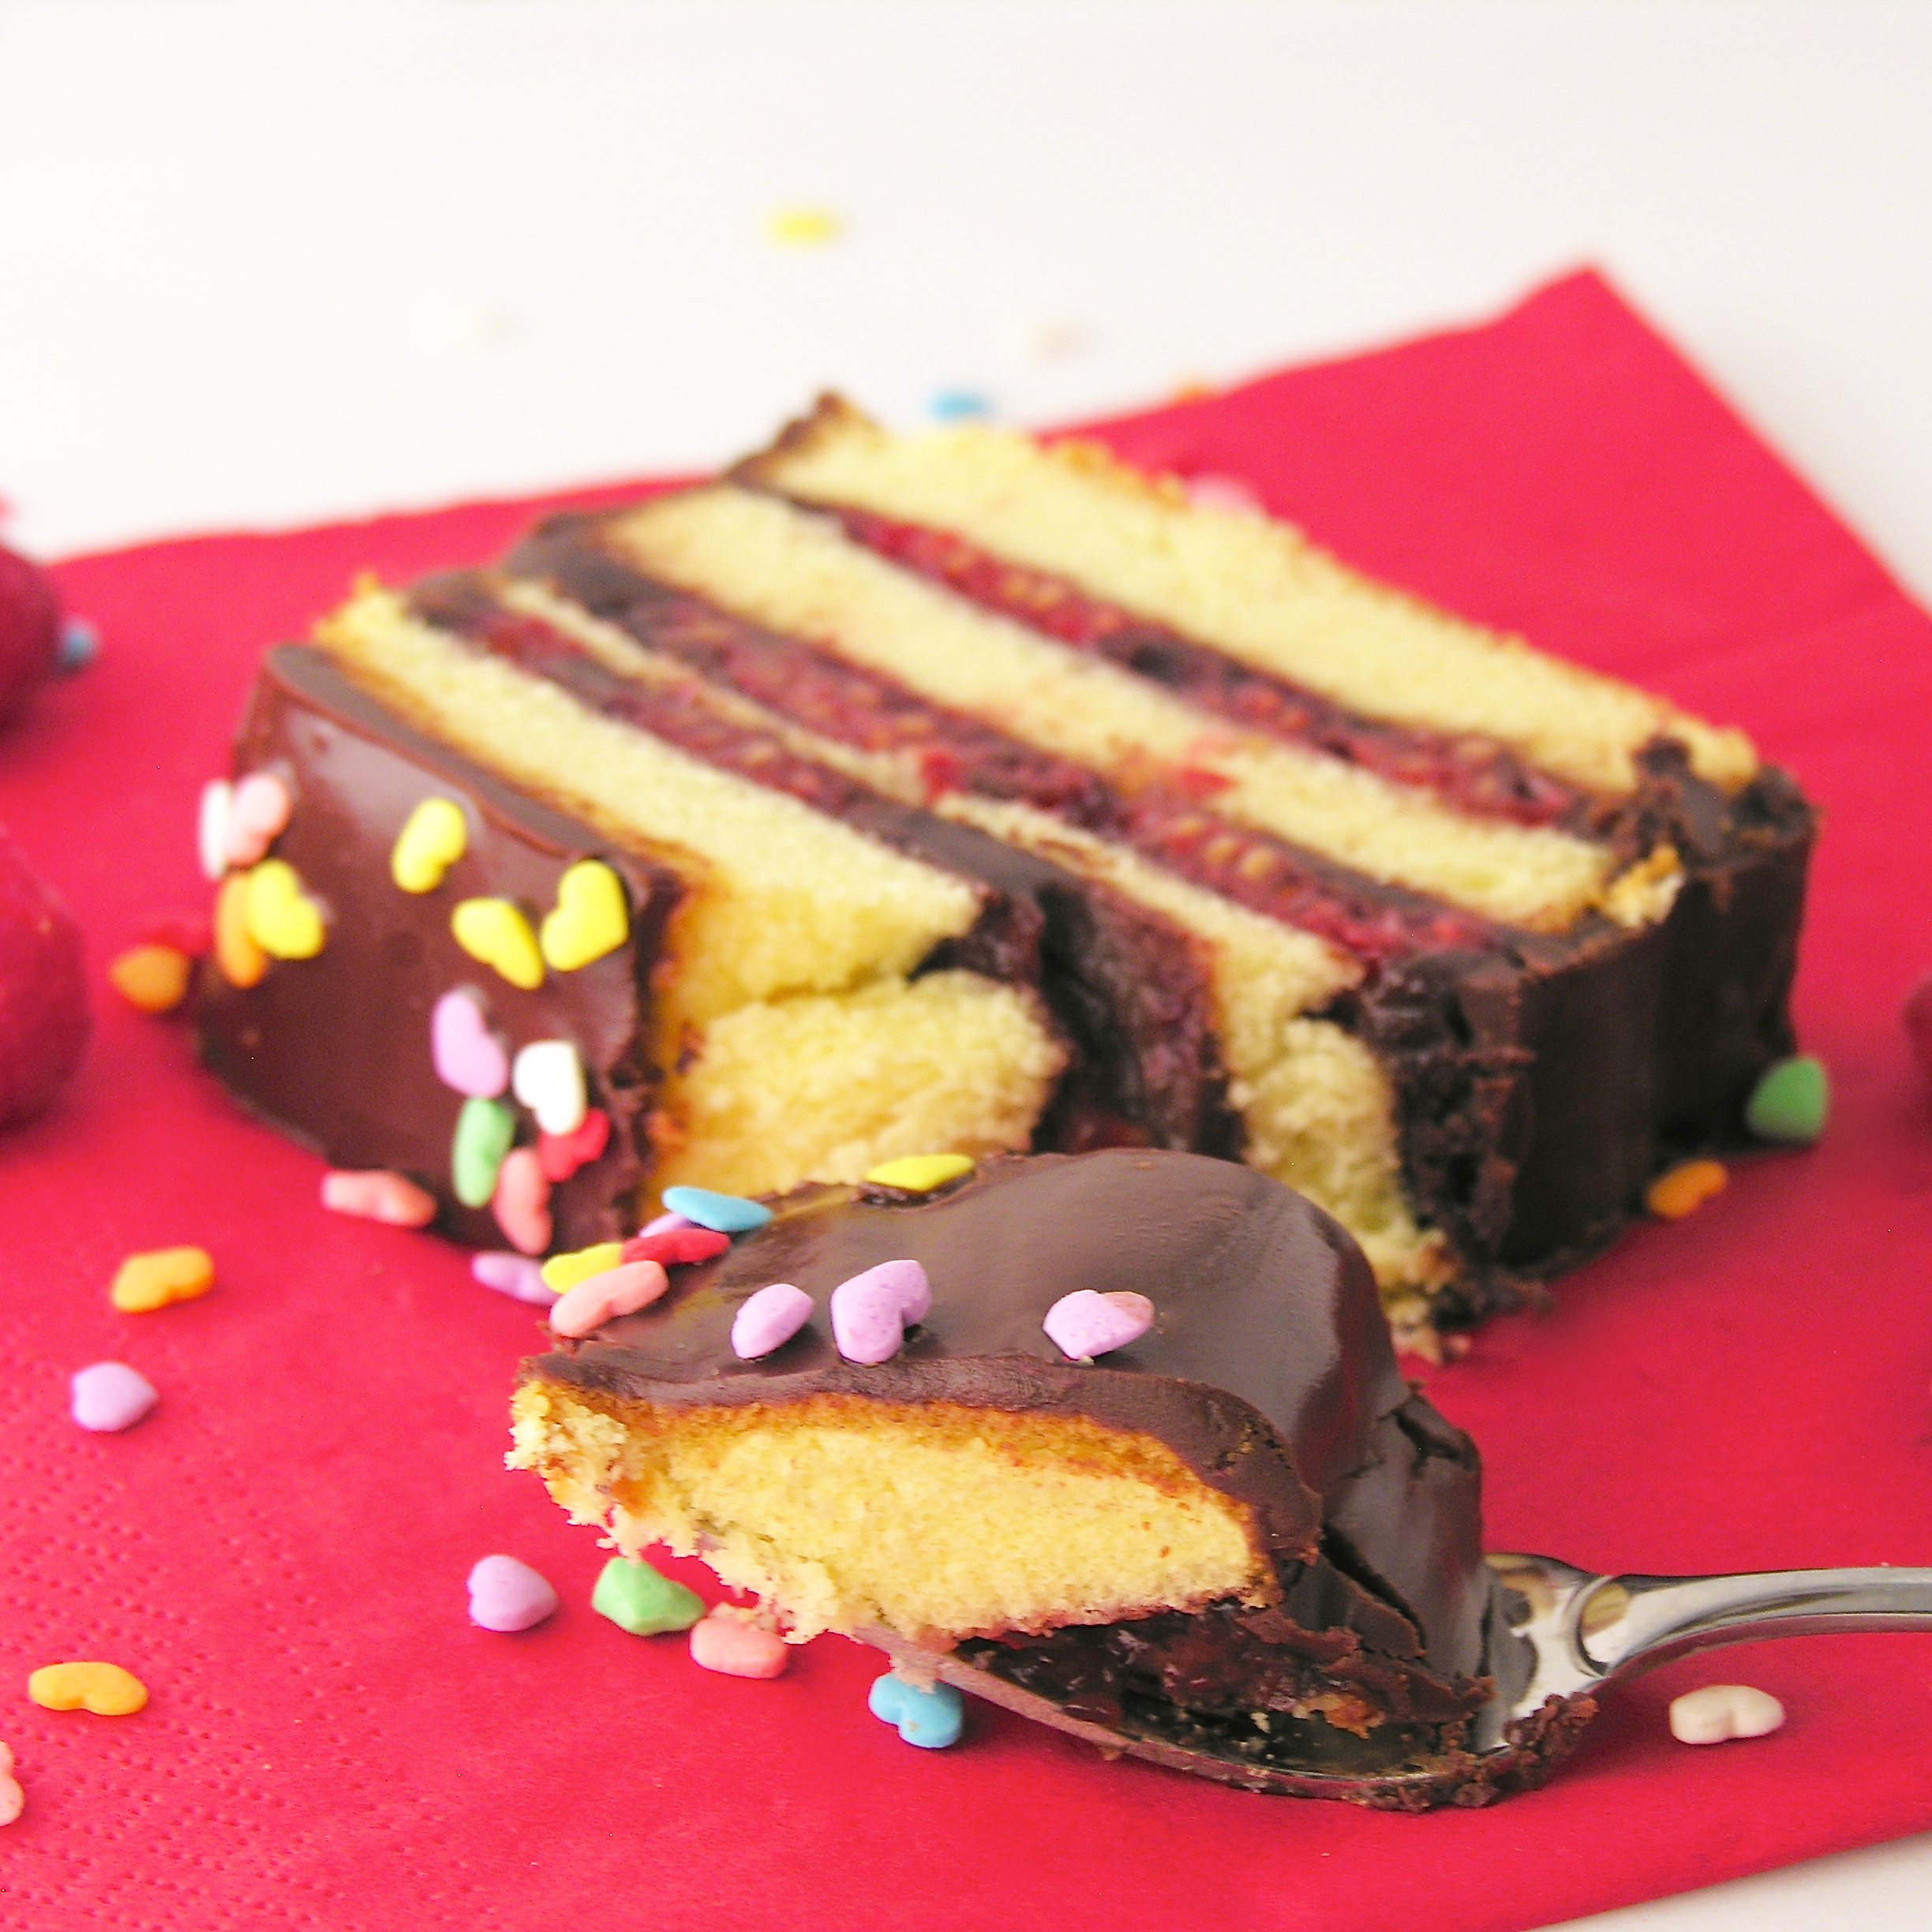
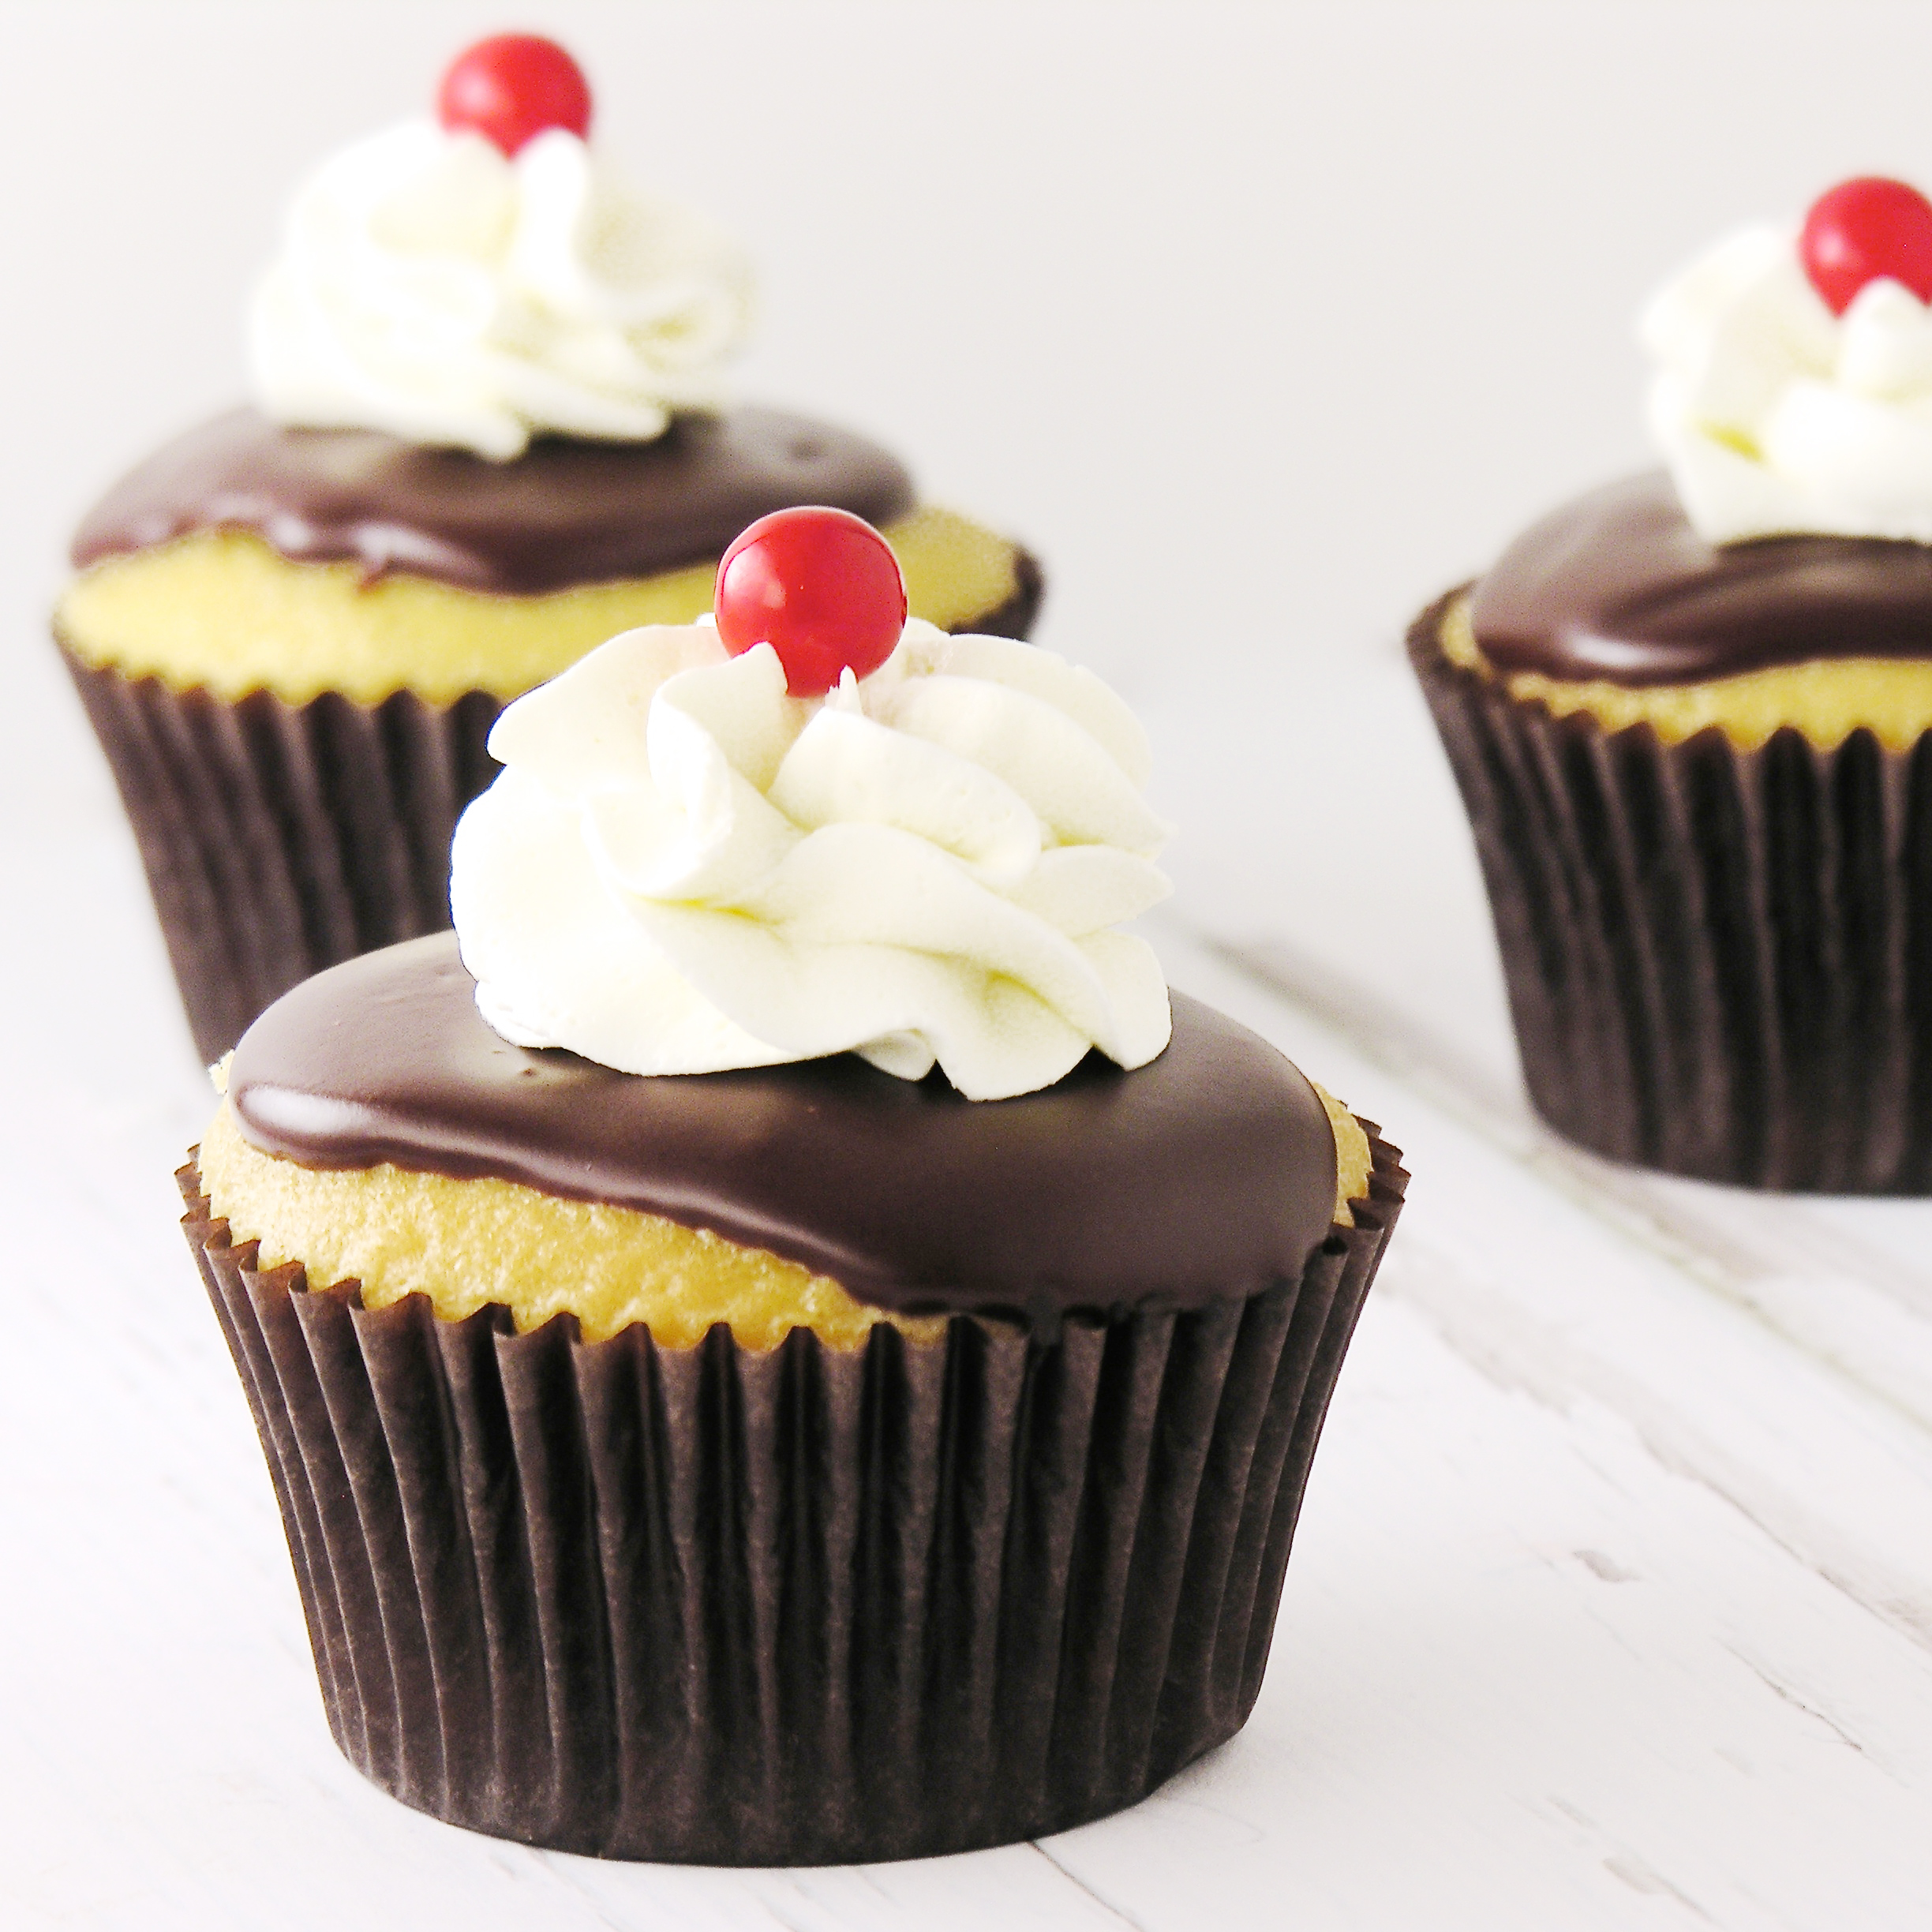
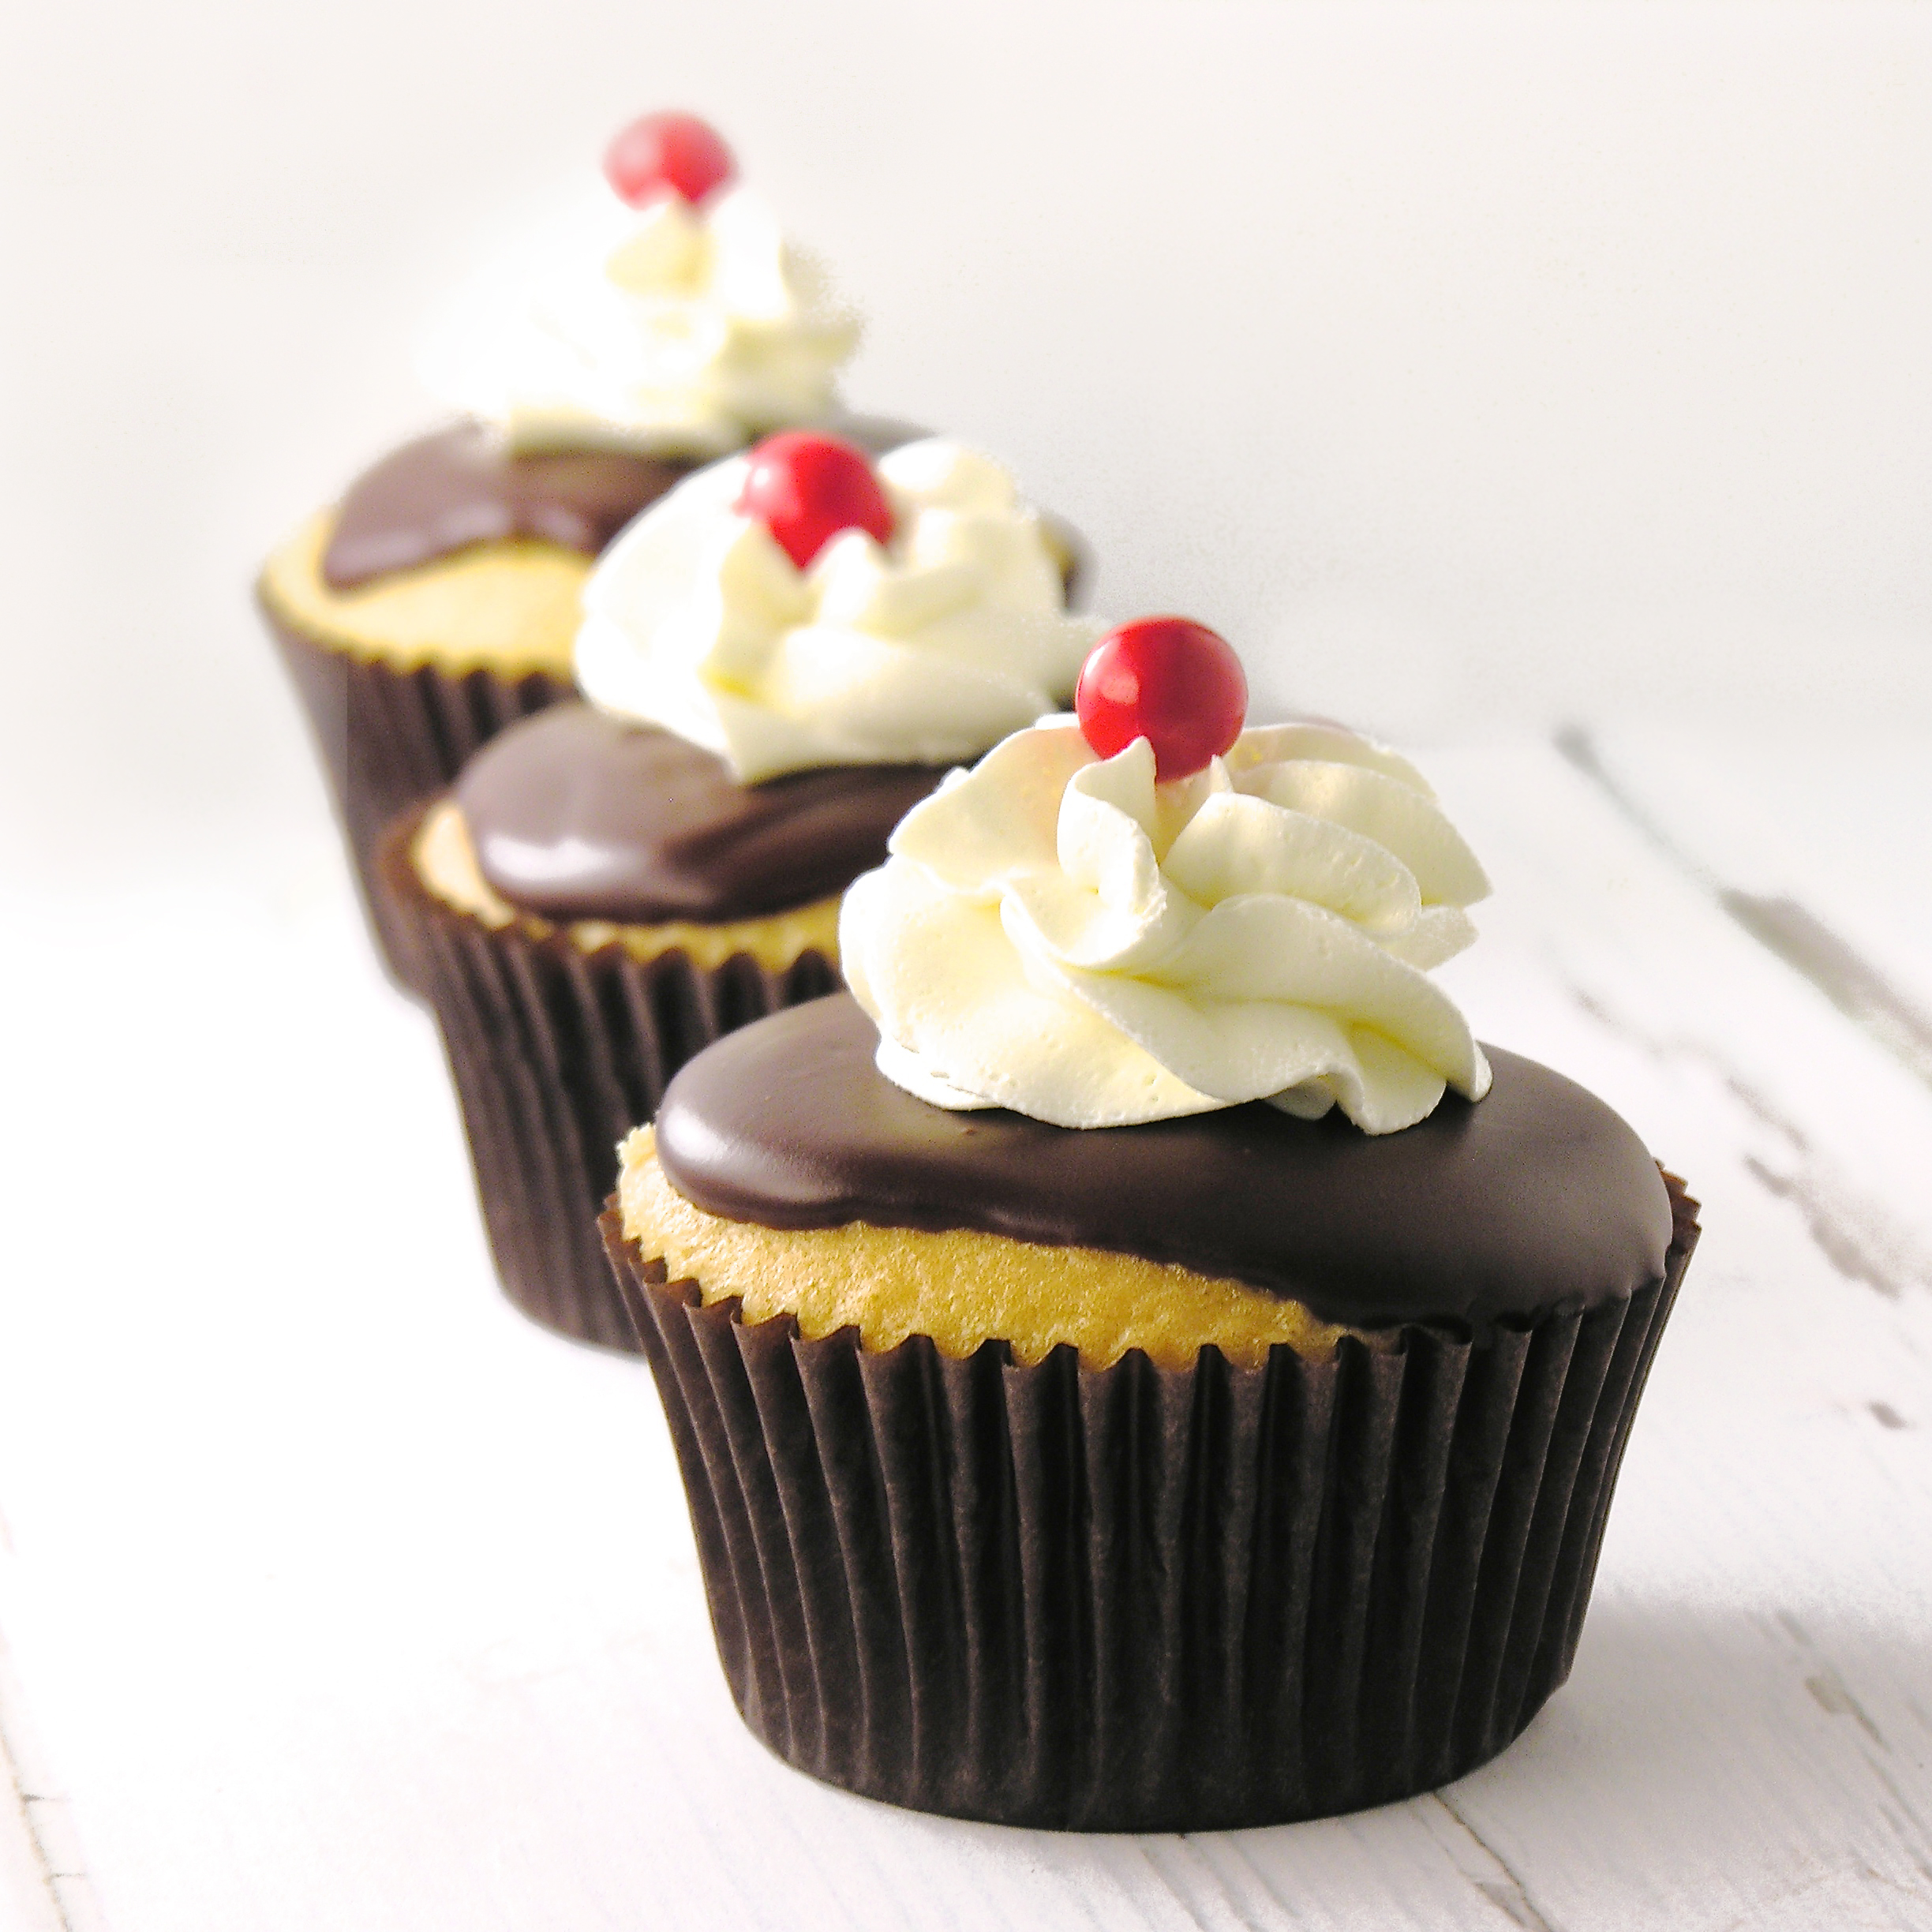
Filled with cream and topped with rich chocolate, these cupcakes capture all the delicious flavor of a Boston Cream Pie in a single-serving form! Easy and soooo yummy!

I’ve never understood why they call it a pie, when it is SO obviously a cake, but Boston Cream Pie is one of my favorite desserts. There’s something about that filling that makes it so moist and flavorful!

These little creations are as easy as can be because they use a cake mix and instant pudding. Easy and delicious!!

Boston Cream Pie Cupcakes2

Here’s how we made them: (printable recipe)
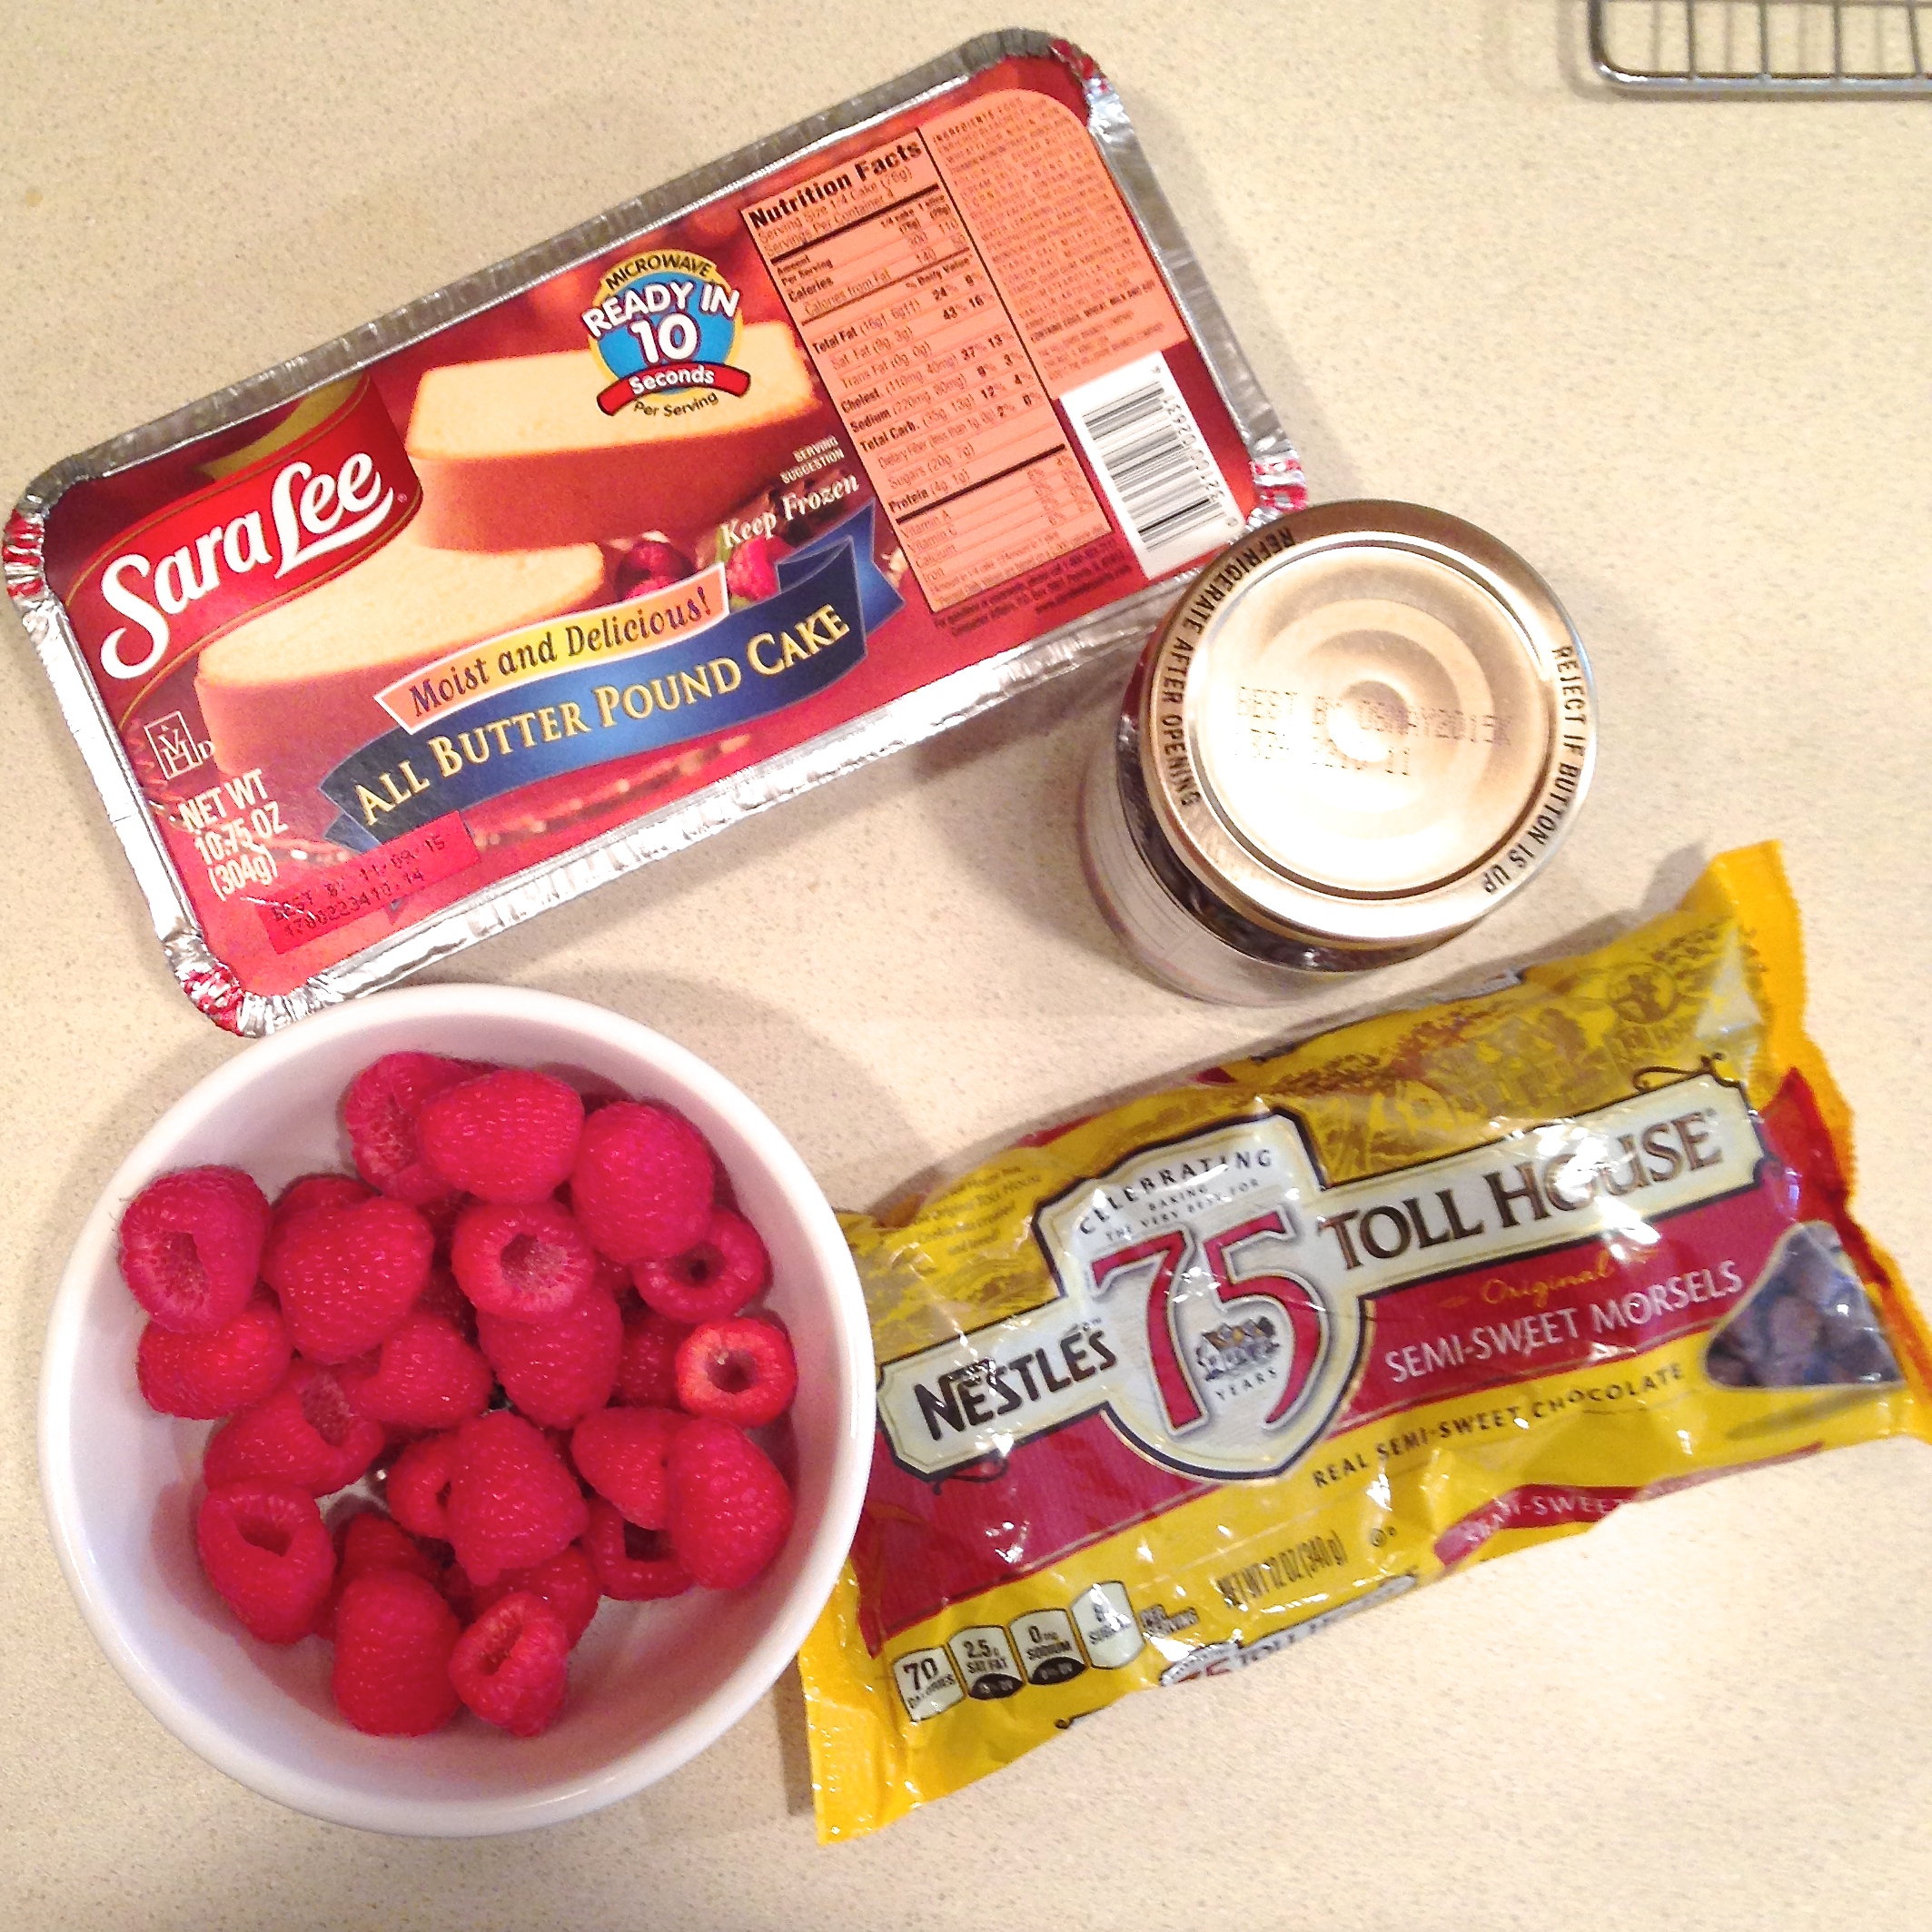
INGREDIENTS:

  • One boxed yellow cake mix (plus water, oil and eggs to make according to package)
  • One packet of Jell-O White Chocolate Instant Pudding (plus milk to make according to package)
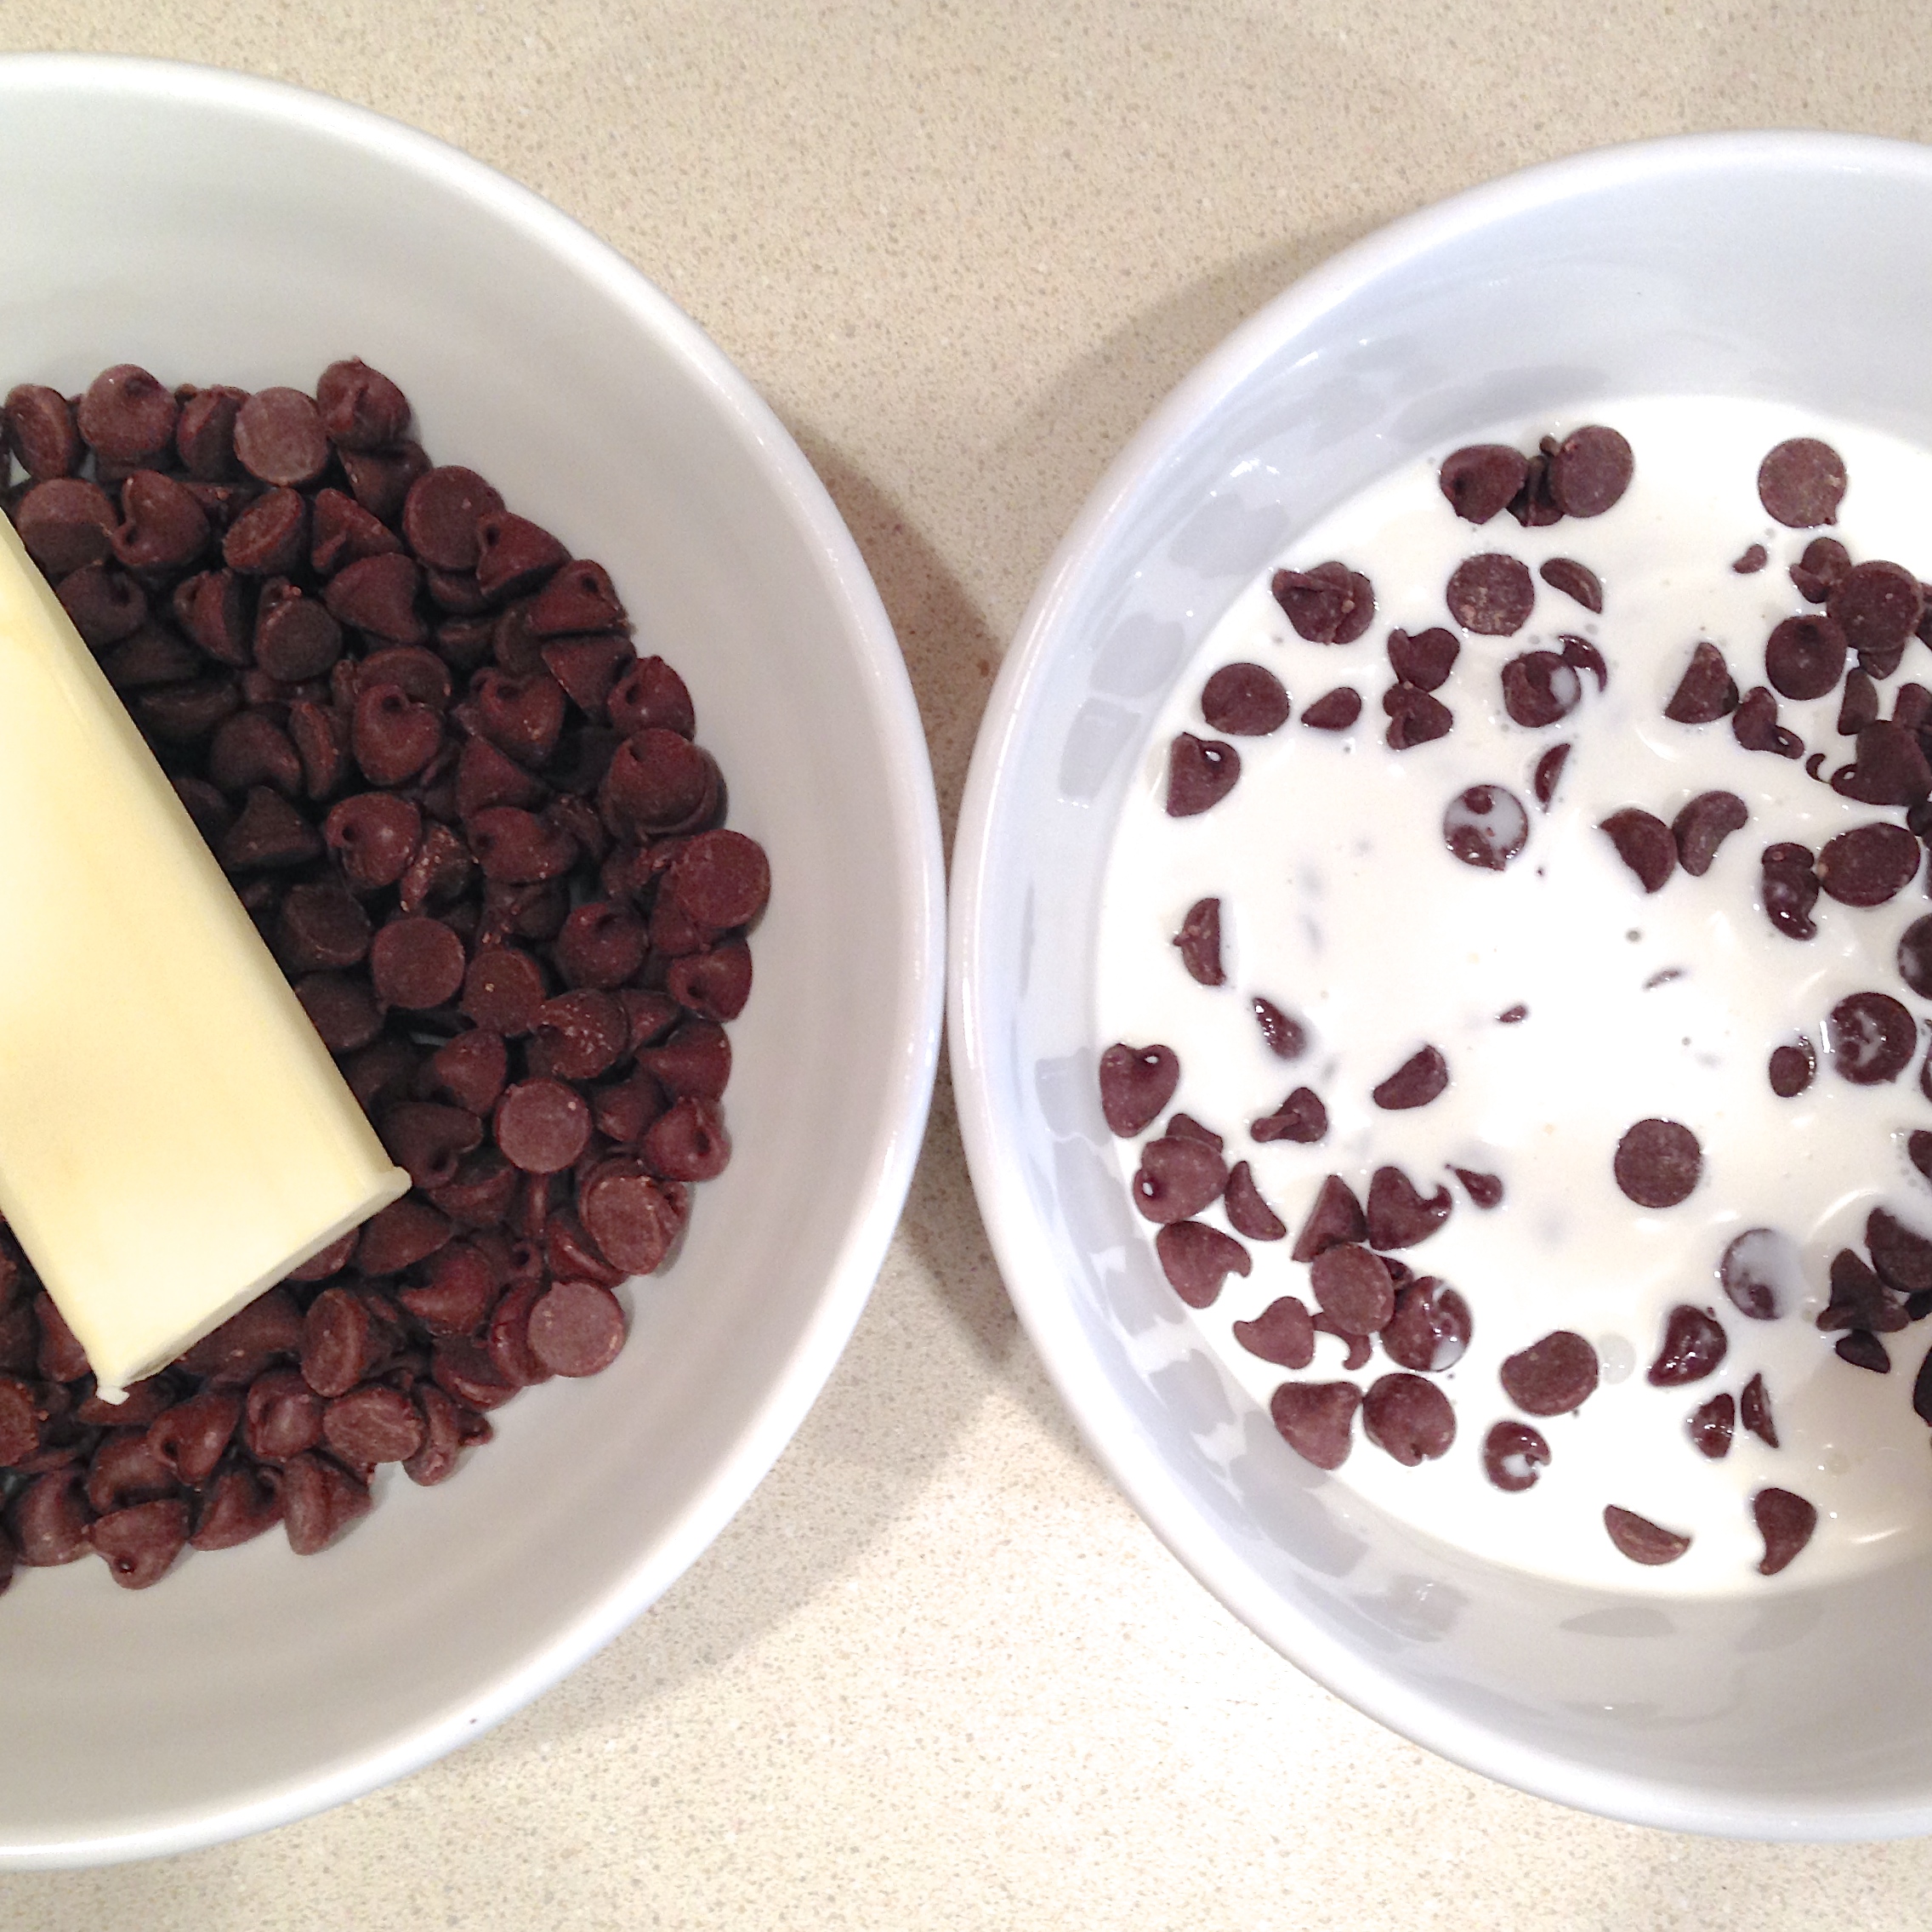
  • One cup of semi-sweet chocolate chips
  • 6 Tablespoons of butter
  • Cool Whip, or Butter Cream frosting (1 stick of (softened)butter with 3/4 cups of powdered sugar and 1 teaspoon of vanilla)
  • 24 red Sixlets candies (as desired for decoration)

DIRECTIONS:

  • Make cake mix according to package and divide into 24 cupcake liners placed in tins. Bake according to package, and cool.
  • Make pudding according to package and spoon into a large zip-top bag. Refrigerate until use.
  • Make chocolate sauce by melting chocolate chips and butter together in the microwave in 30 second increments, stirring between, until melted and smooth.
  • If you are making butter cream for the top (this gives you a swirl on top that is more firm for transporting than Cool Whip): Beat together the butter cream ingredients until they are light and fluffy.
  • Place either Cool Whip or butter cream in a zip-top bag fitted with a decorative tip.
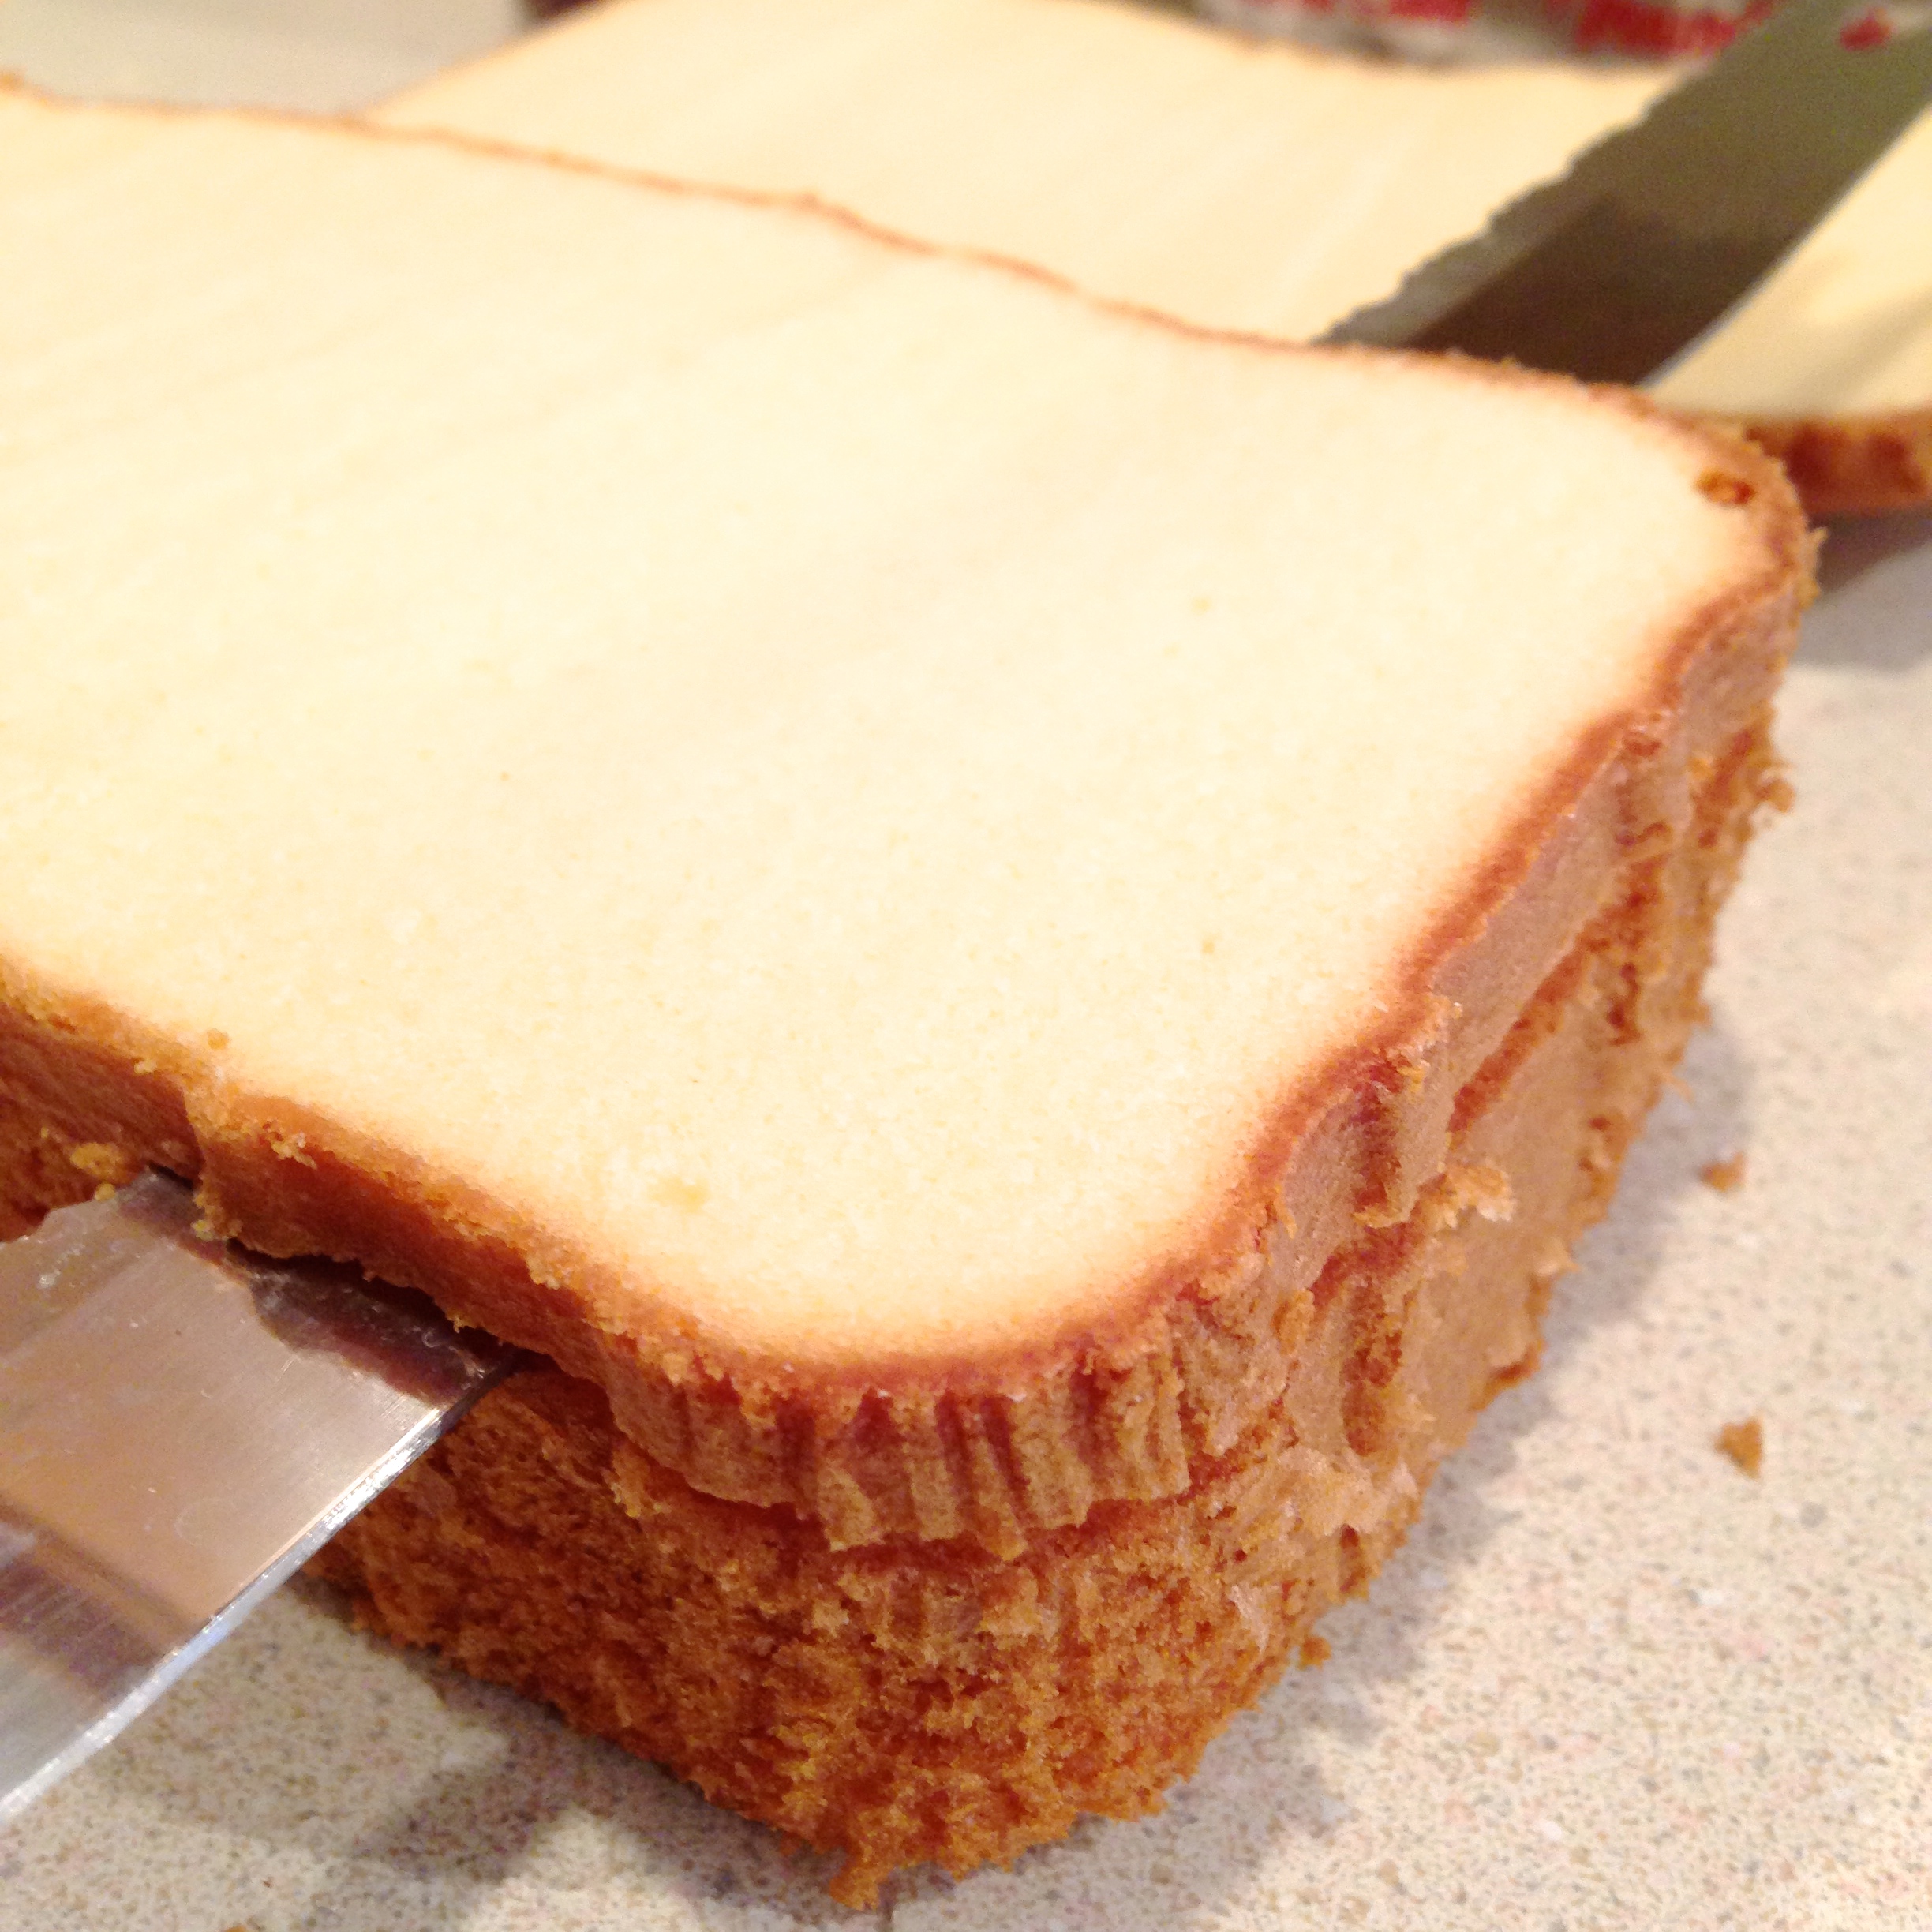
  • To assemble: use a cupcake corer (or a knife) to remove a core out of the center of each cooled cupcake.
  • Cut the tip off the bag containing the pudding and pipe a dollop of pudding into the center of each cupcake.

Pecan Pie Cupcake1

  • Trim the “core” a little bit (makes room for the pudding) and place the top of the core back on, covering the pudding with cake.
  • Carefully spoon the warm chocolate over the top of each cupcake, gently pushing it toward the sides, but not over the sides.
  • Allow chocolate to cool. It will firm up.
  • Once it is completely cool, pipe Cool Whip or butter cream in a little swirl on top.
  • Decorate using sixlets (or any other sprinkles or decorations you like!)
  • Enjoy!

Boston Cream Pie Cupcakes1

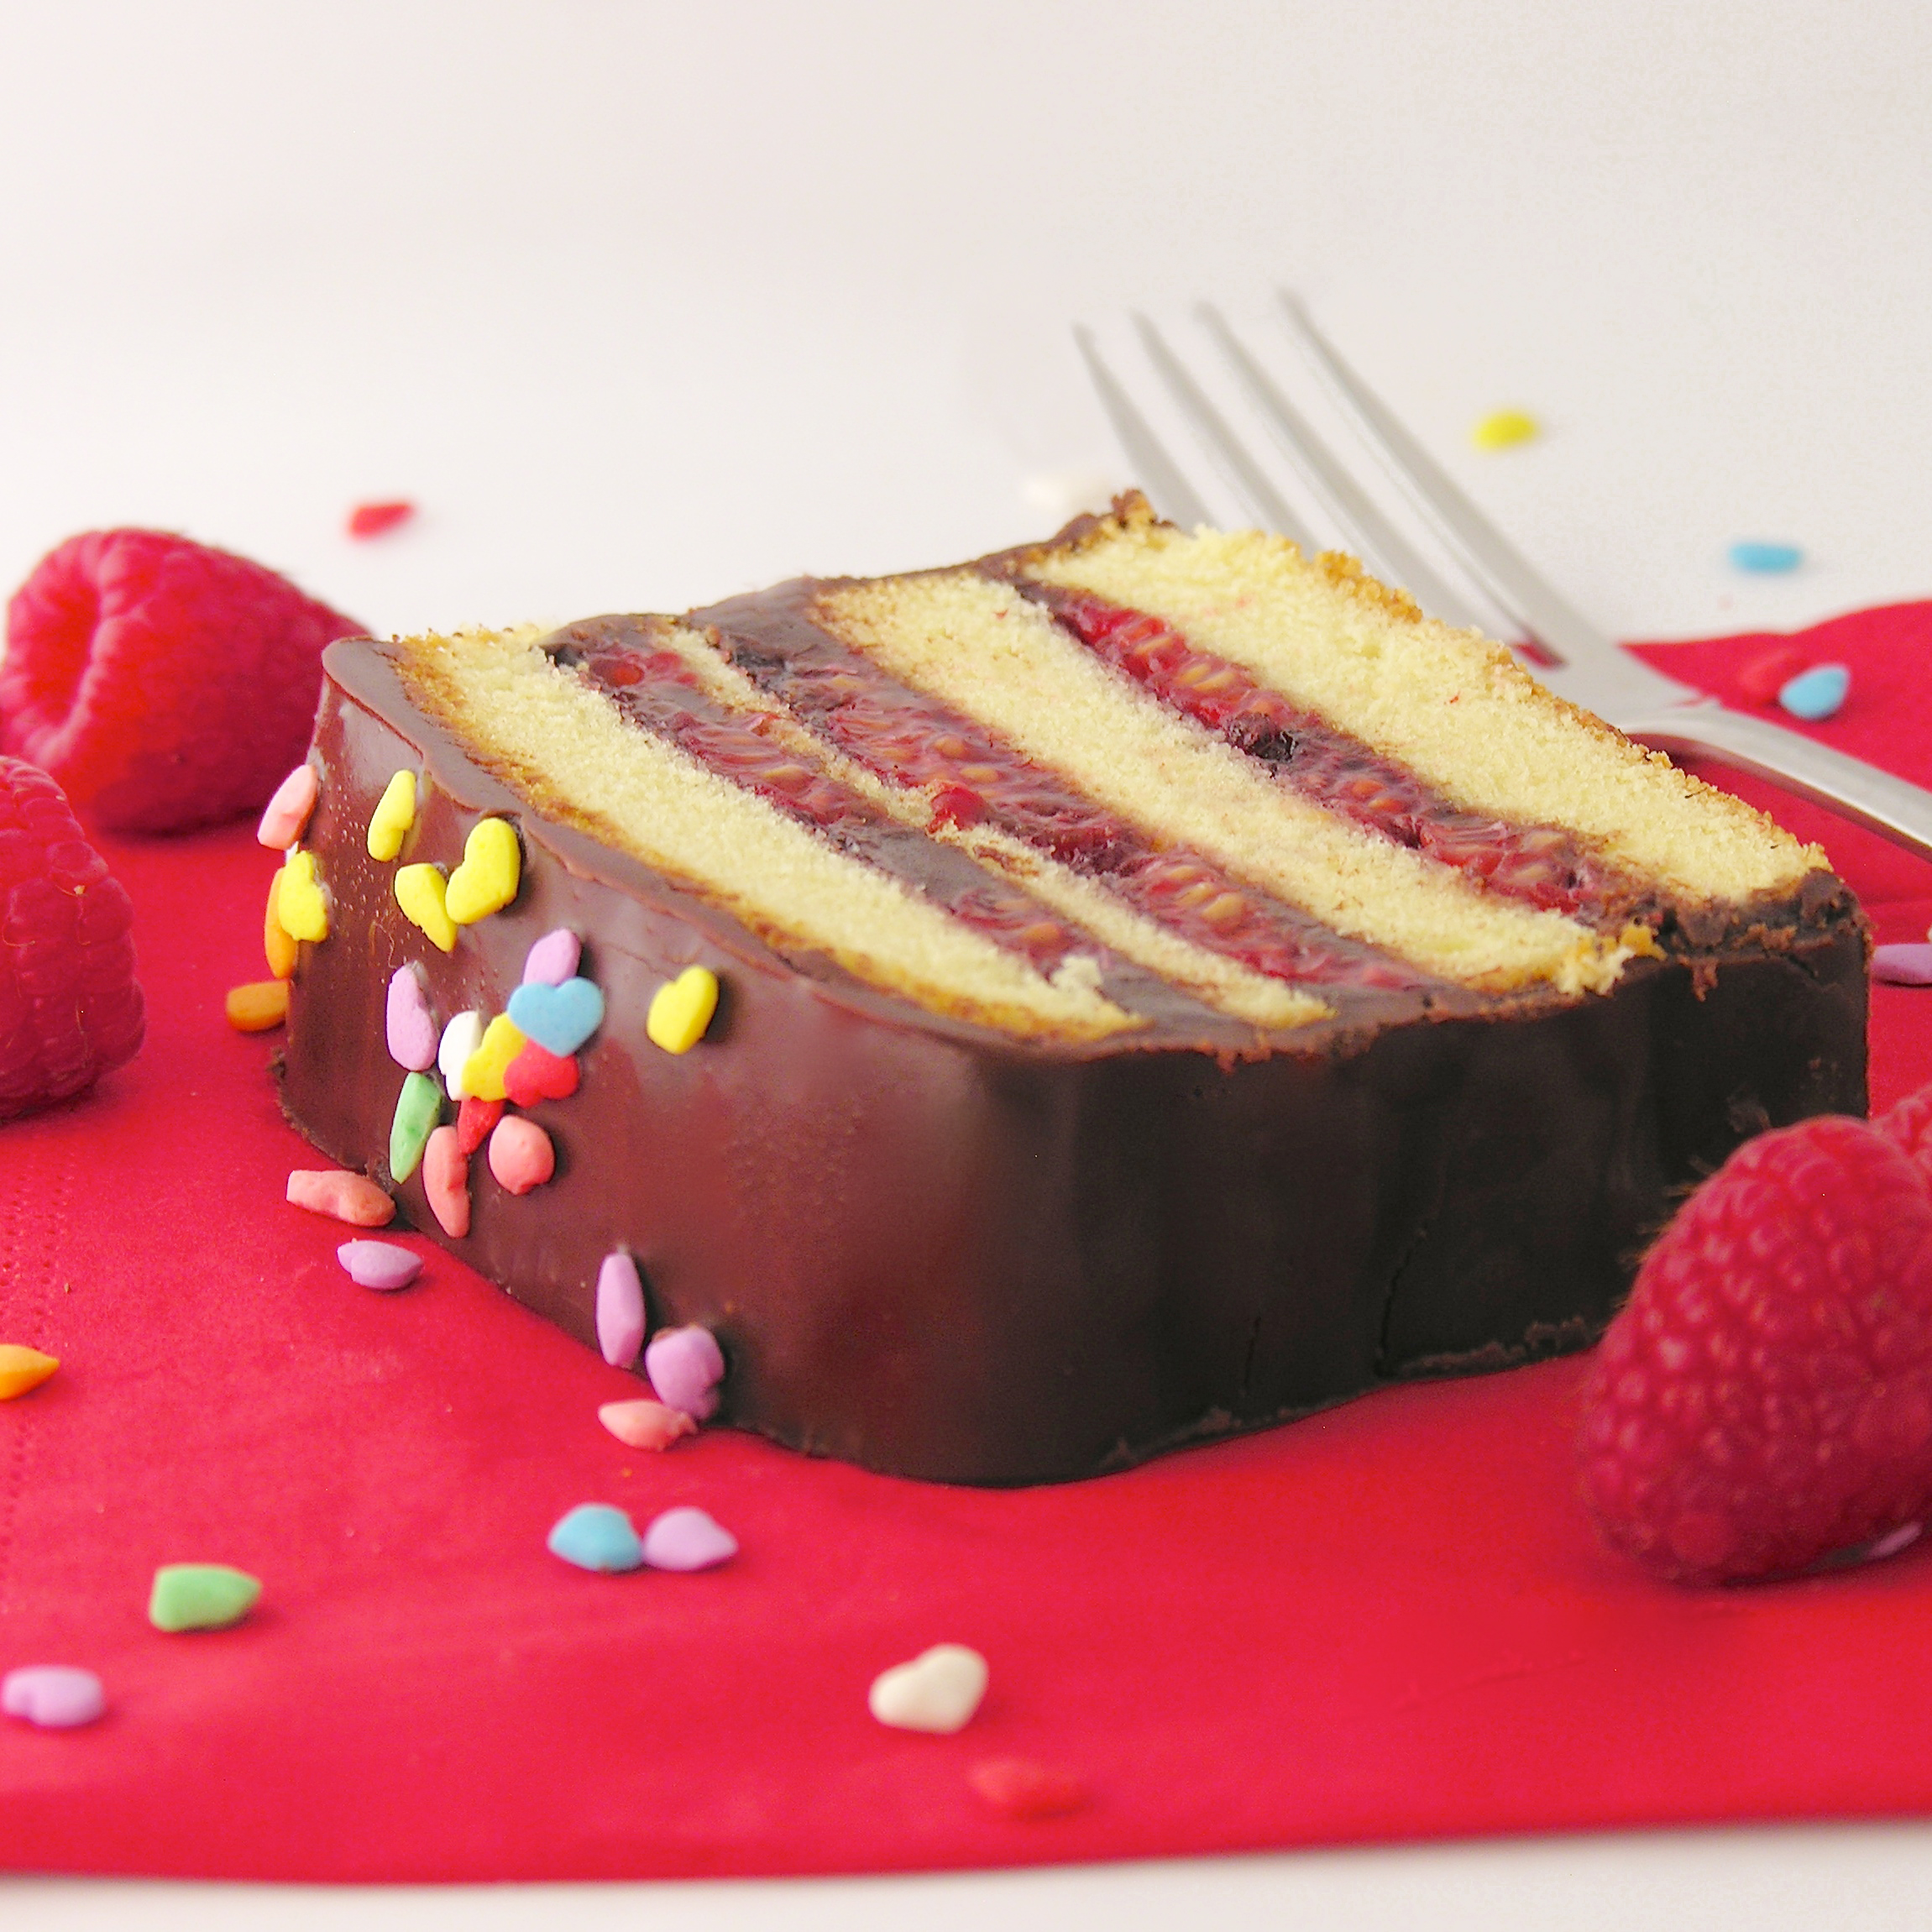
My thoughts: These really are delicious… I try to only “taste” my treats and give the rest away, but you better believe I finished this little cupcake…with a cup of coffee. Yum!  I hope you get a chance to try them too! ~r


Boston Cream Pie Cupcakes

Here are some other fun uses for pudding! Click on a photo to see the recipe.

Heath Bar Ice Cream Dessert3Toxic Slime-filled Cupcakes!Mini Filled Boston Cream Pies!frozen s'more cups

Advertisement

Raspberry Fudge Layer Cake

Raspberry Fudge Layer Cake1Layers of pound cake, chocolate and raspberry are sure you make your Valentine smile this year!

You know those desserts that look incredibly difficult and are super easy? This is one of those. The cake is simply a frozen pound cake sliced and stacked with chocolate and raspberries. Makes you smile, doesn’t it?

Raspberry Fudge Layer CakeHere’s how we made it: (printable recipe)

INGREDIENTS:

  • One frozen pound cake
  • 1 bag of semi-sweet chocolate chips
  • 1 cup of red raspberry jam
  • 1 cup of sliced red raspberries
  • 1 stick of butter
  • 1/2 cup of whipping cream

IMG_0147DIRECTIONS:

  • Remove pound cake from packaging and use a large serrated knife to slice it into 3 or 4 layers
  • Divide the bag of chocolate chips into 2 separate microwave-safe bowls.
  • Add the stick of butter to one, and the whipping cream to the other.
  • Melt each bowl of chocolate, one at a time, in the microwave, stirring every 30 seconds until melted and smooth.
  • Set aside the butter/chocolate glaze.
  • Lay the bottom layer of the pound cake on a baking rack set over a cookie sheet.
  • Spread chocolate/whipping cream mixture generously on the top of this layer and sprinkle with fresh raspberries.
  • On the “bottom” of the next layer, spread raspberry jam and then gently place (jam side down) on top of the raspberries.

IMG_0150IMG_0153IMG_0156

  • Repeat this process until all layers are used.
  • Refrigerate until layers firm up a little (10 minutes or so)
  • Pour remaining chocolate/butter glaze over the top and sides of cake, allowing excess to run through the baking rack and onto the cookie sheet below.
  • Refrigerate until glaze firms up.
  • Cut into slices and enjoy!!!

Raspberry Fudge Layer Cake5My thoughts: This is so easy. A tiny bit messy with all of that melted chocolate, but once it is made, it stores well for a couple of days and makes a beautiful layered dessert. I think you could fill these layers with so many different things for different times of the year. Yum. Enjoy!!! Happy Valentine’s Day! ~r

Raspberry Fudge Layer Cake3

Other fun (and creative!) Valentine’s treats, just click on a picture for the recipe:

White Chocolate Strawberry Cookies!!Chocolate covered strawberry Cake roll!!Frog Oreos!!Creamy cheesecake with sour cream topping

Mini S’mores Pies

Posted on

S'mores Pie!!!Rich dark chocolate pie in a graham crust, topped with marshmallow meringue.  S’mores with a new, fun look!

Everyone loves these flavors together.

Don’t they?

It just occurred to me that someone might hate s’mores.

Ok, well I don’t personally know anyone who doesn’t just adore this flavor combination.  I LOVE them, and crave them, and sometimes cheat by making them in the microwave when it’s snowing and a campfire is out of the question!

These little pies capture the flavor of a s’more, but add a rich chocolate flavor that is incredibly delicious, and can’t be had with just 2 squares of Hershey’s chocolate.  Or four squares… sometimes I use four.  Don’t tell.

S'mores Pie!!!

Here’s how these simple little treats are made: (printable version)

INGREDIENTS: (makes 12 mini pies)

  • 12 pre-made mini graham cracker crusts.
  • 1 cup of Ghirardelli Bittersweet chocolate chips (melted)
  • 1 cup of Ghirardelli Semi-sweet chocolate chips (melted)
  • 8 eggs (divided)
  • 5 Tablespoons of heavy whipping cream
  • 2 Tablespoons of vanilla
  • 2 cups of granulated sugar
  • 1/4 teaspoon of cream of tartar

DIRECTIONS:

  • Preheat oven to 350F degrees.
  • Divide eggs, keeping ALL of the 8 egg whites and only 5 of the yolks.
  • Place the melted chocolate, 5 egg YOLKS, whipping cream and vanilla in a large mixing bowl and stir until well combined.
  • Evenly divide among all twelve mini pie crusts.
  • Bake (I put them all on a baking sheet) for 14-16 minutes, until the middle of each pie is set.
  • Make meringue while these bake, by adding all of the 8 egg WHITES, sugar and cream of tartar together in a medium heat-proof bowl that will sit on the top of a sauce pan of boiling water without touching the water.  (I had to experiment a bit to find a good fit.)
  • Bring water to a boil in the saucepan and set the bowl on top.
  • Whisk ingredients together for about 3-4 minutes.  Sugar will be dissolved and egg whites should be heated to 145F degrees.
  • Remove bowl from top of sauce pan and beat on low until the mixture thickens a little, then beat on high for about 10 minutes.  The meringue will become the most beautiful, white, glossy mixture.  It should form stiff peaks before you stop beating it.
  • Spoon all that wonderful marshmallow yumminess into a bag fitted with a decorating tip.
  • Once mini pies are removed from the oven, let them cool completely.
  • Pipe marshmallow meringue on the top of each pie and toast it with a kitchen torch.
  • Add a few graham cracker crumbs if you want, and enjoy!!!!


S'mores Pies!!!!My thoughts:  These are delicious. You can see from my pictures that I didn’t beat my meringue as long as I should have.  The are not the tall swirls of happiness I wanted them to be….  it was only my second time making meringue though, so I guess I won’t beat myself up too much.  My 1st time was perfect.  If you want to see how fluffy it SHOULD be, click here.  I LOVE this meringue.  When you read the instructions you might think it is too hard to make- but once you do it, you will realize that it isn’t hard at all.  Just a lot of time with a mixer in your hands.  I hope you get a chance to try this recipe out!  Enjoy! ~r
S'mores Pie!!!

We like our chocolate and marshmallow here at easybaked… here are other recipes that feature that yummy combo:

frozen s'more cupsMelted Smores cupRocky Road Cupcakes!!!!Baked Alaska Cupcakes!!


Candy Corn Peanut Bars

Posted on

Candy Corn Peanut Bars!!
A chewy cookie crust topped with peanuts and sweet candy corn.  So many fun fall flavors in one  little bar cookie!

I confess.  I hate candy corn.  Everyone I know loved these cookie bars, but I had to make a little section of no-candy-corn just for me.  This recipe is easily made with or without the candy corn.  The candy makes it pretty though…and that counts for a lot!

Candy Corn Peanut Bars!!

Want to know how to make these easy little cookie bars?

Here you go (printable recipe)

INGREDIENTS: (makes about 24 bar cookies)

Crust:

  • 1 boxed yellow cake mix
  • 1/3 cup butter (melted)
  • 1 egg

Topping:

  • 3 cups mini marshmallows
  • 1 (10 oz) package of peanut butter chips
  • 2/3 cup light corn syrup
  • 2 teaspoons vanilla
  • 1/4 c. butter
  • 2 cups Rice Krispies
  • 2 cups salted, roasted peanuts
  • One bag of candy corn

DIRECTIONS:

  • Preheat oven to 350F degrees
  • In a mixing bowl, combine cake mix, 1/3 cup of melted butter and one egg.  Mix well, kneading with clean hands at the end.
  • Carefully press crust into the bottom of a greased 9×13 pan. (I line mine with parchment paper)
  • Bake at 350F degrees for 12-14 minutes.
  • Carefully pour mini marshmallows over top of hot crust and place in oven for about 5 minutes (until marshmallows puff up)
  • Cool.
  • In a large saucepan, heat peanut butter chips, corn syrup, vanilla and 1/4 cup of butter until all chips are melted and smooth.
  • Add Rice Krispies and peanuts and combine well.
  • Working quickly, spoon topping over marshmallows and then press candy corn on top.
  • Chill before cutting and ENJOY!

Candy Corn Peanut Bars!!


My thoughts:  I can’t believe it is already October.  When I spotted candy corn at the store I did a double take.  October….already?  These are an easy and fun treat for all of your fall parties and events.  Hope you love them!! ~r

Candy Corn Peanut Bars!!!
Other fun fall recipes:

Inside-out Caramel Apple!!Honey cut-out cookiesFall Acorn Cupcakes!Peanut butter Acorn Cookies!

Lemon Lime Cupcakes

Refreshing lime cupcakes topped with lemon butter cream- SO easy and fun!!

I just can’t say goodbye to those summer flavors and colors….I know I should be sharing my apple and pumpkin recipes with you, but these just make me so happy!!  The tart and the sweet….lime green and yellow….if you are missing summer already these are the perfect remedy this weekend!

INGREDIENTS:

  • One boxed white cake mix
  • Oil, eggs and water to make mix according to box
  • 1 small box(3 oz) of lime jello
  • 2 sticks of salted butter
  • 2 sticks of unsalted butter
  • 3 c. powdered sugar
  • 3 t. lemon extract
  • 1 t. vanilla extract
  • Yellow food coloring (to desired shade)

DIRECTIONS:

  • Make cake according to directions on box, but add lime jello before mixing.
  • Pour into 24 lined cupcake tins and bake according to package.
  • Cool cupcakes completely.
  • Make frosting by combining butters (softened), powdered sugar, lemon and vanilla extracts and coloring in a large bowl and beating on high until light and fluffy.
  • Pipe frosting onto cupcakes (watch this video for techniques)
  • Decorate as desired.  I topped with heart sprinkles and sour fruit heart candies, but I thought it might be fun to top with course salt and a cute straw and call them Margarita cupcakes!  Be creative!


My thoughts:  These are so easy.  Because they use Jell-O, the flavor possibilities are incredible.  Raspberry and Lemon?  Peach?  If you want a really easy twist on a plain cupcake these are your recipe!  Enjoy!!!  ~r

Chocolate Mousse Cake

Posted on

This wonderful cake recipe is courtesy of my Uncle John.  He has made this cake for family gatherings for years now and it is one of my favorites.  I think I’d have tried it sooner if I’d known how EASY it is.  There’s nothing better than a really easy dessert that looks this fancy!

INGREDIENTS:

  • 1 boxed chocolate cake mix- I like Duncan Hines!  (with oil/eggs/water to make according to directions)
  • 2 packets of Dream Whip (I’d never heard of this– it comes in a box and was near the jello/pudding boxes at the grocery.  There are 4 packets per box, and if you order them in a 6-pack at Amazon they are much cheaper than in the store.)
  • 3/4 c. milk
  • 1 t. vanilla
  • 3T. cocoa powder
  • 3T. powdered sugar
  • one container of pre-made chocolate frosting.

DIRECTIONS:

  • Make cake mix according to box and bake in 2 – 8 or 9 inch round pans (I cut parchment paper to fit and place it in the bottom of each pan so that it comes out easier).
  • Cool cakes completely on a wire rack and while they are cooling make your mousse.
  • Put Dream Whip, milk, vanilla, cocoa powder and powdered sugar into a mixing bowl and blend together.
  • Using a mixer, beat until stiff peaks form (3-4 minutes)
  • Scoop chocolate frosting into a microwave safe bowl and heat for only about 20-30 seconds in the microwave.  Heat until frosting is melted into a hot fudge consistency.
  • Use a large serrated knife to level your two cakes.
  • Place 1st cake on serving plate, leveled edge up.
  • Pour about 1/4 of melted frosting on top of cake and spread to cover (I put this layer in the fridge for about a minute just to cool the warm frosting down before adding the mousse layer)
  • Spoon all of the mousse on top of the cake and spread it ALMOST to the edges.
  • Top with second cake– put the leveled edge against the mousse…this keeps all the crumbs in the middle and leaves a nice flat surface on the top of your cake. Gently press top layer down to squeeze the mousse all the way to the edges.
  • Pour the rest of the melted frosting over the entire cake and let it drip over the edges.
  • Refrigerate until serving.

My thoughts:  WHO KNEW you could melt frosting and make such a wonderful fudge-like topping?  Learn something new every day.  Uncle John sometimes adds peppermint extract to the mousse– so yummy– and I had the thought while I was making this that a layer of raspberry preserves somewhere in the middle would be amazing.  I think you will just love this mousse.  It is so creamy and flavorful.  

If you live in Africa and cant find Dream Whip PLEASE don’t ask me what to substitute– I have no idea what this stuff is…it’s MAGIC 🙂 and I love it!   

Curiosity got he better of me…. here’s what Dream Whip is: click here  (I still think it’s magic.)

Enjoy this recipe friends!  Thanks for the inspiration Uncle John!!!   -r

%d bloggers like this: