RSS Feed

Tag Archives: ganache

Fall Marshmallow Cakes

Posted on

marshmallow cake

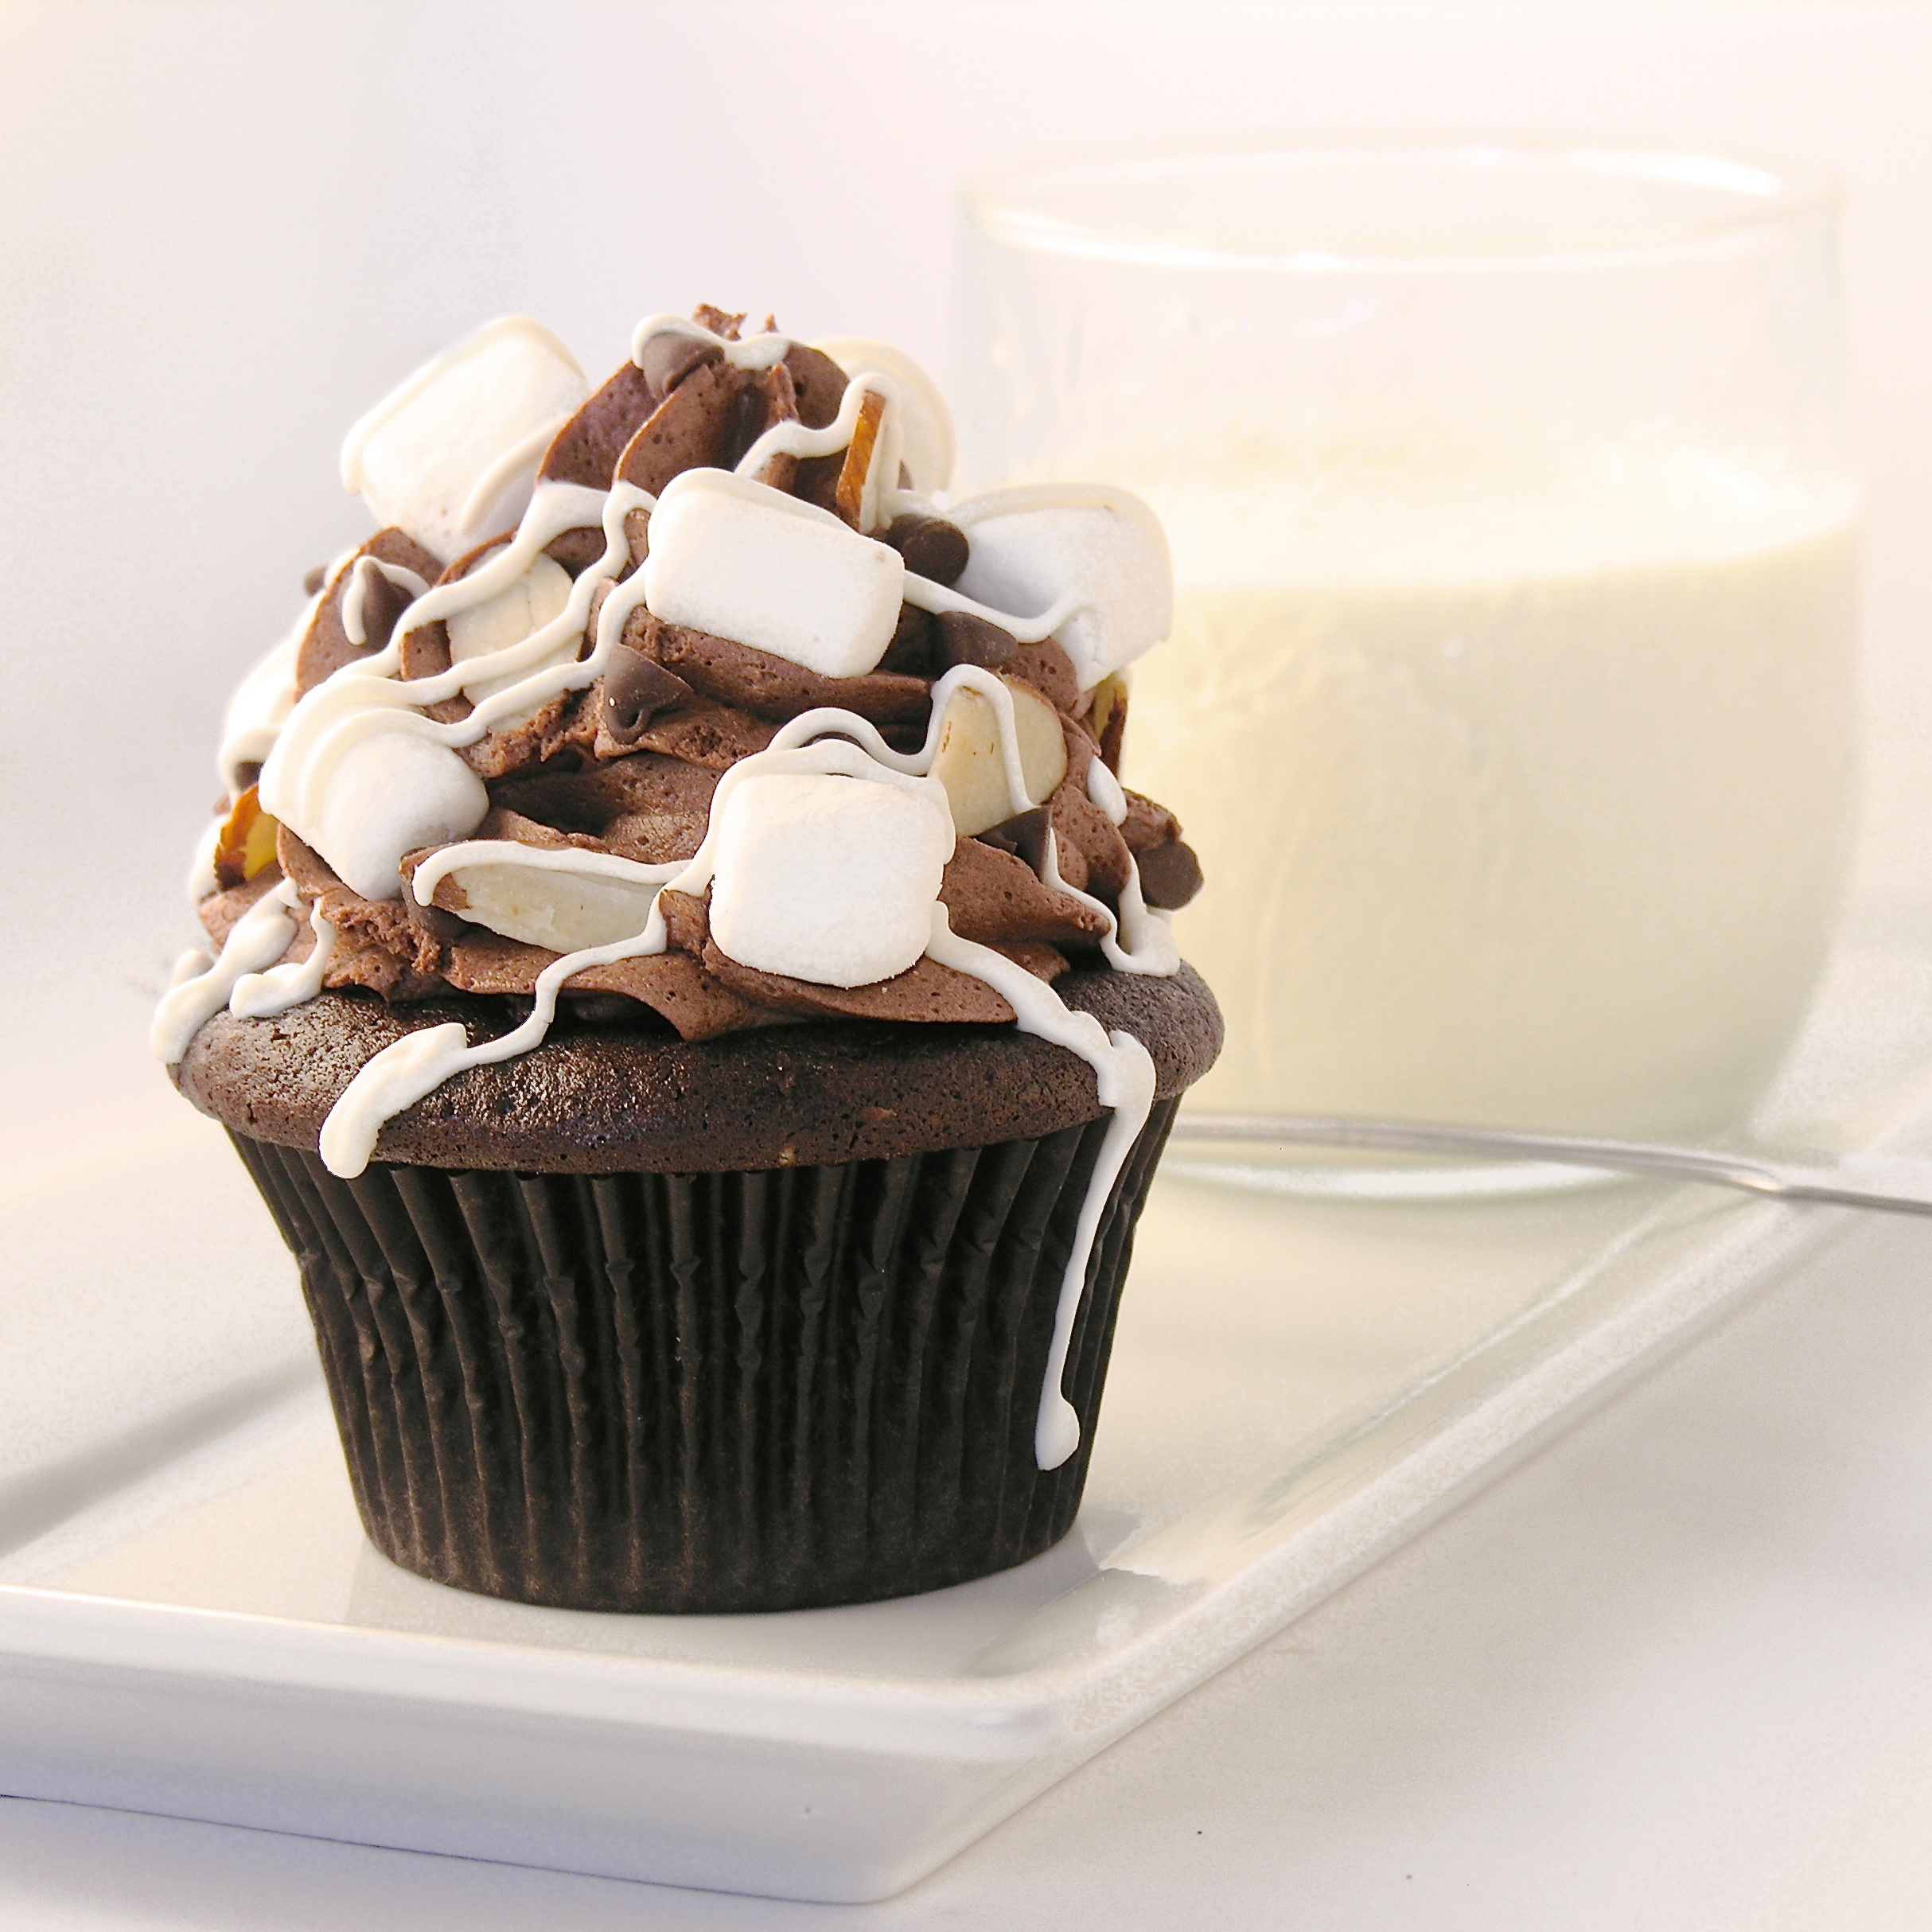
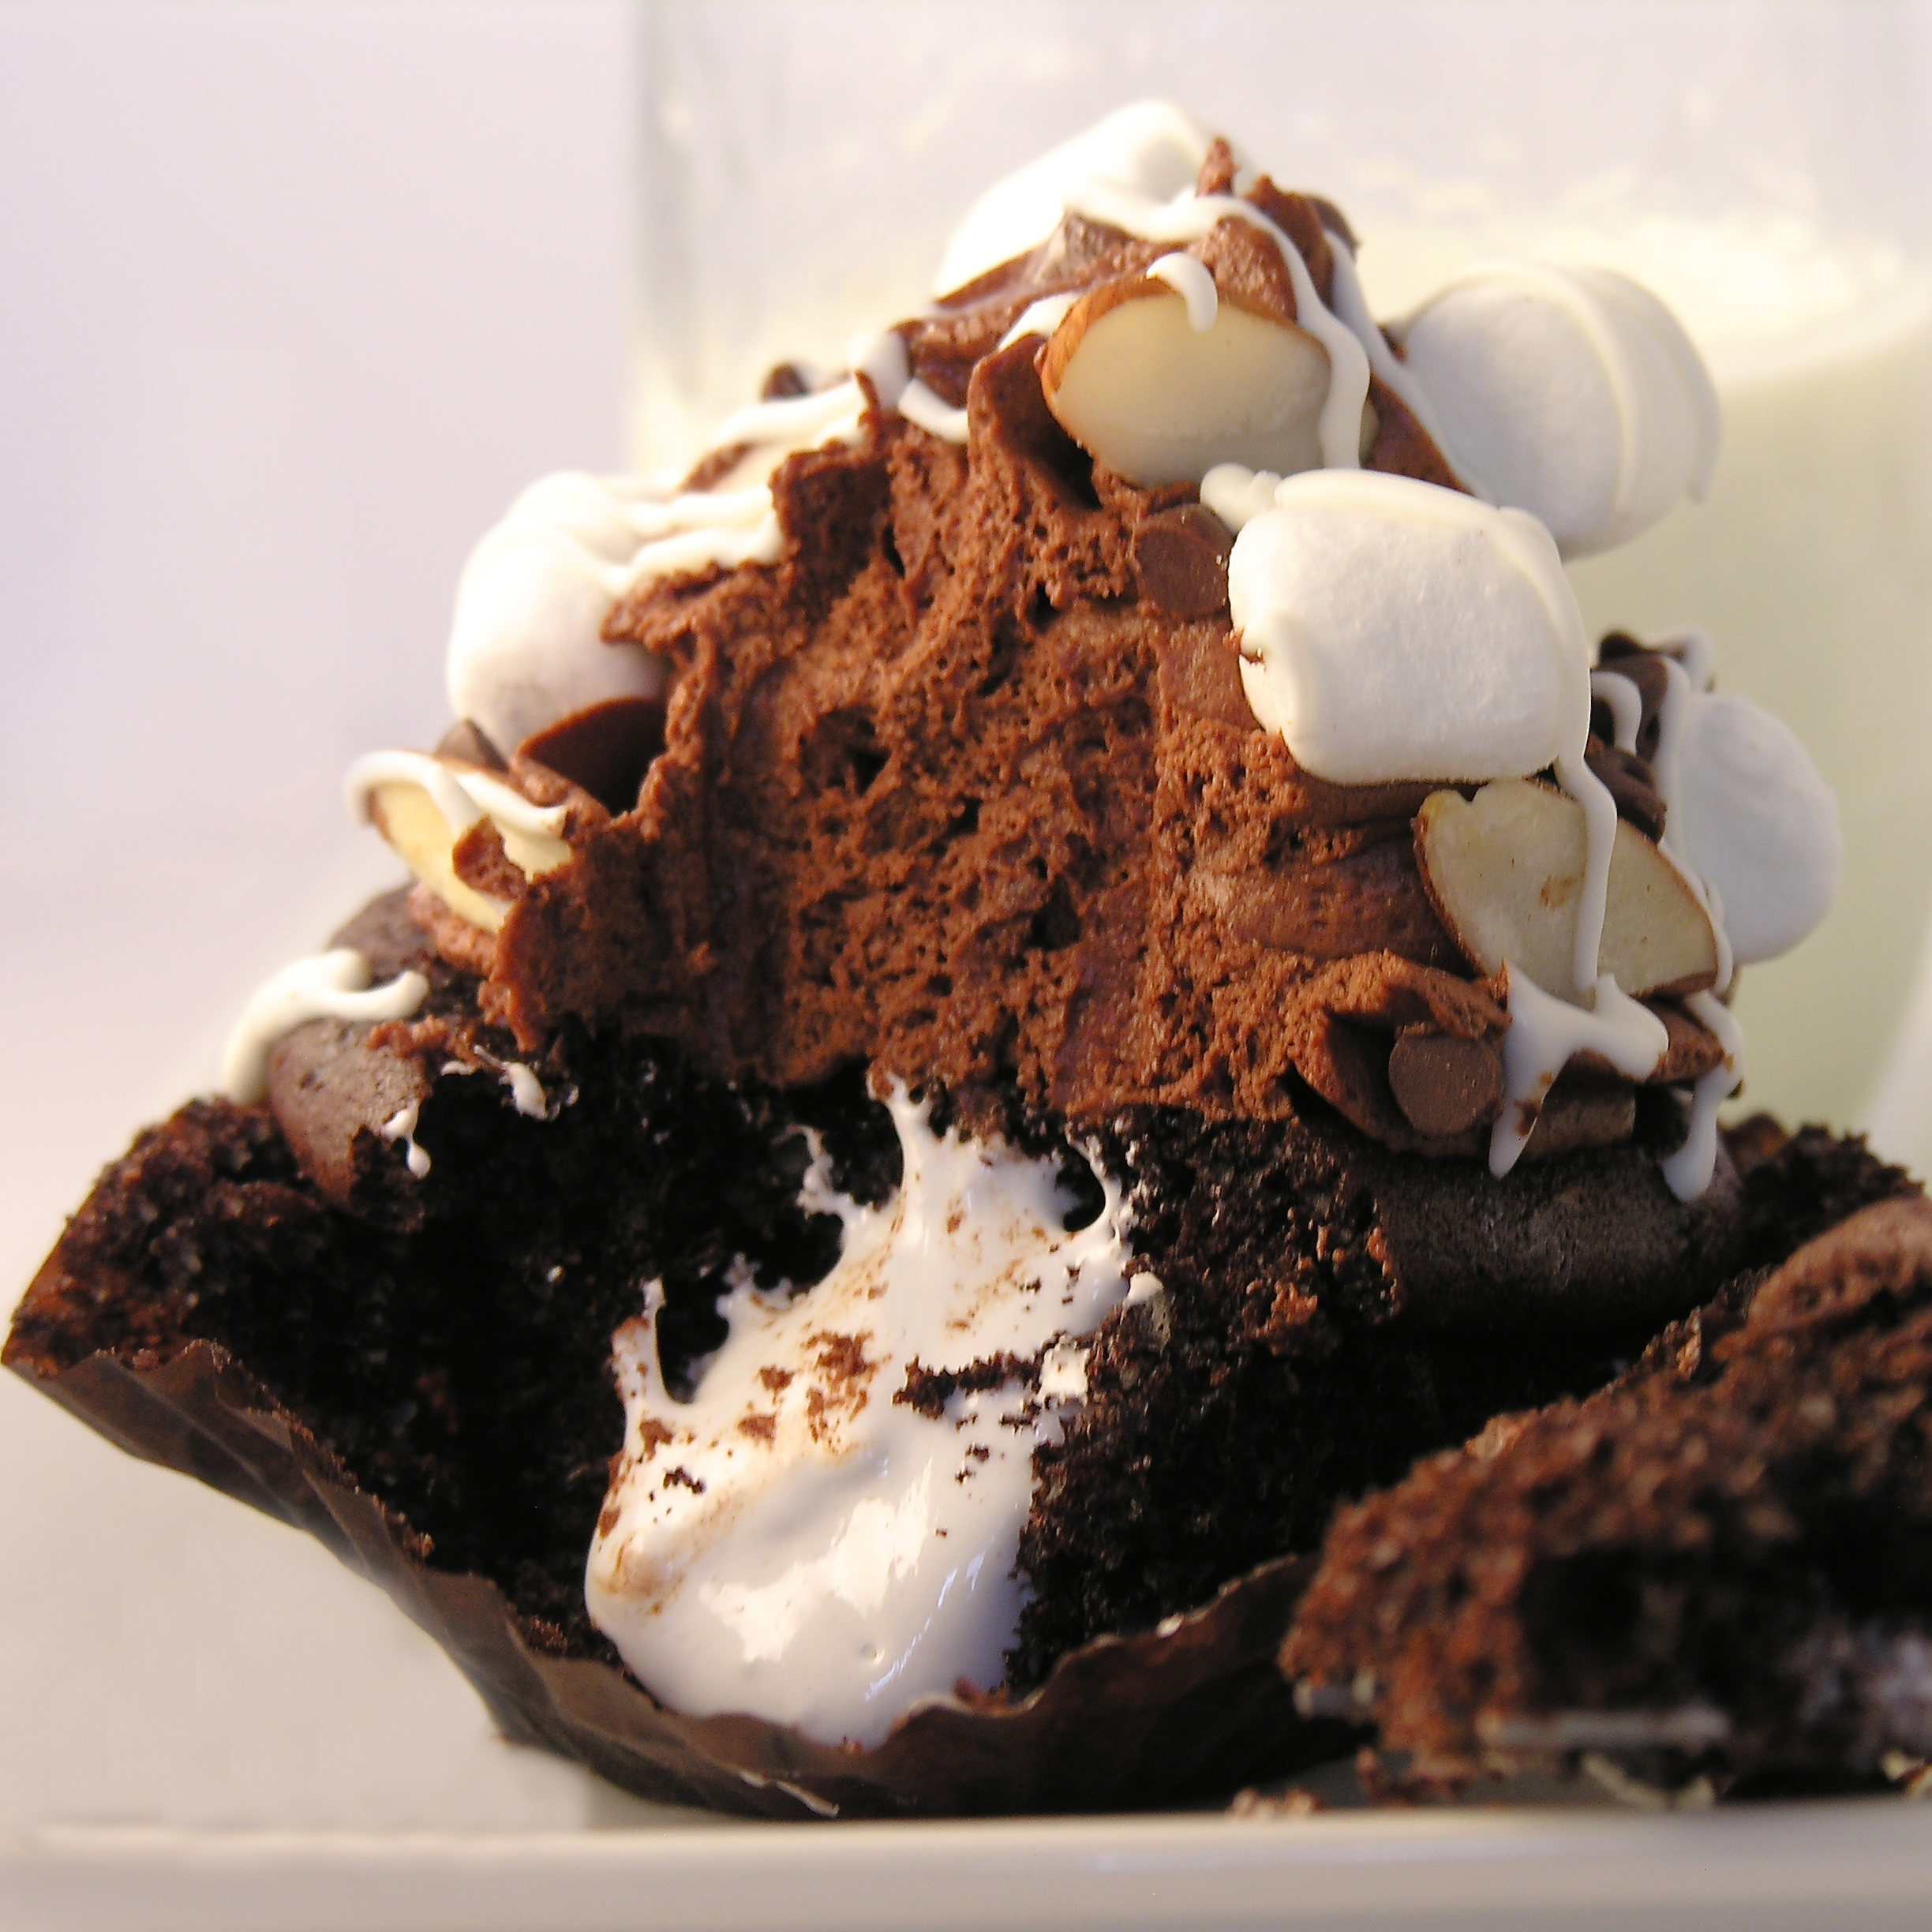
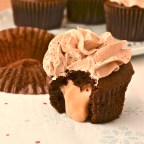
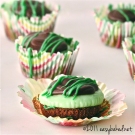
These delicious little chocolate cakes are filled with creamy sweet marshmallow, and decorated to make everyone at your fall table smile!

I’ve been craving HoHos lately. Do they even still make those? Seems like Hostess went out of business awhile back…? Anyway- or those Little Debbie Swiss Cake Rolls. Both of those desserts remind me of high school lunches. My friends and I would sit at lunch, peel them apart in layers, and talk about boys and such while we ate them.

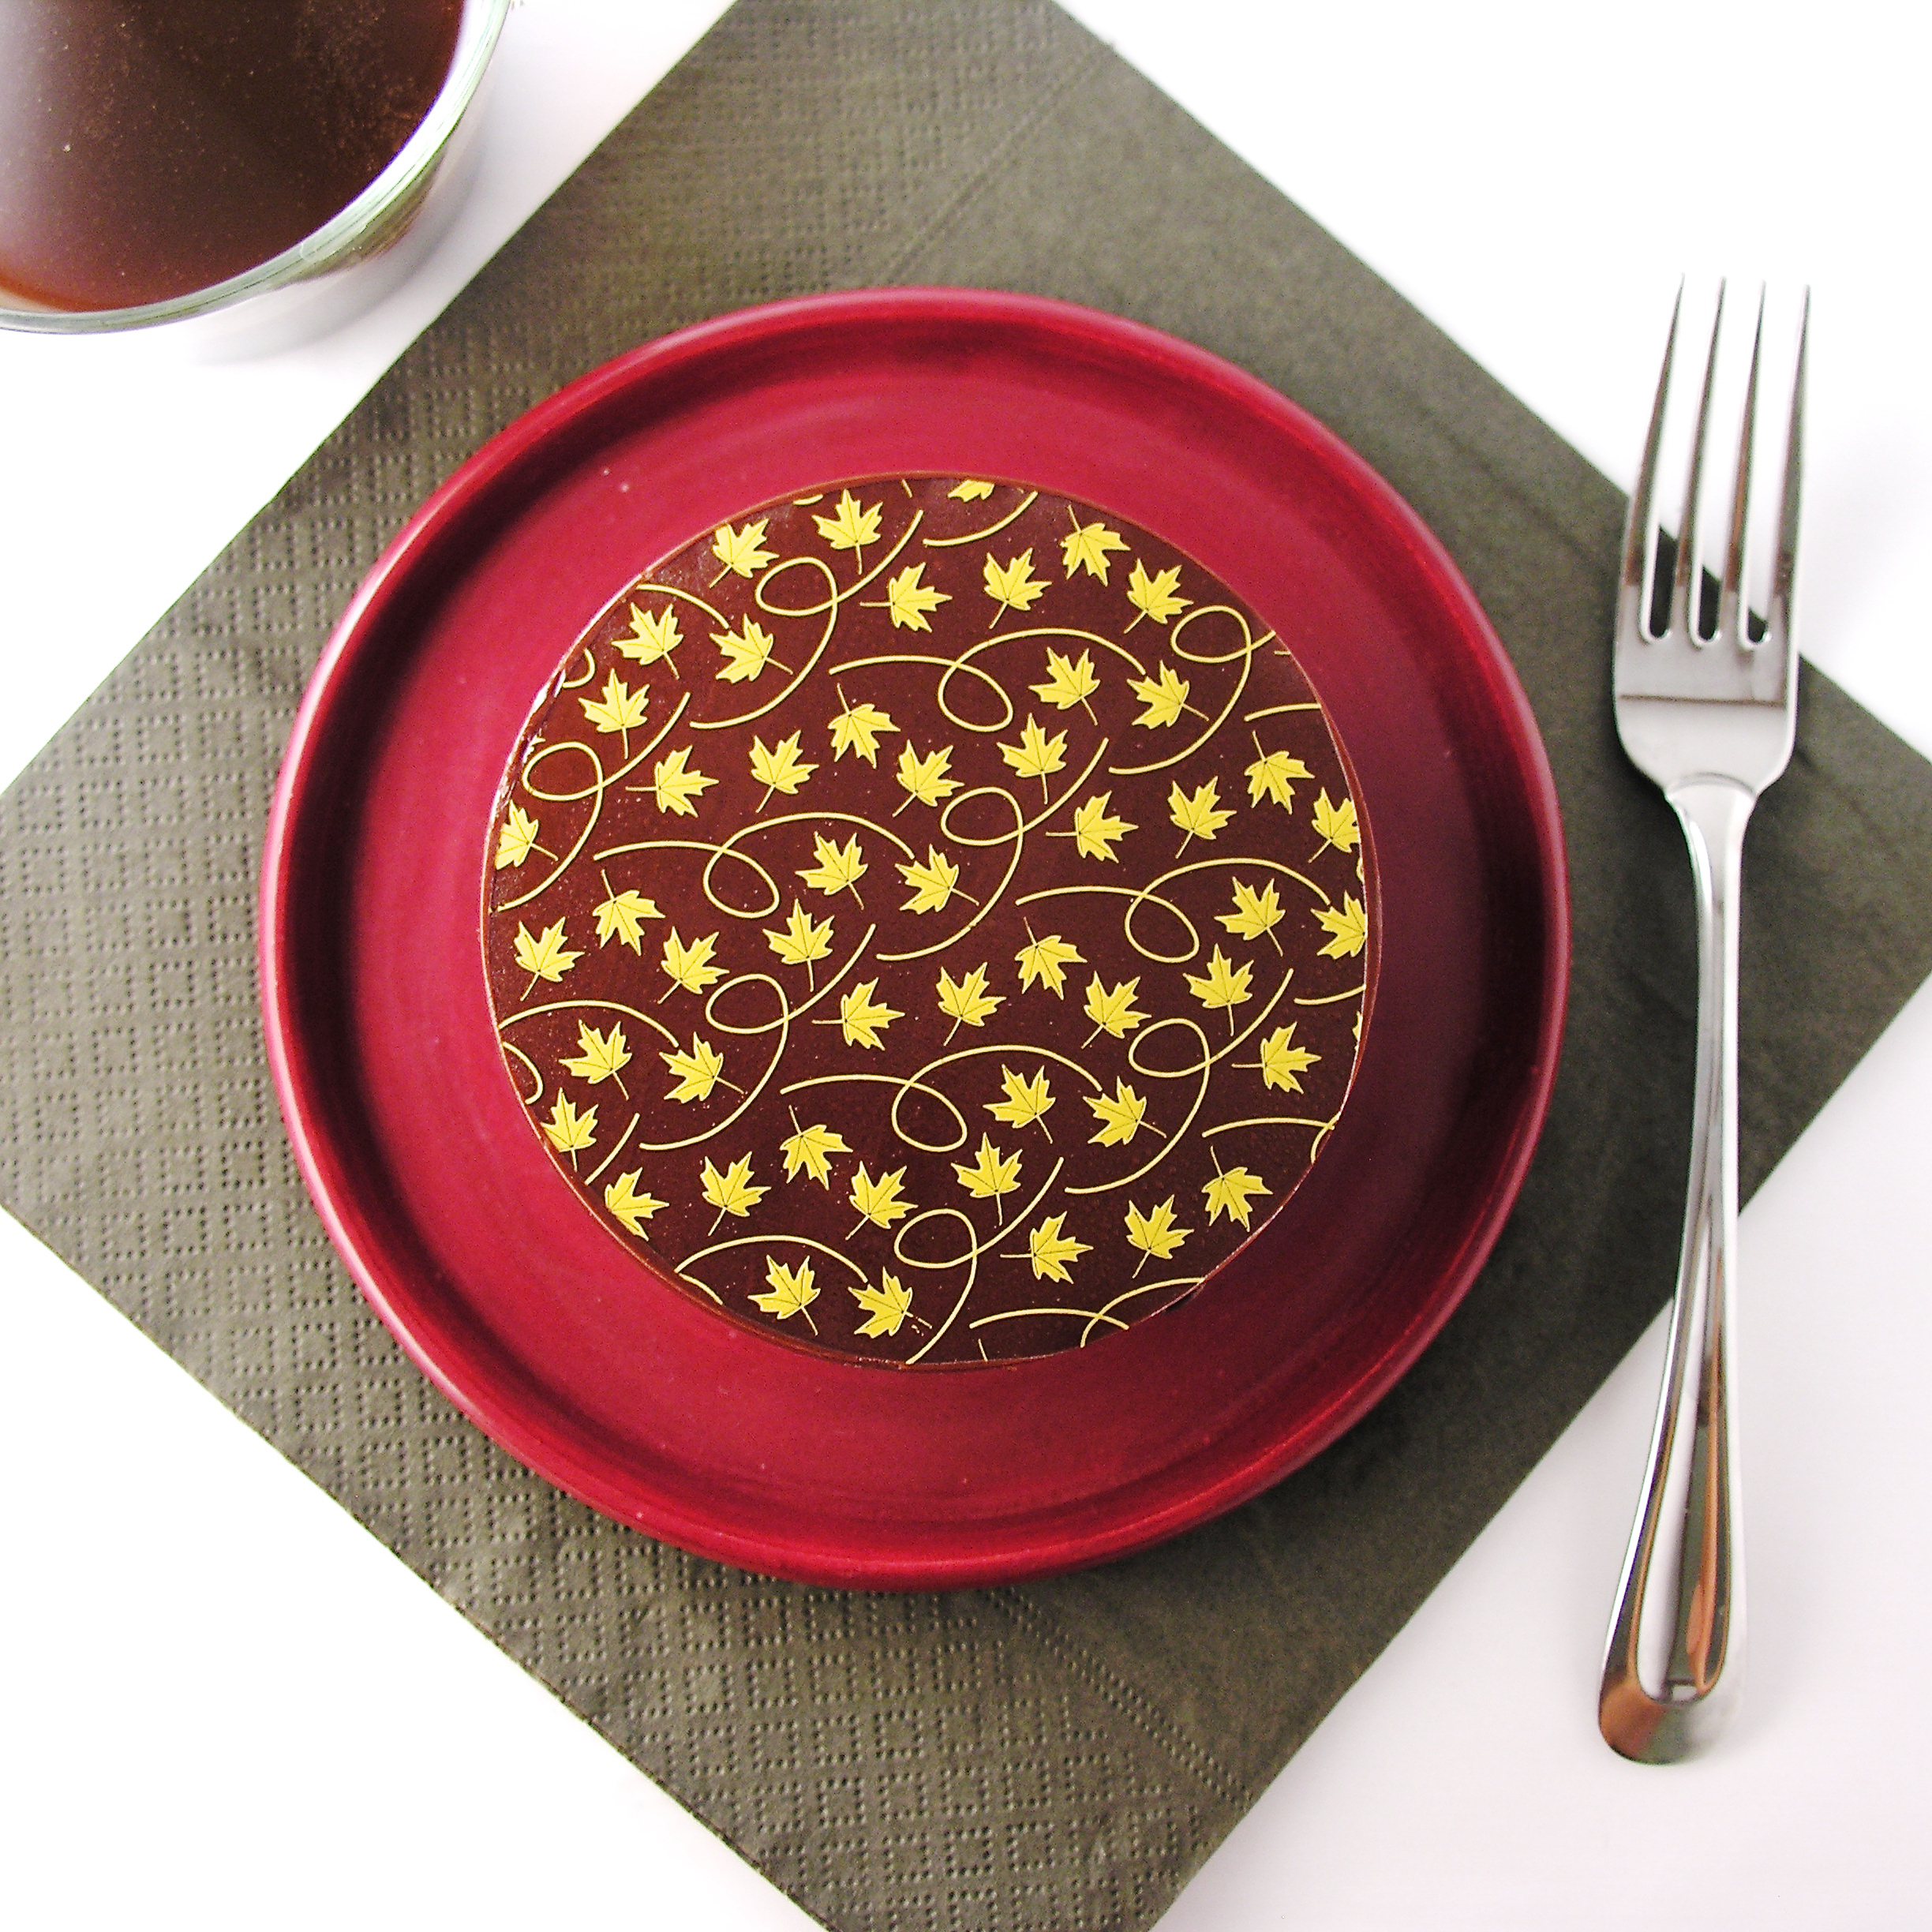
Anyway… so I started thinking about a way to do a grown-up version of these flavors. My friend Angie gave me SUCH a fun pan- it makes little cakes with a cavity in the center that holds filling. See what I mean HERE. I’ve used these pans before here on Easybaked and they seemed perfect for this idea. Instead of topping cake with cake—- I topped each cake with a thick layer of chocolate glaze that was decorated with chocolate transfers.

I love how they turned out! This was my 1st time using transfers, and they are a little fussy- but the wow factor….!!!!!

marshmallow cake

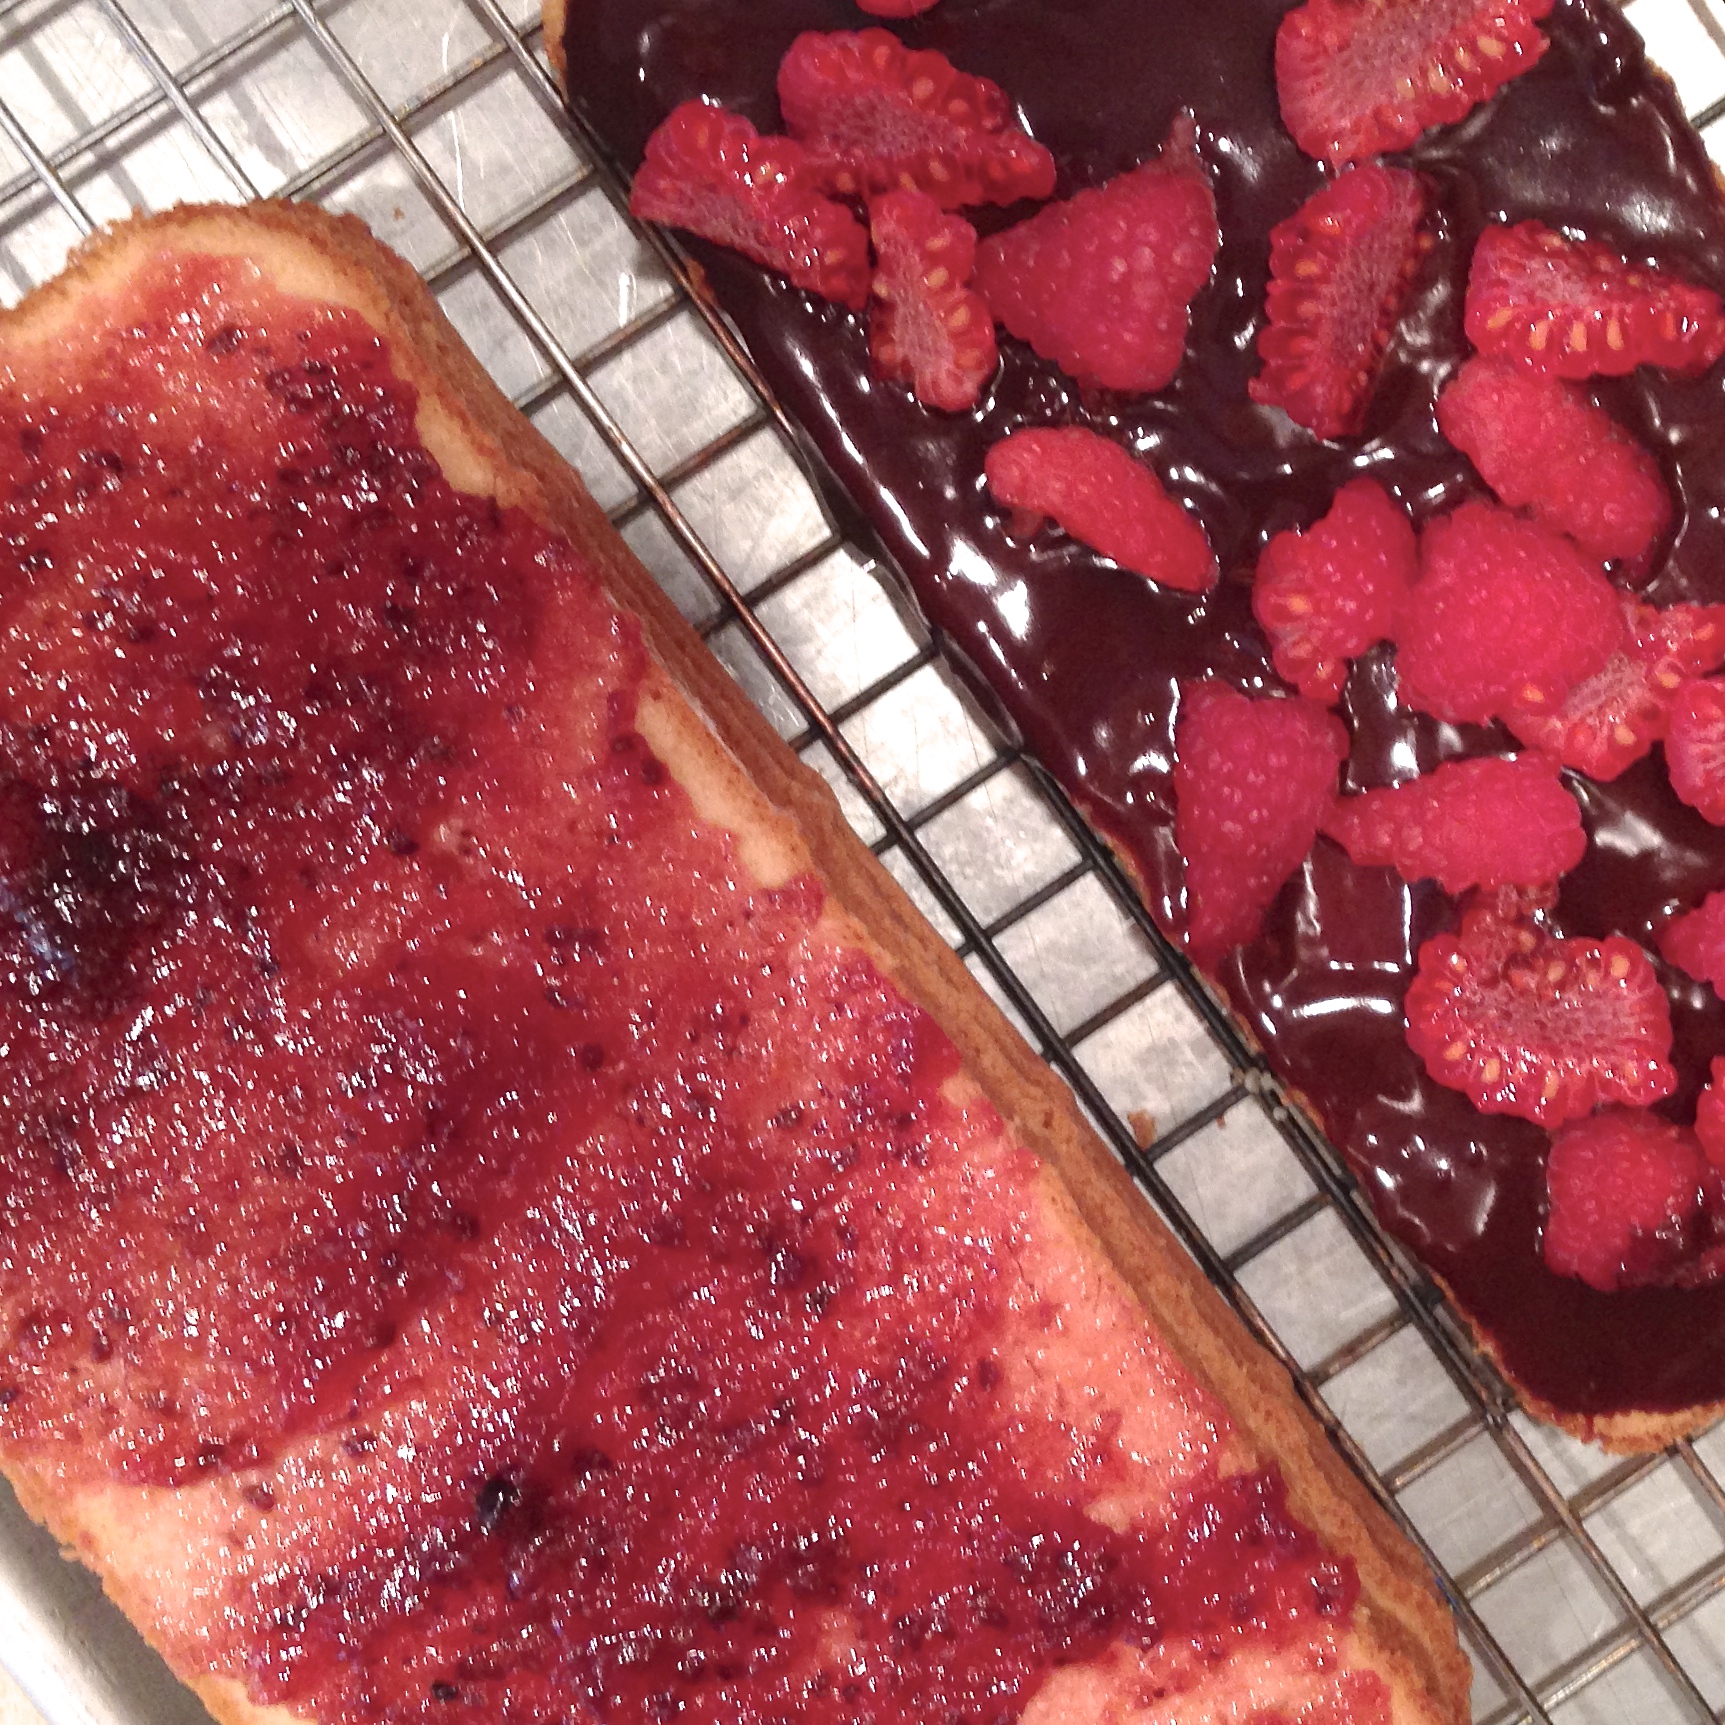
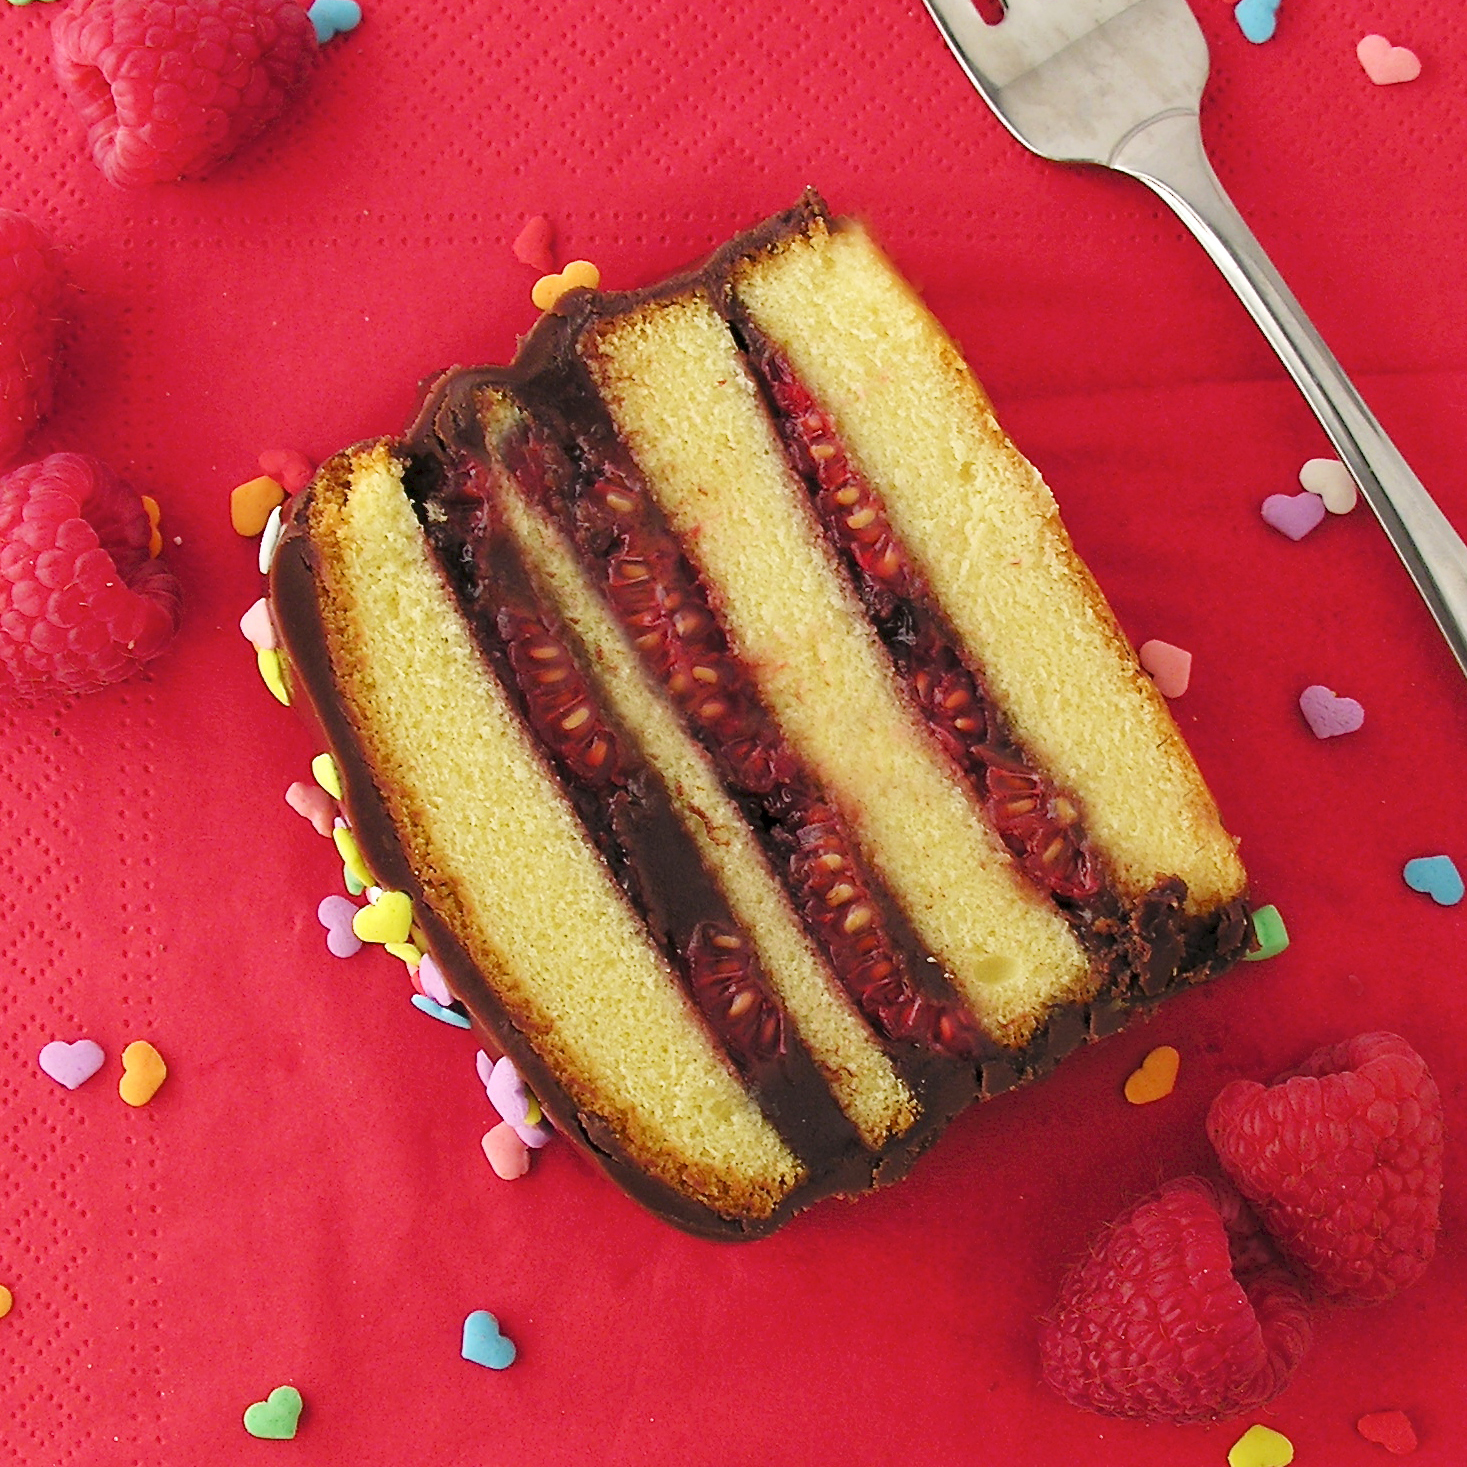
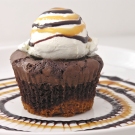
Mmmm……!! So there is some special equipment to make these exactly like I did (cake pans, silicone molds to make the top chocolate layer). If you hate to purchase the pans and chocolate mold, make these as cupcakes. Fill them with marshmallow and pour the glaze over the top. Or make this as a layer cake maybe- with the marshmallow in the middle and the glaze drizzled over the top?

However you choose to make it, the flavors are wonderful together!

Here’s how we put these together. (Printable recipe here)

Ingredients (makes 8 mini cakes)

Cake:

  • 1 chocolate cake mix (plus water, oil and eggs to make according to package)

Filling:

  • 2 cups marshmallow creme
  • 1/2 cup butter, softened
  • 1/4 cup powdered sugar

Topping:

  • 2 cups chocolate chips
  • 12 tablespoons of butter
  • 1 large (12″x16″) chocolate transfer sheet (here is where I got mine)

Directions:

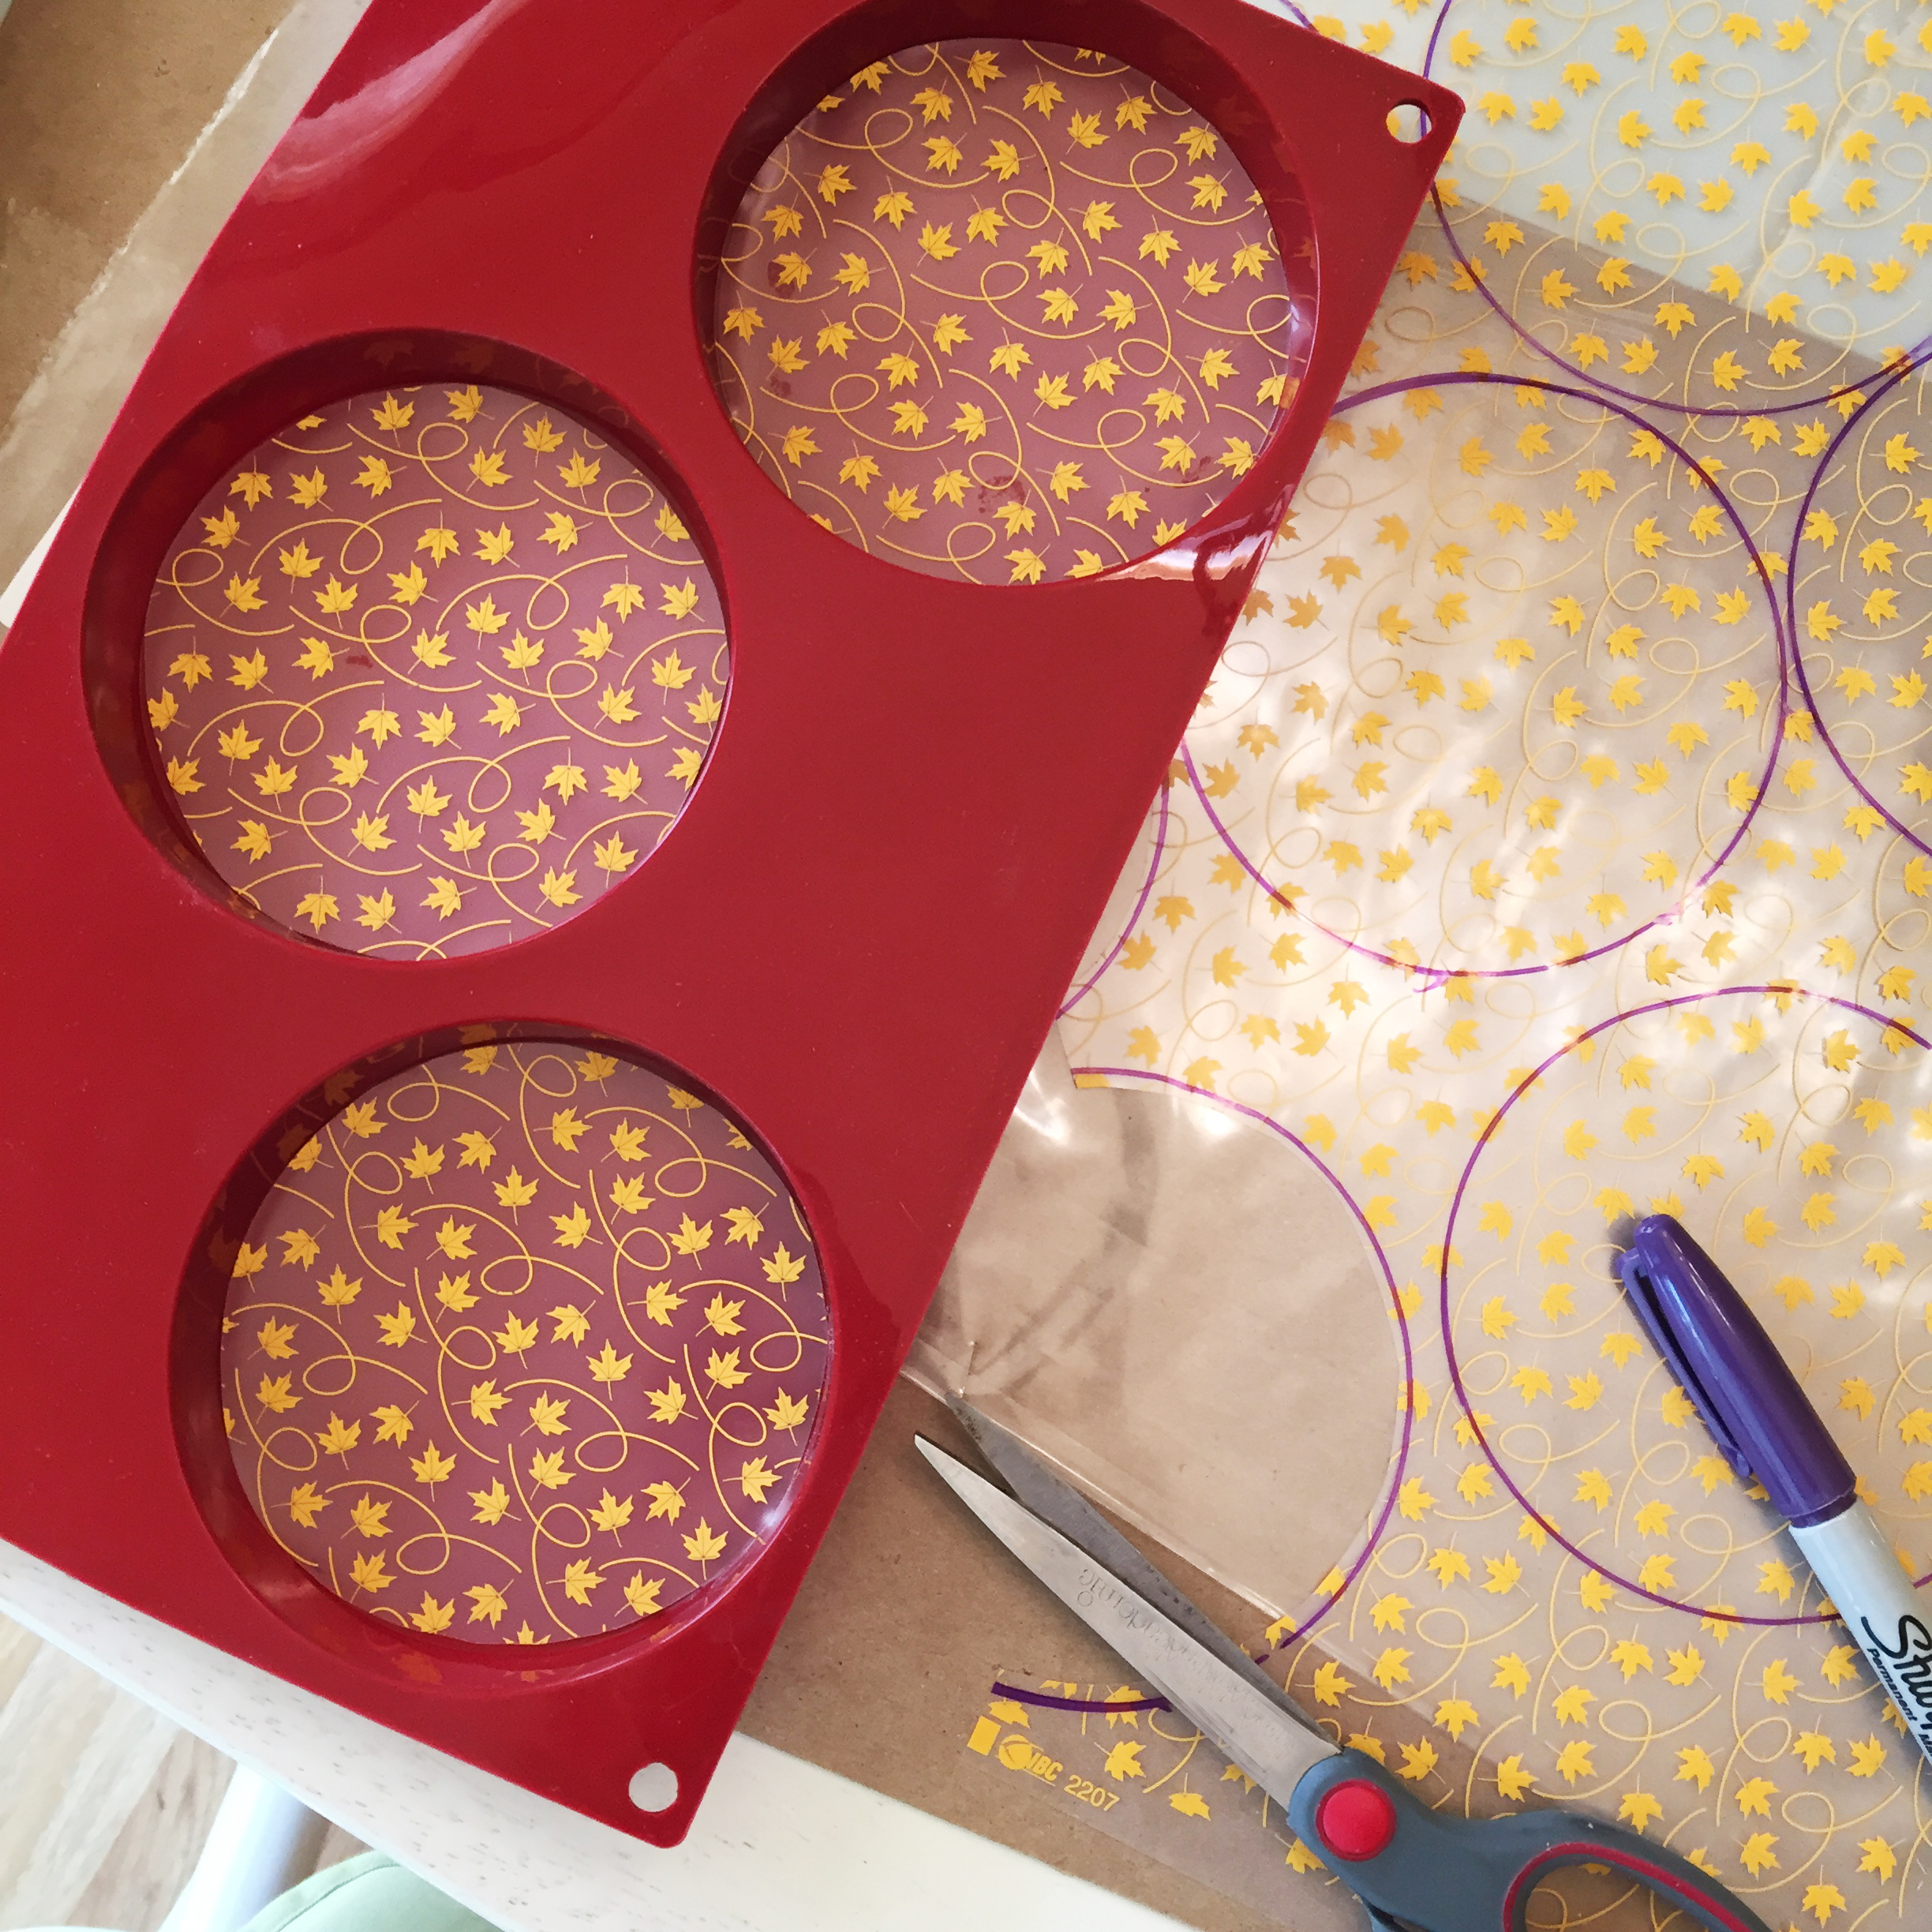
  • Start with the chocolate toppers. To add a chocolate transfer on top, cut 8 circles in a 4 inch diameter. I traced the pans with a marker and the cut the transfer just inside the line. Place the smooth side down and the rough side up inside a 4 inch silicone cake mold (I got mine here, in the medium size).
  • Place chocolate chips and 12 tablespoons of butter into a microwave safe dish and melt in 30 second increments, stirring between until smooth.
  • Gently spoon chocolate over the top of each transfer until it is covered completely. 
  • Freeze for about 20 minutes- until completely hard.
  • Gently peel away the silicone mold, leaving the chocolate. Keep this chocolate in the freezer until use.

chocolate transferschocolate transfers

  • Repeat process (re-melt chocolate glaze if needed) until you have 8 toppers in the freezer.
  • Make cake according to mix and bake in 4 pans as directed on box. Only fill the pans 1/2 full, or they will overflow. And grease the pans generously!!! My 1st batch stuck a little.
  • You will need to bake two batches to get your 8 cakes. Cool completely.
  • Make filling by beating together the marshmallow creme and the butter until smooth and light (about 2 minutes).
  • Slowly add the powdered sugar, beating on low until it is fully mixed in, and then increasing to high and beating until light and fluffy (another 2 minutes or so).
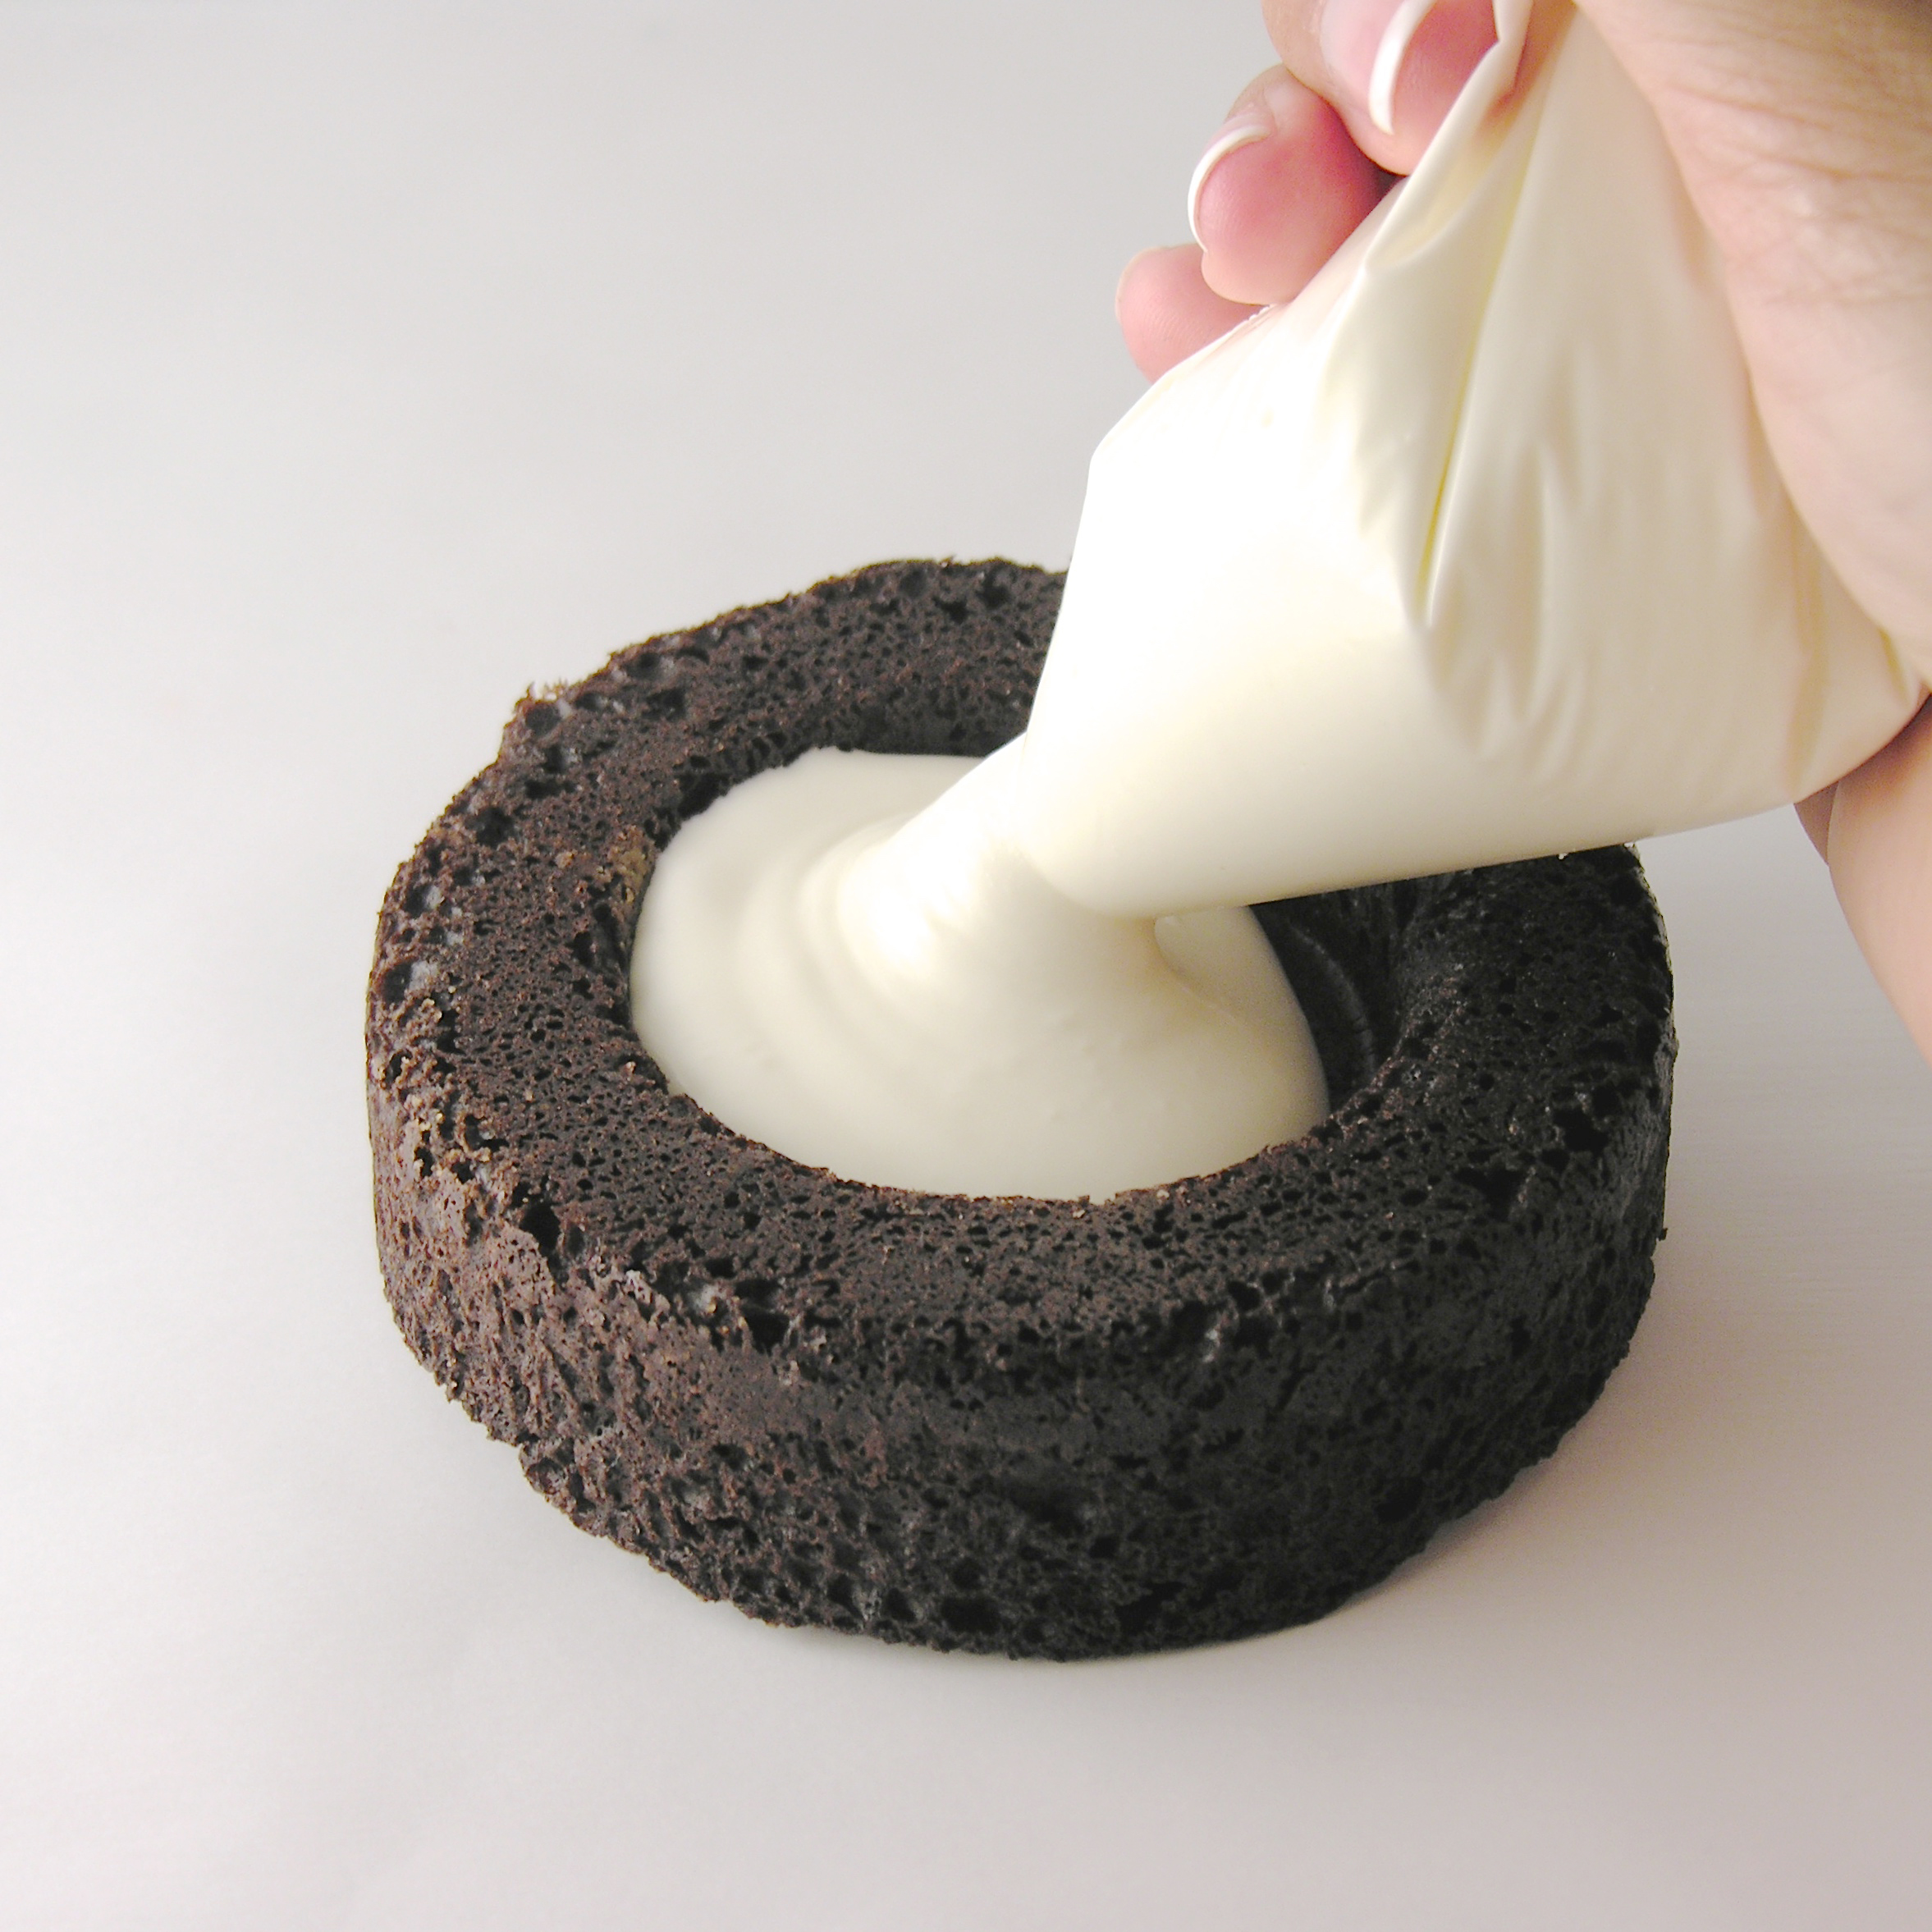
  • Place filling into a zip top bag and zip it tightly closed. Clip a corner off and squeeze filling into each open cake cavity. 
  • Gently set a chocolate topper over the filling, pressing it lightly against the filling. As the topper warms to room temperature, it will soften and stick more firmly to the cake. 
  • Gently peel away the plastic from the top of the transfer.


marshmallow cakemarshmallow cake

  • Keep at room temperature until serving. Kept covered, these can be stored for two to three days.
  • Enjoy!

marshmallow-cake

My thoughts: If you don’t mind the extra equipment and a little bit of time, these are positively the most elegant and delicious little cakes! I had so much fun serving these as individual desserts- and everyone loved them. If what you are aiming for is extra special- this is your dessert. If you need your chocolate fix right now? Get those Little Debbies!!! 😉 ~r

Other fall treats here on Easybaked:

Pecan Pie CupcakesPumpkin Pie Cutout cookies!Honey cookies cut into leaf shapes!Acorn Candy

Advertisement

Mud Pie!

Posted on

Mud Pie!

A layer of dense cake, topped with fudge, chocolate mousse and whipped cream. Yum.

Life is mud right now. At least if you live in the midwest and regularly walk a dog. My pup’s little white paws and belly are just caked in mud after every trip down our walking trail. There’s one kind of mud I don’t mind though- the edible kind!

Have you ever tried Mississippi Mud pie? I feel like there’s not an “official” recipe for this pie- sometimes pudding, sometimes marshmallow…I just put several things I love into an Oreo crust and called it mud. And it is delicious. I really think you’ll like it!

Mud Pie

Here’s how we did it: (printable recipe)

INGREDIENTS:

  • One pre-made Oreo crumb crust

Cake layer:

  • 1/2 bag of Nestle dark chocolate chips (this ends up being just a little less than 1 cup)
  • 2 egg yolks
  • 2 Tablespoons vanilla
  • 3 Tablespoons of heavy cream
  • 3 Tablespoons of powdered sugar

Fudge layer:

  • remaining 1/2 bag of Nestle dark chocolate chips (this ends up being just a little less than 1 cup)
  • 1/2 cup of heavy cream

Chocolate Mousse Layer:

  • 1 Packet of Dream Whip
  • 1/3 cup milk
  • 1/4 cup cocoa
  • 1/2 cup powdered sugar

White whipped topping:

  • 1 packet of Dream Whip
  • 1/2 cup milk

DIRECTIONS:

Cake Layer:

  • Unwrap Oreo crust and preheat oven to 350F degrees
  • Melt chocolate chips in the microwave in 30 second increments, stirring in between until smooth.
  • In a separate bowl combine eggs, cream, vanilla and powdered sugar.
  • Add cream mixture to chocolate and blend well.  Pour into crust and bake for 20 – 25 minutes until center is set. Cool completely.

Fudge Layer:

  • Melt remaining chocolate chips and cream together in microwave in 30 second increments, stirring between until melted and smooth.
  • Pour all but about 1/8 cup over cooled cake and allow this layer to firm up (I placed it in the refrigerator while I made the remaining 2 layers).
  • Pour remaining 1/8 cup into a small zip-top bag to use later for drizzle.

Chocolate Mousse Layer:

  • Add all ingredients to mixing bowl and beat on high for 3-4 minutes until light and fluffy.
  • Spoon on top of fudge layer and spread to edges.

Whipped topping:

  • Add all ingredients to mixing bowl and beat on high for 3-4 minutes until light and fluffy.
  • Spoon on top and spread to edges.
  • Take your small bag with 1/8 cup chocolate fudge filling (The one you set aside earlier), clip corner of bag and drizzle over the top. (I added a little shaved chocolate too)
  • Enjoy!

Mud Pie!

My thoughts: This is really as good as it looks…dense fudge bottom topped with the creamiest chocolate toppings. I usually eat that one bite I take off for a picture and give every bit of the rest away. But I ate the whole piece. Bad day for the diet, but a wonderful day to really savor this rich chocolate dessert. This is on my list of “must-make-again” recipes! I hope you get a chance to try it and enjoy it as much as I did!!!! Enjoy! ~r

Mud Pie!!!

Is chocolate the only way to do dessert in your house? Here are some other incredible chocolate treats from Easybaked~ just click on the photo to see the recipe!

Chocolate Mousse CakeTriple Chocolate Cheesecake 2Brownie Oreo Cookie CupGerman Chocolate Pie

Raspberry Fudge Layer Cake

Raspberry Fudge Layer Cake1Layers of pound cake, chocolate and raspberry are sure you make your Valentine smile this year!

You know those desserts that look incredibly difficult and are super easy? This is one of those. The cake is simply a frozen pound cake sliced and stacked with chocolate and raspberries. Makes you smile, doesn’t it?

Raspberry Fudge Layer CakeHere’s how we made it: (printable recipe)

INGREDIENTS:

  • One frozen pound cake
  • 1 bag of semi-sweet chocolate chips
  • 1 cup of red raspberry jam
  • 1 cup of sliced red raspberries
  • 1 stick of butter
  • 1/2 cup of whipping cream

IMG_0147DIRECTIONS:

  • Remove pound cake from packaging and use a large serrated knife to slice it into 3 or 4 layers
  • Divide the bag of chocolate chips into 2 separate microwave-safe bowls.
  • Add the stick of butter to one, and the whipping cream to the other.
  • Melt each bowl of chocolate, one at a time, in the microwave, stirring every 30 seconds until melted and smooth.
  • Set aside the butter/chocolate glaze.
  • Lay the bottom layer of the pound cake on a baking rack set over a cookie sheet.
  • Spread chocolate/whipping cream mixture generously on the top of this layer and sprinkle with fresh raspberries.
  • On the “bottom” of the next layer, spread raspberry jam and then gently place (jam side down) on top of the raspberries.

IMG_0150IMG_0153IMG_0156

  • Repeat this process until all layers are used.
  • Refrigerate until layers firm up a little (10 minutes or so)
  • Pour remaining chocolate/butter glaze over the top and sides of cake, allowing excess to run through the baking rack and onto the cookie sheet below.
  • Refrigerate until glaze firms up.
  • Cut into slices and enjoy!!!

Raspberry Fudge Layer Cake5My thoughts: This is so easy. A tiny bit messy with all of that melted chocolate, but once it is made, it stores well for a couple of days and makes a beautiful layered dessert. I think you could fill these layers with so many different things for different times of the year. Yum. Enjoy!!! Happy Valentine’s Day! ~r

Raspberry Fudge Layer Cake3

Other fun (and creative!) Valentine’s treats, just click on a picture for the recipe:

White Chocolate Strawberry Cookies!!Chocolate covered strawberry Cake roll!!Frog Oreos!!Creamy cheesecake with sour cream topping

Rocky Road Cupcakes!

Posted on

Rocky Road Cupcakes!!!!These chocolate cupcakes are filled with creamy marshmallow and topped with a rich ganache frosting, marshmallows and almonds! YUM!!!!!

These are fork-eating cupcakes!  You’ll love that combination of rocky road flavors in these rich and messy-to-eat cupcakes.

Rocky Road Cupcakes4I absolutely love this frosting.  I have used ganache for many recipes, but I’d never taken the time to whip it up into a frosting.  Now that I’ve tried it, I will be back for more- this frosting is so rich and chocolatey!!! Ready for a recipe?

Here you go: (printable version)

INGREDIENTS:

  • One box of chocolate cake mix (with oil, water and eggs to make according to package)
  • One large jar (13 oz) of Jet-Puffed Marshmallow Creme
  • One bag of semi-sweet chocolate chips *
  • 1/2 cup of whipping cream *

(*double these two ingredients if you want to pile your frosting high like mine is)

  • One bag of mini-marshmallows
  • 1 cup of slivered or sliced almonds
  • a little white chocolate to drizzle on top, if desired

DIRECTIONS:

  • Start your frosting first, as it needs to chill before you beat it, and double the recipe if you want piles of frosting like mine.  I went a little overboard for fun pictures!! 🙂
  • Place 1/2 cup of whipping cream into a medium saucepan and heat it on the stove until the cream starts to bubble just a bit on the edges, stirring as it heats.  Turn off the heat, add the chocolate chips and cover for 5 minutes.
  • Stir melted chocolate and warm cream together until completely smooth (a “ganache”).  Put it in a medium bowl and refrigerate until it is a cool, spoonable consistency (30 minutes to an hour).
  • Make cake mix according to box, and divide equally into 24 cupcake lines placed in a muffin tin.
  • Bake as directed on box, and cool completely.
  • Core cupcakes using a small knife, or a cupcake corer.  I used the Chicago Metallics one, and for $4 there is just no reason to not get one- it makes filling cupcakes SOOOO easy!  Isn’t your birthday coming up???

So easy to core cupcakes!

  • Spoon entire jar of marshmallow fluff into a gallon-size zip-top bag and clip a corner off with scissors.  Squeeze the marshmallow into the middle of each cupcake and then trim a little of the core you removed and place the “lid” back on top of the filling.
  • Remove cooled chocolate ganache from refrigerator and beat on high until light and fluffy.
  • Place icing in a gallon size zip-top bag that has been fitted with a decorating tip in one corner, and pipe icing onto the cupcakes.
  • Decorate with almonds, and mini marshmallows.  I also added some mini chocolate chips (because I had some leftovers from another recipe) and I melted some white chocolate to drizzle on top.  Be creative and make these little marshmallow-y cupcakes irresistible!!!!


Rocky Road Cupcakes!!!!!


My thoughts:  These are FABULOUS cupcakes.  I love the gooey marshmallow creme surprise in the middle!  And that frosting….. oh my.  A few tips:  the frosting does harden up, so get those almonds and marshmallows placed in it as soon as you are done piping the frosting on.  This is good, because it holds all those yummy toppings in place!  Also, store these all sealed up.  You know what happens when you leave the bag of marshmallows open?  Yucky, rubbery, dried up marshmallows!  The same will happen if you just let these set out. 

I hope you love these little yummy desserts!!!!  ~r

Rocky Road Cupcakes with marshmallow filling!!!!Want some other ideas for that new cupcake corer?  We love filled cupcakes here at Easybaked!  Here’s a few of our favorites:

Cinnamon Roll Filling in a yummy cupcake!Peppermint Hot Chocolate Cupcakes!!!Toxic Slime-filled Cupcakes!Mocha caramel filled cupcakes3

Chocolate Ganache Brownies

Posted on

Ganache Brownies
These dense chocolate brownies are topped with a rich chocolate ganache.  You won’t be able to eat just one!!

It’s November.  Time for turkey and thankfulness.  One of the things I am incredibly thankful for is my wonderful family.  We are spread over many states and have many interests, but one thing we all love:  dessert.  This month I am going to feature some of our family’s best dessert recipes– just to get you all ready to bring some mouthwatering treats to your Thanksgiving feast!

This brownie recipe is from my Aunt Sara.  She’s known in our family for her wonderful layered salad, but since this is a blog about sweets, that recipe will have to wait for another day.

Aunt Sarah and her granddaughter Sierra

Aunt Sarah and her granddaughter Sierra

Several years ago I asked everyone in our family to submit recipes to compile into a family cookbook.  SO many wonderful things (with the exception of “Feline Delight”, submitted by my Uncle Keith and my dad, involving a stew made from the family pet…. a joke, of course!)  My Aunt Sara turned in this brownie recipe and I’ve always wanted to try it but just hadn’t taken the time until right now.

The verdict:  AMAZING.  These are the most fudge- like brownies I’ve ever had.  If you prefer cake-like brownies just stop reading right here….because these are rich, heavy, delicious bits of chocolate joy.

Ganache Brownies
So, lets get you the recipe so you can try these yummy treats! (printable version)

INGREDIENTS:

Brownie:

  • 1 stick (1/2 cup) butter
  • 2/3 cup chocolate (I used Nestle’ dark chocolate chips)
  • 4 eggs
  • 1/4 teaspoon salt
  • 2 cups granulated sugar
  • 1 teaspoon vanilla
  • 1 cup flour
  • 1 cup chopped nuts (optional)

Frosting:

  • 1/2 cup whipping cream
  • 1 cup chocolate (Aunt Sara uses Ghiradelli, I just used the rest of the Nestle’ dark chips)

DIRECTIONS:

Brownie:

  • Preheat oven to 325F degrees
  • Place butter and chocolate into a microwave safe bowl and melt in 30 second increments, stirring between, until melted and smooth.
  • Beat eggs and salt until they turn a light yellow color.
  • Add sugar to egg mixture gradually, and then beat until thick and creamy (about 15 minutes).
  • Fold in melted chocolate/butter mixture.
  • Add flour and vanilla and beat until smooth.
  • Fold in nuts.
  • Lightly spray a 9×13 pan with cooking spray and pour batter in.
  • Bake at 325F degrees for 25-30 minutes.  Toothpick should not come out clean- if you over-bake them they will be dry.

Frosting:

  • Place chocolate (either chips, or chopped up) into a bowl.
  • Bring whipping cream to a boil over the stove.
  • Pour hot cream over chocolate and whisk until smooth.
  • Refrigerate about 20 minutes, until thick enough to spread, but not completely set.
  • Spread over brownies and enjoy!!!

Ganache Brownies
My thoughts:  These are wonderfully gooey and rich- my perfect kind of brownie!  The only downside of these is having to beat the eggs for 15 minutes.  If you have a stand mixer you won’t mind it, but I have a hand mixer…seemed like an eternity!  Once I tasted them, it was worth every second though!  Thanks for the wonderful recipe Aunt Sara!!  Love you!  ~r

Other brownie recipes to fill your November with yummy goodness:

Caramel Fudge Brownies!!Fudge Brownie!Mint Creme Brownie CupsBrownie Oreo Cookie Cup

Chocolate Lava Cupcakes

Posted on

These rich chocolate cupcakes are made with a cake mix, but filled with warm chocolate fudge that pours out when you take a bite~ yum!!!!!

INGREDIENTS: (makes 18-20 cupcakes)

  • One boxed dark chocolate cake mix (plus water, eggs and oil to make according to box)
  • 1 c. semi sweet chocolate chips
  • 1/2 c. whipping cream
  • 1/4 c. cocoa powder
  • 1/2 c. white baking chips

DIRECTIONS:

  • Heat semi-sweet chips and whipping cream in the microwave, stirring every 30 seconds until completely melted and smooth, making a ganache.
  • Refrigerate for about 2 hours, until hardened to a soft fudge consistency.
  • Scoop small balls of cold chocolate ganache out of bowl using a small cookie scoop (I highly recommend a small cookie scoop for this job- the chocolate is sticky and hard to work with until it is rolled in cocoa- a scoop makes it so much easier!)
  • Roll balls in cocoa powder and keep refrigerated until use.
  • Preheat oven to 350F degrees
  • Make cake mix according to box and spoon about 1 1/2 tablespoons of batter in 18-20 cupcake liners in tins.
  • Gently press a ball of ganache into the center of each cupcake.

  • Cover each ball with a small scoop of cake batter- just enough to cover the ball completely.
  • Bake at 350F for the time recommended on the box.
  • Remove from oven and serve warm with ice cream and drizzles of white chocolate.

If you aren’t serving immediately, warm each cupcake in the microwave for 15-20 seconds before serving.

My thoughts: I’ve had many a molten lava cake and cupcake before, but usually they fall apart right out of the pan.  These cupcakes hold together beautifully and don’t leak all that warm fudge out until they are cut into.  They are perfect re-heated and sooooo yummy with a little ice cream and raspberry sauce.  A perfect treat for a chilly fall day!!  Enjoy!!  ~r

Other cupcake recipes you might enjoy: (click on the image to be taken to the recipe)

Frostings, Fillings and Fun!

Posted on

One of the most frequent questions I’m asked about this blog is this:  How do you keep coming up with new  and original recipes?

The answer is this: I find elements (usually a filling, topping or frosting) that I love in one recipe and imagine ways to use it again in a totally new recipe.

Here’s an example:  My friend Dawn’s friend Lily gave her a recipe for caramel chip bars.  I changed a few elements in the recipe and made it my own.  The bars are reeeeaaaaalllly good.  The best part about them is the amazing caramel sauce that makes up the middle layer.  How have I used this caramel sauce since?

(click on a picture to see the whole recipe)


This post is dedicated to sharing my favorites in the frosting, topping and filling world– I hope you can use some of these elements to create your own yummy treats (and if you do, please share them here with the rest of us!!!)

FROSTINGS:

Buttercream Frosting:

By far, my favorite frosting recipe ever.  Light and whipped and a perfect blend of sweet and a touch of salty.  If you want it flavored use extract in place of the vanilla.  You can also add colors.

Ingredients:

  • 1 stick (4 oz.)of salted butter (room temp)
  • 1 stick (4 oz.)of unsalted butter (room temp)
  • 1 1/2 c. powdered sugar
  • 3 t. vanilla (use clear if you want white frosting)

Directions:

  • Place all ingredients in a mixing bowl and beat on high until light and fluffy.
  • This is enough to frost 12-18 cupcakes.  Double this recipe to frost more or to frost an entire layered cake.

German Chocolate Frosting:


Ingredients:

  • 1c. sugar
  • 1c. evaporated milk
  • 1/2c. butter
  • 3 egg yolks (beaten)
  • 1 1/3c. flaked coconut
  • 1c. finely chopped pecans.
  • 1 t. vanilla extract

Directions:

  • In saucepan combine sugar, evaporated milk, butter and egg yolks.  Cook over low heat (stir constantly!) until this thickens considerably (took me about 8 minutes).
  • Remove from heat and stir in pecans and coconut.
  • Chill until thick enough to spread.
  • This makes enough frosting to frost a layer cake.

Kool-Aid Frosting:

Just plain fun.  Use different flavors to be as creative as you want!


Ingredients:

  • 2- 8oz. packages of Philadelphia Cream Cheese (softened to room temp.)
  • 1 packet (0.23oz.) of Kool-Aid
  • Food coloring  (to deepen color if desired)
  • 1- 7oz. container Jet-Puffed Marshmallow Creme
  • 1/3 c. powdered sugar
  • 8 oz. Cool Whip Topping

Directions:

  • Cream together cream cheese, Kool-Aid and food coloring (if desired) until smooth.
  • Beat marshmallow creme and powdered sugar in and then fold in Cool Whip until completely smooth.
  • This makes enough frosting to frost a layer cake.

Whipped Cream Cheese Frosting:


Ingredients:

  • 2 packets of Dream Whip  (4 come in one box)
  • 3/4 c. milk
  • 1/2 t. vanilla
  • 4 oz. (1/2 brick) of softened Philadelphia Cream Cheese
  • 1/3 c. powdered sugar (divided)

Directions:

  • Cream together softened cream cheese and about half of the powdered sugar.  Set aside.
  • Add remaining ingredients together in a large mixing bowl and stir until all powder is combined.
  • Mix with an electric mixer (beaters are ok, but I like to use my whisk attachment if you have one) on high until very stiff peaks form.
  • Add cream cheese mixture and continue beating on high until stiff and thick.
  • This makes enough frosting to frost a layer cake.

Royal Icing:

Not my favorite frosting to work with, but perfect for a smooth and hard topping for cookies.  Beautiful but a lot of work…


Ingredients:

  • 1 lb of powdered sugar
  • 3 T. meringue powder
  • 6 T. water
  • 1t. vanilla (use clear if you want white frosting)
  • Food coloring

Directions:

  • Add all ingredients together and mix with a mixer for at least 2 minutes until smooth and fluffy. Color as desired.

FILLINGS:

Mint Filling

This is perfect for layering inside of brownies and cakes.  I’ve even made a peppermint patty tart using this filling as a layer inside.


Ingredients:

  • 5 c. powdered sugar
  • 8 tbsp. (one cup) melted butter or margarine
  • 2 tsp. peppermint extract
  • food coloring (if desired)

Directions:

  • Add melted butter to sugar and extract.
  • Mix well, using water to bring it to a thick but spreadable consistency.
  • Add food coloring if desired.

Kool-Aid Filling

Perfect for making a cream pie or putting in little cookie cups- this filling’s potential is as endless as the flavors of Kool-Aid on the shelf!  Kids will LOVE this!


Ingredients:

  • 8oz. Philadelphia Cream Cheese
  • 1 (0.22 oz.) packet Kool Aid in any flavor
  • 2c. marshmallow fluff
  • 8 oz. Cool Whip (refrigerator temp)

Directions:

  • Cream together Kool Aid and Philadelphia Cream Cheese
  • Add Marshmallow fluff and blend well.
  • Fold in 1c. of Cool Whip.

Chocolate Mousse:

A perfect creamy filling for a layer cake–YUM!


Ingredients:

  • 2 packets of Dream Whip 
  • 3/4 c. milk
  • 1 t. vanilla
  • 3T. cocoa powder
  • 3T. powdered sugar

Directions:

  • Put Dream Whip, milk, vanilla, cocoa powder and powdered sugar into a mixing bowl and blend together.
  • Using a mixer, beat until stiff peaks form (3-4 minutes)

Easy Cheesecake Filling:

I’ve used this no-bake cheesecake filling for years- I like to make it and fill a pre-made graham crust for a super easy dessert!


Ingredients:

  • 8 oz. of Philadelphia Cream Cheese
  • 1/3 c. granulated sugar
  • 2 t. vanilla
  • 1 (8 oz) container of Cool Whip
  • 1 c. mini chocolate chips

Directions:

  • Cream together softened cream cheese and sugar.
  • Add vanilla.
  • Fold in Cool Whip and  1 c. chocolate chips.

TOPPINGS:

Chocolate glaze:

This glaze is nice because it hardens just enough to still cut- like a really hard fudge.


Ingredients:

  • 12oz. semi-sweet chocolate chips
  • 12 tsp. butter (do not substitute margarine here!)

Directions:

  •  Melt butter and chocolate together in the microwave in 30 second increments, stirring in between until completely melted and smooth.
  • Pour over dessert and spread evenly.  Allow glaze to harden.

Ganache:

This is a big go-to topping for me- you’ll see it in many varieties in my recipes.  You can change the flavor by changing the type of chips you use.  I’ve made dark chocolate, milk chocolate, white chocolate, butterscotch, cinnamon and peanut butter ganache using this recipe— it makes a GREAT (easy to cut!) topping for cheesecakes.

Ingredients:

  • 1/2 c. whipping cream
  • 1 c. chips (any flavor)

Directions:

  • Warm whipping cream in a small saucepan until just bubbling around edges (stirring!)
  • Turn off heat, add chips and cover pan for 5 minutes.
  • Stir melted chips into hot whipping cream until smooth (add a little heat if the chips aren’t fully melted)
  • Pour over dessert (or into cookie cups etc.) and allow ganache to harden.

Melted Frosting Glaze:

Such a simple topping- yet so yummy!


Ingredients:

  • One can of pre-made frosting

Directions:

  • Spoon frosting into a microwave safe bowl.
  • Warm in microwave for about 30 seconds.
  • Stir until smooth and runny.
  • Pour over dessert and allow glaze to harden.

Wilton’s Candy Melts:

The best thing to drizzle any dessert with.  These are little candy wafers in a variety of colors that you can melt and drizzle.  They harden into a solid layer though- so cutting them is more difficult.

I hope this collection of my favorites inspires you to create wonderful new treats!

Enjoy your weekend– and Happy Father’s Day to all of you dads out there!!  -r

Chocolate-covered Strawberry Cheesecake!!

Posted on

White chocolate cheesecake covered with chocolate dipped strawberries??? I’ll have some of that! (in fact I went off my diet and did– just a little….)  This is my standard cheesecake recipe with a twist- it’s surrounded by Nilla Wafers and topped with loads of dipped strawberries!  Fun and fancy- you will impress your guests with this cheesecake!

INGREDIENTS:

Cheesecake:

  • 9 oz. chocolate wafer cookies (I use animal crackers)
  • 15-20 Nilla Wafers
  • 1/4 c. margarine (melted)
  • 2 (8oz.) packages of Philadelphia Cream Cheese (softened)
  • 1/2c. sugar
  • 3 eggs
  • 2 c. white chocolate chips (melted)
  • 1 c. heavy whipping cream
  • 2 tbsp. margarine (melted)
  • 3 tsp. vanilla

Toppings:

DIRECTIONS:
Cheesecake:
  • Preheat oven to 325 degrees
  • Crush cookies into fine crumbs and add melted margarine.  Combine well and press into the bottom of a 9-Inch Springform Pan
    .
  • Gently press Nilla wafers upright along the edges of the crust.
  • Beat softened cream cheese with sugar until smooth.
  • Add eggs one at a time, beating in between each one.
  • Add remaining cheesecake ingredients, beating until smooth.
  • Pour into crust and allow to sit at room temp for 30 minutes.
  • Place on a cookie sheet and bake for 60 minutes.
  • Turn off oven, open oven door a little and allow to sit for another 30 minutes.
  • Remove from oven and run knife around edge of pan.  Remove edge of pan. 
  • Allow cheesecake to come to room temperature and then refrigerate overnight.
Toppings:
  • CHOCOLATE:  Put 1/2c. whipping cream into saucepan and heat just until bubbling at edges.  Turn heat off, add chocolate chips, cover and allow to sit for 5 minutes.
  • After 5 minutes, stir until smooth.
  • Pour over top of cheesecake and allow this to harden.
  • STRAWBERRIES: Take the top off each strawberry and wash well.  Allow these to dry completely on paper towel.
  • Melt both dark and white chocolate candy melts in the microwave in 30 second increments, stirring in between until completely melted.
  • Gently dip strawberries in chocolate (half in dark and half in white).  Use a fork to drain away excess chocolate and set on parchment paper to harden.
  • Put remaining melted chocolate in ziplock bags.  Clip a corner and drizzle each strawberry with its opposite color.
  • Allow these to completely harden.
  • Add powdered sugar to remaining cup of  whipping cream and whip with mixer (you could use Cool Whip to save time on this part).
  • Spoon whipped cream into a zip-lock bag with a decorative tip added into one corner.
  • Gently place hardened dipped strawberries on cheesecake.
  • Pipe whipped cream around edges and between berries.
  • Keep chilled.  Serve the same day as you place the berries (they will eventually get “soggy”  if they sit too long.
  • ENJOY!!!
My thoughts:
This is the only recipe I’ve ever won a contest with.  Two, in fact!  The 1st was a recipe contest through our local newspaper.  The second was a contest with Ferrara Pan Candy Company.  It isn’t a recipe thats quick and easy, but it’s fun to make and sure to impress!!!  Here’s a couple of tips:  Get more than enough strawberries- you want similar sizes and you will need to go through a few to find enough of the same size.  Start placing the strawberries in the middle with the largest.  The smaller berries are easier to squeeze in around the edges 🙂  Enjoy!!!  r-
This recipe was shared on these wonderful blogs:
%d bloggers like this: