Tag Archives: raspberry

Berry Bomb Cupcakes

Posted on

Berry Bomb Cupcakes1

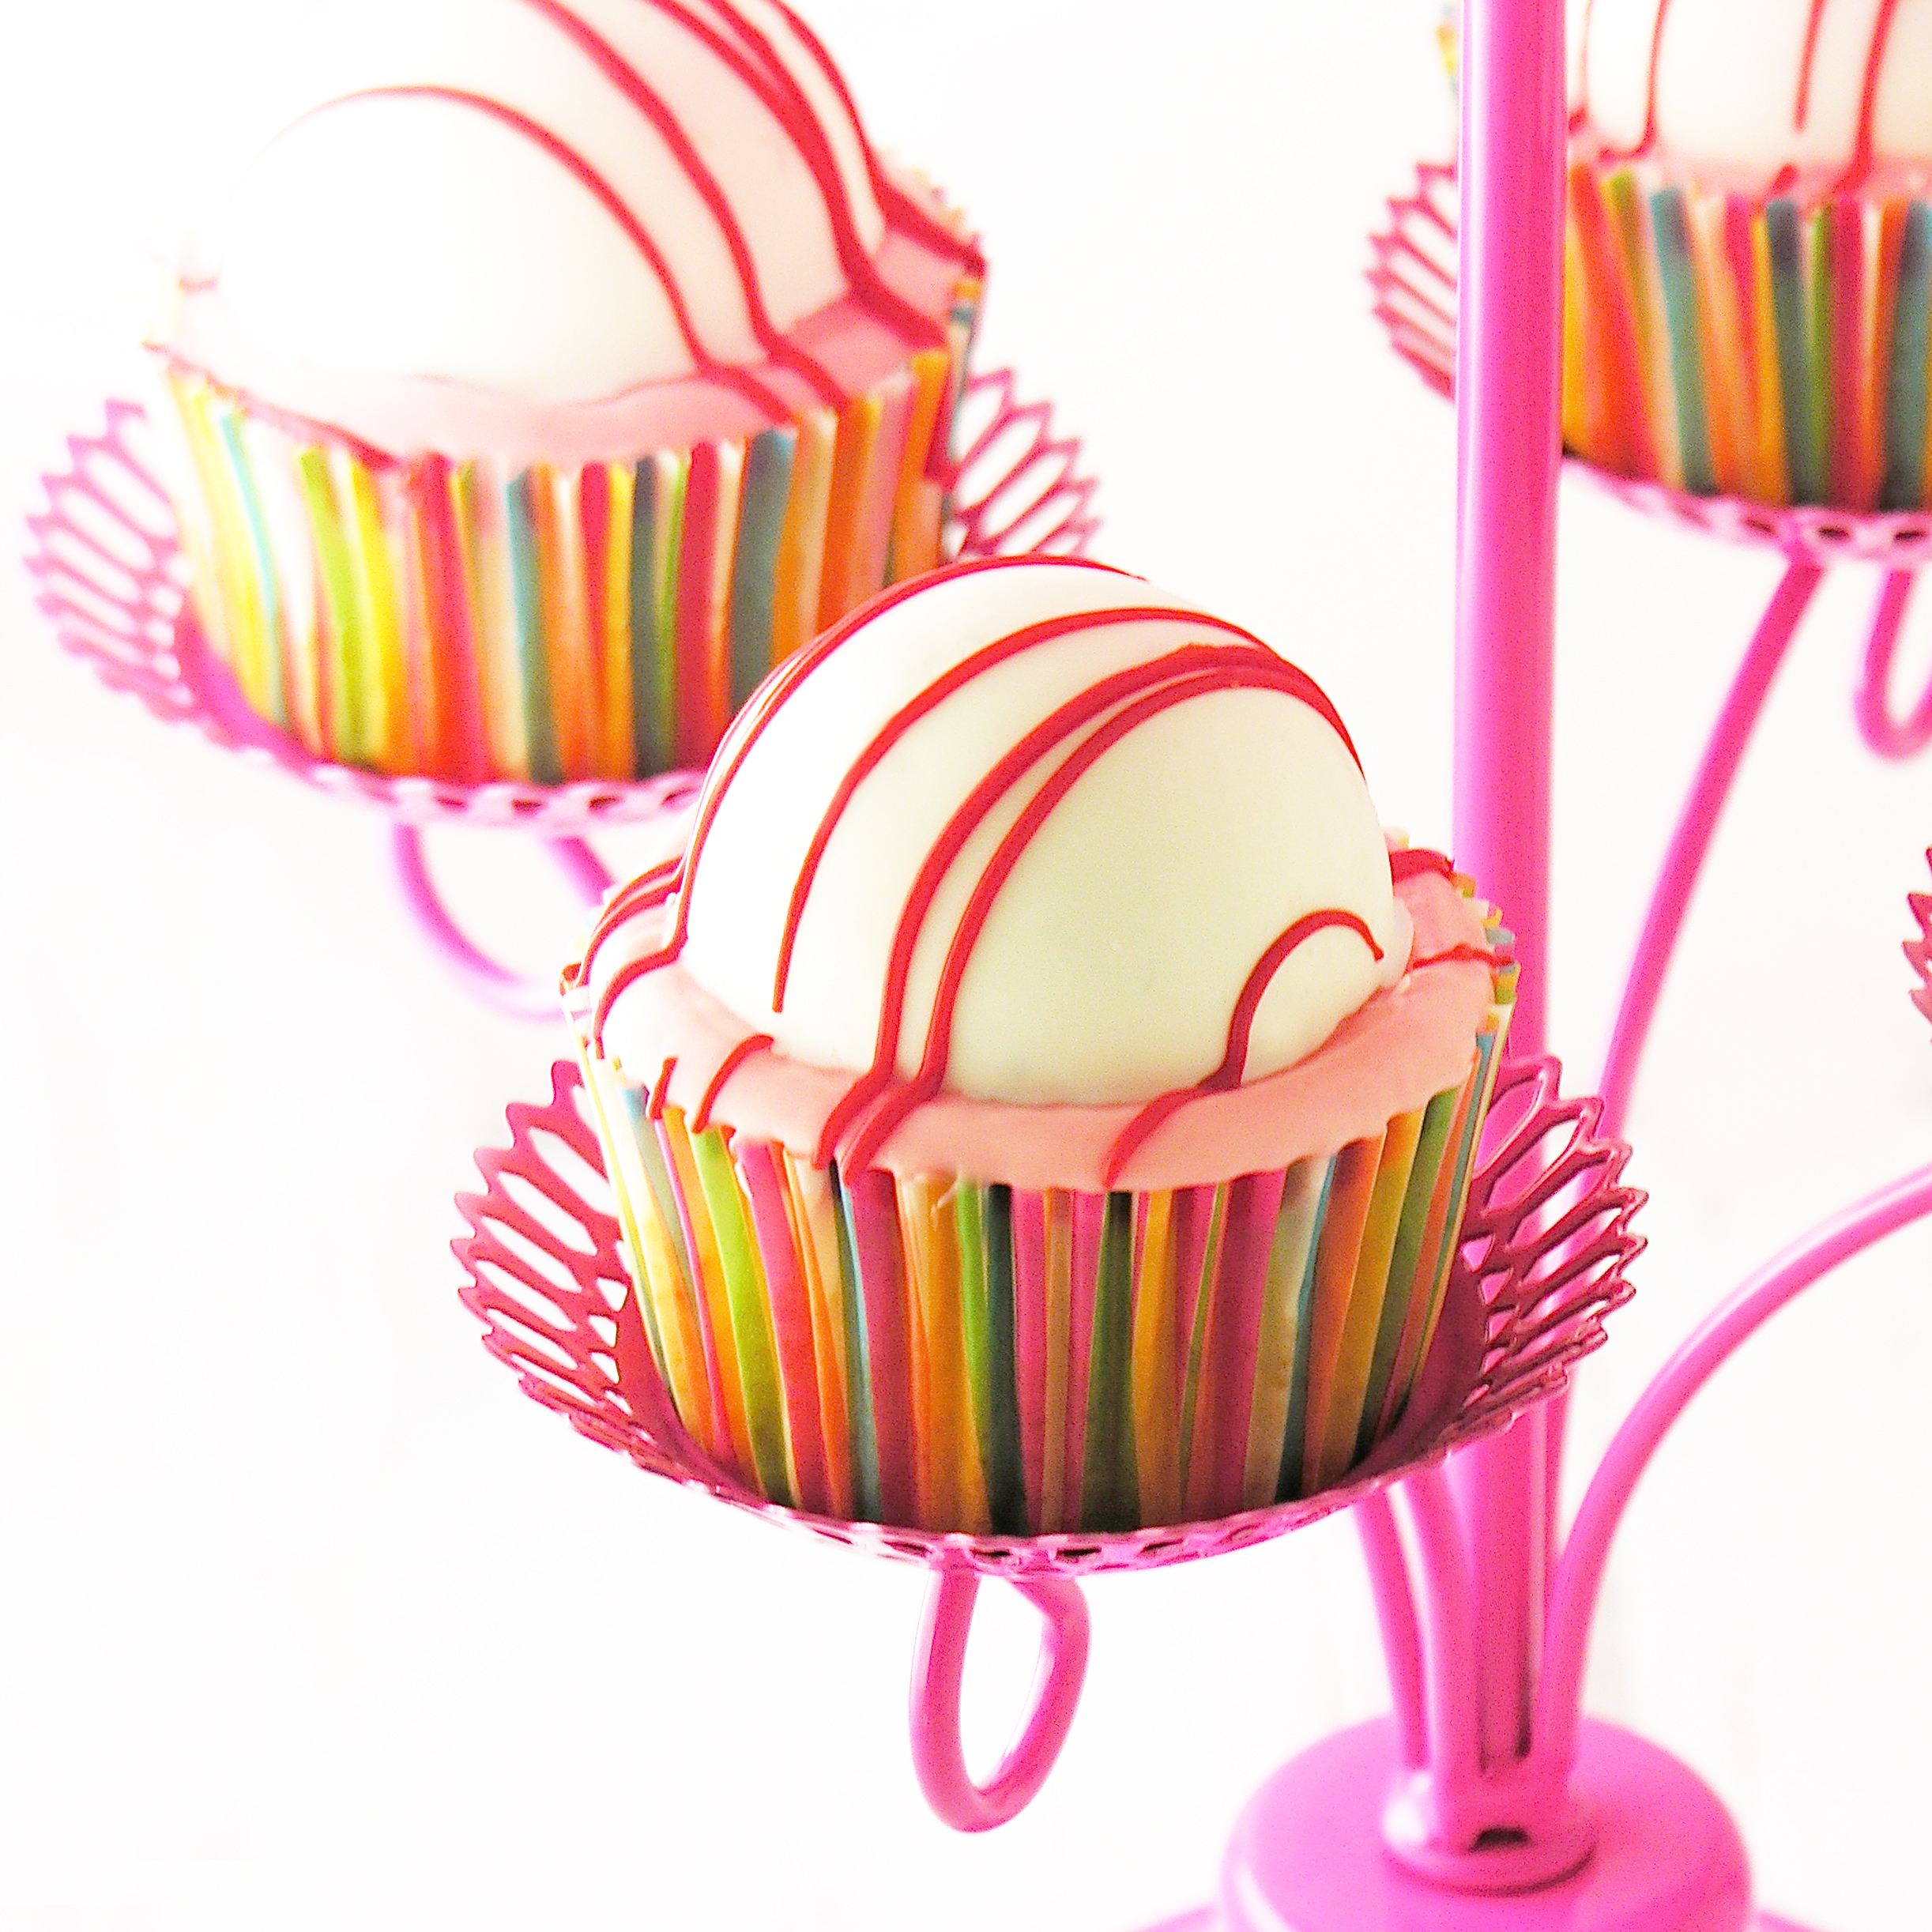
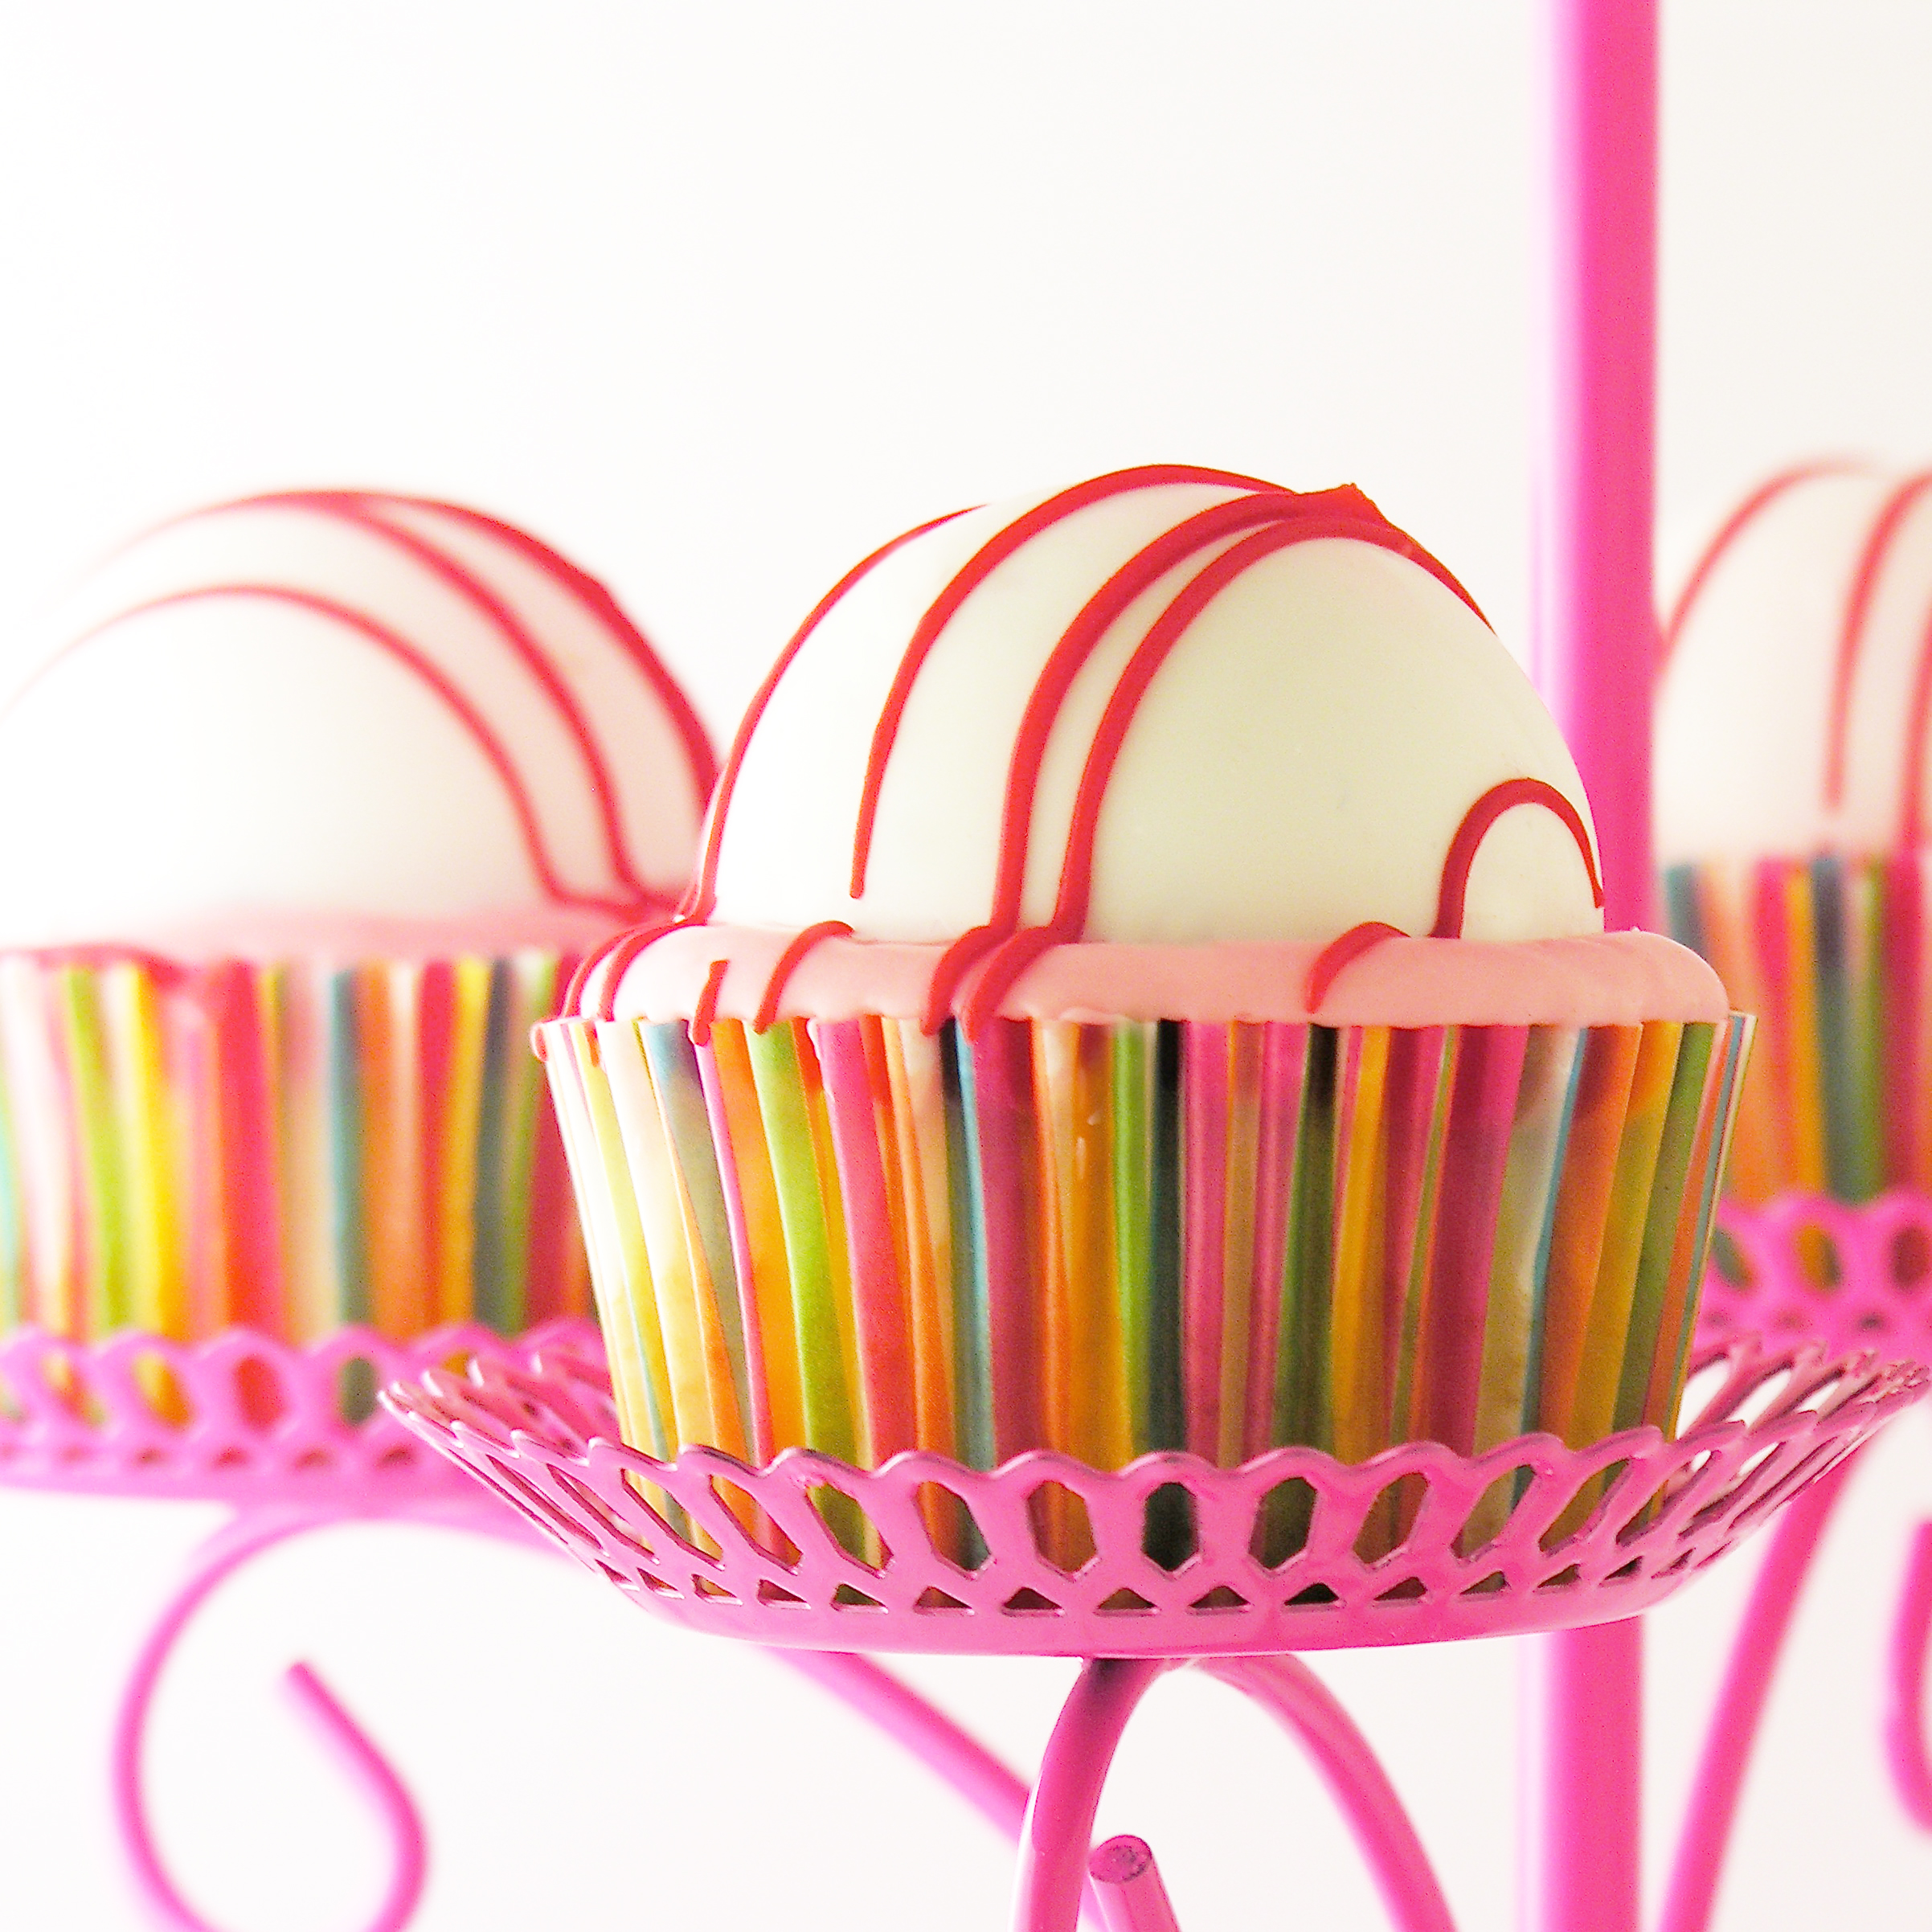
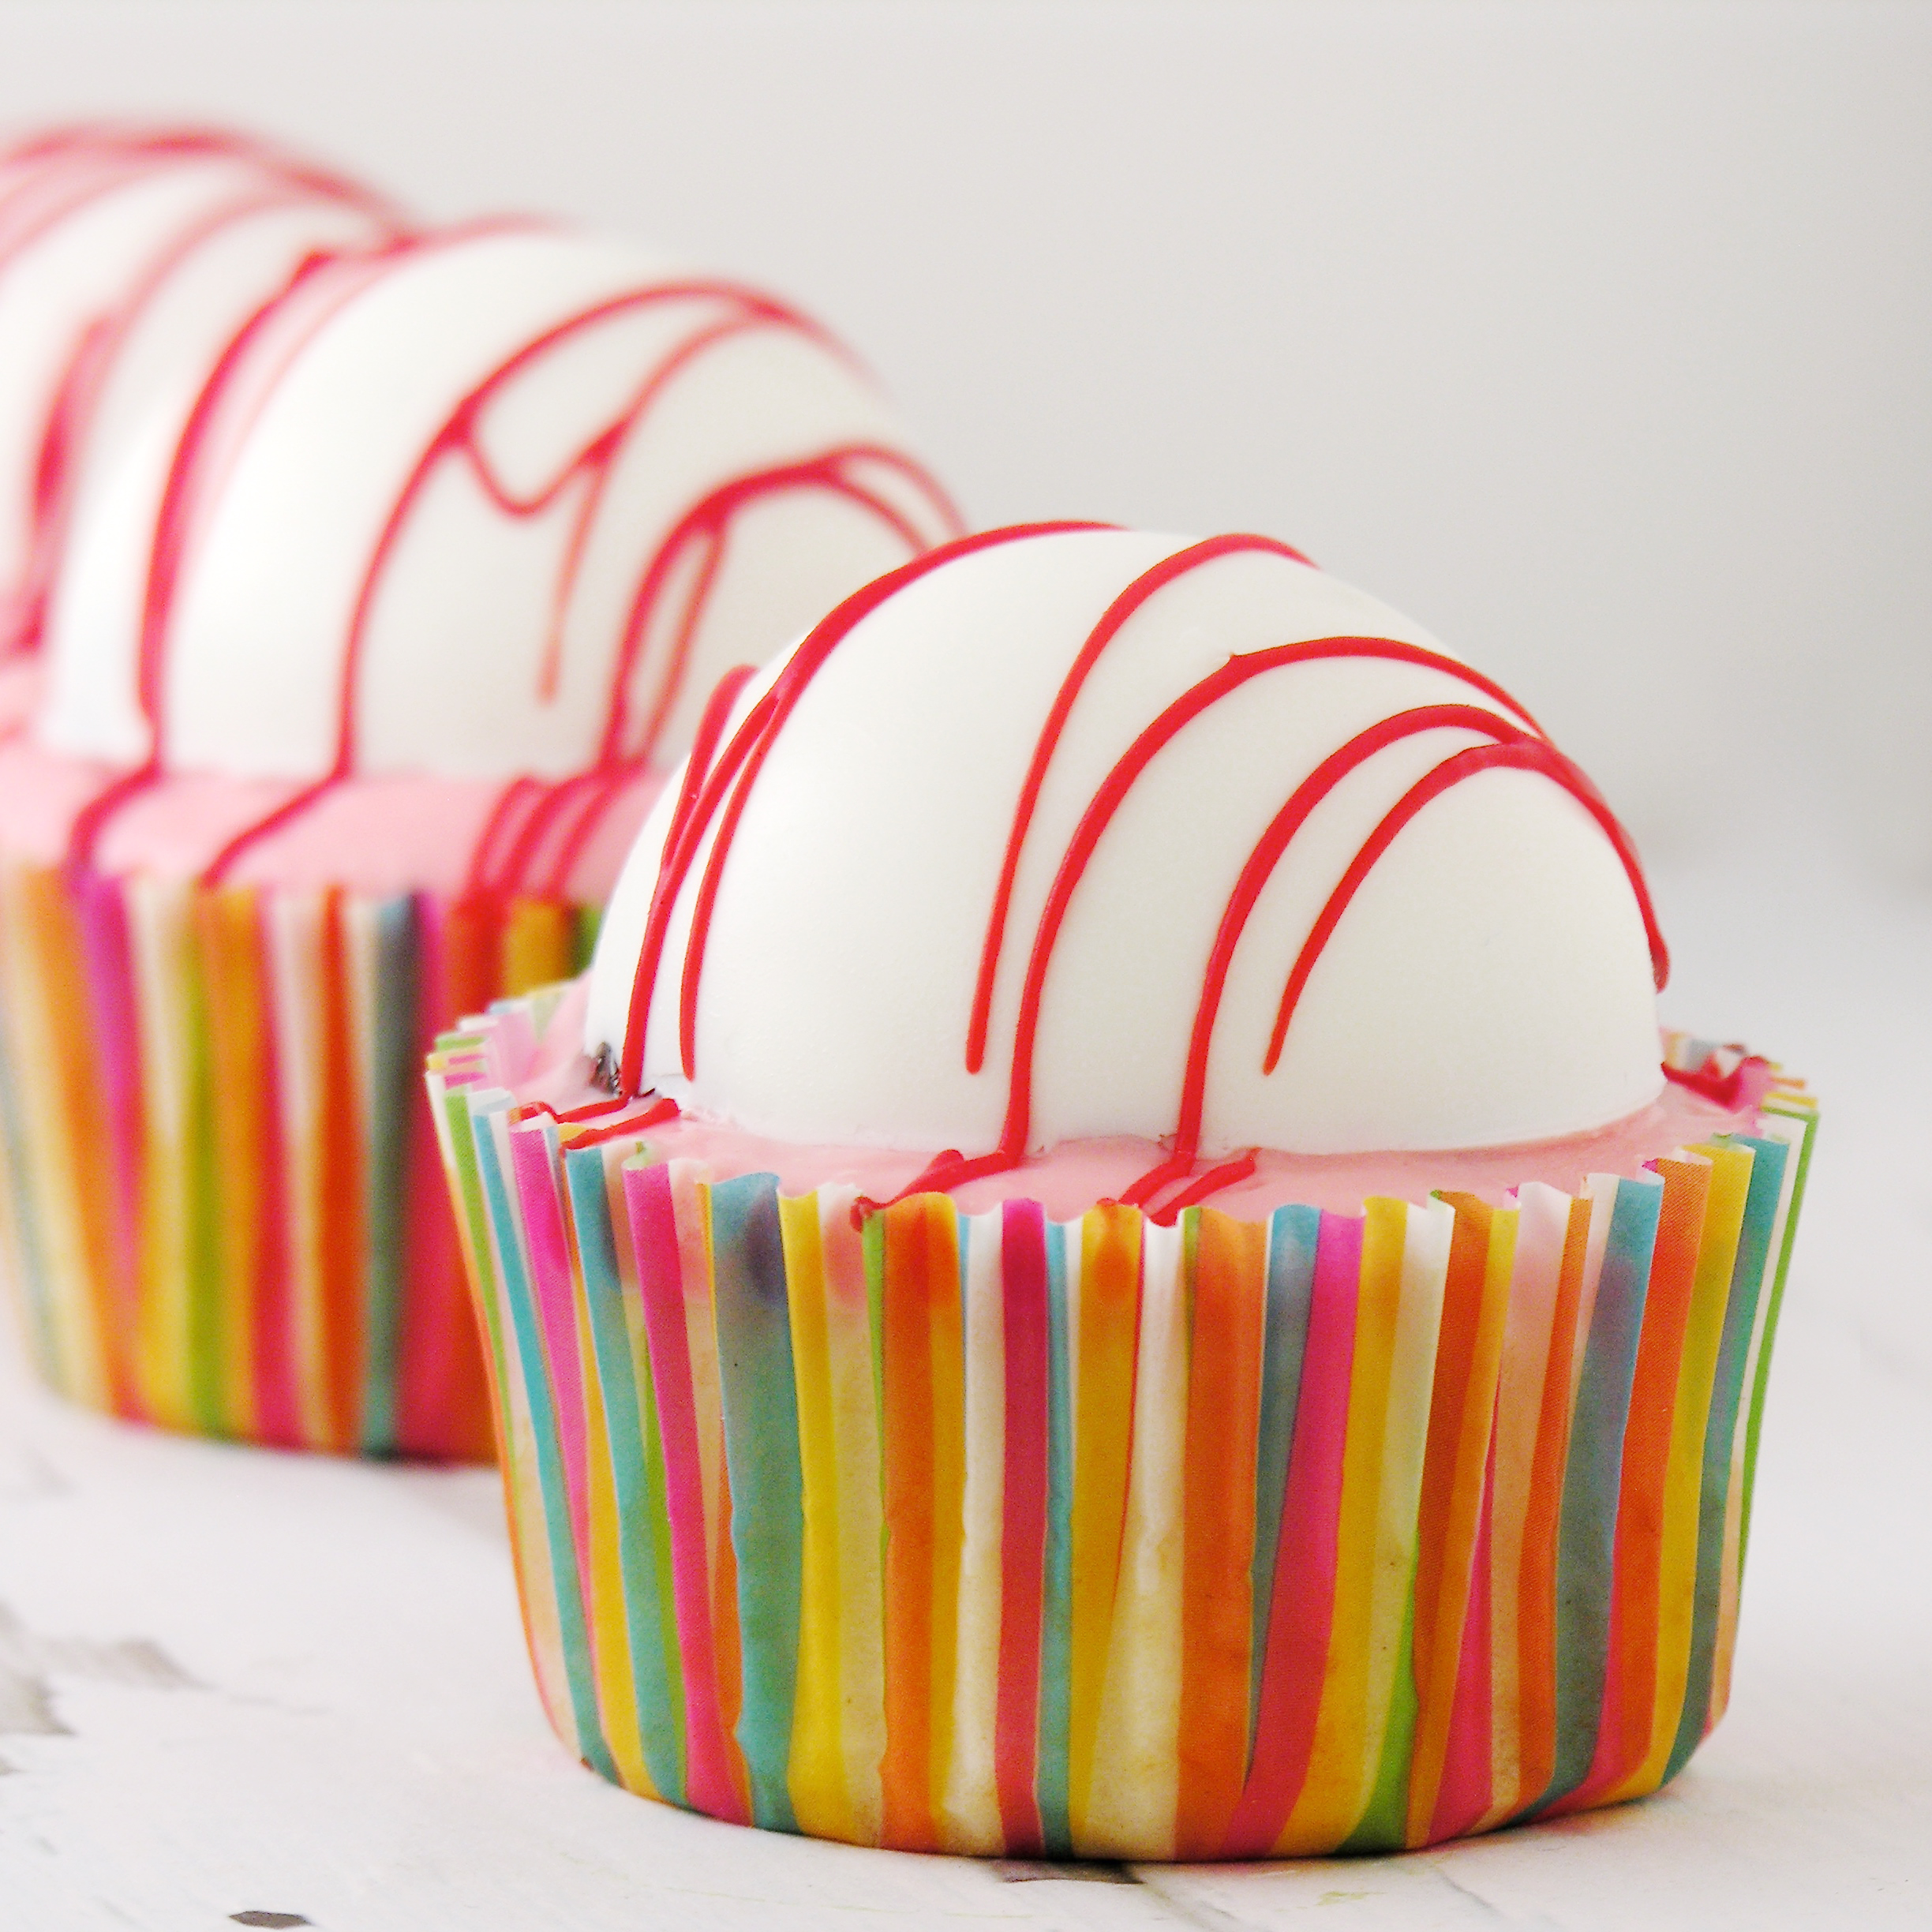
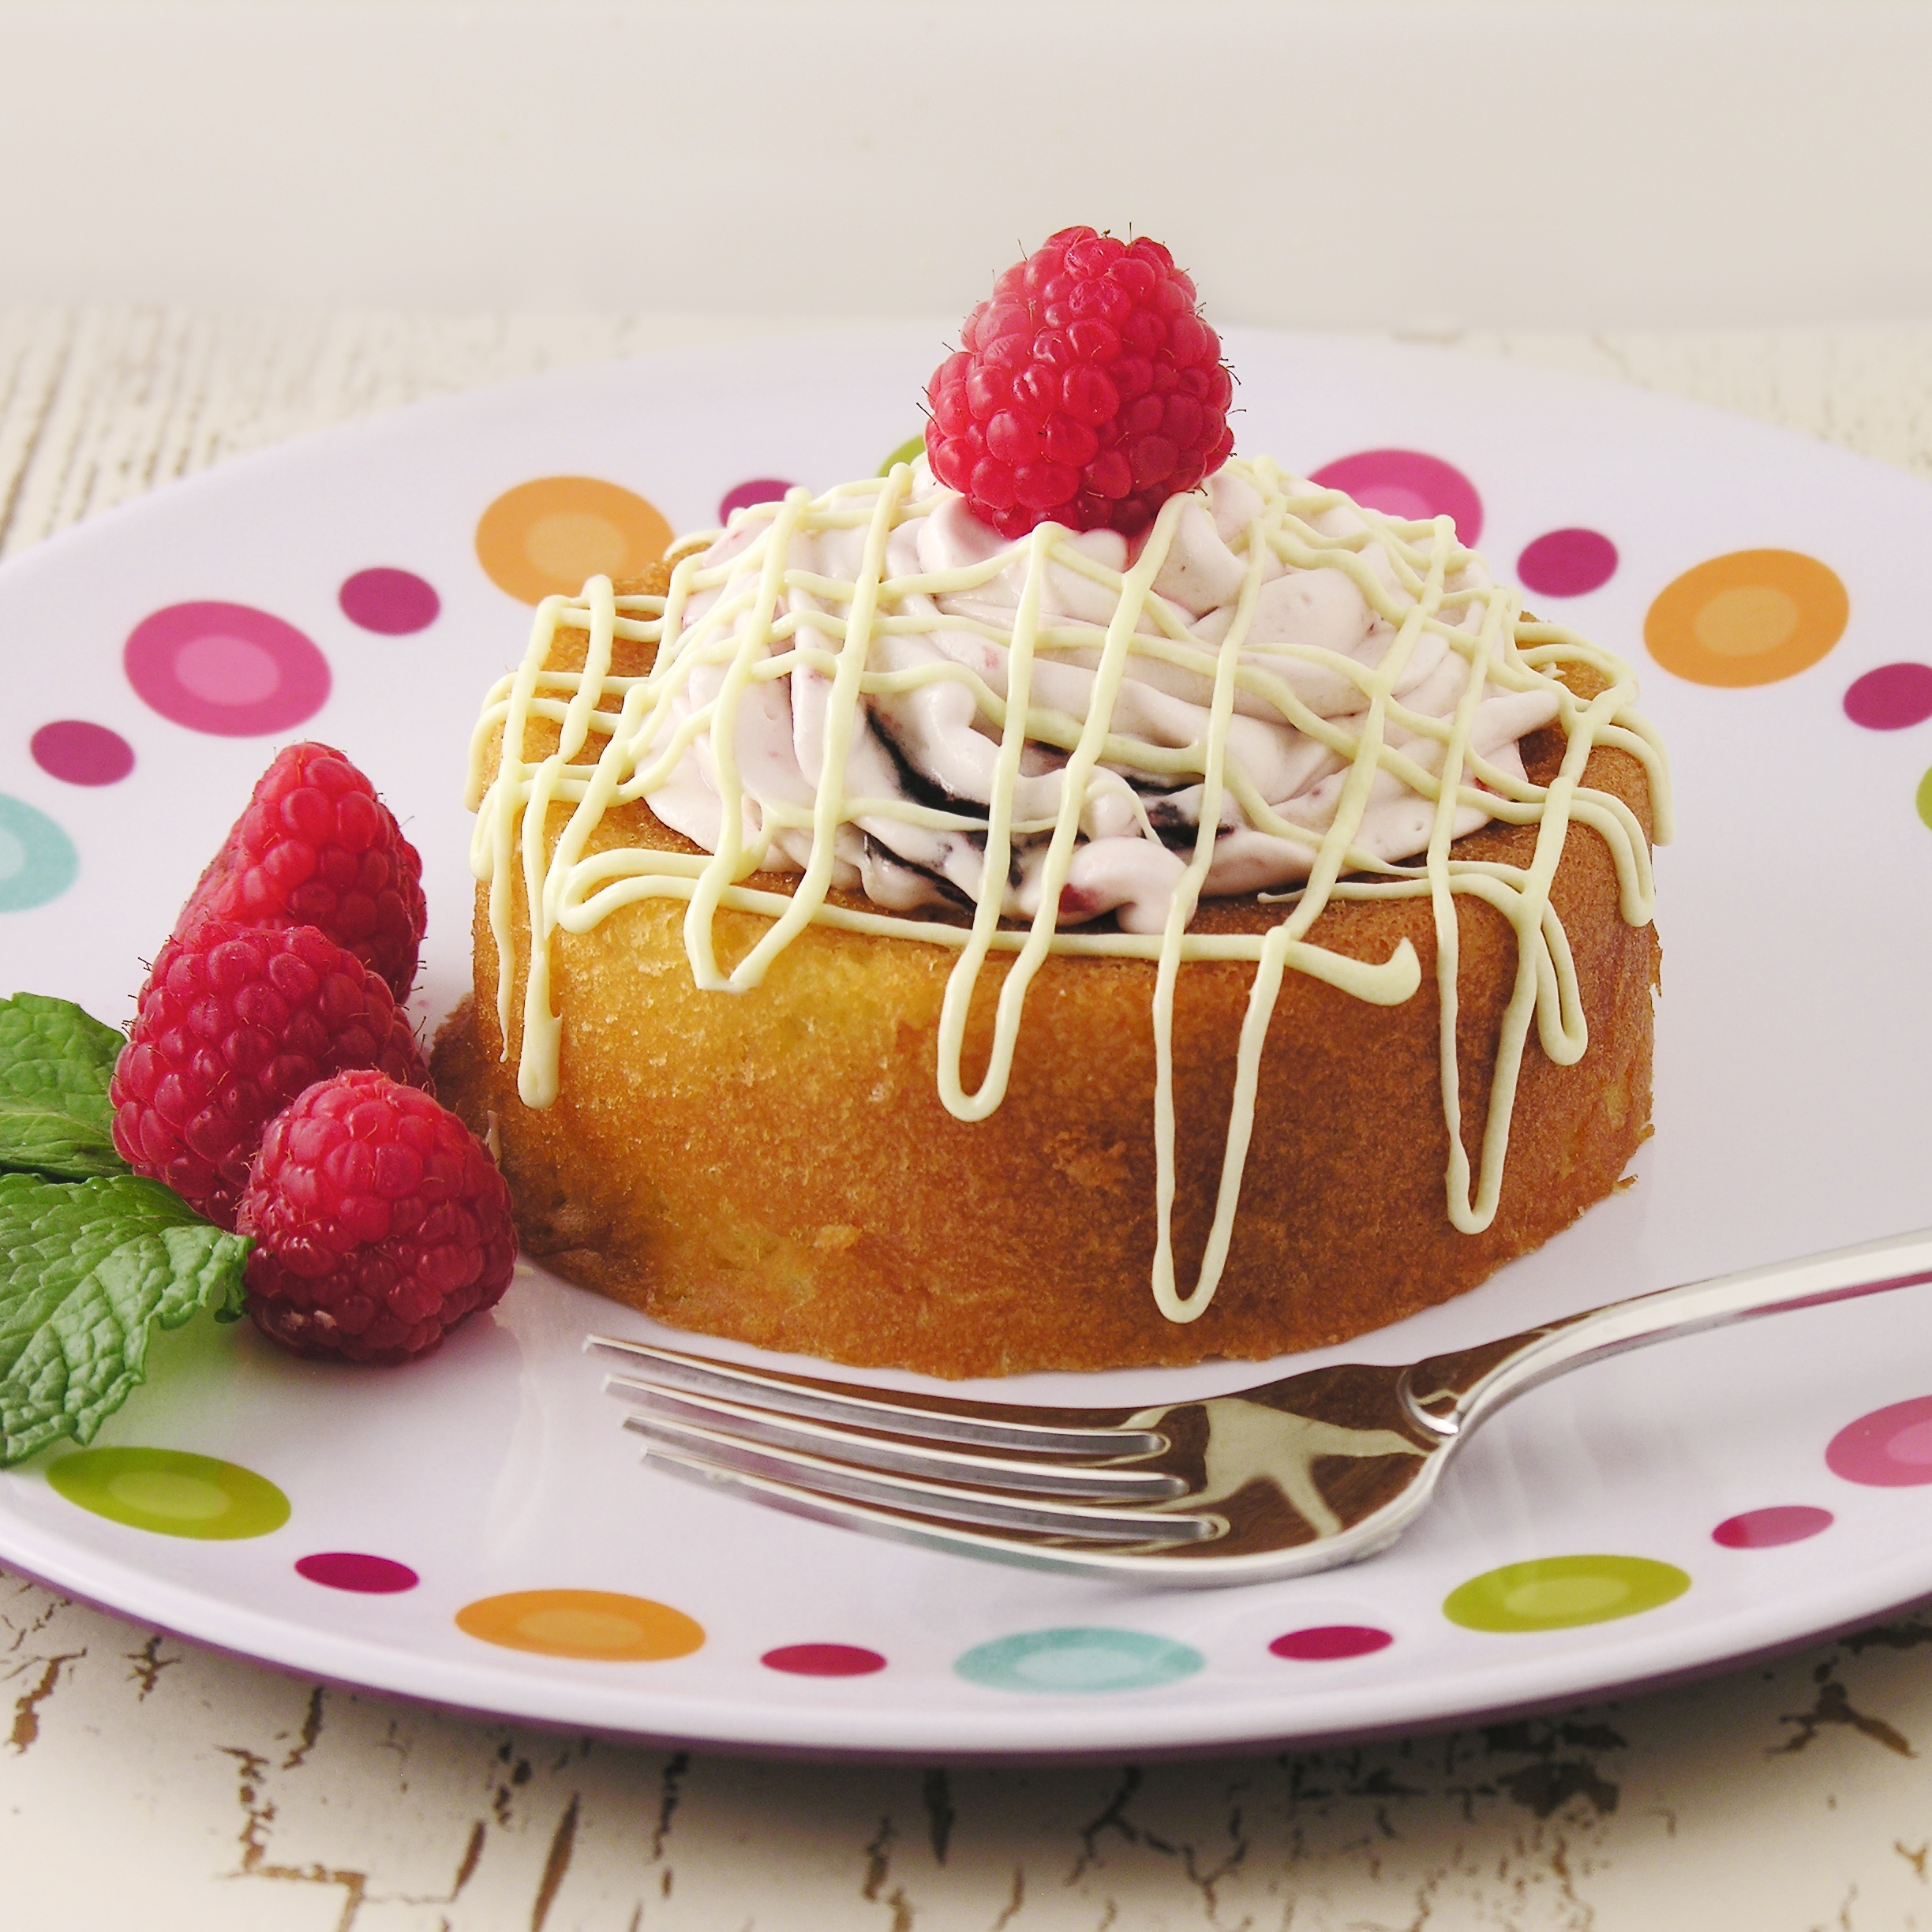
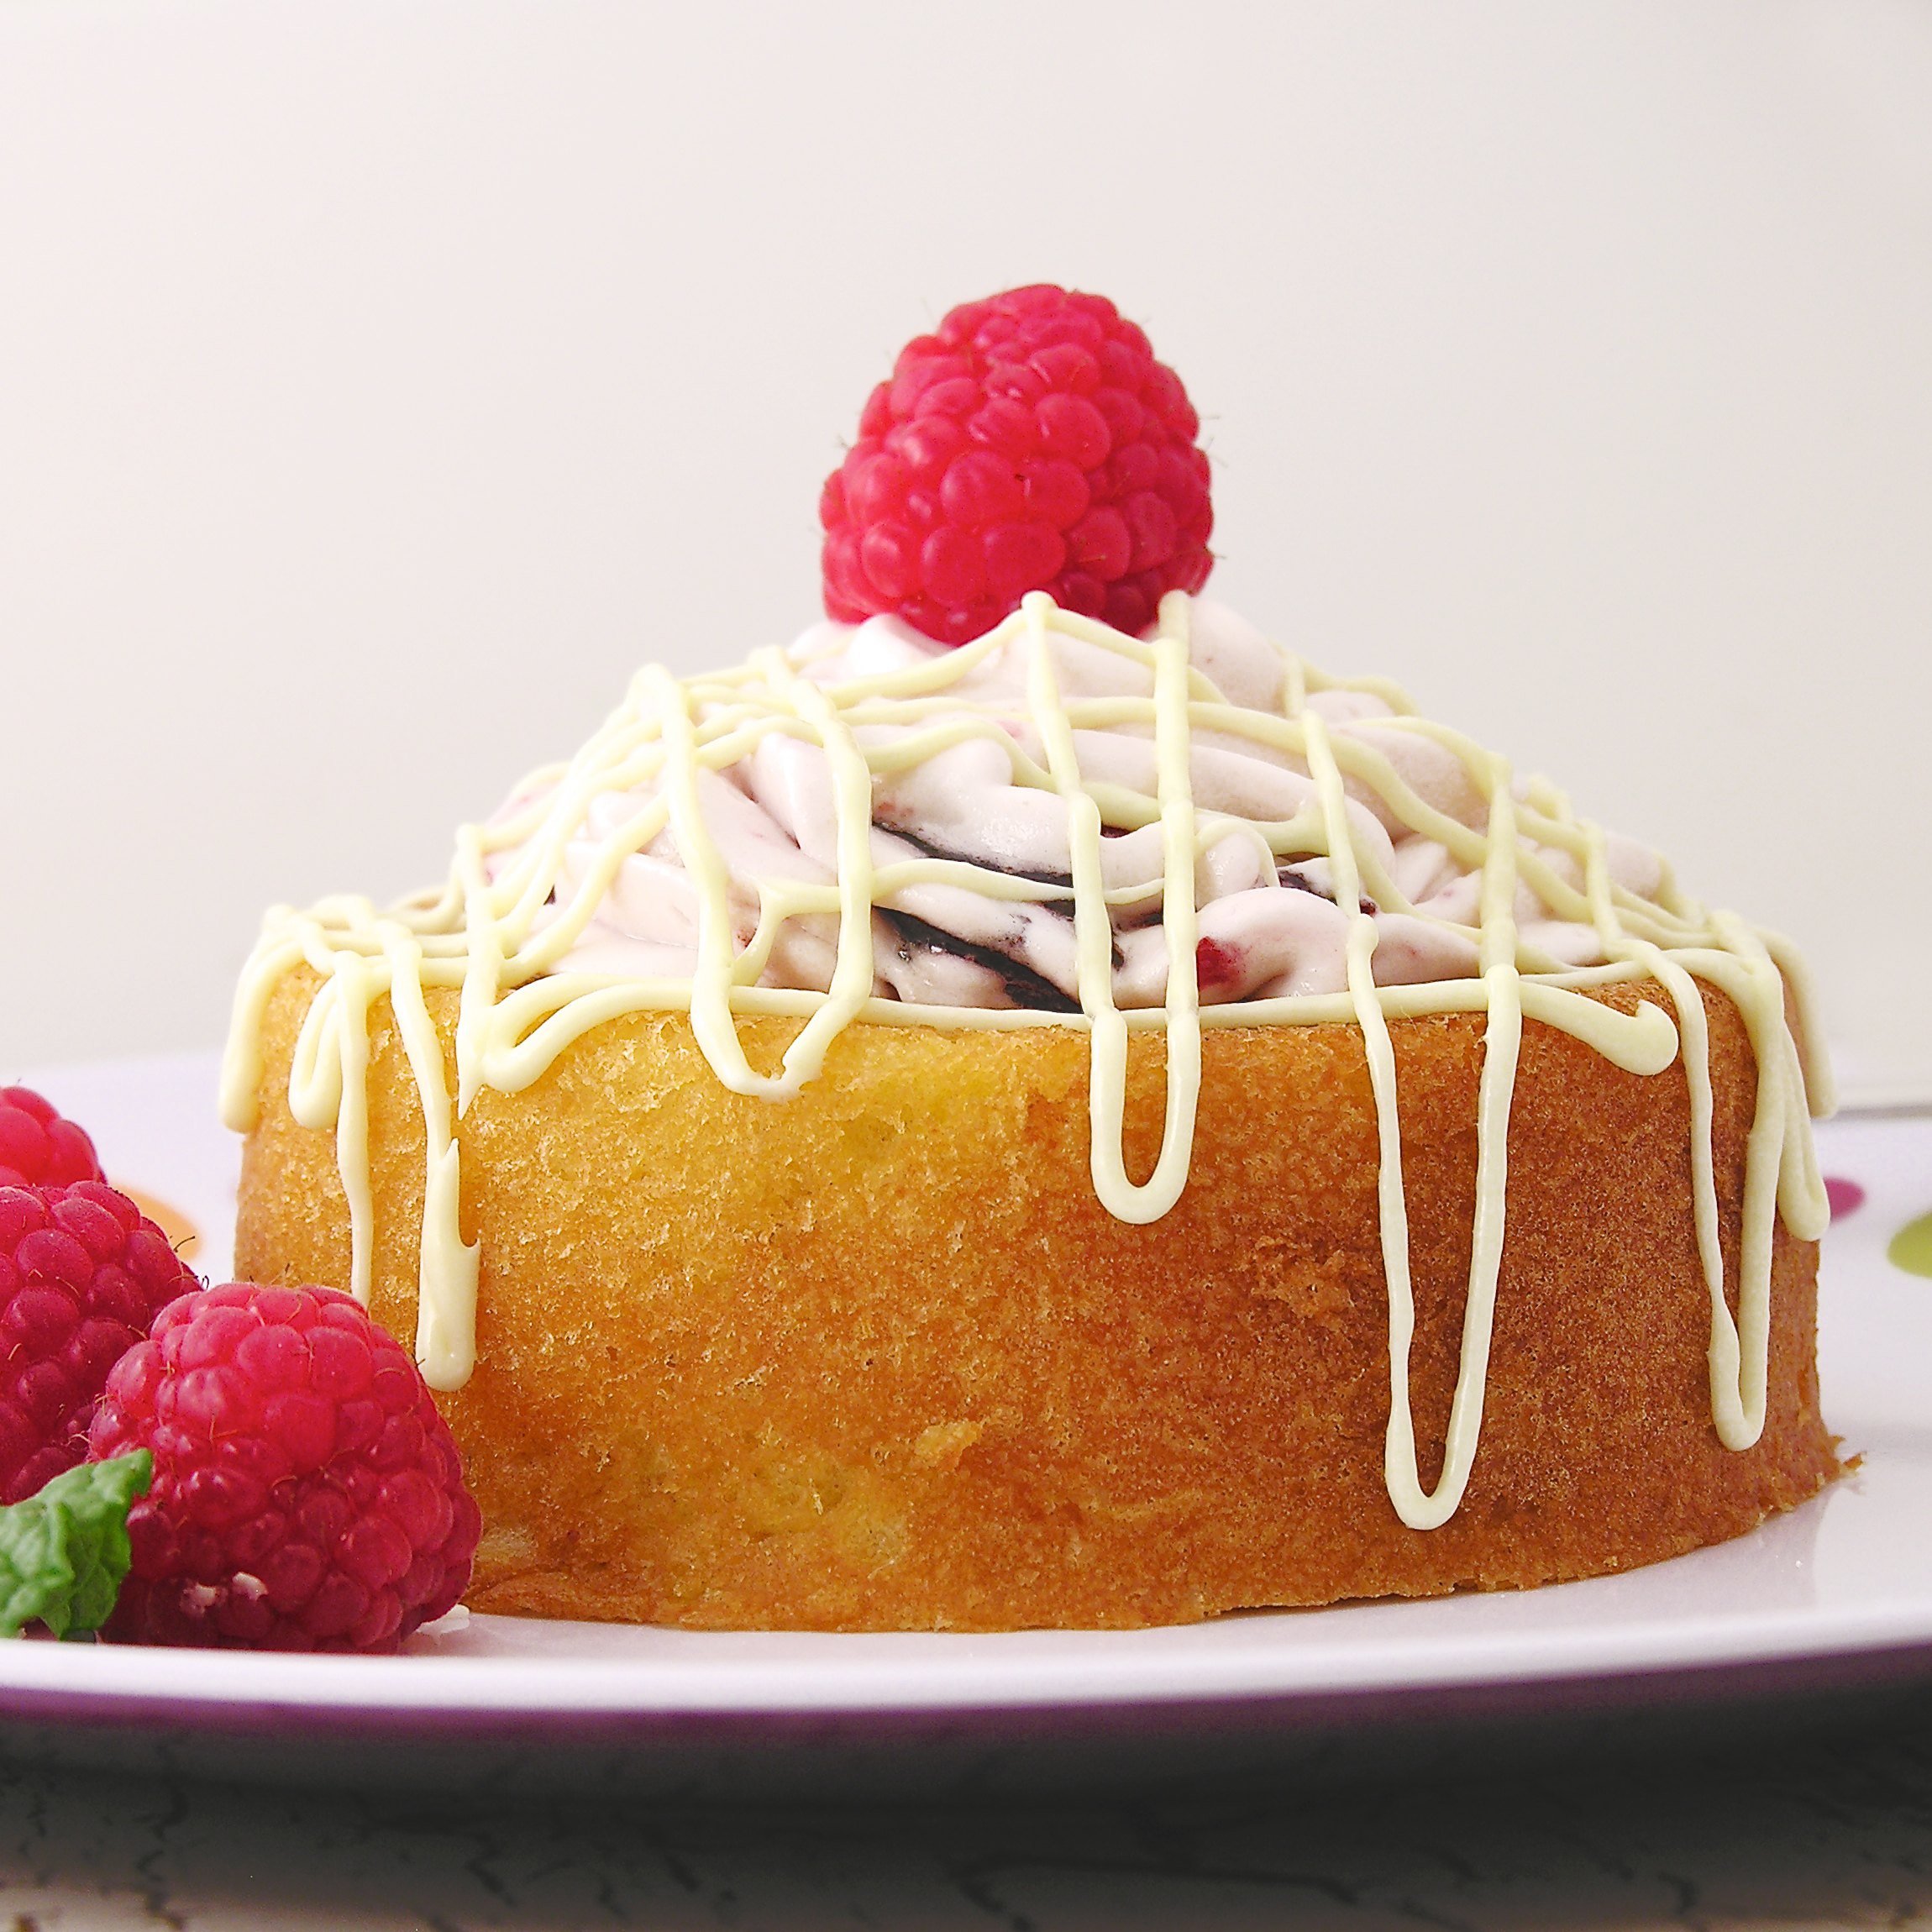
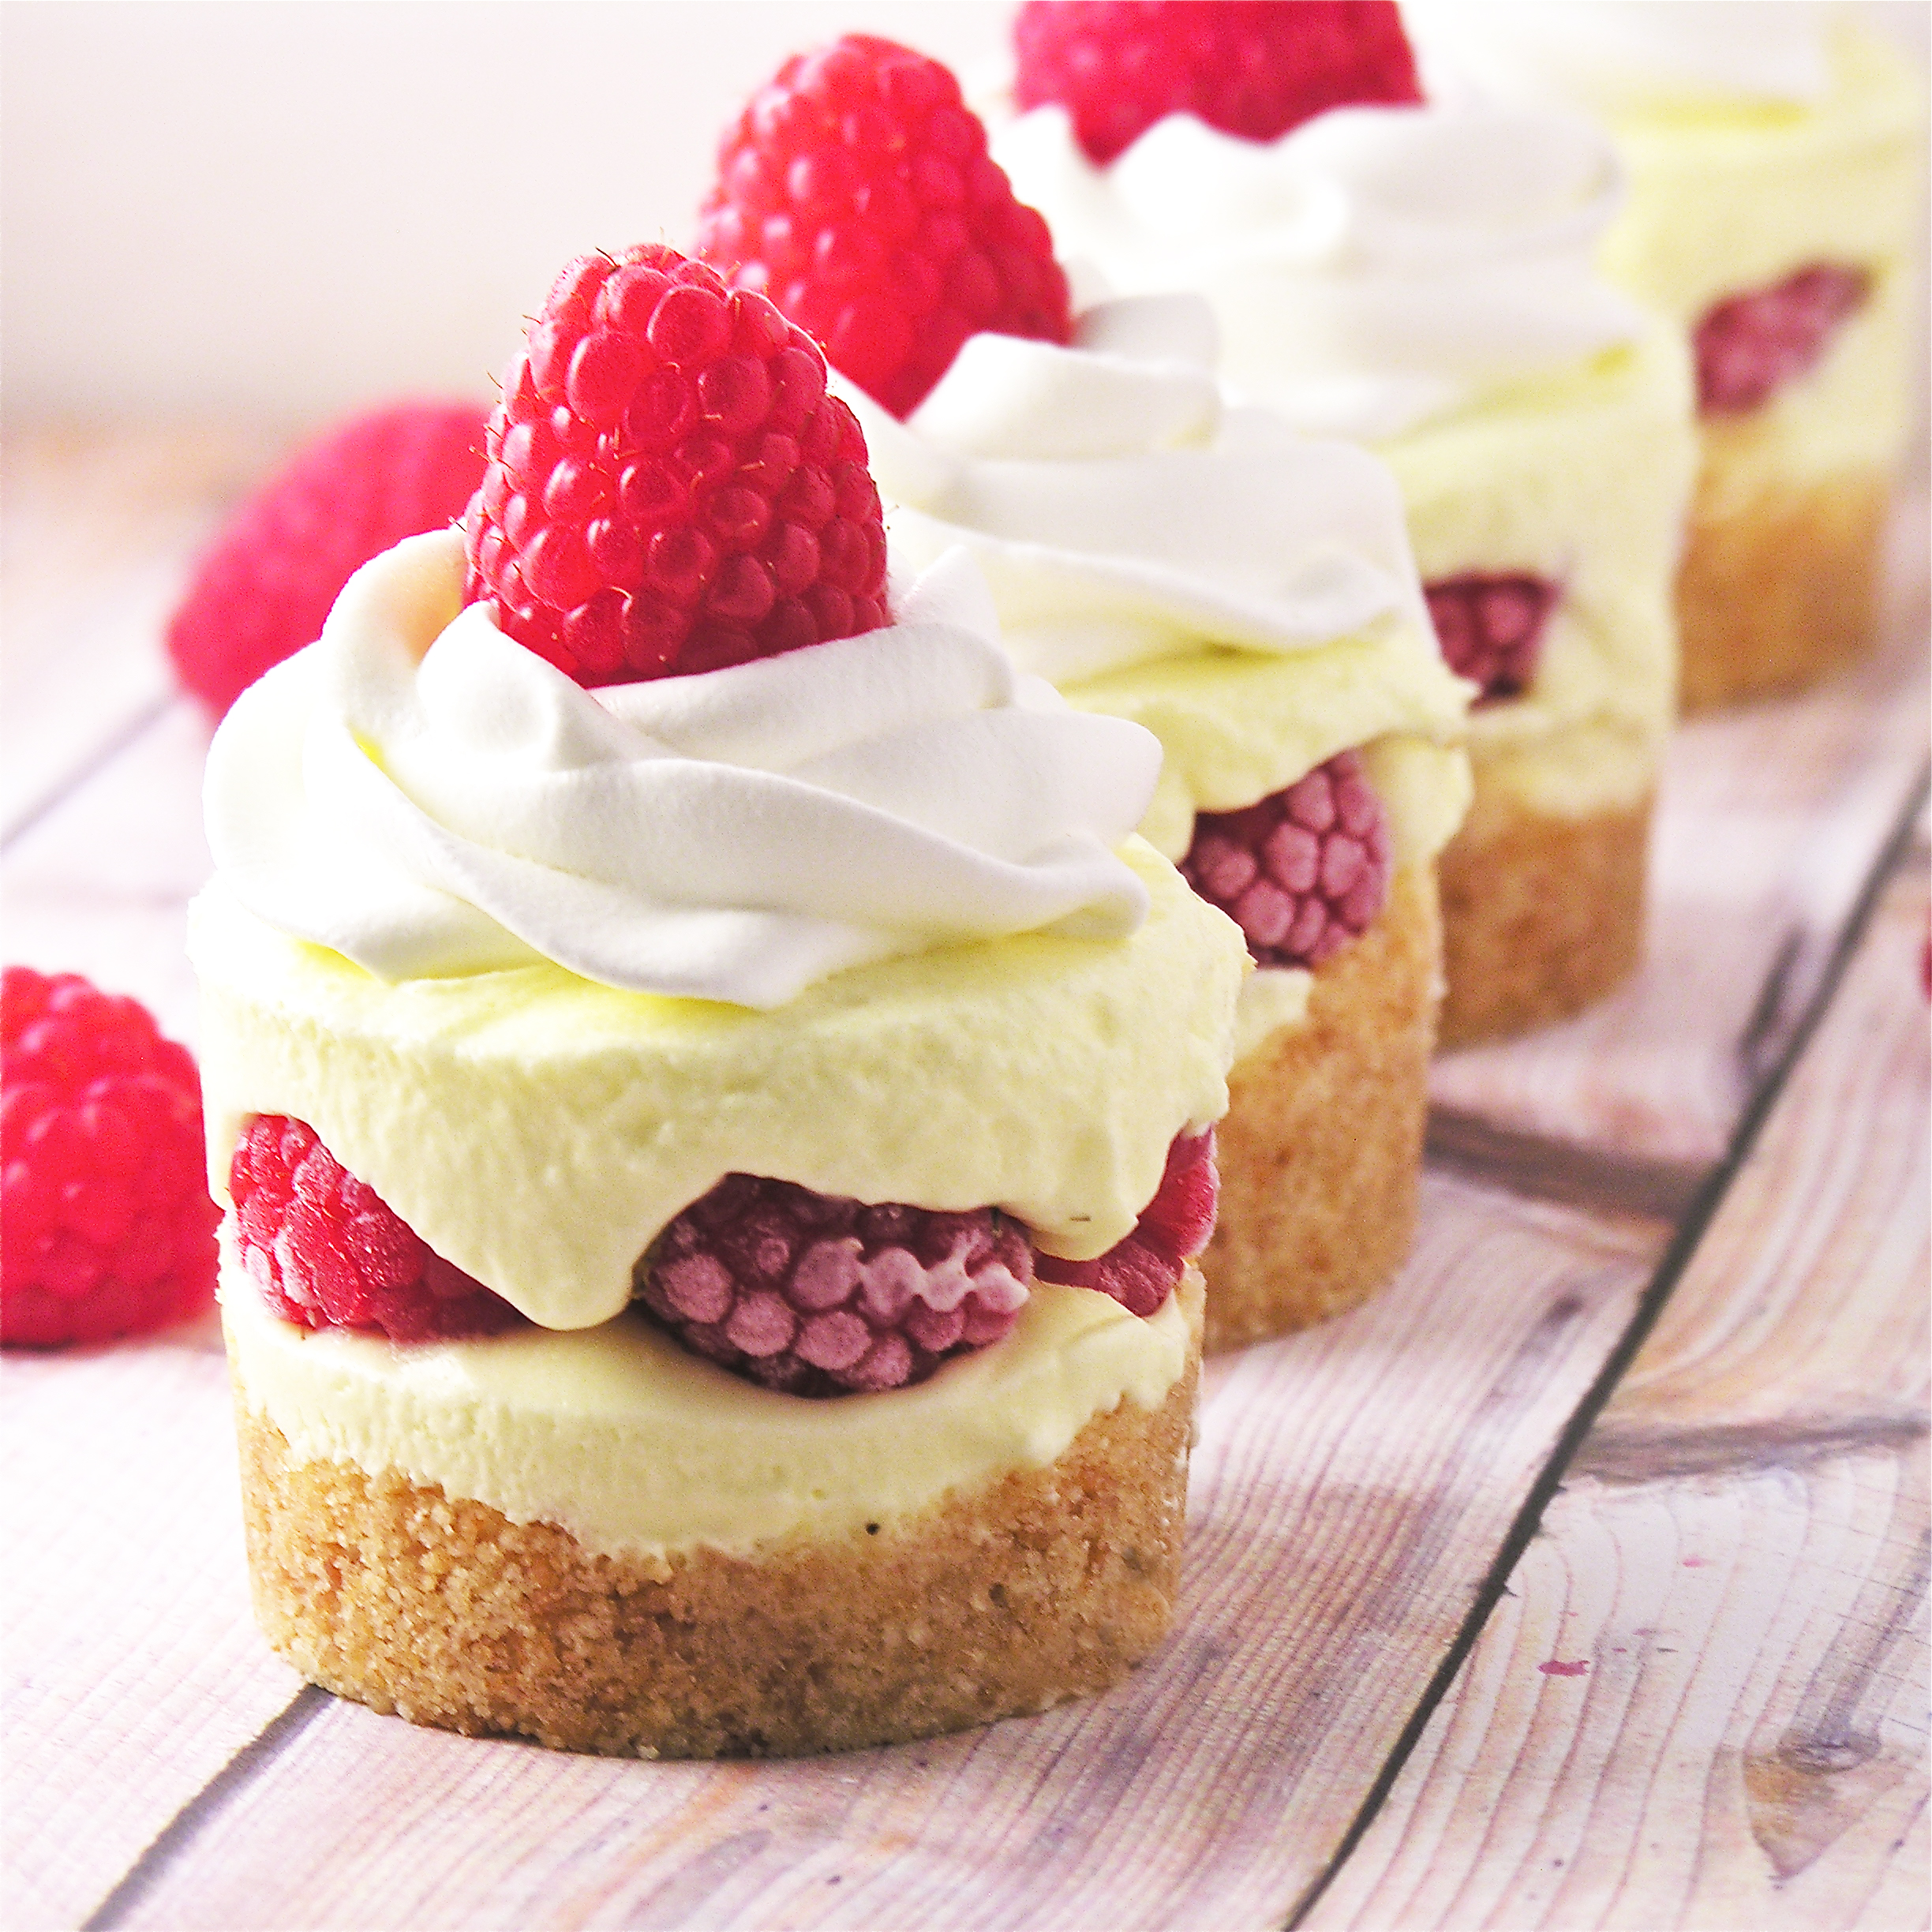
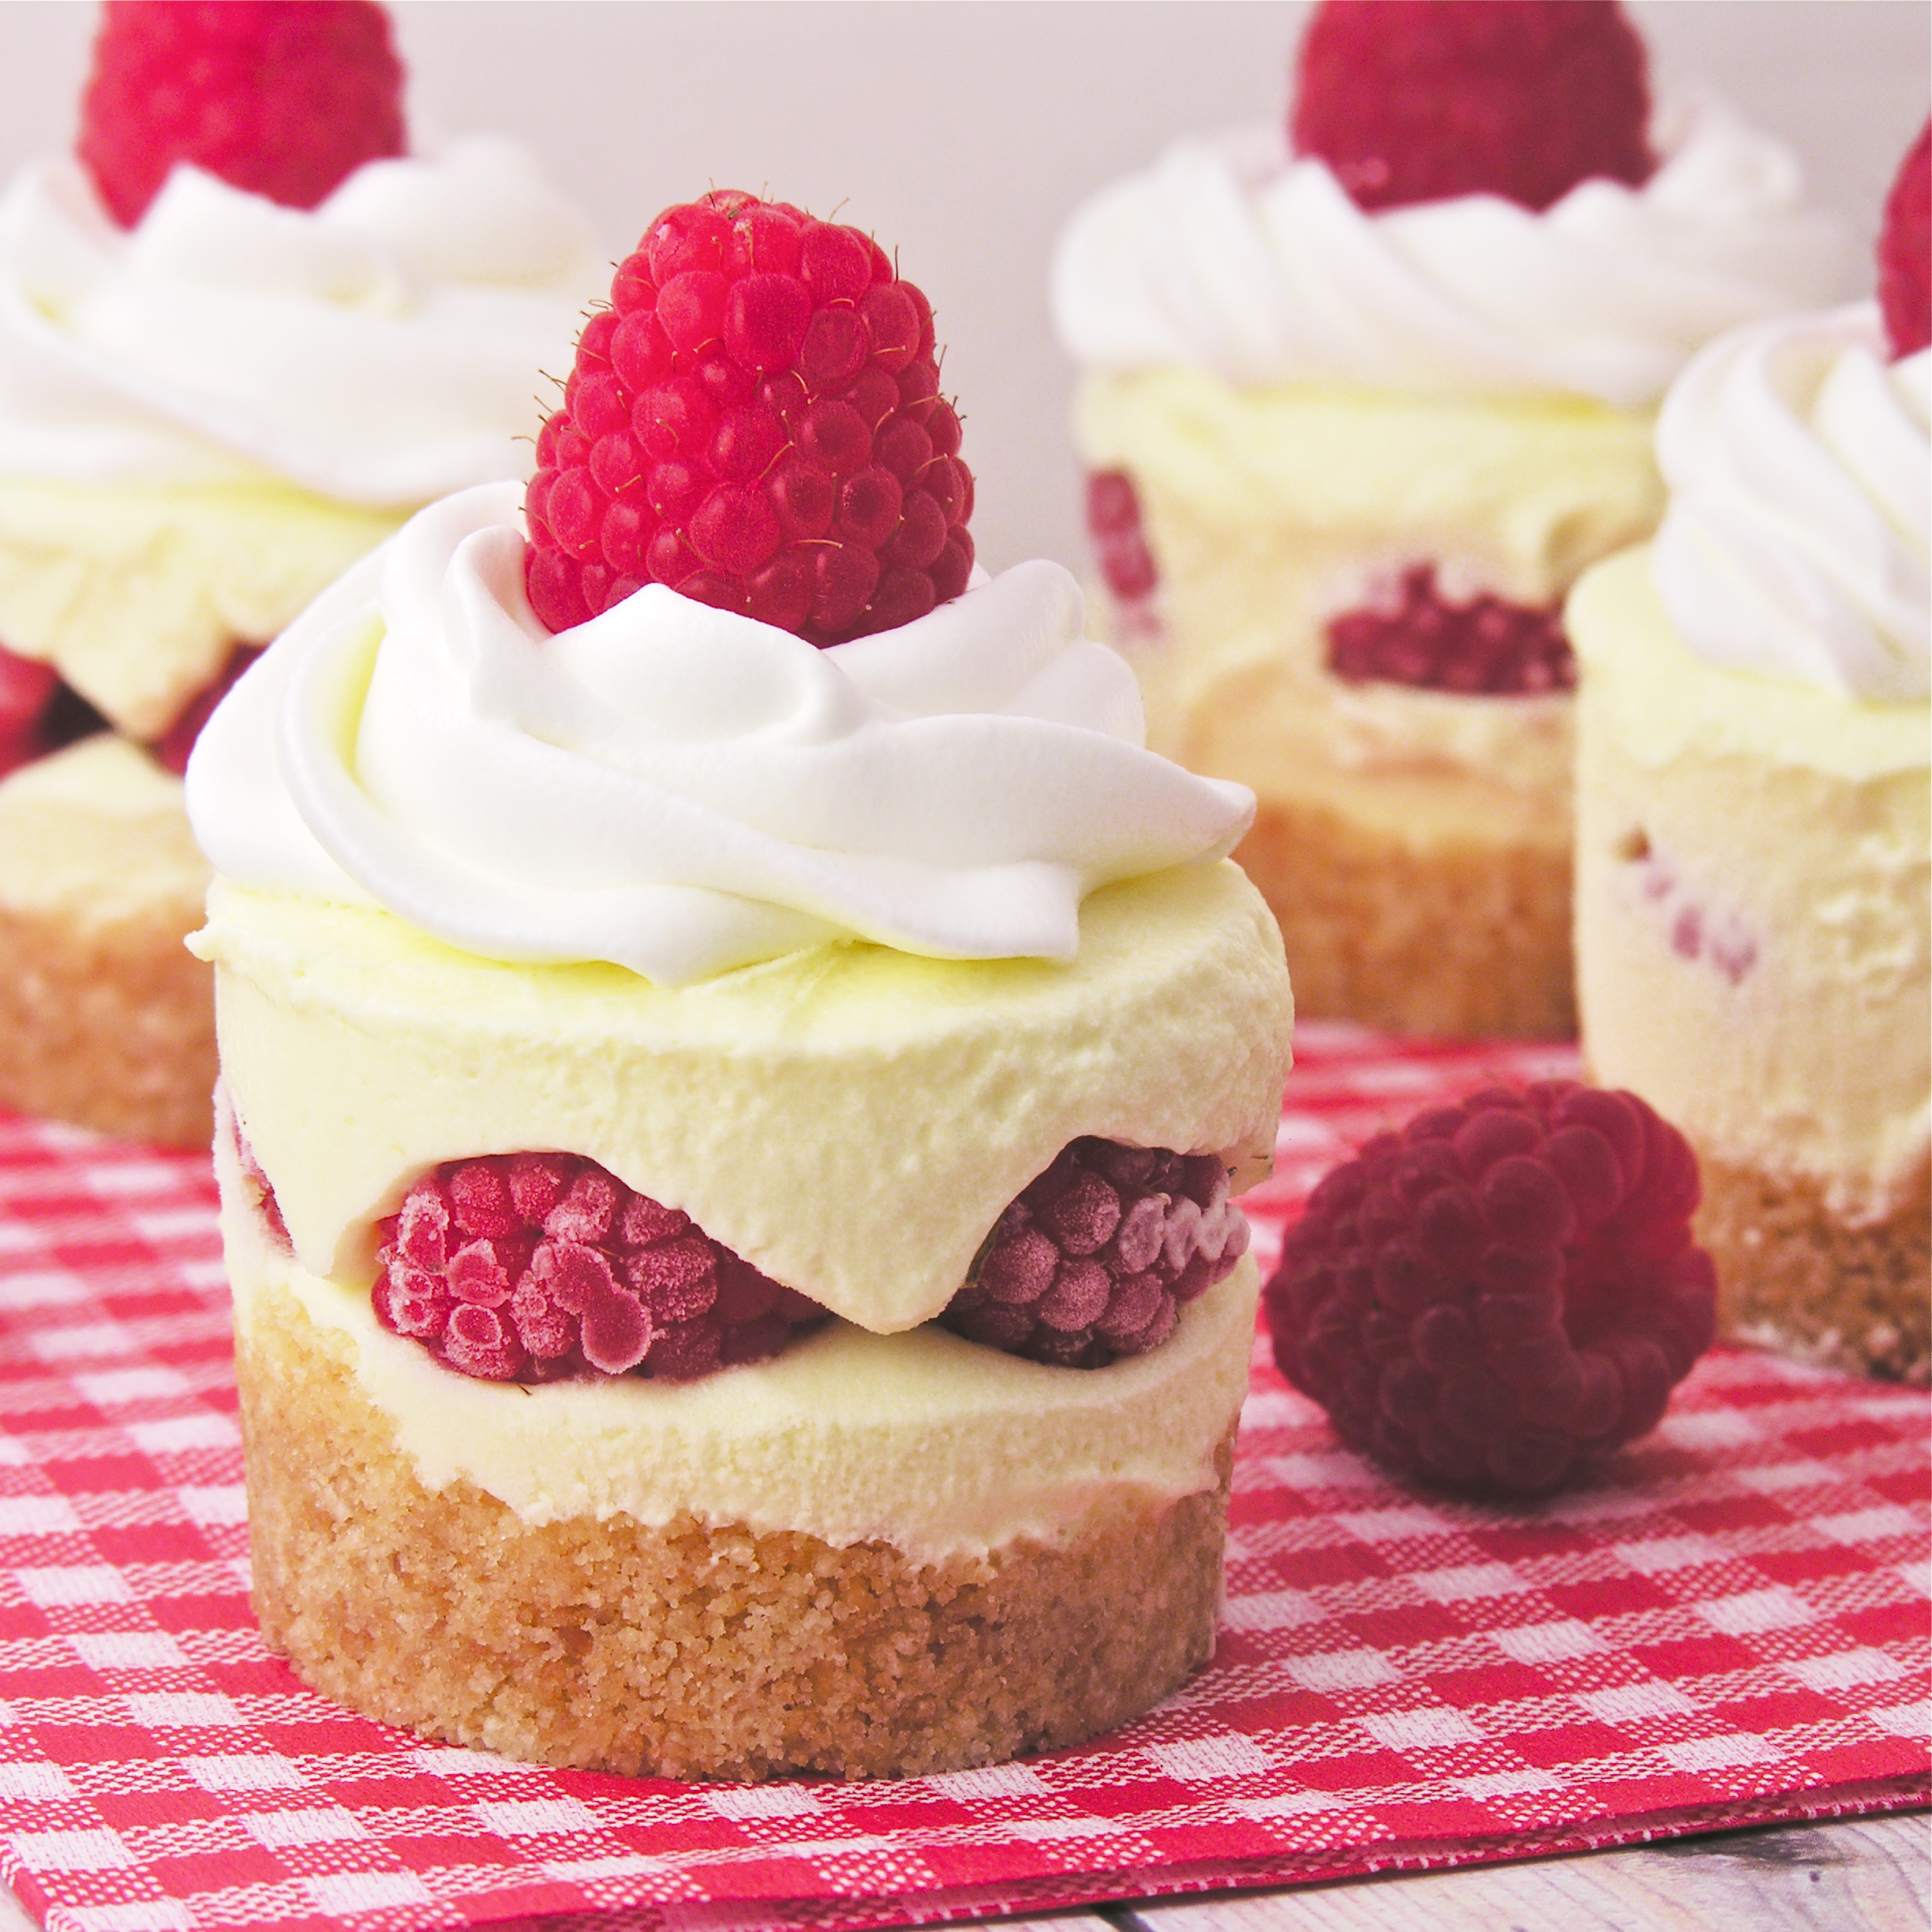
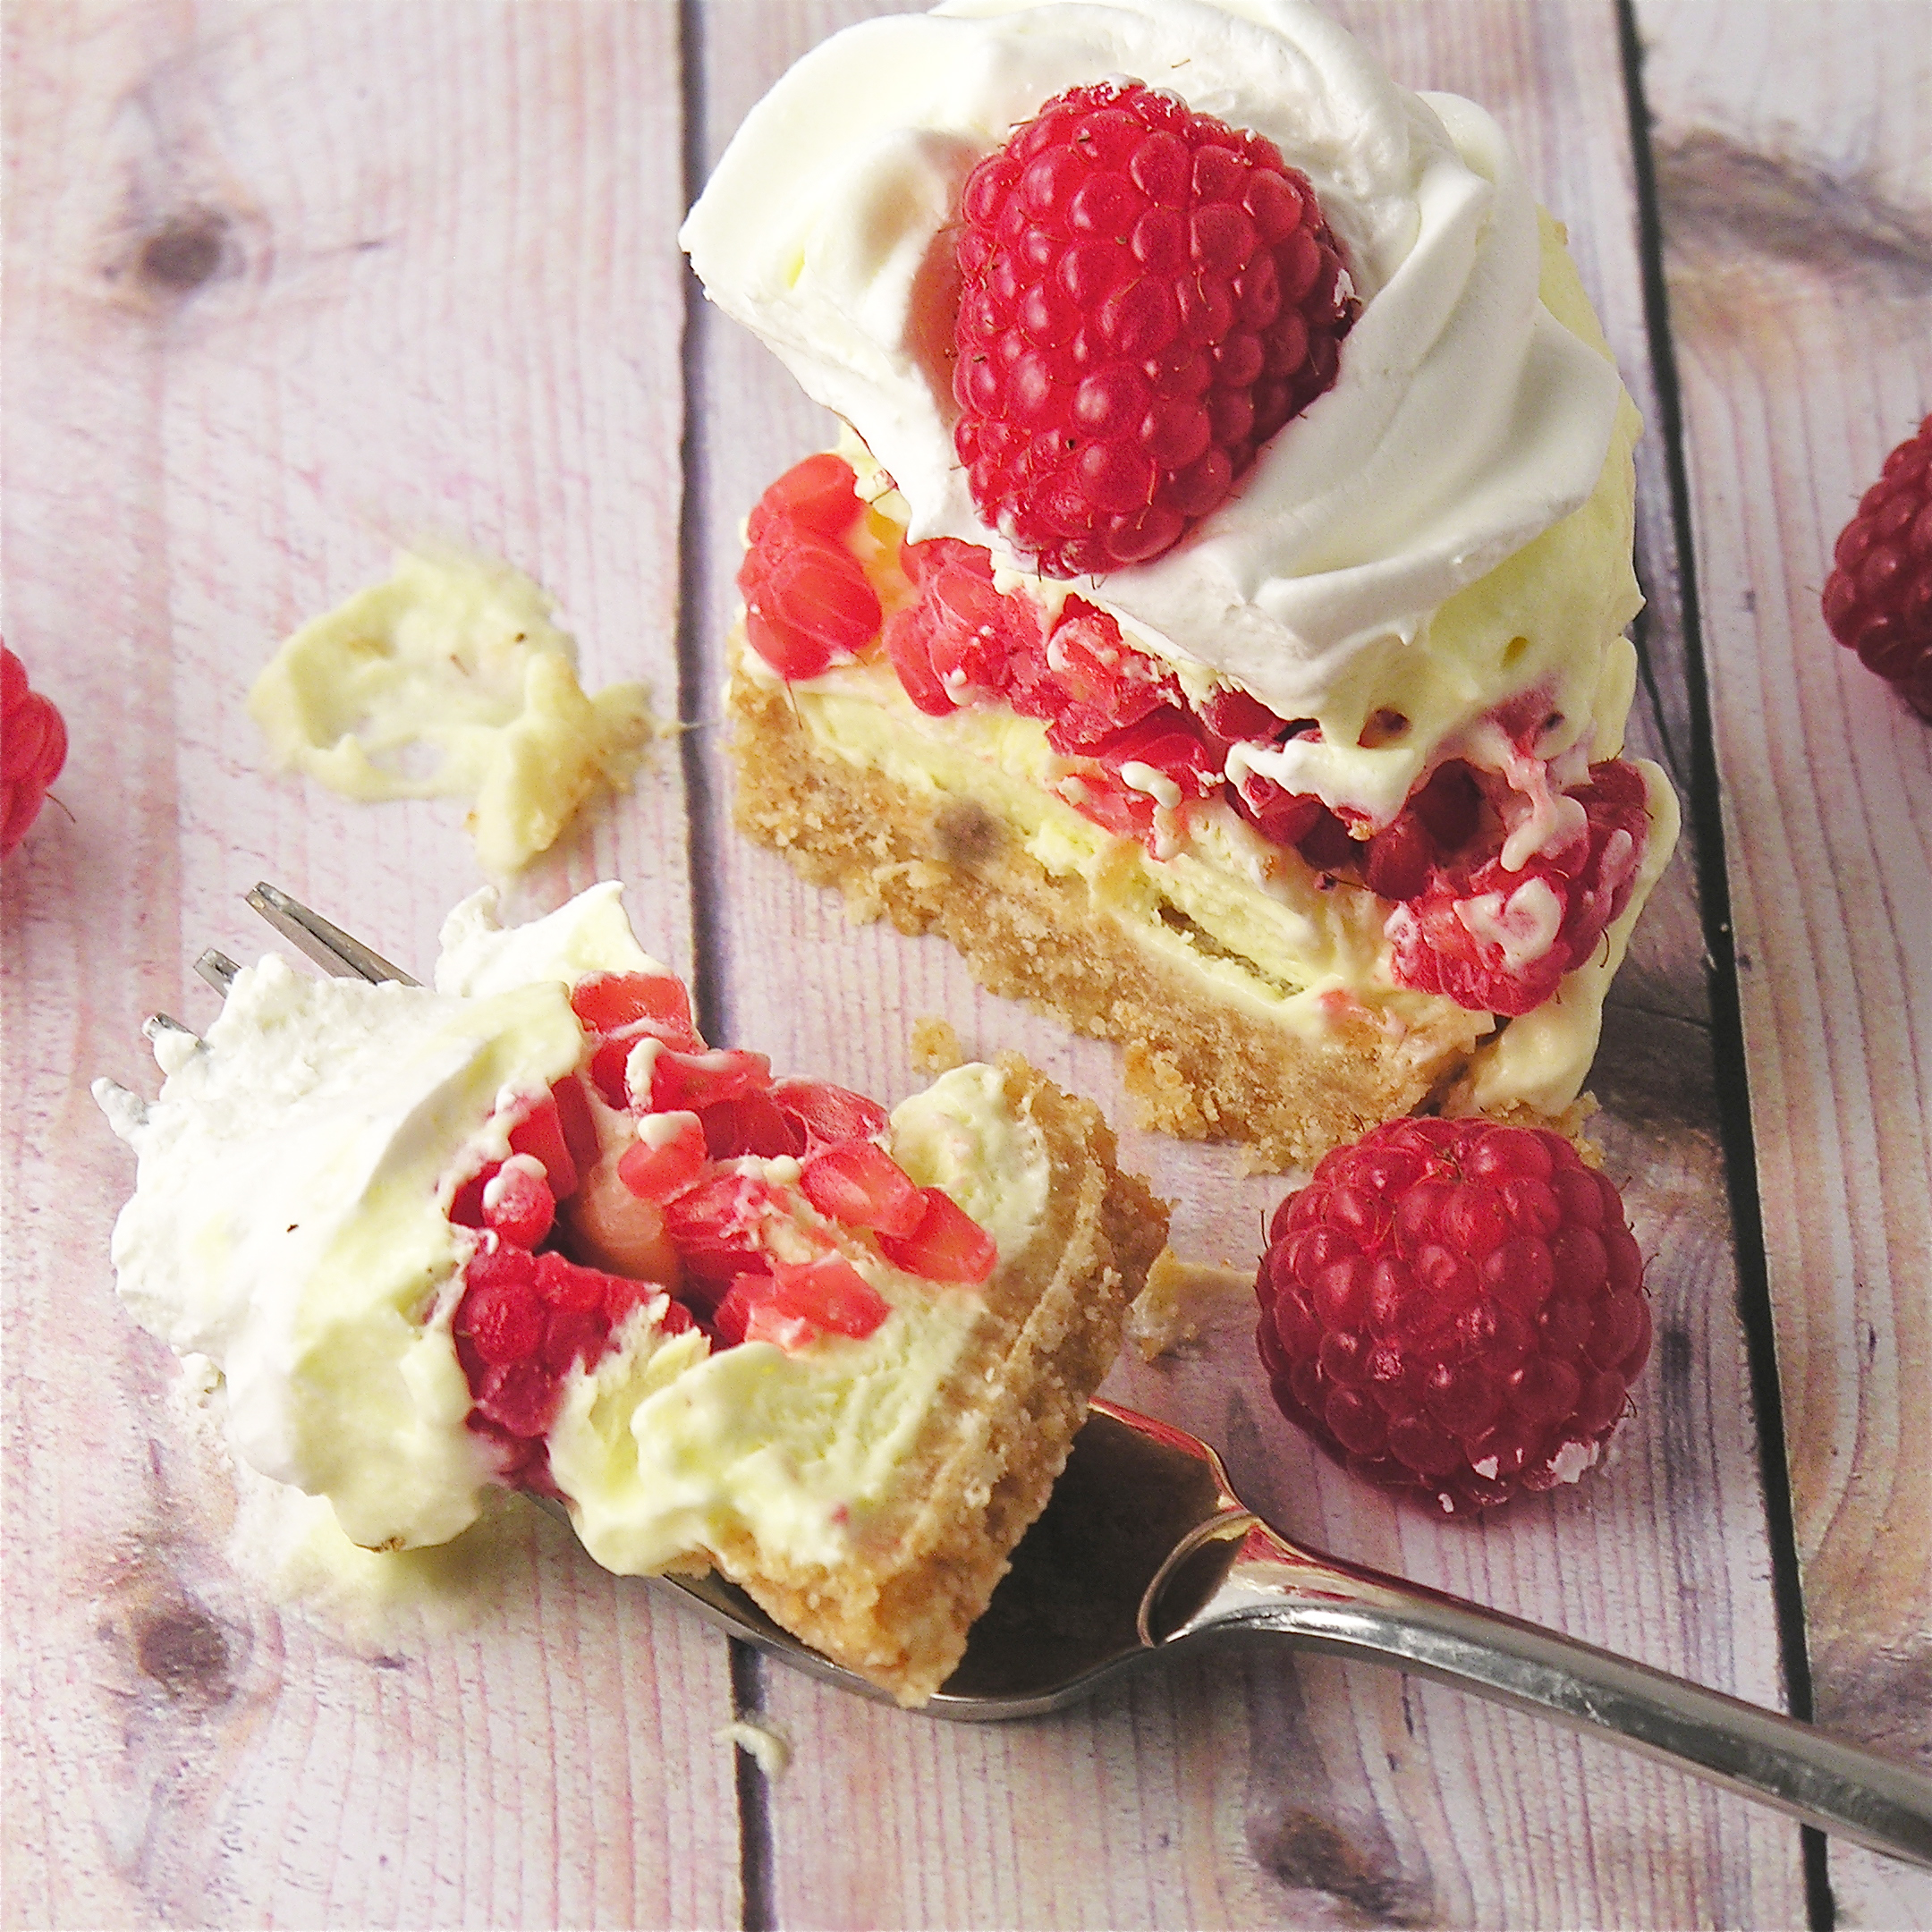
These delicious cupcakes are topped with a dome of raspberry cream and a touch of black raspberry jam- a perfectly pink Valentine’s Day treat!

I love berries over vanilla cake- it reminds me of summer and makes me smile. I got a little creative with the presentation, but I think that makes them just perfect as a Valentine– don’t you?

Berry Bomb Cupcakes3

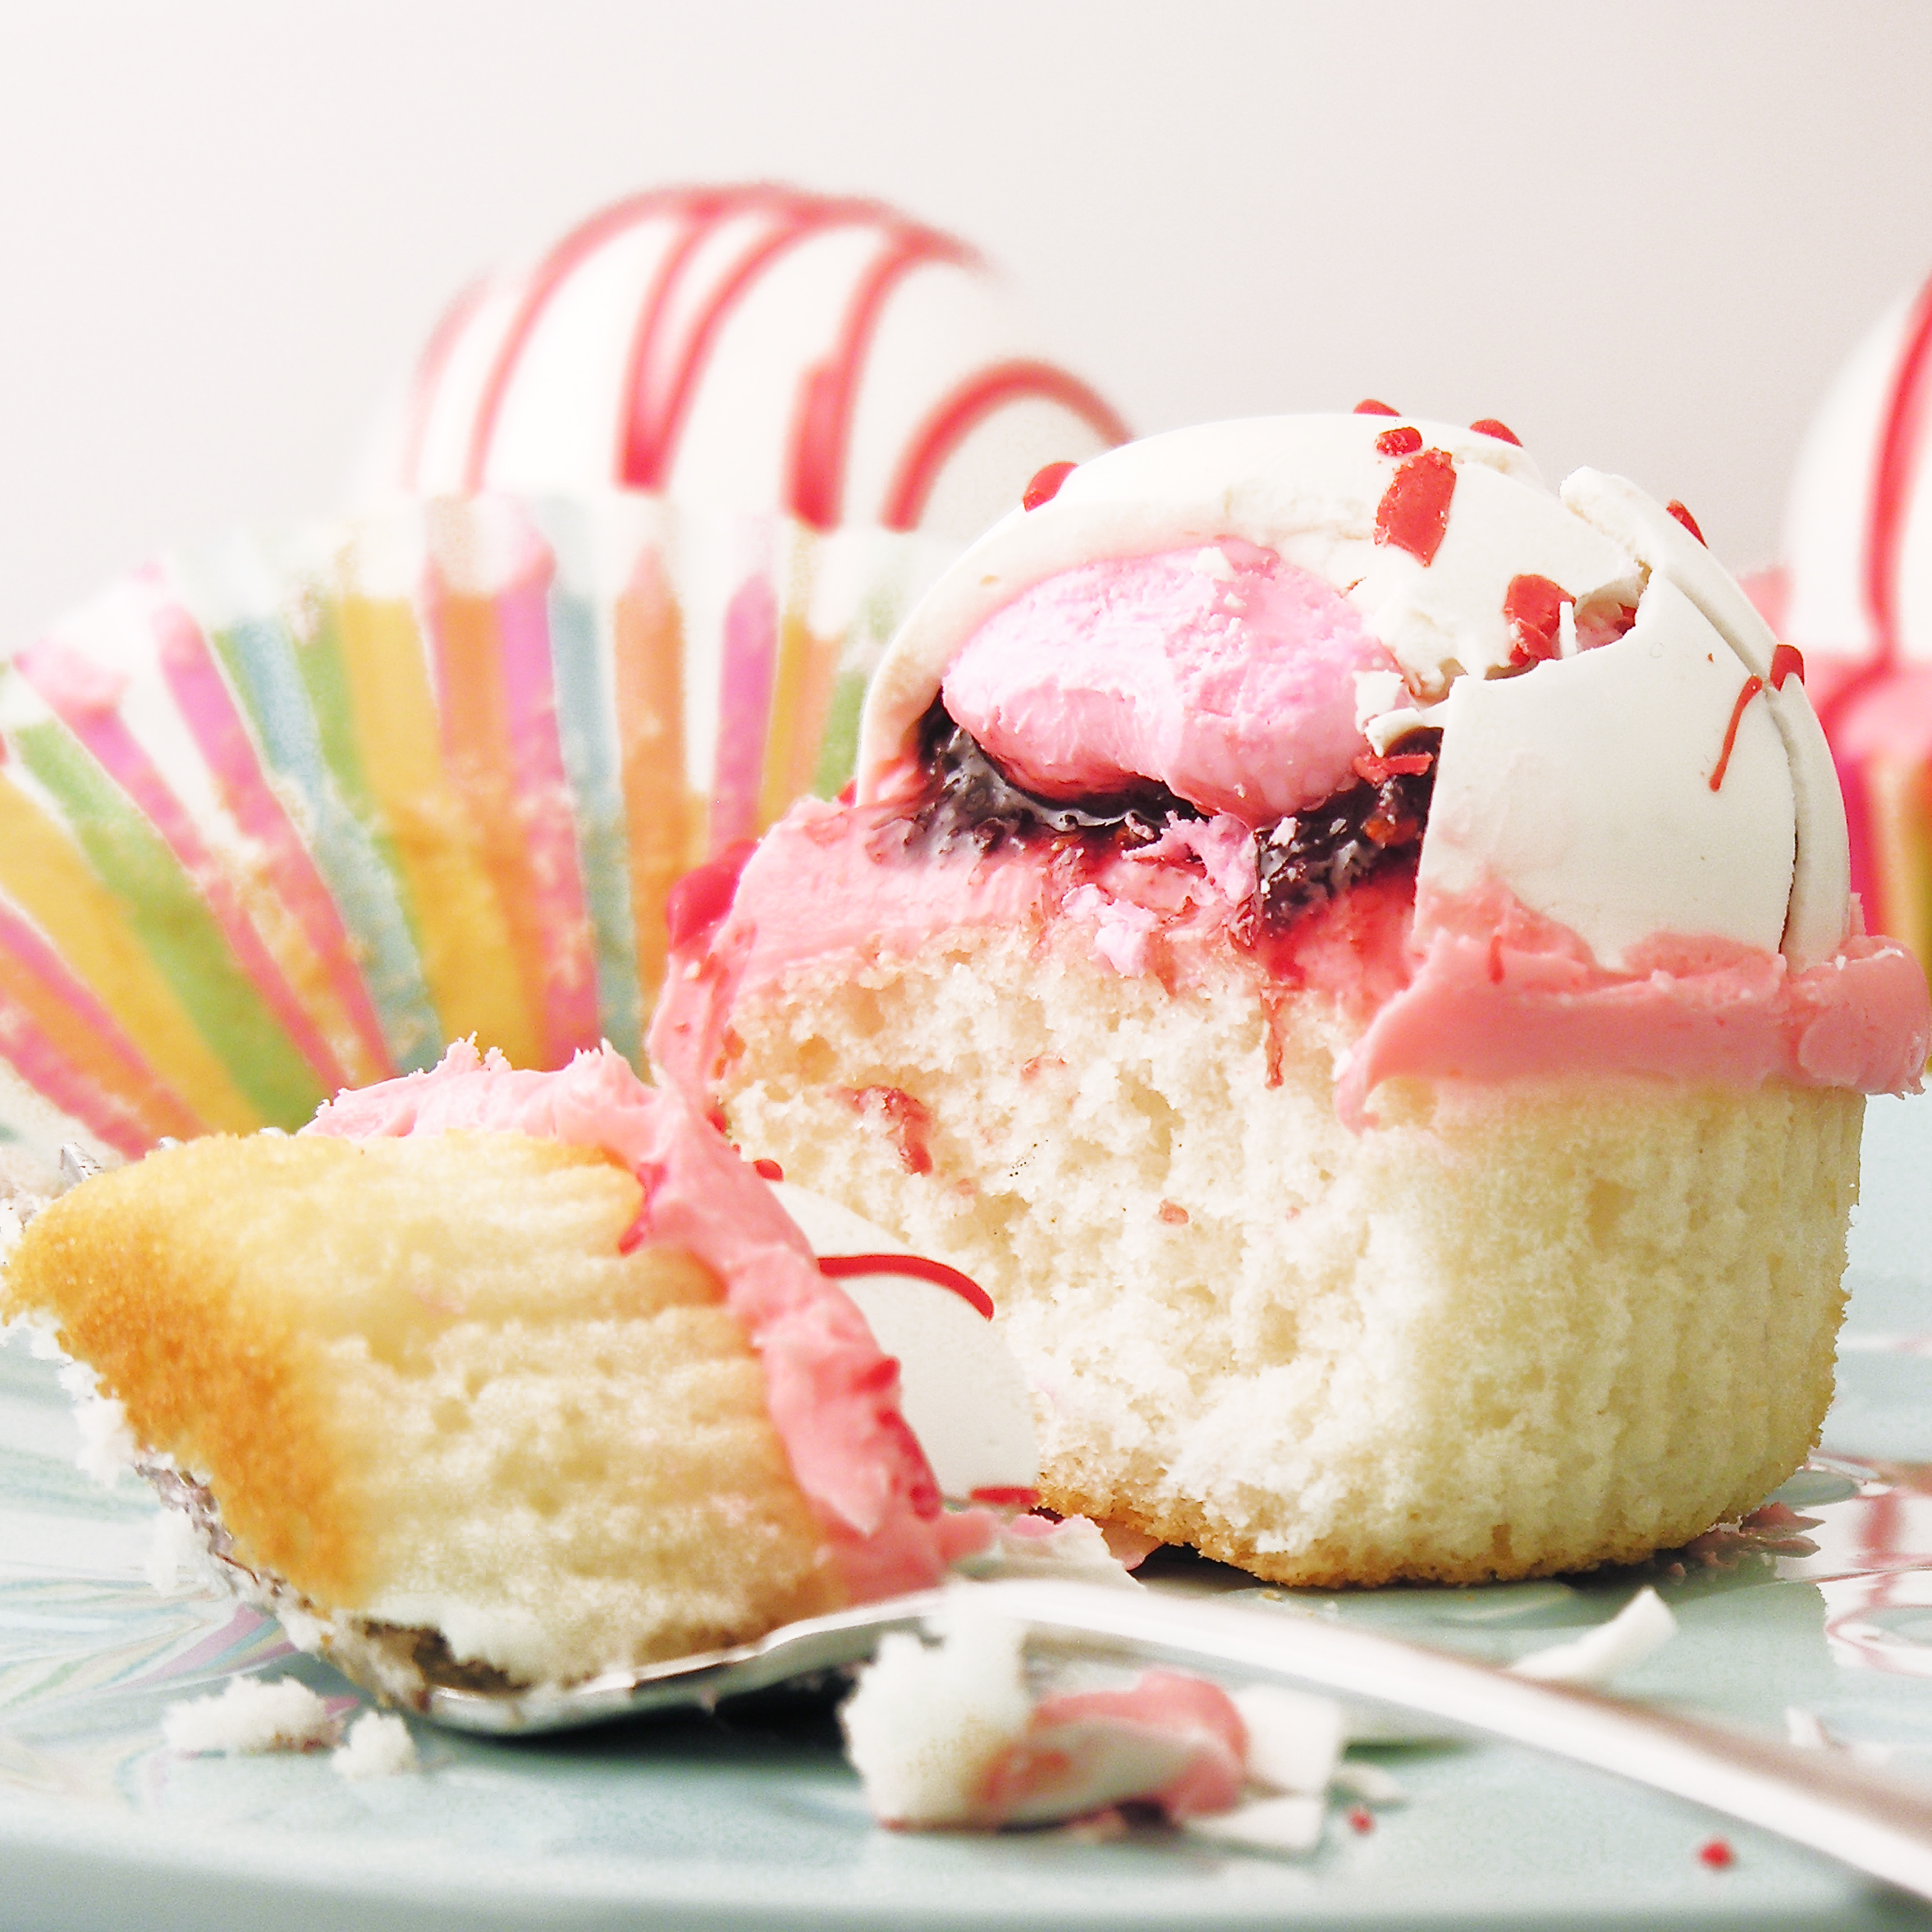
These are incredibly delicious and fun to make. They use a fun (and inexpensive) silicone mold that I got here and have used before on my Peanut Butter Bomb Brownies. I just love how beautiful the dome of white chocolate looks atop these cupcakes! There are so many possibilities for fillings….!

Want to know how we made these cute little desserts? Here you go: (Printable recipe)

INGREDIENTS:

  • One boxed white cake mix (with water, oil and eggs to make according to package)
  • 1 large jar of black raspberry preserves
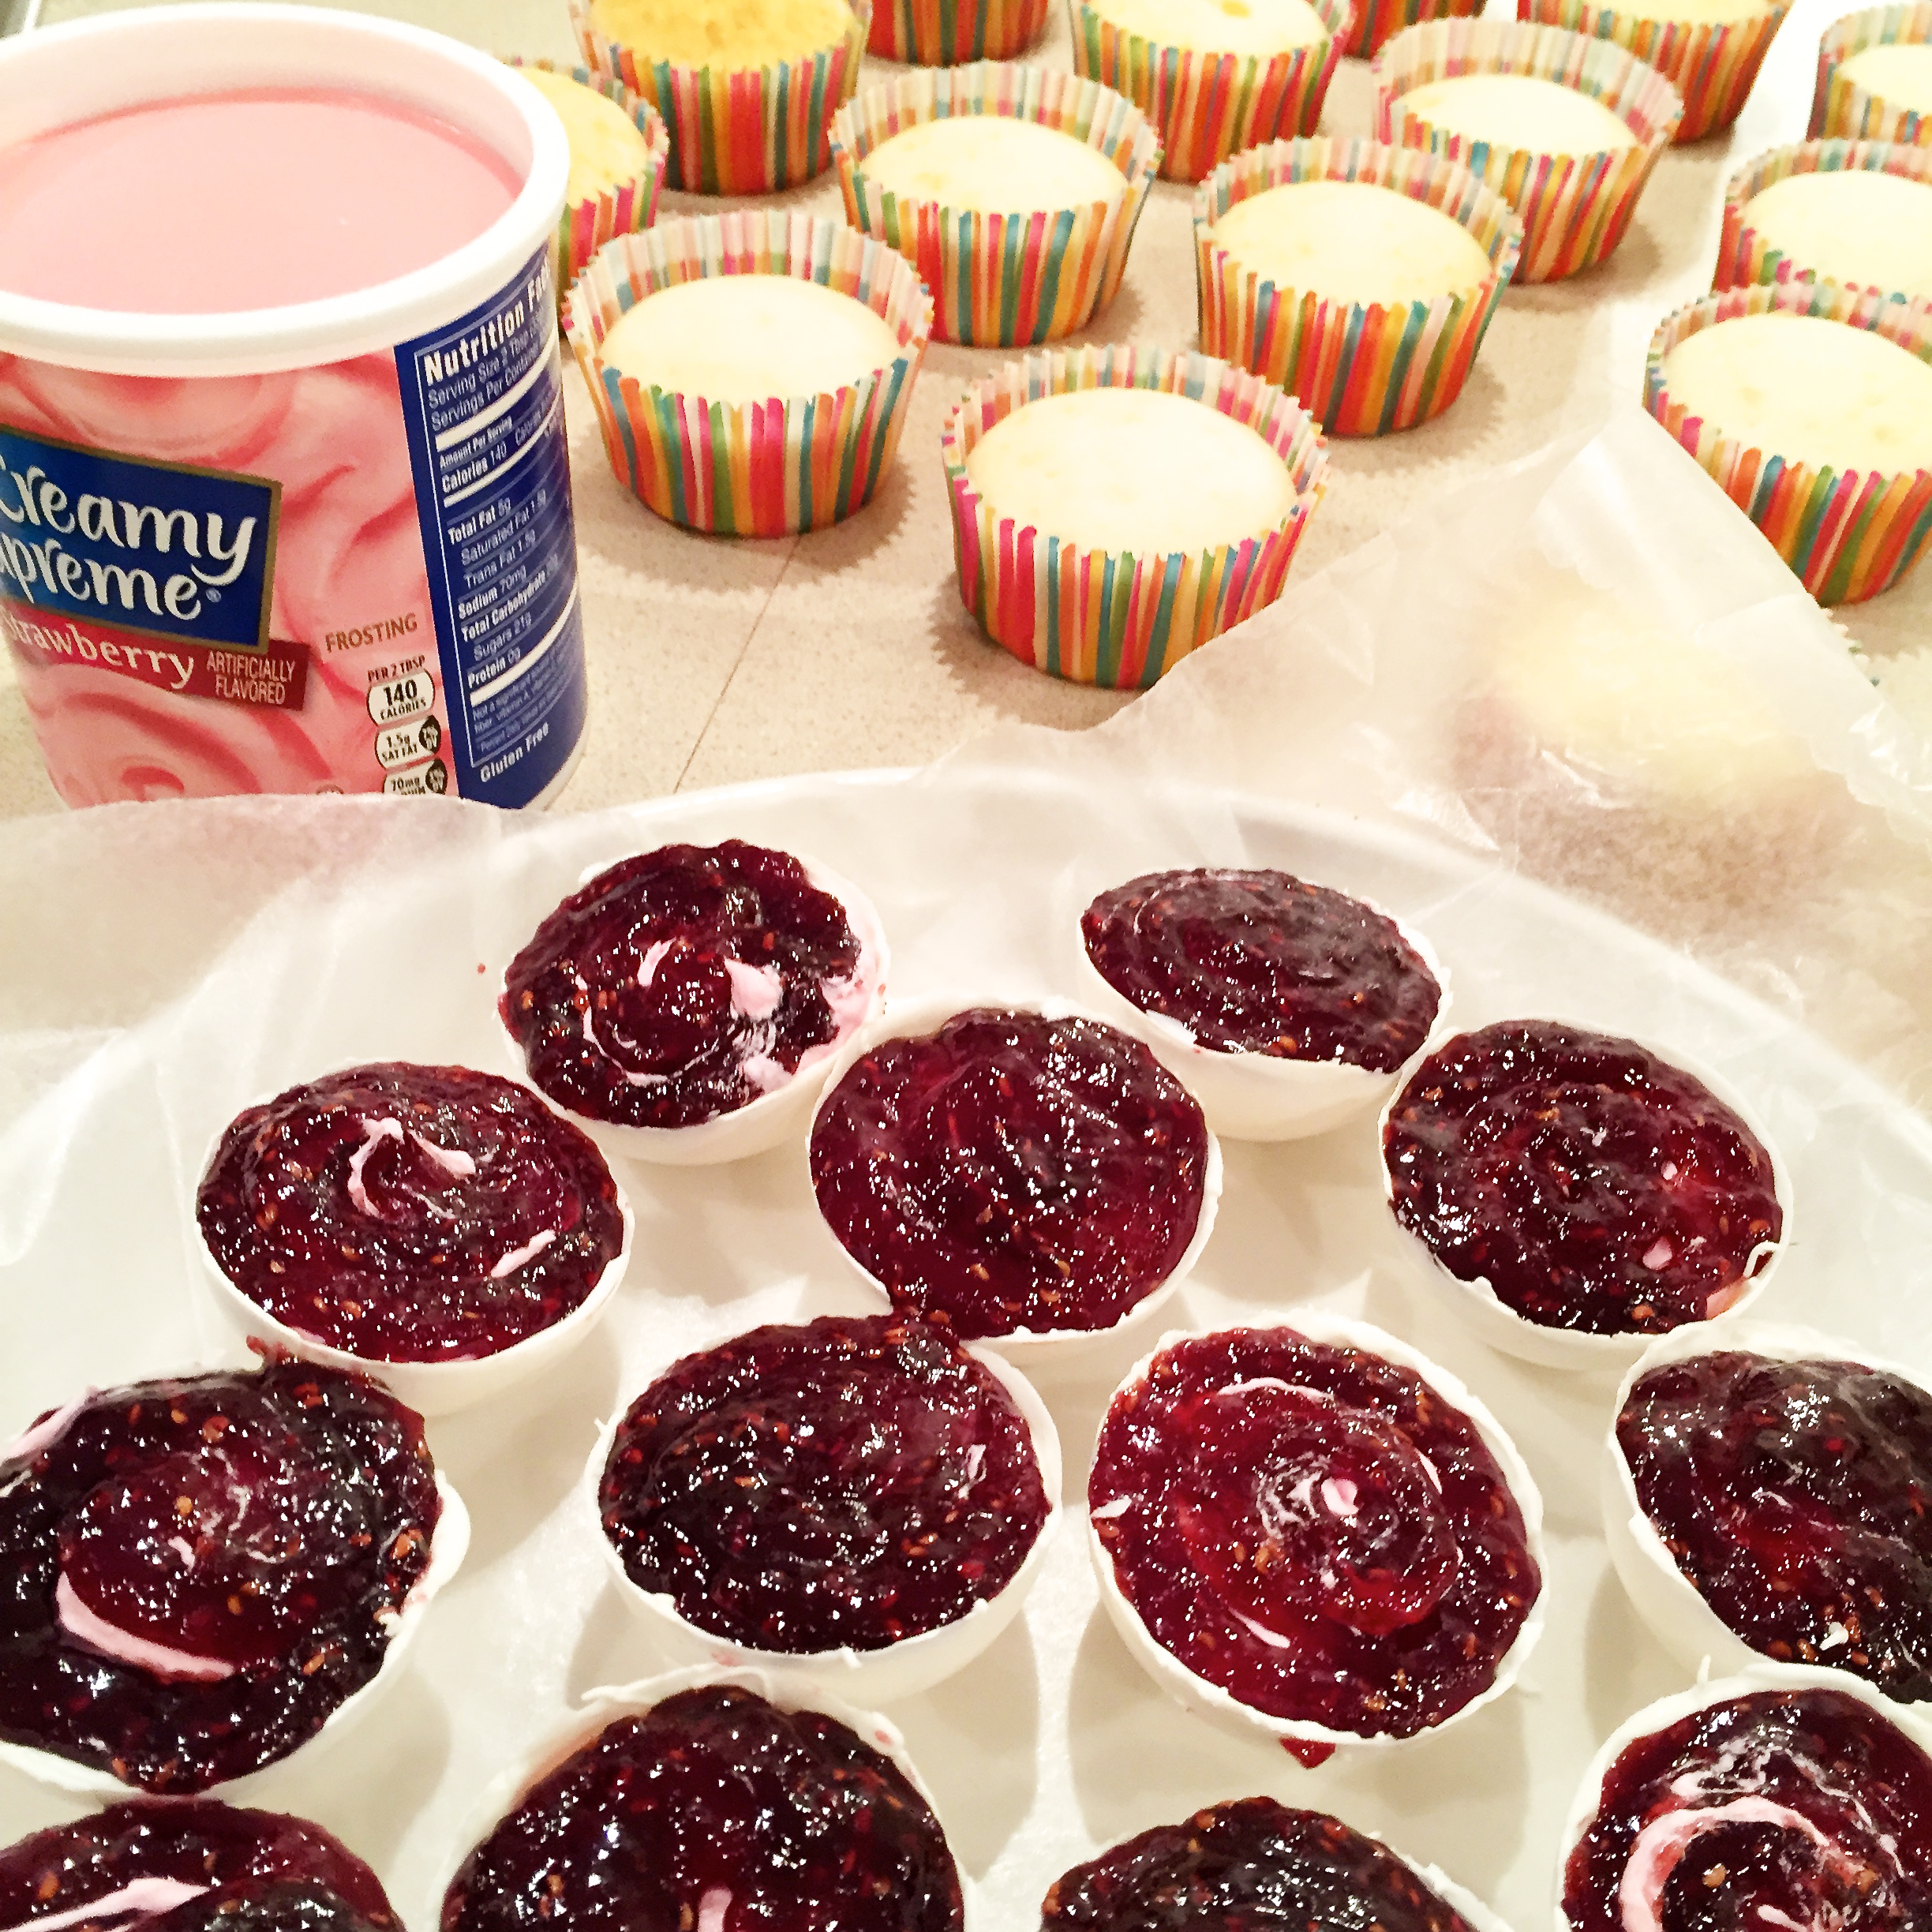
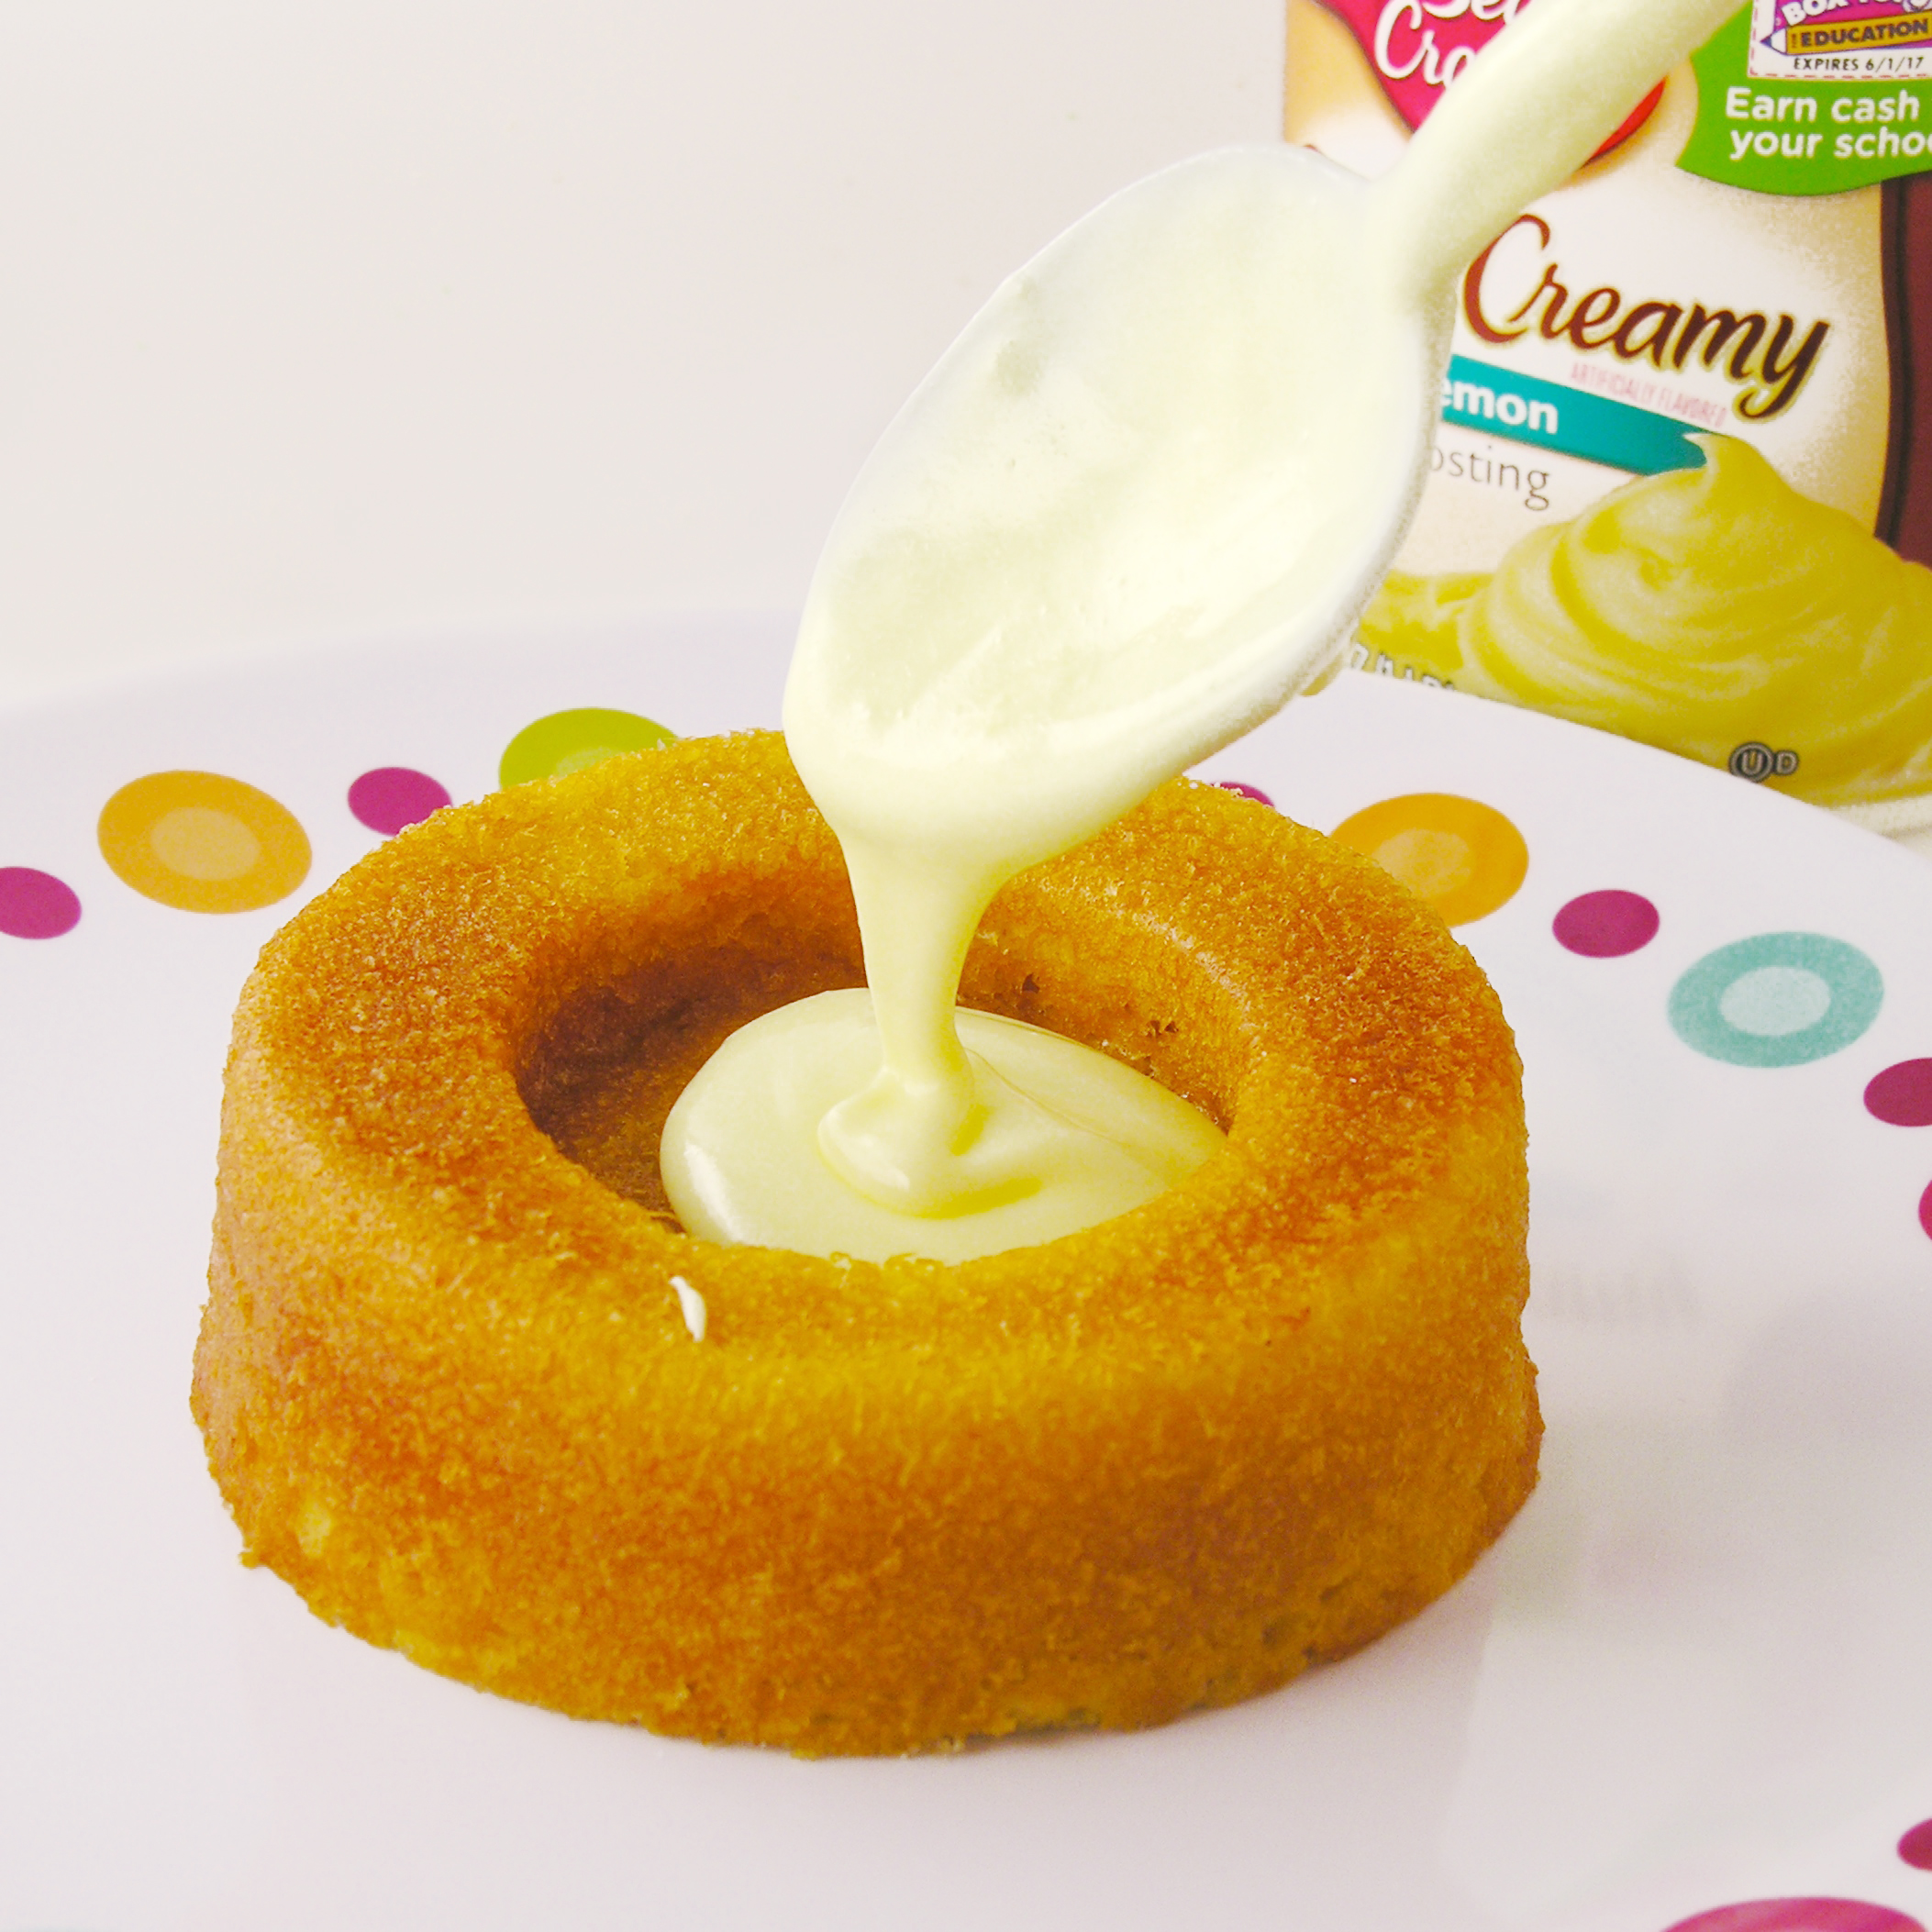
  • 1 can of strawberry frosting
  • 2 packets of Dream Whip
  • 3/4 cup milk
  • 1 tablespoon of raspberry extract
  • 6 tablespoons powdered sugar
  • Pink food color gel (to desired shade)
  • 2 bags of Wiltons candy melts in bright white.

DIRECTIONS:

  • Make cake mix according to package and divide into 24-28 cupcake liners placed in a muffin tin. Fill only about 1/2 full so that they bake up flat and not mounded up and over edges. Bake according to package.
  • Make Berry Bomb filling by combining Dream Whip, milk, extract, and powdered sugar in a mixing bowl and blending together with mixer until stiff peaks form. Add coloring to desired shade of pink.
  • Melt Wiltons candy melts and use a brush to “paint” the melts into the inside of the silicone mold. Do two layers and then freeze until hard (5 minutes).
  • Place filling into a large zip-top bag and clip a corner. Pipe filling into hardened cups- about 3/4 full- and then top with a little jam. 
  • Use a knife to spread jam flat and freeze another 5-10 minutes.
  • Carefully remove berry bombs from mold and place, round side down and sticky jam side up, on a wax-papered plate. Keep these cool until all bombs are made.

Berry Bomb Cupcakes5

  • Open strawberry frosting and warm in the microwave for about 15 seconds- just until it softens a bit when stirred,
  • Spoon frosting over tops of cupcakes, allowing it to spread to edges.
  • Gently set a bomb on top of cupcake, pressing it into the soft frosting (I used wax paper to touch chocolate to prevent fingerprints)
  • Allow frosting to firm up and hold the bomb in place.
  • Drizzle with a little red or pink melted candy melts if desired. Keep refrigerated until serving.
  • Enjoy!!!!!!!

Berry Bomb Cupcakes2

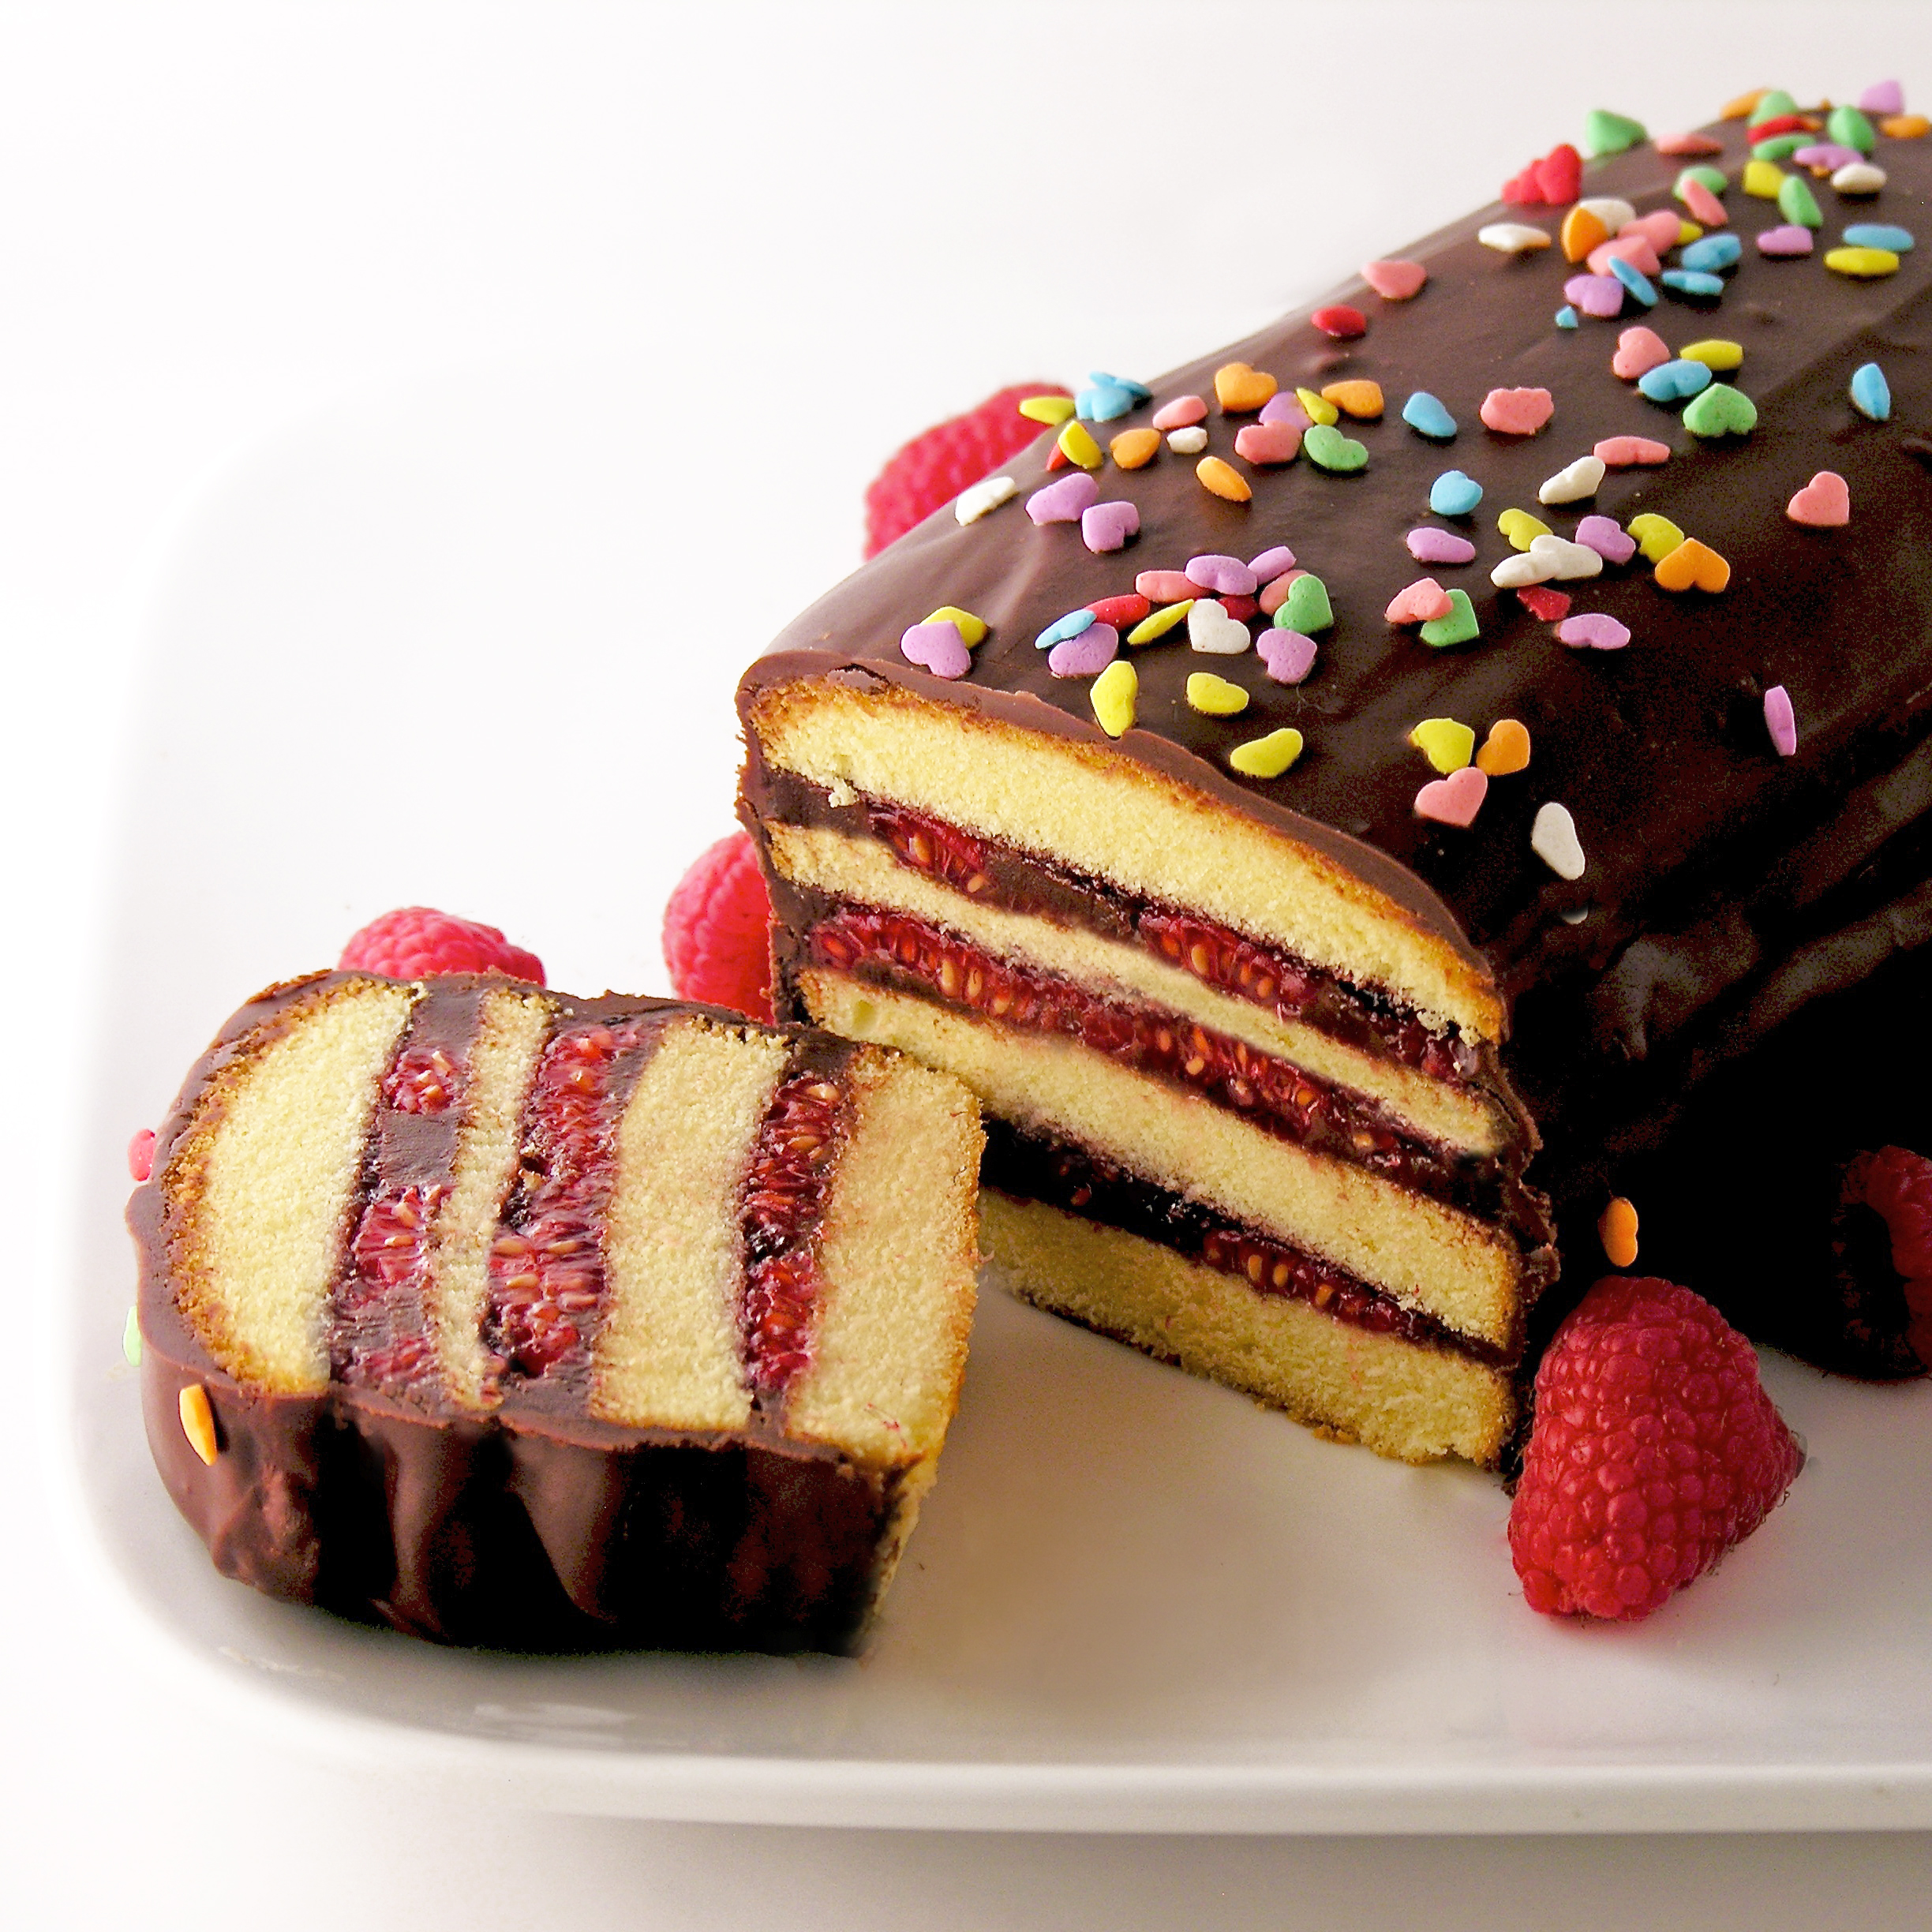
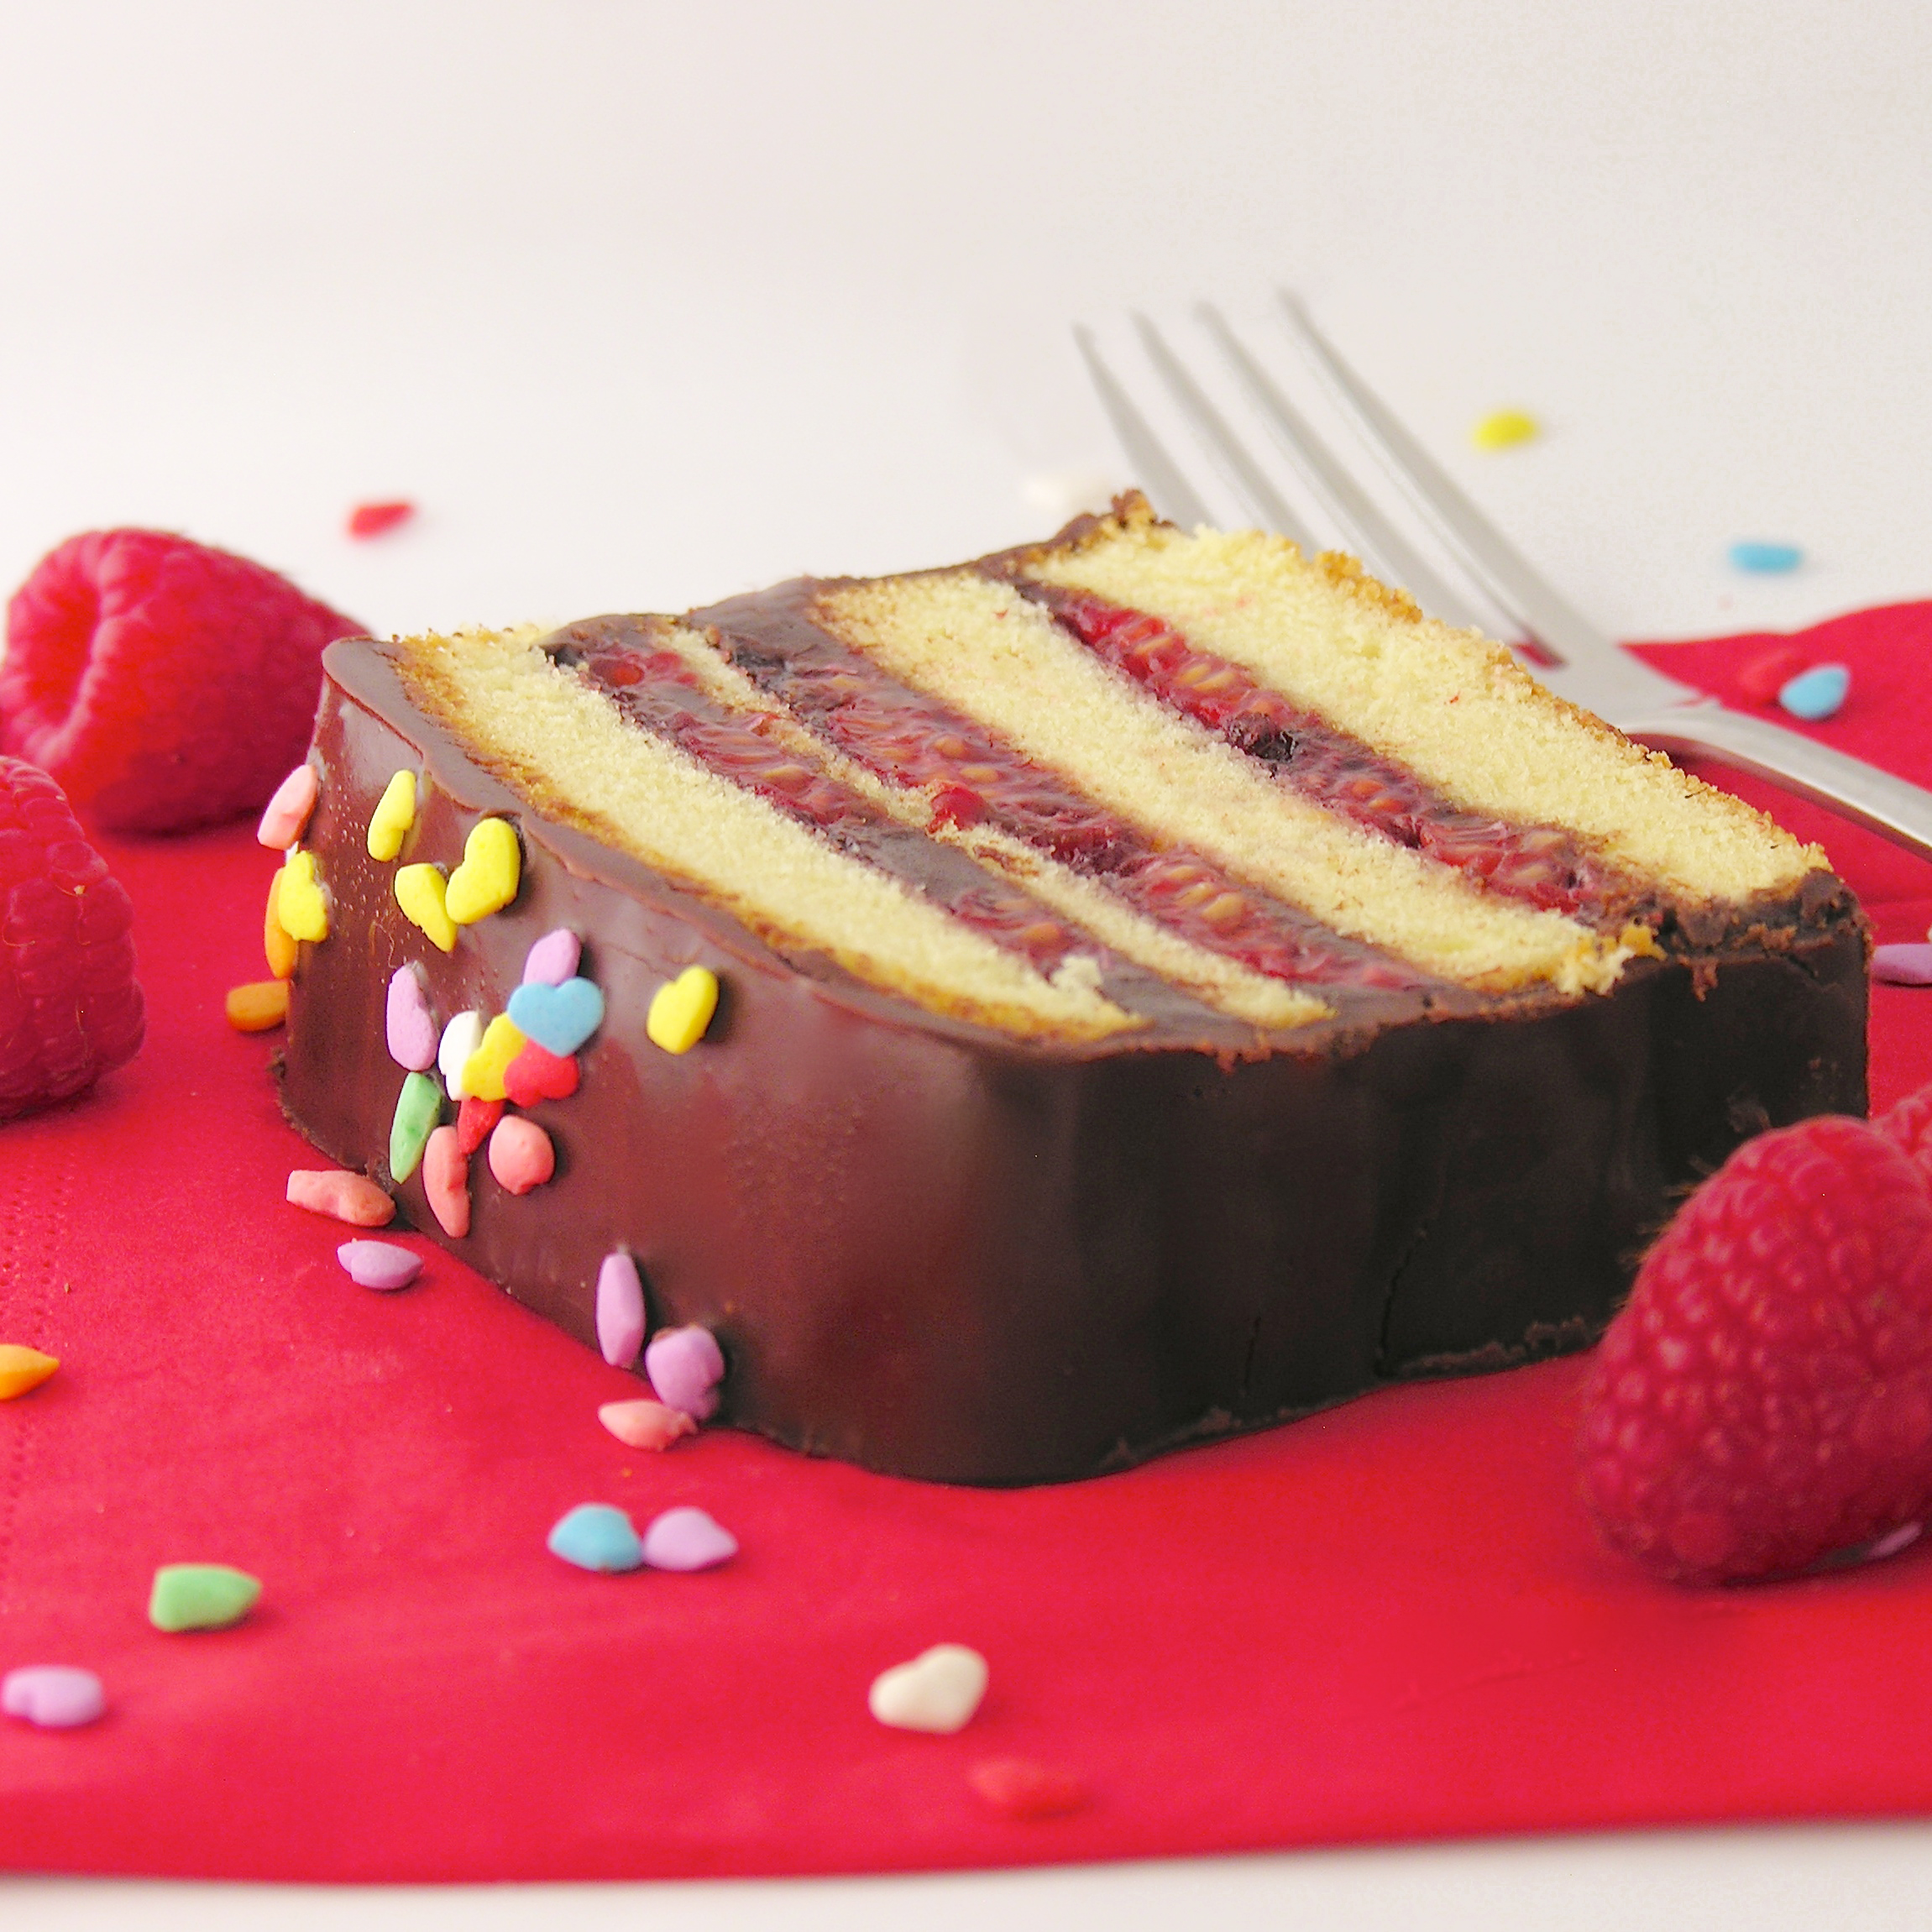
My thoughts: These are a fun and refreshing twist on a berry-topped cupcake. The bombs take a little time to make- since you have to to do them in batches of 6. I recommend you start making them when you start the cupcakes. You can be in and out of the freezer while you are baking and save a little time. My other thought- serve these with a fork!!! When you bite into them and that white candy shell breaks it is too much to hold onto. I promise. Use forks 🙂  I hope you enjoy making and eating these as much as I did!!  ~r

Berry Bomb Cupcakes4


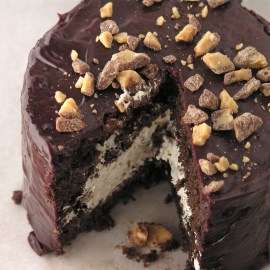
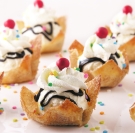
Other Valentines Day treats to try (click on a photo to see the recipe)

Chocolate covered Strawberry cupcakes1Frog Oreos!!Strawberry layer cakeCake balls filled with cream cheese frosting


Raspberry Fudge Layer Cake

Raspberry Fudge Layer Cake1Layers of pound cake, chocolate and raspberry are sure you make your Valentine smile this year!

You know those desserts that look incredibly difficult and are super easy? This is one of those. The cake is simply a frozen pound cake sliced and stacked with chocolate and raspberries. Makes you smile, doesn’t it?

Raspberry Fudge Layer CakeHere’s how we made it: (printable recipe)

INGREDIENTS:

  • One frozen pound cake
  • 1 bag of semi-sweet chocolate chips
  • 1 cup of red raspberry jam
  • 1 cup of sliced red raspberries
  • 1 stick of butter
  • 1/2 cup of whipping cream

IMG_0147DIRECTIONS:

  • Remove pound cake from packaging and use a large serrated knife to slice it into 3 or 4 layers
  • Divide the bag of chocolate chips into 2 separate microwave-safe bowls.
  • Add the stick of butter to one, and the whipping cream to the other.
  • Melt each bowl of chocolate, one at a time, in the microwave, stirring every 30 seconds until melted and smooth.
  • Set aside the butter/chocolate glaze.
  • Lay the bottom layer of the pound cake on a baking rack set over a cookie sheet.
  • Spread chocolate/whipping cream mixture generously on the top of this layer and sprinkle with fresh raspberries.
  • On the “bottom” of the next layer, spread raspberry jam and then gently place (jam side down) on top of the raspberries.

IMG_0150IMG_0153IMG_0156

  • Repeat this process until all layers are used.
  • Refrigerate until layers firm up a little (10 minutes or so)
  • Pour remaining chocolate/butter glaze over the top and sides of cake, allowing excess to run through the baking rack and onto the cookie sheet below.
  • Refrigerate until glaze firms up.
  • Cut into slices and enjoy!!!

Raspberry Fudge Layer Cake5My thoughts: This is so easy. A tiny bit messy with all of that melted chocolate, but once it is made, it stores well for a couple of days and makes a beautiful layered dessert. I think you could fill these layers with so many different things for different times of the year. Yum. Enjoy!!! Happy Valentine’s Day! ~r

Raspberry Fudge Layer Cake3

Other fun (and creative!) Valentine’s treats, just click on a picture for the recipe:

White Chocolate Strawberry Cookies!!Chocolate covered strawberry Cake roll!!Frog Oreos!!Creamy cheesecake with sour cream topping

Chocolate Raspberry Cheesecake

Chocolate Raspberry Cheesecake!!Creamy chocolate cheesecake topped with a layer of raspberry and sour cream. Unbelievably yummy!!!

If you follow my blog on a regular basis, you will remember this cheesecake from last fall.  It is my Aunt’s recipe and it is literally the best cheesecake I’ve ever eaten.  It is so creamy and smooth…oh my.

I decided to add a few twists to the recipe by making it chocolate and adding raspberries to the topping.  It worked beautifully and added so much flavor!  It is really quite easy to make.  I hope you enjoy it as much as I did!!!!

Here’s the recipe (printable version):

INGREDIENTS:

Crust:
  • 1 1/4 cups Honeymaid graham cracker crumbs
  • 5 tablespoons butter, melted
  • 3 tablespoons sugar 
Filling: 
  • 3/4 cup sugar
  • 3 (8 oz.) Philadelphia cream cheese bars (must be the Philadelphia brand)~ softened to room temperature.
  • 2 eggs
  • 1 teaspoon vanilla
  • 1 teaspoon lemon juice
  • pinch of salt
  • 1 cup of semi-sweet chocolate chips
Topping: 
  • 1 pint (2 cups) sour cream
  • 1/2 cup sugar
  • 1 tsp. vanilla
  • pinch of salt
  • 1/3 cup of canned raspberry pie filling

DIRECTIONS:

  • Preheat oven to 350F degrees.
  • In a medium bowl, combine crust ingredients together until well combined.
  • Press into a 9″ spring form pan, pressing crumbs into bottom and about 1 1/2″ up sides of pan.    
  • For the filling, combine the sugar and softened cream cheese in a large mixing bowl and beat together until smooth.
  • Add the eggs, one at a time, beating between each addition.
  • Add the vanilla, lemon juice and salt and beat until smooth and creamy.
  • Melt the one cup of chocolate until smooth, and add to cheesecake mixture, beating until completely incorporated.
  • Pour into crust.
  • Bake at 350F degrees for 35-45 minutes.
  • While cheesecake is baking, make topping by simply mixing together all of the topping ingredients.
  • After 35-45 minutes of baking, remove cheesecake from oven and turn oven down to 325F degrees.
  • Pour topping over hot cheesecake, gently spreading to edges.
  • Return cheesecake to oven and bake for an additional 12-15 minutes.
  • Remove cheesecake from oven and leave sides on pan while allowing cheesecake to cool to room temperature.  
  • Refrigerate several hours (or overnight)
  • Run a small knife around the edges of the pan and remove them before serving.
  • Serve with extra raspberry pie filling– YUM!
  • Enjoy!!!!


Chocolate Raspberry Cheesecake!!
My thoughts:  You can see in my pictures that I added a cup of raspberry pie filling over the crust before I poured the cheesecake batter in.  It was really yummy, but made it hard to remove the bottom of the springform pan (which I always do before pictures).  If you don’t mind leaving the bottom on, this is a yummy addition to the recipe!  Just gently spread it out over your graham crust and pour the cheesecake over the top.
Chocolate Raspberry Cheesecake!!

We love raspberries here at Easybaked!  Check out our other yummy raspberry recipes!

Raspberry Lemon Cream Cups!!!Raspberry Confetti KissesRaspberry Truffle TartRaspberry Lemon drop Cakes!!!

Raspberry Lemon Drop Cakes

Posted on

Raspberry Lemon Drop Cakes!!
Moist yellow cake bowls filled with lemon and topped with whipped raspberry cream.  These are such a unique and flavorful dessert- you are going to love them!

This is recipe #2 in my tribute to melted frosting.  Last week we used a chocolate frosting and this week- lemon frosting.  The plan for this recipe was chocolate cake bowls with chocolate filling and raspberry cream.  I caught myself half-way through making a yellow cake mix before I remembered I wanted to do chocolate though.

I have a lot on my mind these days!

SO, I sat down and thought about what flavors are good with yellow cake mix and I already had a tub of lemon frosting…and here we go! It was a fortunate mistake, because these are delicious.  One of my new favorites!  I even ate one for breakfast, and with a cup of coffee?  Perfection!

Here’s the recipe:  (printable version)

INGREDIENTS:

  • 1 box of yellow cake mix (plus oil, water and eggs to make according to package)
  • 1 tub of lemon frosting
  • 1 packet of Dream Whip
  • 1/3 cup cold milk
  • 1 tablespoon of powdered sugar
  • 1 teaspoon vanilla
  • 1/4 cup of raspberry preserves (more or less, to taste)

DIRECTIONS:

  • Preheat oven to 350F degrees.
  • Make yellow cake mix according to package.
  • Grease 4 Wilton fillable mini cake pans, and fill each one about 2/3 full.  This will use about 1/2 of the batter- so you will fill these pans again once the 1st set is through baking.
  • Bake at 350F degrees for 20-30 minutes, until a toothpick inserted comes out clean.
  • Tip cakes onto a cake rack to cool.  Trim bottoms flat, if needed.
  • Spoon tub of frosting into a microwave safe bowl and heat in microwave for about 30 seconds.  Stir.
  • Spoon melted lemon frosting into each cake “cup”, filling each to the top.

Raspberry Lemondrop Cakes1

  • Place remaining frosting into a small zip top bag.
  • Place Dream Whip, milk, powered sugar and vanilla into a large mixing bowl and beat on high for about 2 minutes, until a thick, whipped consistency.
  • Fold raspberry preserves in, and place into a zip top bag that has been fitted with a decorator tip.
  • Pipe whipped topping on top of each cake.
  • Clip a small corner off the bag of remaining frosting and drizzle liberally over the top of each cake. 
  • Top with a fresh raspberry if desired.
  • Keep these chilled until serving- and ENJOY!!! 

Raspberry Lemondrop Cakes4c

My thoughts: I’m not kidding you– these are amazing!  If you don’t want to use the pans (they are a really fun addition to your kitchen though!) you could do a layer cake:  2 round cakes with lemon icing and whipped topping in the middle and lemon icing poured over the top- see my Chocolate Mousse Cake for how to assemble.  These are a must-try recipe!!!  SO easy with that melted frosting– love it!!!
Raspberry Lemon drop cakes!!

One more picture:

Raspberry Lemon drop cakes!!!!
Want some other ideas for those cute little pans?  Here’s a couple- just click on the picture to see the recipe!

Mini Filled Boston Cream Pies!Heath Bar crunch filled mini cake

Ruthanne news:  I don’t often post about my personal life here, because my goal is to just get yummy recipes to you without a ton of personal commentary.  When I really want to just see a recipe, I hate scrolling through 3 pages of of kids and dog stories first, so I promised myself that this site would be more about recipes than about me!!!

I have a few really exciting things going on that I wanted to share with you though~

First, Warner Press Publishing contacted me about making a boxed set of greeting cards from my recipes and photos.  These are available now in many Christian bookstores or on their site.  Click here to check them out!

Second, I have a cookbook for kids coming out this summer!  I’m so excited about this project- there’s nothing better than time in the kitchen with your kids!  Details to follow on this!

Third, I lost my job in genetics.  Our hospital can “no longer invest in expensive cutting edge technology due to the affordable care act”.  Thats a quote.  I struggled with what comes next and eventually (after much soul searching and prayer!) decided to move out to Arizona for the next 8 months to work alongside a church in the Navajo Nation.  I’m writing this blog from the comfort of a motel in Tucumcari, New Mexico.  I’ve driven about 1200 miles from home and I’m about 6 hours from my new home in Rough Rock Arizona.  My car is literally packed to the ceiling with things- about half of those things are supplies for baking, blogging and photography!  I’m hoping to continue creating and posting for all of you!

Many thanks to each of you for being a part of the easybaked community!  I’m incredibly glad you are along for this journey!  ~r

Sunset over New Mexico

Sunset over New Mexico

Pink Champagne and Raspberry Cupcakes!

Pink Champagne Cupcakes1
These cheery pink cupcakes are made like a 7-Up cake, but with sweet pink champagne instead! Topped with a raspberry buttercream, they are a perfect way to bring in the New Year!!!

INGREDIENTS: (printable recipe)

Cupcakes:

  • 3 1/4 cups flour
  • 1/2 teaspoon salt
  • 3/4 cup sweet champagne or bubbly wine (I used Barefoot Bubbly, and wished it had been sweeter)
  • 5 eggs
  • 1 teaspoon vanilla
  • 2 sticks (1 cup) butter, softened
  • 1/2 cup vegetable shortening
  • 3 cups granulated sugar

Frosting:

  • 2 sticks (1 cup) butter, softened
  • 1 1/2 cups powdered sugar
  • 2 tablespoons raspberry extract
  • pink food coloring gel (as desired for coloring both cupcakes and frosting)
  • fun sprinkles! (I used edible star glitter and pearls—love them!!!)

DIRECTIONS:

  • Preheat oven to 350F degrees
  • Place 24 cupcake liners into muffin tins
  • In a medium bowl, combine champagne, eggs, and vanilla
  • In a second medium bowl, mix together flour and salt
  • Use an electric mixer to beat together 2 sticks of softened butter, shortening and granulated sugar.
  • Beat until light and fluffy, about 2 minutes
  • With the mixer on low speed, add about 1/3 of the flour mixture, followed by 1/3 of the champagne mixture.
  • Alternate the flour and champagne, mixing until well combined.
  • Add a little bit of pink food coloring gel if you want a pink tint to your cupcakes and combine well.
  • Spoon batter evenly into cupcake liners
  • Bake at 350F degrees for 20-25 minutes, until a toothpick inserted into a cupcake comes out clean.
  • Allow cupcakes to cool completely.
  • When cupcakes are cool, you can add a little extra champagne taste by poking holes in the top of each cupcake with a toothpick and brushing the tops of each cupcake with champagne. 
  • Make frosting by combining all of the frosting ingredients in a large mixing bowl and beating on low until combined and then on high until light and very fluffy (about 2-3 minutes).
  • Pipe frosting on tops of cooled cupcakes and decorate with sprinkles as desired.
  • ENJOY!!

Pink Champagne Cupcakes2
My thoughts:  These are just fun little cupcakes.  Use the sweetest sparkling wine/champagne you can though.  For an alcohol-free treat use sparkling grape juice.  I made a valiant attempt at including the champagne in the frosting, but it was TERRIBLE.  Simple buttercream with a touch of raspberry flavor was perfect instead.

Happy New Year!!!!!

~r

Pink Champagne Cupcakes
Other fun New Years recipe ideas:

Raspberry Confetti KissesCheesecake Sundaes Strawberry Lemonade Cupcakes!!!!!Polka Dot Cake!!!

Raspberry Lemon Cream Cups

Posted on

Raspberry Lemon Cream Cups!!!

These adorable chilled lemon and raspberry treats are creamy, sweet summer dessert perfection!

I love lemon and raspberry together and I just couldn’t resist trying a new flavor combination in my mini cheesecake pan !  The sweet raspberries and tart lemon cream are a perfect ending to any meal!  Want to try them???

Here’s how:  (printer friendly recipe)

Ingredients:

  • 40 Nilla Wafers
  • 4 Tablespoons of melted butter
  • 1 package (4-serving size) of instant lemon pudding
  • 1 1/2 cups of cold milk
  • 1 container of Cool Whip topping
  • 2-3 cups of fresh raspberries (about 60 berries)

Directions:

  • In a food processor or a large food chopper, crush Nilla wafers to fine crumbs.
  • Add melted butter to crumbs and pulse a few more times to combine.
  • Prepare mini cheesecake pan by placing metal disks in the bottom of each cup.
  • Evenly divide crumbs between all 12 cups.
  • Press firmly into bottom of each cup using a mini tart shaper or the end of a wooden spoon.
  • In a large mixing bowl, combine cold milk with packet of pudding mix.  Beat on medium for 2 minutes.
  • Mix in HALF of the Cool Whip topping (the rest will be used on top once dessert is frozen, so you can return it to the refrigerator).
  • Spoon/pour pudding mixture into a large zip-top bag and carefully clip a corner off.
  • Pipe filling into each cup, covering crust and filling only half way.
  • Place 4 to 5 fresh raspberries on top of filling in each cup.
  • Pipe filling over raspberries until it reaches top of cup (be sure to push filling down around berries and not just on top of them). You will probably have a little lemon filling left at the end. I can tell you from experience that Nilla Wafers dipped in this filling are AMAZING!!
  • Use a knife to level the tops of each cup.
  • Cover with plastic wrap and freeze for several hours (or overnight!)
  • Once frozen, (and just before serving) allow pan to warm just slightly at room temperature and then use your fingers to push up on metal disk and push each dessert out of the pan.
  • Remove metal disks from bottom crust.
  • Pipe remaining Cool Whip on top and garnish with remaining raspberries on top.

Raspberry Lemon Cream Cups!!!

These can be served frozen, or allowed to warm at room temperature for a little while before serving.  Don’t leave them at room temperature for longer than an hour or so, or your crust will start to get soggy!

My thoughts:  I cannot even think of the words to describe how yummy these little cups are.  Plus they are EASY to make and quick (except for the freezer time, of course!)  If you do not have a mini cheesecake pan, you can make these in cupcake liners in a muffin tin…or you could get a mini-cheesecake pan and add to the fun in your life.  I absolutely love mine!!!  So many possibilities!!

Raspberry Lemon Cream Cup!!!

Other recipes that use the mini-cheesecake pans:

Frosty Almond Joy Cups!Mini Cookie Dough CheesecakeMini Pineapple Upside Down CakesFrozen S'mores Cups

Mango Smoothie Pops

Posted on


These creamy mango popsicles are filled with fun fruit and ice cream– a perfect summer treat!

A few weeks ago I shared a recipe from my travels to Mexico- Leche de Chocolate and this week I want to share another favorite with you.  One of my trips to Mexico involved 10 days of digging a foundation for a new church building in a little town in Sinoloa.  We used pick-axes to dig twelve 5-foot deep holes that eventually had cement footers poured into.  By noon it was over 120 degrees and one of our favorite treats was when the local kids would bring us “helados” or homemade fruit ice cream in plastic bags.  I was a little hesitant at first, but after I bit the corner off of the bag and had a taste, I was addicted!  SO refreshing and delicious!  I asked my friend Clarissa for the recipe and she graciously wrote it out for me:

I’ve made it many times since and it always makes me smile when I remember those long hot (incredibly fun!) days.

A few days ago I came across some really fun popsicle molds called Volcano Pops.  The centers of the popsicle can be filled with things and I just imagined the creamy mango pops filled with coconut, or ice cream or berries…..endless possibilities!  So I had to try them!  SO much fun!  Here’s the recipe:

INGREDIENTS:

  • 2 cups of cubed fresh mango (about 2 medium mangos)
  • 1 can of evaporated milk
  • 1/4 c. sugar (use more or less depending on how sweet your fruit is)

DIRECTIONS:

  • Combine all of above ingredients in a blender (I used an Oster Smoothie MakerI got it for Christmas and I LOVE it– it makes smoothies right into a cute to-go cup.  These ingredients fit perfectly into the cup and made my clean up really easy!)
  • Blend until smooth.
  • Pour into  popsicle molds (or into sandwich bags– then just knot the top) and freeze overnight.
  • Remove popsicles from mold (and fill if you used Volcano Pops) or clip a corner off the bag and ENJOY!

My thoughts:  Only one— the mango pop filled with vanilla bean ice cream?  Oh.  My. Word. 🙂

/>

Raspberry Confetti Kisses

Happy New Year!!!!

Nothing says New Years Eve like confetti, and these crisp melt-in-your-mouth raspberry cookies will be everyone’s party favorite!!!

INGREDIENTS:

  • 3 egg whites
  • 1/8t. salt
  • 3 1/2 T. raspberry Jell-O
  • 3/4 c. sugar
  • 1T. vinegar
  • Confetti sprinkles

INSTRUCTIONS:

  • Preheat oven to 250 degrees
  • Beat egg whites with salt until foaming.
  • Add Jell-O and sugar as you beat mixture and beat until it stands in peaks.
  • Add vinegar and gently mix.
  • (if you want, you can add a few mini chocolate chips at this point! yum!)
  • Spoon or pipe into small circles on a cookie sheet covered in parchment paper.
  • Sprinkle with confetti sprinkles or jimmies.
  • Bake at 250 degrees for 25 minutes, turn oven off and allow to sit for an additional 20 minutes.
  • Remove from oven and allow cookies to cool completely.

My thoughts: These are great with chocolate chips in them if you like raspberry and chocolate together. I opted for confetti for a fun New Years treat!  These are like cotton candy- light and fluffy sugar that melts in your mouth and is a tiny bit chewy at the end.  A unique and fun “end-of -the-year” party cookie.

HAPPY NEW YEAR!!!!!


Want another confetti-themed dessert idea?  Try Confetti Cups made with sugar cookies and Fruit Loops—make them in mini-muffin tins for bite-sized New Years fun!

Enjoy!  r-

Raspberry Truffle Tart

Posted on

Smooth dark chocolate and tangy raspberry filling topped with a shiny glaze make this tart one of the richest and creamiest desserts you’ve ever had!

INGREDIENTS:

  • One refrigerated pie crust
  • 1c. Ghirardelli Bittersweet chocolate chips
  • 2c. Ghirardelli Semi-sweet chocolate chips (divided)
  • 5 egg yolks
  • 5 T. heavy whipping cream
  • 3 cups plus 5 T. powdered sugar
  • 2 T. vanilla
  • 12 T. butter (divided and melted)
  • 2t. raspberry flavoring
  • red food coloring

DIRECTIONS:

  • Preheat oven to 350 degrees.
  • Spray an 8 or 9 inch tart pan with cooking spray and line with pie crust.  Poke holes into bottom with fork and set on a cookie sheet.
  • Melt together 1 cup of bittersweet chips and one cup of semi-sweet.  Allow this to cool to room temperature.
  • In a separate bowl combine eggs, cream, vanilla and 5 T. powdered sugar.
  • Add cream mixture to chocolate and blend well.  Pour into crust and bake for 20 – 25 minutes until center is set.
  • Cool tart completely and then remove outer ring.
  • For filling: Combine remaining 3 c. of powdered sugar with 6 T. melted butter and blend well. Add raspberry flavor and food color. Blend well (add extra powdered sugar if needed for thick frosting-like consistency) and spread over the top of cool tart.
  • For Glaze: Melt 6 T. butter (do not use margarine here!) with remaining cup of semi-sweet chips and stir until smooth.  Pour over top of tart and smooth to edges.
  • Garnish with fresh raspberries if desired.

My thoughts…soooo rich (take a small slice!) and so flavorful!  This tart recipe (minus the toppings) is one of my last-minute go-to recipes.  Its SO quick and easy and you can serve it right out of the oven warm -with cool-whip or ice cream.  The toppings are a bonus if you have a little more time- mix those flavors up!  Great with mint and peanut butter and maple and coconut– such a fun and versatile recipe!  ENJOY!!!

A special thanks to my friend Brie from Color Canvas Media who is teaching me about my camera and who helped me take these photos far better than I could have alone!  I’m addicted to Foodgawker and thus far I’ve had 36 photos rejected and 2 accepted (lol!!) I’ve never had any interest in photography and now I think I’m addicted- fun new hobby!   So here’s to better blog pictures! Thanks Brie!!!!!

Raspberry Lemonade Truffles

Posted on

img_0886

These soft and creamy lemonade truffles are accented with a sweet raspberry white chocolate.  Truly a unique dessert that will have you thinking summer as soon as you taste one!

INGREDIENTS: (makes 30 truffles)

  • 1 (8 oz.) bar of Philadelphia Cream Cheese (softened to room temp)
  • 1 packet (0.23 oz.) of Kool-Aid Lemonade mix (unsweetened)
  • 5 cups powdered sugar (plus a little extra to coat your hands as you work with dough)
  • 1 bag (12oz) Wilton White Candy Melts
  • 1/4 teaspoon imitation raspberry flavoring
  • Red and yellow food coloring (enough to get the color you desire)

DIRECTIONS:

  • Cream together Philadelphia cream cheese and packet of lemonade.
  • Add yellow food coloring to desired shade of yellow.
  • Add powdered sugar one cup at a time, blending well between each one.  After 4th cup, coat your hands in powdered sugar and mix in 5th cup with your hands until well blended.
  • Using sugar-covered hands, roll dough into 1 inch truffle balls and set on parchment paper.
  • Melt candy coating chips in microwave in 30 second increments, stirring between until smooth.
  • Add raspberry flavoring and red food coloring (to desired color) and mix well.
  • Spoon about 1/2 – 1 tsp. of chocolate onto parchment paper and then press a truffle on the top of it until the chocolate is visible around the edges.  Finish the rest of the truffles this way.
  • Spoon remaining chocolate into a ziplock bag and clip the corner.  Drizzle the chocolate over the truffles.
  • Allow topping to harden (about 5 minutes)
  • Peel off parchment paper and serve at room temperature or chilled.

Makes about 30 truffles.

My thoughts:  Wow!  These have been a huge hit with everyone in my life that’s tried them!  They are an original creation for Real Women of Philadelphia.  For all of you who love to cook and bake, you really should check this contest out– its a lot of fun and the sweetest people are a part of this community!  I was longing for something to remind me that summer is coming (in spite of all the yucky weather lately!)  Raspberry lemonade is such  treat- and these truffles capture the essence of it to me.  I hope you get a chance to try them– let me know what you think!  :o)r-