Tag Archives: mini cheesecake pan

Frosty Fall Pudding Treats

Posted on

Frosty Candy Corn Dessert!
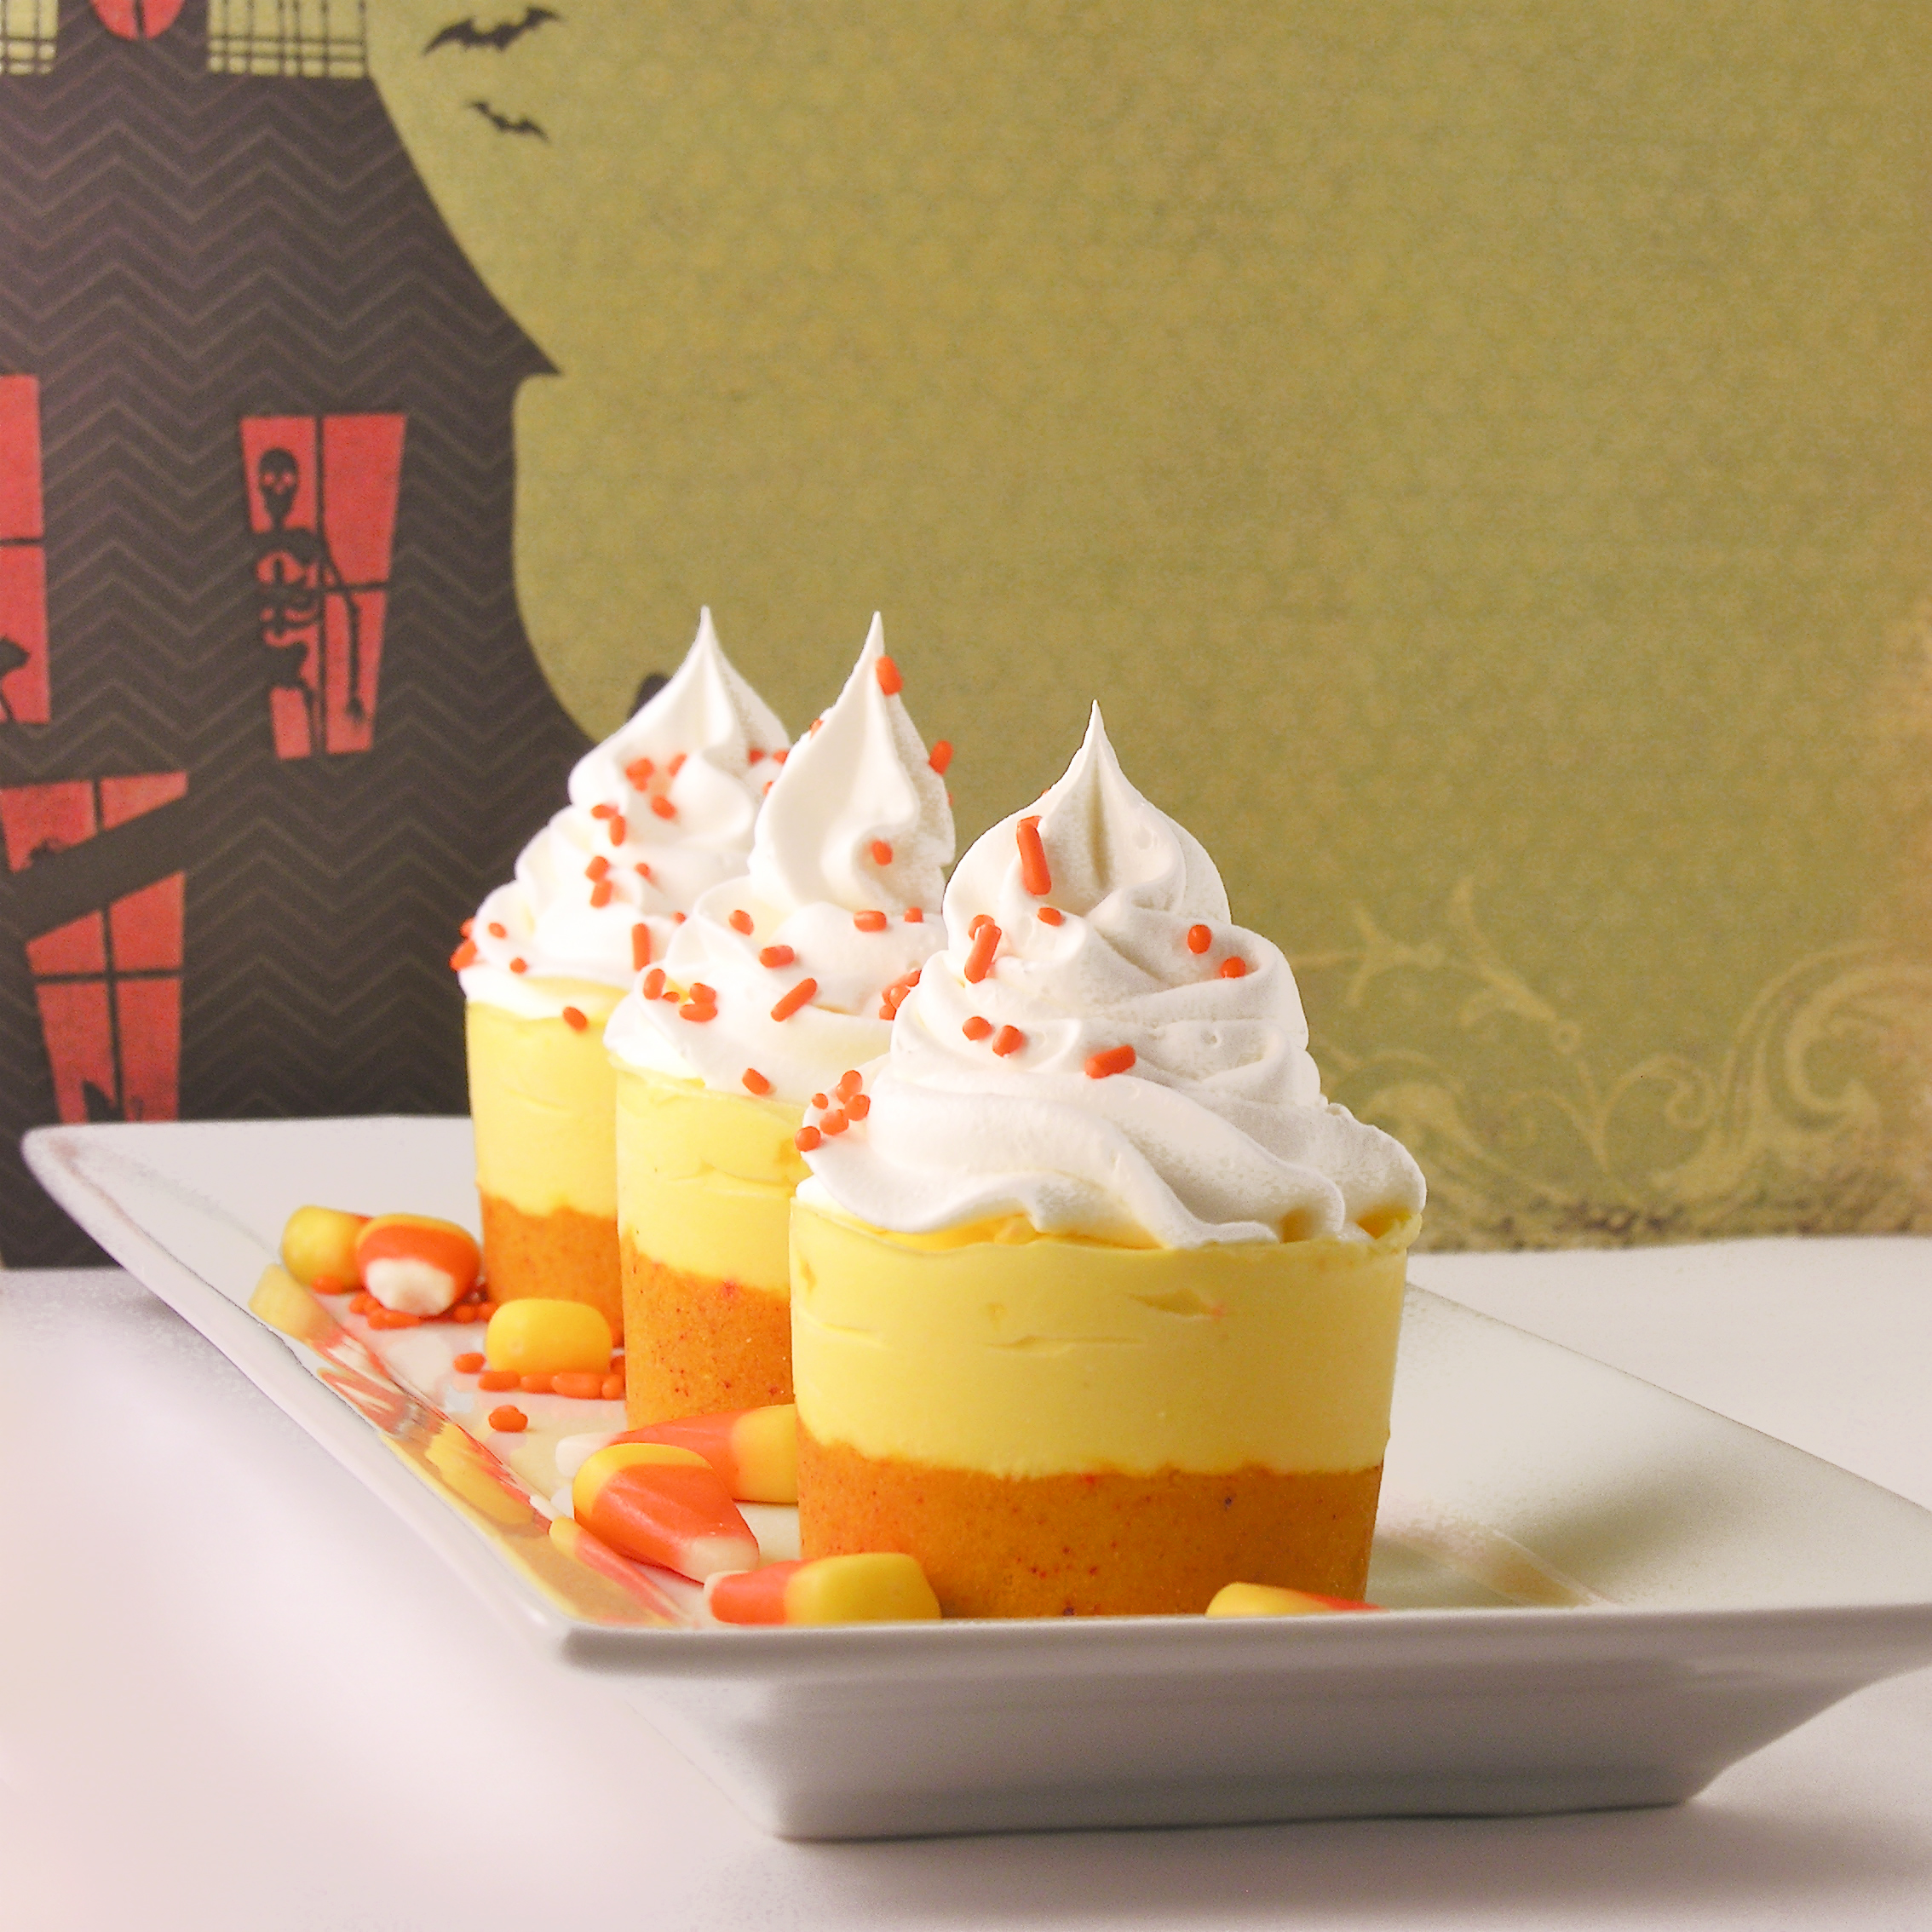
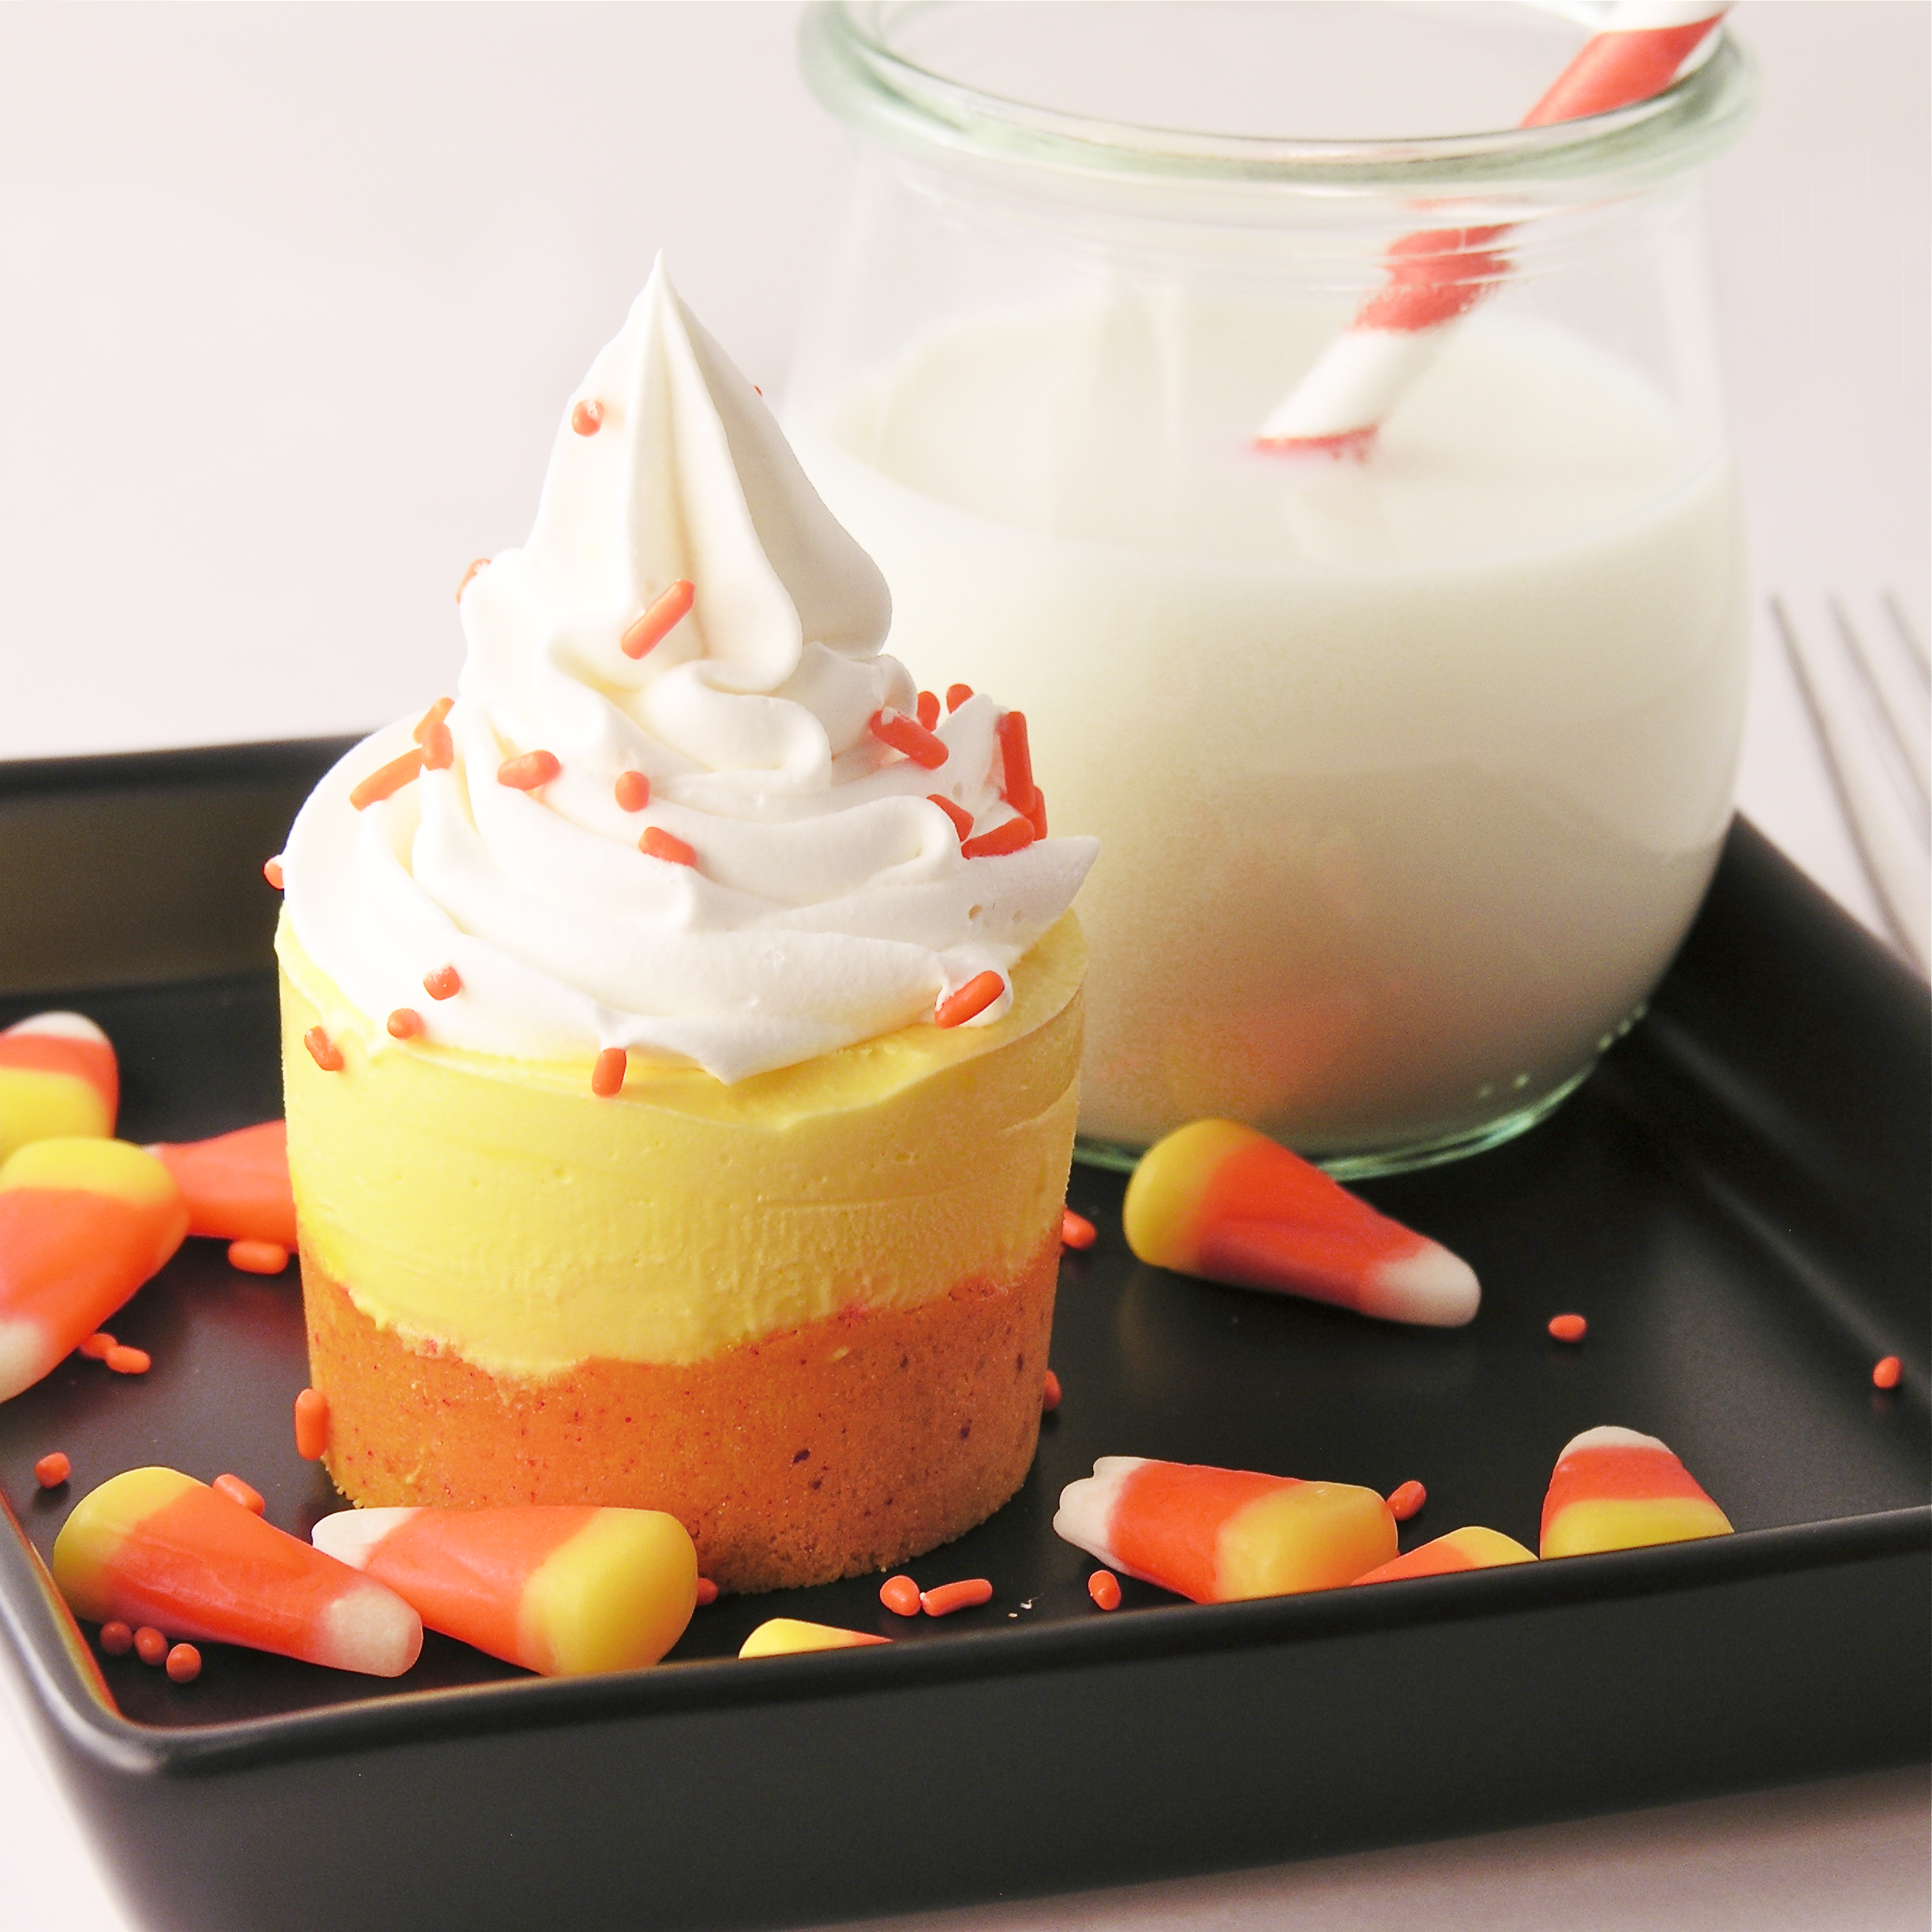
Who says you can’t do frozen treats for Halloween??  These yummy little frosty pudding cups have a Golden Oreo crust and are decorated like fun candy corn treats!

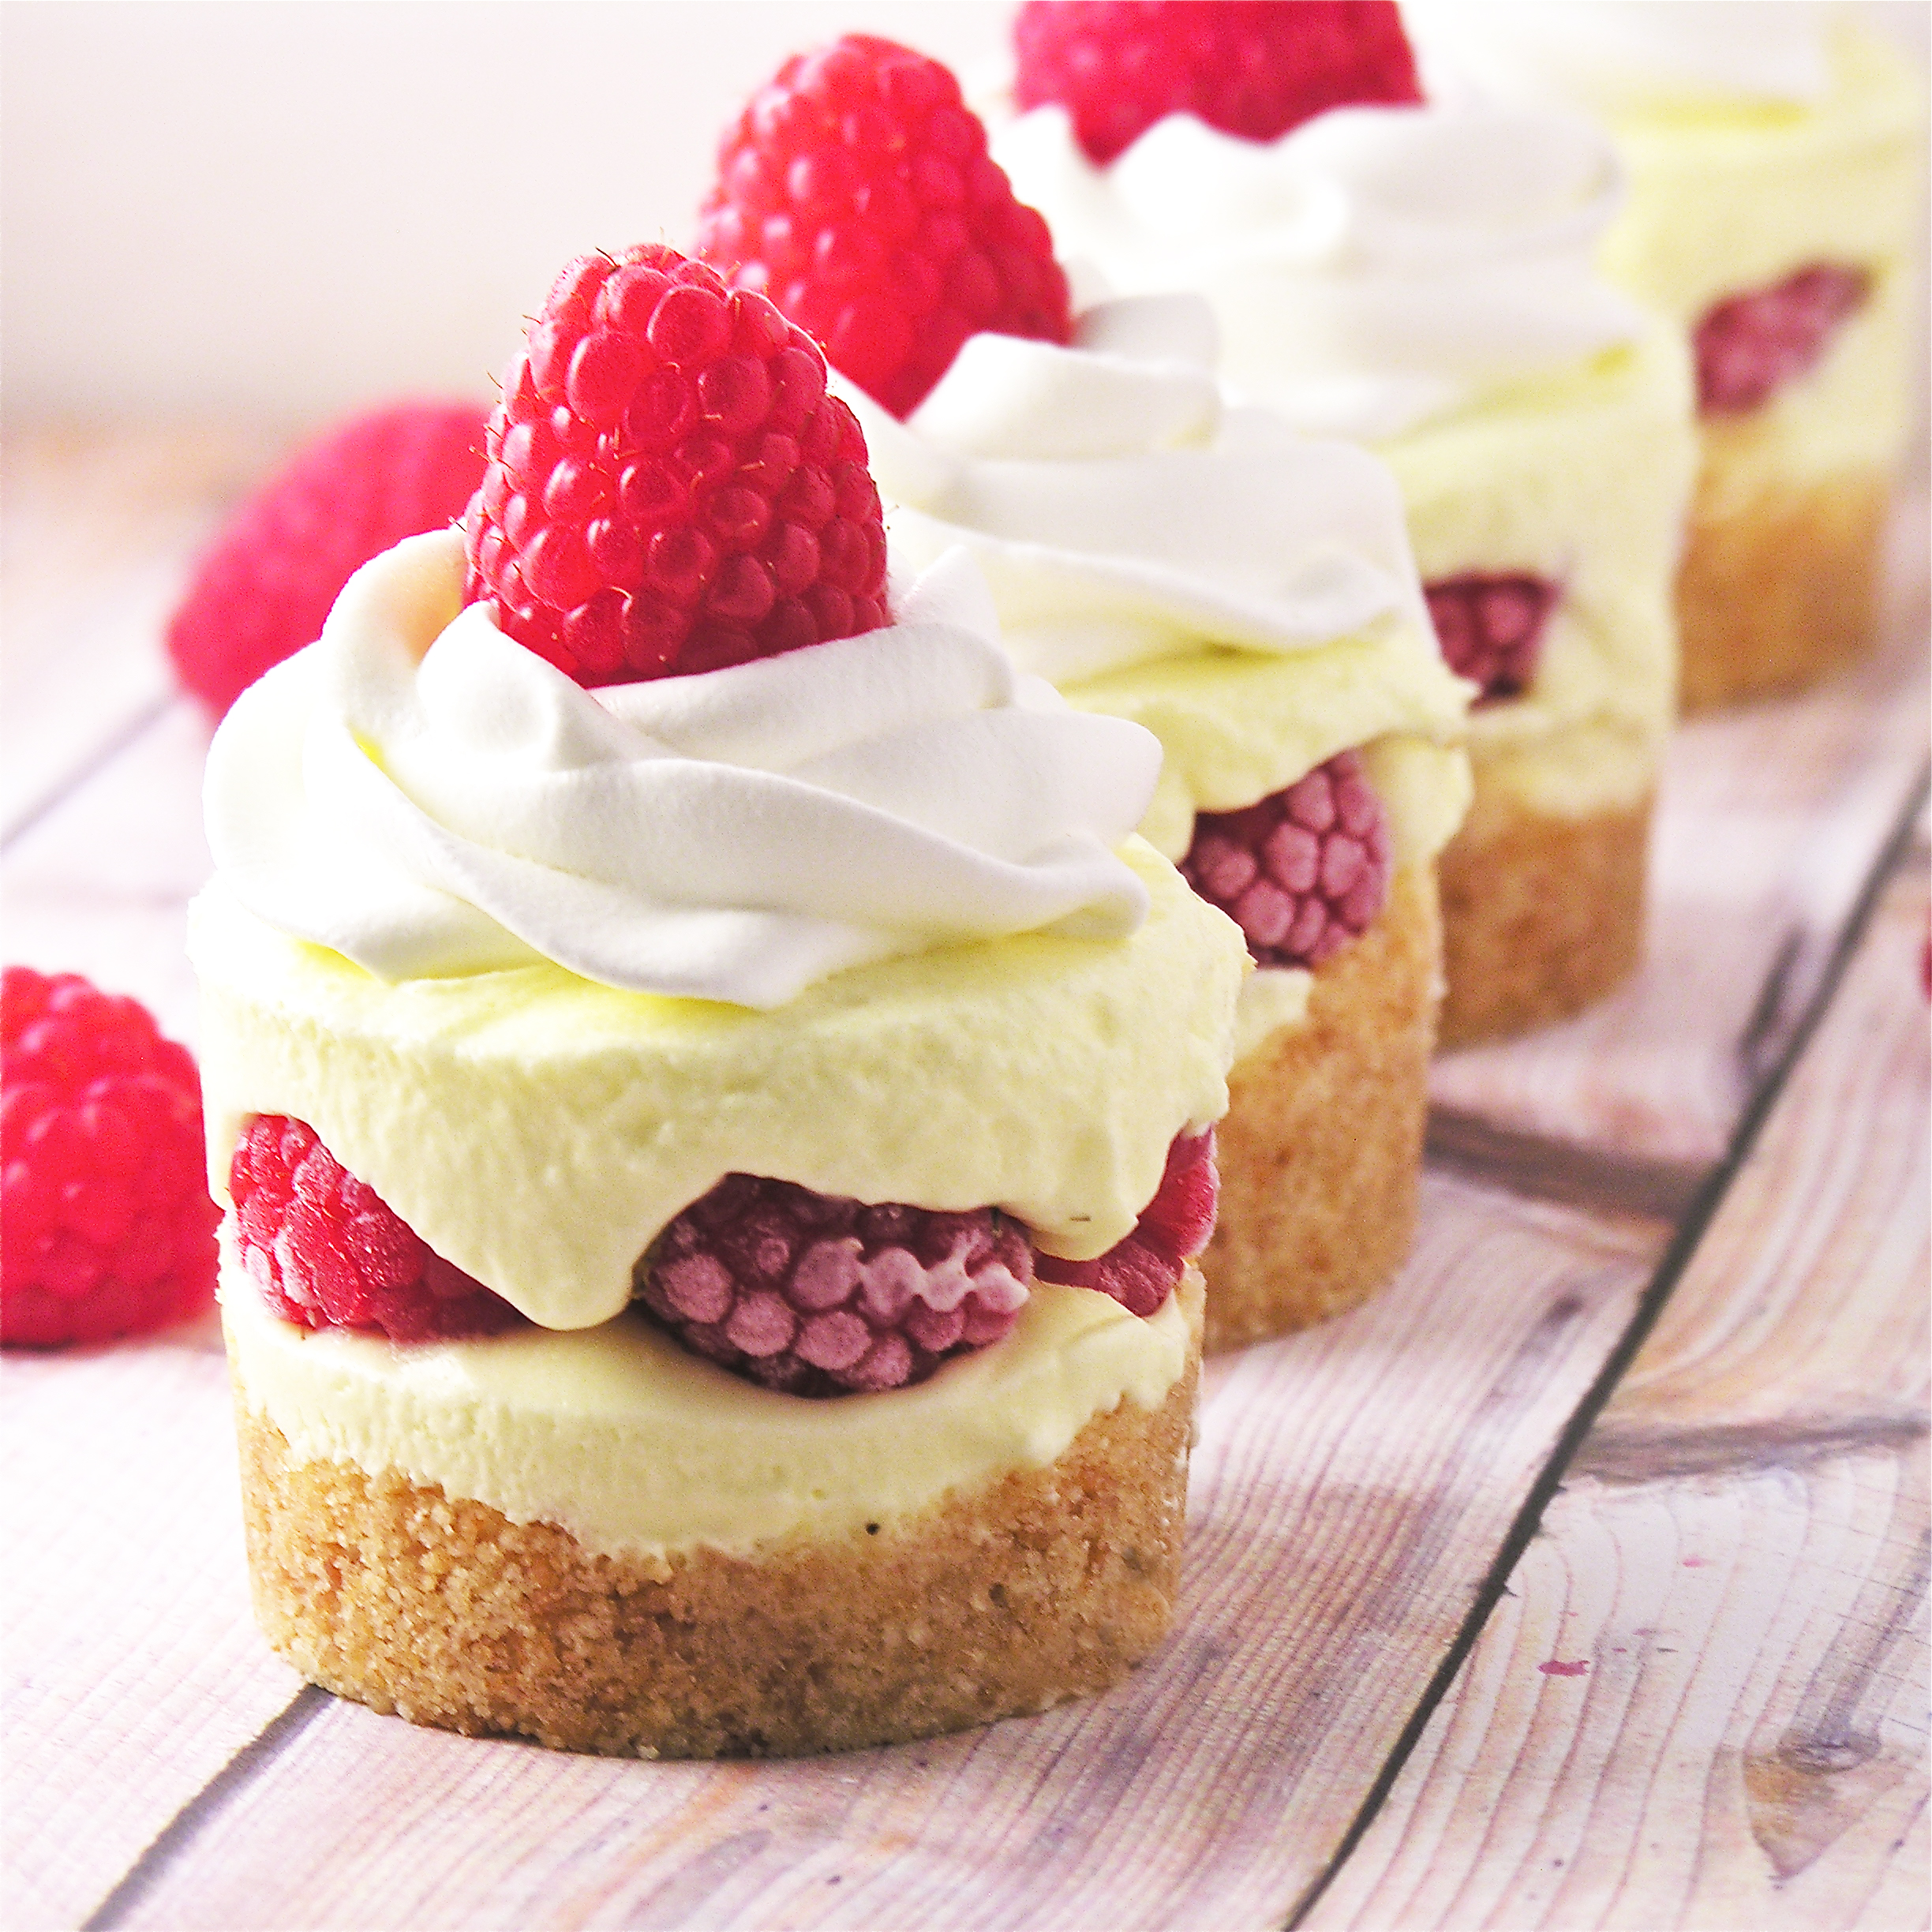
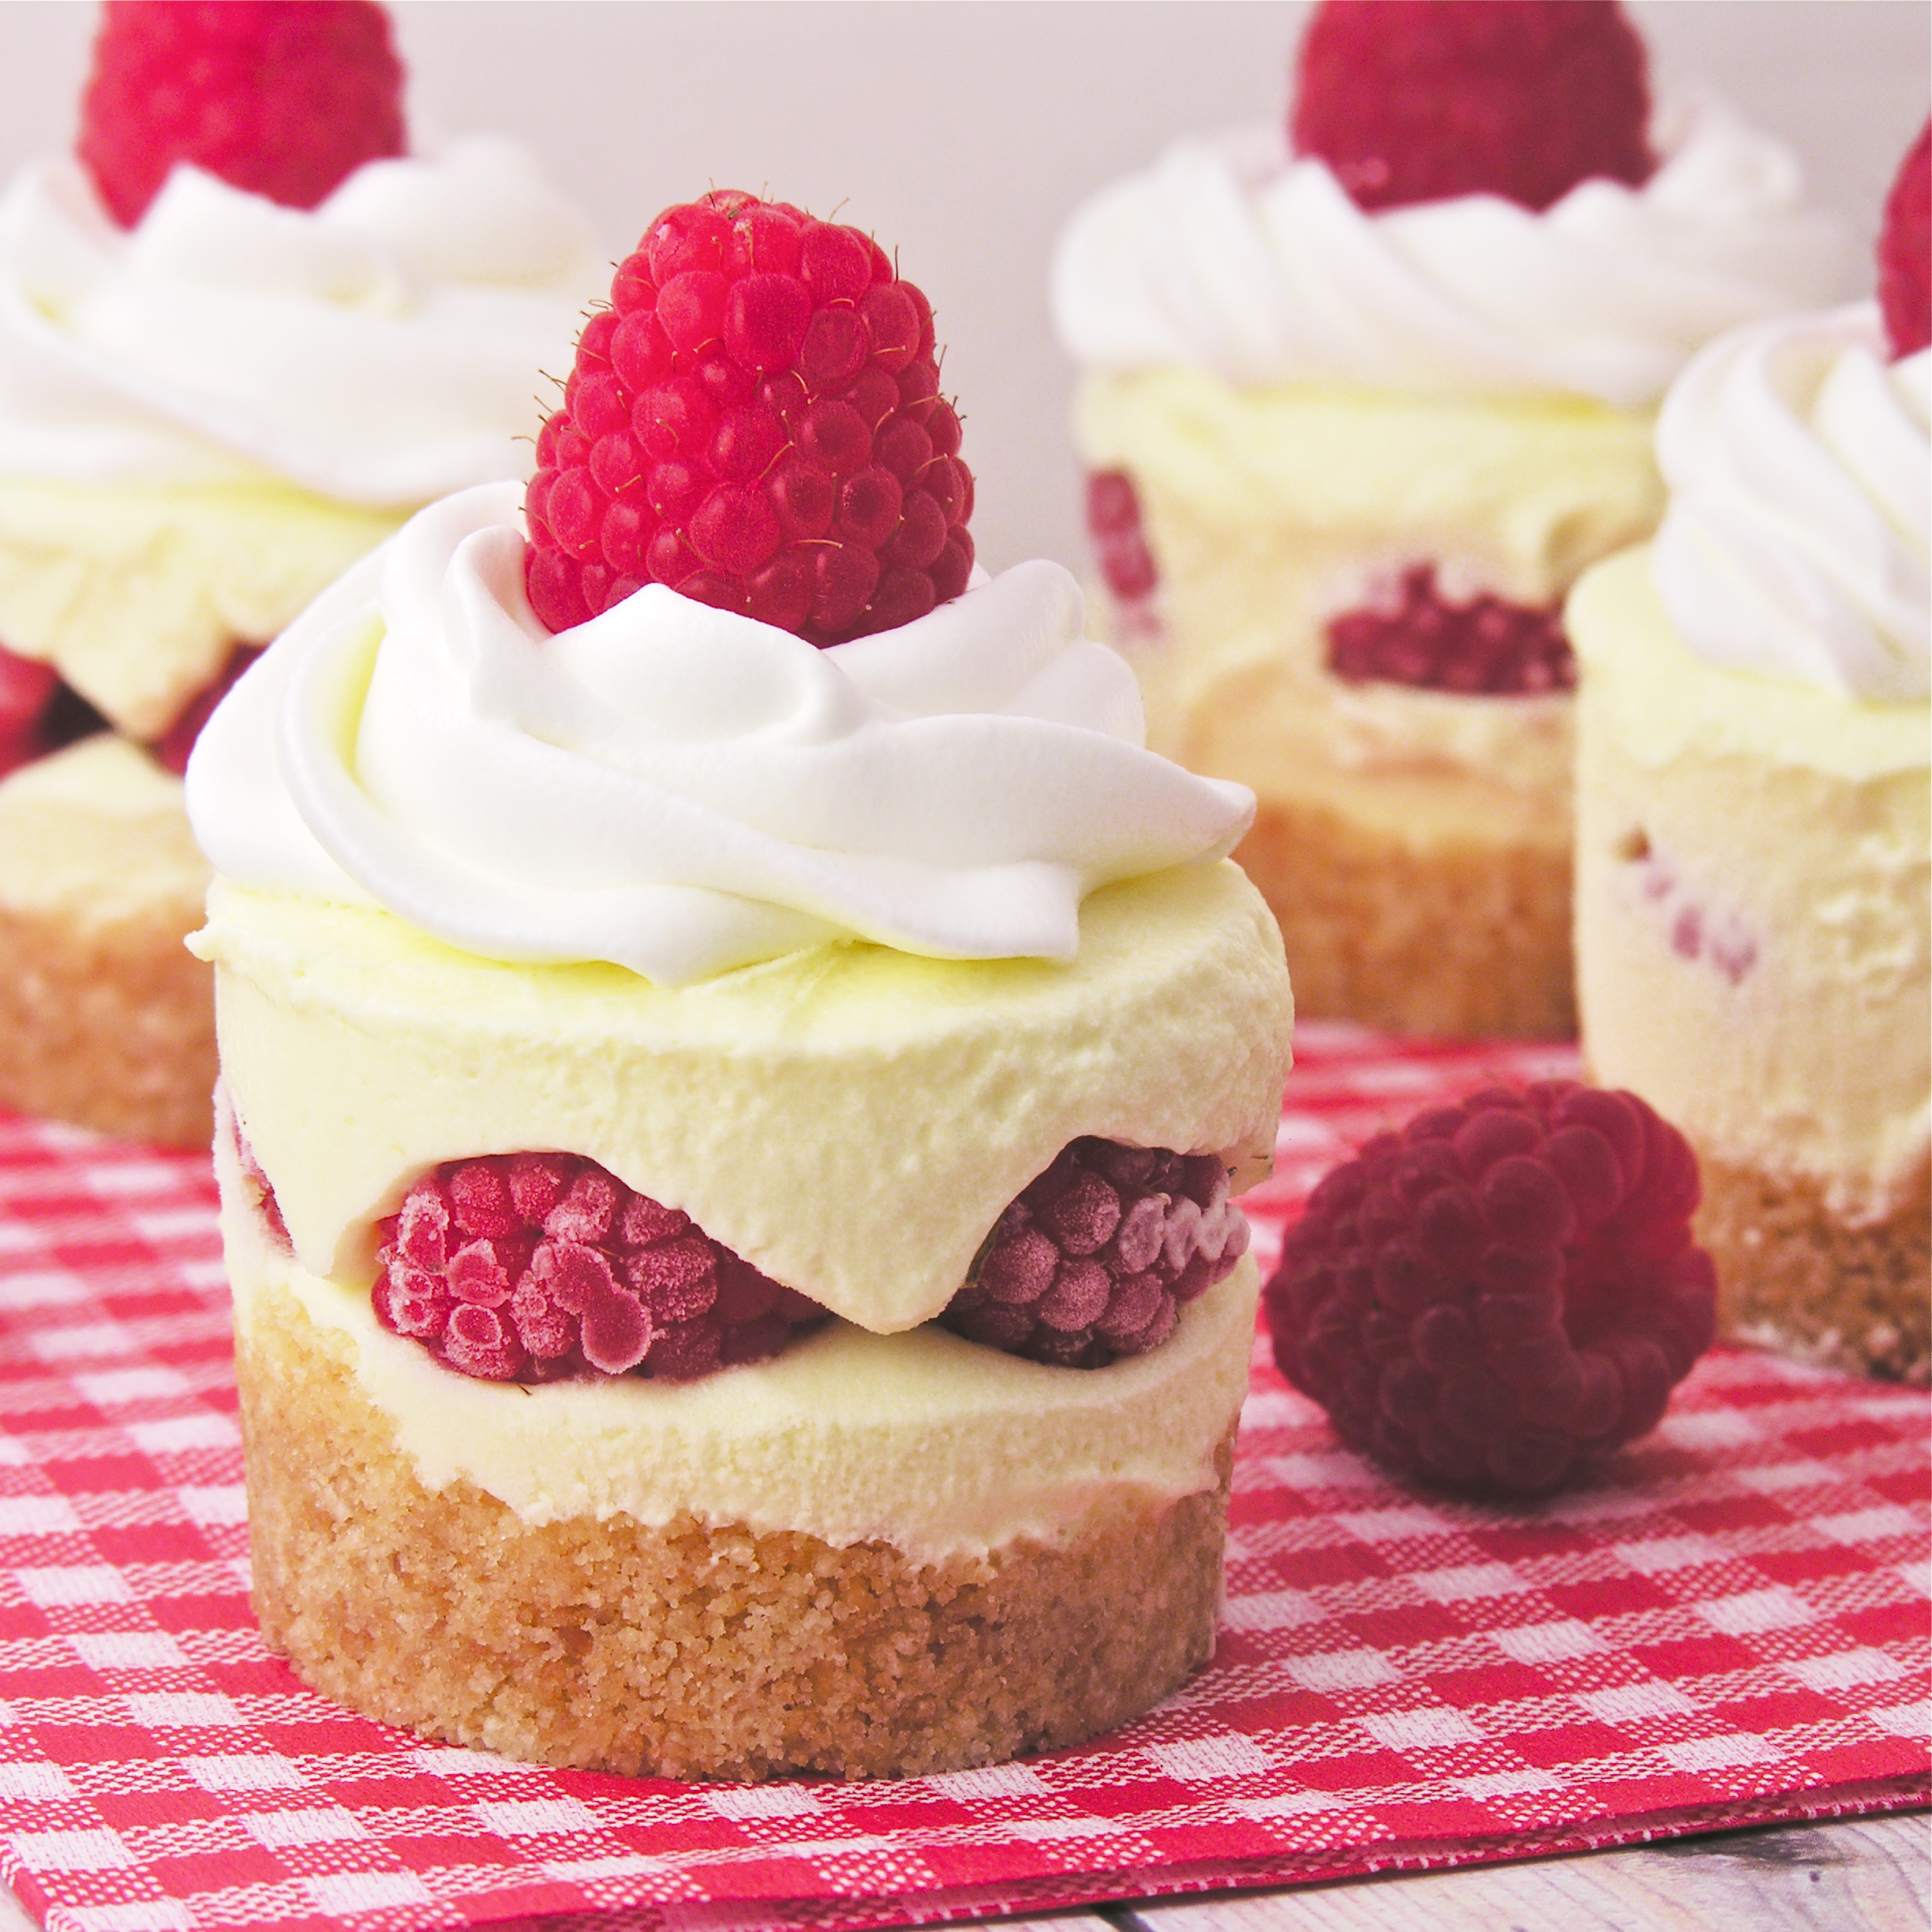
I’m back with a recipe in my Chicago Metallic Mini Cheesecake Pan.
For those of you who haven’t gotten one of these yet, they are SO much fun.  I’ve done some of my favorite desserts in this little pan.  You can do this particular dessert in cupcake liners placed in muffin tins, but they are just SO cute in the mini cheesecake pan.

Here’s how the pan works:  You get a pan that looks just like a muffin tin but each cup has a hole in the bottom.  You also get 12 little metal disks that fit perfectly in each cup, covering up that hole.  You make, bake, freeze, etc. your dessert and then just push up through that hole in the bottom and the disk pushes out with your little dessert on top.  I love fun individual desserts, so this is pretty much the perfect idea, in my opinion!

These are really easy, but they need to freeze for several hours/overnight, so make them ahead.

Frosty Fall Pudding Treat!!

Here’s the recipe: (printable version)

INGREDIENTS:

  • One package of Golden Oreos
  • 1 package (4 servings, 3.3 oz.) of Jell-O Instant White Chocolate Pudding
  • 1 1/2 cups of cold milk
  • 1 (8 oz.) container of Cool-Whip topping (thawed in refrigerator)
  • Food colorings in yellow and orange
  • Fall sprinkles

DIRECTIONS:

  • Crush about 2/3 package of Golden Oreos in a food processor or large food chopper.
  • Add orange food coloring until desired shade of orange is reached and mix on high until cookie bits and color are well combined.
  • Place metal disks into cheesecake pan and spoon cookie crumbs evenly into all 12 wells of mini- cheesecake pan (or cupcake liners), and press firmly into bottom (I use a Mini Tart Shaper– and I love it!)
  • In a large mixing bowl, mix cold milk with pudding for 2 minutes.
  • Add yellow food coloring to get desired shade and mix until well combined.
  • Fold in 1/2 of the Cool Whip (the rest will be used as topping- keep it refrigerated until use)
  • Spoon pudding mixture into a large zip-top bag (and zip it tight).
  • Cut a corner of the bag off and pipe pudding mixture into each cup, all the way to  the top.
  • Use a knife to smooth the tops flat and cover entire pan with plastic wrap.
  • Freeze until serving (at least a few hours)
  • Before serving, remove pan from freezer and allow it to warm up a little bit before popping desserts out.
  • Press a finger up through the hole in the bottom of the pan, pushing each dessert up- grab it by the crust and take metal disk off the bottom.
  • Serve immediately, or place in a sealed container back in the freezer until ready to serve.
  • Pipe remaining Cool Whip on top of each little dessert cup and decorate as desired.
  • Enjoy!!

Frosty Fall Pudding Treats!!!My thoughts:  There are two things that make a dessert perfect in my mind.  Taste and the amount of smiles that happen when you serve them.  These are really yummy (how can you go wrong with pudding and Oreos???) and the number of smiles….?  Well, you are just going to have to make them to see that for yourself!  Enjoy!! ~R

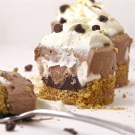
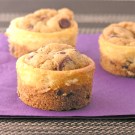
Other mini-cheesecake pan recipes you will love:

Mini chocolate chip cookie cheesecakesFrozen S'mores CupsMini Cookie Dough CheesecakeRaspberry Lemon Cream Cups!!!

Raspberry Lemon Cream Cups

Posted on

Raspberry Lemon Cream Cups!!!

These adorable chilled lemon and raspberry treats are creamy, sweet summer dessert perfection!

I love lemon and raspberry together and I just couldn’t resist trying a new flavor combination in my mini cheesecake pan !  The sweet raspberries and tart lemon cream are a perfect ending to any meal!  Want to try them???

Here’s how:  (printer friendly recipe)

Ingredients:

  • 40 Nilla Wafers
  • 4 Tablespoons of melted butter
  • 1 package (4-serving size) of instant lemon pudding
  • 1 1/2 cups of cold milk
  • 1 container of Cool Whip topping
  • 2-3 cups of fresh raspberries (about 60 berries)

Directions:

  • In a food processor or a large food chopper, crush Nilla wafers to fine crumbs.
  • Add melted butter to crumbs and pulse a few more times to combine.
  • Prepare mini cheesecake pan by placing metal disks in the bottom of each cup.
  • Evenly divide crumbs between all 12 cups.
  • Press firmly into bottom of each cup using a mini tart shaper or the end of a wooden spoon.
  • In a large mixing bowl, combine cold milk with packet of pudding mix.  Beat on medium for 2 minutes.
  • Mix in HALF of the Cool Whip topping (the rest will be used on top once dessert is frozen, so you can return it to the refrigerator).
  • Spoon/pour pudding mixture into a large zip-top bag and carefully clip a corner off.
  • Pipe filling into each cup, covering crust and filling only half way.
  • Place 4 to 5 fresh raspberries on top of filling in each cup.
  • Pipe filling over raspberries until it reaches top of cup (be sure to push filling down around berries and not just on top of them). You will probably have a little lemon filling left at the end. I can tell you from experience that Nilla Wafers dipped in this filling are AMAZING!!
  • Use a knife to level the tops of each cup.
  • Cover with plastic wrap and freeze for several hours (or overnight!)
  • Once frozen, (and just before serving) allow pan to warm just slightly at room temperature and then use your fingers to push up on metal disk and push each dessert out of the pan.
  • Remove metal disks from bottom crust.
  • Pipe remaining Cool Whip on top and garnish with remaining raspberries on top.

Raspberry Lemon Cream Cups!!!

These can be served frozen, or allowed to warm at room temperature for a little while before serving.  Don’t leave them at room temperature for longer than an hour or so, or your crust will start to get soggy!

My thoughts:  I cannot even think of the words to describe how yummy these little cups are.  Plus they are EASY to make and quick (except for the freezer time, of course!)  If you do not have a mini cheesecake pan, you can make these in cupcake liners in a muffin tin…or you could get a mini-cheesecake pan and add to the fun in your life.  I absolutely love mine!!!  So many possibilities!!

Raspberry Lemon Cream Cup!!!

Other recipes that use the mini-cheesecake pans:

Frosty Almond Joy Cups!Mini Cookie Dough CheesecakeMini Pineapple Upside Down CakesFrozen S'mores Cups

Easter Mini-Cheesecakes

Posted on

Easter Cheesecake Cups

These colorful mini-cheesecakes are made with malted milk ball eggs and have a sugar cookie crust…yum!

I love seasonal candy.  I love Cadbury eggs at Easter and Tim Tams at Christmas and conversation hearts at Valentines Day….but the Whopper brand malted milk ball eggs are the best.  Did any of you use the outside shell as colorful “lipstick” as a kid?  So fun!  Crunch them up in a whipped cheesecake and put them in a fun Mini Cheesecake Pan for a dessert that will make everyone smile!

INGREDIENTS: (makes 12 mini cheesecakes)

  • One Nestle Sugar Cookie Dough Bar (the refrigerated dough that is scored into 24 squares)
  • 8 oz. of Philadelphia Cream Cheese (softened)
  • 1/3 c. granulated sugar
  • 2 t. vanilla
  • 1 (8 oz) container of Cool Whip
  • 2 bags (10 oz. each) of Whopper’s Robin Eggs (I used mini’s, but I’m sure the full size would work fine too.)  You could use regular Whopper candies to get the same flavors when the seasonal Robin’s Eggs are not available.

DIRECTIONS:

  • Preheat oven to 350 degrees.
  • Prepare pan by placing the metal disks into each cup (the Mini Cheesecake Pan comes with metal disks that sit at the bottom of each cup- like the bottom of a spring form pan!)
  • Break apart 1/2 of cookie dough bar.  (This recipe makes 12 cheesecakes but the bar contains 24 cookies.  You can double this recipe and make 24 cheesecakes or just make the other 12 cookies another time.)
  • Roll each cookie dough square into a ball and put it into a greased cup in the mini cheesecake pan.
  • Bake at 350 for 12-14 minutes.
  • Cool completely.
  • In a mixing bowl, cream together softened cream cheese and sugar. 
  • Add vanilla.
  • Smash one full bag of Malted Milk Chocolate Eggs.  I put them in a ziplock , placed them on a cutting board and hit them with a hammer until they were in pieces about the size of mini chocolate chips.
  • Fold about 2/3 of Cool Whip and  the one bag of smashed eggs into the cream cheese mixture.
  • Spoon cheesecake mixture into a large zip-top bag.  Clip a large piece of one corner off and pipe filling evenly over each cooled cookie crust.
  • Use a knife or spatula to smooth tops of cheesecakes flat across top of pan.
  • Freeze for about 3-4 hours (or overnight)
  • Remove from freezer, pop cheesecakes out by pushing up on the bottom of each cup. (This took a little practice for me- you have to push it up high enough to grab it by the cookie part.)
  • Remove the metal disk from the crust.
  • Pipe remaining 1/3 of Cool Whip on top of each cheesecake and decorate with  malted milk chocolate eggs as desired
  • Keep refrigerated until serving.

Easter Cheesecake Cups

My thoughts:  These are a yummy, colorful and fun Easter treat!  They go together fast too- which is always a bonus for me.  You can make these in a muffin tin, if you don’t want to invest in the mini-cheesecake pan- but mine has been a great addition to my kitchen- so many fun things to make in it!!!  Hope you enjoy these fun little treats!!!  ~r

Easter Cheesecake Cups!!

Other Easter ideas from Easybaked (click on an image to get the recipe):

Chocolate Easter Eggs with Peanut Butter FillingEasy Easter cut out cookiesOreo pops!!!!!Raspberry Confetti Kisses

Other ways to use your Mini Cheesecake Pan:

frozen s'more cupsMini Pineapple Upside Down CakesMini chocolate chip cookie cheesecakesMini Cookie Dough Cheesecake

Mini Cookie Dough Cheesecakes

Posted on


These yummy little cheesecakes have chocolate chips in the crust and adorable little chocolate chip cookies baked right on the top.  A perfect mini party dessert!!

INGREDIENTS: (makes 12 mini cheesecakes)

  • 3/4 c. finely crushed graham crackers
  • 2 1/2 T. melted butter
  • 1/3 c. mini chocolate chips
  • 1 (8oz) bar of Philadelphia Cream Cheese (softened to room temperature)
  • 1/3 c. sugar
  • 1 egg
  • 1/4 t. vanilla
  • 1 tube of refrigerated chocolate chip cookie dough (I use Pillsbury)

DIRECTIONS:

  • Preheat oven to 325.
  • Open tube of cookie dough and using a small melon baller or Mini Cookie Scoop make 12 small cookie balls (about an inch in diameter) and set aside. (You will not use much of the dough for this recipe- which means you can make cookies later!!!)
  • Combine graham cracker crumbs with butter and mix well.
  • Add mini chips, and when well combined, evenly divide into a Mini Cheesecake Pan (make sure you place your metal disks in each cup first!)
  • Press crumbs into bottom of each cup using a Mini Tart Shaper
  • Combine softened cream cheese with sugar and add egg and vanilla.  Beat until smooth.
  • Evenly divide batter into each of the 12 mini cheesecake cups.
  • Place pan on a cookie sheet and bake at 325 degrees for 30 minutes.
  • Remove pan from oven and gently place one cookie dough ball on the top of each mini cheesecake.
  • Return pan to the oven for 10-12 minutes- until cookies are baked on the top of each cheesecake and starting to brown.
  • Remove from oven and cool completely.
  • Refrigerate overnight, remove from pan and ENJOY!!

My thoughts:  It took me two tries to get the cookie dough to bake on the top all cute and pretty.  Its all in the timing.  My first attempt at this recipe, I put the cookie dough on top before the cheesecake was baked.  The cookie dough sank and pushed the cheesecake batter right over the top of the pans, leaving a huge mess!  Putting the dough on near the end of baking worked perfectly.  Lesson?  When at first you don’t succeed, try again! (also, stock up on cream cheese when it is on sale so it doesn’t cost a fortune to experiment!)  I really hope you love these yummy little treats!  Enjoy!!  -r

Mini Pineapple Upside Down Cakes

Posted on


A fun twist on the traditional pineapple upside down cake– little mini cakes that are so pretty and fun to serve!

The Mini cheesecake pan is back!  I love this Chicago Metallic pan so much!!!  I know lots of you have gotten this pan for previous recipes (Cookie cheesecakes and Frozen S’mores) and love it– so here’s another!  These little cakes could be made in muffin tins- but in the mini cheesecake pan the bottom comes right out and you can keep your toppings in place and pretty– no sticking to the bottom of the pan.  Love it!  Here’s the recipe: so easy!

Ingredients:

  • One boxed white cake mix (plus the oil, water and eggs to make according to box)
  • 2/3c. packed dark brown sugar
  • 1/3c. melted butter
  • 1 (20oz.) can of pineapple chunks
  • 24 maraschino cherries

Directions:

  • Preheat oven to 350 degrees
  • Place disks in the bottom of your Mini cheesecake pan and spray well with non-stick spray.
  • Mix together brown sugar and melted butter.
  • Spoon half of the sugar mixture evenly into the bottom of each cup in the pan (this recipe makes 24 mini cakes, so if you only have one pan you will need to do this in 2 batches).
  • Place one cherry in the center of each cup.
  • Break apart pineapple chunks and place around cherry in each cup.
  • Make cake mix according to box (I used the whole egg method)
  • Spoon half of batter evenly in each cup over cherry and pineapple.
  • Place pan on a cookie sheet (important– these will leak a little!!!)
  • Bake at 350 degrees for about 22-24 minutes.
  • Allow pan to set and cool.
  • Gently push up on bottom disk and remove each mini-cake from pan.
  • Place bottom up on a cake rack and gently remove disk from top (replace any fillings that stick)
  • Wash your sticky fingers and pan and repeat to make 24 cakes (unless you are lucky enough to have two pans- then you can do them all at once!)
  • Allow these to cool completely.  Once they set they hold together beautifully- they are just a little fragile when they are still warm.

My thoughts: Well, I hate cooked fruit.  I have to admit that I didn’t try these.  I did, however, enlist many friends and coworkers in the tasting process and got a unanimous thumbs up on them.  They are (of course!) more work than just a regular cake.  They are sticky and the toppings slide off a bit and I wished I had 2 pans so that I could do them all at once.  I’m thinking of getting a second one…. the end result was so cute and so much more fun than just a plain cake though.  I really like that everyone gets pineapple and a cherry.  Enjoy!!!!!!!  -r