Tag Archives: Nilla wafer crust

Mile High Key Lime Pie

Posted on

Key Lime Pie3

A Nilla Wafer crust filled with a creamy key lime pie and topped with piles and piles of sweet whipped key lime topping. If you love key lime pie, this is your new favorite recipe for it!!

I adore key lime pie. I love that tart and smooth pie filling. Whenever I get the opportunity, I try key lime pies, and I can honestly say that this is the best I’ve had…so far! This recipe is courtesy of my friends Chuck and Heather Lane. They pinched it from a newspaper article years ago that claimed it as the recipe of one of the fancier restaurants in Fort Wayne. We were out for dinner one night not long ago, and they started talking about this pie and I (of course!) asked for the recipe. They had made a few “tweaks” to it, and I honestly think it is perfect. My only disappointment with this recipe is the pictures I took of it. I wish I’d waited to cut it until it had chilled completely. It is BEAUTIFUL when it is cut chilled. Perfect layers of happiness.

Anyway. I digress. Here’s the recipe~ I hope you love it as much as I do! (printable version)

INGREDIENTS:

  • 6 Tablespoons of butter, melted
  • 2 cups of finely crushed Vanilla Wafers
  • 2 3/4 cups of sweetened condensed milk (divided)
  • 3 egg yolks
  • 1 cup of key lime juice (divided)
  • 1 large (16 oz) tub of Cool Whip (softened in fridge)

DIRECTIONS:

  • Preheat oven to 350F degrees
  • Mix together crushed vanilla wafers and melted butter until well combined. Press into a greased pie pan.
  • Beat egg yolks and add 1 3/4 cups of sweetened condensed milk and 1/2 cup of key lime juice.
  • Mix well and pour into crust.
  • Bake at 350F degrees for 20-25 minutes. Cool completely.
  • Beat together Cool Whip, 1 cup sweetened condensed milk, and 1/2 cup of key lime juice until smooth. It should have a nice shiny look.
  • Refrigerate for at least 30 minutes.
  • Top cooled pie with whipped topping and chill for several hours before cutting and serving.
  • Enjoy!

Key Lime Pie1

My thoughts: With the exception of squeezing a million little key limes, this is such an easy recipe~ and oh so delicious! My only tip: don’t cut into it until it is cold! 🙂 Enjoy! ~r

Other bits of key lime joy (click on photo to see recipe)

Key Lime Cupcakes!Key Lime TartletsKey Lime Cake!!!Key Lime Cookie Bars2

Raspberry Lemon Cream Cups

Posted on

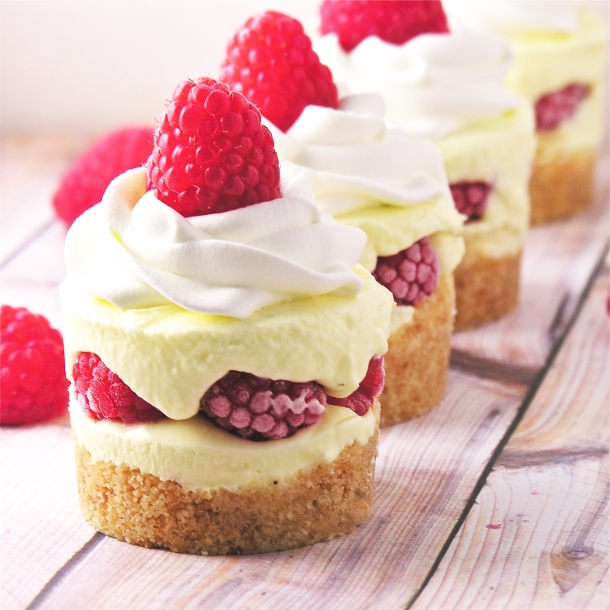
Raspberry Lemon Cream Cups!!!

These adorable chilled lemon and raspberry treats are creamy, sweet summer dessert perfection!

I love lemon and raspberry together and I just couldn’t resist trying a new flavor combination in my mini cheesecake pan !  The sweet raspberries and tart lemon cream are a perfect ending to any meal!  Want to try them???

Here’s how:  (printer friendly recipe)

Ingredients:

  • 40 Nilla Wafers
  • 4 Tablespoons of melted butter
  • 1 package (4-serving size) of instant lemon pudding
  • 1 1/2 cups of cold milk
  • 1 container of Cool Whip topping
  • 2-3 cups of fresh raspberries (about 60 berries)

Directions:

  • In a food processor or a large food chopper, crush Nilla wafers to fine crumbs.
  • Add melted butter to crumbs and pulse a few more times to combine.
  • Prepare mini cheesecake pan by placing metal disks in the bottom of each cup.
  • Evenly divide crumbs between all 12 cups.
  • Press firmly into bottom of each cup using a mini tart shaper or the end of a wooden spoon.
  • In a large mixing bowl, combine cold milk with packet of pudding mix.  Beat on medium for 2 minutes.
  • Mix in HALF of the Cool Whip topping (the rest will be used on top once dessert is frozen, so you can return it to the refrigerator).
  • Spoon/pour pudding mixture into a large zip-top bag and carefully clip a corner off.
  • Pipe filling into each cup, covering crust and filling only half way.
  • Place 4 to 5 fresh raspberries on top of filling in each cup.
  • Pipe filling over raspberries until it reaches top of cup (be sure to push filling down around berries and not just on top of them). You will probably have a little lemon filling left at the end. I can tell you from experience that Nilla Wafers dipped in this filling are AMAZING!!
  • Use a knife to level the tops of each cup.
  • Cover with plastic wrap and freeze for several hours (or overnight!)
  • Once frozen, (and just before serving) allow pan to warm just slightly at room temperature and then use your fingers to push up on metal disk and push each dessert out of the pan.
  • Remove metal disks from bottom crust.
  • Pipe remaining Cool Whip on top and garnish with remaining raspberries on top.

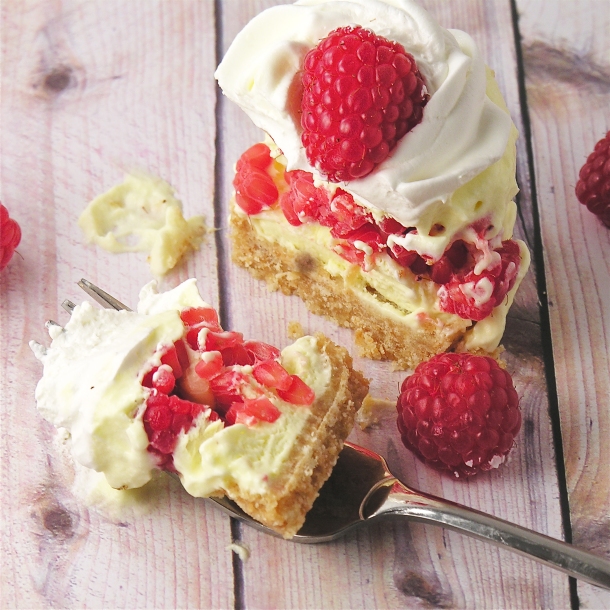
Raspberry Lemon Cream Cups!!!

These can be served frozen, or allowed to warm at room temperature for a little while before serving.  Don’t leave them at room temperature for longer than an hour or so, or your crust will start to get soggy!

My thoughts:  I cannot even think of the words to describe how yummy these little cups are.  Plus they are EASY to make and quick (except for the freezer time, of course!)  If you do not have a mini cheesecake pan, you can make these in cupcake liners in a muffin tin…or you could get a mini-cheesecake pan and add to the fun in your life.  I absolutely love mine!!!  So many possibilities!!

Raspberry Lemon Cream Cup!!!

Other recipes that use the mini-cheesecake pans:

Frosty Almond Joy Cups!Mini Cookie Dough CheesecakeMini Pineapple Upside Down CakesFrozen S'mores Cups