Category Archives: Easy recipes

No-Bake Easter Nest Cookies

Posted on

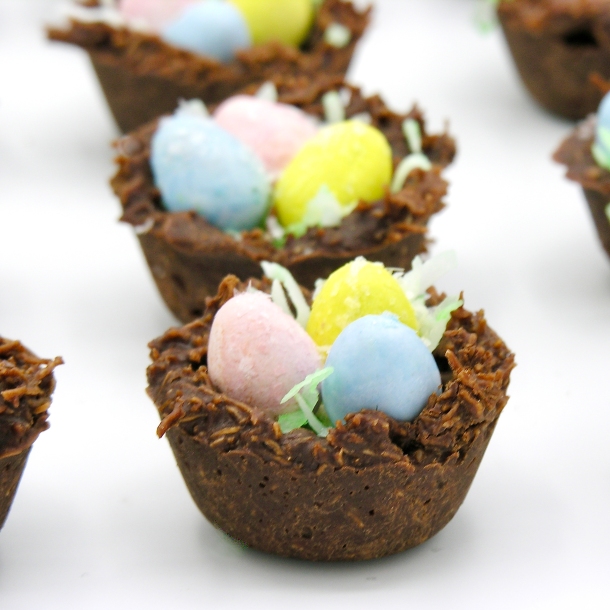
Easter nest 4-1These crunchy little nest cookies are filled with the (seriously addictive!) Cadbury mini eggs and a pinch of coconut. A perfect Easter treat! 
Easter nest 6-1

I just want you to know… I am the owner of the perfect no-bake cookie recipe. It’s my mom’s recipe, and it is perfect because it was the recipe we grew up enjoying. My mom passed away about 6 years ago, and I cherish every recipe I have of hers. When I was thinking about making Easter nest cookies, this recipe was the 1st to pop into my head. For sure I could have made it with the traditional oatmeal, but that’s not very nest-y, is it? So I used shredded wheat (the big ones!) I had to look a little bit to find the full-size shredded wheat (there are like a million flavors of mini!), but I found it- and it worked perfectly. I see you, chow-mien nest-makers- but I just could not bring myself to cover chow mien noodles in chocolate. Ewww. Sorry. Sticking with cereal here 🙂

Easter Nest 2-1

Want to know how to make these little nest cookies? Here is the recipe: (printable version)

Ingredients: (makes 24 mini nest cookies)

  • 2 cups sugar
  • 1/2 cup milk
  • 1/2 cup margarine (or one stick of butter)
  • 1/2 cup cocoa
  • 1/2 cup peanut butter (creamy)
  • 3 teaspoons vanilla extract
  • 4 cups of broken up shredded wheat (this was 9 big pieces, broken up)
  • 1/2 cup coconut (optional) with a tiny bit of green food coloring
  • 72 mini Cadbury eggs (just get a big bag- you’ll want the rest- I promise!)

Directions: 

  • Crunch up the shredded wheat until you have 4 cups.
  • If you use coconut, place it in a zip-top bag with the food coloring and shake until green.
  • Spray a mini-muffin tin with non-stick spray and set aside. 
  • Measure sugar, milk, margarine, and cocoa into a large saucepan. 
  • Heat until boiling (stirring constantly) and then boil for 2 minutes. 
  • Add peanut butter and vanilla. Stir until smooth. 
  • Take off heat, and add Shredded wheat, stirring until it is completely coated. I recommend adding it one cup at a time and using a little less if it gets too thick to stir well.
  • Working quickly, spoon or scoop into mini-muffin tin. 
  • Use a tart shaper or a rounded measuring spoon to press the center in (spray this item with cooking spray between each nest to keep it from sticking). 
  • Sprinkle a little coconut over each nest. 
  • Press three eggs into each nest. 

Nest process1Process3Process2

  • Allow nests to cool and harden.
  • Use a small knife to pop nests out of pan. 
  • Enjoy! 

Easter nest 5-1

My thoughts: I love how interesting these cookies taste with a different cereal added! For sure the shredded wheat gives these a more nest-like appearance. I really wanted to get the Cadbury eggs that are shimmery, but I couldn’t find them at my grocery, so I sprinkled a few edible sparkles over the top. 

If you want to try these with the oatmeal (and experience one of my favorite cookies from childhood), I will leave you with my mom’s original recipe (in her handwriting :)). I actually remember her writing this out for me (from memory). I’d just gotten my 1st apartment out of college and was craving these and she pulled out her notepad and jotted this down for me.

Just a note though- she NEVER used butter (even though the recipe says butter). Butter translated to her was always Country Crock. I use margarine as well- just to be true to her recipe- but I’m sure butter works fine too. Enjoy! ~r

Mom's recipe

Looking for other fun recipe ideas for Easter? We have lots of them! Just click a photo to see the recipe!

babychicks3cadbury-egg1dscn8243jelly-bean-cookies1

Cookie Butter Stuffed Oreos

cookie-butter-oreos3

A creamy layer of chocolate chip cookie butter is a wonderful surprise inside these easy chocolate cookies!

I may be out of the loop on things, but somehow I missed this whole craze over COOKIE BUTTER. When I was in the Czech Republic about a year ago, my friend Angie (the best gift-giver!) sent me home with a collection of European treats. Nestled in with the coffees and chocolates, there was this jar of “stuff” (all the labels were in Czech) and I wasn’t sure what to expect. I know that peanut butter is hard to find in Eastern and Central Europe- so I knew it wasn’t that- but it was close… it was butter- but not made out of peanuts..made out of COOKIES!!!!! Seriously. I fell in love.

Cookie Butter!

Then I found it at Wal Mart. Here. In Indiana. #smile!!!

So, I’ve been stuffing Oreo Thins with all sorts of things over the past few months. Marshmallows….Key Lime Pie…I can’t stop. I have A LOT more ideas. This is just one more. (Prepare yourself…)

Cookie butter stuffed Oreos

These are simply….delicious. I shouldn’t have been surprised that adding cookie butter to Oreos would create such a yummy combination- but I was. The combination is such a unique flavor- and I’m not kidding you- unbelievably good!

Plus they are SUPER easy to make.

Here’s how we did it: (printable recipe available here)

INGREDIENTS: (makes about 25 cookies)

  • One box of Oreo Thins Chocolate cookies
  • One jar of crunchy cookie butter (I’ve loved every brand I have tried, but I used Lotus for these)
  • One cup of mini chocolate chips
  • One and 1/2 bags of Wilton’s Candy melts in dark chocolate
  • A little bit of milk chocolate candy melts to make stripes on top (or any sort of sprinkles you’d like to add to make these for any season!)

DIRECTIONS:

  • Set half of Oreo cookies on a small tray or sheet that will fit in your freezer.
  • Mix jar of cookie butter and mini chips in a small bowl.
  • Scoop or spoon cookie butter on top of each Oreo and press a second Oreo on top to make a sandwich.

Cookie butter on Oreo Thins

  • Freeze for about 30 minutes.
  • Melt Candy Melts in microwave, in 30 second increments, stirring in between, until melted and smooth.
  • Take 3 or 4 cookies at a time out of freezer and carefully dip in melted chocolate, using a fork to tap excess chocolate off and sliding the bottom of the cookie along the edge of the bowl to remove excess from the bottom. 

Oreo Thins dipped in chocolateOreo Thins dipped in chocolate

  • Set on parchment paper to harden.
  • Add sprinkles (if desired) before chocolate hardens, or after it hardens, drizzle or pipe a little bit of contrasting chocolate across the top of each cookie.
  • Enjoy!

Oreo Thins dipped in Chocolate

My thoughts: Mmmmmmm! These cookies were eaten up so fast- and I got back so much positive feedback on them- everyone loved them! The only tricky part might be dipping them (if you haven’t dipped things in chocolate before). The trick is to tap off excess chocolate and to remove excess off the bottom. If you aren’t feeling confident in your dipping skills, try just dipping half of the cookie and leaving half of that yummy cookie butter visible! I hope you get a chance to try these!!!  Enjoy!!  ~R

Cookie Butter stuffed Oreo Thins

More delicious Oreo ideas! (Click on a photo to see the recipe)

Caramel Oreo Brownie BarBrownie Oreo Cookie CupMud Pie!Creamy Coconut Cheesecake

Fun recipes for kids!

Posted on

Strawberry Lemonade Cupcakes!!!!!Summer is almost here- and that means summer vacation! I remember spending my summer days in the kitchen with cookbooks I’d gotten out of the library, trying new things. Sometimes I baked with mom- and sometimes I ventured out on my own and learned valuable lessons like you can’t put the whole egg in when the recipe calls for just egg whites!

As an adult, I love baking with kids. I love creating recipes that make kids smile. My childhood interest turned into a lifelong hobby for me, and it’s fun to share that with a new audience.

I thought I’d share some of my favorite kid-friendly recipes that have been posted on Easybaked over the years.

Some of these are featured in my cookbook for kids, “Life is Sweet, Baking Devotions for Kids”.

As I share photos of these recipes, click on the photo to be taken to the recipe!

Easy Recipes- ones that kids can make on their own or with a little adult supervision.

Cinnamon Cheesecake Sundaes– use wonton wrappers to make crispy little cups. Fill them up with a no-bake cheesecake and sundae toppings. Kids love to make their own creative sundaes!

Cinnamon Cheesecake Sundaes


Nutter Butter Flip Flops- less baking and more art! Simply dip Nutter Butter cookies in Wilton’s candy melts and draw on flip-flop straps. It might take a little practice, but learning to dip things in chocolate is a skill everyone should learn!

Nutter Butter Flip Flops

Tie-Dye Cake- If your kids love color, this cake will make them smile! You color cake mix in all the shades of the rainbow and then bake it into a swirling masterpiece. With blue frosting. Everyone loves blue frosting- right?!?

Tie-Dye Cake with Blue Raspberry Frosting!

Hamburger Cookies- They look like hamburgers but taste like chocolate. What kid wouldn’t love that! Easy and quick to make- and very cute when served with those mini potato sticks as french fries!

Hamburger Cookie!

Earthworm Cupcakes- Kids will love making these jello “worms” and poking them into Oreo crumbs. Not just your USUAL dirt cupcakes- because this time the worms look REAL!

Edible Jello Earthworm Cupcakes

“Pup”cakes- If your kids are looking for someone special to bake for… try these super-easy cupcake treats for dogs! Peanut butter happiness for everyone!

Pupcakes8

Confetti Kisses- here’s that chance to learn about egg whites! A little supervision if they’ve never divided an egg before- and help with beaters- but add some Jell-O and you have such a fun treat!

Raspberry Confetti Kisses


Recipes for kid’s parties: These are fun ideas to surprise kids with. Maybe they help create the masterpiece- or you create it for them. These are a little more difficult, but so much fun!

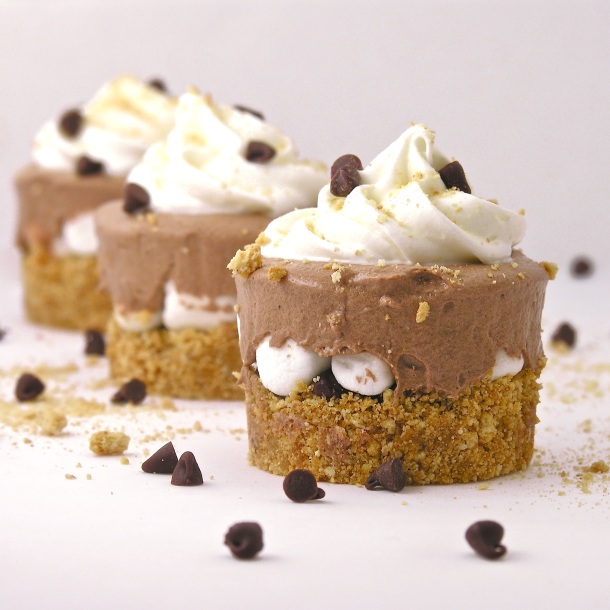
Frozen S’mores Cups!

frozen s'more cups

Kool-aid Truffles

Kool-Aid Truffles!!

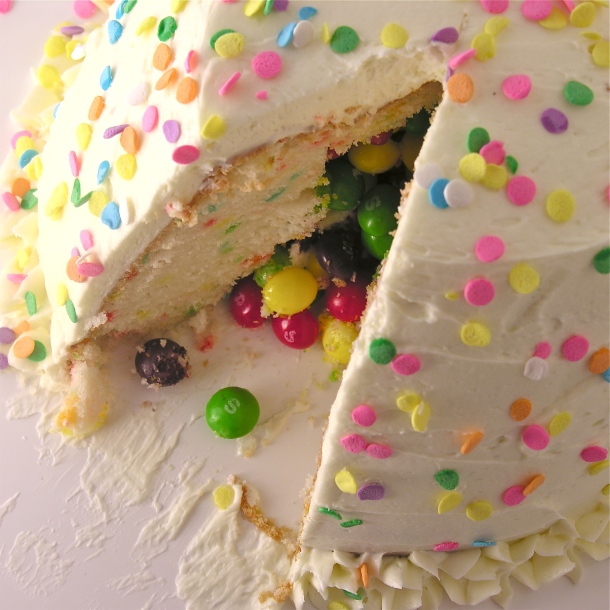
Candy-filled Cake

Confetti Cake Filled with Candy

A Dr. Seuss-style stack of cupcakes

Pile of Cupcakes!

Polka Dot Cake!

Polka Dot Cake!!!

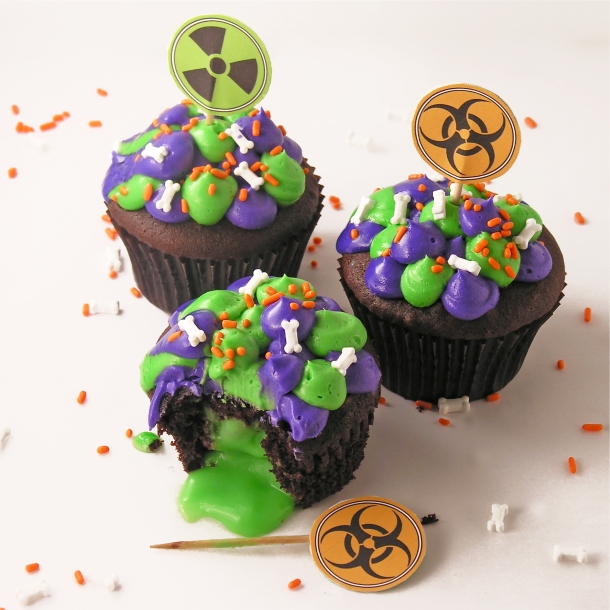
Toxic Slime Cupcakes!

Toxic Slime-filled Cupcakes!

Oreo Frogs!

Frog Oreos!!

Root beer float cupcakes (one of my favorite cupcake recipes!)

Root Beer Float Cupcakes!!!!

And last…but certainly not least:

Kool Aid Pie!

KoolAid Pie

I hope I’ve inspired a little summer fun in the kitchen!  Enjoy! ~r

12291253_10153201470262513_496953405046934959_o

One of our specialties here on Easybaked is our fun-to make (and eat!) Oreo pops! We have them for every season! (click on photo to get directions!)

Original Oreo pops!!!!!Mummy Oreo Pops!Snowman Oreo PopsLadybug Oreo Pops!

Reindeer Oreo Pops!!!Rainbow Oreo Pops!!!!Goldfish Oreo Pops!American Flag Oreo Pops!!!!

Cupcakes for Puppies!!!

Posted on

Pupcakes

These delicious little peanut butter cupcakes are a yummy treat for puppies and people!

(Just don’t sprinkle the people-ones with dog treats!)

Pupcakes

So, I have this dog named Casper.

He was an answer to prayer 6 years ago and he has been making me smile and cheering my heart ever since. His 6th birthday is coming up in June and I wanted to celebrate with a dessert made just for him. I took my peanut butter cookie recipe (which is delightfully simple, using pup-friendly ingredients) and scooped it into mini-muffin tins to bake. They bake up into adorable little bite-size treats. I topped the puppy ones with whipped cream and puppy treats. Then I added a little chocolate on top of the “human” variety.

Peanut butter cookie cupcakes

Here’s how we made them: (printable recipe)

INGREDIENTS: (makes 24-30 mini cupcakes)

  • 1c. creamy peanut butter
  • 1c. sugar
  • 1 egg

DIRECTIONS:

  • Preheat oven to 350F degrees.
  • Mix peanut butter, sugar and eggs together in a mixing bowl.
  • Use a medium size cookie scoop to scoop dough into mini cupcake liners placed in a mini cupcake tin.
  • Bake at 350 degrees for 12-14 minutes.  Cool completely.
  • Serve plain, or top with a little whipped cream and dog treats (for dogs)
  • I like a little chocolate with my peanut butter (for humans ONLY though- chocolate makes puppies sick!)
  • Enjoy! (and help your pup with that paper wrapper!)

Pupcakes7

Pupcakes1

Just like that, his “pupcake” is gone! (he needed a little help with the paper wrapper…)

Then we played with the extra whipped cream a little bit…just for fun.

Pupcakes6Pupcakes5

Love him!!!!!

My thoughts: Easy, fun and yummy for both you and your furry friends. Casper and I shared these with both human and puppy friends and they were a hit! There are only 3 basic ingredients in these, but you’ll want to make sure that neither dog nor human have allergies to them before serving!  ~Enjoy!!!

Casper and his white-dog cupcakes

Don’t miss Casper’s other recipe feature here: “Cupcakes for Casper”

Sunny Side Up Egg Cookies!!!

Posted on

Fried Egg Cookies

Whoever said you can’t have cookies for breakfast never tried these cookies!

A perfect April Fool’s treat!

Tomorrow is April Fool’s Day, and we all know that if you don’t catch people early, they will remember what day it is and call your bluff! That’s why these little “breakfast” cookies are the perfect trick. I served them with bacon (salty and sweet…) and toasted pound cake. They are easy to put together and they are the cutest little things in Easter baskets too!

Egg cookies for EasterTwo holidays covered by one recipe? Perfect.

These are perfectly tasty too~ and so easy to create for yourself! Here’s how we did them (printable recipe)

INGREDIENTS: (makes 24-36 cookies, depending on the size of your cookie cutter)

  • 2 sticks (1 cup) unsalted butter (softened)
  • 1 1/2 cups of granulated sugar
  • 2 eggs
  • 1 teaspoon of vanilla
  • 1 teaspoon of butter flavoring
  • 3 cups of flour
  • 1 teaspoon of baking powder
  • 1/2 teaspoon of salt
  • 3 bags of Wiltons candy melts in white
  • 1 bag of Wilton’s candy melts in yellow
  • 24-36 Nilla Wafers

DIRECTIONS:

  • Preheat oven to 350F degrees.
  • In a large mixing bowl, cream together butter and sugar until smooth.
  • Add eggs, vanilla and butter flavoring and mix well.
  • Add all dry ingredients and mix until able to knead into a firm ball of dough (add additional flour if necessary).
  • Roll out on a floured counter with a flour coated rolling pin to desired thickness.
  • Cut using an egg shaped cookie cutter.
  • Place cookies on ungreased cookie sheets and bake at 350F degrees for 8 to 10 minutes.
  • Slide baked cookies onto parchment paper to cool completely.
  • Melt 1/2 a bag of yellow candy melts in a small bowl in the microwave in 30 second increments, stirring in between, until smooth.
  • Gently dip Nilla wafers into yellow candy melts, covering completely and removing with a fork by tapping on the edge of the bowl and sliding bottom along edge. Place on parchment paper to harden completely. (I placed these in the fridge to harden more quickly so they would be ready to place on the egg “whites”)
  • Melt white candy melts in a larger bowl, using the same technique as melting the yellow ones.
  • Gently dip each cooled egg cookie into the white candy melts, using the same technique as with the Nilla Wafers. 

Fried egg cookieFried Egg Cookie

  • Place on parchment paper to harden, but before white egg hardens completely, place a yellow Nilla Wafer on top as a “yolk”.

Fried eggFried Egg cookies

  • Allow cookie to harden completely and serve up with bacon and toasted pound cake…and maybe coffee?
  • These can be placed into treat bags and put into Easter baskets too! Fun!!!

Fried egg cookie for Easter

My thoughts…oh goodness, I’ve had fun with these. They aren’t hard to make, they are very realistic, and they make everyone laugh! I think they are cute in little treat bags too. Have fun- April Fool’s!!! ~r

Fried egg cookies!We have lots of fun Easter treats here on Easybaked! Check them out by clicking on a photo to see the recipe!

Jelly Bean Cookies!!!!Cadbury Egg Cookie Cups!!!!Easter Cheesecake CupsEasy Easter cut out cookies

Pumpkin Guts!

Posted on

Pumpkin Guts Dessert!

This delicious coconut cream pie dip is disguised as gooey pumpkin guts (with sliced almond “seeds”)~ a perfect Halloween treat!!

I love carving pumpkins. The smell is my favorite part, it reminds me of being very small and in a homemade costume anxiously awaiting trick-or-treat time. We always carved pumpkins several days earlier, but we lit them on Halloween and all evening the lids would quietly cook in the candle flame, filling the house with an indescribably wonderful scent that still reminds me of childhood whenever I smell it.

I carved a pumpkin for this recipe.

1. To serve this dip in.

2. To use as a reference in coloring this dessert!

Pumpkin Guts!!!!Isn’t it fun?  I savored the smell and enjoyed the squishy guts between my fingers…I even roasted a few seeds and ate them with salt as a reward for getting my pictures taken!

Want to know how to make this yummy fall treat?  It is SUPER easy!  (Printable recipe)

INGREDIENTS:

  • 3 cups of shredded sweet coconut (to desired consistency)
  • 1 cup of sliced almonds
  • 1 box (3.3 oz.) Jello Brand White Chocolate Pudding (instant)
  • Milk (to make pudding according to package)
  • Orange and yellow food coloring
  • Chocolate cookies for dipping!

DIRECTIONS:

  • Make pudding as directed on package and color to desired shade with food colors
  • Place coconut in a large zip-top bag and add the same food colors to the bag. Toss and mix coconut until colored as well.
  • Mix pudding with enough coconut to make a gooey pumpkin consistency.
  • Mix about half of the almonds in, and use the rest to sprinkle on top.
  • Serve with chocolate cookies or graham crackers for that “Almond Joy” taste!
  • Enjoy! 

Halloween dessert!My thoughts:  Well, I love coconut, almonds and chocolate- so this was a given “perfect” dessert for me!  I think it would be fun to serve this with a “murdered” pumpkin, I just didn’t have time to draw a dramatic face and stick a big knife in mine! Serve it up classy, or make it into a funny Halloween treat- either way, it is easy and soooooo yummy!  ~Enjoy!!!!! ~r

Pumpkin Guts!Other fun fall desserts here on Easybaked (click on a photo to see the recipe)

Halloween Swirl Cookies!!!Frosty Candy Corn Dessert!Ginger Maple CookiesSpider Cupcakes!

Hamburger Cookies!

Posted on

Hamburger Cookie!These cute little burgers are a fun April Fools treat.  They look like a little burger, but they taste like a yummy peppermint cookie!

I’ve been making these since I was a little girl.  They are so easy to put together and so fun to share with people!  Both kids and adults will smile when they see these on the table or tucked into a lunch box!

Hamburger Cookies!!Want to know how to make these cute little treats?  Here’s the recipe: (printable version)

INGREDIENTS:

  • 1 box of Nilla Wafers
  • 1 bag of York Peppermint Patties
  • 1/3 cup each of red, green and yellow Wilton’s candy melts.

DIRECTIONS:

  • Preheat the oven to 350F degrees
  • Unwrap all of your peppermint patties. (Usually there are 24-26 of them per bag)
  • Count out twice that many Nilla Wafers (choose the pretty and unbroken ones!)
  • Place half of the Nilla Wafers, flat side up, on a cookie sheet.
  • Set one peppermint patty on each Nilla wafer.
  • Carefully place the cookie sheet in the oven for 1 to 2 minutes, just long enough to melt the chocolate coating on the peppermint patty. (This will melt the bottom of the peppermint to the Nilla wafer).
  • In 3 small bowls, melt the Candy Melts in the microwave in 30 second increments, stirring between until completely melted and smooth.
  • Place each of the 3 melted colors in separate zip-top bags.
  • Clip one corner and drizzle one color across tops of each peppermint.  Repeat this with other two colors.

Hamburger Cookies!!!

  • Gently press a Nilla wafer, flat side down, on top of the drizzled candy melts. Press to gently squeeze the “ketchup, lettuce and cheese” colors out at the edge of the cookie “bun”.
  • Allow cookies to harden completely.

I like to serve them with those little mini potato sticks.  I wanted to take some pictures with some, but I couldn’t find any at the grocery store here.  Trust me, the salty and sweet is a yummy combination.

Hamburger Cookies!!!!My thoughts:  My mom was downright mischievous on April Fools Day.  I had green milk and no meat on my sandwich and holes poked in my apple.  This is a fun “eating hamburgers for dessert” prank that will make your family smile.  Plus they are SO yummy!  Enjoy!!! ~r

Other fun treats you might like:

Patriotic Flip Flop Cookies!!!!Toxic Slime-filled Cupcakes!Ladybug Oreo Pops!Pile of Cupcakes!


Cinnamon Upside Down Cakes

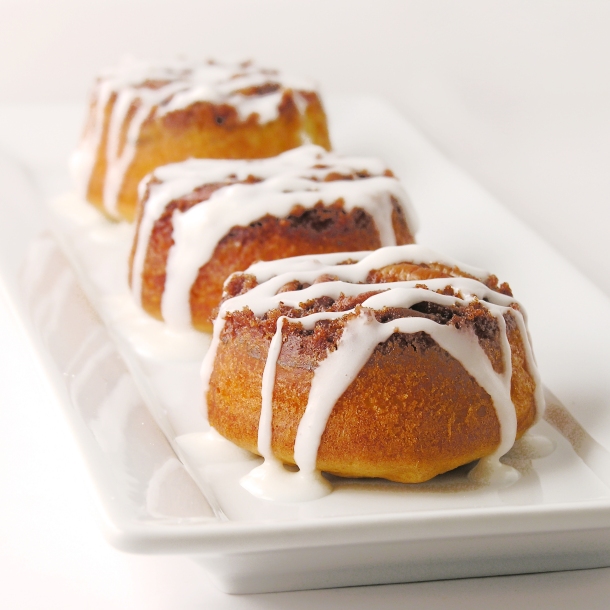
Cinnamon Upside Down Cakes!!
These little mini cinnamon cakes are the perfect make-ahead treat.  Perfect as dessert and such a sweet and yummy breakfast!  Dripping with sweet glaze, these will be a new family favorite, and the best part?  They use a cake mix and they are SO easy!!!

Ready to make these fun little cakes? Click here for the printable recipe.

INGREDIENTS:

  • 2 cups brown sugar (packed)
  • ½ cup butter (melted)
  • 2 tablespoons cinnamon
  • 36 pecan halves (optional)
  • One boxed yellow cake mix
  • Water, oil and eggs to make mix according to box
  • 1 cup of powdered sugar
  • 1 to 2 tablespoons of milk
  • ½ teaspoon of vanilla

DIRECTIONS:

  • Preheat oven to 350F degrees
  • Spray two muffin tins with non-stick cooking spray
  • Place brown sugar, cinnamon and melted butter into a small bowl and mix until well combined.
  • Spoon sugar mixture evenly into all 24 cups of the muffin tins.
  • Use a mini tart shaper or a wooden spoon to press sugar mixture flat into the bottom of each cup.
  • Place 3 pecans on top of sugar.
  • Make cake mix according to box instructions.
  • Scoop batter over the top of sugar and pecans.  Fill each cup about 2/3 full.

Cinnamon Upside Down Cakes!!Cinnamon Upside Down Cakes2

  • Bake at 350F degrees for 18-20 minutes.
  • Remove from oven and quickly run a small knife around the edge of each cup.
  • Using oven mitts, place a wire cake rack on top of the muffin tin and flip the pan and rack over so that cakes are upside down on the rack.
  • Gently lift the muffin tin up and allow the cakes to pop out. Some sugar will remain in the bottom of each cup, which is fine.
  • While cakes cool, make a glaze by mixing milk, vanilla and powdered sugar together in a small bowl.  Add extra milk or powdered sugar to make glaze a thick frosting consistency- not very runny.
  • Spoon glaze into a small zip-top bag and seal the top.
  • Clip a corner of the bag and drizzle glaze over the tops of each little cake.
  • ENJOY!

Cinnamon Upside Down Cakes!!
My thoughts: These are really easy little treats and they are gobbled up fast!  I’ve made them twice now and everyone asks for the recipe. I made my second batch without the pecans on half of them.  They were still wonderful and make this recipe yummy for even people who don’t like or can’t have nuts. Keep them covered up and they last a few days- a perfect make-ahead Christmas morning treat!  

Cinnamon Upside Down Cakes!!!
Other yummy ideas from easybaked:

Cinnamon Roll Cheesecake!!Cinnamon Roll Filling in a yummy cupcake!Brownie Oreo Cookie CupSpiced Mocha and Tim Tam Slams!

Raspberry Lemon Cream Cups

Posted on

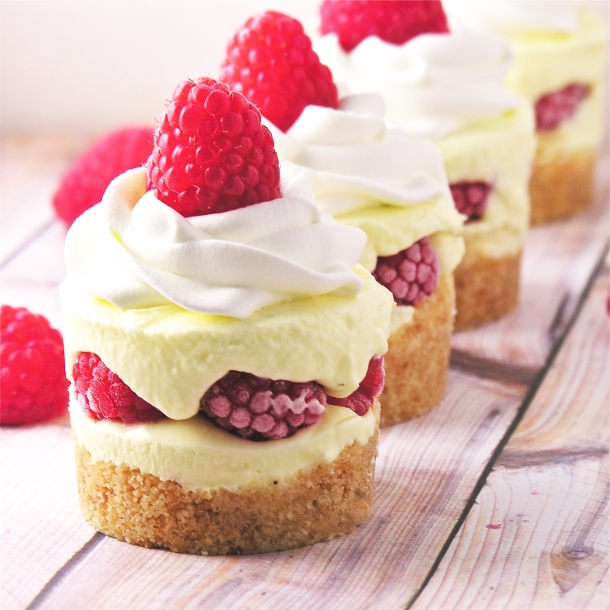
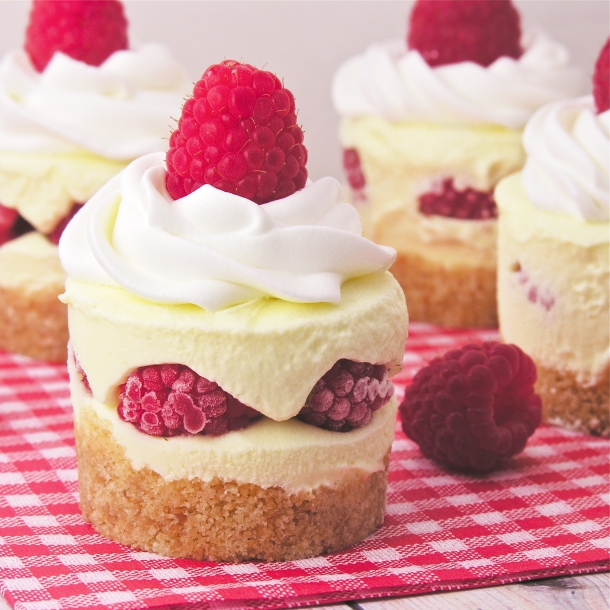
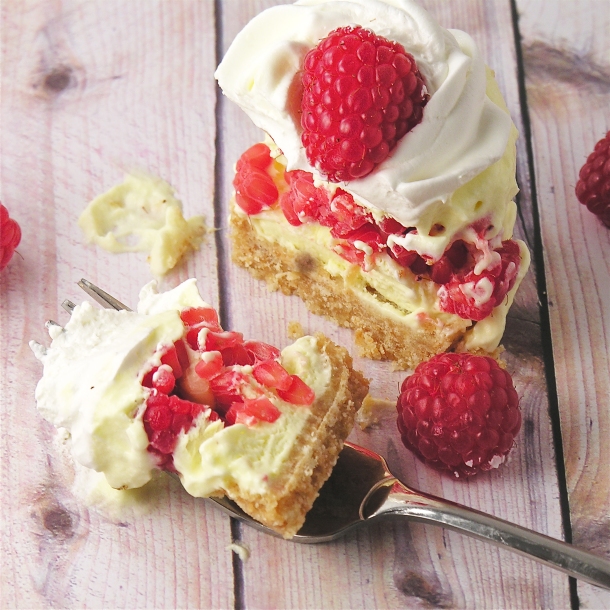
Raspberry Lemon Cream Cups!!!

These adorable chilled lemon and raspberry treats are creamy, sweet summer dessert perfection!

I love lemon and raspberry together and I just couldn’t resist trying a new flavor combination in my mini cheesecake pan !  The sweet raspberries and tart lemon cream are a perfect ending to any meal!  Want to try them???

Here’s how:  (printer friendly recipe)

Ingredients:

  • 40 Nilla Wafers
  • 4 Tablespoons of melted butter
  • 1 package (4-serving size) of instant lemon pudding
  • 1 1/2 cups of cold milk
  • 1 container of Cool Whip topping
  • 2-3 cups of fresh raspberries (about 60 berries)

Directions:

  • In a food processor or a large food chopper, crush Nilla wafers to fine crumbs.
  • Add melted butter to crumbs and pulse a few more times to combine.
  • Prepare mini cheesecake pan by placing metal disks in the bottom of each cup.
  • Evenly divide crumbs between all 12 cups.
  • Press firmly into bottom of each cup using a mini tart shaper or the end of a wooden spoon.
  • In a large mixing bowl, combine cold milk with packet of pudding mix.  Beat on medium for 2 minutes.
  • Mix in HALF of the Cool Whip topping (the rest will be used on top once dessert is frozen, so you can return it to the refrigerator).
  • Spoon/pour pudding mixture into a large zip-top bag and carefully clip a corner off.
  • Pipe filling into each cup, covering crust and filling only half way.
  • Place 4 to 5 fresh raspberries on top of filling in each cup.
  • Pipe filling over raspberries until it reaches top of cup (be sure to push filling down around berries and not just on top of them). You will probably have a little lemon filling left at the end. I can tell you from experience that Nilla Wafers dipped in this filling are AMAZING!!
  • Use a knife to level the tops of each cup.
  • Cover with plastic wrap and freeze for several hours (or overnight!)
  • Once frozen, (and just before serving) allow pan to warm just slightly at room temperature and then use your fingers to push up on metal disk and push each dessert out of the pan.
  • Remove metal disks from bottom crust.
  • Pipe remaining Cool Whip on top and garnish with remaining raspberries on top.

Raspberry Lemon Cream Cups!!!

These can be served frozen, or allowed to warm at room temperature for a little while before serving.  Don’t leave them at room temperature for longer than an hour or so, or your crust will start to get soggy!

My thoughts:  I cannot even think of the words to describe how yummy these little cups are.  Plus they are EASY to make and quick (except for the freezer time, of course!)  If you do not have a mini cheesecake pan, you can make these in cupcake liners in a muffin tin…or you could get a mini-cheesecake pan and add to the fun in your life.  I absolutely love mine!!!  So many possibilities!!

Raspberry Lemon Cream Cup!!!

Other recipes that use the mini-cheesecake pans:

Frosty Almond Joy Cups!Mini Cookie Dough CheesecakeMini Pineapple Upside Down CakesFrozen S'mores Cups

Dulce de Leche Caramel Sauce

This creamy sweet caramel sauce couldn’t be easier to make.  Ingredients?  One can of Sweetened Condensed Milk and a very brave spirit…..


I had heard from several people about the “boil a can of condensed milk to make caramel” idea, and I knew someday I would try it.  That “someday” arrived when I was asked to bring a birthday cheesecake for my brother this weekend.  He likes PLAIN cheesecake.  For those of you who have followed easybaked for awhile, you know I don’t do “plain” anything.  I take plain and add peanut butter, chocolate, glazes, ganache, frosting, candy….nothing plain.  But for my wonderful brother John….I present:  a plain white cheesecake…..

so…..plain.  In case you are wondering, this recipe is the basis for almost all of my cheesecakes, and you can click on one of the following pictures to get the recipe using white chocolate (plus fun toppings!!!!) Using other chip flavors gives you chocolate, peanut butter, cinnamon or even butterscotch cheesecakes.

In any case, I made the plain cheesecake, but I wanted a fun topping sauce to serve with it.  Dulce de Leche.  Now, I don’t know about you, but in my mind boiling a can of any sort sounds like a disaster….so I looked up the technique- just to be sure I did it right and didn’t explode anything.

I found a cute blog called Not Without Salt that gave instructions….scary instructions….and I quote:

“In a large pan, completely submerge the can of sweetened condensed milk in water. Make sure it is covered by at least one inch of water and remains covered throughout the entire process – this is VERY important otherwise it could explode. Cover the pan with a lid and bring to a boil. Reduce heat and simmer for three hours. Continually check to make sure the can is completely covered with water.”

Yes, it could explode.  Needless to say, I obsessively checked my water level for 3 hours.  I never needed to add any…but I imagined lovely dulce de leche covering my ceiling and walls and I obsessed.

After 3 hours of fear, I took the pan off the stove and had a debate with my friend Danielle about if I should leave it in the hot water to cool…or take it out…?  I took it out.  And I set it outside on my sunporch to cool- or explode.

It cooled beautifully and when I opened the can….oh my.

I love it.  I would do this again in a heartbeat— it is SO good.  I’m so excited to serve it with my cheesecake in a few hours.  It would be good over ice cream or apples…so many possibilities.  ENJOY!!! (and be very careful that your water doesn’t evaporate!!)    ~r

Happy Birthday!!!

Dulce de Leche in your coffee???


Other recipes you might enjoy: Click on the image to be taken to the recipe.


Shop Amazon – Cyber Monday Deals Week