Tag Archives: whipped cream

Cupcakes for Puppies!!!

Posted on

Pupcakes

These delicious little peanut butter cupcakes are a yummy treat for puppies and people!

(Just don’t sprinkle the people-ones with dog treats!)

Pupcakes

So, I have this dog named Casper.

He was an answer to prayer 6 years ago and he has been making me smile and cheering my heart ever since. His 6th birthday is coming up in June and I wanted to celebrate with a dessert made just for him. I took my peanut butter cookie recipe (which is delightfully simple, using pup-friendly ingredients) and scooped it into mini-muffin tins to bake. They bake up into adorable little bite-size treats. I topped the puppy ones with whipped cream and puppy treats. Then I added a little chocolate on top of the “human” variety.

Peanut butter cookie cupcakes

Here’s how we made them: (printable recipe)

INGREDIENTS: (makes 24-30 mini cupcakes)

  • 1c. creamy peanut butter
  • 1c. sugar
  • 1 egg

DIRECTIONS:

  • Preheat oven to 350F degrees.
  • Mix peanut butter, sugar and eggs together in a mixing bowl.
  • Use a medium size cookie scoop to scoop dough into mini cupcake liners placed in a mini cupcake tin.
  • Bake at 350 degrees for 12-14 minutes.  Cool completely.
  • Serve plain, or top with a little whipped cream and dog treats (for dogs)
  • I like a little chocolate with my peanut butter (for humans ONLY though- chocolate makes puppies sick!)
  • Enjoy! (and help your pup with that paper wrapper!)

Pupcakes7

Pupcakes1

Just like that, his “pupcake” is gone! (he needed a little help with the paper wrapper…)

Then we played with the extra whipped cream a little bit…just for fun.

Pupcakes6Pupcakes5

Love him!!!!!

My thoughts: Easy, fun and yummy for both you and your furry friends. Casper and I shared these with both human and puppy friends and they were a hit! There are only 3 basic ingredients in these, but you’ll want to make sure that neither dog nor human have allergies to them before serving!  ~Enjoy!!!

Casper and his white-dog cupcakes

Don’t miss Casper’s other recipe feature here: “Cupcakes for Casper”

Pumpkin Pie Spice Cookies

Pumpkin Pie Cutout cookies!

These cute little pumpkin cutout cookies are chock-full of pumpkin spices and capture the tastes of fall in every bite!

I really dislike pumpkin pie. This time of year it is found everywhere! I’ve discovered that it is truly the pumpkin I dislike though- not the spices. These cookies offer all the yummy spices of pumpkin pie without a hint of actual pumpkin… plus they are cute as can be! These cookies can be cut into any shape you like and decorated accordingly. I had a hard time not eating them all up before  I decorated them- so use frosting…or don’t…. maybe just cut them in circles and add a few sugar sprinkles to make them really easy!

Pumpkin Pie Cutout CookiesHere’s how we made the cookies- and how we decorated them. (printable recipe)

INGREDIENTS:

  • 2 sticks (1 cup) unsalted butter (softened)
  • 1 1/2 cups of granulated sugar
  • 2 eggs
  • 1 teaspoon of vanilla
  • 1 teaspoon of butter flavoring
  • 3 cups of flour
  • 1 teaspoon of baking powder
  • 1/2 teaspoon of salt
  • 2 Tablespoons of pumpkin spice seasoning

DIRECTIONS:

  • Preheat oven to 350F degrees.
  • In a large mixing bowl, cream together butter and sugar until smooth.
  • Add eggs, vanilla and butter flavoring and mix well.
  • Add all dry ingredients and mix until able to knead into a firm ball of dough (add additional flour if necessary).
  • Roll out on a floured counter with a flour coated rolling pin to desired thickness.
  • Cut using a large (I used a 6″) round cookie cutter
  • Use a knife or pizza cutter to divide circle into even triangle “pie” pieces.
  • Place cookies on ungreased cookie sheets and bake at 350F degrees for 8 to 10 minutes.
  • Slide baked cookies onto parchment paper to cool completely.
  • To decorate, use royal icing (so it will harden into a firm shell) my recipe for that is here.
  • Use thicker icing to outline the shape of the cookie and then flood the inside of the outline with thinner icing.

Pumpkin Pie Cut-out CookiesPumpkin Pie Cutouts CookiesPumpkin Pie Cutout cookies

  • Allow icing to harden up and then make the “crust” by using royal icing colored to match the cookies and swirling a loose “m” pattern across the end of each cookie.
  • Use a star tip to add a little white icing as “whipped cream”

Note: I wanted to add some cute factor to these yummy cookies and saw sugar cookies done as slices of pie on a REALLY fun blog called sweetsugarbelle.com. She does a GREAT job of showing the decorating process step-by-step, and I highly recommend you visit her site if you decide to make these cookies in slice form. The hardest part is the crust. I’m NOT a cake decorator and I really had to practice to get the crust to look acceptable. Her pictures and instruction were a big help! Plus the rest of this site is so addictive. Beautiful creations! Love it!

Slice of Pumpkin Pie CutoutsMy thoughts: YUM. Seriously yummy cookies. If you are up for a challenge make them into pie slices, but if you just want some simply delicious and EASY cookies just cut these into fun fall or Christmas shapes and sprinkle with a little colored sugar. Don’t omit that butter flavoring- you can find it with other flavors and extracts at the grocery- it adds such a yummy flavor!  Hope you get a chance to try these!!! Enjoy! ~r


Pumpkin Spice CookiesOther fun Thanksgiving recipe ideas~ click on a photo to see the recipe:

Cinnamon Upside Down Cakes!!Red velvet cookies with cream cheese icing!!Cinnamon Roll Cheesecake!!Brownie Oreo Cookie Cup

Tres Leches Layer Cake

Posted on


Tres Leches Cake!!!!

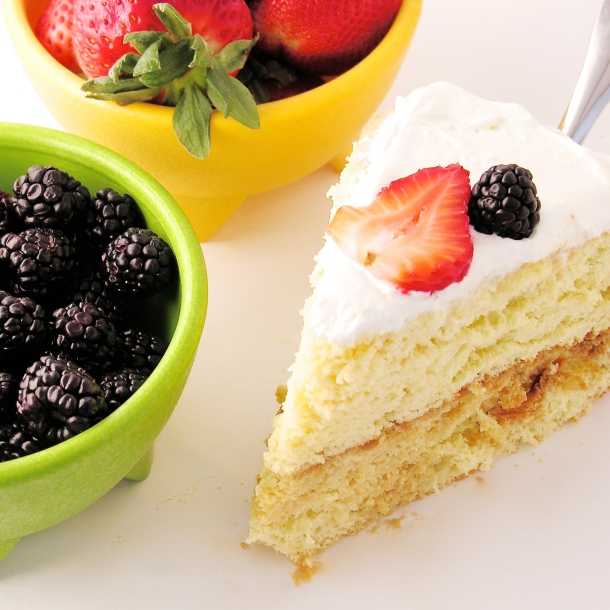
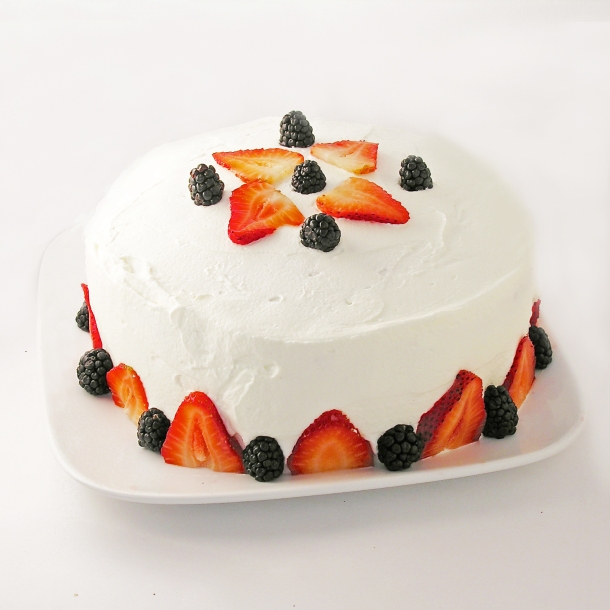
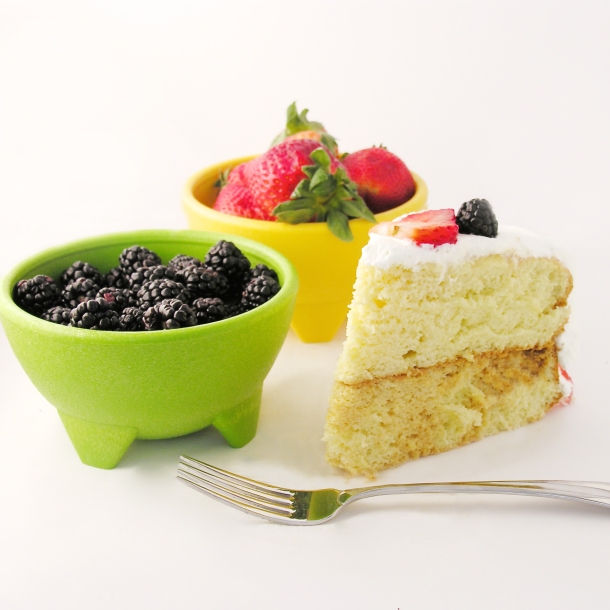
This traditional sponge cake is soaked in a vanilla 3-milk sauce and layered with dulce de leche.  Topped with whipped cream and fresh fruit, it is a light and refreshing dessert.

It’s nearly Cinco de Mayo time!  I first tried Tres Leches cake in Mexico.  I had taken a group from our church down to a tiny village in Sinaloa.  We had spent the week building, painting, doing electrical work and laying cement.  It was my birthday while I was there, and some of the ladies from the church made me a HUGE tres leches cake.  It was DELICIOUS!  When I asked for the recipe, they all looked at me funny and said- it’s tres leches cake..? (like everyone knows how to make that!!!)

Tres Leche Cake in MexicoSince then, I’ve tried this cake at other places in Mexico and in the states.  I’ve noticed that there are two kinds:  The firm, sweet and moist kind, and the dripping with milk kind.  I really don’t like the dripping with milk kind…that consistency is really gross to me- and cake should never be gross!

I researched lots of recipes, and discovered that there are two varieties: a butter based sponge cake and an egg based sponge cake.  The egg based one is the one I liked.  It soaks up all that yummy sauce and stays firm, while the other just sits in a puddle of sauce…YUCK!

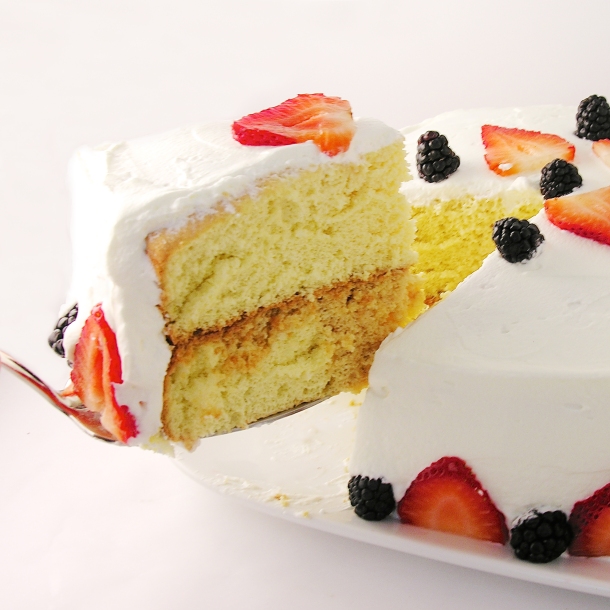
Tres Leches Cake!!!!All of that said, this is an egg based recipe that I found on a lovely blog called Pati’s Mexican Table.  My research paid off- this was a FABULOUS cake!  Here’s the recipe: (printable version)

INGREDIENTS

Cake

  • 9 eggs, separated
  • 1 cup sugar
  • 1 tablespoon vanilla extract
  • 2 cups all purpose flour

Vanilla Sauce:

  • 1 (14oz) can sweetened condensed milk (I used La Lechera brand)
  • 1 (12oz) can evaporated milk
  • 1/2 cup heavy cream
  • 1 tablespoon vanilla extract

Topping/filling

  • 2 cups heavy whipping cream
  • 1/4 cup confectioners’ sugar
  • fresh fruit for garnish
  • 1 (13.4 oz) can of La Lechera Dulce de Leche (or make your own here)

DIRECTIONS:

  • Preheat oven to 360F degrees and spray two 8 or 9 inch cake pans with non-stick spray.  Cut a circle out of parchment paper to place in the bottom of each pan to help these cakes come out of the pan cleanly.
  • Divide eggs into 2 bowls.  Put the egg whites into a large mixing bowl and the yolks into a medium bowl.
  • Beat the egg whites on medium-high until they form soft peaks.  Add sugar and beat on high until they form stiff peaks (this will take 4-5 minutes, depending on your mixer).
  • Beat the egg yolks on high for 5 to 6 minutes until they increase in volume and turn a creamy yellow.
  • Beat the vanilla into the egg yolks until combined.
  • Add the yolks to the whites and use a spatula or large spoon to gently fold them together.
  • Add flour and gently mix until completely combined.
  • Divide batter evenly between the 2 pans and bake for 20-25 minutes.  The tops should be golden and when a toothpick is inserted in the center, it should come out clean.
  • Cool completely, run a small knife around the edges and tip cakes over on a plate.  Remove parchment paper.
  • Make sauce by combining the 3 milks (condensed, evaporated and cream) together with the vanilla.
  • Poke (lots!) of holes in the top of each cake with a fork and carefully pour sauce over the top, dividing it evenly between the 2 cakes.
  • Place one cake on a serving plate, spread dulce de leche caramel over the top, stack second cake on top.
  • Make frosting by beating together the whipping cream and powdered sugar, until stiff peaks form.
  • Frost cake and serve with fresh fruit. Refrigerate until serving.

Tres Leches Cake with caramel and fruitMy thoughts:  I was so pleased with how yummy this cake was.  The sponge cake is very firm and easy to work with, even when it’s soaked with sauce.  You can make this in a 9×13 inch pan too- I just wanted the tall layer cake look~ and that caramel in the middle?  Oh my… take a look at my pictures- it partially soaks in to that bottom layer and gives it a rich caramel flavor.  I think you all are going to love this cake!!  I hope you get a chance to try it!!!  Enjoy!!!!  ~r

Tres Leches Cake!!!!Other cinco de Mayo recipe ideas:

Alfajores-- yummy dulce de leche filling!Confetti Cake Filled with CandyCreamy Mango Pops!Mexican Chocolate Milk

Shamrock Parfaits…the unplanned dessert.

Posted on

Shamrock Parfaits!!!!These lovely layered St. Patty’s Day treats were supposed to be a cake…but ended up even better!

I am in the middle of the Navajo Nation without a Bundt cake pan.  That is how this tale begins.  I am almost 3 hours from a store that sells Bundt pans.  In my mind, I wanted to make a lovely bundt cake full of swirls of various shades of green, topped with melted Key Lime frosting.  SO- I did what any enterprising blogging girl would do- I ordered a pan on ebay, with free shipping.  It took a week, but once I got it I was ready to go!  I divided my cake mix into 4 parts and colored each part an increasingly darker shade of green and swirled the colors together in the pan.  After it baked, I tipped it out on a cake rack and…..Bundt Cake disaster!

Sadness.

I let the disaster cool and re-thought my recipe.  I brought my favorite little Weck jars with me, and I had some heavy cream to whip… how about parfaits!!

Shamrock Parfaits!!!Here’s the recipe: (printable version)

INGREDIENTS: (makes 10-12 small parfaits)

  • One boxed white cake mix (Plus water, oil and eggs to make according to box)
  • Green food coloring gel
  • One tub of Pillsbury Key Lime Frosting
  • 2 cups heavy whipping cream
  • 3 Tablespoons of powdered sugar

DIRECTIONS:

  • Make cake according to boxed mix, adding green food color to make batter green (you can make several shades of green if you want, but you don’t have to).
  • Bake as directed in any cake pan you want (lol!)
  • Allow cake to cool completely.
  • Put heavy cream and powdered sugar in a large mixing bowl and beat on high until cream is whipped and light, holding stiff peaks.
  • Take the lid and foil wrap off the tub of frosting, and heat in the microwave for 20-30 seconds.  Stir until it is a nice smooth liquid.
  • Assemble your parfaits by spooning a bit of frosting into each glass, followed by a bit of crumbled cake, followed by a dollop of whipped cream.  Repeat these layers until you are at the top.
  • End with a swirl of whipped cream and some sprinkles.
  • Enjoy!

Shamrock Parfait!!!My thoughts:  These ended up being the yummiest dessert!  I had a family over to visit that night and they gobbled up every last bit of it and loved it.  That key lime frosting is the BOMB!  Yum!  Anyway, thanks for joining me on my latest Navajo kitchen adventure!  Happy St. Patricks Day!!  ~rShamrock Parfaits!!!!Usually I give you another four recipes related to this one.  But today I leave you with one. These are seriously some of the best cupcakes I’ve ever made, and they are perfect for St. Patrick’s Day….just click on the photo and you’ll be magically transported to the yummy recipe.  I present:  Bailey’s Irish Cream Cupcakes….Enjoy!!!! ~r

Baileys Irish Cream Cupcakes

Creamy Chocolate Pie

Creamy Chocolate Pie
This is a new take on a chocolate pudding pie.  So incredibly rich in chocolate flavor that you will never go back to just plain pudding!

This week’s family recipe comes to us from Florida…or Yellowstone…or Peru….or wherever my wonderful adventurous Aunt Paula might be.  She and my Uncle Jim have literally travelled the world and done the most interesting things.  They are great story tellers and a family meal with them is a treasure.

4769_1062312648969_4724662_n

I had never tried this recipe before, but Paula and Jim submitted it to our family cookbook and titled it “The Best Chocolate Pie in the World”.  How can you resist trying a pie with a name like that?!??

Paulas Pie 4
The chocolate flavor in this pie filling is extraordinarily good.  Very rich and dark.  I’m really not a pie person (check the rest of this blog….not too many pies…) but this one is worth trying, it’s very yummy!

Here’s is the recipe: (printable version)

INGREDIENTS:

  • 1 1/2 cups sugar
  • 2 tablespoons cornstarch
  • 5 tablespoons of cocoa
  • 3 egg yolks, beaten
  • 2 cups hot milk
  • 1 stick (1/2 cup) butter. melted
  • 1 1/2 teaspoons of vanilla

DIRECTIONS:

  • Prepare a graham cracker or a plain baked pie crust.  Since I rarely make pie, I just used a refrigerated pie crust and baked it according to the package.  If you have a favorite crust recipe, now’s the time.
  • In a large, heavy saucepan, combine dry ingredients together.
  • Heat milk over stove or in the microwave and add it gradually to the dry ingredients, stirring as you add.

Not-so-homemade pie crustAdd hot milk slowly...

  • Add butter and egg yolks and mix well.
  • Cook on stove over low heat until thickened, stirring constantly. (I did not allow mine to cook long enough the first time I made this and it didn’t firm up very well.  Cook it until it is a very thick custard like consistency.  Mine actually boiled before it thickened enough.)
  • Remove from heat
  • Mix in vanilla.
  • Pour into prepared pie crust and chill several hours or overnight.
  • Enjoy!

Creamy Chocolate Pie!


My thoughts: Such an easy way to get your chocolate fix!  This pie is  soooo good with a cup of coffee and a little whipped cream on top…YUM!  Thank you for sharing your wonderful dessert with us Aunt Paula!  Enjoy your latest Caribbean adventure!! ~r  

The other lonely (yet yummy!) pie recipes of Easybaked:

Fruit Loop Pie!German Chocolate PiePecan and chocolate pieRaspberry Truffle Tart

Butterscotch Caramel Cheesecake

Creamy butterscotch cheesecake and a thick layer of caramel sauce over a gingersnap crust .  A unique combination of delicious seasonal flavors!!!

Are you ready for Thanksgiving?  Have you decided what you’re having for dessert yet–other than the proverbial pumpkin pie?  This cheesecake combines three unique fall flavors- ginger, butterscotch and caramel- and it simply melts in your mouth.  Wow your guests with an Easybaked cheesecake!!

INGREDIENTS:

Crust:

  • One bag (13 oz.) of Archway ginger snaps, finely crushed. (approximately 2 cups)
  • 1/4 c. butter

Cheesecake:

  • 2 (8oz.) packages of Philadelphia Cream Cheese (softened)
  • 1/2c. sugar
  • 3 eggs
  • 2 c. butterscotch chips (melted)
  • 1 c. heavy whipping cream
  • 3 tsp. vanilla

Caramel Topping:

  • 32 Kraft caramels (unwrapped)
  • 1/2c. butter
  • 1 can (14oz.) sweetened condensed milk

DIRECTIONS:

  • Preheat oven to 325 degrees
  • Crush cookies into fine crumbs and add melted butter.  Combine well and press into the bottom of a 9-Inch Springform Pan
  • Beat softened cream cheese with sugar until smooth.
  • Add eggs one at a time, beating in between each one.
  • Add remaining cheesecake ingredients, beating until smooth.
  • Pour into crust and allow to sit at room temp for 30 minutes.
  • Place on a cookie sheet and bake for 60 minutes,
  • Turn off oven, open oven door a little and allow to sit for another 30 minutes.
  • Remove from oven and run knife around edge of pan.  Remove edge of pan. 
  • Allow to come to room temperature (make caramel topping during this time.)
  • Put caramels, condensed milk and margarine into a saucepan and melt over medium heat, stirring constantly until smooth (6-8 minutes)
  • Pour caramel over the top of the cooled cheesecake, spreading to edges.
  • Refrigerate overnight
  • Remove bottom of pan when cheesecake is thoroughly chilled.
  • Before serving, pipe whipped cream around edges of cheesecake if desired and sprinkle with a little cocoa powder.


My thoughts: A flavorful creamy cheesecake.  I love the gingersnap crust– that adds a lot of the fall spice to this.  I ADORE caramel- so there’s a lot of it on this cheesecake.  If you want less, simply halve the recipe and be happy!!  Have a wonderful Thanksgiving with your family and friends!!!!  Enjoy!  r~

One last yummy bite…..

Other cheesecake recipes from Easybaked that you might enjoy~ click on the image to be taken to the recipe:

Shop Amazon – Black Friday Deals Week

Mango Smoothie Pops

Posted on


These creamy mango popsicles are filled with fun fruit and ice cream– a perfect summer treat!

A few weeks ago I shared a recipe from my travels to Mexico- Leche de Chocolate and this week I want to share another favorite with you.  One of my trips to Mexico involved 10 days of digging a foundation for a new church building in a little town in Sinoloa.  We used pick-axes to dig twelve 5-foot deep holes that eventually had cement footers poured into.  By noon it was over 120 degrees and one of our favorite treats was when the local kids would bring us “helados” or homemade fruit ice cream in plastic bags.  I was a little hesitant at first, but after I bit the corner off of the bag and had a taste, I was addicted!  SO refreshing and delicious!  I asked my friend Clarissa for the recipe and she graciously wrote it out for me:

I’ve made it many times since and it always makes me smile when I remember those long hot (incredibly fun!) days.

A few days ago I came across some really fun popsicle molds called Volcano Pops.  The centers of the popsicle can be filled with things and I just imagined the creamy mango pops filled with coconut, or ice cream or berries…..endless possibilities!  So I had to try them!  SO much fun!  Here’s the recipe:

INGREDIENTS:

  • 2 cups of cubed fresh mango (about 2 medium mangos)
  • 1 can of evaporated milk
  • 1/4 c. sugar (use more or less depending on how sweet your fruit is)

DIRECTIONS:

  • Combine all of above ingredients in a blender (I used an Oster Smoothie MakerI got it for Christmas and I LOVE it– it makes smoothies right into a cute to-go cup.  These ingredients fit perfectly into the cup and made my clean up really easy!)
  • Blend until smooth.
  • Pour into  popsicle molds (or into sandwich bags– then just knot the top) and freeze overnight.
  • Remove popsicles from mold (and fill if you used Volcano Pops) or clip a corner off the bag and ENJOY!

My thoughts:  Only one— the mango pop filled with vanilla bean ice cream?  Oh.  My. Word. 🙂

/>

Chocolate-covered Strawberry Cheesecake!!

Posted on

White chocolate cheesecake covered with chocolate dipped strawberries??? I’ll have some of that! (in fact I went off my diet and did– just a little….)  This is my standard cheesecake recipe with a twist- it’s surrounded by Nilla Wafers and topped with loads of dipped strawberries!  Fun and fancy- you will impress your guests with this cheesecake!

INGREDIENTS:

Cheesecake:

  • 9 oz. chocolate wafer cookies (I use animal crackers)
  • 15-20 Nilla Wafers
  • 1/4 c. margarine (melted)
  • 2 (8oz.) packages of Philadelphia Cream Cheese (softened)
  • 1/2c. sugar
  • 3 eggs
  • 2 c. white chocolate chips (melted)
  • 1 c. heavy whipping cream
  • 2 tbsp. margarine (melted)
  • 3 tsp. vanilla

Toppings:

DIRECTIONS:
Cheesecake:
  • Preheat oven to 325 degrees
  • Crush cookies into fine crumbs and add melted margarine.  Combine well and press into the bottom of a 9-Inch Springform Pan
    .
  • Gently press Nilla wafers upright along the edges of the crust.
  • Beat softened cream cheese with sugar until smooth.
  • Add eggs one at a time, beating in between each one.
  • Add remaining cheesecake ingredients, beating until smooth.
  • Pour into crust and allow to sit at room temp for 30 minutes.
  • Place on a cookie sheet and bake for 60 minutes.
  • Turn off oven, open oven door a little and allow to sit for another 30 minutes.
  • Remove from oven and run knife around edge of pan.  Remove edge of pan. 
  • Allow cheesecake to come to room temperature and then refrigerate overnight.
Toppings:
  • CHOCOLATE:  Put 1/2c. whipping cream into saucepan and heat just until bubbling at edges.  Turn heat off, add chocolate chips, cover and allow to sit for 5 minutes.
  • After 5 minutes, stir until smooth.
  • Pour over top of cheesecake and allow this to harden.
  • STRAWBERRIES: Take the top off each strawberry and wash well.  Allow these to dry completely on paper towel.
  • Melt both dark and white chocolate candy melts in the microwave in 30 second increments, stirring in between until completely melted.
  • Gently dip strawberries in chocolate (half in dark and half in white).  Use a fork to drain away excess chocolate and set on parchment paper to harden.
  • Put remaining melted chocolate in ziplock bags.  Clip a corner and drizzle each strawberry with its opposite color.
  • Allow these to completely harden.
  • Add powdered sugar to remaining cup of  whipping cream and whip with mixer (you could use Cool Whip to save time on this part).
  • Spoon whipped cream into a zip-lock bag with a decorative tip added into one corner.
  • Gently place hardened dipped strawberries on cheesecake.
  • Pipe whipped cream around edges and between berries.
  • Keep chilled.  Serve the same day as you place the berries (they will eventually get “soggy”  if they sit too long.
  • ENJOY!!!
My thoughts:
This is the only recipe I’ve ever won a contest with.  Two, in fact!  The 1st was a recipe contest through our local newspaper.  The second was a contest with Ferrara Pan Candy Company.  It isn’t a recipe thats quick and easy, but it’s fun to make and sure to impress!!!  Here’s a couple of tips:  Get more than enough strawberries- you want similar sizes and you will need to go through a few to find enough of the same size.  Start placing the strawberries in the middle with the largest.  The smaller berries are easier to squeeze in around the edges 🙂  Enjoy!!!  r-
This recipe was shared on these wonderful blogs: