Tag Archives: candy

No-Bake Easter Nest Cookies

Posted on

Easter nest 4-1These crunchy little nest cookies are filled with the (seriously addictive!) Cadbury mini eggs and a pinch of coconut. A perfect Easter treat! 
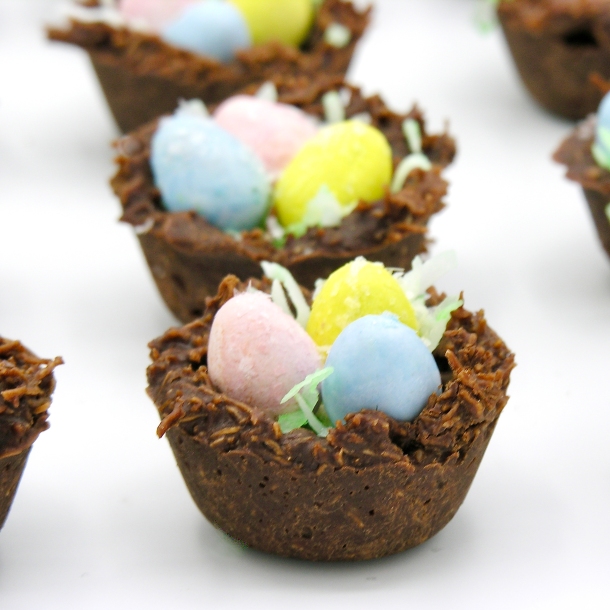
Easter nest 6-1

I just want you to know… I am the owner of the perfect no-bake cookie recipe. It’s my mom’s recipe, and it is perfect because it was the recipe we grew up enjoying. My mom passed away about 6 years ago, and I cherish every recipe I have of hers. When I was thinking about making Easter nest cookies, this recipe was the 1st to pop into my head. For sure I could have made it with the traditional oatmeal, but that’s not very nest-y, is it? So I used shredded wheat (the big ones!) I had to look a little bit to find the full-size shredded wheat (there are like a million flavors of mini!), but I found it- and it worked perfectly. I see you, chow-mien nest-makers- but I just could not bring myself to cover chow mien noodles in chocolate. Ewww. Sorry. Sticking with cereal here 🙂

Easter Nest 2-1

Want to know how to make these little nest cookies? Here is the recipe: (printable version)

Ingredients: (makes 24 mini nest cookies)

  • 2 cups sugar
  • 1/2 cup milk
  • 1/2 cup margarine (or one stick of butter)
  • 1/2 cup cocoa
  • 1/2 cup peanut butter (creamy)
  • 3 teaspoons vanilla extract
  • 4 cups of broken up shredded wheat (this was 9 big pieces, broken up)
  • 1/2 cup coconut (optional) with a tiny bit of green food coloring
  • 72 mini Cadbury eggs (just get a big bag- you’ll want the rest- I promise!)

Directions: 

  • Crunch up the shredded wheat until you have 4 cups.
  • If you use coconut, place it in a zip-top bag with the food coloring and shake until green.
  • Spray a mini-muffin tin with non-stick spray and set aside. 
  • Measure sugar, milk, margarine, and cocoa into a large saucepan. 
  • Heat until boiling (stirring constantly) and then boil for 2 minutes. 
  • Add peanut butter and vanilla. Stir until smooth. 
  • Take off heat, and add Shredded wheat, stirring until it is completely coated. I recommend adding it one cup at a time and using a little less if it gets too thick to stir well.
  • Working quickly, spoon or scoop into mini-muffin tin. 
  • Use a tart shaper or a rounded measuring spoon to press the center in (spray this item with cooking spray between each nest to keep it from sticking). 
  • Sprinkle a little coconut over each nest. 
  • Press three eggs into each nest. 

Nest process1Process3Process2

  • Allow nests to cool and harden.
  • Use a small knife to pop nests out of pan. 
  • Enjoy! 

Easter nest 5-1

My thoughts: I love how interesting these cookies taste with a different cereal added! For sure the shredded wheat gives these a more nest-like appearance. I really wanted to get the Cadbury eggs that are shimmery, but I couldn’t find them at my grocery, so I sprinkled a few edible sparkles over the top. 

If you want to try these with the oatmeal (and experience one of my favorite cookies from childhood), I will leave you with my mom’s original recipe (in her handwriting :)). I actually remember her writing this out for me (from memory). I’d just gotten my 1st apartment out of college and was craving these and she pulled out her notepad and jotted this down for me.

Just a note though- she NEVER used butter (even though the recipe says butter). Butter translated to her was always Country Crock. I use margarine as well- just to be true to her recipe- but I’m sure butter works fine too. Enjoy! ~r

Mom's recipe

Looking for other fun recipe ideas for Easter? We have lots of them! Just click a photo to see the recipe!

babychicks3cadbury-egg1dscn8243jelly-bean-cookies1

Maple Snowflake Candy!

Posted on

maple-snowflake-candy

These adorable maple candy snowflakes are made with only one ingredient- maple syrup! Such a delicious and easy-to-make winter treat!

Every winter for most of my life, my mom would tell us about making maple snow candy. It involved pouring hot maple syrup into snow, and it would harden into delicious candy bits. She said they made it at school when she was little, and she loved it.

I’ve never made it- and the thought of pouring anything edible into snow from my backyard? I don’t think so. 🙂 I was thinking about the candy and saw cute snowflake silicone molds online and decided I would try my hand at maple candy. It is a well-known technique, probably made for many years in some families, but a new technique for me- and I learned some things about how to make them well! 🙂

maple-snowflake-candy4

Here is how we made them: (printable recipe here)

INGREDIENTS/SUPPLIES:

  • 1 cup of pure maple syrup (grade A)- I used Wal-Mart brand because it was the least expensive 🙂 Worked great!
  • A few drops of vegetable oil- if desired to prevent boiling over
  • Silicone molds (the ones I got are discontinued- which is so sad!!!  I just got them about 2 weeks ago!) Here is a link to very similar sized ones (2 inch diameter).
  • A candy thermometer

DIRECTIONS:

  • Prepare molds by setting them on a small cookie sheet (to keep them flat). One cup of syrup will make about 8, 2 inch diameter and 1/3 inch deep candies.
  • Pour syrup into a medium saucepan. Clip a thermometer on the side with tip in syrup.
  • Add a few drops of oil on the top to keep it from foaming up when it heats. 
  • Heat to soft-ball stage(about 240F degrees on the candy thermometer), stirring slightly to prevent scalding .
  • Remove from heat, remove thermometer, and do not stir for 5 minutes. 

maple-candymaple-candy

  • After 5 minutes, start to stir the mixture. It will (fairly quickly) start to form little bubbles and change color. It will feel like you are scraping sugar off the bottom of the pan. At this point, quickly spoon into molds and then tap the entire cookie sheet on the counter to flatten out the candy in the molds.

maple-candymaple-candy

Now. I experimented with this a little. I placed my 1st batch in the freezer to harden for about 15 minutes and they had a sugary film on them when I took them out. I left my second batch in the freezer while I went out for dinner (several hours) and they came out beautifully. I repeated this with 3 more batches and it worked perfectly every time. If you are going to make a lot of these, get a couple of molds to save time! 

Here’s a photo of the second batch (several hours in freezer) vs the 1st batch (15 minutes in freezer) 

maple-snowflake-candy

  • Just pop these out of the molds and keep them in a sealed container for up to several weeks. 
  • Enjoy!!

maple-snowflake-candy

My thoughts: These are particularly good with a cup of coffee… the sweet and the sugar… yum! I put these on my Christmas cookie trays for friends and they LOVED them. My gluten-free friends were particularly excited about them 🙂

Since the syrup is so expensive, I just did one-cup batches for the 1st two sets- so I could experiment without ruining a whole 2 cups of syrup. My remaining batches, I boiled 2 cups at once and used 2 sheets of molds. You have to pour very quickly when you use 2 cups- so that it doesn’t thicken up before you get it into the mold. Other than that, it worked great and was actually a VERY easy and fun treat! Hope you get a chance to try them! ~r

Other snowy day desserts here on Easybaked: (click a photo to see the recipe)

Snowman Oreo PopsCoconut Cupcakes!!!Caramel Ritz CookiesBerry Bomb Cupcakes4

Spiderweb Oreo Pops

Posted on

spiderweb-oreo-pops

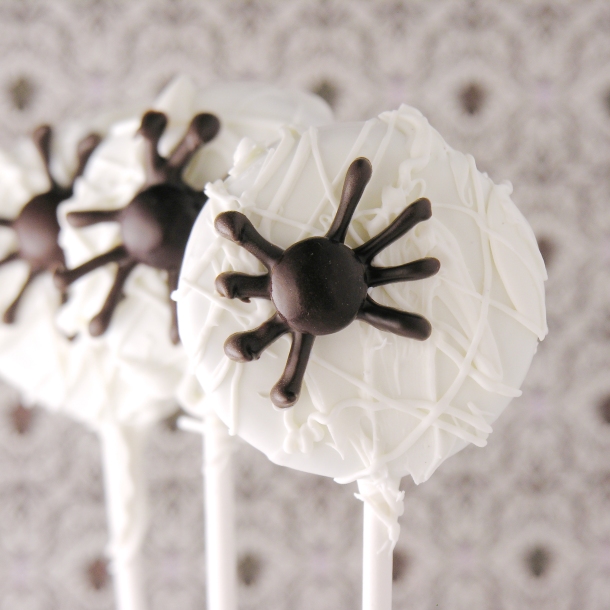
These web-wrapped Oreos with M&M spiders are not only cute fall treats- but delicious ones!

It’s that time of year again. That time when spiders think it’s too cold outside, and find little cracks around my windows and doors to creep in through. There’s nothing worse than sitting here, innocently blogging about a dessert recipe, only to be shocked by a giant black spider racing out from behind the couch. Seriously- they move so fast!

In any case, I make a lot of spider-themed treats. Maybe because candy spiders are so cute- and they don’t move. These are especially cute little guys- and they are perfect on top of these web-coated Oreos! Plus, as is true with all Oreo pops, you can make them weeks ahead and have them all wrapped in pretty bags and ready for a party. I love recipes like that.

spiderweb-oreo-pops

Here is how we made them: (printable recipe available here)

INGREDIENTS: (makes about 24 pops)

  • One box of Double Stuff Oreos
  • 24 lollipop sticks
  • 2 bags of Wilton’s Candy Melts in white
  • 1/4 cup of Wilton’s candy melts in dark chocolate
  • 36-ish dark brown M&Ms (no worries–you can eat the rest of the bag while you work 🙂 )

DIRECTIONS:

  • Make your spiders 1st.
  • Melt dark chocolate melts in microwave in 30 second increments, stirring in between until melted and smooth. Spoon into a small zip-top bag and clip a tiny corner off (or use a decorator tip, if you have one). 
  • Pipe spider legs on parchment paper (see photo) and place an M&M in the center. I make more than 24, because the legs sometimes break when you peel them off.

The photos below are from my recipe for Spider Eggs, and some of them are piped on Lindt truffles. You can see how I piped them on parchment paper though.

Spider eggsSpider Eggs

  • Let spiders harden while you assemble your Oreos.
  • Twist apart all of your Oreos.
  • Melt a small amount of candy melts (<1/4 cup) in the microwave in 3o second increments, stirring between until smooth.
  • Dip the end of a lollipop stick into the melts, and press into white filling of Oreo. Place other half of cookie back on top and press together.
  • Place Oreo and stick on a cookie sheet. Repeat this process with remaining Oreos, and then freeze all Oreos until firm (10-15 minutes).
  • Melt one and a half bags of white Candy Melts using method from above.
  • Once Oreos are chilled, hold with stick and dip into Candy Melts until completely coated.
  • Tap on side of bowl to get excess off, and drag across lip of bowl to scrape excess off back of cookie.
  • Set on parchment paper to harden.
  • Melt remaining white Candy Melts and place in a zip-top bag. Clip the corner off and drizzle over each Oreo to make a messy web-like pattern.
  • Immediately place a “spider” on this melted drizzle and allow everything to harden up for at least a couple of hours. 
  • Once hardened, store in an air-tight container or tie up in little cello bags. 
  • Enjoy!!!

spiderweb-oreo-pops

My thoughts: *Smile*!!! These are fun little treats- and not too difficult to make. I always love my Oreo pops. One of these days I should put all of them in one post since I’m getting such a large collection of them! I hope you get a chance to try these fun little treats! And I hope they are the only spiders you find in your home this fall!!!  ~r

spiderweb-oreo-pops

Other spider-y treats found on Easybaked: (click on a photo to see the recipe)

Spiderweb CookiesSpider Cupcakes!Spider Eggs Cupcakesspiderweb brownie

Emoji Oreo Pops!

Emoji Oreo Pops2

Surprise everyone with these adorable Emoji Oreo Pops! They look difficult- but I found some cookie cutters that make fast work of these cute little faces!

I’m not sure when the Emoji craze hit, but all of a sudden, these cute little social media expressions are EVERYWHERE! Pillows, T-shirts, masks, cards, balloons… People are even throwing Emoji parties (which actually sounds really fun…!)

Emoji Oreo Pops

In any case, when I decided to re-create these little guys I was unaware of how popular they are! I always google my ideas to see if I’m original or re-creating something, and there were a few Emoji Oreos and cookies out there- but they were mostly hand-drawn faces, and let’s face it: I am NO artist! I wondered if there were cookie cutters in the shapes of the faces- so I could use fondant. Most of the cutters were for full-sized cookies, not Oreos. But then I found these from JB Cookie Cutters. They are available in a 2 inch size which was perfect!

Emoji Oreo Pops

Look at all the faces you can make with this set of cookie cutters! Very, very fun!!!! 🙂

Let me show you how we put these little cookies together (printable recipe here)

INGREDIENTS: (makes about 25 cookies)

  • One box of Double Stuff Oreos
  • One and a half bags of Wilton’s Candy Melts in yellow
  • One box of Wilton’s white fondant or make your own- recipe here
  • A little powdered sugar to roll the fondant out with
  • Gel food coloring in black, red and blue
  • You’ll also need some lollipop sticks, (and a set of tweezers, some toothpicks and a small paintbrush are helpful!)

DIRECTIONS: (if you have never made Oreo Pops before, click here for tips!)

  • Make all the components for your Emoji faces first! They will be ready to place on the melted candy when the time comes!
  • If you have never worked with fondant before, you might find our tutorial here helpful.
  • Pull a small ball of fondant off the block of Wilton’s white fondant and roll it into a ball.
  • Using a small rolling pin and a little powdered sugar, roll the fondant out like cookie dough and cut all the white pieces of the faces you want to make. The big eyes and teeth are easy- but the little teeth need a toothpick’s help to poke them out of the cutter when it picks them up off the table. You will also want to “paint” the black lines on the big teeth with black gel food coloring. You can use a toothpick or a small brush to do this.

Emoji Cookies Emoji Oreo Pops

  • You want to work with fondant starting with the lightest colors 1st and ending with the darkest, so next up is blue tears- then red tongues and hearts- and finally all the black pieces.
  • To color fondant, add gel to the center of the ball and knead it with your hands. You will get colored hands (unless you wear gloves).
  • Once you are finished with a color, you can keep it soft by protecting it from air (under a small dish or glass).
  • One note: When you get to the black pieces, the little eyebrows are SO tiny that I skipped cutting them out and just used a toothpick to draw them on the faces at the end (I can draw eyebrows…) 🙂 
  • To stick two pieces together (like pupils on the eyes, and tongues on the mouths), brush a little water on the back of the piece you want to “glue on” and place it where you want it.
  • Once your pieces are finished, just let them sit and harden up a bit while you make your Oreo Pops!

Emoji Oreo Pops

  • See the powdered sugar on the black pieces? Use a little paintbrush to brush that off once your Oreo pops are completed.
  • Twist apart all of your Oreos.
  • Melt your yellow candy melts in the microwave in 30 second increments, stirring in between, until melted and smooth.
  • Dip the end of a lollipop stick into the melts, spread a little on the top of the white filling of the Oreo and then press the stick into the white filling.
  • Place the top of the Oreo back on so that the stick is in the middle with the filling.
  • Do this for all the Oreos, and set them on a large plate or cookie sheet to FREEZE for about 10 minutes.
  • Hold a chilled pop by the stick, and spoon yellow candy melts over the top, bottom and sides of the Oreo.
  • Tap stick against the side of the bowl to get extra melts off, and gently pull the bottom of the Oreo along the edge of the bowl, scraping off excess melts.
  • Set Oreo on parchment paper to harden- but before it hardens, place your fondant face on top. I used my fingers, but tweezers and a toothpick would be helpful in placing and positioning each piece. I honestly felt like I was playing the game “Operation”. You need steady hands!
  • Allow Oreo to harden up.
  • Brush away extra powdered sugar from face, and paint on some eyebrows for the faces that require some 🙂
  • Let these sit for a couple hours to fully harden (you can chill to speed this up) and then serve! I placed them in individual cello bags and tied them with ribbons to make giving them away easy!
  • Enjoy!

Emoji Oreo Pops

My thoughts: These are probably the most fun dessert I’ve ever given away. These were a HUGE hit with everyone and resulted in lots of Emoji selfies 🙂 Here’s a little glimpse of the fun:

Emoji Lineup!

Of course, these are time consuming. Even with the added help of the little cookie cutters, they take time. If your time is limited, I recommend you make the fondant faces and then assemble the pops later. The good thing about these is that they keep for several weeks when they are tied up in those cello bags- so you can do them WAY ahead of an event! I hope you are brave enough to tackle these- and that my other posts on Oreo Pops and the use of fondant are helpful!  Enjoy! ~r

Emoji Oreo Pops

Other Oreo Pop ideas: (click on a photo to see the recipe)

Ladybug Oreo Pops!Rainbow Oreo Pops!!!!Goldfish Oreo Pops!Football Field Oreo Pops

Candy-coated Cut-out Cookies!

Posted on

My Message5

These buttery cut-out cookies are decorated in melted candy and designed to replicate our Josiah Venture Camps Theme for 2016!

There is so much to talk about with these little cookies! I will start with the WHY.

I work for an organization named Josiah Venture. We are a movement of God among the youth of Eastern and Central Europe that finds its home in the local church and transforms society. We plan over 100 evangelical camps each summer in 13 different countries, and each camp has the same theme. This year the theme is “Did You Get My Message?”, and this is the camp logo- on all of the t-shirts and banners and materials.

A3_Camp_Poster_2016_FINAL_EDITABLE_ENGLISH

Last year, I made cookies that replicated our camp theme “You are Here” and they were such a hit that people asked if I planned to do this again… I’m starting to be a little afraid of the next year’s design!!! THIS year was pretty easy- and a lot of fun!

My Message3

Now for the HOW.

Have you ever pieced two cookie parts together to make a shape not available in the cookie cutter world?

Me neither. When I was challenged to re-create this design in cookie form I knew I could get a hexagon cookie cutter- but how to add that cute little circle at the top? Then, how to decorate them without using Royal Icing? I’m not a fan of all the waiting for it to harden between colors.

Here’s what I did- and it worked (and tasted) GREAT. I realize you will want to make your own shapes and decorations- just adjust the amounts and colors of Wilton’s candy Melts accordingly.  (For a printable cookie recipe, click here)

My Message6

 INGREDIENTS: (makes about 24 cookies)

  • 2 sticks (1 cup) unsalted butter (softened)
  • 1 1/2 cups of granulated sugar
  • 2 eggs
  • 1 teaspoon of vanilla
  • 1 teaspoon of butter flavoring
  • 3 cups of flour
  • 1 teaspoon of baking powder
  • 1/2 teaspoon of salt
  • 2 bags of Wilton Candy Melts in blue (or in whatever colors you want to decorate in!)
  • 1 bag of Wilton Candy Melts in white
  • 1 bag of Wilton Candy Melts in red

DIRECTIONS:

  • Preheat oven to 350F degrees.
  • In a large mixing bowl, cream together butter and sugar until smooth.
  • Add eggs, vanilla and butter flavoring and mix well.
  • Add all dry ingredients and mix until able to knead into a firm ball of dough (add additional flour if necessary).
  • Roll out on a floured counter with a flour coated rolling pin to desired thickness (I made them fairly thick)
  • Cut into whatever shape you want- and if you want to join two shapes like I did, gently set one piece against the other on a parchment paper covered cookie sheet and press gently together.
  • Bake at 350F degrees for 8-10 minutes and slide off the cookie sheet (leaving on parchment paper) to cool.
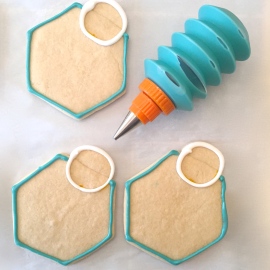
  • I needed a full circle on top of each cookie, so I used a cookie marker to trace the cookie cutter as pictured.

My Message 10My Message9

  • I needed 2 items drawn on top of each cookie- an envelope and an question mark. I drew the envelopes out on my computer, found a good bold font for the question marks, and printed several sheets of these. I taped them under parchment paper and used melted white candy melts to trace them. To melt candy melts, you heat them in the microwave in 30 second increments, stirring until smooth.
  • Then I took that same melted white chocolate and outlined the circle- using my lines as a guide.
  • Melted blue candy was used to outline the hexagon.

My Message8My Message11

  • Finally, red candy melts are piped into the circle, filling it completely. I tapped the cookie gently on the table to get rid of bubbles before gently setting a question mark in the center. This step further cements those cookie pieces together.
  • The last step is to completely fill the hexagon with blue, tap out bubbles, and gently set an envelope in the center. I swirled a little white in the blue to copy the logo’s wave look.

My Message13

Any squeeze bottle that can be fitted with a small round decorating tip will work, but aren’t these so fun? These are from the Kuhn Rikon Decorating Set. That’s a link to find them on Amazon, but I got mine in a clearance bin at Marshall’s and didn’t even know how much I would love them!

The best part about working in candy melts rather than frosting is that they harden up SO fast. No waiting between colors- and no bleeding of one color into another. Plus they taste like a cookie covered in white chocolate! The cons are color choice. You are fairly limited in what colors you can use- although the Wilton’s site does have this handy chart to help you mix colors. I will use this again- for sure. I loved it.

My Message1

So. Fun. *smile*  ~enjoy!!!

My role with Josiah Venture is as their intern coordinator. Every year we have over 100 college age interns that spend the summer in Eastern and Central Europe. They partner with local churches and help them reach young people through English, Music, and Sports camps, with the message that God loves them. We also invite churches from the US, Canada and the UK to bring groups of young people over to serve short term. I’ve taken two college-age groups over to Slovakia, and it is a life-changing experience! If you are a part of a church that might be interested in helping next summer, or you might be interested in being a summer intern- check out our website for more info. Applications for 2017 internships will be available in July!

Here’s a link to internship opportunities.

Here’s a link to short-term opportunities.

Here’s a link to a great video that explains more about who Josiah Venture is and what God is doing in Eastern and Central Europe.

JV Interns 2017- cropped

Our 2016 interns!

My message4

Other cut-out cookie recipes you will love! (click on a photo to see the recipe)

Sugar cookie cut-outsGingerbread Cookies!Honey cut-out cookiesChocolate cut-out cookies

10 Fun Dessert Recipes for Father’s Day!

Posted on

Golf Cupcakes!!!!

Father’s Day is upon us! I love this day. I have such a great dad- he is adventurous, wise, funny and so much fun to spend time with. I’ve created many recipes here at Easybaked on his behalf, and thought I would gather them all into one little post for you!

Dads come in all varieties with all sorts of interests and hobbies. If your dad is a golfer, try the Hole-in-one Cupcakes pictured above. They use a Lindt chocolate truffle as a golf ball- which is cute and SO yummy eaten with that cupcake!

If your dad is the grill-master of your family, you might make him BBQ Cupcakes– or Hamburger Cookies– or maybe both!

BBQ Grill Cupcakes!!

Hamburger Cookie!

He loves football??? Hopefully he loves the Green Bay Packers… the only team truly worth cheering for….!

Make him delicious dark chocolate Football Cookies, fun little First Down Oreo Pops, OR Cheesehead Cupcakes (Go Packers!) At the very least you can entertain him with stories of how you use your tire pressure gauge with that last recipe…

Chocolate Football Cookies!


Football Field Oreo Pops


Cheesehead Cupcakes!!!!!

Maybe your dad is a foodie. He loves his bacon and doughnuts! We’ve got both of those covered! Our Pancake and Bacon Cupcakes are actually incredibly delicious! I was skeptical- and I made them- but they got five stars in my book! We also have some pretty amazing Doughnut Cupcakes– that actually taste like doughnuts!

Pancake Cupcakes!!!!


Cream filled doughnut cupcake

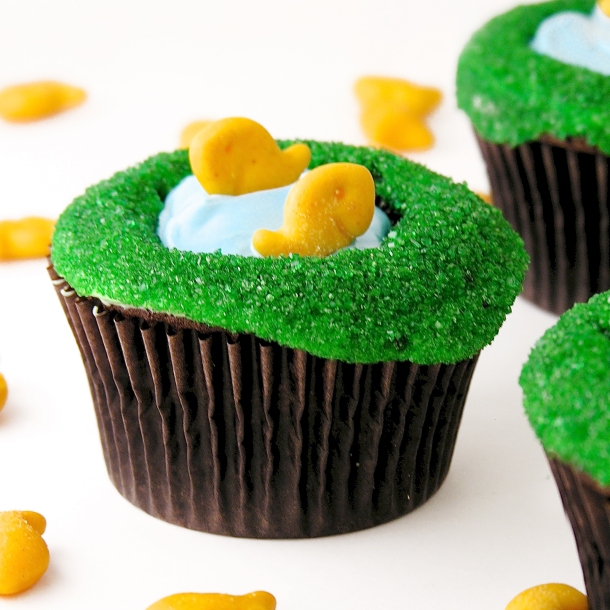
Finally, for the fisherman fathers out there….. Fishing Bobber Cupcakes– that use Lindt Truffles as an adorable bobber on waves of blue icing- and Fishing Pond Cupcakes– stocked with little goldfish crackers!

Bobber Cupcakes1


Fish Pond Cupcakes9

That makes 10 incredibly fun, unique and delicious recipes! But I need to add one more… in honor of my dad, who spent his life working in a medical laboratory and literally spent an hour this morning over breakfast telling me all the horrible things they used to have to mouth-pipette back when he started in the profession in the 1960’s… (like formaldehyde… as one of the less nasty things…)

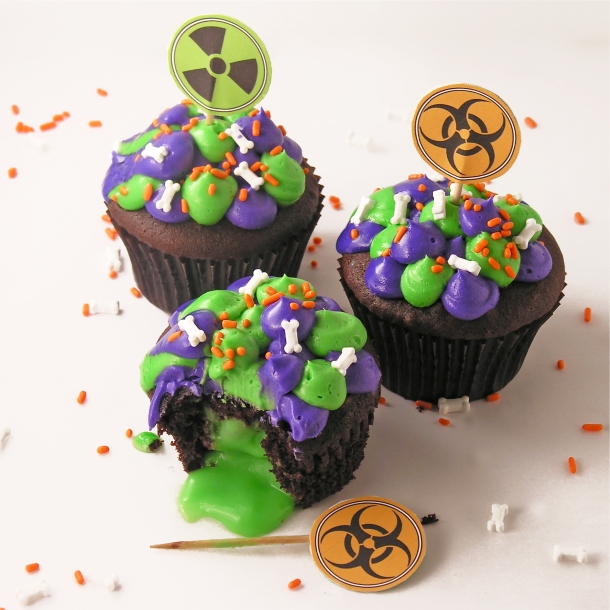
For you dad…(and all scientist dads out there!) Toxic Sludge Cupcakes! These are unbelievable delicious… that green goo is white chocolate pudding and it is SO good inside these cupcakes… makes me smile 🙂

Toxic Slime-filled Cupcakes!

Happy Father’s Day! I hope you have a chance to bake some sweet treats to celebrate your dad this weekend!  ~r

13422342_10153594155067513_6491943221366895816_o

Dad and my sweet puppy this morning **smile**

Some of my dad’s other favorites through the years:

Pecan Pie CupcakesKey Lime Cupcakes!Caramel Fudge Brownies!!frozen s'more cups

Praline Fudge Brownies

Posted on

Praline Fudge Brownies

A dense brownie covered in creamy praline filling and topped with chocolate fudge and pecans. This will satisfy the most demanding sweet tooth!!!!

I adore pralines. Especially around Thanksgiving and Christmas when anything with pecans is somehow better. Some people say they are just too sweet- and this filling is no exception! Paired with this not-too-sweet brownie, I think it is perfect though. These got rave reviews and several people exclaimed, “These taste like Christmas!”

Praline Fudge Brownies4So let’s make these yummy little treats! (printable recipe)

INGREDIENTS:

Brownie:

  • 1cup butter
  • 2 cups sugar
  • 3 eggs
  • 2 teaspoons vanilla
  • 2 cups flour
  • 1/2 cup cocoa
  • 1/2 teaspoon salt
  • 1 cup milk

Praline Filling:

  • 1 cup whipping cream
  • 12 Tablespoons of butter
  • 3 cups of brown sugar (packed)
  • 1 1/2 cup of finely chopped pecans (divided)
  • 3 cups of powdered sugar
  • 2 teaspoon of vanilla

Fudge Topping:

  • 12oz. semi-sweet chocolate chips
  • 12 tablespoons butter (do not substitute margarine here!)

DIRECTIONS:

Brownie:

  • Preheat oven to 350.
  • Cream butter and sugar together. 
  • Beat in eggs, cocoa, vanilla and salt.
  • Add flour and milk (alternating them and mixing well in between)
  • Spread evenly in greased jelly roll pan (12 1/2 x 17 1/2 x 1″).
  • Bake at 350 degrees for 15 minutes or until done in center and just starting to pull away from sides.
  • Cool.  

Praline filling:

  • In a large saucepan, mix cream, butter and brown sugar.
  • Cook over medium heat, stirring often, until mixture comes to a boil.
  • Cook for one minute, stirring constantly and then remove from heat.
  • Stir in powdered sugar, vanilla and 1 cup of pecans (you may need to do this in a separate bowl if your saucepan isn’t big enough)
  • Cool for 5 minutes, stirring often until it thickens up a bit.
  • Spoon mixture over cooled brownies and spread into a smooth layer over the top.

Praline Fudge BrowniesFudge Topping:

  • Melt butter and chocolate together in the microwave in 30 second increments, stirring in between until completely melted and smooth.
  • Pour over praline filling and spread evenly over top.
  • Sprinkle with remaining 1/2 cup of chopped pecans.
  • Chill until top layer is hard and cut into bars.

Praline Fudge Brownies7My thoughts: These aren’t hard to put together and they are oh-so-yummy!!! I froze about half of the batch in an air-tight container for several weeks and just pulled them out for a party I was having- they freeze GREAT. In fact, they are pretty yummy frozen. 🙂  I hope you get a chance to try these and enjoy them as much as I did!

Praline Fudge Brownies2

Other yummy Christmas desserts: (click on a photo to see the recipe)

Chocolate bonbonsHot Chocolate Pop!Snowman Oreo PopsPeanut Brittle!!

Leprechaun Truffles

Posted on

Green Apple Truffles

These fun truffles are made with green apple (or lime!) Kool Aid filling and they are SO yummy!

It’s the time of year when all things green are made. One of my favorite truffle fillings is made with Kool Aid, which makes the flavors limited only to what little packets of flavor you can find! I made these with green apple Kool Aid, but I’ve made them with lime before too- and they are delicious! This tart fruit filling is SO creamy and smooth. I absolutely love it!

Green Apple Truffles

Here’s how we made these delicious little green treats: (printable recipe)

INGREDIENTS:

  • 1 (8 oz) package of cream cheese (softened to room temperature!)
  • 3 cups of powdered sugar
  • 3 cups of white chocolate chips
  • 1 tsp vanilla
  • 1 (0.16oz) packet of Kool-Aid drink mix (any flavor- I used green apple)
  • 2 bags of Wiltons Candy Melts (in whatever colors you wish)

DIRECTIONS:

  • Cream together cream cheese, powdered sugar and Kool-Aid in a large mixing bowl.
  • Melt white chocolate chips in the microwave in 30 second increments (stirring in between) until smooth and creamy.
  • Add melted chips and vanilla to cream cheese mixture and combine until completely smooth.
  • Refrigerate for at least 30 minutes.
  • Remove mixture from refrigerator and use a small cookie scoop or melon baller to make small balls of filling (I placed these on a plate and put them back in the fridge to chill while I prepared my chocolate to dip)
  • Melt the Wilton’s Candy Melts in the microwave in 30 second increments, stirring until smooth and creamy.
  • Dip chilled balls of filling in the melted chocolate, draining away excess and placing on parchment paper to harden (if you want pictures of how I dip things click here for a previous recipe) The balls of filling need to stay cold, so keep them in the fridge until you are ready to dip them.
  • Decorate with drizzles of fun colored chocolate. 
  • Enjoy!

Green Apple Truffles

My thoughts: Aren’t they cute? They are SO yummy too… my only recipe tip is to make sure those balls of filling are chilled and your melted candy isn’t super hot. I allowed my candy melts to cool a bit before I dipped. You just don’t want that soft filling to start melting while you dip.

Green Apple Truffles

These are as fun as can be using all sorts of fillings, which makes them a good treat for any holiday!

Kool-Aid Truffles!!

Here they are in other fun flavors. Click on the photo to see how I did them!

Finally, one of our most popular recipes on Easybaked is a St. Patricks Day treat! Bailey’s cupcakes are everyone’s favorite! You should probably try them. 🙂 Again, click on the photo to see the (oh so yummy!) recipe:

Baileys Irish Cream Cupcakes

Lucky Charms Truffles

Posted on

Lucky Charm Truffles

If you like Lucky Charms Cereal, you will love these chocolate-covered treats!

I was walking down the cereal aisle and a box of Chocolate Lucky Charms jumped into my cart and begged me to make a dessert with it.

That’s almost how it happened…! I love Lucky Charms and I adore the chocolate version. Did you know that just before St. Patrick’s Day they have a limited time version full of shamrocks and pots of gold. Too cute!

I had actually been wondering if the oft-used technique of Oreos + Cream Cheese, rolled into a ball and covered in chocolate would work with cereal. Perfect opportunity to try!

These are yummy little chocolate-y and marshmallow-y treats that are SO cute for the month of March!

Lucky Charm Truffle

Here’s how we put them together: (printable recipe)

INGREDIENTS: (makes 24-36 truffles, depending on how big you make them)

  • 4 cups of Lucky Charms Chocolate cereal (marshmallows and all)
  • 1 bar of Philadelphia Cream Cheese (at room temp)
  • 1 bag of Wilton’s candy melts (in any color you like- I used up some leftover bags in a variety of colors)

DIRECTIONS:

  • Finely crush cereal into crumbs (I used a food-chopper).
  • Combine with cream cheese until it forms a soft ball of dough.
  • Roll dough into small balls.
  • Melt candy melts in the microwave in 30 second increments, stirring between, until melted and smooth.
  • Use a fork to dip balls of cereal into the melted candy. Tap the fork on the side of the bowl to drain off excess melted candy, and slide fork along edge of bowl to remove excess.
  • Place each truffle on parchment paper to harden. Top with marshmallow bits from the cereal, or sprinkles.
  • Allow them to harden completely.

Lucky Charm Truffles

My thoughts: Aren’t they cute? They are pretty yummy too. I thought the consistency was a little weird, but once they are covered in chocolate it’s not as noticeable. I got a thumbs up from friends who tried them and kids LOVED them. Just a fun little St. Patricks Day project! Enjoy! ~r

Other yummy St. Patrick’s Day treats here on Easybaked: (click on image to see recipe)

Andes Mint CupcakesKey Lime CakeLime Soda Cupcakes!!!!Baileys Irish Cream Cupcakes

Turtle Cookie Cups

Posted on

Turtle Cookie Cup

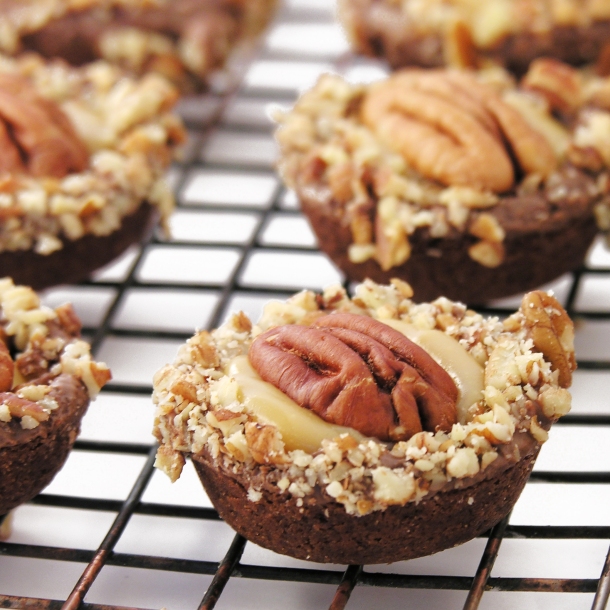
Chocolate cookie cups full of creamy caramel, chocolate and pecans.  So many fun fall flavors in one little dessert!

There’s something about November that makes me think caramel and pecans. Comfort food, maybe? Thanksgiving?  I’m not sure, but these yummy little treats hit the spot!  They are fun to make, and a pretty mini dessert for all those November and December get-togethers.

Here’s how they are made: (printable recipe)

INGREDIENTS:

Cookies:

  • 2 sticks (one cup) butter (softened)
  • 1 ½ cups sugar
  • 2 eggs
  • 1 teaspoon of vanilla extract
  • 2/3 cup unsweetened cocoa powder
  • 3 cups flour
  • ½ teaspoon salt
  • ½ teaspoon baking powder

Toppings:

  • 1 bag of Wilton’s candy melts in milk chocolate
  • 2 cups of chopped pecans and about 60 whole pecans
  • 32 Kraft caramels (unwrapped)
  • 1 can (14oz) sweetened condensed milk
  • 1 stick (1/2 cup) butter

DIRECTIONS:

Cookies:

  • Preheat oven to 350 degrees
  • Add butter, sugar, eggs and vanilla together in a large mixing bowl
  • Blend on medium speed with a mixer until smooth
  • Gradually add dry ingredients and mix until smooth (use clean hands at the end, and knead into a soft ball of dough
  • Use a small cookie scoop (I used one that holds ½ tablespoon of batter) to portion your dough into mini muffin tins that have been sprayed with non-stick spray
  • Use a tart shaper, or a wooden spoon to press the dough into a cup shape.

Making cookie cups

  • Bake at 350F degrees for 7-8 minutes and remove from oven.
  • Press centers in a second time and allow cups to cool for just a couple of minutes.
  • Use a small paring knife to pop each cup out and allow them to cool on the counter.

Toppings:

  • Place caramels, sweetened condensed milk and butter into a medium saucepan and heat on medium over the stove until all of the caramels are melted.
  • Heat milk chocolate candy melts in the microwave in 30 second increments until melted and smooth.
  • Place chopped pecans into a small bowl.
  • To assemble, dip top edge of cup in candy melts and then in chopped nuts.

Dipping tops of cookie cups in chocolate

  • Place caramel sauce into a sturdy zip top bag and clip a corner.
  • Pipe caramel into each cup until filled completely and top with a whole almond.
  • Allow caramel and chocolate to firm up.
  • Store in an airtight container for 2-3 days.
  • Enjoy!

Turtle Cookie Cup2

My thoughts: These are a little time-consuming to make, but sooooo yummy. They are a perfect mini-dessert for any of the upcoming holidays, and they got RAVE reviews in my little world! That caramel….!!!! Enjoy! ~r

Other fun mini desserts here at Easybaked (click on a photo to see the recipe)

Cheesecake Sundaes Mint Creme Brownie CupsCake balls filled with cream cheese frostingMini chocolate chip cookie cheesecakes