Tag Archives: oreo pops

Seashell Oreo Pops!

Posted on

Turn your Oreos into a celebration at the beach! Sand Dollars, Sea Scallops and cute little fish. So much delicious fun!


There’s just something about the beach that makes my heart happy! Have you ever been to Sanibel Island in Florida? It’s right by Fort Meyers. Growing up, our family spent nearly every Thanksgiving at a little condo on the beach there. They have some of the best seashell hunting in North America. As a little girl, I had a shell identification book and a big pail, and I spent hours and hours combing the beach for shells. Sand dollars were one of my favorites!

This past spring, I used chocolate covered sunflower seeds in several projects, and thought about how much they remind me of the little centers of sand dollars. So I had to try! I also made some sea scallops using…wait for it… Wheat Thin crackers to make those little shell points (and they are a super yummy salty-sweet combo!) 🙂


Here is how we made these little Oreo pops:

Fish Oreo Pops are from an earlier recipe here on Easybaked. You can find them by clicking here.

These were featured in our cookbook for kids, Life Is Sweet: 12 Baking Devotions for Kids.

Sand Dollars:

Ingredients: (makes about 24 pops)

  • One package of Double Stuff Oreos
  • 2 (12 oz.) bags of Wiltons Candy Melts in white
  • Chocolate covered sunflower seeds (I used blue)
  • 24 Lollipop sticks
  • Small pearl decorating sprinkles
  • Small treat bags and ribbon, if you want to package them up to give away.

Directions: (Need a little visual help?  Click here.)

  • Carefully twist apart all Oreo cookies.  Do this slowly and gently- and expect that some will break. 
  • Melt about 1/4 cup white candy melts using a microwave-safe bowl in the microwave in 30 second increments, stirring between until completely melted and smooth.
  • Use a lollipop stick to make an indentation in the white filling of an Oreo.
  • Dip the end of the stick into the candy melts, spread a little on top of the white filling and then press the stick into the indentation.
  • Place the top of the Oreo back on and allow the candy melts to harden and cement the cookie back together with the stick inside. I like to stick these in the freezer to get nice and hard.
  • While you wait, melt your remaining white candy melts in the same manner as previously.
  • Once the cookies are firmly hardened back together, pick one up (using the stick) and dip it into the bowl of white candy melts. 
  • Spoon candy melts over the top and sides.
  • Gently lift the Oreo out of the candy melts, and tap the stick on the side of the bowl to allow the excess melts to drip off.
  • Slide the bottom of the Oreo against the edge of the bowl to remove excess candy melts.
  • Gently set the coated Oreo on clean parchment or wax paper.
  • Immediately, set the sunflower seeds as shown at the center of the cookie.
  • Place pearl sprinkles as shown, between sunflower seeds.
  • Serve as-is, or package up for giving away by sliding each cookie into a little treat bag and tying with a ribbon.

Scallops: 

Ingredients: (makes about 24 pops)

  • One package of Double Stuff Oreos
  • 3-4 (12 oz.) bags of Wiltons Candy Melts in various colors
  • A few wheat thin crackers
  • 24 Lollipop sticks
  • A toothpick to pull through colors and make design.
  • Small treat bags and ribbon, if you want to package them up to give away.

Directions: (Need a little visual help?  Click here.)

  • Carefully twist apart all Oreo cookies.  Do this slowly and gently- and expect that some will break. 
  • Melt about 1/4 cup candy melts (any color) using a microwave-safe bowl in the microwave in 30 second increments, stirring between until completely melted and smooth.
  • Use a lollipop stick to make an indentation in the white filling of an Oreo.
  • Dip the end of the stick into the candy melts, spread a little on top of the white filling and then press the stick into the indentation.
  • Set 1/2 of a Wheat thin cracker on top of candy melts at the top (so just the points poke out when the top is back on).


  • Place the top of the Oreo back on and allow the candy melts to harden and cement the cookie back together with the stick inside. I like to stick these in the freezer to get nice and hard.
  • While you wait, pick your “main color” and melt those candy melts in the same manner as previously.
  • Also melt smaller amounts of two to three other colors. Spoon these into zip top bags and seal them up. Wrap them in a warm towel to keep them melted and smooth.
  • Once the cookies are firmly hardened back together (about 10 minutes in a freezer), pick one up (using the stick) and dip it into the bowl of candy melts. 
  • Spoon candy melts over the top and sides.
  • Gently lift the Oreo out of the candy melts, and tap the stick on the side of the bowl to allow the excess melts to drip off.
  • Slide the bottom of the Oreo against the edge of the bowl to remove excess candy melts.
  • Gently set the coated Oreo on clean parchment or wax paper.
  • Immediately, clip a corner off a bag of colored candy melts and pipe a couple curved lines on top of Oreo. 
  • Repeat these lines with other colors and then place bags back inside warm towel. 
  • Use a toothpick to pull lines up from the bottom through these colors (see photos)


  • Sprinkle with a little gold sugar and add a candy pearl if you want.
  • Repeat this process with remaining Oreos. You may need to repeat the melting process for the  small bags of colors. If you need to do this, try making one of these colors your “main” color and decorating with the others!
  • Serve as-is, or package up for giving away by sliding each cookie into a little treat bag and tying with a ribbon.
  • ENJOY!

My thoughts: I experimented a little with the sand dollars. I had some butterscotch candy melts that I used with brown sunflower seeds- they are cute too- but I love the white ones best! I was really happy with how these turned out, and they really aren’t too difficult to put together- especially if you have made Oreo pops before. I hope you get a chance to try these for your next beach party! Happy summer to you!!!!  ~r

Other fun beach- themed ideas here at Easybaked (click on a photo to see a recipe):

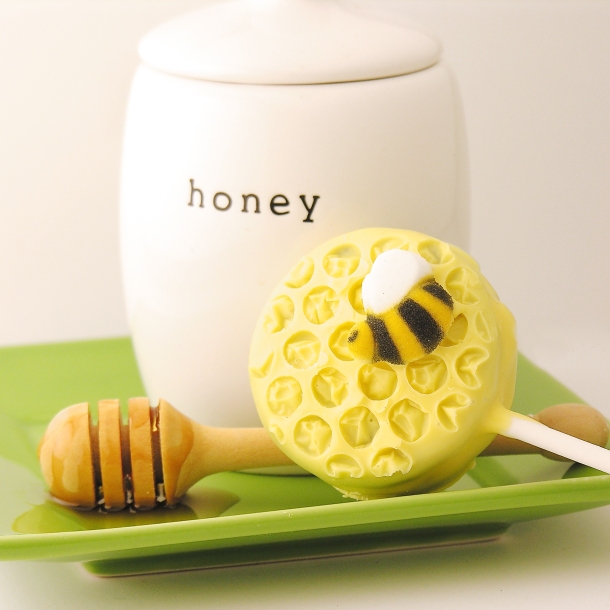
Honeycomb Oreo Pops- with Bees!

Posted on

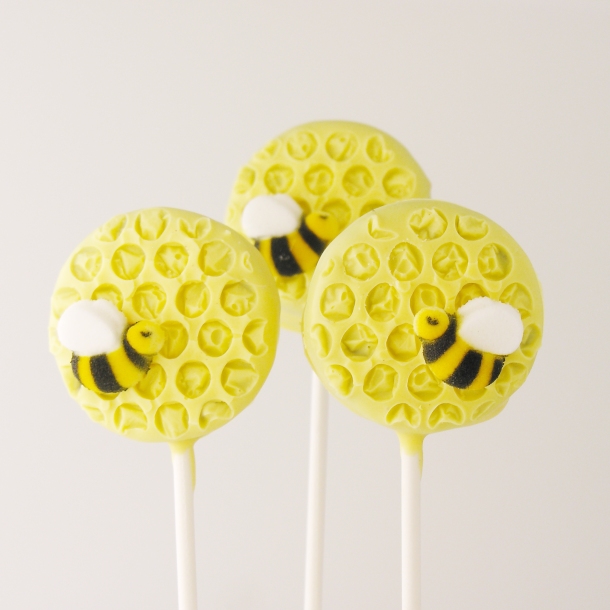
Adorable Honeybee Oreo Pops are sure to make your summer picnics more fun!!!

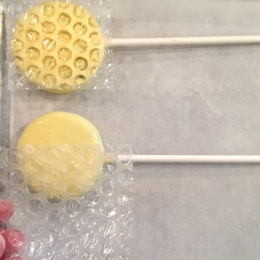
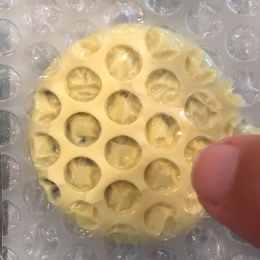
There is something so fun about using bees and honeycomb as a dessert decoration. I originally wanted to use a chocolate transfer with a honeycomb design on these- but I couldn’t find the transfers available in the states (except for in bulk- which I definitely did NOT need!). I decided to experiment with bubble wrap instead and they turned out SO cute. Goodness- I love these. When I gave them away to friends they all asked how I made the honeycomb. I thought it would be obvious that I’d used bubble wrap, but all they could see was the honeycomb until I explained.

These are maybe one of the easiest Oreo pops I’ve done. You really need to try them!

Here’s how we made them: (printable recipe here)

(If you have never made Oreo Pops before, check out our tutorial here.)

INGREDIENTS: (makes about 24 pops)

  • One package of Double Stuff Oreos
  • 2 bags of Wilton’s candy melts in yellow
  • 1/4 cup of Wilton’s candy melts in white
  • Candy bees (I got mine here)

DIRECTIONS:

  • Gently twist apart all Oreos.
  • Melt white candy melts in the microwave in 30 second increments, stirring between until melted and smooth.
  • Dip end of a lollipop stick into the white chocolate, spread a little on the top of the white Oreo filling and then press the stick flat into the center of the filling.
  • Place top of Oreo on, and set on a cookie sheet. When all Oreos have sticks inserted, pop these in the freezer for 15-20 minutes (until they are nice and firmly set).
  • While these chill, cut bubble wrap (try to find a small bubble variety- I used 1/8″ bubbles) into squares just big enough to cover the top of an Oreo.
  • Melt yellow candy melts in the microwave in 30 second increments, stirring between until melted and smooth.
  • Spoon yellow melts over the top of each chilled Oreo pop, making sure all sides are completely covered. Tap stick against side of bowl to remove excess candy melts and slide bottom against edge of bowl to take excess off.
  • Set coated pop on a sheet of parchment paper and gently press bubble wrap on top.

  • Repeat this with all Oreo pops and allow candy melts to harden completely (refrigerate to speed process up)
  • Gently peel bubble wrap off top of Oreo (I thought it might pop and leave plastic behind, but it came off perfectly!)
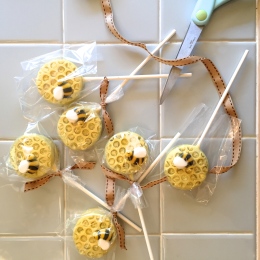
  • Use remaining candy melts to “glue” a bee on top. Simply use a toothpick or small knife to wipe a bit of melted yellow candy on the back of a candy bee, and set it on top. Allow this to harden. 

  • Place each Oreo into a little cello bag, and tie with ribbon for a cute summer treat that will keep for weeks in a cool place! ENJOY!!!!

My thoughts: SO FUN!!!!  Oreo pops are always fun- no matter what they are decorated with- but these Oreo pops are just especially cute! Goodness. I love them! Perfect for the end of a picnic or for a honeybee themed party! I hope you get a chance to try these out! Enjoy! ~r

Like cute bugs? We have a few recipes here for your summer insect enjoyment 🙂 (click on a photo to see the recipe)

Smoke Bomb Oreo Pops!

Posted on

These adorable smoke bomb Oreos will be the hit of your July 4th parties!

It’s hard to believe that July is just around the corner– but it is! I love summer, and making fun patriotic treats always reminds me of pool parties and days at the beach on Lake Michigan 🙂 I made smoke-bomb brownies last year, and they were such a hit that I decided to turn them into Oreo pops this year!

Cute, yummy and SO easy to make ahead and have ready for all your summer celebrations!

Here’s how we made them: (printable recipe here)

INGREDIENTS: (makes about 30 pops)

  • One package of Double Stuff Oreos
  • 2 bags of Wilton’s candy melts in red
  • 1/4 cup of Wilton’s candy melts in white
  • Twizzlers Pull-n-Peel licorice in red/white/blue (or licorice strings of another variety)
  • Large star sprinkles
  • Tiny star spinkles

DIRECTIONS:

  • Gently twist apart all Oreos.
  • Melt white candy melts in the microwave in 30 second increments, stirring between until melted and smooth.
  • Dip end of a lollipop stick into the white chocolate, spread a little on the top of the white Oreo filling and then press the stick flat into the center of the filling.
  • Place top of Oreo on, and set on a cookie sheet. When all Oreos have sticks inserted, pop these in the freezer for 15-20 minutes (until they are nice and firmly set).
  • While these chill, cut licorice strings into about 30 (1 inch) segments.
  • Melt red candy melts in the microwave in 30 second increments, stirring between until melted and smooth.
  • Dip the end of a licorice string into the red melts and then set flat against a large star sprinkle and allow this to harden- this will basically “glue” the star onto the end of the licorice. 
  • Gently dip chilled Oreo in red candy melts, using a spoon to cover all sides. Tap stick against side of bowl to drain excess. Set on parchment paper.
  • While candy melts are still soft, set end of licorice into the top of the Oreo and sprinkle with tiny stars.
  • Allow everything to harden up, and then slide each pop into a small cello bag and tie with ribbon (alternatively, store in an airtight container with parchment paper as layers between).
  • Enjoy!

My thoughts: These are easy little treats to make- and they have OREOS inside- so they are delicious too! (If you have never made Oreo Pops before, check out our tutorial here.) ENJOY!

Other fun and very patriotic desserts for your July: (click on photo to see recipe)


Spring Flower Oreo Pops!

Posted on

Make a bouquet of Oreo flowers for mom this Mother’s Day!

This is the third Oreo Pop recipe I’ve used these cute little sunflower seeds in this spring- and it might be my favorite! The fun bright colors just make you smile. Tie them up in little cello bags with pretty ribbon and they make the perfect Mother’s Day treat next weekend!

You’re smiling aren’t you? Just guessing… 🙂 I absolutely LOVE these- and the color combinations are only limited to the colors you can find in the sunflower seeds. Mine are a combination of Trader Joe’s and JoAnn’s Fabric ones. You can get them online- or maybe even at your grocery! Different companies make different colors. The JoAnn ones gave me those pretty teal blue and shiny purple ones. I just used little pearl sprinkles for the centers.

Here’s how we made these fun little pops:

(If you have never made Oreo Pops before, check out our tutorial here.)

INGREDIENTS: (makes 24-30 Oreo pops)

  • One box of Double Stuff Oreos
  • 1/4 cup of Wilton’s Candy Melts in white.
  • Wilton’s Candy Melts in a variety of colors (you’ll need at least 2 bags of them)
  • Chocolate-covered sunflower seeds
  • Edible pearl sprinkles in a variety of colors

DIRECTIONS:

  • Gently twist apart all Oreos.
  • Melt white candy melts in the microwave in 30 second increments, stirring between until melted and smooth.
  • Dip end of a lollipop stick into the white chocolate, spread a little on the top of the white Oreo filling and then press the stick flat into the center of the filling.
  • Place top of Oreo on, and set on a cookie sheet. When all Oreos have sticks inserted, pop these in the freezer for 15-20 minutes (until they are nice and firmly set).
  • Melt one color of Candy Melts in the microwave in 30 second increments, stirring between until melted and smooth.
  • Gently dip Oreo in Candy Melts, using a spoon to cover all sides. Tap stick against side of bowl to drain excess. Set on parchment paper.
  • While Candy Melts are still soft, set a pearl sprinkle at the center and then gently place sunflower seeds around the pearl in the shape of a flower (as pictured). Allow Candy Melts to harden completely.
  • Repeat with other colors of Candy Melts.
  • Store in a sealed container for 2-3 weeks. You can also tie them individually in small cello bags and store for the same timeframe. (These are a perfect treat to mail to mom or grandma!!!!)
  • Enjoy!

My thoughts: I will never pick a bouquet of flowers without thinking of my mom 🙂 She never had a summer day where there wasn’t a huge bouquet of fresh-cut flowers from her garden sitting in the center of the kitchen table. This is her third Mother’s Day in heaven, but I know these would have made her smile if she was here.

Happy Mother’s Day, Mom. I love you, and miss you!

We have lots of fun recipe ideas for Mother’s Day! Click a photo to see the recipe:

Looking for that perfect gift for moms and grandmas? Get them my cookbook- specially designed to use with kids and grandkids, teaching them both kitchen skills and about God’s love for them! Fun!!! Click on the following link to find out more about it: Life Is Sweet: 12 Baking Devotions for Kids.

HAPPY MOTHER’S DAY!!!


Maracas Oreo Pops!

Posted on

Celebrate Cinco de Mayo with these adorable maracas made with Oreos and candy sunflower seeds!

I love Mexico! I’ve been there on vacation, and I’ve been there many times to work alongside the people of a little town called Siete Ejidos in Sinaloa. I love the food, the beautiful people, the music, and the bright, fun colors that are everywhere! Seriously- why is it unacceptable to paint a house bright blue and orange in the States? (or at least in my neighborhood…)

These were such fun cookies to make because you can just go crazy with color and make any design you want! Use sprinkles or candy…I used chocolate covered sunflower seeds on mine, and I love how they turned out! They have that “bead” look you often see on maracas and other art in Mexico.

Here’s how we made these (printable recipe here)

(If you have never made Oreo Pops before, check out our tutorial here.)

INGREDIENTS: (makes 24-30 Oreo pops)

  • One box of Double Stuff Oreos
  • 1/4 cup of Wilton’s Candy Melts in white.
  • Wilton’s Candy Melts in a variety of colors (you’ll need at least 3 bags of them)
  • One box of Dots Candy

DIRECTIONS:

  • Gently twist apart all Oreos.
  • Melt white candy melts in the microwave in 30 second increments, stirring between until melted and smooth.
  • Press a lollipop stick through a Dots candy until about 1 inch of the stick is out of the other side (see photo below).
  • Dip end of a lollipop stick into the white chocolate, spread a little on the top of the white Oreo filling and then press the stick flat into the center of the filling.
  • Place top of Oreo on, and set on a cookie sheet. When all Oreos have sticks inserted, pop these in the freezer for 15-20 minutes (until they are nice and firmly set).

  • Melt one color of Candy Melts in the microwave in 30 second increments, stirring between until melted and smooth.
  • Gently spoon color over bottom 1/4 of Oreo (see photos below).  I gently turned the stick so I could spoon color on the back too- then tap stick against side of bowl to drain excess. Set on parchment paper and allow this to harden up.
  • Melt second color of Candy Melts as above. Spoon color over the rest of the Oreo, tap stick against bowl to drain away excess, place on parchment paper, and gently place sunflower seeds in flower pattern in the center (or add sprinkles…or drizzle chocolate…). Allow this to harden.
  • Melt third color of Candy Melts and spoon over top 1/4. Tap stick against bowl to drain excess and set on parchment paper to harden.
  • Allow candy melts to harden completely, and then pipe line/dots on in any color (I used black).
  • ENJOY!

My thoughts: These are a delicious little way to celebrate Cinco de Mayo! Once they are hardened up, you can tie them into little individual cello bags and they will keep for weeks. I love make-ahead treats! 

Are you a recent arrival to the incredible fun of Oreo Pops?? They are one of our favorite things to make here on Easybaked- and we have them for every possible occasion! Here are a few to try: (click on photo to see recipe)

Or are you looking for great recipes for Cinco de Mayo?? We have those too! We love to celebrate this holiday here!!

Baby Chick Oreo Pops

Posted on

These adorable baby chicks are made with Oreos- a perfect treat for Easter baskets!

Have you seen the chocolate covered sunflower seeds yet??? Oh my goodness. I saw them for the 1st time at Trader Joe’s, and I’ve been on the hunt for new colors ever since! My latest find was at JoAnn fabrics- right at the checkout!

I’ve been experimenting with them on a variety of Oreo pops (coming soon!) and these were a part of those experiments!

Aren’t they cute???

Here is how we made them: (printable recipe here)

(If you have never made Oreo Pops before, refer to our tutorial here.)

INGREDIENTS: (makes 24-30 Oreo Pops)

  • 1 package of Double Stuff Oreo cookies
  • 1/4 cup of Wilton’s candy melts in white
  • 2 bags of Wilton’s candy melts in yellow
  • 1/4 cup of Wilton’s candy melts in dark chocolate
  • Chocolate-covered sunflower seeds in yellow and orange

DIRECTIONS:

(If you want to simplify these- don’t add a stick. Just dip the Oreos using a fork, and skip the following steps for inserting a stick!)

  • Gently twist apart all Oreos.
  • Melt white candy melts in the microwave in 30 second increments, stirring between until melted and smooth.
  • Dip one end of a lollipop stick into the white chocolate, spread a little on the top of the white Oreo filling and then press the stick flat into the center of the filling.
  • Place top of Oreo on, and set on a cookie sheet. When all Oreos have sticks inserted, pop these in the freezer for 15-20 minutes (until they are nice and firmly set).
  • Melt yellow candy melts in the microwave in 30 second increments, stirring between until melted and smooth.
  • Have parchment paper spread on your countertop and have your sunflower seeds ready. 
  • Dip an Oreo into the yellow melts, spooning melts over top and sides. Tap on edge of bowl to get rid of excess and slide bottom of Oreo along edge of bowl to remove drips.
  • Place on parchment paper and while melts are still soft, gently place seeds in place (use photos as a guide). I used a clean tweezers to place these and adjust them. You can add a few flower sprinkles too, if you want! Allow these to harden.
  • Melt chocolate candy melts in the microwave in 30 second increments, stirring between until melted and smooth.
  • Use a toothpick, wooden skewer, or food-grade paintbrush to add little eyes.

  • Allow these to harden completely. 
  • Wrap these up in little cello bags tied with Easter ribbon for a fun treat! These will keep (sealed up) for several weeks.

My thoughts: These are as fun to make as they are cute! Placing all those little seeds can take some time- and it might take you a couple tries to get the hang of it. I was pretty speedy by the end! 🙂 Make these with our fun Flower Oreo pops– or even just dip some in fun pastel colors and add Easter sprinkles. You’ll have loads of fun treats to share! Hope you get a chance to try these! Enjoy! ~r

Other recipes to try at Easter (click on a photo to see the recipe):

Love Bug Oreo Pops!

love-bug-oreo-pops

Show a little love this Valentine’s Day with these Oreo Love Bugs!

Easy to make ahead and wrap up as gifts!

I just have to keep making Oreo Pops… there are so many possibilities and all of them are yummy and cute! I’ve pretty much failed at cake pops, but these? My favorite!

I made Lady Bugs Oreo Pops a couple of years ago, and when I was visiting Florida last month I was subjected to everyone’s horror stories about some awful little bug called a Love Bug. I guess people hate them down south, but when I heard “Love Bug” I immediately pictured these. Sweet little pink bugs with hearts and sprinkles!

love-bug-oreo-pops

Aren’t they fun? Cuteness overload….! These really aren’t hard to put together- especially if you’ve made Oreo Pops in the past. (If you haven’t ever made them, click here for a tutorial).

Here’s how we created these little love bugs! (printable recipe here)

INGREDIENTS: (makes 25-30 Oreo Pops)

  • 1 package of Oreo Double Stuff cookies
  • 1/2 bag of Wilton’s candy melts in white
  • 1 bag of Wilton’s candy melts in bright pink
  • 1/2 bag of Wilton’s candy melts in black
  • Heart-shaped sprinkles (I used these), pink/red jimmies or sugars
  • Candy eyes

DIRECTIONS: 

(If you want to simplify these- don’t add a stick. Just dip the Oreos using a fork, and skip the following steps for inserting a stick!)

  • Gently twist apart all Oreos.
  • Melt white candy melts in the microwave in 30 second increments, stirring between until melted and smooth.
  • Dip one end of a lollipop stick into the white chocolate, spread a little on the top of the white Oreo filling and then press the stick flat into the center of the filling.
  • Place top of Oreo on, and set on a cookie sheet. When all Oreos have sticks inserted, pop these in the freezer for 15-20 minutes (until they are nice and firmly set).
  • Melt pink candy melts in the microwave in 30 second increments, stirring between until melted and smooth.
  • Have parchment paper spread on your countertop and have your sprinkles ready. 
  • Dip an Oreo into the pink melts, spooning melts over top and sides. Tap on edge of bowl to get rid of excess and slide bottom of Oreo along edge of bowl to remove drips.
  • Place on parchment paper and while melts are still soft, sprinkle with hearts and sugar or jimmies, leaving these OFF the top 1/3 of the cookie. Allow these to harden.

love-bug-oreo-pops

  • Melt black candy melts in the microwave in 30 second increments, stirring between until melted and smooth.
  • Spoon black melts over the top 1/4 of the cookie and then tap to remove excess and slide bottom across bowl edge to remove drips.
  • Set on parchment paper and place two eyes on top.
  • Once all heads and faces are done, spoon remaining black melts into a small zip-top bag. Clip a corner, and pipe a center line down the middle of the cookie as pictured. 
  • Allow Oreo pops to harden. Bag them up individually or store them in an air-tight container. 
  • Enjoy!!

love-bug-oreo-pops

My thoughts: One of the main reasons I love Oreo Pops is that you can make them ahead for events. I’m baking quite a few things for an orientation next week and these are DONE. Wrapped in cute bags, tied with cute ribbons and ready to go. Cross one thing off my list! I also made some of my personal favorite Valentine’s treats: Frog Prince Oreos. If you need hearts for the 14th, you have these Love Bugs. If you’ve kissed one too many Frogs this year… well. These other Oreos are for you:)

Frog Oreos!!

Happy Valentine’s Day !!!!

love-bug-oreo-pops

Other Valentine treats here on Easybaked (click on a photo to see the recipe):

Raspberry Truffle TartRaspberry Confetti KissesChocolate covered strawberry Cake roll!!Red velvet cookies with cream cheese icing!!

A New Year’s Collection of Top Recipes on Easybaked!!

new-years-collection

Happy New Year, friends! One of my favorite parts of marking the end of one year and the beginning of the next is looking back at all the things that made the previous year wonderful! One of the really fun things to look at is my statistics for this blog. A LOT of you visited us here this year!  Thank you!!!  I am always fascinated by which recipes really took off and became HUGE hits- and I’m always a tiny bit disappointed by the ones that I thought were AMAZING, that didn’t really catch anyone’s attention.

I have lots of fun recipes lined up to share with you in January, but this week- as we welcome 2017- here are the top picks from 2016.

Just click on a photo to see the recipe- and enjoy!!! ~r

new-years-collection2

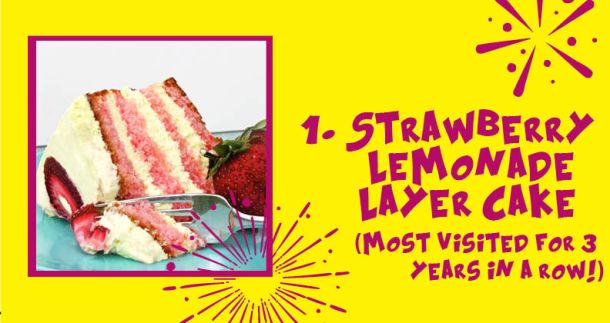
Strawberry Lemonade layer cake

Viewed 203,655 times in one month alone! The cupcake version of these is really popular too.

Classic Cheesecake with Sour Cream topping

Seriously, that cheesecake is maybe the best recipe on this blog. You have GOT to try it!!!! 🙂

Oreo pops

When this was 1st posted, there were NO other Oreo Pops on the internet- so I like to think that the Oreo Pop craze started here! We certainly have had fun creating all sorts of them for every holiday!

Bailey's Cupcakes

This recipe was from a failed audition for The Great American Baking Show, and a new friend!

Turtle Bundt

This is the most recent big hit on Easybaked- and it is really easy to make!

So, those were the top 5 in all-time views this year… but what were my favorites from 2016? These three!

new-years-collection8

new-years-collection9

This is the star of 2016. It is SO yummy and got rave reviews every time I made it. A massive layer of cookie dough in the middle of a cake? Does it get any better than that???

Marshmallow Stuffed Oreos

2016 was also my year to turn those healthy little Oreo Thins into amazing stuffed Oreos! These marshmallow ones… oh my! We also stuffed Oreos with Key Lime Pie, Pumpkin Pie and Cookie Butter!

Cookie Monster Oreos!

These win my personal “cutest” recipe award for 2016! I loved making them and making cute little stickers to seal the bags I gifted them in too! So fun!

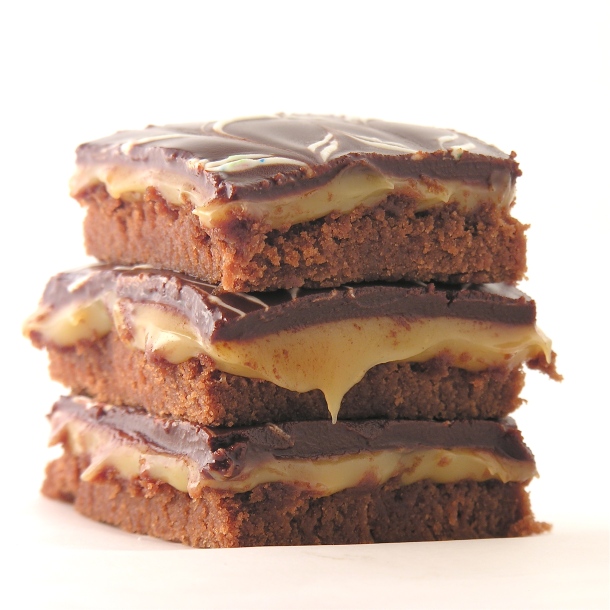
I’ve been asked many times what my all-time favorite recipe on Easybaked is. I’ve got SO many favorites- but if I had to pick one, it would be my Caramel Fudge Brownies. I love them because they are my mom’s famous mint brownies with my favorite caramel added in place of the mint- and they are just the BEST chocolate fix ever.

Caramel Fudge Brownies!!

I hope you have enjoyed this round-up of recipes!

HAPPY NEW YEAR!!!!!!


Oreo Ornament Pops!

Oreo Ornament Pops

Celebrate the Christmas season with these fun ornament pops.

Made with Oreos, mini peanut butter cups and sprinkles, they are sure to make everyone in your family smile!

Goodness. I love cute Christmas cookies. These were SO fun to make, and decorating them is a blast. I pulled out all of those Christmas sprinkles and just went crazy. I highly recommend these for a fun project with your kids!!

The dilemma for making an edible ornament is always that little cap. I solved the problem by painting mini peanut butter cups with a little bit of edible gold dusting powder (the same stuff I used on my shortbread cookies last week). I love how they turned out! Happy shiny tops for these!

Oreo Ornament Pops!

Here is how we made them: (printable recipe here)

INGREDIENTS: (makes about 24-28 pops)

  • One package of Oreo Double Stuff cookies.
  • 2 bags of Wilton’s Candy Melts. As you can see, I used pink and aqua, plus I had a little green and red extra from other projects. You can use as many colors as you want- but you will need at least 2 full bags to cover the Oreos. 
  • One bag (8 oz) of Reese Peanut Butter Cup Minis- in white chocolate
  • Edible gold dusting powder (I used this brand)
  • Fun Christmas sprinkles and jimmies

DIRECTIONS:

Make gold “caps” for ornaments first.

  • Spoon a little of the gold powder into a small bowl or plate, and add a bit of water until it is the consistency of a thick paint. 
  • Use a food-grade brush to paint the gold on the bottom and sides of 24-28 peanut butter cups. Paint them all and then go back and give them a second coat to smooth out the parts that didn’t stick the 1st time.
  • Set aside to dry.

Prepare Oreo Pops (there is a tutorial for these, if you have never done them, here)

  • Twist apart all of your Oreos.
  • Melt a small amount of Candy Melts (<1/4 cup) in the microwave in 3o second increments, stirring between until smooth.
  • Dip the end of a lollipop stick into the melts, and press into white filling of Oreo. Place other half of cookie back on top and press together.
  • Place Oreo and stick on a cookie sheet. Repeat this process with remaining Oreos, and then freeze all Oreos until firm (10-15 minutes).
  • Melt remaining Candy Melts using method from above.
  • Once Oreos are chilled, hold with stick and dip into Candy Melts until completely coated.
  • Tap on side of bowl to get excess off, and drag across lip of bowl to scrape excess off back of cookie.

Ornament OreosOreo Ornaments

  • Set on parchment paper  and immediately set a gold “cap” on the top edge to harden there as the candy melts solidify.
  • If you want to add sprinkles, do so before the Candy Melts get hard (stripes in other colors can be added later)

Oreo Ornamentoreo-ornament-pop

  • Allow Oreo Pop to harden completely
  • Decorate with other colors of Candy Melts, as desired. To make the stripes, I placed melted candy in a small zip top bag, clipped a corner and piped lines onto the Oreos. 
  • Once everything has completely hardened, place into individual cello bags, or into an air-tight bag or container. These will stay good for weeks when sealed up. 
  • Enjoy!

oreo-ornament-pops

My thoughts: Well, by now you know how much I love my Oreo Pops! These were fun to make and a little peanut butter on top of that Oreo? Yes, please! 🙂 These make great little gifts and stocking stuffers! Enjoy! ~r

oreo-ornament-pops

Don’t stop with just ornaments! We have two other fun Christmas Oreo Pops! (click on the photo to see the recipe)

Reindeer Oreo Pops!!!Snowman Oreo Pops

Spiderweb Oreo Pops

Posted on

spiderweb-oreo-pops

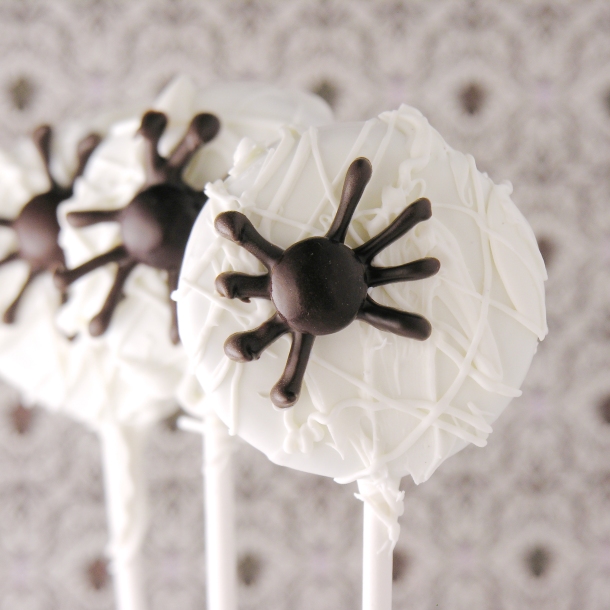
These web-wrapped Oreos with M&M spiders are not only cute fall treats- but delicious ones!

It’s that time of year again. That time when spiders think it’s too cold outside, and find little cracks around my windows and doors to creep in through. There’s nothing worse than sitting here, innocently blogging about a dessert recipe, only to be shocked by a giant black spider racing out from behind the couch. Seriously- they move so fast!

In any case, I make a lot of spider-themed treats. Maybe because candy spiders are so cute- and they don’t move. These are especially cute little guys- and they are perfect on top of these web-coated Oreos! Plus, as is true with all Oreo pops, you can make them weeks ahead and have them all wrapped in pretty bags and ready for a party. I love recipes like that.

spiderweb-oreo-pops

Here is how we made them: (printable recipe available here)

INGREDIENTS: (makes about 24 pops)

  • One box of Double Stuff Oreos
  • 24 lollipop sticks
  • 2 bags of Wilton’s Candy Melts in white
  • 1/4 cup of Wilton’s candy melts in dark chocolate
  • 36-ish dark brown M&Ms (no worries–you can eat the rest of the bag while you work 🙂 )

DIRECTIONS:

  • Make your spiders 1st.
  • Melt dark chocolate melts in microwave in 30 second increments, stirring in between until melted and smooth. Spoon into a small zip-top bag and clip a tiny corner off (or use a decorator tip, if you have one). 
  • Pipe spider legs on parchment paper (see photo) and place an M&M in the center. I make more than 24, because the legs sometimes break when you peel them off.

The photos below are from my recipe for Spider Eggs, and some of them are piped on Lindt truffles. You can see how I piped them on parchment paper though.

Spider eggsSpider Eggs

  • Let spiders harden while you assemble your Oreos.
  • Twist apart all of your Oreos.
  • Melt a small amount of candy melts (<1/4 cup) in the microwave in 3o second increments, stirring between until smooth.
  • Dip the end of a lollipop stick into the melts, and press into white filling of Oreo. Place other half of cookie back on top and press together.
  • Place Oreo and stick on a cookie sheet. Repeat this process with remaining Oreos, and then freeze all Oreos until firm (10-15 minutes).
  • Melt one and a half bags of white Candy Melts using method from above.
  • Once Oreos are chilled, hold with stick and dip into Candy Melts until completely coated.
  • Tap on side of bowl to get excess off, and drag across lip of bowl to scrape excess off back of cookie.
  • Set on parchment paper to harden.
  • Melt remaining white Candy Melts and place in a zip-top bag. Clip the corner off and drizzle over each Oreo to make a messy web-like pattern.
  • Immediately place a “spider” on this melted drizzle and allow everything to harden up for at least a couple of hours. 
  • Once hardened, store in an air-tight container or tie up in little cello bags. 
  • Enjoy!!!

spiderweb-oreo-pops

My thoughts: *Smile*!!! These are fun little treats- and not too difficult to make. I always love my Oreo pops. One of these days I should put all of them in one post since I’m getting such a large collection of them! I hope you get a chance to try these fun little treats! And I hope they are the only spiders you find in your home this fall!!!  ~r

spiderweb-oreo-pops

Other spider-y treats found on Easybaked: (click on a photo to see the recipe)

Spiderweb CookiesSpider Cupcakes!Spider Eggs Cupcakesspiderweb brownie