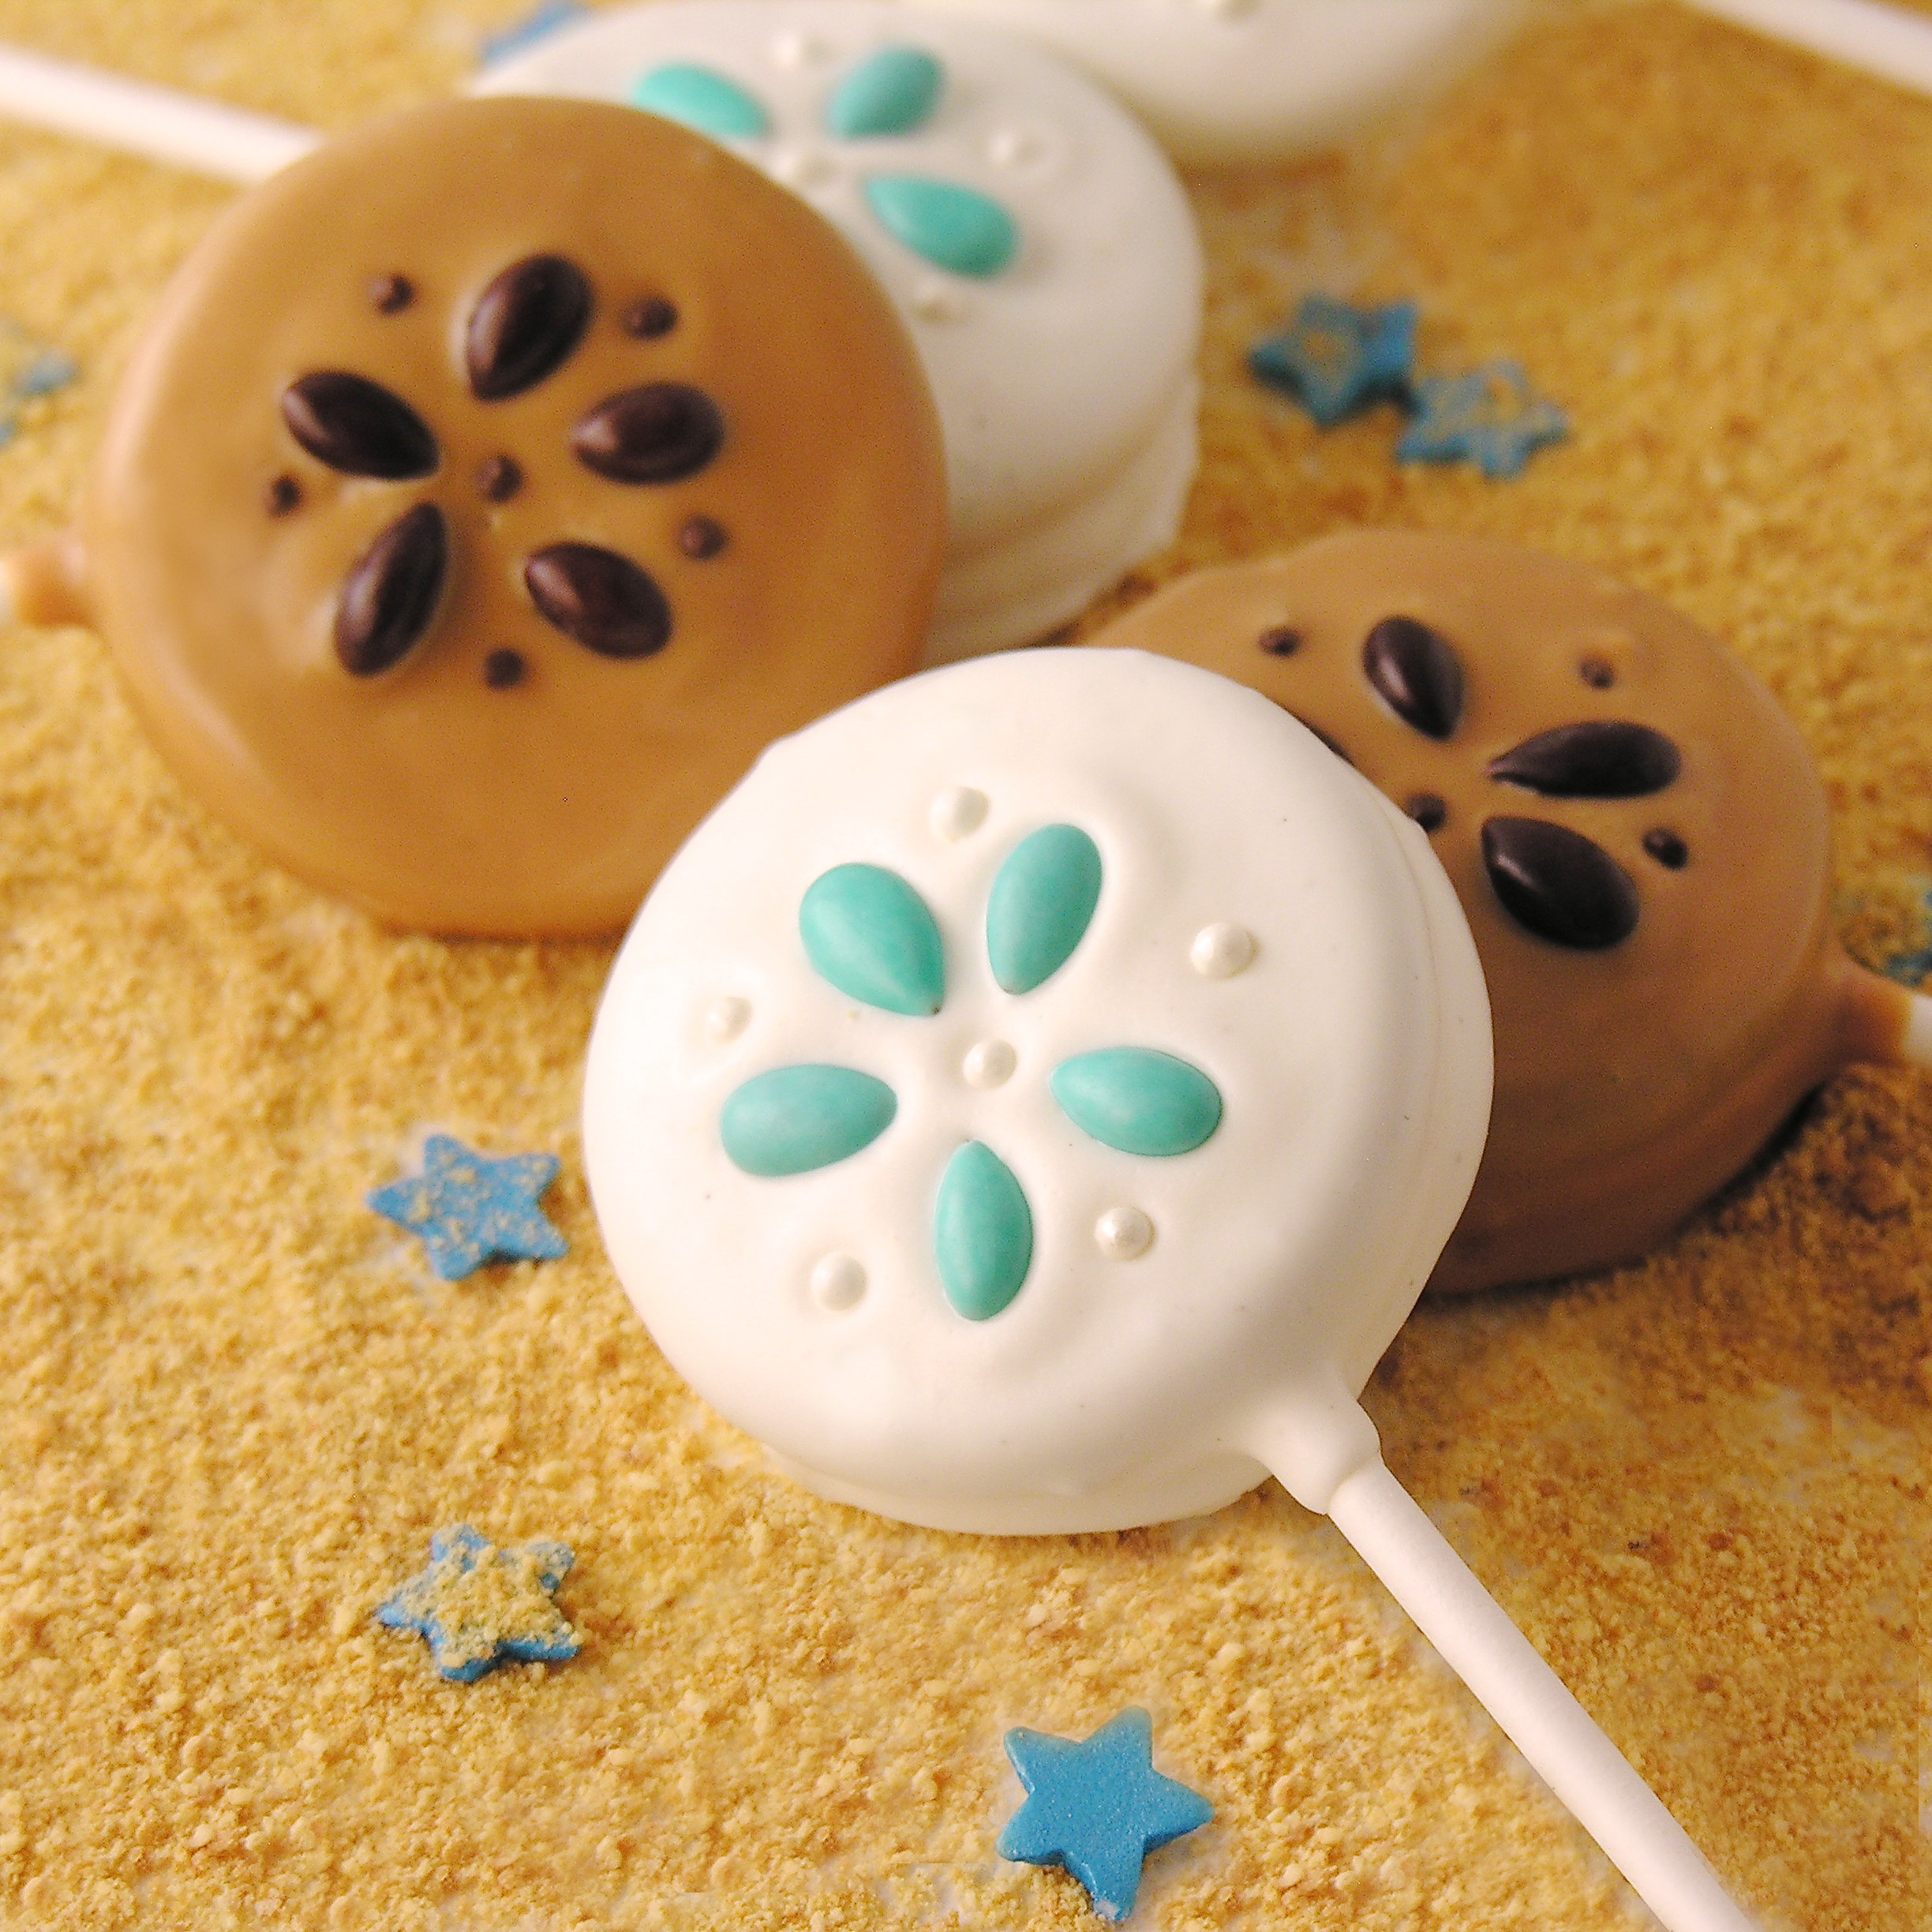
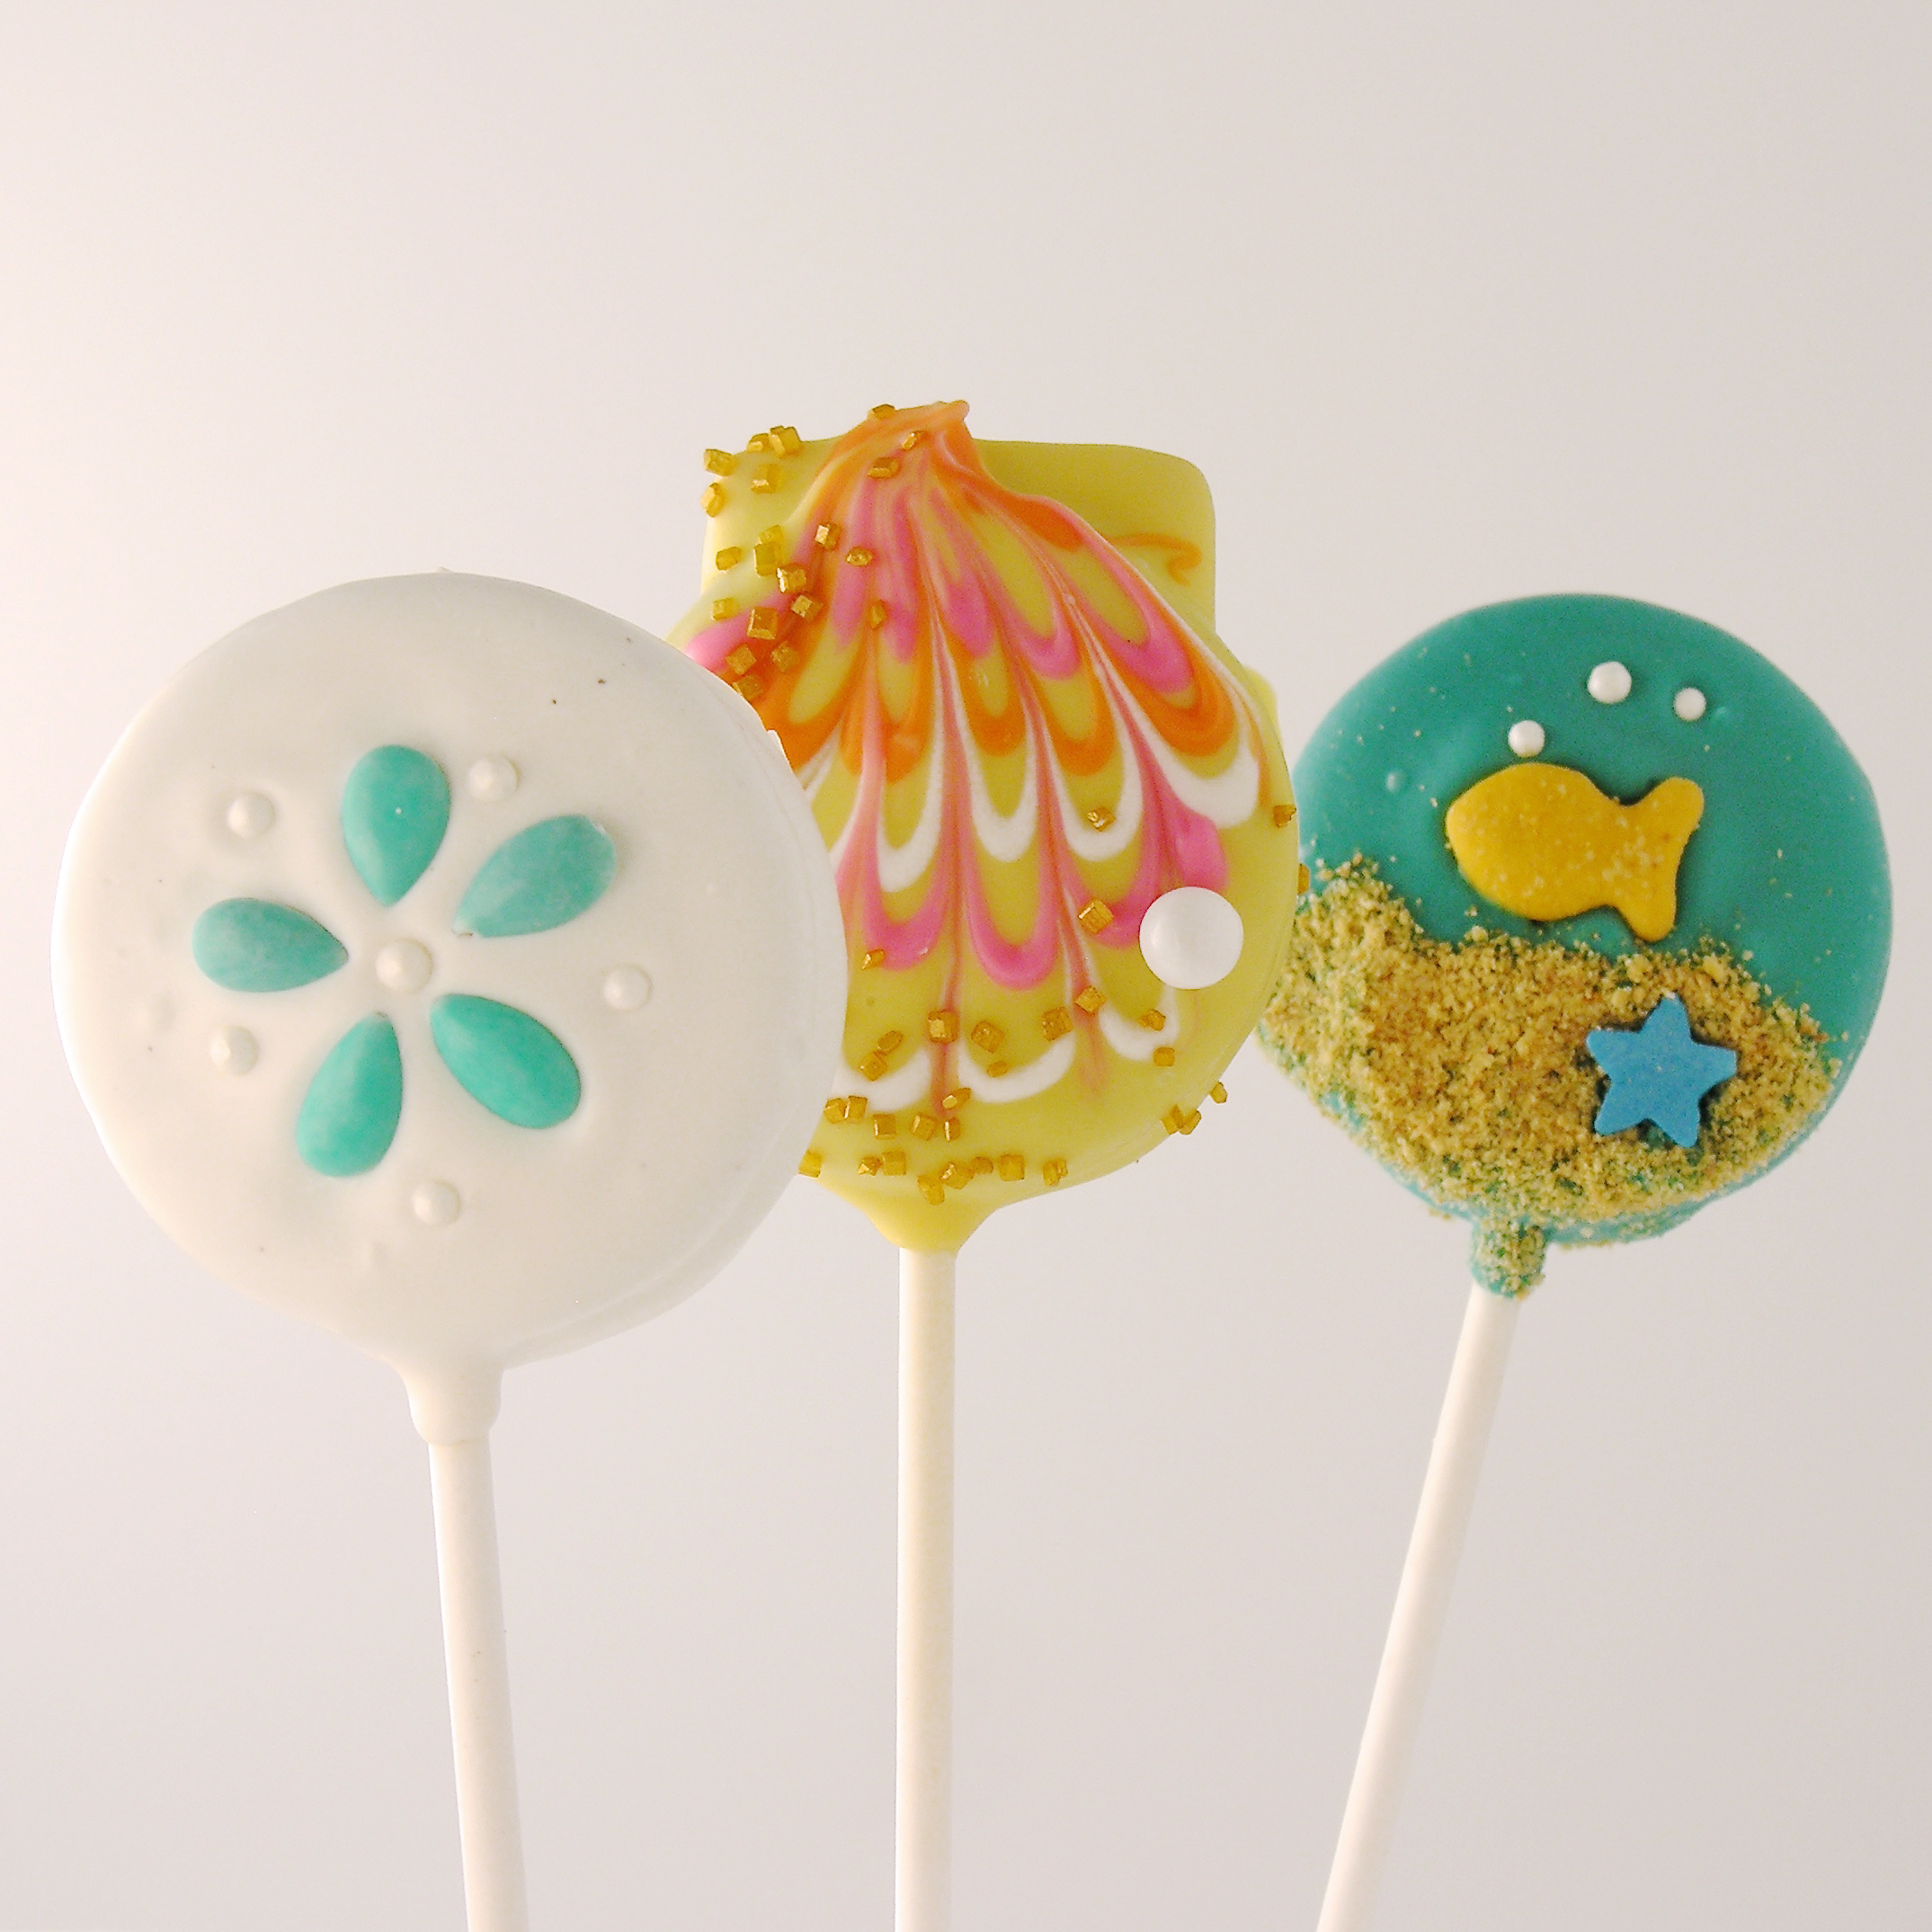
Turn your Oreos into a celebration at the beach! Sand Dollars, Sea Scallops and cute little fish. So much delicious fun!

There’s just something about the beach that makes my heart happy! Have you ever been to Sanibel Island in Florida? It’s right by Fort Meyers. Growing up, our family spent nearly every Thanksgiving at a little condo on the beach there. They have some of the best seashell hunting in North America. As a little girl, I had a shell identification book and a big pail, and I spent hours and hours combing the beach for shells. Sand dollars were one of my favorites!
This past spring, I used chocolate covered sunflower seeds in several projects, and thought about how much they remind me of the little centers of sand dollars. So I had to try! I also made some sea scallops using…wait for it… Wheat Thin crackers to make those little shell points (and they are a super yummy salty-sweet combo!) 🙂
Here is how we made these little Oreo pops:
Fish Oreo Pops are from an earlier recipe here on Easybaked. You can find them by clicking here.
These were featured in our cookbook for kids, Life Is Sweet: 12 Baking Devotions for Kids.
Sand Dollars:
Ingredients: (makes about 24 pops)
- One package of Double Stuff Oreos
- 2 (12 oz.) bags of Wiltons Candy Melts in white
- Chocolate covered sunflower seeds (I used blue)
- 24 Lollipop sticks
- Small pearl decorating sprinkles
- Small treat bags and ribbon, if you want to package them up to give away.
Directions: (Need a little visual help? Click here.)
- Carefully twist apart all Oreo cookies. Do this slowly and gently- and expect that some will break.
- Melt about 1/4 cup white candy melts using a microwave-safe bowl in the microwave in 30 second increments, stirring between until completely melted and smooth.
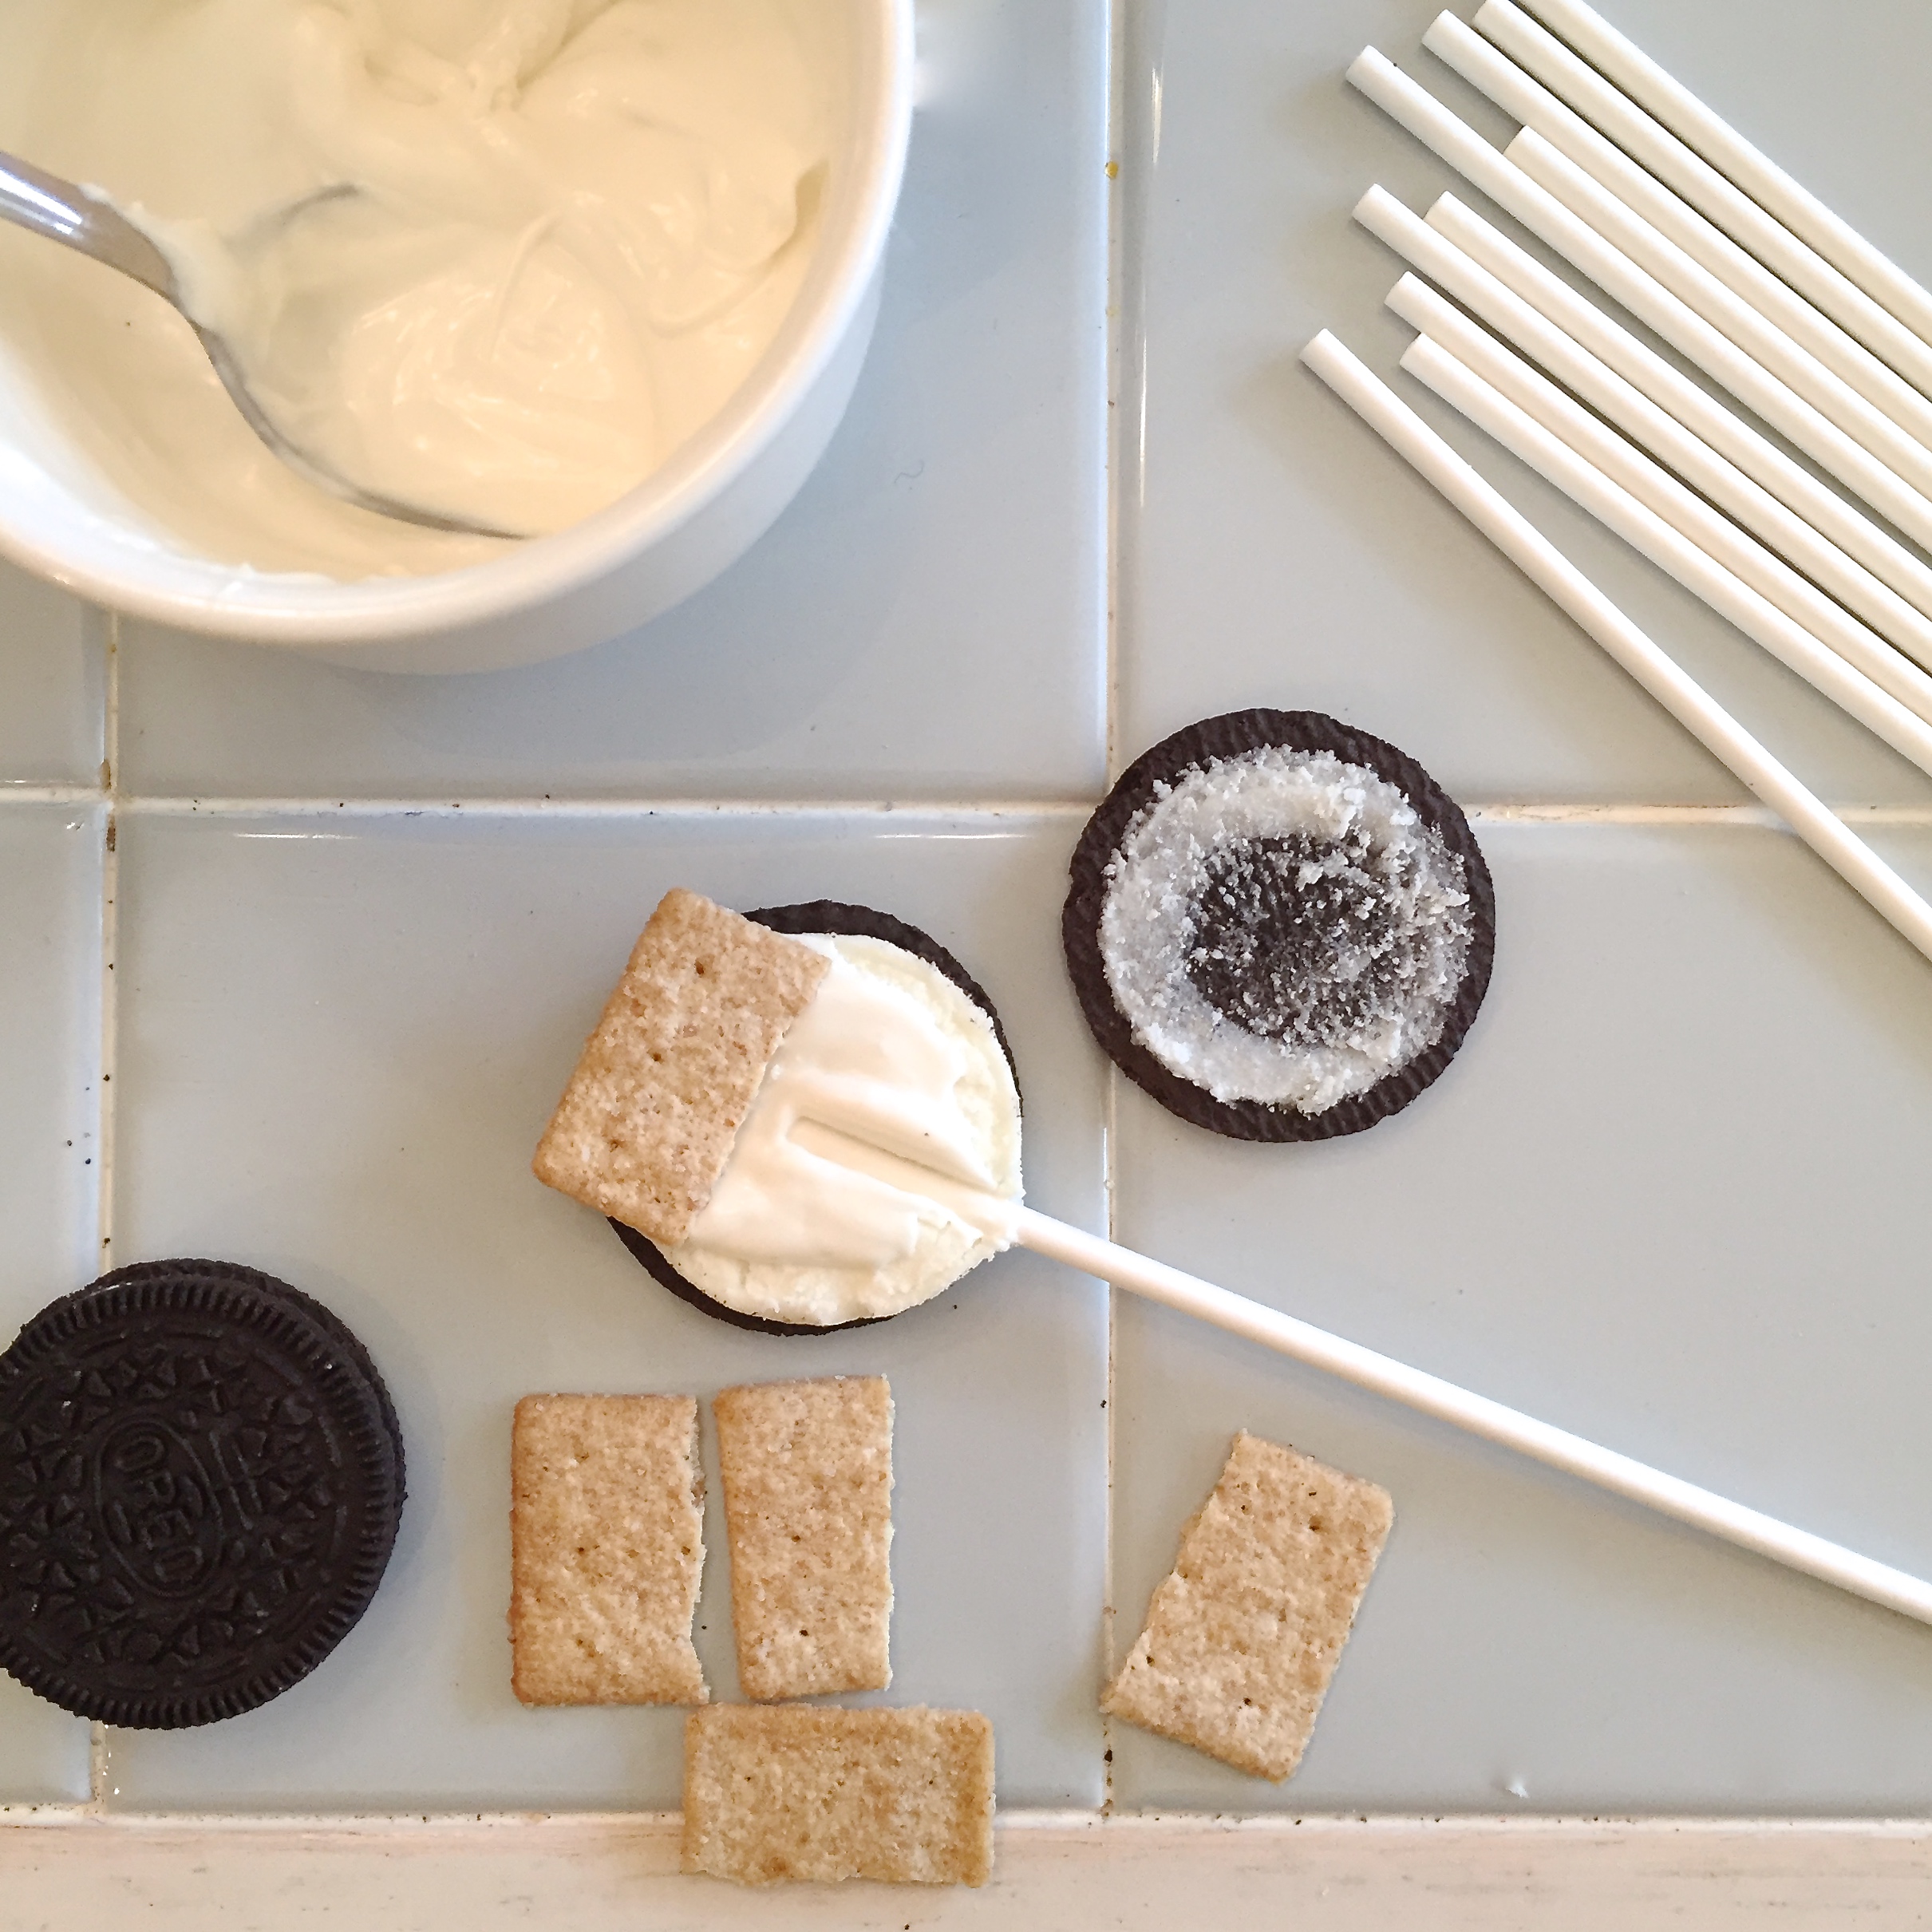
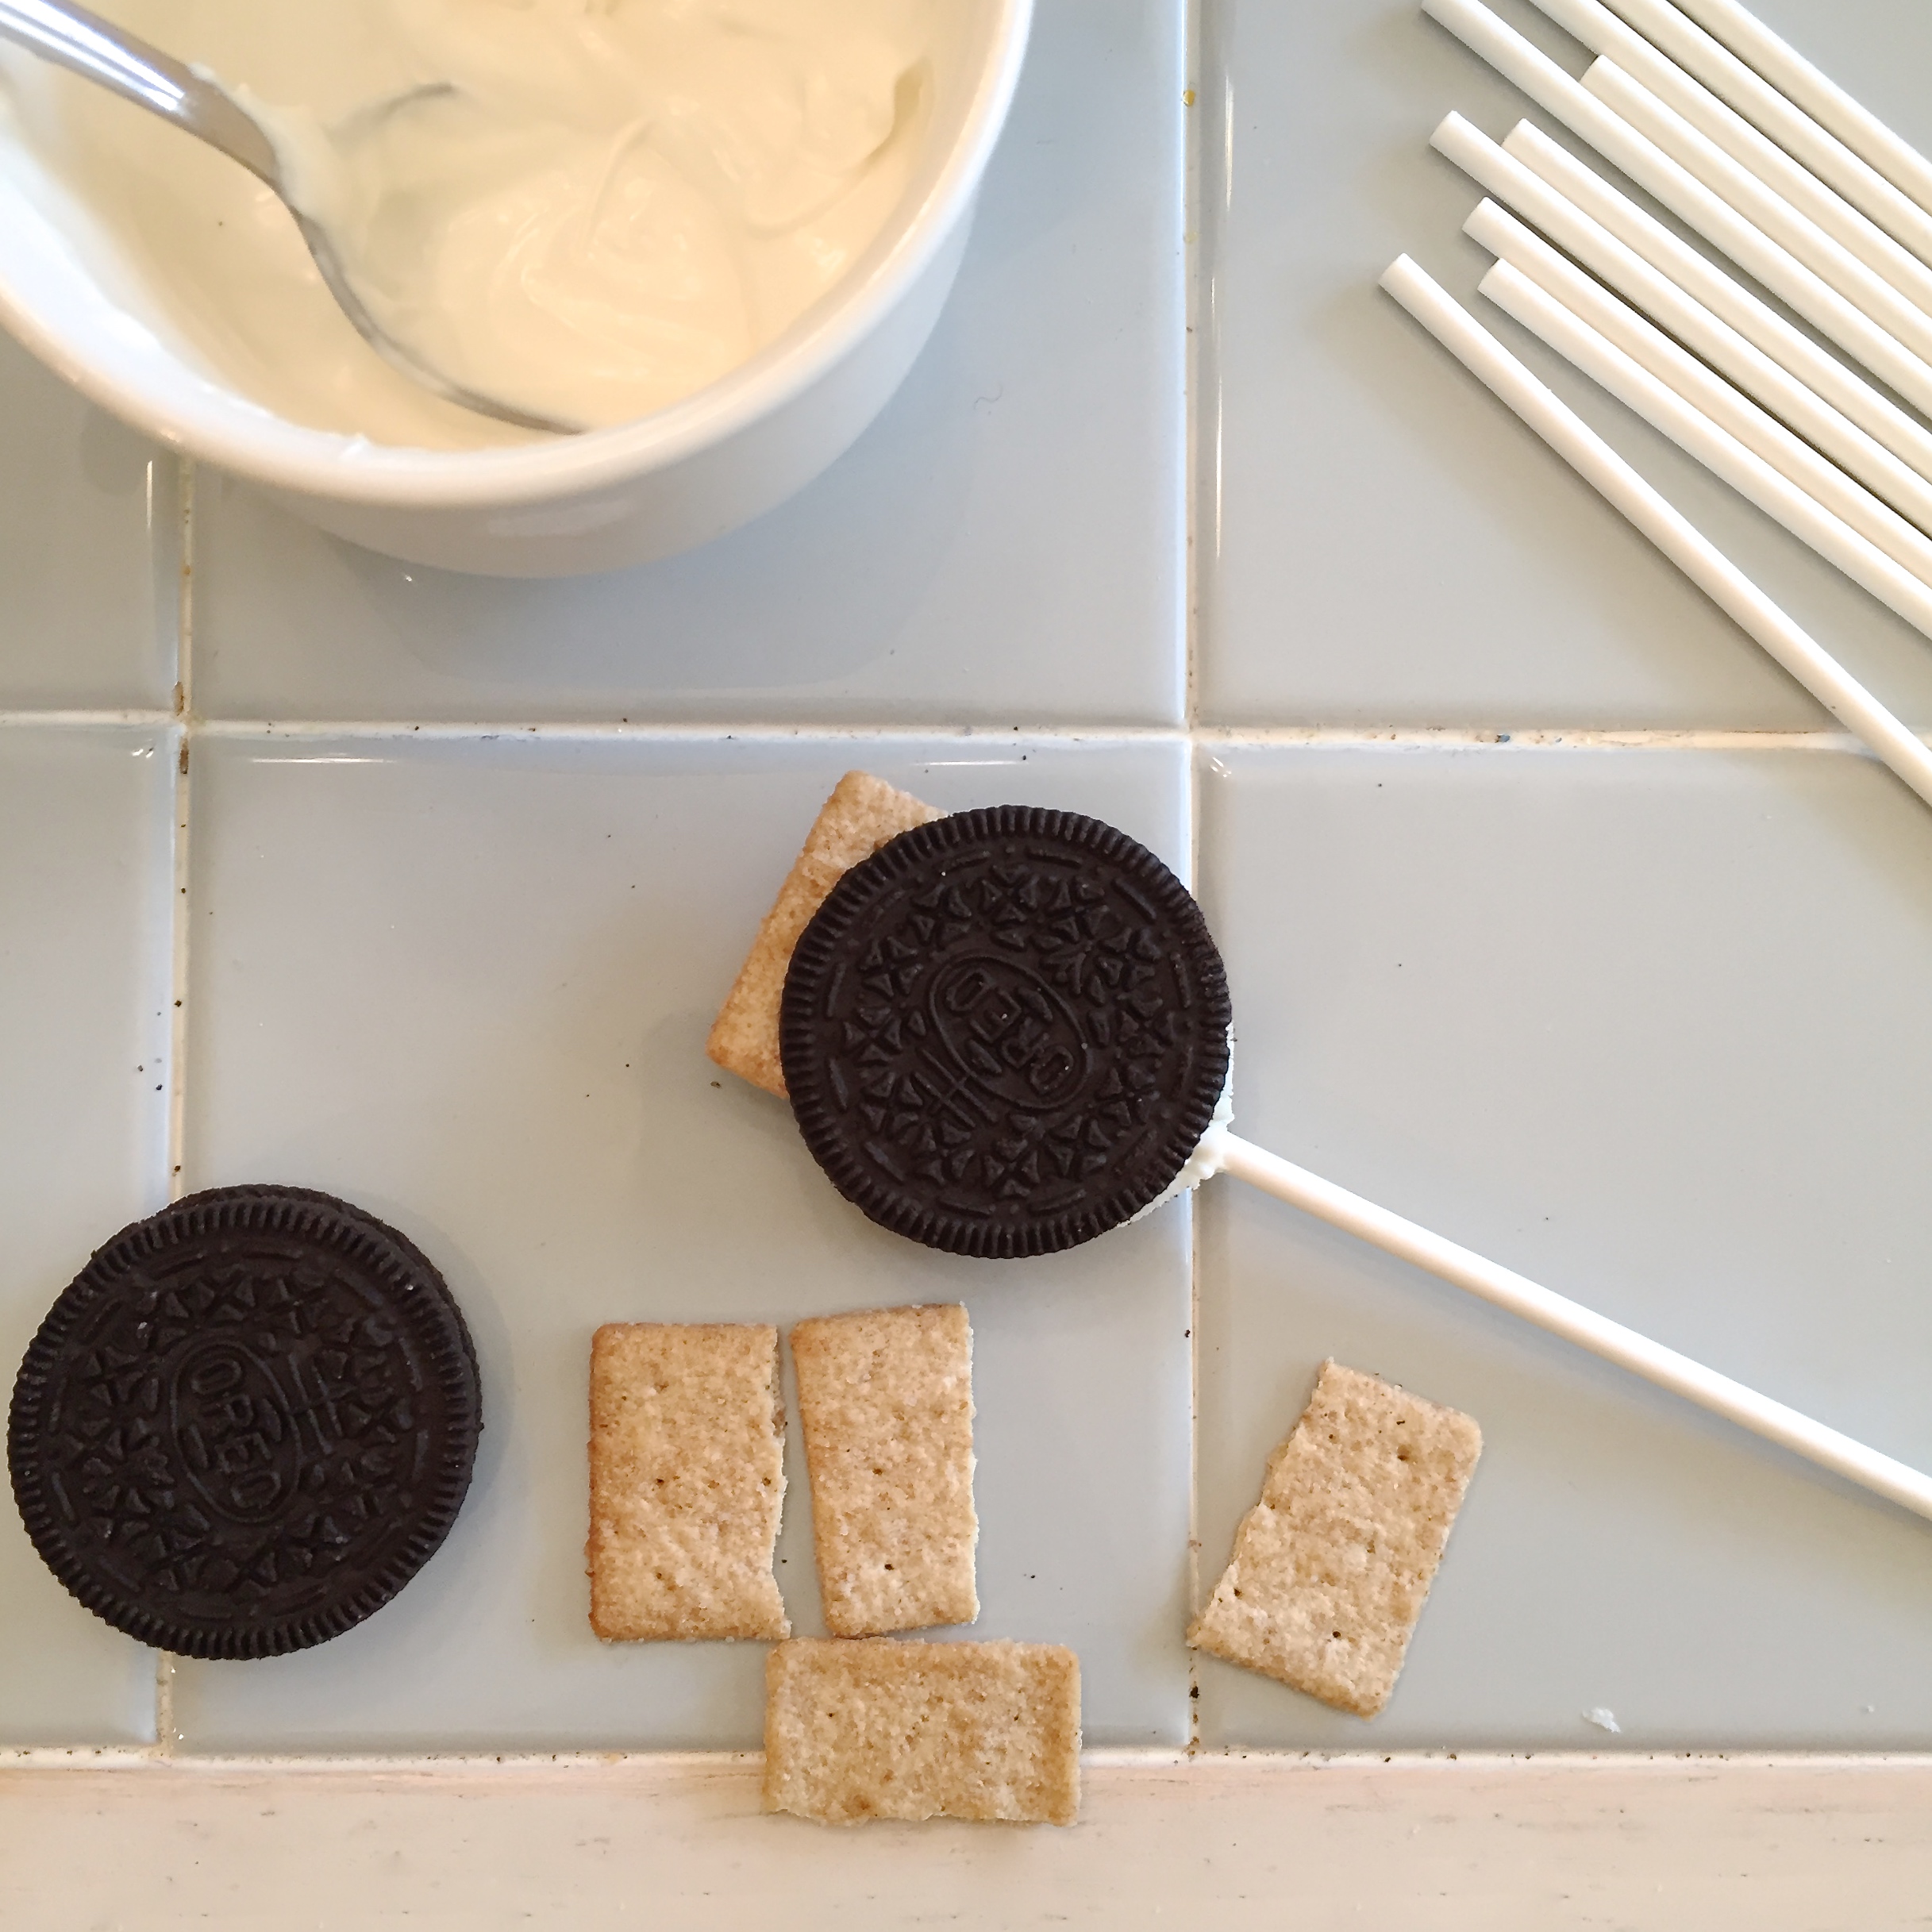
- Use a lollipop stick to make an indentation in the white filling of an Oreo.
- Dip the end of the stick into the candy melts, spread a little on top of the white filling and then press the stick into the indentation.
- Place the top of the Oreo back on and allow the candy melts to harden and cement the cookie back together with the stick inside. I like to stick these in the freezer to get nice and hard.
- While you wait, melt your remaining white candy melts in the same manner as previously.
- Once the cookies are firmly hardened back together, pick one up (using the stick) and dip it into the bowl of white candy melts.
- Spoon candy melts over the top and sides.
- Gently lift the Oreo out of the candy melts, and tap the stick on the side of the bowl to allow the excess melts to drip off.
- Slide the bottom of the Oreo against the edge of the bowl to remove excess candy melts.
- Gently set the coated Oreo on clean parchment or wax paper.
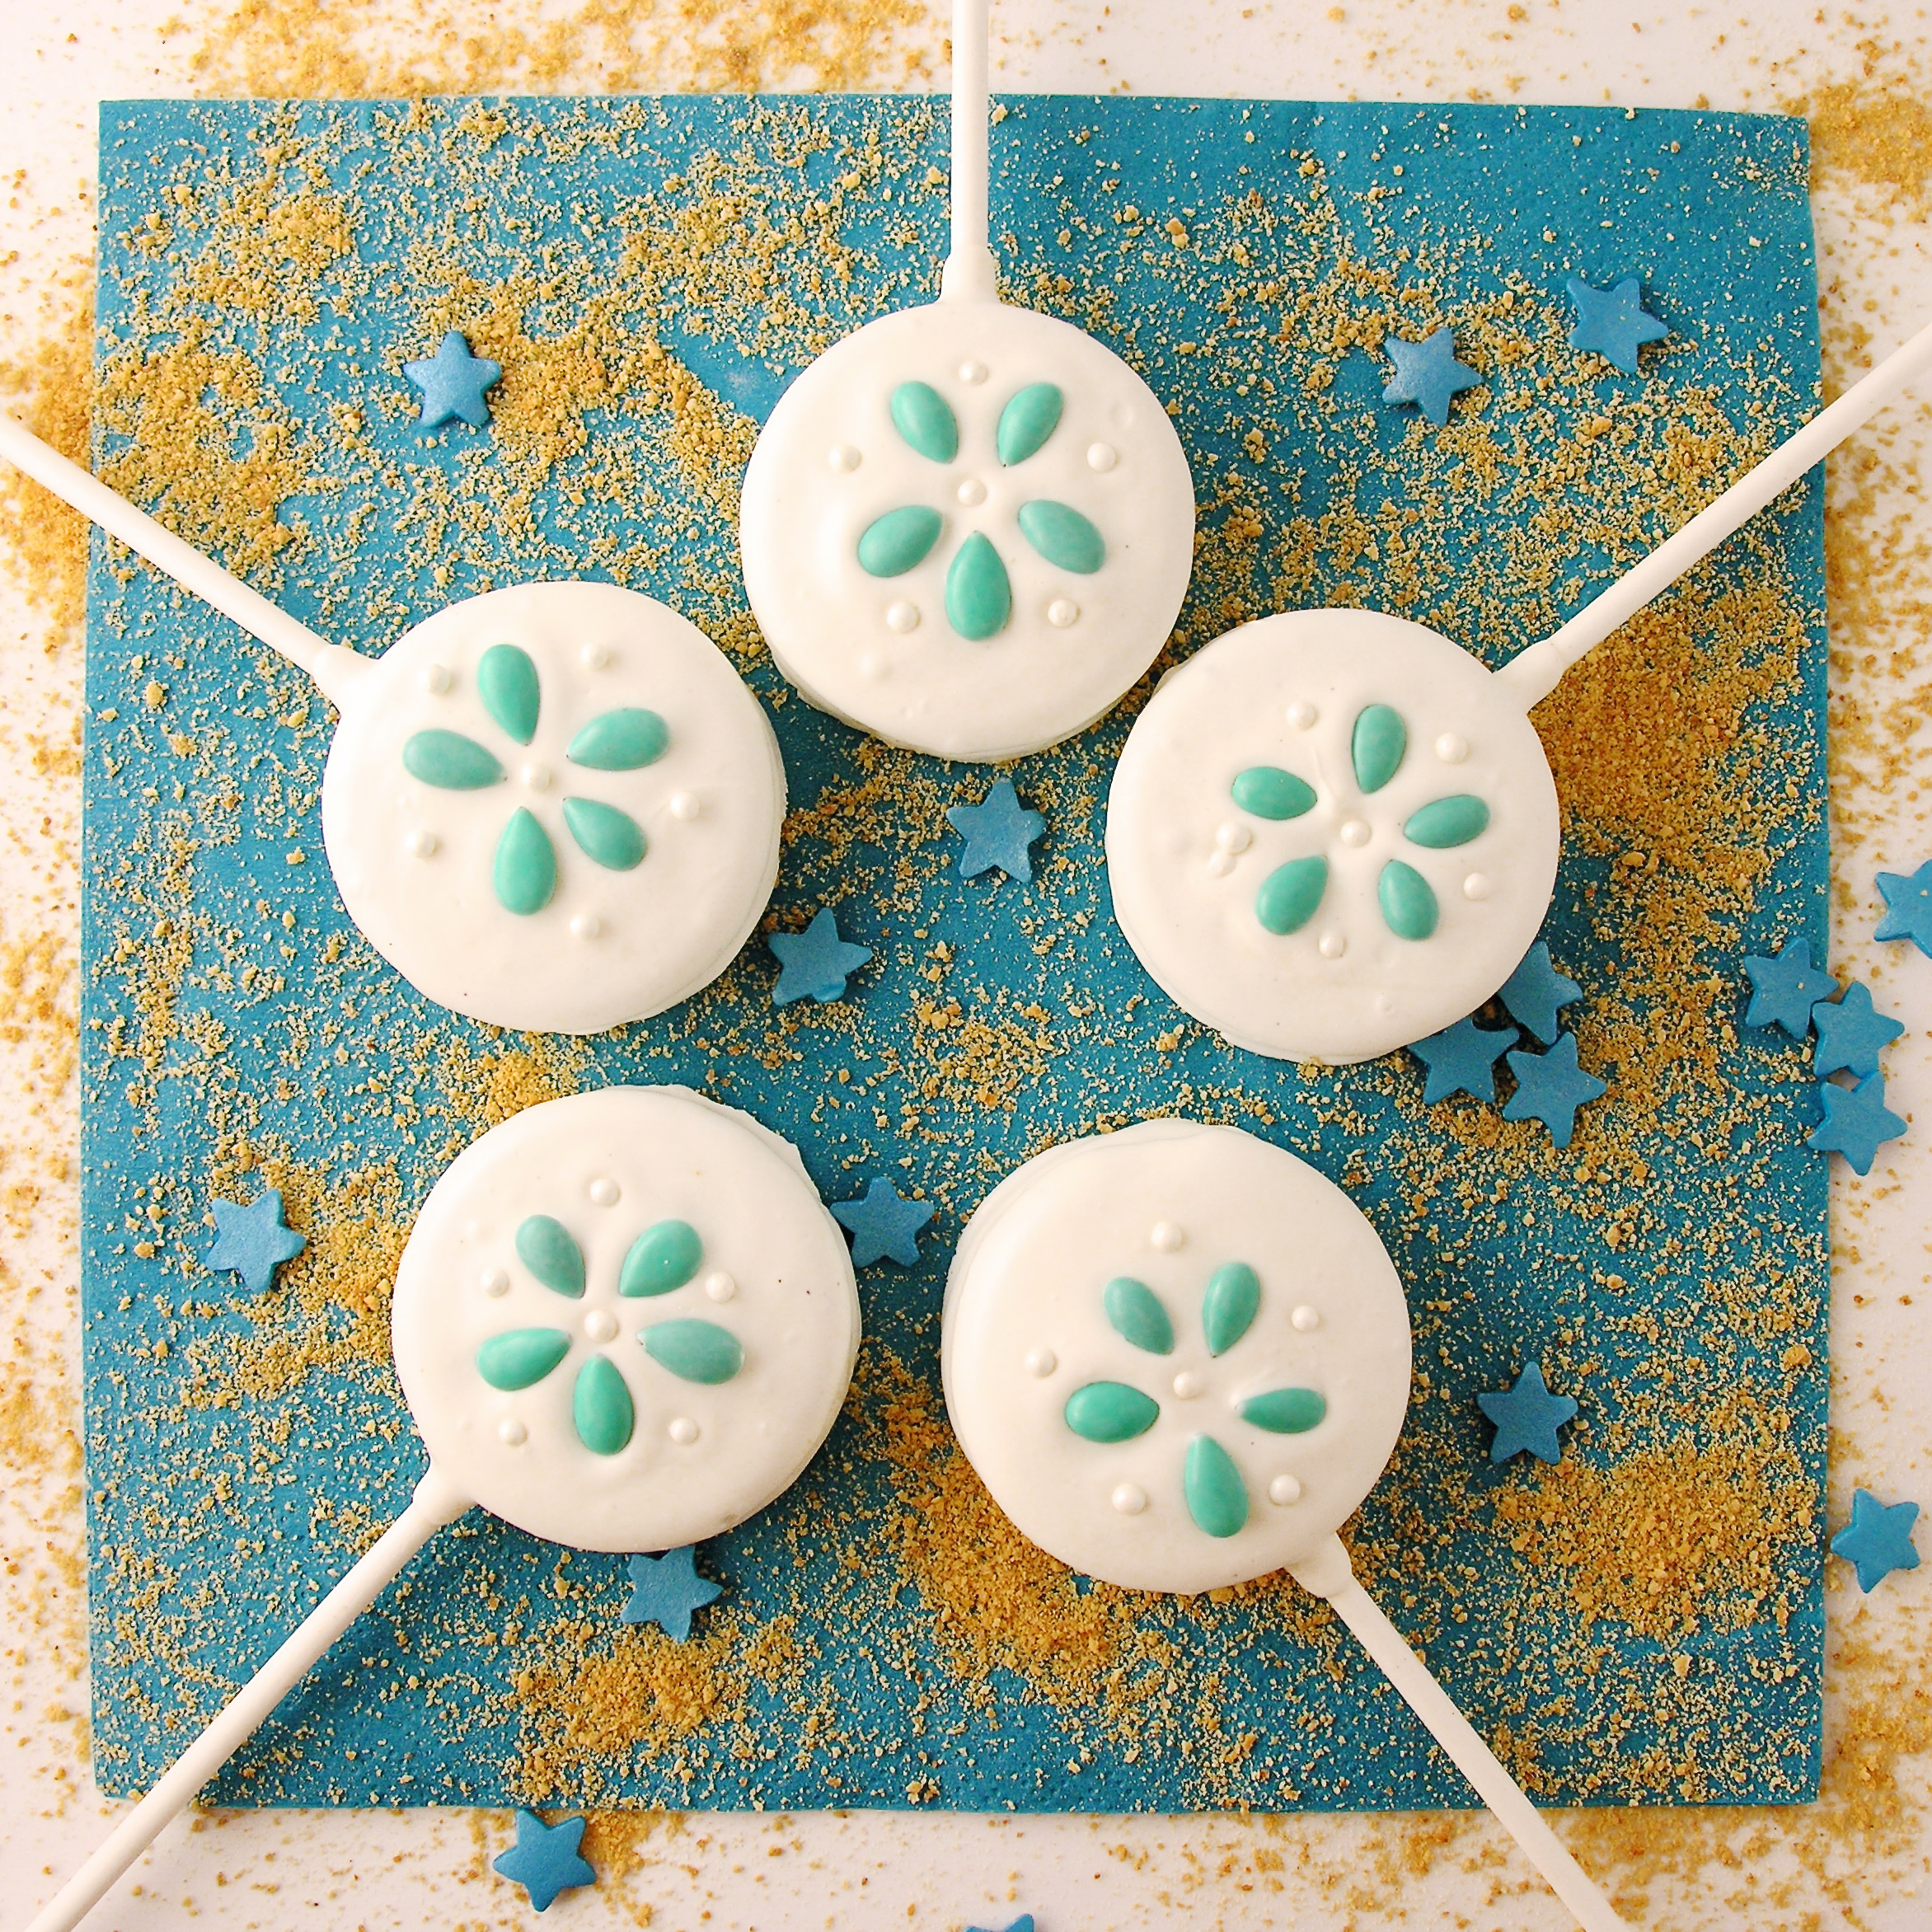
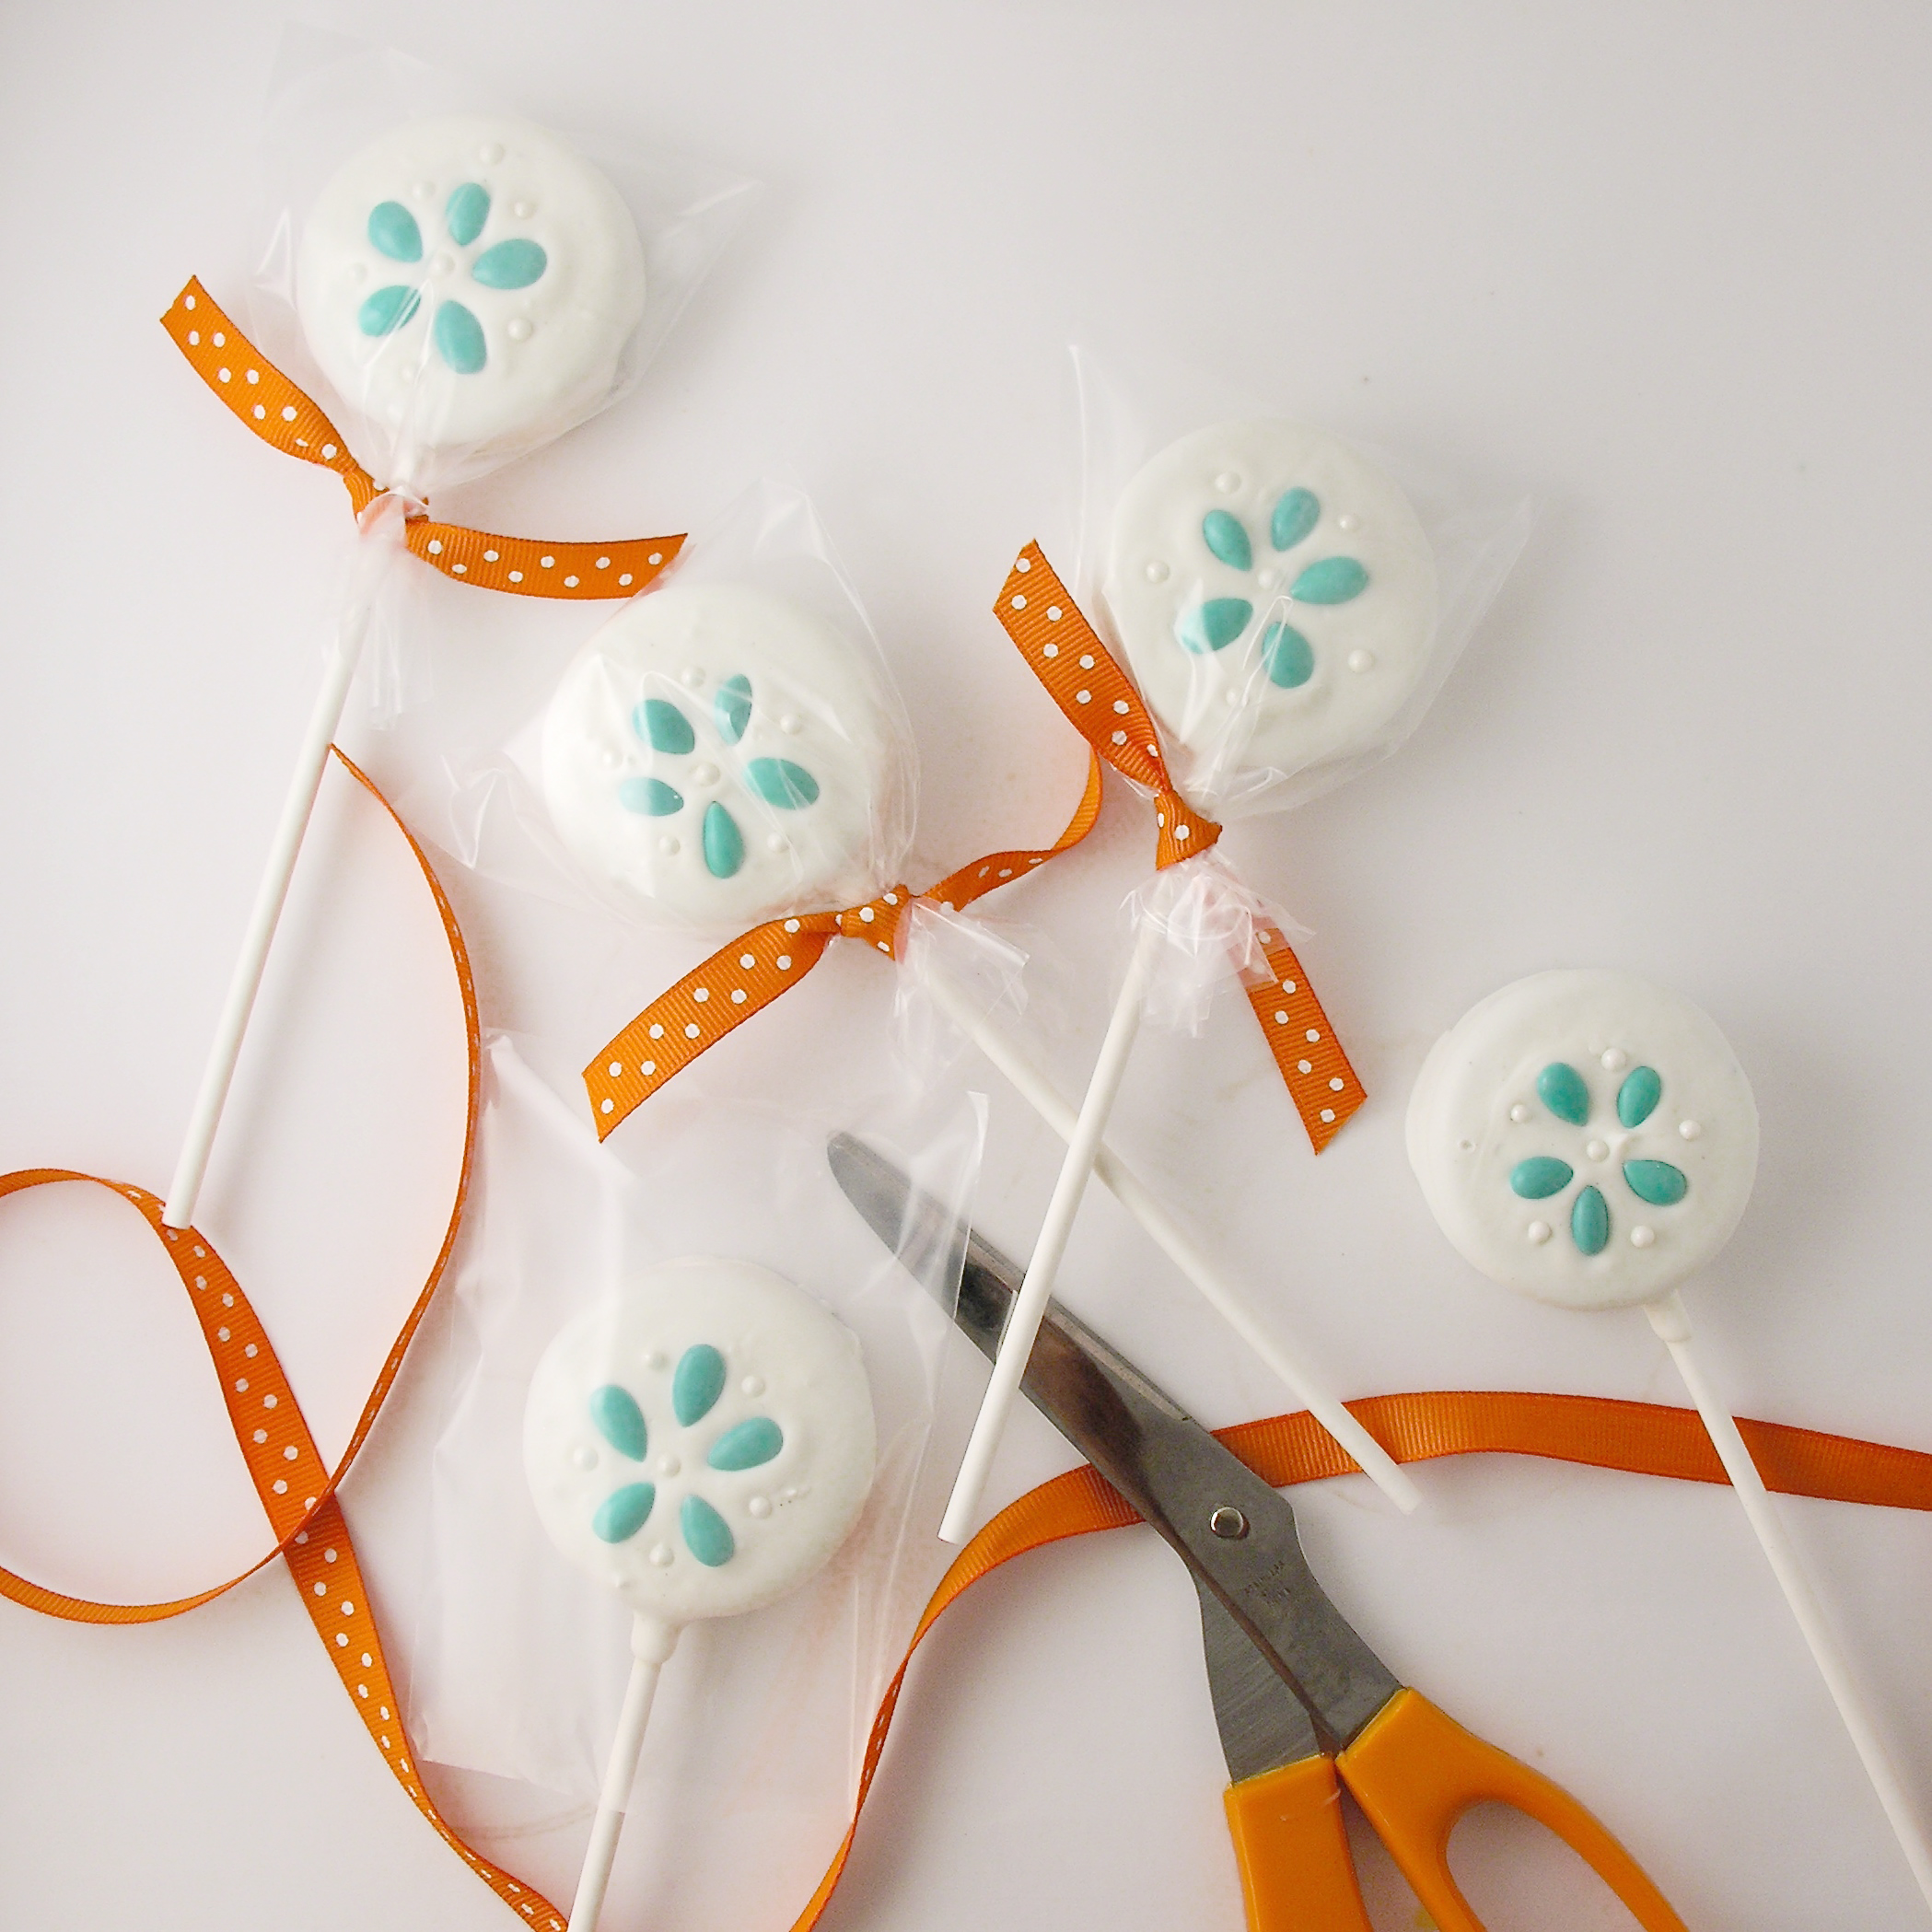
- Immediately, set the sunflower seeds as shown at the center of the cookie.
- Place pearl sprinkles as shown, between sunflower seeds.
- Serve as-is, or package up for giving away by sliding each cookie into a little treat bag and tying with a ribbon.

Scallops:
Ingredients: (makes about 24 pops)
- One package of Double Stuff Oreos
- 3-4 (12 oz.) bags of Wiltons Candy Melts in various colors
- A few wheat thin crackers
- 24 Lollipop sticks
- A toothpick to pull through colors and make design.
- Small treat bags and ribbon, if you want to package them up to give away.
Directions: (Need a little visual help? Click here.)
- Carefully twist apart all Oreo cookies. Do this slowly and gently- and expect that some will break.
- Melt about 1/4 cup candy melts (any color) using a microwave-safe bowl in the microwave in 30 second increments, stirring between until completely melted and smooth.
- Use a lollipop stick to make an indentation in the white filling of an Oreo.
- Dip the end of the stick into the candy melts, spread a little on top of the white filling and then press the stick into the indentation.
- Set 1/2 of a Wheat thin cracker on top of candy melts at the top (so just the points poke out when the top is back on).
- Place the top of the Oreo back on and allow the candy melts to harden and cement the cookie back together with the stick inside. I like to stick these in the freezer to get nice and hard.
- While you wait, pick your “main color” and melt those candy melts in the same manner as previously.
- Also melt smaller amounts of two to three other colors. Spoon these into zip top bags and seal them up. Wrap them in a warm towel to keep them melted and smooth.
- Once the cookies are firmly hardened back together (about 10 minutes in a freezer), pick one up (using the stick) and dip it into the bowl of candy melts.
- Spoon candy melts over the top and sides.
- Gently lift the Oreo out of the candy melts, and tap the stick on the side of the bowl to allow the excess melts to drip off.
- Slide the bottom of the Oreo against the edge of the bowl to remove excess candy melts.
- Gently set the coated Oreo on clean parchment or wax paper.
- Immediately, clip a corner off a bag of colored candy melts and pipe a couple curved lines on top of Oreo.
- Repeat these lines with other colors and then place bags back inside warm towel.
- Use a toothpick to pull lines up from the bottom through these colors (see photos)

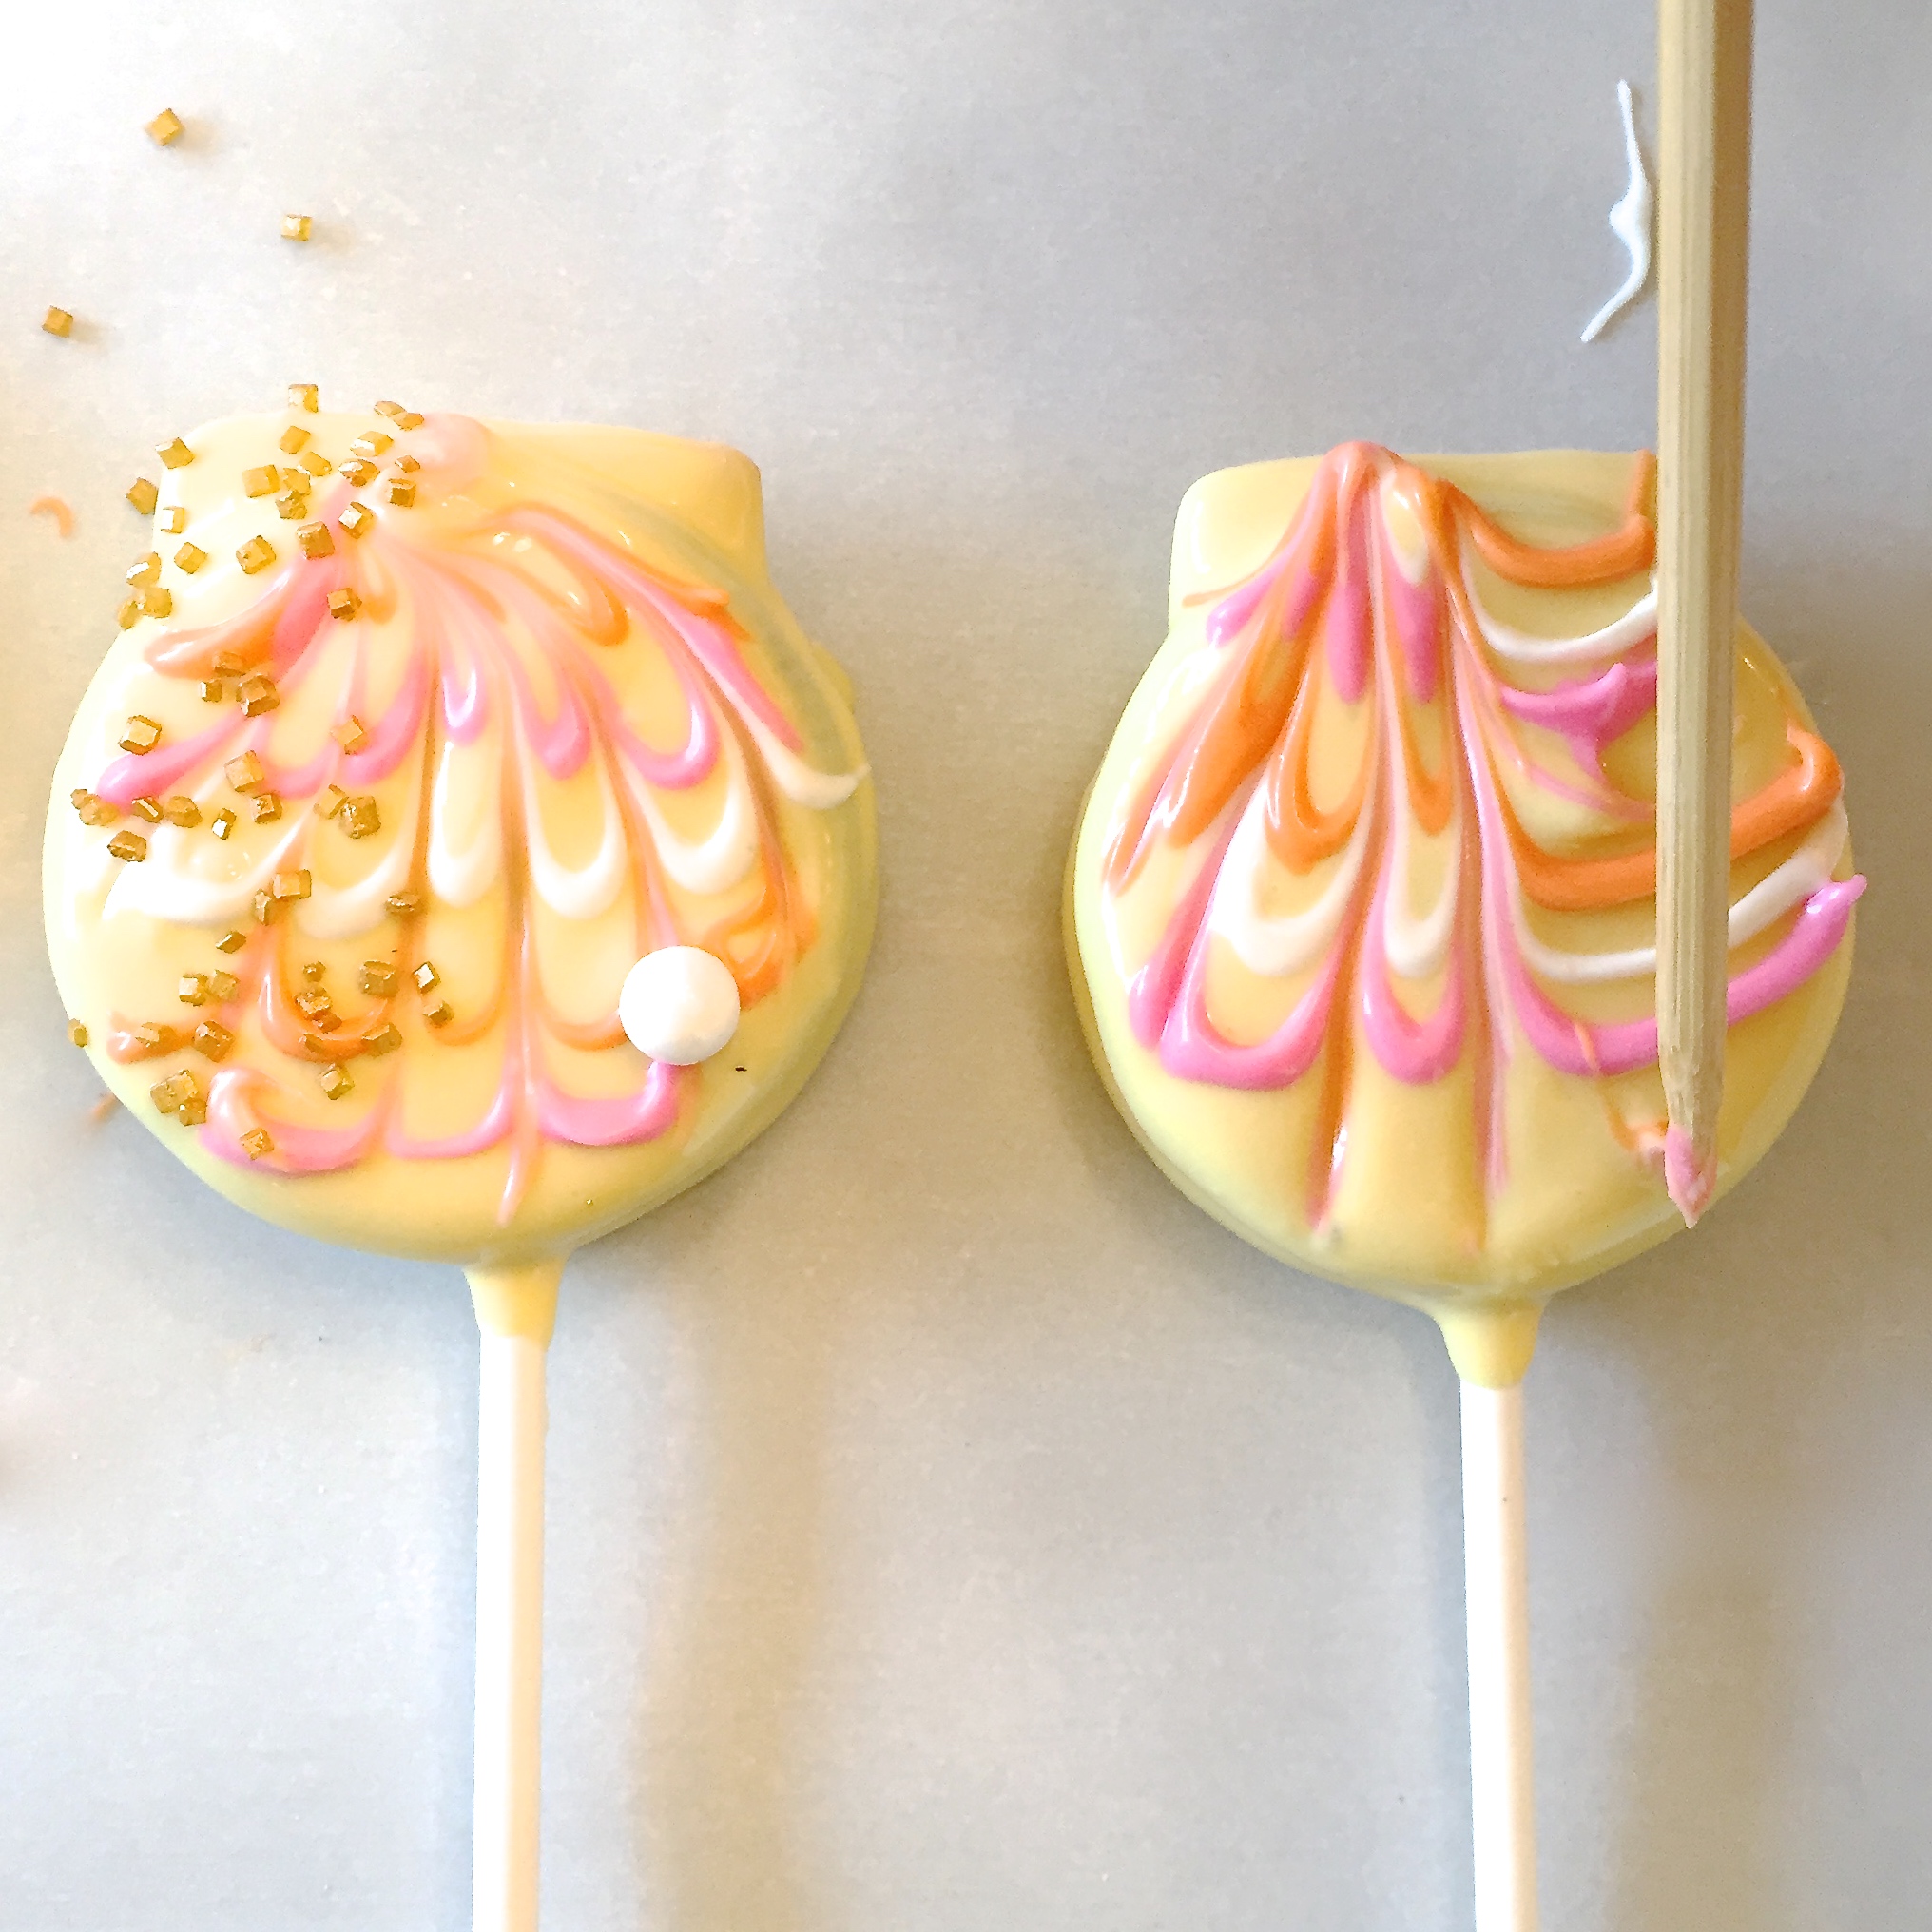
- Sprinkle with a little gold sugar and add a candy pearl if you want.
- Repeat this process with remaining Oreos. You may need to repeat the melting process for the small bags of colors. If you need to do this, try making one of these colors your “main” color and decorating with the others!
- Serve as-is, or package up for giving away by sliding each cookie into a little treat bag and tying with a ribbon.
- ENJOY!
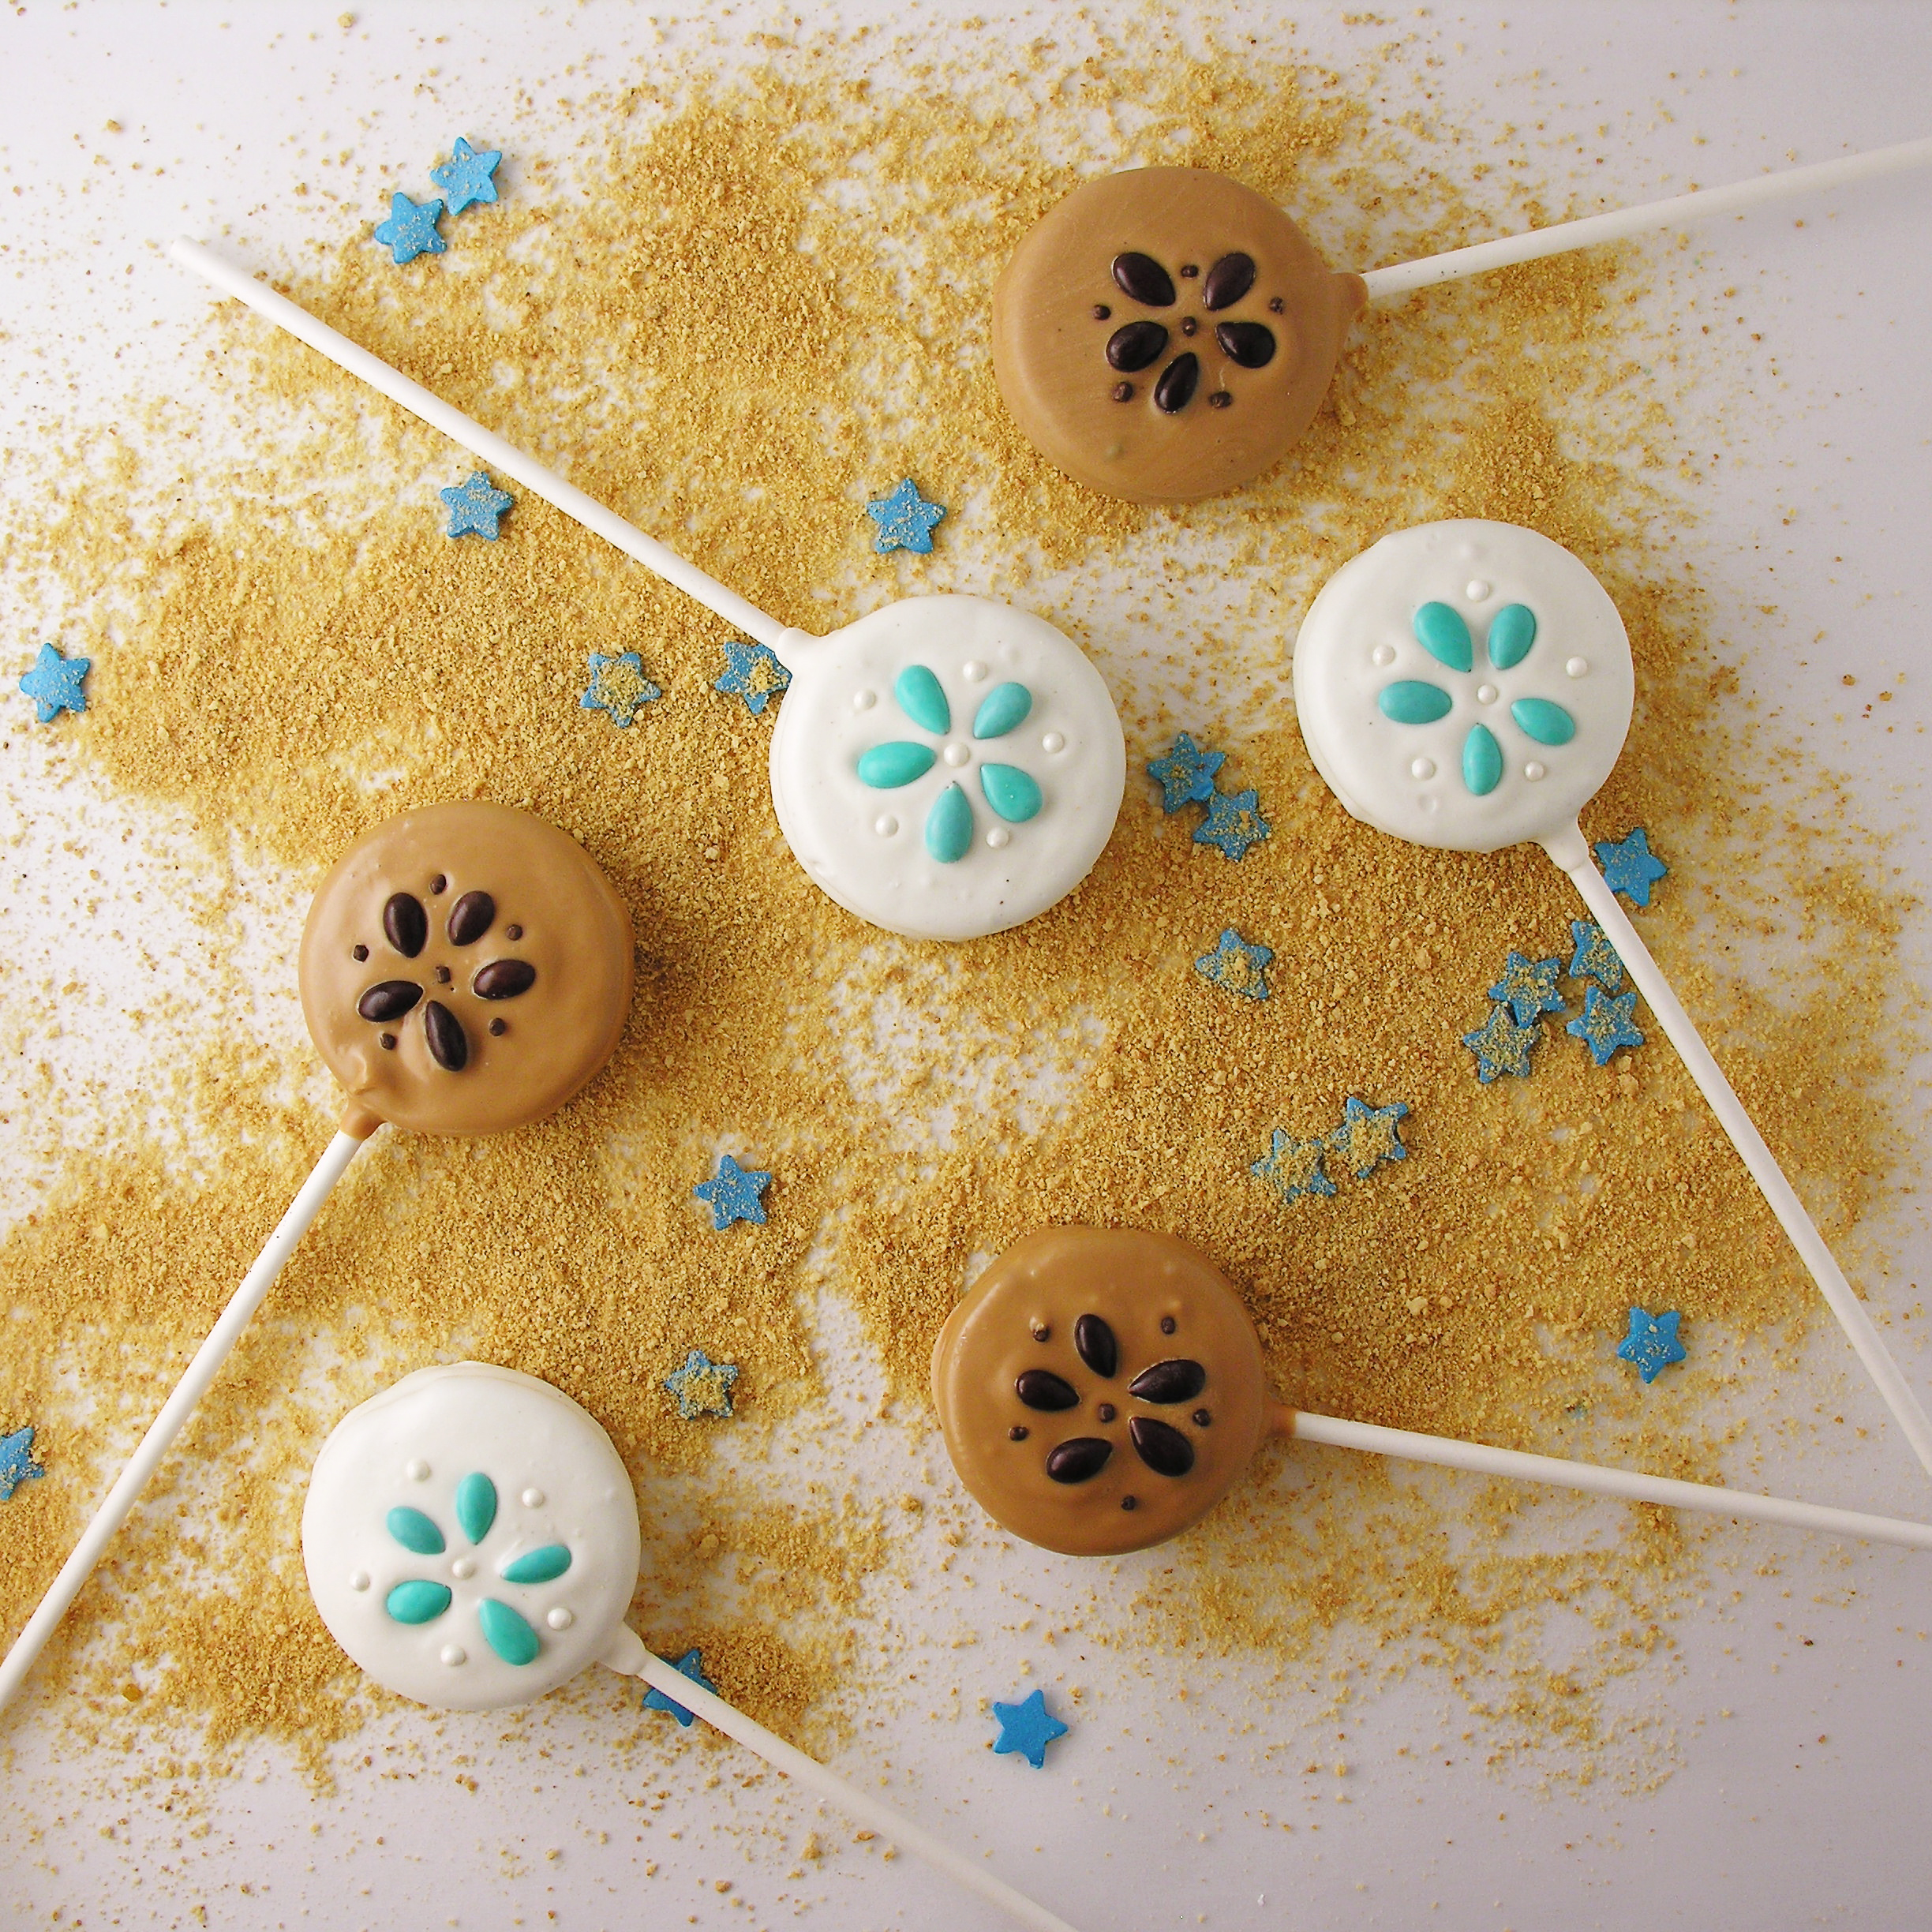
My thoughts: I experimented a little with the sand dollars. I had some butterscotch candy melts that I used with brown sunflower seeds- they are cute too- but I love the white ones best! I was really happy with how these turned out, and they really aren’t too difficult to put together- especially if you have made Oreo pops before. I hope you get a chance to try these for your next beach party! Happy summer to you!!!! ~r
Other fun beach- themed ideas here at Easybaked (click on a photo to see a recipe):


