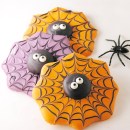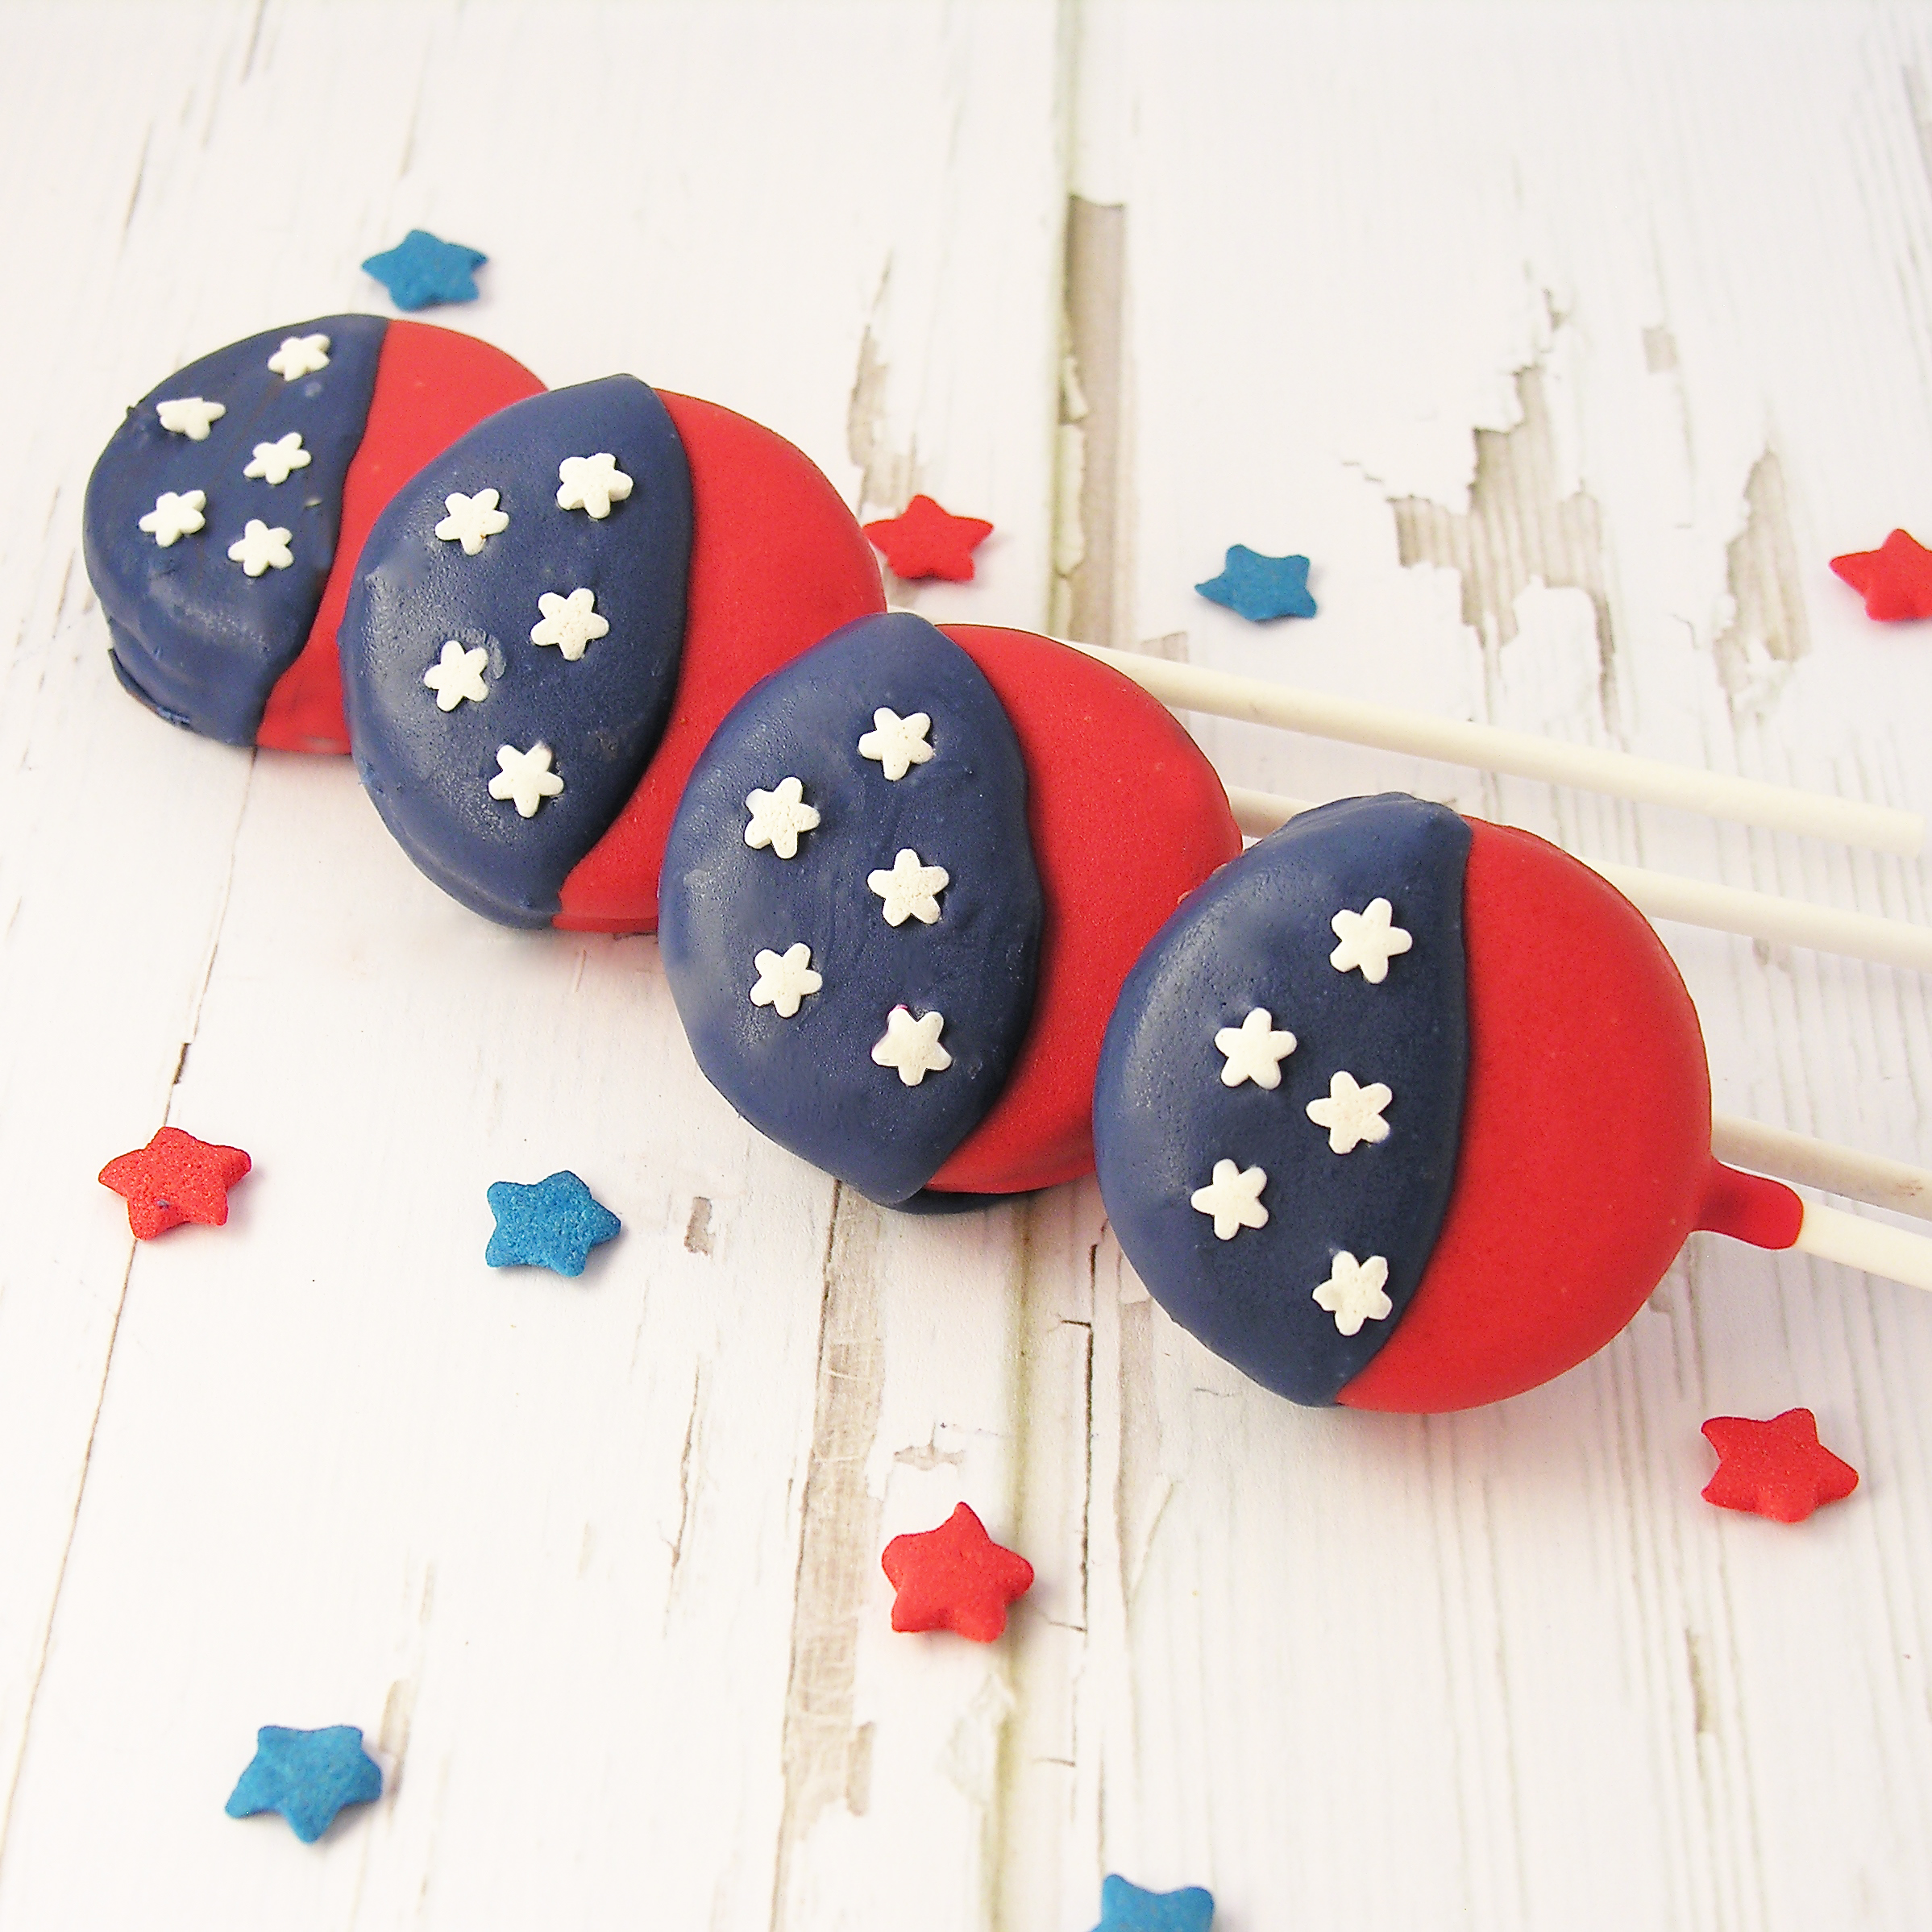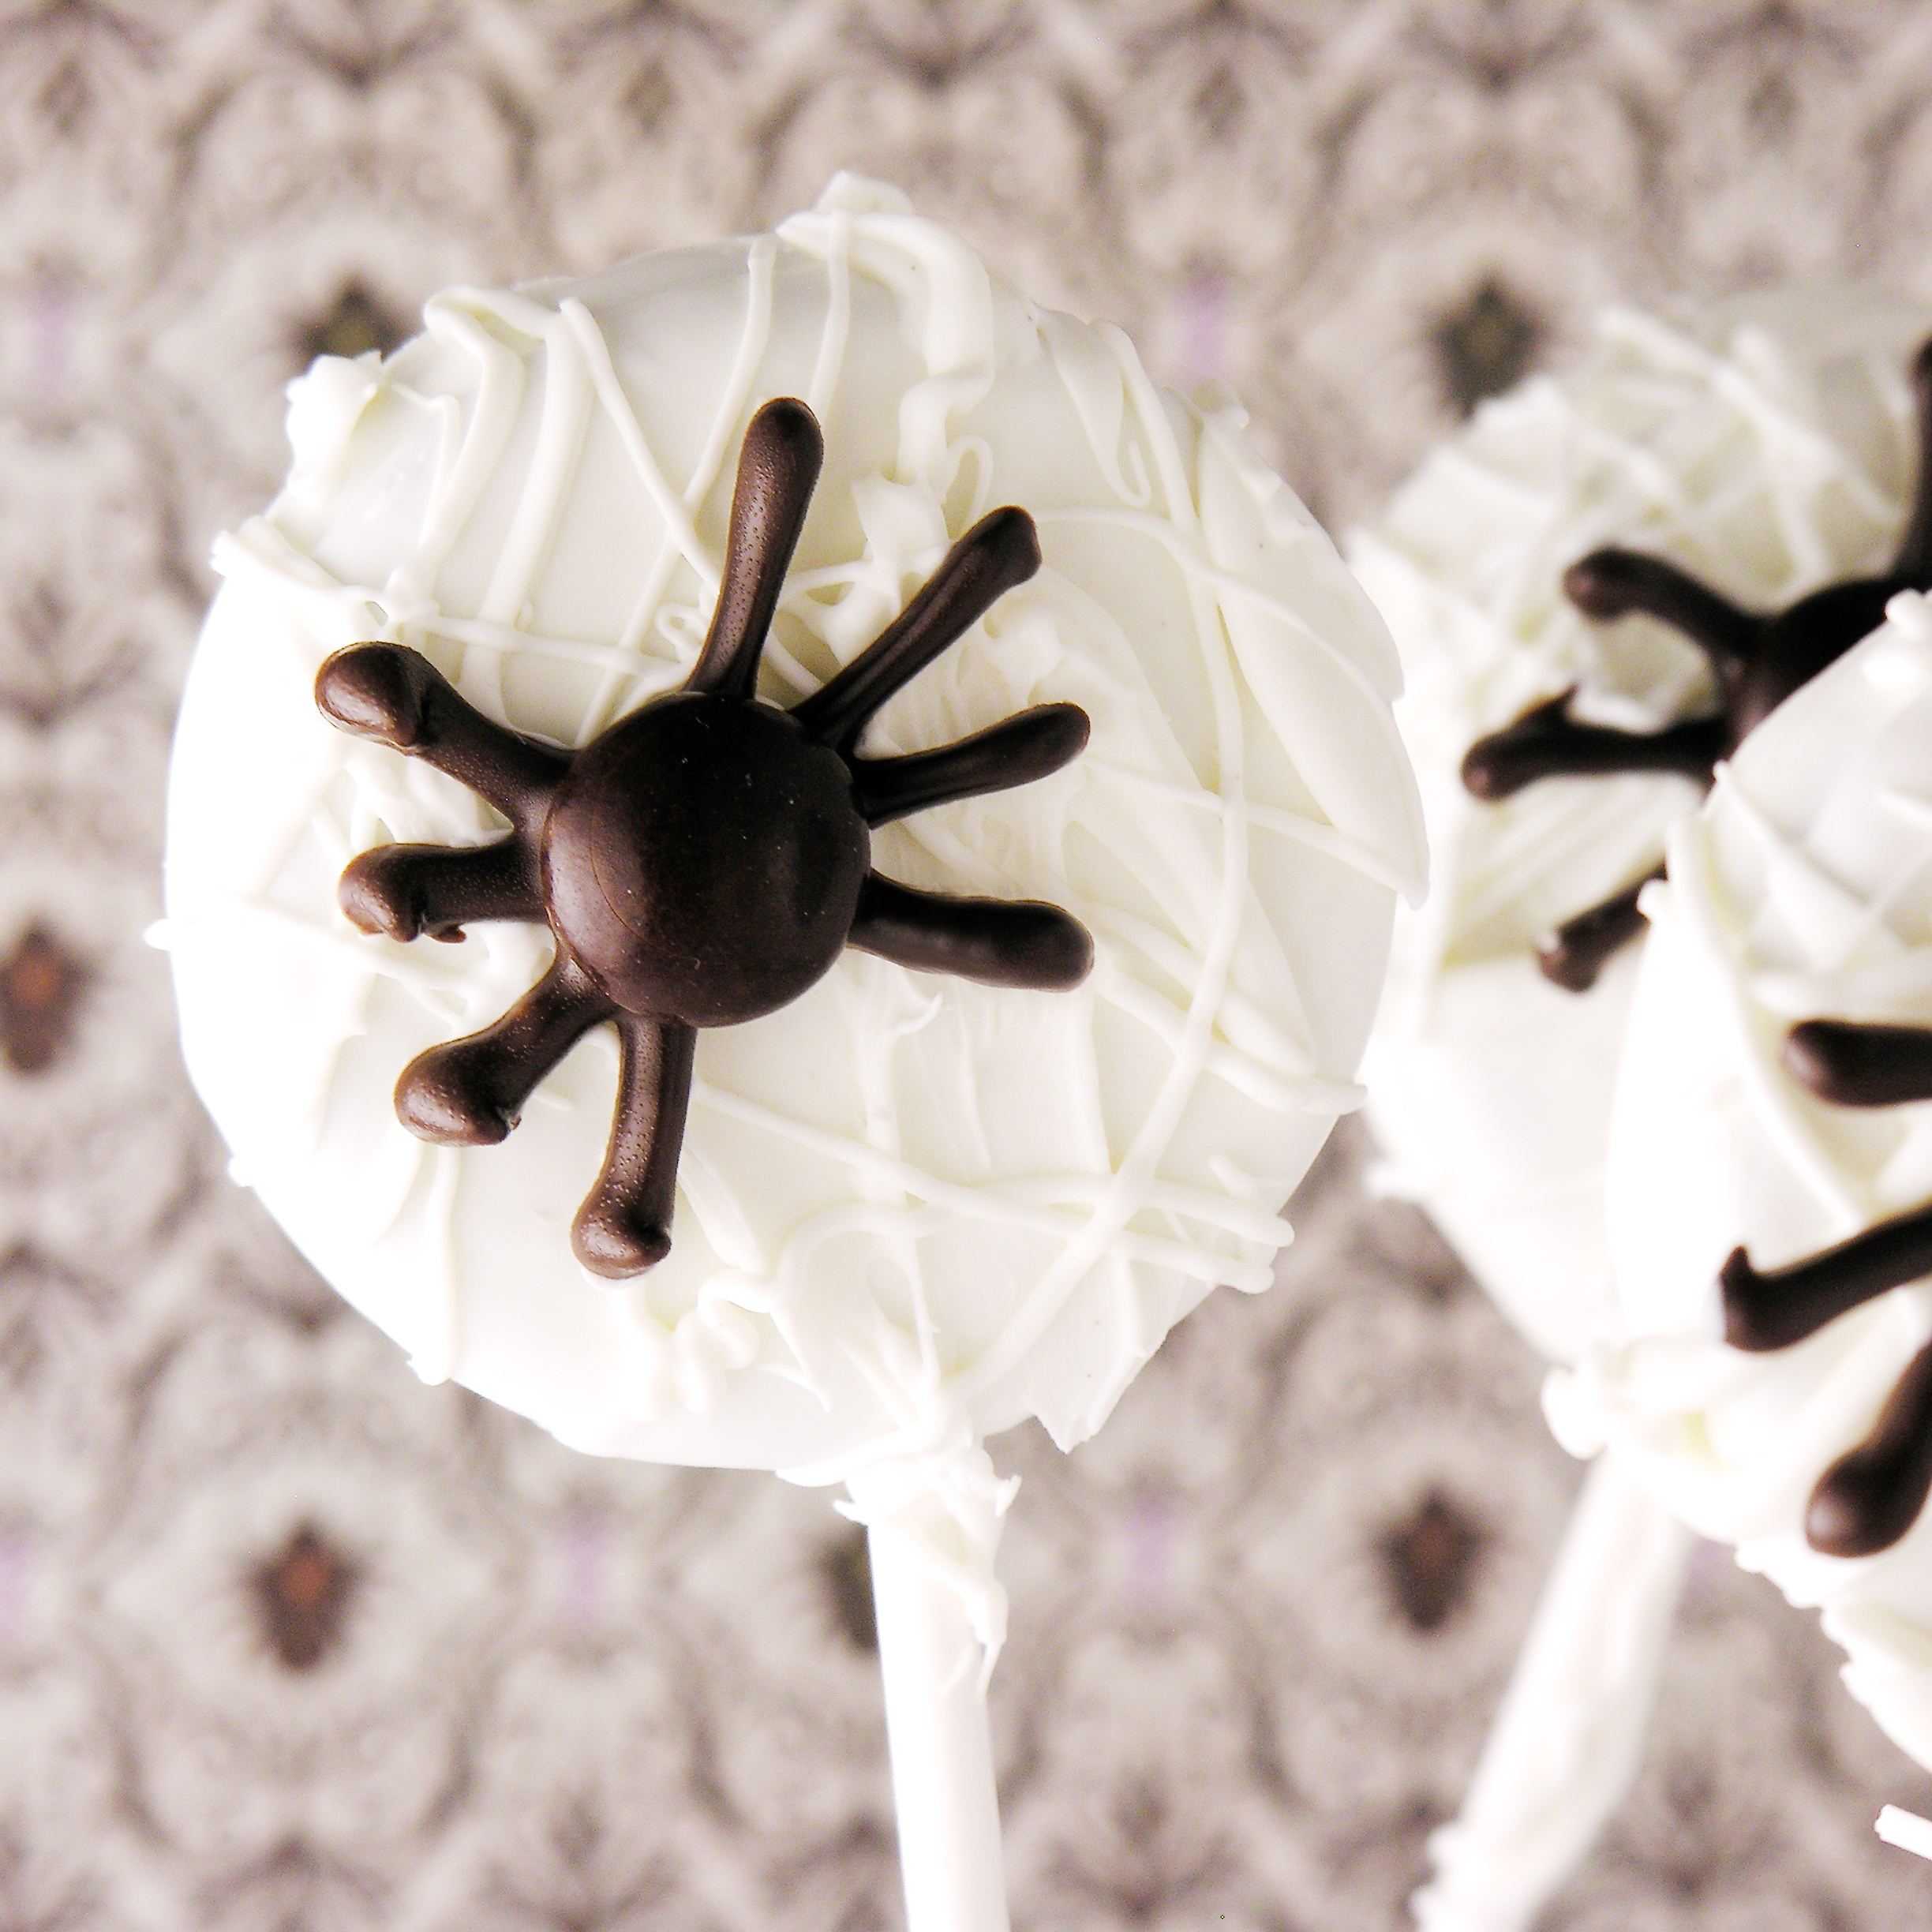
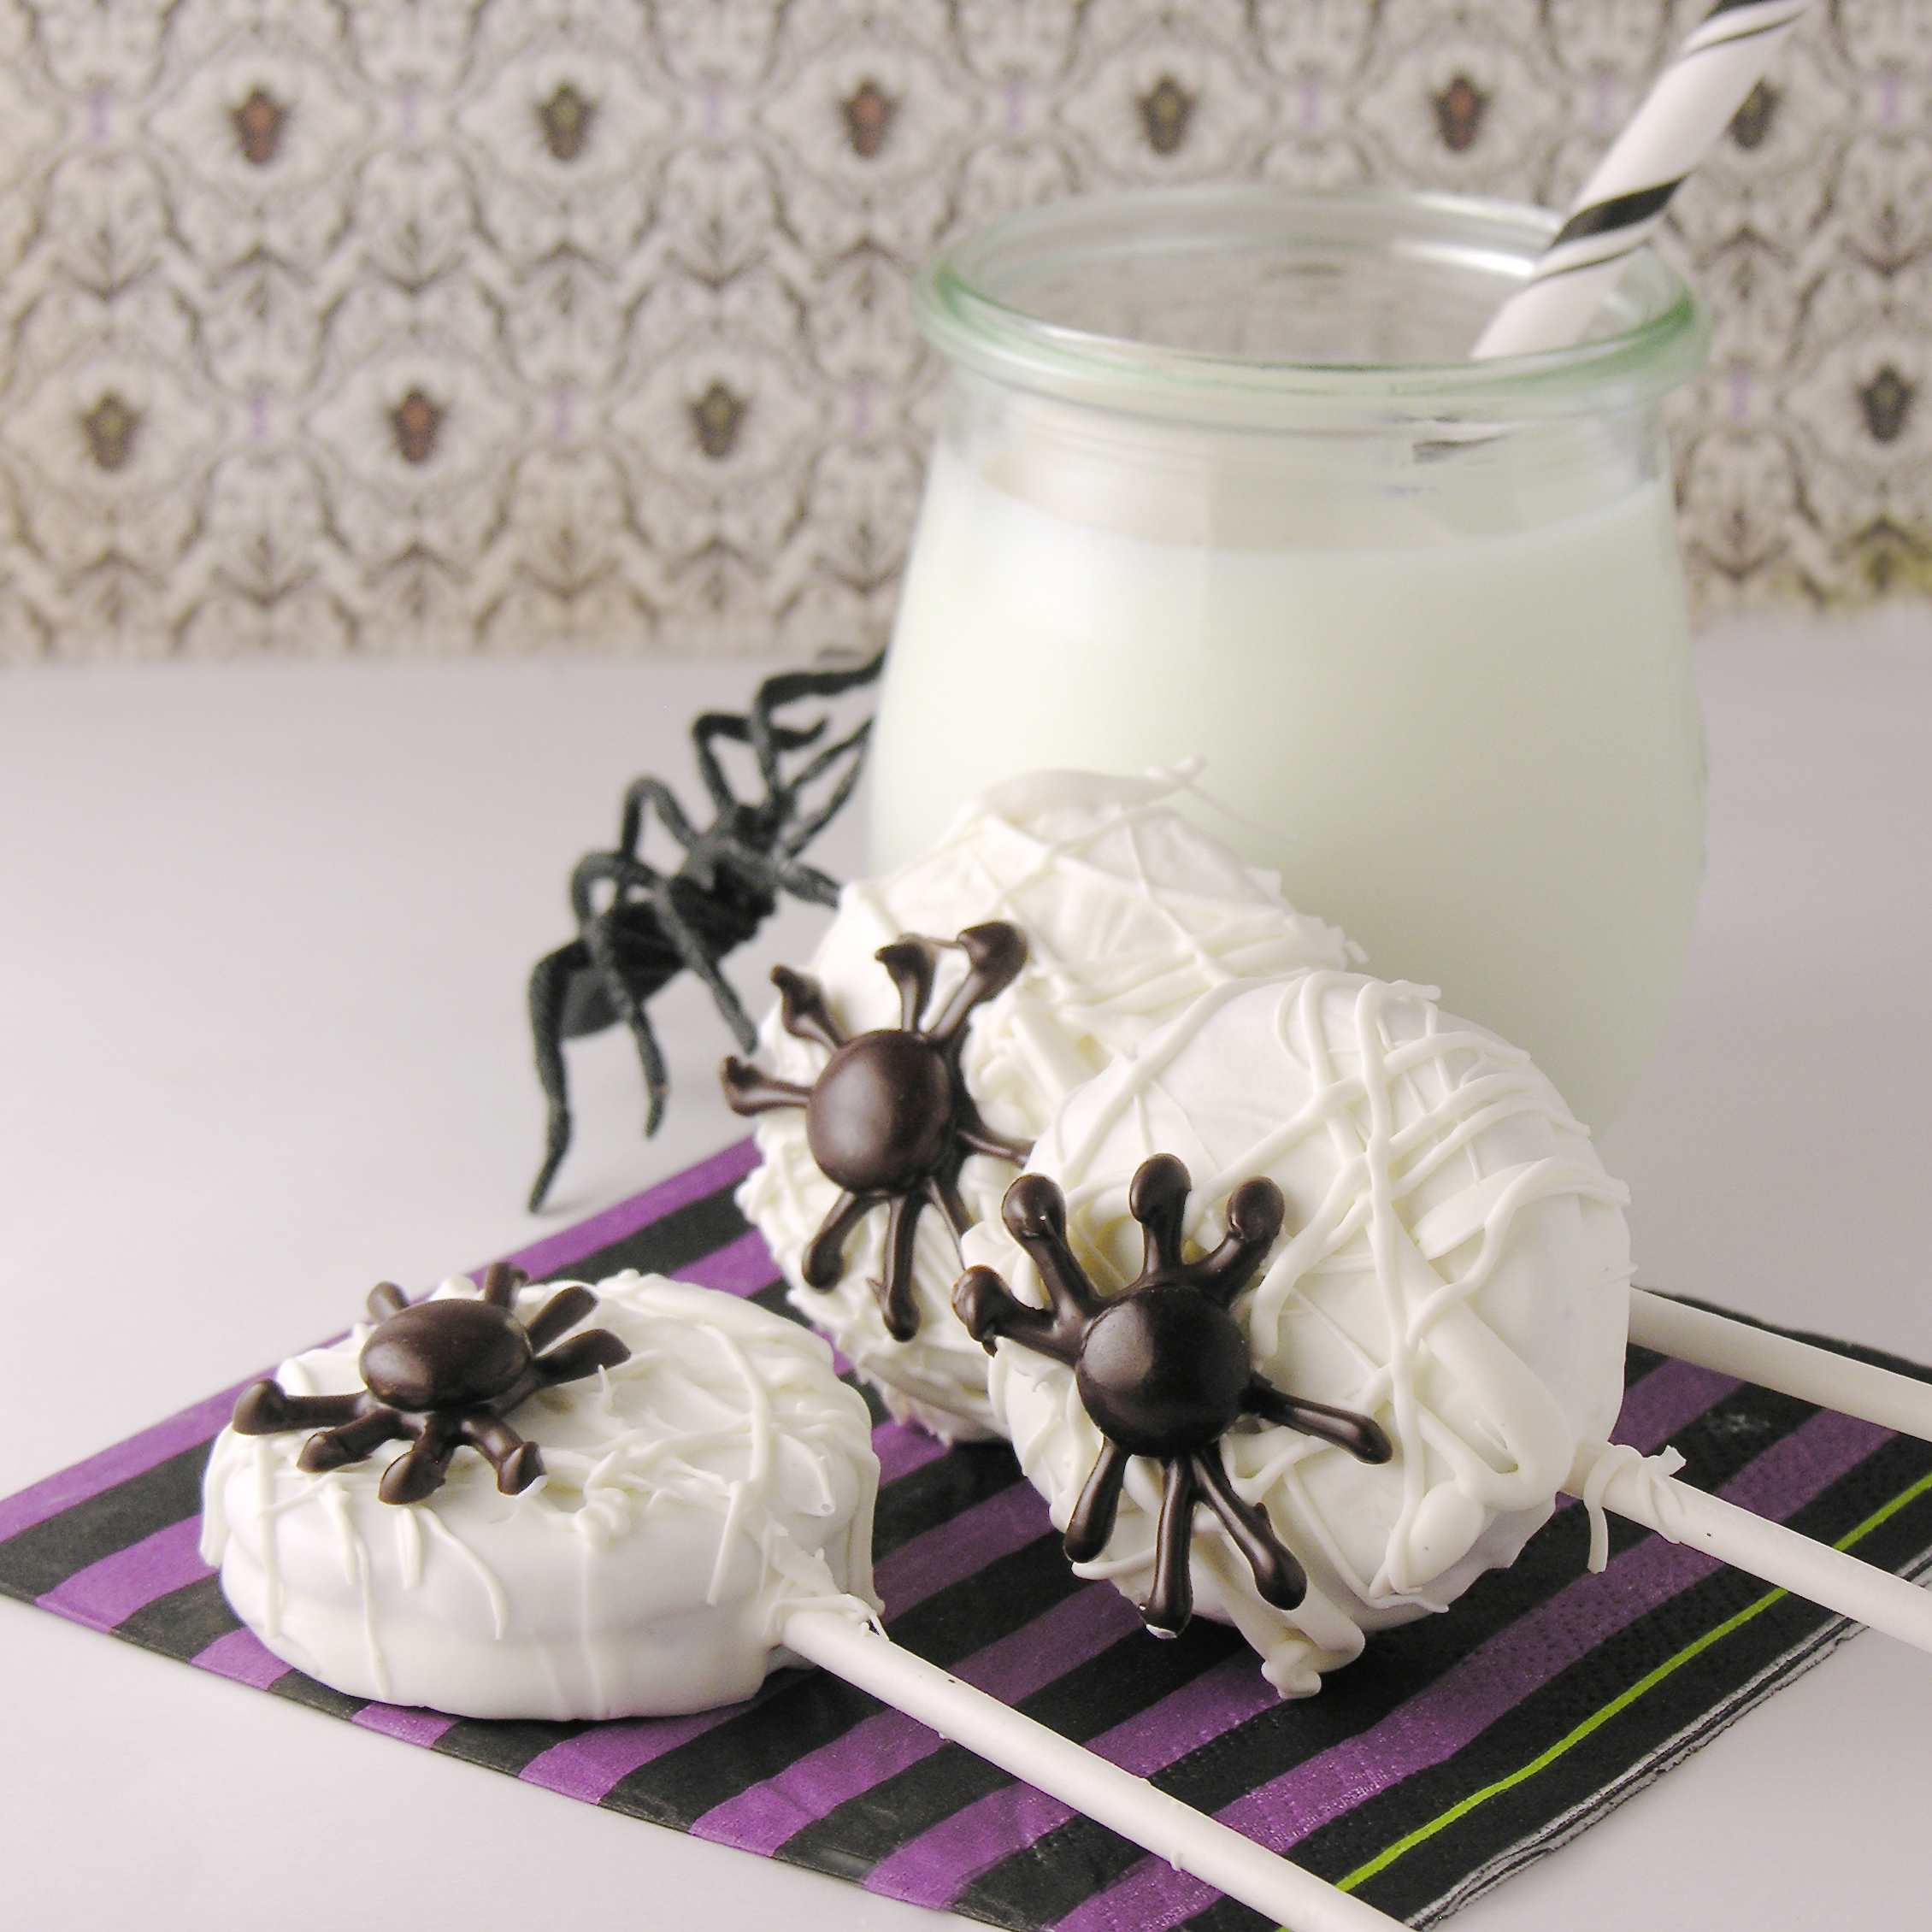
These web-wrapped Oreos with M&M spiders are not only cute fall treats- but delicious ones!
It’s that time of year again. That time when spiders think it’s too cold outside, and find little cracks around my windows and doors to creep in through. There’s nothing worse than sitting here, innocently blogging about a dessert recipe, only to be shocked by a giant black spider racing out from behind the couch. Seriously- they move so fast!
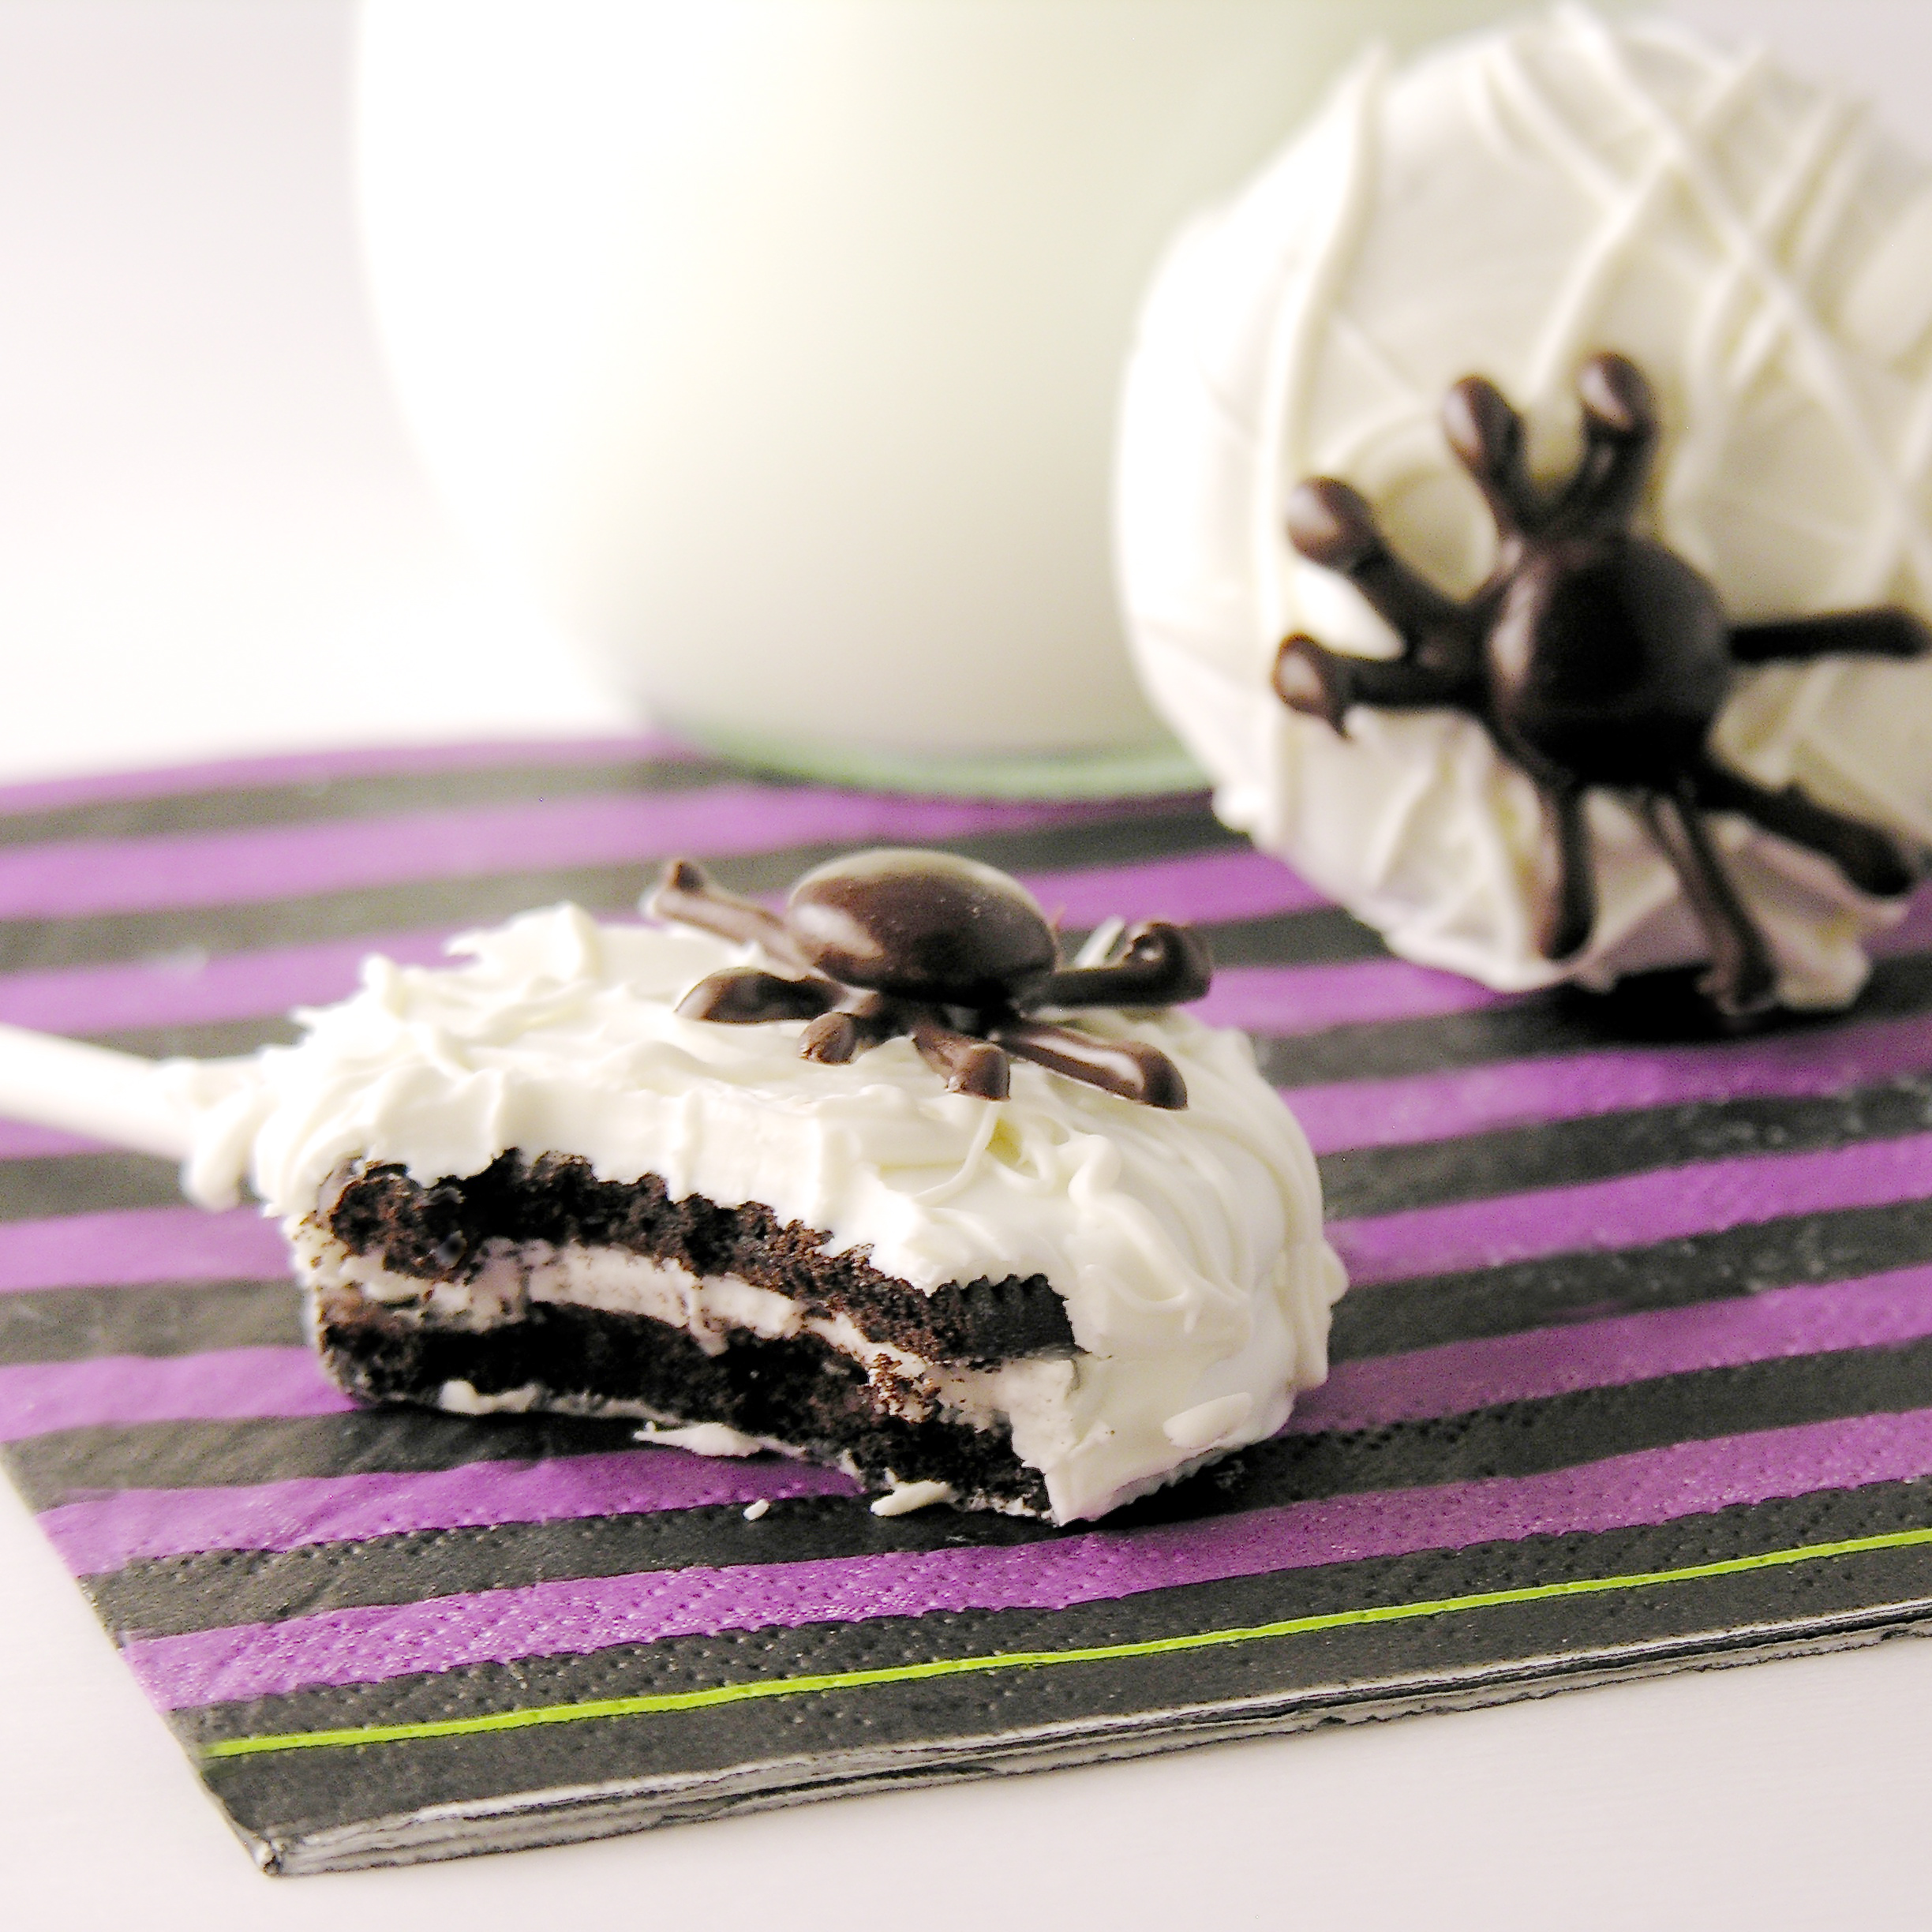
In any case, I make a lot of spider-themed treats. Maybe because candy spiders are so cute- and they don’t move. These are especially cute little guys- and they are perfect on top of these web-coated Oreos! Plus, as is true with all Oreo pops, you can make them weeks ahead and have them all wrapped in pretty bags and ready for a party. I love recipes like that.
Here is how we made them: (printable recipe available here)
INGREDIENTS: (makes about 24 pops)
- One box of Double Stuff Oreos
- 24 lollipop sticks
- 2 bags of Wilton’s Candy Melts in white
- 1/4 cup of Wilton’s candy melts in dark chocolate
- 36-ish dark brown M&Ms (no worries–you can eat the rest of the bag while you work 🙂 )
DIRECTIONS:
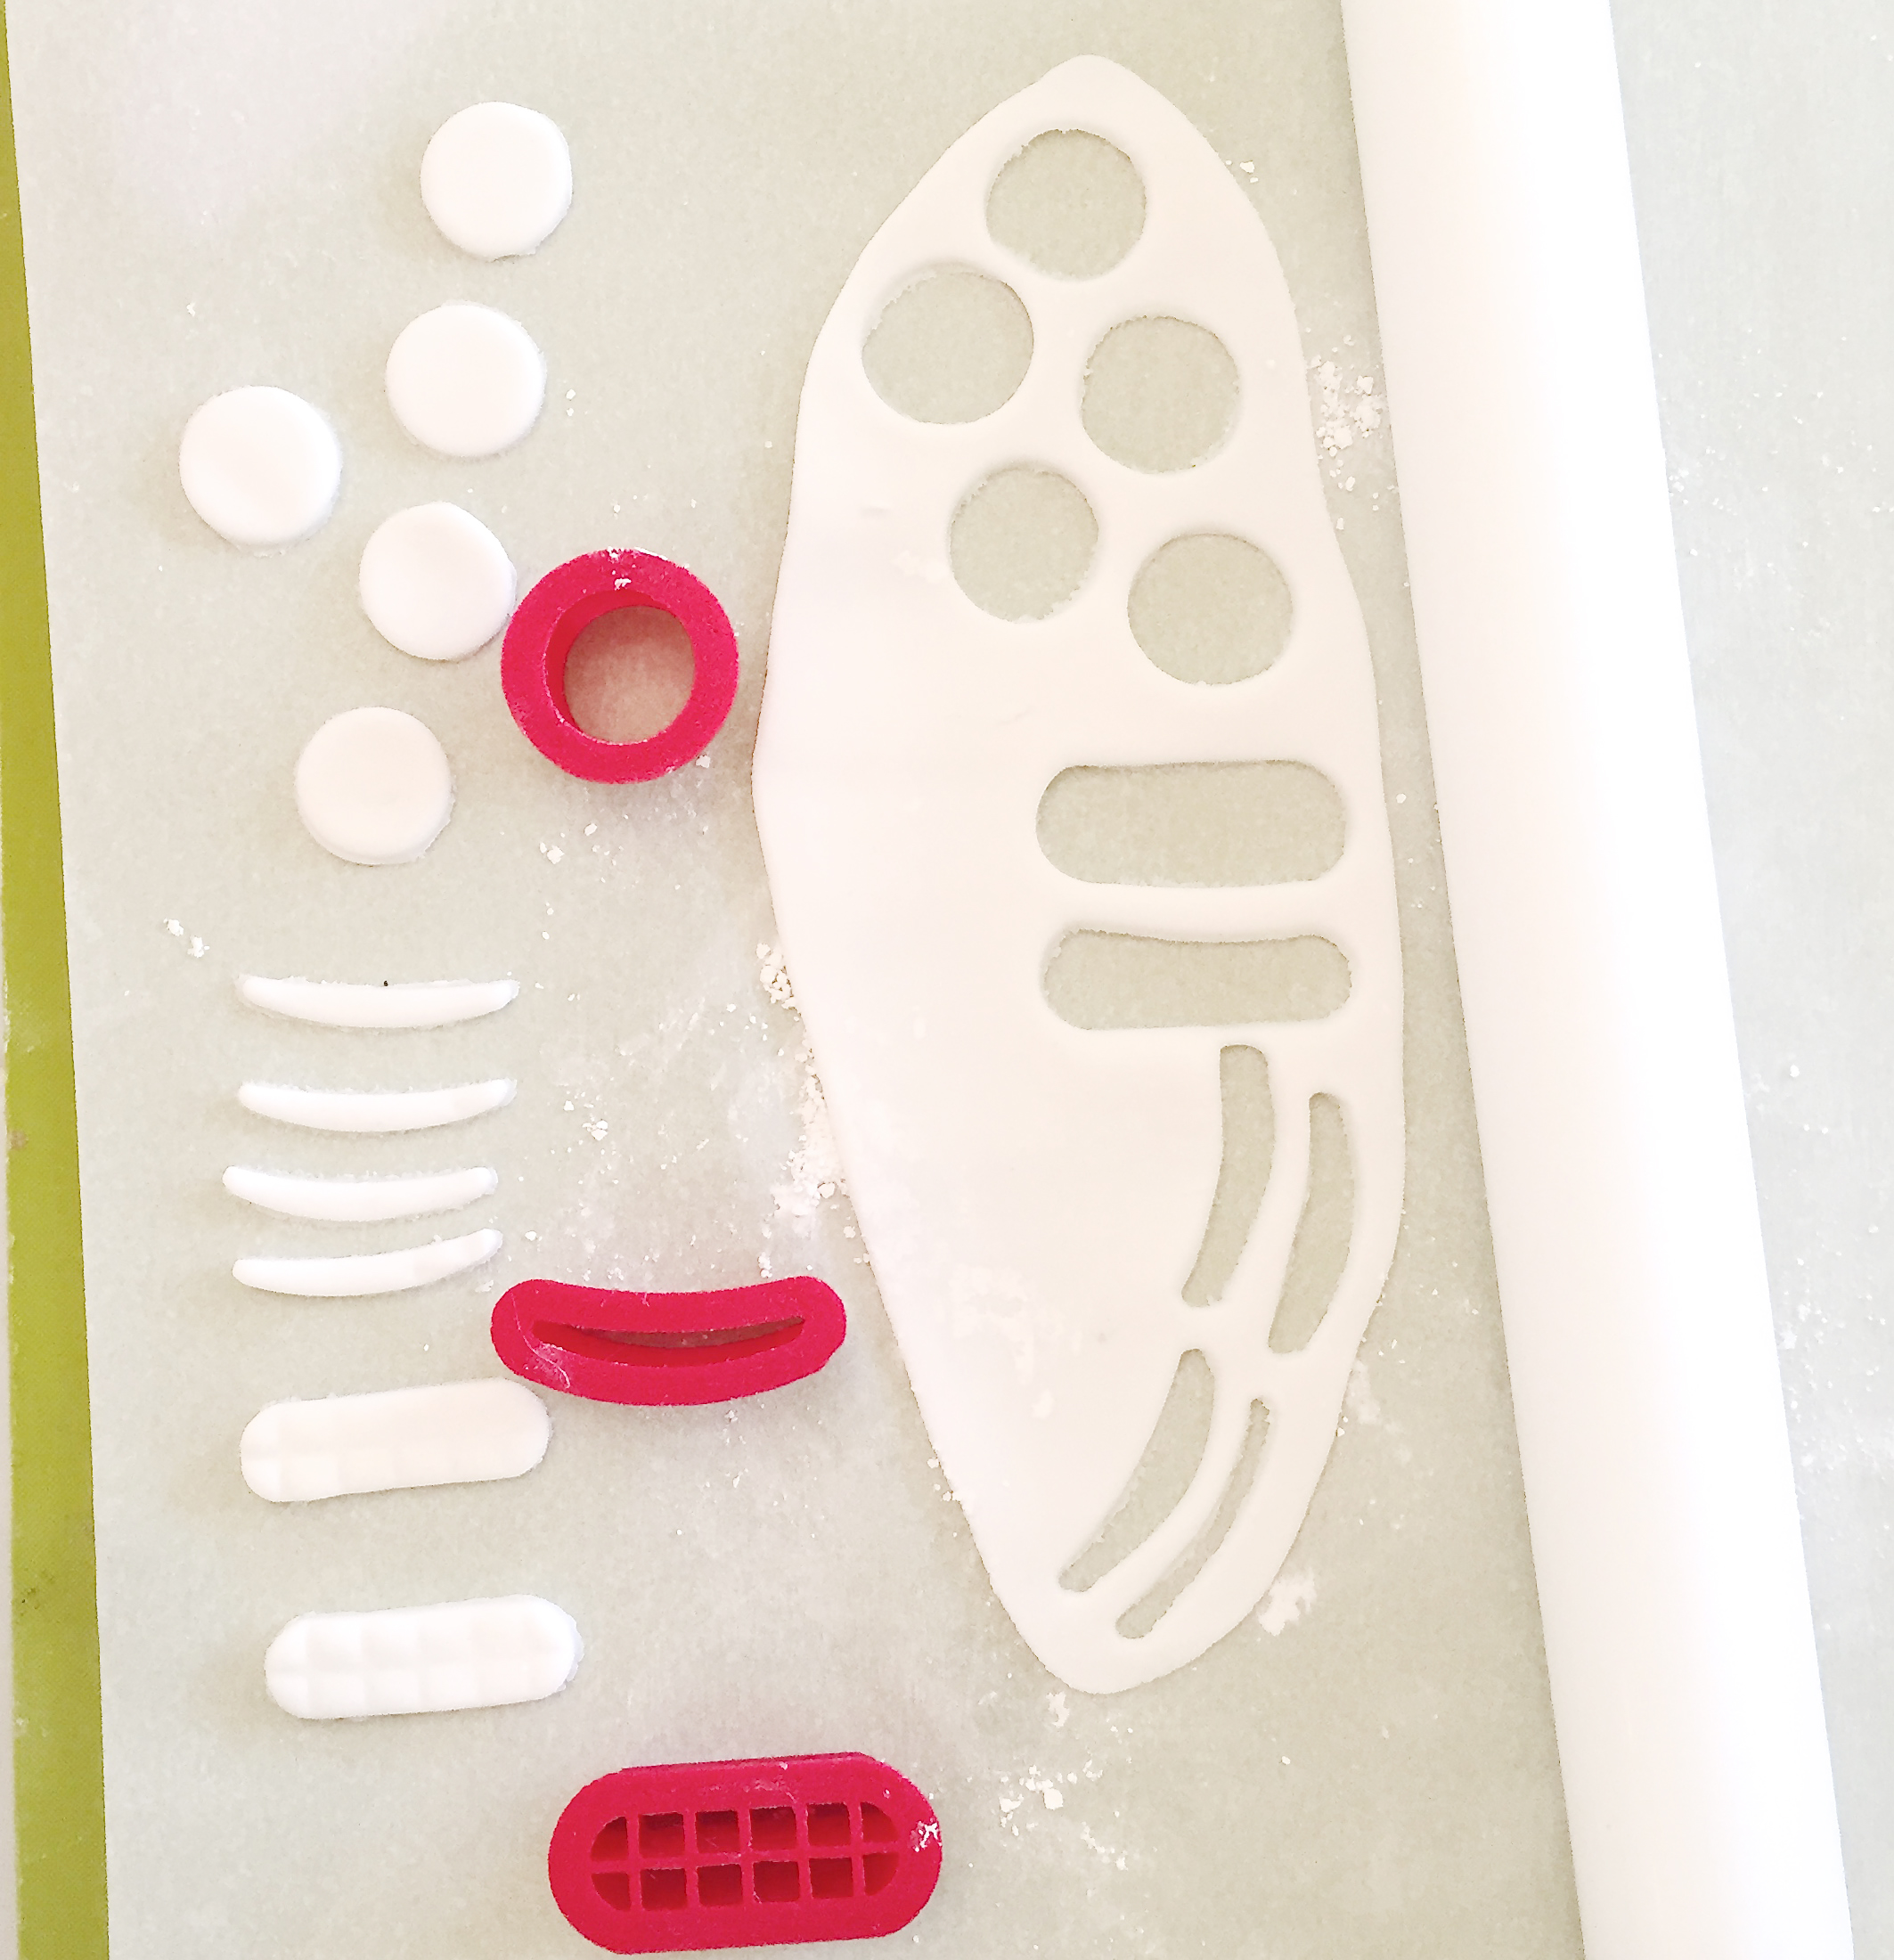
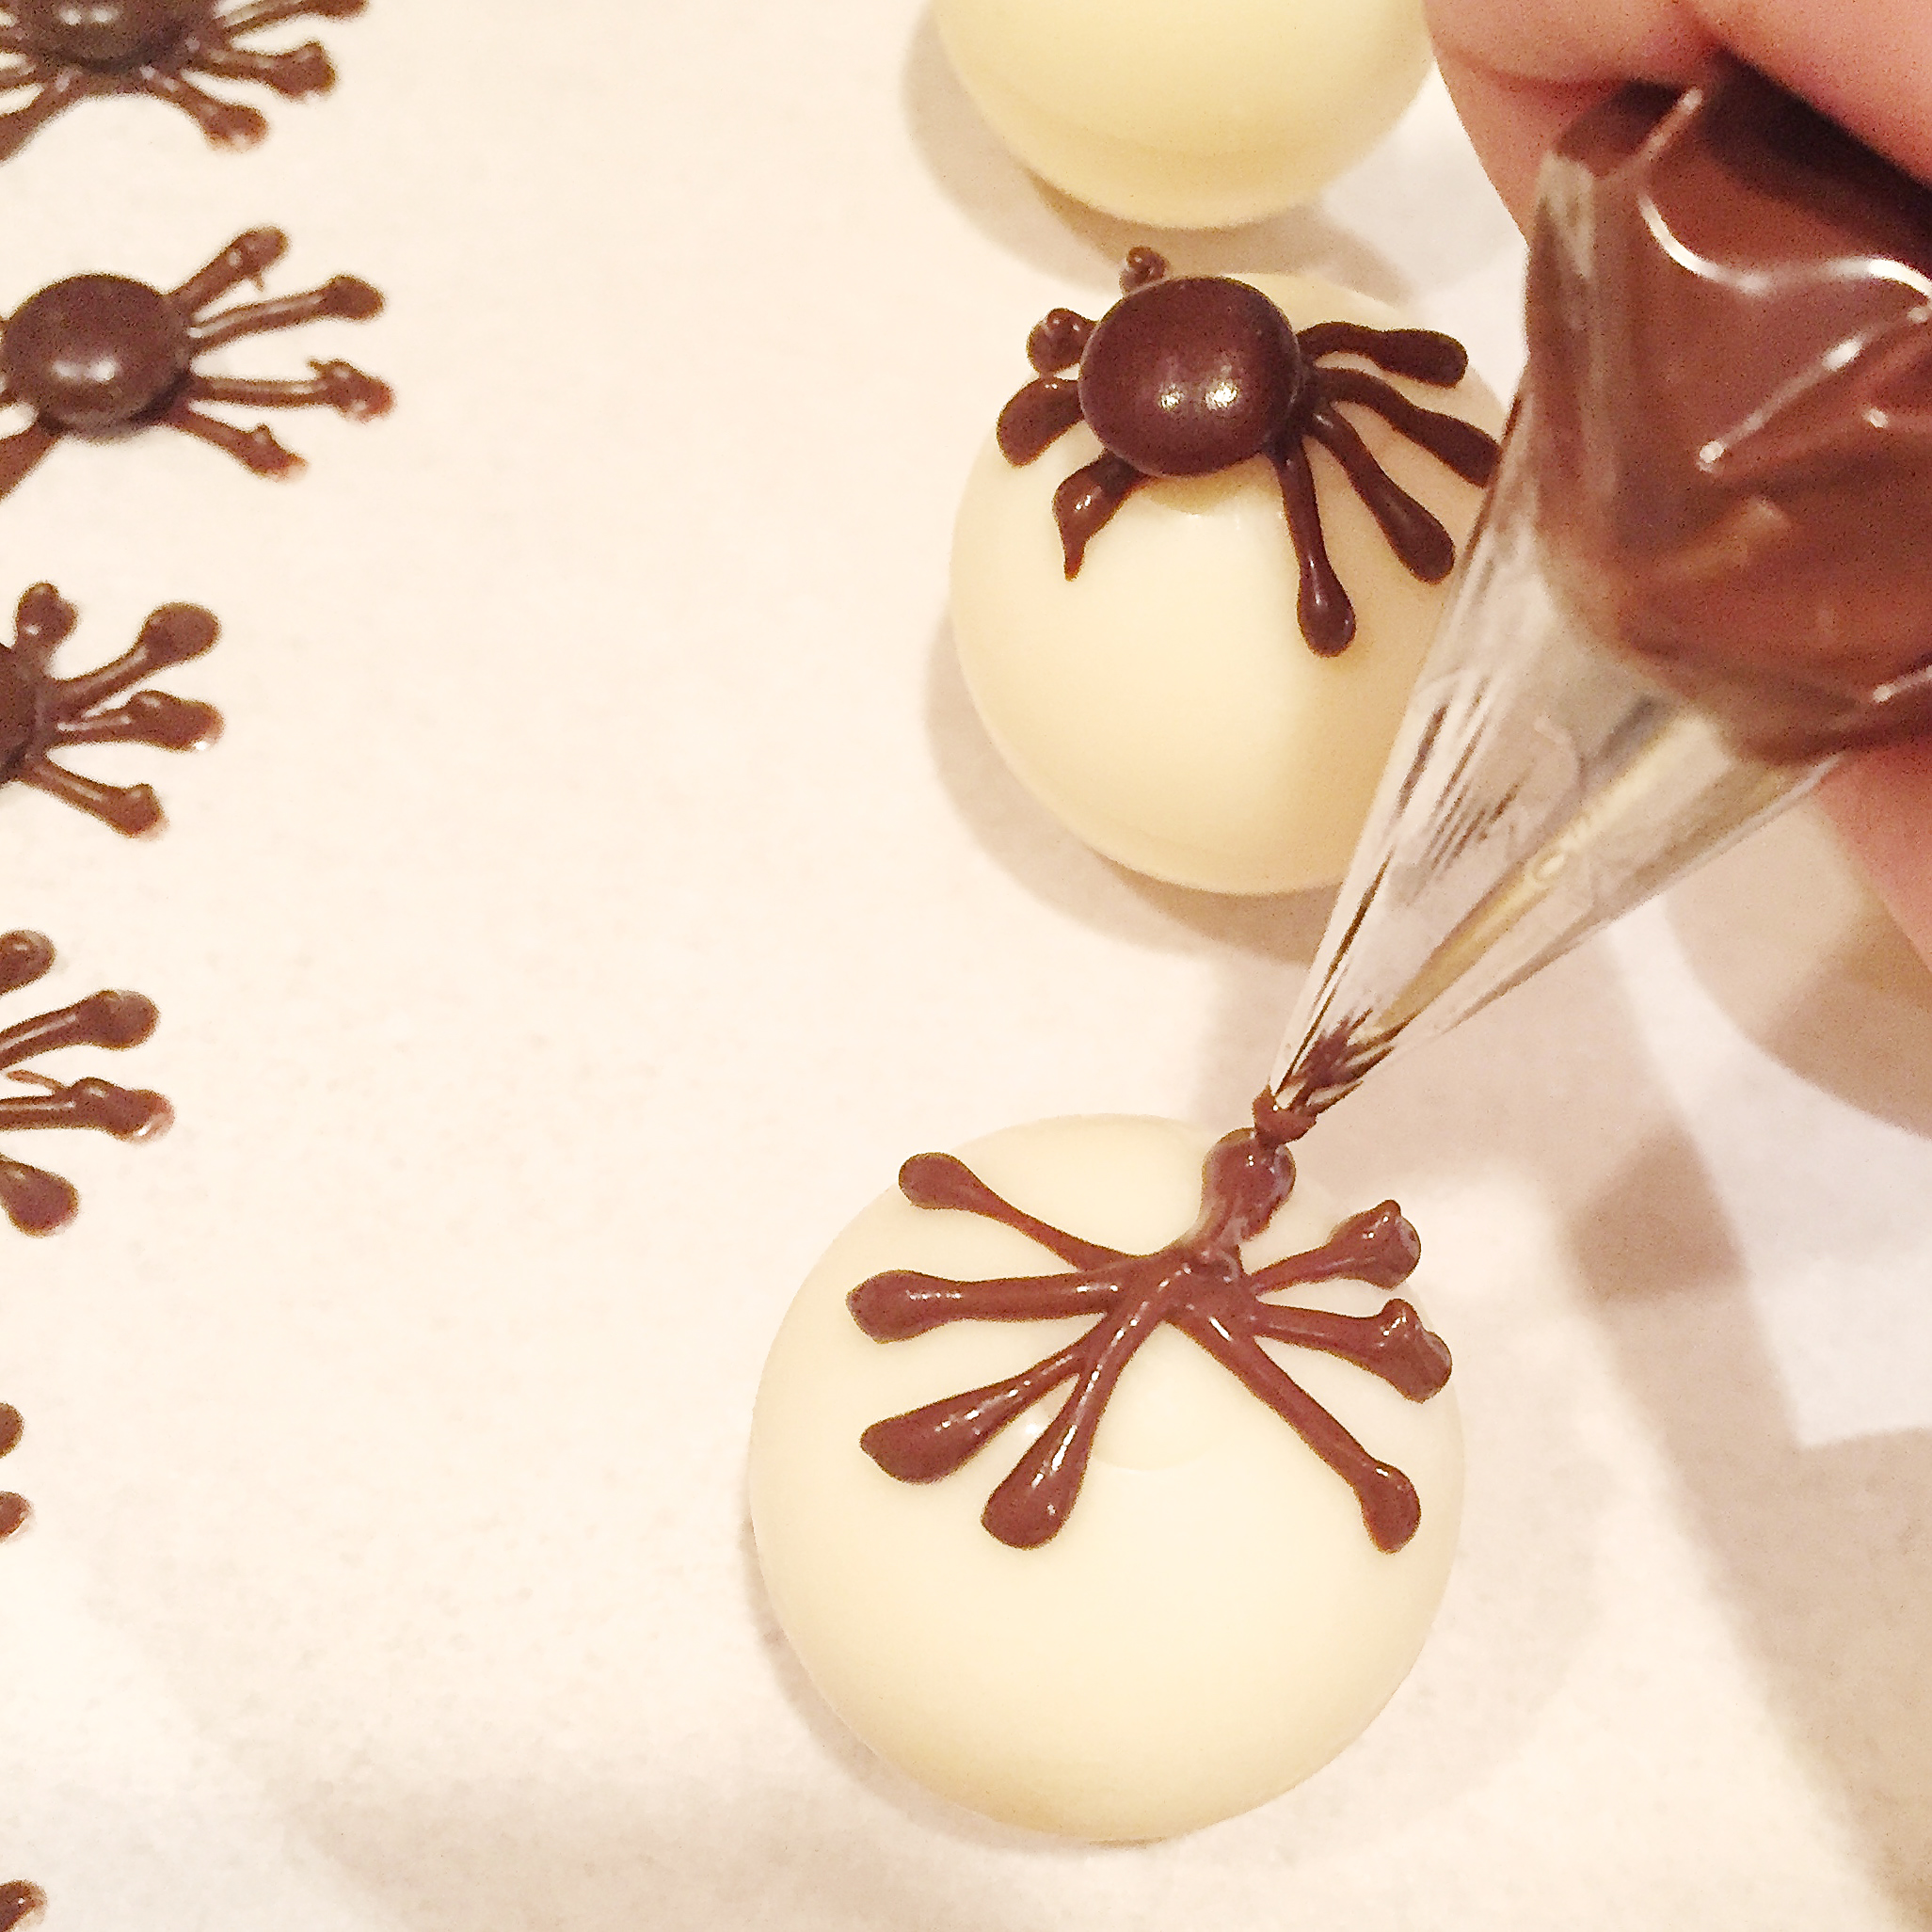
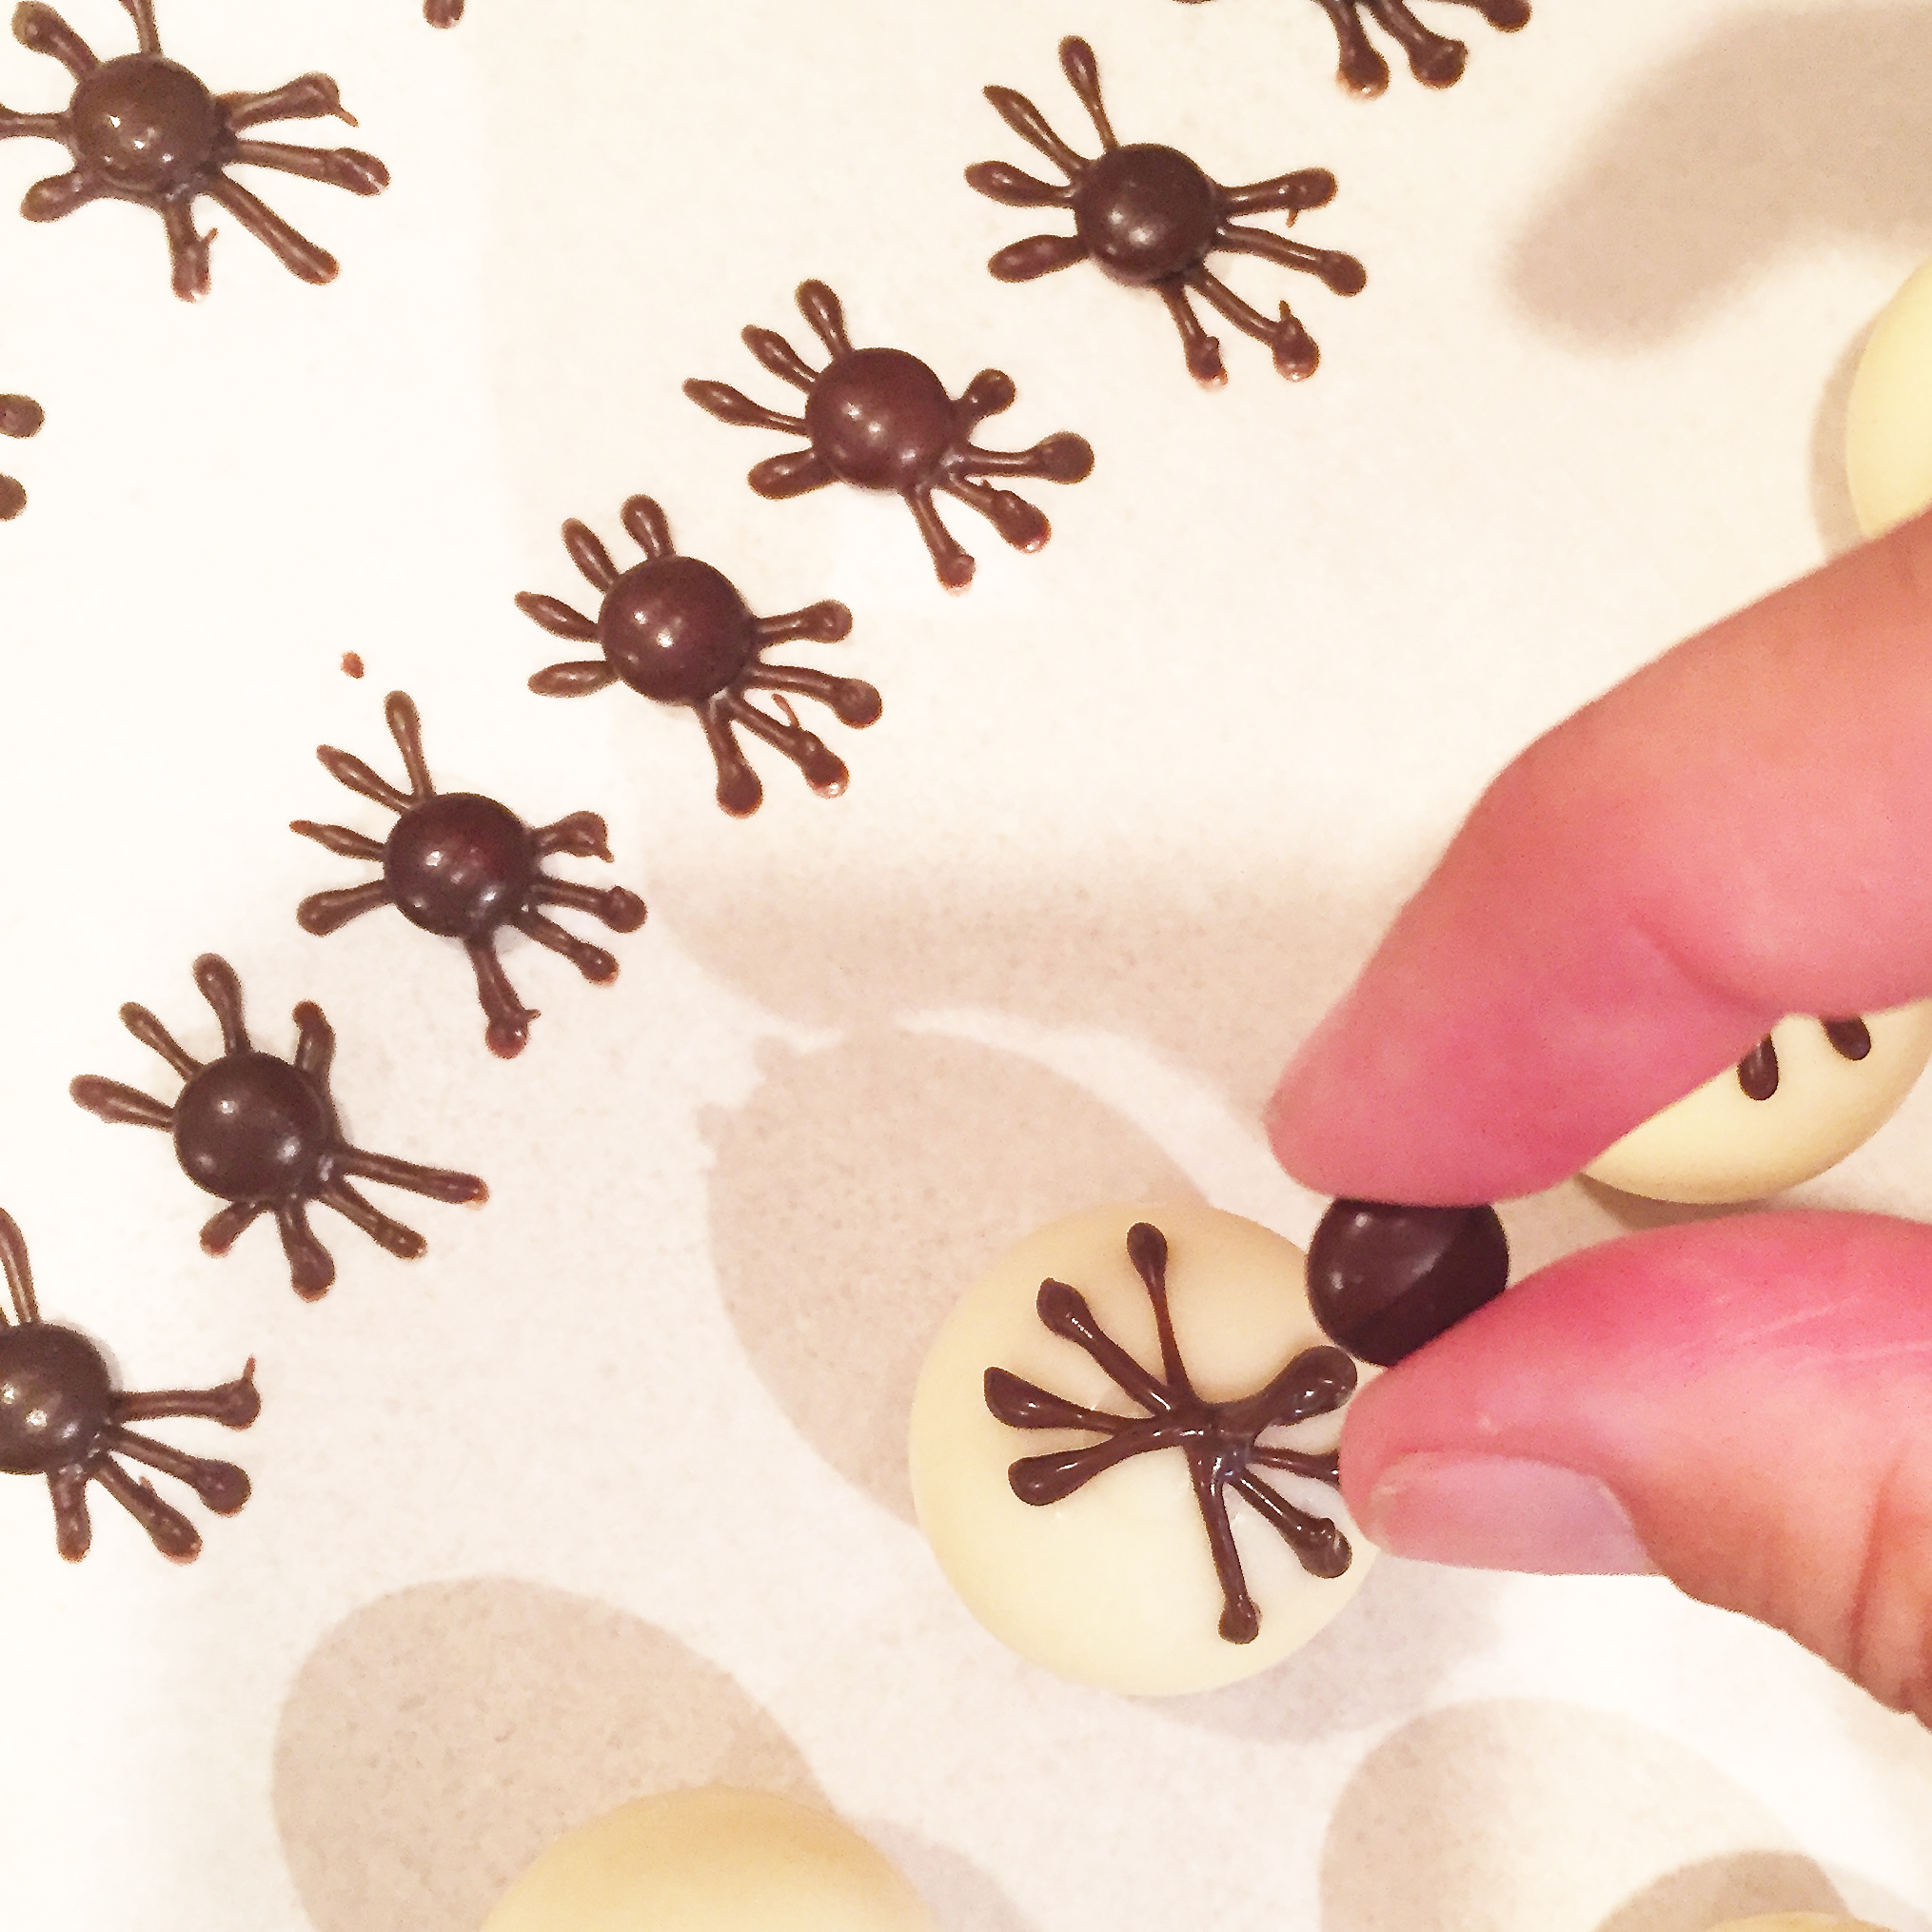
- Make your spiders 1st.
- Melt dark chocolate melts in microwave in 30 second increments, stirring in between until melted and smooth. Spoon into a small zip-top bag and clip a tiny corner off (or use a decorator tip, if you have one).
- Pipe spider legs on parchment paper (see photo) and place an M&M in the center. I make more than 24, because the legs sometimes break when you peel them off.
The photos below are from my recipe for Spider Eggs, and some of them are piped on Lindt truffles. You can see how I piped them on parchment paper though.
- Let spiders harden while you assemble your Oreos.
- Twist apart all of your Oreos.
- Melt a small amount of candy melts (<1/4 cup) in the microwave in 3o second increments, stirring between until smooth.
- Dip the end of a lollipop stick into the melts, and press into white filling of Oreo. Place other half of cookie back on top and press together.
- Place Oreo and stick on a cookie sheet. Repeat this process with remaining Oreos, and then freeze all Oreos until firm (10-15 minutes).
- Melt one and a half bags of white Candy Melts using method from above.
- Once Oreos are chilled, hold with stick and dip into Candy Melts until completely coated.
- Tap on side of bowl to get excess off, and drag across lip of bowl to scrape excess off back of cookie.
- Set on parchment paper to harden.
- Melt remaining white Candy Melts and place in a zip-top bag. Clip the corner off and drizzle over each Oreo to make a messy web-like pattern.
- Immediately place a “spider” on this melted drizzle and allow everything to harden up for at least a couple of hours.
- Once hardened, store in an air-tight container or tie up in little cello bags.
- Enjoy!!!
My thoughts: *Smile*!!! These are fun little treats- and not too difficult to make. I always love my Oreo pops. One of these days I should put all of them in one post since I’m getting such a large collection of them! I hope you get a chance to try these fun little treats! And I hope they are the only spiders you find in your home this fall!!! ~r

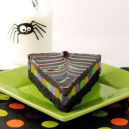
Other spider-y treats found on Easybaked: (click on a photo to see the recipe)