RSS Feed

Tag Archives: holiday recipe

Peppermint “Smoke Bomb” Brownies!

Posted on

Smoke Bomb5Celebrate July 4th with these fun peppermint brownie cups! Fun to make and sooooo yummy to eat!

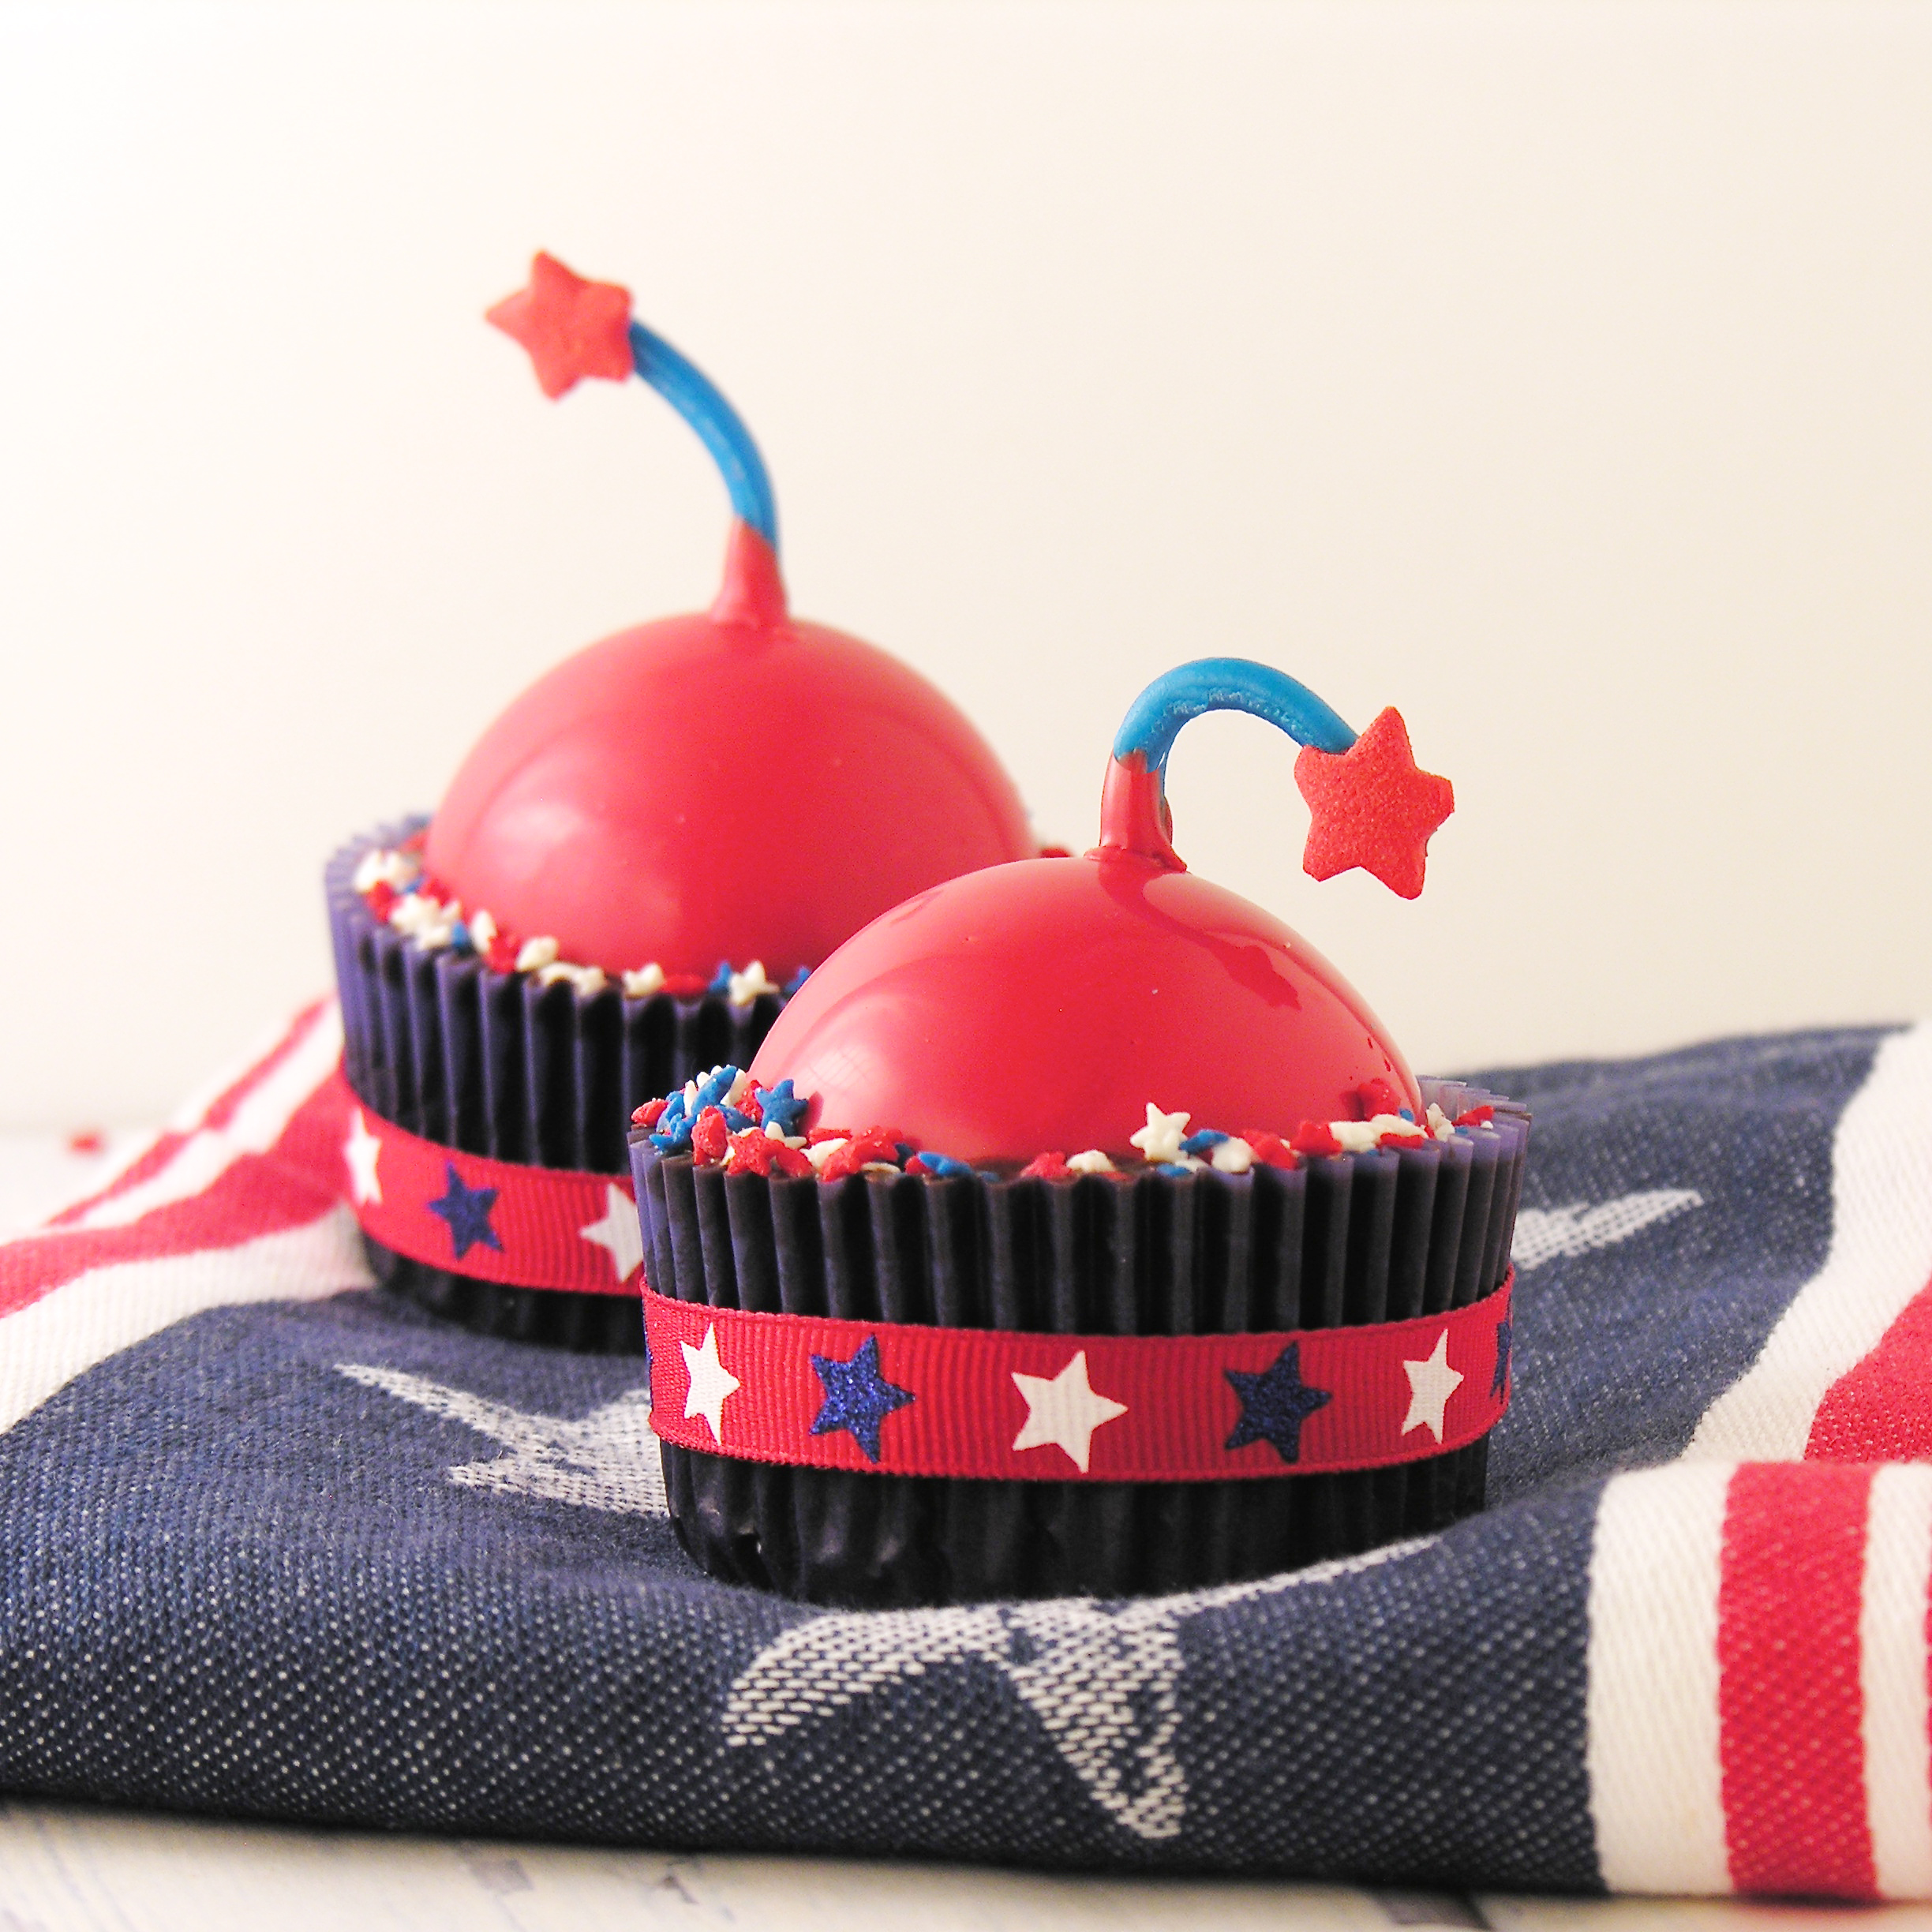
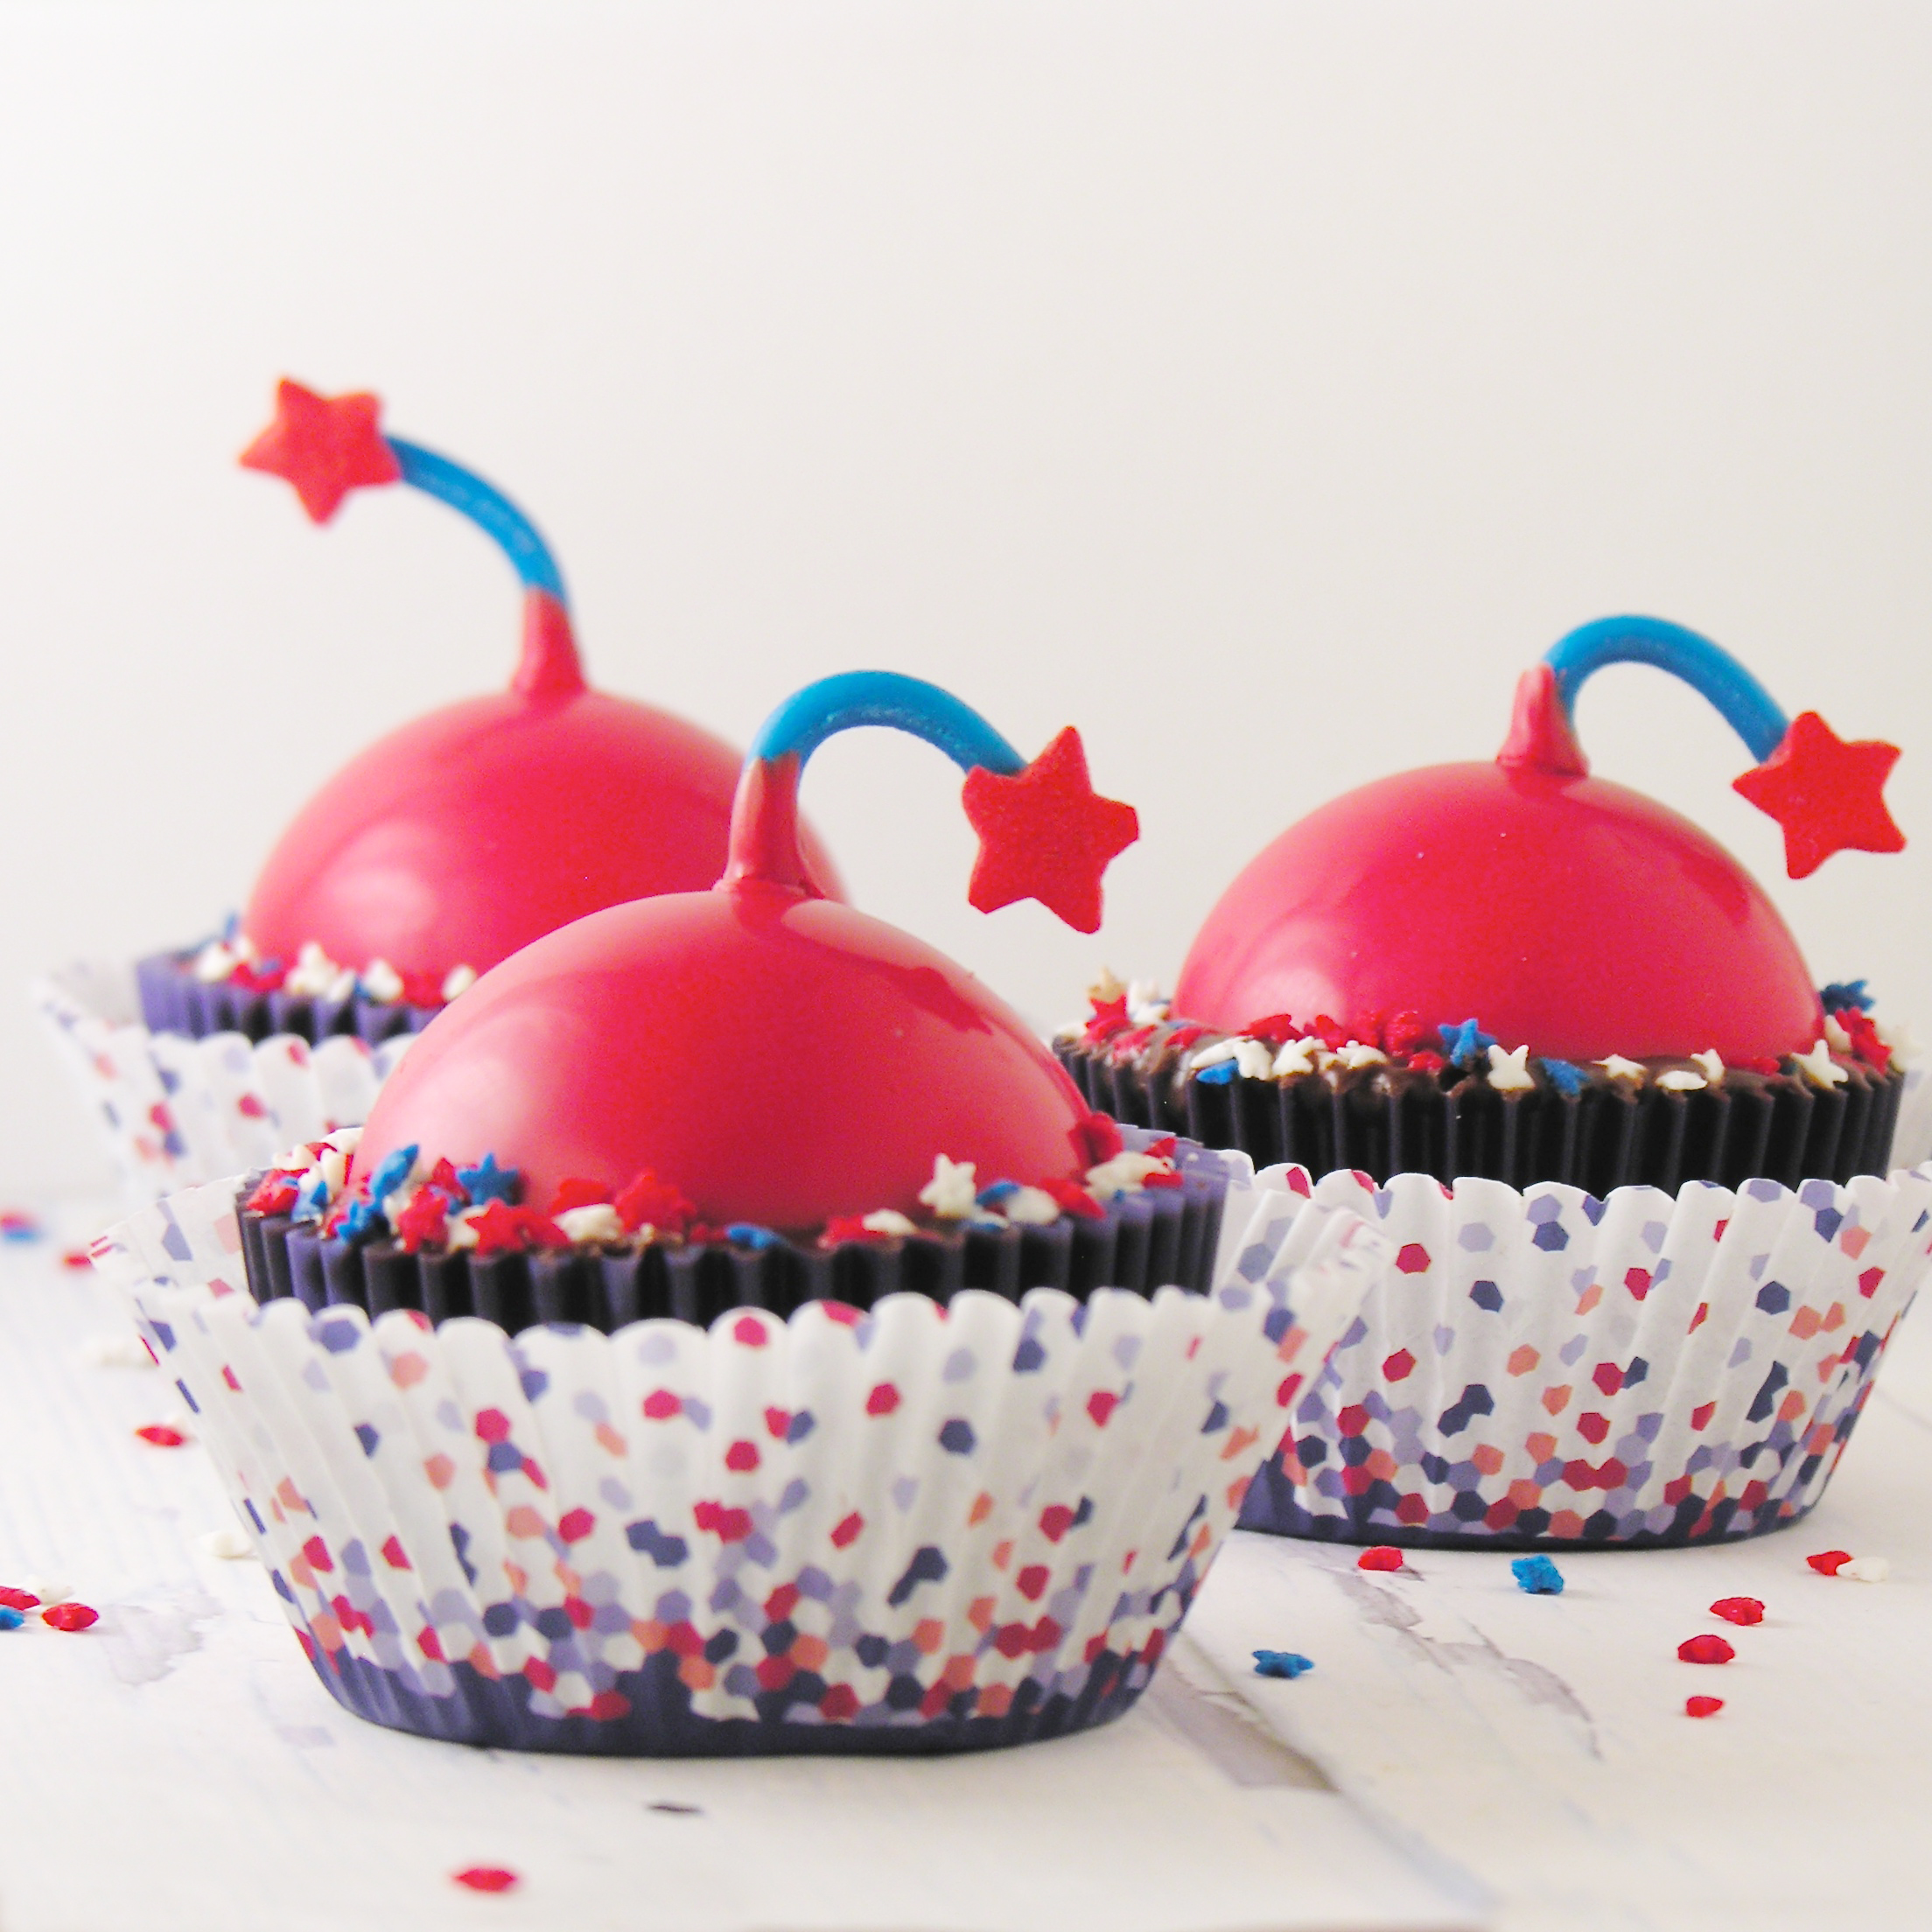
I got a little chocolate bomb mold a few months ago and I love it. I have used it for so many creative things! This time, I am using it to make actual bombs- edible smoke bombs that is! The inside of this red candy shell is packed with sweet mint filling that mixes with the dark chocolate of these brownies perfectly!

Smoke Bomb1

Yes, these are a little fussy. It seems like anything super fun in the food realm takes some effort. If you want to make these SUPER easy, they are simply an adaptation from my Candy Cane Brownies from last Christmas. You could certainly add a little blue to the mint filling and just sprinkle stars on top for a fun (and equally delicious) patriotic alternative. OR you could be an over-achiever and make mint smoke bombs. Your choice! 🙂

Smoke Bomb2

Here is how we put these fun treats together: (printable recipe here)

INGREDIENTS:

Brownie:

  • 1cup butter
  • 2 cup sugar
  • 3 eggs
  • 2 teaspoons vanilla
  • 2 cups flour
  • 1/2 cup cocoa
  • 1/2 teaspoon salt
  • 1 cup milk

Chocolate Glaze:

  • 6oz. semi-sweet chocolate chips
  • 6 tablespoons butter (do not substitute margarine here!)

Mint “Smoke Bombs”:

  • 5 cups powdered sugar
  • 8 tablespoons (1/2 cup) melted butter
  • 2 teaspoons peppermint extract
  • Food color in red and blue
  • One bag of Wilton’s Candy melts in red
  • One bag of Twizzler’s Red, White and Blue licorice (I found them at Target)
  • Large Star Sprinkles
  • Mini Star Sprinkles

DIRECTIONS:

Brownie:

  • Preheat oven to 350F.
  • Cream butter and sugar together. 
  • Beat in eggs, cocoa, vanilla and salt.
  • Add flour and milk (alternating them and mixing well in between)
  • Spoon evenly into 24 cupcake liners in a cupcake tin.
  • Bake at 350 degrees for 15-18 minutes (don’t over bake- they will start to pull away from the liner)
  • Cool.  
Chocolate Glaze:
  • Melt butter and chocolate together in the microwave in 30 second increments, stirring in between until completely melted and smooth.
  • Set aside until bombs are made

Mint Smoke Bombs:

  • Melt red candy melts in microwave in 30 second increments, stirring between until smooth.
  • Use a pastry brush to brush melts into a chocolate bomb mold and freeze for a couple minutes until hard. Do two coats- freezing in between.
  • Make mint filling  by adding melted butter to sugar and extract.
  • Mix well, using water to bring it to a thick but spreadable consistency.
  • Divide into 3 parts and color 2 of them red and blue using food coloring.
  • Place all three colors into a large zip-top bag and swirl together with a knife before sealing bag.
  • Cut a corner off bag and pipe mint filling into each red bomb shell- filling them about 3/4 full.
  • Refreeze these for a few minutes before gently popping them out and setting them on a plate. (I took pictures of this process in an earlier recipe here– but I didn’t fill these shells all the way full like I did there).
  • Repeat this process until you have 24 mint bombs ready.
  • Assemble brownies by spooning a little glaze on top of a brownie cup and then setting a bomb on top. Sprinkle edges with small star decorations and freeze to harden the glaze.
  • Once all your brownies are in the freezer, make the wicks by pulling apart the licorice and cutting into 1 to 2 inch pieces of blue. 
  • Dip one end into the leftover red candy melts (you might need to remelt these) and set it on top of a large red star sprinkle to harden. 

Smoke Bomb7Smoke Bomb9

  • Once these have hardened, and your brownies are nice and cold, take a few brownies out of the freezer, dip the end of a “wick” in red candy melts and hold it to the top of a cold peppermint bomb. It should immediately set and hold the wick in place.
  • Then- simply enjoy the smiles as people bite into your yummy (and very patriotic!) peppermint brownies!!!

Smoke Bomb6

My thoughts: Ah…I loved making these. I always wonder if the idea in my mind will come across the way I pictured it, and these did—-makes me smile! I loved sharing these with friends and family too. Makes me wish I had a 4th of July party to go to this year!!! 🙂 I hope you get a chance to try these and that you love them as much as I do!  ~r

Smoke Bomb3

Other fun desserts to make for the Fourth of July!!! (click on a photo to see the recipe):

Bomb Pop Cupcakes!!!American Flag Oreo Pops!!!!Patriotic Tie-Dye Cake!!!!Fire Cracker Cookies!


Advertisement

Tepee Cupcakes!

Posted on

Tepee CupcakesThese adorable little tepees are filled with yummy chocolate cake and are sure to make everyone smile at YOUR Thanksgiving feast!

Since I spent 8 months on the Navajo Nation and learned to love their culture and traditions, I thought I’d skip the Pilgrim themes and go straight for the Indians this Thanksgiving. My first trip out to the reservation I wondered if Tepees were even used by the Navajo. They are- but only for special ceremonies. The Navajo traditionally lived in round or multi-sided structures called hogans.

AZ-92DSC_0815

Here is a picture of a ceremonial tepee and of my friend Rod by his family’s hogan.

I had quite a time making these cute little desserts, but I hope that my experimenting will help you make this perfectly the 1st time! They really aren’t difficult once you figure out what the best system is! I will give you my recipe 1st (that’s what you’re here for, right??) But after the recipe I will share my trials and tribulations in the process!

Teepee4

Here’s how to make these cute little treats: (printable recipe)

INGREDIENTS:

  • 24 pointed ice cream cones
  • One boxed cake mix in chocolate (or any flavor you like!), plus water, oil and eggs to make according to box.
  • One bag (12 oz) of Wilton Candy Melts in dark chocolate.
  • Leaf sprinkles (at least one to two cups of them)
  • Straight pretzel sticks
  • DIRECTIONS:
    Cover the entire top of a large springform pan with aluminum foil, wrapping it around several times.
  • Use a small knife or scissors to make a tiny slit in the center.
  • Push the pointed tip of one ice cream cone through the slit until the tip rests on the inside bottom of the pan.
  • Repeat this with the rest of the cones (depending on the size of your pan you may need to bake these in two batches).

Baking pointed cones

  • Preheat oven to 350F degrees.
  • Make cake mix according to box, and spoon or pipe into cones, filling them about 2/3 full.
  • Bake at 350F degrees for about 15-20 minutes.
  • Allow them to cool before removing.

Ice cream cone cupcakes

  • Use a knife to cut the points off of each cone. I scored around the edge with the knife and then just snapped the tip off with my fingers.
  • Trim off tops of cupcakes to make a flat “bottom”
  • Melt candy melts in microwave in 30 second increments, stirring in between, until melted and smooth.
  • Dip the flat end of the cone into the chocolate, coating it completely.
  • Dip chocolate into a bowl filled with leaf sprinkles.
  • Set coated cone on parchment paper to harden up.
  • Place remaining chocolate into a small zip-top bag and clip a corner.
  • Pipe a bit of chocolate on the top of each tepee and then stick 3 pretzel sticks into the top.
  • After chocolate has hardened up, serve and enjoy!!!

Teepee cupcakeTeepee CupcakeTeepee Cupcake

Teepee cupcakesThe story behind the cupcakes:

These are the result of much experimenting. I saw a picture of tepee cupcakes on Pinterest and was intrigued by this idea, but I couldn’t imagine how you would bake cake batter into a pointed cup…? So I googled the idea and discovered that nobody really has any very good ideas for this…? I wondered if I could maybe cut the top point off 1st, stick the bottom into something like cookie dough and pipe batter in to bake upside down? I tried this with the following result:

Recipe fail!These really made the most beautiful exploding volcano-type effect in the oven. It was very entertaining, although not what I was hoping for!

Many sites recommended poking the cones into disposable tin foil pans, but they all said to watch them closely because they tip…and to be careful of the hot cake batter when righting them. Oh my. Not my sort of recipe. Sounds like one big mess in my oven!

Eventually I tried the foil and springform pan idea and it was not only easy but very sturdy. Nothing tipped even a tiny bit!

Teepee Cupcakes

My thoughts: YUM! These are just delicious and fairly easy to make once you know how to get those cupcakes baked. My only advice: make sure you cut enough off the top that all three of those pretzels fit into the opening. A few of mine were too tight, and I had to use the chocolate melts to cement them in place. I hope you have fun making these! I certainly did!  Enjoy!! ~r

Other fun fall recipes here on Easybaked (click on a photo to see the recipe):

Caramel Pecan CookiesPeanut butter Acorn Cookies!Honey cut-out cookiesPumpkin Pie Dip!

%d bloggers like this: