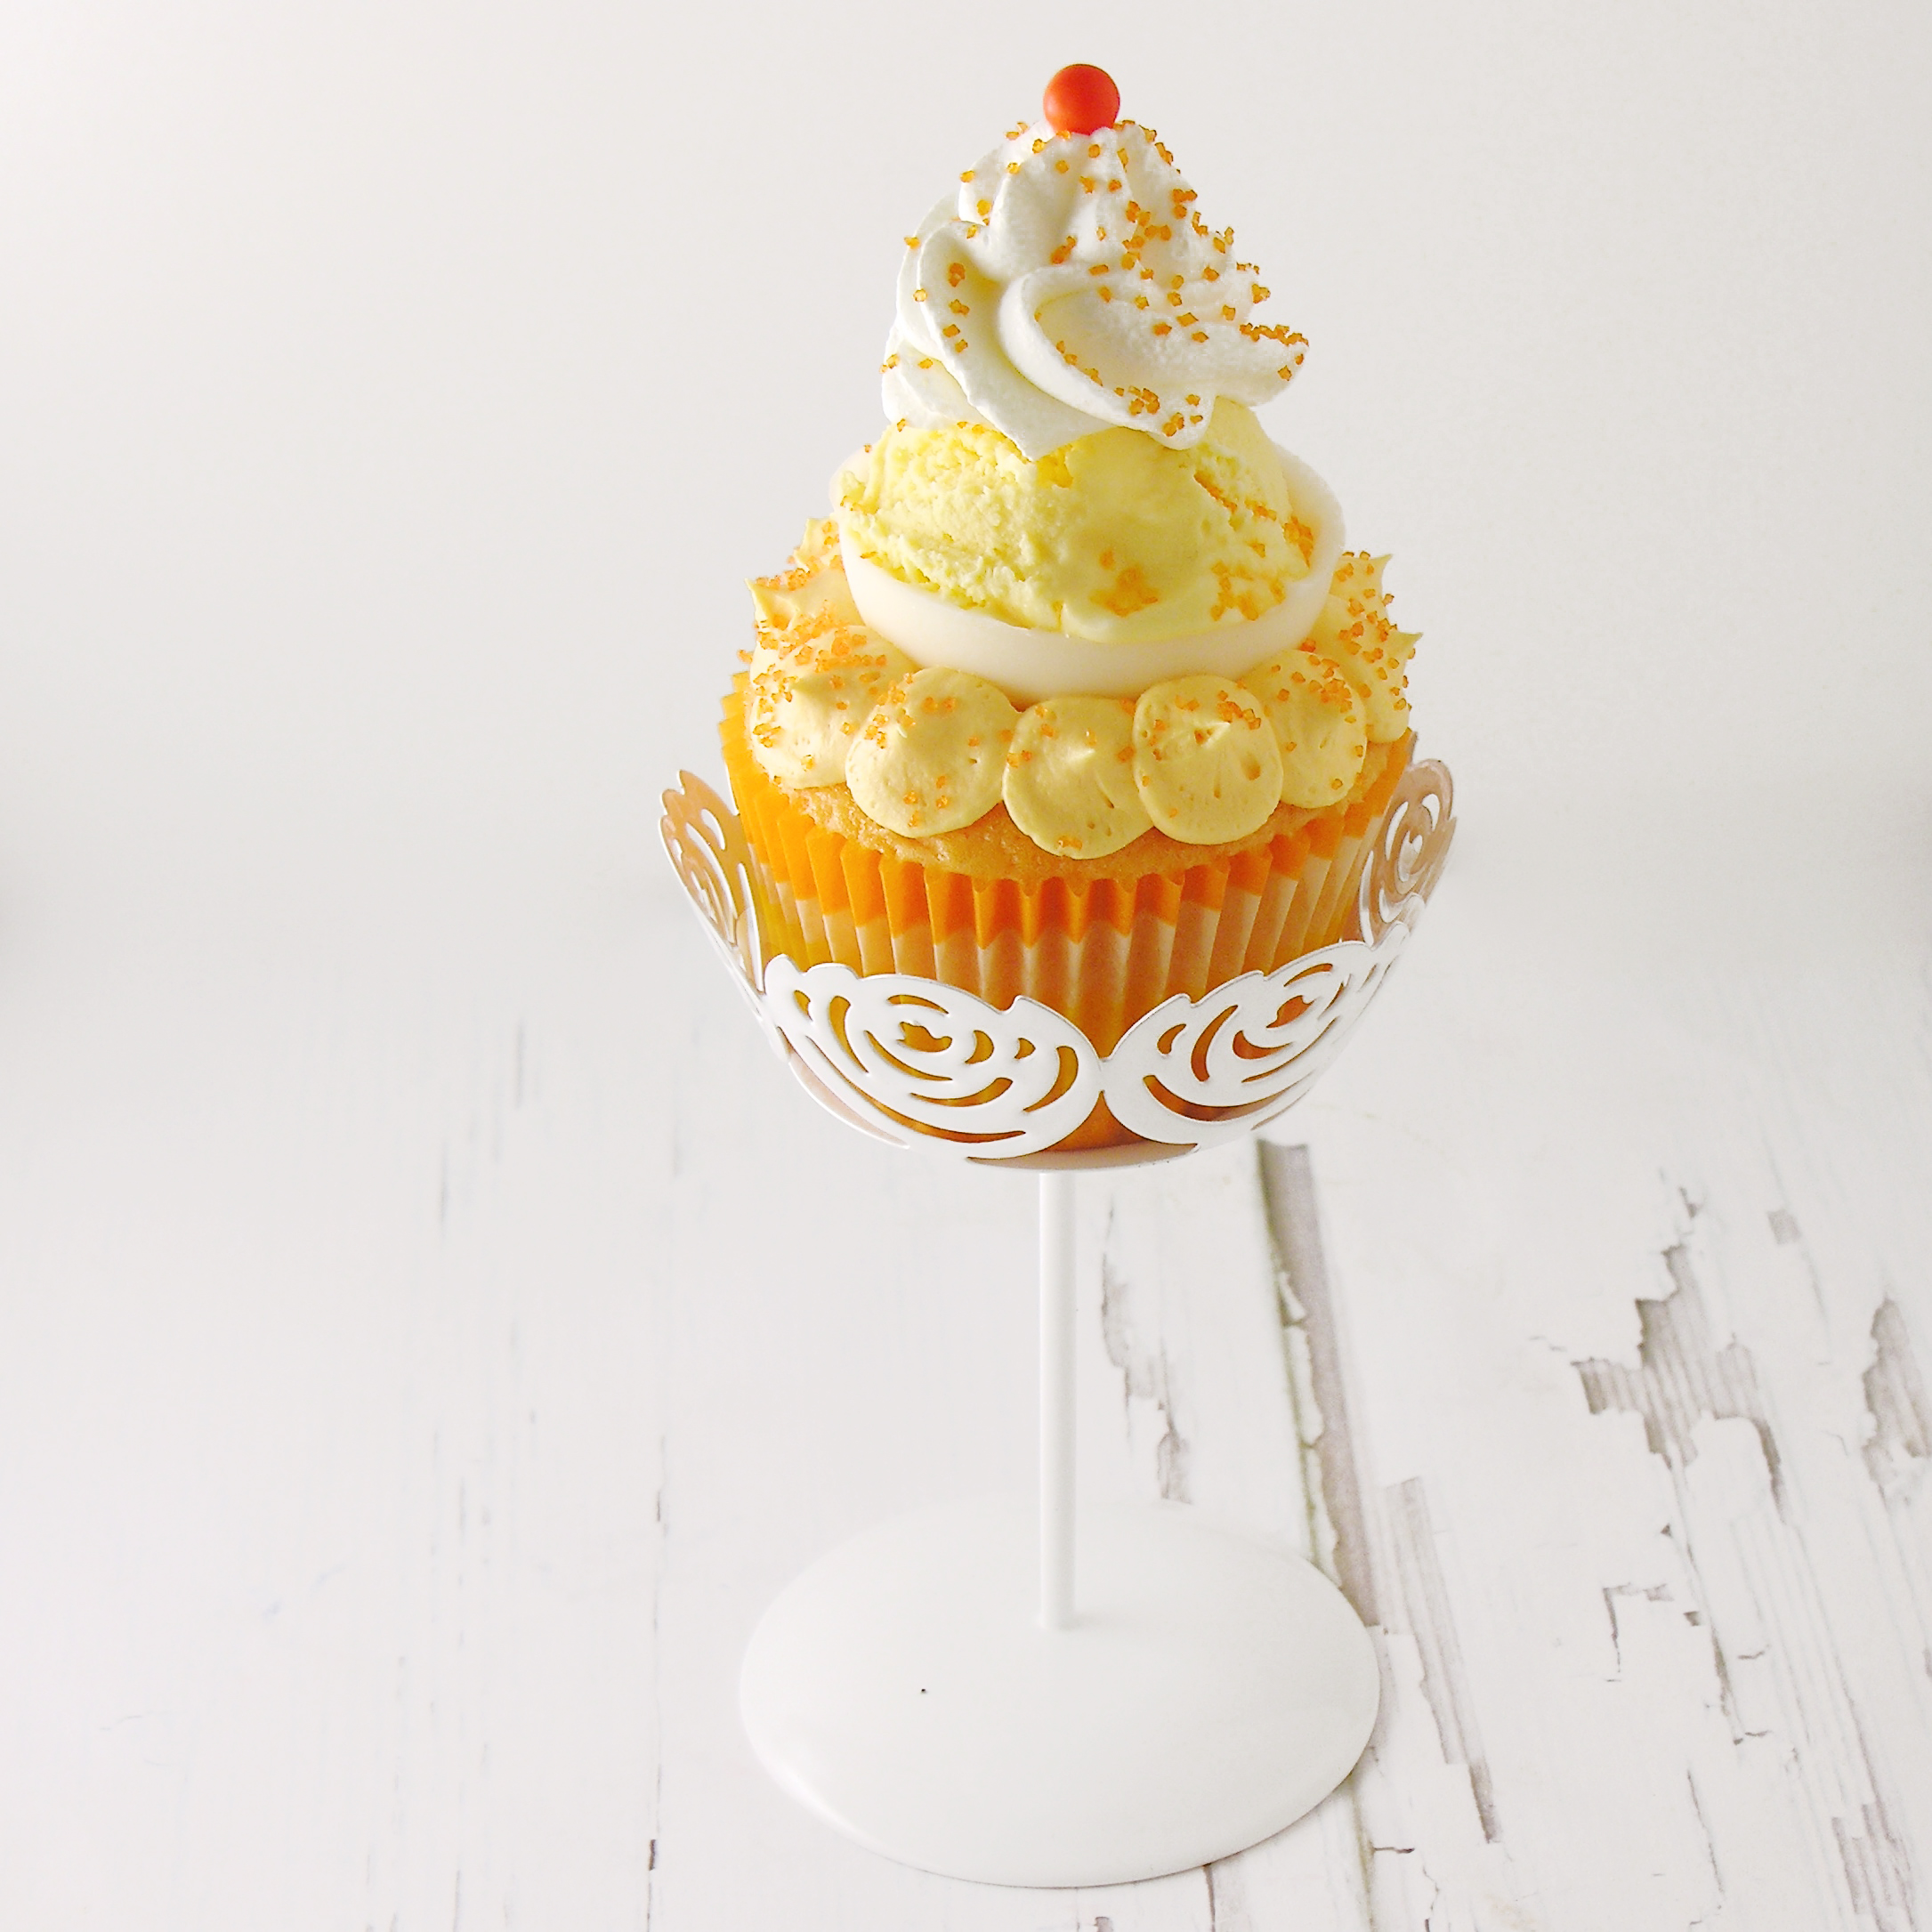
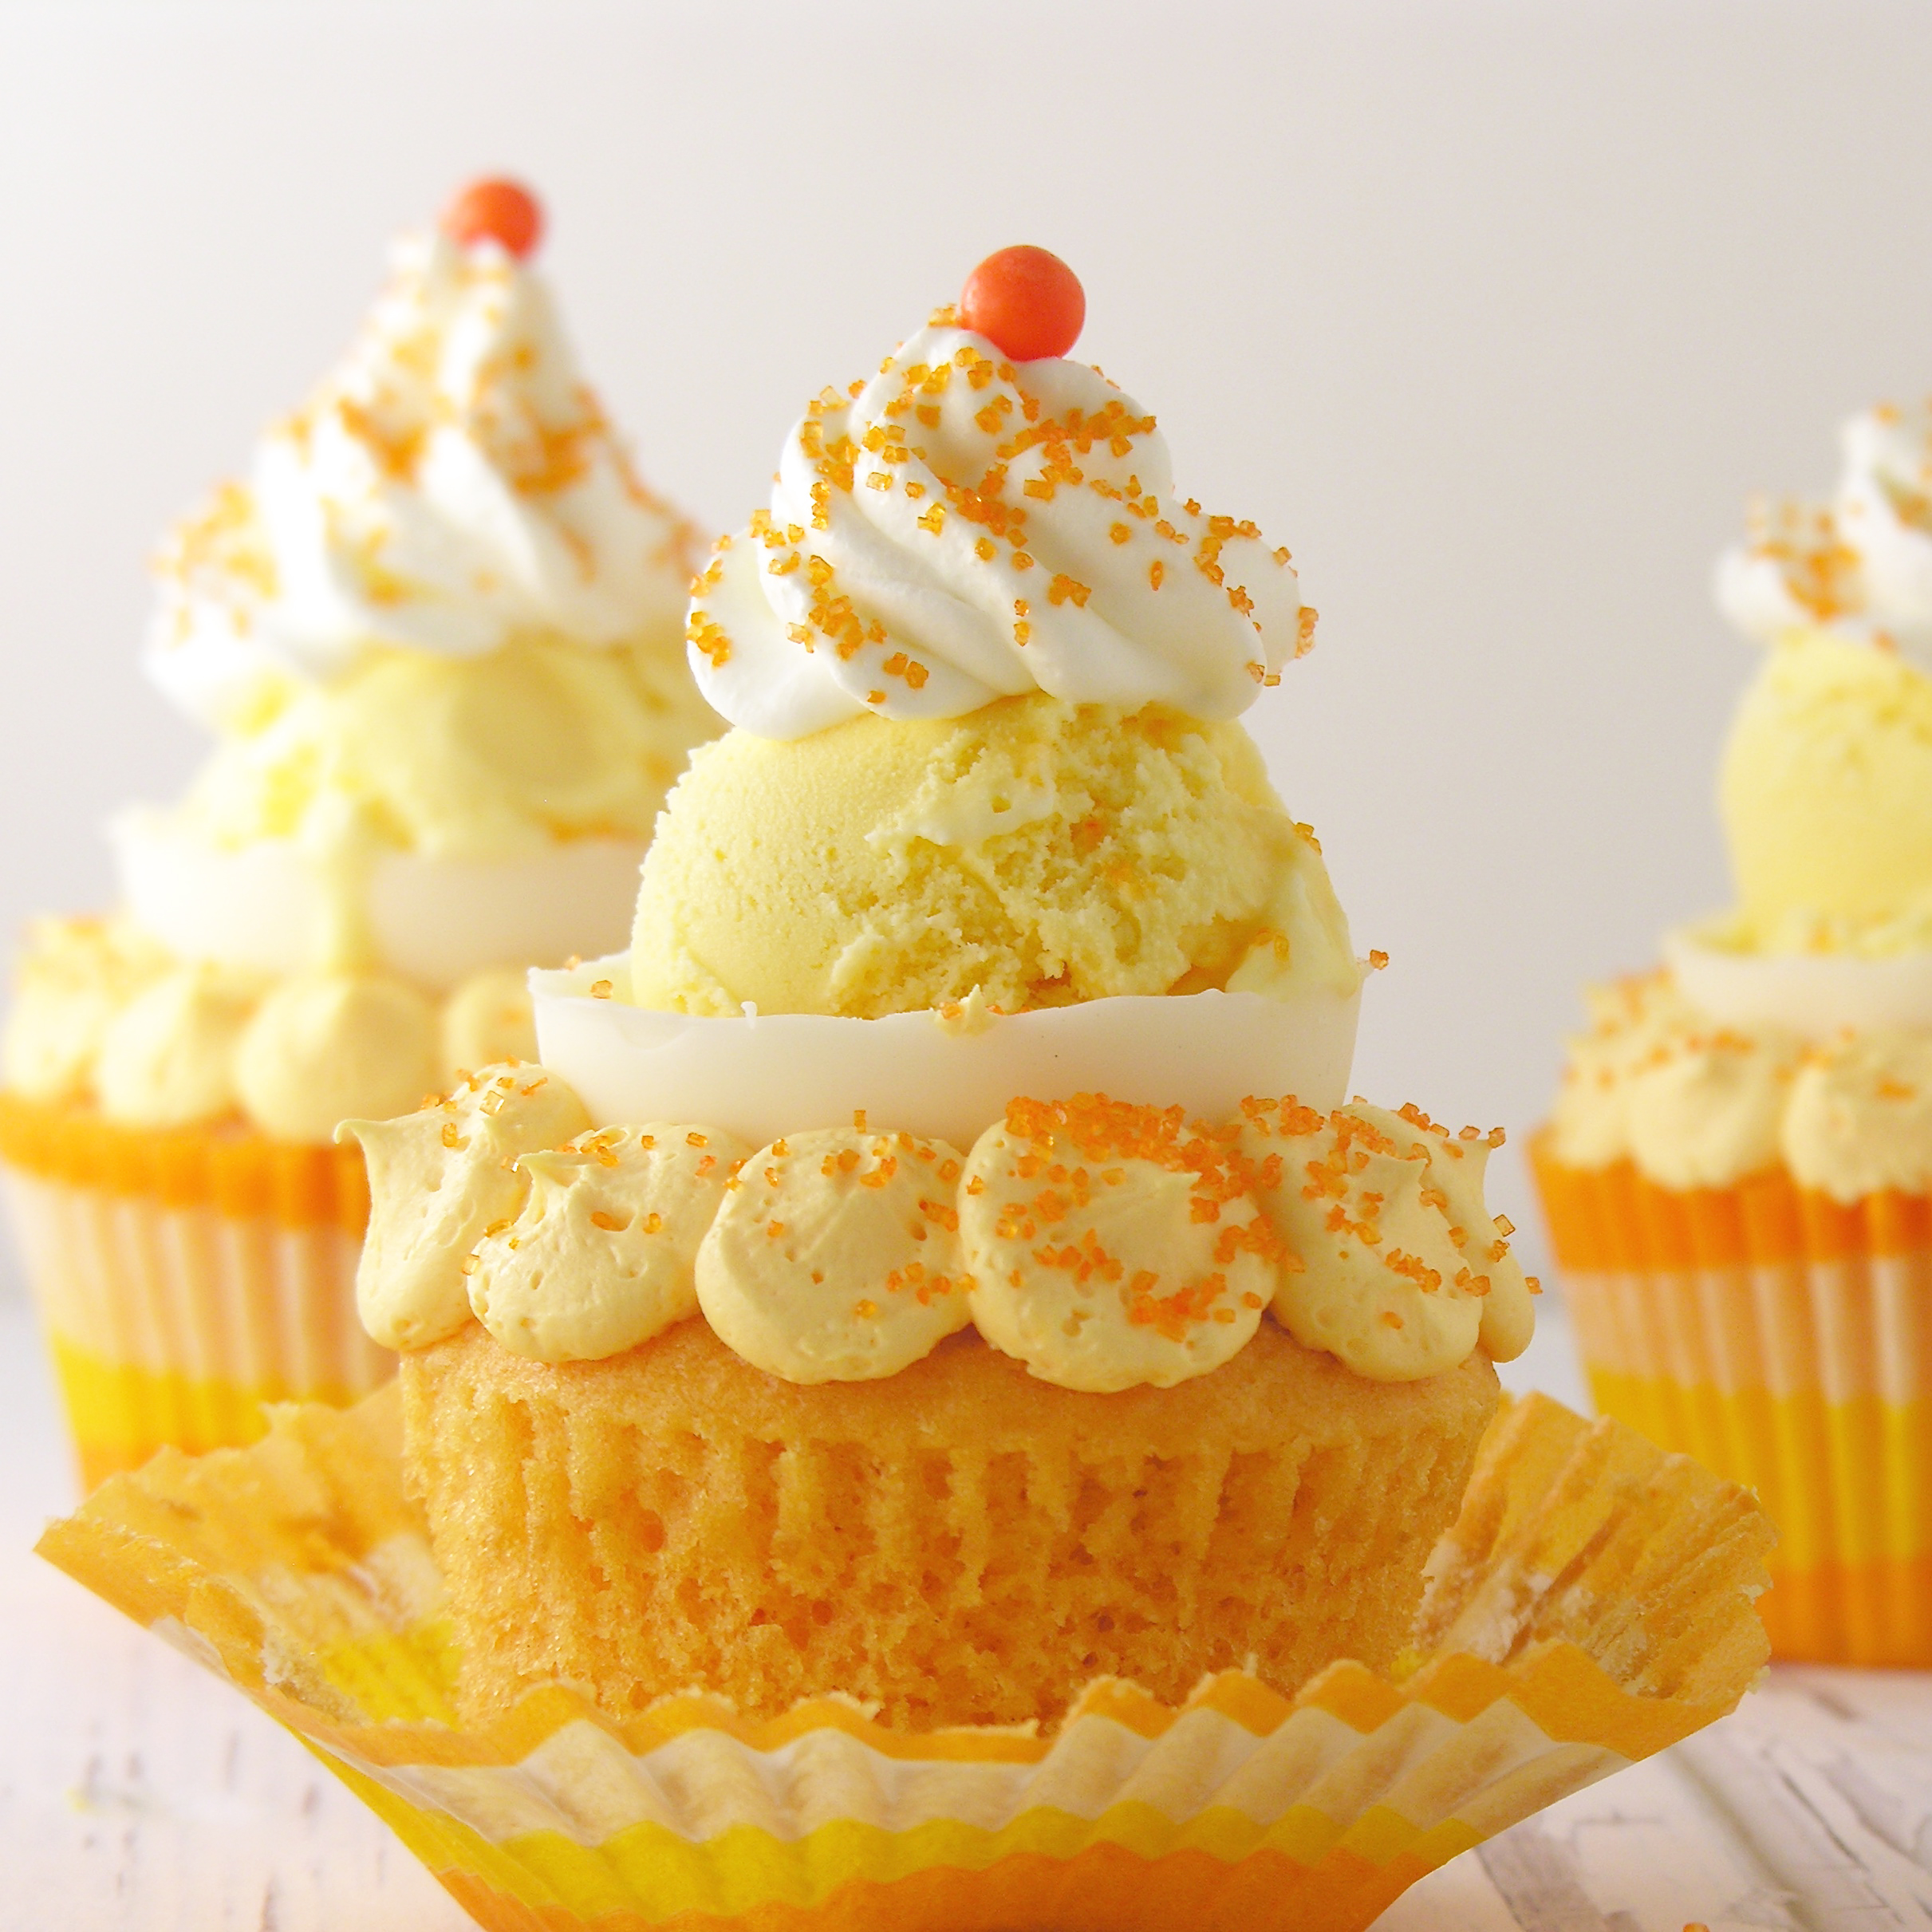
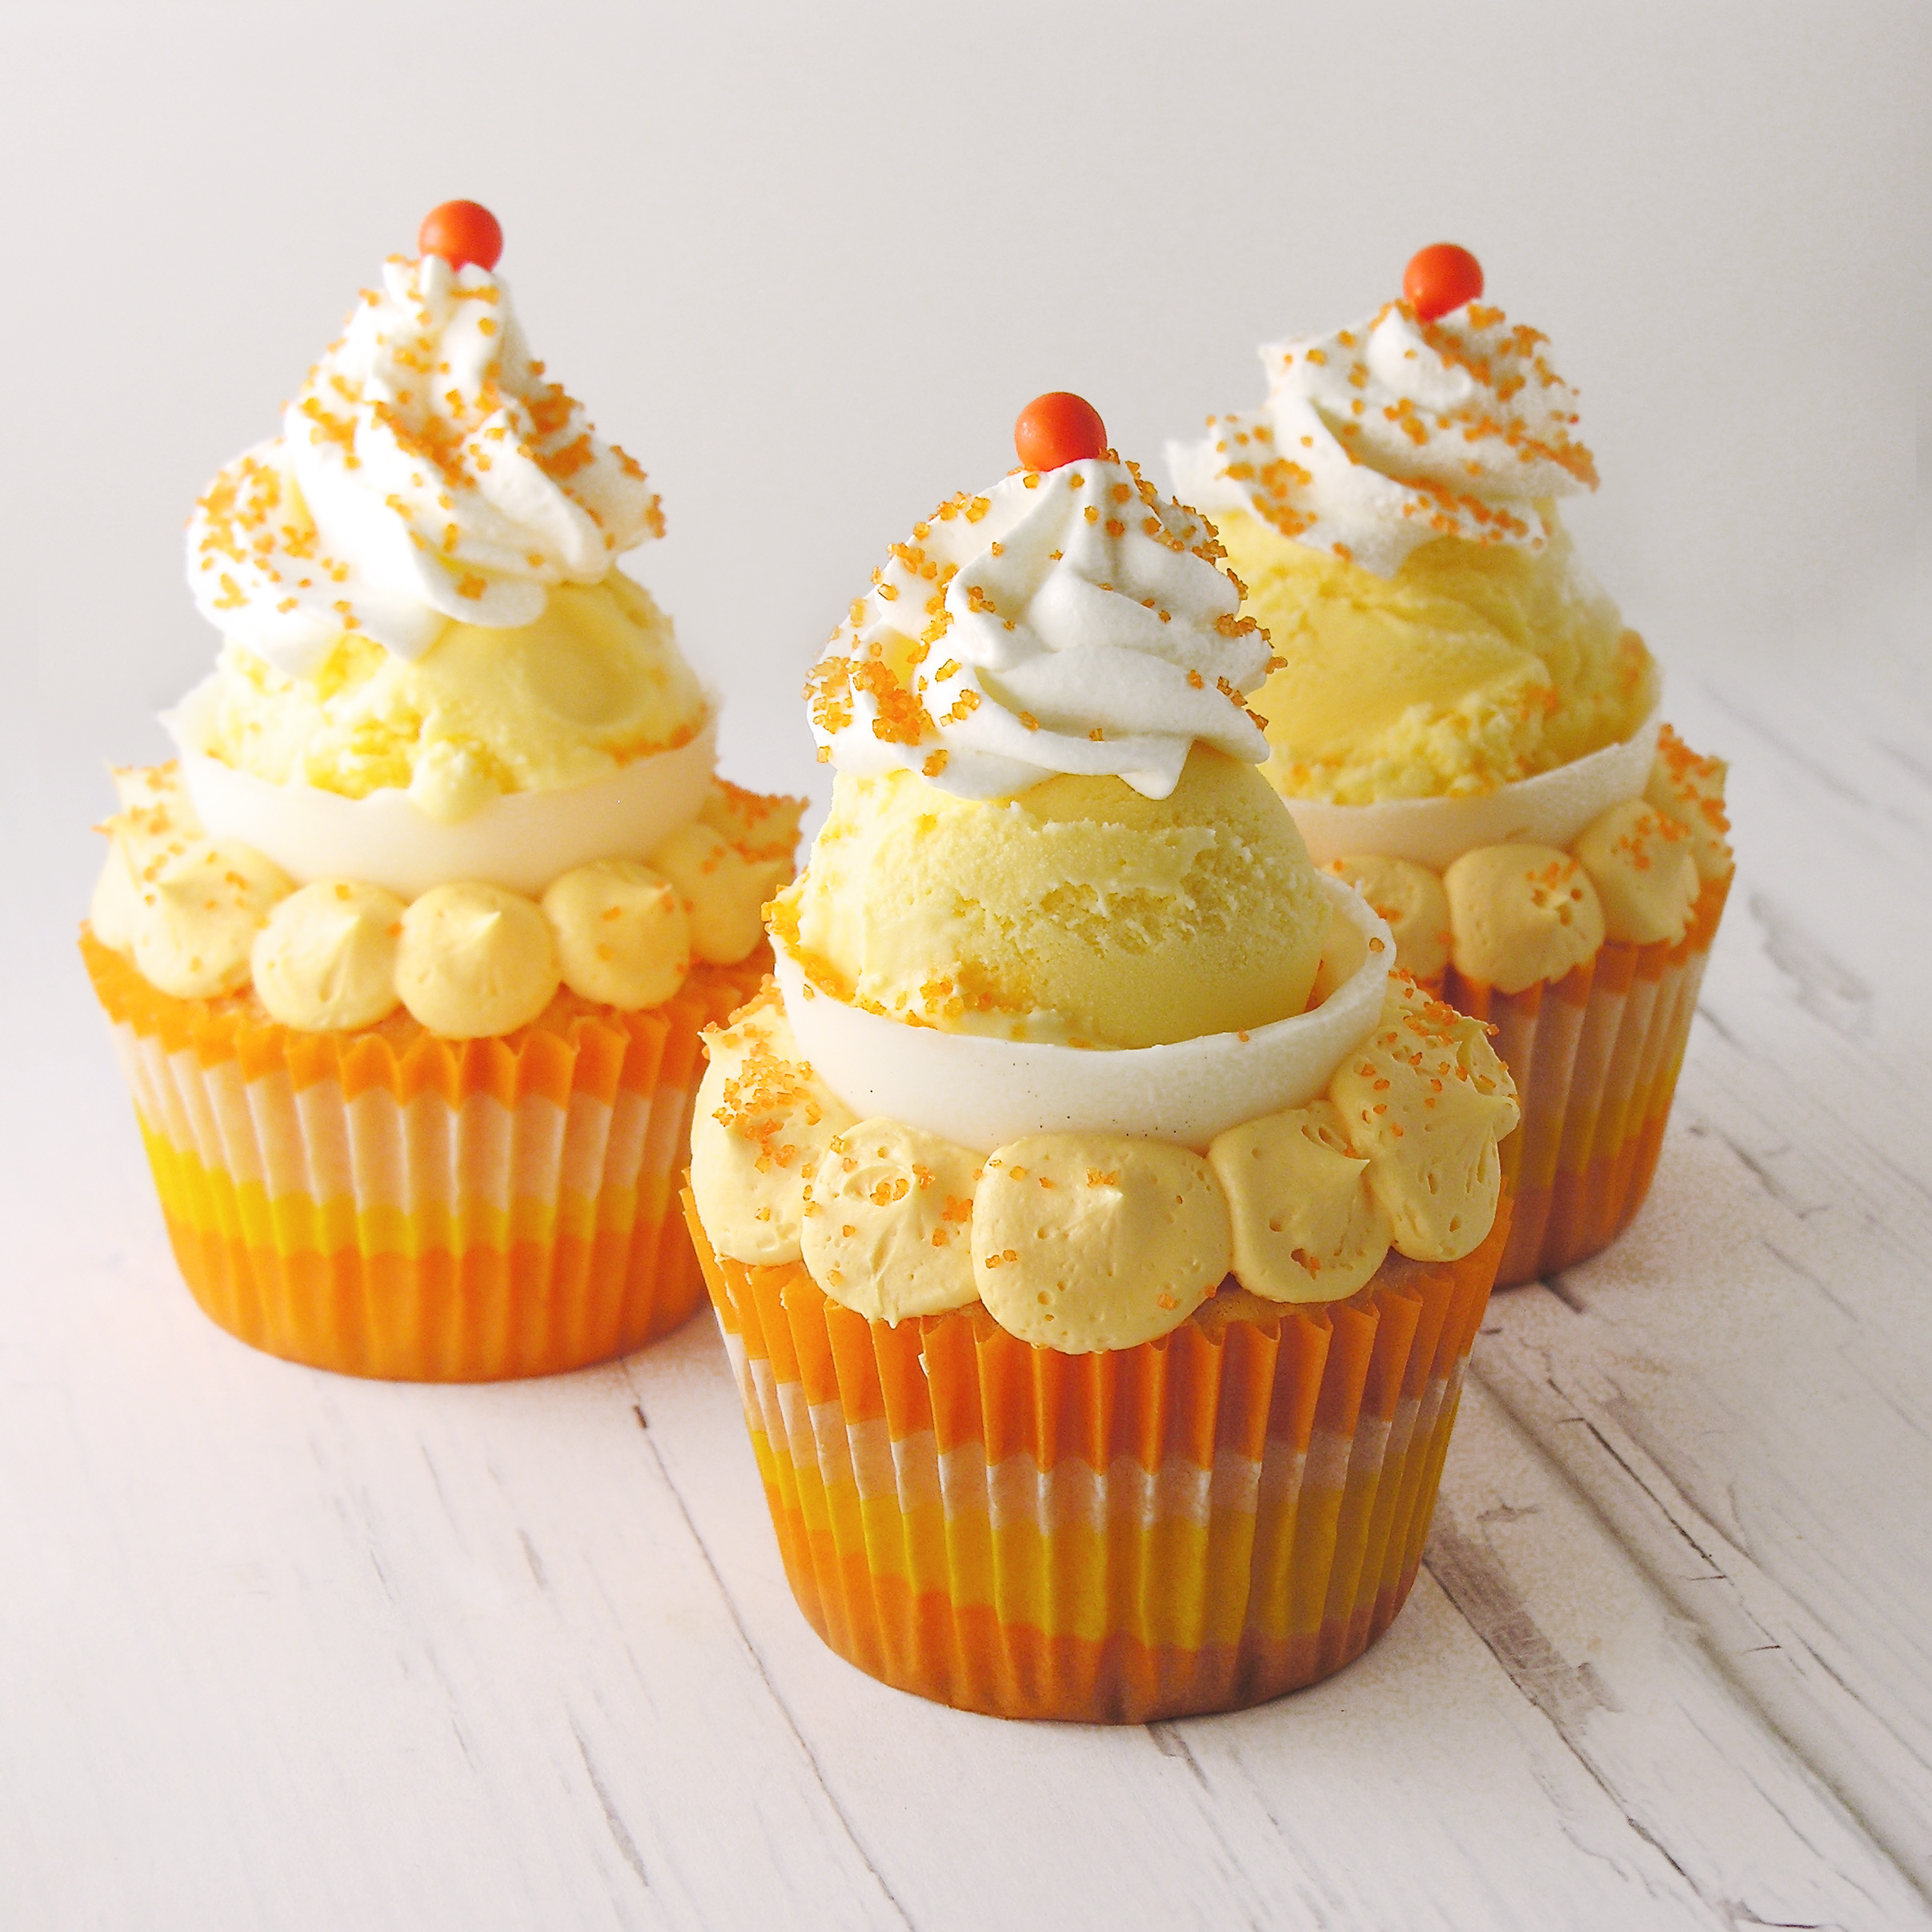
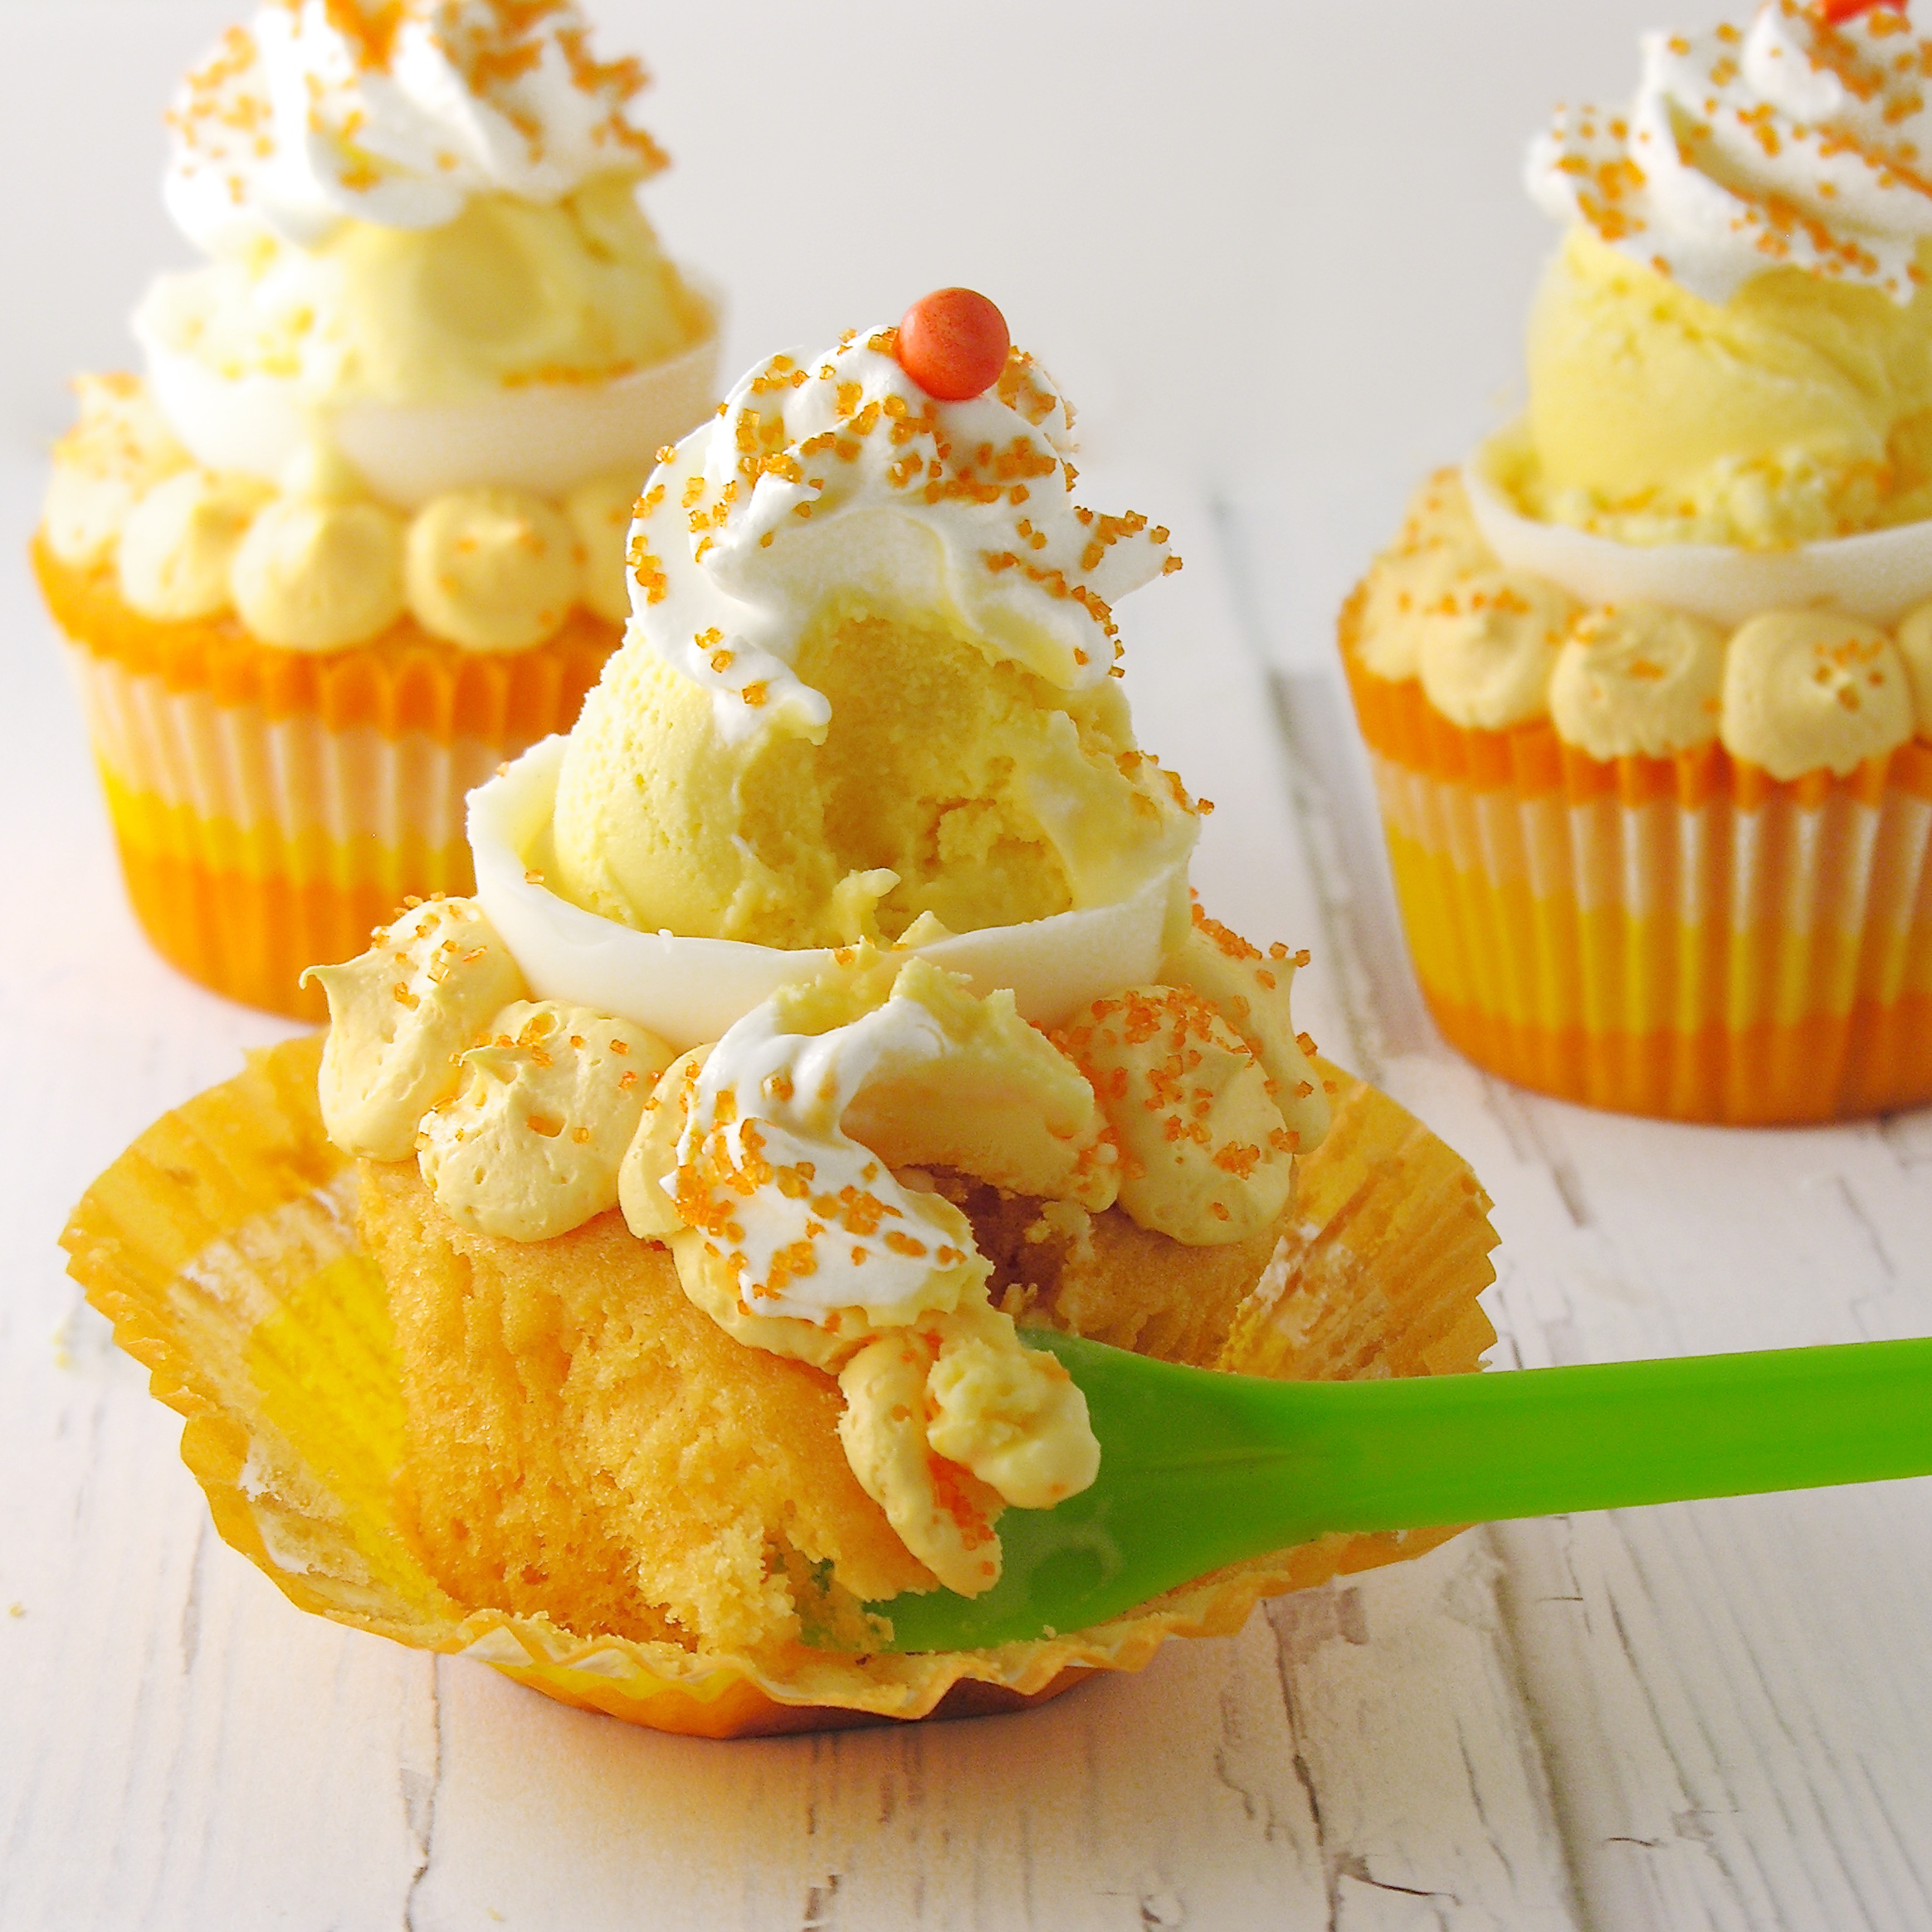
These delicious orange cupcakes have a white chocolate cup of vanilla ice cream in the center! Just like everyone’s favorite Orange Creamsicle frozen treats! Summer is coming…. you need these frozen cupcake treats!!!!
Confession: I hate all things orange flavored.
Confession: I was making cookie dough cupcakes for a party last week and I accidentally grabbed an orange cake mix instead of a chocolate cake mix at the store. I’m not sure how you do that… but I did. I had to rush to the store for a chocolate cake mix and then I was stuck with this orange one…. and I hate…hate…hate orange.
My dad suggested a Creamsicle cupcake and I went for it. Turns out, everyone else in the world LOVES orange Creamsicles- so it all worked out.
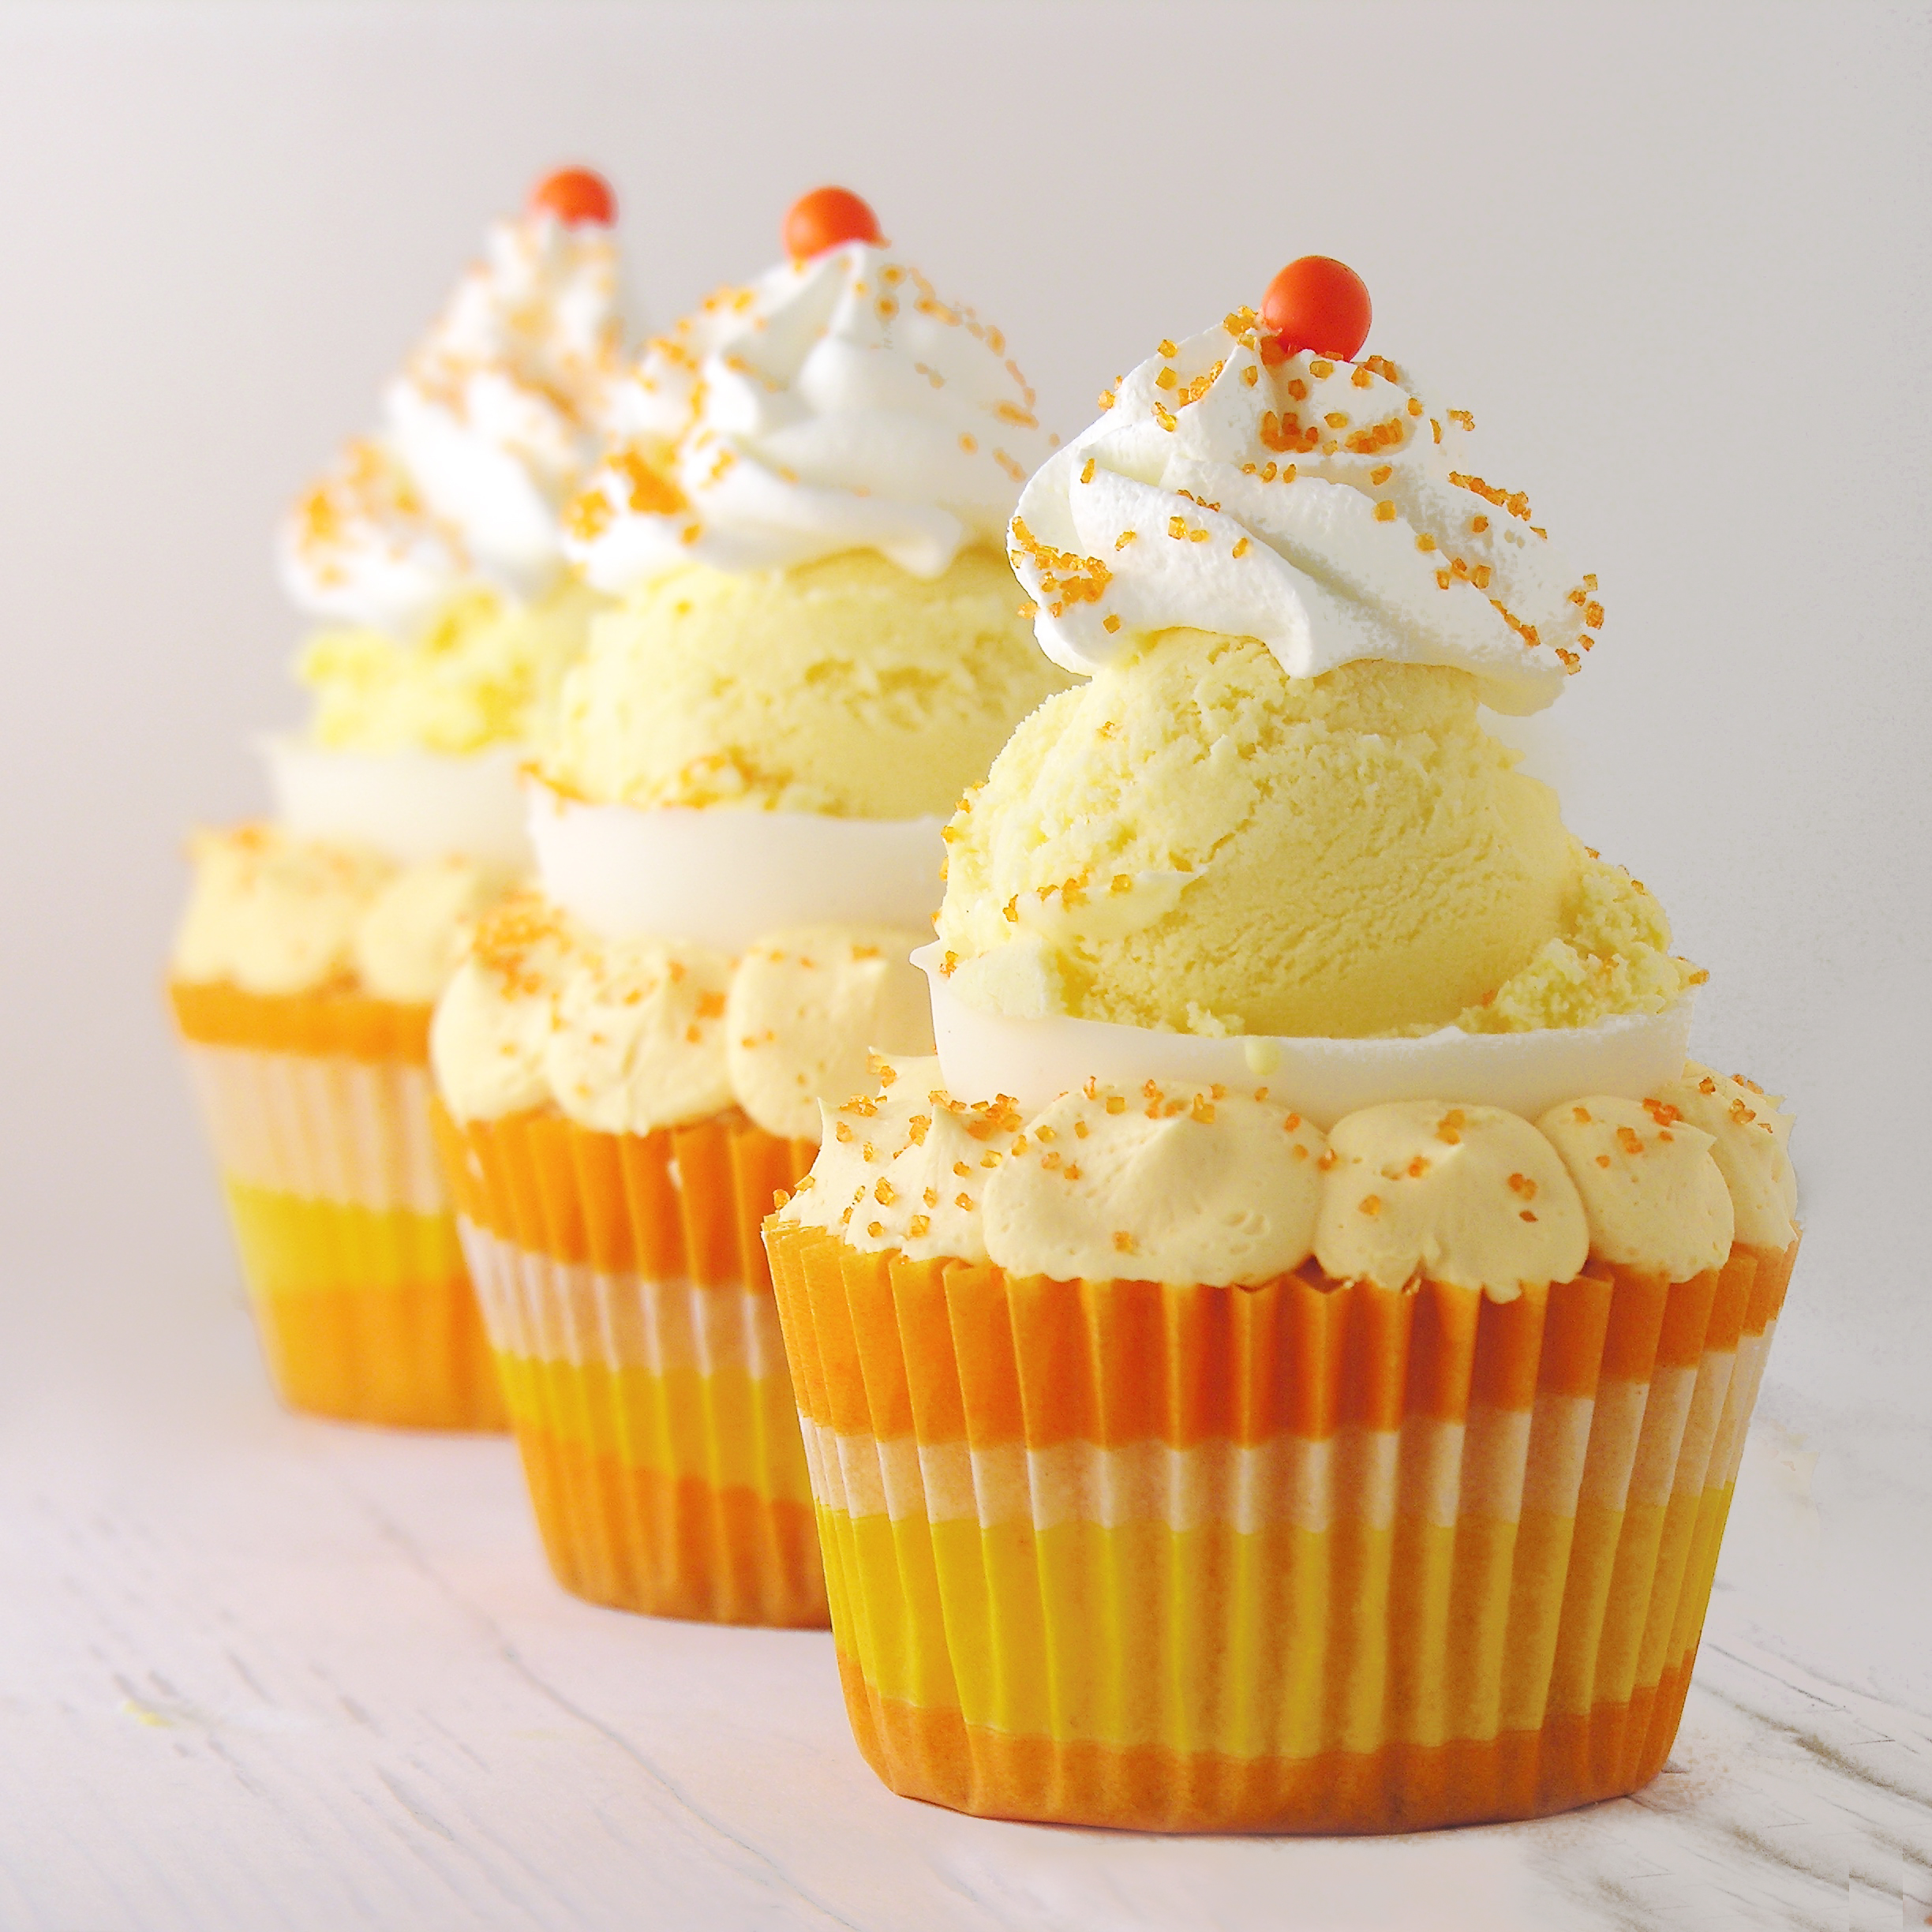
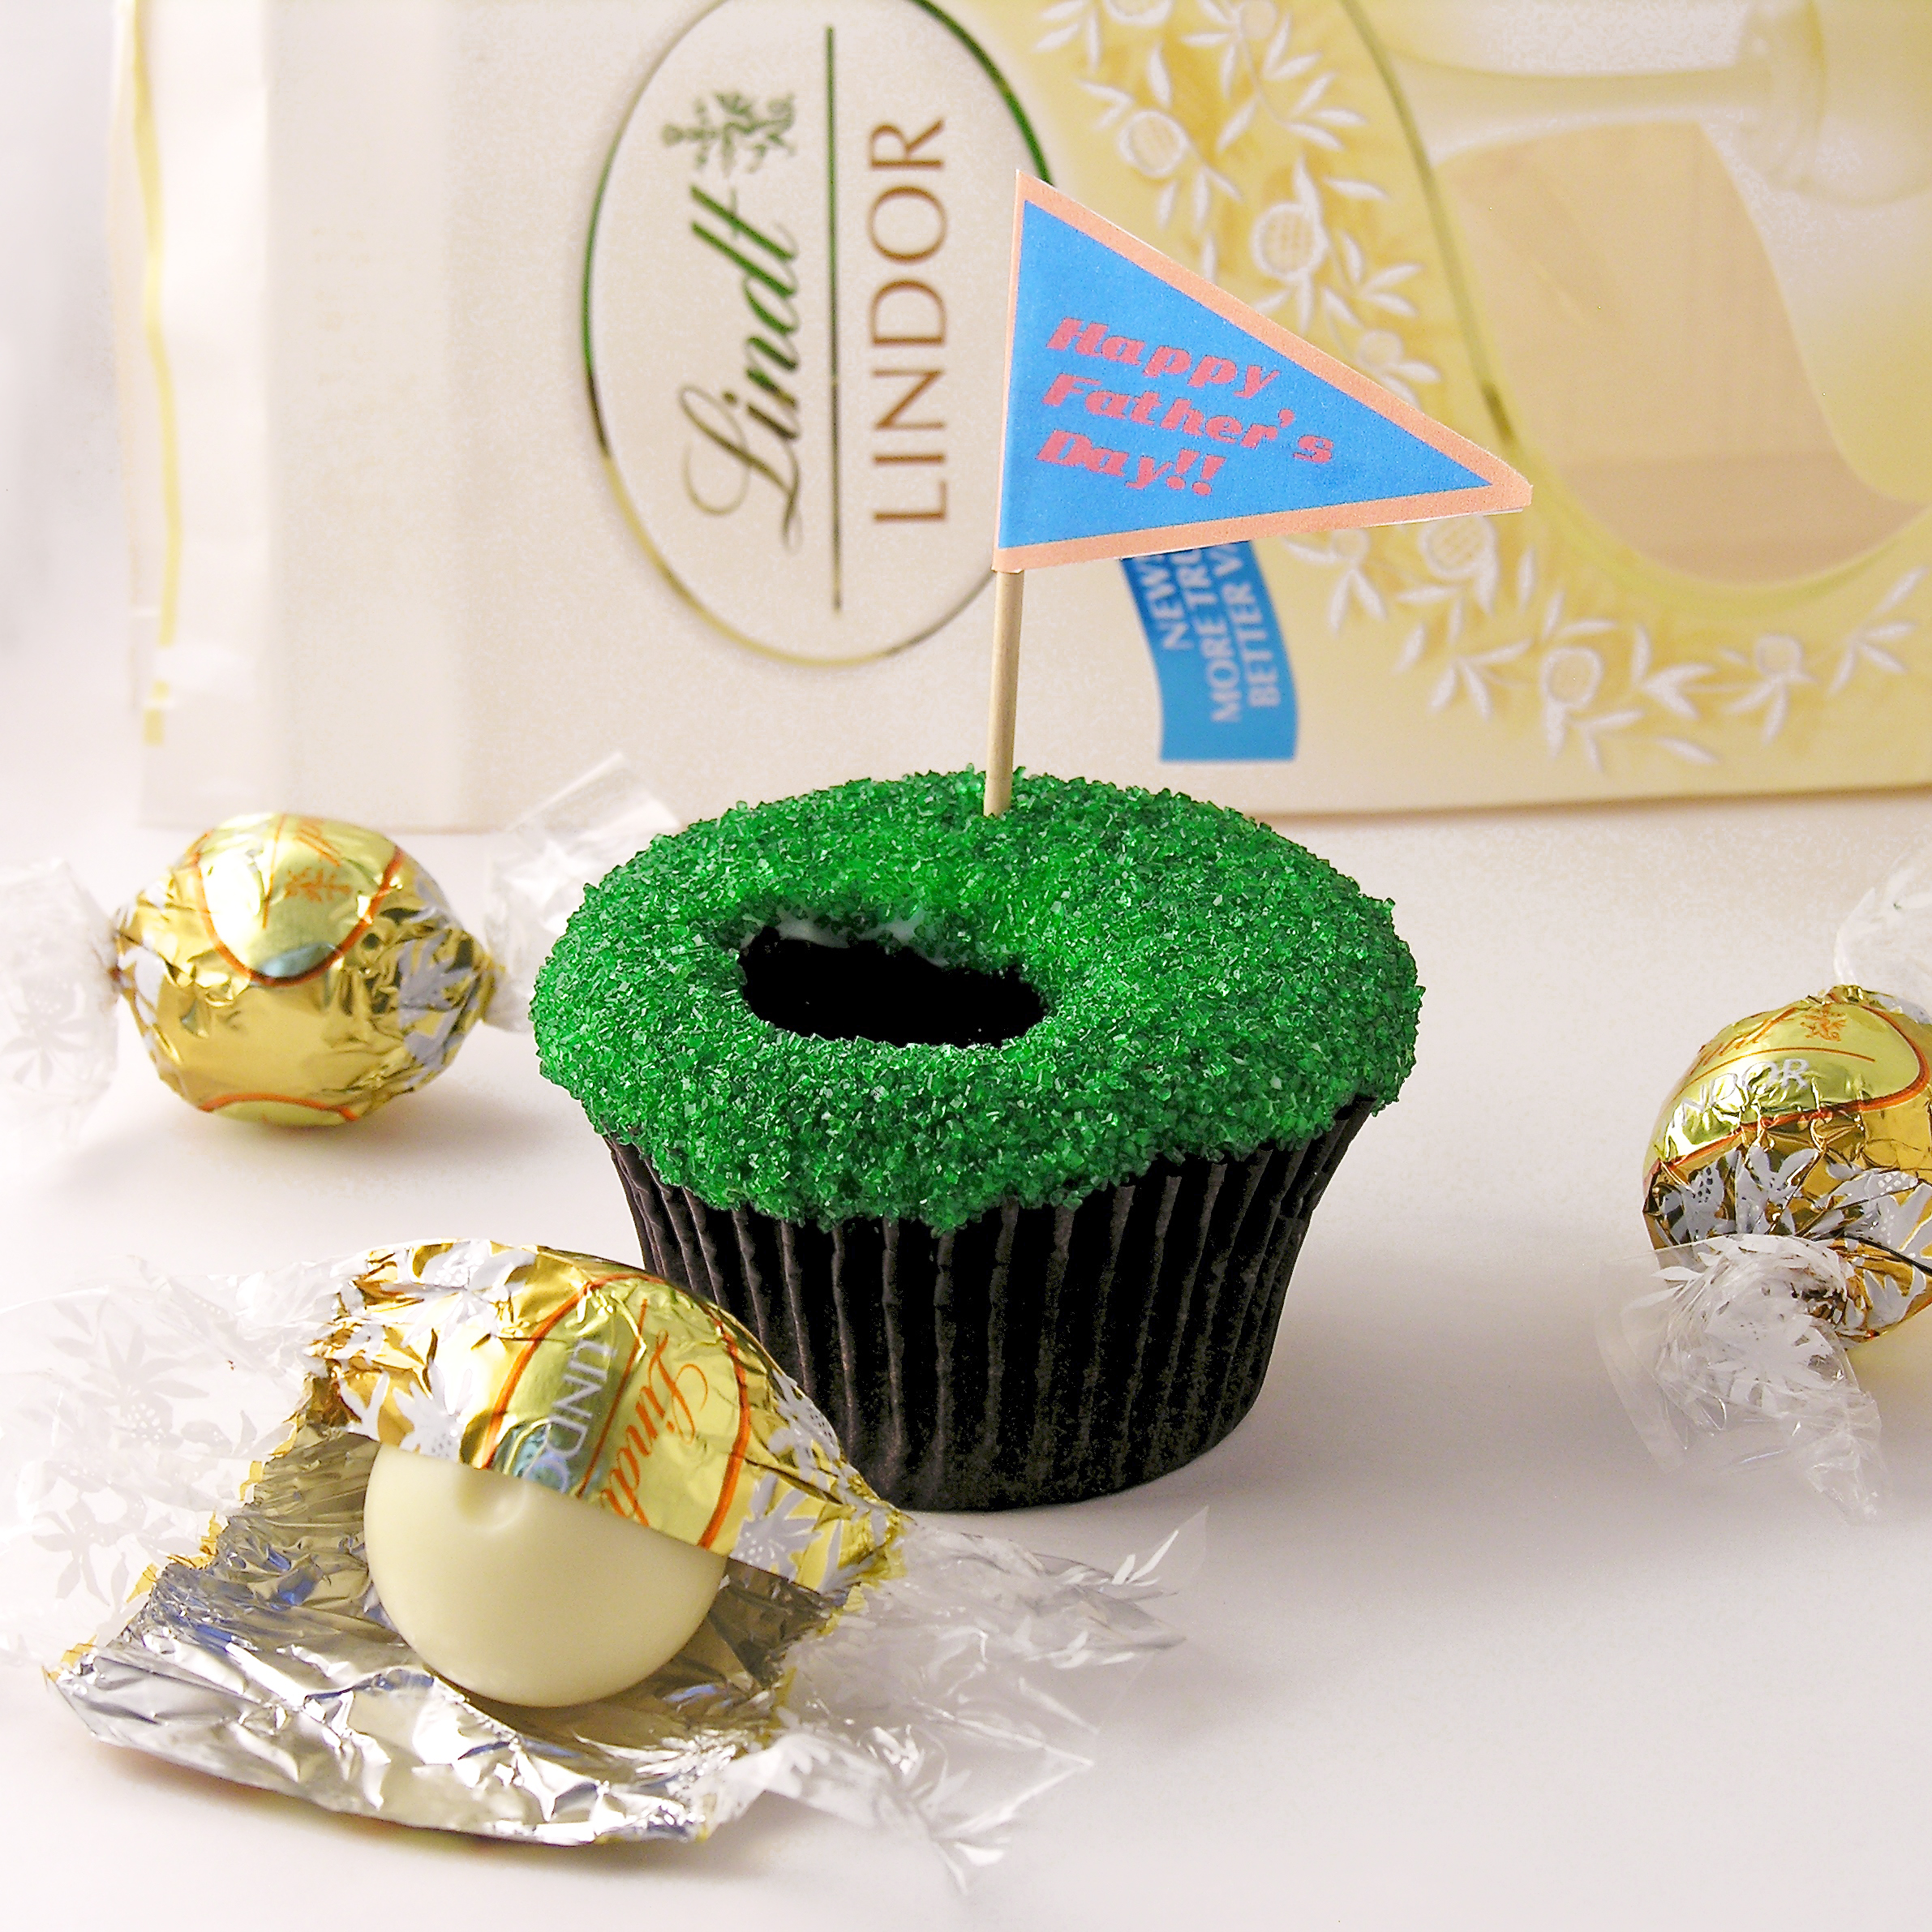
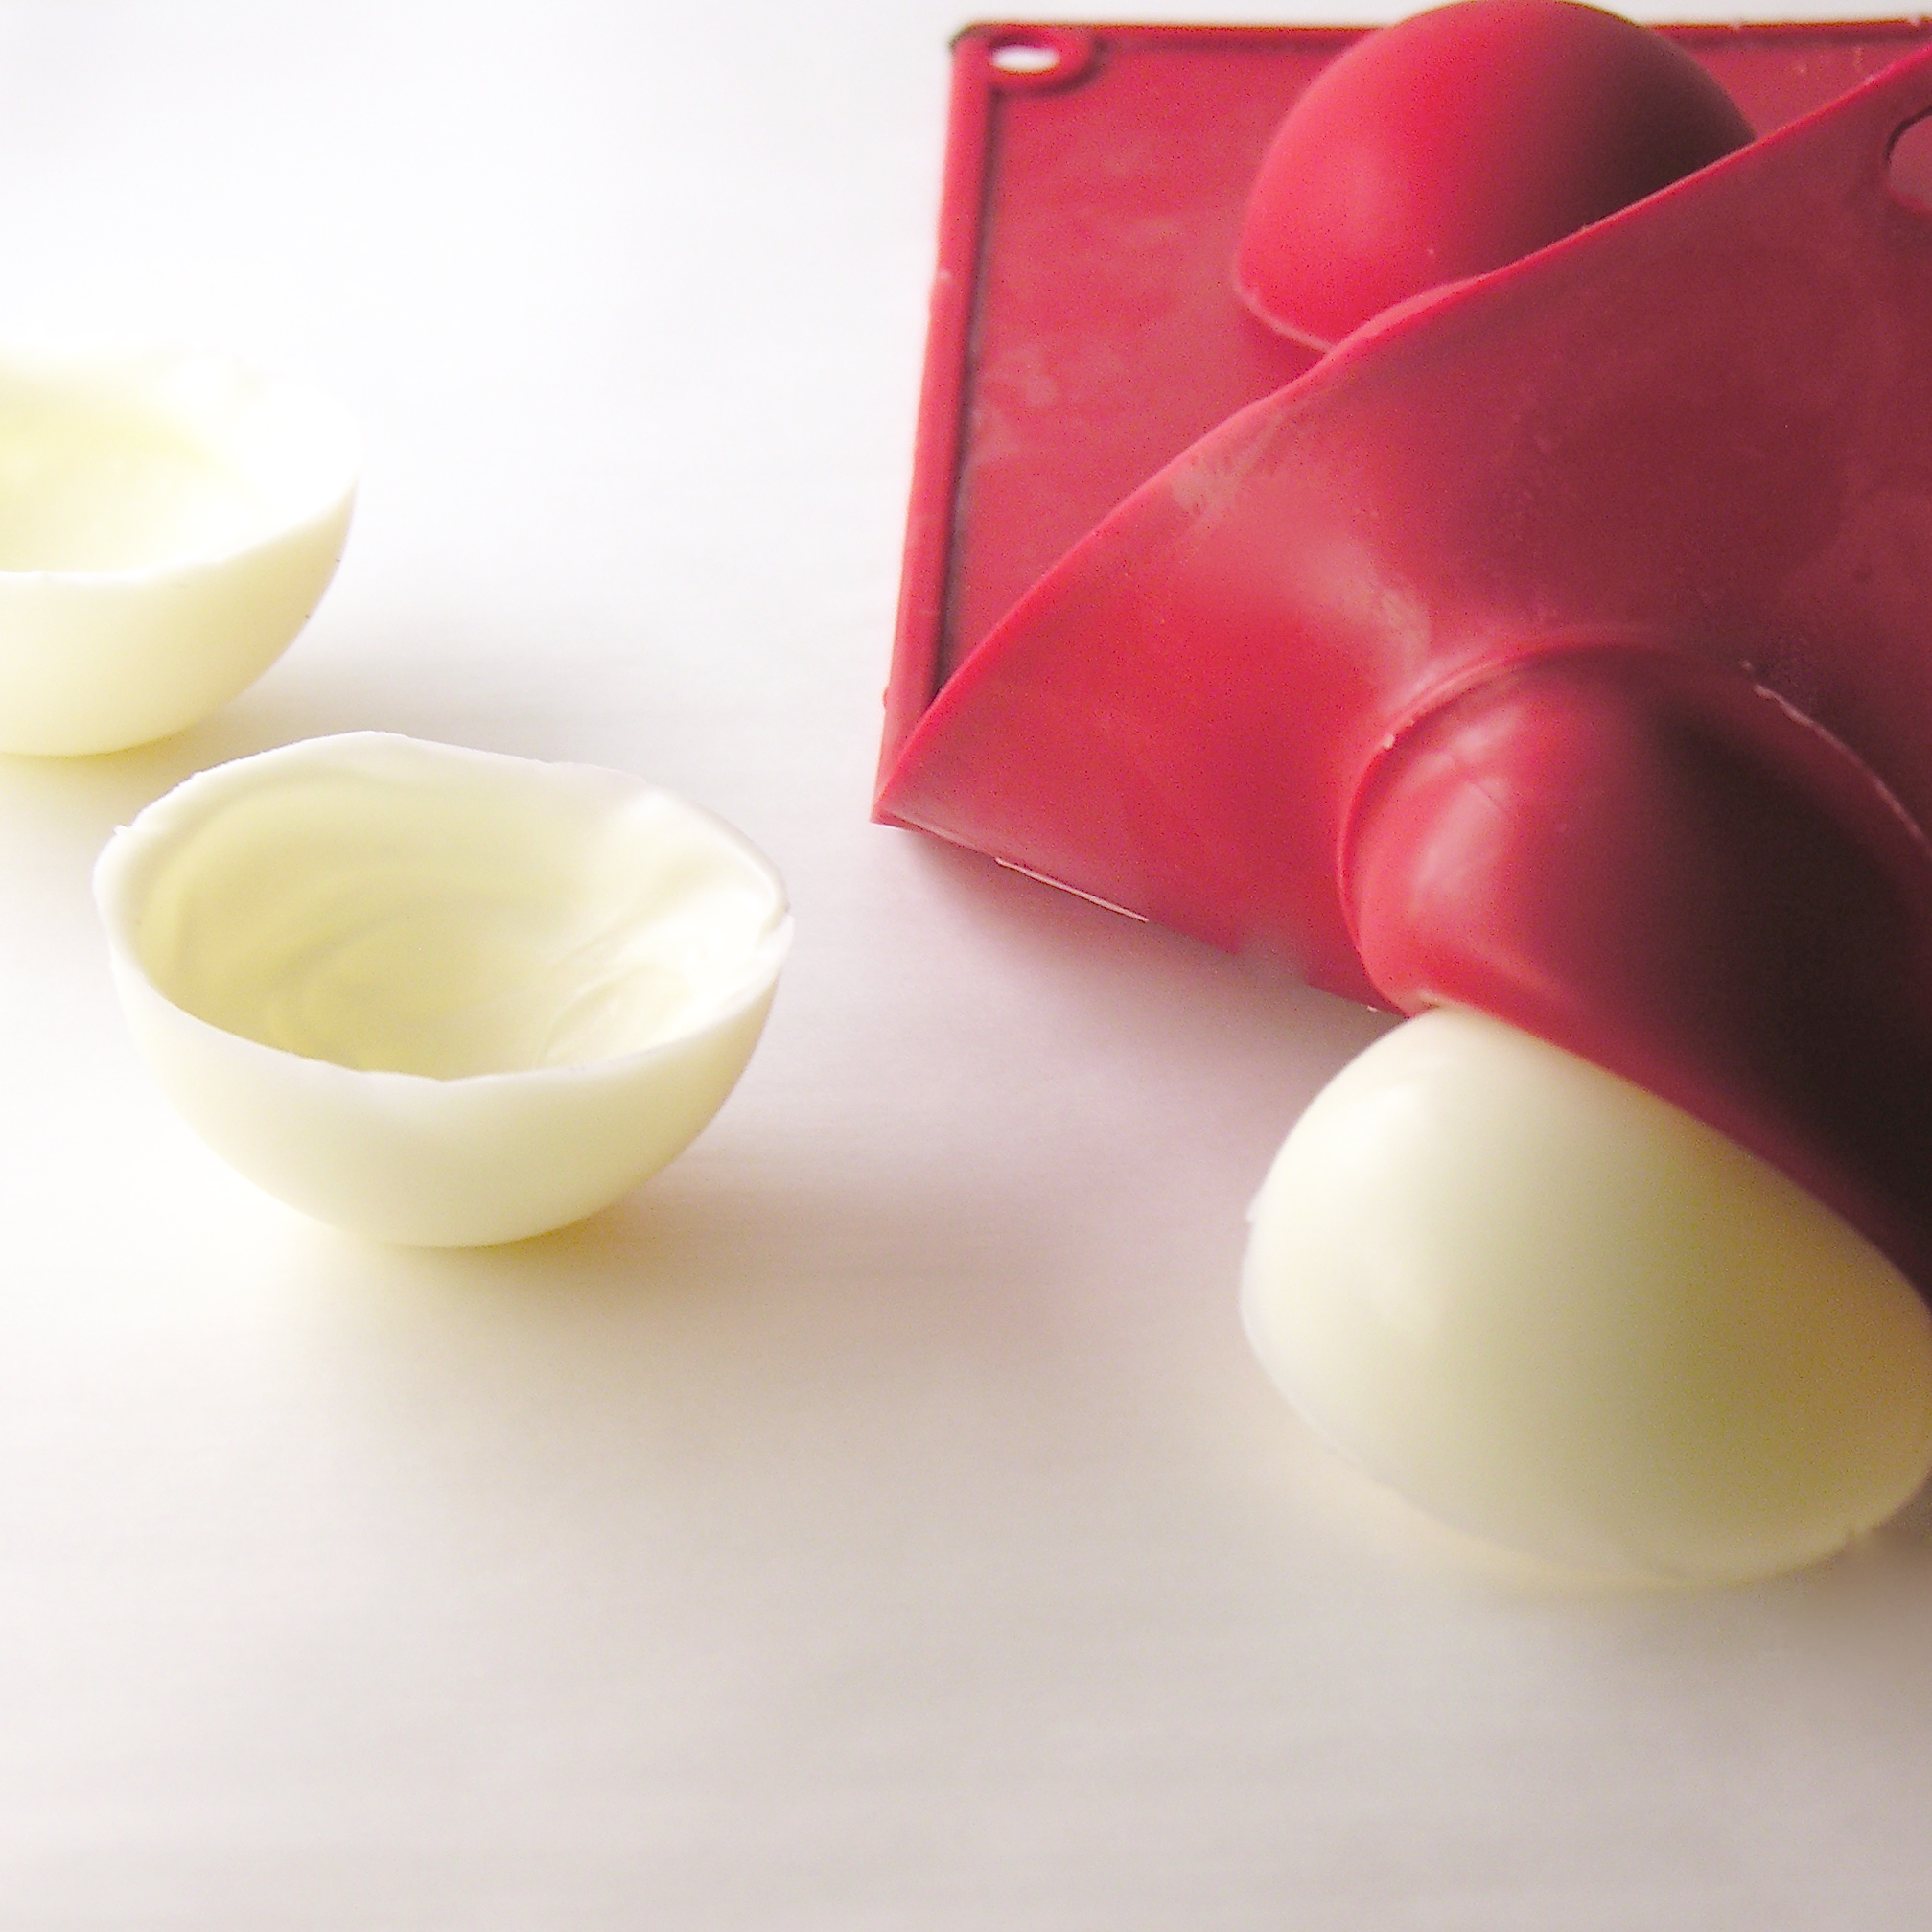
I knew I wanted ice cream in the middle, but I didn’t want a soggy cupcake. Solution: the fun chocolate bomb mold that I’ve been raving about and using on cupcakes whenever I get a chance! Best kitchen gadget ever! I used the mold to make little white chocolate cups to hold the scoop of ice cream on top. Perfect!
Here’s how I put these fun little desserts together: (printable recipe)
INGREDIENTS:
- One box of orange cake mix (plus oil, water and eggs to make according to package)
- 1 bag of Wilton’s candy melts in white
- 2 sticks of butter (room temp)
- 1 1/2 cups of powdered sugar
- 1 teaspoon of vanilla
- Orange food coloring (if desired)
- Vanilla ice cream
- Cool Whip (if desired)
- Sprinkles to decorate
DIRECTIONS
- Make cake mix according to package and divide equally into 24 cupcake liners in cupcake tins.
- Bake according to package and cool.
- Make icing by combining butter, powdered sugar and vanilla in bowl and beating until light and fluffy. Color orange if desired.
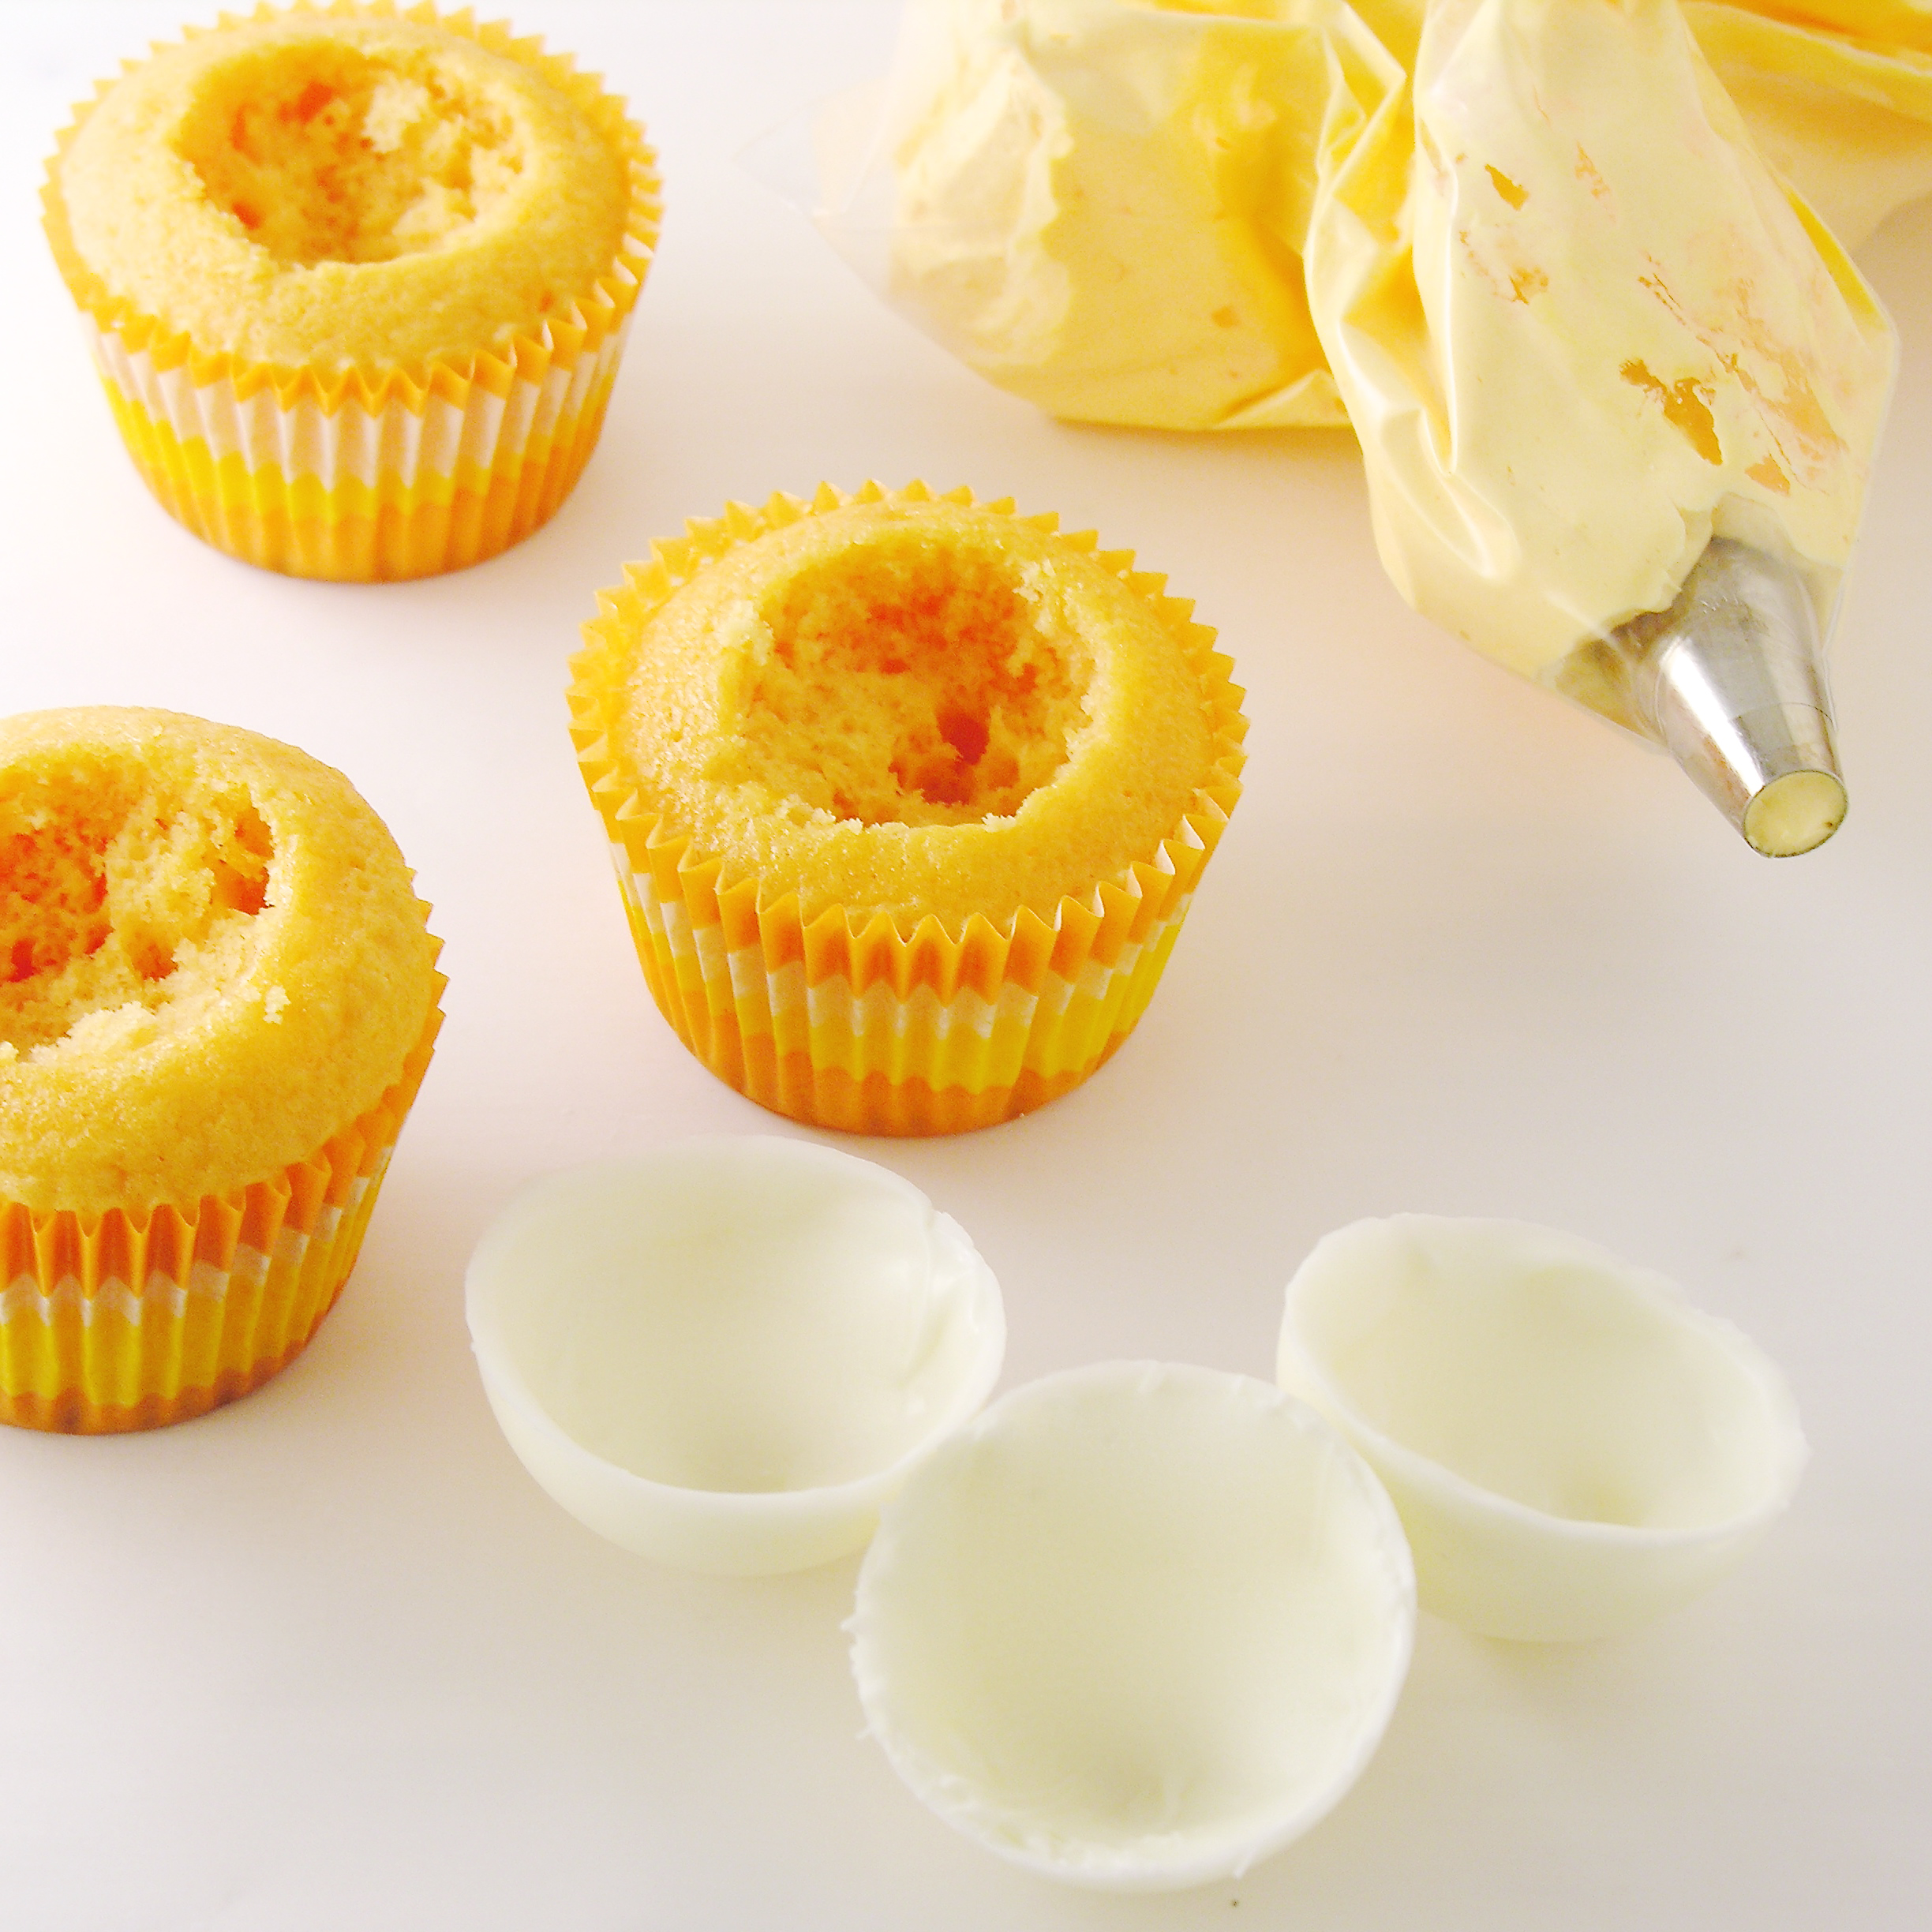
- Place icing in a large zip-top bag fitted with a round tip, and set aside.
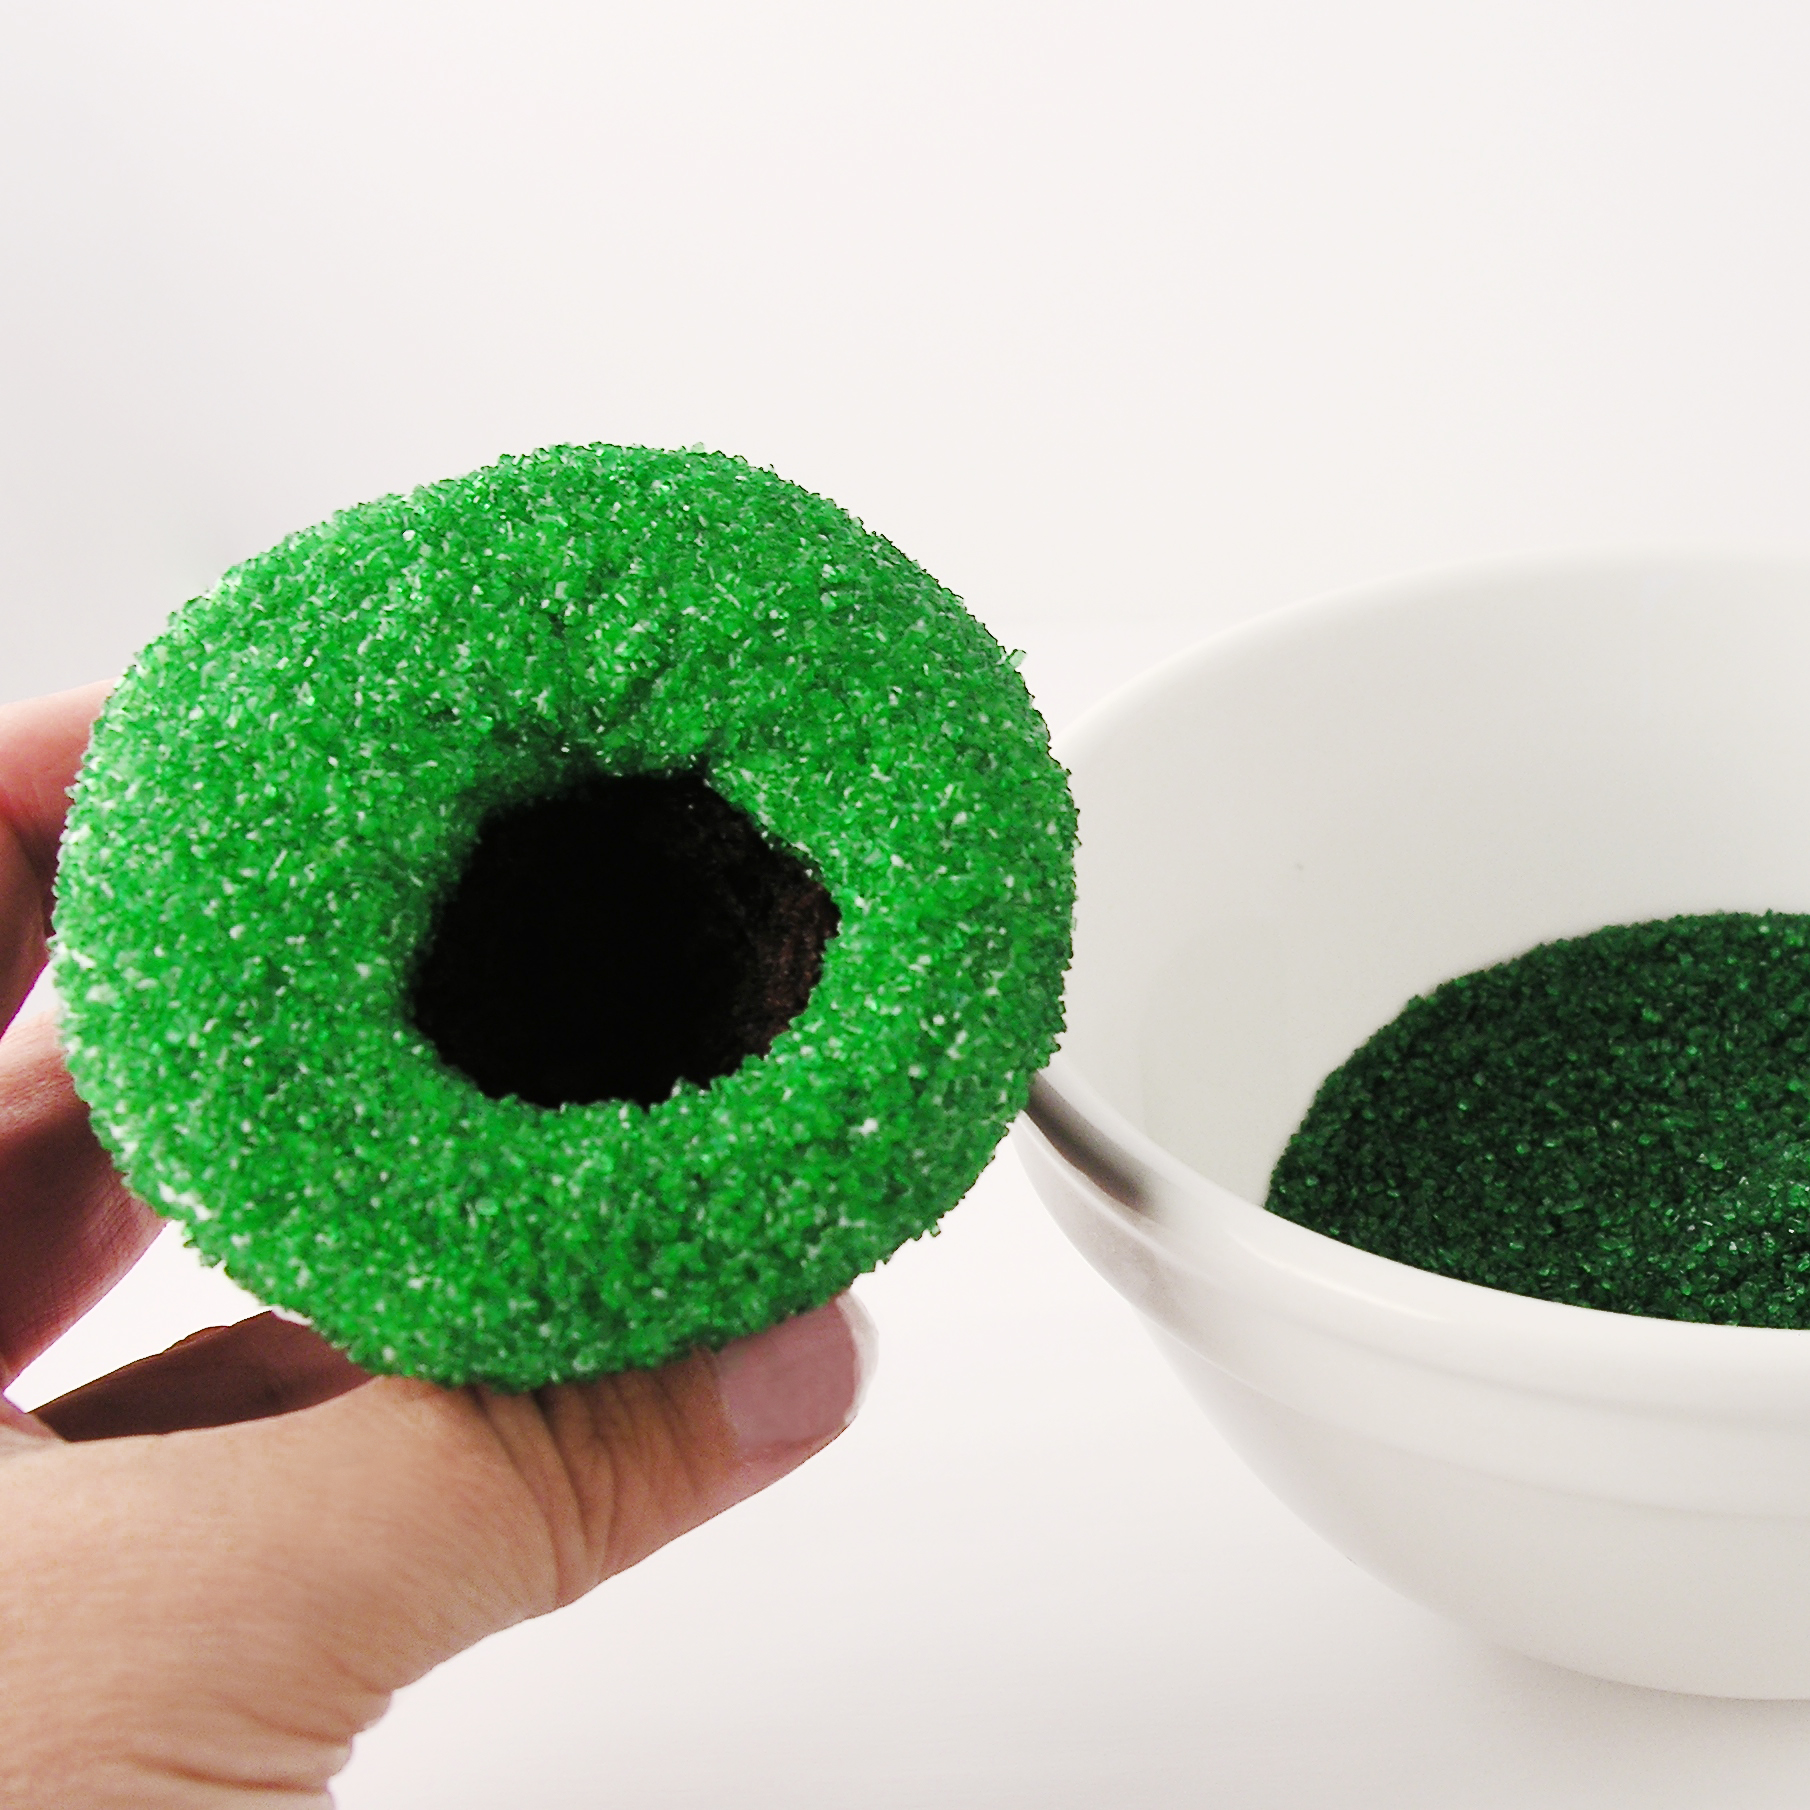
- Melt candy melts in microwave in 30 second increments, stirring between until completely melted.
- Use a pastry brush to brush candy melts inside each cavity of the chocolate bomb mold and freeze for a few minutes.
- Coat a second time (it needs to be nice and thick since we aren’t filling them before popping them out of the mold).
- Pop these cups out of the mold by peeling the silicone away. Repeat.
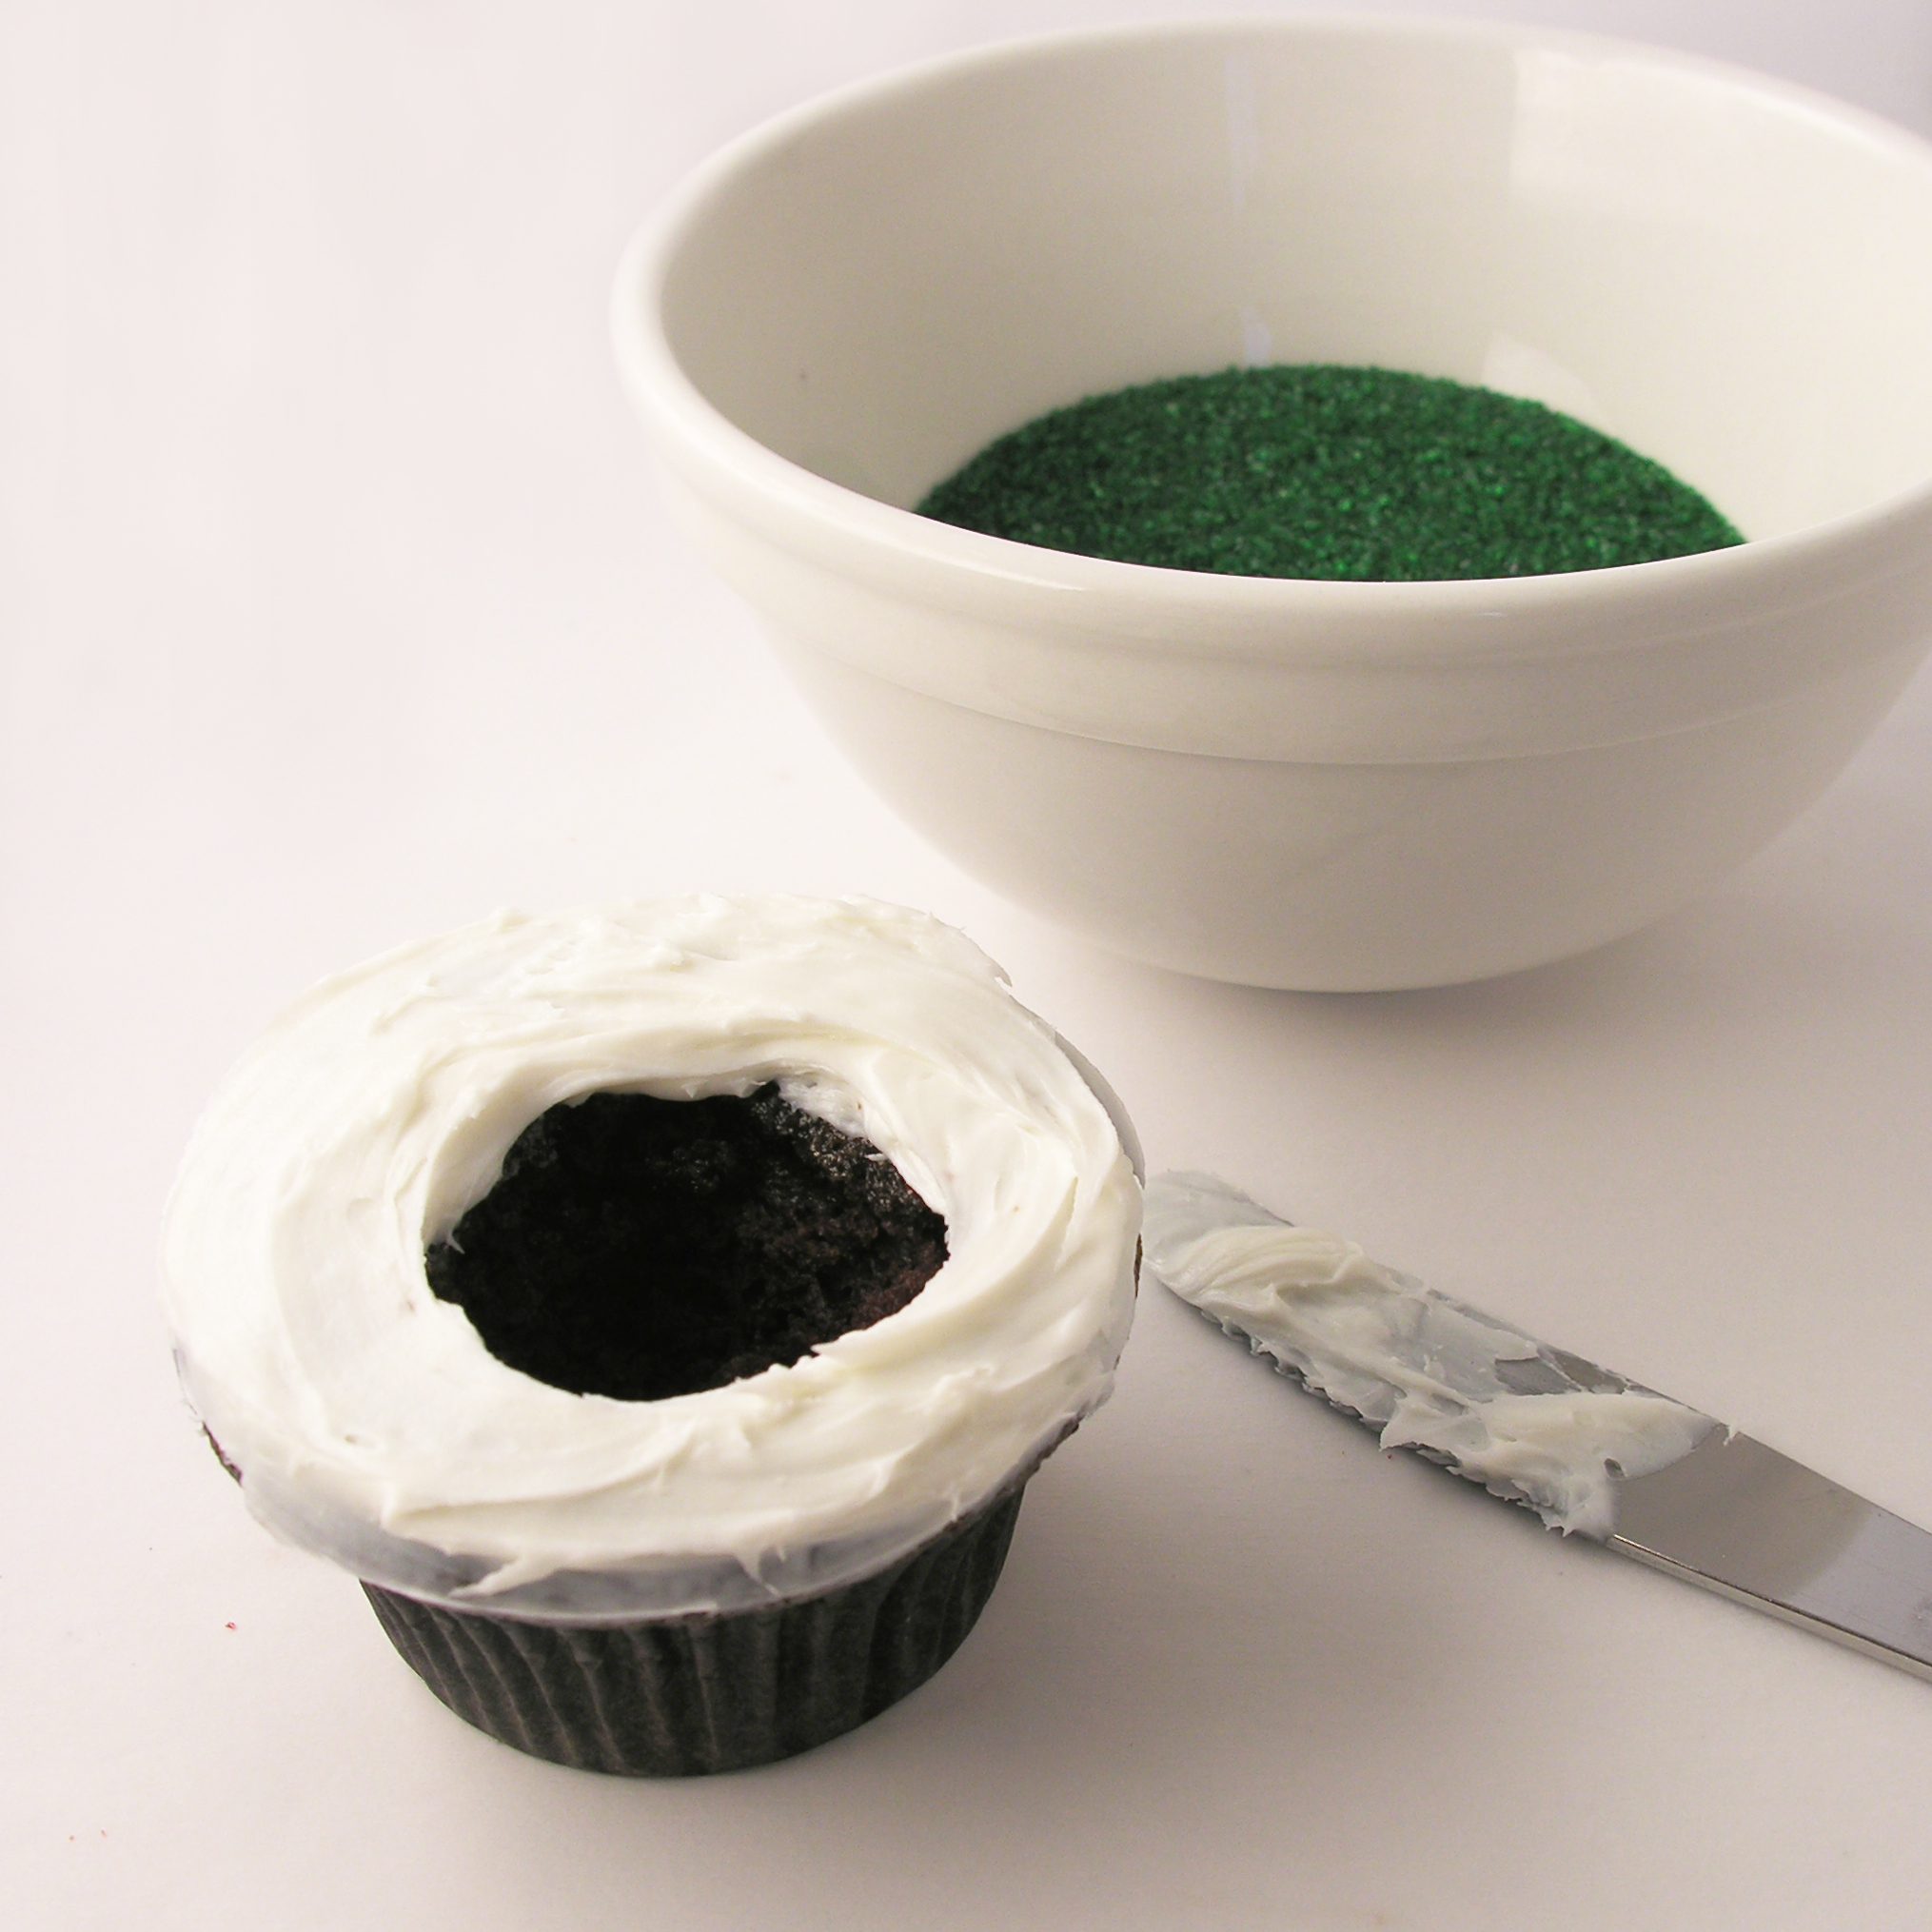
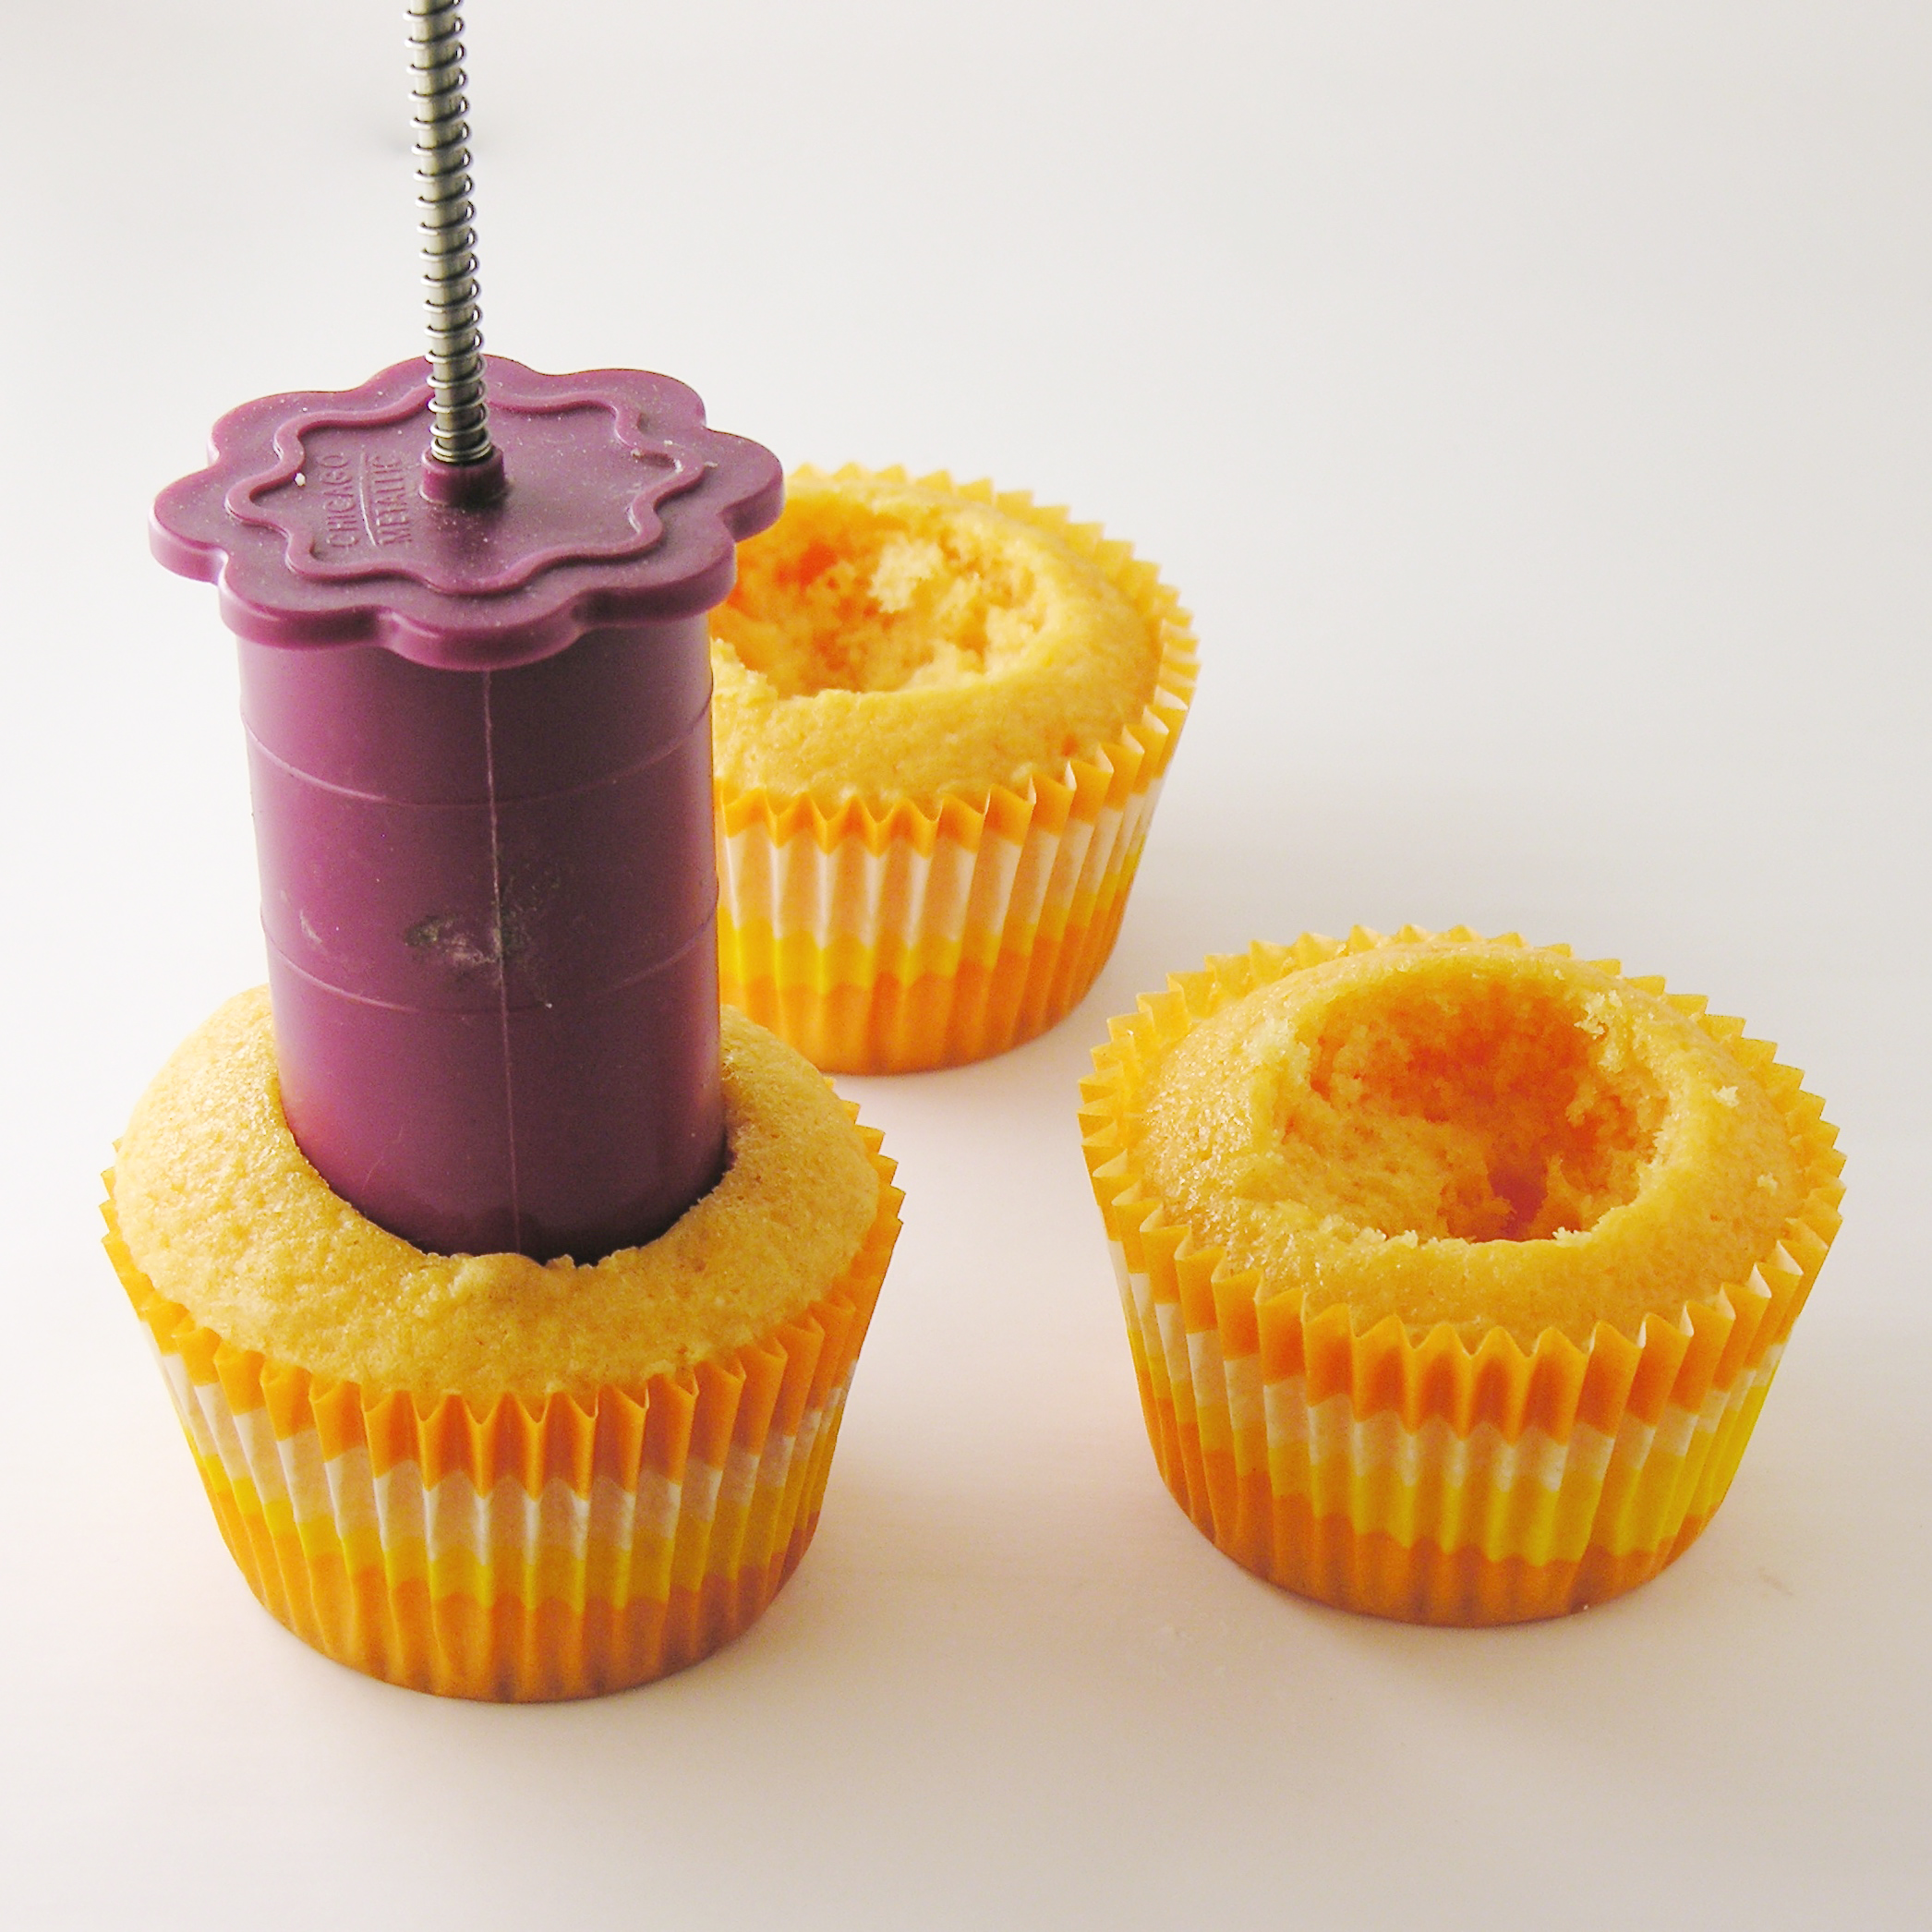
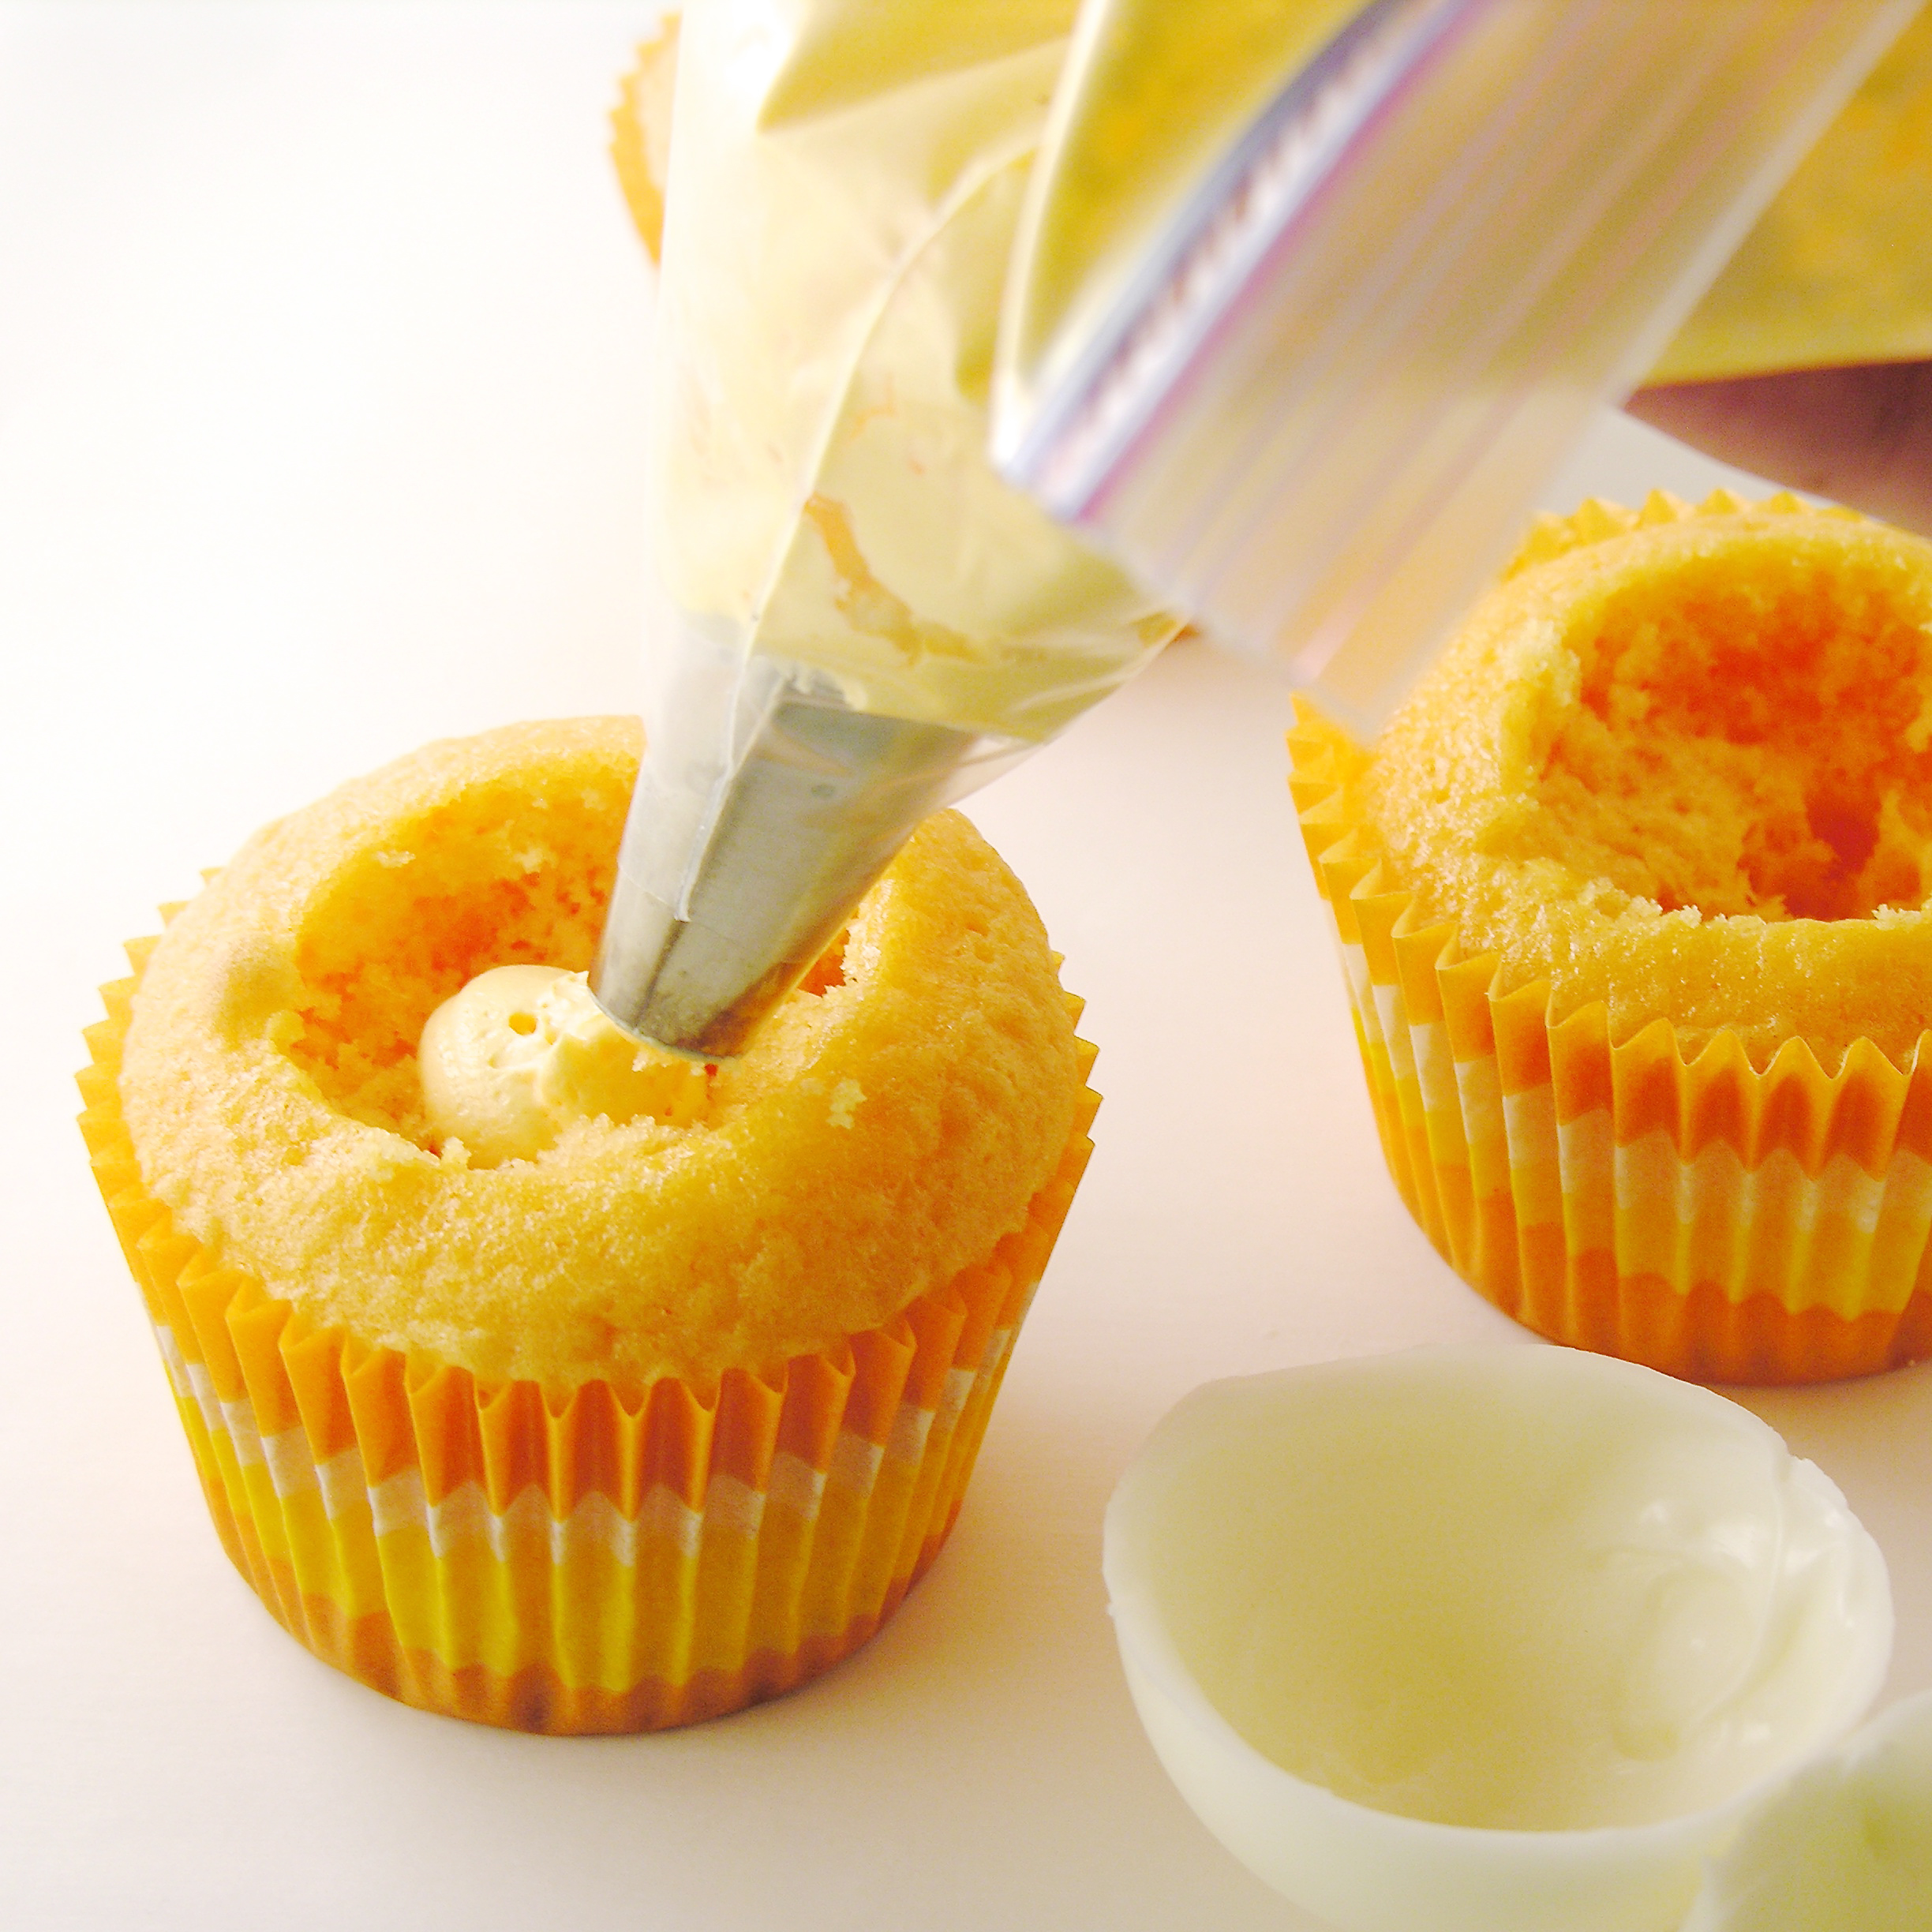
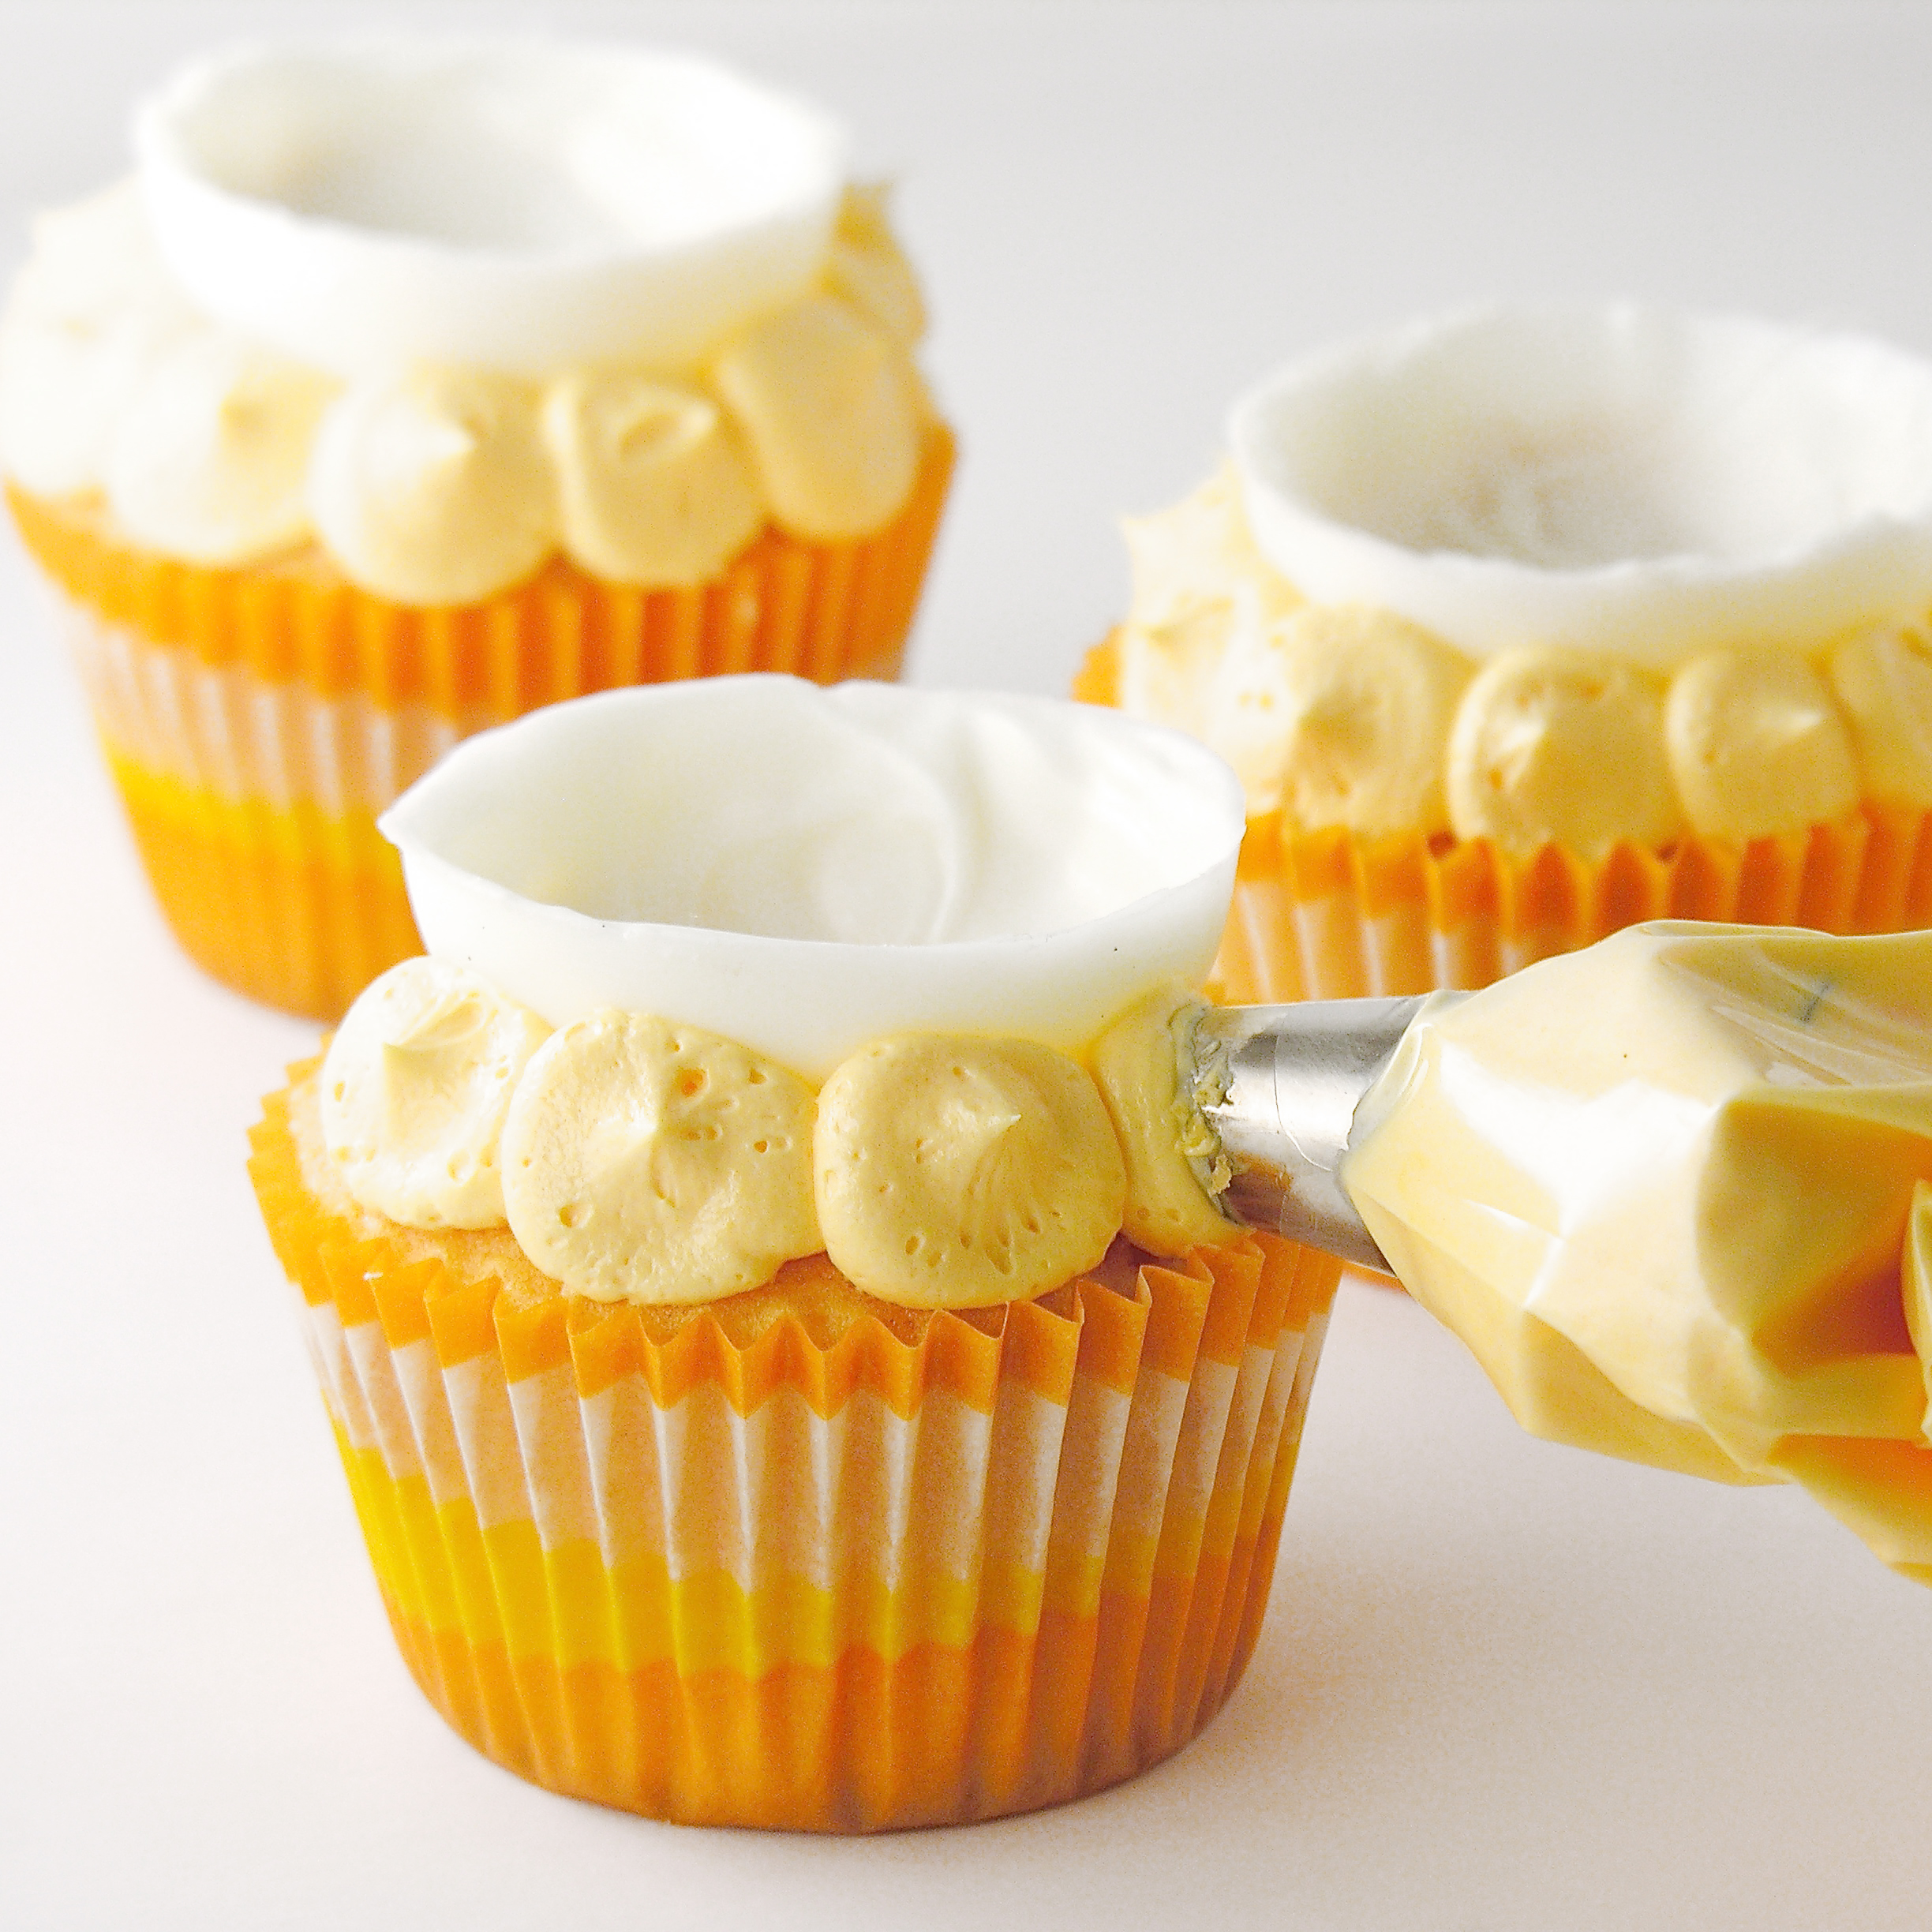
- Assemble cupcakes by cutting a small core out of the center of each one, pipe a little frosting into this core, and set a chocolate cup on top.
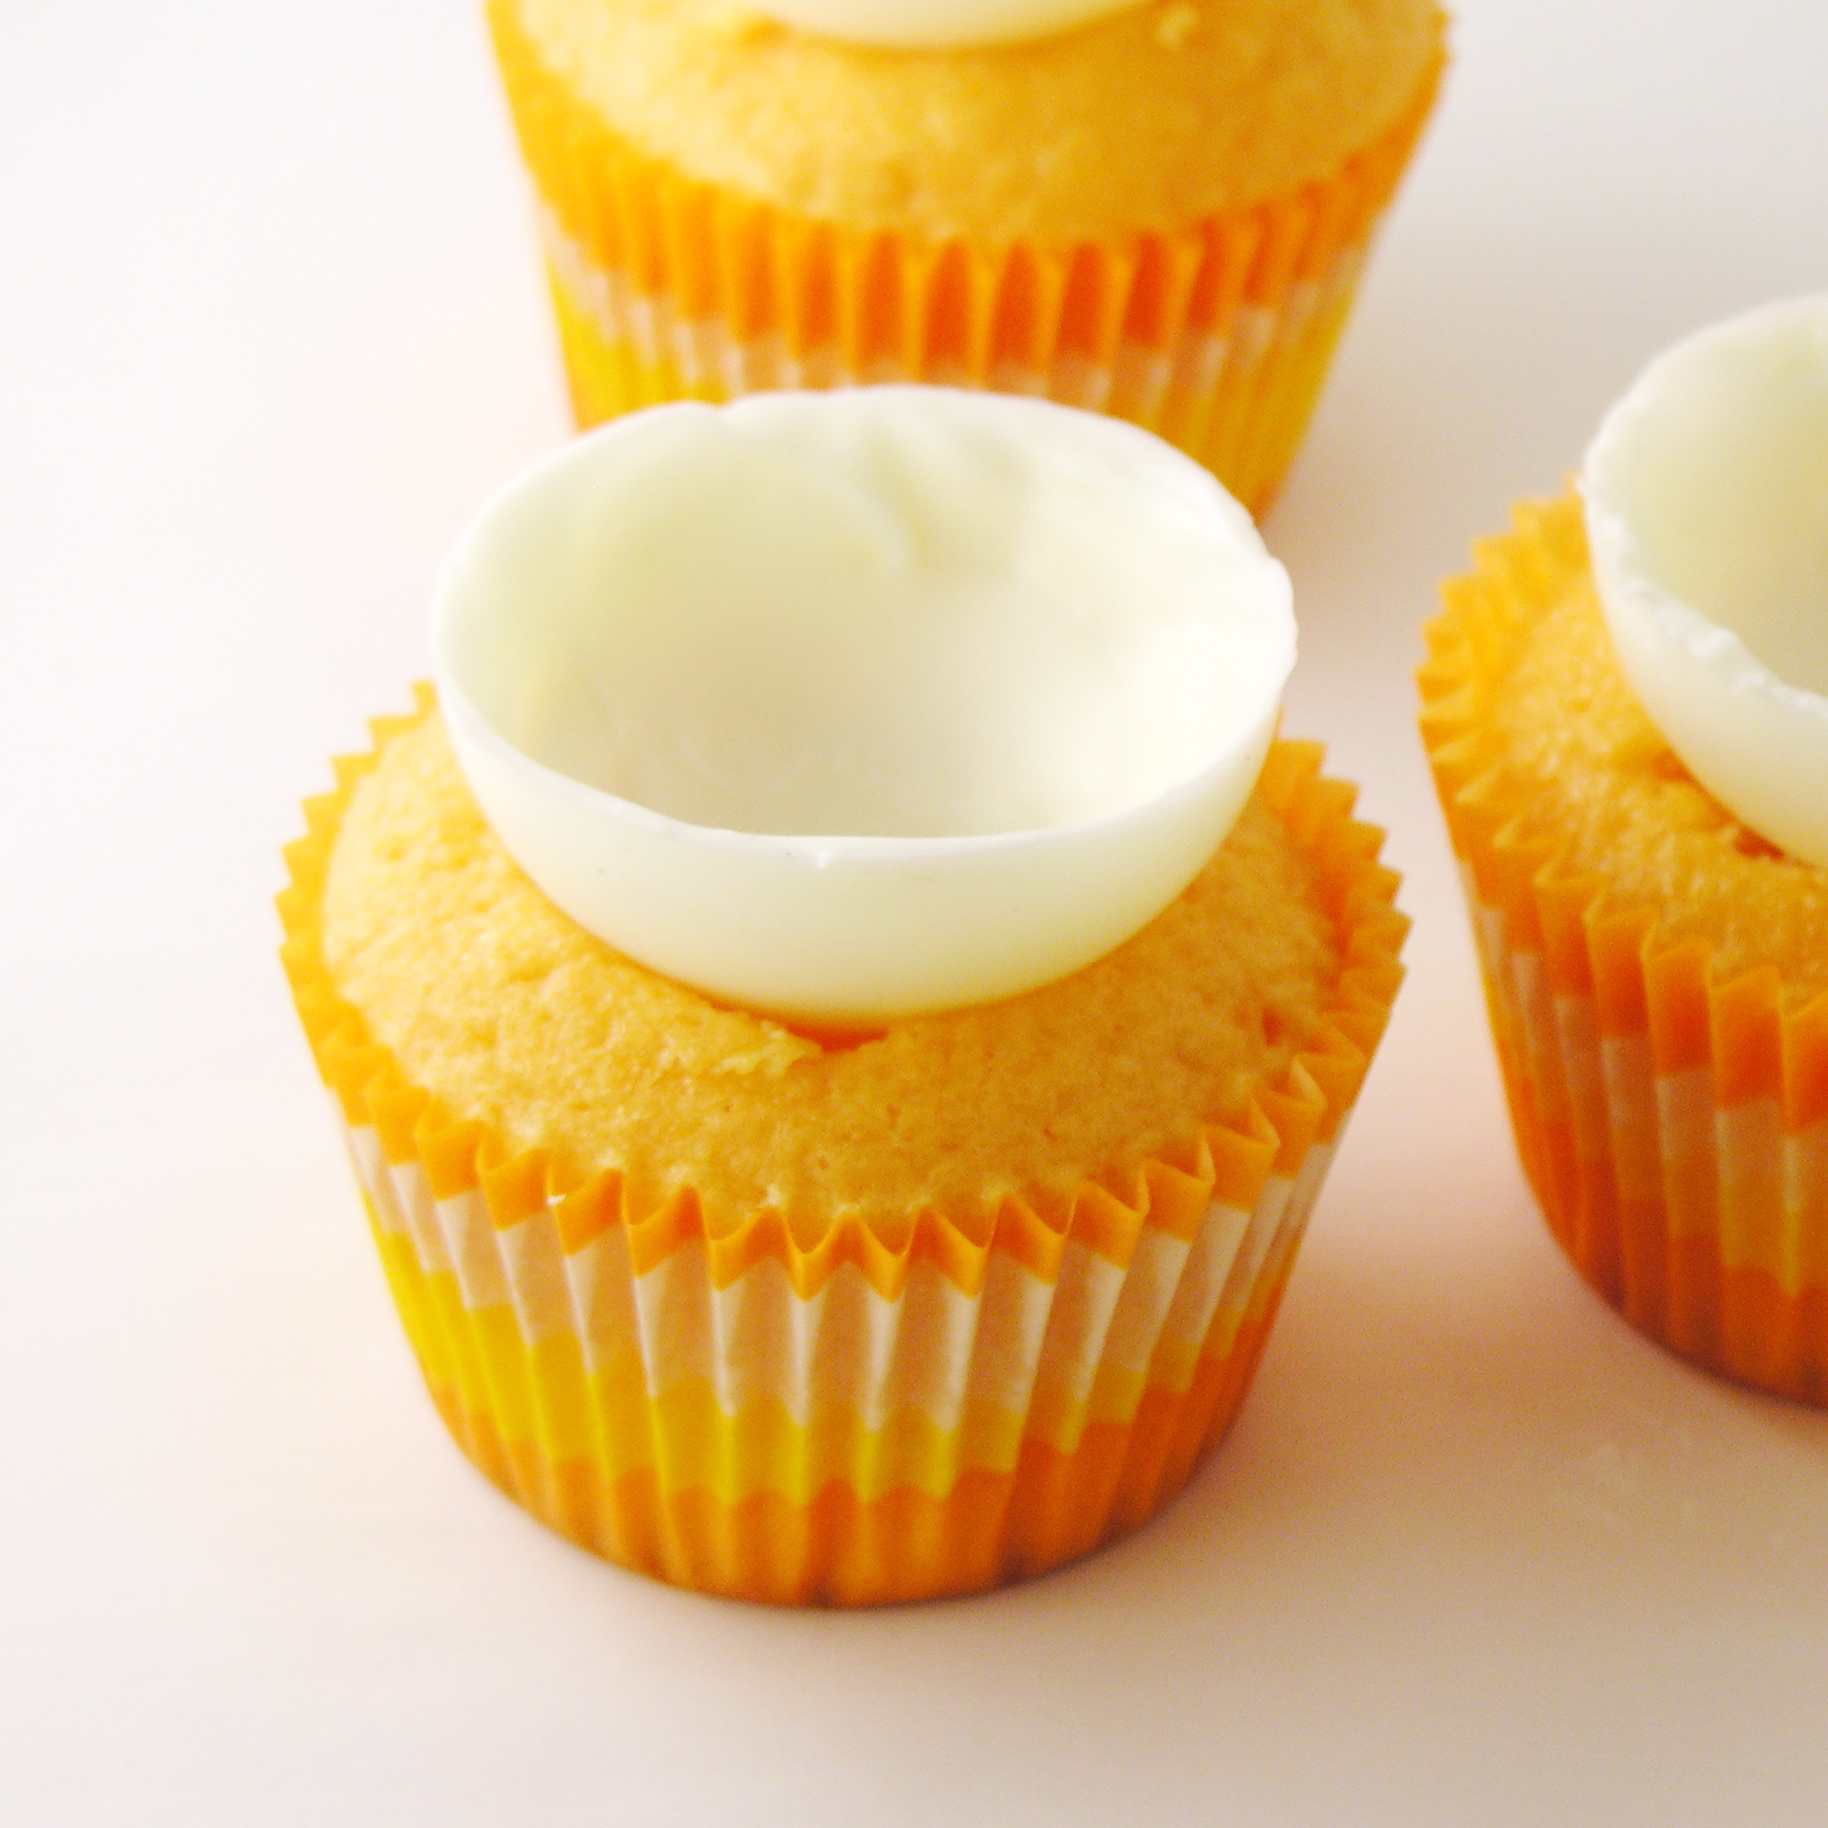
- Pipe frosting dots all the way around the edge of the cup.
- You can hold the cupcakes here until serving and do the next steps right beforehand- or do the following steps and keep the entire cupcake frozen until serving. Depends on how and where you will be serving them.
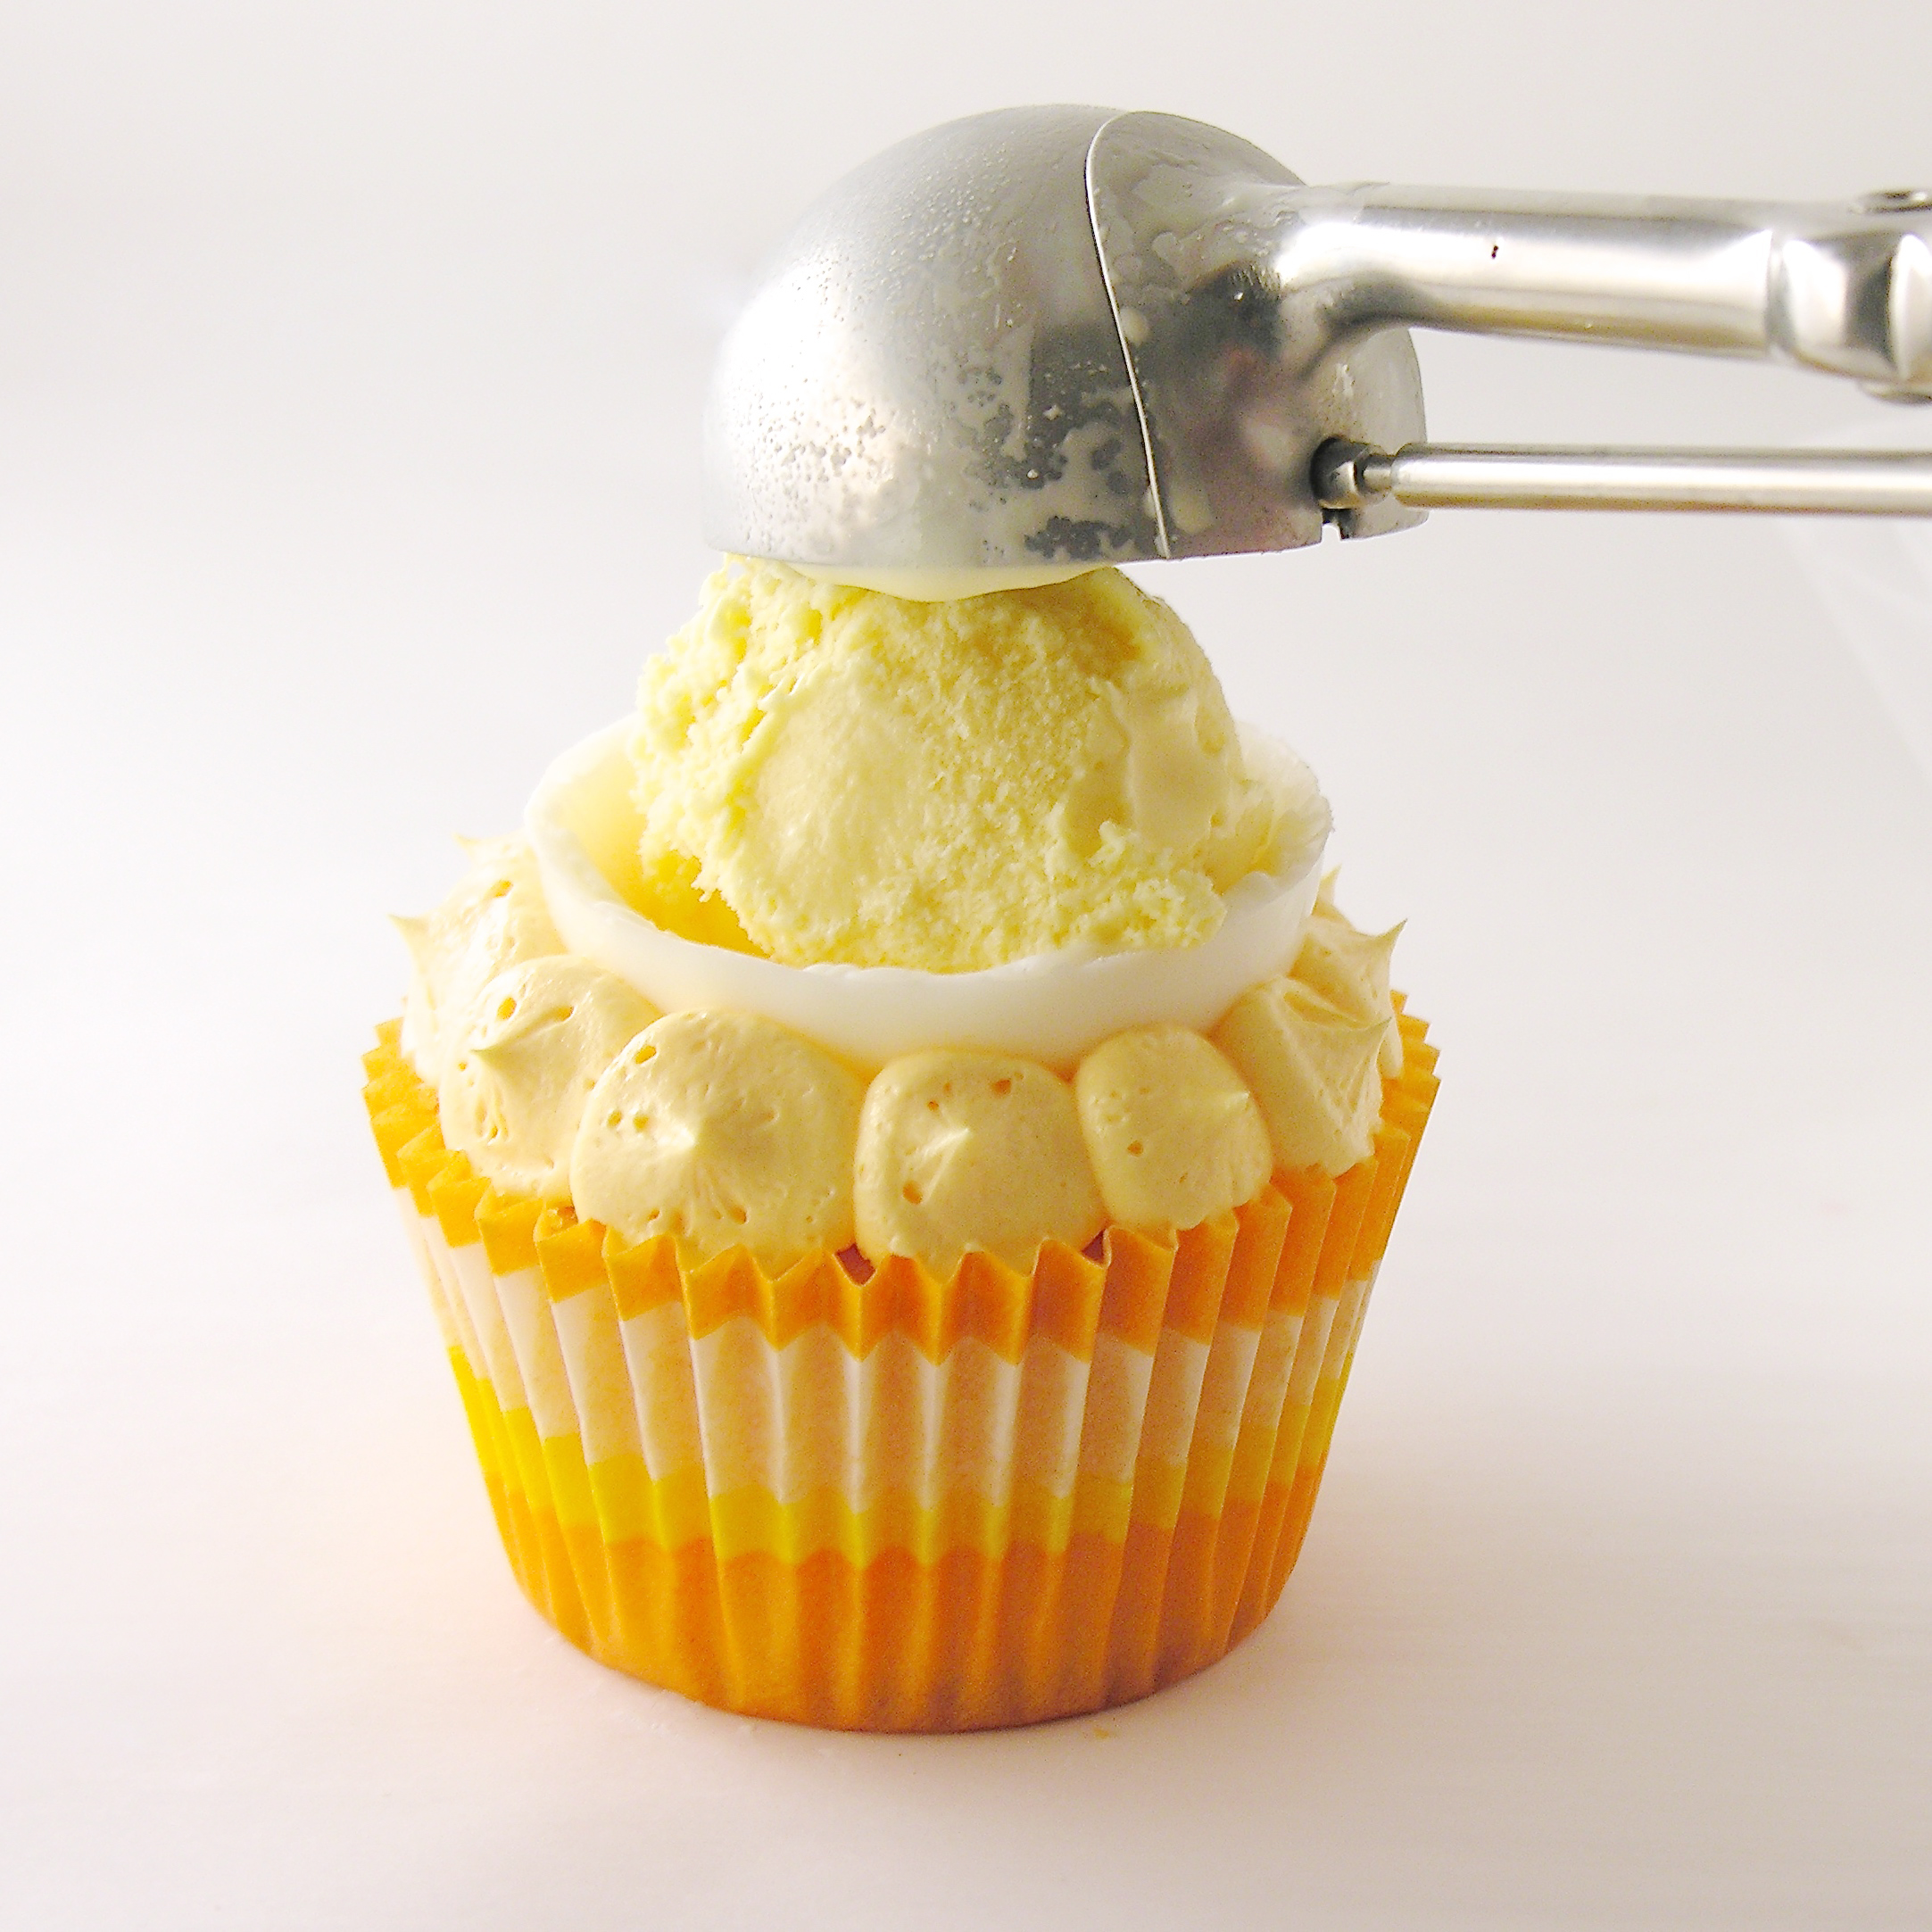
- Place a small scoop of ice cream into the center
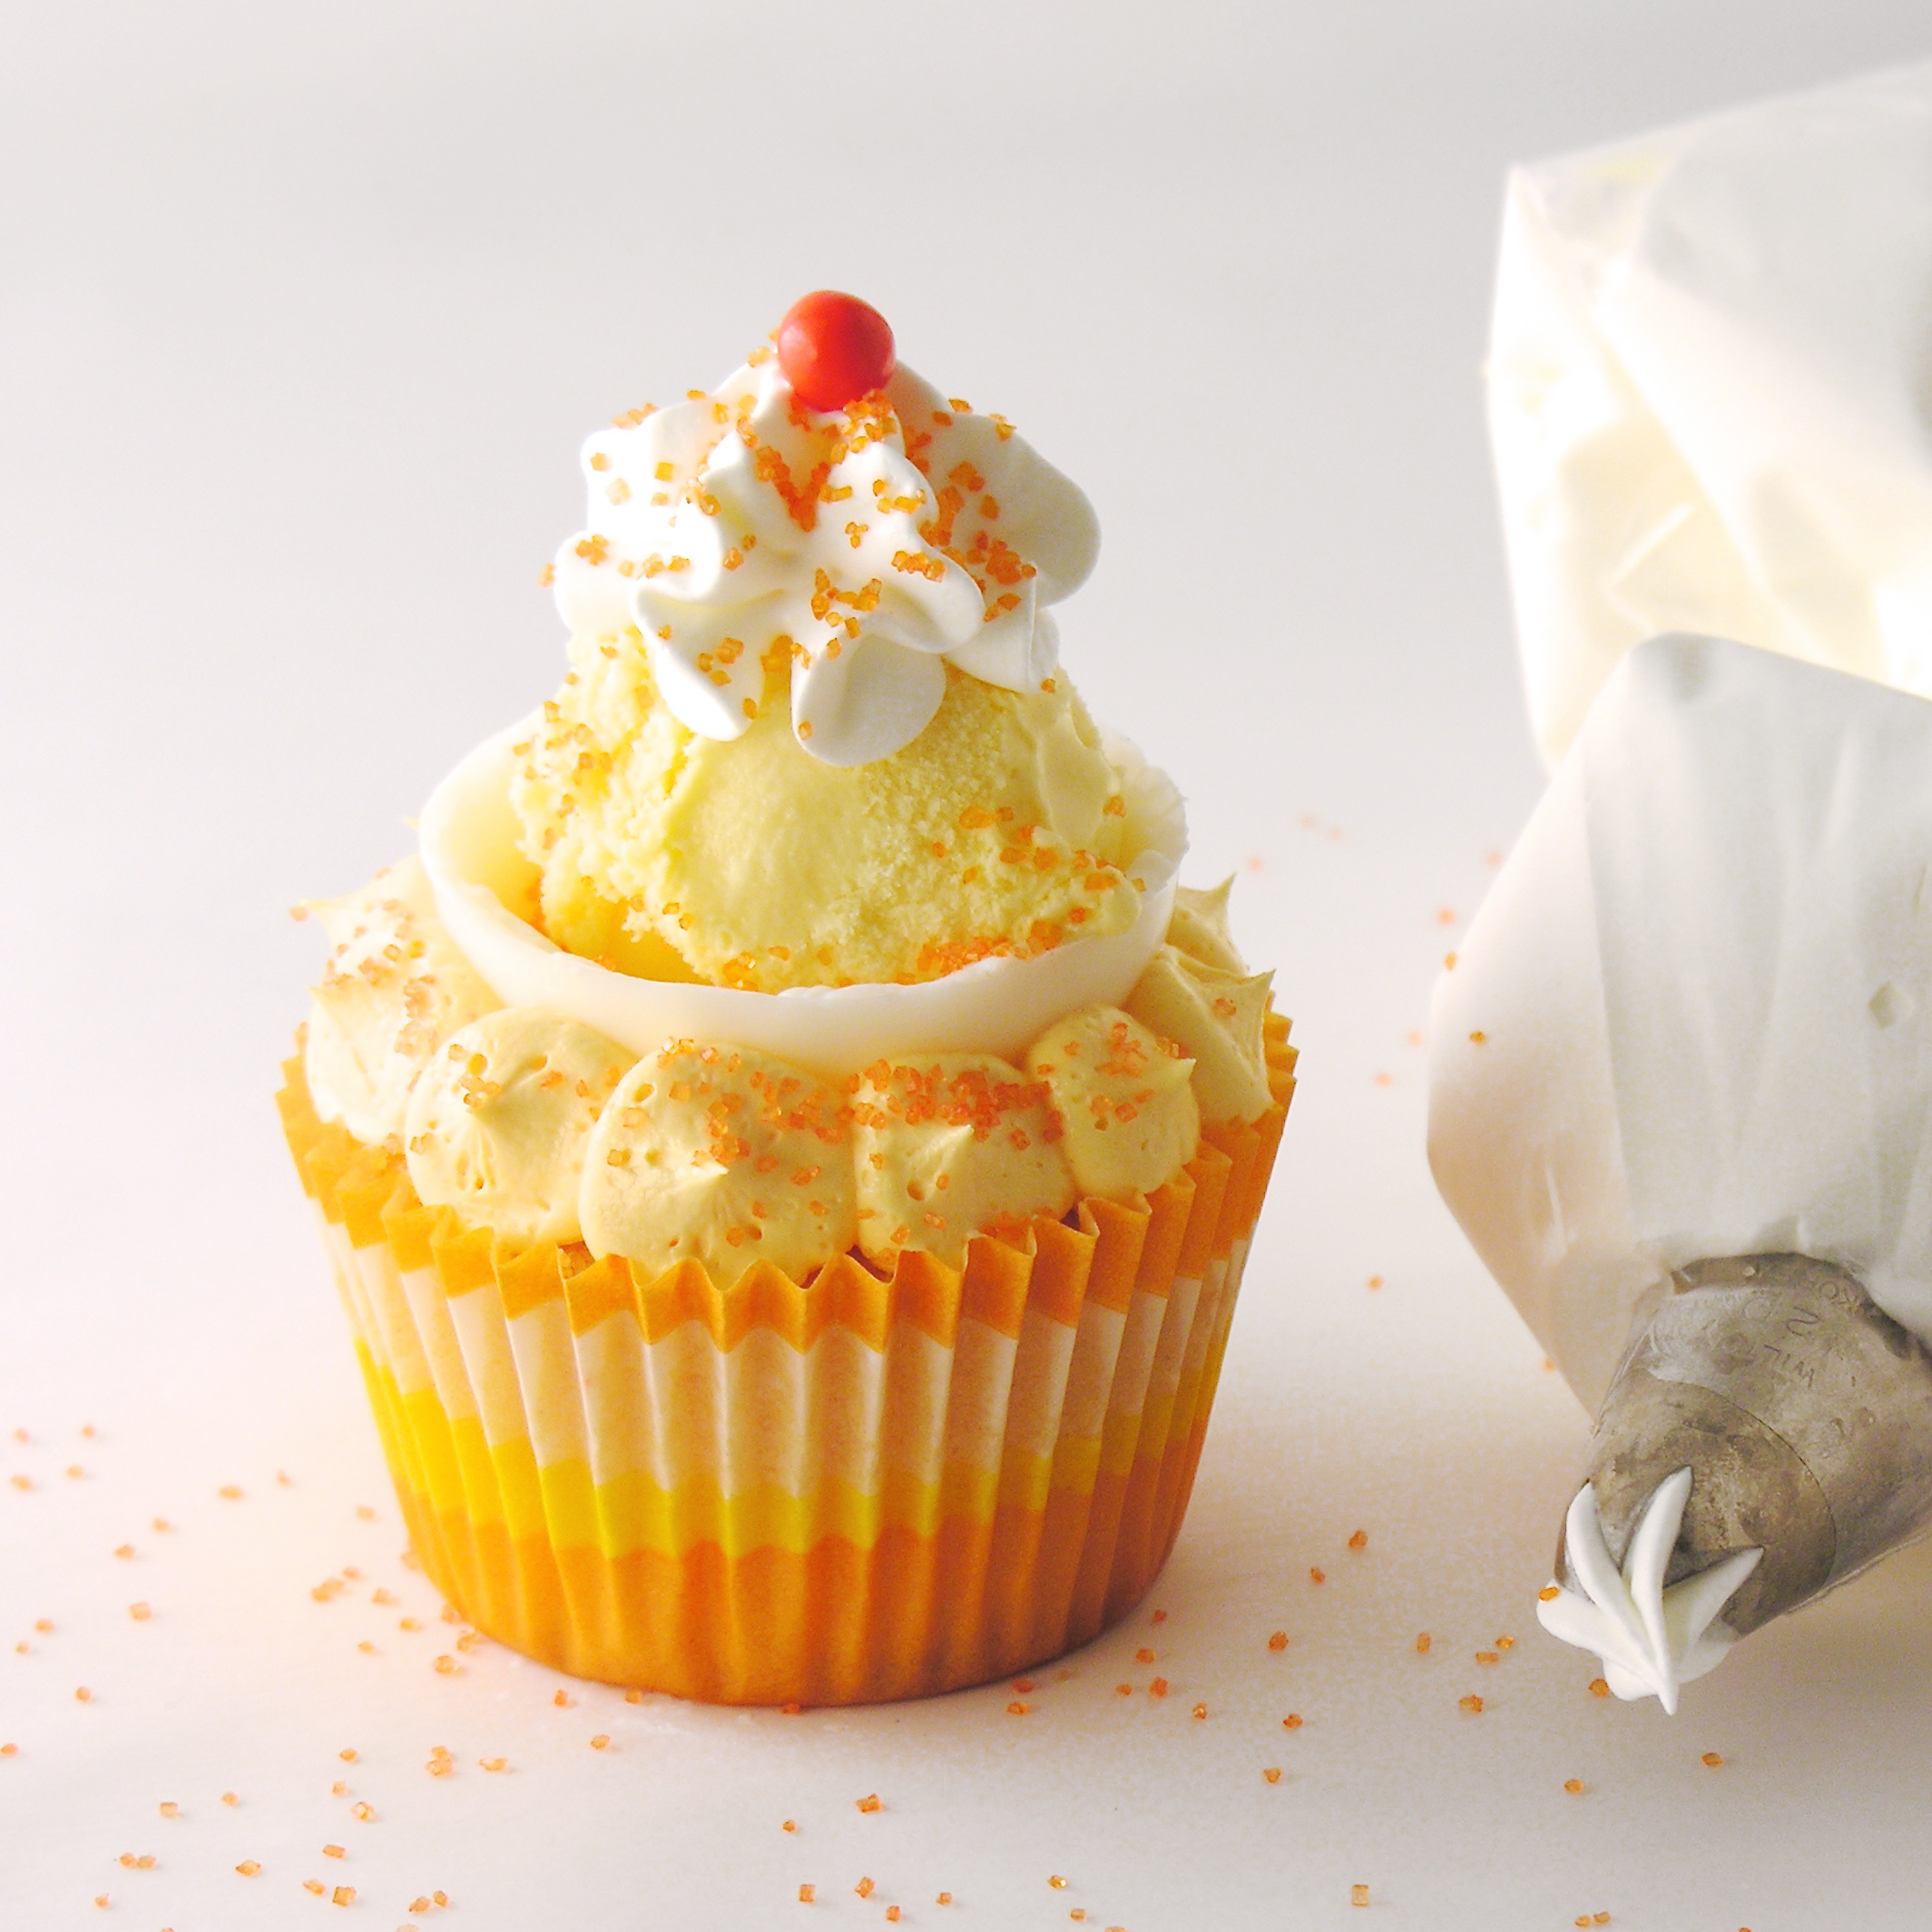
- Top with Cool Whip, and sprinkles as desired
Enjoy!!!!!
My thoughts: Well, I didn’t try these, but I did share them and according to others, they are a yummy success! These work best if you keep them at room temp and add the ice cream just before serving. If you add the ice cream ahead of time, let the cupcakes and ice cream warm up and soften a bit before serving- otherwise they are fairly difficult to eat! At room temperature though… cake and ice cream all at once!!! YUM! Enjoy!!! ~r
Other fun ice cream desserts to try! (click on a photo to see the recipe)