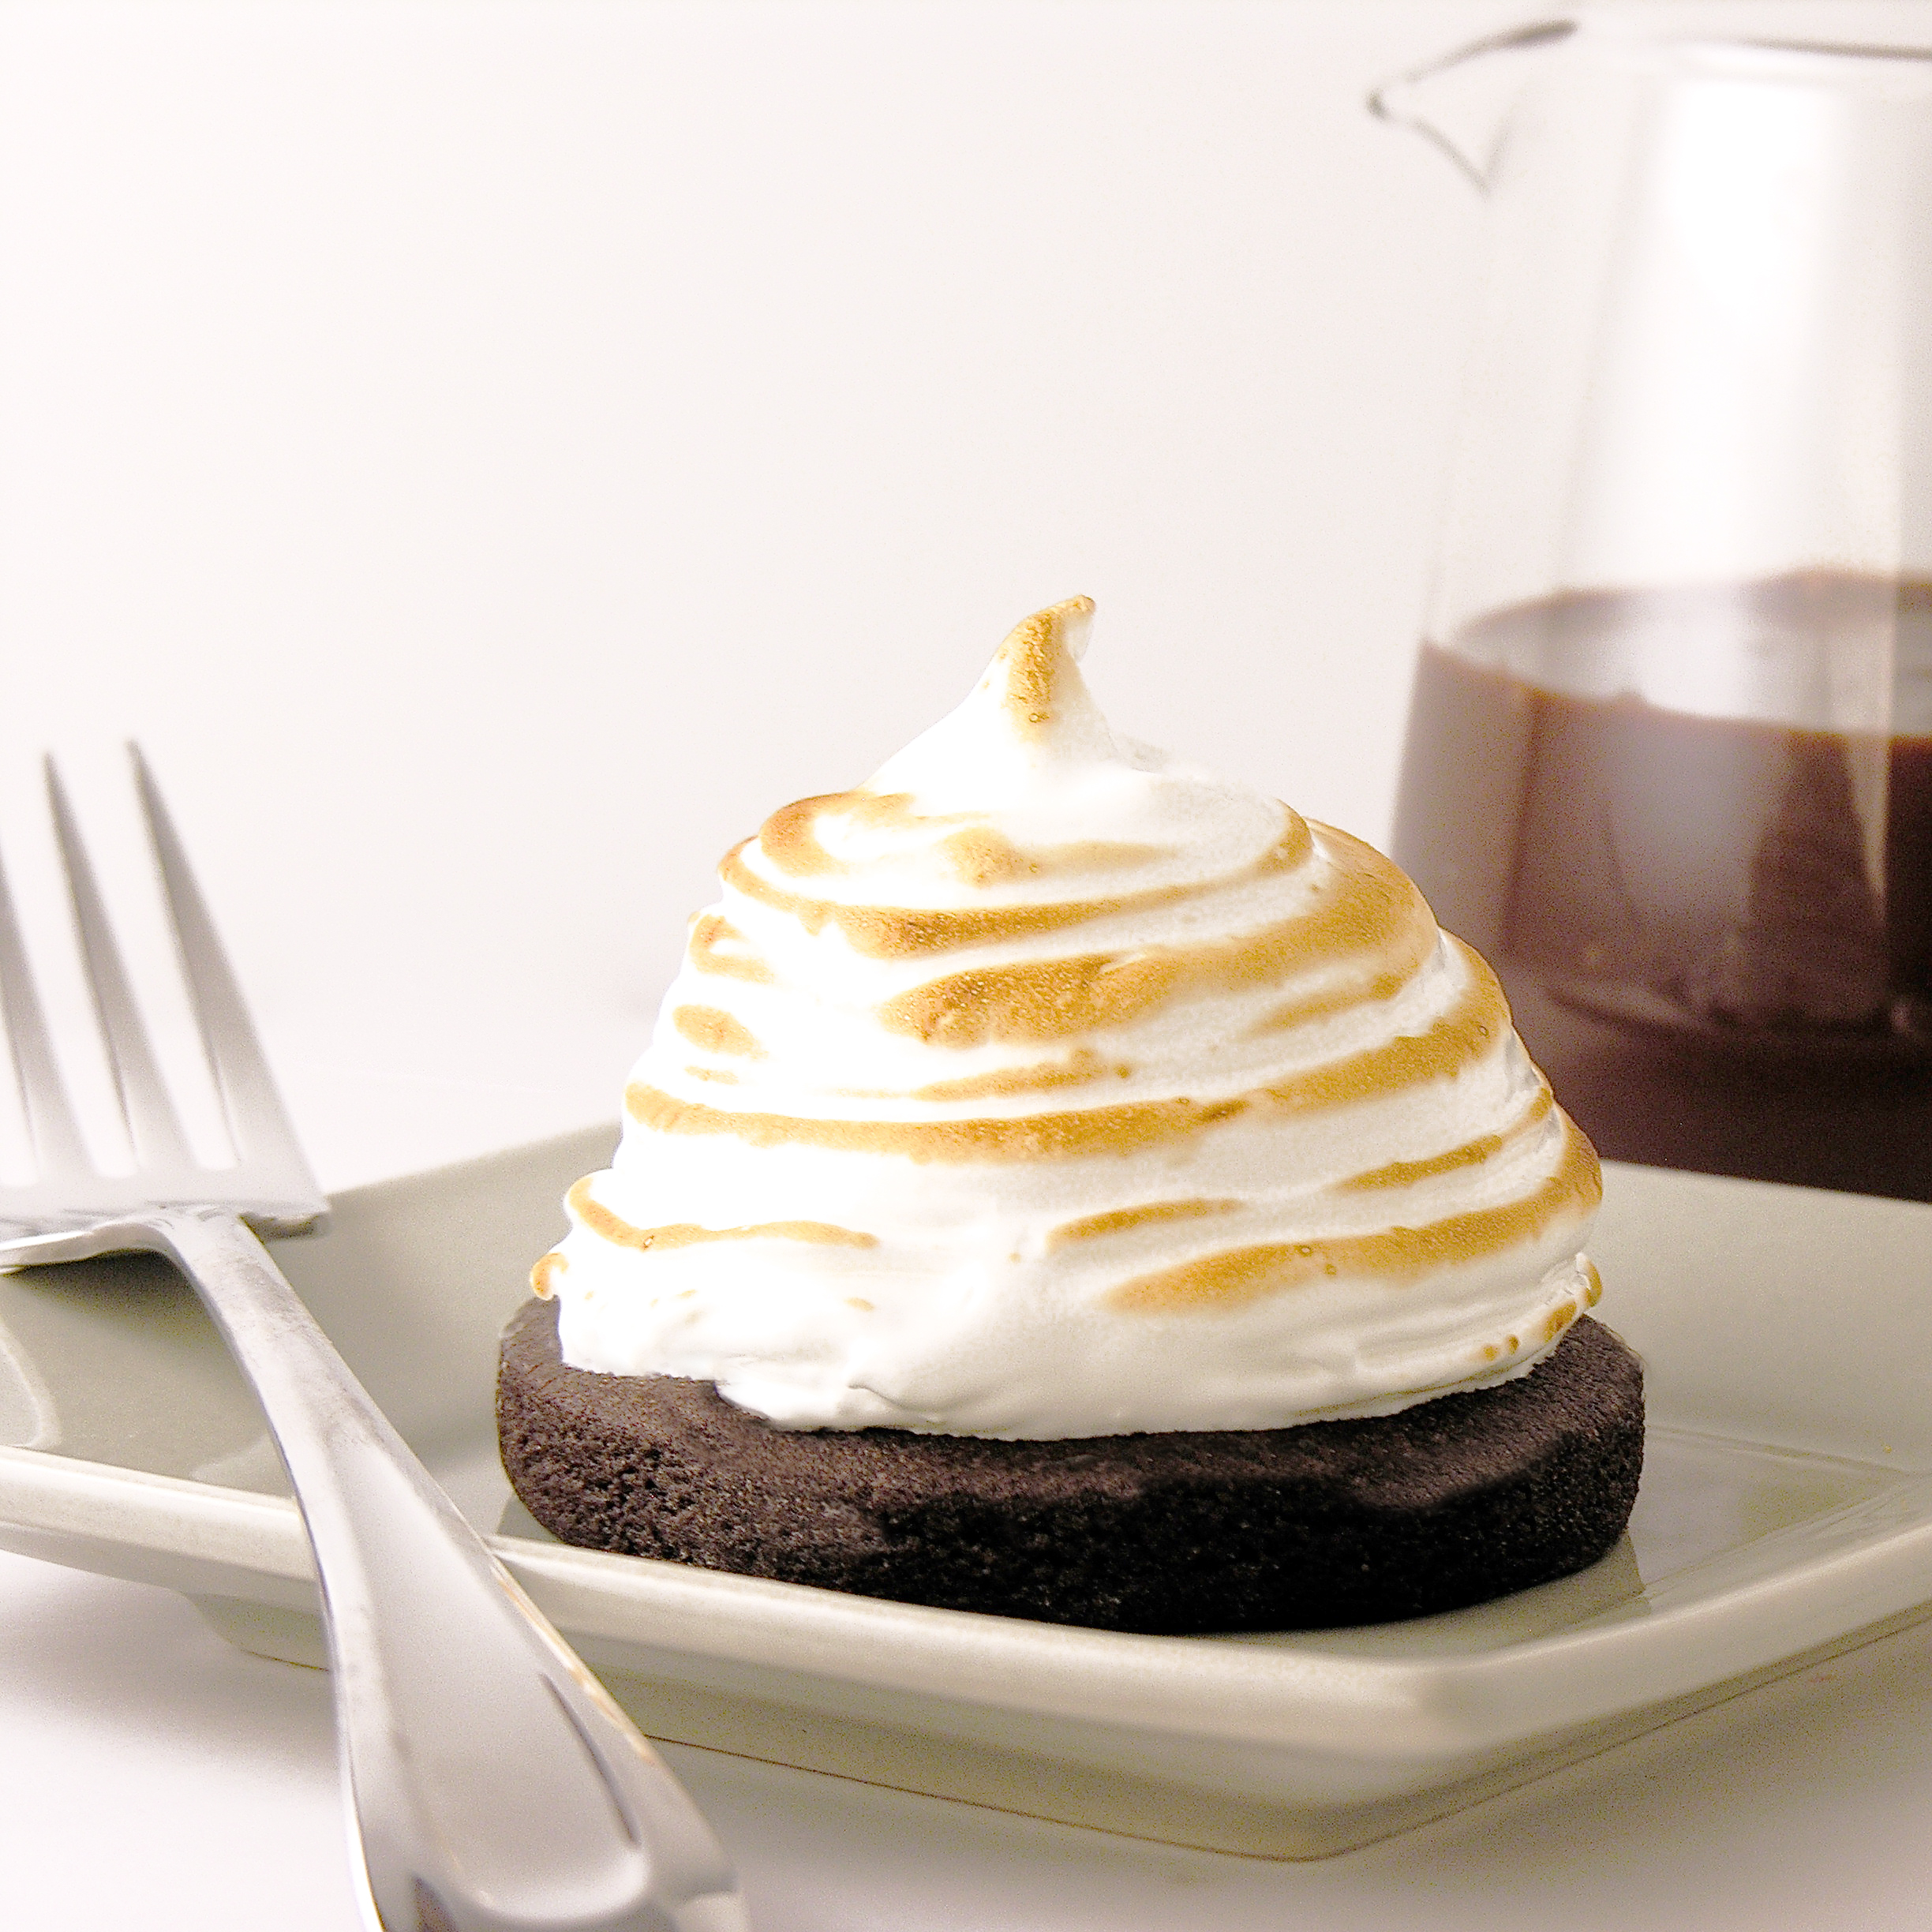
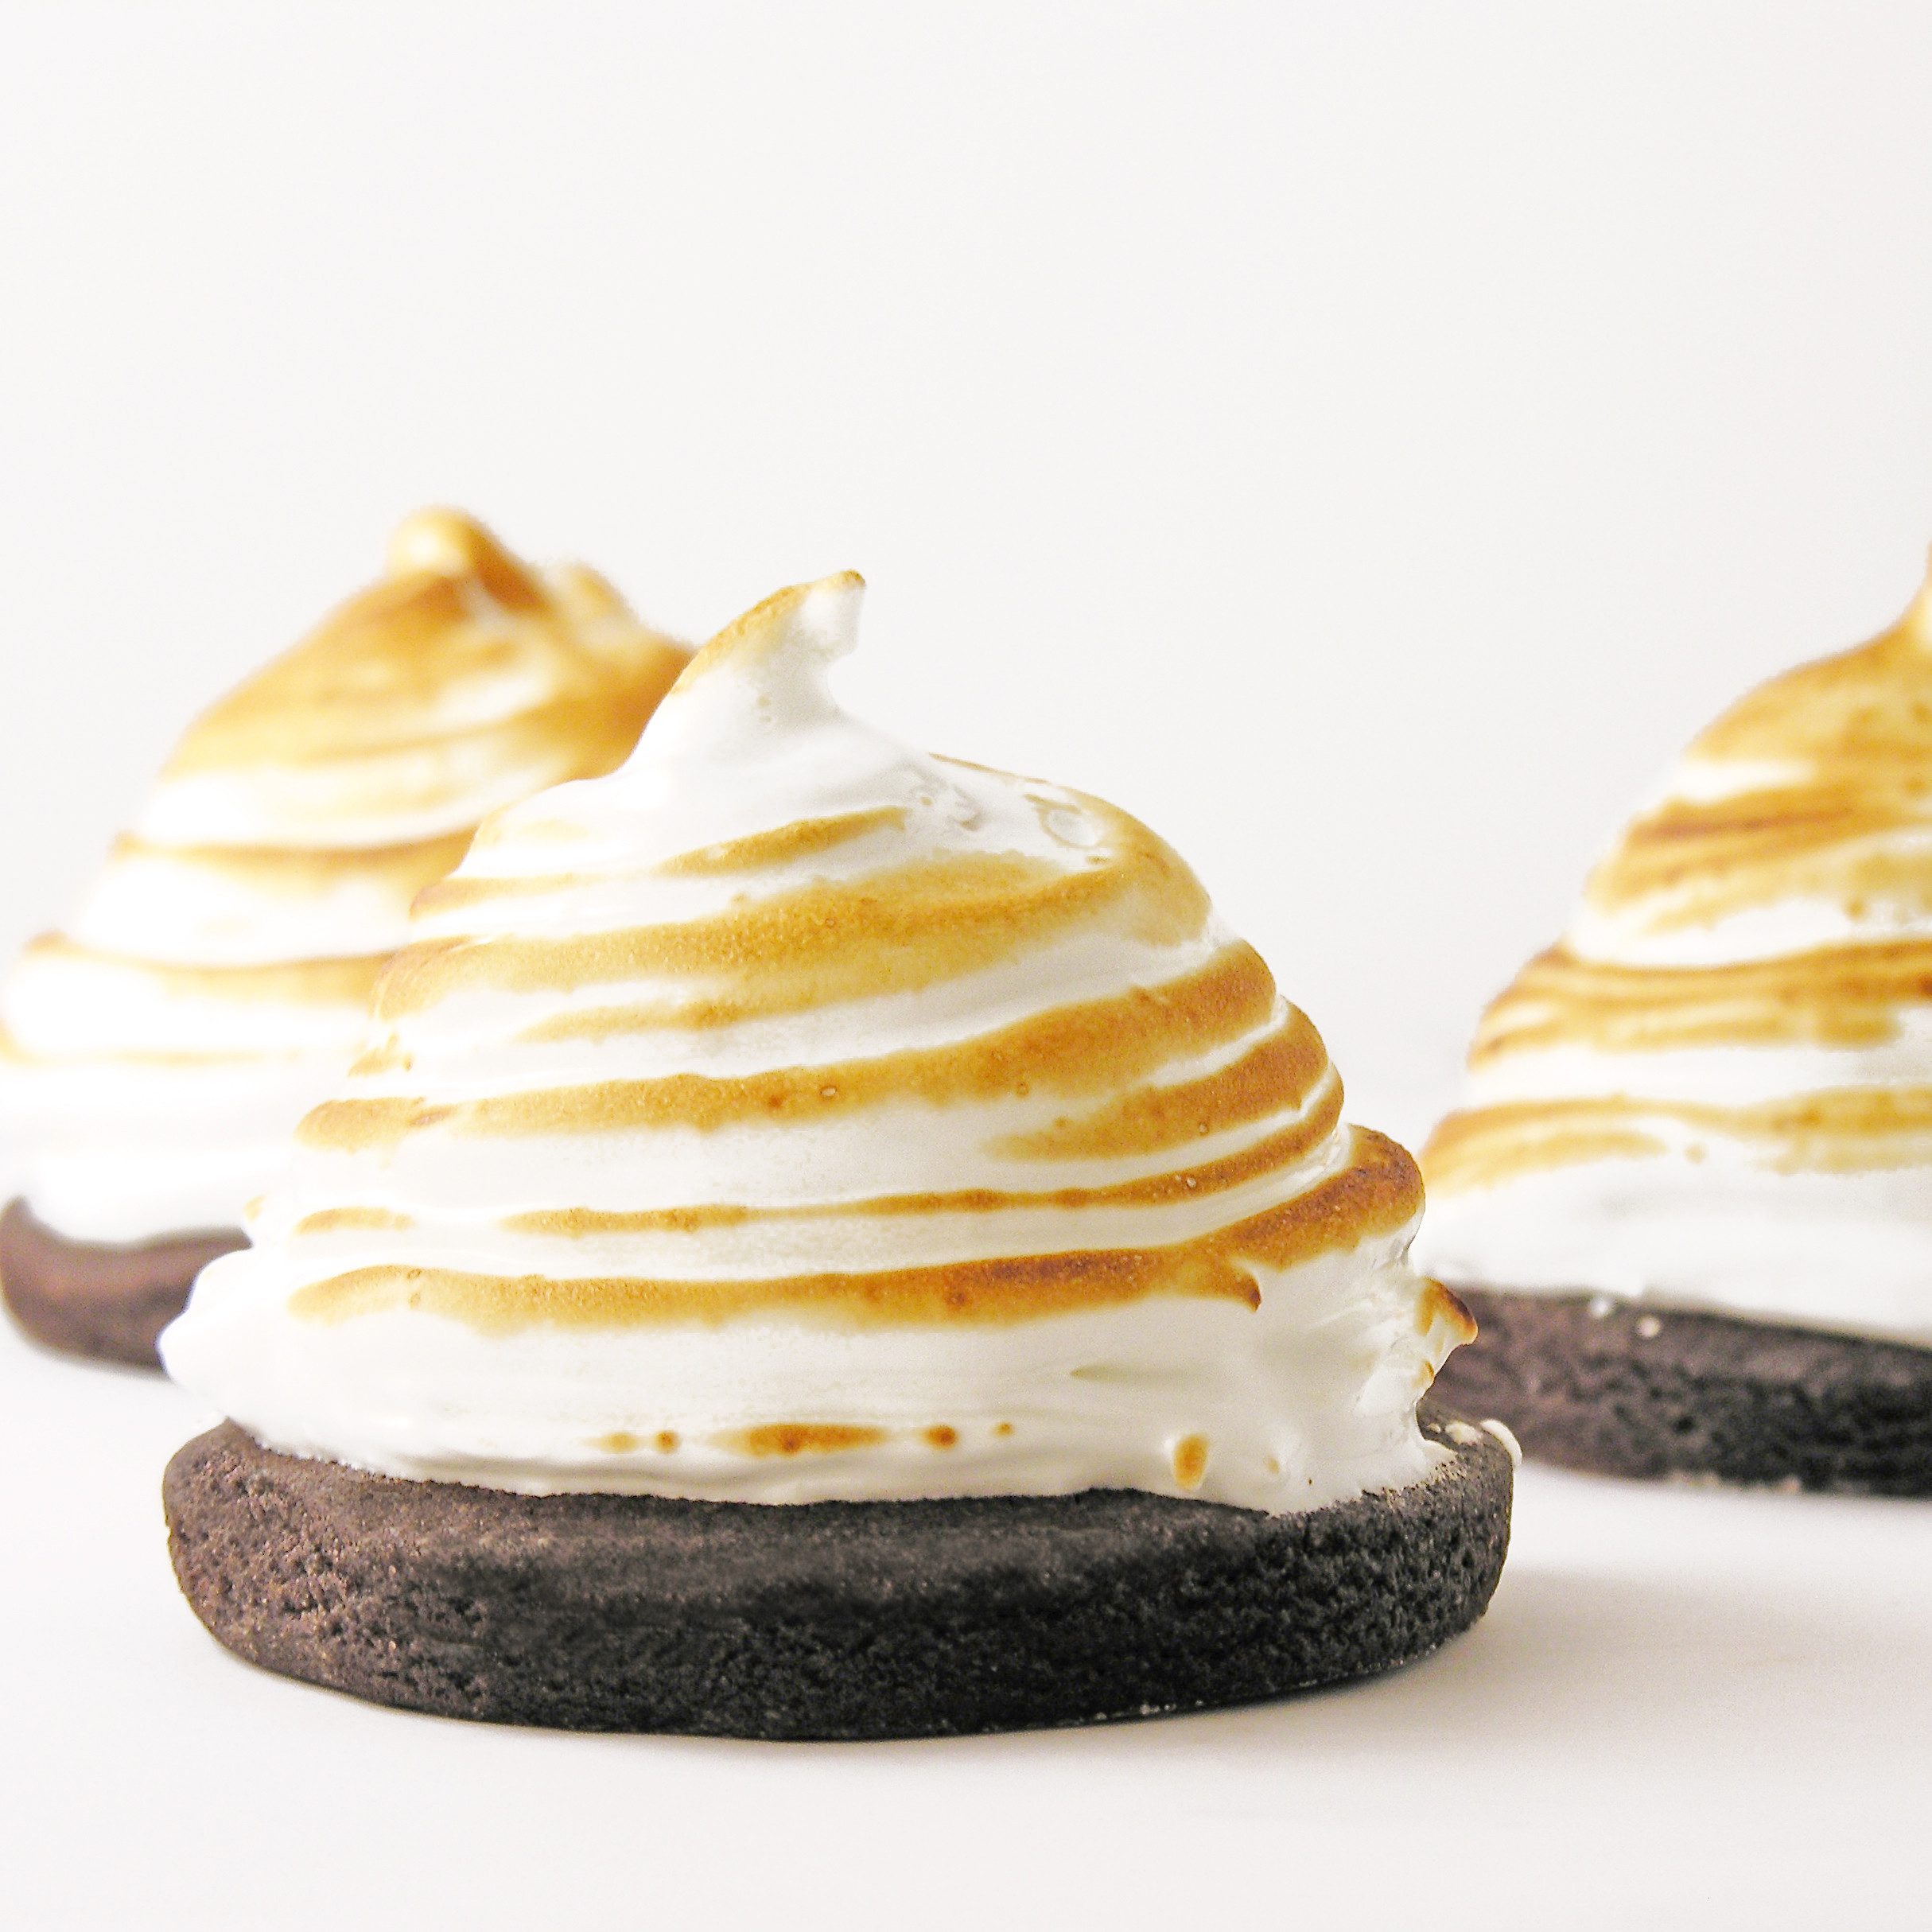
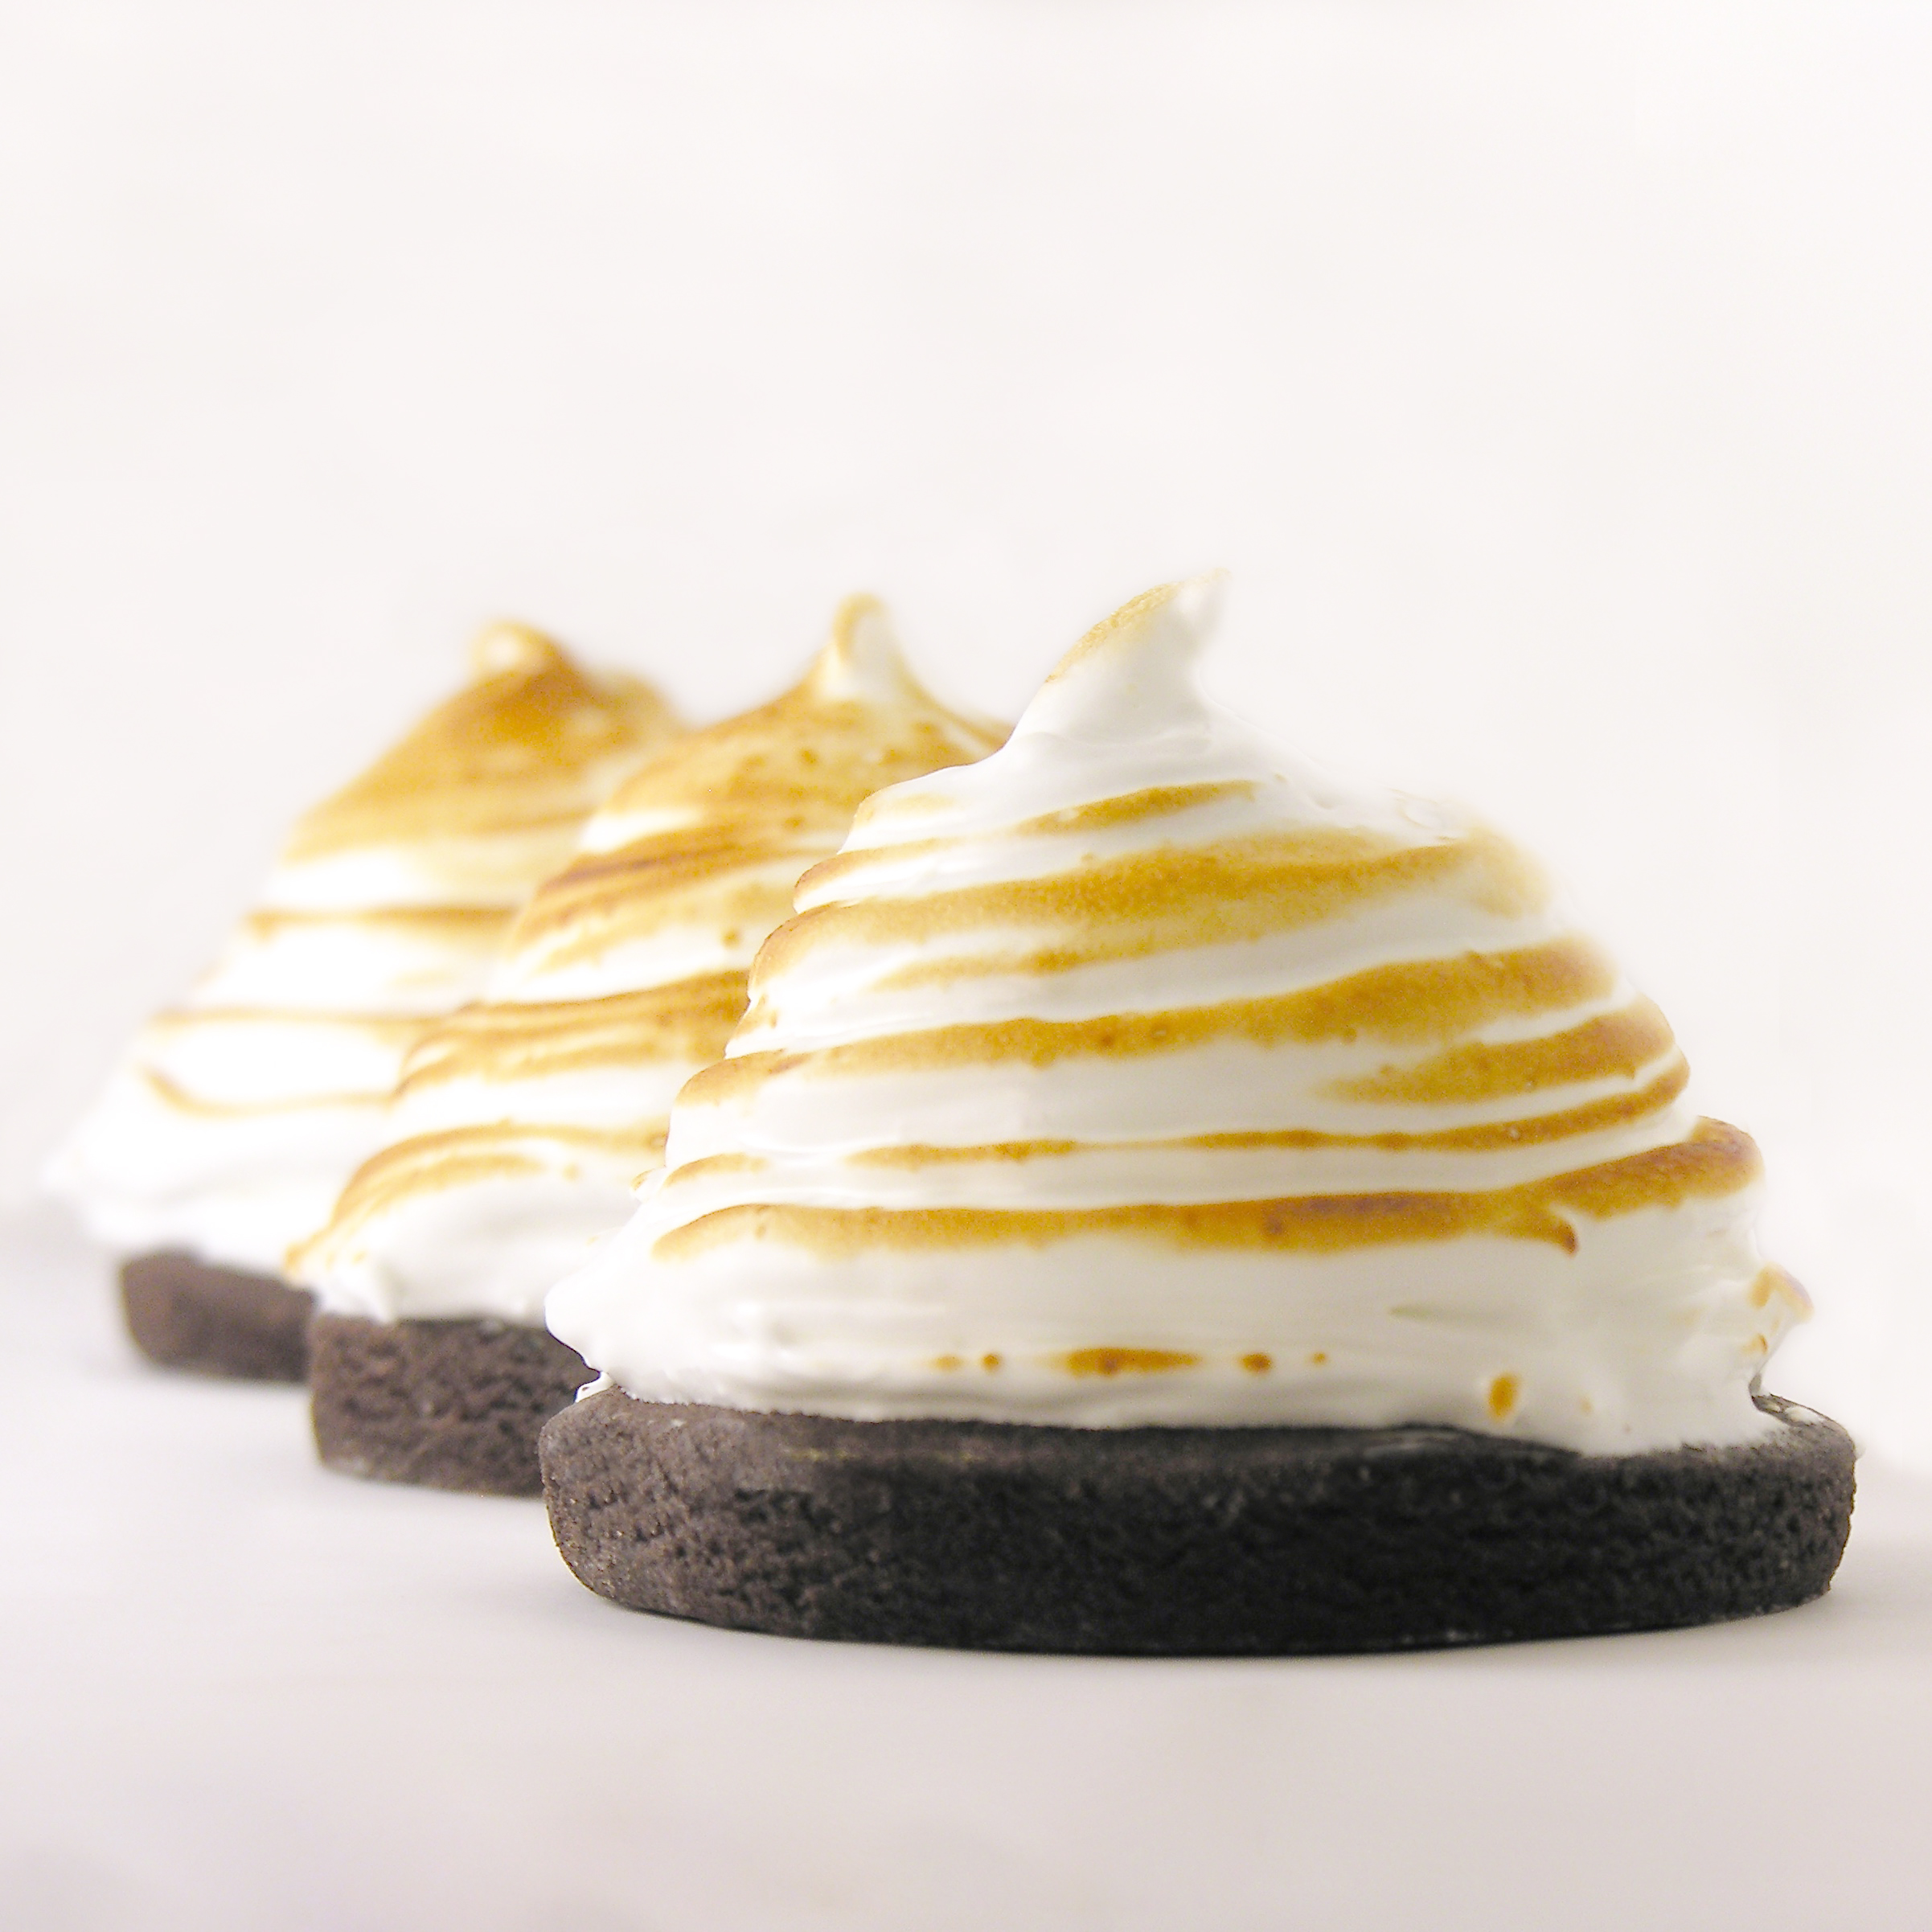
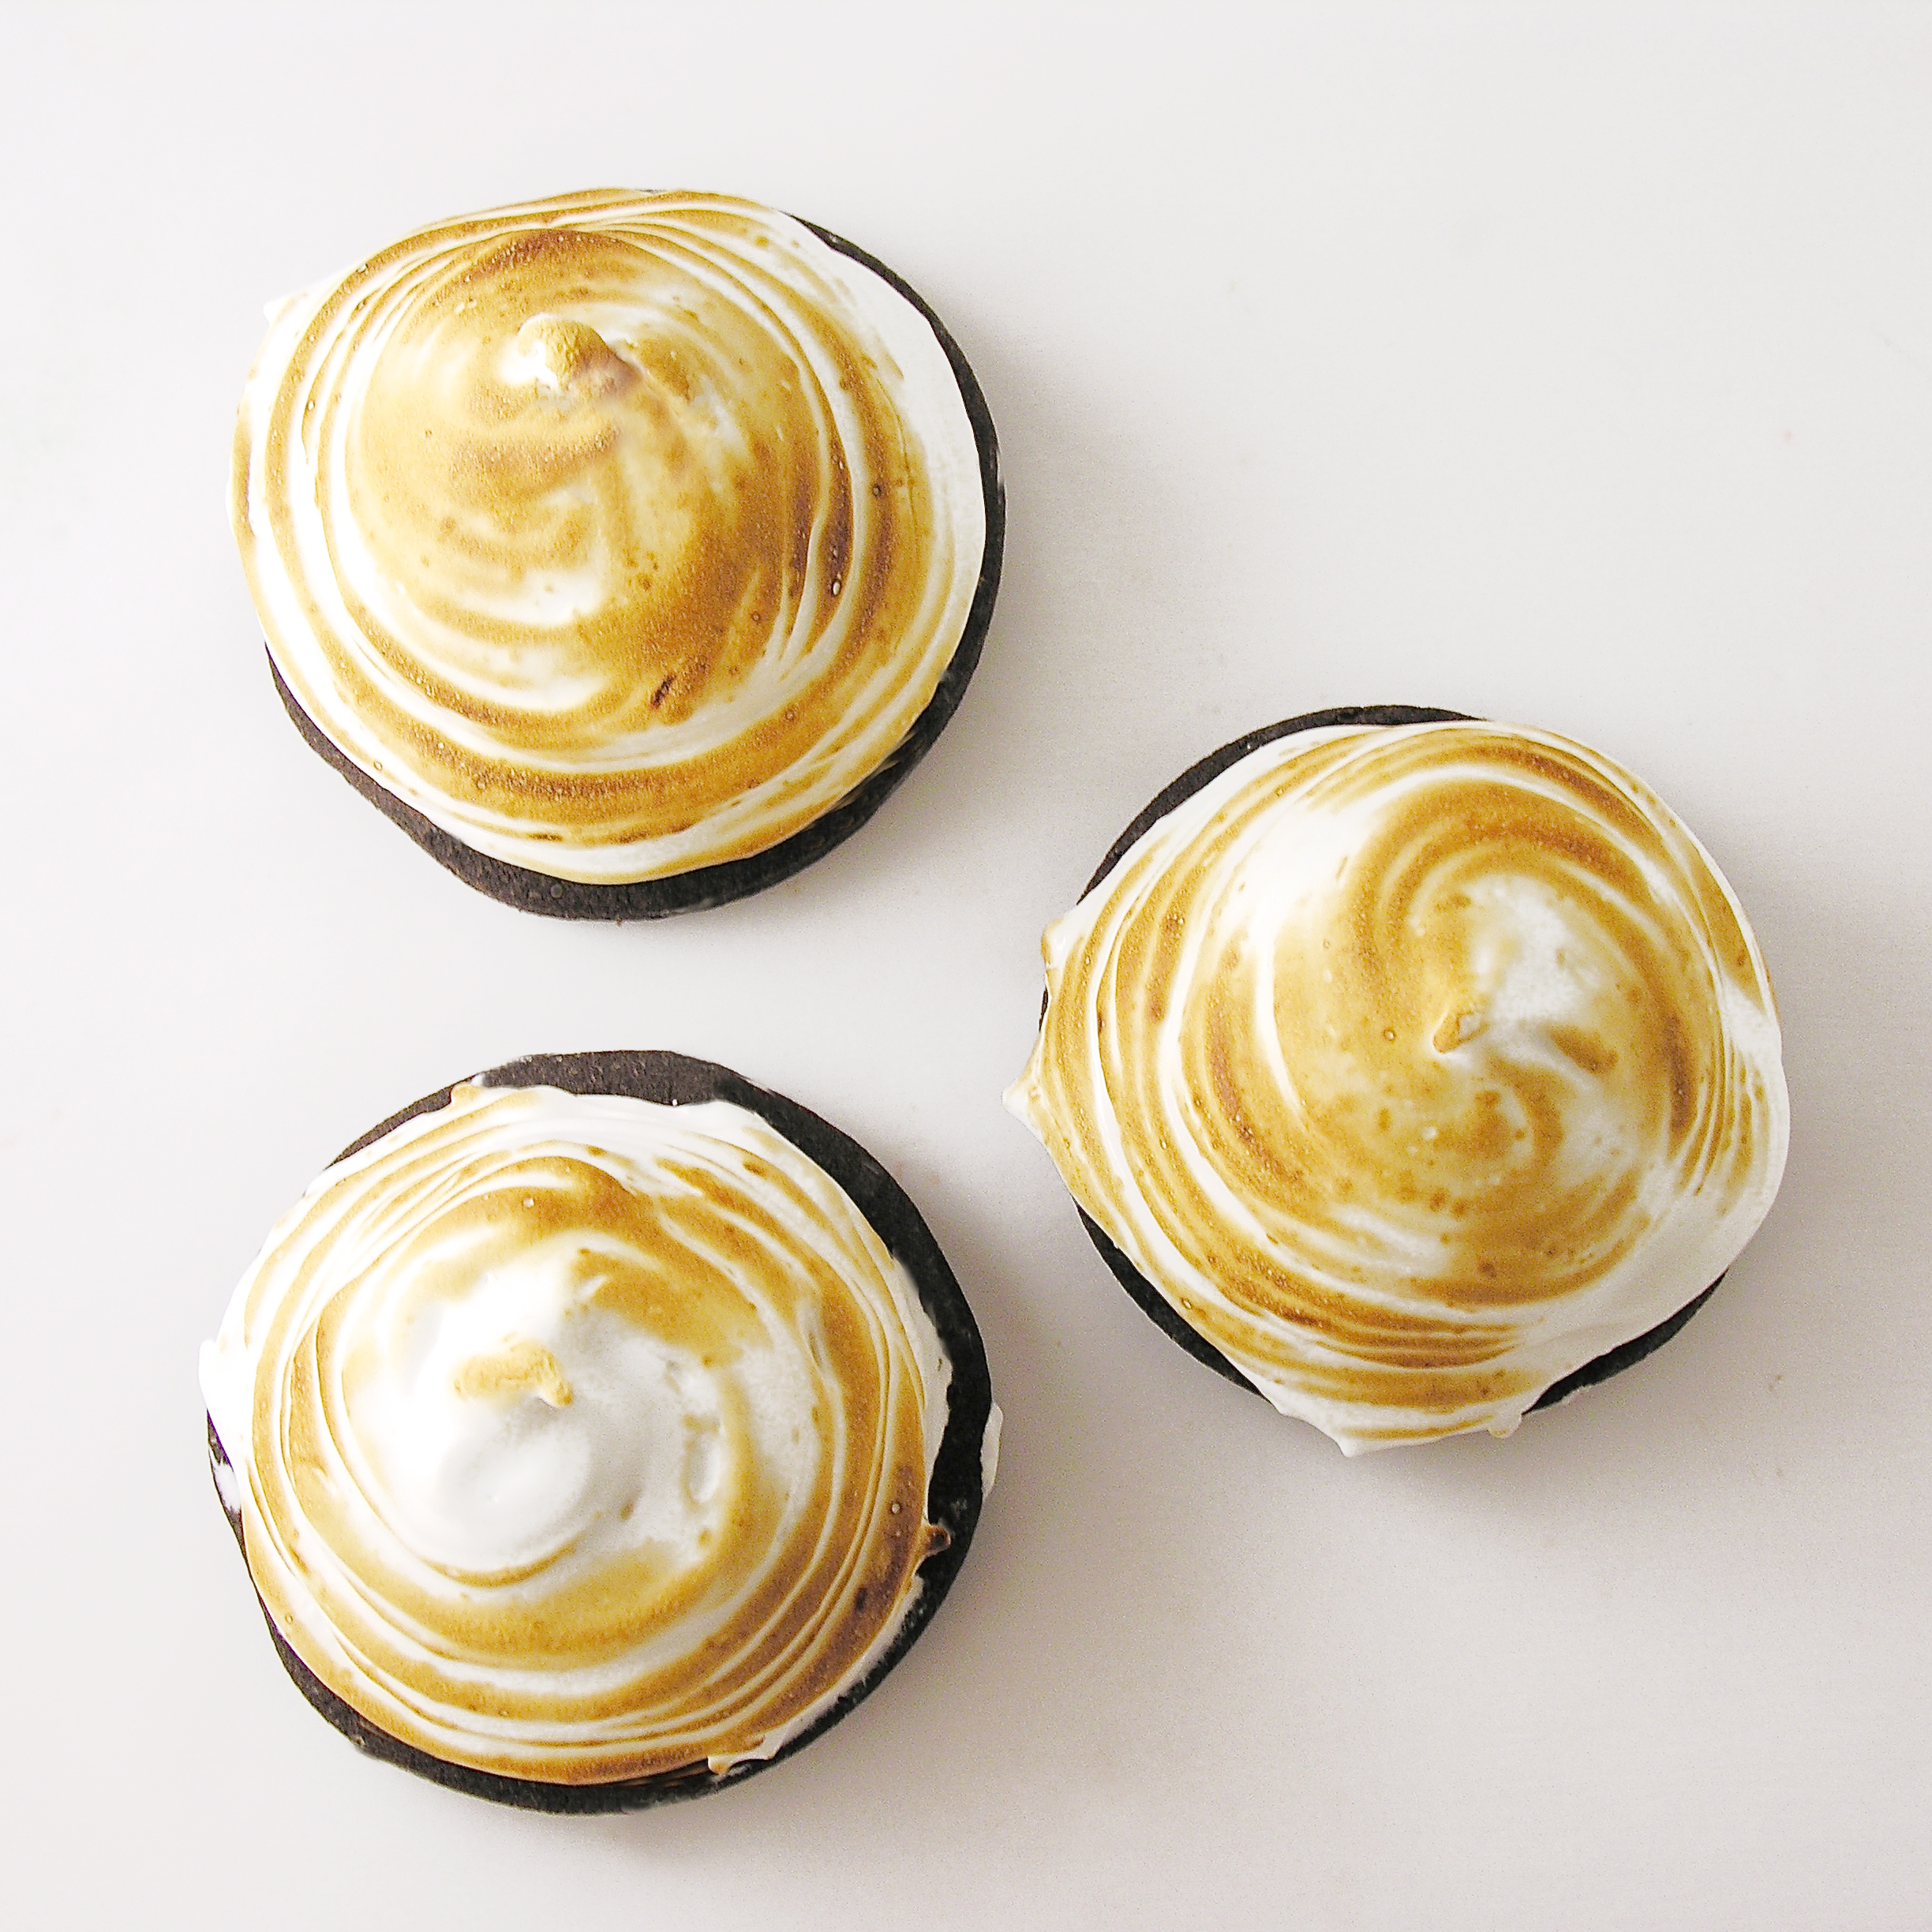
These dark chocolate cookies are topped with a scoop of ice cream and a cloud of toasted meringue~ a cookie sized Baked Alaska! So fun!
Baked Alaska is a dessert that is dear to my heart. Every year, for as long as I can remember, my mom, sis-in-law and I have celebrated our (nearly-Christmas) birthdays with this dessert. At Christmas, the ice cream of choice is peppermint stick. I made these with Mocha Chip ice cream. Pick your favorite ice cream flavor, and give these sweet mini desserts a try!
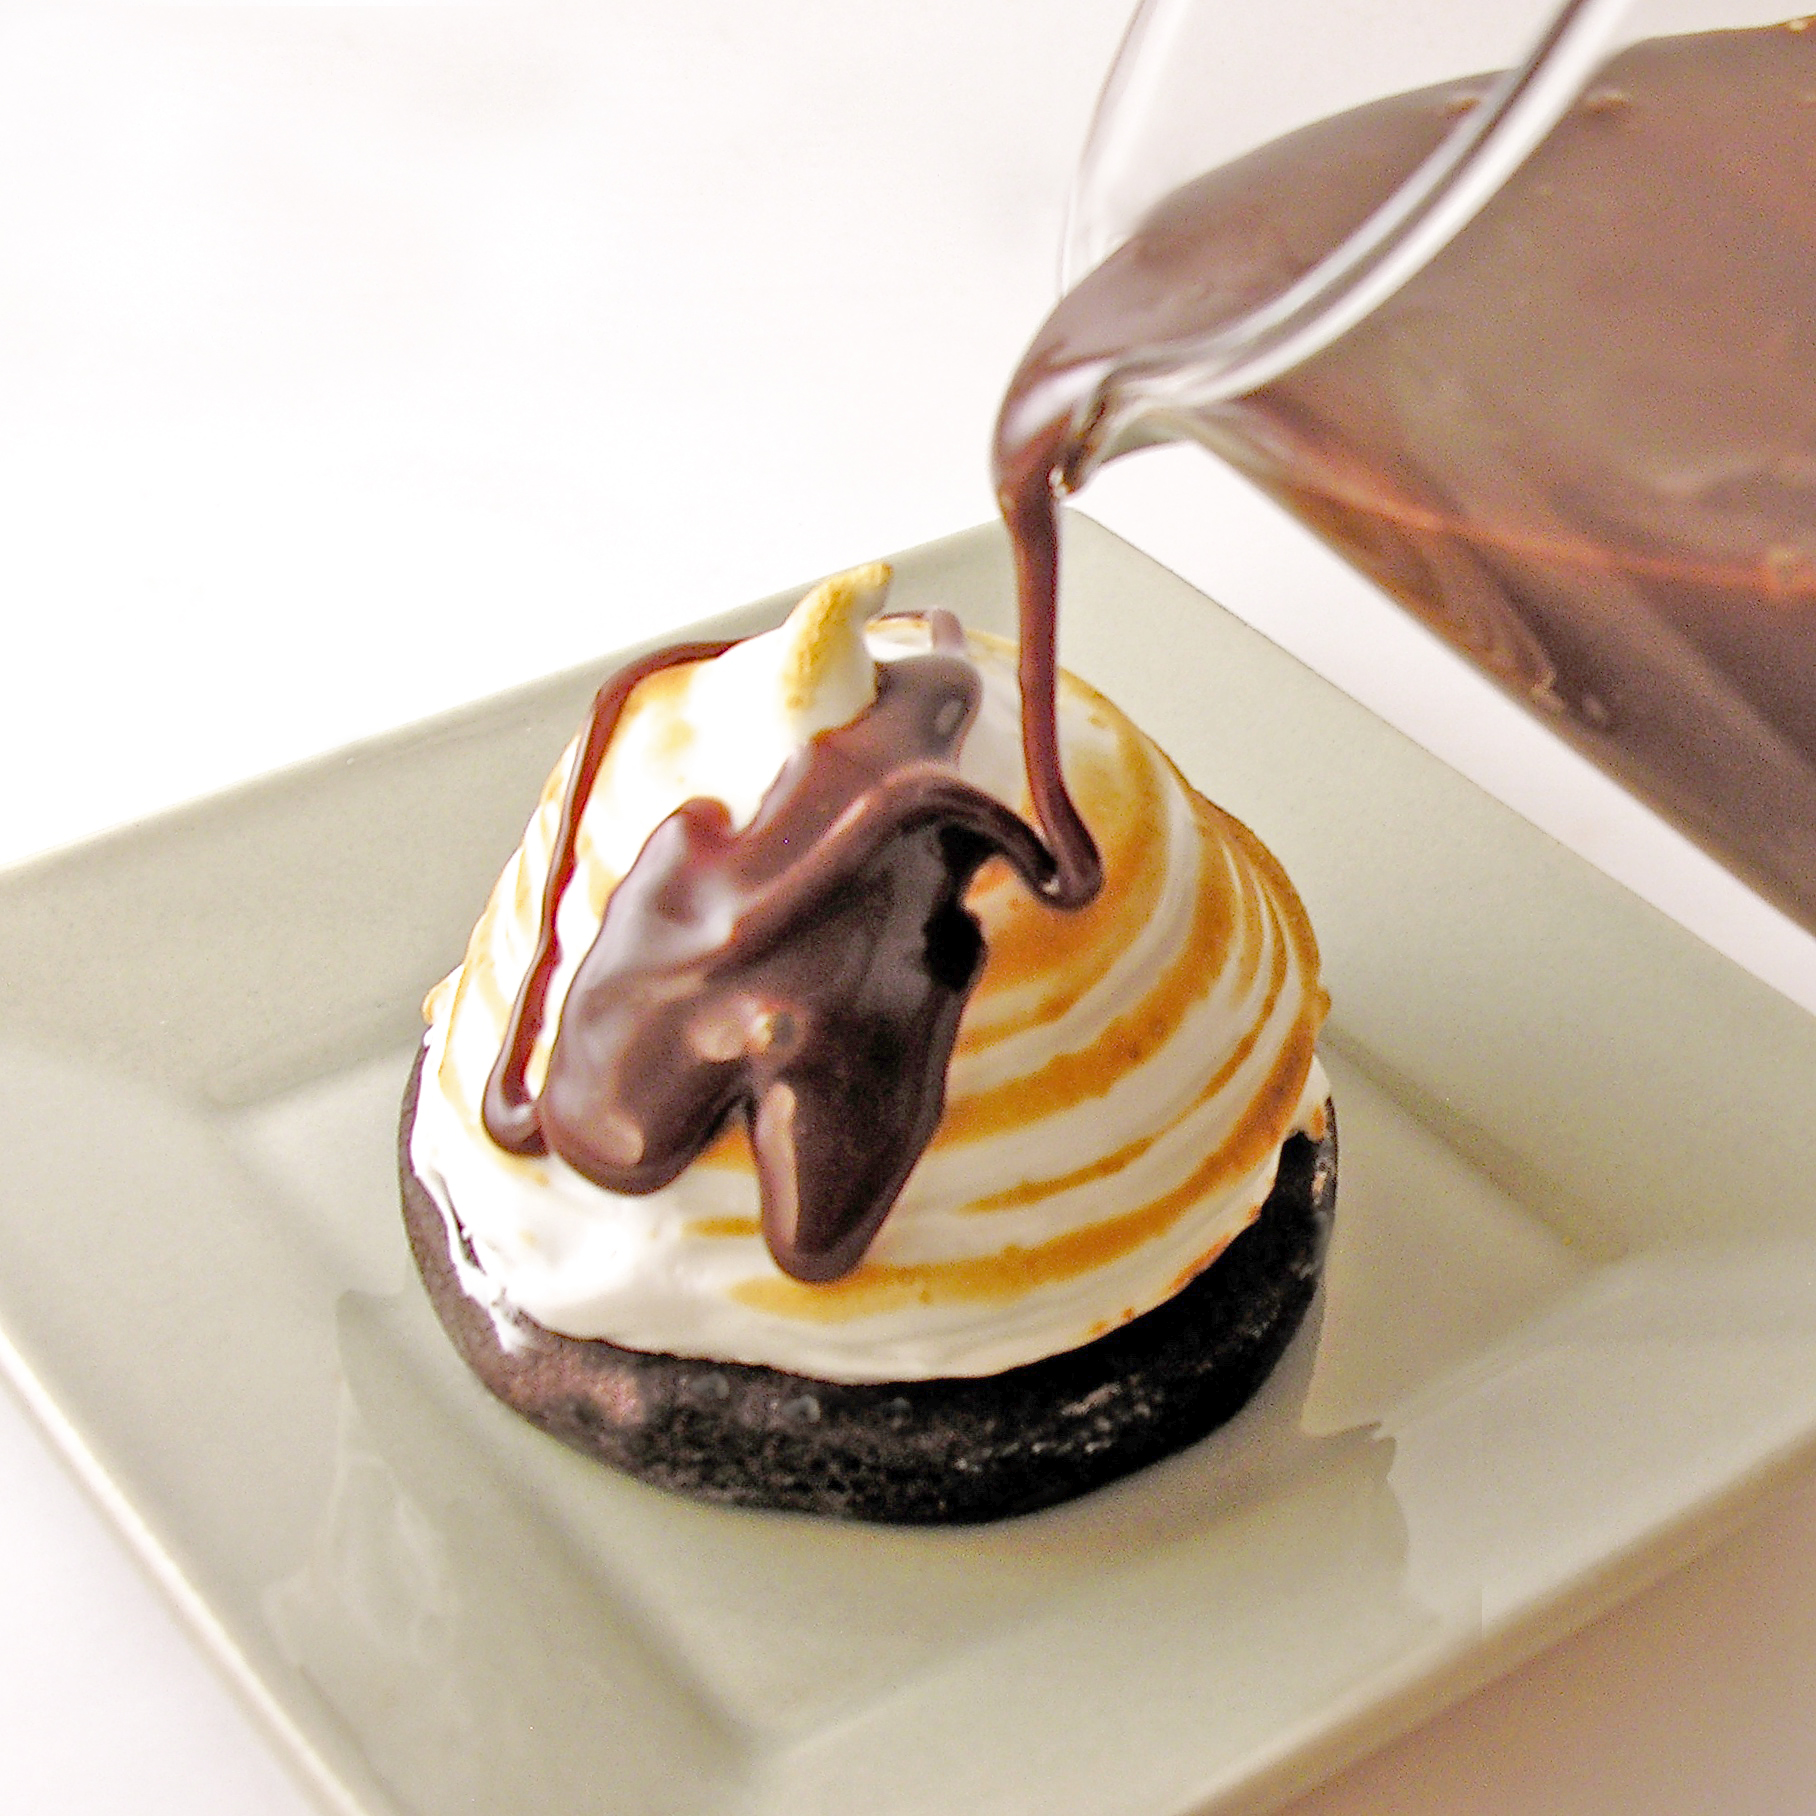
Oh- and remember that hot fudge sauce I shared here a few days ago? Well…put that to good use here:
Here is how we made these: (printable recipe)
INGREDIENTS: (makes about 18-22 desserts)
Cookies:
- 1 sticks (1/2 cup) butter, softened
- 3/4 cup sugar
- 1 egg
- 1/2 teaspoon vanilla extract
- 1/3 cup unsweetened cocoa powder
- 1 1/2 cups flour
- 1/4 teaspoon salt
- 1/4 teaspoon baking powder
- 1/2 gallon of ice cream
Meringue topping:
- 8 egg whites
- 2 cups of granulated sugar
- 1/4 teaspoon of cream of tartar
DIRECTIONS: (note: you will need a Kitchen Torch to toast the tops of these)
Cookies:
- Preheat oven to 350F degrees.
- Add butter, sugar, eggs, vanilla and cocoa together in large mixing bowl.
- Blend on medium speed with a mixer until smooth.
- Gradually add dry ingredients and mix until smooth (use clean hands at the end, to knead into a soft ball of dough)
- Roll out cookie dough on floured counter, using a floured rolling pin.
- Cut into 2 1/2″ circles and place on a parchment-lined baking sheet.
- Bake for 8 to 11 minutes until the edges are firm.
- Gently slide parchment paper off of cookie sheet and onto a flat surface. Cool.
- Place cookies back on cooled cookie sheets and freeze them to get them cold while you make meringue.
Meringue topping: (Don’t be afraid- this is easy! It just takes some quality time with your mixer.)
- Place egg whites, sugar and cream of tartar in a medium heat-proof bowl that will set on the top of a sauce pan of boiling water without touching the water. (I had to experiment a bit to find a good fit)
- Bring water to a boil in the saucepan and set the bowl on top.
- Whisk ingredients together for about 3-4 minutes. Sugar will be dissolved and egg whites should be heated to about 145F degrees.
- Remove bowl from top of sauce pan and beat on low until the mixture thickens a little, then beat on high for about 10 minutes. The meringue will become the most beautiful, white, glossy mixture. It should form stiff peaks before you stop beating it.
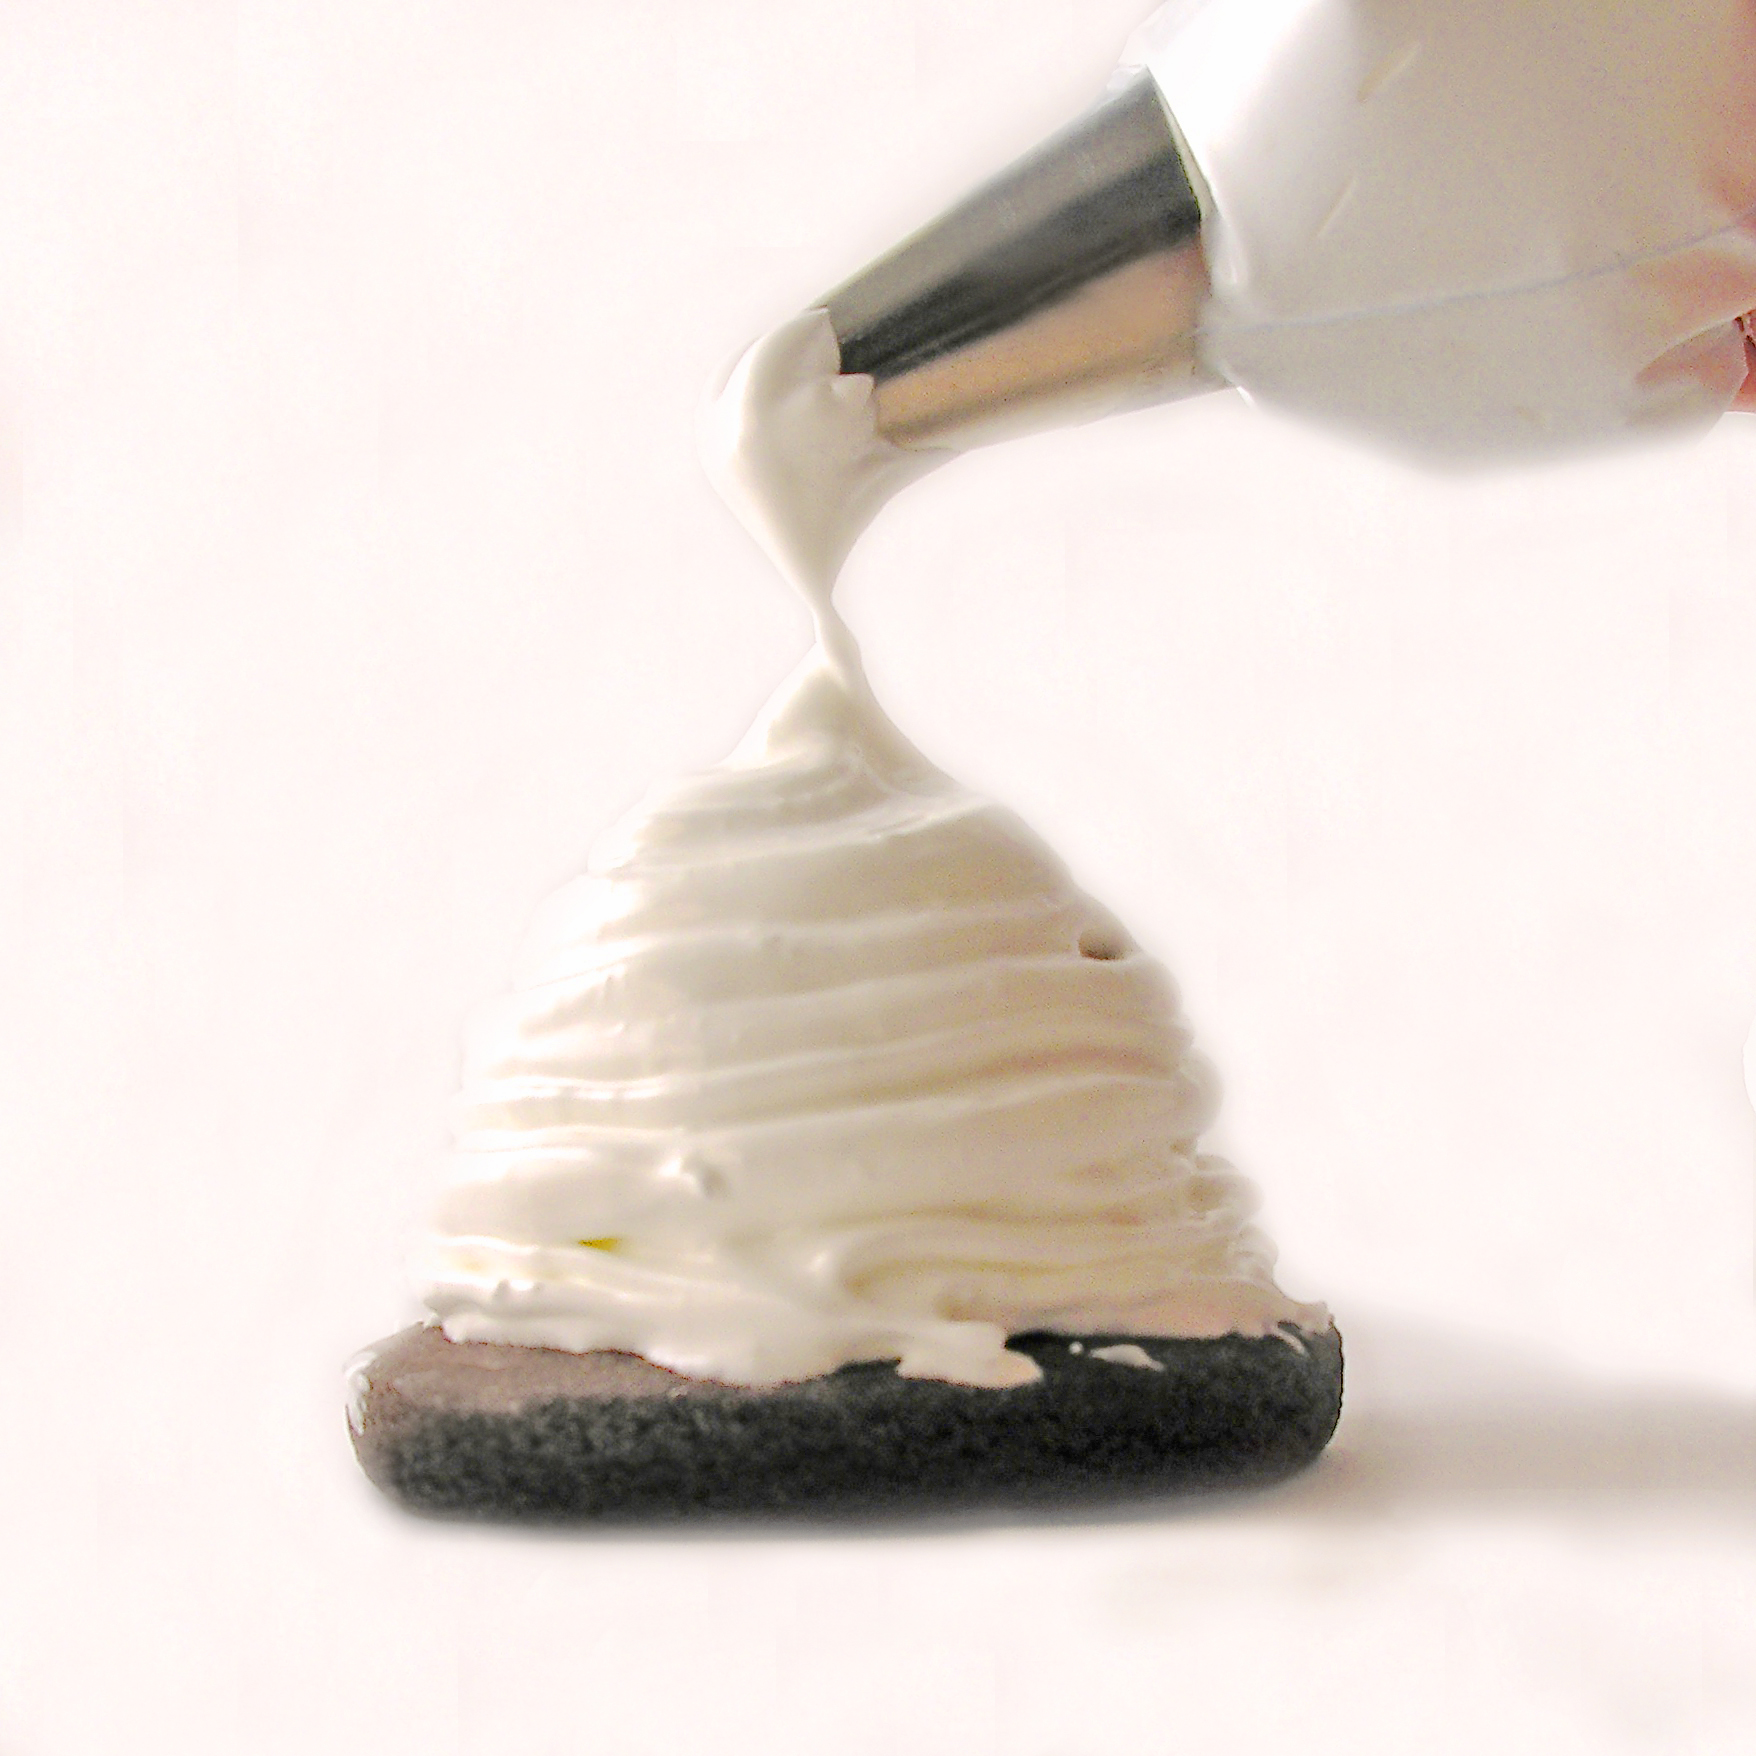
- Spoon all that wonderful glossy white yumminess into a bag fitted with a decorating tip.
Assembly of dessert:
- Assemble one dessert at a time, and then pop it into the freezer immediately.
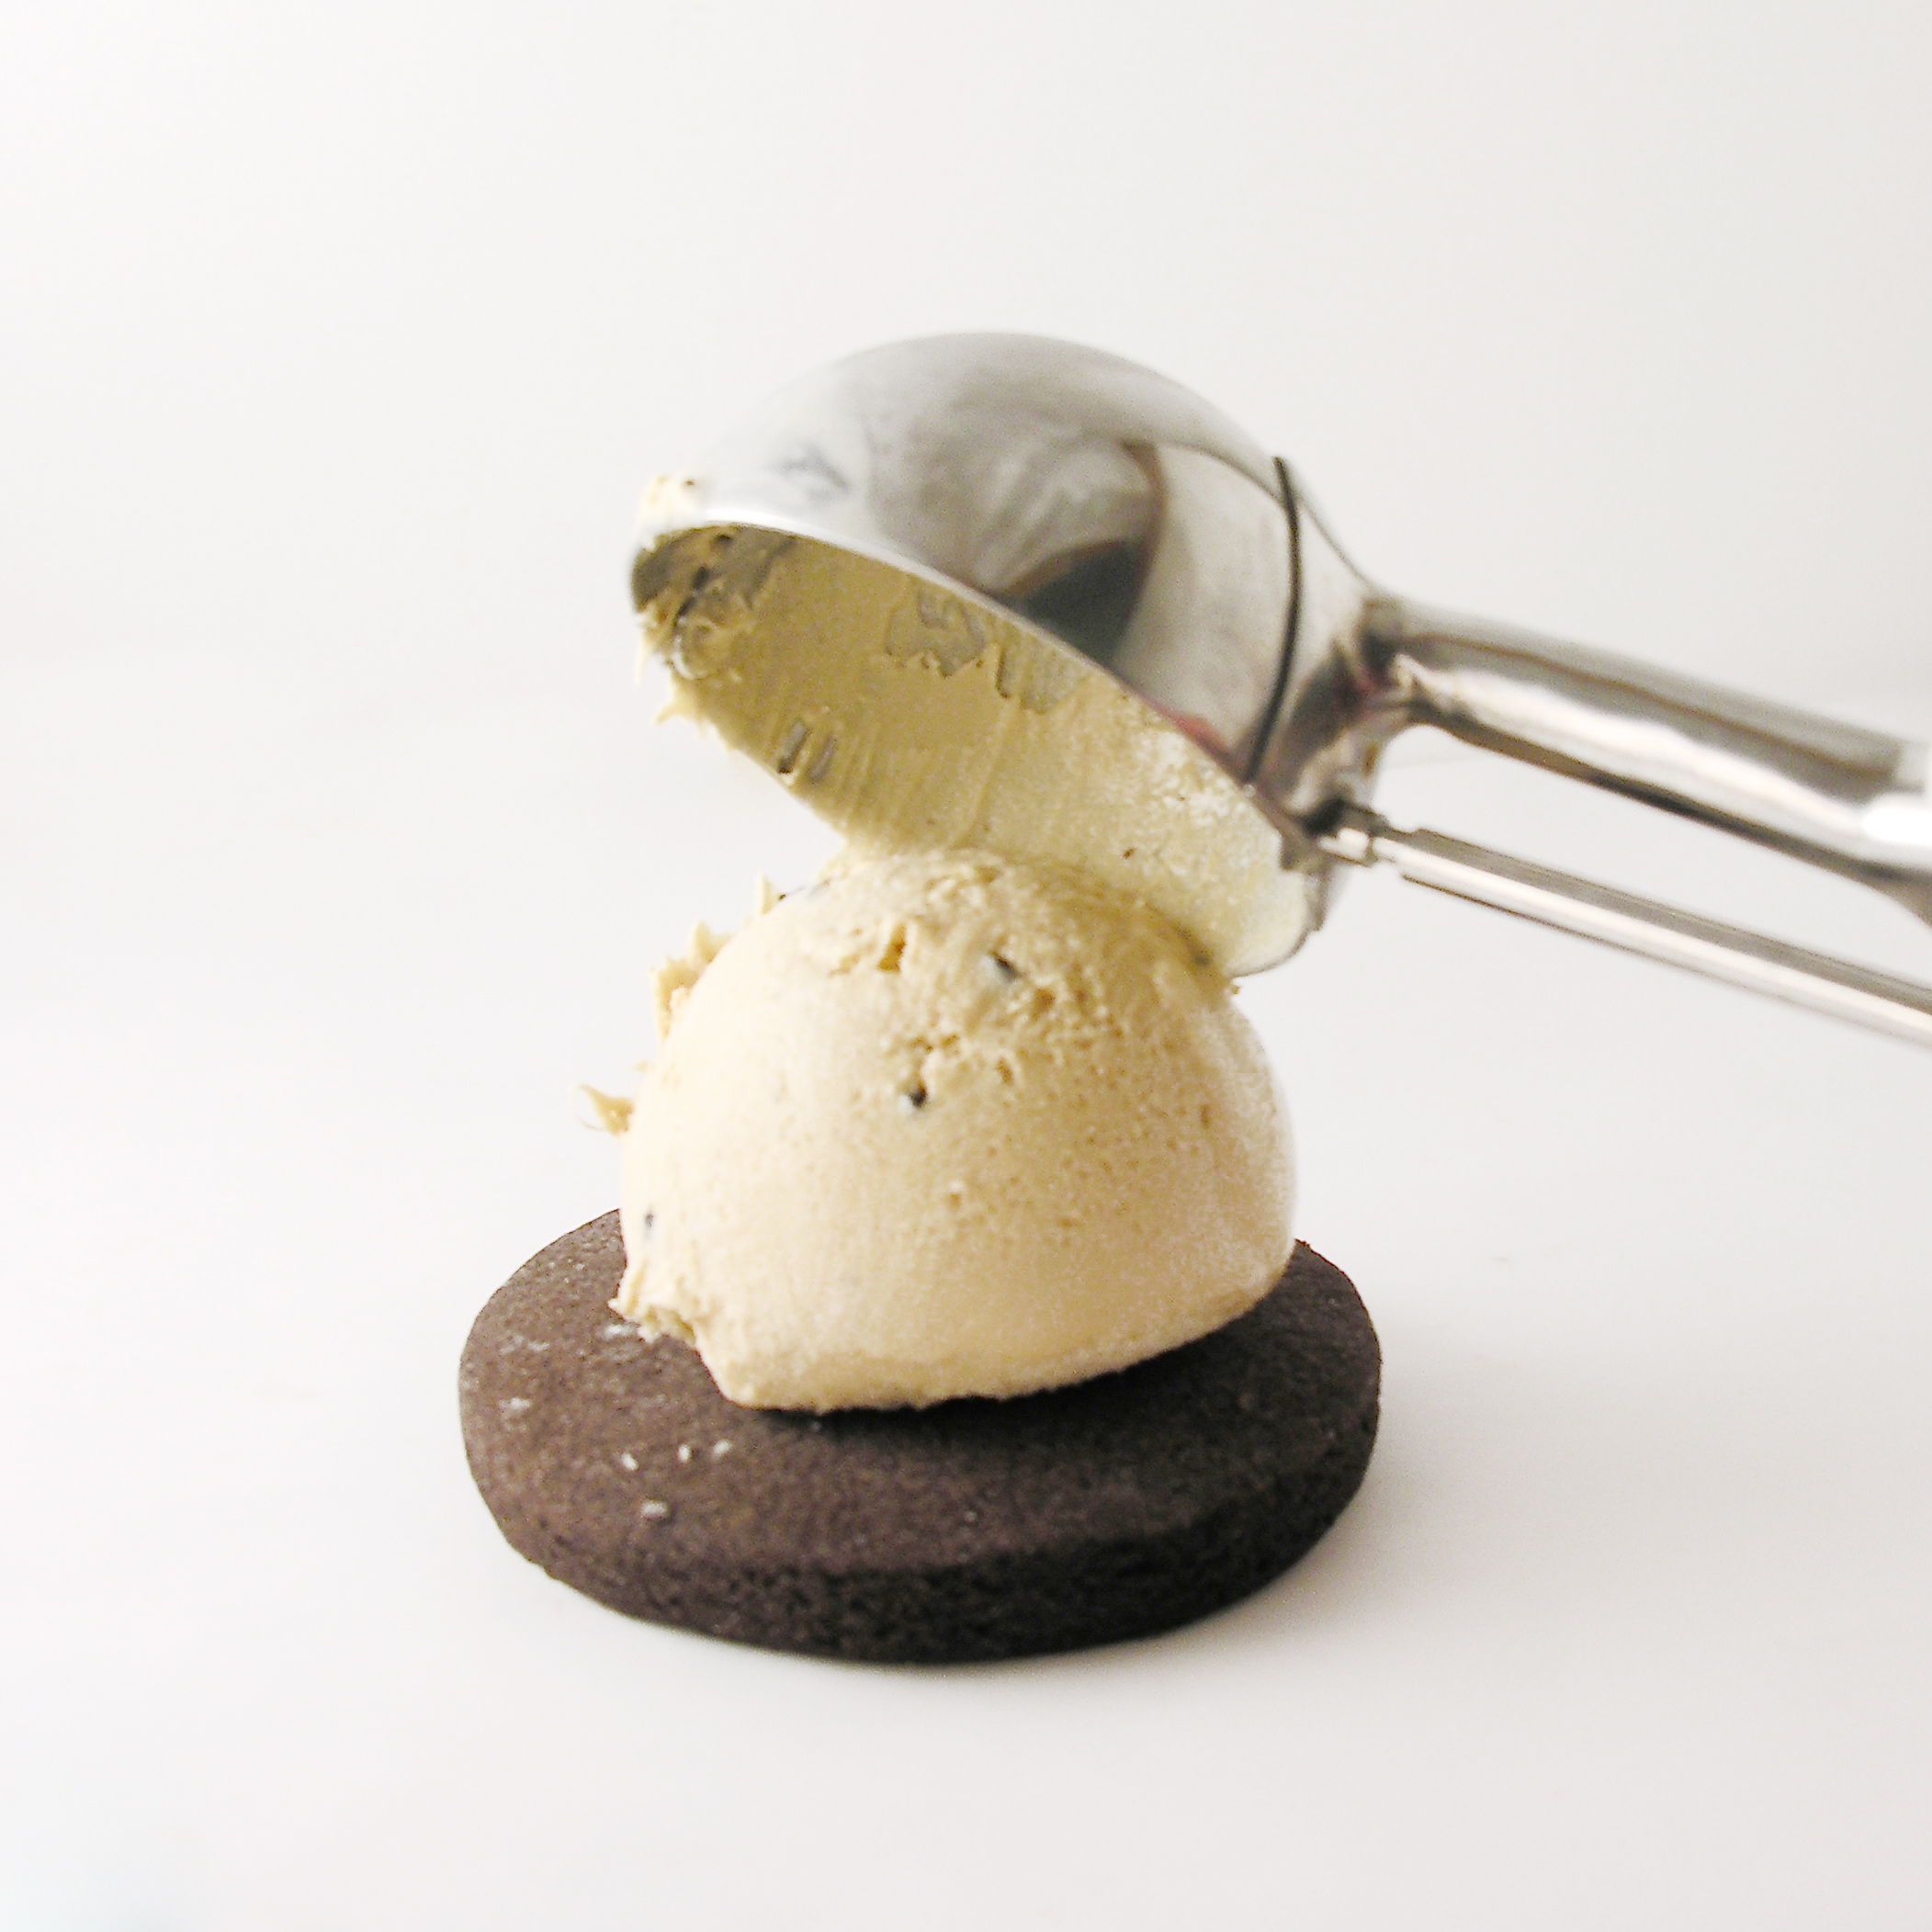
- Take a cold cookie, use a small cookie scoop or melon baller and place a scoop of ice cream in the center of the cookie. Pipe meringue all around it, being careful to seal up all the ice cream at the bottom and them working your way up to a swirled top!
- Immediately toast this meringue with a Kitchen Torch
to firm up the outside of the meringue and then FREEZE!
- Serve frozen with a little bit of hot fudge on top.
- Enjoy!!!!
My thoughts: **Smile** I loved these…. oh my. SO much! I made a mistake with the ice cream by using yogurt instead- it was softer than ice cream and harder to assemble- so use ice cream! I tried to take a picture of the inside and is was so soft that as soon as I cut into it, it fell apart into a pile of yummy frozen yogurt..that’s why there are no pictures of the insides 🙂 These were well-loved by everyone who tried them- including me! Enjoy!!! ~r
Other mini desserts to try: (click on a photo to be taken to a recipe)


