
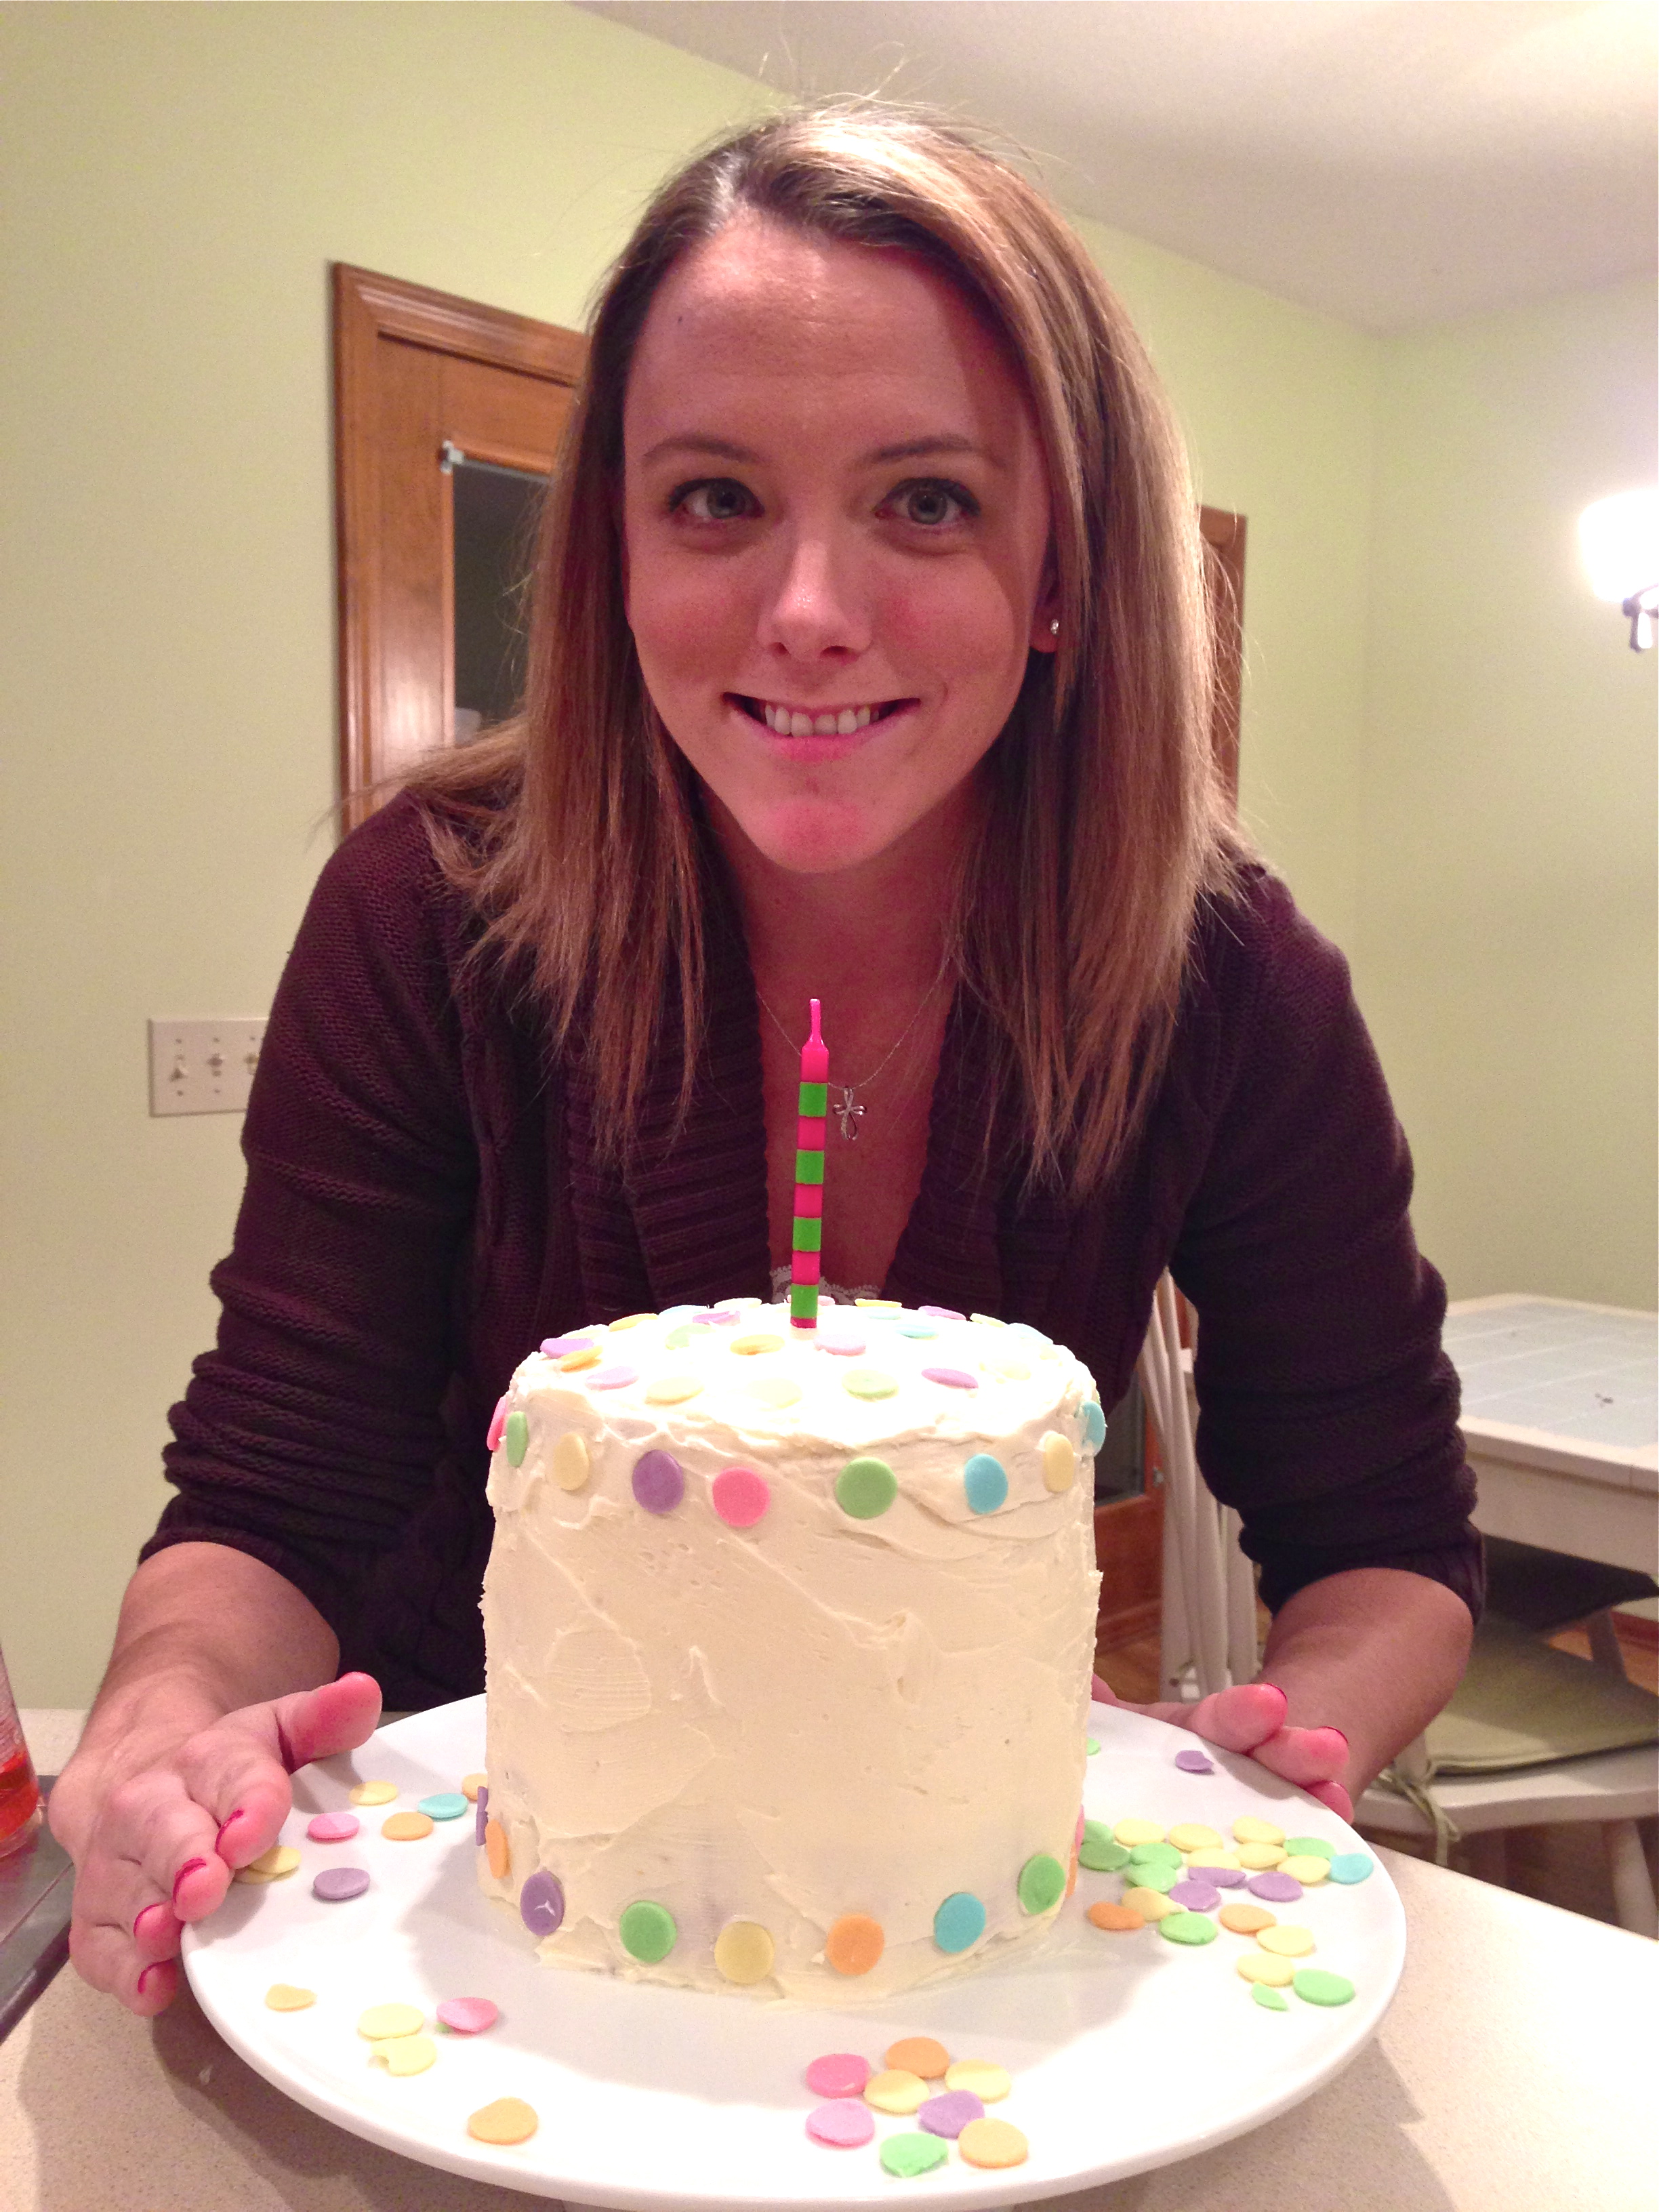
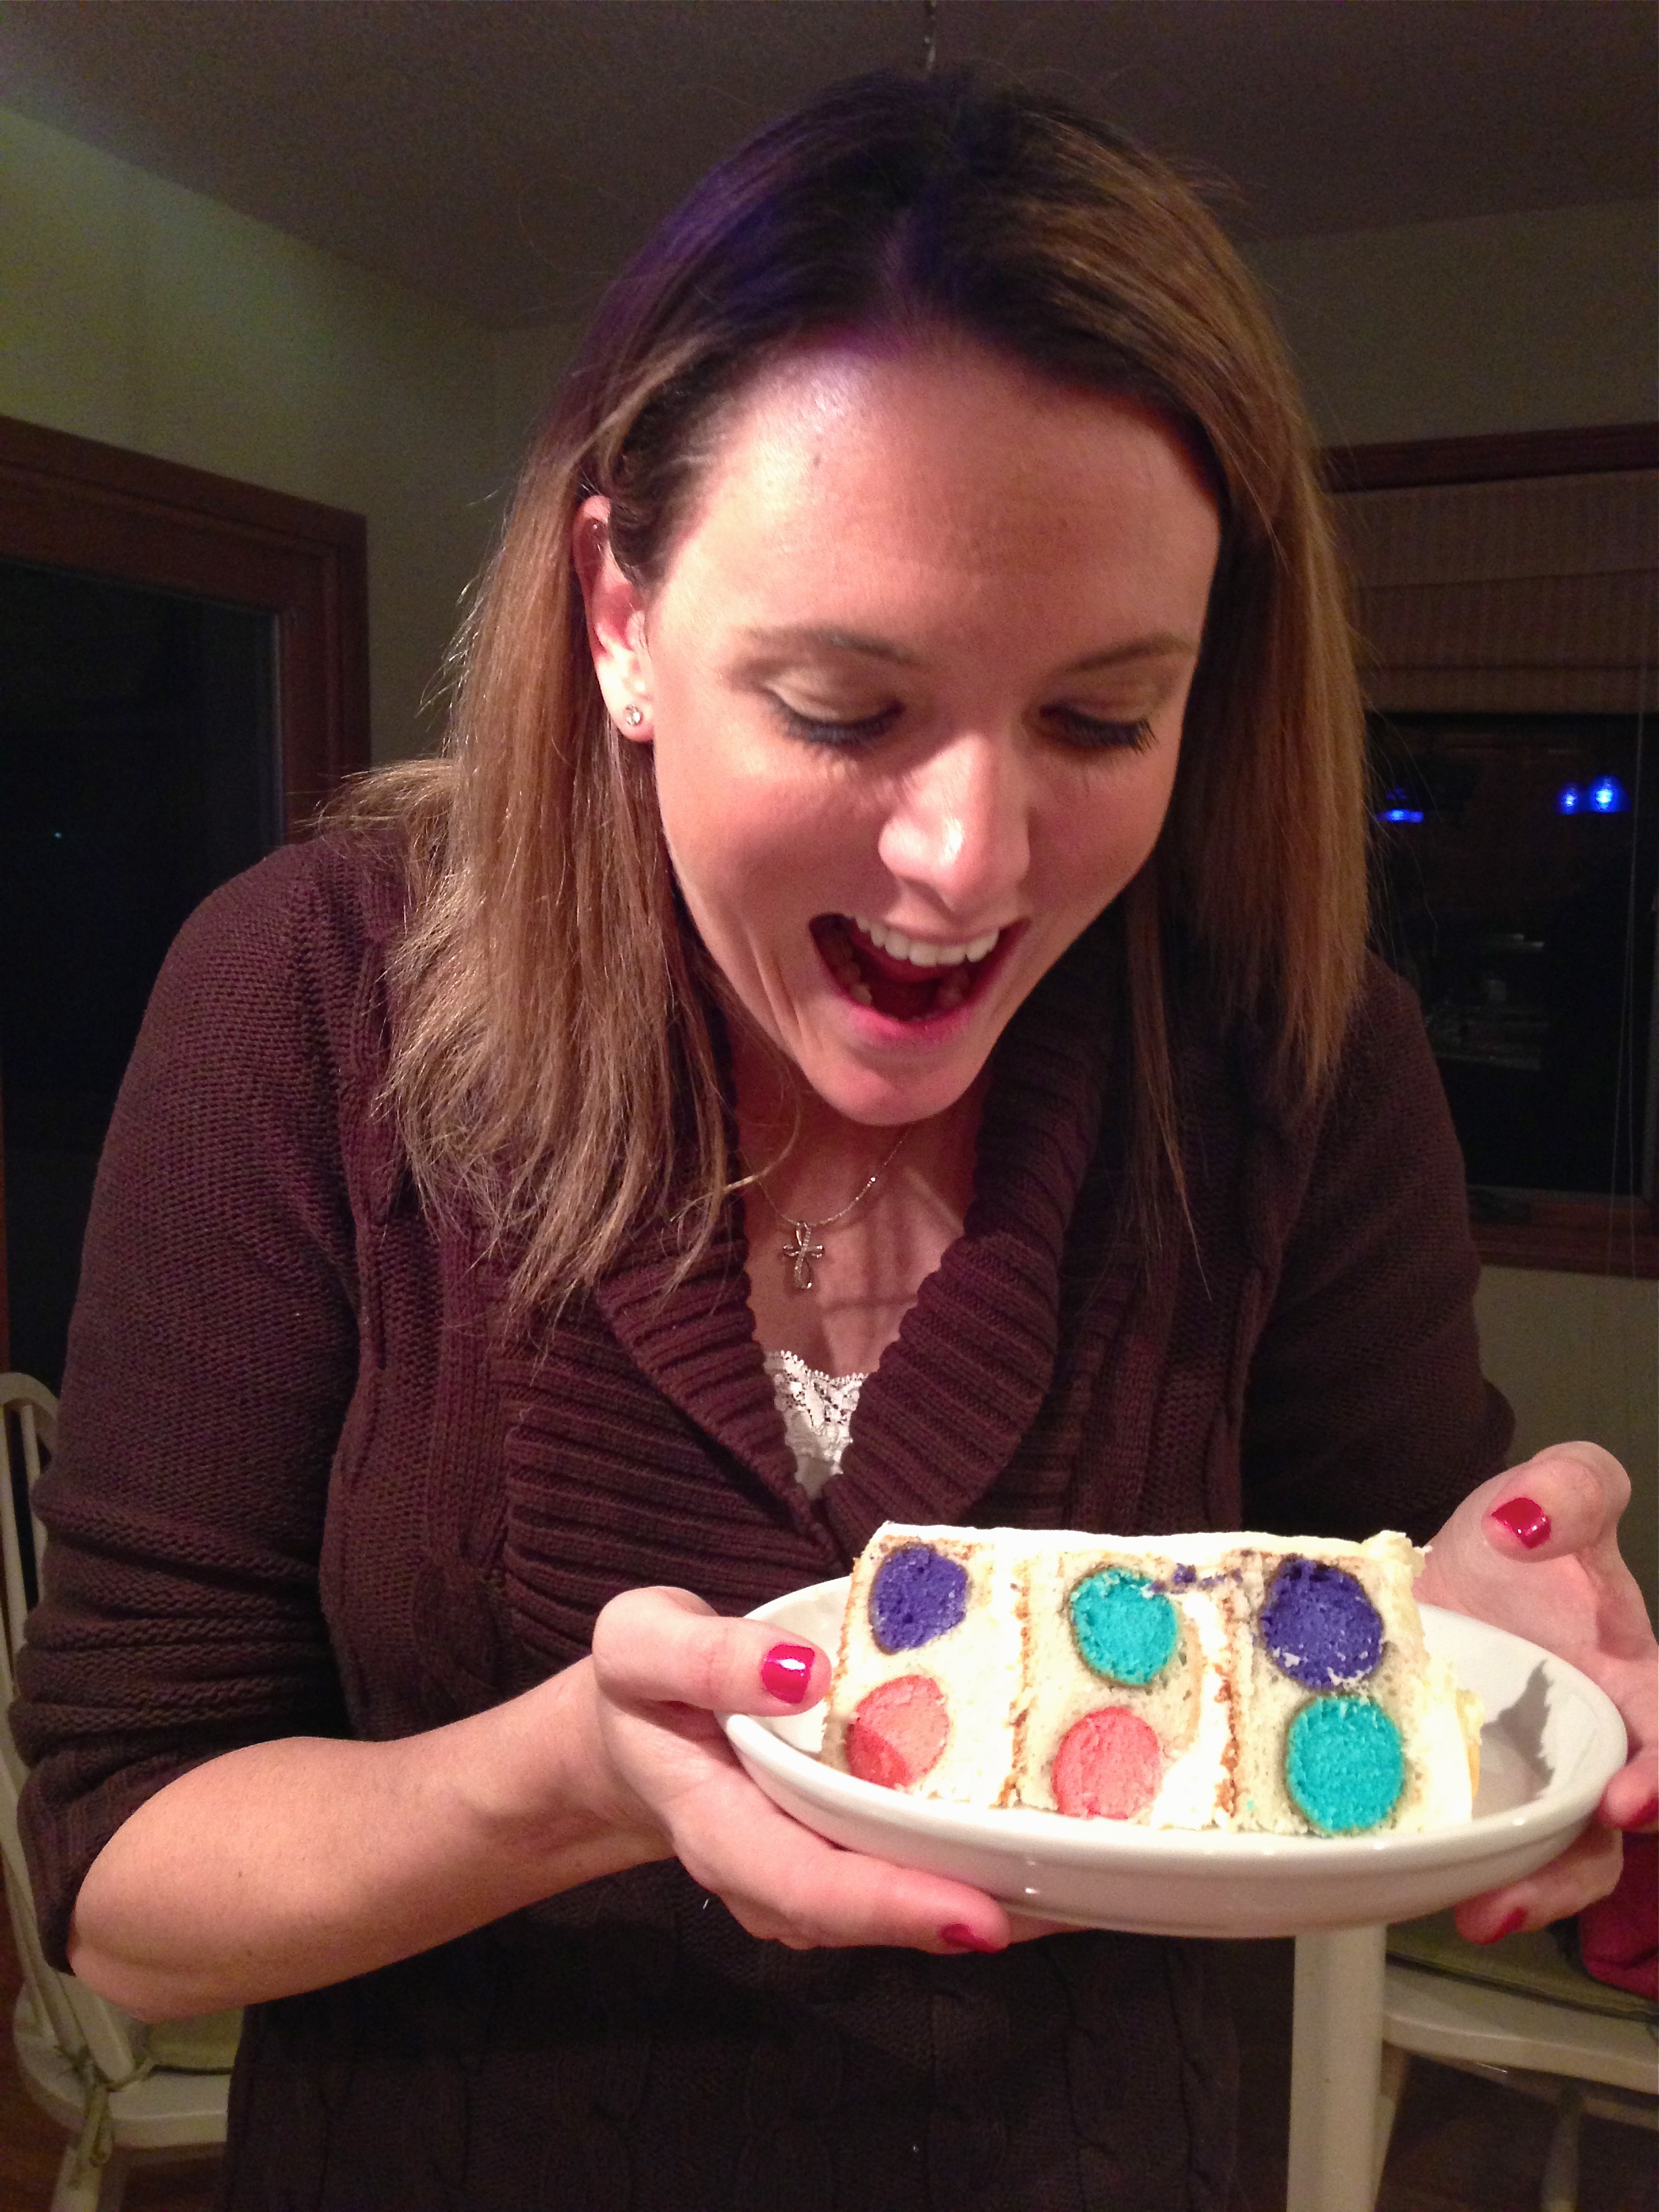
 It just makes you smile, doesn’t it? I don’t think I can adequately express how happy this cake makes me.
I made this cake for my friend Nikki’s birthday and it made her happy too…
I simply can’t take credit for the idea behind this cake, that credit goes to an adorable blog called “Once Upon a Pedestal”. I can’t even take credit for finding the idea… that goes to my wonderful Pinterest addicted friend Laura. I can tell you this: it is NOT hard to make. It does take some time, but it is very easy to put together, and the “wow” factor? Incredible!


The 1st question everyone asks is “How did you get the polka dots INSIDE the cake?” They are cake balls. To make this recipe, you will need one piece of special equipment: a cake pop/ doughnut hole maker. I feel like I walked by those like 100 times over the holidays in various stores and every time I thought, “I wonder why you would ever buy one of those?” Now I know! Here’s the one I got: Bella Sensio Cake Pop Maker
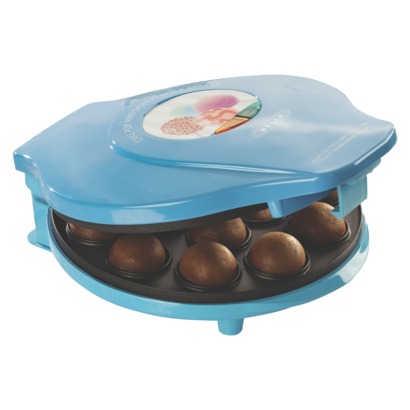
There are several brands and varieties- I’m sure they all work great- I would look for one that does 12 at once, just as a time saver! The good news? Once you make this cake, your friends will all want to borrow your cake pop maker and you won’t have to store it anywhere!
Are you ready to see how this is done? Here we go: (printable recipe)
INGREDIENTS:
- 2 boxed white cake mixes (plus the oil, water and eggs to make them according to the package)
- You favorite frosting (I used my buttercream recipe, doubled, which you can get by clicking here)
- Sprinkles or candy to decorate the cake.
DIRECTIONS:
- Plug in/turn on your cake pop maker to warm it up.
- Make one of the cakes according to package directions.
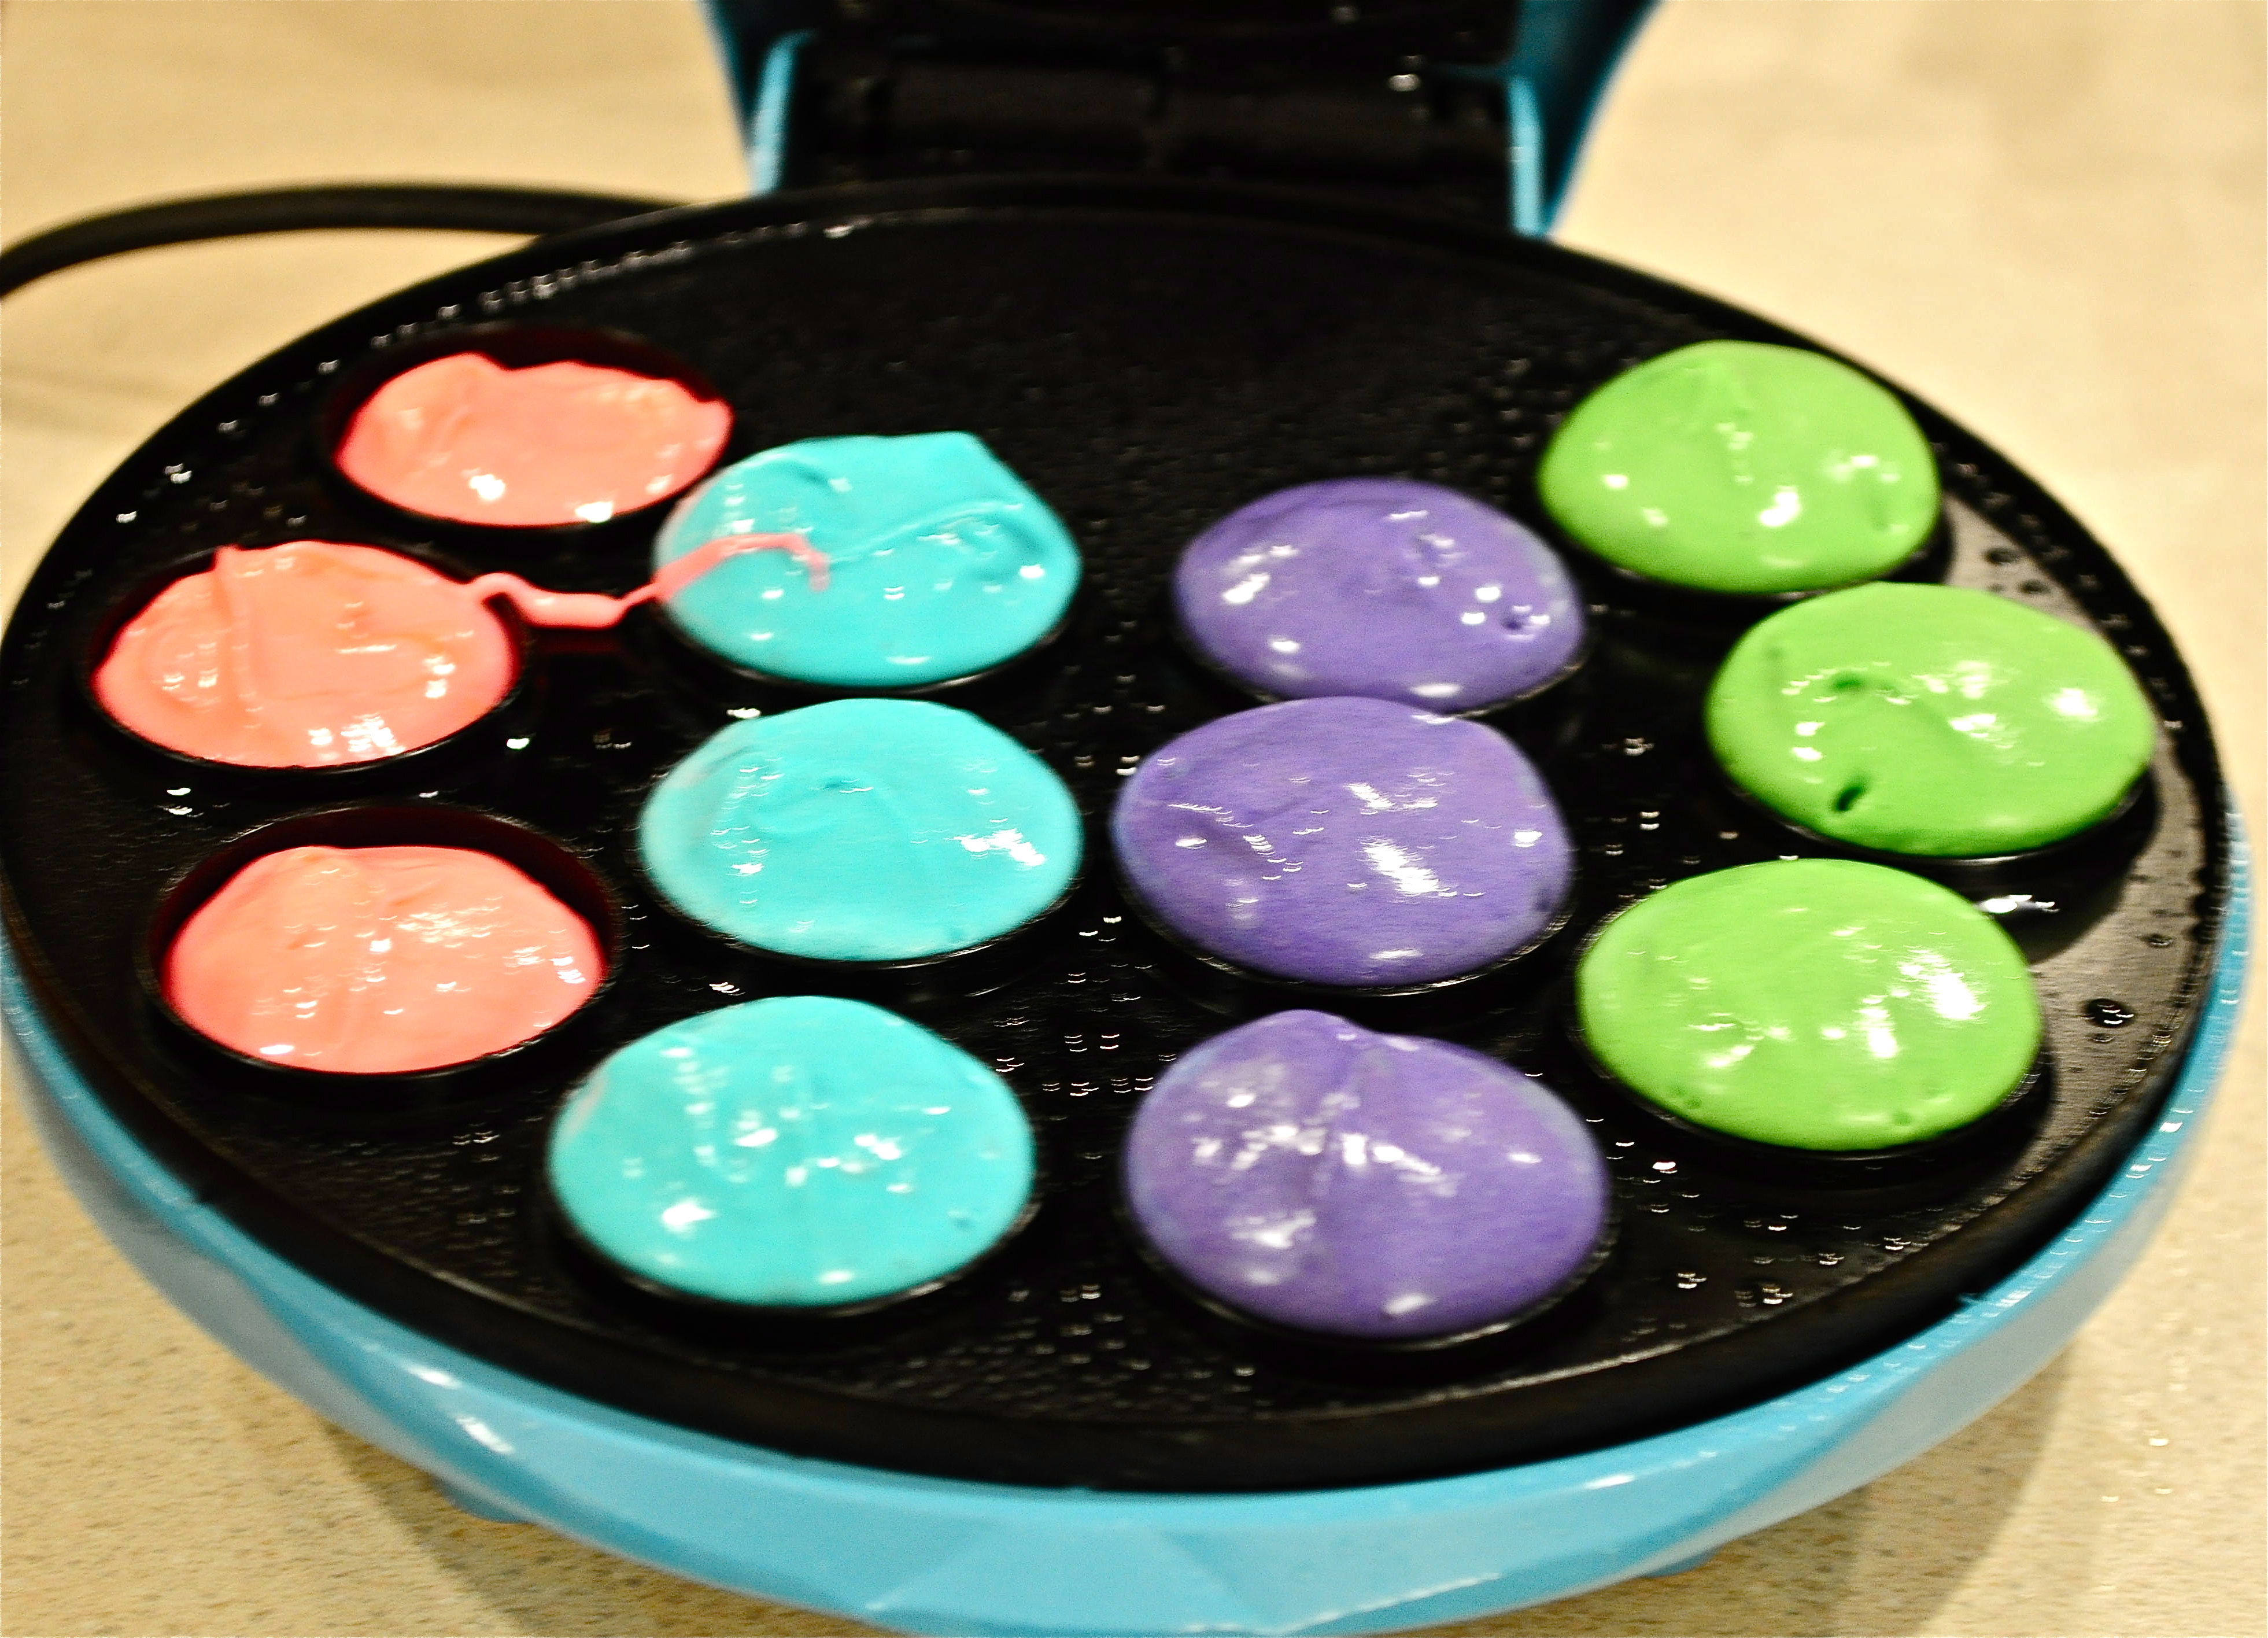
- Divide batter evenly into smaller bowls based on the number of colors you want to use (I did 4)
- Color the batter using color gels (I love the Wilton
brand in particular because it gives such a vivid color)
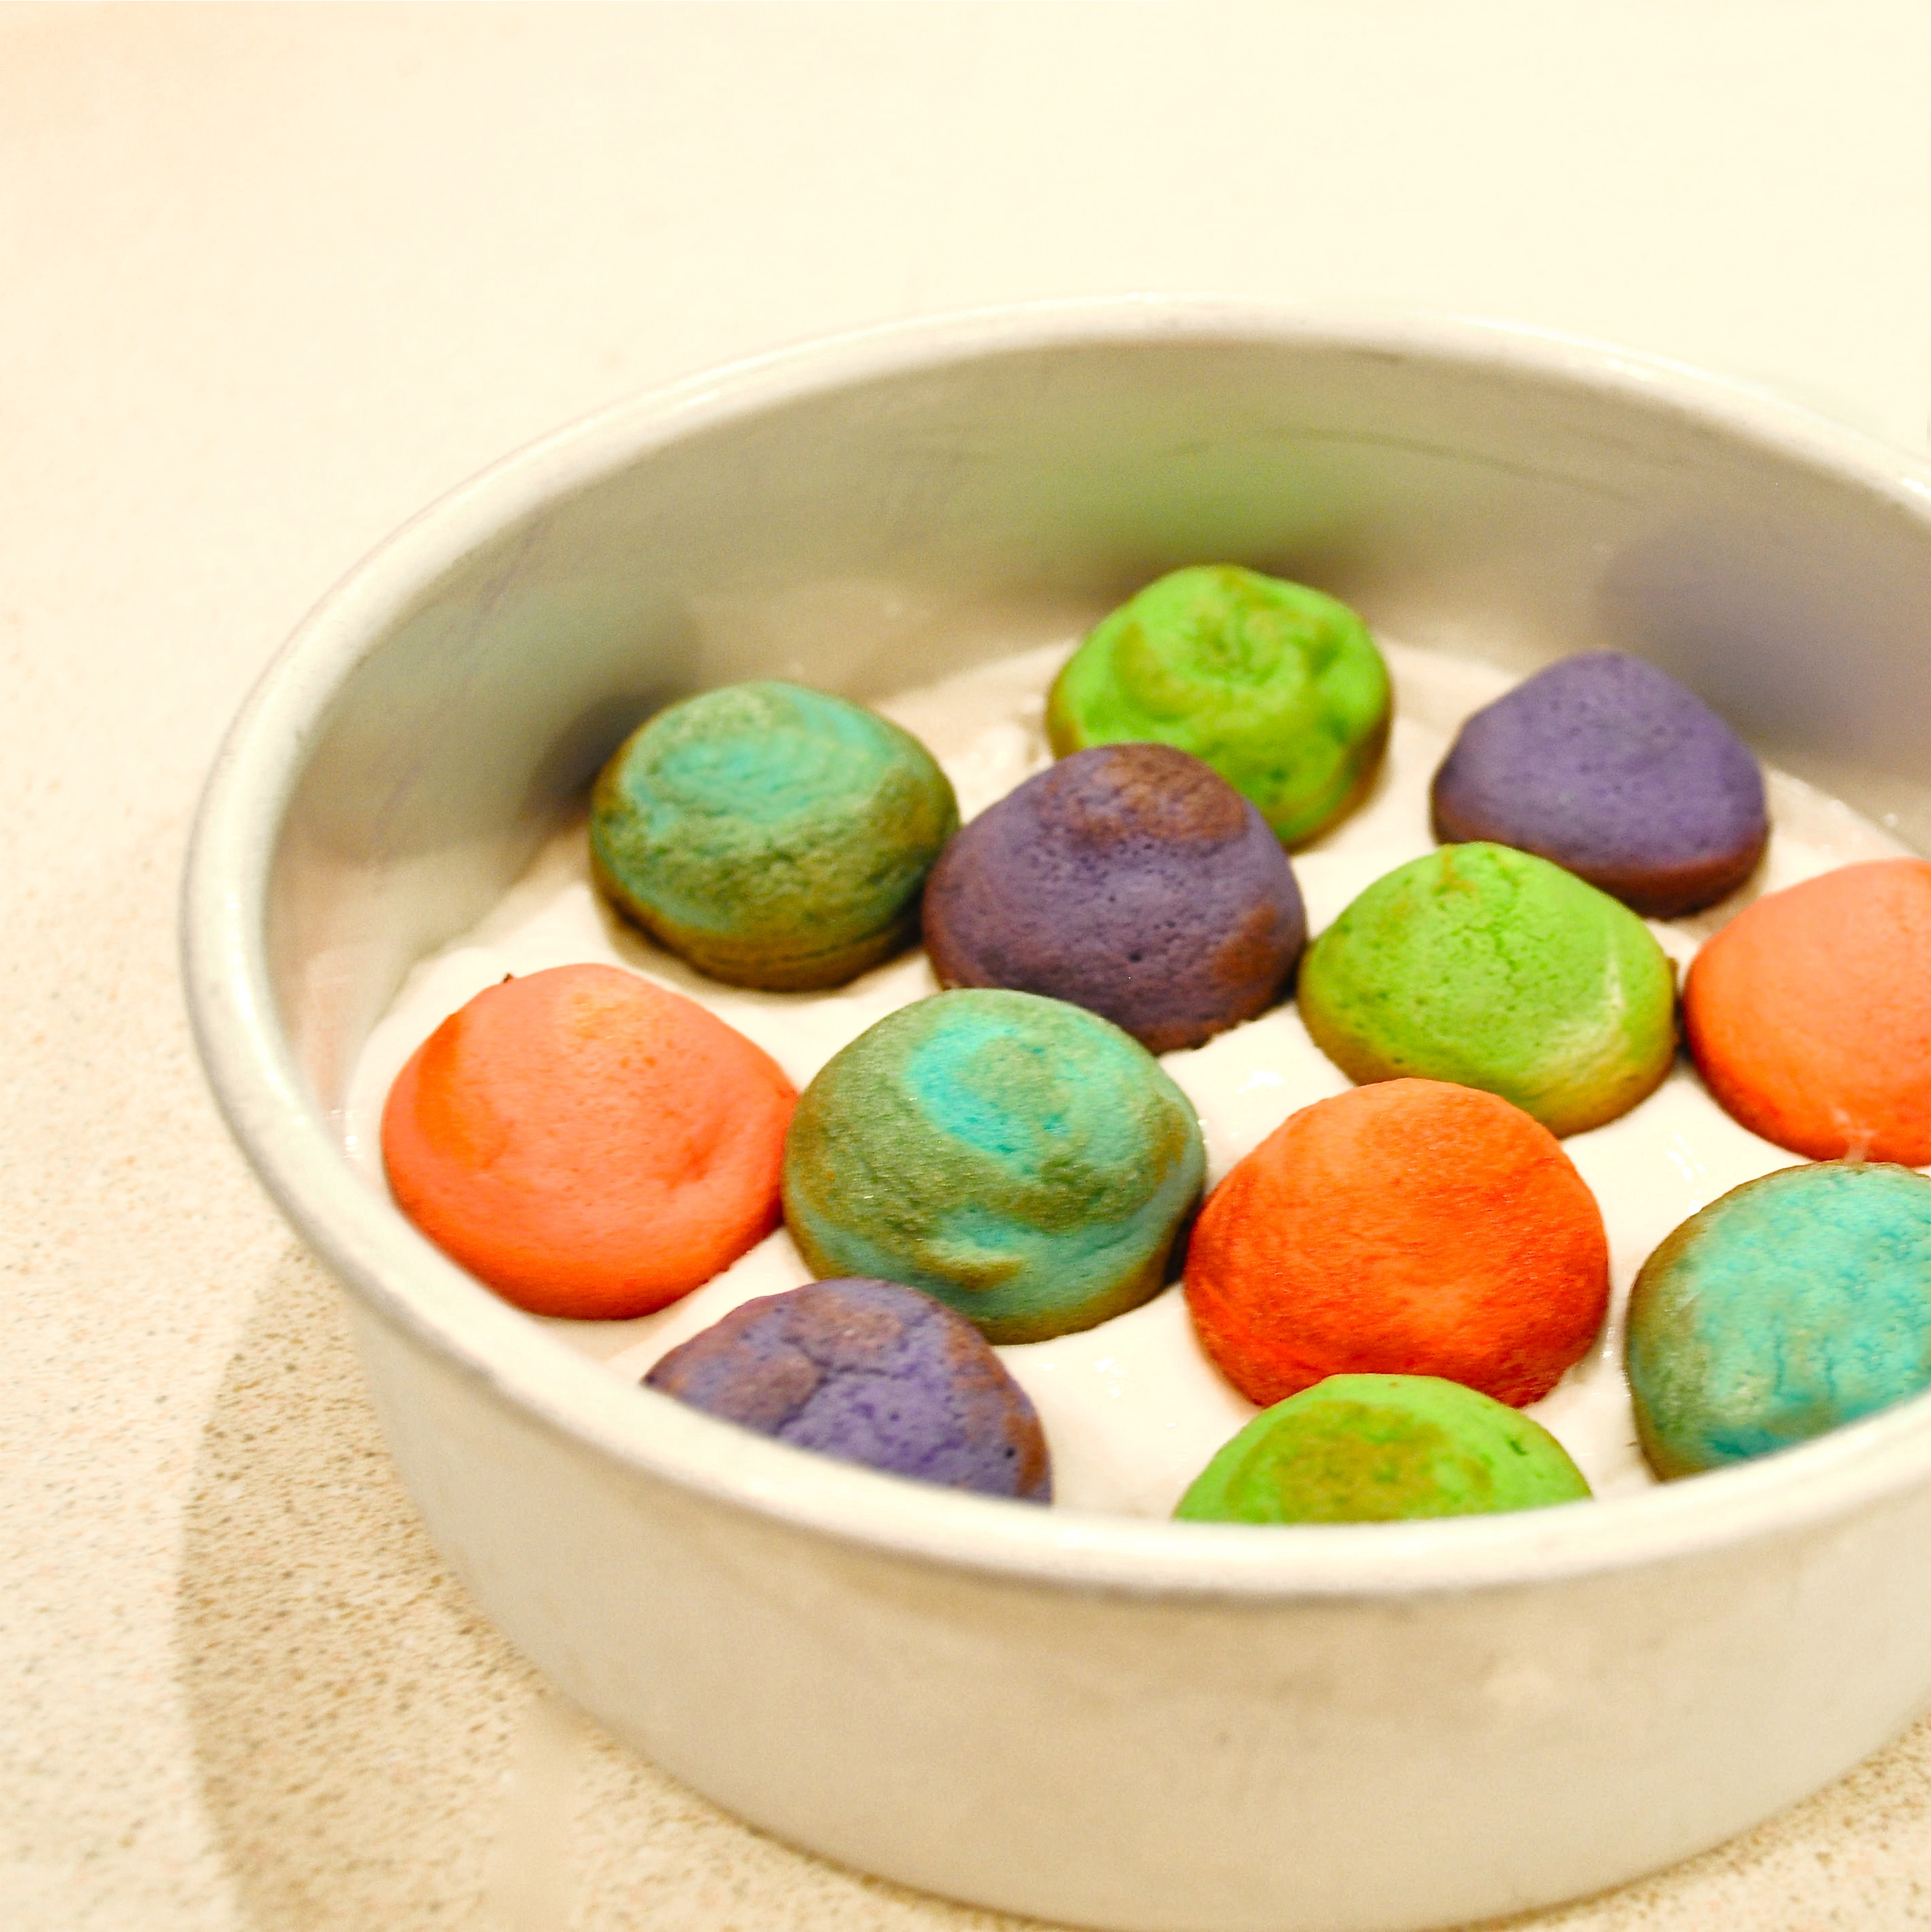
- Following the directions for your particular cake pop maker, make cake balls using each of the colors.
(with mine I sprayed it with Pam, used a small (2 tsp) cookie scoop, rapidly scooped batter in and immediately closed the lid. My directions said 4-5 minutes and they all were burnt to a crisp– about 2 minutes worked perfectly for me. I just set them out on a plate to cool then…be prepared to experiment a little with this– you will have some extra pops at the end, so its ok if you mess some up!)
- While cake balls are cooling, preheat oven to 350F, and make the second cake mix according to package.
- Spray 3 – 6″ round pans with non-stick spray and set a circle of parchment paper in the bottom of each one (to keep your layers pretty!)
- Spread a thin layer of batter in the bottom of each pan, place cake balls on top in any pattern you choose and divide remaining batter over the top of the balls so they are completely covered.

- Bake layers at 350F degrees for about 30 minutes. You can use the toothpick test (I recommend it!) but be careful to hit cake and not cake balls….you can kind of tell where they are- they bump up just a bit.
- When cooked all the way through, tip over on a cake rack to cool completely.
- Trim, if needed, to flatten layers and use frosting to stack all three layers and cover the entire cake with frosting.
- Decorate as desired.

 My thoughts: I’m not a cake decorator, and my buttercream is a whipped frosting that is OH so yummy, but not very good for a smooth cake surface….it still makes me smile…bumps and all. You can decorate your cake however you like. I used Wilton Jumbo Confetti Sprinkles
 on this one. I really hope you give this cake a try– if you have any questions about the process just ask!! — or check out “Once Upon a Pedestal”, as her pictures were very helpful. She also uses a different type of cake pop pan than I did. I hope this recipe idea made you smile on this cold winter morning– enjoy!!!!! ~r


Other Easybaked cake recipes you might enjoy: (click on the photo to see the recipe)


