RSS Feed

Tag Archives: creative desserts

Bomb Pop Cupcakes!!

Posted on

Bomb Pop Cupcakes!!!!!! 
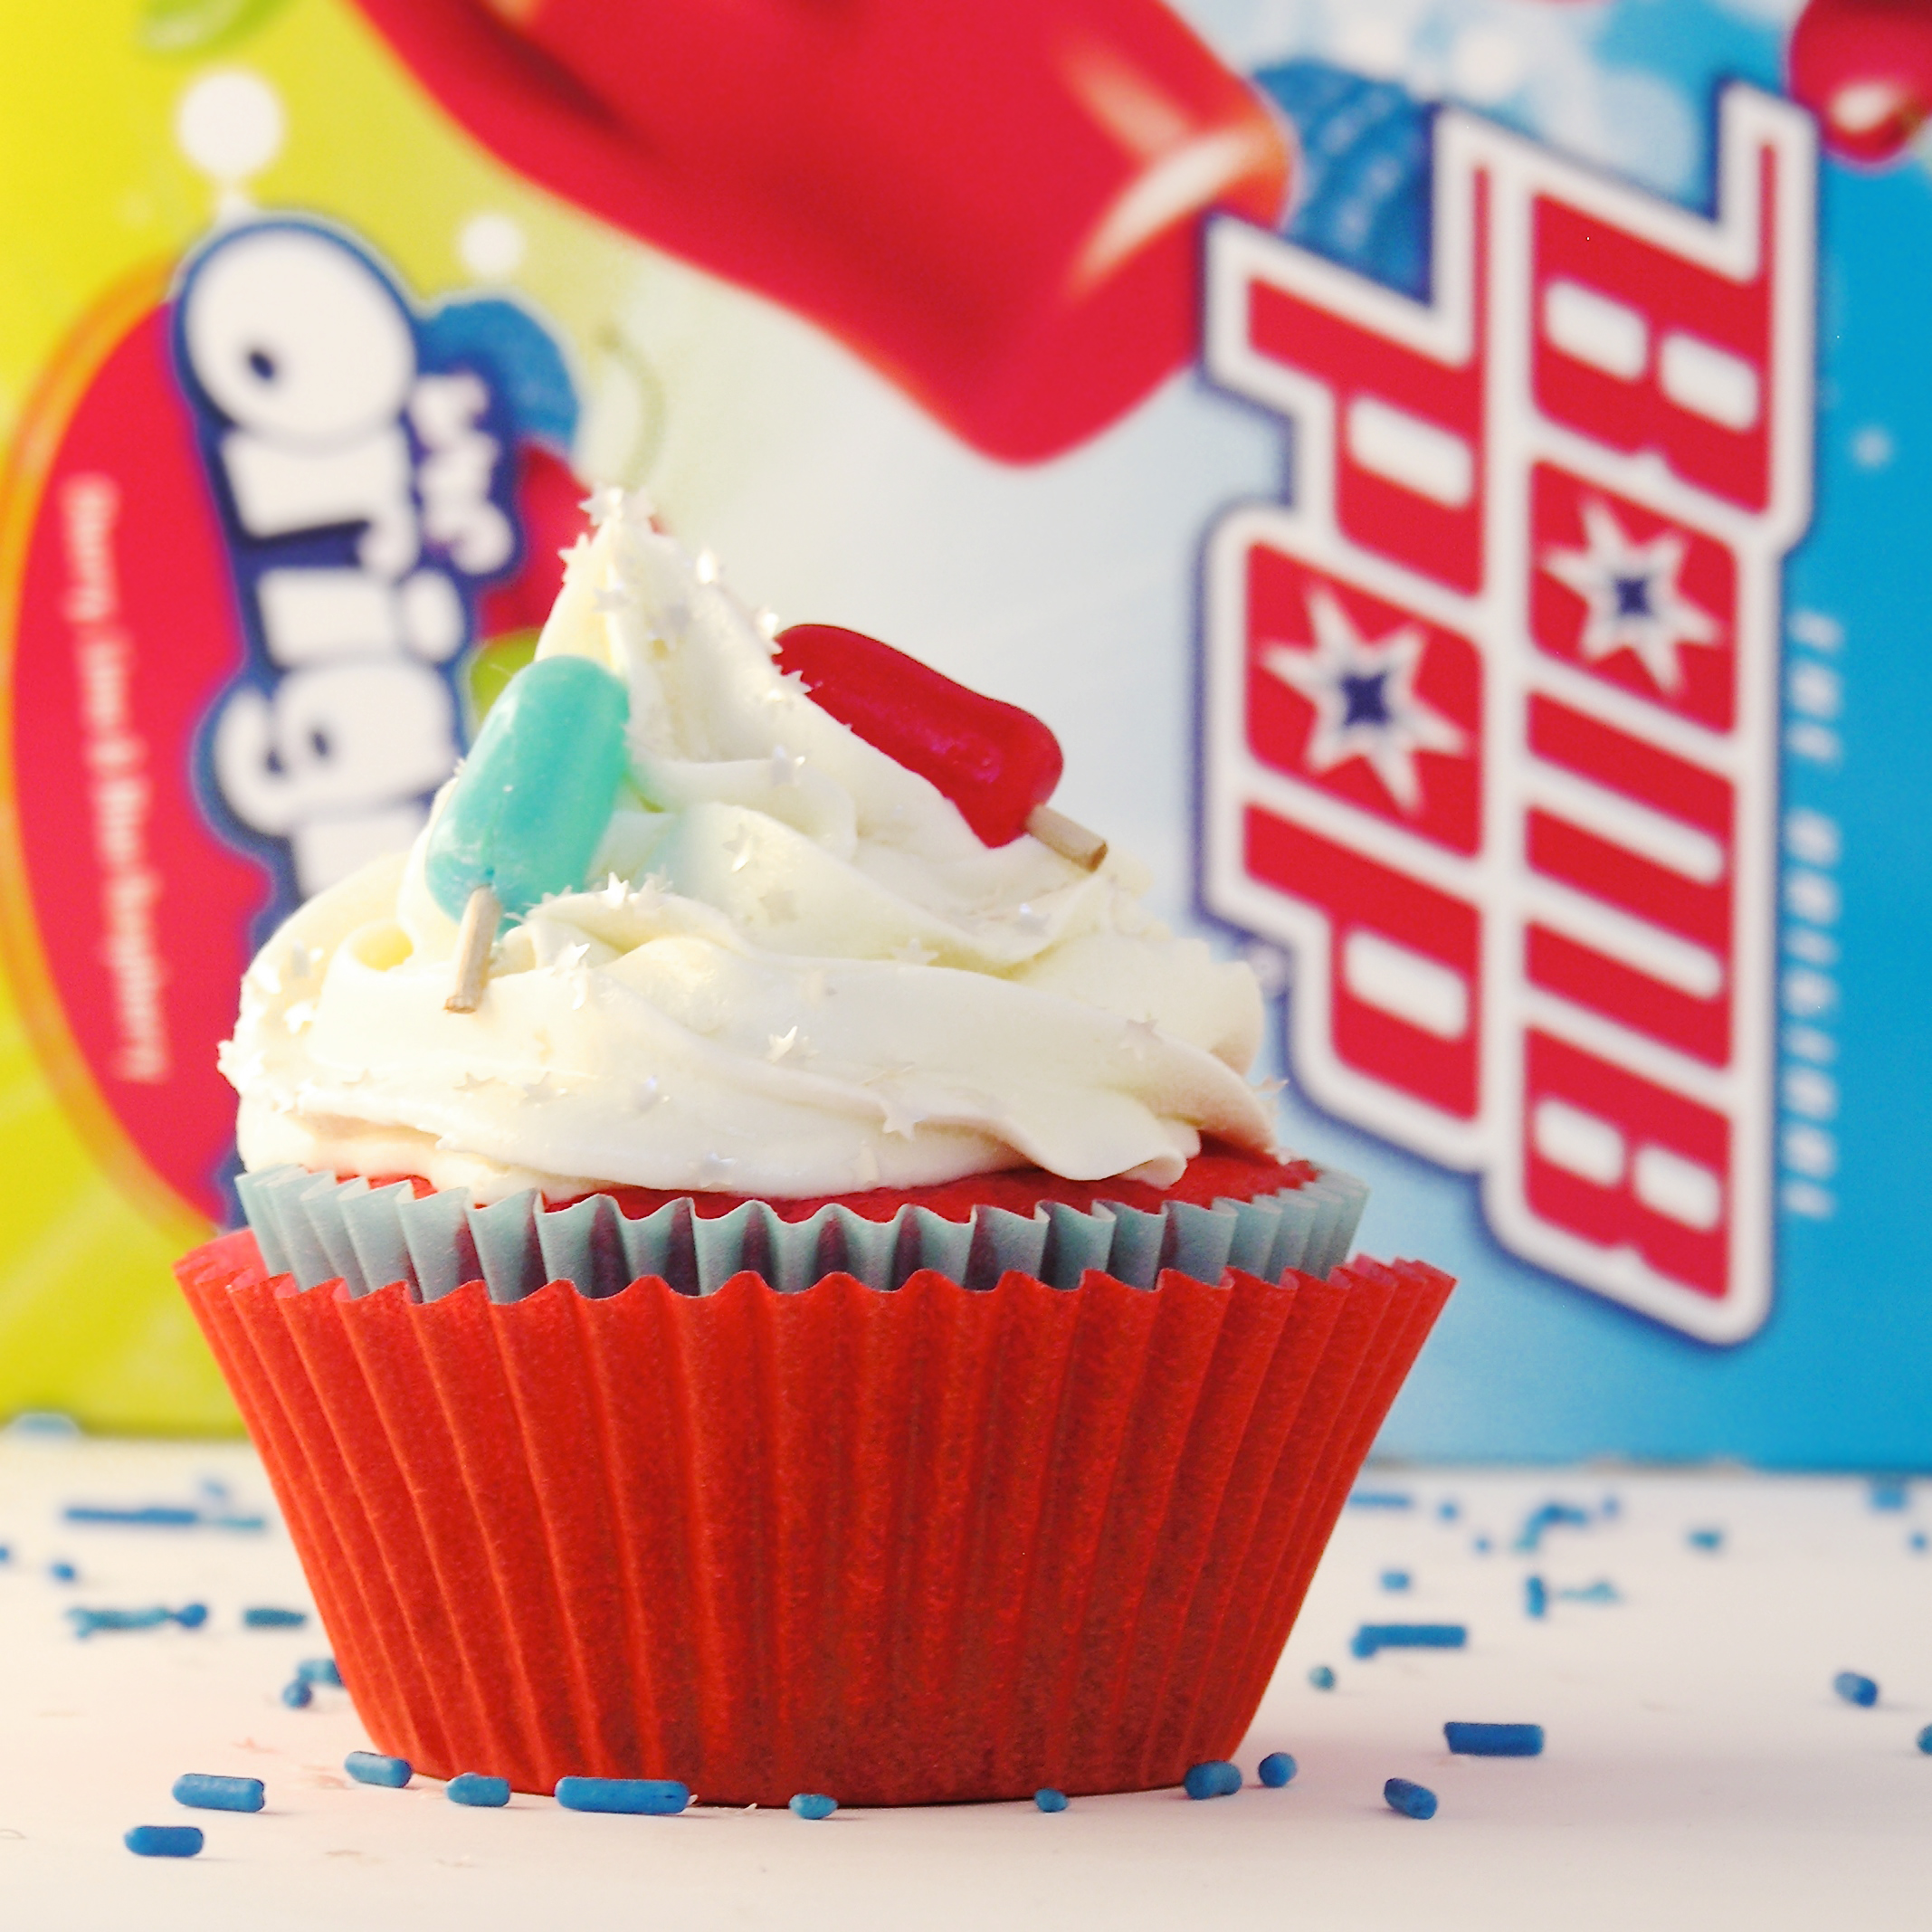
Does anything scream SUMMER, or FOURTH OF JULY like Bomb Pops?  These adorable cupcakes capture the flavors of an iconic summertime popsicle and make a perfect holiday treat!

You know those memories from childhood that spring up unexpectedly and make you smile?  Bomb Pops have that effect on me.  My brother and I always spent a week or two at my grandparents house each summer.  They had an immaculately clean garage with a huge freezer in it.  Grandma would always keep a box of bomb pops inside for our visits.  I remember so clearly, sitting out on her porch eating these in the evenings, letting the drips of sweet popsicle land on the cement by my bare feet.  Every time I eat one, it’s like traveling back in time to those days.

I wanted to capture the flavors of these summer treats in cupcake form, and I love how these turned out!  The kids in my life who tried them exclaimed, “These taste like popsicles!”

 I consider that a success!

Bomb Pop Cupcakes!!!

These were not hard to make at all- simply add jello to white cake mix and pipe the batter into cupcake liners in layers.

Here’s how we made them:  (printable recipe)

INGREDIENTS:

  • One boxed white cake mix (with oil, water and eggs to make according to package)
  • One small box of blue raspberry Jell-O (Jolly Rancher had this flavor, and Jell-O has a Berry Blue that works)
  • One small box of Cherry Jell-O
  • 2 sticks of salted butter (at room temperature)
  • 2 sticks of unsalted butter (at room temperature)
  • 3 cups of powdered sugar
  • 3 teaspoons of lemon extract or flavoring (technically the flavor in the popsicles is lime…but I couldn’t easily get my hands on lime extract.  The lemon was great- but feel free to use lime instead, if you want!)

DIRECTIONS:

  • Preheat oven to 350F degrees
  • Make cake mix as directed on box, and divide batter equally into two bowls.
  • Add 3 Tablespoons of Blue Raspberry Jell-O to one bowl, and 3 Tablespoons of Cherry Jell-O to the other bowl.
  • Mix each bowl of batter until well combined
  • Place each flavor of batter into a large, sturdy (I use freezer-type) zip top bag.
  • Clip a corner off the bag of Blue Raspberry batter and evenly pipe into 24 cupcake liners placed into muffin tins.
  • Clip a corner off the bag of Cherry batter and evenly pipe over the top of the Blue Raspberry batter.
  • Bake cupcakes as directed on boxed mix, remove from oven, and cool.
  • Make frosting by combining butters, powdered sugar and lemon extract in a large bowl.  Beat on low until combined and then high, until light and fluffy.
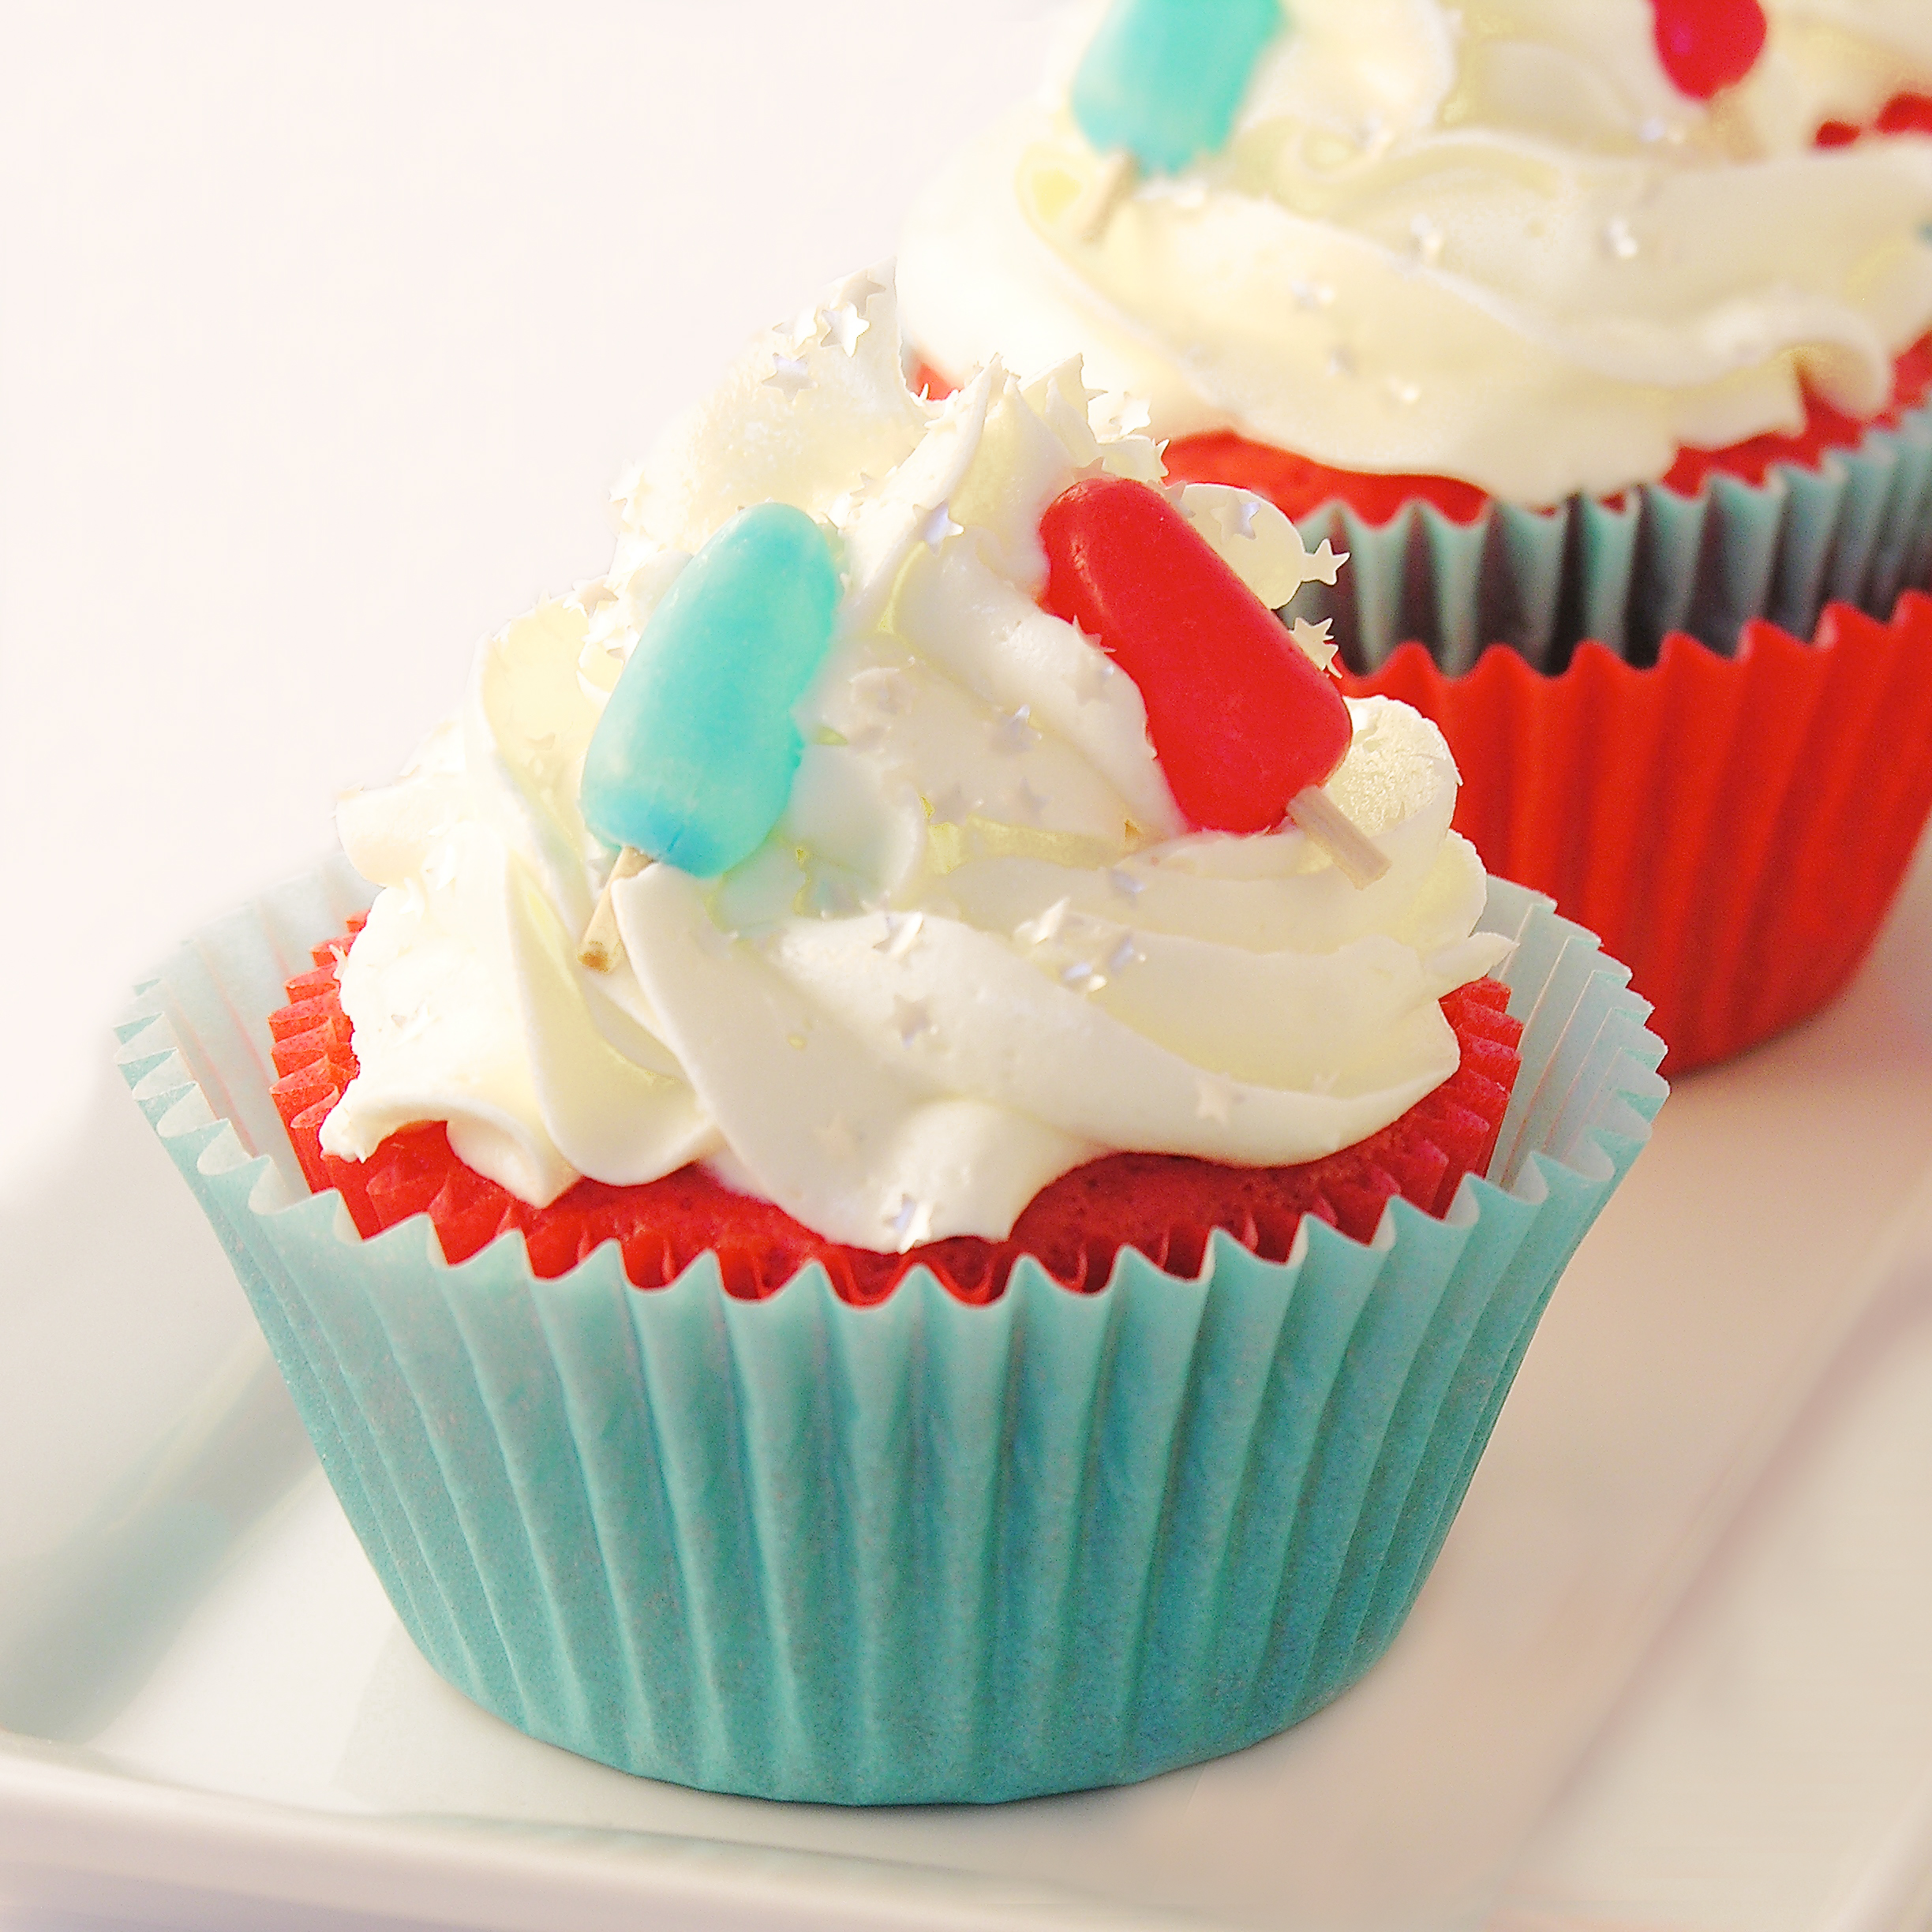
  • Put frosting into a large, sturdy zip-top bag that has been fitted with a decorating tip, and pipe frosting on the top of each cupcake.
  • Decorate as desired.  I saw these cute little Mike and Ike “popsicle” toppers on a fun site called Party Pinching. They were fun and easy to make, but they use toothpicks and could be dangerous to serve- especially to kids.  I love how cute they are, but I can’t recommend them.  Use cute sprinkles and maybe a popsicle stick instead!
  • Enjoy!

Bomb Pop Cupcakes!!!!

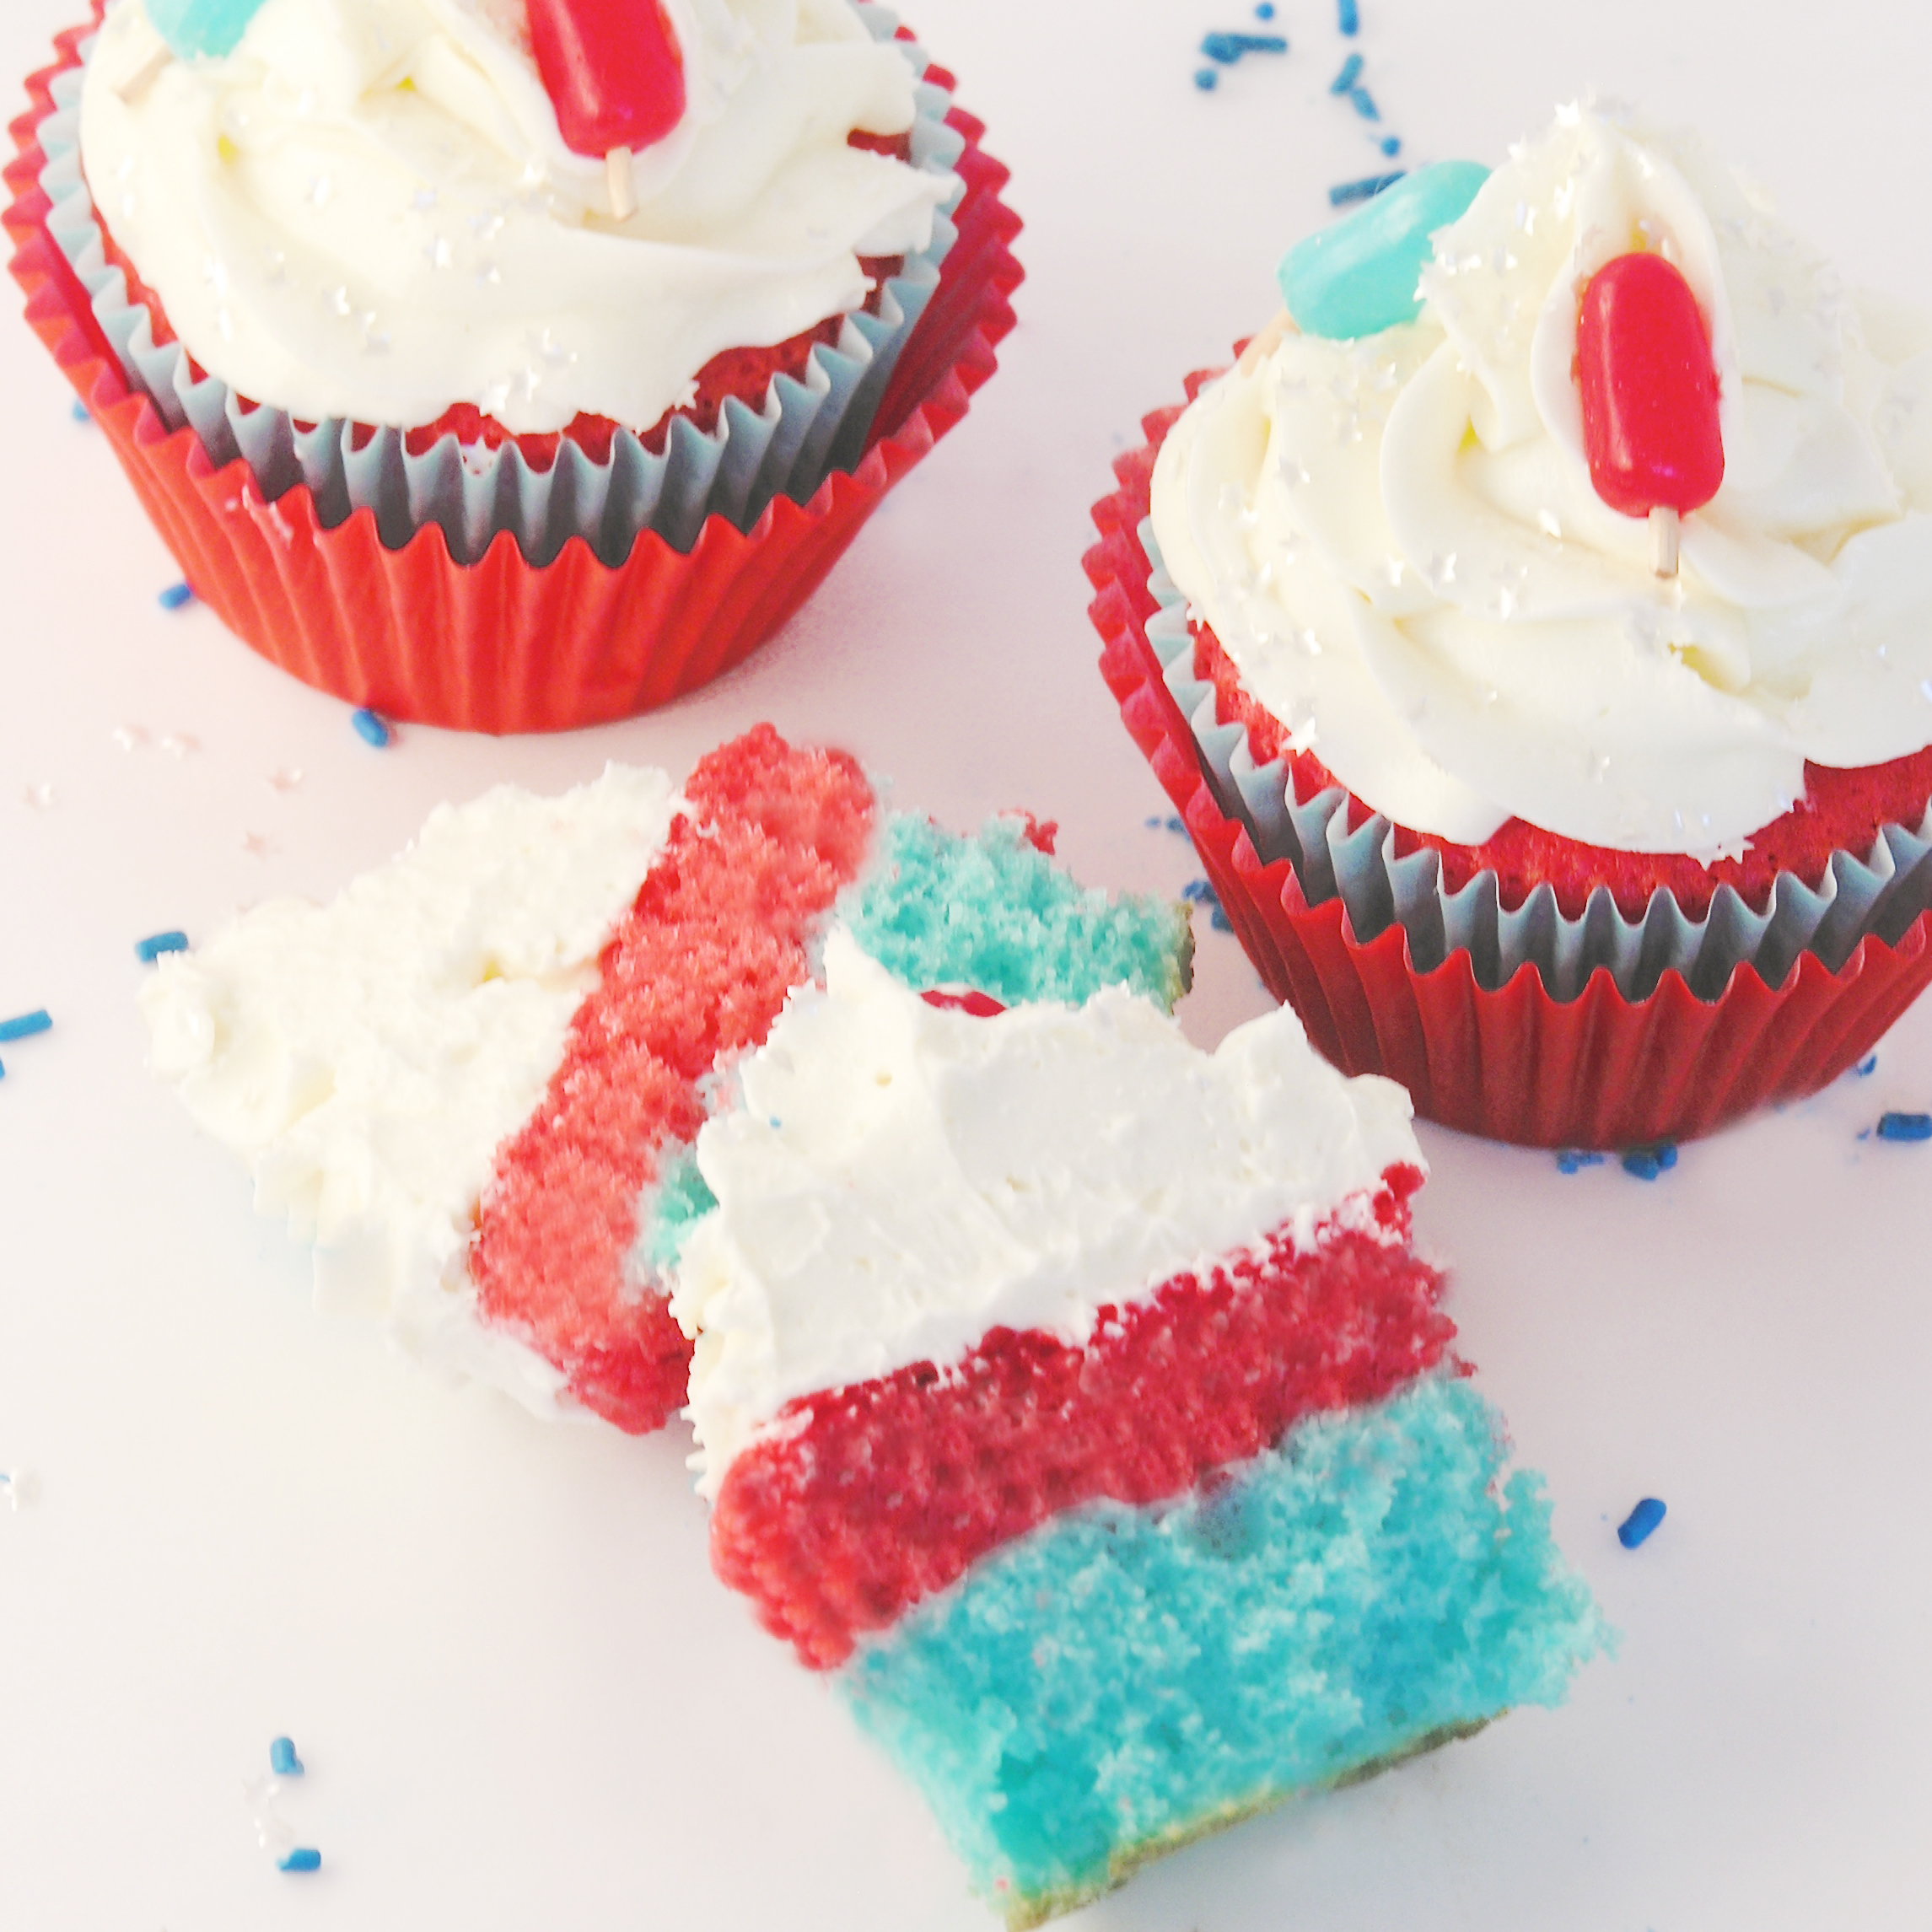
My thoughts: These were really easy to put together and the fruit flavors are so refreshing!  I love the patriotic colors too!

Just as a note: the blue layer of cupcake rises to the top, just a little bit, so don’t panic! You will still have nice layers of the two flavors.  

I really hope you get a chance to try these treats in celebration of summer!  Enjoy! ~r

Bomb Pop Cupcakes!!!Other fun summer treats to try:

Confetti CupsRaspberry Truffle TartMini chocolate chip cookie cheesecakesCreamy Mango Pops!

Advertisement

Caramel Pecan Marshmallow Pops

Posted on


Marshmallow Turtle Pops!

  Big marshmallows covered in creamy caramel and chocolate are dipped in pecans to make an incredibly decadent treat!

These are unbelievably good.  I was visiting my friend Andreya in San Diego last weekend and we passed a store while window shopping in La Jolla that had all sorts of dipped marshmallows.  I started craving them and had to try this.   These are like yummy caramel apples- but with a soft marshmallow inside, instead of an apple.  If you are looking for a really unique treat that is easy to put together, this is your recipe!!!  I couldn’t believe how easy and yummy  these were.

Caramel Pecan Dipped Marshmallows

Here’s the recipe: (printable version)

INGREDIENTS:

  • 2 bags of jumbo marshmallows (24 marshmallows)
  • 24 lollipop sticks
  • 32 Kraft caramels, unwrapped
  • 1 (14 oz) can of sweetened condensed milk
  • 1/2 cup of butter
  • 1 bag of dark chocolate Wilton’s candy melts
  • 2 cups of chopped pecans

DIRECTIONS:

  • Set marshmallows out on parchment paper and stick one lollipop stick into the flat side of each one.
  • In a medium saucepan, melt together caramels, butter and sweetened condensed milk, stirring constantly, until completely smooth (takes about 5 minutes)
  • Pour caramel mixture into a bowl.
  • Using stick, carefully dip each marshmallow into caramel, coating it to the top.  Gently tap stick against side of bowl to remove excess caramel and then slide bottom of marshmallow along bowl’s edge to remove most of caramel.  (It is ok if you remove it down to the marshmallow- the chocolate will cover this up!
  • Place upright on a sheet of parchment paper and cool.
  • Place chocolate candy melts into a bowl, and melt them in the microwave in 30 second increments, stirring in between, until completely melted and smooth.
  • Lay a fresh sheet of parchment paper out before beginning next step.
  • Place pecans in a small bowl.
  • Gently peel a marshmallow away from the parchment paper. This is a little tricky, as it will still be a bit gooey.  I held the stick, lifted, and peeled the paper away from the marshmallow.
  • Dip bottom of marshmallow into melted chocolate and slide bottom along edge of bowl to remove excess.
  • Dip bottom of coated marshmallow into pecans and set on fresh parchment paper to harden.

Once these are hardened up, you can serve them up on a pretty plate, or wrap them in cello bags to use as gifts or favors.
If you aren’t serving them right away, be sure to cover them so the marshmallows don’t harden up.

Caramel Pecan Marshmallow Pops!

My thoughts: These are a recipe I will make again.  I had fun putting them together and everyone who tried them asked me to make them again.  Easy. Yummy. Beautiful.  My kind of recipe!  Enjoy!! ~r

Other unique recipes you might enjoy:

Fruit Loop Pie!Raspberry Lemon Cream Cups!!!Cookie Dough Whoopie Pie!Doughnut cupcakes!!

Candy Surprise Cake!

Imagine the moment you cut into a cake and pull that first piece out.  Now imagine a waterfall of candy pouring out of the center of the cake.  Every child’s dream come true!  This recipe was inspired by a conversation at work; my friend Mary was telling us how she liked to surprise her kids with candy-filled cakes on their birthdays.  She used a variety of candies and one time actually filled the cake with runny orange frosting and called it a volcano!  I loved the idea and decided to bake my cake in a bowl to make it tall enough to fill (Mary used layers).  What a fun idea for the upcoming Halloween season- the possibilities are as endless as the candy on the shelves!  Here’s how it was made:

INGREDIENTS:

  • One boxed cake mix (any flavor you’d like- I used confetti)
  • Water, eggs and oil to make mix according to box
  • Candy to fill center of cake (I used Skittles and it took about 1 1/2 cups of candy)
  • 1 stick of salted butter
  • 1 stick of unsalted butter
  • 1 1/2 c powdered sugar
  • 1 t. clear vanilla flavor
  • Sprinkles to decorate with if desired.

DIRECTIONS:

  • Preheat oven to 325 degrees.
  • Prepare cake according to package and pour into a greased and floured 2 quart glass bowl (I used my 2 Quart Batter Bowl from Pampered Chef)
  • Bake at 325 degrees for 1 hour and 10 minutes- or until a cake tester inserted into the middle comes out clean.
  • Cool for 15 minutes.
  • Run a knife around edges to loosen, and gently tip out onto a wire cake rack to cool completely.
  • Once cool, trim flat edge even and set on serving plate with dome side up.
  • Cut a round opening in the top of the cake, gently pulling the cake out.  Keep the top layer, but spoon out the core, leaving about an inch of cake at the bottom.

  • Gently pour candy into the center of the cake and place the top back on (like a pumpkin!)
  • Make frosting by beating softened butters, powdered sugar and vanilla on high until light and fluffy. 
  • Frost cake and decorate as desired.

  • Cut a slice and watch the smiles start!

My thoughts:  This is SO much fun to cut into and serve- it made everyone laugh when the skittles started pouring out!  It serves up messy (be prepared to scoop skittles out for each serving).   The Skittles started to get soft inside the moist cake eventually- they still tasted great- but if you want them fresh just serve this within a few hours of making it.  You’ll want to think this through for other candy types as well.  I’m guessing most would be best served right away.  Believe me— it is worth the surprise factor!!!!  Enjoy!!!! -r

9-24-12 My friend Angie from the Czech Republic just sent this picture of her cupcakes using this recipe:

SO fun!  Great job Angie!!  If you want to try a cupcake version of this cake, save some time with a Cupcake Corer to remove the centers!


Red Velvet Cake Balls- filled with Cream Cheese Frosting!

Surprise!!!  These red velvet cake balls are filled with cream cheese frosting!  A fun treat for birthdays, holidays, showers….it is all in the decorating!

INGREDIENTS:

  • One red velvet cake mix (with oil, water and eggs to make according to box)
  • One tub of ready-made cheesecake frosting.
  • 2 (12 oz.) bags of Wilton White Candy Melts
  • Sprinkles or dark chocolate candy melts to use for decorating.

DIRECTIONS:

  • Bake cake mix according to package and cool
  • While cake is baking/cooling- spoon 1/2 of the tub of frosting into a ziptop bag.  Clip a corner and pipe dime-size dollops of frosting onto a cookie sheet covered in parchment paper (pipe about 35-40) Place in freezer.

  • Cut cooled cake into pieces and chop into fine crumbs using a food processor or food chopper.
  • Mix cake crumbs with remaining frosting until it can be formed into balls that hold together (you may not need all the frosting).
  • Roll about one tablespoon of cake into a ball, press it flat and put a frozen frosting bit in the center.  Wrap cake dough around frosting and smooth into a ball. (try to keep the frosting bits frozen- I did only 5 at a time and kept the rest in the freezer.  The frosting will not freeze hard- it will be more like taffy when you peel it from the parchment paper).

  • Refrigerate cake balls for a few hours.
  • Melt Candy Melts in microwave in 30 second increments until smooth.
  • Dip cold cake balls into white chocolate candy melts (this is the hardest part for me….I made a huge mess trying different techniques and finally settled on a fork, tapping it against the edge of the bowl until excess has drained away.  Some people use toothpicks or spoons or special dipping tools….I think this part is just a mess for me no matter how I do it!)
  • Place dipped cake balls on parchment paper to harden.  If you are decorating with sprinkles, do this before the chocolate hardens.  Otherwise, just drizzle with some dark chocolate for a more elegant look:

My thoughts: These are SO good.  The frosting in the middle is a fun surprise and it adds a yummy creaminess to the cake balls.  Hassle?  Yes.  I am convinced that cake balls and cake pops are not my gifting– so many people make them look effortless and that is NOT the case for me!  I love the taste though….so once in awhile….ENJOY!!!

.

Cupcakes for Casper :o)

Posted on


Two years ago- almost to the day- I brought home a puppy destined to be my best friend- his name is Casper.

This past thanksgiving weekend I was sent a picture via facebook by my friend Mimi.  Mimi is spending a year studying in England and I’ve NO idea where she found this picture- but it made me laugh and I KNEW that someday  I would make this dessert:

(I did try to find the original source of this picture and I just couldn’t– so my apologies if it is yours.  I always try to credit a source but just couldn’t find it!)

My biggest concern with these cupcakes was of course the tremendous amount of icing on them—YUCK!  I decided that mini cupcakes turned upside-down on top would bump up the center and reduce the amount of icing needed.  My second concern was the icing itself.  A heavy buttercream would work- but a little of that goes a long way.

After making my last dessert- Chocolate Mousse Cake, I realized that the filling “mousse” layer was the PERFECT consistency for these cupcakes.  A light whipped frosting that is still thick enough to keep its shape.  Once I’d decided on the frosting I created my own:

THAT one looks good!

Yum! I need a bite of that!


Here’s how I made them:

INGREDIENTS:

  • One box of white cake mix (I use Duncan Hines) with water, oil and eggs to make according to package.
  • One box (4 packets) of Dream Whip Whip (find it by the pudding boxes- or order multiple boxes online for a better deal)
  • 1 1/2c. cold milk
  • 1 c. powdered sugar
  • mini M&Ms or black/brown icing coloring.

DIRECTIONS:

  • Make cake according to package and make as cupcakes.  Only make about 16-18 cupcakes though and use the rest of the batter in a lightly greased mini-muffin tin to make 16-18 mini cupcakes (with no liners).
  • While cupcakes are baking make frosting.
  • Combine Dream Whip, milk and powdered sugar in a large bowl and beat on high until it is very stiff (whipped frosting consistency).  Refrigerate until use.
  • Cool cupcakes completely and then level the tops with a serrated knife

  • Divide about 2/3 of the frosting off into a zip-top bag that has a corner clipped off and a decorator tip inserted in the opening.  Refrigerate.
  • If you aren’t using mini-M&Ms for eyes and nose, pull about 3T of frosting out and color it black or brown with icing color.  Place this in a zip-top bag as well with a tip inserted.  Refrigerate.
  • Use the rest of the frosting to frost the top of each large cupcake.  Tip the mini cupcake upside-down on top and frost that as well.

  • Using the bag of icing with the decorator tip, pipe icing on making little points coming up from the cupcake.  make a larger dollop of icing for the nose and two off the top and folding over a bit for ears.

  • Take the bag of black icing (or your mini M&Ms) and make eyes and a nose.

(My technique started off rough and gradually improved.  Here’s my two 1st ones:

Sheep?

Chewbacca?


  • Keep refrigerated until serving

My thoughts:  You could certainly use a couple of cans of frosting for this if you want.  The light whipped frosting is SO tasty though.  These cupcakes are easy but time-consuming.  I’m no cake-decorator, so I loved that these are so free-form….just have fun!  

Here’s some more photos of Casper and my friend Danielle enjoying the finished result (they BOTH have frosting on their noses!)  Only little tastes for puppies though– these are cupcakes designed for people and feeding them to your pets could make them sick.


ENJOY!


Have you seen Casper in my other recipes?

Check him out in Coconut Lemon bars with Mimi  and Fresh Blackberry Tart.

%d bloggers like this: