RSS Feed

Tag Archives: winter

Upside Down Oreo Cupcakes

Upside Down Oreo Cupcakes

Turn these cupcakes upside down and find a cute “winter” Oreo on the top! Add a little bit of frosting in the middle and you have a delicious and beautiful winter dessert!

I saw this cute idea on the Oreo site and decided to “winterize” the idea. You’ll have to find the Winter Oreos- they have red filling and the most adorable designs on them, or you can use plain Oreos too- either way they are delicious!

Oreo Cupcakes!!

These aren’t difficult to make, but you will definitely need to keep them in a sealed container until serving them. I put all of mine away, but 2 didn’t fit and since that cupcake liner is pulled off, they got all hard and stale. In a container they kept fine for a couple of days!  On a side note: I used the Duncan Hines Blue Velvet mix and it was delicious! You could use Red Velvet or a White cake mix with food coloring too. Here’s how we made them: (printable recipe)

INGREDIENTS:

  • One box of Duncan Hines Blue Velvet cake mix (plus water, butter and eggs required by mix)
  • One package of “winter” Oreos
  • One tub of white frosting
  • Sprinkles as desired

DIRECTIONS:

  • Make cake mix as directed on box.
  • Place one Oreo each into 24 cupcake liners placed into muffin tins- making sure that cute winter design is facing down!
  • Spoon cake batter evenly into liners, making sure it get down around the sides of the Oreo
  • Bake cupcakes as directed by box and allow them to cool completely.
  • Remove cupcake liners, use a small knife to slice each one in half and spread some frosting between the 2 layers.
  • When cupcake is reassembled, sprinkle with fun sparkly sugars.
  • Store in an airtight container. I ADORE my cupcake carrier – it’s one of my favorite kitchen belongings and you should totally ask for one for Christmas!!!
  • Enjoy!!!!!!!

Oreo Cupcakes!

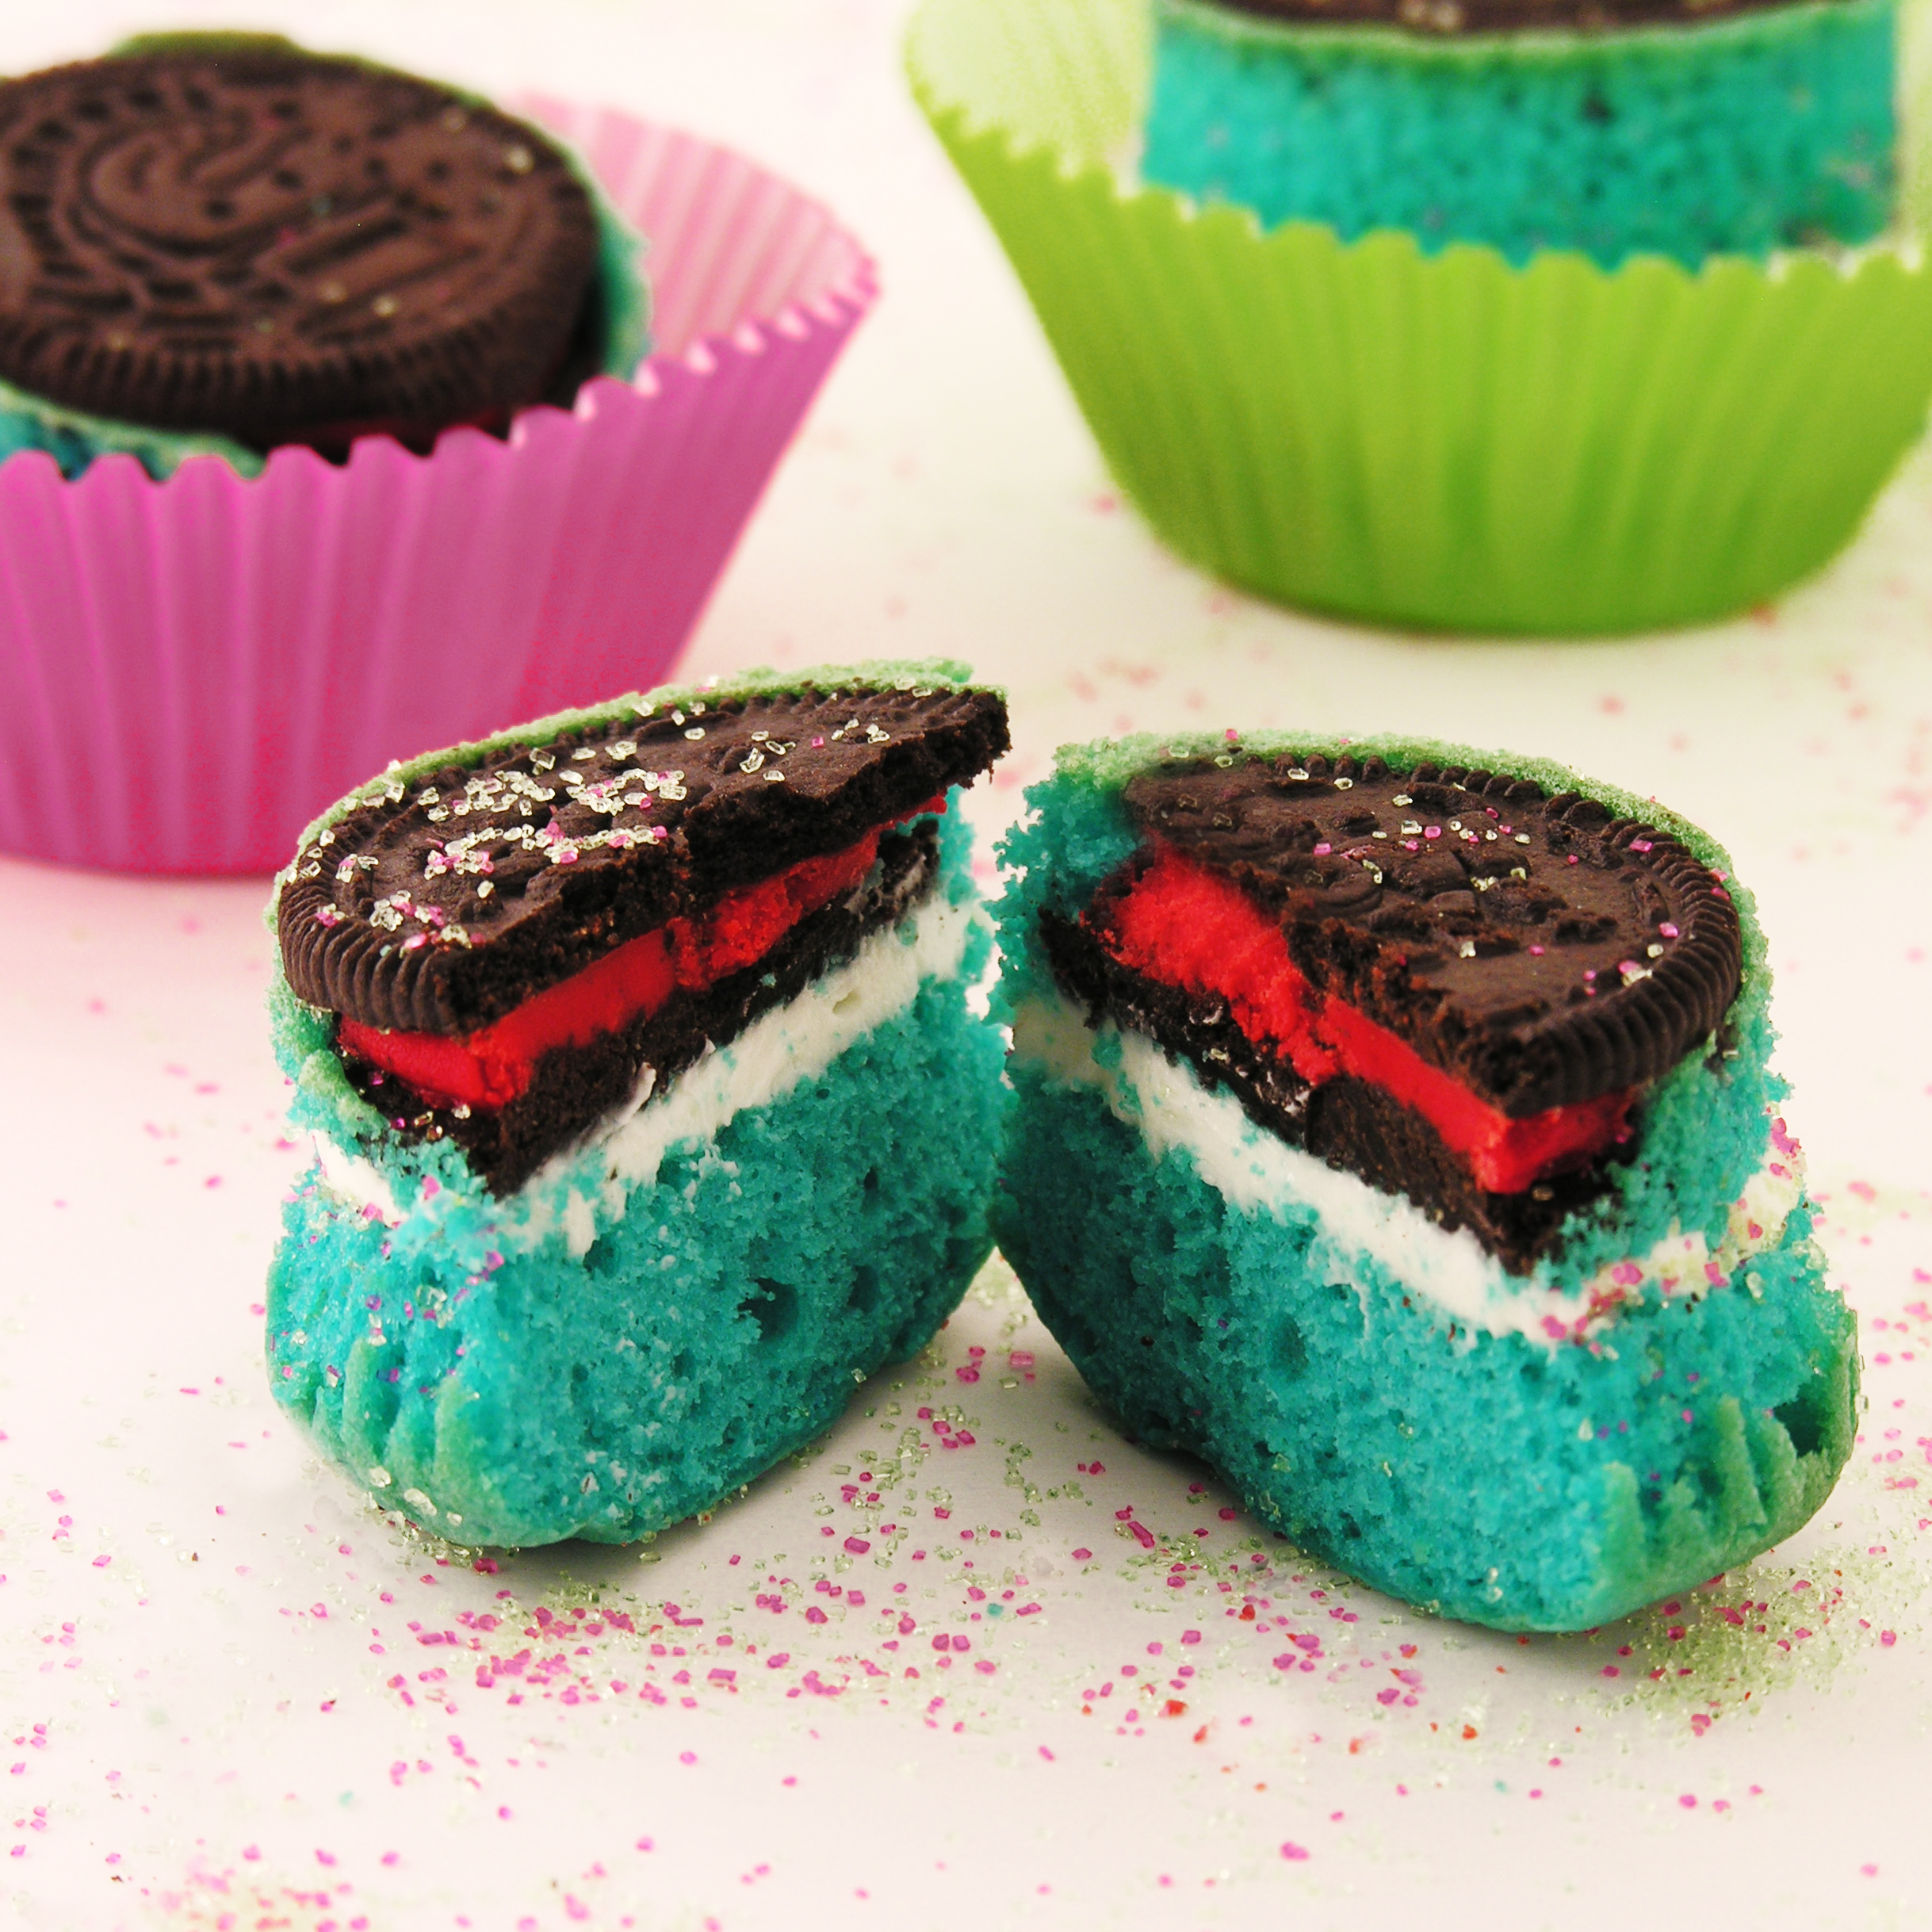
Aren’t those fun winter colors?  I love reds and blues for Christmas!

My thoughts: These are really easy and fun- I think with the lighter cake mix color you get a little more discoloration or “browning” around the Oreo cookie itself, that was my only disappointment. I think if you used a darker cake batter you wouldn’t notice it so much. The flavor was wonderful though. Thanks for the fun idea Oreo!!!!  Enjoy!

Oreo Cupcakes2

Other Christmas recipe ideas~ click on a photo to be taken to the recipe:

Hot Chocolate Pop!Peppermint Hot Chocolate Cupcakes!!!Gingerbread Cake RollReindeer Oreo Pops!!!

Need a fun and unique gift idea? Easybaked has adorable boxed sets of notecards. They have an Easybaked dessert photo on the front and a recipe on the back! The come in a cute box and the best part? They are ON SALE for Christmas, include free shipping and the site that is hosting them offers $10 off a $50 purchase! Enjoy!!! (Click on photo for more information)

Easybaked Card sale

Advertisement

Hot Chocolate Pops!

You’ve heard of cake pops, cookie pops, brownie pops, doughnut pops and even pie pops— but have you ever tried a Hot Chocolate Pop?  Creamy chocolate surrounding a marshmallow surprise center- pop it into a cup of hot milk and YUM- a perfect yummy creamy cup of cocoa.  Wrap them up and they make the PERFECT winter gift!

Ingredients:

  • Wilton White Candy Melts and Wilton Dark Candy Cocoa Melts.  You will need about one 12 oz. bag per 8 pops.
  • Marshmallows (one for every pop you intend to make!)
  • Stir sticks (I found these cute dowels at Michaels)
  • Small plastic cups (I used 3 oz. clear plastic cups by Solo)
  • Clear plastic bags I used Wilton Lollipop Bags -they are so easy- perfect size and come with a bow!
  • Cute tags– use mine if you want or make your own!! 🙂

Hot Chocolate Pop Labels

Hot Chocolate Pop Labels- Mint

Hot Chocolate Pop Labels- Instructions for use.

Instructions:

  • Melt candy melts in the microwave in 30 second increments, stirring between until smooth.
  • Spoon melted candy into a zip-top bag and seal.
  • Clip a corner off and squeeze about a teaspoon of chocolate into the bottom of each cup.  Tap cup against counter to spread chocolate and remove bubbles.
  • Place cups in the refrigerator for about 5 minutes until chocolate is hard.
  • Press dowels or stir sticks into marshmallows
  • Squeeze about 2 teaspoons of chocolate (I used a contrasting color) into cup and while it is still melted, press marshmallow into cup (this will squeeze the chocolate up along the sides of the cup.) Tap to remove bubbles.
  • Top with chocolate until marshmallow is completely covered -or—
  • (If you are using contrasting chocolates) Refrigerate about 10 minutes until second layer is hard and then add contrasting chocolate over the top, completely covering marshmallow.
  • Place cups in fridge for about 30 minutes to an hour.
  • Clip top of cup with scissors and tear it down the side which will release the pop.
  • Serve or gift wrap!  Enjoy!!!
  • To eat pop: Use a BIG mug (20 oz.) and heat up about 10oz. of milk in it.  Place pop in hot milk and stir until smooth and creamy!

My thoughts:  I love these so much…I love to come up with fun and creative edible gifts each year for giving in bulk (Bible studies, family get-togethers, hair stylist etc…) and these are just FUN!!!  I am wholeheartedly a blonde and my 1st use of these involved a full cup of hot milk plus a pop -resulting in  a huge lake of hot milk on the counter…so learn from me and use a big cup with room in it for the pop- lol!  

Also– I found MINT Wiltons candy melts and that is how I got the mint cocoa flavor.  I just added a little layer of green candy melt before I put lots of white melts and a marshmallow– I like how it turned out!  I wish I’d thought to take pictures as I went for you- I just forgot!  (NOTE: see below!!) Experiment with colors and flavors- these are pretty forgiving projects!

Enjoy– and a very Merry Christmas to you!!!!  -R

Ok– I had to make a second batch because I ran out.  Since I was making them again I took the time to take some pictures for you of the process:

A little bit of chocolate in the bottom of a 3 oz. cup.

White chocolate added over dark and marshmallow pressed into center.

Dark chocolate added over white and marshmallow– don’t forget to tap the bubbles out!

Everything is so pretty set up for pictures….this is what my counter ACTUALLY looked like at the end!

Pops ready to go in the fridge to harden!

Clip the top of the cup and tear down the side to release. (I used paper cups too this second time and they worked great– you just have to peel them off a little more.)

I hope these help– have fun!!  r-

%d bloggers like this: