Tag Archives: chocolate covered oreos

Friendly Monster Oreo Pops

Posted on

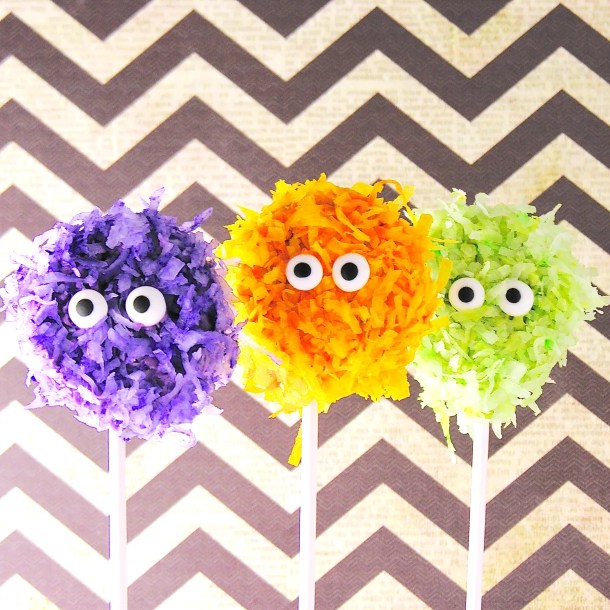
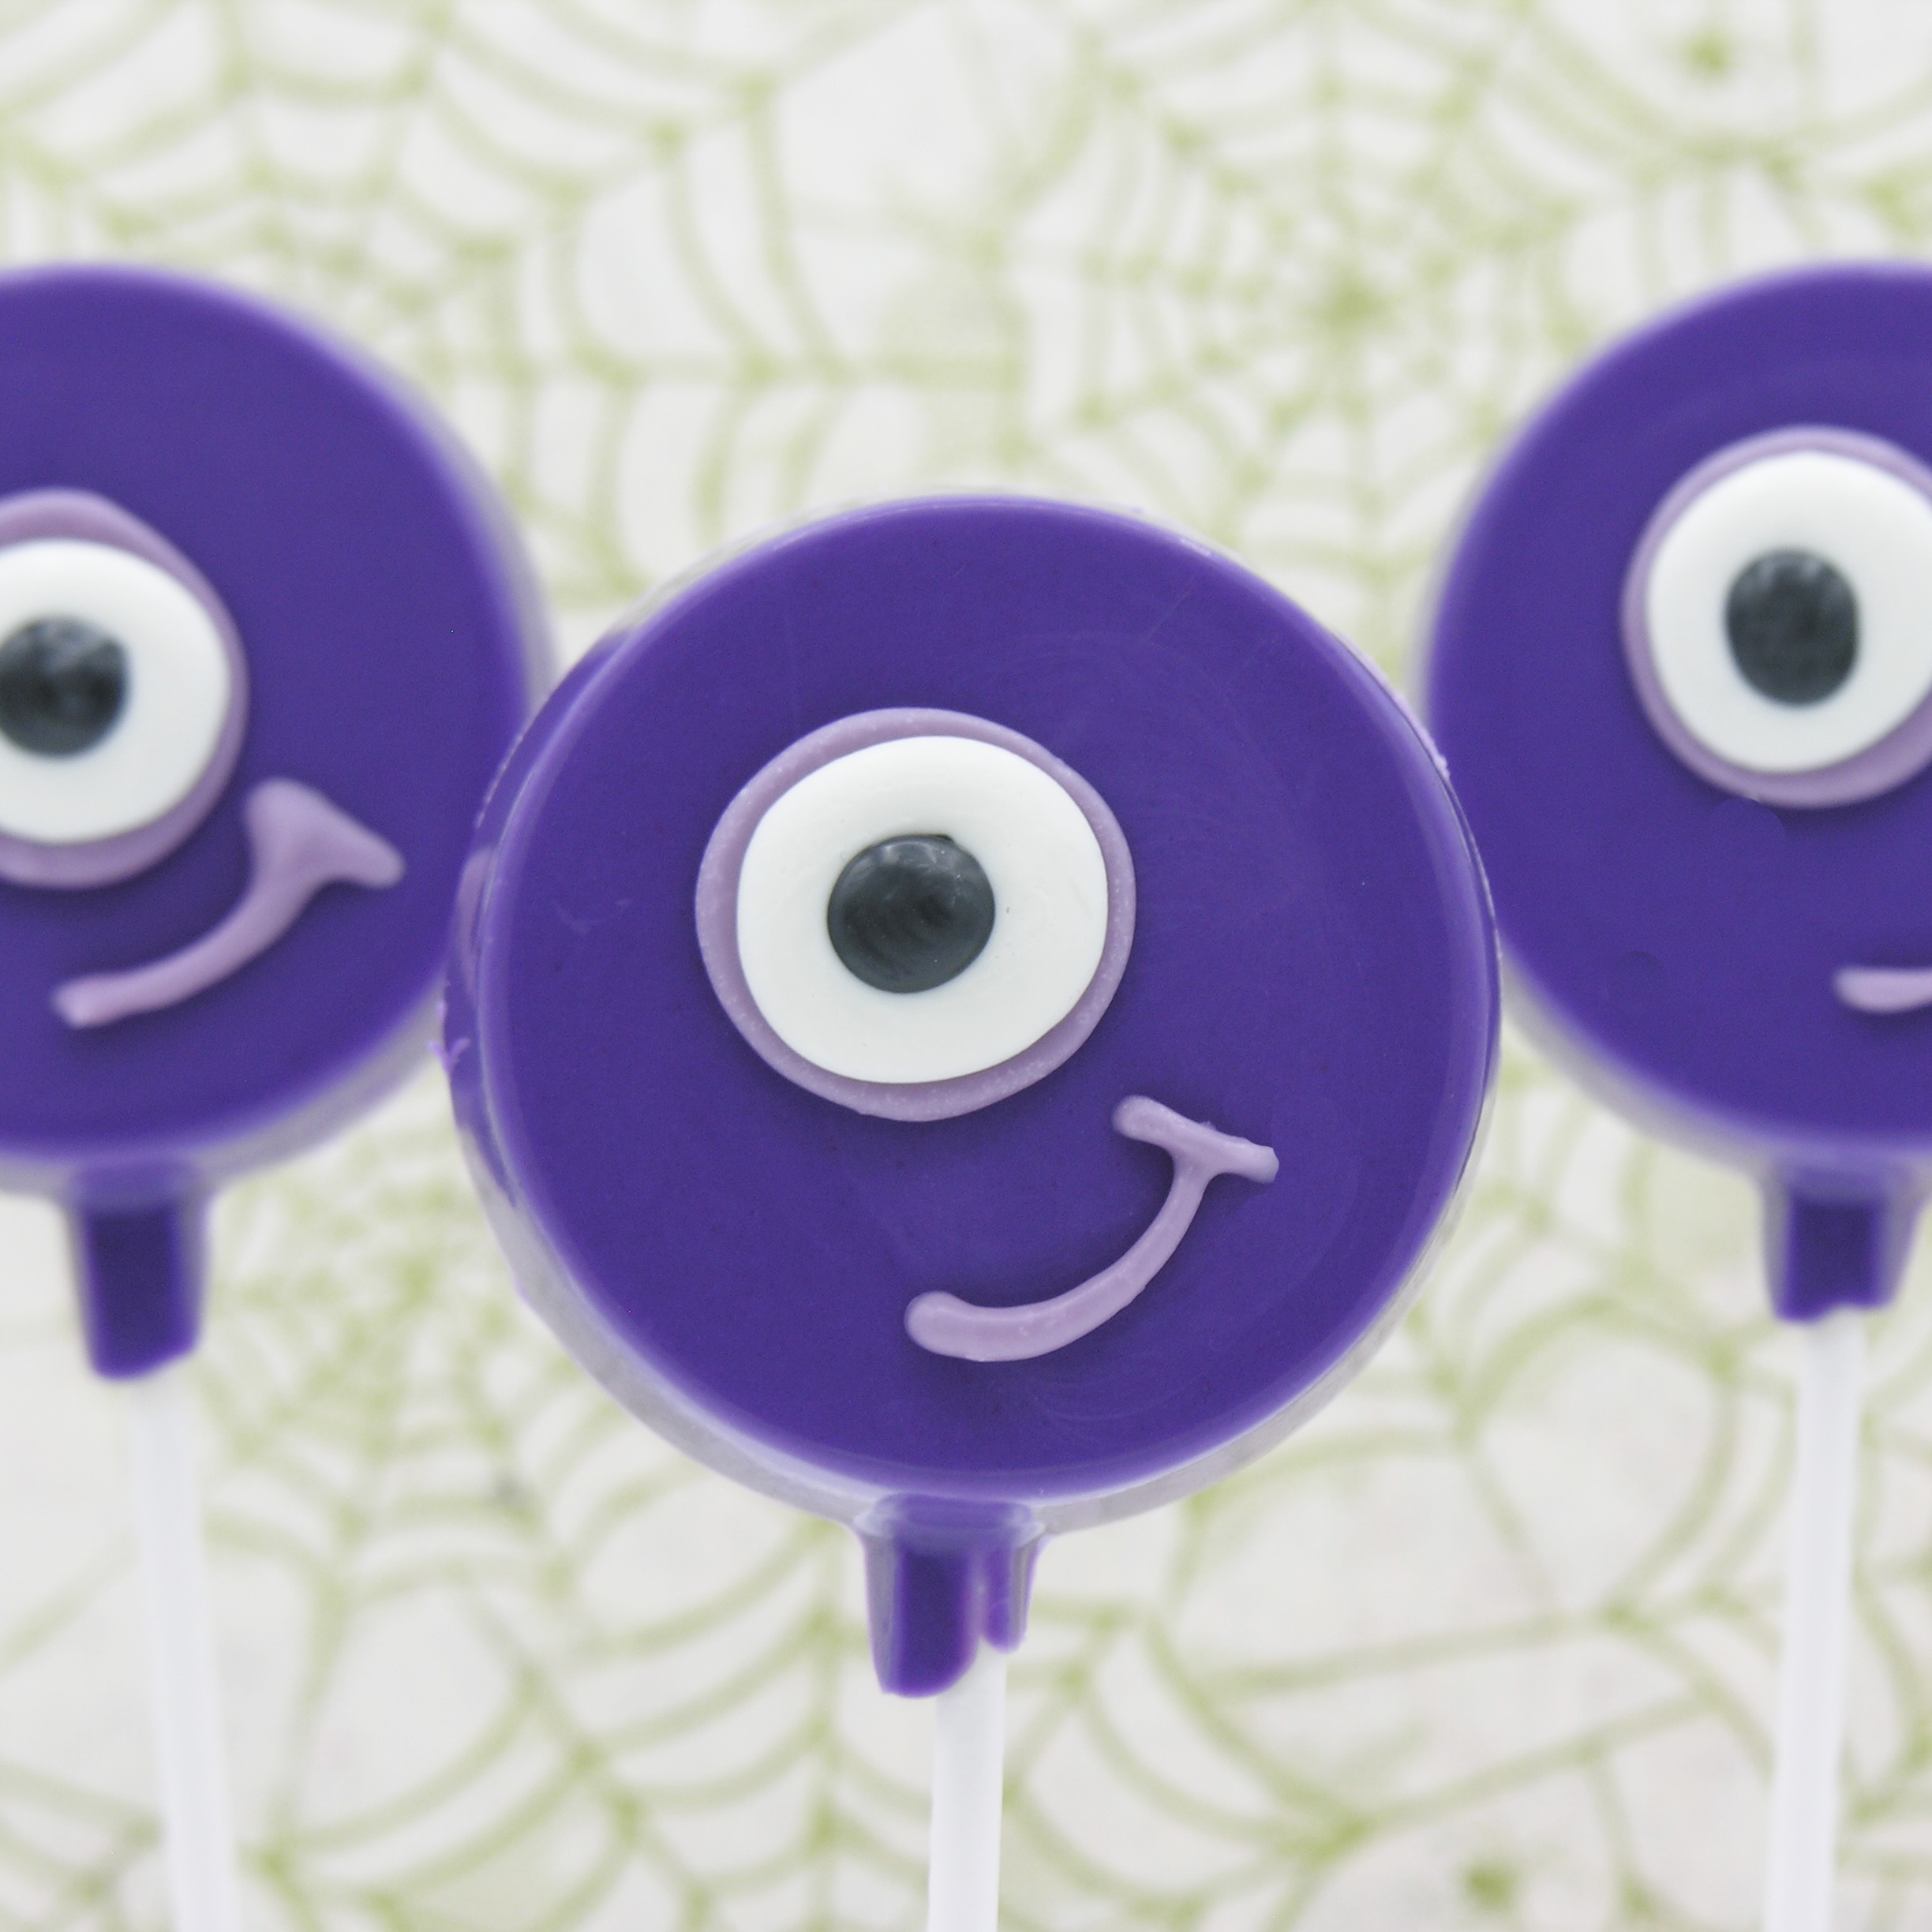
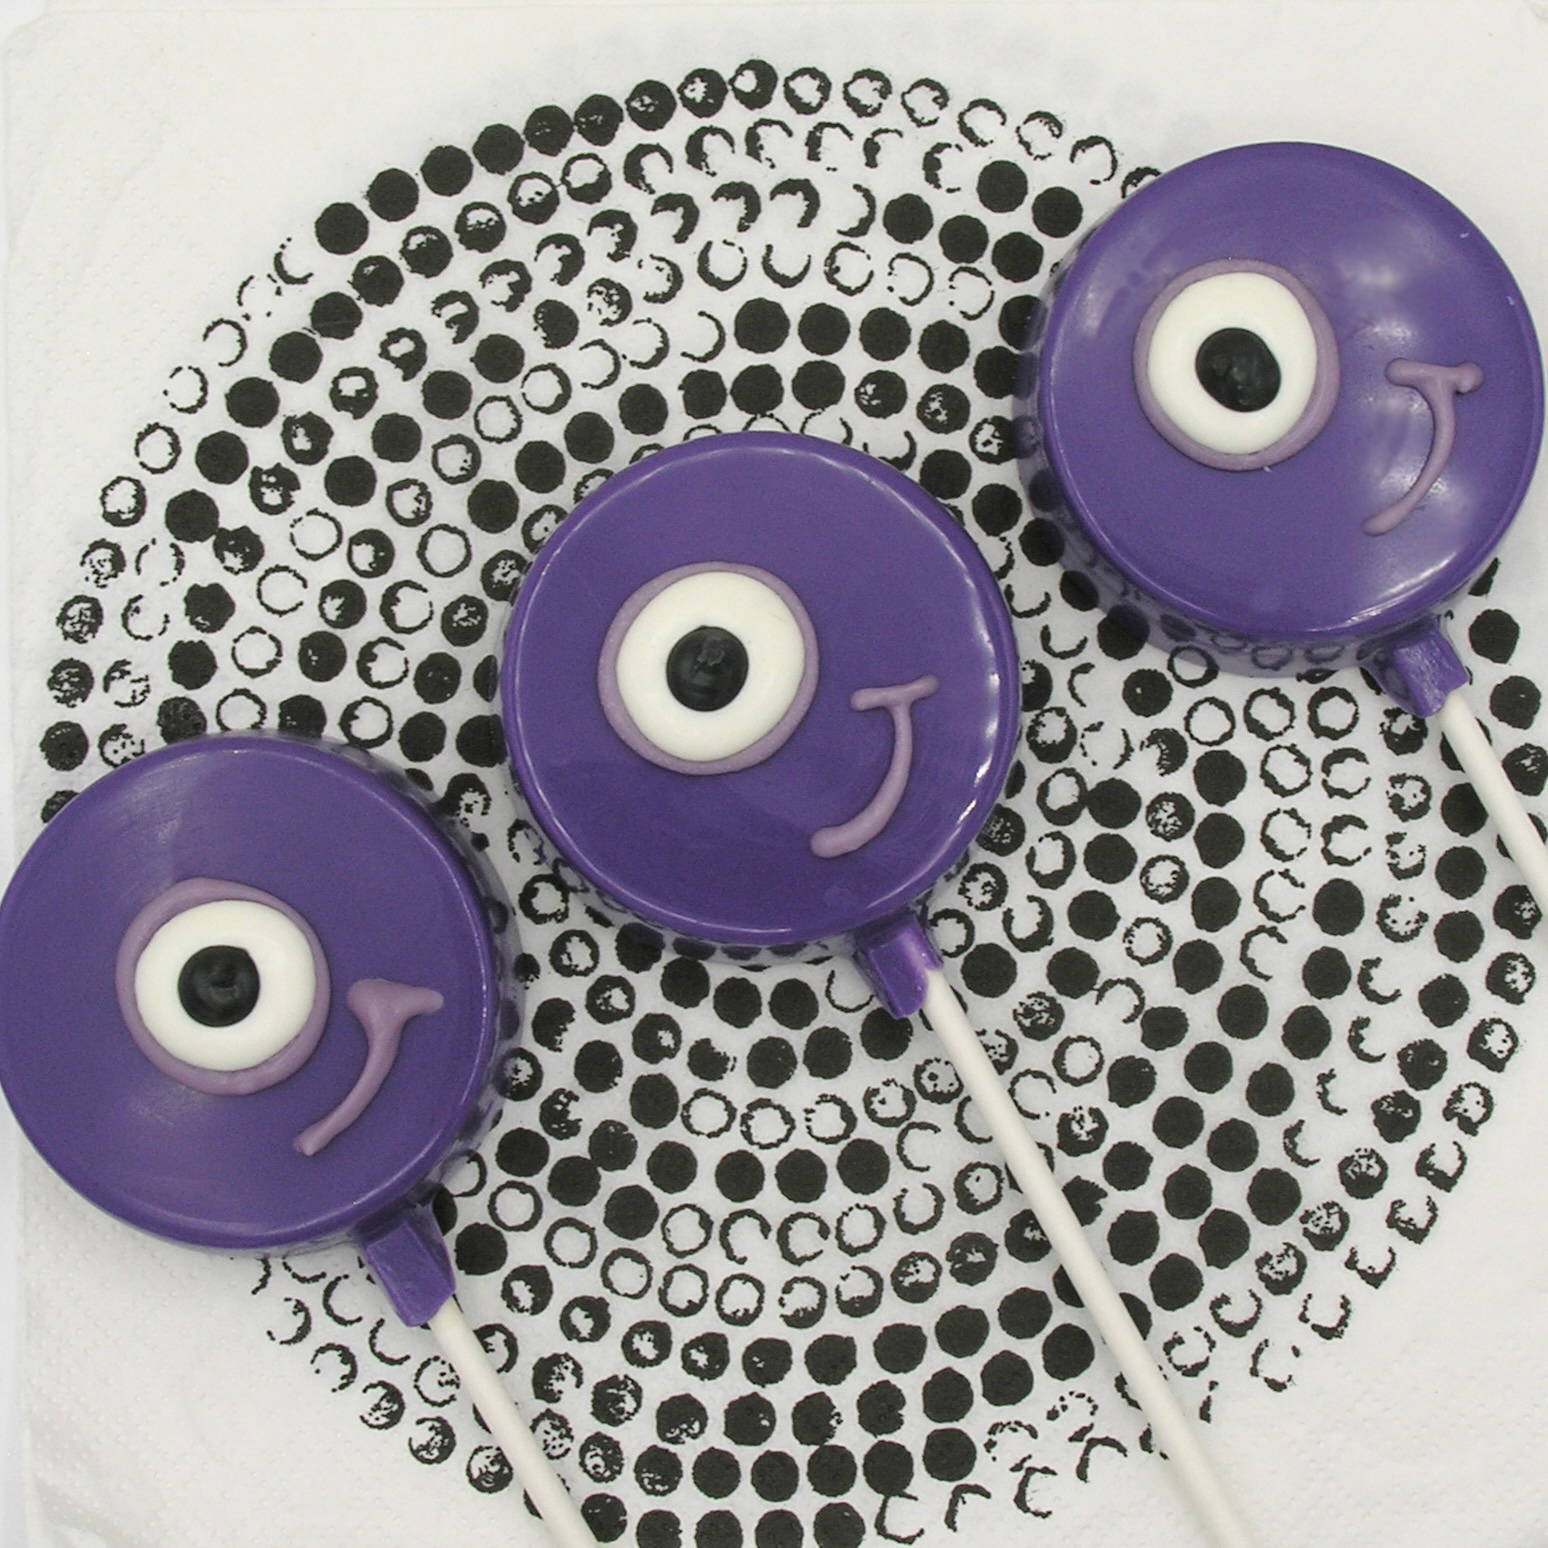
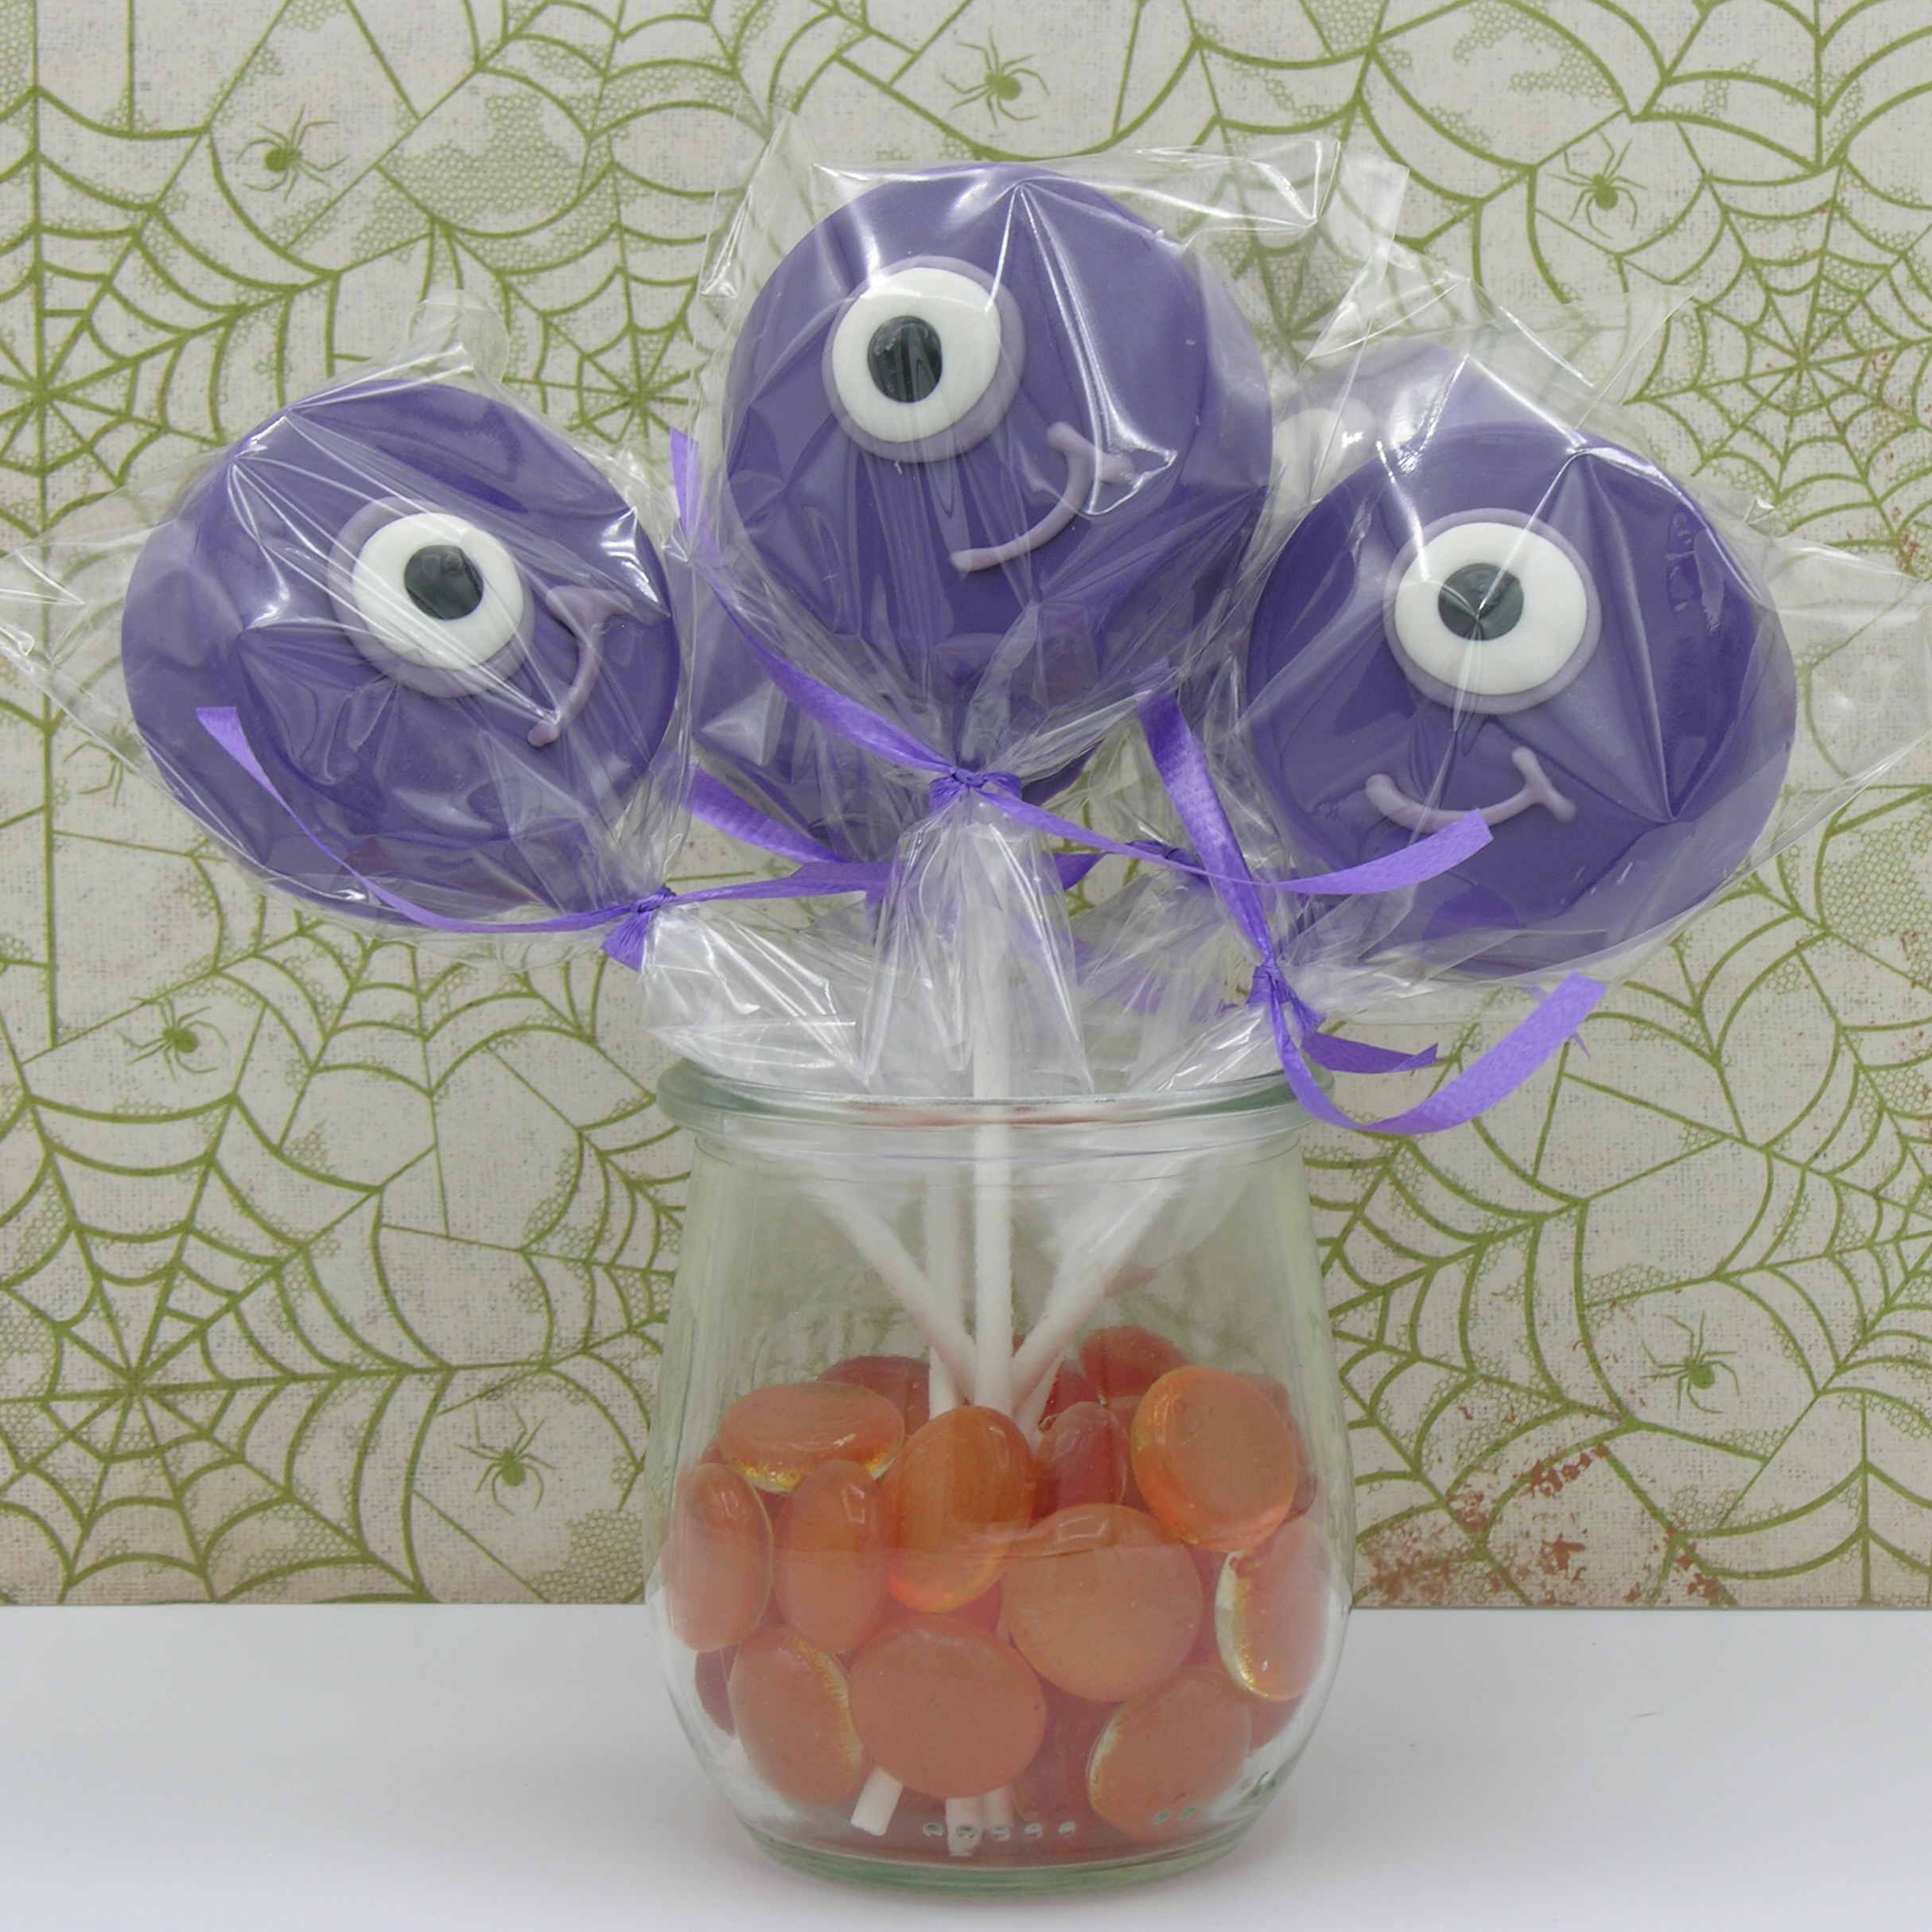
These friendly purple monsters are filled with an Oreo, and are sure to make the kids in your life smile this Halloween!

(The links to Amazon in this recipe are affiliate links. Your purchases help to support future recipe creations!)

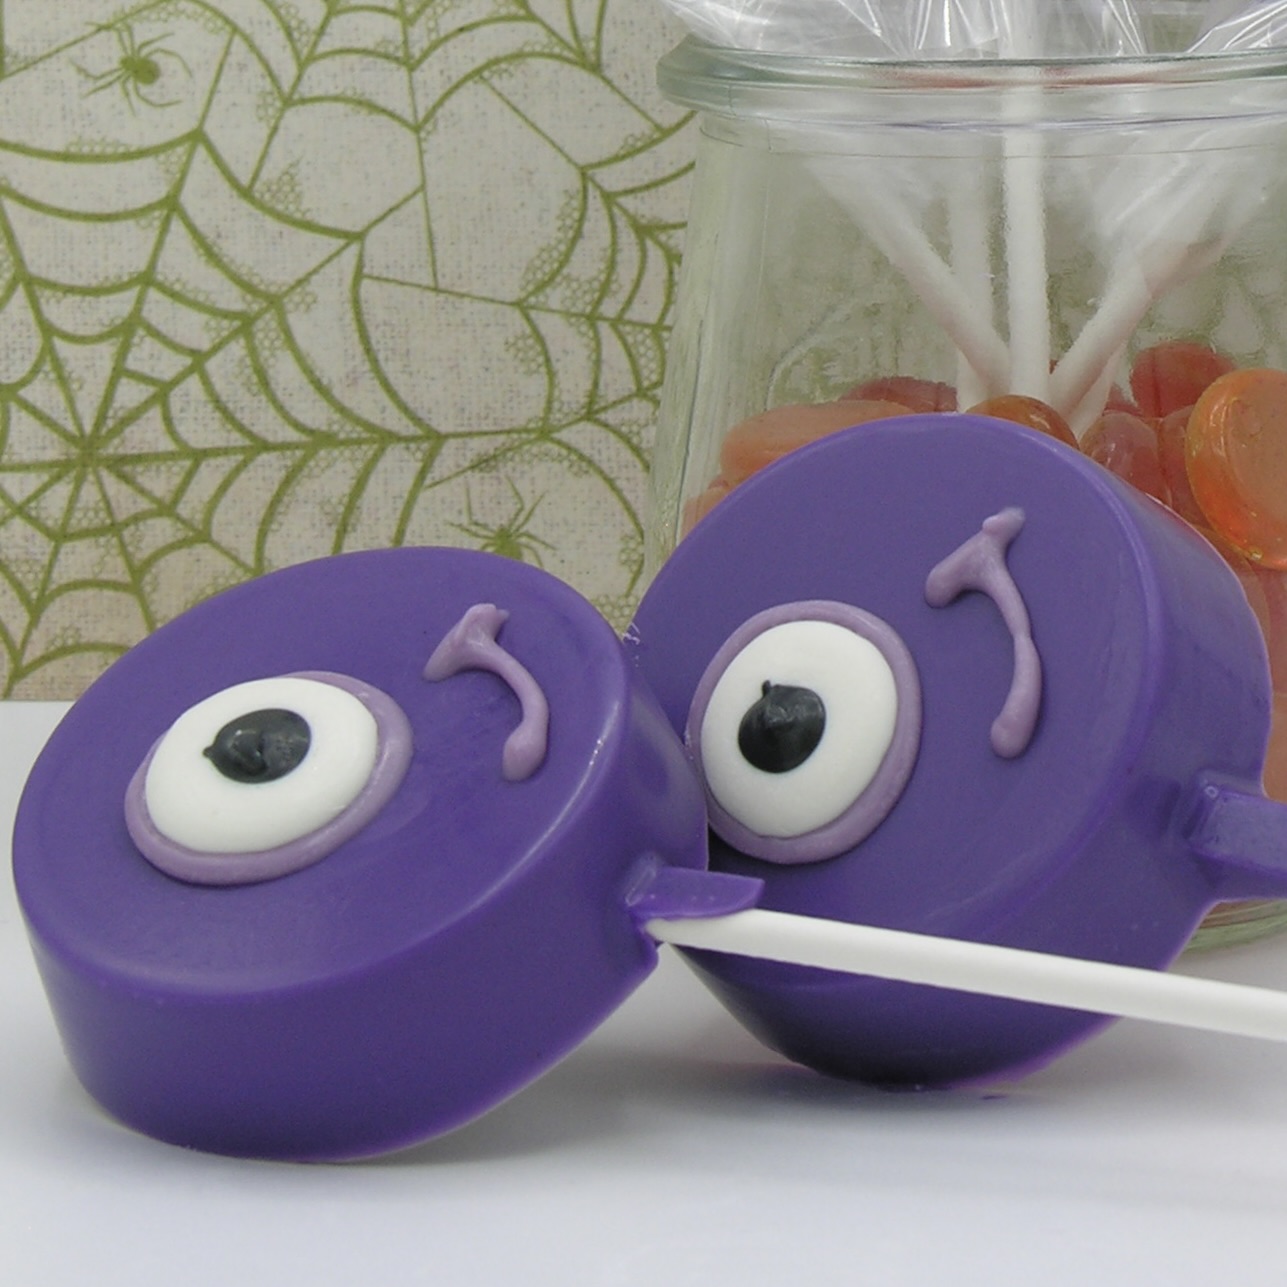
Usually, I dip my Oreo pops, but this time I used some Oreo Pop molds (got mine here), and I love how they turned out! If you don’t want to purchase molds, these would be just fine dipped as well (instructions here). You could also save some time on these by purchasing the large eyes, but I wanted to save a little on the cost (and I already had both white and black candy melts).

Want to know how to make these fun little monsters??? Here we go! (Printable recipe here)

INGREDIENTS:

DIRECTIONS:

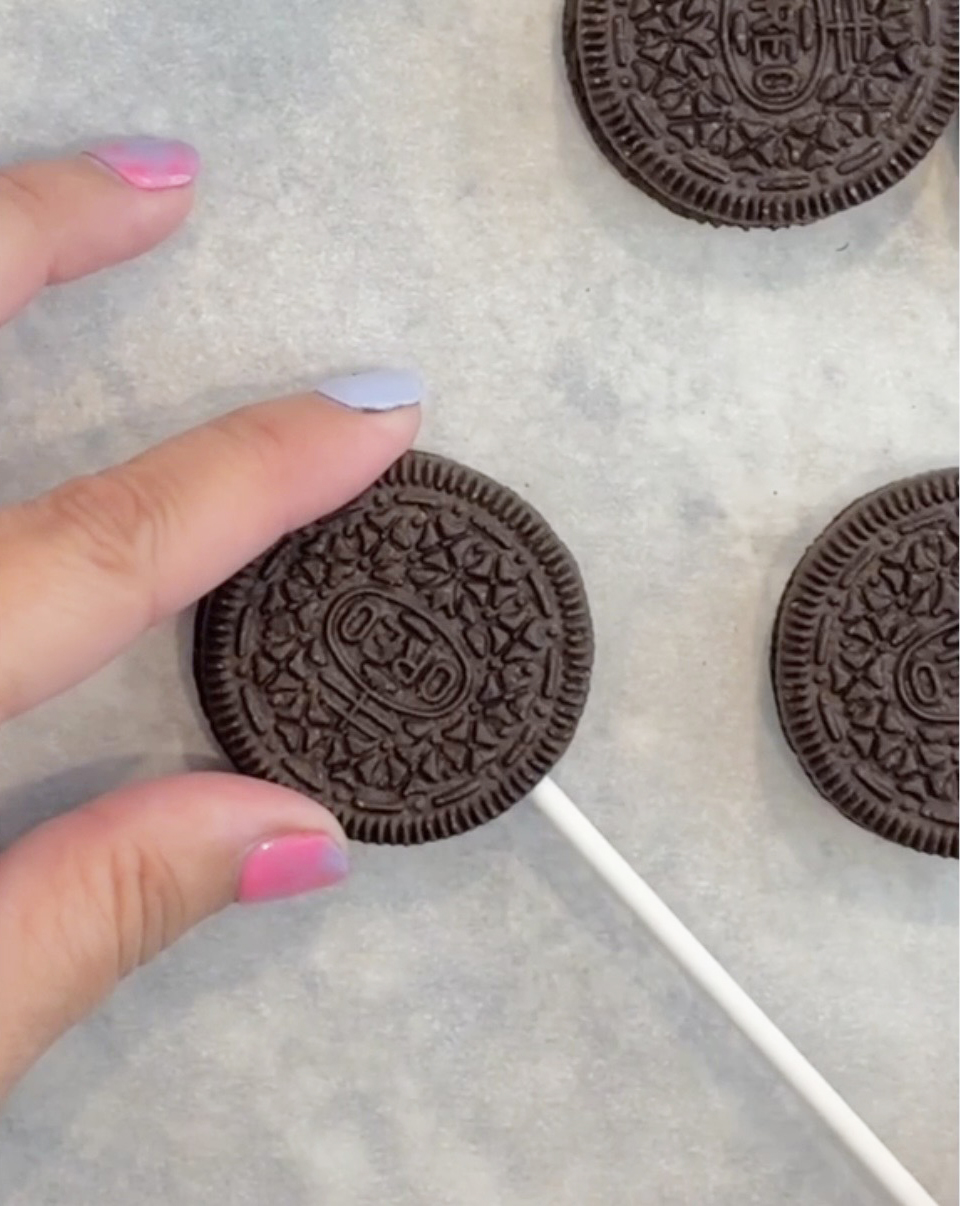
  • Slide a lollipop stick into each Oreo, making sure it doesn’t come out of the top.
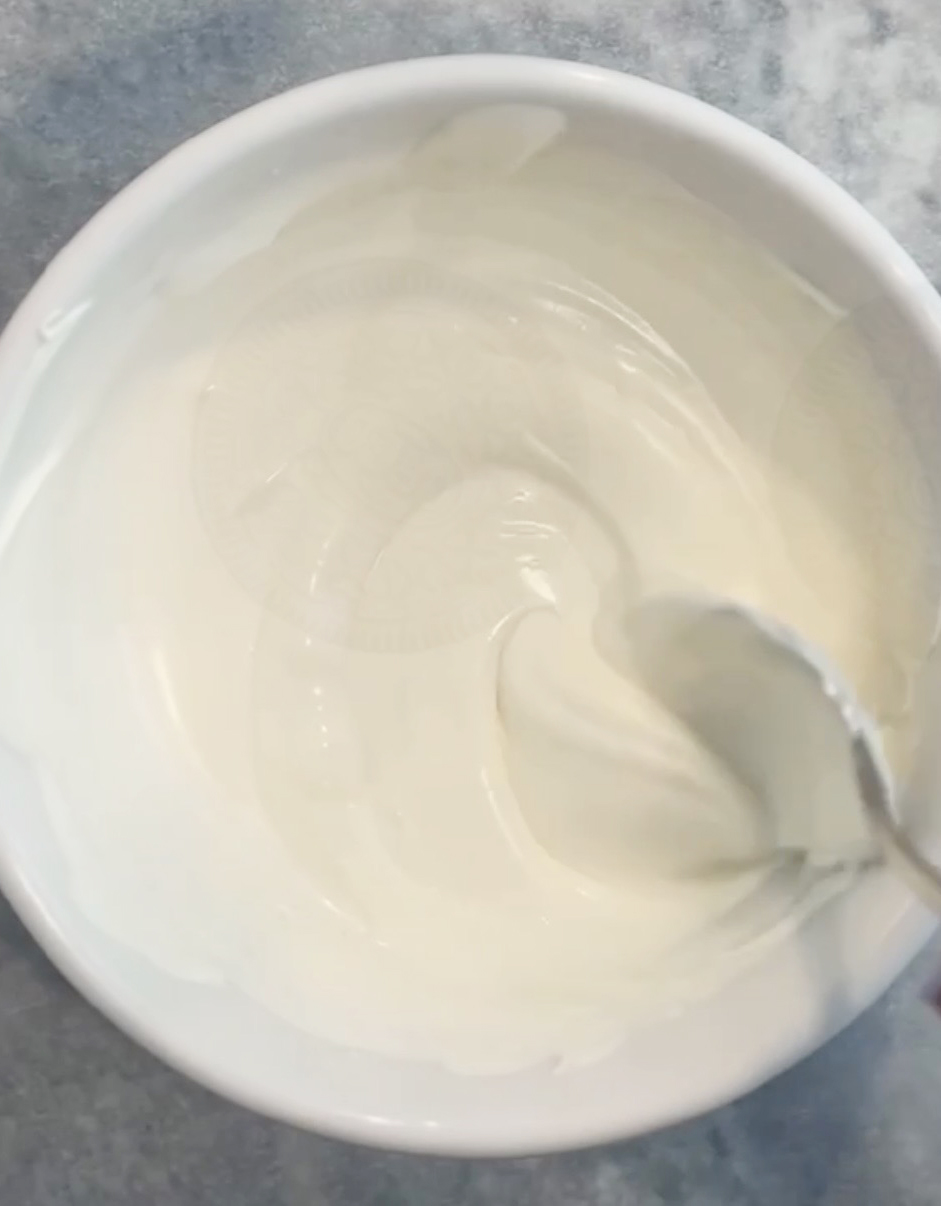
  • Melt purple candy melts in the microwave in 30 second increments, stirring in between, until melted and smooth.
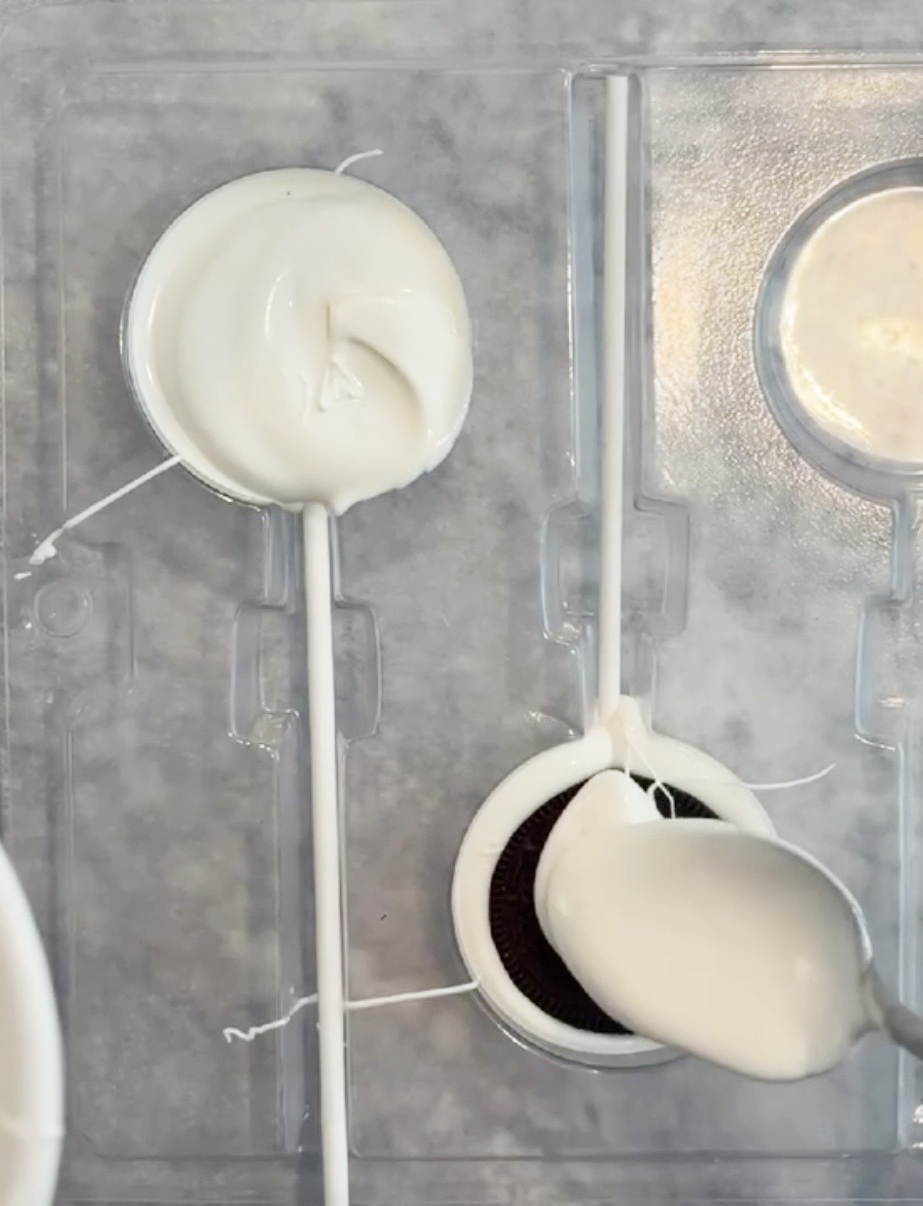
  • Spoon about 1 tablespoon of melts into each mold cavity
  • Press an Oreo into each cavity, allowing melts to rise up along sides.
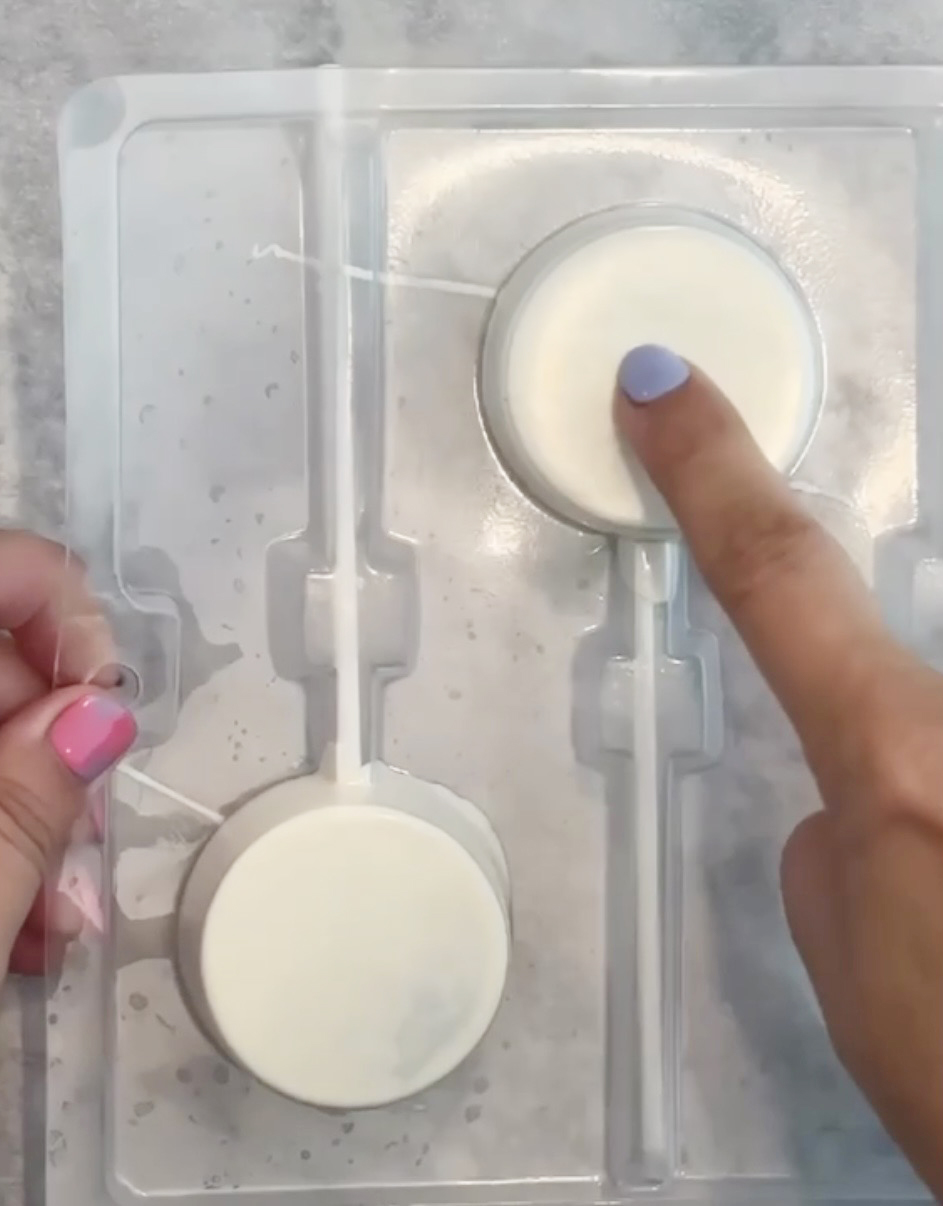
  • Spoon a little more of the candy melts on top, and tap on counter to get bubbles out and fill in along the sides. Note: if you have these clear molds, you can lift them up and check for any areas that might have bubbles or where the melts aren’t covering the Oreo, and use a toothpick to poke those out and allow the candy melts to fill in.
  • Allow candy melts to harden. I put these on a small cookie sheet and freeze them for about 5 minutes to speed up the process.
  • Turn the mold over and tap to release the covered Oreo.
  • For the eyes (if you do not purchase them), put some melted white candy melts into a zip-top bag and clip a corner.
  • Put some melted black candy melts into a bag as well, and clip a smaller corner.
  • On parchment or wax paper, squeeze the white candy melts out into a 3/4″ to 1″ circle.
  • Use the black candy melts to squeeze a pupil in the center of the white to create a big eyeball.
  • Allow your eyes to harden up.
  • Mix a little white into any leftover purple candy melts you have, to make lavender. Put this lighter purple into a zip-top bag and clip a corner.
  • Squeeze some lavender melts onto the top-middle of the Oreo pop and press an eye on top until the lighter purple squeezes out around the edges.
  • Pipe a little half-smile under the eye.
  • Allow everything to harden up.
  • Tie these up in cute little bags (I LOVE these ones because they fit a covered Oreo perfectly and leave room to tie a ribbon under it!) to make them last longer (they will last 4-6 weeks in tied bags) and ENJOY!!

My thoughts: These turned out exactly as I pictured them in my mind, and I love that they aren’t scary 🙂 Be creative with yours- maybe you need three eyes or a different color? However you decide to make them, I hope you enjoy the process and the results! ~r

Other monster-y recipes you might enjoy:

Gum Ball Machine Oreo Pops

Posted on

These fun little gum ball machines aren’t filled with gum balls, but with a yummy Oreo! Easy to make, these little treats are sure to bring smiles!

It’s no secret that we love to try new versions of Oreo Pops around here. In fact, the very first time I tried making cake pops (an utter, embarrassing failure), I had the thought… maybe I could put a cookie- like an Oreo- on a stick and dip it in chocolate instead! I searched the internet for an example of this and couldn’t find anyone else who’d tried it. Does this mean I invented the Oreo Pop? Maybe. Or I did a bad job on Google searching them! 🙂 In any case, from that day in 2012 on, we have turned all sorts of things into Oreo Pops! The sprinkles were the inspiration for these. Every time I used them, they reminded me of little gum balls! The basics of how to create an Oreo Pop live on in my original recipe. The only thing I have changed is a little freezer time to harden the stick in place before dipping.

Let’s make these! (printable recipe is found here)

INGREDIENTS:

  • One package of Double Stuf Oreos
  • 2 (12oz.) bags of Wilton White Candy Melts
  • 24 Lollipop sticks  (I like the 6-8 inch ones)
  • Small, round sprinkles (for the gum balls)
  • Silver dragees (for top knob)
  • White heart sprinkles (Or you could use squares too- for the coin slot)
  • Dots Candy (for the stand)

DIRECTIONS: (to see pictures, refer to my original “how-to” post here)

  • Carefully twist apart all of the Oreo cookies.
  • Using one of the pop sticks, make an indentation in the white filling of each cookie.
  • On the rest of the sticks, slide one red Dots candy about an inch down the stick. Yes, it is sticky, and leaves a trail of red on the stick, but this part will go inside the Oreo.
  • Melt the Candy Melts in the microwave in 30 second increments, stirring until completely melted and smooth.
  • Dip the end of one stick into the melted white chocolate, drizzle a little in the center of the white cookie filling and then gently press it into the indentation made, making sure that the Dots Candy is right up against the bottom of the cookie.
  • Place the top of the cookie back on and allow white chocolate to harden (5 minutes or so), cementing the cookie back together with a stick inside. (I like to place all the cookies on a small baking sheet and set them in the freezer for a few minutes to really firm them up before dipping)
  • Holding the stick, lower the entire Oreo into the bowl of melted white chocolate, spooning it over the top and sides to cover it completely, but being careful to not get too much on the Dots Candy.
  • Allow the excess chocolate to drain off, and slide the bottom of the cookie against the lip of the bowl to remove excess. Then, gently place the covered Oreo on a piece of parchment paper to harden.  
  • Immediately (before the candy melts harden!), sprinkle the gum ball sprinkles on the bottom half of the Oreo pop, and set a dragee on the top.
  • Allow the pops to harden completely.
  • Use a little bit of the melted white candy melts to “glue” the heart sprinkle on the front of the Dots candy. Allow this to harden as well.
  • Eat and enjoy!!!

My thoughts: I love these little cuties! They make me smile. How fun would a mason jar of these be at a Birthday party?!? You can easily put a cello bag over each pop and tie them with a ribbon to share! I really hope you try these and enjoy them! ~r

Want to try some of our other Oreo Pops? We have a whopping TWENTY FOUR varieties on the blog- plus a couple of cute not-on-a-stick Oreo creations (scroll here to see them all)- but here are just four of my favorites (click on photo to see recipe):

Reindeer Oreo Pops!

Posted on

Reindeer Oreo Pops!!!
These chocolate covered Oreos are so full of holiday cheer!  Wrap them in little cello bags for a quick and fun Holiday gift!

I confess.  I am addicted to making Oreo pops.  I can’t stop.  They are so easy and fun.  They give me an excuse to buy a package of my favorite cookies.  They make people smile.

Original Oreo pops!!!!!Mummy Oreo Pops!Snowman Oreo PopsLadybug Oreo Pops!

I have the art of “stick-placing” and “dipping” Oreos to coat them in chocolate down.

Click here for a printable sheet that takes you through the basic process step by step.

INGREDIENTS:

  • 1 package of Double Stuff Oreos
  • 2 bags (12oz each) of milk chocolate candy melts (I use Wilton’s)
  • 24 lollipop sticks
  • 1 small bag of mini-pretzels
  • Candy eyes
  • Mini M&Ms

DIRECTIONS:

  • Gently twist apart Oreos.  Some will break.  No stress.  Eat them.
  • Break apart pretzels by using a sharp knife to carefully cut them top to bottom through the center.  Then cut the round tops off, leaving a “Y” shape.
  • Put eyes and red mini M&Ms into small bowls, ready to use.
  • Place candy melts into a bowl.
  • Melt candy melts in the microwave in 30 second increments, stirring between, until completely melted and smooth.
  • Press a lollipop stick into white filling, making an indentation.
  • Dip stick into melted chocolate and spread chocolate on top of white filling.
  • Place stick into indentation and set top of cookie back on, cementing the cookie back together around the stick.
  • Allow chocolate to harden.  If you set cookies on a large plate as you put them together, you can place the entire plate into the fridge to speed the hardening process up.
  • Once hardened, pick the cookie up using the lollipop stick and set into melted chocolate.
  • Spoon melted chocolate over the Oreo to coat it.
  • Gently tap the stick on the bowl’s edge to allow excess chocolate to drip off.
  • Slide bottom of cookie along edge of bowl to remove excess chocolate.
  • Set cookie on parchment or waxed paper.
  • Put pretzel “antlers” into the top of the Oreo, and set two eyes and a nose on the front of the Oreo.
  • Allow chocolate to harden completely.
  • Serve as-is, or tie up in cello treat bags to give as gifts!

Reindeer Oreo Pops!!!
My thoughts:  What to do you get when you combine an Oreo with melted chocolate and salty pretzels?  Deliciousness!!!!!!  Use them as place settings on each plate for Christmas! Make reindeer, snowmen and red/green sprinkle Oreo pops and create a bouquet of pops in a cute Christmas planter for your Christmas celebration!  Use them as stocking stuffers or teacher gifts….the possibilities are endlessly fun!  Enjoy!  ~r


Reindeer Oreo Pops

Oreo Pops~ a recipe revisited!

Posted on

RR HeaderDay #4 of our celebration of past recipes.  This week is going fast!  Today’s recipe is the 4th most viewed recipe on the Easybaked site.  It has had nearly 60,000 visits since it was published in February of 2012.  Can you guess what it is????

Oreo pops - a revisited recipe!These little treats are a favorite of mine.  They have been remade as mummies and snowmen already- the decorating possibilities are just endless!

These have been the star attraction at birthdays, showers, picnics, retirement parties, and even as favors at weddings.  They have been decorated in flowers and butterflies and school colors and even with Barney the Dinosaur!  The end of July they will be featured in Women’s World Magazine (so be on the look-out and grab a copy!).

For the Fourth of July holiday I simply dipped them in red white and blue and decorated with drizzles and sprinkles.  SO easy.  I tied these up in little favor bags and they are all set to travel to all of my upcoming holiday parties and picnics!  I just love things you can make ahead!

To see the original recipe and get directions for how to insert the stick and dip these, click here.

To print a copy of the recipe and directions, click here.

Patriotic Oreo Pops!!!

Patriotic Oreo Pops!!!

Patriotic Oreo Pops- yum!!!Don’t miss our very last recipe remake tomorrow morning~ you’re going to love it!!!

Want to know what our other most-visited recipes are?  Here’s what’s at the top of the list:

Strawberry-Lemonade Layer CakeFrozen S'mores CupsRaspberry Confetti KissesSalted Caramel Cookie Cups (2)

Mummy Oreo Pops for Halloween!!

Posted on

These make me smile– aren’t they cute?  I saw the idea on a regular cookie at Mel’s Kitchen Cafe (along with a really cute mummy hot dog idea!) and I immediately thought of my Oreo pops recipe from last spring and decided to turn some Oreos into mummies!  It was a little time consuming, but not difficult.  I think the results were worth the effort!  Here’s how we did it:

INGREDIENTS:

DIRECTIONS:

  • Carefully twist apart all of the Oreo cookies.
  • Using one of the pop sticks, make an indentation in the white filling of each cookie.
  • Melt the Candy Melts in the microwave in 30 second increments, stirring until completely melted and smooth.
  • Dip the end of one stick into the melted white chocolate, drizzle a little in the center of the white cookie filling and then gently press it into the indentation made.
  • Place the top of the cookie back on and allow white chocolate to harden (5 minutes or so), cementing the cookie back together with a stick inside.

(For a picture tutorial on this click here)

  • Before dipping the entire cookie, unwrap your fondant, split it in half and immediately place one half in an air-tight zip-top bag (you will only use half of the fondant).
  • Roll the remaining  fondant out with a rolling pin as directed on the box.  Using a sharp knife, cut strips (about as wide as an oreo) in the fondant and then cut narrow strips across (see photo)

  • Now it is time to dip your Oreo pops (you may need to put your candy melts back in the microwave for a few seconds to remelt them)
  • Holding the stick, lower the entire Oreo into the bowl of melted white chocolate, spooning it over the top and sides to cover it completely.
  • Allow the excess chocolate to drain off and gently place covered Oreo on a piece of parchment paper to harden. 
  • Immediately place two eyes on the front and gently lay strips of fondant back and forth across the cookie.  It took me a little bit to figure out a pattern that looked good and worked– copy mine if you want!!
  • Allow everything to harden and place in treat bags with ties.

My thoughts:  These are a little time-consuming, but if you enjoy the process  (I do!) and you have a free afternoon (I did!) these are just really fun to put together.  The smiles when people see them make all that work worthwhile!  Enjoy!  ~r

Other recipes you might enjoy (click on the image to see the recipe):

Easy Oreo Pops!

Chocolate-covered Oreos on a lollipop stick– perfect for any festive occasion!

INGREDIENTS:

DIRECTIONS:

  • Carefully twist apart all of the Oreo cookies.
  • Using one of the pop sticks, make an indentation in the white filling of each cookie.
  • Melt the Candy Melts in the microwave in 30 second increments, stirring until completely melted and smooth.
  • Dip the end of one stick into the melted white chocolate, drizzle a little in the center of the white cookie filling and then gently press it into the indentation made.
  • Place the top of the cookie back on and allow white chocolate to harden (5 minutes or so), cementing the cookie back together with a stick inside.

Here’s some pictures (worth a thousand words I hear!):

That last picture is intended to make you feel better about breaking a few cookies in the process.  I believe the Oreo package contains 30 cookies and I made 23 pops….7 “failures”.  The hardest part is simply twisting the cookies apart without the top cracking.  Just be gentle 🙂

DIRECTIONS (continued):

  • Holding the stick, lower the entire Oreo into the bowl of melted white chocolate, spooning it over the top and sides to cover it completely.
  • Allow the excess chocolate to drain off and gently place covered Oreo on a piece of parchment paper to harden.  
  • Top with confetti sprinkles immediately before the chocolate hardens.
  • Eat and enjoy!!!


My thoughts: I love Oreos so much that it hurts….and I am on a diet…and there were SEVEN broken cookies.  Sigh.  I just closed my eyes and *smelled* them…who knew Oreos smelled so good??!!  These pops were wrapped up in cute bags and given as Valentines treats– they are MUCH easier to dip than cake pops, which made me happy.  I hope you have a fun occasion coming up and get and chance to try these!   -r

4-28-12:  Just made these for a couple of bridal showers and put them into “bouquets”- SO fun and really easy.  Just make the pops, tie them up in little treat bags with tags (free pdf for the “i do” ones I used : Oreo Pop Leaf Tags) and poke them into floral foam in a cute container.