RSS Feed

Tag Archives: parchment paper

Halloween Cookie Swirls!

Posted on

Halloween Swirl Cookies!!!
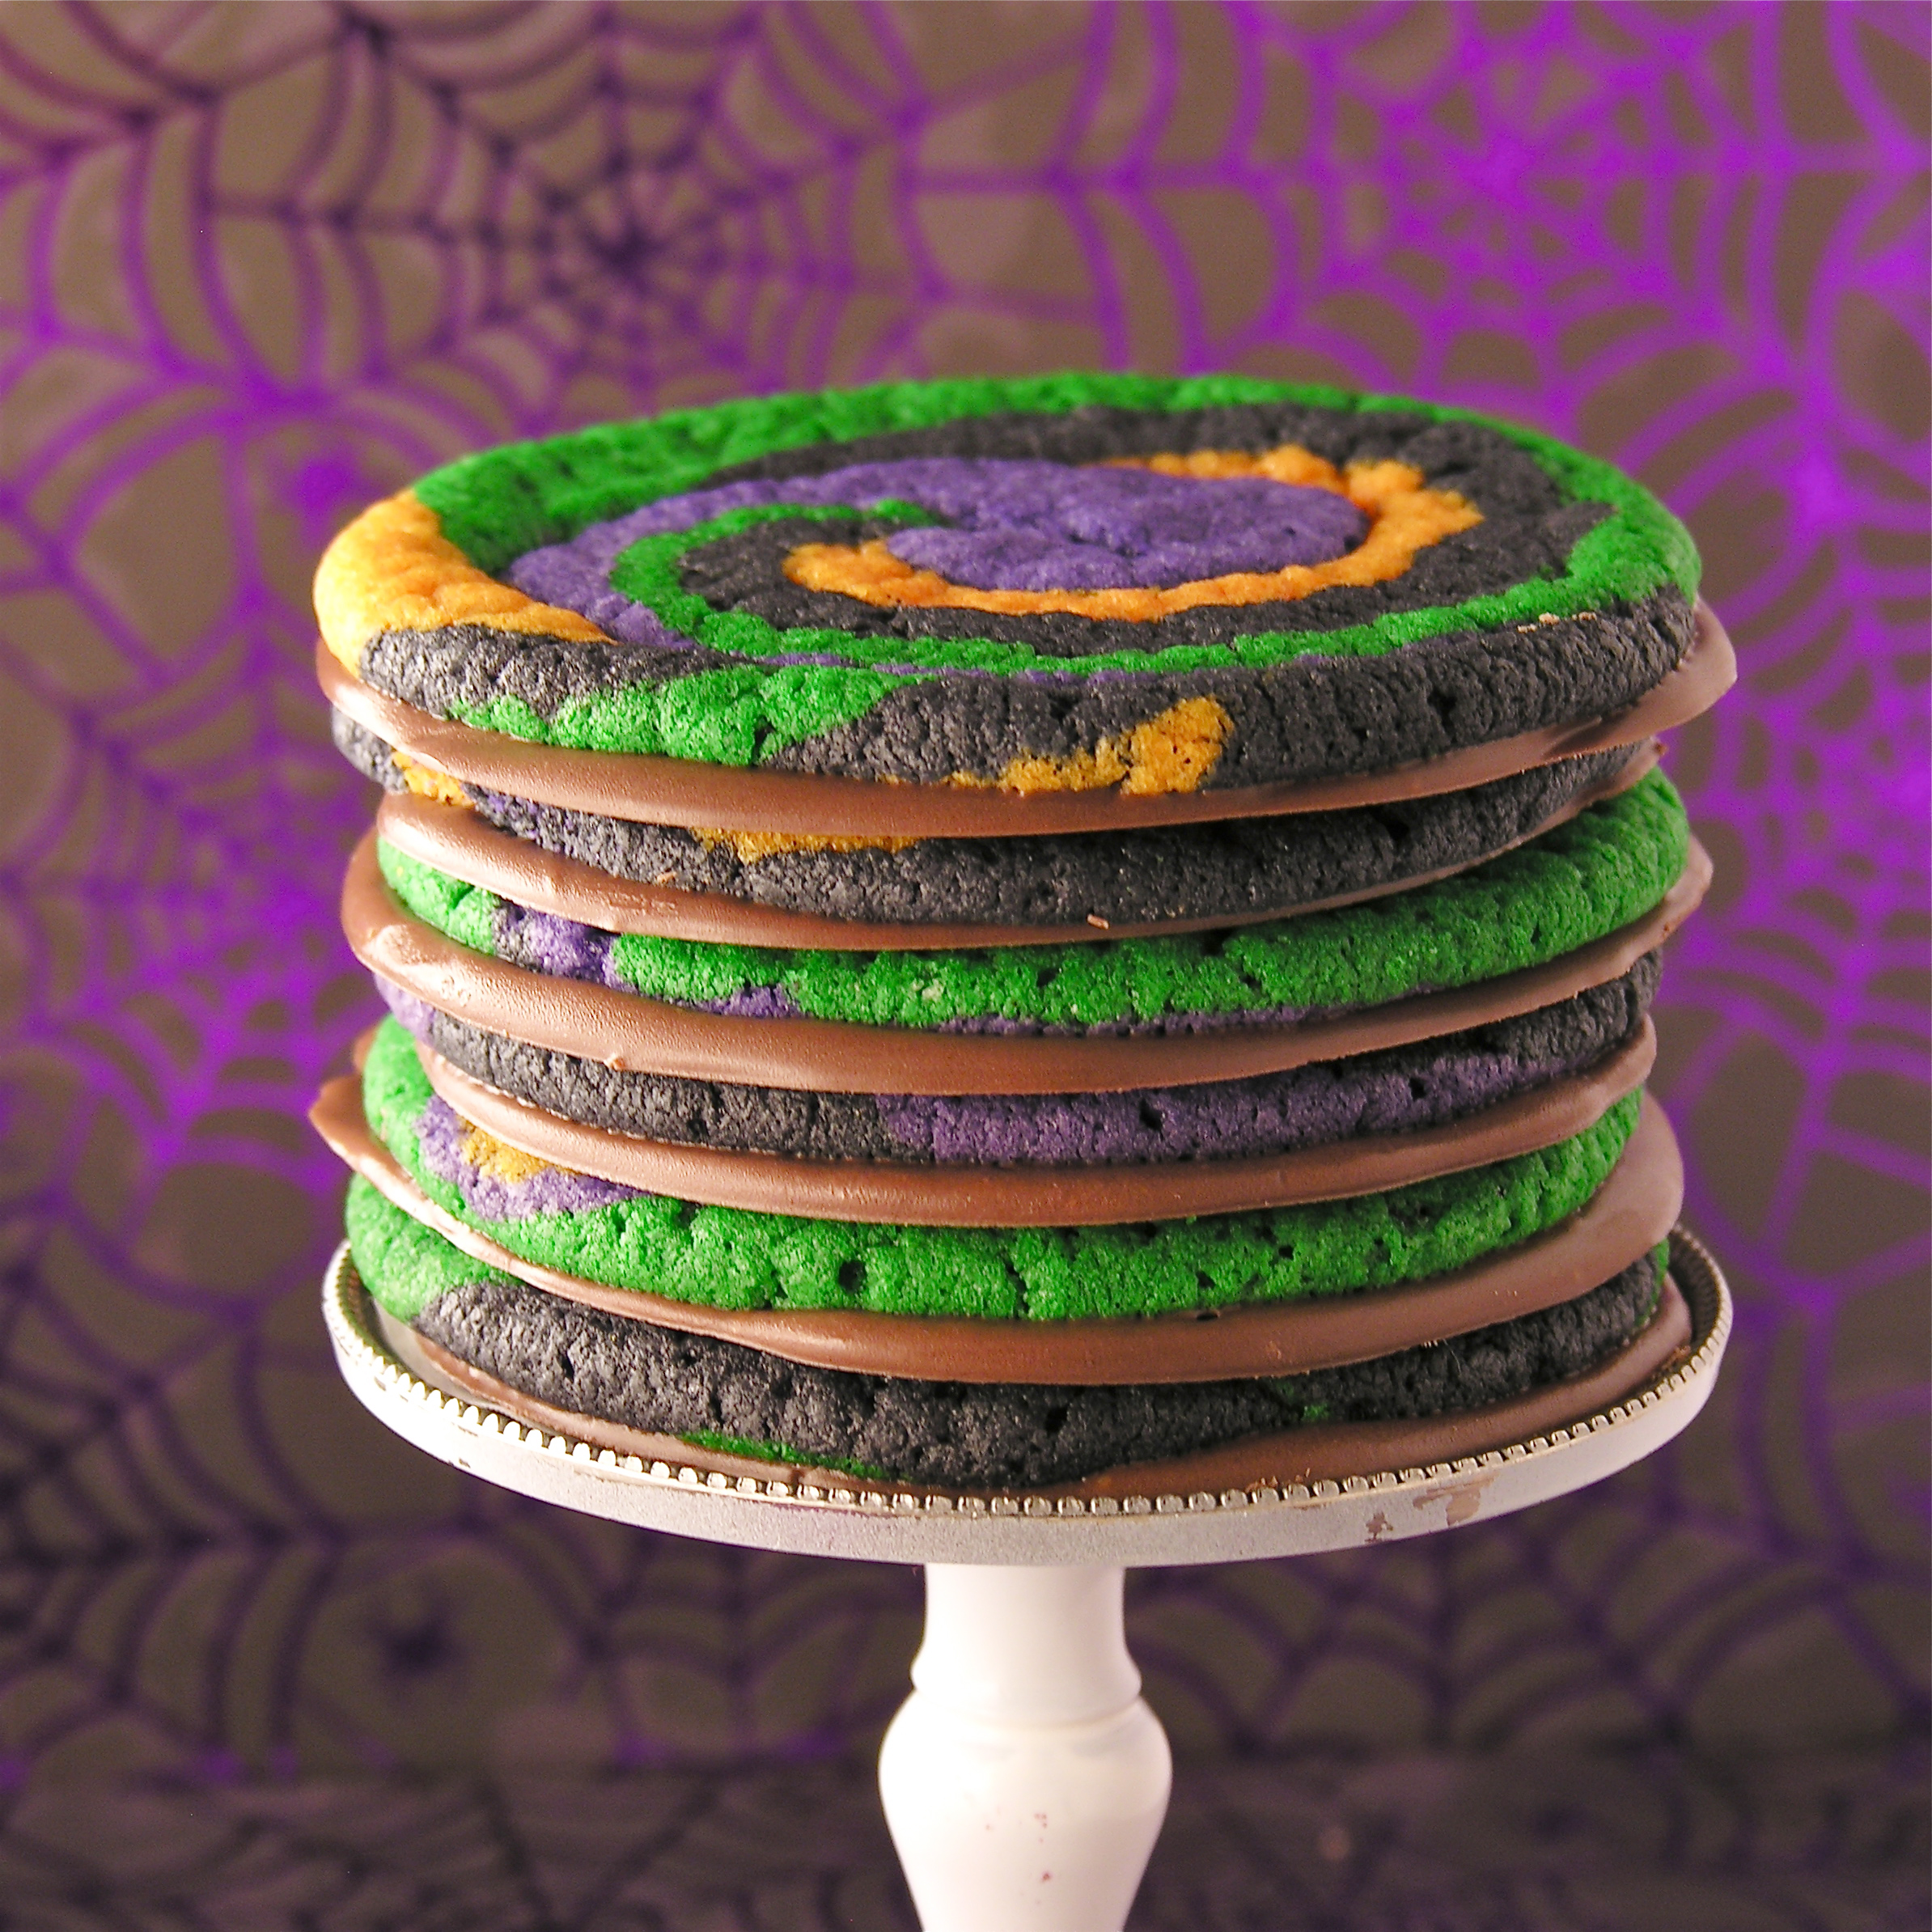
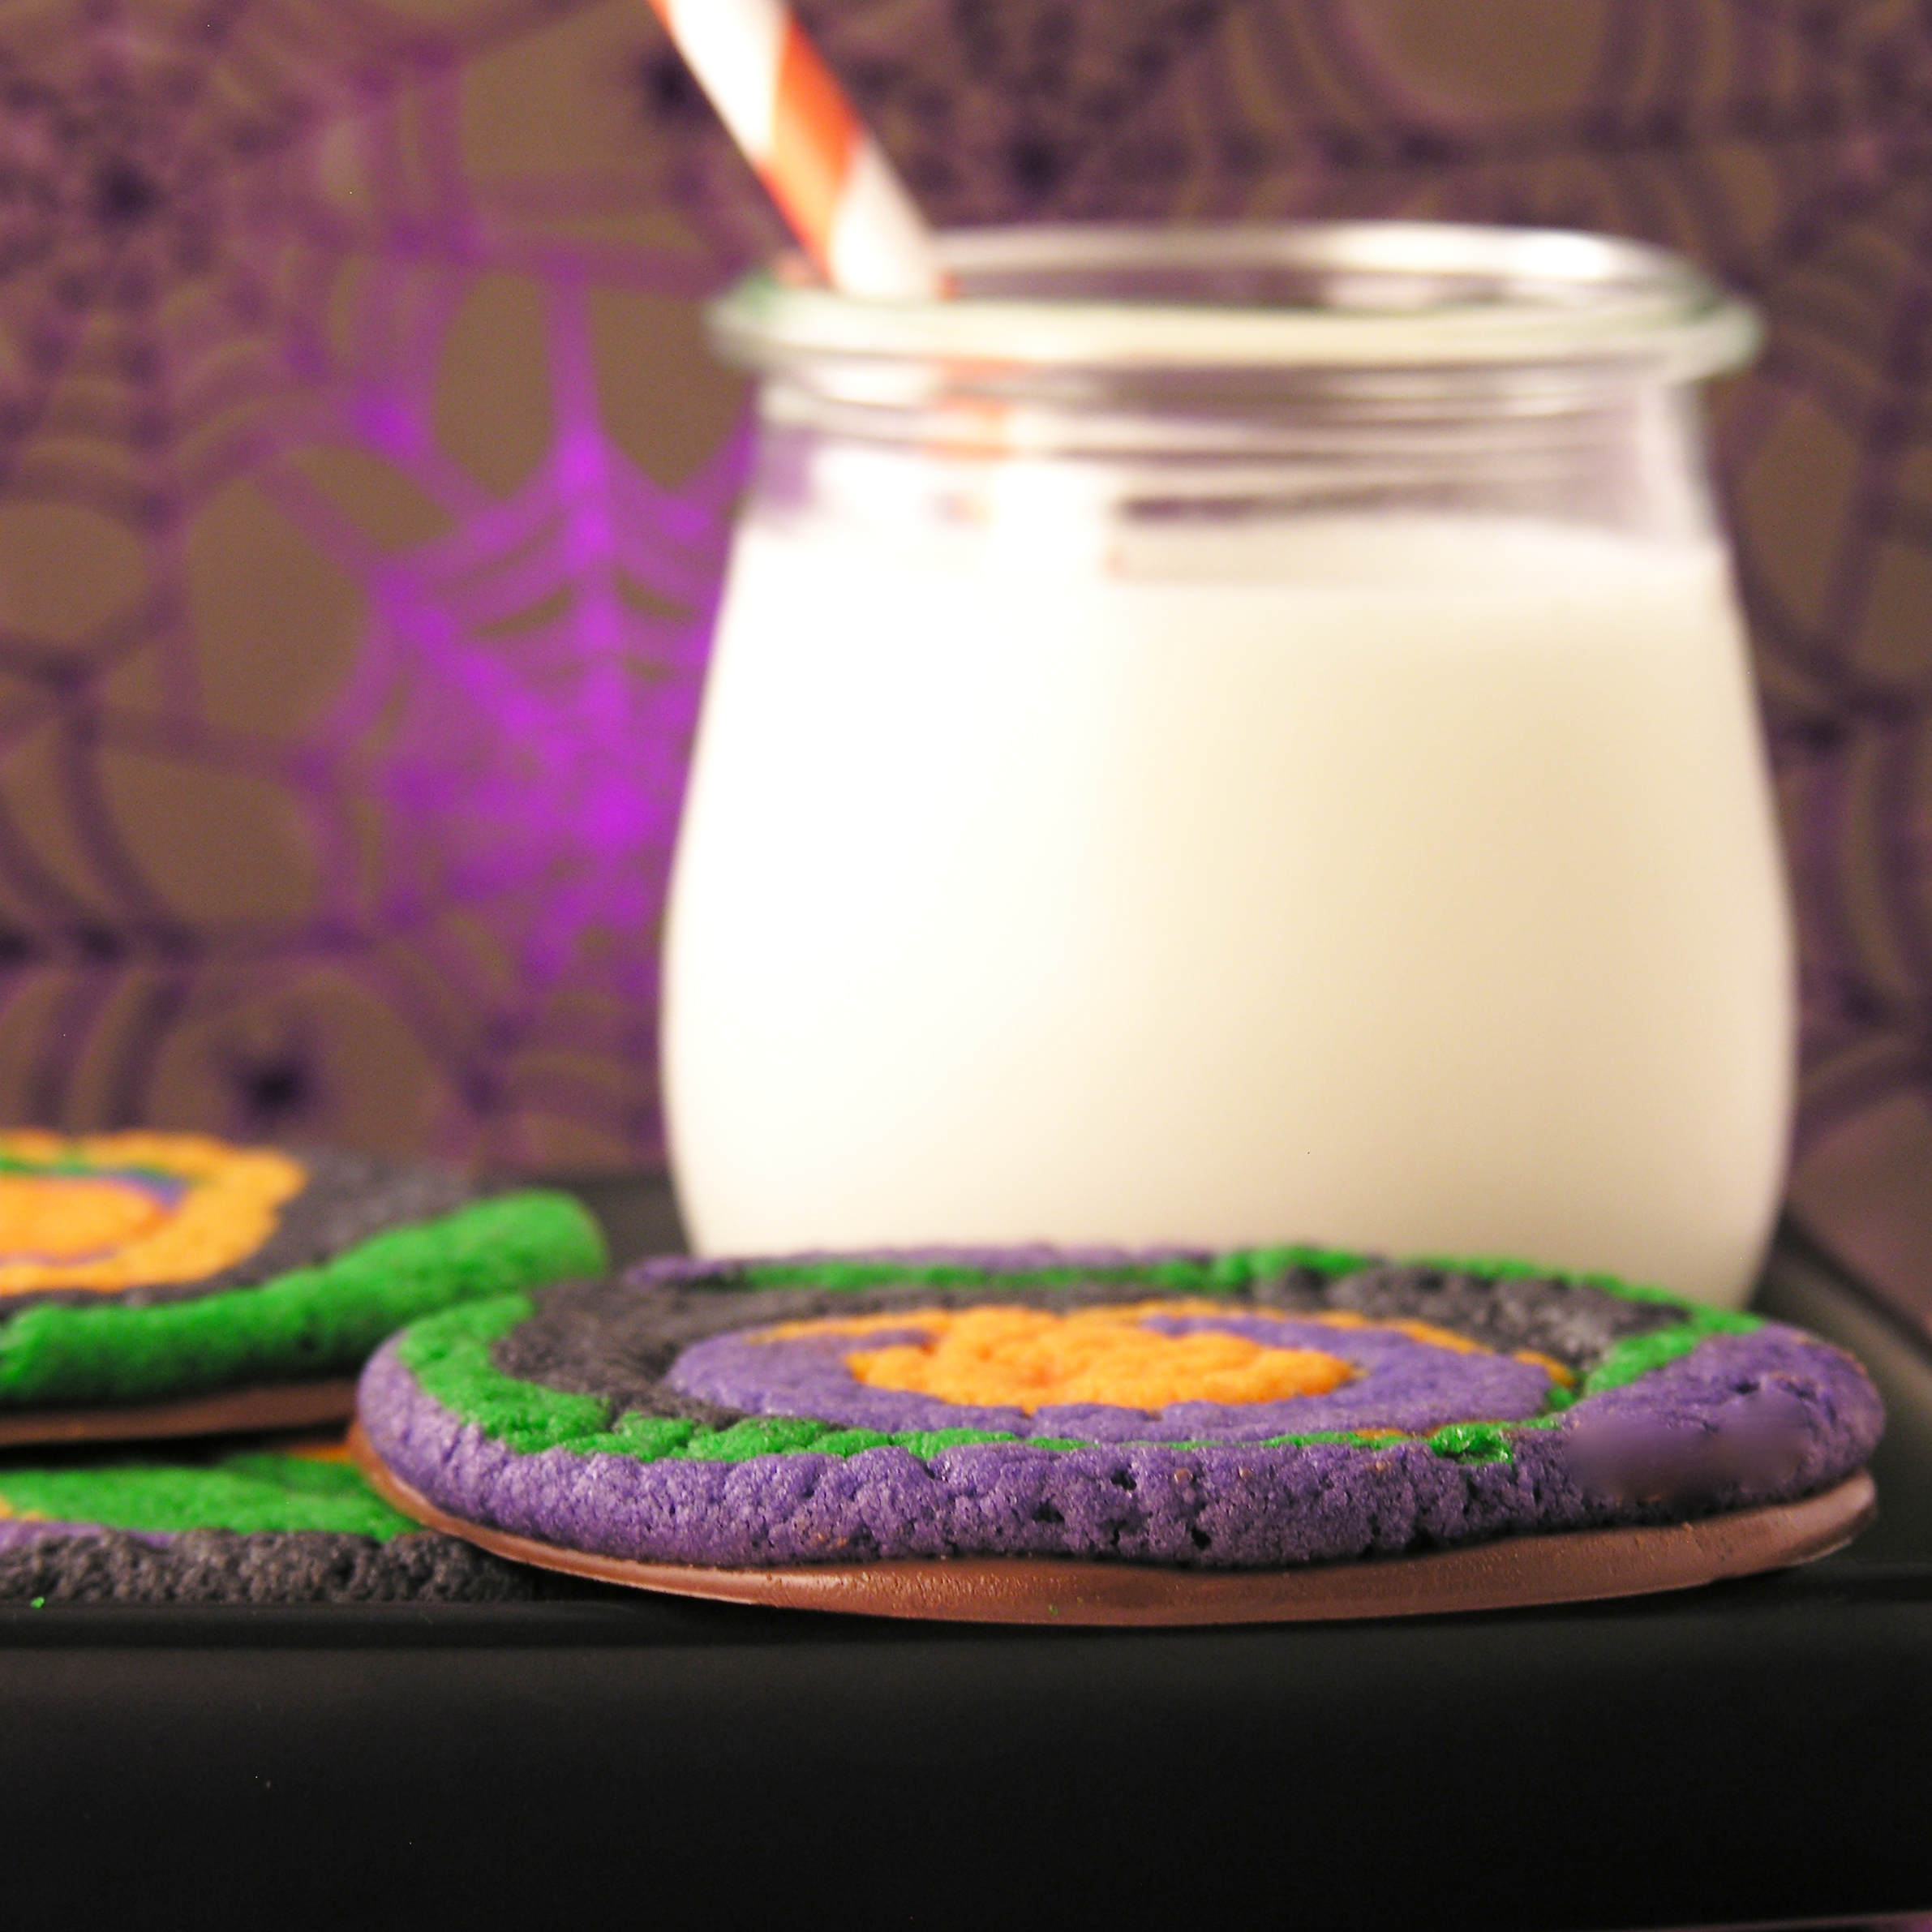
These festive, fun cookies are made with refrigerated cookie dough, and are SO easy!  A little chocolate on the bottom and you have not only cute cookies, but really yummy ones as well!!!!

I keep seeing these swirled cookies online and I decided I simply had to try them in halloween colors this year.  They were a little time consuming, simply because you need to color your cookie dough and then blend the colors together.  Not hard at all– but set aside a little prep time.

Want to see how to put these together?  Here’s the recipe: (printable version)

INGREDIENTS:

  • 1 tube refrigerated cookie dough (I used Pillsbury)
  • Gel food coloring in the colors you desire
  • 1 bag of Wiltons dark chocolate candy melts.

DIRECTIONS:

  • Divide cookie dough into 4 equal parts and color each part using food color gels. (I recommend wearing food-prep gloves to save your hands from being colored along with the dough!   Also, start with the lightest color 1st)
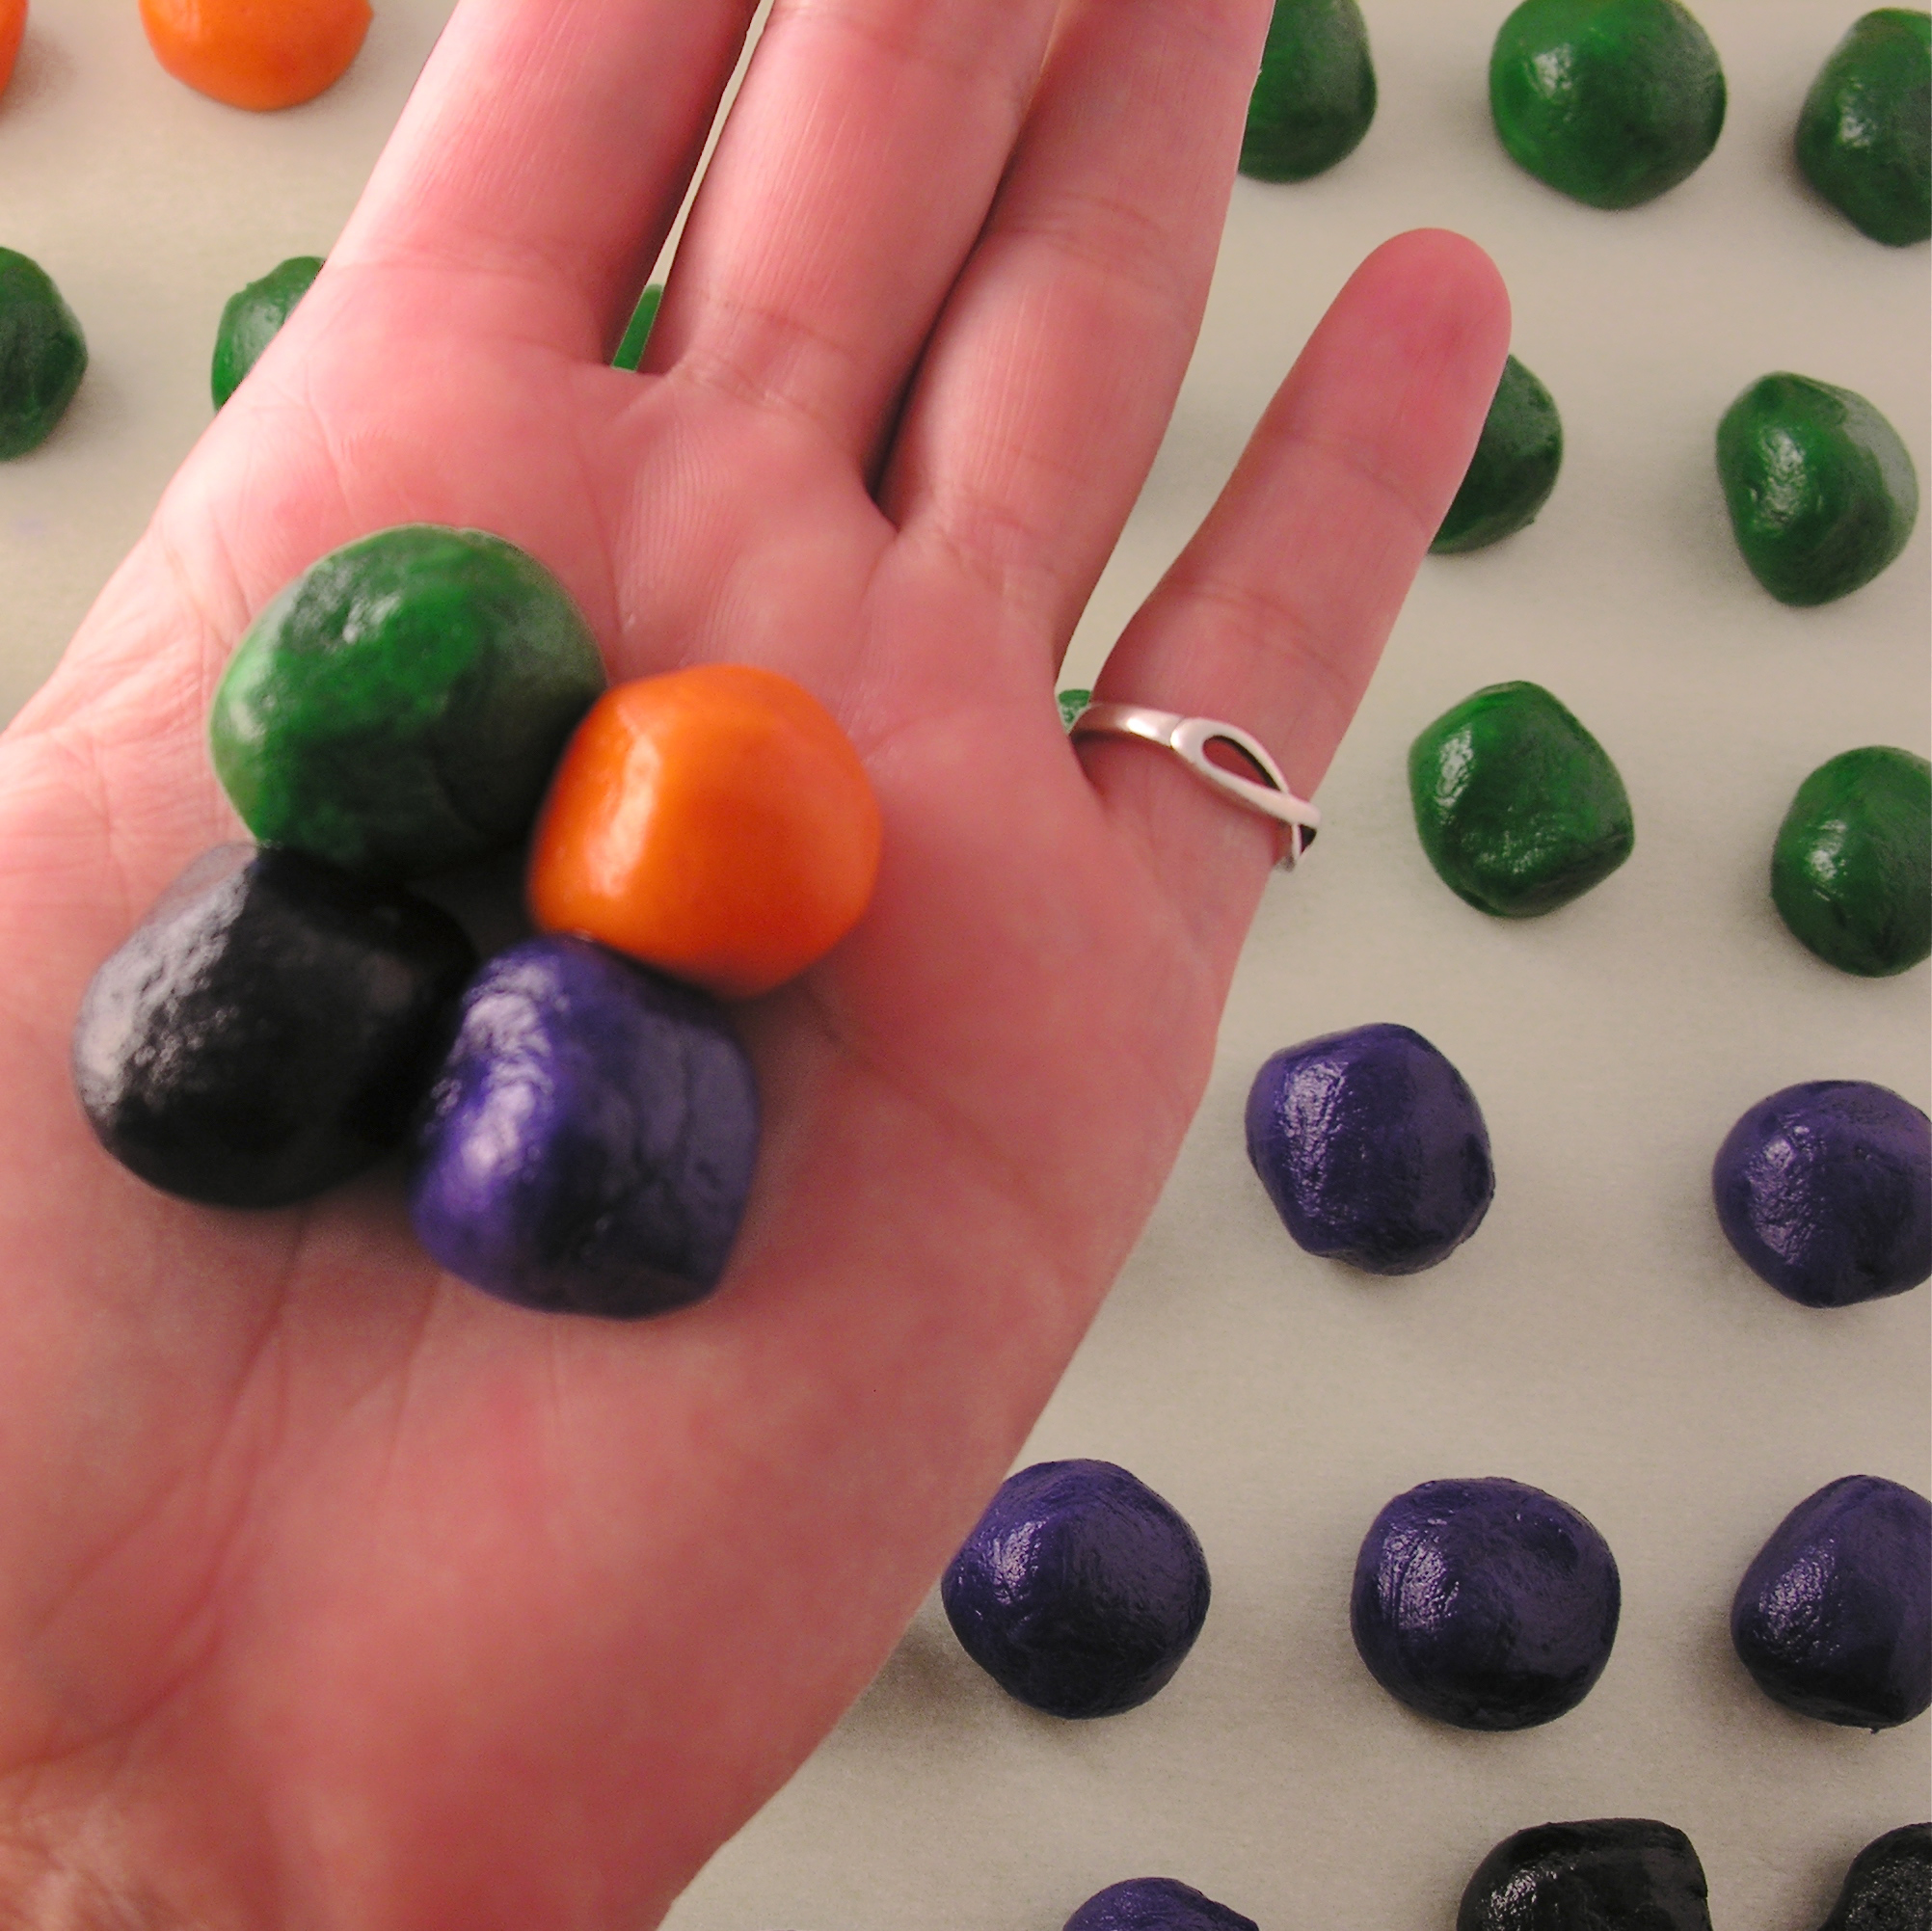
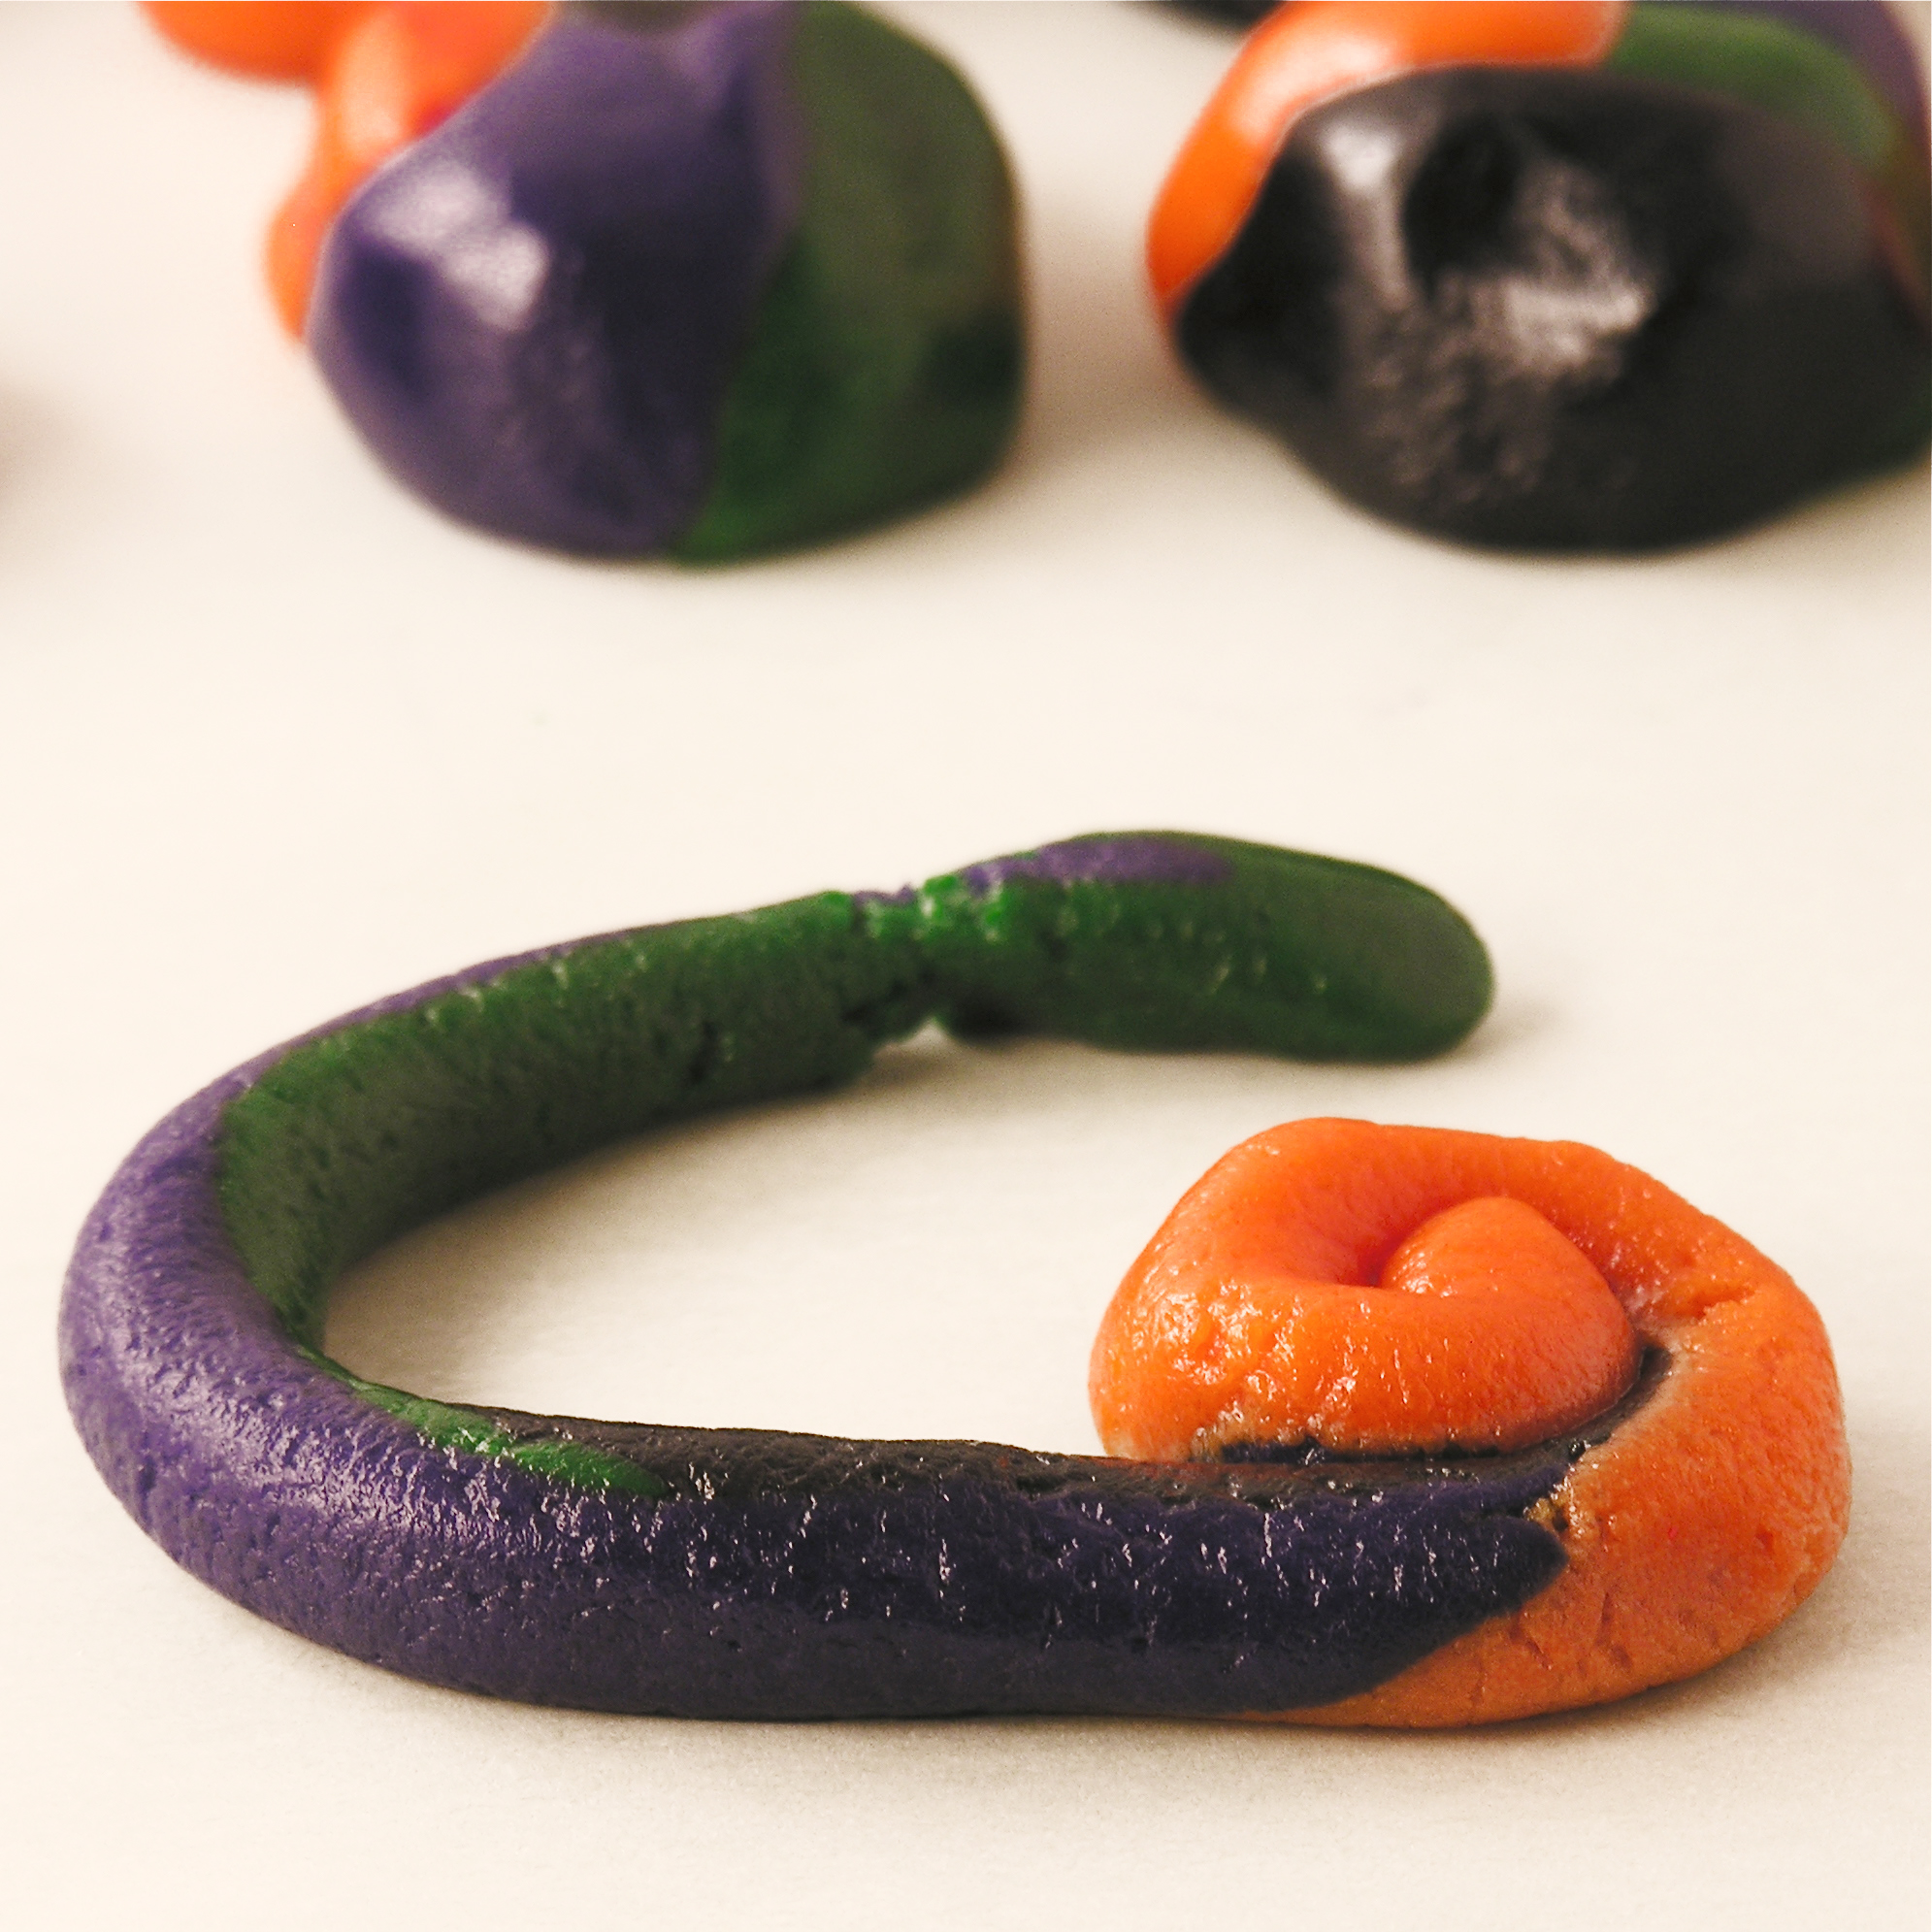
  • Starting with the lightest color, divide each part of dough into small balls (about the size of a small grape)
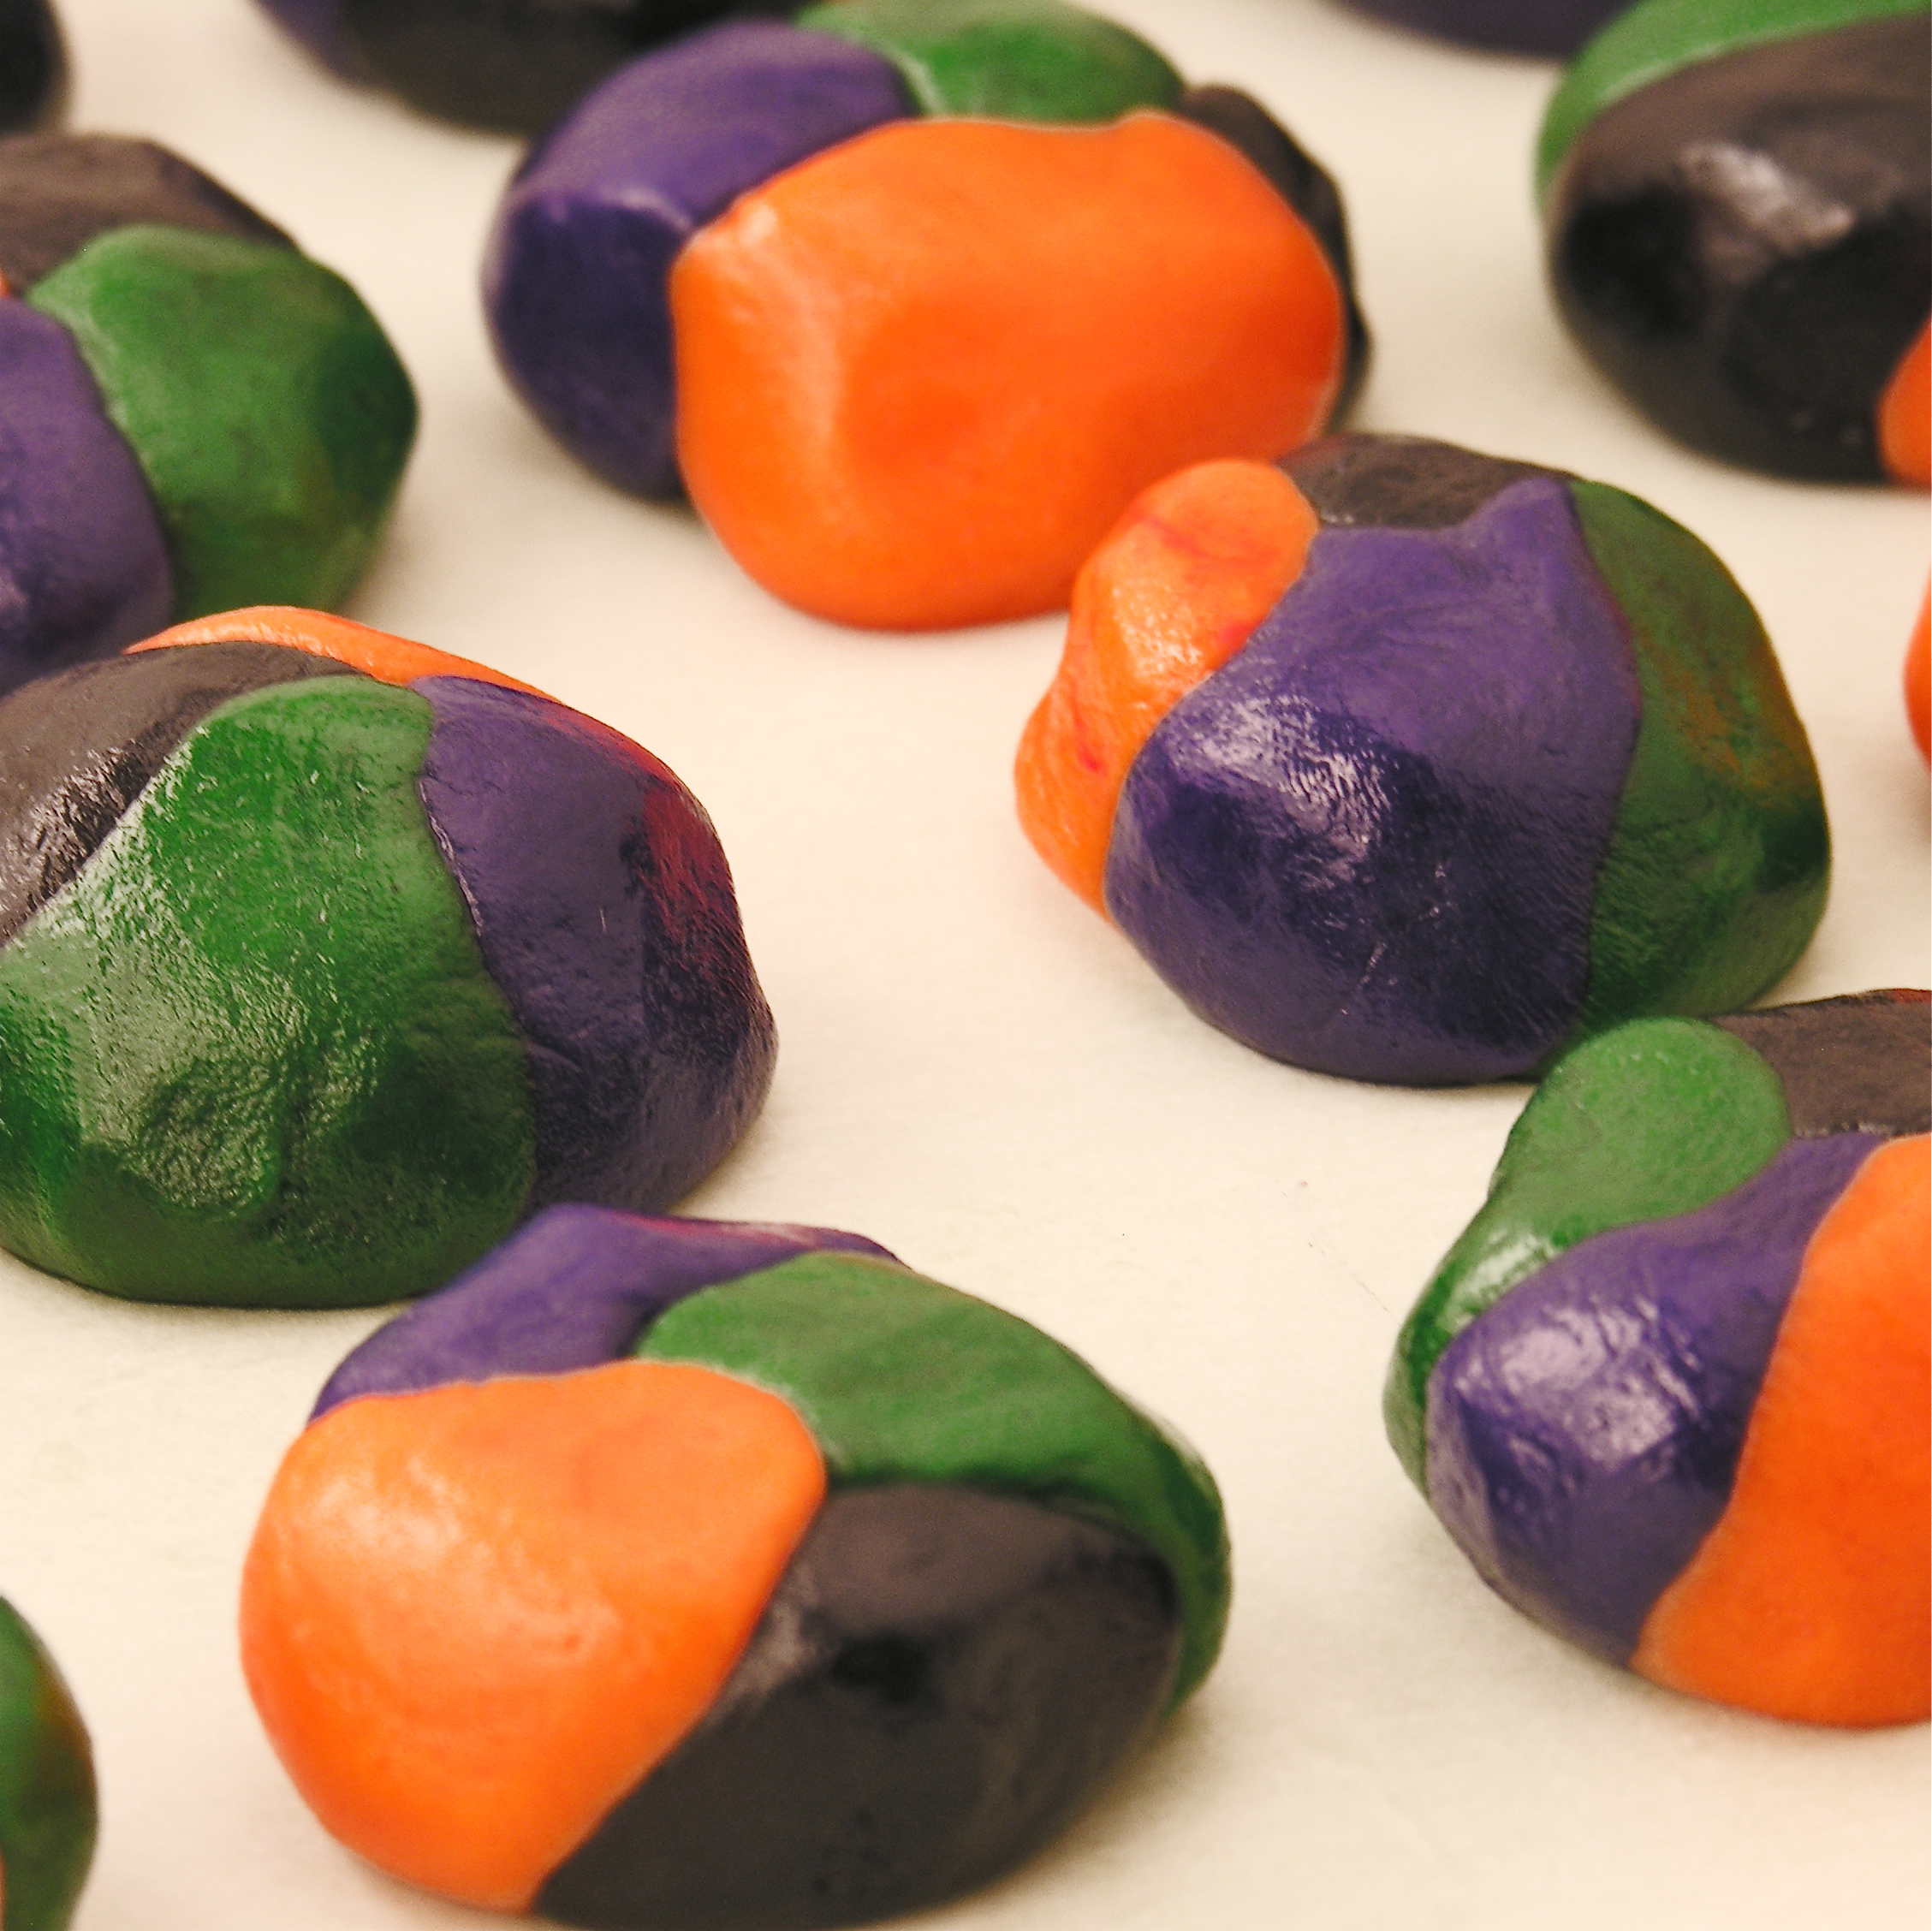
  • Take one ball of each color in your hand, and gently squeeze it into a 4-color ball.

Halloween Cookies How-to2Halloween Cookies How-to3

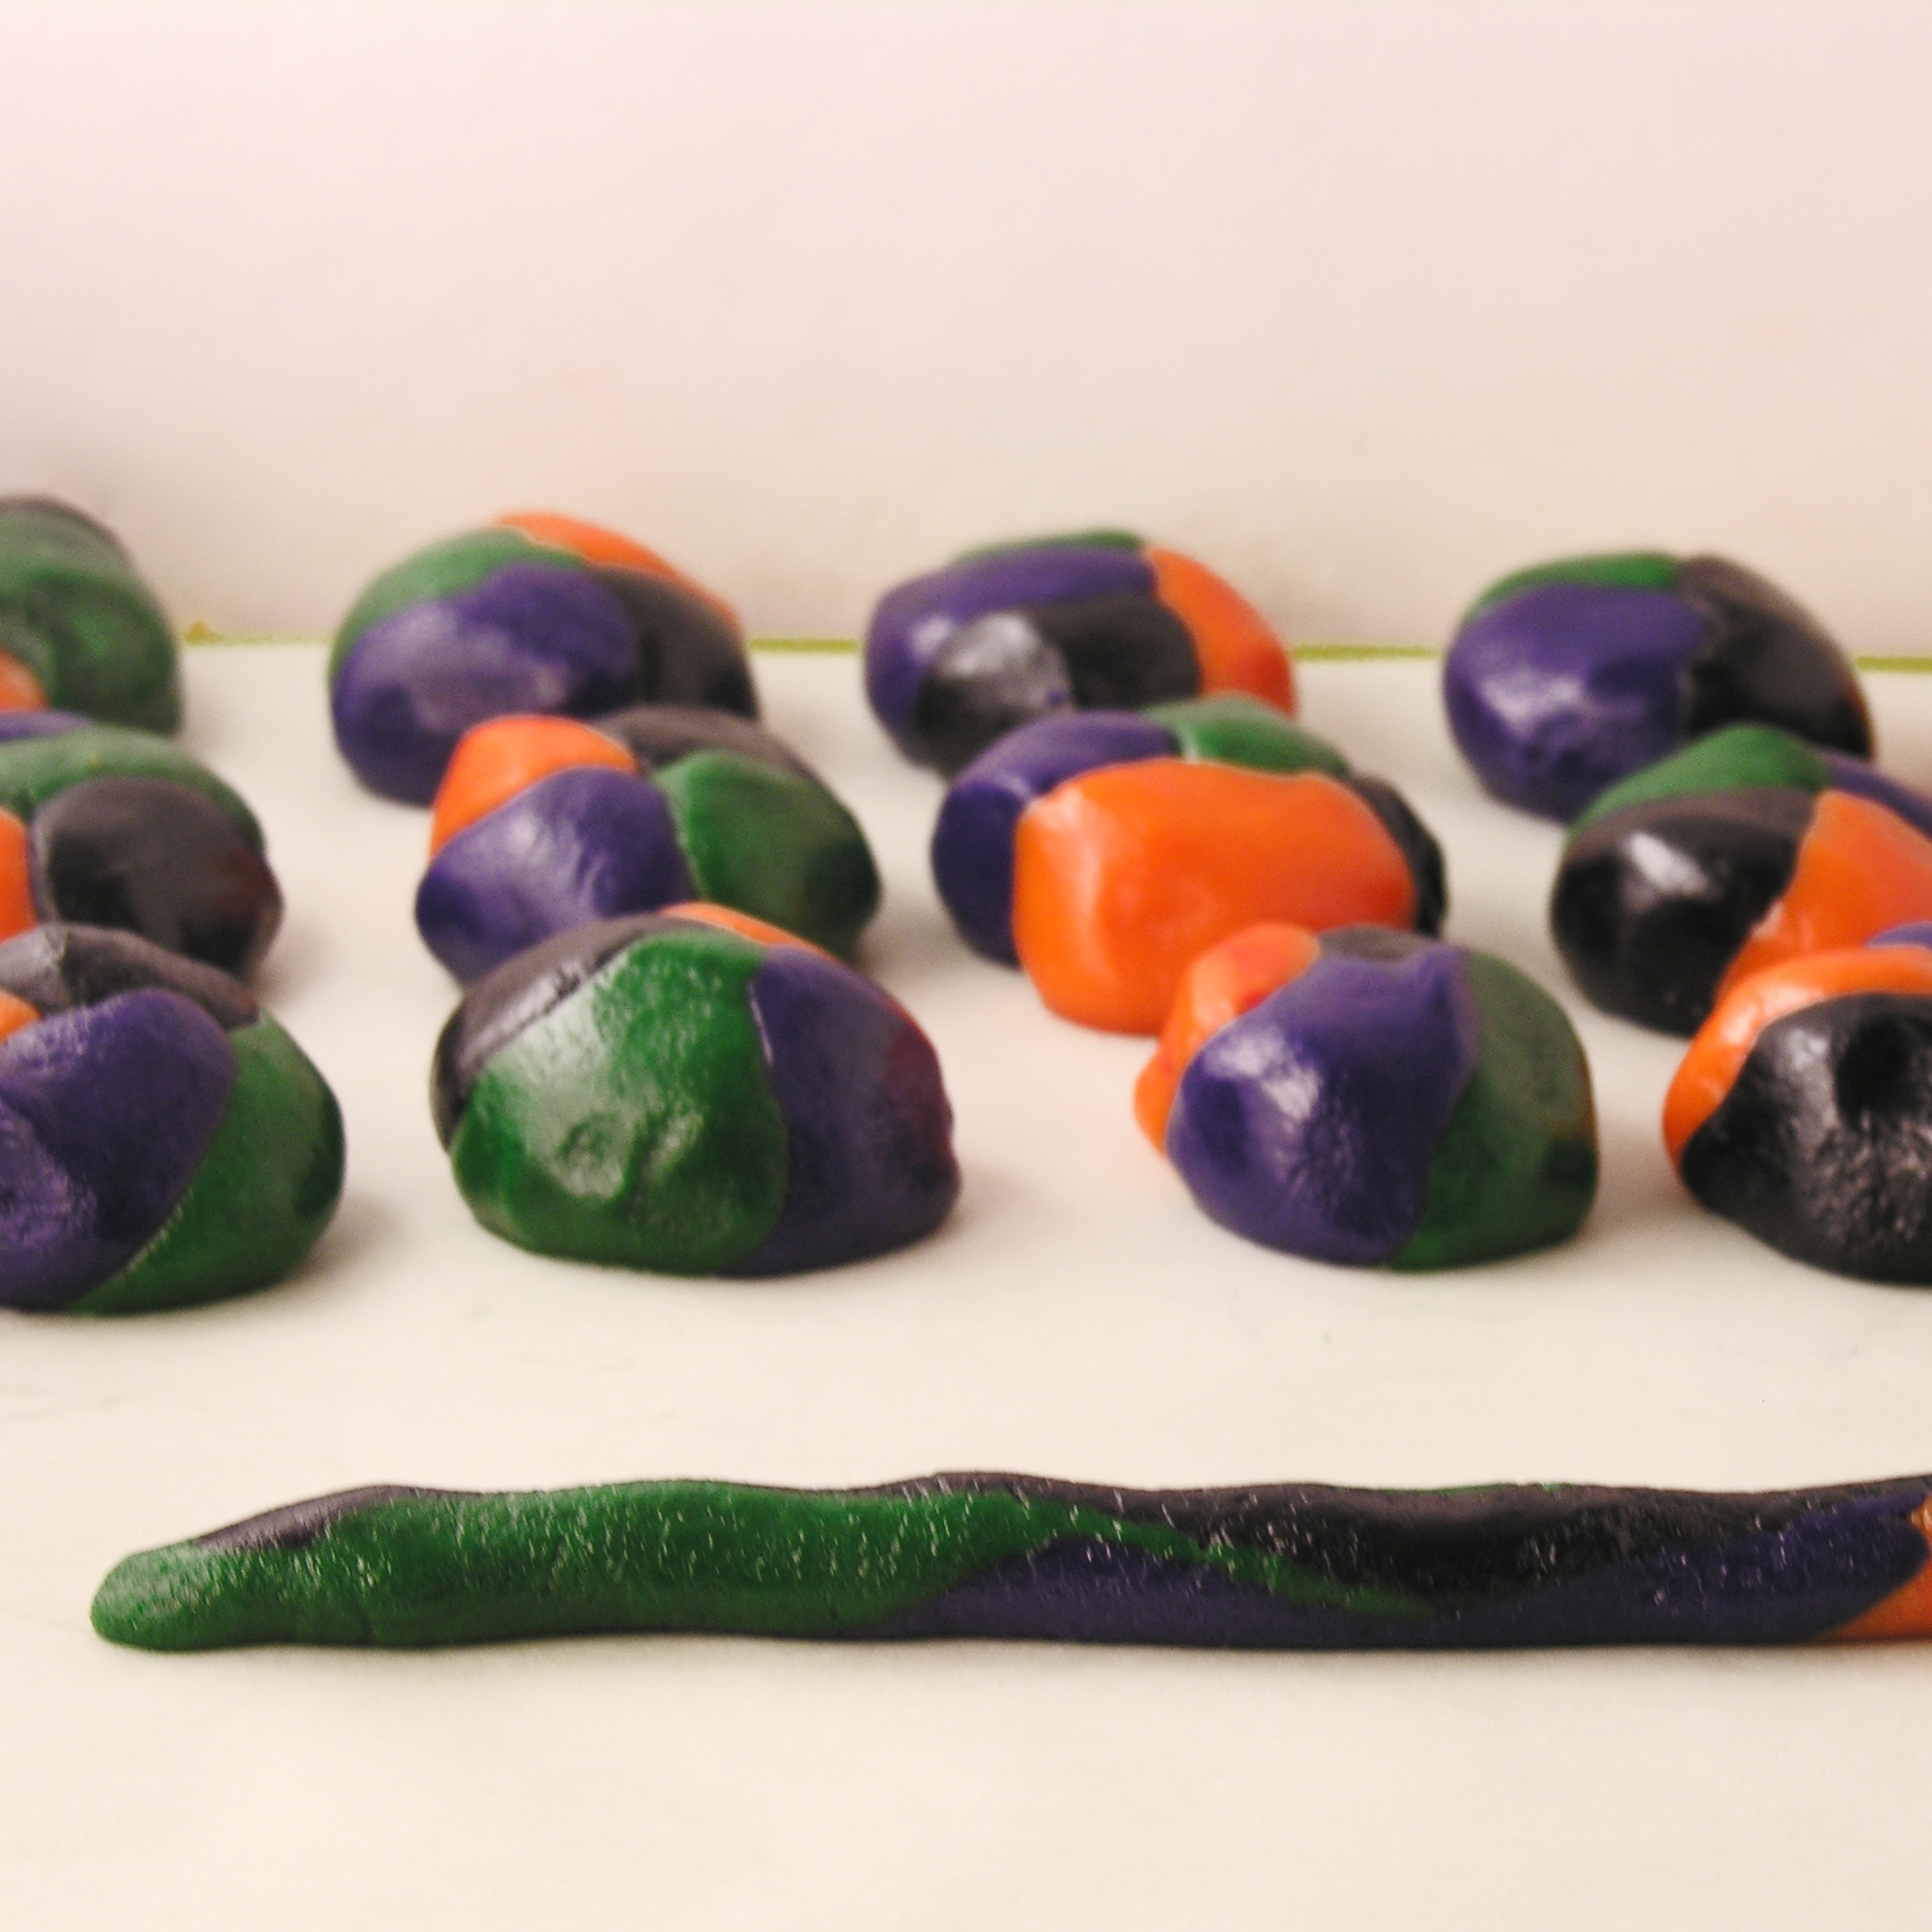
  • Roll each ball out into a long strip and then gently coil it together into a cookie.  Tuck end under cookie and gently place on parchment paper on a cookie sheet.

Halloween Cookies How-to4Halloween Cookies How-to6

  • Bake at 350F degrees for time recommended on cookie dough tube.
  • Remove from oven by sliding parchment paper off cookie sheet and on to a flat surface.
  • Cool cookies completely
  • Melt Wiltons candy melts in 30 second increments in the microwave, stirring between until smooth.
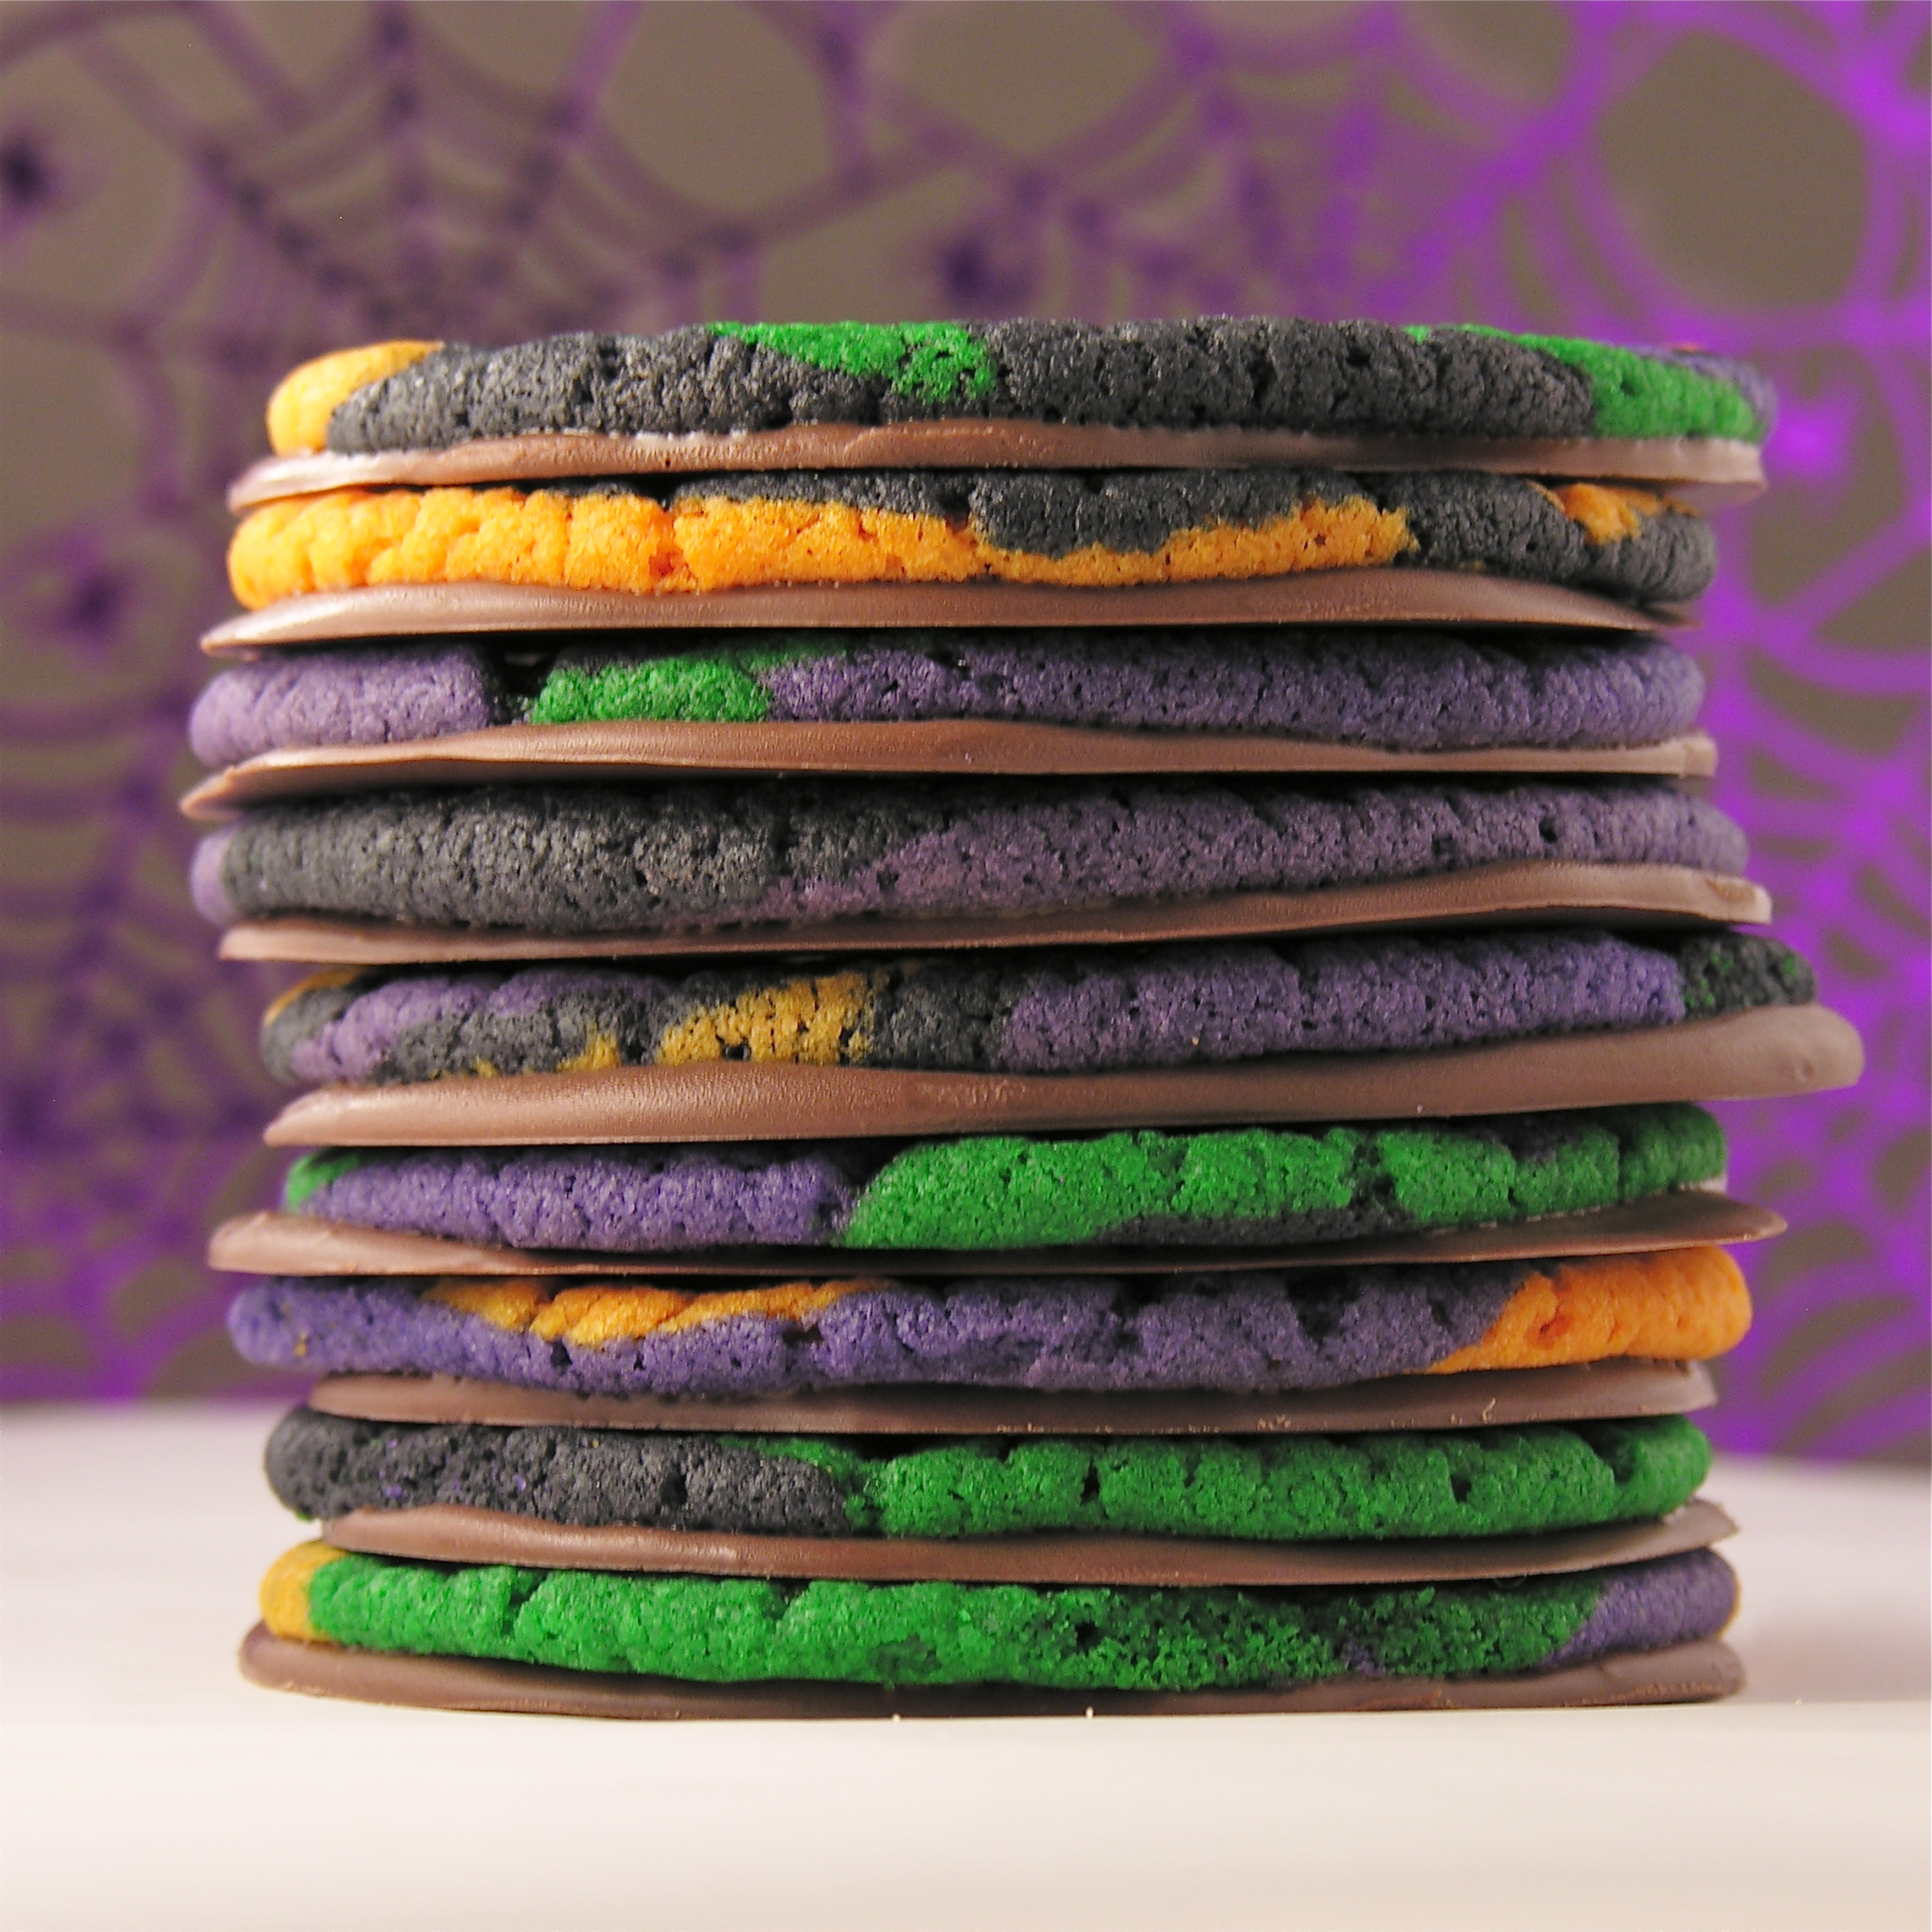
  • Spoon a bit of melted chocolate on a clean piece of parchment paper- make it about the size of one cookie.
  • Gently press a cookie on top of the chocolate until you can see it around the edges.
  • Allow chocolate to cool and harden.
  • Peel away parchment paper and ENJOY your cute cookies!!!!

Halloween Swirl Cookies!!!
My thoughts:  These were a fun Halloween baking project.  I really enjoyed how each cookie looked so unique and I learned as I went how to swirl them most effectively (so that all the colors can be seen on top).  I loved using the pre-made cookie dough, that saved a lot of time!  I hope you get a chance to try these!!!  Enjoy!!  ~r


Halloween Swirl Cookies!!!!Halloween Swirl Cookie!!!!
Other fun Halloween ideas from Easybaked:

Halloween Bundt CakeGinger Maple CookiesSpider Cupcakes!Pumpkin Roll

Advertisement

Oreo Snowman Pops!

These cute little snowmen are easy to put together and make cute stocking stuffers or party favors!

What could be better than an Oreo cookie??  An Oreo cookie dipped in white chocolate and decorated as a fun hat-wearing snowman!

These are really fun.  If you’ve tried making Oreo pops already, these will be a breeze for you.  If this is your 1st time, you will want to refer to my original Oreo pop recipe to see pictures of these steps.  Click HERE to see the tutorial.

INGREDIENTS:

  • One package of Double Stuff Oreos
  • 2 (12oz.) bags of Wilton White Candy Melts
  • 24 Lollipop sticks 
  • Small amounts of colored Wilton Candy Melts for eyes, nose and hats
  • 24 M&Ms in colors that match your hat colors.
  • Fun ribbons to tie on as scarves

DIRECTIONS: 

  • Carefully twist apart all of the Oreo cookies.
  • Using one of the pop sticks, make an indentation in the white filling of each cookie.
  • Melt the Candy Melts in the microwave in 30 second increments, stirring until completely melted and smooth.
  • Dip the end of one stick into the melted white chocolate, drizzle a little in the center of the white cookie filling and then gently press it into the indentation made.
  • Place the top of the cookie back on and allow white chocolate to harden (5 minutes or so), cementing the cookie back together with a stick inside.
  • Holding the stick, lower the entire Oreo into the bowl of melted white chocolate, spooning it over the top and sides to cover it completely.
  • Allow the excess chocolate to drain off and gently place covered Oreo on a piece of parchment paper to harden.  
  • Melt small amounts (about 2 c. TOTAL) of Wilton candy melts in your hat colors.
  • Hold coated Oreo over bowl and gently spoon color over top edge of cookie at an angle to make a hat shape.  Use spoon to shape this.
  • Tap cookie over bowl and slide bottom edge against edge of bowl to remove excess.
  • Gently place an M&M on the cookie- against the melted candy melts and wait a few seconds for it to stick.
  • Set pop back on parchment paper to harden.
  • Use a toothpick to add eyes and a nose with Wilton candy melts in black and orange.  (If you want to color your white candy melts for these tiny bits of color you can use Wilton Icing Colors in them.)
  • Allow pops to harden completely and add a cute ribbon to the lollipop stick for a scarf.


You can put these into cute clear cello bags, tie them shut and give them as gifts or put them in a cute jar or basket as a Oreo Pop arrangement for your Holiday party!

The best part????  There’s an OREO inside!!

Enjoy these yummy winter treats!!!!!!

Click on the banner below to get more Holiday ideas and free printable gift tags:

Tie-Dye Cake with Blue Raspberry Frosting

Posted on

Swirls of colors plus a blue raspberry frosting make everyone smile when they see this cake!

This recipe is dedicated to my nephew Marshal, who informed me a few weeks ago that today, October 10, 2012 is an important day:  it marks the 2 year anniversary of the release of  “My Little Pony: Friendship is Magic” TV show.

Confused?  I was!  Apparently this show, targeted toward young girls, has gained a cult following among teenage boys– they call themselves “Bronies”…I guess Bro+ponies= Bronies.  Um…yeah. Learned all of that on Wikipedia… SO Marshal was telling me that he and his friends wanted to make a rainbow cake (for the pony “Rainbow Dash”, of course) to celebrate the day.  The thought of making 6 layers of cake in different colors sounded exhausting, so instead I made 6 colors and just dumped them on top of each other in the same pan.  I love how it turned out!

Here’s how it was made:

INGREDIENTS: (printer friendly recipe)

  • One boxed white cake mix, plus eggs, water and oil to make it according to the box.
  • Icing colors in Purple, Blue, Green, Red, Orange and Yellow.
  • One stick (4 oz.) salted butter at room temp.
  • One stick (4 oz.) unsalted butter at room temp.
  • 1 1/2 cups powdered sugar
  • 2 teaspoons raspberry flavoring

DIRECTIONS:

  • Preheat oven to 350F degrees.
  • Make cake mix according to box (or make your own favorite white cake recipe!)
  • Grease 2- 9 inch cake pans and place a circle of parchment paper in the bottom of each.
  • Evenly divide batter into 6 bowls (about 1 cup of batter in each)
  • Add icing color gels to color each bowl of batter.
  • Pour 1/2 of the purple batter in the center of one pan.
  • Pour 1/2 of the blue batter into the center of the purple batter (adding the blue will push the purple toward the edges).
  • Continue to pour 1/2 of each color batter into the center using green, yellow, orange and red in that order.
  • In second pan do the same but in the reverse order, starting with the red 1st.
  • Bake at 350 according to package (mine took about 25 minutes)
  • Remove from oven and cool.  Tip over onto a wire cake rack to finish cooling.
  • Make frosting by adding butters, powdered sugar, raspberry flavor and a little blue icing gel color together and beating on high until light and fluffy.
  • Level off the tops of each cake layer and place one layer, cut side up on a serving plate.  Frost the top of this layer.
  • Place the second layer, cut side down on top and frost entire cake.
  • Sprinkle with rainbow sugar or decorate as desired.

ENJOY!!!

My thoughts:  Although this cake was created with Marshal’s celebration in mind, it would be such a fun and colorful addition to any party!!!  Lets hear it for tie-dye rainbow cake!!!!!  Thanks for the idea Marshal!!!

%d bloggers like this: