RSS Feed

Author Archives: Ruthanne

Love Bug Cupcakes

Posted on
These cute little bugs are filled with berry cream and jam. They sit on top of a dense, not-too-sweet brownie base, and are the *perfect* treat for your Valentine!

I feel like I am always on the lookout for something creative to make for Valentine’s Day. January is such a blah, grey month, and I miss having something to celebrate with colors and sprinkles. And along comes Valentine’s Day! Even as a single person (for WAY to many years!) I celebrated the day- just because you need SOMETHING in February to make you smile. In fact, if you are single and these love bugs make you want to roll your eyes, try my cute Frog Prince Oreo Pops instead! 🙂

These treats are a little on the fussy side. Obviously. Anything cute requires a little time. If you want a simple, delicious dessert- without the fuss- you can just pipe some topping on, add some sprinkles, and call it a day.

Want to know how to make these fun treats? Here is the recipe: (printable version)

Ingredients: (makes 24 love bug cupcakes)

Love Bugs: (make these 1st)- you will need a silicone chocolate bomb mold to make these:

  • 5 cups powdered sugar
  • 8 tablespoons (1/2 cup) melted butter
  • 2 teaspoons strawberry or raspberry extract
  • 1 cup of raspberry jam
  • Food color in pink
  • One bag of Wilton’s Candy melts in pink
  • About 1/2 cup of Wilton’s Candy melts in black
  • 48 candy eyes
  • Candy heart sprinkles

Brownie cups:

  • 1 cup butter
  • 2 cup sugar
  • 3 eggs
  • 2 teaspoons vanilla
  • 2 cups flour
  • 1/2 cup cocoa
  • 1/2 teaspoon salt
  • 1 cup milk

Chocolate Glaze:

  • 6oz. semi-sweet chocolate chips
  • 6 tablespoons butter (do not substitute margarine here!)
  • Green jimmies for grass!

DIRECTIONS:

Berry Love Bugs:

  • Melt pink candy melts in microwave in 30 second increments, stirring between until smooth.
  • Use a clean paint brush to brush melts into a chocolate bomb mold and freeze for a couple minutes until hard.
  • Make berry filling  by adding melted butter to sugar and extract.
  • Mix well, using water to bring it to a thick but spreadable consistency.
  • Add pink food coloring to make it a fun pink color.
  • Place filling into a large zip-top bag and seal tightly.
  • Cut a corner off bag and pipe berry filling into each pink shell- filling them about 1/4 full.
  • Place jam into a small zip-top bag, clip corner and pipe a little bit in the center of each pink shell.
  • Pipe more berry filling over the top until it is level .
  • Use a knife to spread berry filling to edges of shell.
  • Refreeze these for a few minutes before gently popping them out and setting them on a plate. 
  • Repeat this process until you have 24 berry bombs ready.

Brownie cups:

  • Preheat oven to 350F.
  • Cream butter and sugar together. 
  • Beat in eggs, cocoa, vanilla and salt.
  • Add flour and milk (alternating them and mixing well in between)
  • Spoon evenly into 24 cupcake liners in a cupcake tin.
  • Bake at 350F degrees for 15-18 minutes (don’t over bake- they will start to pull away from the liner)
  • Cool.  

Chocolate Glaze:

  • Melt butter and chocolate together in the microwave in 30 second increments, stirring in between until completely melted and smooth.
  • Set aside until cupcakes are ready to assemble.
  • Assemble the cupcakes by spooning a little chocolate glaze on top of a brownie and spreading to all edges.
  • Place a berry bomb in the center and sprinkle green jimmies around edge.
  • Allow this all to harden up (refrigerate to speed process up).
  • Melt black candy melts in microwave in 30 second increments, stirring between until smooth.
  • Use a clean paint brush to paint a black face on the front of each bomb, and immediately place eyes before candy melts harden. Place the rest of the melts in a plastic zip-top bag, cut a corner and pipe the center line down the bug’s back.
  • Melt just a few pink candy melts, and use a paint brush to stick each little candy heart “dot” in place.
  • Enjoy!

My thoughts: These are delicious. Think chocolate covered strawberries. I made half of mine with the love bug domes, and half with just the berry icing and chocolate glaze- just to save time. Either way, they are delicious and sure to make YOUR Valentine smile! Enjoy! ~r

Looking for other fun baking ideas for Valentine’s Day? Click on the title to see the recipe:

Advertisement

A Cup of Cheer! Christmas Punch Pops.

These cute punch pops are the perfect “drop off” gift for friends and family you can’t see in person this season. Keep them in the freezer until your virtual celebration and everyone can have some Christmas punch while they open gifts.

I grew up in Michigan, and I can’t remember a Christmas celebration with our family that did not involve absolutely delicious punch- served with Christmas cookies, of course! I’m not sure where I got this punch recipe, but I’ve been making it for as long as I can remember. A few years ago, I was craving this yummy, fruity, ice cream punch in the middle of summer, but didn’t want to fill an entire punch bowl with the ingredients- or waste ingredients by only making only one cup of it. So I invented…. PUNCH POPS! Once you add a little room temp ginger ale to these, you have a perfect one-person cup of punch!

As my husband and I are trying to decide how we will celebrate Christmas in the middle of this crazy COVID season, I knew I wanted something fun, festive, and unique to deliver to friends and family we won’t be able to see in person this year.

And I thought of these punch pops.

I’ve already shared this idea on Easybaked (here), but as I was putting my cute pops in bags this morning, I decided to share the recipe with you all again 🙂

Here it is!

INGREDIENTS: (makes 20 pops)

A couple of notes before you start: This is an EASY recipe, but it takes some time and freezer space. You’ll need a day to assemble (freezing between layers) and one long overnight freeze before you can package them up. You’ll also need a freezer shelf with some height above it to allow the straws to fit while freezing.

  • 18-24 oz of pineapple juice
  • ½ gallon vanilla ice cream
  • 1 quart of fruit sherbet- any flavor (I used 2 flavors and only used 1/2 of each quart)
  • 20 mini cans of Ginger ale (or if you are giving a family gift, a two liter)
  • About 40 raspberries, or 4-5 sliced strawberries.
  • 20 (3 oz) paper cups and 20 straws
  • small cello bags and ribbon for tying them up

DIRECTIONS:

  • In 20 small (3 oz) paper cups, measure about 1/8 cup of pineapple juice and add two raspberries or a slice of strawberry.
  • Freeze until hard (4-6 hours)

Note: I did this on a small cookie sheet so that I could pop them all into and out of the freezer at once.

  • Scoop ice cream into a large zip top bag and microwave in 10 second increments until soft-serve consistency. Mix bag by squeezing. (Tip: wear gloves to keep your hands warm!)
  • Clip a corner off this bag and squeeze the softened ice cream over frozen juice, leaving room at the top for a layer of sherbet (you will add about twice as much ice cream as sherbet, and use almost all of the ½ gallon)
  • Slide a straw into the center of each cup and re-freeze until ice cream layer is hard (2-3 hours)
  • Scoop sherbet into a large zip-top bag and microwave/squeeze until a soft-serve consistency (this melts faster than ice cream, so be cautious)
  • Clip a corner off this bag and squeeze the softened sherbet over the top of the frozen ice cream. Tap each cup against the counter to flatten the sherbet out a little bit on top.
  • Re-freeze overnight (10-12 hours)
  • To remove them from the cup, snip a tiny cut into one of the cup’s edges and tear the cup away.
  • Set the pop on a small cookie sheet that has been covered with parchment paper and keep frozen until you are ready to bag them up.
  • To place them in individual bags, keep them frozen, and one at a time, slide into a bag, tie shut and refreeze.
  • To serve these cute little pops, simply place one in a glass that holds at least 12 ounces, and pour room temperature ginger ale over the top- just until the pop is covered. 
  • Stir your punch with the straw until it has melted into a cold frothy ice cream treat!

My thoughts: We all need a little extra cheer this Christmas season, and these punch pops are just a tiny way to make someone you love smile. You can make them in any flavor of sherbet you can find and add any type of fruit!

Be sure, when you hand them out, to tell the recipients to get them from their porch and freeze them right away! Then, have everyone make a cup of punch, get on Zoom, and make a toast to better days in 2021! Hugs to each of you as you navigate this Christmas season, and prayers for good health, and all the peace and joy God can fill you up with this year! ~Enjoy!

Other fun Christmas porch drop-off ideas (click on title to see recipe):

Tres Leches Cupcakes

Posted on

If you’ve ever had tres leches cake, you already know you will love these little cupcakes! Soaked in a vanilla cream sauce, the dense cupcake is a not-too sweet base for delicious dulce de leche caramel and whipped cream. Add a little fruit and you have perfection! 

Ever since the stay-at-home rules have been in place, we are looking for anything (even little things) to celebrate. So Cinco de Mayo was a fiesta- complete with these little cupcakes. I made this recipe as a cake several years ago, but my husband had never tried it, so this was his 1st time trying these, and he declared them his favorite cupcakes I’d ever made.

So… there’s that endorsement for this recipe… 🙂

These are not too fussy to make, they keep for over a week in the fridge. I made half of this recipe, or 12 cupcakes, and it still took us the whole week to eat them all! Is anyone else sad that they can’t bring extra blog baked goods in to work or over to the neighbors?!?! Slowing packing on my quarantine 15… :/

Here is how to make these sweet treats: (printable recipe)

INGREDIENTS

Cupcake

  • 9 eggs, separated
  • 1 cup sugar
  • 1 tablespoon vanilla extract
  • 2 cups all purpose flour

Vanilla Sauce:

  • 1 (14oz) can sweetened condensed milk
  • 1 (12oz) can evaporated milk
  • 1/2 cup heavy cream
  • 1 tablespoon vanilla extract

Topping/filling

  • 2 cups heavy whipping cream
  • 1/4 cup confectioners’ sugar
  • fresh fruit for garnish
  • 1 (13.4 oz) can of La Lechera Dulce de Leche (or make your own here)

DIRECTIONS:

  • Preheat oven to 350F degrees and place 24 cupcake liners into baking tins.
  • Divide eggs into 2 bowls.  Put the egg whites into a large mixing bowl and the yolks into a medium bowl.
  • Beat the egg whites on medium-high until they form soft peaks.  Add sugar and beat on high until they form stiff peaks (this will take 4-5 minutes, depending on your mixer).
  • Beat the egg yolks on high for 5 to 6 minutes until they increase in volume and turn a creamy yellow.
  • Beat the vanilla into the egg yolks until combined.
  • Add the yolks to the whites and use a spatula or large spoon to gently fold them together.
  • Add flour and gently mix until completely combined.
  • Divide batter evenly between the 24 cupcake liners and bake for 15-20 minutes.  The tops should be golden and when a toothpick is inserted in the center, it should come out clean.
  • Remove from tin and cool completely on counter.
  • Make sauce by combining the 3 milks (condensed, evaporated and cream) together with the vanilla.
  • Poke (lots!) of holes in the top of each cupcake with a toothpick and use a pastry brush to spread vanilla cream over the top of each cupcake- letting it soak into the cake. I did this twice to use up the sauce and make my cupcakes super soaked and moist. 
  • Spread dulce de leche caramel over the top of each cupcake- spreading all the way to the edges.
  • Make frosting by beating together the whipping cream and powdered sugar, until stiff peaks form.
  • Pipe frosting on tops of cupcakes, and serve with fresh fruit. Refrigerate until serving, and store chilled.

My thoughts: If you like a cupcake that isn’t overly sweet, you’ll love this. The firm cake soaks up all that cream, and the dulce de leche caramel soaks into the top as these sit- so yummy! You don’t have to wait until the next Cinco de May to try them either- this is such a refreshing summer dessert! I hope you get a chance to try it!!! Enjoy ~r

Other fun and refreshing desserts for summer:

Toilet Paper Cake

Posted on

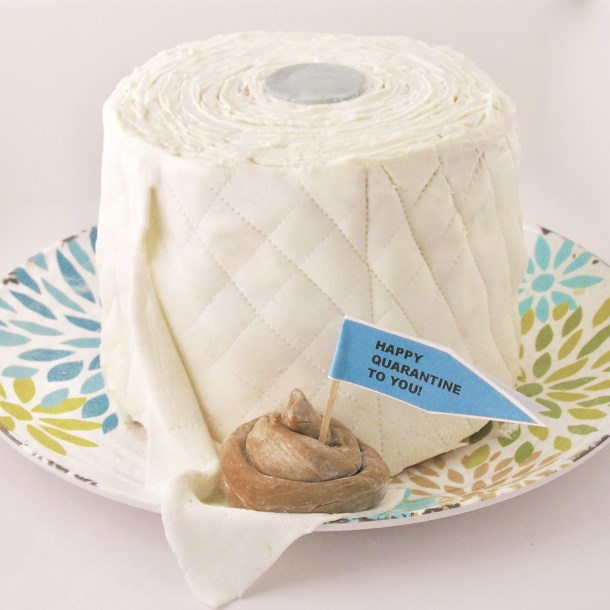
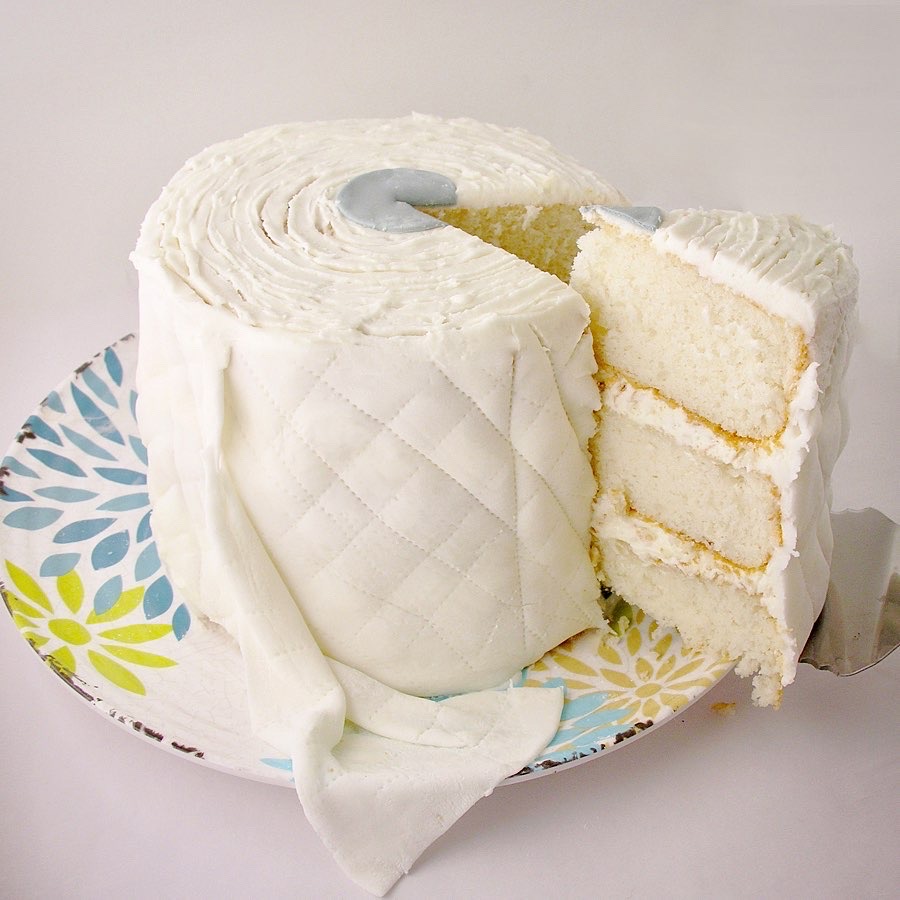
Can’t find TP at the grocery? This cake will NOT solve that problem for you, but it might make you and your family laugh- and that counts for a lot right now!

Well, here we are. About a month into this craziness called Coronavirus. First of all, for my readers and fellow bakers that have been directly affected by this pandemic- hugs to you. We all have been affected to some degree, but some of you have been ill with it, had family ill with it, and maybe even lost someone close to you. My husband and I were just talking about how numbing the numbers are each day. We keep saying things like, “oh- look only 14 deaths in our state today!” And then we remember that those 14 people were deeply loved members of families, and it hits home. This recipe is fun, and maybe even funny, but I don’t want to make light of the terrible situations that many of you are living through right now. 

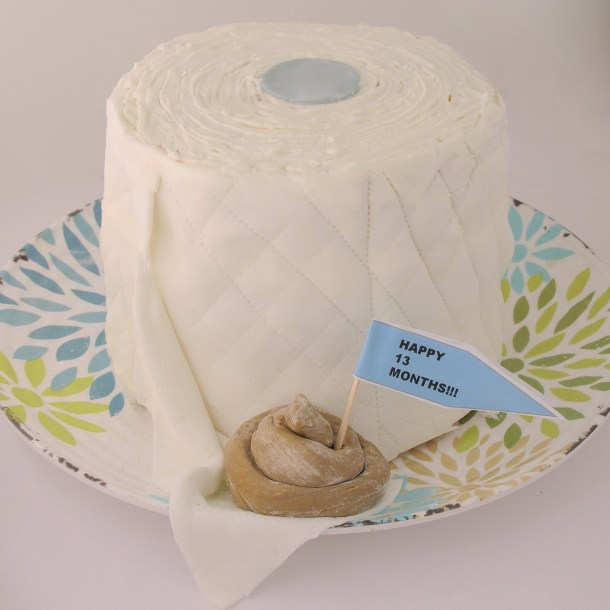
Just a month ago, my husband and I celebrated our one year anniversary with a long weekend trip to Florida. We had a wonderful meal at a beach-side restaurant and walked the beach afterwards, picking up seashells. Yesterday was exactly one month later and it felt like 5 months had passed. So much has changed in one little month! I knew I wanted to make a cake for my hubby for our 13 month celebration (we celebrate everything!) and this little TP cake- celebrating a whole month of TP concern- made us both smile. 

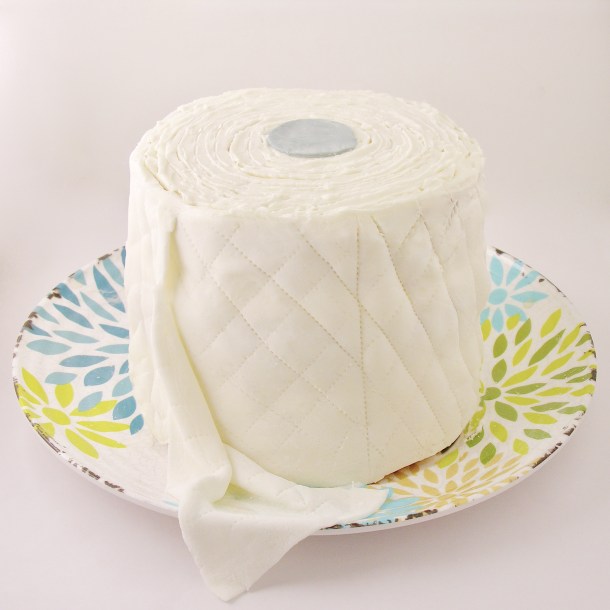
Here’s the deal: I am NOT(!!!) a cake decorator! I cannot even frost a layer cake without it looking super homemade. Cupcakes? Yes. Cake? NO WAY. So I thought about just trying to frost the cake and adding the little cut-out for the center of the roll, but when it was all finished the frosting looked terrible. I’d made fondant for the little grey circle on top, so I rolled the rest of it out, cut it to the height and circumference of the cake, and slapped it on the outer edges. It looks messy- but in a genuinely toilet-papery kind of way 🙂 How’d I make the pattern on it? While sewing masks earlier this week, I caught a glimpse of my pattern marking wheel, and decided I could roll this over the fondant to make those little serration marks. 

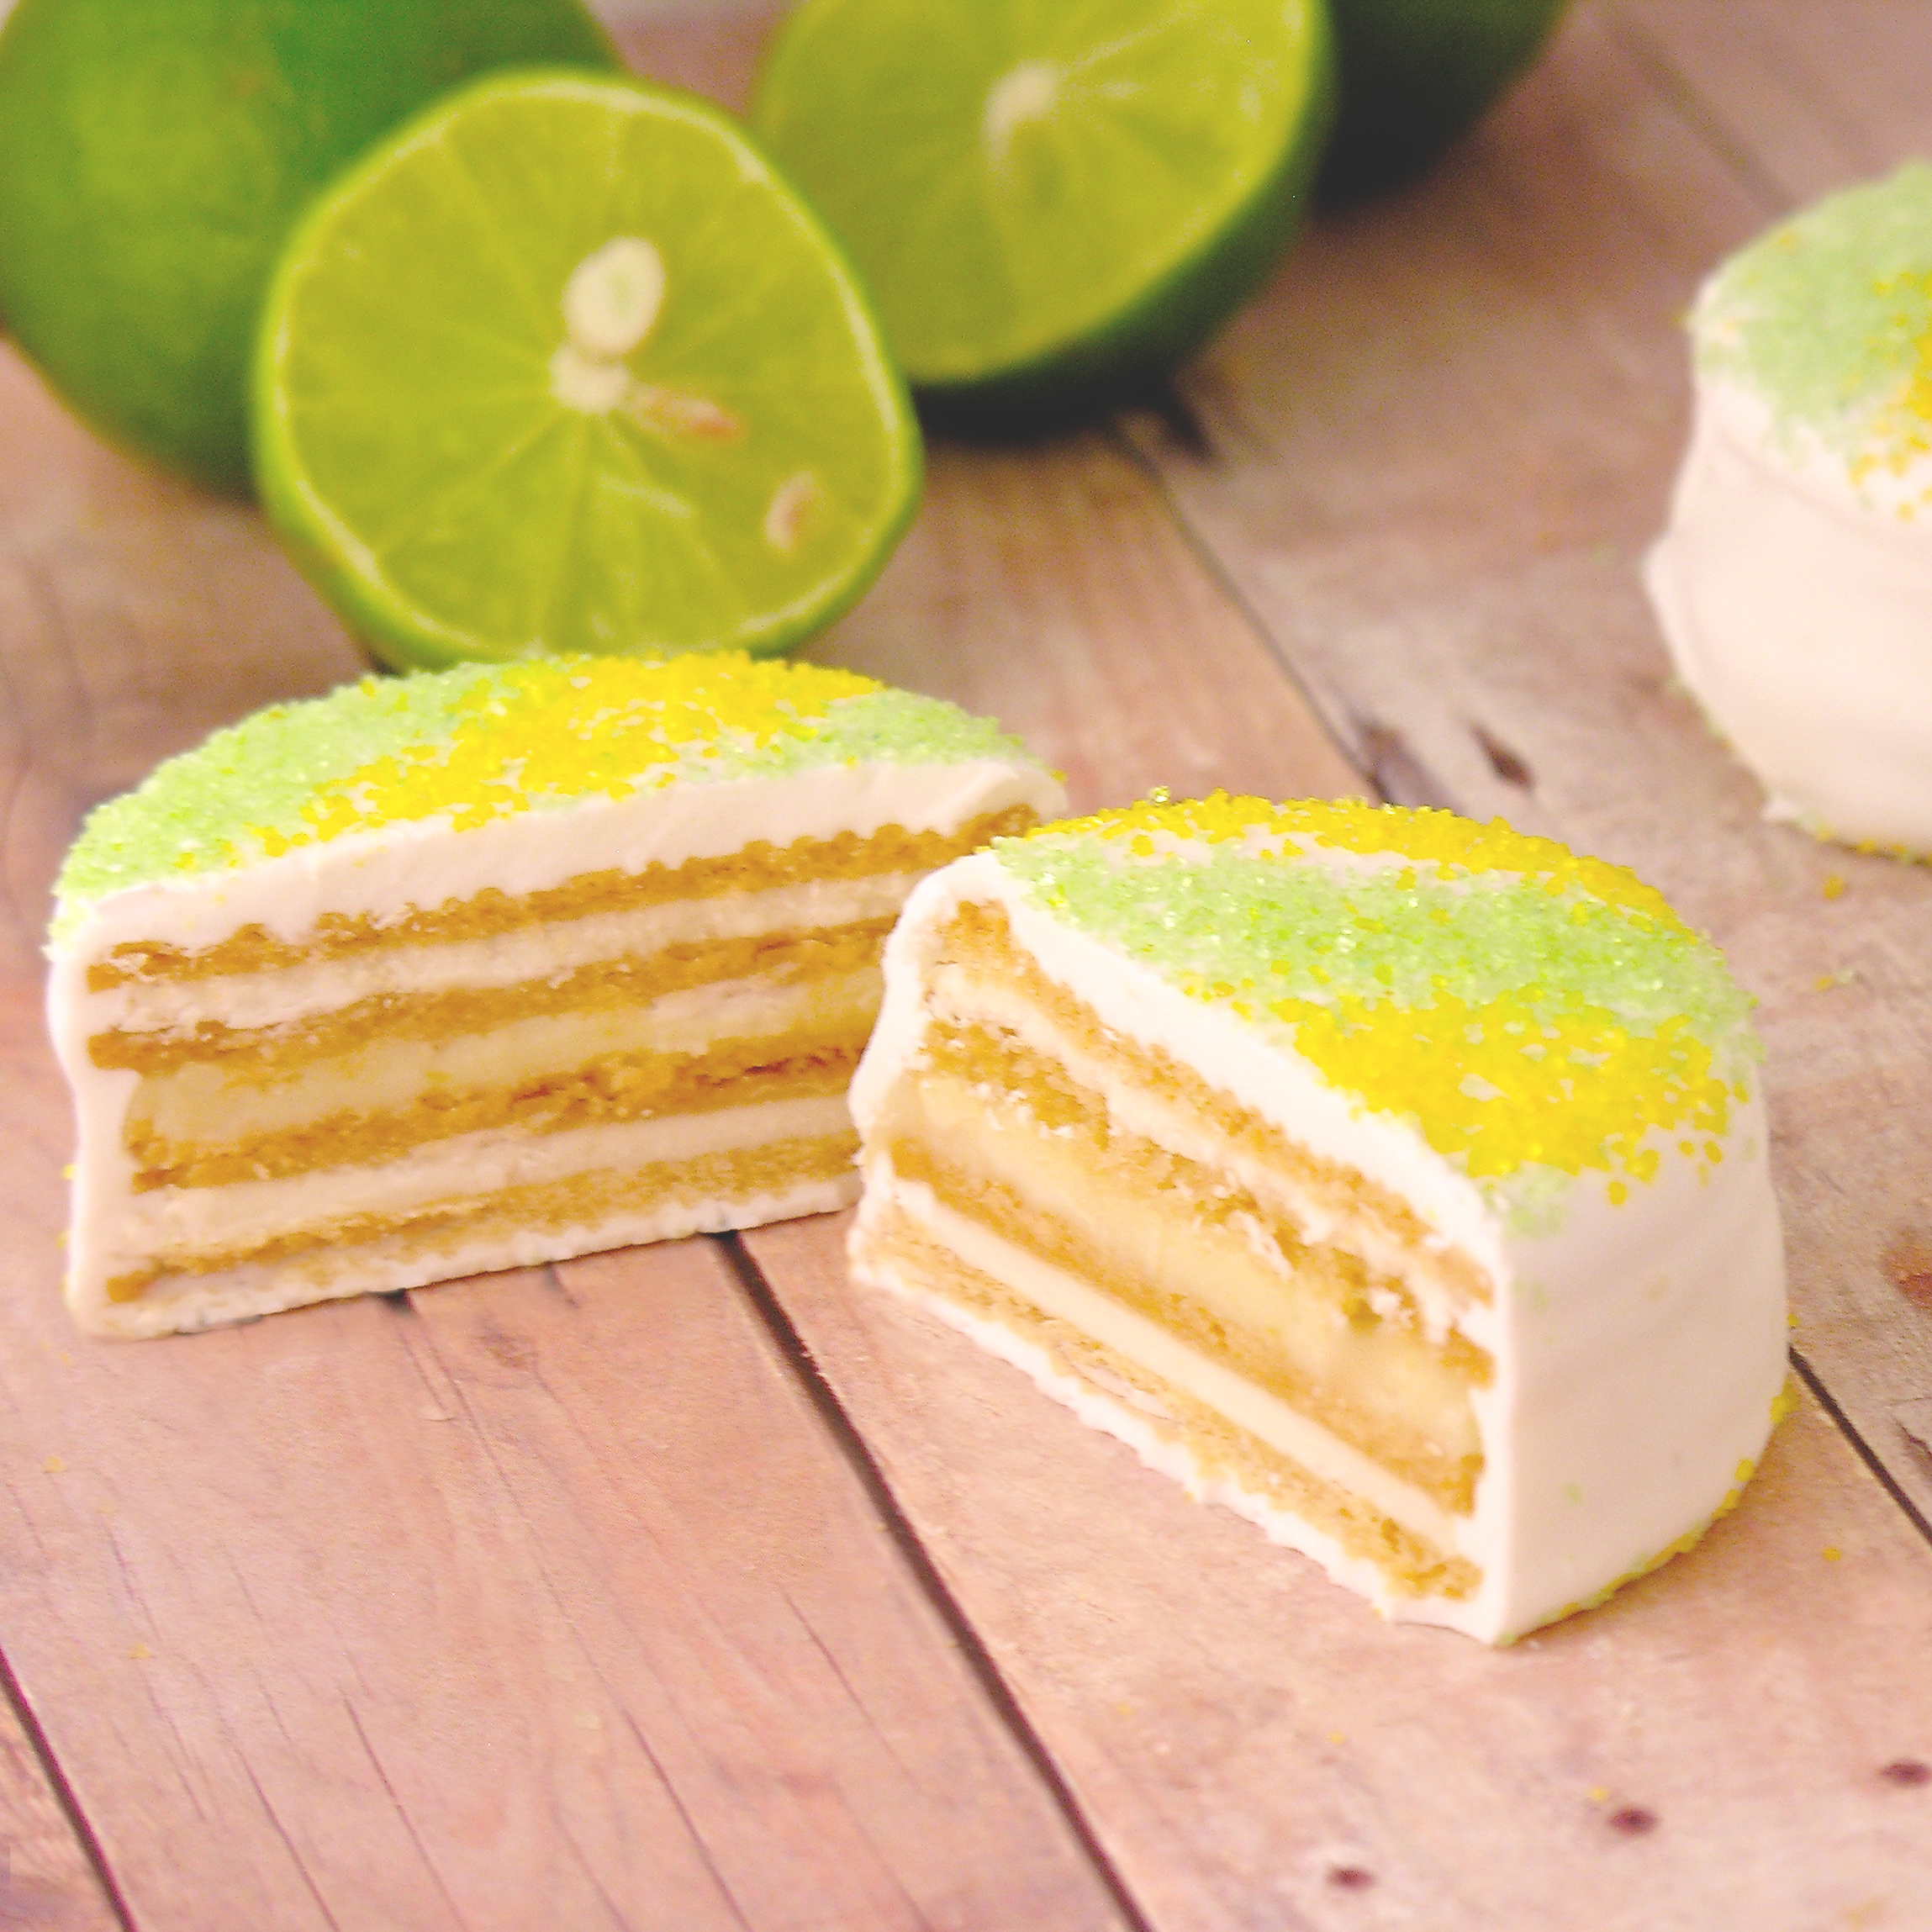
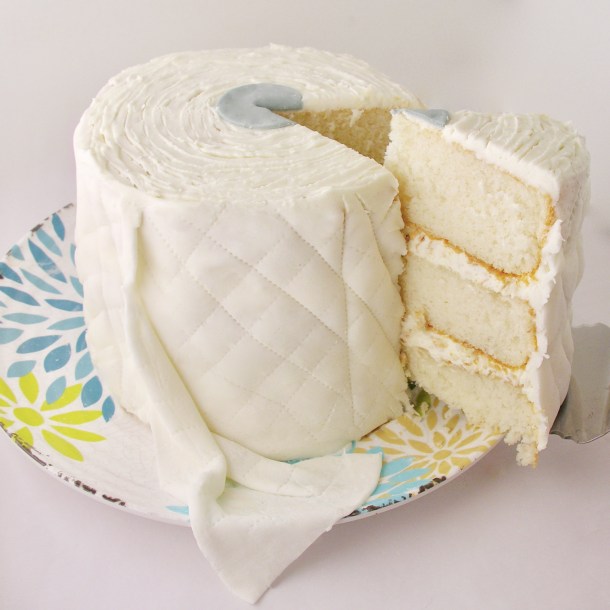
The cake is coconut, with toasted coconut filling (YUM!!)- but you can use any flavor or type of cake with this. Here is how I did mine: 

INGREDIENTS: (cake/filling)

  • 1 white cake mix (with water, oil and eggs to make according to box)
  • 1 cup of toasted coconut
  • 1 stick of butter, softened
  • 1/2 cup powdered sugar
  • 2 teaspoons coconut flavoring
  • About 1/2 cup cream of coconut (optional- just makes cake moist and adds more flavor)


DIRECTIONS: (cake/filling)

Make cake according to package and bake in three 6″ pans according to package. 

Remove cakes from pans and cool completely.

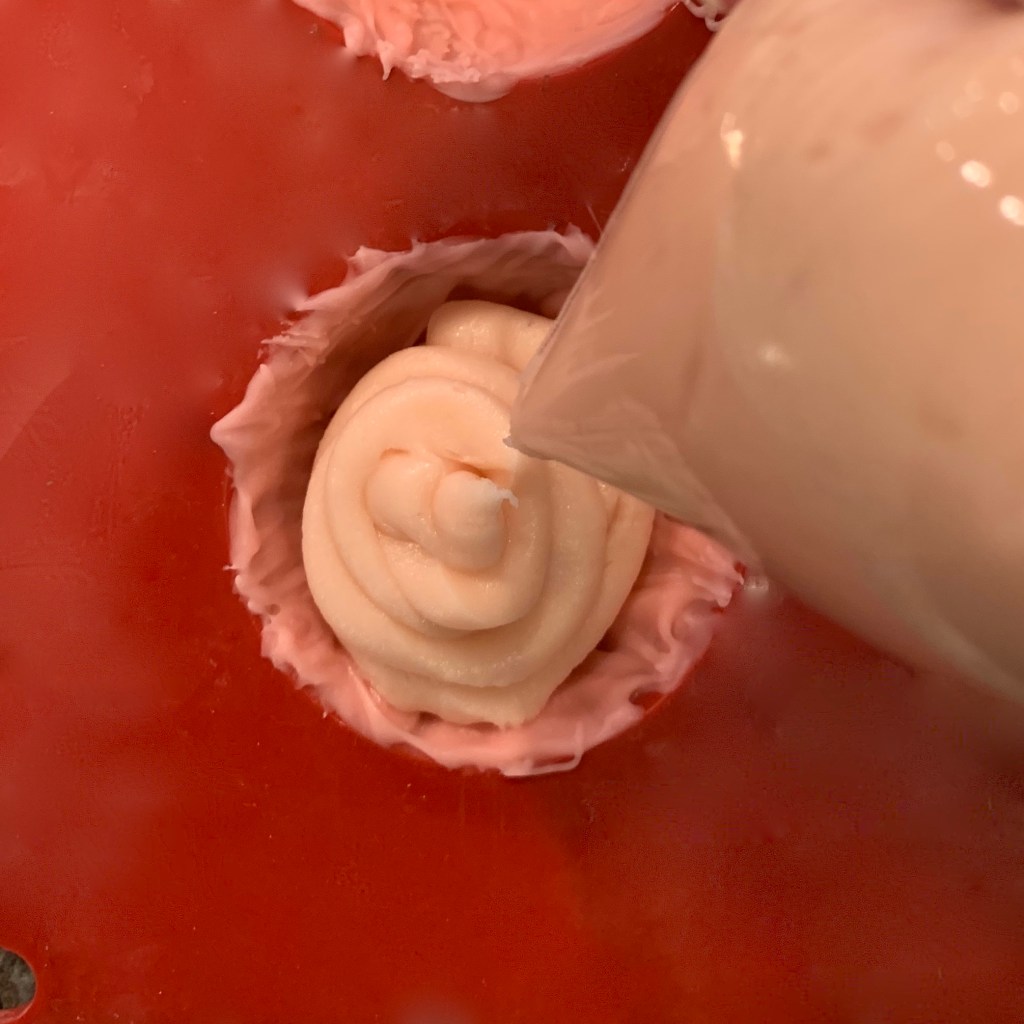
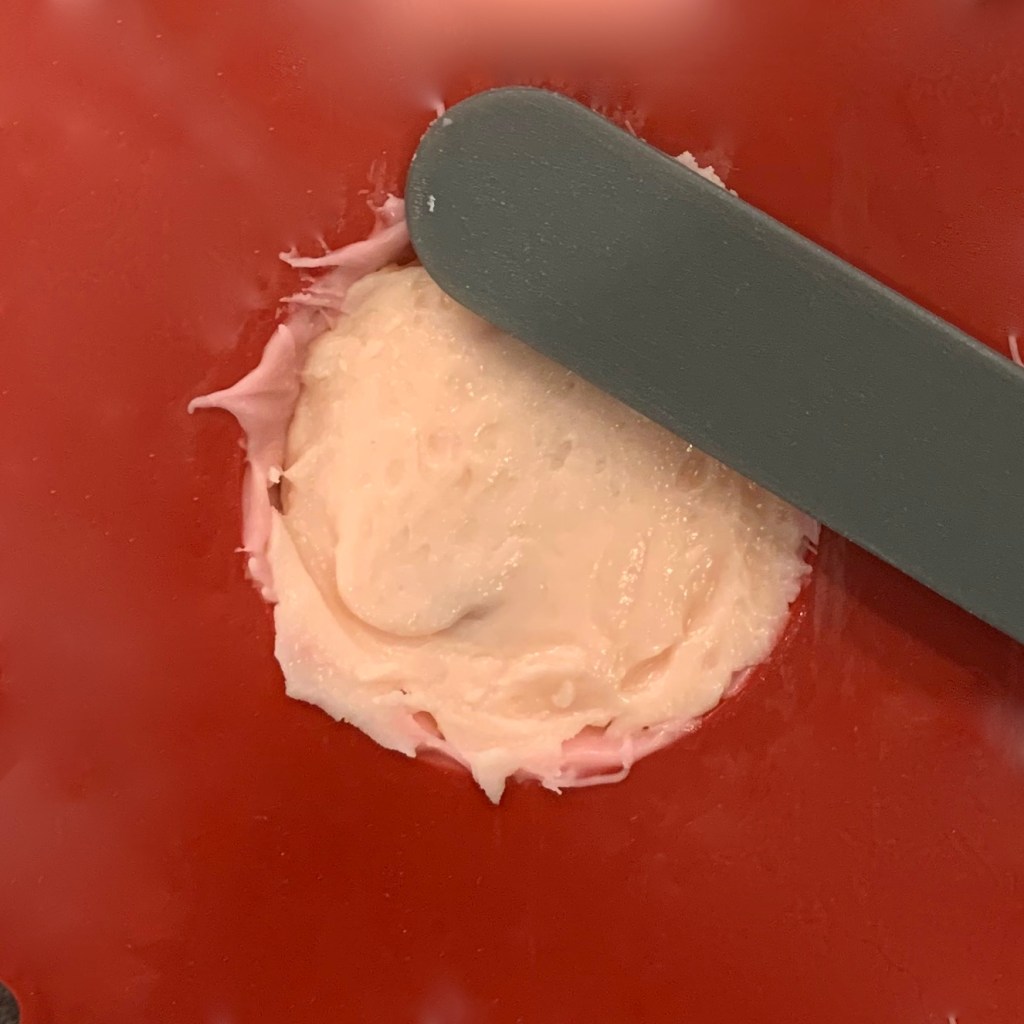
Place butter, powdered sugar, and coconut flavoring in a mixing bowl and beat on high until light and very fluffy (about 2 minutes). 

Fold in the toasted coconut and set aside. 

When cakes are cool, place one on serving plate and drizzle with cream of coconut.

Top this with 1/2 of the filling mixture and spread to edges. 

Repeat this with the next layer, and set cake aside.

INGREDIENTS: (frosting)

  • 1 stick (1/2 cup) butter (softened)
  • 1/2 cup Crisco
  • 1 tsp clear vanilla (or any flavoring you might want!)
  • 4 c. powdered sugar
  • 1 Tablespoon of half-and half cream.

DIRECTIONS: (frosting)

Beat together butter, Crisco and vanilla with a mixer until smooth.

Add powdered sugar gradually and mix until combined and a little crumbly.

Add half and half cream and mix on low.  You might need to add a little more until frosting is a thick but smooth consistency.

INGREDIENTS: (fondant)

  • 4 cups mini marshmallows (half of a 16 oz. bag)
  • 4 cups powdered sugar- plus a little for dusting.
  • 2 tsp water
  • 1/2 teaspoon of clear vanilla
  • black gel color to make center of roll
  • brown gel color if you want to add a poo or two 🙂 

DIRECTIONS: (fondant)

Place your mini marshmallows and water into a large mixing bowl and microwave on high for about one minute- until they are puffy and melted.

Stir them together with a rubber spatula until they are completely smooth (if not melted completely, put them back in the microwave on high for 5-10 seconds).

Add clear vanilla and mix well.

Add about 1/4 of the powdered sugar, stir until smooth, add another 1/4 and stir.  It will become difficult to stir and very sticky.

Pour the rest of the powdered sugar onto a clean counter or cutting board.

Scrape the sticky fondant mixture out of the bowl and onto the powdered sugar and begin to knead it together with clean (powder sugar coated!) hands.  It will gradually become like a smooth clay consistency.  Use a metal scraper to keep it from sticking to the counter/ board.

This can now be colored with gel, rolled out and cut, or stored (tightly wrapped) in the fridge for about one week.  Want a picture tutorial of this process? Check out this post. 

Assembly: (the fun part!)

Use the frosting to place a thin, smooth layer over the entire cake. Let this harden a bit while you prepare your fondant. 

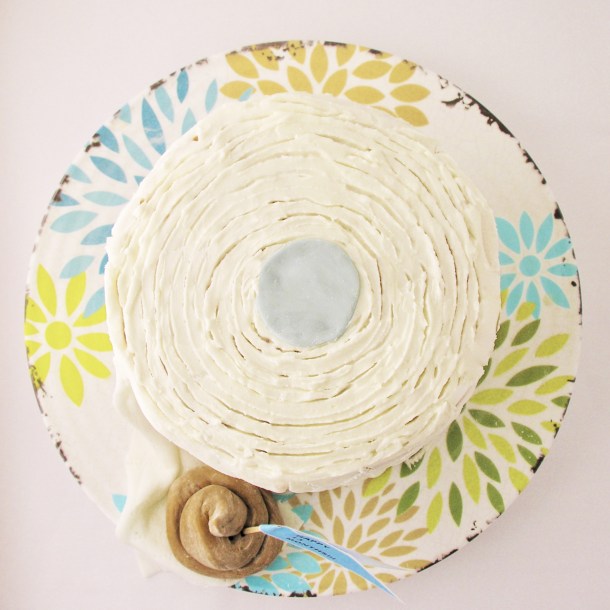
Color a small ball of fondant a grey color. Roll this out on a clean and powder-sugared counter and use a small circle cookie cutter to cut the center of the roll out. Set aside.

Roll the remaining white fondant out into a large flat rectangle. Measure your cake height and circumference and then trim the rectangle into this size using a ruler and knife. I made mine a tiny bit longer so it would drape off the end like TP does. 

Frost the cake again with a thicker layer, making sure it is as smooth as possible. Gently fold the fondant strip a couple of times so it is easier to handle, and then carefully press it against the sides of the cake, lining the top edge up with the top of the cake. Once you are all the way around, gently lay the extra across the front and on the plate. Mine wasn’t even close to perfect- it was bumpy, and wrinkly. Normally, I would smooth this out, but I left it because it looked more like TP — all messy! 

Place the grey center on the cake’s top, and use a toothpick to draw a spiral in the frosting out from the center to the edges. 

Finally, (if you have one!) use a pattern marking wheel to make the pattern on your fondant resemble TP. You could also use a toothpick- but that seems like a lot of work? Brainstorm ideas for an item you might have lying around that could do this otherwise. 

I had extra fondant, so I colored it brown, rolled it into a little poo and added it to the side of the cake- with a little flag. Then, I stepped back and laughed. Which was good for my soul 🙂 

My thoughts: There are ways to make this easier. You could buy fondant, you could skip the fondant entirely and decorate with frosting (if you are gifted in cake decorating skills), you can skip adding the little poo… I know this cake is a little more complicated that what I usually share, but it seems like we all have a little extra time these days to fuss over a cake- especially one that makes us all smile.

Enjoy! ~r

Other fun baking ideas for your shelter-in-place time: 
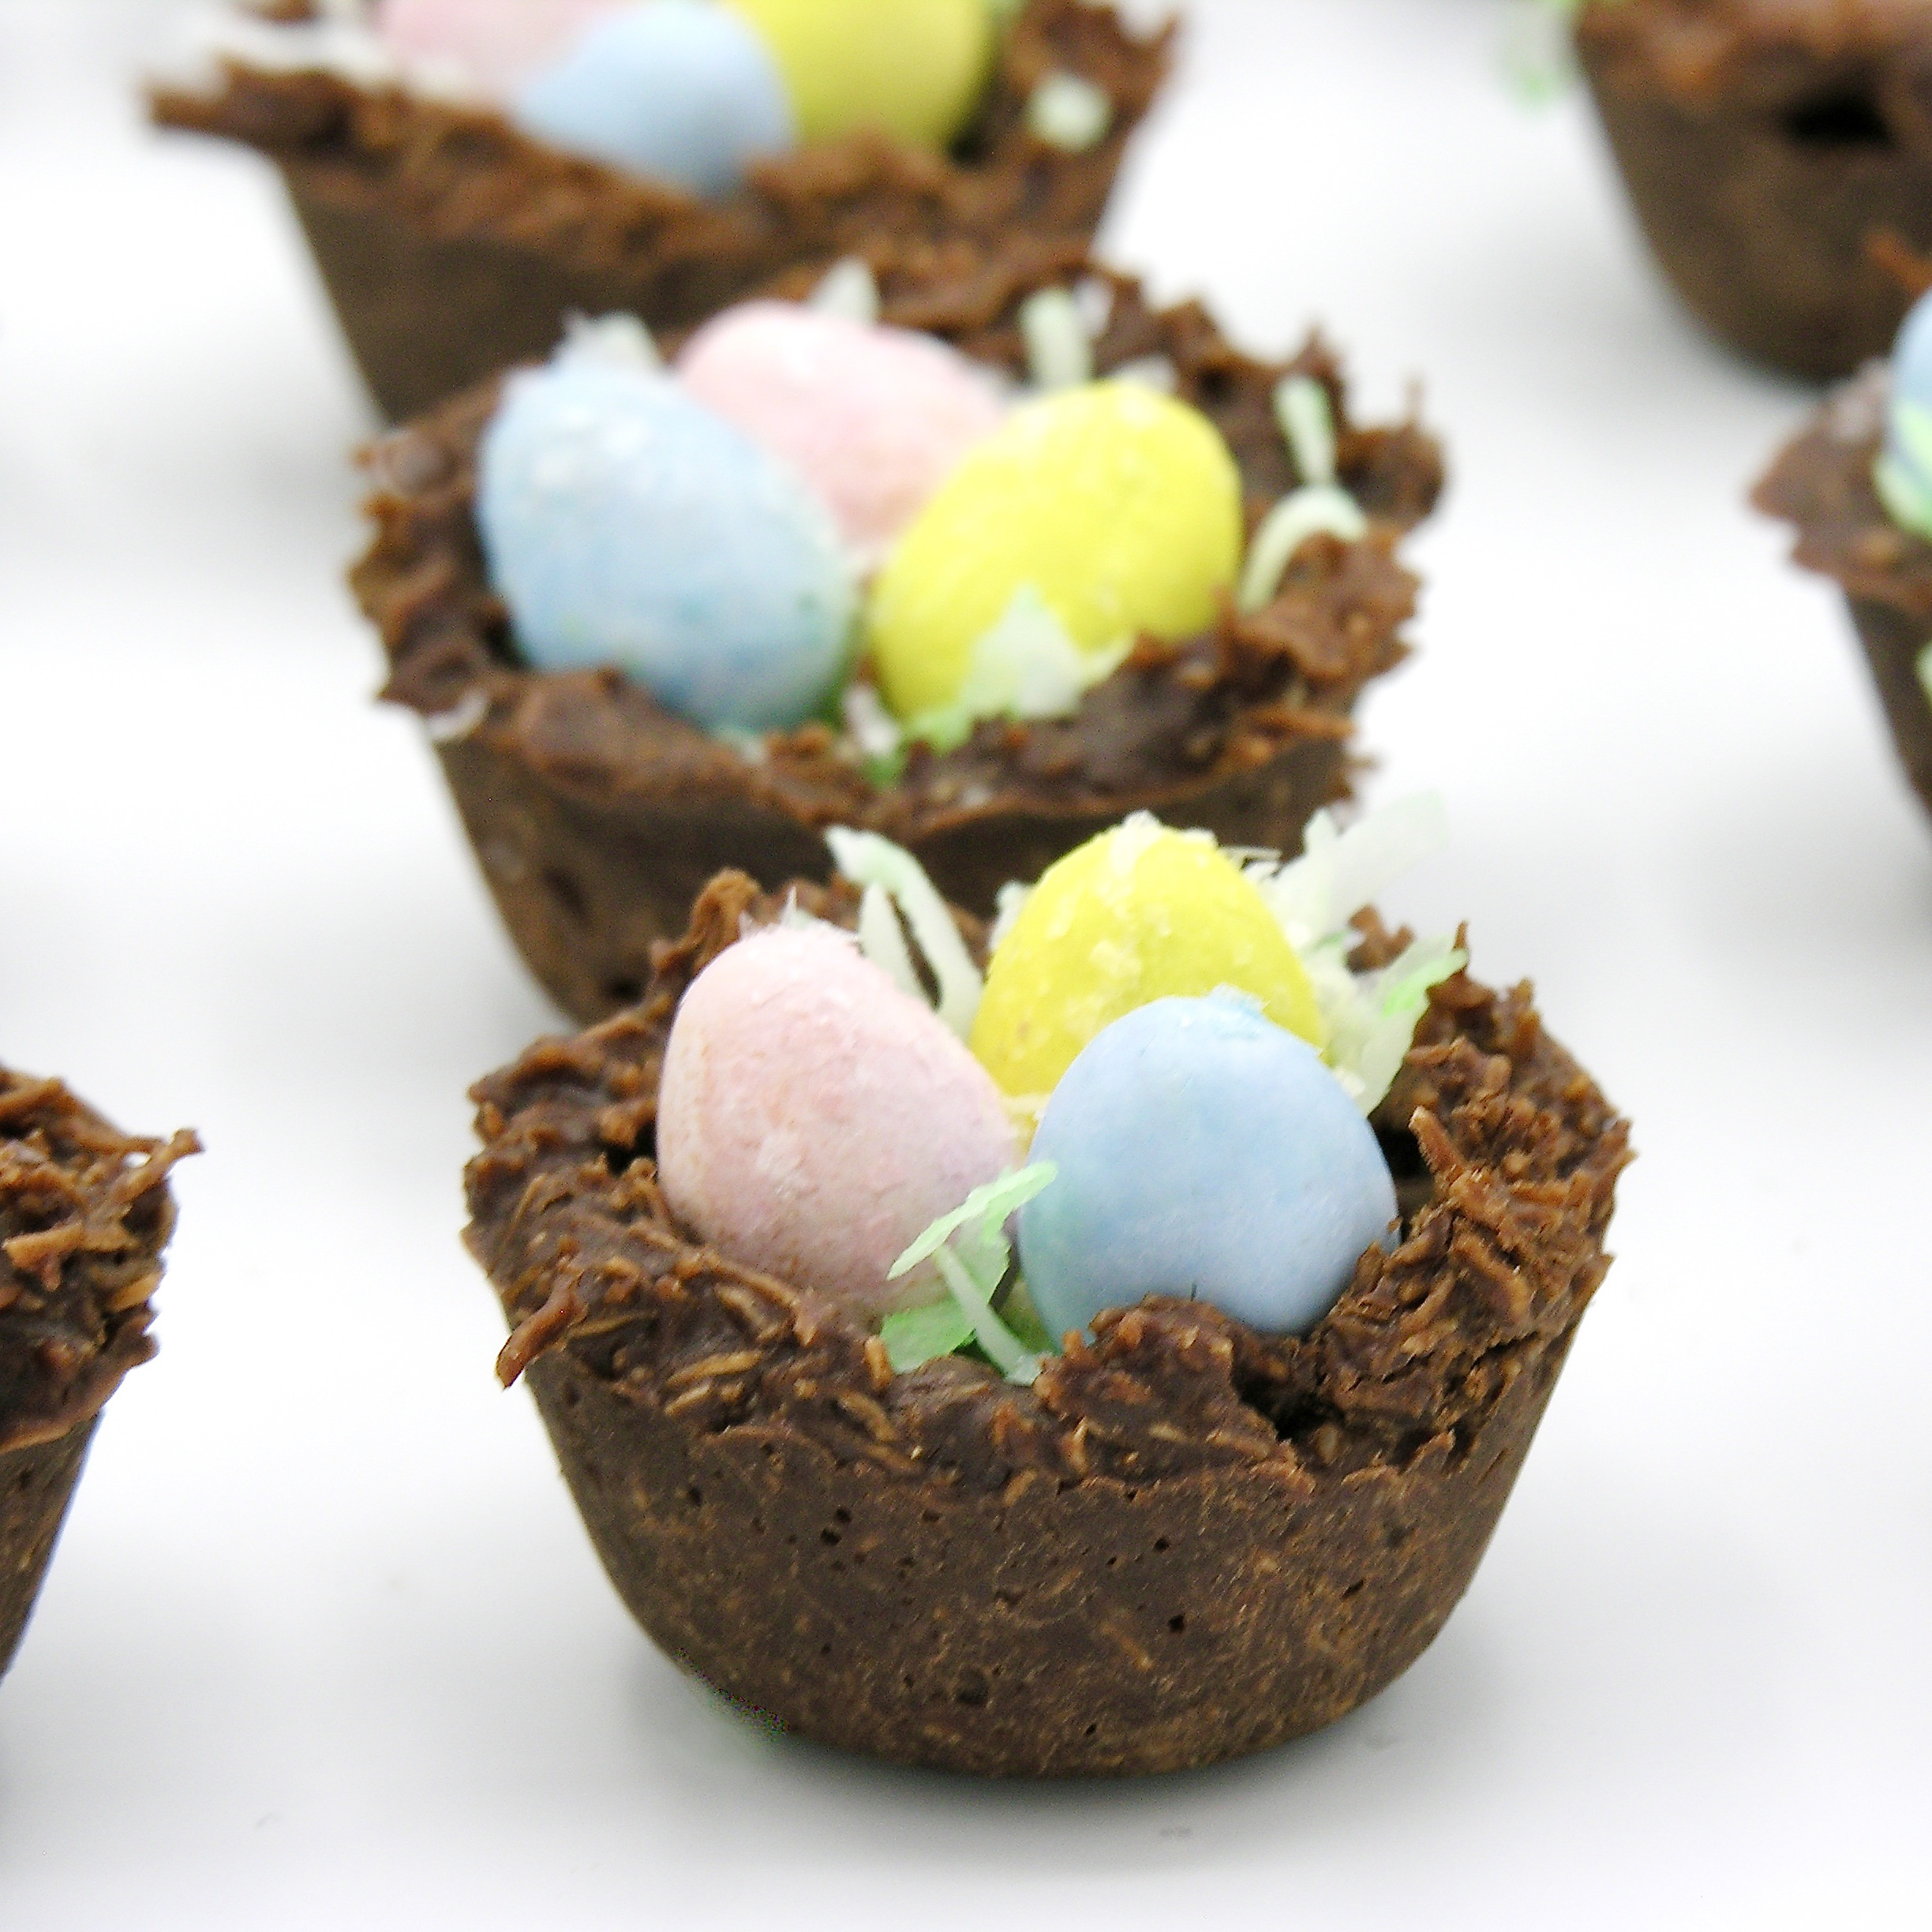
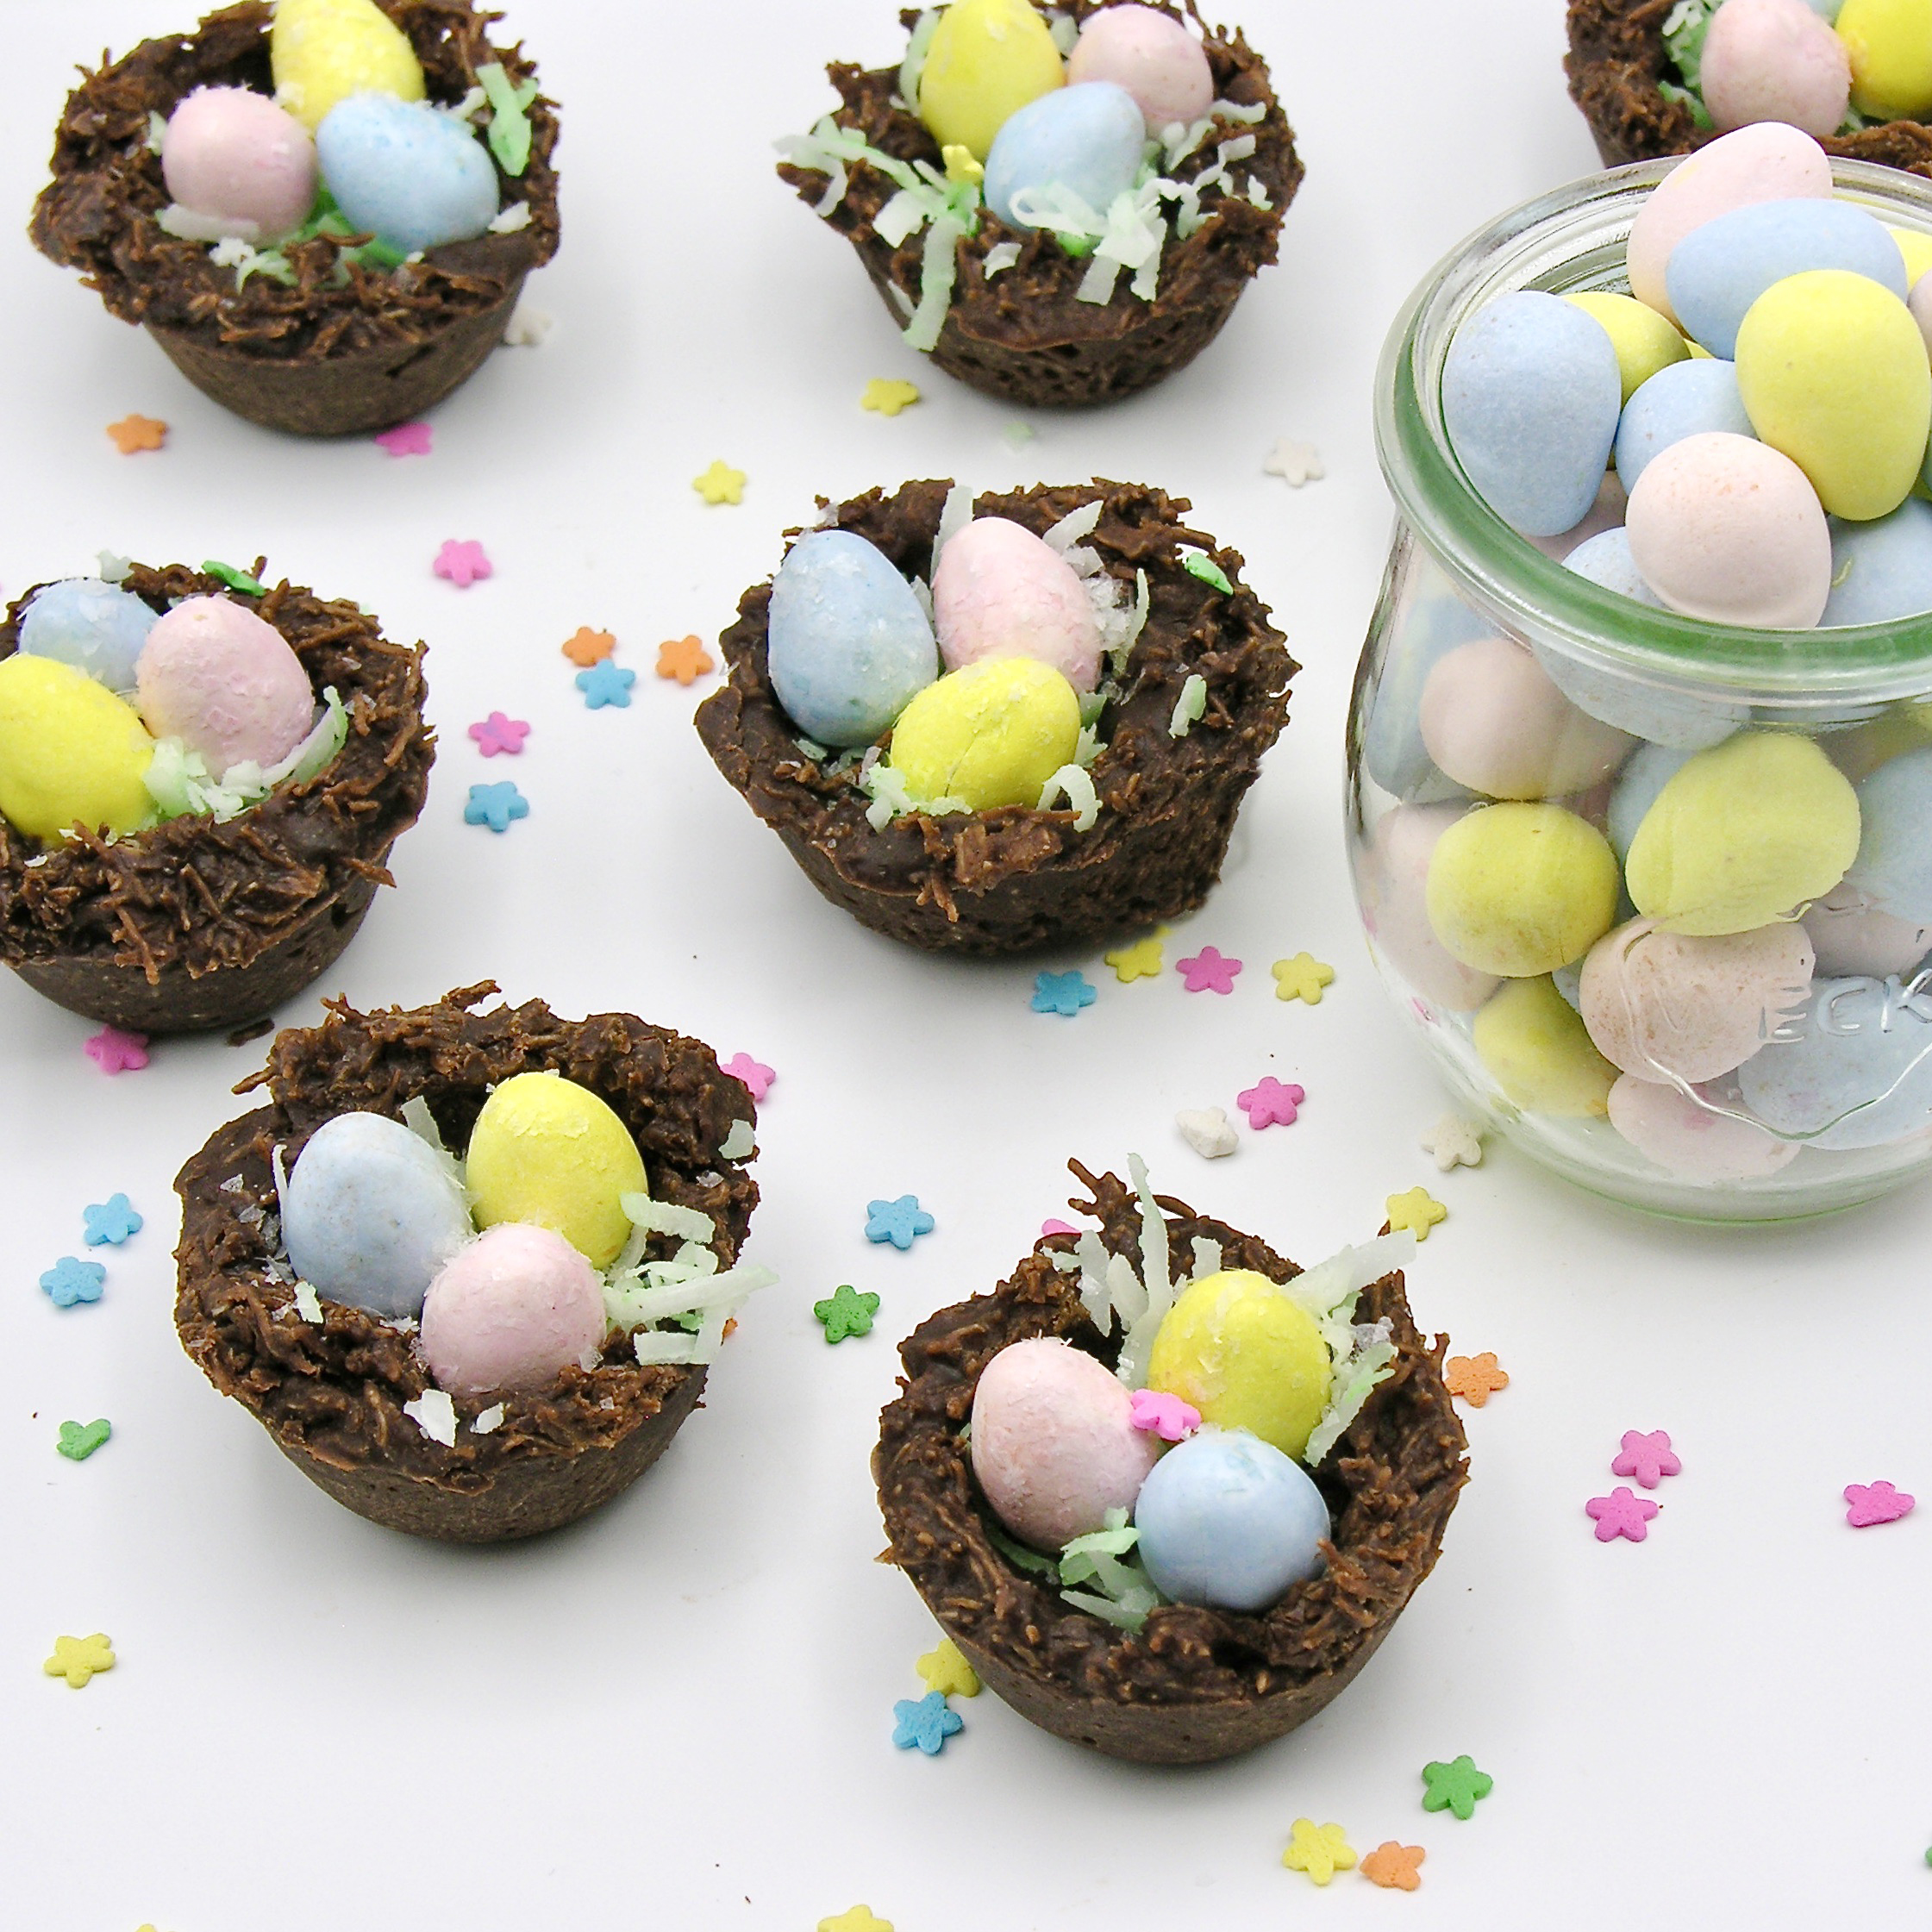
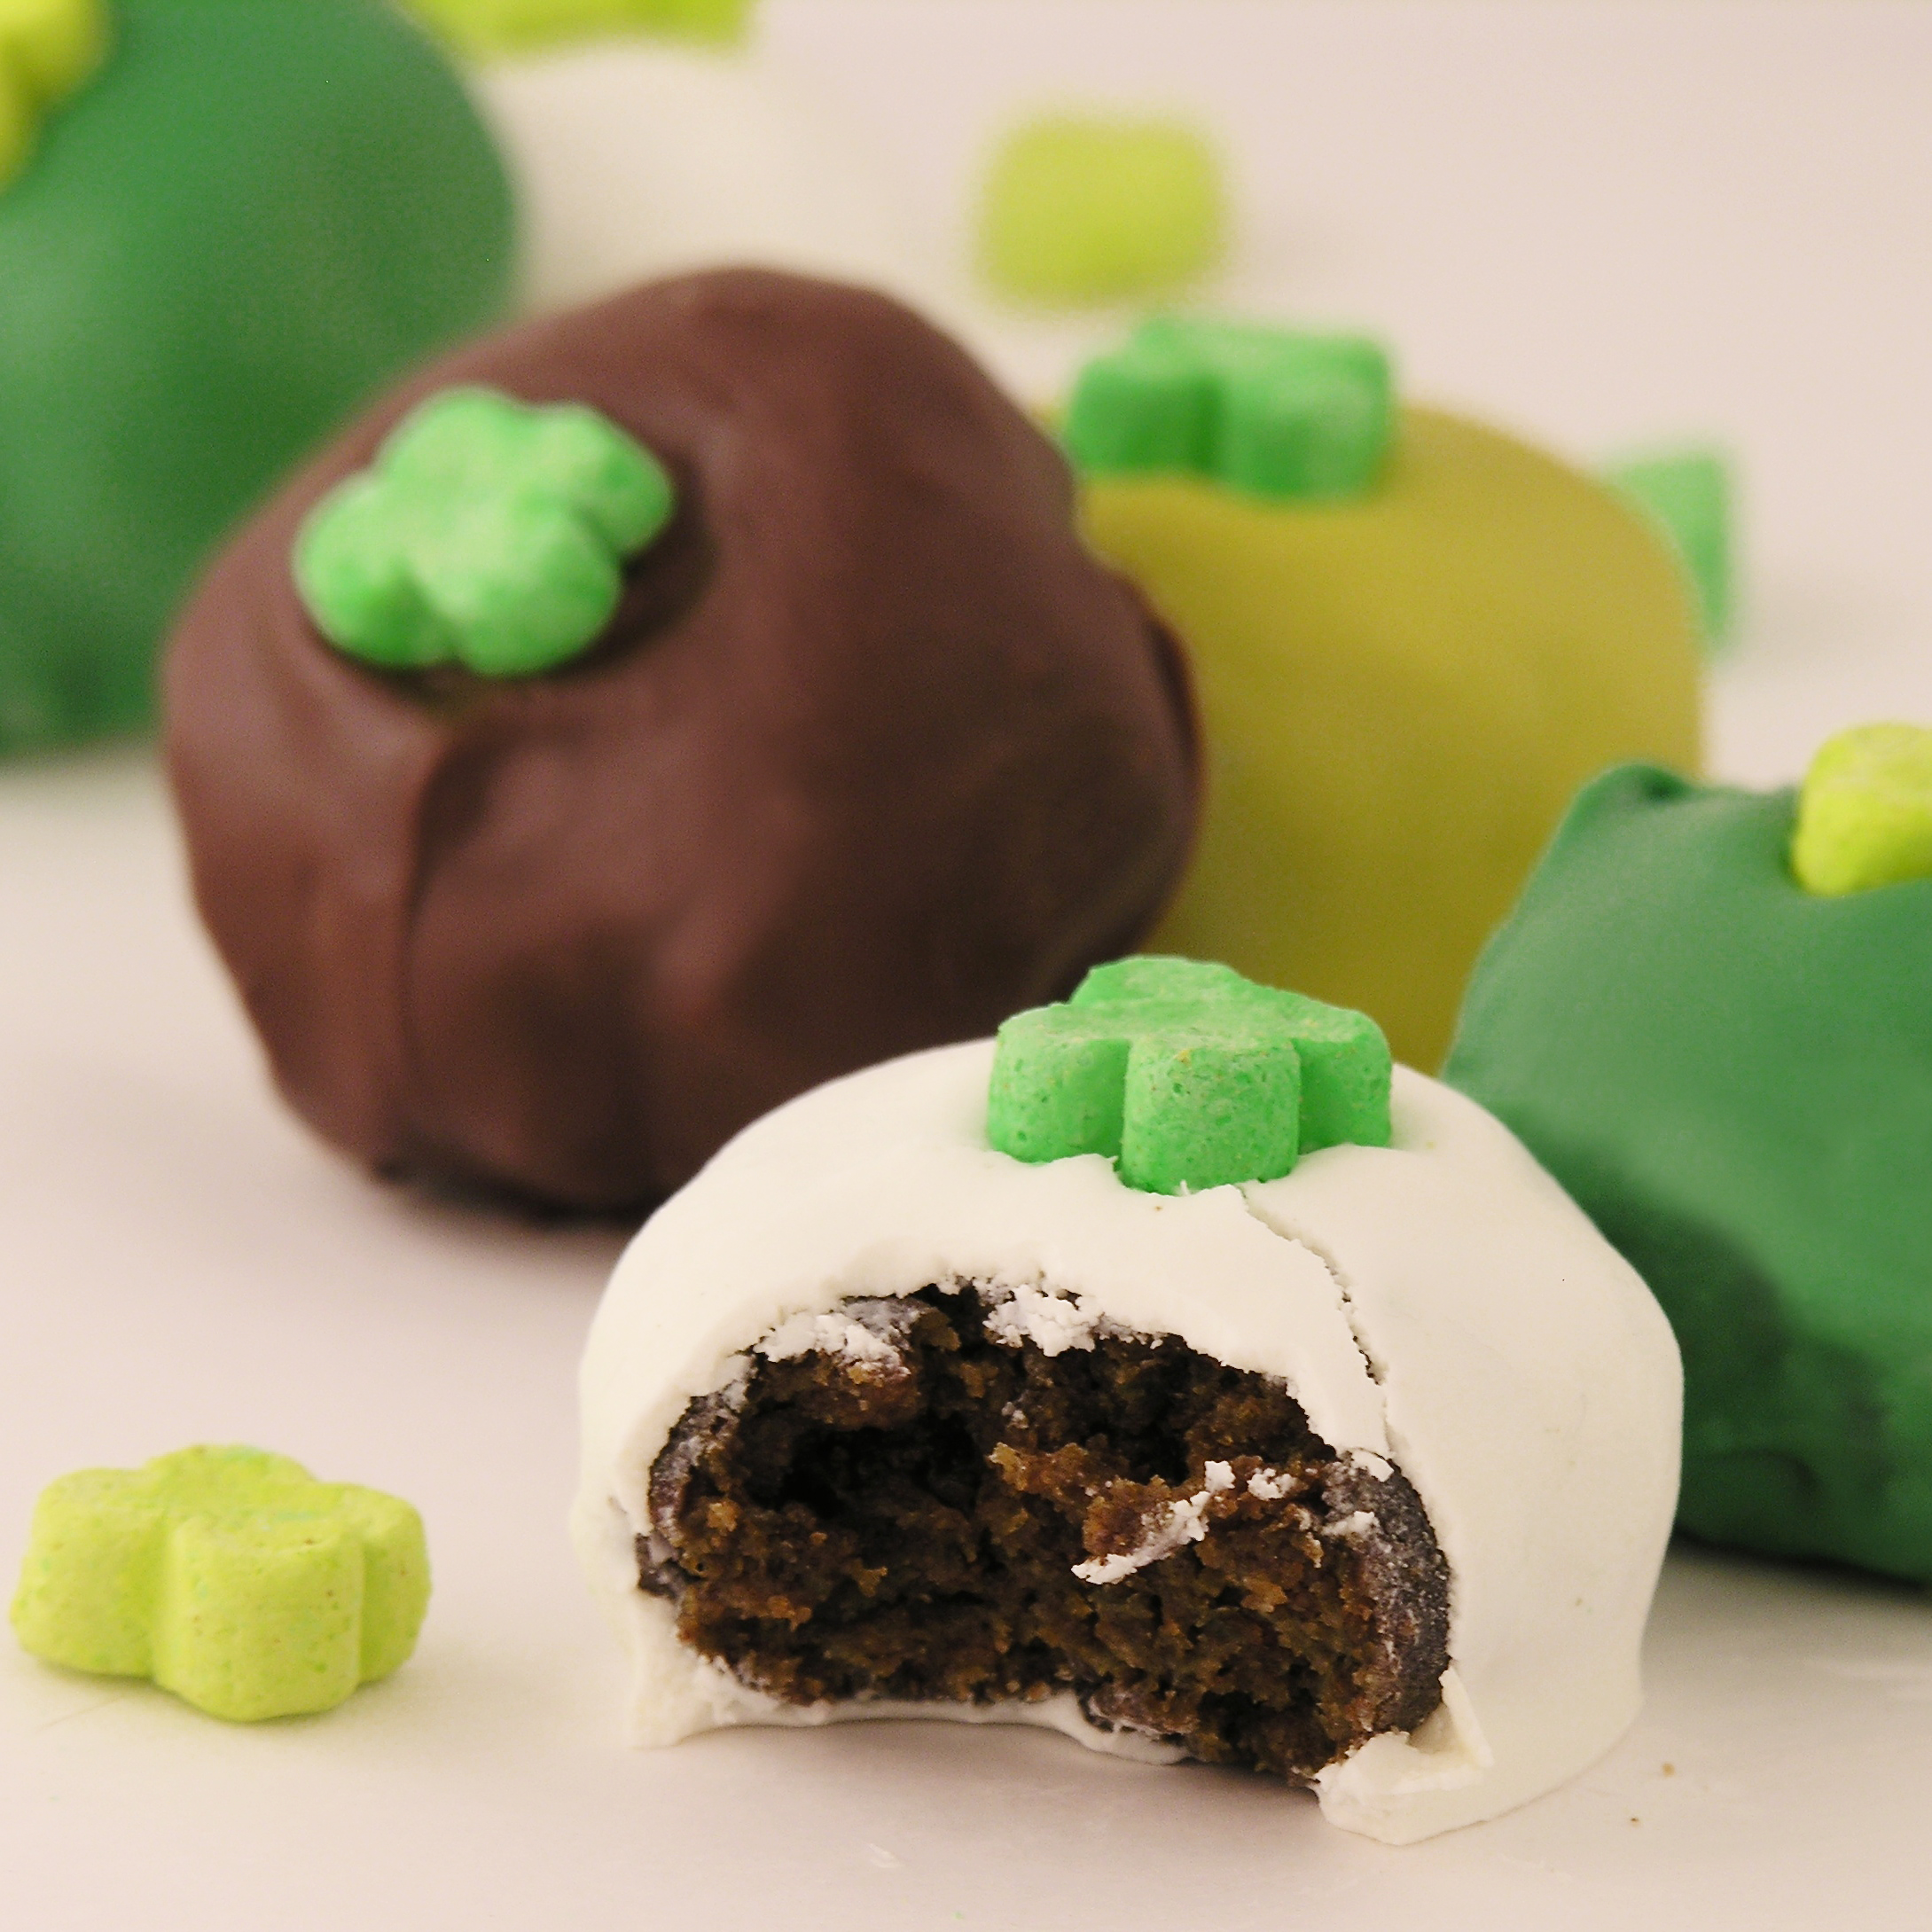
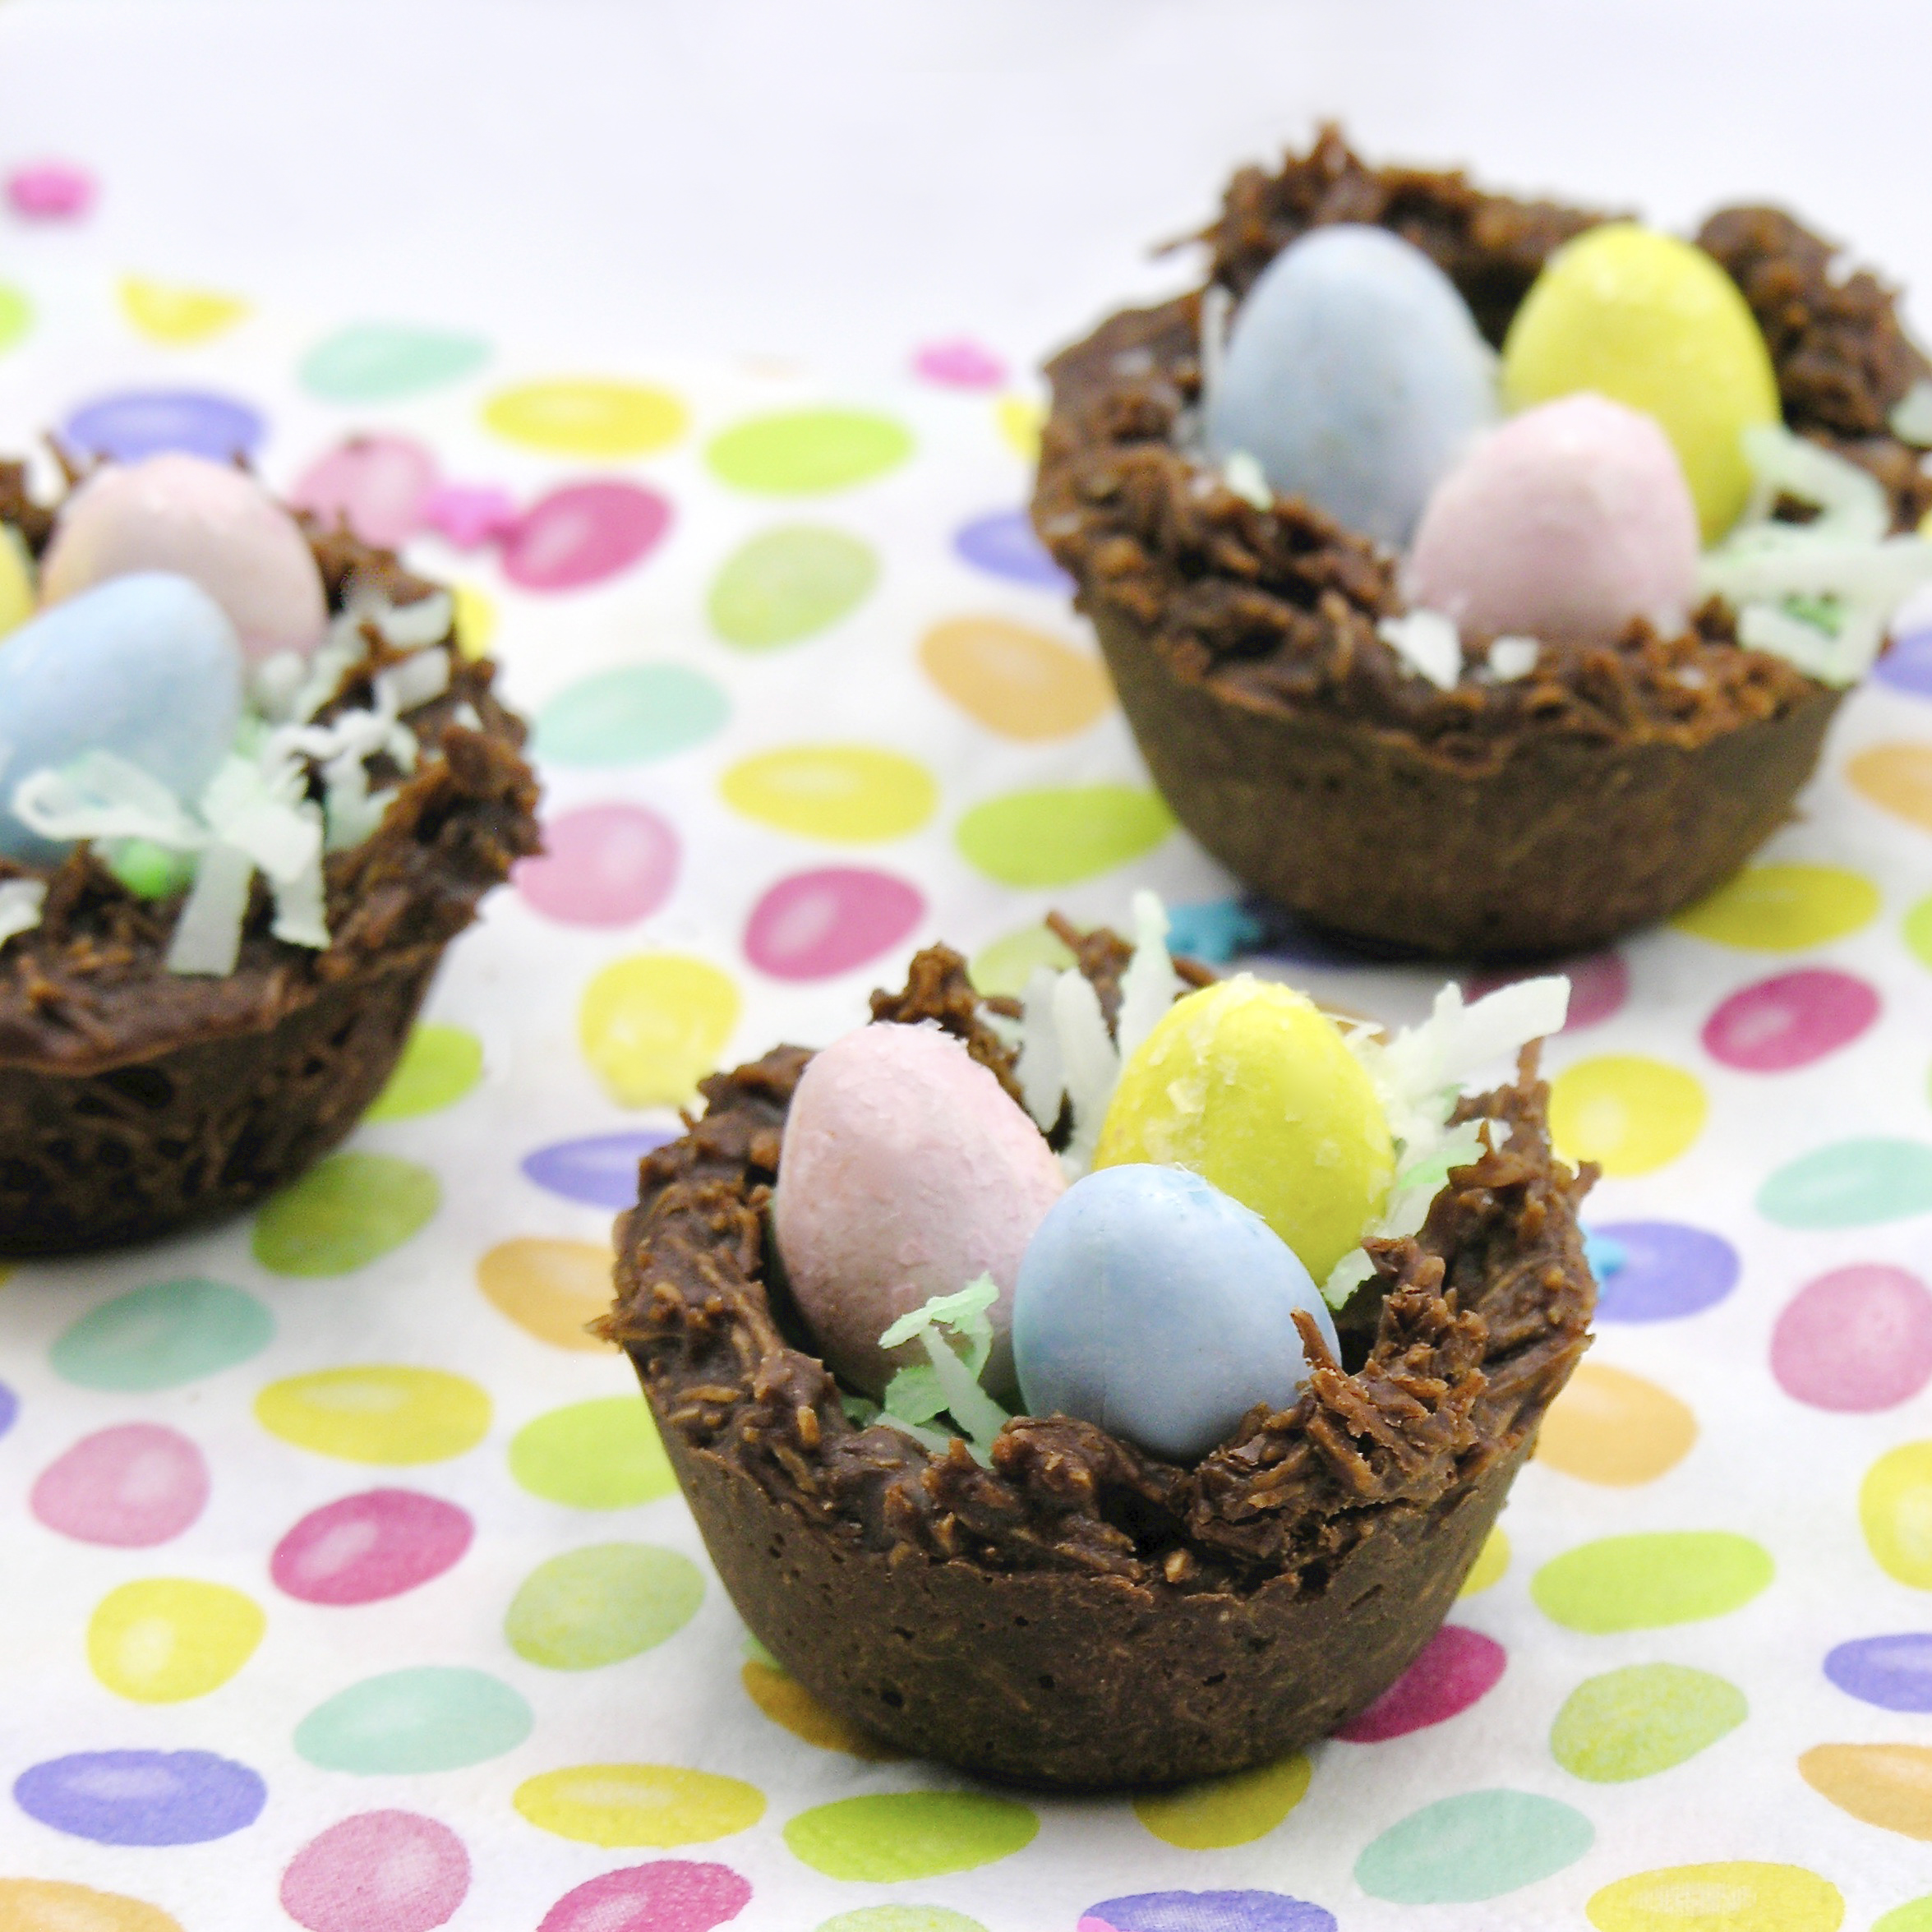


Peppermint Mocha Cookies

Posted on

Brighten up your February with these cheery peppermint mocha cookies!

Sweet peppermint icing over dark chocolate coffee cookies? Yes please!

Just in time for Valentine’s Day, these cookies didn’t last long in our house, and my husband is already hoping I will make them again. Not too sweet, but full of rich espresso and peppermint. I think you’ll love them.

Want to know how to make them?
Here you go. (printable recipe)

INGREDIENTS: (makes 36 medium cookies)

Cookies:

  • 2 sticks (1 cup) butter, softened
  • 1 1/2cups sugar
  • 2 eggs
  • 3 teaspoons vanilla extract
  • 3 teaspoons instant Espresso Powder
  • 2/3 cup unsweetened cocoa powder
  • 3 cups flour
  • 1/2 teaspoon salt
  • 1/2 teaspoon baking powder

Icing:

  • 4 cups powdered sugar
  • 3/4 cup water
  • 3 Tablespoons meringue powder
  • 1/2 teaspoon peppermint extract
  • a little pink food coloring gel
  • sprinkles or white chocolate to make the design on top

DIRECTIONS:

Cookies: 

  • Cream together butter and sugar in a large mixing bowl.
  • Mix in eggs and then cocoa.
  • Place vanilla and Espresso Powder together in a small cup until coffee dissolves.  Add this mixture to the batter and mix until completely incorporated.
  • Gradually add dry ingredients and mix until smooth (use clean hands at the end, to knead into a soft ball of dough)
  • Wrap in plastic and chill for at least one hour.
  • Allow cookie dough to soften a little at room temperature
  • Preheat oven to 350F degrees.
  • Roll out cookie dough on floured counter.  
  • Cut into circles and place on a parchment-lined baking sheet.
  • Bake for 8 to 11 minutes until the edges are firm.
  • Gently slide parchment paper off of cookie sheet and onto a flat surface.  Cool completely before removing cookies from paper.

Icing: 

  • Beat together all ingredients and add powdered sugar until it becomes a thick glaze consistency. 
  • Place in a zip-top bag fitted with a small round piping tip. 
  • Pipe icing around edges of cookie and allow this to harden.
  • Fill center of cookie with icing, spreading it to the edges that have hardened. 
  • To make coffee or heart design, pipe lines on top of cookie with white chocolate, and pull a toothpick through to form design. Otherwise (much easier!) sprinkle with some crushed peppermint or heart sprinkles!
  • Let icing harden and ENJOY!!!

My thoughts: These are easy to make, and they keep in an air-tight container for at least a week (and freeze well). I spent way too much time making coffee froth designs on the top, and when I make them again they will just have sprinkles. I really hope you get a chance to try these!!! Enjoy! ~r

Other cute Valentine’s Day ideas to try (click on photo to see recipe): 


Fall Peanut Butter Crisps

Posted on

Fall Peanut Butter Crisps1

These beautiful fall cookies are special– not just because they are salty, sweet, crispy deliciousness– but because they use up your kids’ Halloween candy!!!!

So… Halloween is over, and you are likely in possession of more candy than you know what to do with. The chocolate will be gone in days, and then the name-brand candy will slowly get picked away at. But there are always those candies that sit in the bottom of the plastic pumpkin until Thanksgiving. For me, those candies were always Bit-o-Honey and the bright orange and black-wrapped “Peanut Butter Kisses“. These are a candy that only seems to make an appearance at Halloween. A combination of taffy and peanut butter, they just always seem to make the left-over candy list.

But not any more!!!  Go ahead, dig through all of that Halloween candy and pull these little guys out- they make the best filling for these beautiful cookies!

Fall Peanut Butter Crisps2

You can also grab other candies to fill these cookies with- rolos, kisses, peppermint patties, mini snickers… all work in this recipe! I actually began making these crisp cookies with Rolos about 5 years ago at Christmas.

Fall Peanut Butter Crisps5

Want the recipe? Here it is!! (printable version)

Ingredients: (makes 20 cookies)

  • 40 Ritz crackers
  • 20 Peanut Butter Kisses (or other small candy that melts at a low temperature)
  • 1 bag of Wilton’s dark chocolate candy melts
  • 1 chocolate transfer sheet (I used 12×16″, and I got mine here). 

Directions: 

  • Preheat oven to 350F degrees. 
  • Place 20 Ritz crackers on a cookie sheet, bottoms up. 
  • Unwrap all 20 peanut butter kisses, and set one on each Ritz cracker. 
  • Place cookie sheet in oven for about 4-5 minutes- check! Candy should be soft but not completely melted. 
  • Remove from oven, and place Ritz cracker, bottom side down, on top of candy and press to spread candy to edge.


  • Place entire tray in freezer to chill for a few minutes.
  • Melt chocolate candy melts in a bowl in the microwave for about 2-3 minutes, stirring once every 30 seconds, until completely melted and smooth.
  • Place parchment paper on a cookie sheet (that fits in your freezer!)
  • Cut chocolate transfer sheet into 20 squares.
  • Take a cookie, place it in the melted chocolate and cover it completely. Use a fork to pick it up and tap on the side of the bowl until all excess chocolate drips off the bottom. Slide bottom along edge of bowl, and using fork, slide onto parchment paper.

  • Immediately place chocolate transfer sheet square on top of the melted chocolate (you’ll need to put the rough side down- the smooth side up) and gently press it into contact with the entire top of the cookie. Repeat 20 times.

  • Place entire cookie sheet into the freezer for 5 minutes or so. As soon as you remove it, gently peel off the transfer sheet from each cookie- and enjoy!!!

How-to-crisps8

My thoughts: There are three things that I love about these cookies…

  1. They are EASY to make- they take almost no time but look so fancy!
  2. They are CHEAP to make- the Ritz crackers and peanut butter candies are really inexpensive (I got mine at the Dollar Store), the chocolate isn’t too costly, and the transfer sheet is like $4.40, but SO worth it! (you could use sprinkles instead, to cut the cost even more though!)
  3. They keep for a long time. Put these little guys in cello bags, tie them up, and use them to decorate your place settings at Thanksgiving! 

They also can use a variety of candies up- and you can decorate them so many fun ways! 

Fall Peanut Butter Crisps3

Go – find your kids’ candy and re-purpose it into these beautiful, crunchy, deliciously salty but sweet treats!

Need other ideas for using up that Halloween candy? This is a project we have a few ideas for! Click on a photo to see the recipe.


Tie Dye Slime Cake for Halloween!

Posted on

Slime Cake1

This deliciously scary layer cake has all the fun colors of Halloween, with green slime oozing out of the layers!

I think that of all the desserts I create all year long, the October ones are my favorite. There is just something fun about the purples and greens and oranges this time of year- and the “yuck” factor that actually tastes amazing. This cake has all the colors, all the feels, and that slimy green layer? It is actually white chocolate pudding that is absolutely delicious.

This filling is inspired by our Toxic Slime Cupcakes from a few years ago. I loved the flavor of the pudding slime so much that I wanted to use it in something else. The cake-of-many-colors is inspired by our Tie Dye cake recipe from a few years back. Put the two together and you have this Franken-dessert mash-up. Just in time for Halloween!

Slime cake3

Want to know how we made it? Here you go: (printable recipe)

Ingredients: 

  • One white cake mix (plus eggs, oil and water to make according to package)
  • One chocolate cake mix (plus eggs, oil and water to make according to package)
  • Food coloring gels in orange, green, purple and black 
  • Two large boxes of instant White Chocolate pudding mix (plus milk to make according to package)
  • 2 sticks of salted butter
  • 2 sticks of unsalted butter
  • 3 cups of powdered sugar
  • 2 teaspoons of vanilla
  • Halloween sprinkles 

Directions: 

  • Make two cake mixes according to package.
  • Use black food coloring gel to make chocolate cake a black color
  • Divide white cake batter into three bowls and add color gels to make them orange, green and purple.
  • Spray three 9 inch pans with cooking spray and cut a round piece of parchment paper to fit in the bottom of each. If you don’t have three pans, bake layers one at a time.
  • Starting with black, place a circle of batter in the middle of each pan. Tap it to make it spread out a bit (batter should not be at the edges yet). Add a circle of green in the center of the black, tap until both colors spread a little. Repeat with orange and then start again with black and repeat all colors, ending with black (because you have more batter in that color). 

Tie Dye Method1

  • Place cakes in a 350F degree oven and bake according to package (mine took about 25 min). 
  • Remove from oven, tip out of pan, and cool completely on a cake rack. 
  • Trim the top of each layer so that it is flat. 
  • Make 2 boxes of pudding according to package, and use green food color to tint it a slimy shade of green. 
  • Make frosting by placing the butter (at room temp), powdered sugar and vanilla into a large bowl and beating it on high until light and fluffy. 
  • Divide frosting into 3 bowls- one bowl for the purple should have about 3/4 of the frosting, the other two should have the rest split in two for orange and green. Use food color gels to color these. 

Assembly of the cake: 

  • Place purple icing in a large zip-top bag fitted with a large round (2A) Wilton decorating tip. Pipe icing around the top of a layer to form a “wall” to hold the pudding slime on the cake. 
  • Spoon 1/2 of the green slime pudding on top of the cake, and spread it to the frosting edges. 

  • Gently place a cake layer on top of the pudding and repeat the process once more, ending with the top layer of cake. 
  • Frost the entire cake in purple and then, using a round (2A) Wilton tip, pipe round dots all over the top of the cake in the 3 colors. 
  • Finish with a sprinkle of eyeballs and bones- or any other fun Halloween candy. 
  • Enjoy!

Slime cake4

My thoughts: YUM!!!  This cake is so good with that white chocolate pudding as a filling. Goodness. You could make this recipe easier by doing either one element or the other (make a purple cake with slime- or make a tie-dye cake with regular filling). Also- you will have a little left-over black batter. I went a little heavier on the black layers to make up the difference, but still had a little left. I really hope you get a chance to try this recipe! Enjoy!! ~r

Slime cake2

Other fun Halloween recipes to try:(click on photo to open recipe)

Peanut Butter Spider Cookies!

Posted on

Spider5

These deliciously creepy little spider cookies are special…. because the peanut butter cookies they sit on only take THREE ingredients, and are the best peanut butter cookies I’ve ever tasted!

Spider7

I’ve seen these cute little guys pop up online, and I’ve wanted to make them with my favorite (super-easy!) peanut butter cookies for more than a few years. They are a cute addition to any Halloween party, delicious, and sooooo easy to make. Want to know how? Here you go: (printable recipe)

Ingredients: (makes about 24 cookies)

  • 2 cups peanut butter (creamy)
  • 2 cups granulated sugar
  • 2 eggs
  • 24 Lindt chocolates
  • 1 cup of Wilton candy melts in milk or dark chocolate
  • 48 candy eyes

Instructions:

  • Preheat oven to 350F degrees
  • Place peanut butter, sugar and eggs into a mixing bowl and stir until well combined.
  • Use a cookie scoop to place 2 inch balls onto a cookie sheet covered in parchment paper. 
  • Bake at 350F degrees for about 12 minutes (cookies will still be soft in the middle). 
  • Remove from oven and use a tart shaper or the rounded back of a measuring spoon to press a small round indentation into the center of the cookie (so the chocolate spider has a place to sit!).
  • Bake another 2-4 minutes and remove from oven. Slide parchment paper off cookie sheet with the cookies still on top and cool completely. 
  • Melt candy melts in the microwave in 30 second increments, stirring between. 
  • Use a toothpick to put a little melted chocolate on the back of your candy eyes and attach them to the Lindt chocolate. Allow these to harden. 
  • Place the rest of the melted chocolate into a zip-top bag. Seal it up and cut a small corner off. Squeeze the bag and pipe legs on the top of each cookie. 
  • Add a bit of chocolate in the center of each cookie and set a Lindt “spider body” on top. 
  • Allow all chocolate to harden and ENJOY!

Spider4

My thoughts: What’s not to like about these?!? A super-easy peanut butter cookie, plus chocolate? SO fun! Too busy for spiders? Just make the cookie part. You could have warm peanut butter cookies in like 20 minutes from RIGHT NOW. Aaaand…. go!

Spider3

Looking for other fun Halloween treats? Here are a few- just click the photo to see the recipe!

Epic Monster Cookies!

Monster1

Every once in awhile I run into a dessert that I simply HAVE to try making. These cookies are that dessert. Recently, my husband and I were invited to be a part of a good friend’s wedding in Georgia. At the rehearsal, the groom’s mom handed out little bags filled with these cookies… and the rest is history. I’ve had monster cookies before… but I’ve never had ones that tasted this good! Thick and full of oats- kind of like the oatmeal no-bake cookies… but better. Seriously– you need to try them!

Monster2

So I got the recipe from Debbie Howard, mom of my recently married friend Josh. It was a really old recipe in one of those church cookbooks where everyone submits recipes. It had alterations scribbled all over the recipe, so it took me three tries, but I finally perfected the recipe. You need to make these exactly as instructed though- or they won’t work as well- and believe me- when they work….? Epic. Cookies.

My biggest mistake was not refrigerating the dough before scooping them out- and they flattened into thin crispy puddles :/ You need to refrigerate- so give yourself at least 2 hours extra time for that. Otherwise, they are fairly easy cookies and worth every bit of effort!!  Want the recipe? Here you go! (printable recipe)

INGREDIENTS:

  • 1 cup sugar
  • 1 cup brown sugar
  • 1 stick of butter (softened to room temperature)
  • 3 eggs
  • 1 ½ cups of extra crunchy peanut butter
  • Âľ tsp salt
  • 2 tsp baking soda
  • 5 cups oatmeal (old-fashioned kind- not instant!)
  • ½ cup M&Ms
  • ½ cup chocolate chips
  • ½ cup chopped pecans
  • 1 tsp vanilla

DIRECTIONS:

  • In a large bowl, beat butter and sugars together and add eggs and vanilla. Beat until smooth.
  • Add peanut butter and beat together until well combined.
  • In a separate large bowl, toss salt, baking soda, oats, pecans, M&Ms and chocolate chips together.
  • Add bowl of dry ingredients to wet and mix well.
  • Cover and refrigerate for about two hours (you must do this, or the cookies will spread thin and crunchy when baked). Dough should be just hard enough to still scoop, so test the time a bit, as refrigerators vary in temperature.
  • Preheat oven to 365F degrees.
  • Use a large cookie scoop or ice cream scoop to place cookie dough on a parchment paper- covered cookie sheet. Roll them smooth with your hands and then flatten them a little bit before baking. Leave room between cookies to allow them to spread a little. 
  • Bake at 365F degrees for 10-12 minutes. They should be just turning brown on top when you remove them. 
  • Slide cookies off sheet, still on parchment paper, and allow them to cool on counter- they will seem fragile until they cool and harden up.
  • Enjoy!

Monster3

My thoughts: Well, I already said this once, but these are really delicious cookies. They are thick and chewy and so peanut-buttery! Store them in an air-tight container and they keep for a long time (we are still eating ours a week later!) Enjoy! ~r

Monster7

We have other epic cookies here- click on a photo to see the recipe!

Chocolate Cake Roll with a Cinnamon Caramel Filling

Posted on

Cake Roll1I love my pumpkin roll recipe. It’s one of my favorite parts of baking in the Fall. I’ve been highly unsuccessful, however, in finding a chocolate cake roll recipe that I love- either it tastes great but cracks like crazy, or it rolls well buts tastes like cardboard. One of my goals over the past 2 years of blog-absence was to create a chocolate cake roll recipe that works AND tastes great.

This is it! It rolls beautifully (I had only one small crack) and tastes like a rich, but not-too-sweet, fudge brownie. Perfect!

Of course you can fill this roll with a multitude of things, but I chose a creamy Dulce de Leche caramel filling with cinnamon.

Cake Roll3

Ready to try this? Here’s the recipe: (printable version)

Ingredients: 

Cake:

  • 2/3 cup flour
  • 1/3 cup unsweetened cocoa powder
  • 1 ½ teaspoon baking powder
  • 1 ½ teaspoon salt
  • 5 eggs
  • 2/3 cup sugar
  • 3 tablespoons vegetable oil
  • 2 teaspoons vanilla

Filling:

  • 3 sticks (1.5 cups) of salted butter, softened to room temperature
  • One can (13.4 oz) Dulce de Leche (I used Nestle’s La Lechera)
  • 1 1/2 teaspoons of cinnamon

Topping:

  • 1 Tablespoon of cinnamon
  • 2 Tablespoons of cocoa powder (mix them together in a small dish)

Directions:

Cake:

  • Heat oven to 350 degrees F and lightly spray a 17 x 12 inch jelly roll pan with non-stick cooking spray. Line the pan with parchment paper with about an inch of extra paper on the 17-inch sides (so you can lift the cake out of the pan easily once it bakes). Note: make sure your paper is nice and flat- the non-stick spray will help hold it down. Mine folded a little and you can see a few bumps on my roll where the batter baked over the fold.
  • Add flour, cocoa powder, baking powder, and salt in a medium bowl stirring gently until just combined.
  • In a large bowl, beat eggs and granulated sugar for about 1 minute until thick. Add in the oil and vanilla extract, and beat together until combined.
  • Add dry ingredients to wet, and mix gently until just combined. The batter will be like a runny brownie batter.
  • Spread the batter evenly into prepared pan, and bake for 12-16 minutes, or until top of cake springs back when touched.
  • Carefully lift the parchment paper and cake out onto a flat (and heat-safe) surface. Then slowly, using your hands (careful, it will be hot!), roll the cake  – rolling from one short (12-inch) end to the other— until it is completely rolled up.
  • Wrap tightly in a towel and place in refrigerator until completely cooled (an hour or so).

CakeRoll6Cake Roll5

  • While the cake is cooling, make the caramel and cinnamon filling (see below).
  • Once the cake has cooled completely, place it on a flat surface, remove the towel, and unroll it carefully until it is flat again (it’s ok if the ends curl up a bit).

Filling: (make while cake cools)

  • Place butter in mixing bowl and beat on high until whipped and smooth.
  • Add Dulce de Leche and cinnamon to butter and beat on high for about 2 minutes until smooth and creamy.

Assembly: 

  • Spread the filling evenly over unrolled cake, leaving a small border on all sides (the filling will spread out as you roll it back up).  Then carefully re-roll the cake, gently peeling away the parchment paper as you roll until you can completely remove and discard it. Tightly wrap the chocolate roll in plastic wrap or Press-n-Seal and refrigerate at least one hour until completely set.

Cake Roll8Cake Roll7

  • Lightly dust with cocoa powder and cinnamon mixture (you could also add a chocolate glaze to the top if you have cracks or you want the dessert to be sweeter).
  • To serve, remove and unwrap the chocolate roll, transfer it to your serving dish and slice.
  • Keep leftovers tightly wrapped and refrigerated for up to 4 days.

Cake Roll2

My thoughts: Yum! I loved this cake roll- I almost feel like it should be called a brownie roll because it is so dense and rich. This is not a super sweet dessert- my husband said it would be better with a sweet chocolate glaze on top- but I loved the rich cocoa/cinnamon flavor. If you like a not-so-sweet but rich and cocoa-y dessert, this one’s for you! Enjoy!! ~r

Cake Roll4

%d bloggers like this: