Tag Archives: dessert

Salted Caramel Tart

Salted Caramel Tart3

A dense, dark chocolate tart covered in creamy, salted caramel sauce. Salty, sweet, and rich dessert flavors!!!!

This recipe is a combination of some of my favorite elements from other desserts. The chocolate tart is the perfect base for just about any topping. You can adjust it from dark to milk chocolate just by swapping out the type of chocolate you add. The caramel sauce is my go-to sauce for so many recipes. It’s not from-scratch, but it is honestly better (and soooo much easier)!

Salted Caramel Tart

That caramel layer does firm up after being chilled- but I wanted to cut into this right away- so these pictures show it in all of the gooey happiness that happens just after baking. Yum!

Here’s how we made this tart: (printable recipe here)

INGREDIENTS:

  • One refrigerated pie crust
  • 1 10 oz. bag of dark chocolate chips
  • 5 egg yolks
  • 5 tablespoons heavy whipping cream
  • 2 teaspoons of vanilla
  • 5 tablespoons of powdered sugar
  • 32 Kraft Caramels (unwrapped)
  • 1 can (14oz) of sweetened condensed milk
  • 1 stick (1/2 cup) of butter
  • 1 tablespoon salt (to taste)

DIRECTIONS:

  • Preheat oven to 350 degrees.
  • Spray a 9 inch tart pan with cooking spray and line with pie crust.  Poke holes into bottom with fork and set on a cookie sheet.
  • Melt dark chocolate chips.  Allow them to cool to room temperature.
  • In a separate bowl combine eggs, cream, vanilla and powdered sugar.
  • Add cream mixture to chocolate and blend well.  Pour into crust and bake for 20 – 25 minutes until center is set.
  • While tart is baking, make caramel sauce by placing caramels, condensed milk and butter into a medium saucepan.
  • Heat over medium/high heat, stirring constantly, until melted and smooth (about 6 minutes).
  • Allow caramel to cool in pan a bit, and add salt, mixing well to combine.
  • Once tart has been removed from the oven and allowed to cool, pour caramel over the top until entire crust is filled (YUM!!!)

Salted Caramel Tart

  • Chill, and drizzle with a little chocolate sauce- if you want- for decoration 🙂
  • Remove sides from pan, serve and enjoy!!!!

Salted Caramel Tart!

My thoughts: Straight up delicious. The sweet caramel has a little bite of salt and that dark chocolate tart is the perfect balance to the sweet. I love the textures of this dessert. The chocolate is so dense and creamy, and the caramel is so soft. This is just “one of those” desserts. The kind you think about long after the last bite. This tart was given away last weekend to friends, and these pictures are killing me… I wish I had another piece right now…! Enjoy this one, friends!!!  ~r

Salted Caramel Tart!

More caramel happiness here at Easybaked: (click on a photo to see the recipe)

Caramel Ritz CookiesCaramel Gelato!!!Alfajores-- yummy dulce de leche filling!Marshmallow Turtle Pops!

Apple Oreo Pops!

Posted on

Apple Oreo Pops6

These adorable Oreo pops are a perfect back-to-school treat. Add hearts to send a little love in the lunchbox- or some worms to get a few giggles!

I hate to even say the words….but fall is coming. I love summer so much, that when I start to see school busses out on the roads I just cringe. Fall has some pretty fun foods though….! One of our family-favorites is apples. I grew up in Michigan, and we have the best fall apples. I loved trips to the orchard to get cider and doughnuts- and these little Oreo pops are perfect to kick off the fall season.

Apple Oreo Pops!

You can make them with hearts and tie them up in cello bags to send a little love…

Apple Oreo Pops with worms!

Or you can add a few caramel worms to your apples to give them an extra “Ewwww” feel- maybe for Halloween?? 🙂

Either way, these are an easy and fun fall treat that keeps for weeks when wrapped up in a cello bag.

Here’s how we made them: (printable recipe here)

INGREDIENTS: (makes about 24 pops)

  • One box of Double Stuf Oreos
  • 24 lollipop sticks
  • 2 bags of Wilton’s Candy Melts in red, yellow or green
  • About 5 tootsie rolls
  • About 1/4 cup of fondant, colored green (you can make a small batch of this or just purchase a box of Wilton’s)
  • leaf cookie or fondant cutter
  • Heart sprinkles (as desired to decorate)
  • 5-10 Kraft caramels to make worms if desired.

DIRECTIONS:

(if you have never made an Oreo Pop before, our how-to is here)

  • Twist apart all of your Oreos.
  • Melt a small amount of candy melts (<1/4 cup) in the microwave in 3o second increments, stirring between until smooth.
  • Dip the end of a lollipop stick into the melts, and press into white filling of Oreo. Place other half of cookie back on top and press together.
  • Place Oreo and stick on a cookie sheet. Repeat this process with remaining Oreos, and then freeze all Oreos until firm (10-15 minutes).
  • While Oreos chill, make stems, leaves and decorations.
  • Make stems by rolling tootsie rolls out and cutting into short pieces.
  • Take colored fondant and roll it out. Use leaf-shaped cutter to cut out 24 leaves.

Apple Oreo PopsApple Oreo Pops- adding leaves

  • If you want wormy apples, simply unwrap a caramel, roll it out into a thin rope using clean hands, and press little lines in it using a small knife or toothpick. Cut them into little pieces to add as if they are crawling out of each apple.

Apple Oreo Pop- making caramel worms!

  • Melt one bag of Candy Melts using method from above.
  • Once Oreos are chilled, hold with stick and dip into Candy Melts until completely coated.
  • Tap on side of bowl to get excess off, and drag across lip of bowl to scrape excess off back of cookie.
  • Set on parchment paper to harden.
  • Immediately set a tootsie roll stem on the top, along with a leaf.
  • Add any other decorations (hearts? worms…?)
  • Melt and use second bag of Candy Melts when you are finished with the first one.
  • Allow Oreos to harden up (at least an hour) before tying each one up in a bag (or putting them in an air-tight container for storage).
  • Enjoy!


Apple Oreo Pops5

My thoughts: You just can’t go wrong with Oreo Pops. They are one of my favorite things to make because you have fun treats handy for awhile afterward!  These are pretty easy- you might hesitate a little with using fondant if you have never used it before- but you should just give it a try! I don’t cover cakes in it or anything crazy- but I like it for little decorations here and there. My recipe and some tips are here. Otherwise just buy a box of the white fondant! It doesn’t taste as good, but for the little bit you are adding here, it doesn’t matter. I really hope you get a chance to try these! Happy almost-fall to you! ~r

More apple-y ideas here on Easybaked: (click on the photo to see the recipe)

Apple Cupcakes!Inside-out Caramel Apple!!Caramel Apple CupcakesGreen Apple Truffles

Iced Mocha Pops!

Posted on

Mocha Pop3

Stir this delicious frozen pop into your coffee, and you have an instant, creamy iced peppermint mocha! 

The heat of summer is here, and I find myself craving iced coffee drinks in yummy flavors. These easy-to-make frozen pops can be stored in your freezer and pulled out any time you have a craving for something a little more fun than just plain coffee!

I made mine with peppermint syrup- but you could certainly make yours with your favorite flavor! Don’t skimp on the chocolate- I used Torani Dark Chocolate Sauce and it is to die for!!  Seriously. Use it.

Iced Mocha Pops

Aren’t they so fun?!? And the smiles when you serve these….. love it!

Here’s how we made them: (printable recipe)

INGREDIENTS (makes 10 pops)

  • 3 cups of whole milk (if you can get it in your part of the world, Fairlife ultra-filtered milk is SO worth trying. It is unbelievably creamy. I’ve never had milk this good…)
  • 2/3 cup Torani Dark Chocolate Sauce (plus a little to drizzle on top, if desired)
  • 3/4 cup Torani Peppermint Syrup (or whatever flavor you love!)
  • Pink food coloring (if desired- match the color to the flavor you use– you can have several flavors in your freezer and know which is which!)
  • Whipped Cream (to top, if desired)
  • 8 oz. of brewed coffee for each serving
  • Crushed ice

DIRECTIONS:

  • Heat 2 cups of milk in the microwave or on the stove until warm (not hot).
  • Add Dark Chocolate Sauce and mix until well-combined.
  • Set 10 (3 oz.) paper cups on a small baking sheet and pour Dark Chocolate milk mixture into each cup. Fill them about 2/3 full.
  • Freeze for 3-4 hours. Press a wooden dowel into each one (the pointed end helps with this) and re-freeze.
  • Mix peppermint syrup with remaining 1 cup of milk and pour all but about 1/3 cup into each cup, leaving a little room on the top of each pop to add some PINK peppermint milk.
  • Freeze for 3-4 hours (keep unused peppermint milk covered in fridge until you need it).
  • Add pink food coloring to remaining peppermint milk, and pour a little on top of each pop.
  • Freeze overnight.
  • The next day, clip the top of the cup with a scissors and tear away the paper cup. Place uncovered pop on a paper plate or parchment paper in the freezer.

Iced Mocha Pops

  • To serve immediately, in a 12-14 oz. cup, brew 8 oz. of strong coffee. I used my Keurig with a dark blend.
  • Place pop into coffee and stir until dissolved. Add a little crushed ice to chill completely and top with whipped cream and chocolate drizzles if desired.

Frozen Mocha PopFrozen Mocha Pop

  • To have a mocha-on-demand, place these little pops into cake-pop cello bags and tie them shut. Keep these frozen for up to a month. When you are craving an iced mocha, simply make coffee and add a pop!
  • Enjoy!!!!

Mocha Pops5

My thoughts: Ah….these are so yummy! I love the deep chocolate taste and how it blends with the coffee. I made some with caramel syrup too, and I can’t wait to try others! Give yourself a day to make them, since they have to freeze in stages. I started my first batch in the afternoon and finally put them in to freeze overnight at 10pm! So plan ahead and start them early.

These are so cute in little cello bags with ties- a perfect addition to a coffee bar- just be sure to keep them on ice! Enjoy!!  ~r

Iced Peppermint Mocha Pops

Other coffee themed desserts here on Easybaked: (click on a photo to see the recipe)

Espresso Cookies 6Mocha cupcakes in edible fondant mugMocha Caramel Cream Cupcakes!Spiced Mocha and Tim Tam Slams!

Key Lime Layer Cookies

Posted on

Key Lime Cookies

Layers of cookie, key lime pie filling, and white chocolate make these an irresistibly refreshing summer treat!

So. You know those new “healthier” Oreo Thins cookies? I found a way to make them unhealthy. Still a reasonable indulgence, but not the super-low calorie tiny sliver of a cookie they were created to be.

I present: Key Lime Layer Cookies!!!!

Key Lime Cookies

Creamy Key Lime filling sandwiched between two Oreo Thins and dipped in white chocolate. YUM!!! These are incredibly easy to put together and such a delicious, creative, and beautiful treat!

Key Lime Cookies4

Here’s how we made them: (printable recipe)

INGREDIENTS: (makes 20 cookies)

  • 3/4 cup of key lime juice (I squeezed ’em!)
  • 1 can of sweetened condensed milk
  • 1 egg
  • 1 package of Oreo Thins in vanilla
  • 1 bag of Wilton’s Candy Melts in white
  • Colored sugar (if desired for decorating)

DIRECTIONS:

  • Preheat oven to 350F degrees.
  • Combine lime juice, condensed milk and egg together in a small mixing bowl.
  • Pour into a small baking dish and bake for 20 minutes.
  • Spoon into a cool bowl and chill in freezer for 30 minutes to cool.
  • While cooling, set 1/2 box of vanilla Oreo Thins out on a baking sheet that will fit into your freezer.
  • After lime filling is chilled, stir and spoon into a large zip-top bag. Clip a corner off and pipe filling on top of each Oreo- not quite going to the edges.
  • Gently set an Oreo Thin on top of the filling. Don’t press too hard or the filling will come out on the edges. Use up all the cookies in the box.

Key Lime Cookies6Key LIme Cookies7

  • Gently slide this baking sheet into the freezer and freeze for 1 hour.
  • Melt Wilton’s Candy Melts in microwave in 30 second increments, stirring between until smooth.
  • Take chilled cookie and place it into melted chocolate. Quickly spoon over the top and sides.
  • Lift the cookie with a fork and tap on side of bowl until excess drips away. Slide bottom edge of cookie along side of bowl to get rid of excess on bottom and set on parchment paper to harden.
  • Repeat with remaining cookies. You may want to keep cookies in freezer before dipping, and only take maybe 4 or 5 out at a time to work on.
  • Decorate as desired. If you want sugar sprinkles, add these before the candy melts harden back up. 
  • Enjoy!

Key Lime Cookies2

My thoughts: These are easy and fun to make, and they keep for up to a week in the fridge! You will have a little pie filling left at the end, but you could get a little more white chocolate and a few more cookies to use it up -if you want. I’d guess you would have enough filling for another 8-10 cookies. Another helpful hint- make sure these are cold when you dip them, and don’t linger and let them sit for a long time in that melted chocolate. Sprinkle sugar on top while they are still melted. I hope you enjoy these as much as I did!!  ~r

Key Lime Cookies5

Other key lime desserts here on Easybaked: (click on a photo to see the recipe)

Key Lime PieKey Lime CakeKey Lime Cupcakes!Key Lime Tartlets

Baked Alaska Cookies!

Posted on

Baked Alaska1

These dark chocolate cookies are topped with a scoop of ice cream and a cloud of toasted meringue~ a cookie sized Baked Alaska! So fun!

Baked Alaska is a dessert that is dear to my heart. Every year, for as long as I can remember, my mom, sis-in-law and I have celebrated our (nearly-Christmas) birthdays with this dessert. At Christmas, the ice cream of choice is peppermint stick. I made these with Mocha Chip ice cream. Pick your favorite ice cream flavor, and give these sweet mini desserts a try!

Baked Alaska Cookies!!

Oh- and remember that hot fudge sauce I shared here a few days ago? Well…put that to good use here:

Baked Alaska Cookies!

Here is how we made these: (printable recipe)

INGREDIENTS: (makes about 18-22 desserts)

Cookies:

  • 1 sticks (1/2 cup) butter, softened
  • 3/4 cup sugar
  • 1 egg
  • 1/2 teaspoon vanilla extract
  • 1/3 cup unsweetened cocoa powder
  • 1 1/2 cups flour
  • 1/4 teaspoon salt
  • 1/4 teaspoon baking powder
  • 1/2 gallon of ice cream

Meringue topping:

  • 8 egg whites
  • 2 cups of granulated sugar
  • 1/4 teaspoon of cream of tartar

DIRECTIONS: (note: you will need a Kitchen Torch to toast the tops of these)

Cookies:

  • Preheat oven to 350F degrees.
  • Add butter, sugar, eggs, vanilla and cocoa together in  large mixing bowl.
  • Blend on medium speed with a mixer until smooth.
  • Gradually add dry ingredients and mix until smooth (use clean hands at the end, to knead into a soft ball of dough)
  • Roll out cookie dough on floured counter, using a floured rolling pin.
  • Cut into 2 1/2″ circles and place on a parchment-lined baking sheet.  
  • Bake for 8 to 11 minutes until the edges are firm.
  • Gently slide parchment paper off of cookie sheet and onto a flat surface. Cool. 
  • Place cookies back on cooled cookie sheets and freeze them to get them cold while you make meringue.

Meringue topping: (Don’t be afraid- this is easy! It just takes some quality time with your mixer.)

  • Place egg whites, sugar and cream of tartar in a medium heat-proof bowl that will set on the top of a sauce pan of boiling water without touching the water.  (I had to experiment a bit to find a good fit)
  • Bring water to a boil in the saucepan and set the bowl on top.
  • Whisk ingredients together for about 3-4 minutes.  Sugar will be dissolved and egg whites should be heated to about 145F degrees.
  • Remove bowl from top of sauce pan and beat on low until the mixture thickens a little, then beat on high for about 10 minutes.  The meringue will become the most beautiful, white, glossy mixture.  It should form stiff peaks before you stop beating it.
  • Spoon all that wonderful glossy white yumminess into a bag fitted with a decorating tip.

Assembly of dessert:

  • Assemble one dessert at a time, and then pop it into the freezer immediately.
  • Take a cold cookie, use a small cookie scoop or melon baller and place a scoop of ice cream in the center of the cookie.  Pipe meringue all around it, being careful to seal up all the ice cream at the bottom and them working your way up to a swirled top!

Baked Alaska CookiesBaked Alaska Cookies

  • Immediately toast this meringue with a Kitchen Torch to firm up the outside of the meringue and then FREEZE!
  • Serve frozen with a little bit of hot fudge on top.
  • Enjoy!!!!

Baked Alaska Cookies

My thoughts: **Smile** I loved these…. oh my. SO much! I made a mistake with the ice cream by using yogurt instead- it was softer than ice cream and harder to assemble- so use ice cream! I tried to take a picture of the inside and is was so soft that as soon as I cut into it, it fell apart into a pile of yummy frozen yogurt..that’s why there are no pictures of the insides 🙂 These were well-loved by everyone who tried them- including me!  Enjoy!!!  ~r

Baked Alaska5

Other mini desserts to try: (click on a photo to be taken to a recipe)

Turtle Cookie CupButterscotch Ice cream towers!!!!S'mores Pie!!!Marshmallow Turtle Pops!

Hot Fudge Sauce

Posted on

Hot Fudge Sauce1

The dark cocoa flavor of this hot fudge is the perfect topping to any dessert. Never use store-bought sauce again!

This hot fudge is a preview to my next recipe. You will need hot fudge sauce for what is coming this weekend on Easybaked! Whenever I have a dessert that needs a spoonful of hot fudge on top, this is my go-to recipe. It has hardly any ingredients, and it is easy to make, store, and reheat.

Here’s how to make it: (printable recipe)

INGREDIENTS: makes about 2 cups of sauce.

  • 1 cup of semi-sweet chocolate chips (use dark chocolate chips for less sweet sauce,  and milk chocolate chips for more)
  • 2 Tablespoons of butter
  • 1 can (14 oz.) of sweetened condensed milk
  • 2 Tablespoons of water
  • 1 teaspoon of vanilla

DIRECTIONS:

  • In a small saucepan, melt chips, butter, condensed milk and water together. Stir until completely smooth.
  • Add vanilla and mix well.
  • Serve warm, or place in an airtight container (or one of these cute jars) -in the fridge for 2-3 days, reheating as needed.
  • ENJOY!!!

Hot Fudge Sauce 2My thoughts: This is my stand-by recipe for hot fudge. I got it from my friend Monica about 20 years ago, and it has stood the test of time – and topped a lot of yummy things over the years!  Stay tuned for a deliciously fun treat to serve with this— coming this weekend!  ~r

Things that need hot fudge on top: (click on a photo to see the recipe)

Fried Ice creamCreamy classic cheesecakeIce cream pie!!!!YUM!!!!!!

Ice Cream Punch Pops!

Posted on

Punch Pops6

Add ginger ale to this cute frozen pop and you’ll have a cup of creamy, fruity, ice cream punch!  A perfect summer treat!

So I have this incredible punch recipe. It is soooooo yummy! I’ve made it for all sorts of parties, showers, picnics, and receptions. I’ve been asked for my recipe so many times that I’m actually surprised I haven’t added it here on Easybaked yet!

Last week I was craving it. I was headed to the pool and thinking about a cup of this creamy summer happiness- but you know punch…you have to throw all the ingredients into a big bowl and it is delicious for maybe an hour- and then it melts and you can’t save it for later. So I sat by the pool and thought about how to make punch in single servings, and these little ice cream punch pops came into being!

Punch Pops !

Aren’t they CUTE? I wrapped mine up in cello bags and tied them with ribbons. When anyone wants  cup of punch, all I need is some ginger ale to pour over the top. Stir….. and….

Punch Pops3

YUM! Punch in whatever fruit flavor you choose! One cup at a time!

These are fun and fairly easy to put together- they just take some freezer time. Make sure you have some freezer space available- and you need some height- so you can fit them in with those straws poking out of the top. Once they are made, you can place them in cake pop bags and tie them with cute ribbons. This makes storage in the freezer easier and keeps them fresh longer.

Here’s how I put these cute little pops together: (if you prefer a big bowl of punch, put all the ingredients in a punch bowl- but use a little less ginger ale).

INGREDIENTS: (makes 20 pops)

  • 24-30 oz of pineapple juice
  • ½ gallon vanilla ice cream
  • 1 quart of fruit sherbet- any flavor (I used 3 flavors and only used 1/3 of each quart)
  • 2 liters of ginger ale at room temperature
  • 6-7 strawberries, sliced 
  • 20 (3 oz) paper cups and 20 straws

DIRECTIONS:

  • In 20 small (3 oz) paper cups, measure about 1/8 cup of pineapple juice and add a slice of strawberry
  • Freeze until hard (4-6 hours)

Note: I did this on a small cookie sheet so that I could pop them all into and out of the freezer at once.

  • Scoop ice cream into a large zip top bag and microwave in 10 second increments until soft-serve consistency. Mix bag by squeezing. (Tip: wear gloves to keep your hands warm!)
  • Clip a corner off this bag and squeeze the softened ice cream over frozen juice, leaving room at the top for a layer of sherbet (you will add about twice as much ice cream as sherbet, and use almost all of the ½ gallon)
  • Slide a straw into the center of each cup and re-freeze until ice cream layer is hard (2-3 hours)
  • Scoop sherbet into a large zip-top bag and microwave/squeeze until a soft-serve consistency (this melts faster than ice cream, so be cautious)
  • Clip a corner off this bag and squeeze the softened sherbet over the top of the frozen ice cream. Tap each cup against the counter to flatten the sherbet out a little bit on top.
  • Re-freeze overnight (10-12 hours)

IMG_8489IMG_8496IMG_8500

  • To remove them from the cup, snip a tiny cut into one of the cup’s edges and tear the cup away.
  • Set the pop on a small cookie sheet that has been covered with parchment paper and keep frozen until use.

Punch Pop1Punch Pops!

  • If you want to place them in individual bags, keep them frozen, and one at a time, slide into a bag, tie shut and refreeze.

Punch Pops 9

  • To serve these cute little pops, simply place one in a glass that holds at least 12 ounces, and pour room temperature ginger ale over the top- just until the pop is covered. 
  • Stir your punch with the straw until it has melted into a cold frothy ice cream treat!

Punch Pops!Punch Pops!

Punch pops!

My thoughts: I love these! They taste exactly like my favorite punch and I love that I can have a cup of it whenever a craving strikes. I had a party a couple of days ago, and the guests enjoyed choosing a flavor (I made raspberry, lime and orange), and making their own punch! It’s just plain fun. 🙂

Oh- and don’t you love the glasses?!? I’m CRAZY about them! Bring me sunshine!!!!  I found them on Amazon while looking for something entirely different- and knew they would make perfect little punch glasses! They are actually intended to be candle holders- so if you use them you will have to wash by hand. I love them so much I will happily wash by hand every time! They are especially cheery with juice at breakfast! Click on the photo below if you want your own: 

I hope you get a chance to try these fun little punch pops- they really are one of my favorite ideas in awhile 🙂  ~r

Other frozen summer treats here on Easybaked:

Creamy Mango Pops!Frosty Almond Joy Cups!Raspberry Lemon Cream Cups!!!Heath Bar Ice Cream Dessert3


Candy-coated Cut-out Cookies!

Posted on

My Message5

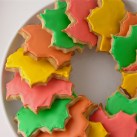
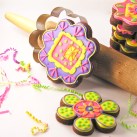
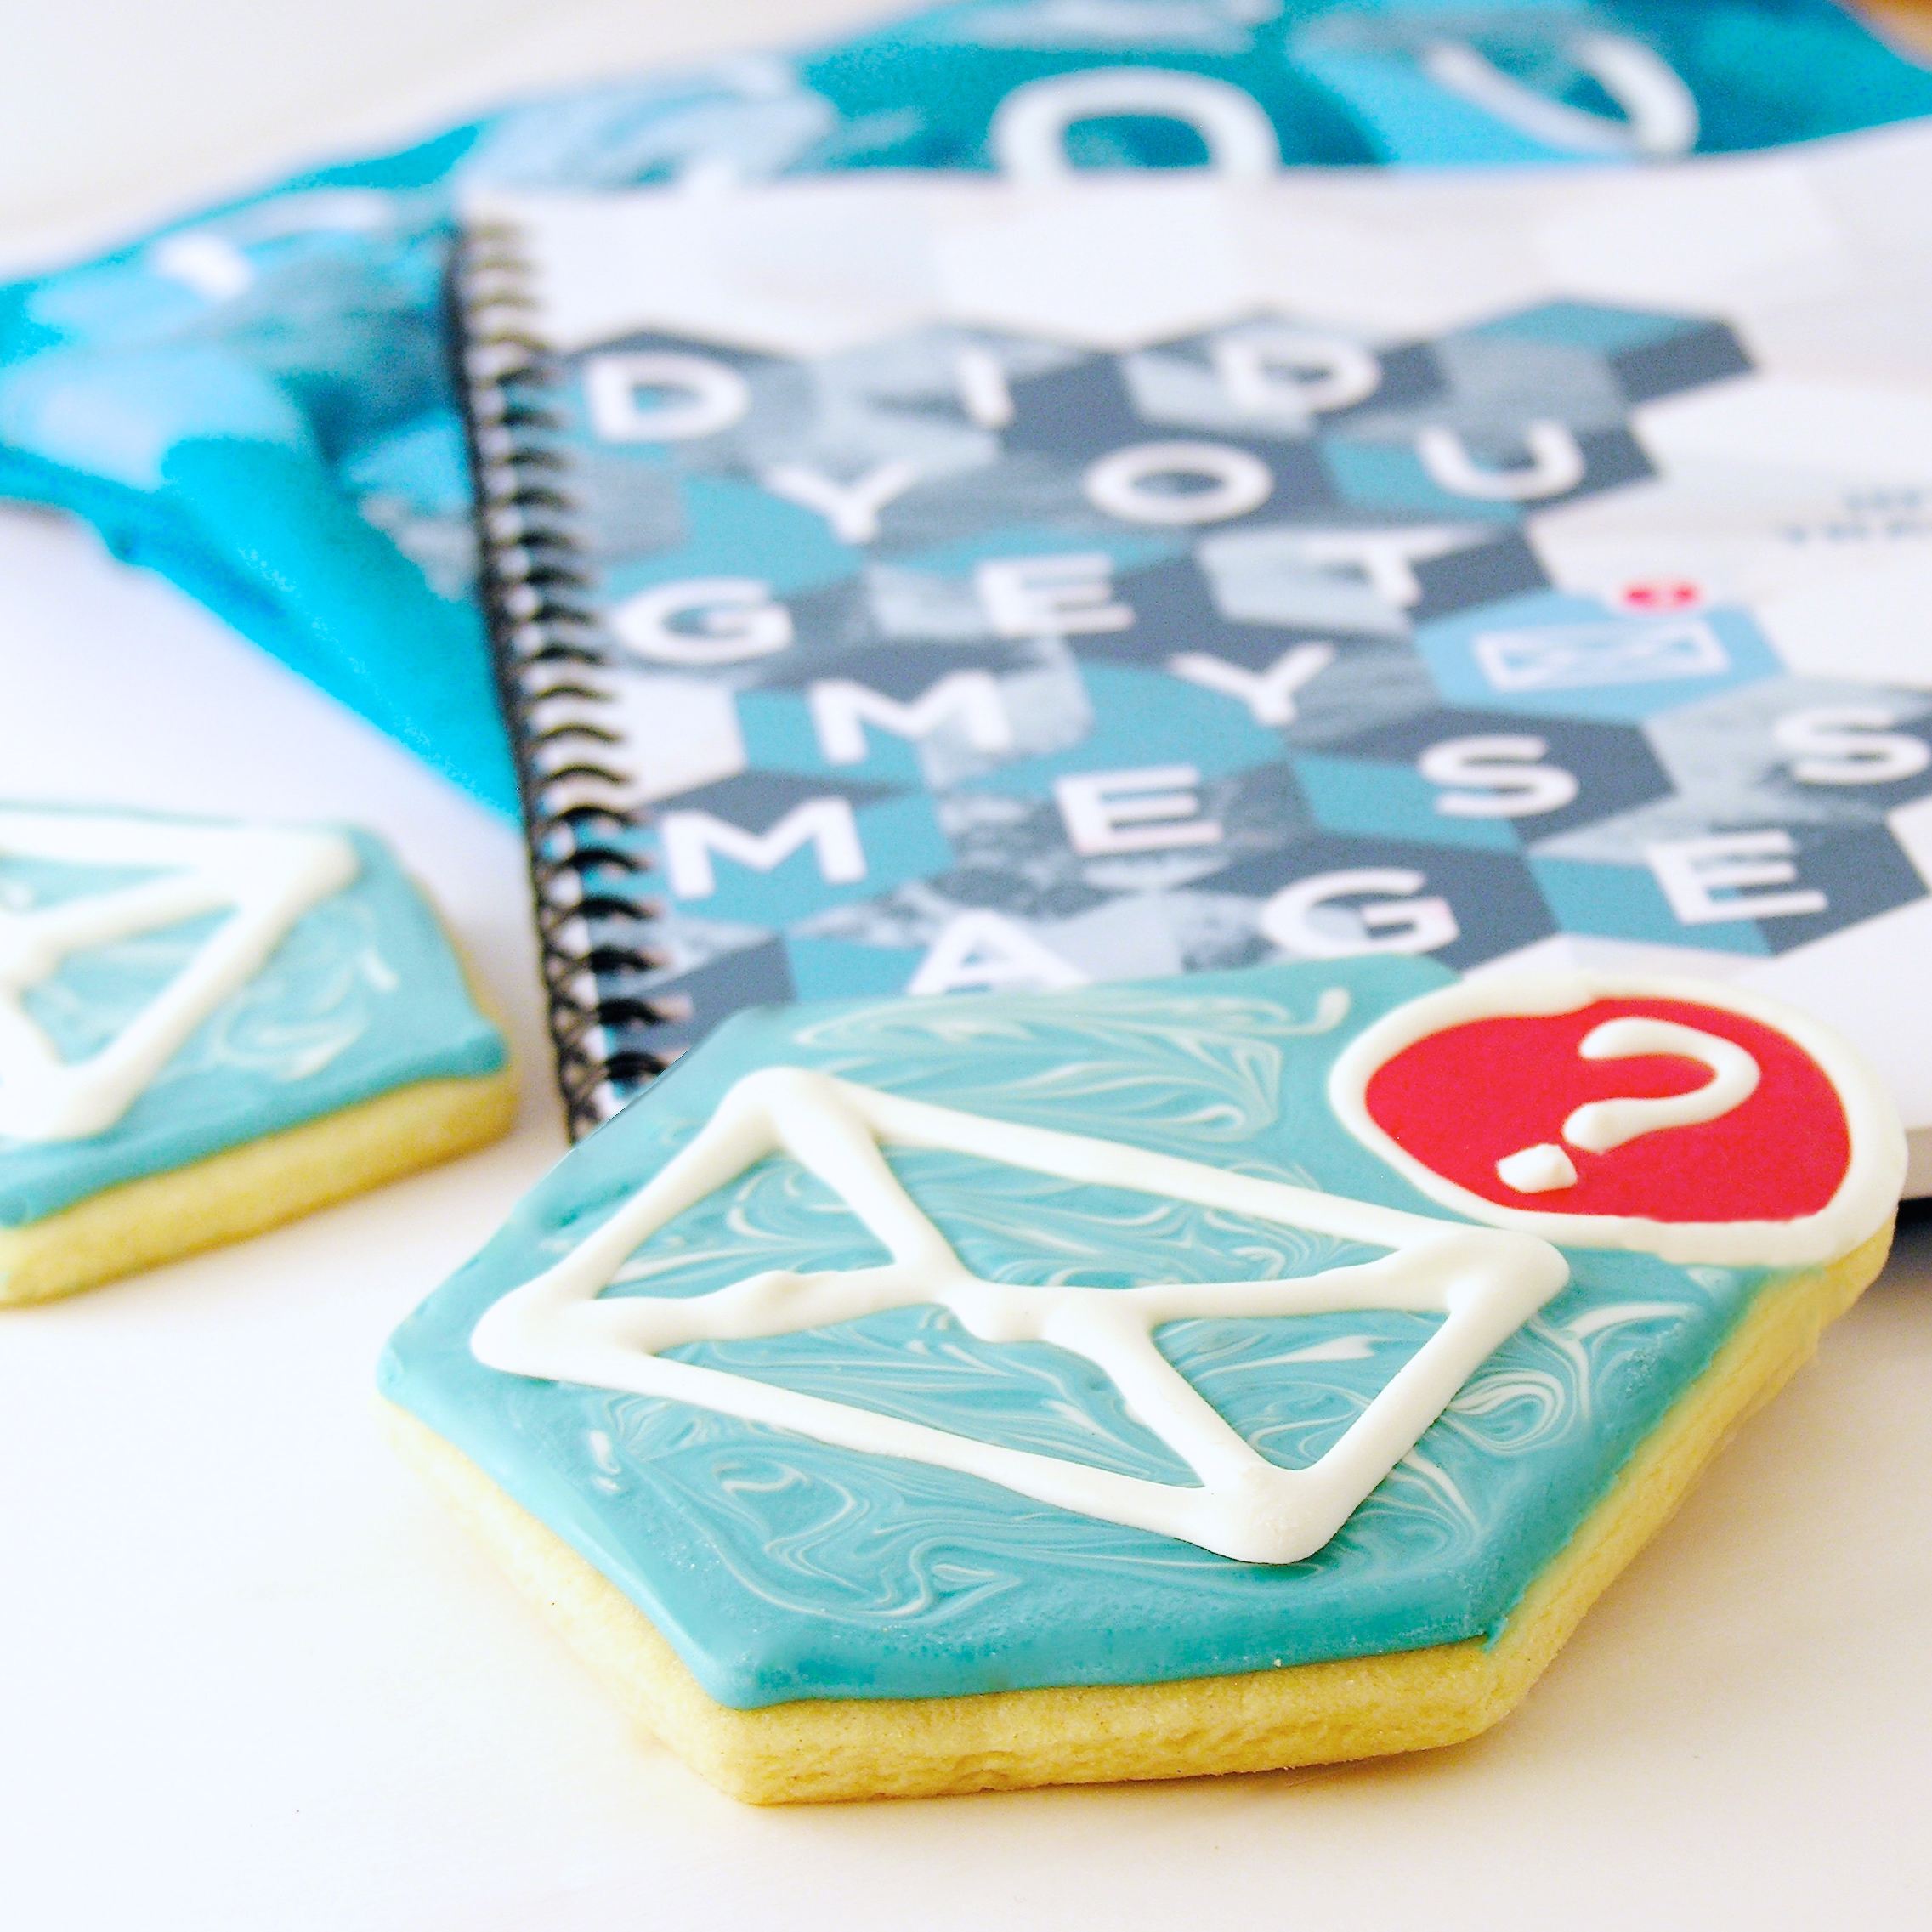
These buttery cut-out cookies are decorated in melted candy and designed to replicate our Josiah Venture Camps Theme for 2016!

There is so much to talk about with these little cookies! I will start with the WHY.

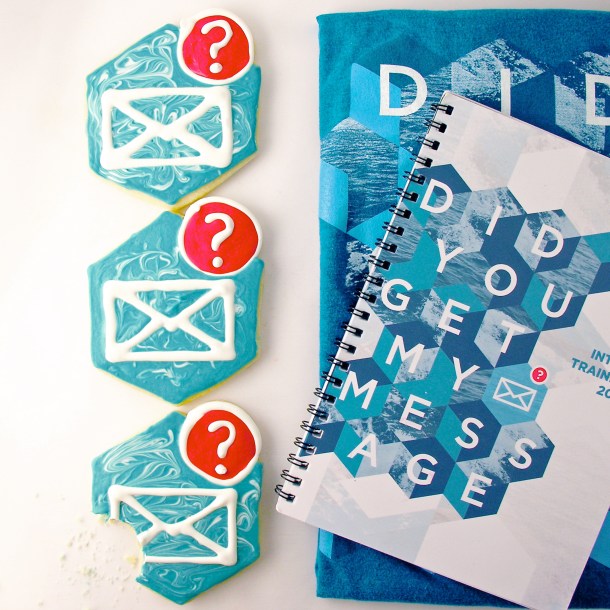
I work for an organization named Josiah Venture. We are a movement of God among the youth of Eastern and Central Europe that finds its home in the local church and transforms society. We plan over 100 evangelical camps each summer in 13 different countries, and each camp has the same theme. This year the theme is “Did You Get My Message?”, and this is the camp logo- on all of the t-shirts and banners and materials.

A3_Camp_Poster_2016_FINAL_EDITABLE_ENGLISH

Last year, I made cookies that replicated our camp theme “You are Here” and they were such a hit that people asked if I planned to do this again… I’m starting to be a little afraid of the next year’s design!!! THIS year was pretty easy- and a lot of fun!

My Message3

Now for the HOW.

Have you ever pieced two cookie parts together to make a shape not available in the cookie cutter world?

Me neither. When I was challenged to re-create this design in cookie form I knew I could get a hexagon cookie cutter- but how to add that cute little circle at the top? Then, how to decorate them without using Royal Icing? I’m not a fan of all the waiting for it to harden between colors.

Here’s what I did- and it worked (and tasted) GREAT. I realize you will want to make your own shapes and decorations- just adjust the amounts and colors of Wilton’s candy Melts accordingly.  (For a printable cookie recipe, click here)

My Message6

 INGREDIENTS: (makes about 24 cookies)

  • 2 sticks (1 cup) unsalted butter (softened)
  • 1 1/2 cups of granulated sugar
  • 2 eggs
  • 1 teaspoon of vanilla
  • 1 teaspoon of butter flavoring
  • 3 cups of flour
  • 1 teaspoon of baking powder
  • 1/2 teaspoon of salt
  • 2 bags of Wilton Candy Melts in blue (or in whatever colors you want to decorate in!)
  • 1 bag of Wilton Candy Melts in white
  • 1 bag of Wilton Candy Melts in red

DIRECTIONS:

  • Preheat oven to 350F degrees.
  • In a large mixing bowl, cream together butter and sugar until smooth.
  • Add eggs, vanilla and butter flavoring and mix well.
  • Add all dry ingredients and mix until able to knead into a firm ball of dough (add additional flour if necessary).
  • Roll out on a floured counter with a flour coated rolling pin to desired thickness (I made them fairly thick)
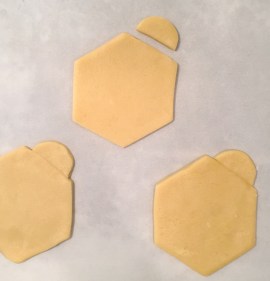
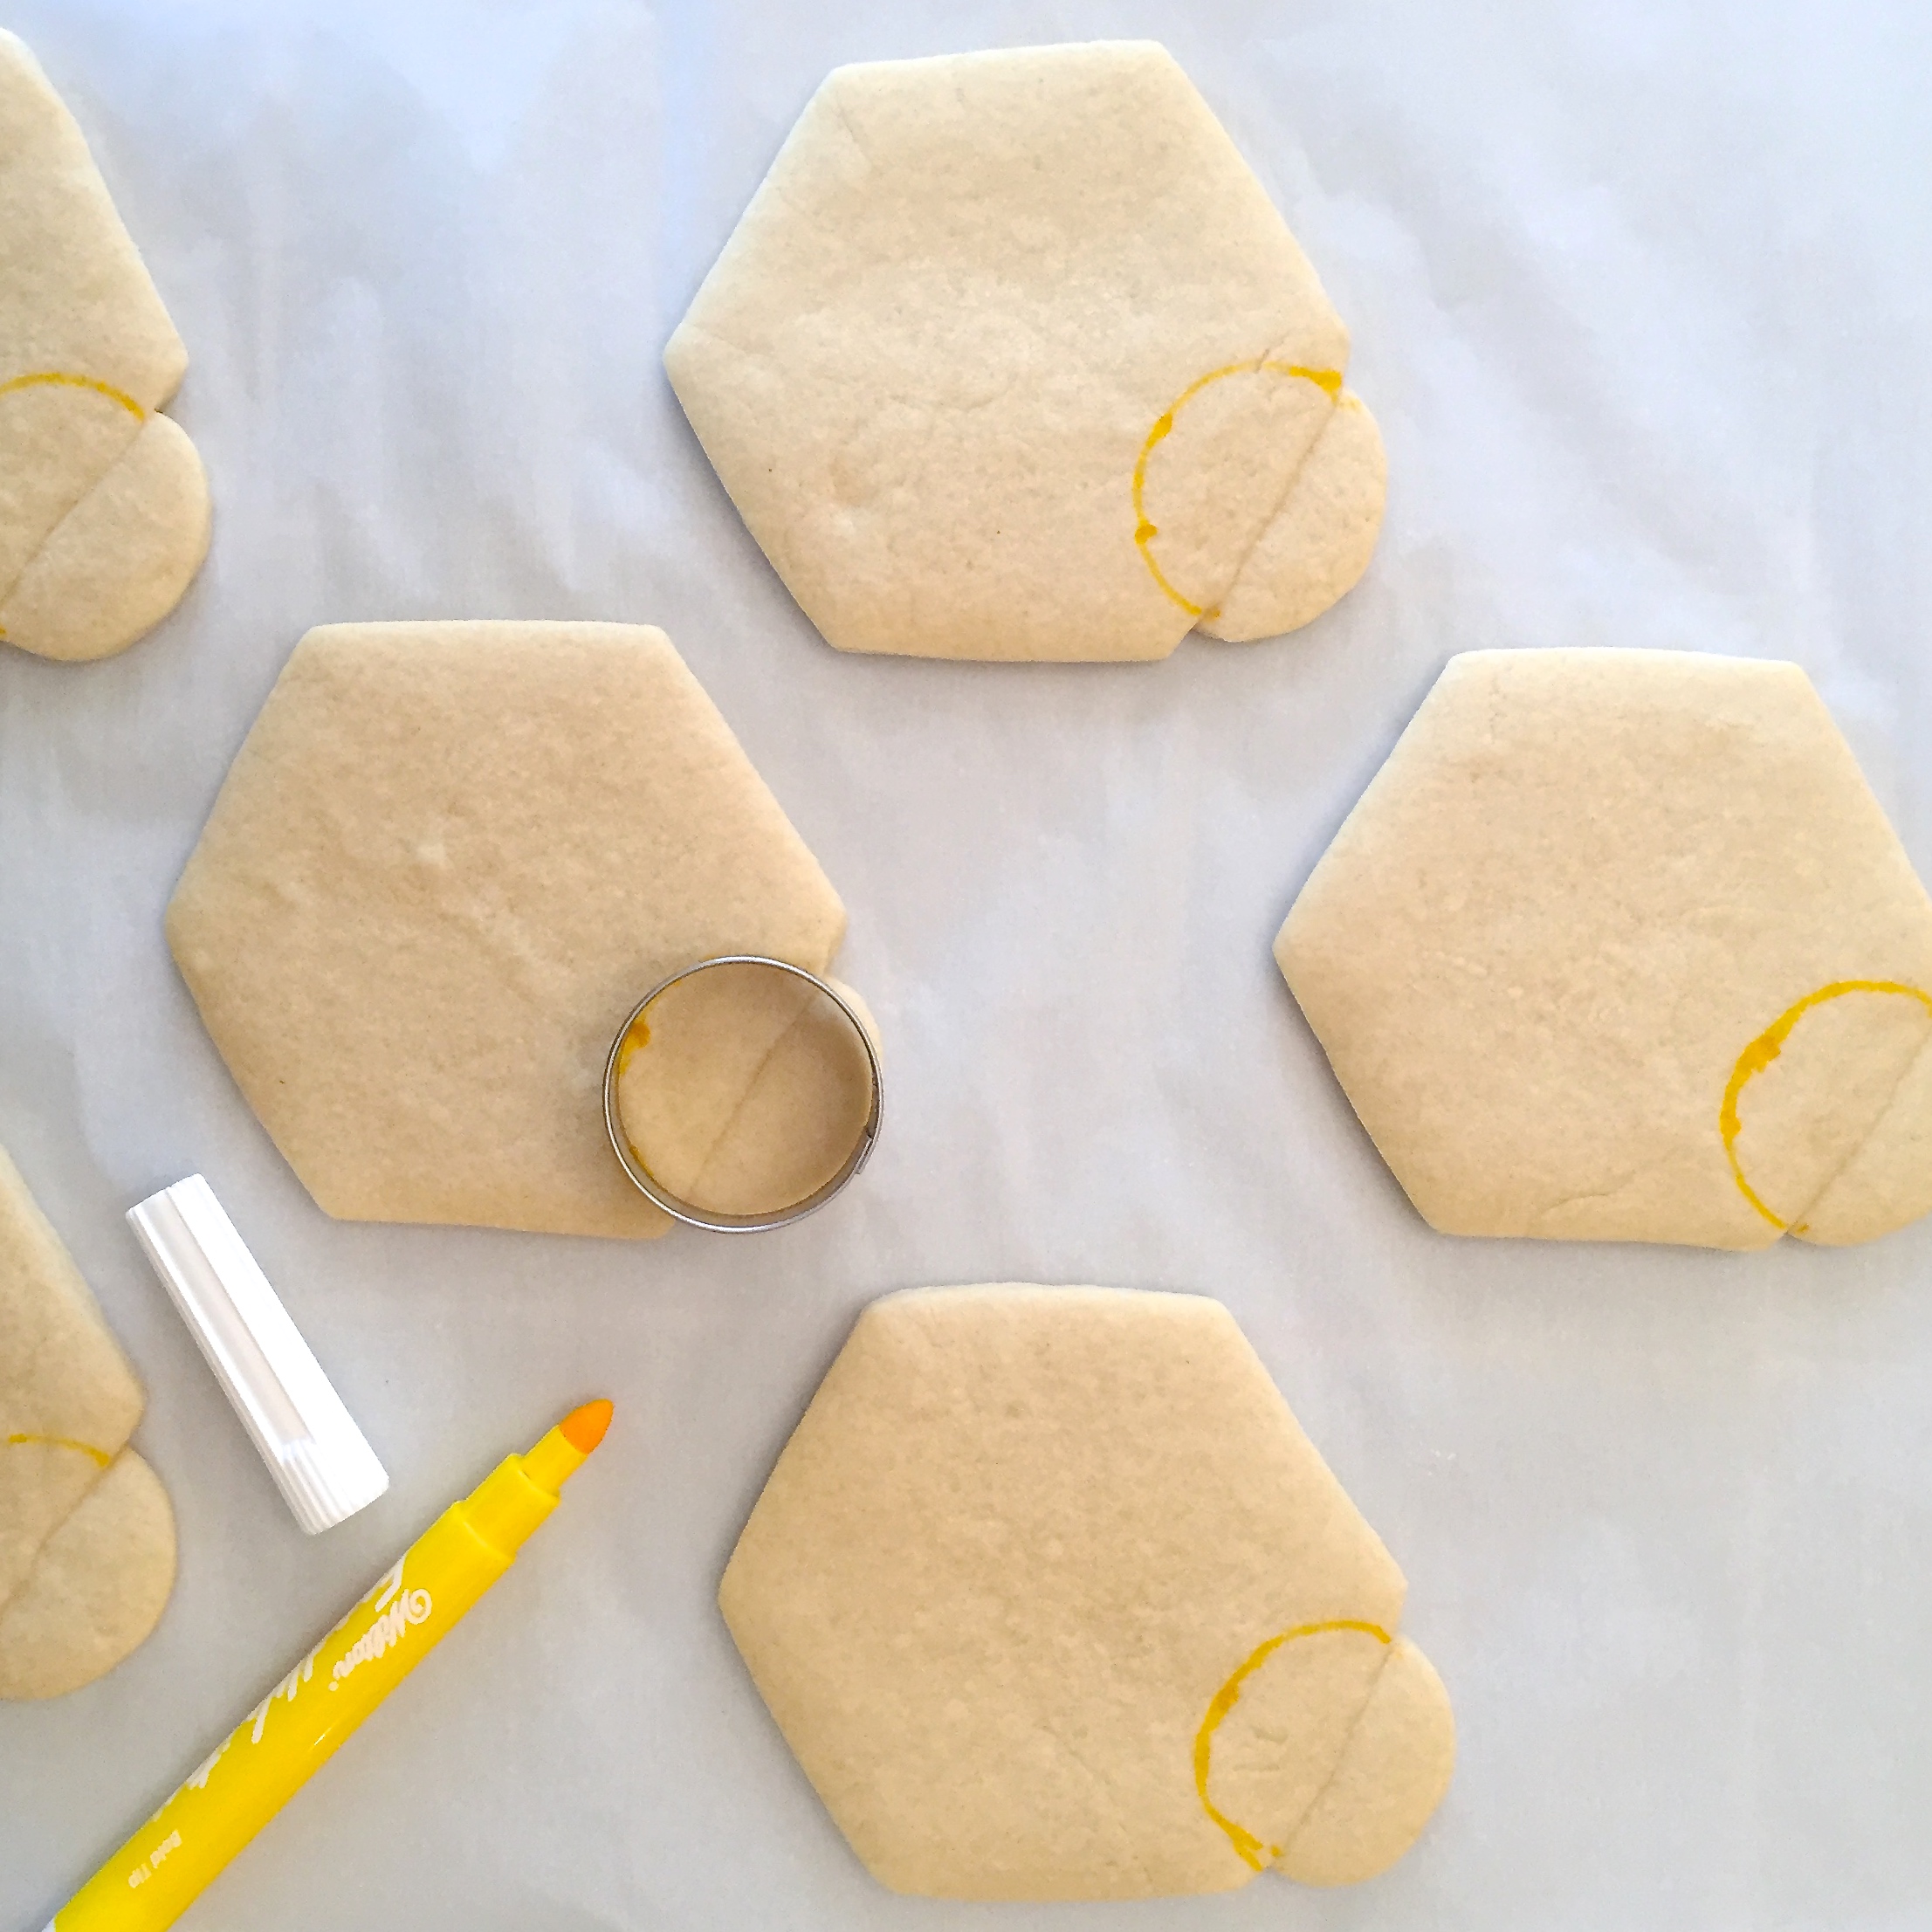
  • Cut into whatever shape you want- and if you want to join two shapes like I did, gently set one piece against the other on a parchment paper covered cookie sheet and press gently together.
  • Bake at 350F degrees for 8-10 minutes and slide off the cookie sheet (leaving on parchment paper) to cool.
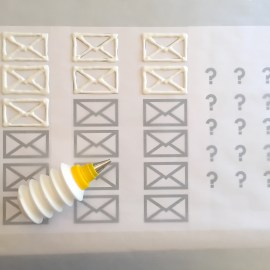
  • I needed a full circle on top of each cookie, so I used a cookie marker to trace the cookie cutter as pictured.

My Message 10My Message9

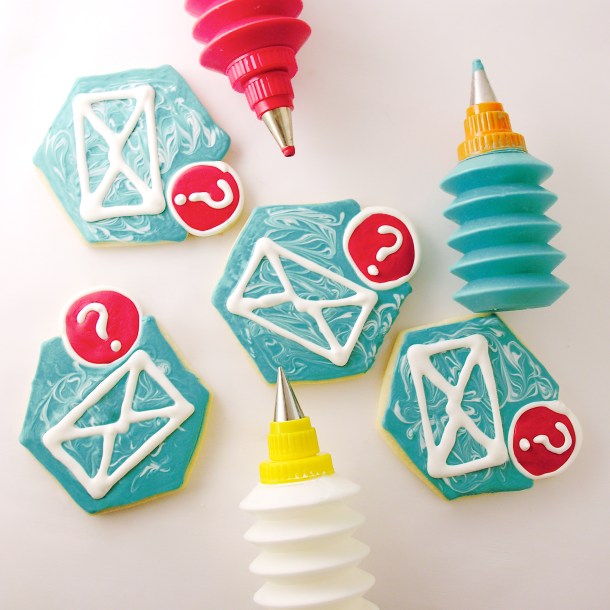
  • I needed 2 items drawn on top of each cookie- an envelope and an question mark. I drew the envelopes out on my computer, found a good bold font for the question marks, and printed several sheets of these. I taped them under parchment paper and used melted white candy melts to trace them. To melt candy melts, you heat them in the microwave in 30 second increments, stirring until smooth.
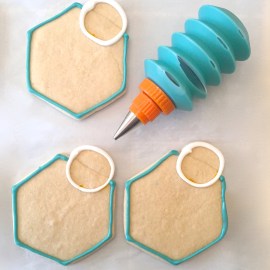
  • Then I took that same melted white chocolate and outlined the circle- using my lines as a guide.
  • Melted blue candy was used to outline the hexagon.

My Message8My Message11

  • Finally, red candy melts are piped into the circle, filling it completely. I tapped the cookie gently on the table to get rid of bubbles before gently setting a question mark in the center. This step further cements those cookie pieces together.
  • The last step is to completely fill the hexagon with blue, tap out bubbles, and gently set an envelope in the center. I swirled a little white in the blue to copy the logo’s wave look.

My Message13

Any squeeze bottle that can be fitted with a small round decorating tip will work, but aren’t these so fun? These are from the Kuhn Rikon Decorating Set. That’s a link to find them on Amazon, but I got mine in a clearance bin at Marshall’s and didn’t even know how much I would love them!

The best part about working in candy melts rather than frosting is that they harden up SO fast. No waiting between colors- and no bleeding of one color into another. Plus they taste like a cookie covered in white chocolate! The cons are color choice. You are fairly limited in what colors you can use- although the Wilton’s site does have this handy chart to help you mix colors. I will use this again- for sure. I loved it.

My Message1

So. Fun. *smile*  ~enjoy!!!

My role with Josiah Venture is as their intern coordinator. Every year we have over 100 college age interns that spend the summer in Eastern and Central Europe. They partner with local churches and help them reach young people through English, Music, and Sports camps, with the message that God loves them. We also invite churches from the US, Canada and the UK to bring groups of young people over to serve short term. I’ve taken two college-age groups over to Slovakia, and it is a life-changing experience! If you are a part of a church that might be interested in helping next summer, or you might be interested in being a summer intern- check out our website for more info. Applications for 2017 internships will be available in July!

Here’s a link to internship opportunities.

Here’s a link to short-term opportunities.

Here’s a link to a great video that explains more about who Josiah Venture is and what God is doing in Eastern and Central Europe.
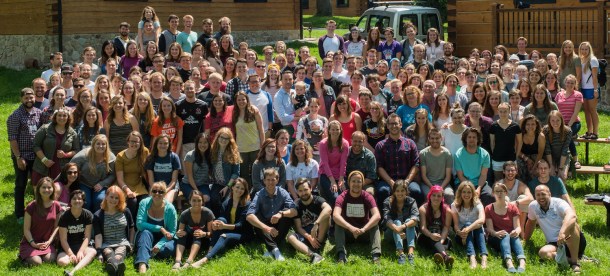
JV Interns 2017- cropped

Our 2016 interns!

My message4

Other cut-out cookie recipes you will love! (click on a photo to see the recipe)

Sugar cookie cut-outsGingerbread Cookies!Honey cut-out cookiesChocolate cut-out cookies

Caramel Armadillos

Posted on

Caramel Armadillos1

Caramel Armadillos. Because Caramel Turtles are soooooo yesterday.

I have this great, really easy, caramel filling. It’s great on ice cream, in brownies, in cupcakes and even by the spoonful. I love it. I decided this week that I wanted to make turtle cookies with it, and I was struck by how boring and predictable caramel turtles are. Why turtles? Who started this trend? I turned to Wikipedia for answers. I was still bored.

I decided to make caramel armadillos instead. Not only are they WAY cuter than turtles, but it’s really fun to say “caramel armadillos”.

Try it… five times fast!

You know you want to… 🙂

Caramel Armadillo
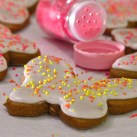
A couple weeks ago I was waiting for a friend to meet me for coffee and I stumbled upon these cute little chocolate molds on Amazon. They are supposedly Easter eggs, but when I decided to make Armadillos they came to mind as the perfect thing to use! All I needed was a tail and ears… and a tootsie roll would suffice!

SO caramel armadillos were born- and they are neither boring nor predictable!

Armadillo3Here’s how I made them: (printable recipe)

INGREDIENTS: (makes about 20 armadillos)

  • 32 Kraft Caramels (unwrapped)
  • 1 can (14 oz.) of sweetened condensed milk
  • 1 stick (1/2 cup) of butter
  • Whole pecans- about 3 per armadillo
  • 1 bag (32 oz/2lbs) of Merckens Milk chocolate wafers. 
  • about 40 candy eyes
  • 20 pink candy balls for noses
  • at least 25 tootsie rolls, unwrapped

DIRECTIONS:

  • Make caramel in a large saucepan over the stove by heating together the caramels, condensed milk and butter. Stir constantly until melted and smooth.
  • Pour into a small bowl and allow mixture to cool a bit (so it doesn’t melt chocolate when poured in).
  • Melt chocolate wafers in the microwave in 30 second increments, stirring in between until melted and smooth.
  • Use a food-grade brush, or pastry brush to “paint” the inside of the egg mold with chocolate. Paint two layers to make it nice and thick- you should not be able to see any of the mold showing through. 
  • Freeze until hard (5 minutes or so)
  • Place cooled caramel into a large zip-top bag, zip tightly closed and clip a corner off the bag using a pair of kitchen scissors.
  • Squeeze a little bit of caramel in each cup, set three pecans on the caramel, pushing them gently into it, then fill the remainder of the cup up with caramel.

**Note: If you are making just armadillos, don’t fill to the top because you will add a layer of chocolate on top once the caramel is hard. If you are placing these on cookies, you can fill to the top and spread flat with a knife.

Caramel ArmadillosCaramel Armadillos

  • Place these in the freezer to harden (5-10 minutes) and then paint a layer of chocolate on the top of the hardened caramel and freeze again until hard.
  • Gently peel silicone mold away from chocolate and set on a plate to be decorated!
  • Unwrap 20 tootsie rolls and place for just a few seconds in the microwave to soften a little.
  • Pull and roll these into tails and use the side of a knife to press grooves along the length. Keep these on parchment paper until they harden up. 
  • Unwrap 4 to 5 tootsie rolls and cut them into little circles. Shape these into ears and keep with tails on parchment paper.

Caramel Armadillos!

  • To assemble, use dabs of melted chocolate to attach ears, candy eyes, nose and tails.

I made cookies for them to sit on. My original idea was for caramel turtle cookies, so I went ahead with the cookie plan and it does add stability to that tail (otherwise they are a little awkward to pick up!)

  • I used my favorite chocolate cookie cut-out recipe from here, and it made a few more cookies than I had armadillos for, but they are yummy cookies all alone!!
  • I used an egg-shaped cookie cutter a bit larger than the armadillo.
  • I added melted green candy wafers to the top- just spooned some on and spread it near the edges- and set a “open” caramel armadillo on top. The green wafers seal up the bottom and keep caramel from leaking out!
  • I set the tail on the melted green wafers and added flower sprinkles! Once everything hardened up I added the eyes, ears and nose.

Caramel Armadillo!

So….cookies??? Candies????  It’s up to you! I think they would be fun on a cake.

How awkwardly wonderful would a caramel armadillo cake be???

Caramel Armadillo Cookie

My thoughts: These are delicious. They are also a lot of work (being honest!). It would help to have your tails and ears shaped ahead of time and I was wishing SO hard for an additional mold. That would save time too. That said- I will totally make these again!!!! They were well- loved by adults and kids alike!  If this recipe seems like too much craziness for you, just make the caramel. Put it on ice cream and be happy!  Enjoy!!  ~r

Dulce de Leche caramel sauce form a can

Other recipes kids will love (click on a photo to see the recipe!):

Polka Dot Cake!!!Pile of Cupcakes!Hamburger Cookie!Edible Jello Earthworm Cupcakes

Mom’s Amazing Coffee Cake!

Posted on

Coffee Cake

This delicious coffee cake has hidden layers of cinnamon and pecans- and a yummy cream cheese frosting!

My mom used to make this delicious coffee cake whenever my grandparents (her mom and dad) would come to visit. I have great memories of sitting around the table having this with all of them and listening to all the “grown-up” talk. They were from Wisconsin, so a visit always meant a couple of days with us in Michigan. I’d get up early and take a long walk with grandpa and our overweight basset hound Max before breakfast, and return to a kitchen table full of family, laughter, and this coffee cake.

My grandparents lived very active and adventurous lives until they left us for heaven several years ago.

Mom, as those of you who keep up with this blog know, left us for heaven about a year and a half ago.

A friend sent me an article last week about 8 ways to celebrate Mother’s Day if your mom is in heaven. They were great ideas, and the very 1st one was, “Make her favorite recipe”. I think her favorite recipe was my grandma’s recipe for German Sauerbraten, but since desserts are my specialty, I decided on this coffeecake as my “remembering mom” recipe.

As my kitchen filled up with the smell of this baking, it made me smile. And remember.

Coffee Cake recipe

Here’s how to make it: (printable recipe)

INGREDIENTS:

Cake:

  • 1 stick of butter, softened
  • 1 cup of sugar
  • 3 eggs
  • 2 cups of flour
  • 1 teaspoon of baking soda
  • 1/8 teaspoon of salt
  • 1 cup of sour cream
  • 1 teaspoon of vanilla

Filling:

  • 1 cup of finely chopped pecans
  • 1 1/2 cups of brown sugar
  • 4 tablespoons of butter, melted
  • 4 tablespoons of flour
  • 2 teaspoons of cinnamon

Icing:

  • 4 oz. (half a package) of cream cheese
  • 4 tablespoons of butter, softened
  • 1/2 teaspoon of vanilla
  •  Dash of salt
  • 2 cups of powdered sugar
  • 1/2 cup of white chocolate chips, melted

DIRECTIONS:

Cake:

  • Preheat oven to 350 degrees and grease/flour a bundt cake pan.
  • Cream butter and sugar together.
  • Add eggs and beat well.
  • Add flour, soda and salt. Mix well.
  • Add sour cream and vanilla and mix well. Set aside.

Filling:

  • Combine all ingredients until completely coated in melted butter.
  • Assemble cake: pour about 1/2 of batter into prepared bundt cake pan, sprinkle more than 1/2 of filling on batter, pour remaining batter over filling and then sprinkle remaining filling over the top.
  • Bake at 350 degrees for one hour. Cool and tip out of pan onto serving plate.

Icing:

  • Combine all ingredients except chocolate in a large mixing bowl and beat on high until smooth and fluffy.
  • Add melted chocolate and beat until smooth.
  • Spread over the top of the cooled coffee cake.
  • Enjoy!

Coffee Cake!

My thoughts: Warm this up for a few seconds in the microwave before serving and YUM!!!  You can keep this cake in an airtight container in the fridge and serve it for several days. I hope your family enjoys this recipe as much as ours did over the years!!  ~r

Coffee Cake

Whether you are celebrating your mom in person, or thanking God for wonderful memories of her today, Happy Mother’s Day to you and to your family!

This one’s for you mom!

10178025_10152079947252513_4311481539876989298_n

Other recipes from my mom: (click on photo to see recipe)

Chocolate Chip CakeChocolate drop cookies!Pumpkin RollMint Creme Brownies

No, seriously…you have to try that 1st one…best. cake. ever. 🙂