Tag Archives: cookies

S’mores Cookie Cups

Posted on

S'more Cookie Cups!!

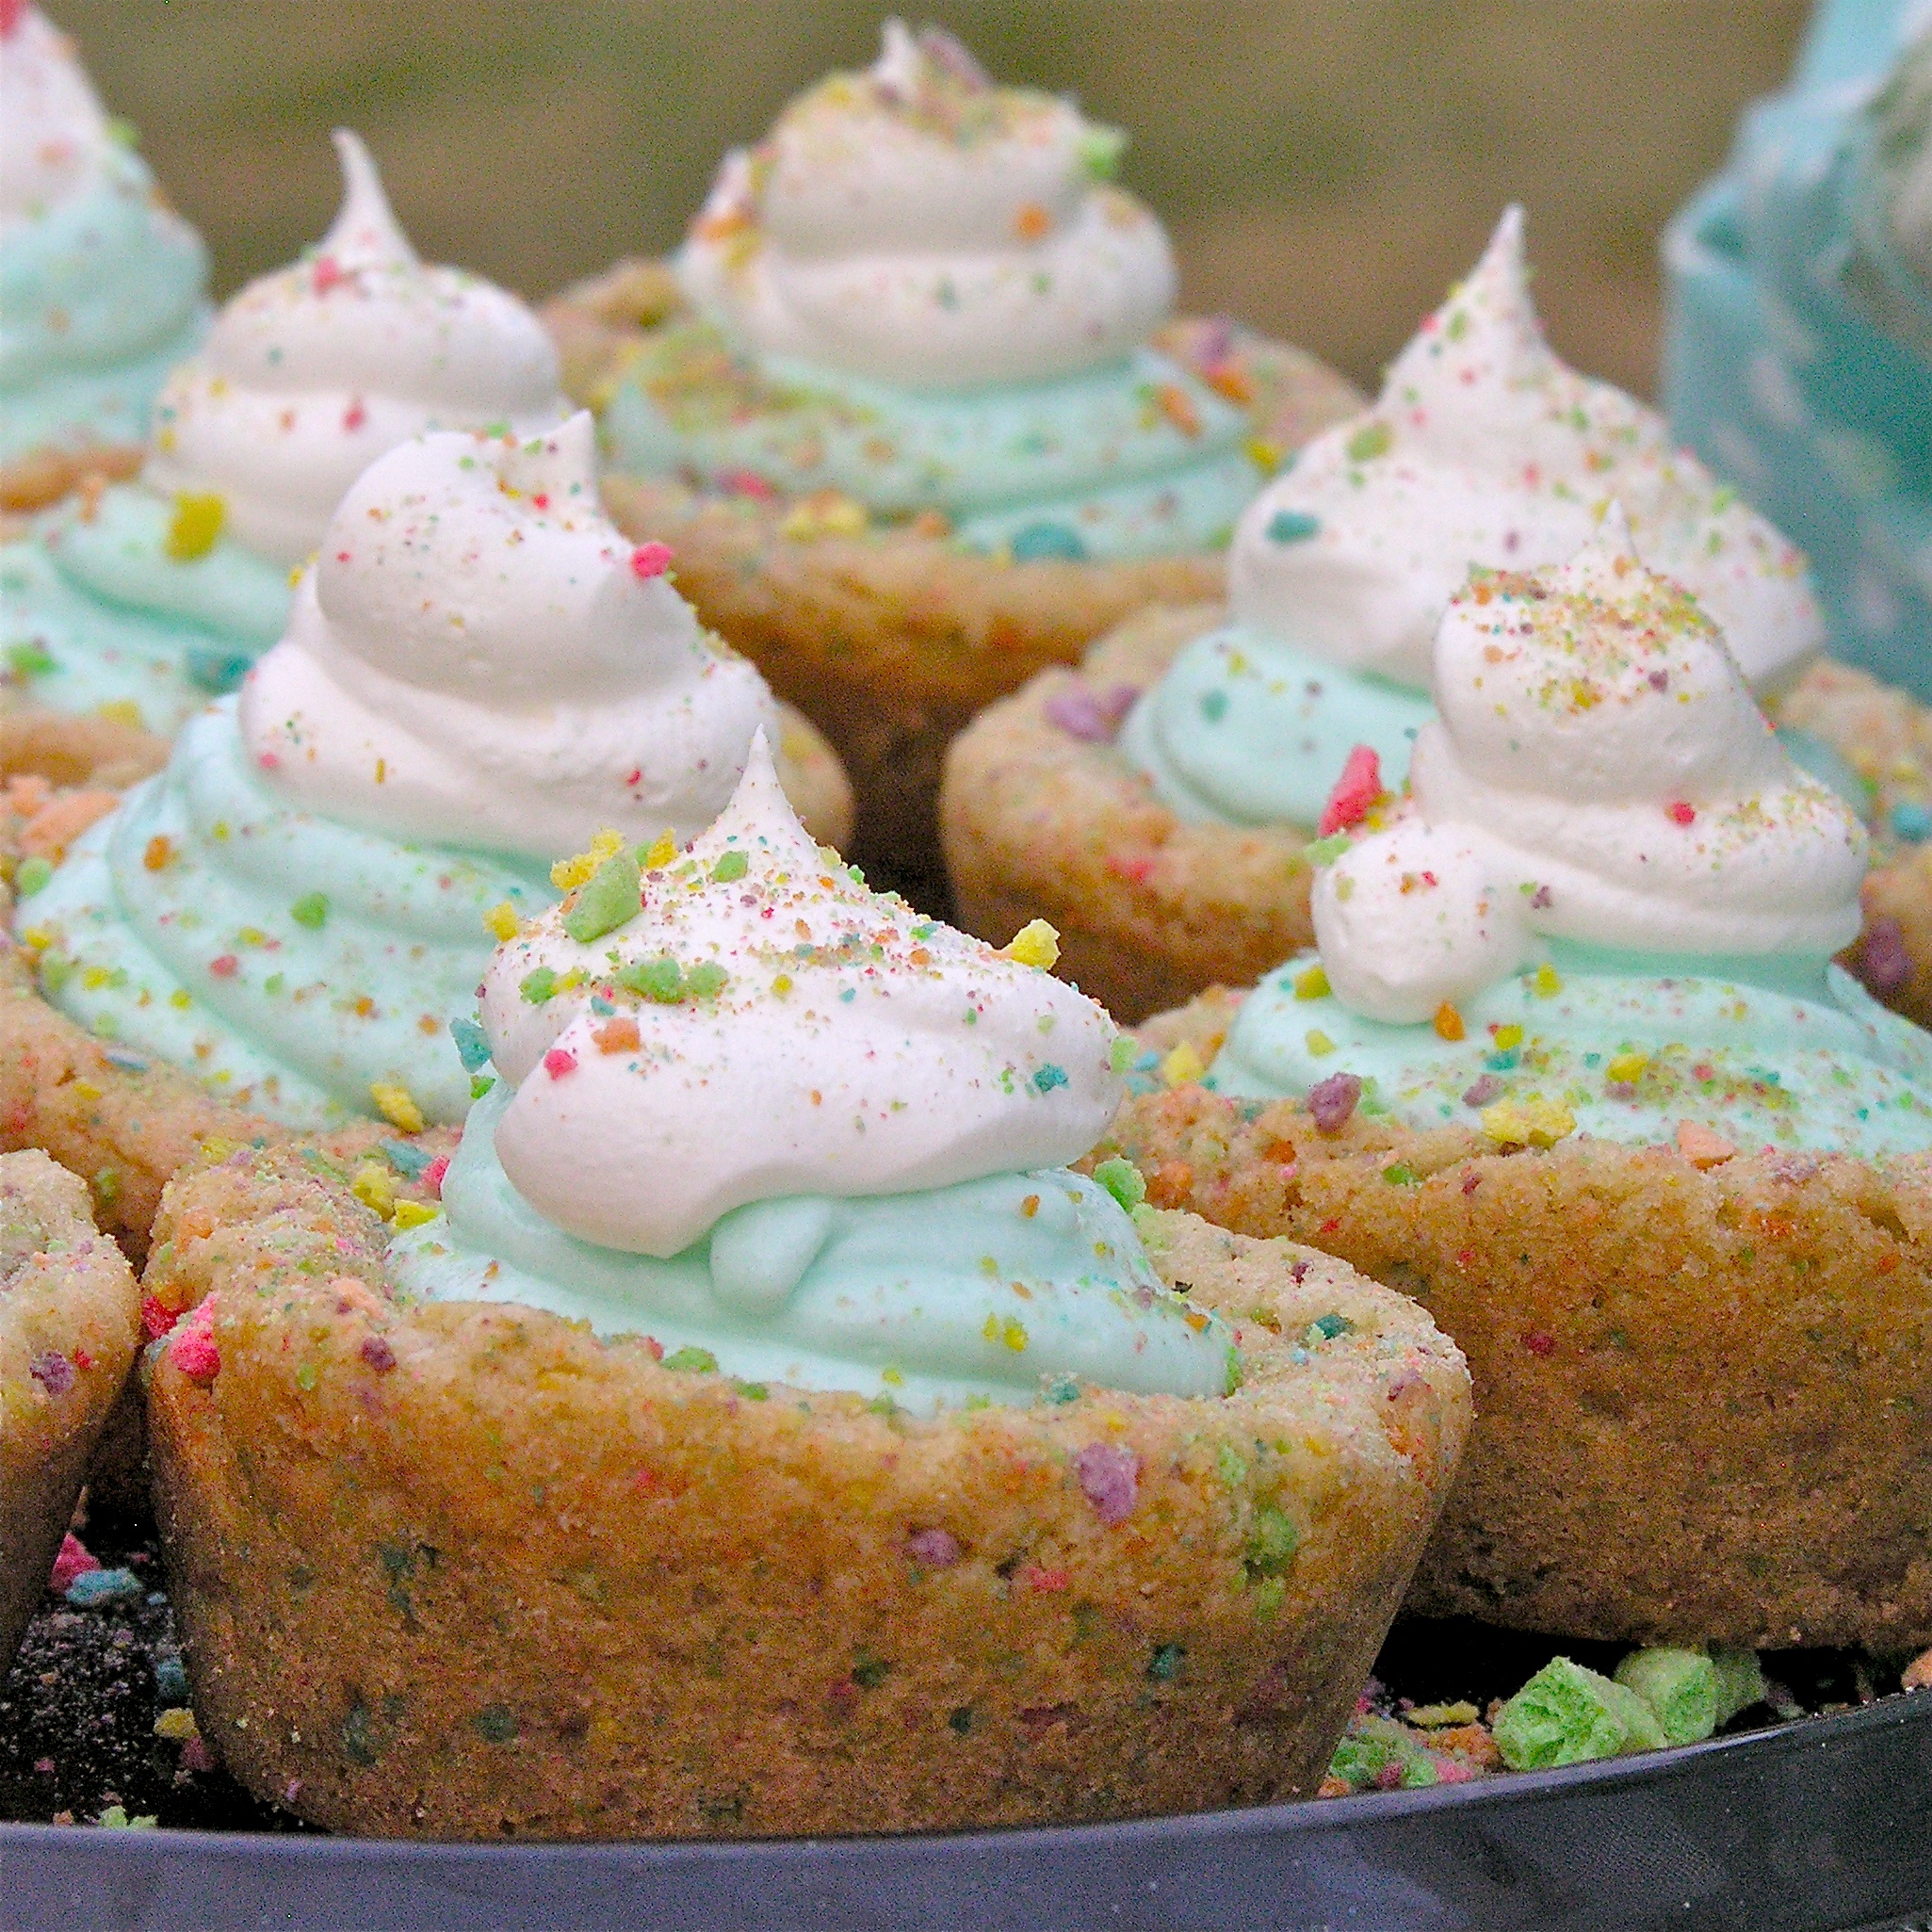
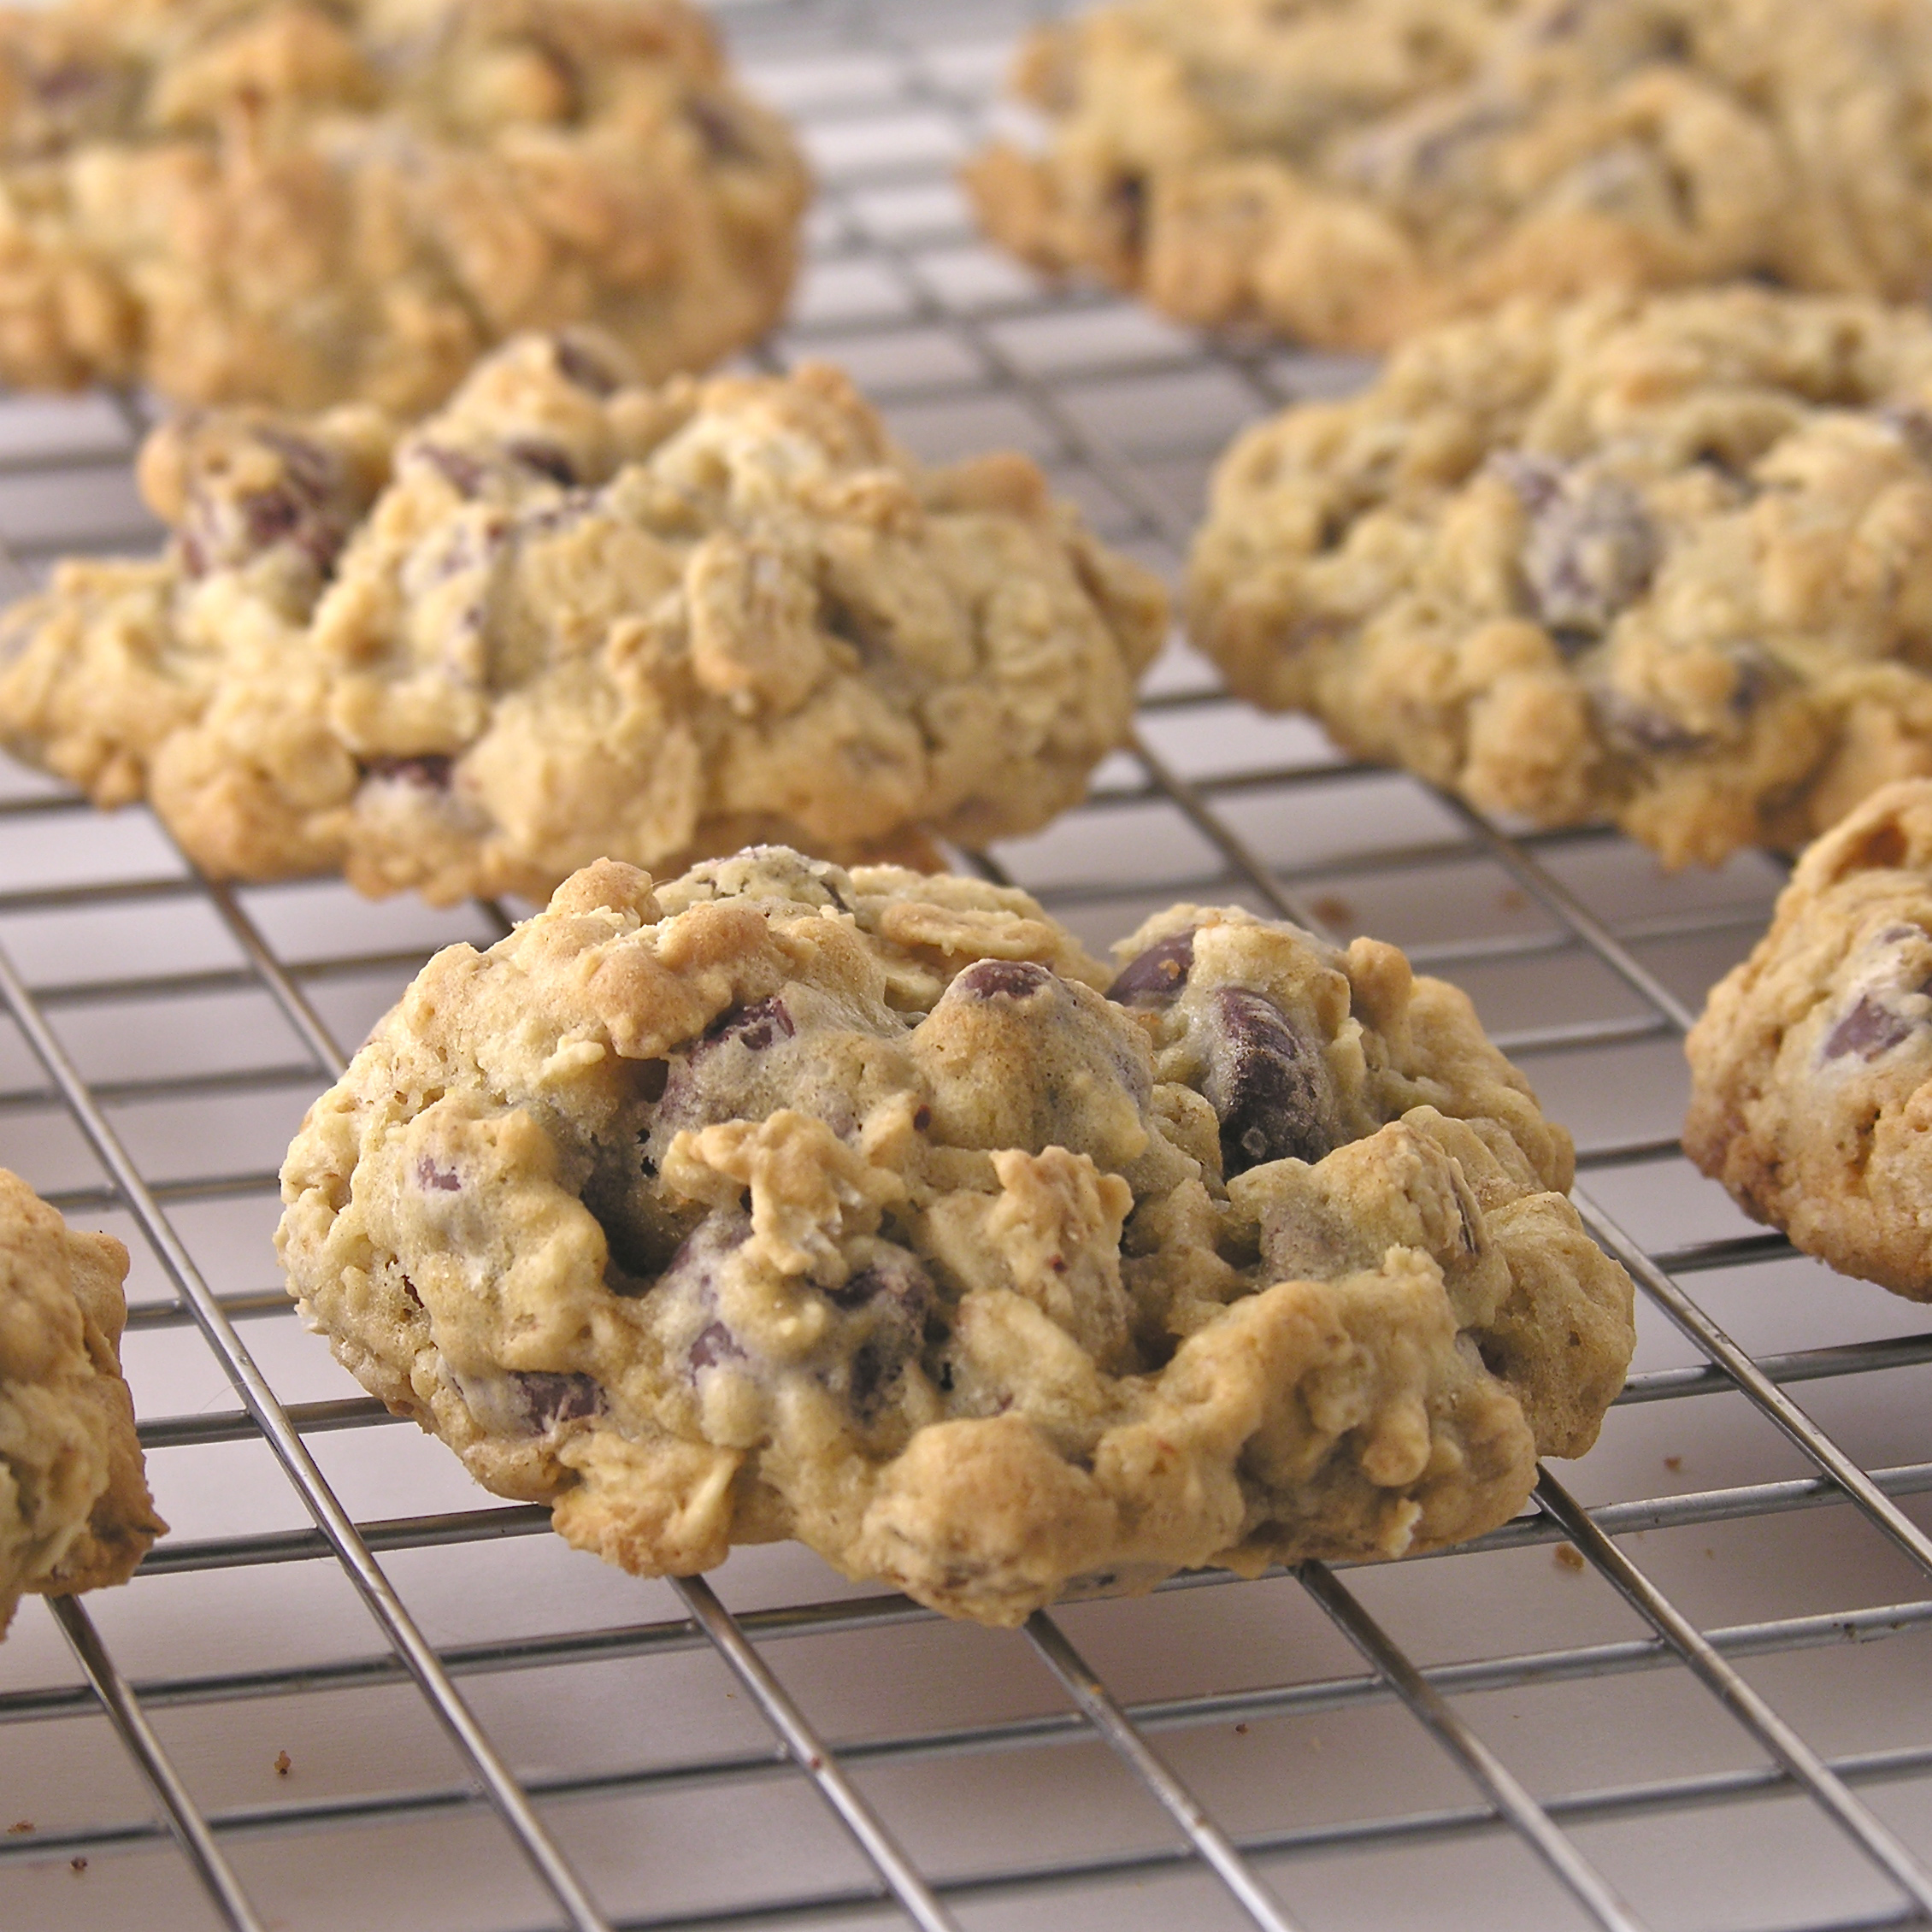
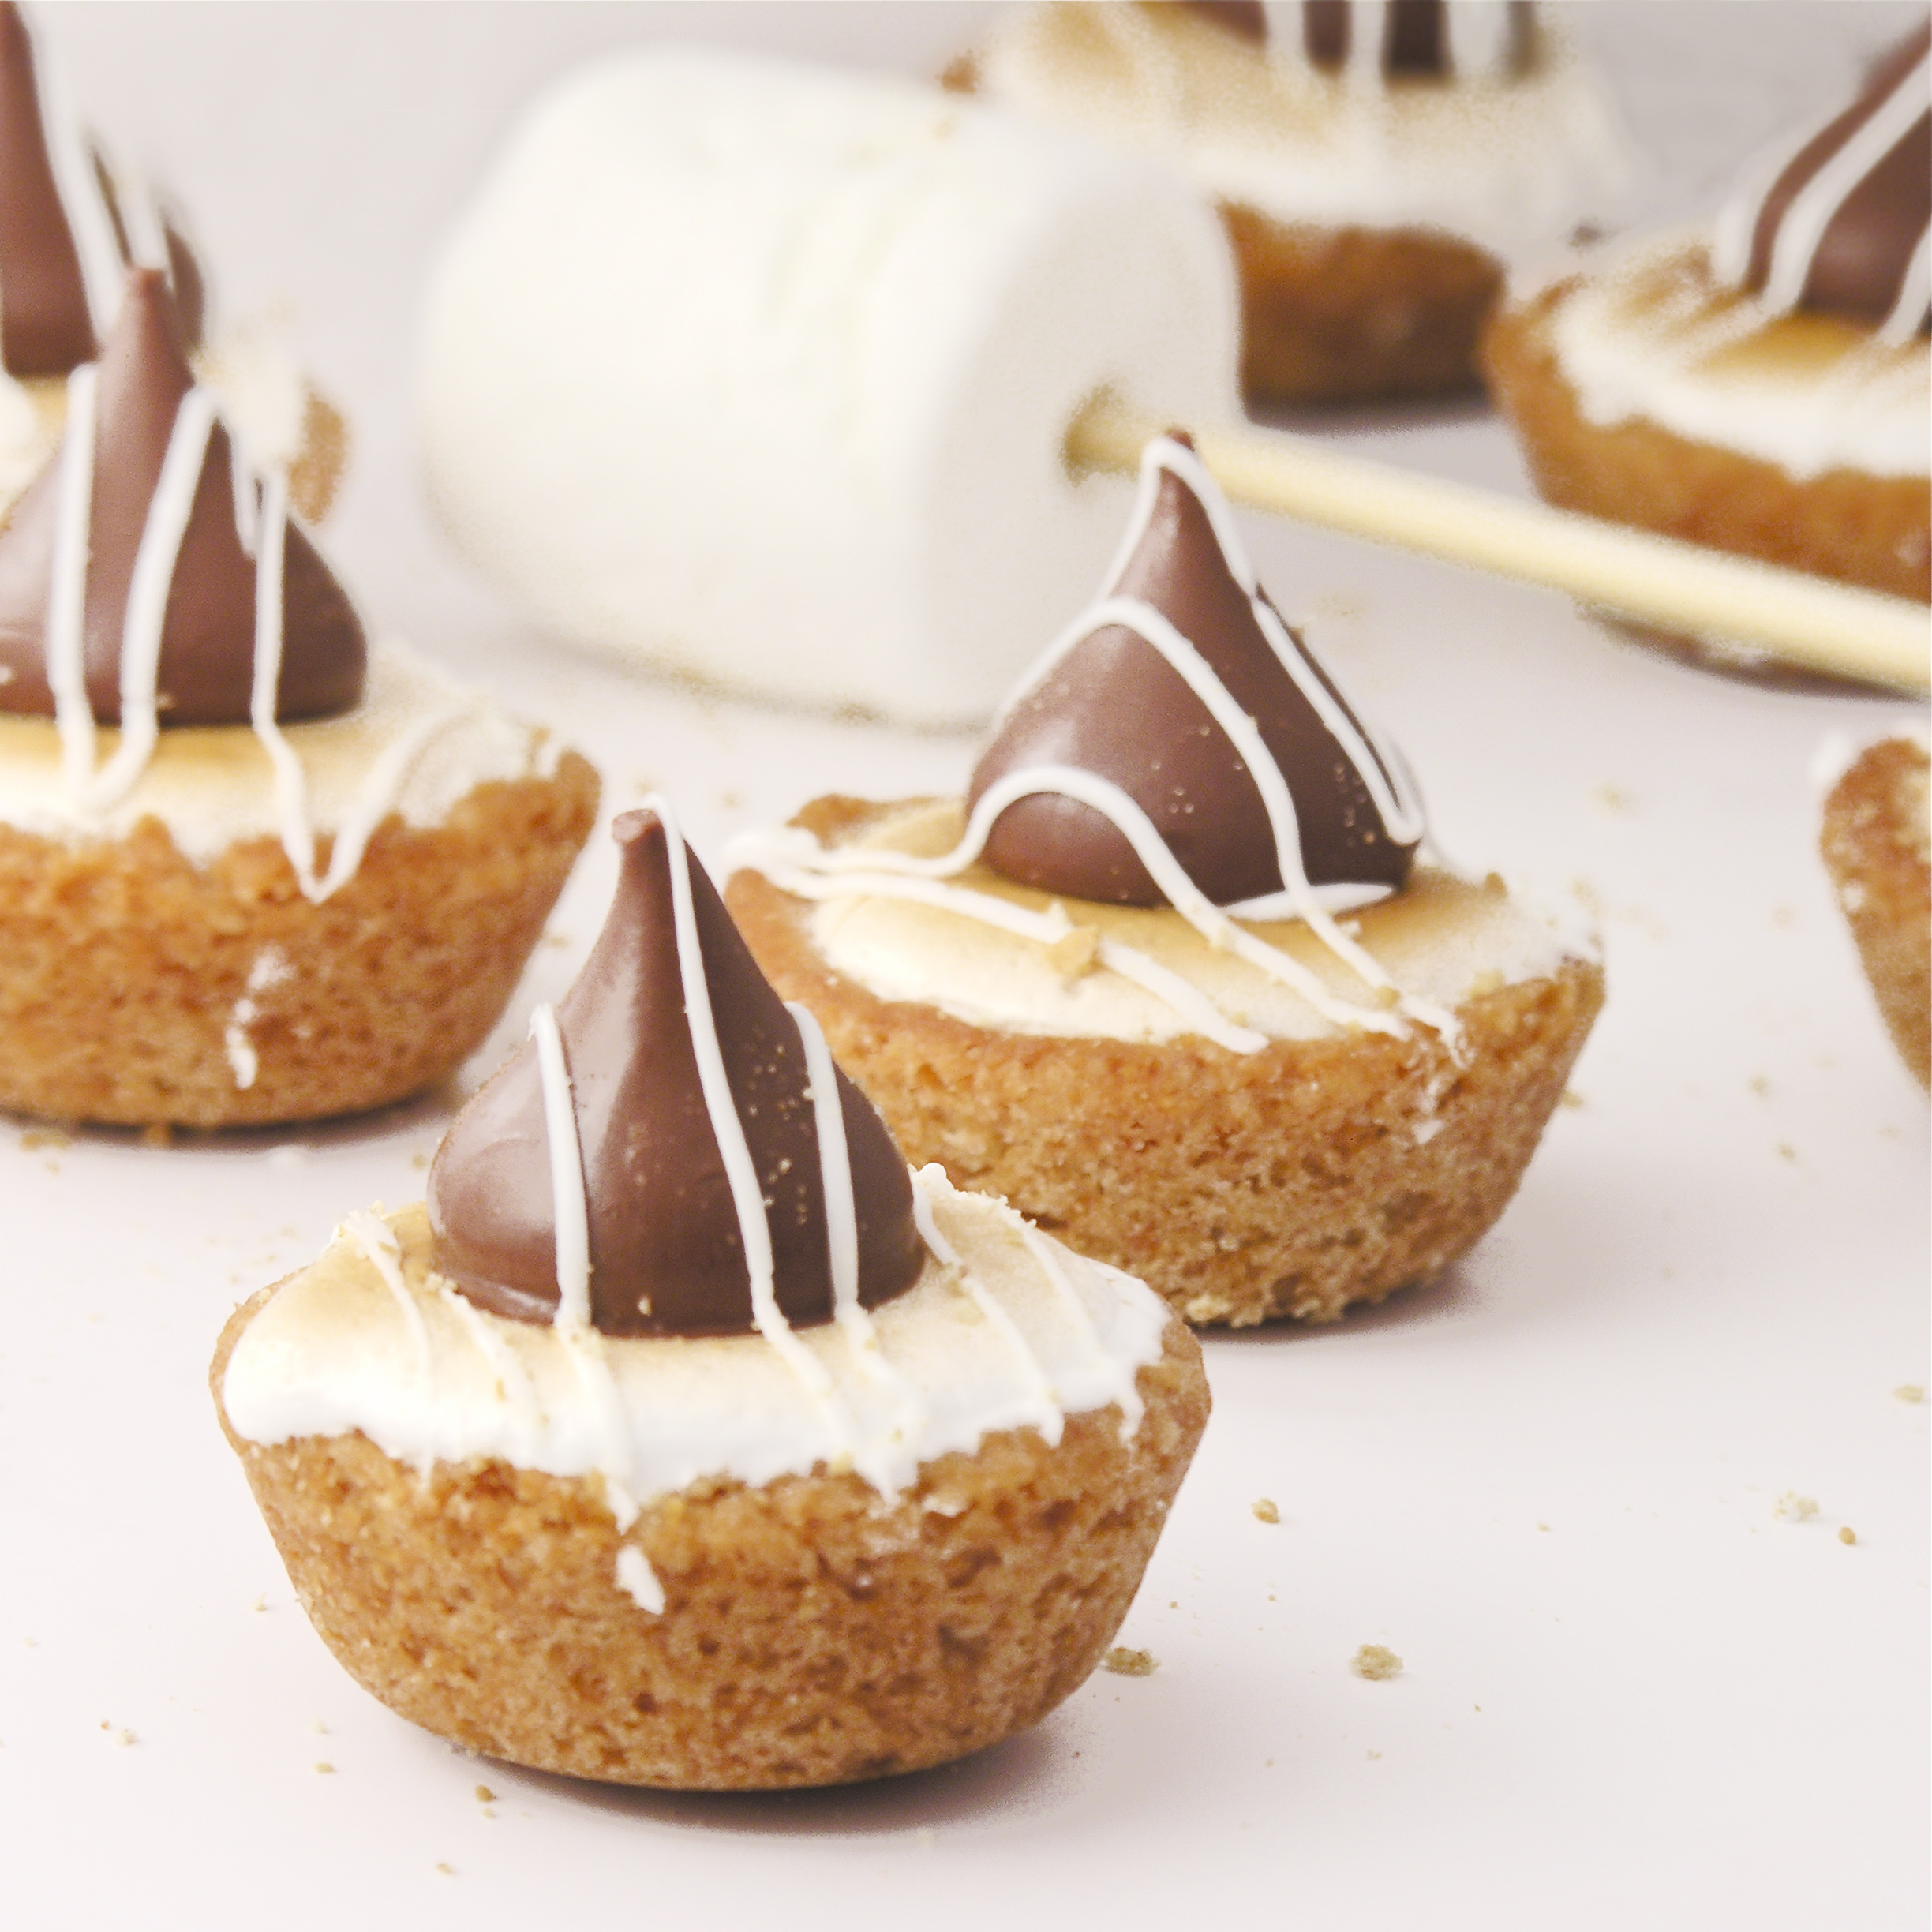
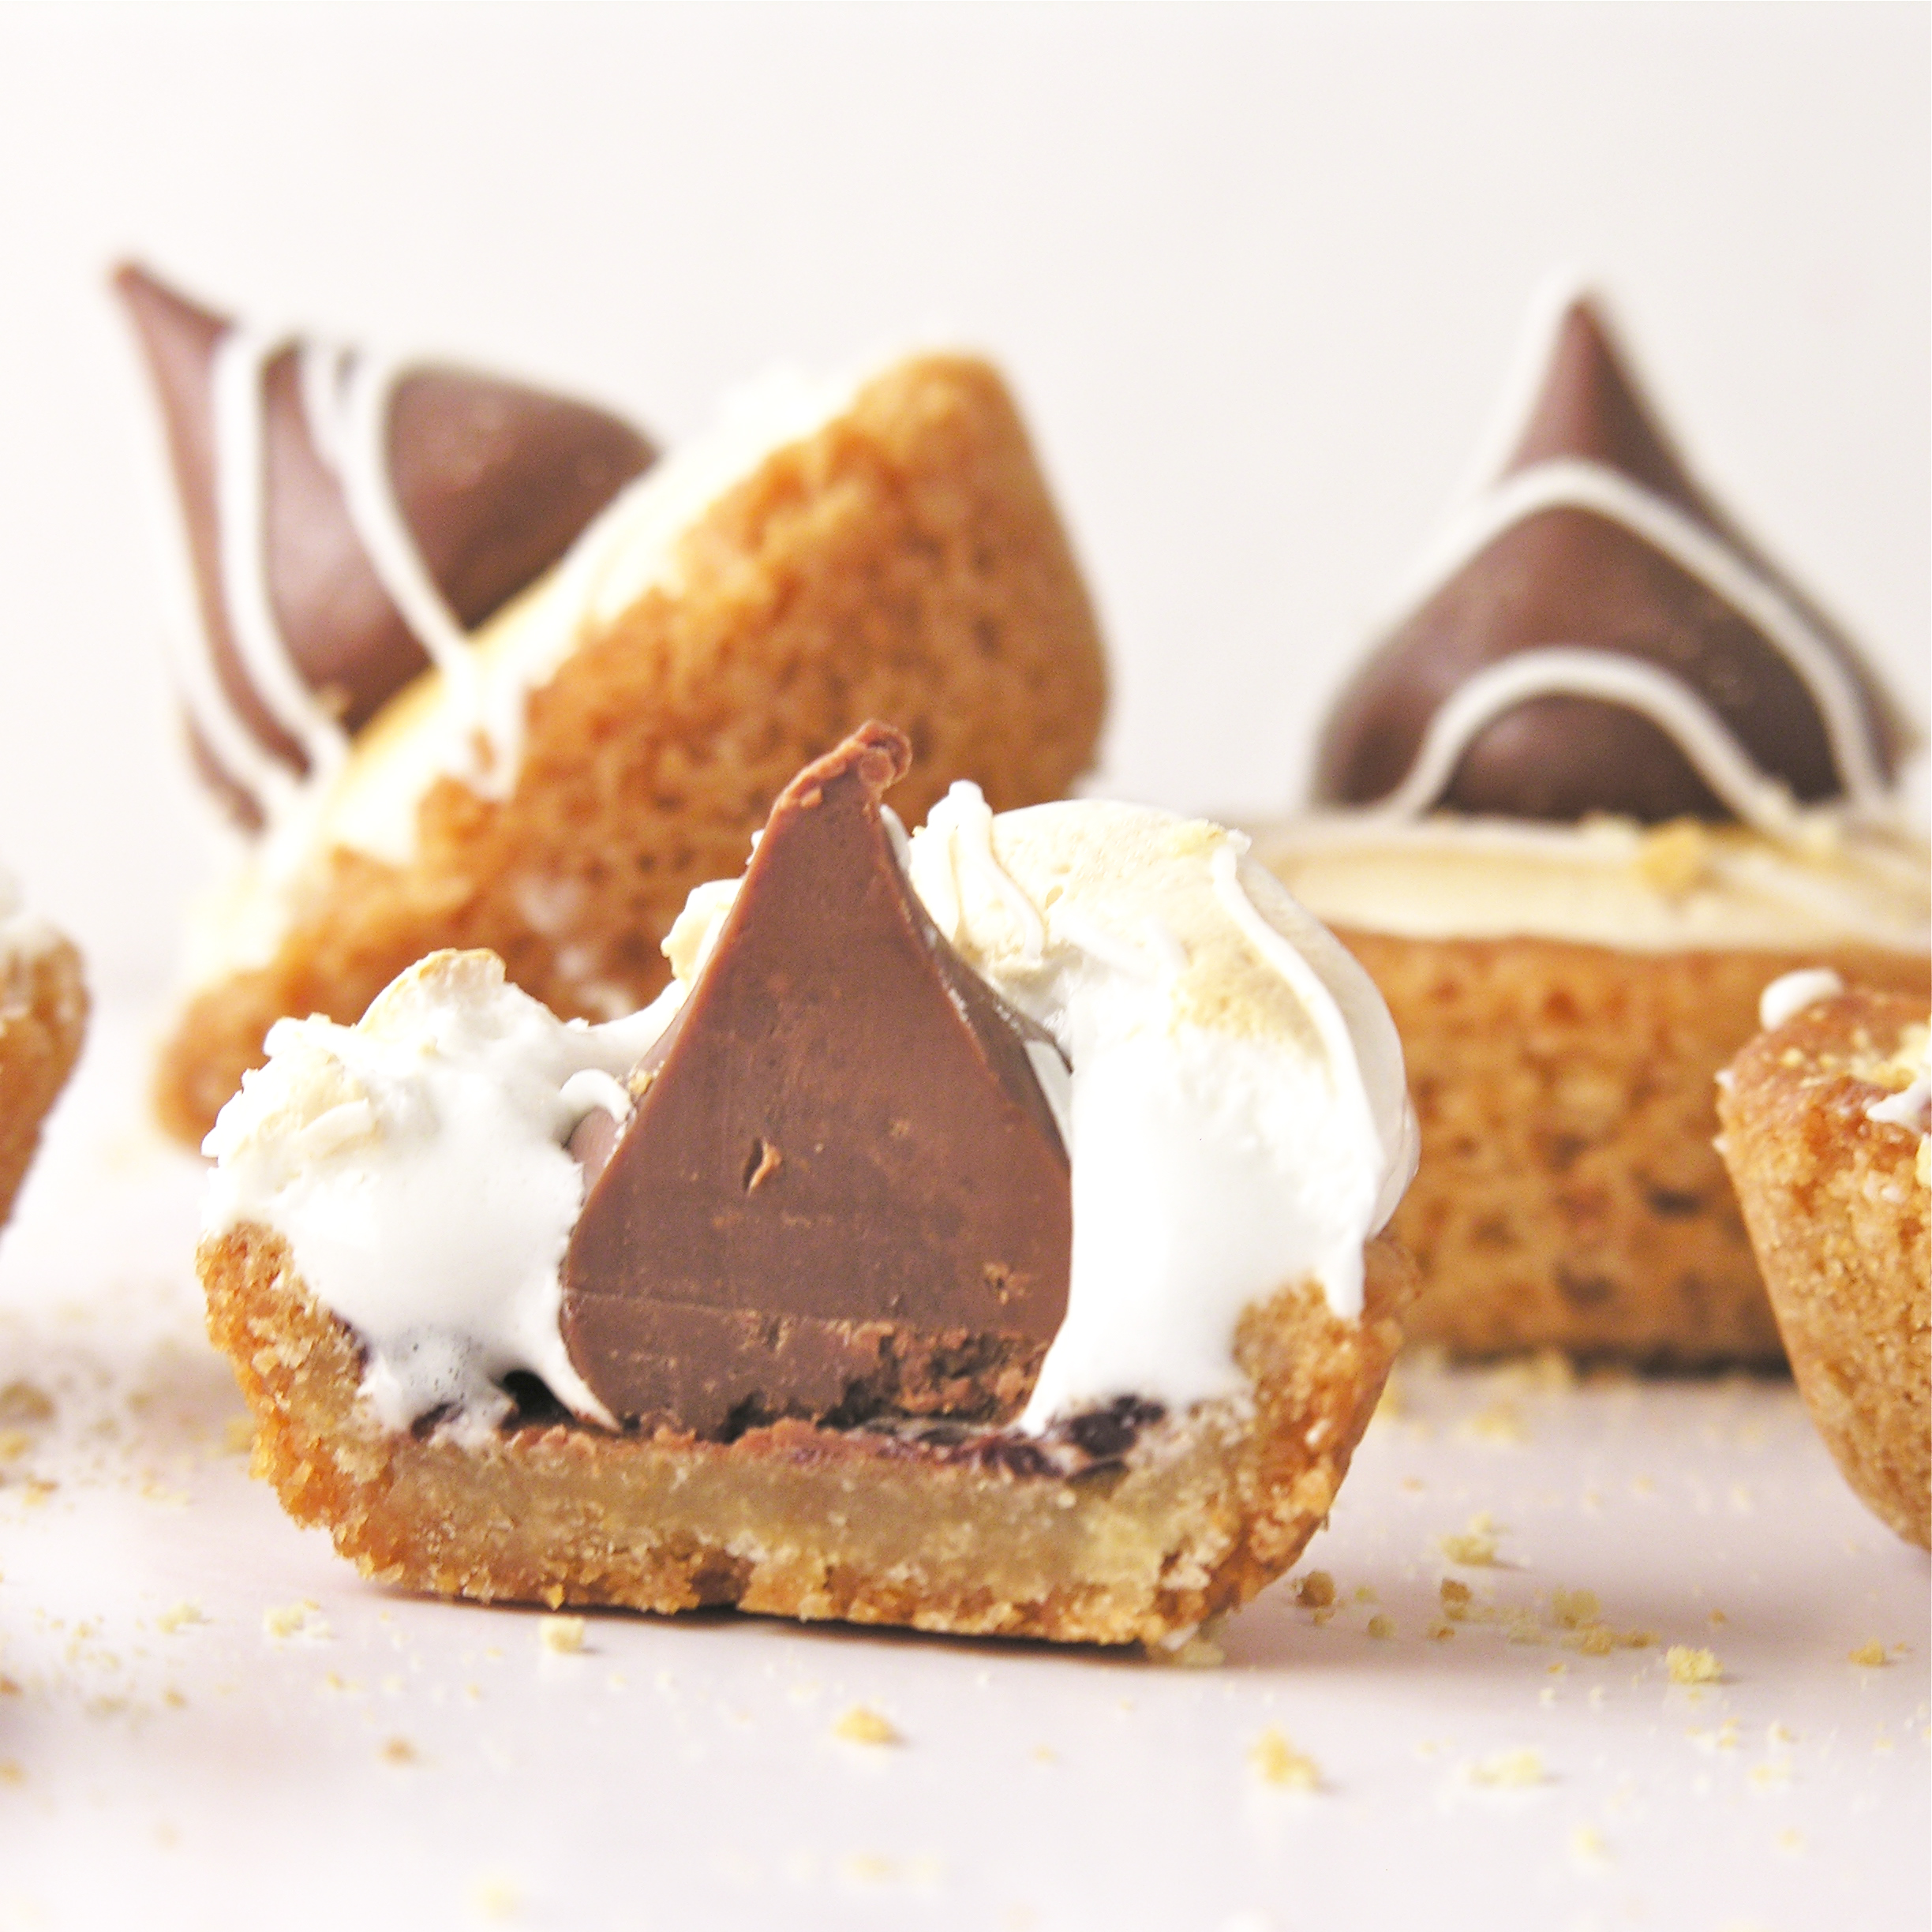
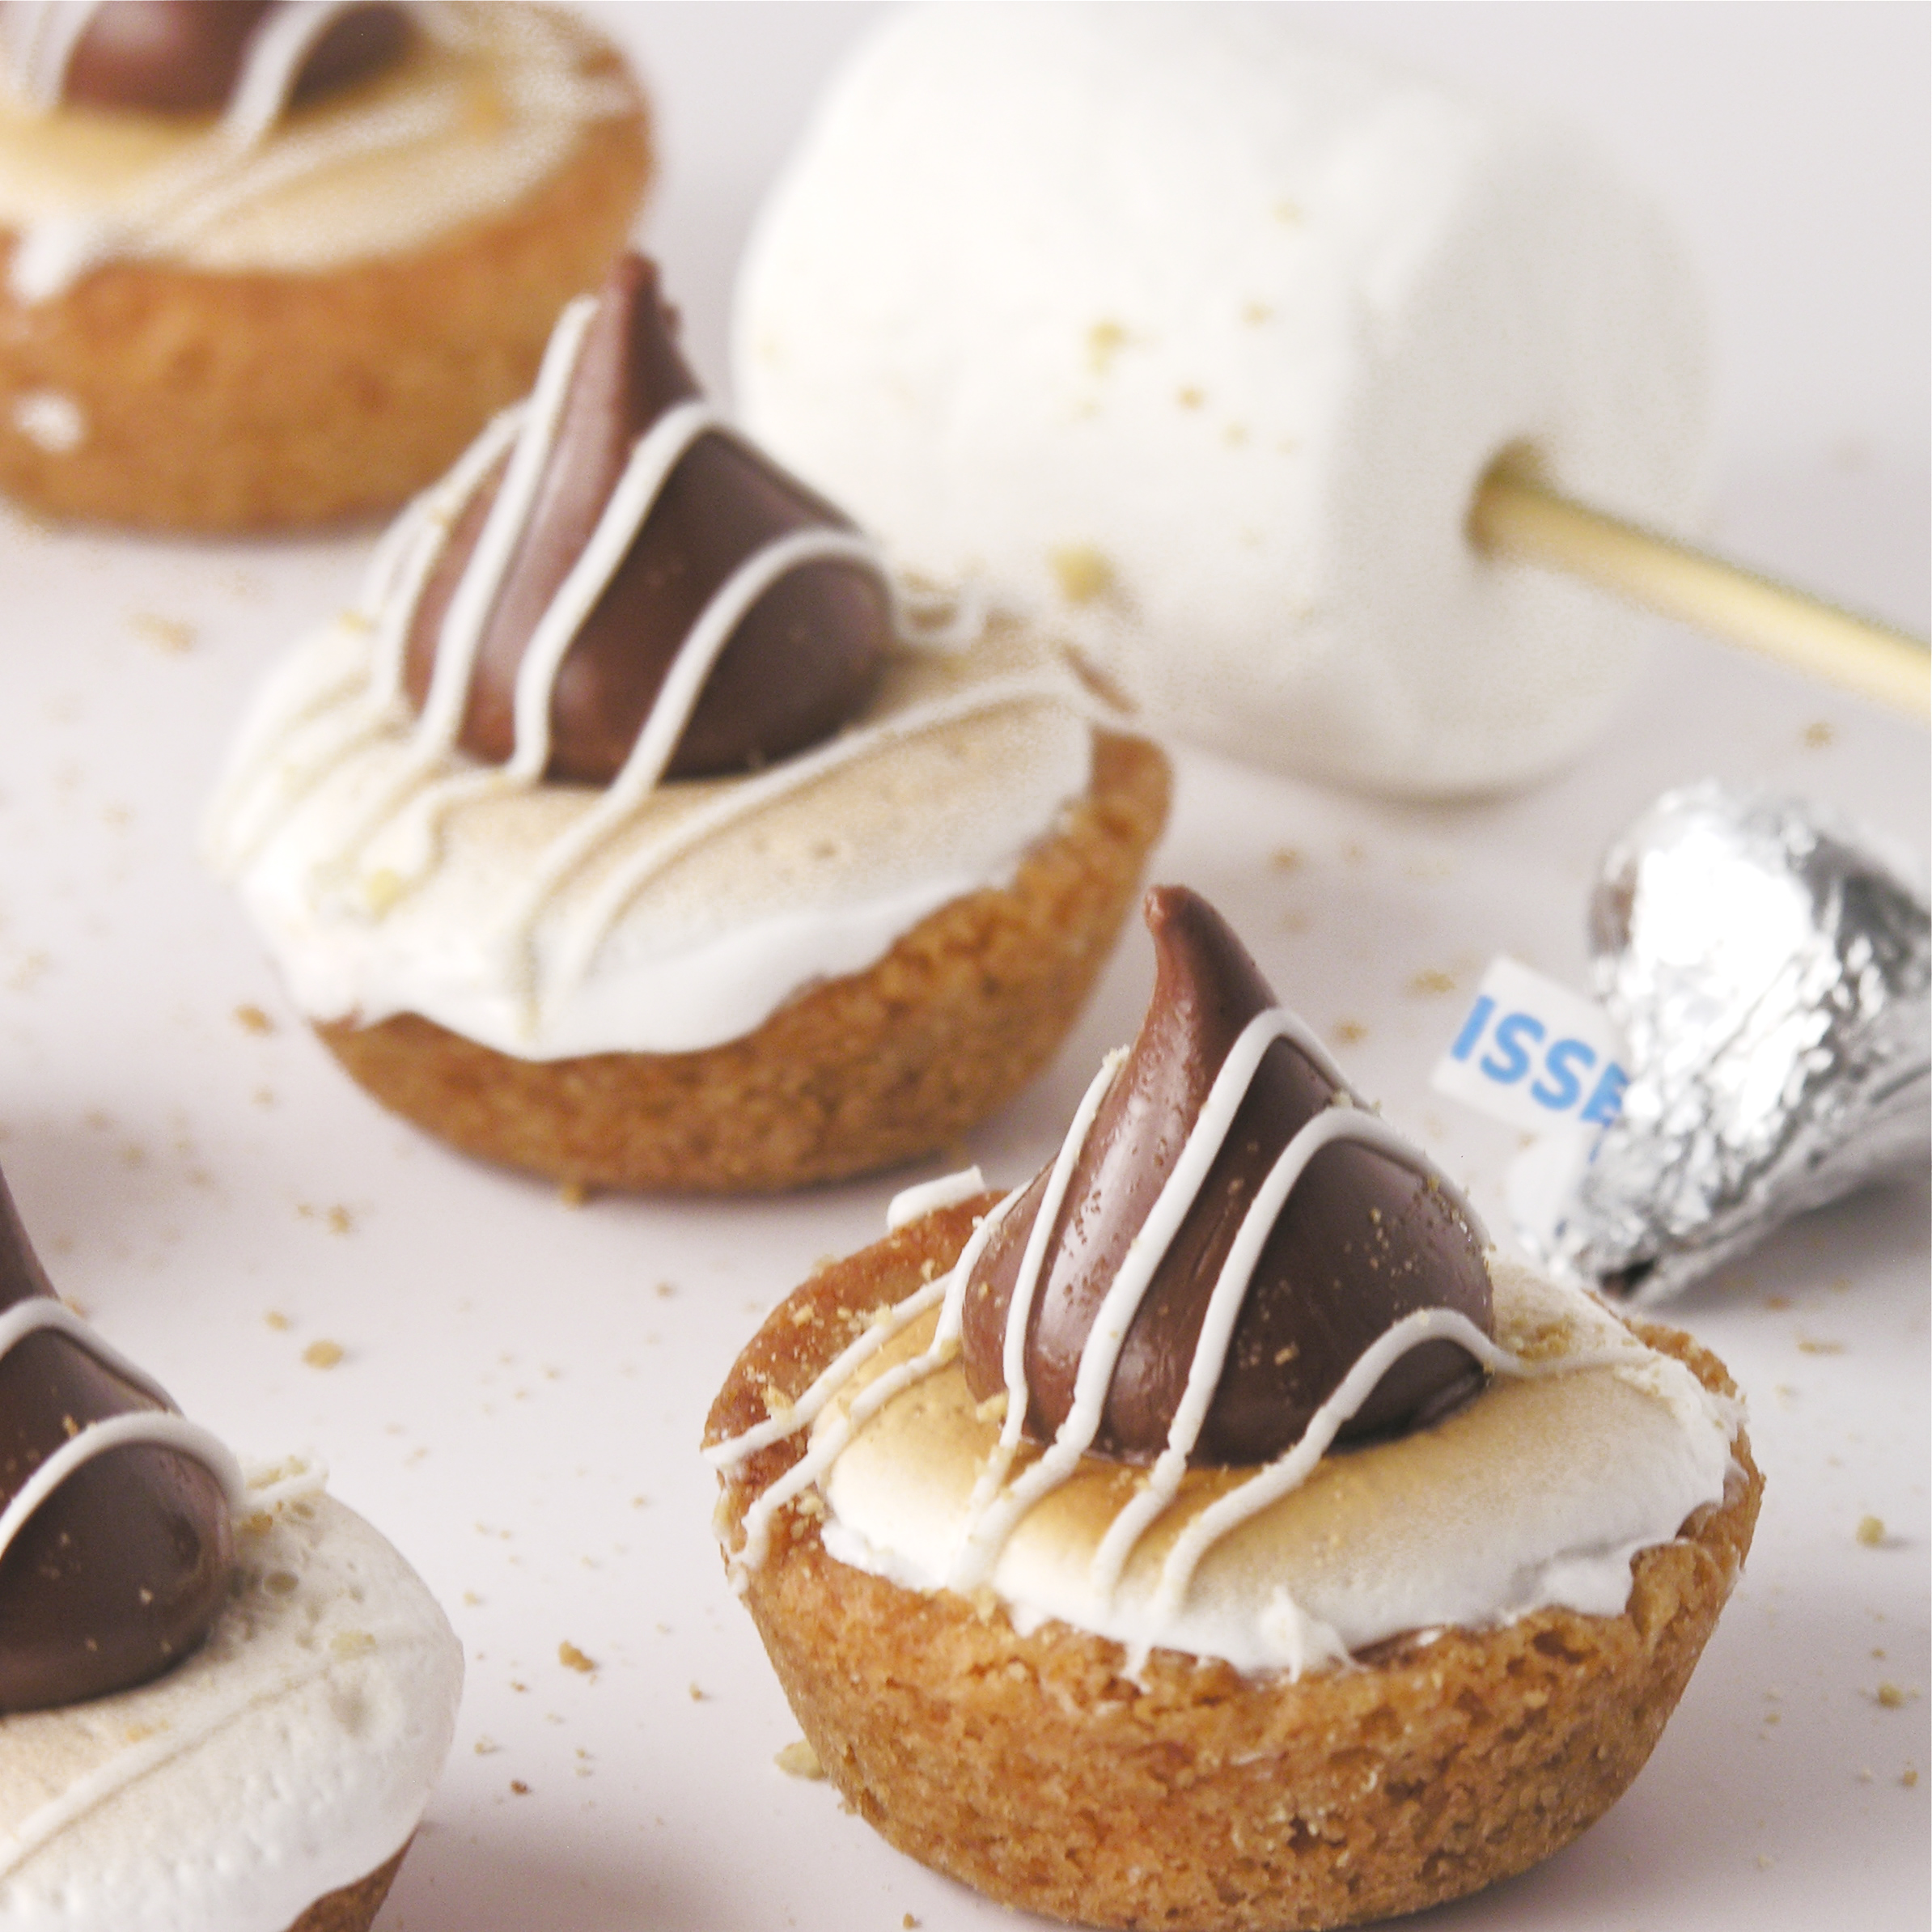
These mini graham cracker cookie cups are overflowing with soft marshmallow and chocolate~ a perfect replica of the summertime favorite~ in cookie form!!

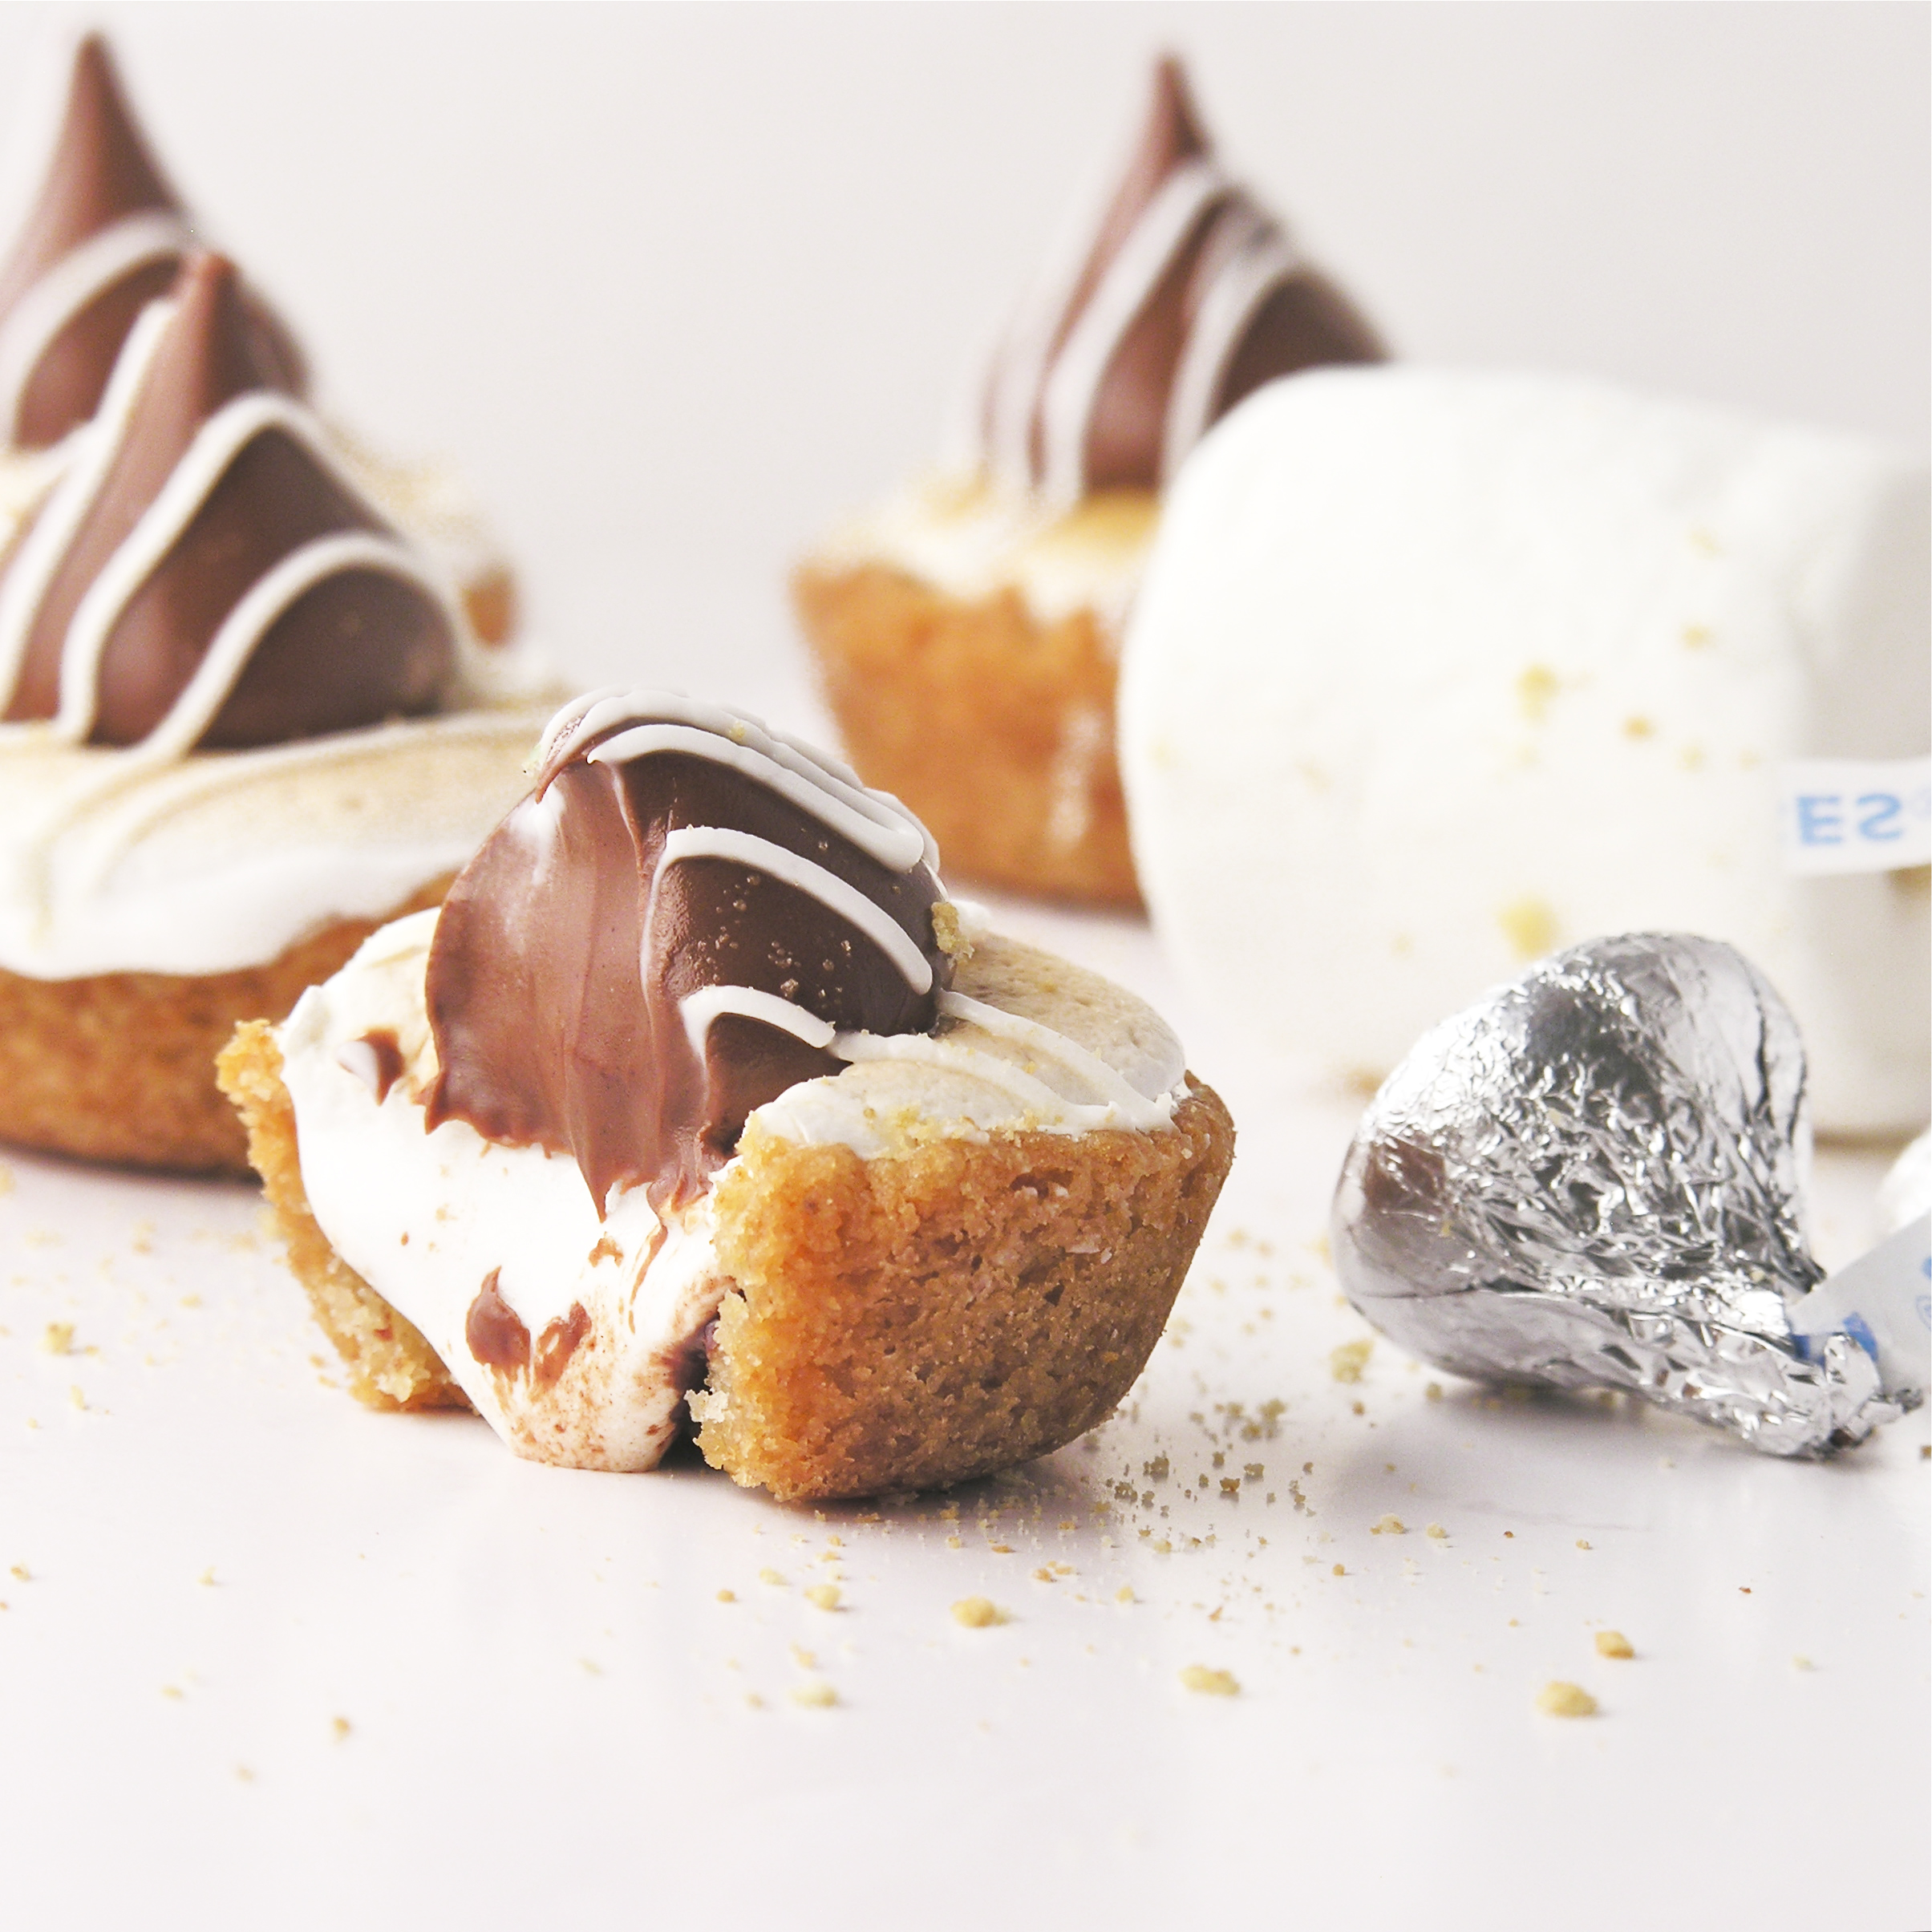
These little cookie cups were eaten up faster than any dessert I can remember.  You simply can’t stop at one!  I guess that’s because they are made with all the ingredients used in S’mores!  The marshmallow stays soft, and the  soft chocolate layer on the inside….?  Oh my.

S'more cookie cups!

Here’s how to make them: (printable recipe)

INGREDIENTS: (makes 48 mini cups)

  • One tube of refrigerated sugar cookie dough
  • 1 cup of finely crushed graham crackers
  • 1/4 cup of heavy cream
  • 1/2 cup semi-sweet chocolate chips
  • 1  (13oz) jar of Jet-Puffed Marshmallow fluff
  • 48 Hershey Kisses (unwrapped!)

DIRECTIONS:

  • Preheat oven to 350F degrees.
  • Place cookie dough and crushed grahams (save 2 to 3 tablespoons of crumbs to sprinkle over cups at end) in a mixing bowl and using hands, combine crushed grahams with cookie dough until completely incorporated.
  • Evenly divide dough into mini muffin tins (I used a medium cookie scoop to do this and got about 48 cookies)
  • Bake at 350F degrees for 7 to 9 minutes, until turning a light brown at edges.
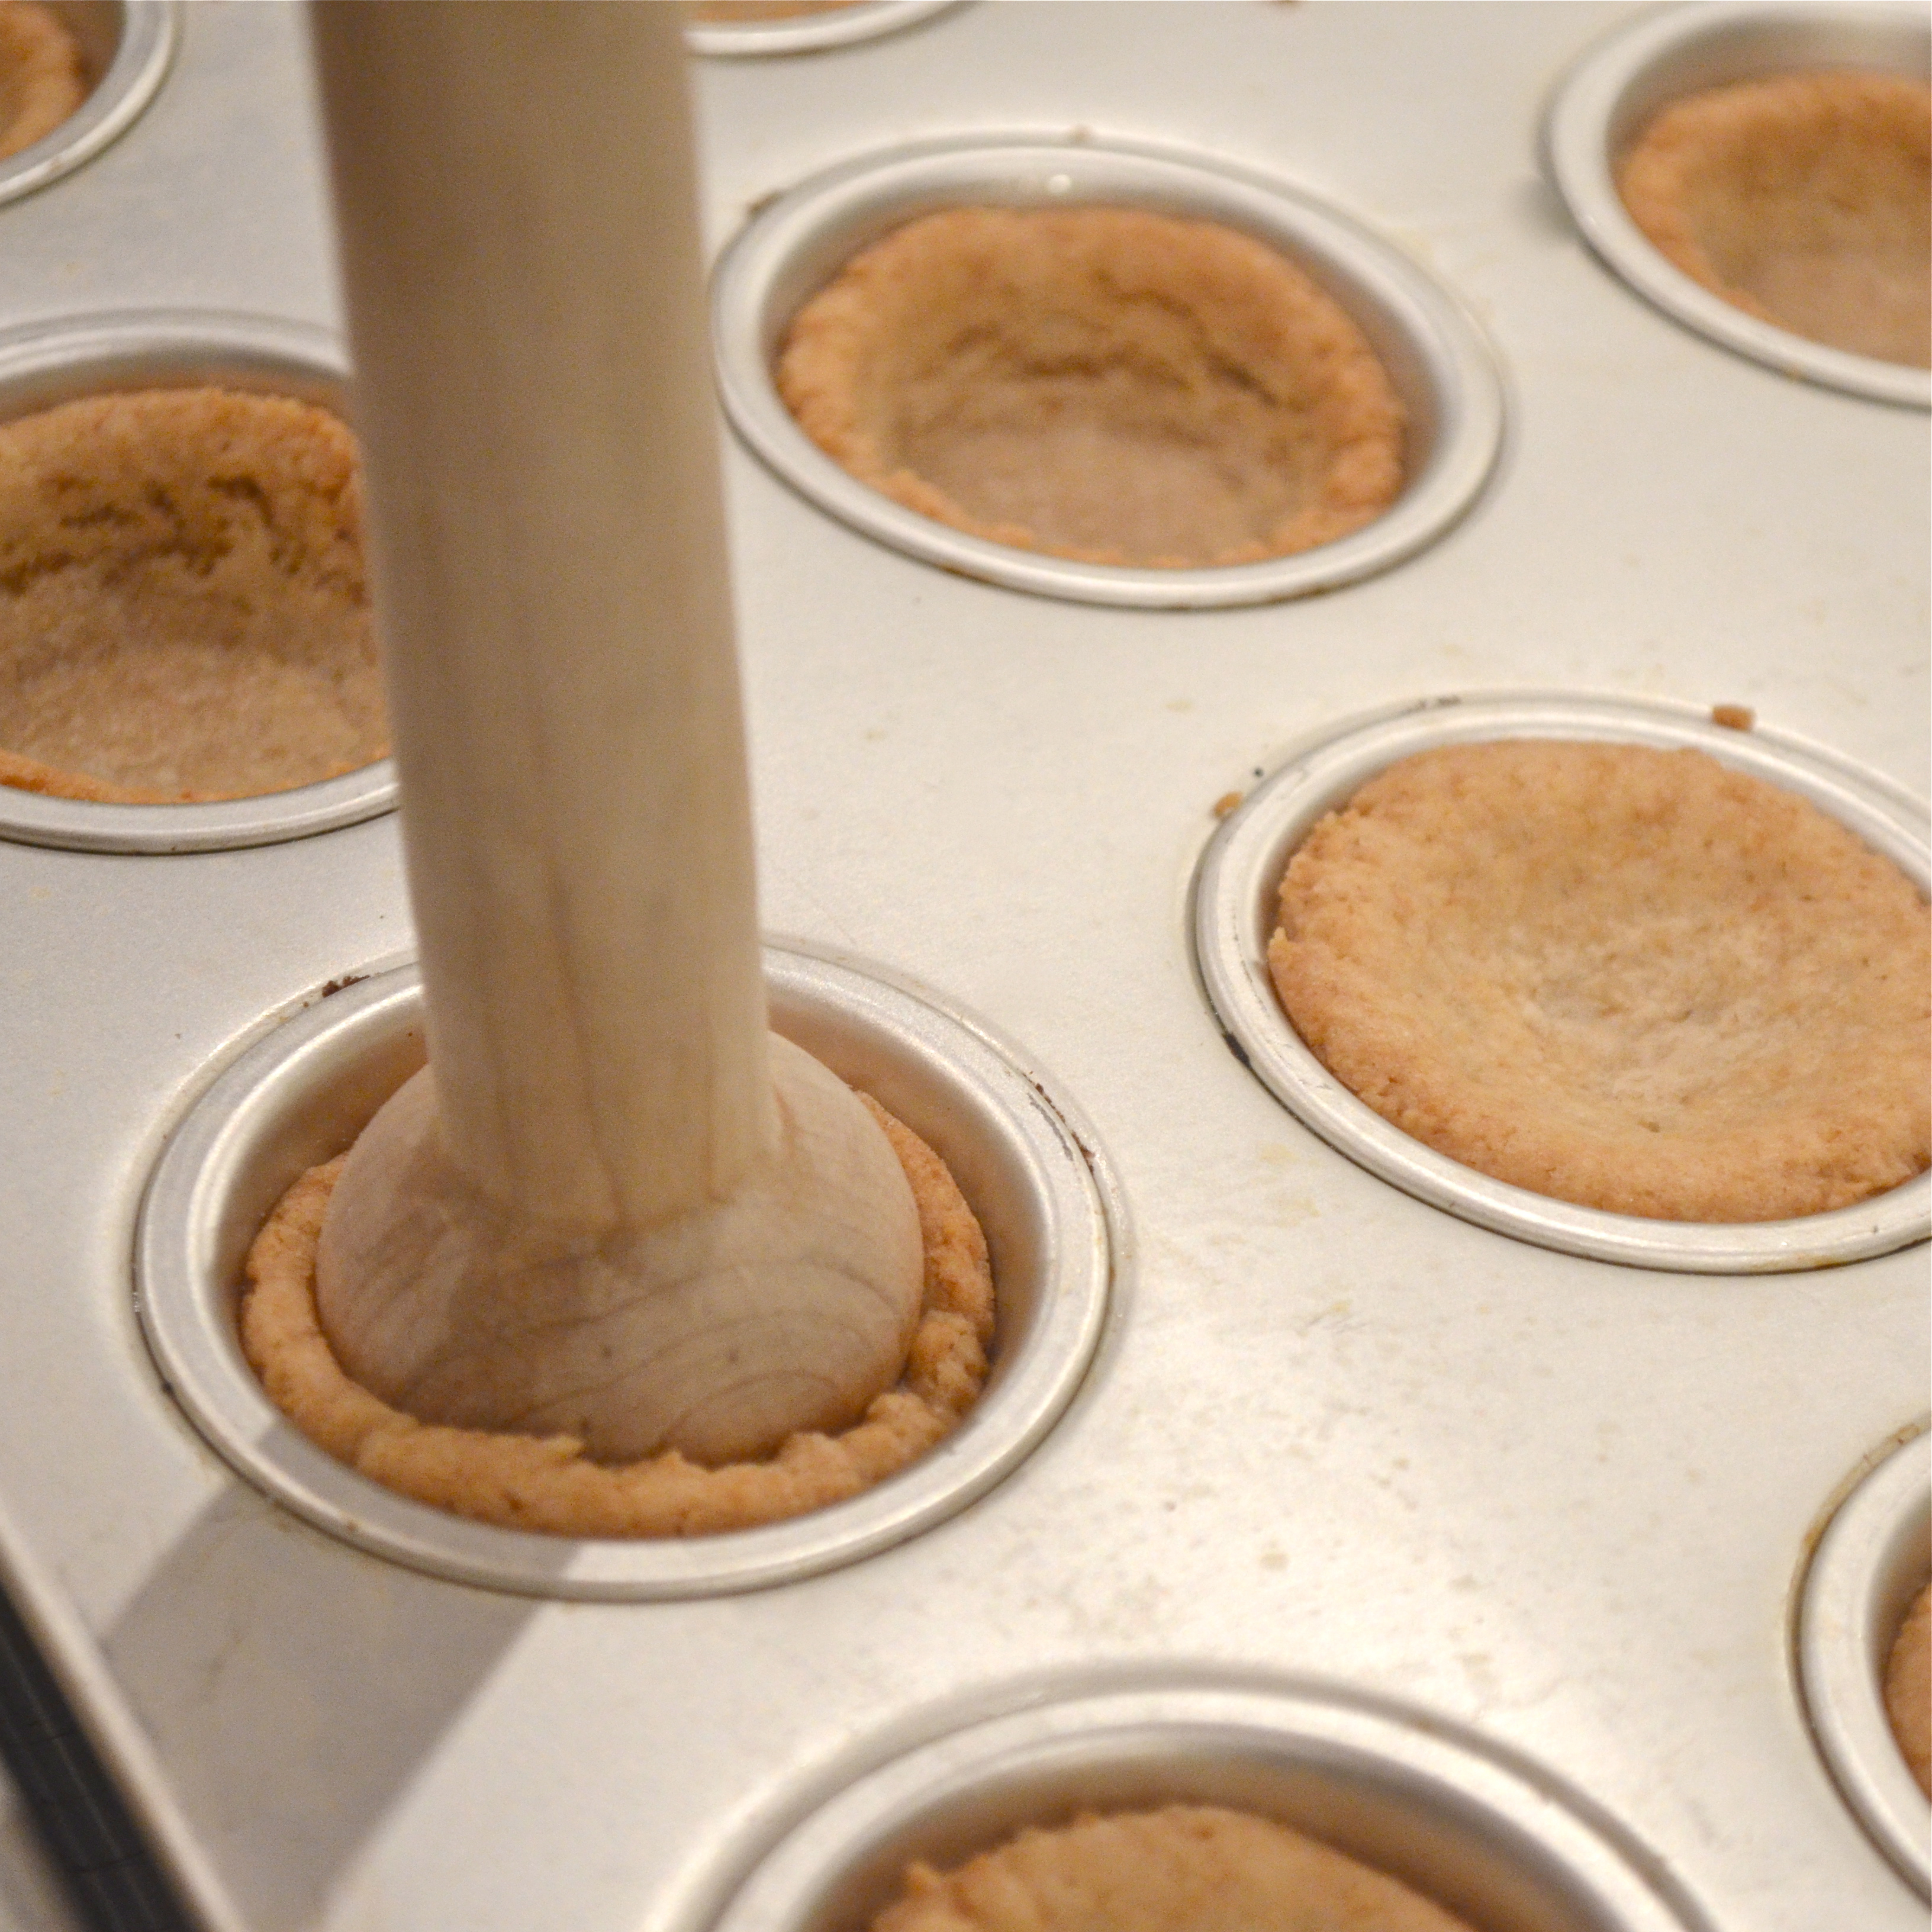
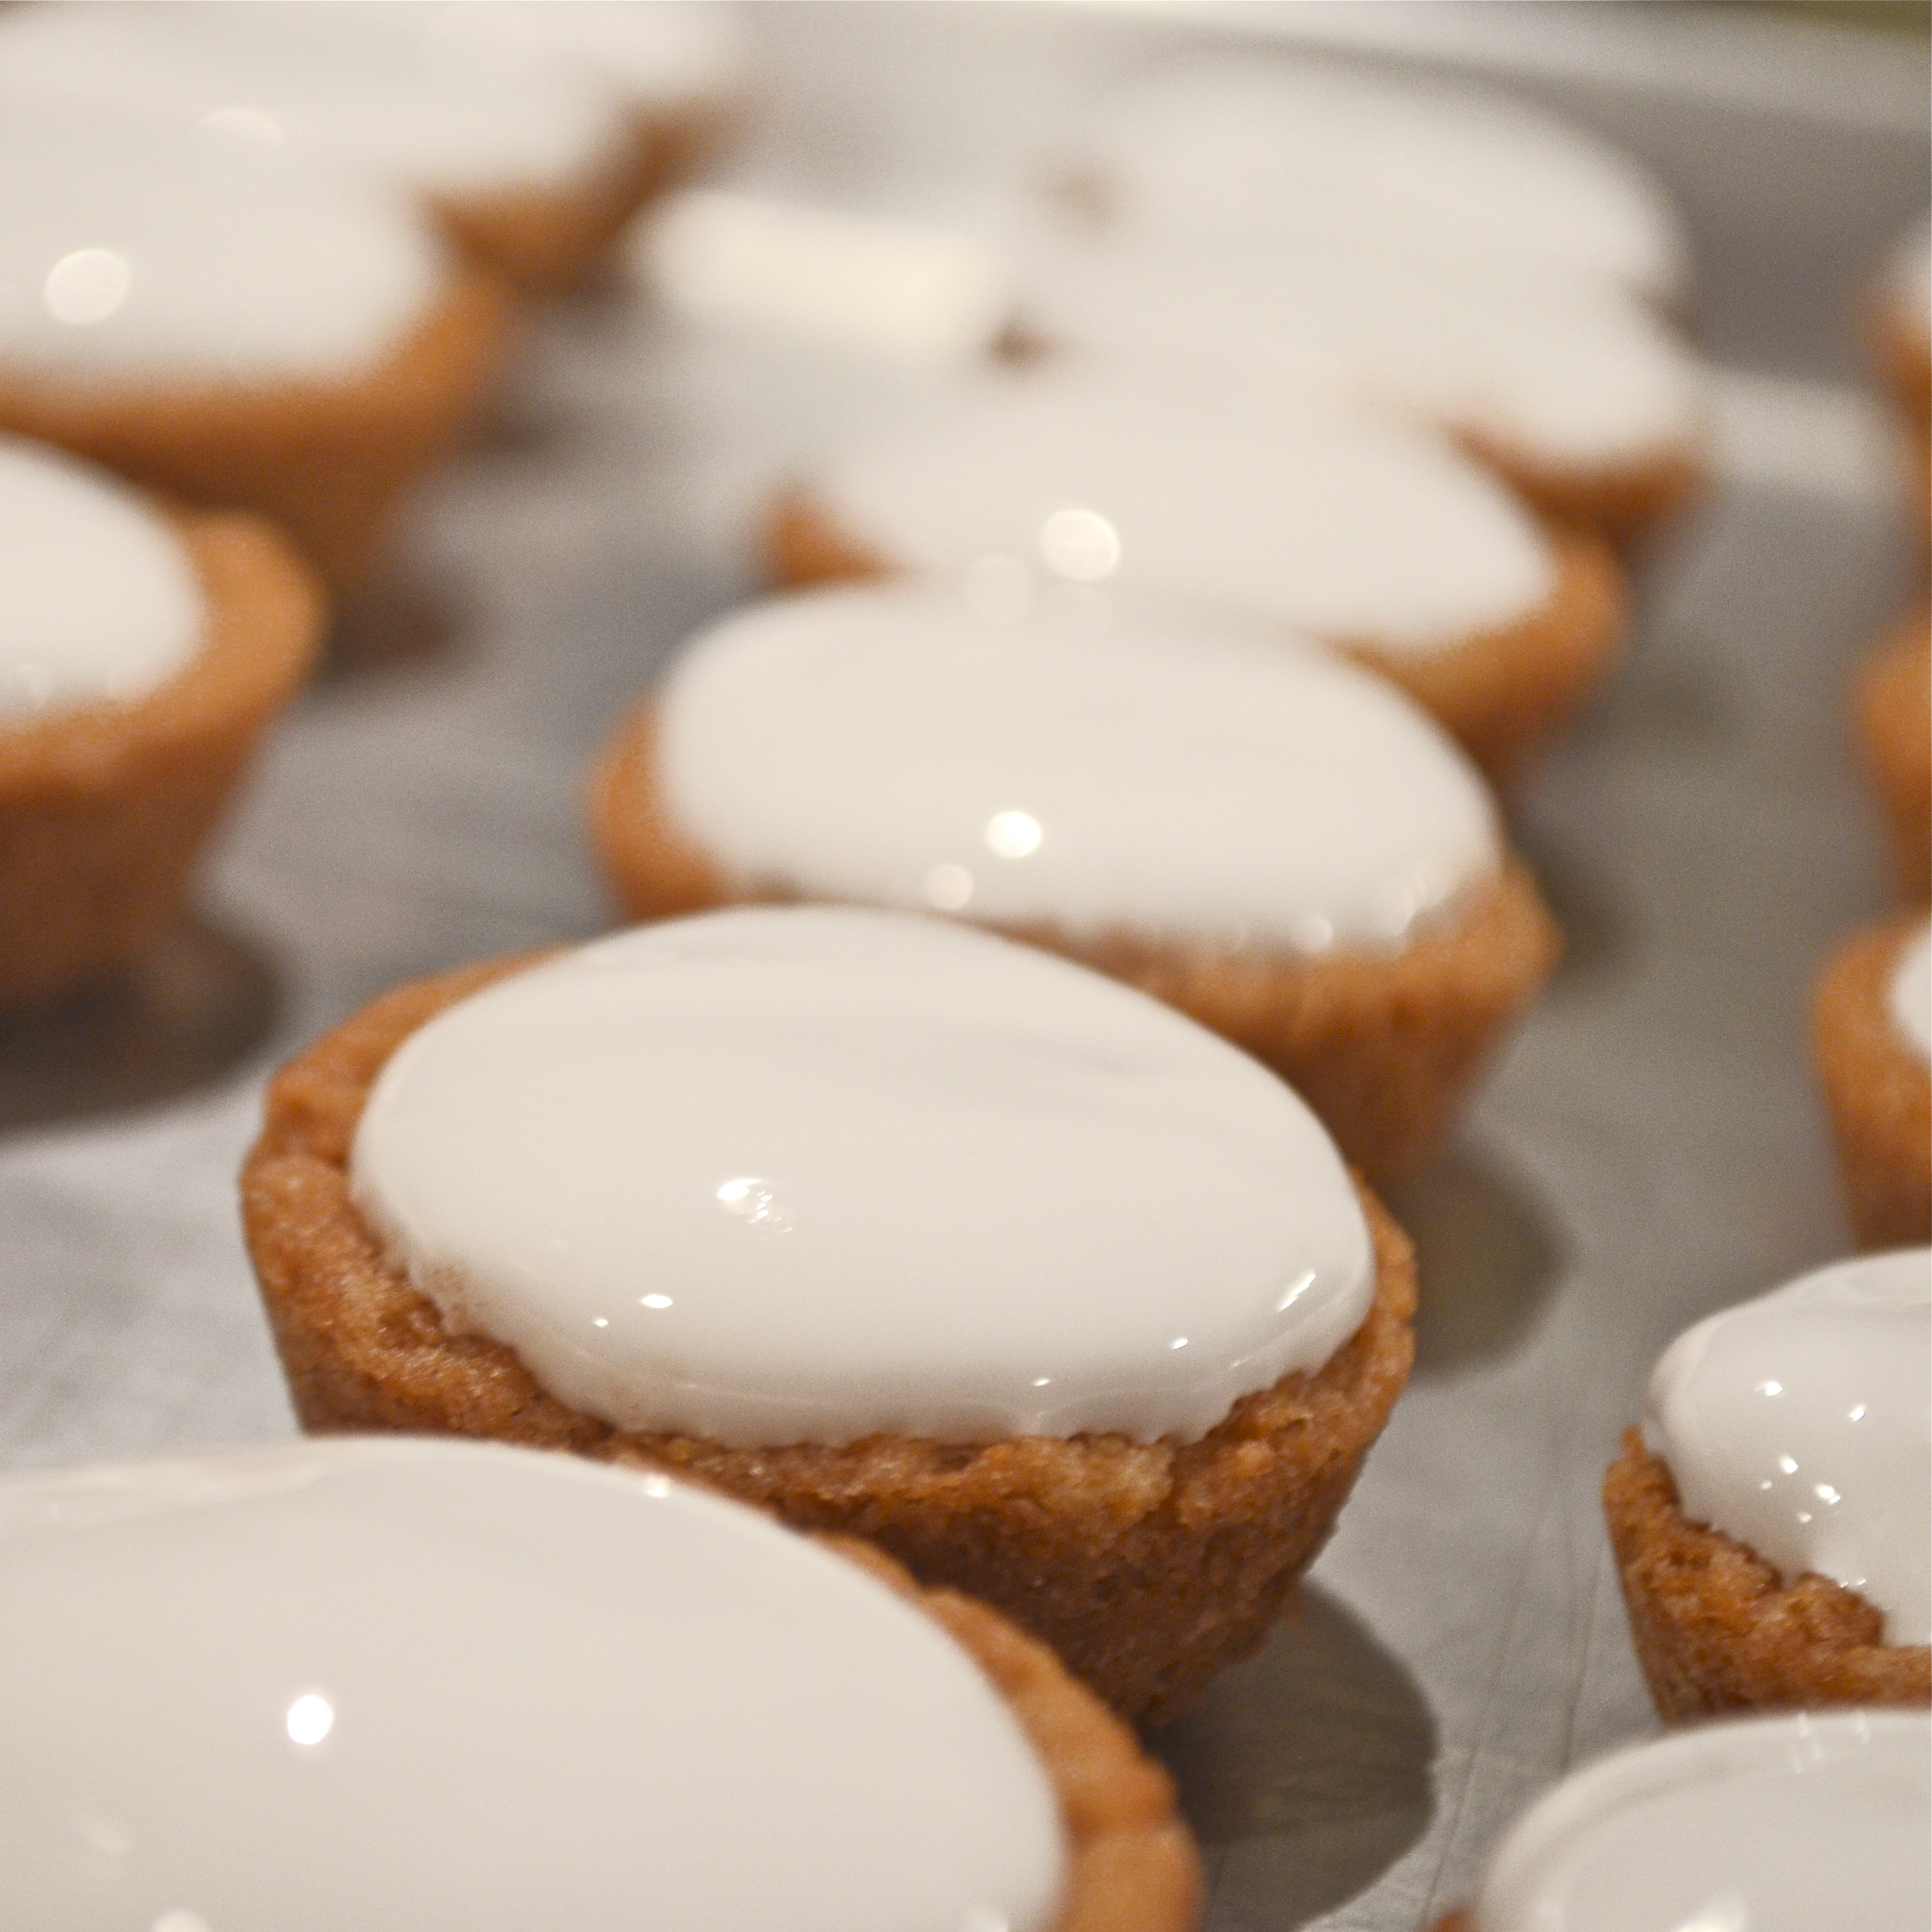
  • Remove from oven and immediately press centers in using a mini tart shaper (or a wooden spoon~ although I highly recommend the tart shaper as it is a small and inexpensive tool that I love and use all the time!)
  • Allow cups to cool for 2-3 minutes and then gently run a small knife around the edges and pop the cup out of the tin.  Allow cup to completely cool on counter.
  • Place all cups on a cookie sheet (preferably one with raised edges)
  • In a small sauce pan, heat up heavy cream until just bubbling at the edges (20 seconds or so).
  • Add chocolate chips, cover and allow them to sit for 5 minutes.
  • Stir melted chips with cream until smooth (turn heat back on if needed)
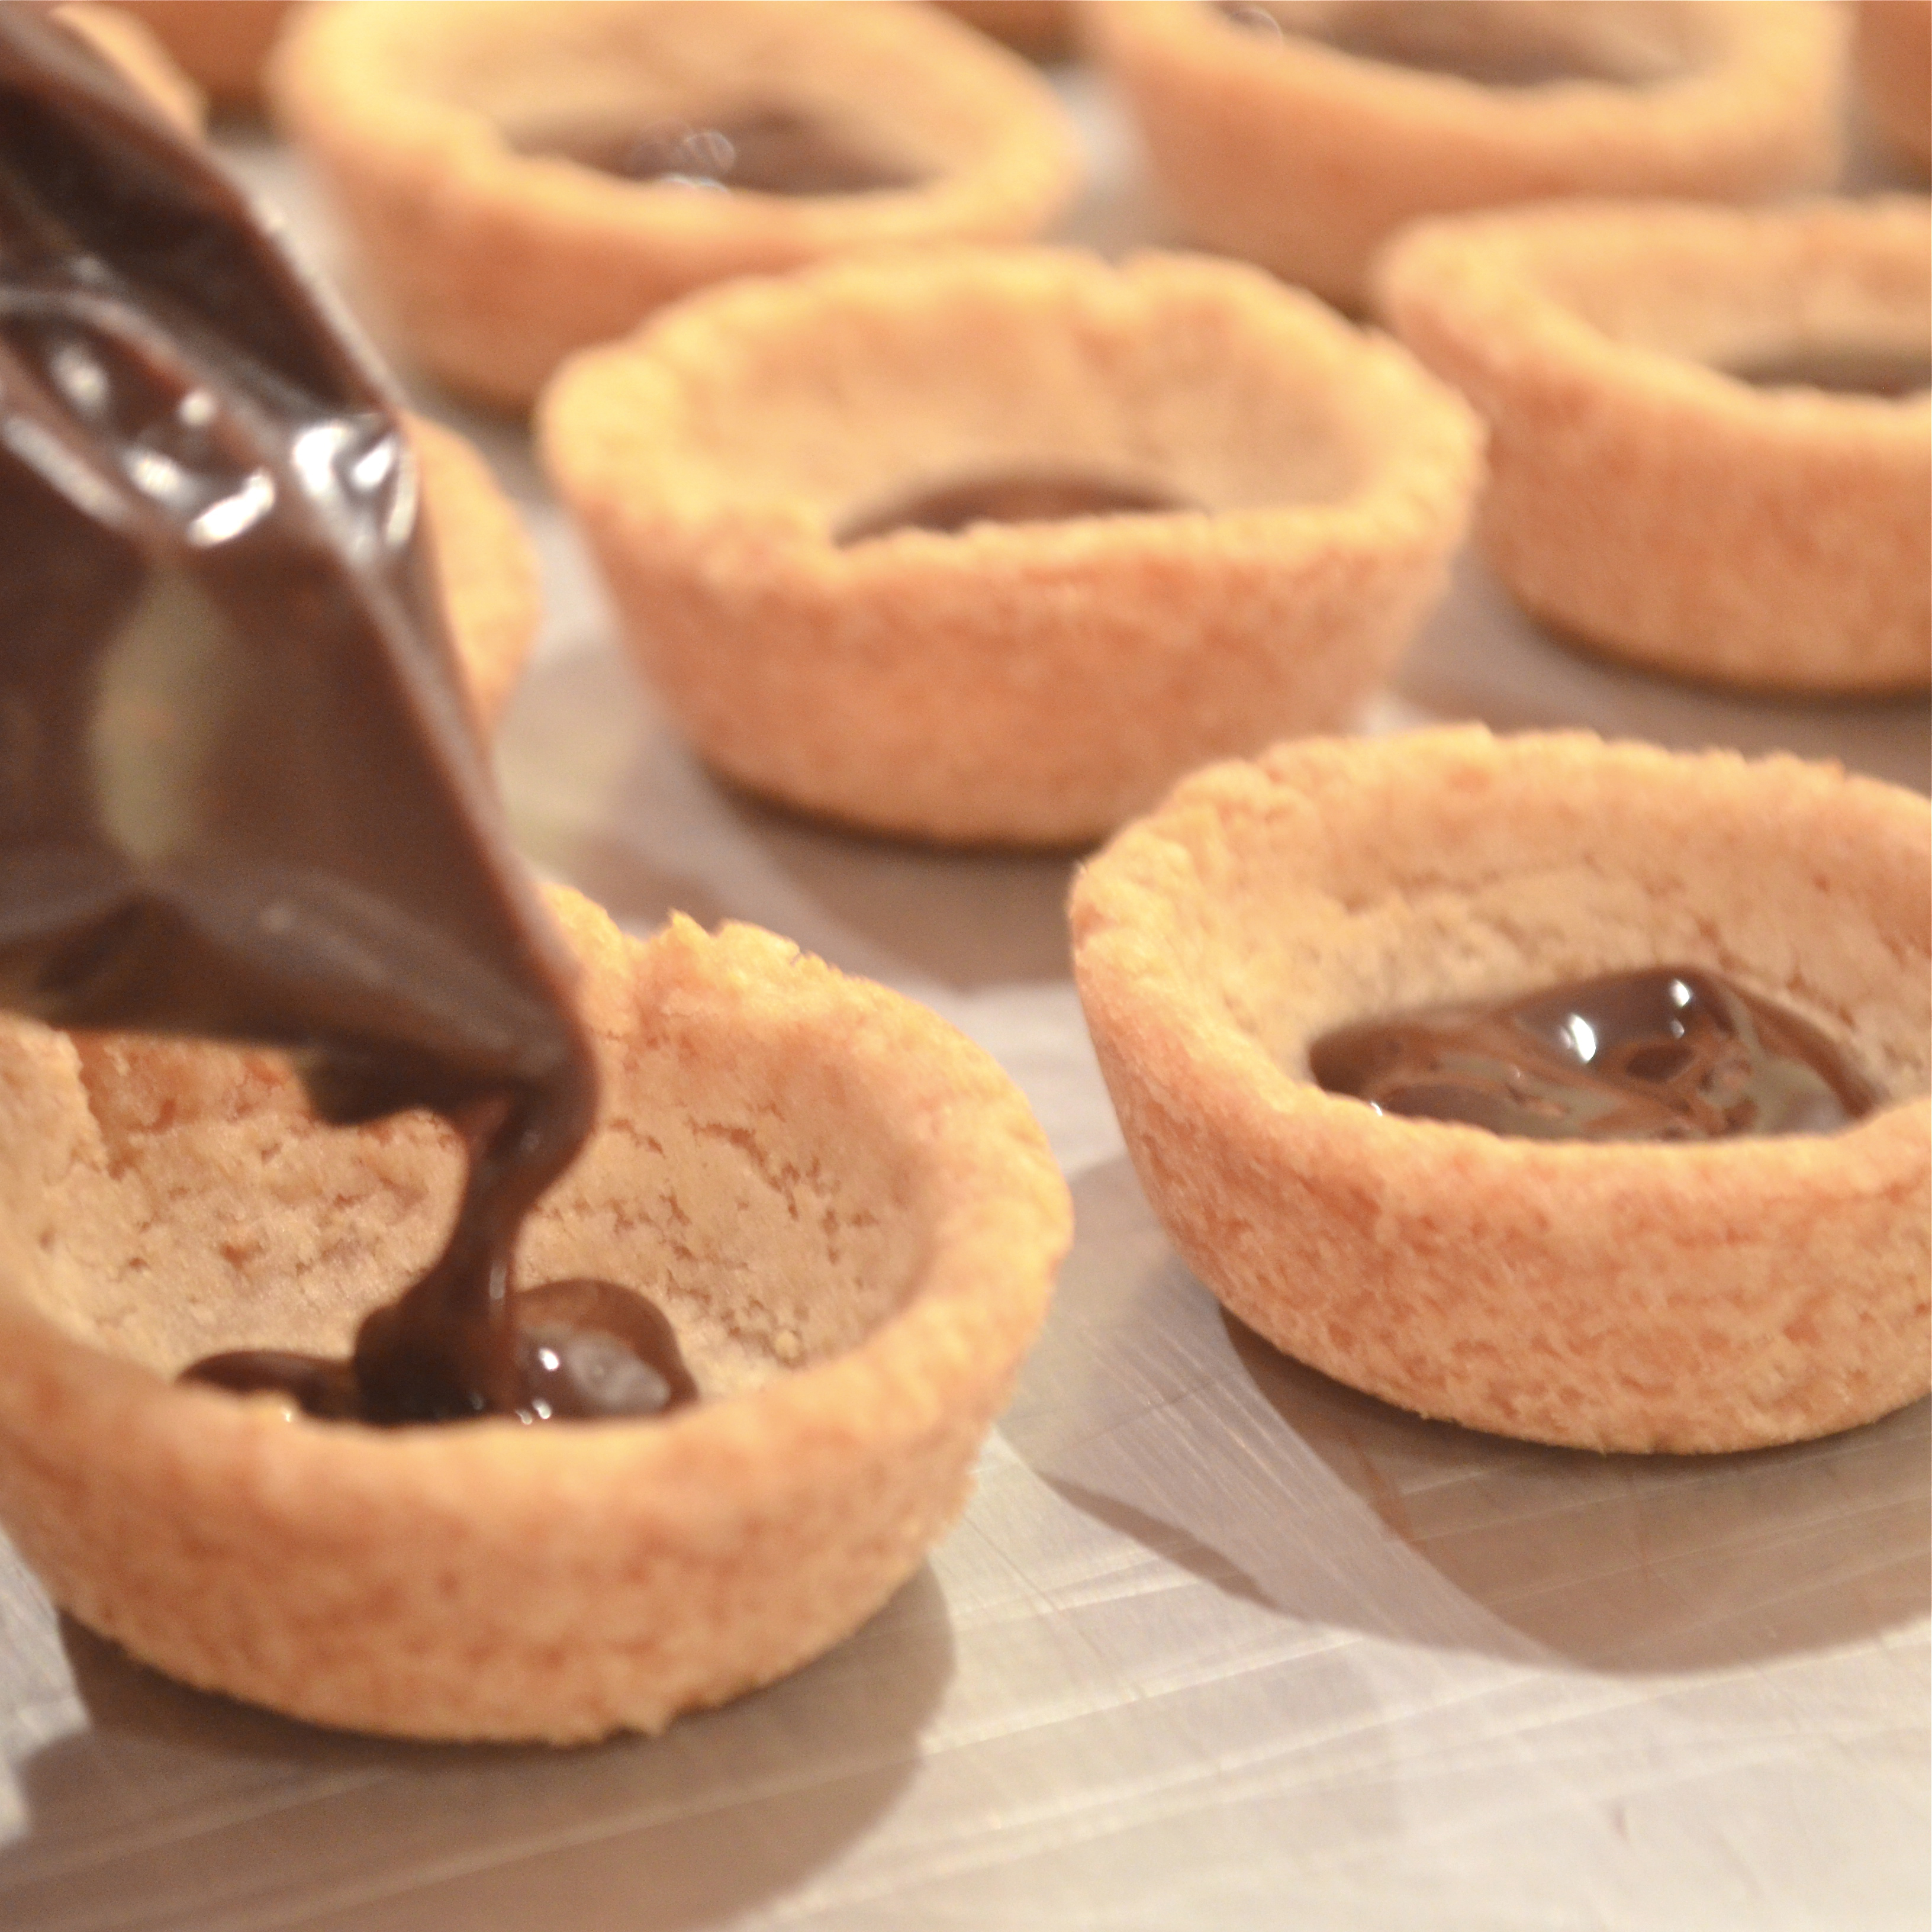
  • Place chocolate sauce in a zip-top bag, clip a corner and pipe chocolate evenly into each cup.

Graham cookie cupsPiping chocolate into cookie cup

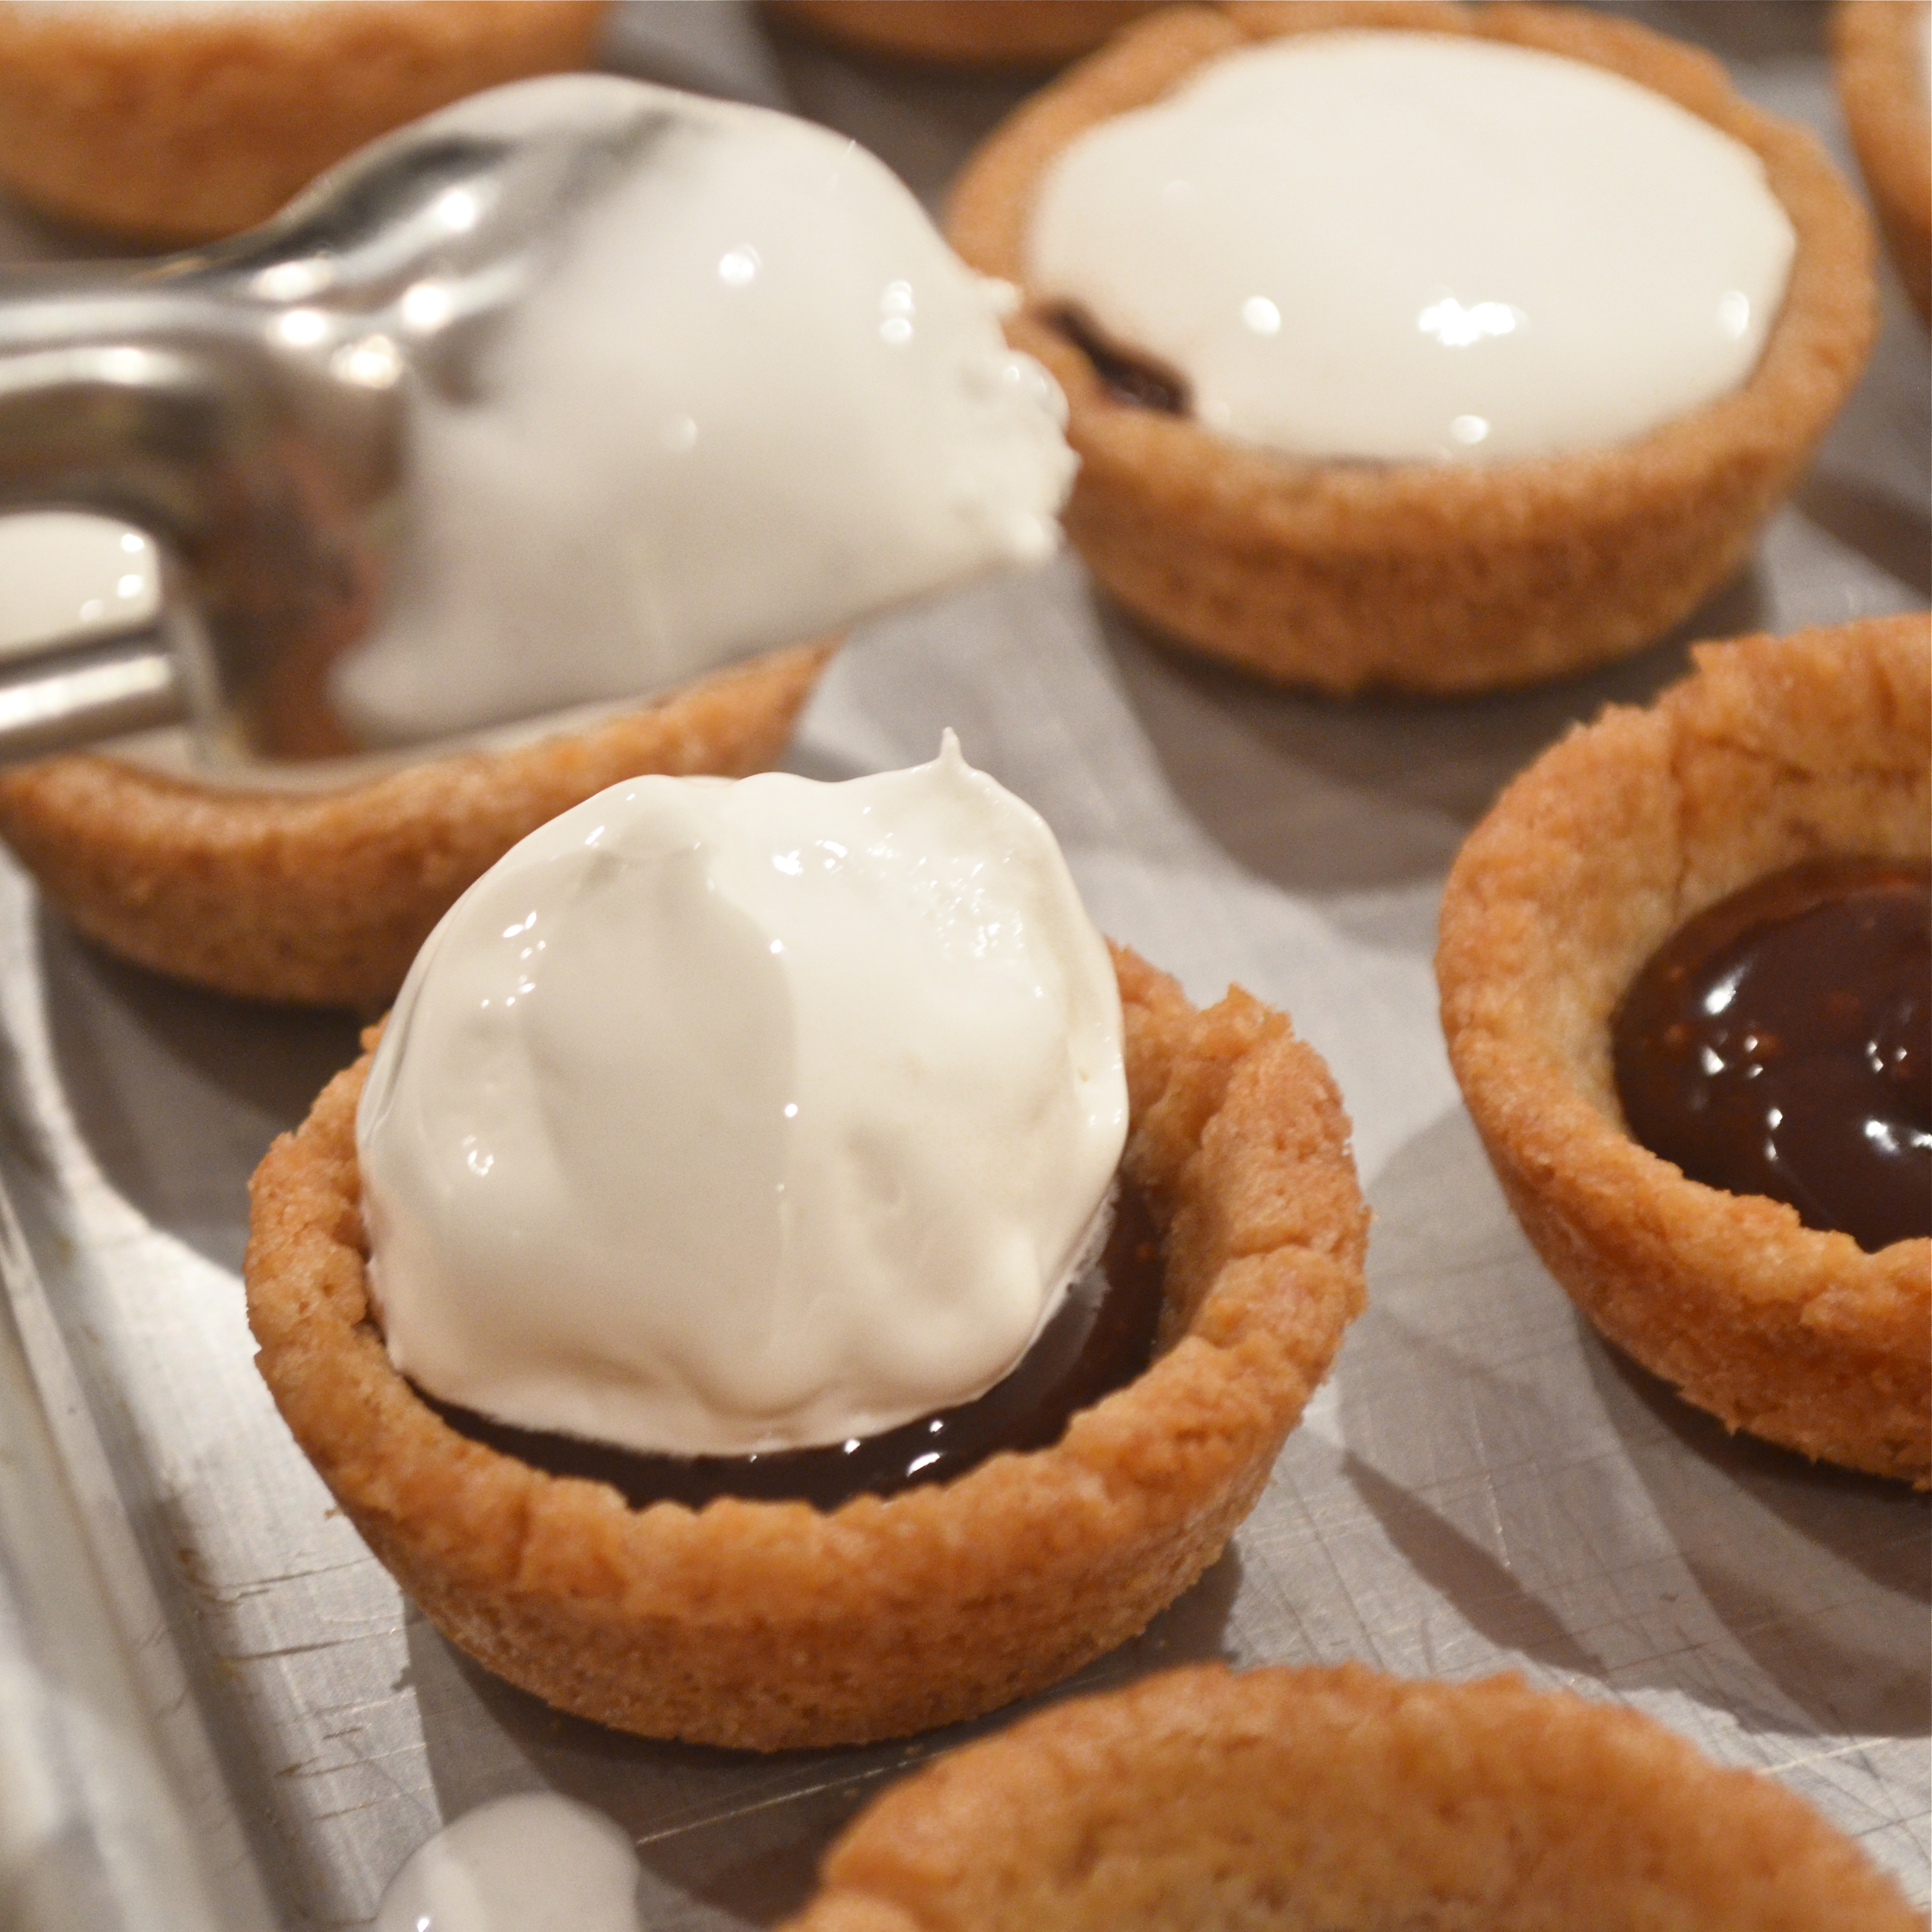
  • Fill a mug or small bowl with HOT water, and place a medium cookie scoop into it.  Shake off excess water and scoop one scoop of marshmallow fluff into each cookie cup.  Place scoop back in hot water as soon as the fluff starts to stick to the scoop.

Scoop Marshmallow into cookie cupSmores cookie cups--yum!!

  • Turn broiler on high and place entire cookiesheet full of cookies in the oven under the broiler.  WATCH the cookies– in about 30 seconds the marshmallows will start to brown.  Take the cookie cups out and immediately place a Hershey kiss on the top of each hot marshmallow top.  Sprinkle with graham crumbs (and drizzle with a little white chocolate if you like).
  • Let these sit for about an hour.  The bottom of the kiss will melt and attach to the marshmallow.
  • You can serve these warm, or at room temp.
  • Once they are cooled, you can store them in an airtight container for about a week.

S'mores cookie cups!

My thoughts~ These cookie cups were a big hit.  They really capture the flavor of a s’more and they aren’t very difficult to make.  The marshmallow fluff was a little fussy, just because it is so sticky.  I highly recommend it though- it was perfect biting into the gooey soft cream rather than an actual marshmallow.  It captured that melted marshmallow feel.  I *highly* recommend you use a cookie scoop for these.  You can get a scoop almost anywhere these days, but if you can’t find one, try ordering one at Amazon.  I hope you really enjoy making (and eating!) these yummy little treats!!! ~r

Melted Smores cup

Other cookie cup recipes you might enjoy:

Gooey filling in Seven layer cups!Fruit Loop Confetti Cups!!Caramel Coconut Creme CupsSalted Caramel Cookie Cup!!!

Flip Flop Cookies~ a Recipe Revisited!

Posted on

RR Header

I’m excited to be back for day #2 of our walk down memory lane!  Today’s treat just had to make the list of fun and colorful recipes to revisit.  It’s not only fun and colorful, but the perfect summer treat…

Flip Flop RR card

This recipe was originally published during my first summer of blogging, on June 11, 2011.  It is particularly memorable for me because it was my first photo published on Foodgawker.  If you even knew how hard I was trying at the time to get a photo accepted on that site….oh my.  I’m very competitive and I had about 60 photos rejected before this one.  I was jumping up and down for joy!  I took this photo at my friends Tom and Tina’s house at the lake.  I knew the lighting was perfect that day and I pulled my little point and shoot out to snap some photos.  Tom suggested I try his higher-end camera and Tina popped that pretty orange flower in the background and I learned two things:  1.Staging food is a must in photography and  2. I needed a better camera.

Since that date I’ve had 55 photos accepted on Foodgawker and SO many rejected.  It has been so good for me to have outside judgement on my photography though.  It is making me better.  Will today’s photo be accepted?  I think not.  I’m not happy with the exposure in any of the pictures, but we will see!

These are white chocolate dipped Nutter Butter cookies (in case you were wondering!)  Originally dipped in rainbow colors, these are dipped in patriotic red, white and blue and garnished with a little star sprinkle.  Serving them on brown sugar gives them a beach feel.  These are a perfect summer treat and really easy to make.

To see the original recipe (along with photos showing how to dip them) click here.

To print the original recipe and instructions click here.

Enjoy!  ~r

Patriotic Flip Flop Cookies!

Patriotic Flip lop Cookies!!

Patriotic Flip Flop Cookies!!!

Patriotic Flip Flop Cookies!!!!

We dip lots of things into candy melts and chocolate here at easybaked.  Here are a few of our favorite candy melt treats:

Chocolate Easter Eggs with Peanut Butter FillingKool-Aid Truffles!!Chocolate covered brownie starsHot Chocolate Pop!

Lemonade Cookies…with a twist!

Posted on

Lemonade Cookies with Strawberry Bits!

Chewy lemonade cookies made with bits of strawberry licorice…a fun treat that every kid (or kid at heart) in your life will love!

Months ago I received a baking challenge from an 8 year old boy named Zao.  His mom Erika works with me and he asked her, “Do you think Ruthanne could make cookies with red licorice in them?”  Well, of course we can!

Now, as a little warning to you:  the bits of licorice are yummy, but they are very chewy and you end up eating licorice after the cookie is all gone in your mouth.  Remember bubble gum ice cream?  It’s a little like that sort of dilemma.  The taste combination is wonderful though and if you can get past the consistency you will love these!

For those of you not-so-brave folks out there….the cookies are soooooo yummy without the licorice too!  I made two batches– one with and one without the licorice.  I loved both varieties (and it gave me an excuse to eat TWO cookies instead of one!)

Lemonade cookies!

Here’s how to make them:  (printer- friendly recipe)

INGREDIENTS:

  • 1 1/2 cups granulated sugar
  • 1 cup butter, at room temperature
  • 1 large egg
  • 1/2 teaspoon vanilla extract
  • 1 packet (0.23oz.) Kool Aid Lemonade
  • Yellow food coloring gel 
  • 2 3/4 cups flour
  • 1 teaspoon baking soda
  • 1/2 teaspoon baking powder
  • 1/2 teaspoon salt
  • 1 cup of chopped Twizzler Strawberry Licorice. (I just chopped them into chocolate chip-size bits using a sharp knife)

DIRECTIONS:

  • Preheat oven to 350F degrees
  • Using a mixer, beat together butter and sugar until smooth and creamy.
  • Add egg and vanilla extract and mix until combined.
  • Add Lemonade powder and coloring gel (if needed) to create a nice yellow color. Mix well.
  • Blend in the dry ingredients, using clean hands to knead the dough together at the end.
  • Add chopped strawberry licorice bits at the very end and blend well (this step can be skipped if you aren’t feeling wild and crazy– you’ll just have yummy lemonade cookies!)
  • Roll rounded tablespoons of dough into balls and place on baking sheets that have been covered in parchment paper.
  • Bake for 8 to 10 minutes or until cookies are set. 
  • Slide parchment paper (with the cookies still on top) onto a cool counter and allow cookies to cool right on paper.

lemonade cookies!


My thoughts:  With or without the strawberry bits, these are great cookies.  I think they balance perfectly between sweet and tart. I was surprised at how many people loved the idea of putting licorice bits into cookies. I think they would be great with a strawberry or raspberry icing on top.  Yum….!  Enjoy!

Enjoying his cookies-- thanks for the recipe idea Zeo!

Enjoying his cookies– thanks for the recipe idea Zeo!

 Lemonade cookies with licorice


You might also enjoy:

Yummy Lime Cupcakes with Lemon Butter cream Frosting!Lemon-Lime and graham cracker truffleLemon Drop3Confetti Cups

Chocolate Chip Oatmeal Cookies

Posted on

Chocolate Chip Oatmeal CookiesEveryone will love this classic oatmeal cookie (with chocolate instead of those yucky raisins!). It’s crisp on the edges and chewy in the middle-YUM!!!  COOKIES!!!!!!!

My friend Laura kept telling me about a chocolate chip oatmeal cookie recipe from when she was a little girl.  Her friend’s mom would make them and they are still one of Laura’s favorites.

DSCN0028Whenever a treat stays in someone’s mind from childhood you know it has to be a good one, so I asked for the recipe.

I texted Laura in the middle of the grocery store standing in front of the oatmeal (yes, I am one of those people…)  She immediately scanned in the recipe and sent it to me, and here you have it….truly amazing oatmeal and chocolate cookies (Thank you Laura!!)

INGREDIENTS:oatmeal recipe

  • 1 c. margarine
  • 1 c. brown sugar (packed)
  • 1 c. sugar
  • 2 eggs
  • 1 tsp. vanilla
  • 2 c. flour
  • 1 tsp. baking soda
  • 3/4 tsp. salt
  • 3 cups uncooked old-fashioned oatmeal (plain, and not instant!)
  • 2 cups of chocolate chips (I added all my leftover chips- some milk chocolate, some dark, some semisweet.  The original recipe calls for only a cup.  That is crazy.  I think I added 2 (maybe 3!) You need at least three chips for every cookie bite in my opinion!)
  • 1/2 c. nuts (If desired ~I didn’t add them)

DIRECTIONS:

  • Preheat oven to 375F degrees.
  • Line cookie sheet(s) with parchment paper – you don’t have to do this, but my cookies stuck a little bit to the sheets, so I did my next batch with paper and they slid right off.
  • Beat margarine and sugars together in a large mixing bowl until creamy.
  • Blend in eggs and vanilla
  • Add flour, soda and salt to cream mixture and beat well
  • Stir in oats, lots of chocolate and nuts (if desired)
  • Mix until well combined. I just used my hands at this point as it was such a stiff dough and I wanted to fully incorporate the two million chocolate chips I added.
  • Drop by about one tablespoon of dough (I used a Medium Cookie Scoop and it was a lifesaver!) onto parchment lined cookie sheets and bake at 375F for 10-14 minutes.  Remove from cookie sheets while warm and cool completely on parchment paper or a wire rack.


chocolate chip oatmeal cookies

My thoughts:  These were really good cookies. You’ll notice a few differences in my recipe and the original.  

I used margarine, not butter.  I generally prefer butter in baking, but cookies are one exception.  I nearly always use margarine as butter seems to make the cookies “spread” more, giving you flat, crunchy cookies instead of thick, chewy ones.

I never “sift” ingredients.  I know that makes some of you shudder in horror, but I just never do.  I put my flour in and sprinkle the other ingredients on top and hope for the best.  I blame my mom for this.  She never taught me to sift 😉  In this recipe if it makes you feel better to sift, by all means do it!!

I did not double this recipe.  It overflowed my biggest mixing bowl.  The handwritten notes on this recipe recommend making a double batch and freezing.  I can only assume she mixed the batch up in her bathtub, as it would be a tremendous amount of cookie dough.  I do NOT recommend doubling this.  I did freeze some and I thought they were ok- a little dry.  I’d stick with making them fresh, and in a reasonable amount.

I hope you enjoy these cookies as much as all of us here did!  Happy baking!!!  ~r

Oatmeal Cookie recipeWant to try more cookie recipes from Easybaked?  We have a lot of them!  Click on an image to be taken to the recipe:

Lemon Drop Cookies with CoconutNew Zealand Chocolate cookiesStrawberry Cookies with Sweet Tart FrostingChocolate chip cookies!!!Chocolate drop cookies!Gingerbread Cookies!Peppermint Chocolate CookiesGerman Chocolate Cookie

Honey Cookies (Medovniky) in fun fall colors!

Posted on

It’s almost too late for these cookies.  Around here the leaves are turning brown and falling fast!  The good news is that these incredibly flavorful cookies can be cut into any shape for any season!

These are a traditional Slovak cookie, generally made around Christmas.  When I traveled to Slovakia I fell in love with a traditional cake called Medovnik (if you want to see my attempt at it, click here).  When I came across this recipe on the Slovak Cooking blog, I knew I had to try them.

They are wonderful.  A little like honey graham crackers, a little like gingerbread cookies, a little like spice cake… an incredibly unique cookie that is SO easy to roll and cut out (I can’t stand sticky, messy cut-out cookie dough!)  They filled my house with wonderful fall scents when I baked them and I will definitely be making them again.  Here’s the recipe:

INGREDIENTS:

  • 4 ¼ cups flour
  • 1 cup sugar
  • 1 ¼ sticks (5 oz.) of unsalted butter
  • 3 ½ tablespoons of honey
  • ½ cup of water
  • 1 teaspoon baking soda
  • 1 teaspoon baking powder
  • 1 teaspoon salt
  • 1 ½ tablespoons cinnamon
  • ½ tablespoon ginger
  • ½ tablespoon cloves

DIRECTIONS:

  • Heat the sugar, water and honey in a sauce pan until the sugar dissolves, stirring constantly.
  • Stir in the butter, salt, cinnamon, ginger and cloves.
  • Once the butter has melted, let the mixture cool.
  • In a large bowl, combine the flour, baking powder and baking soda.
  • Pour the sugar-spice mixture over it and mix well.
  • Knead lightly to form a smooth dough.
  • Wrap it in cling film and refrigerate for at least an hour. (the recipe called for refrigeration, but my dough was just perfect to roll out immediately.)
  • Preheat oven to 400F degrees.
  • Roll dough out on a board dusted with flour.
  • Cut cookies in whatever shapes you want and place on a cookie sheet.
  • Bake for 5-8 minutes (they bake fast, so keep an eye on them).
  • Cool and frost with your favorite glaze or frosting (I used Royal Icing, click here for the recipe and for directions on how to use it)

My thoughts:  I really do love these cookies.  The recipe was so different than any other cookie recipe I’ve made before.  I have a love/hate relationship with royal icing.  I hate the 12 years it takes to frost my cookies, but then I LOVE the finished result.  However you ice them, these cookies are a unique addition to your cookie recipe collection.  Enjoy!  ~r

Other recipes you might enjoy: (just click on the image to see the recipe)


Carrot Cookies with Creamy Orange Frosting

Posted on

These moist cake-like carrot cookies are topped with a thick orange cream frosting.

INGREDIENTS:

Cookies:

  • 1 cup shortening
  • 3/4 cup sugar
  • 2 eggs
  • 1 cup mashed carrots (I used canned)
  • 2 cups flour
  • 2 tsp baking powder
  • 1/2 tsp salt

Frosting:

  • 5 T butter (melted)
  • 3 cup powder sugar
  • 3 T fresh squeezed orange juice
  • 4 t finely grated orange rind

DIRECTIONS:

  • Preheat oven to 400 degrees F.
  • Beat together shortening, sugar, eggs and carrots until smooth.
  • Add flour, baking powder and salt.
  • Mix together until smooth and creamy.
  • Using a Small cookie scoop, scoop batter onto parchment paper lined cookie sheets.
  • Bake for 10 minutes at 400 degrees F.
  • Cool completely.
  • To make frosting, add all ingredients together and beat until smooth,
  • Frost cookies and enjoy!

My thoughts:  Yuck.  I don’t like carrots and I don’t like carrot cake, carrot muffins, carrot anything…these were no exception (I’ve gotta be honest here!!).  I got this recipe from my sister-in-law who promises that people love them and rant and rave over them.  I will find that out tomorrow when I serve them- and from you if you try them!  They are easy as can be to make and they really are very moist and cake-like (which I prefer to crunchy cookies)…but those carrots….sigh.  The frosting, on the other hand, is delicious.  I love the orange flavor and I think it would be wonderful over lemon cupcakes- yum.   In any case– enjoy—and do let me know if you try these and what you think!   -r

Frosted Chocolate Drop Cookies

Posted on

These thick cake-like cookies are a recipe from my mom.  She made them all the time when I was growing up.  Her recipe calls for milk, but all I had on hand was whipping cream and they turned out GREAT!

This was a busy week and these were just a last-minute dessert for friends.  Quick and easy- you can top them with a chocolate glaze or frosting.  I used my favorite buttercream frosting- so yummy, but since it doesn’t harden completely they weren’t stackable.  This is a great recipe to have handy for a busy week that still needs dessert in it!

INGREDIENTS:

Cookies:

  • 1 c. brown sugar
  • 1/2 c. margarine
  • 1 egg
  • 1/3 c. heavy whipping cream
  • 2 1/2 c. flour
  • 1/2 t. baking soda
  • 1/4 t. salt
  • 2 squares of unsweetened baking chocolate (melted)
  • 1 t. vanilla

Frosting:

  • 1/2 stick of salted butter
  • 1/2 stick of unsalted butter
  • 3/4 c. powdered sugar
  • 1 t. vanilla (use clear if you want your frosting to stay nice and white)

DIRECTIONS:

Cookies:

  • Preheat oven to 350 degrees.
  • Cream sugar and margarine together.
  • Add egg, cream and vanilla and mix well.
  • Add sifted soda, salt and flour and mix well.
  • Add melted chocolate last and mix until completely combined.
  • Using a Medium cookie scoop, spoon cookie dough out onto cookie sheets covered in parchment paper (makes 24-28 cookies).
  • Bake at 350 for 10-12 minutes.
  • Cool completely on parchment paper.

Frosting:

  • Place (room temp) butter in mixing bowl with powdered sugar and vanilla.
  • Beat on high until very light and fluffy.
  • Frost cookies and enjoy!


My thoughts:  Only one– the cookie dough is AMAZING….amazing……I don’t recommend the eating of cookie dough that contains raw eggs.  You definitely shouldn’t do it…..or let your kids do it……….. soooooooooo good……. 😉

Chocolate Cookies – New Zealand Style!

Posted on


Tiny, crunchy chocolate and coconut cookies with a delicious chocolate glaze- SO good!

I love food blogs- particularly ones that major in fun desserts!  One of my favorite Saturday morning activities is to read through all my favorite blogs and enjoy the photos.  This past weekend Aimee from Clever Muffin posted a recipe that I simply HAD to try.  This doesn’t happen very often, as I prefer creating to copying–but the photos of these little cookies just screamed MAKE ME!!!  So I did.

I love them– truly LOVE these cookies.  They are so light and crunchy and cocoa-y.  I will be adding these to my permanent recipe collection and making them again….soon.

These are called Afghan Biscuits.  One of the things I love about Aimee is that she’s from Australia and she calls cookies “biscuits”, powdered sugar “icing sugar”and her mom her “mum”.  I also love that the world is such a small place that I can get a recipe from a friend in Australia and here I am 3 days later eating New Zealand-ish “biscuits” in my living room.  So. Much. Fun.

Anyway, Aimee has the history of these cookies on her blog.  She says they were invented in the 1940’s, possibly as a means to send cookies to loved ones away at war in WW2.  She says they “post” (so cute!) beautifully.  I know several of you have ones you love far away from you– here’s a great idea for a cookie that keeps well in the mail.   Are you ready for the recipe???  I’m really excited to share it with you!

INGREDIENTS:

Cookies:

  • 14 T. butter -softened (I know, awkward measurement…had to convert 200 grams for you though and the alternatives were 1.76 sticks of butter OR 0.88 cups of butter….so yeah….you choose.)
  • 1/2 c. sugar
  • 1 t. vanilla extract
  • 2 T. cocoa powder
  • 1 1/2 c. flour
  • 1 c. lightly crushed cornflakes
  • 1 c. shredded coconut

Icing:

  • 1 c. powdered sugar
  • 2 T. cocoa powder
  • Water (1-3 T.) to make a good spreading consistency.
  • Almond slivers (to garnish)

DIRECTIONS:

  • Heat oven to 250 degrees.
  • Place 1 c. shredded coconut on a small cookie sheet and place in oven for 10-15 minutes until it is dried and crunchy— not browned– just dry and crunchy.  Remove from oven and cool.
  • When coconut is cool, use your hands to crush it up  into smaller pieces, set aside.
  • Heat oven to 350 degrees.
  • Line two cookie sheets with parchment paper.
  • Use an electric beater to cream sugar and butter together, add vanilla.
  • Add flour, cocoa and coconut, beating until well combined.
  • Add cornflakes and beat on low speed until just combined.
  • Use a small cookie scoop to spoon batter onto parchment paper.
  • Bake at 350 degrees for 12-16 minutes.
  • Allow cookies to cool before frosting.
  • Make icing by combining  powdered sugar, cocoa and water until you have a smooth glaze that doesn’t run off the edges of the cookies.
  • Top cookie with icing and one almond sliver.


My thoughts:  These are SO good.  SOOOOOOOOOO good.  Many thanks to Clever Muffin for the inspiration!  Go check out her blog– you will love it!  Enjoy!!!!!!  -r

Easy Lemon Cut-out Cookies

Posted on

These brightly colored Easter cookies have a hint of lemon and a creamy sweet filling.  This cut-out recipe is REALLY easy to roll out and I used Linzer cookie cutters to make them into fun sandwich cookies.

Cookies:

INGREDIENTS:

  • 1 c. margarine
  • 1 c. sugar
  • 1 egg
  • 1 t. vanilla
  • 1 t. lemon juice
  • 2 T. whipping cream
  • 3 c. flour
  • 1/2 t. salt
  • 1/2 t. baking powder

DIRECTIONS:

  • Preheat oven to 350 degrees.
  • Cream together margarine and sugar.
  • Add egg, vanilla and whipping cream and mix.
  • Add lemon juice and mix until completely combined.
  • Add dry ingredients and mix well.
  • To color the dough:  I divided the dough into 3 smaller bowls and colored it using Wilton Icing Colors.  I love this food coloring…it says its for icing but I use it in everything– it makes things SO bright and doesn’t change the consistency of what you add it to.
  • Use a little additional flour to make your dough a good rolling consistency.  Using a flour-coated rolling pin, roll the dough out on a flour-coated surface.
  • Cut your cookies using any cookie cutters you like.  I used Springtime Shapes Linzer Cookie Cutters and I just LOVE the way they turned out.  Just cut solid cookies for the backs and for the tops use the tiny shapes to cut bunnies and chicks and flowers from the center of each cookie.  It IS a little fussy, but worth it in the end!
  • However you choose to cut them, place the cookies on parchment paper- covered cookies sheets and bake at 350 degrees for 10-12 minutes (check for a slightly browned edge).
  • Cool and frost.

Frosting:

INGREDIENTS:

DIRECTIONS:

  • Cream together the powdered sugar and Crisco.
  • Add the milk and blend until a smooth spreadable consistency.  Divide frosting and color in as many colors as you want.
  • Frost and enjoy!

My thoughts:  I love these Linzer cookie cutters.  I got them last fall when I made cookies for both Halloween and Christmas and I’ve been waiting for spring to arrive so I could try this set out– they are just so much fun.

I really think you will like this dough– it rolls out beautifully even with no refrigeration ahead.  If you want an easier cookie, just use traditional cookie cutters and have fun with all the bright colors!   Enjoy!  r-

Fudge cookies for gender reveal party!

Posted on

So my cousin Erika messaged me this week asking for ideas for a gender-reveal party she’s throwing this spring.  For those of you uninformed folks (as I was a week ago)– a gender reveal party is where you break the “It’s a boy/girl” news to all your friends and family at a fun party.  I say– what better way to deliver good news than in a dessert??!!??  So I went to work and I have several ideas you will likely see here in the coming weeks.

Idea#1— a recycled recipe tweaked for the occasion.  Remember my chocolate bonbons?  Fun little fudge cookies with a hershey kiss inside.   Instead of a kiss, how about colored white chocolate?  Here you go:

INGREDIENTS:

  • 40-50 Wilton candy melt pieces in BLUE or PINK
  • 8 oz. Philadelphia Cream Cheese
  • 1 bag (12 oz) semi-sweet chocolate chips
  • 2 c. all-purpose flour
  • 1 t. vanilla
  • Additional Wilton White Candy Melts
    for decorating as desired.

DIRECTIONS:

  • Soften Philadelphia cream cheese in microwave until completely smooth.
  • Melt chocolate chips in microwave in 30 second increments, stirring well in between.
  • Add cream cheese to melted chocolate and blend well.
  • Add flour and vanilla and stir into a thick dough consistency.
  • Flatten about 1 tbs. of dough in your palm, place 2 candy melts (flat sides together) in the center and gently wrap the dough around the melts until they are completely covered.
  • Flatten dough and shape into an Oreo shaped and sized cookie and place on an un-greased cookie sheet.
  • Bake cookies at 350 degrees for 8-10 minutes.
  • Remove warm cookies from cookie sheet and place on parchment paper (they will be a little greasy on the bottom, the parchment paper helps with this)
  • Decorate as desired- I dipped the entire top of the cookie in melted white candy melts and then piped two small circles on the top.  Dragging the tip of a toothpick through the circles while they are still melted makes them into hearts (aww….)  Easy and fun!

Not expecting a baby?  Make these with pink or red melts inside and pink and red hearts on top for a fun and festive Valentines Day treat!

ENJOY!!