Tag Archives: dessert

Cookie Dough Whoopie Pies

Posted on

Cookie Dough Whoopie Pies!

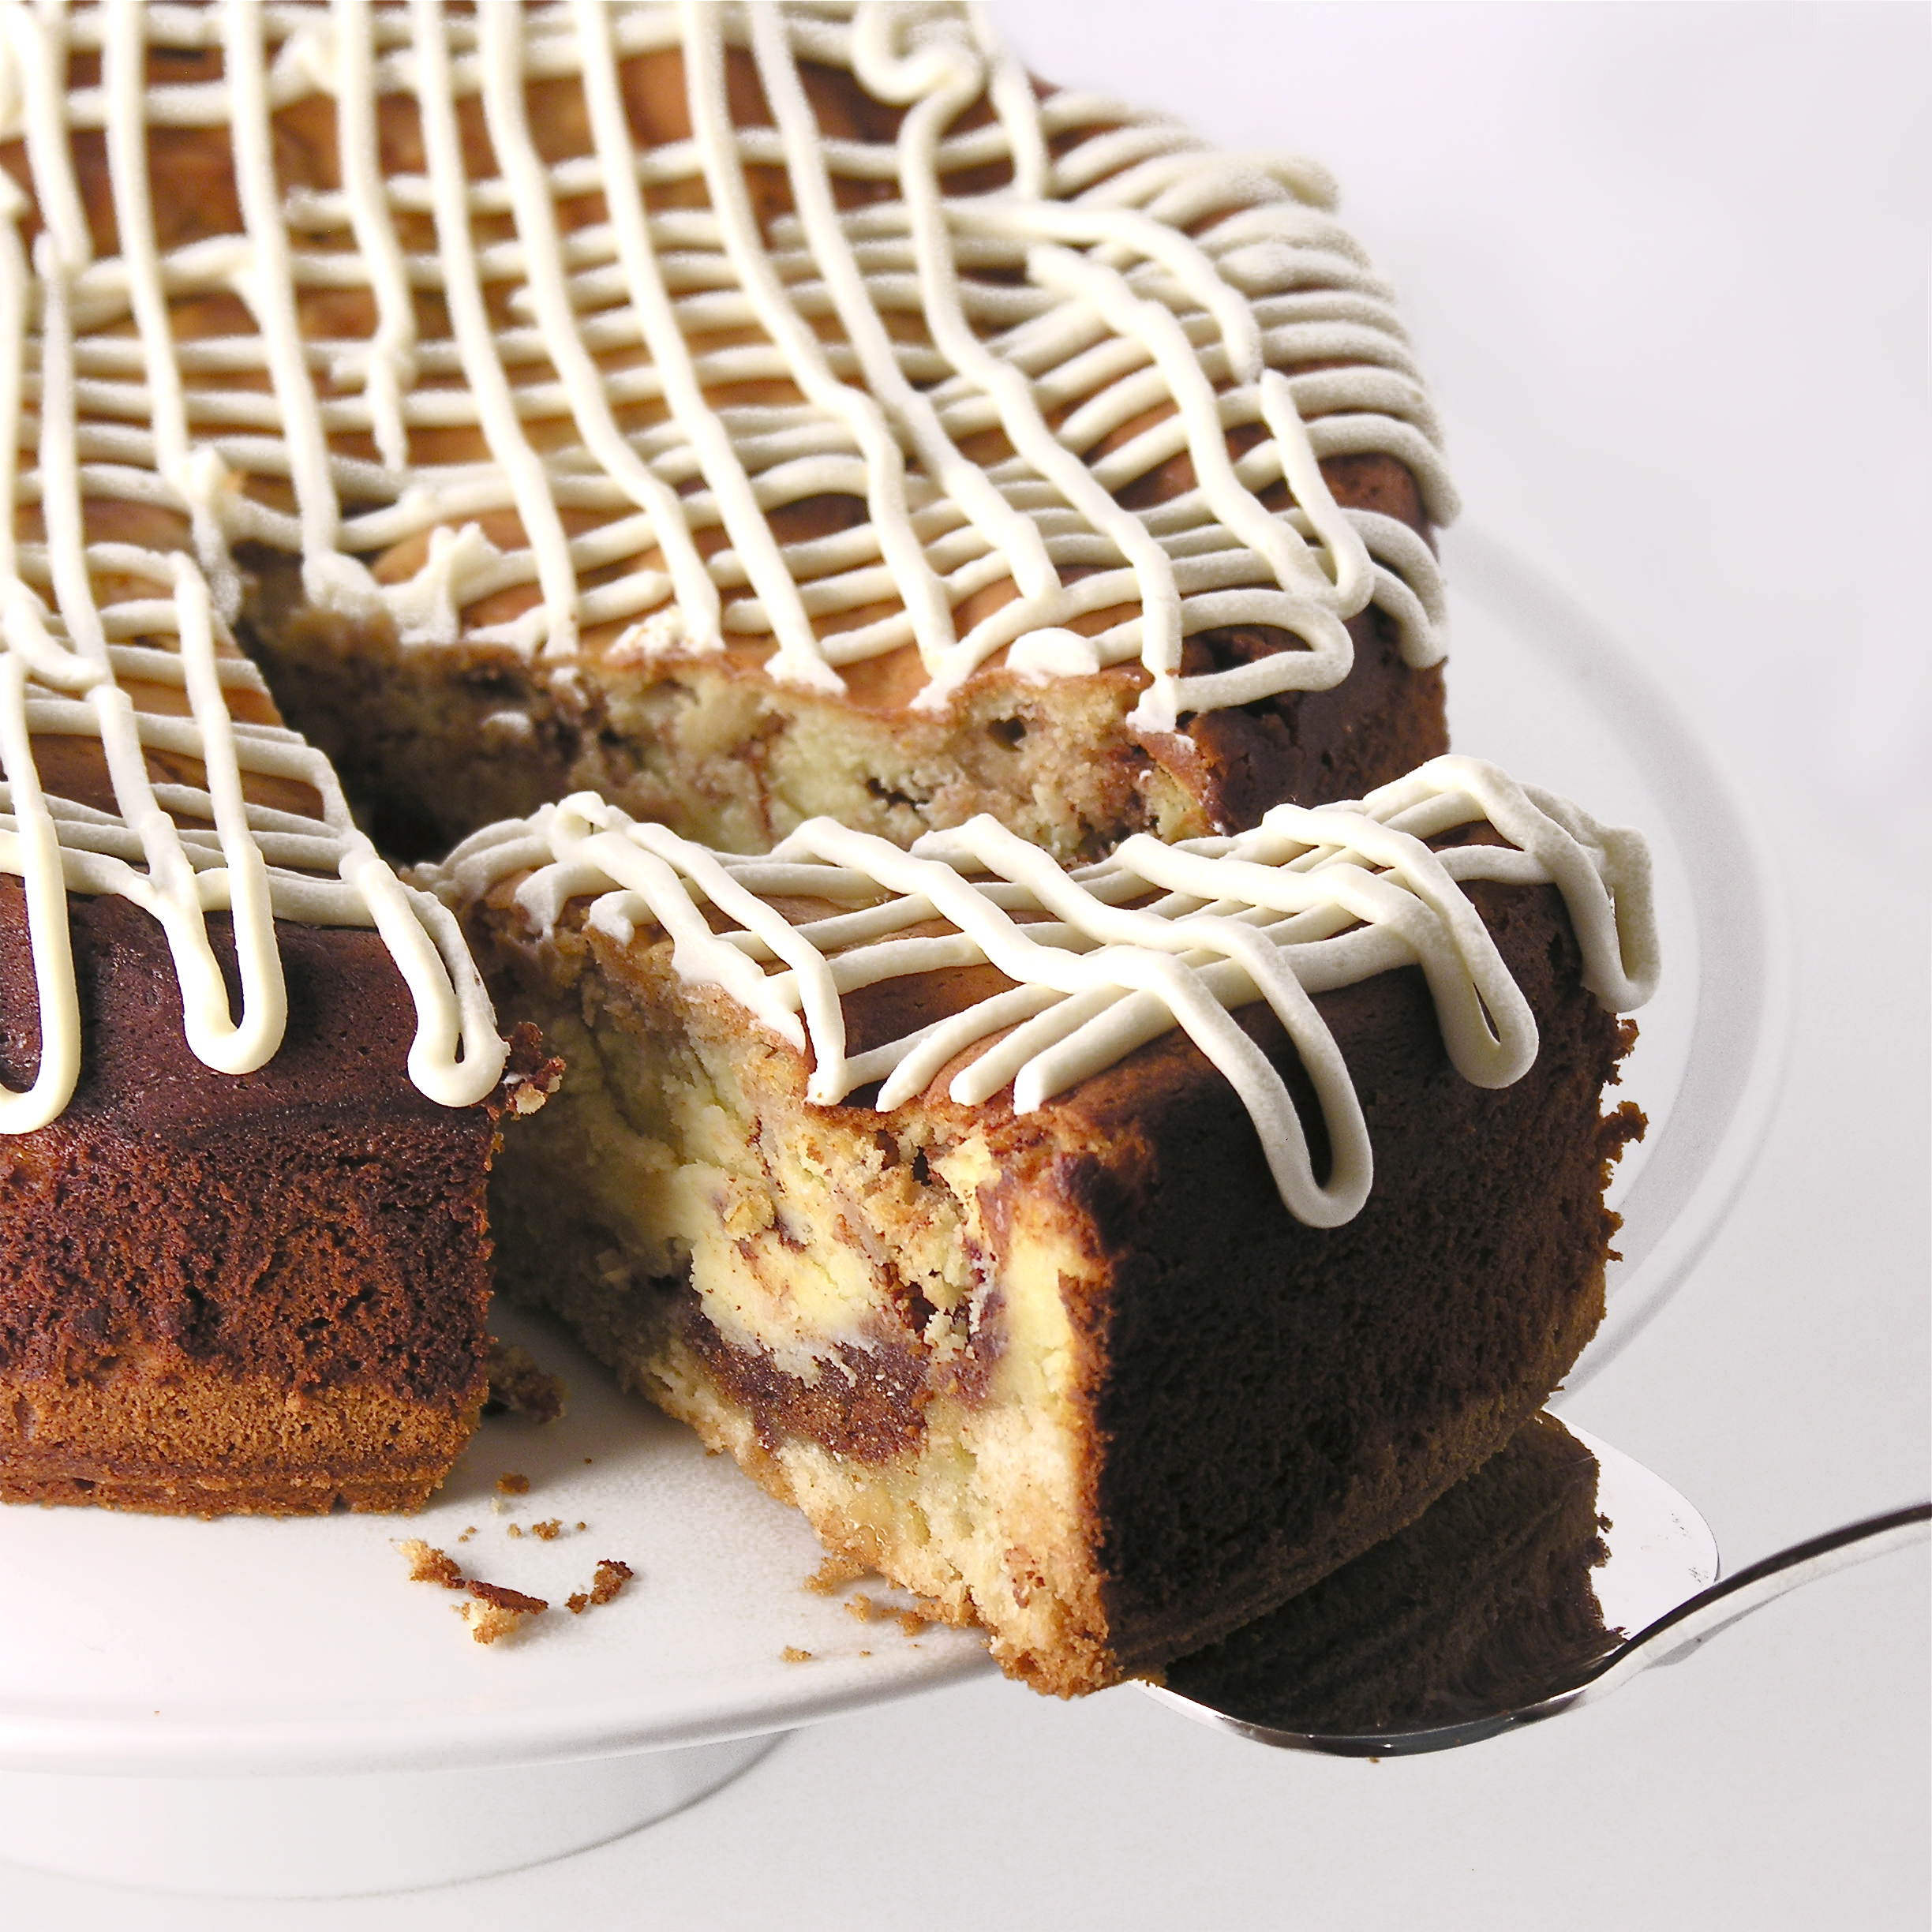
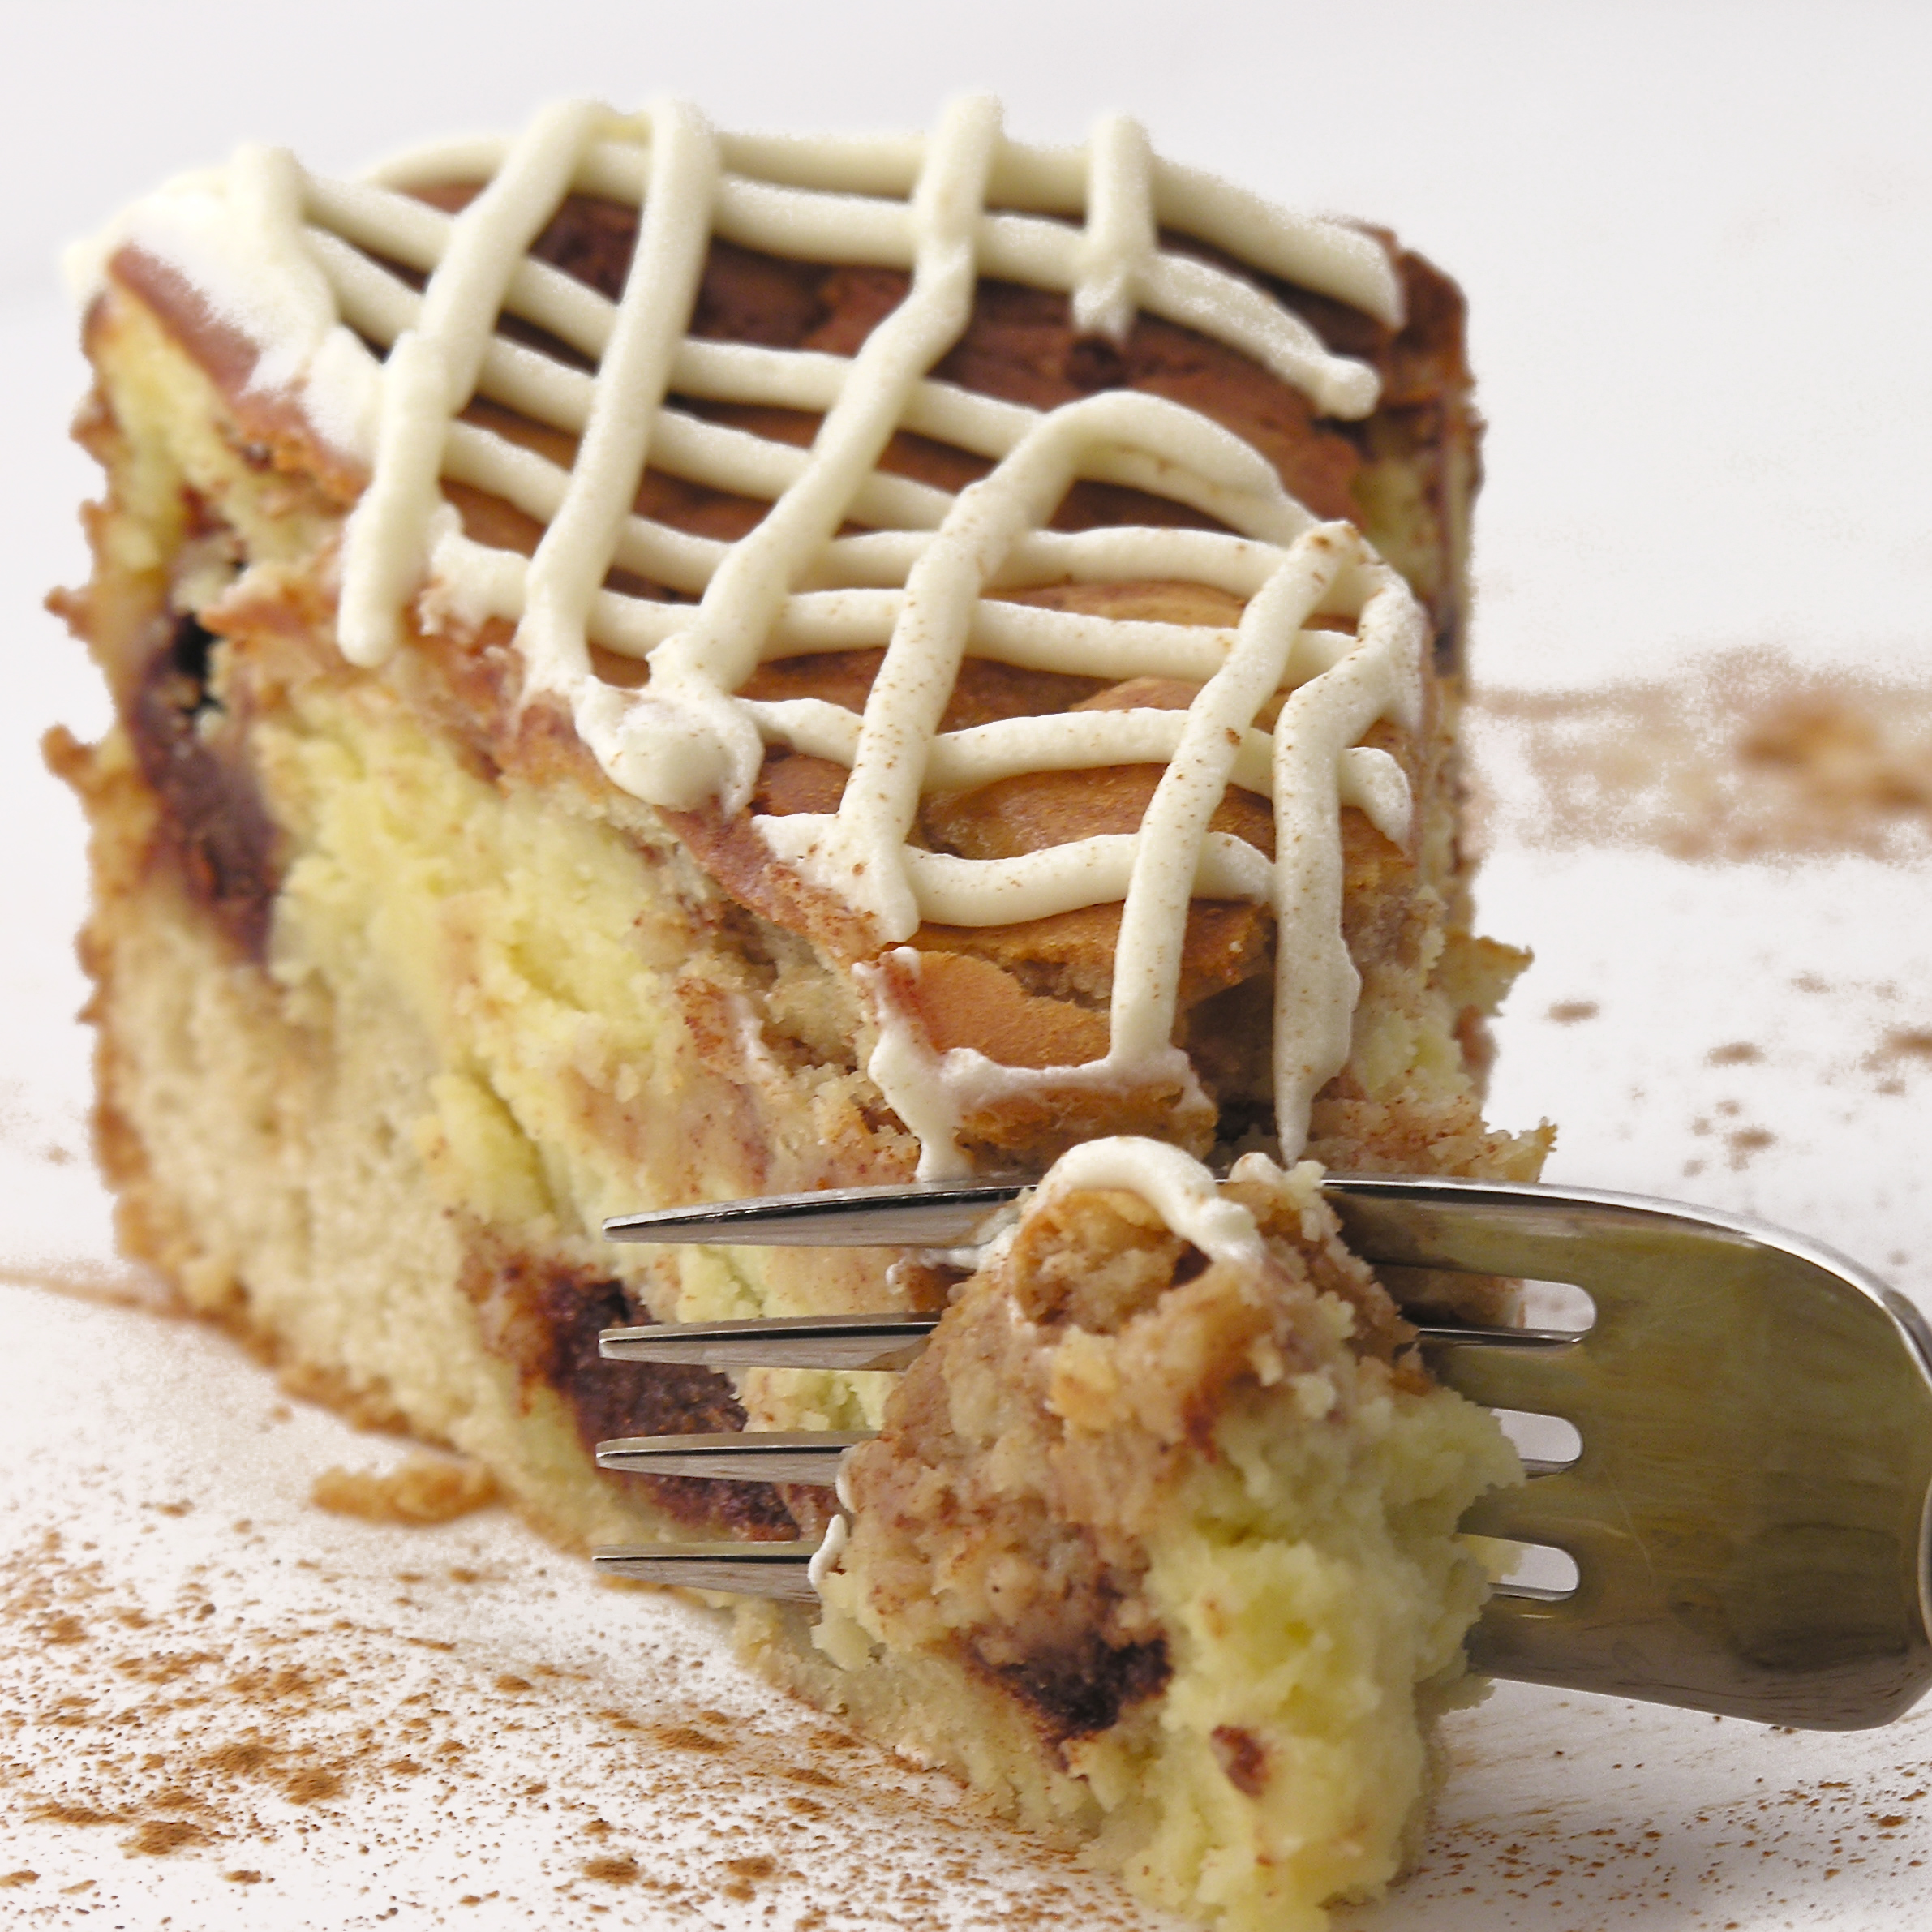
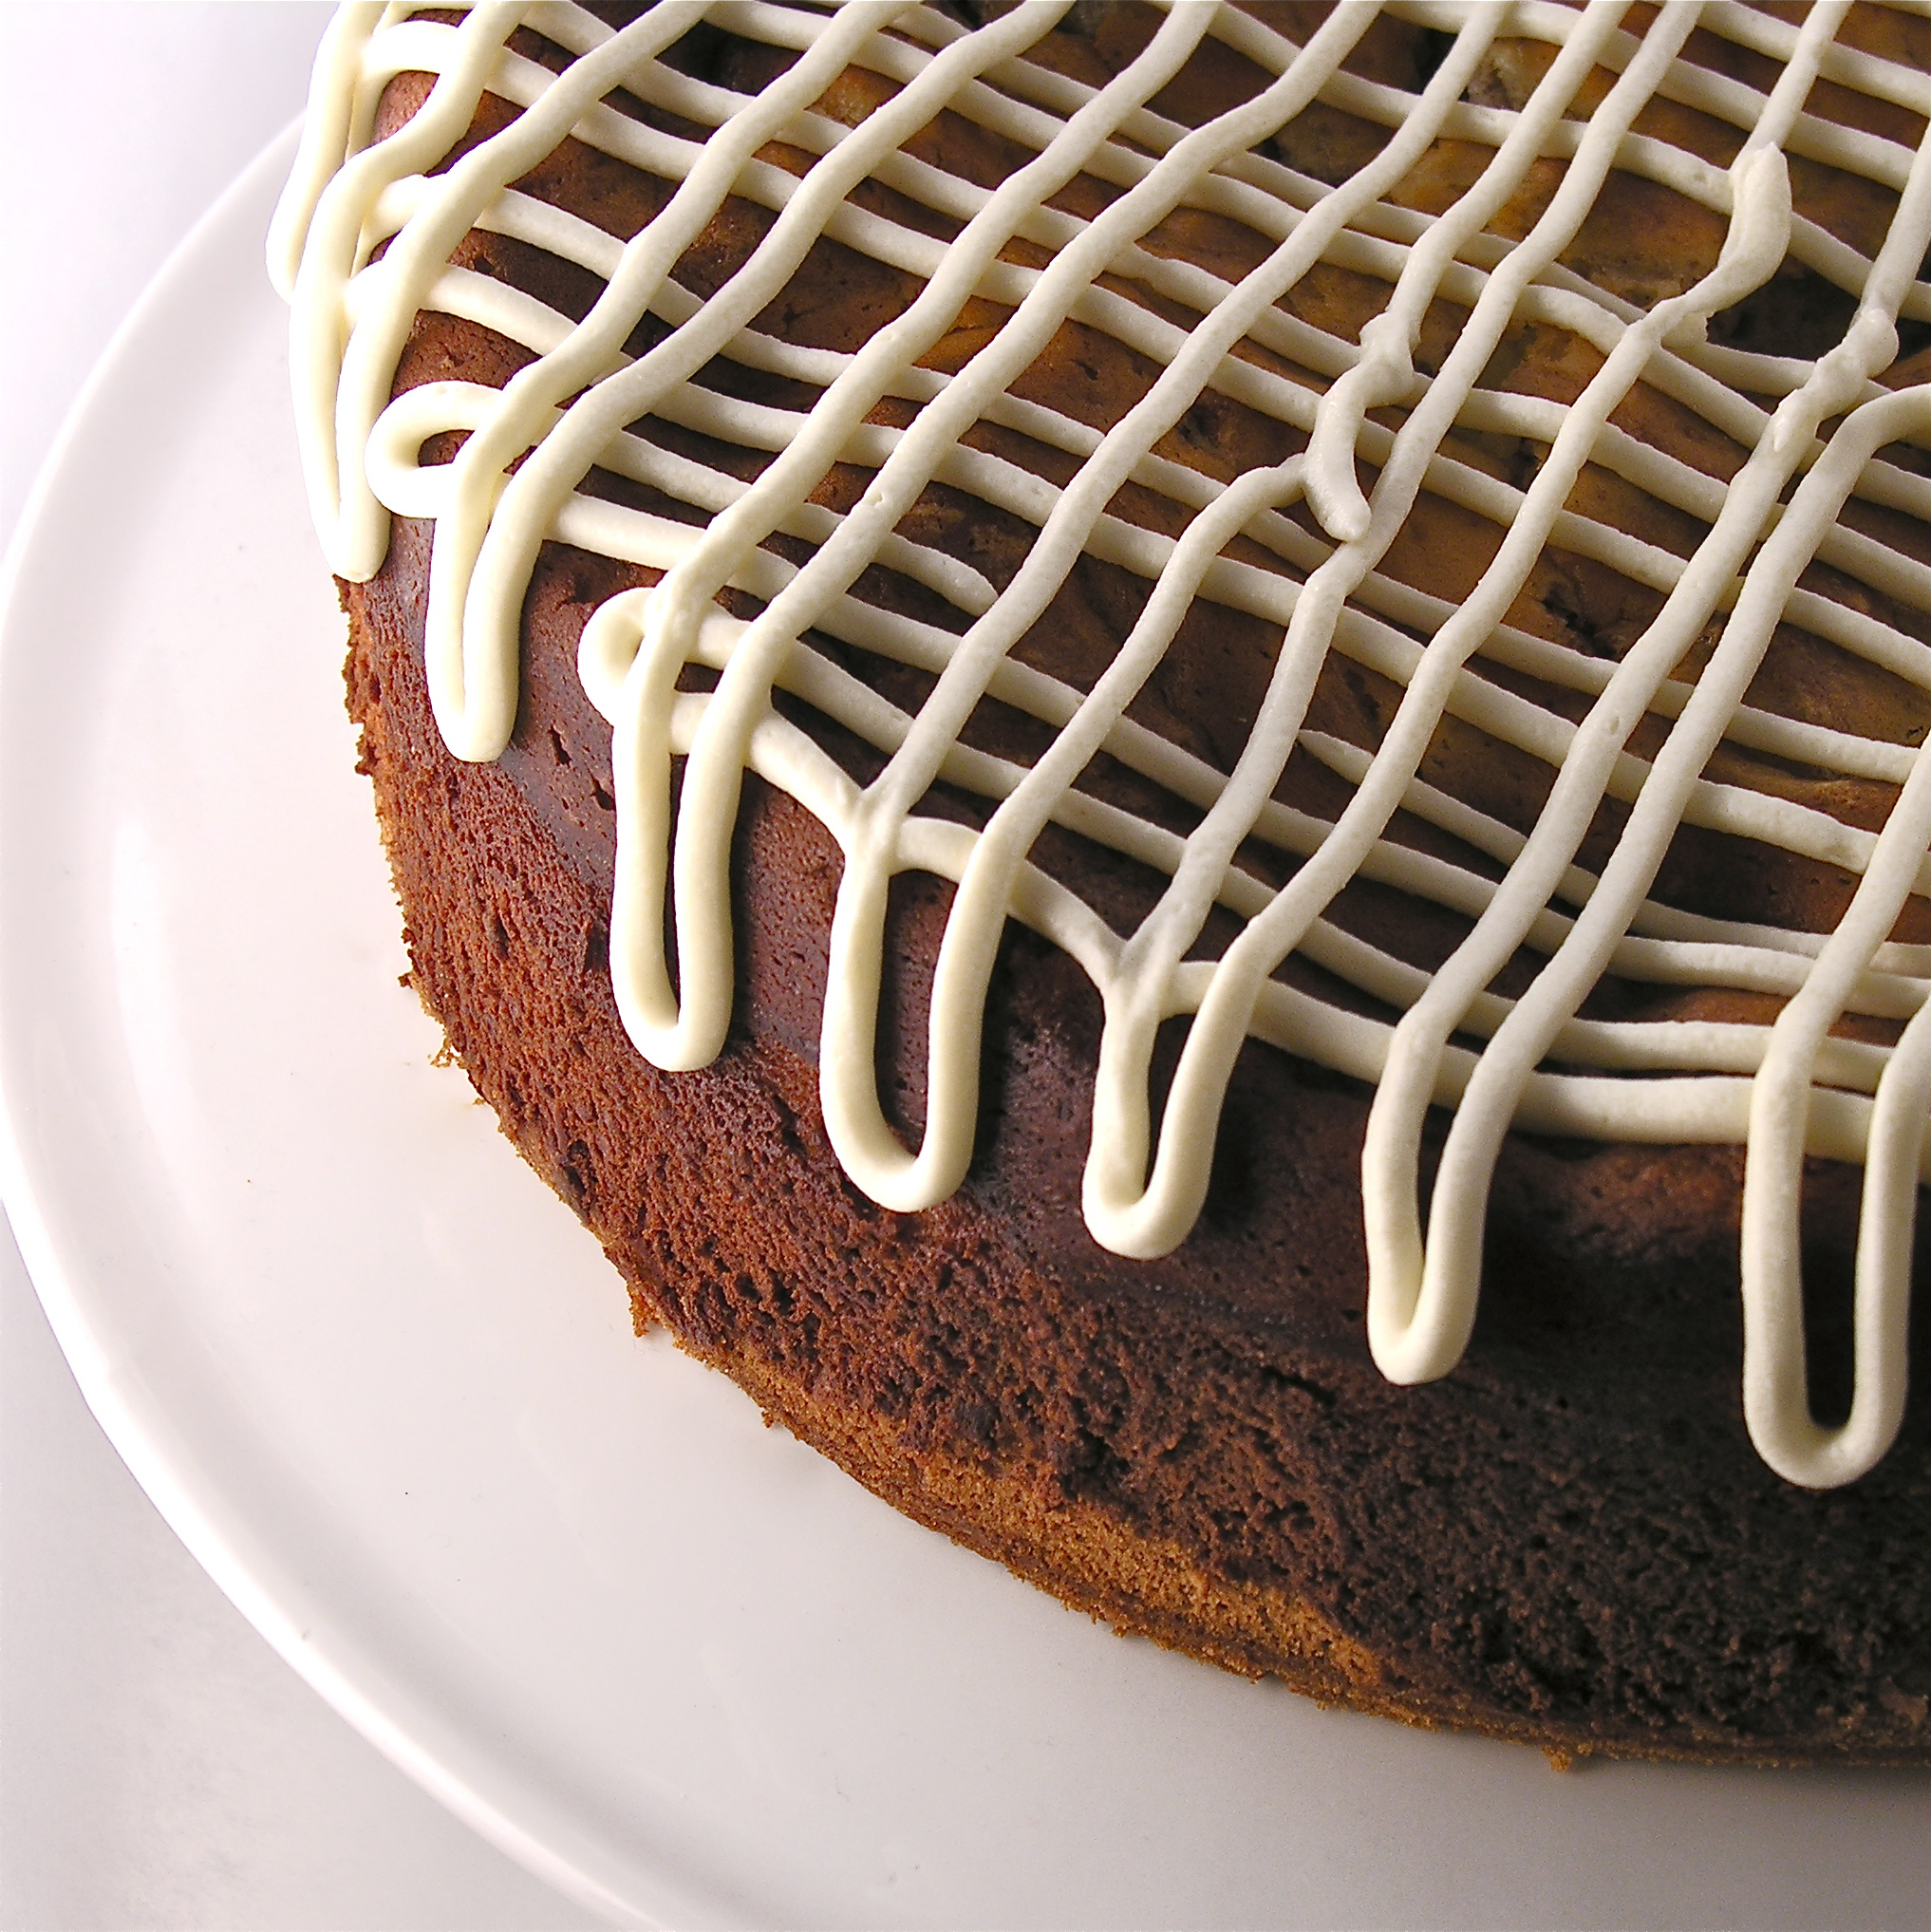
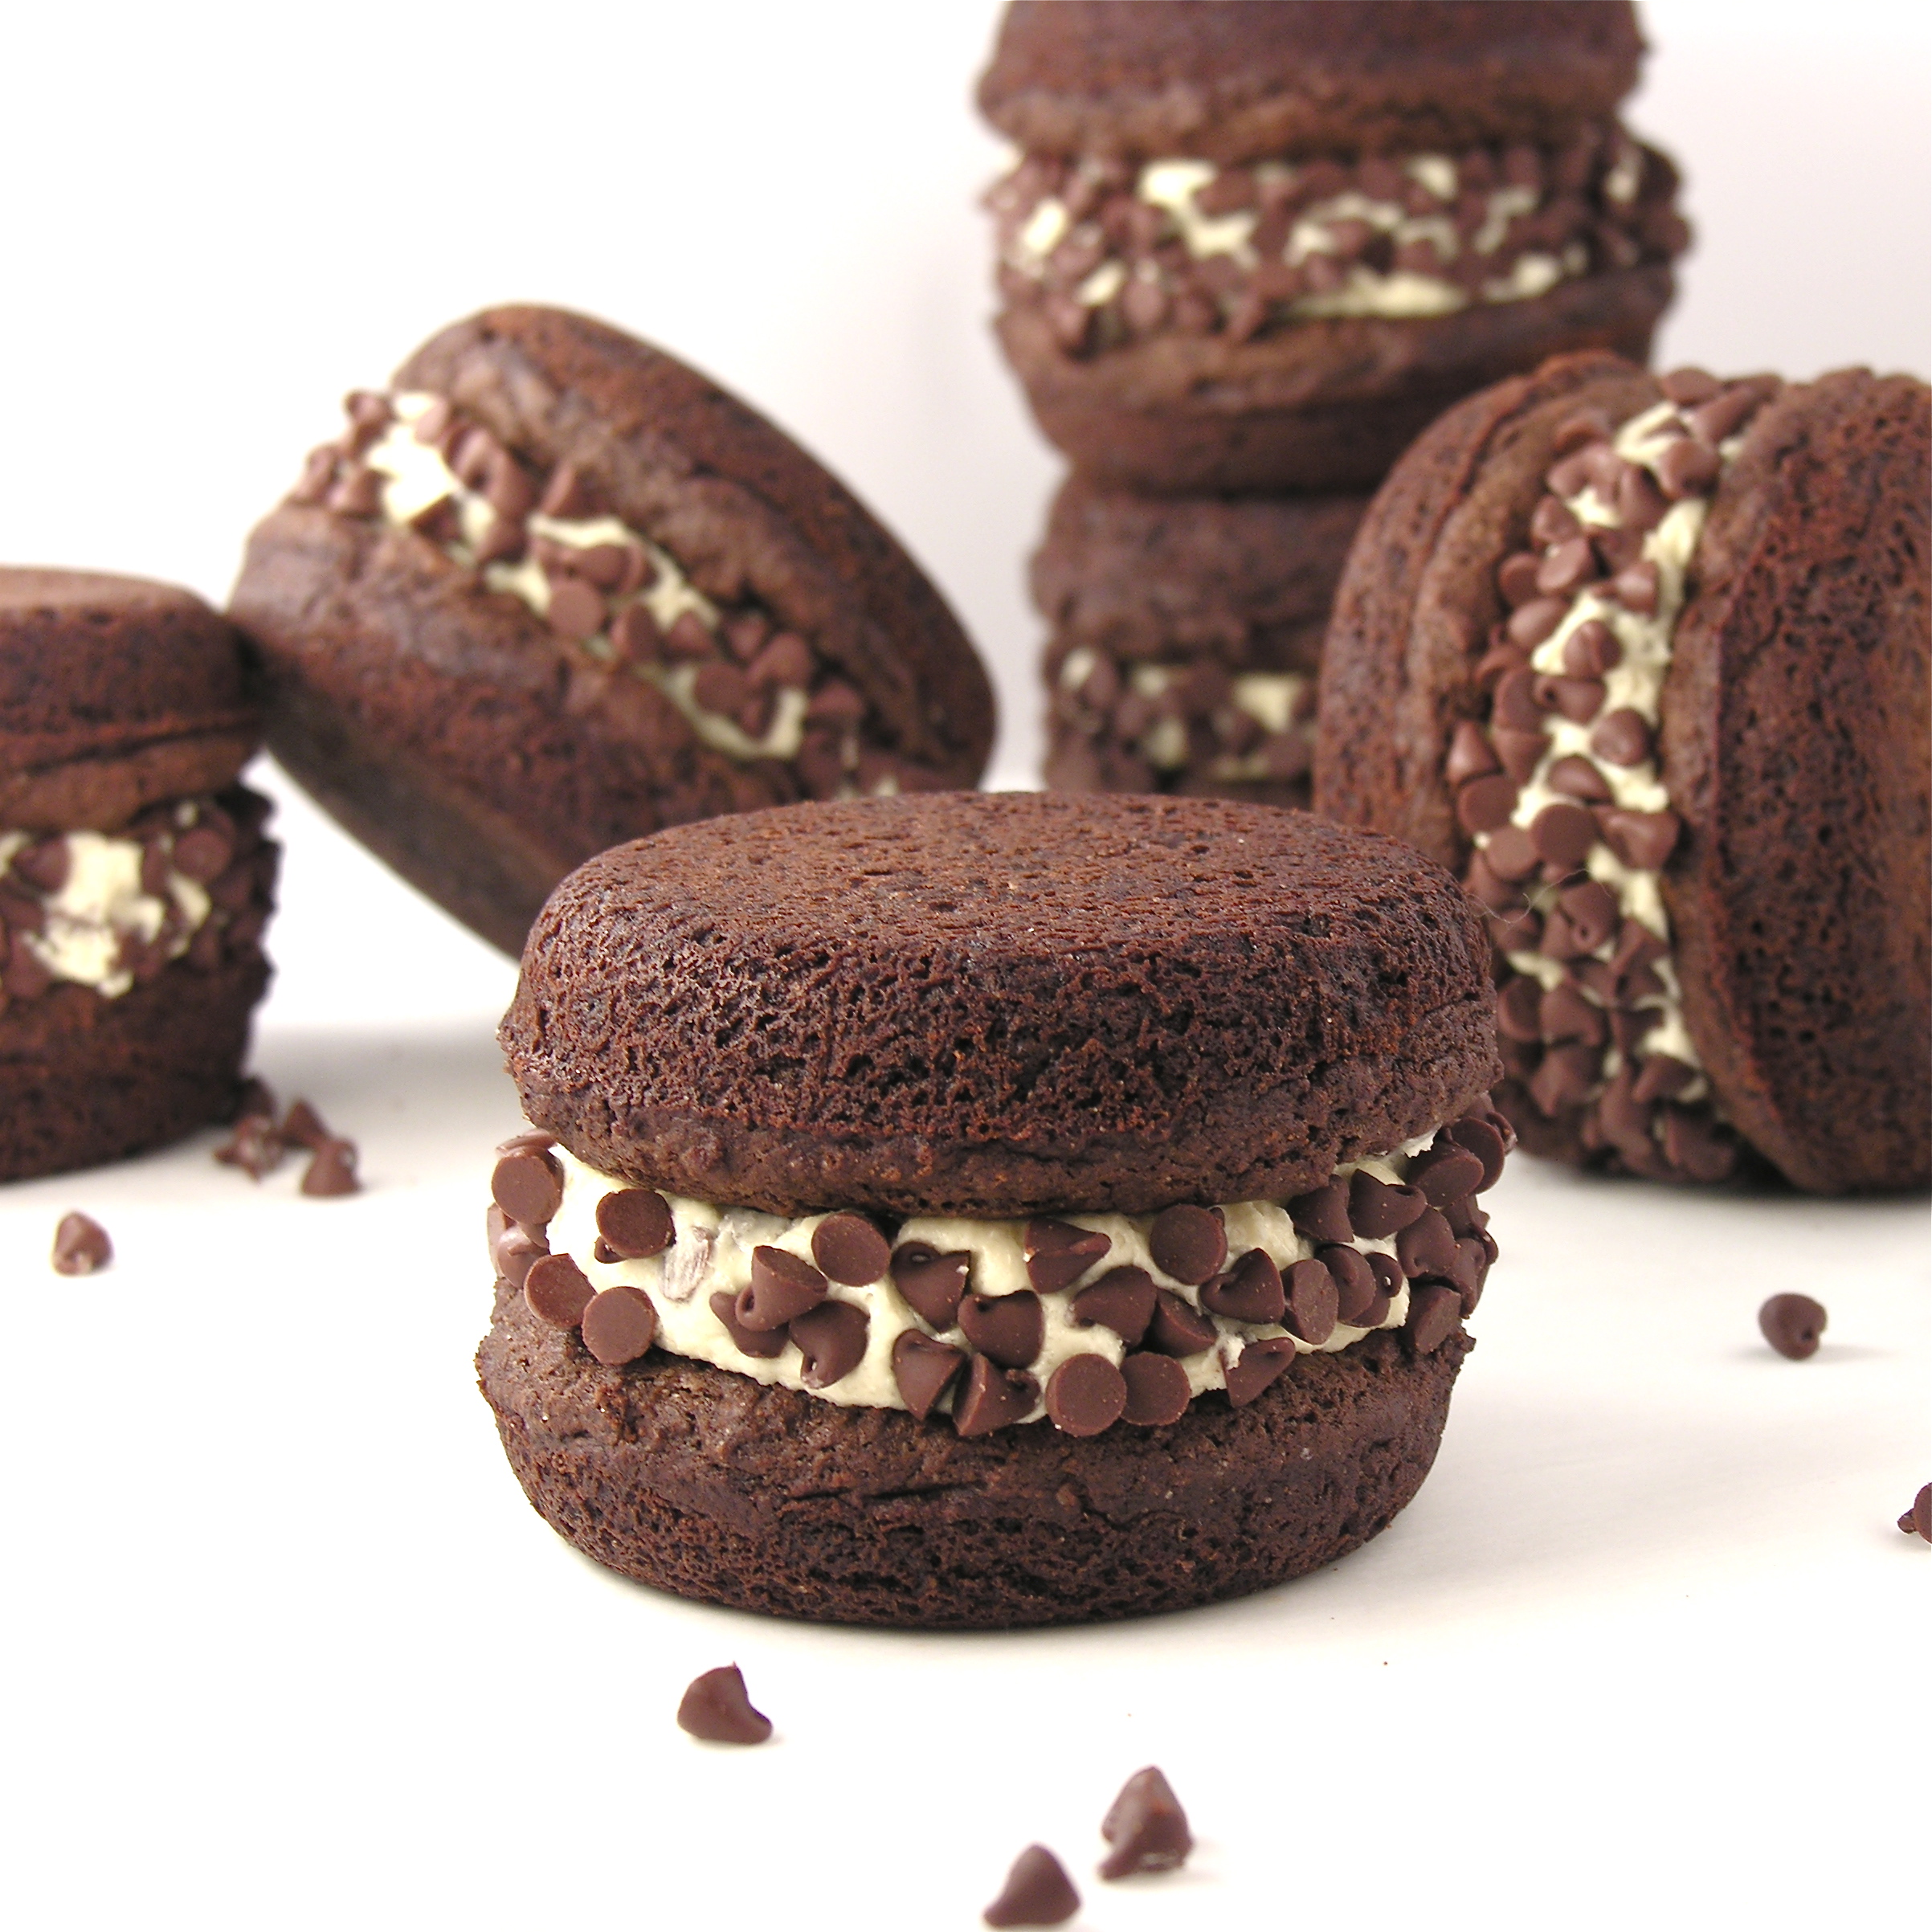
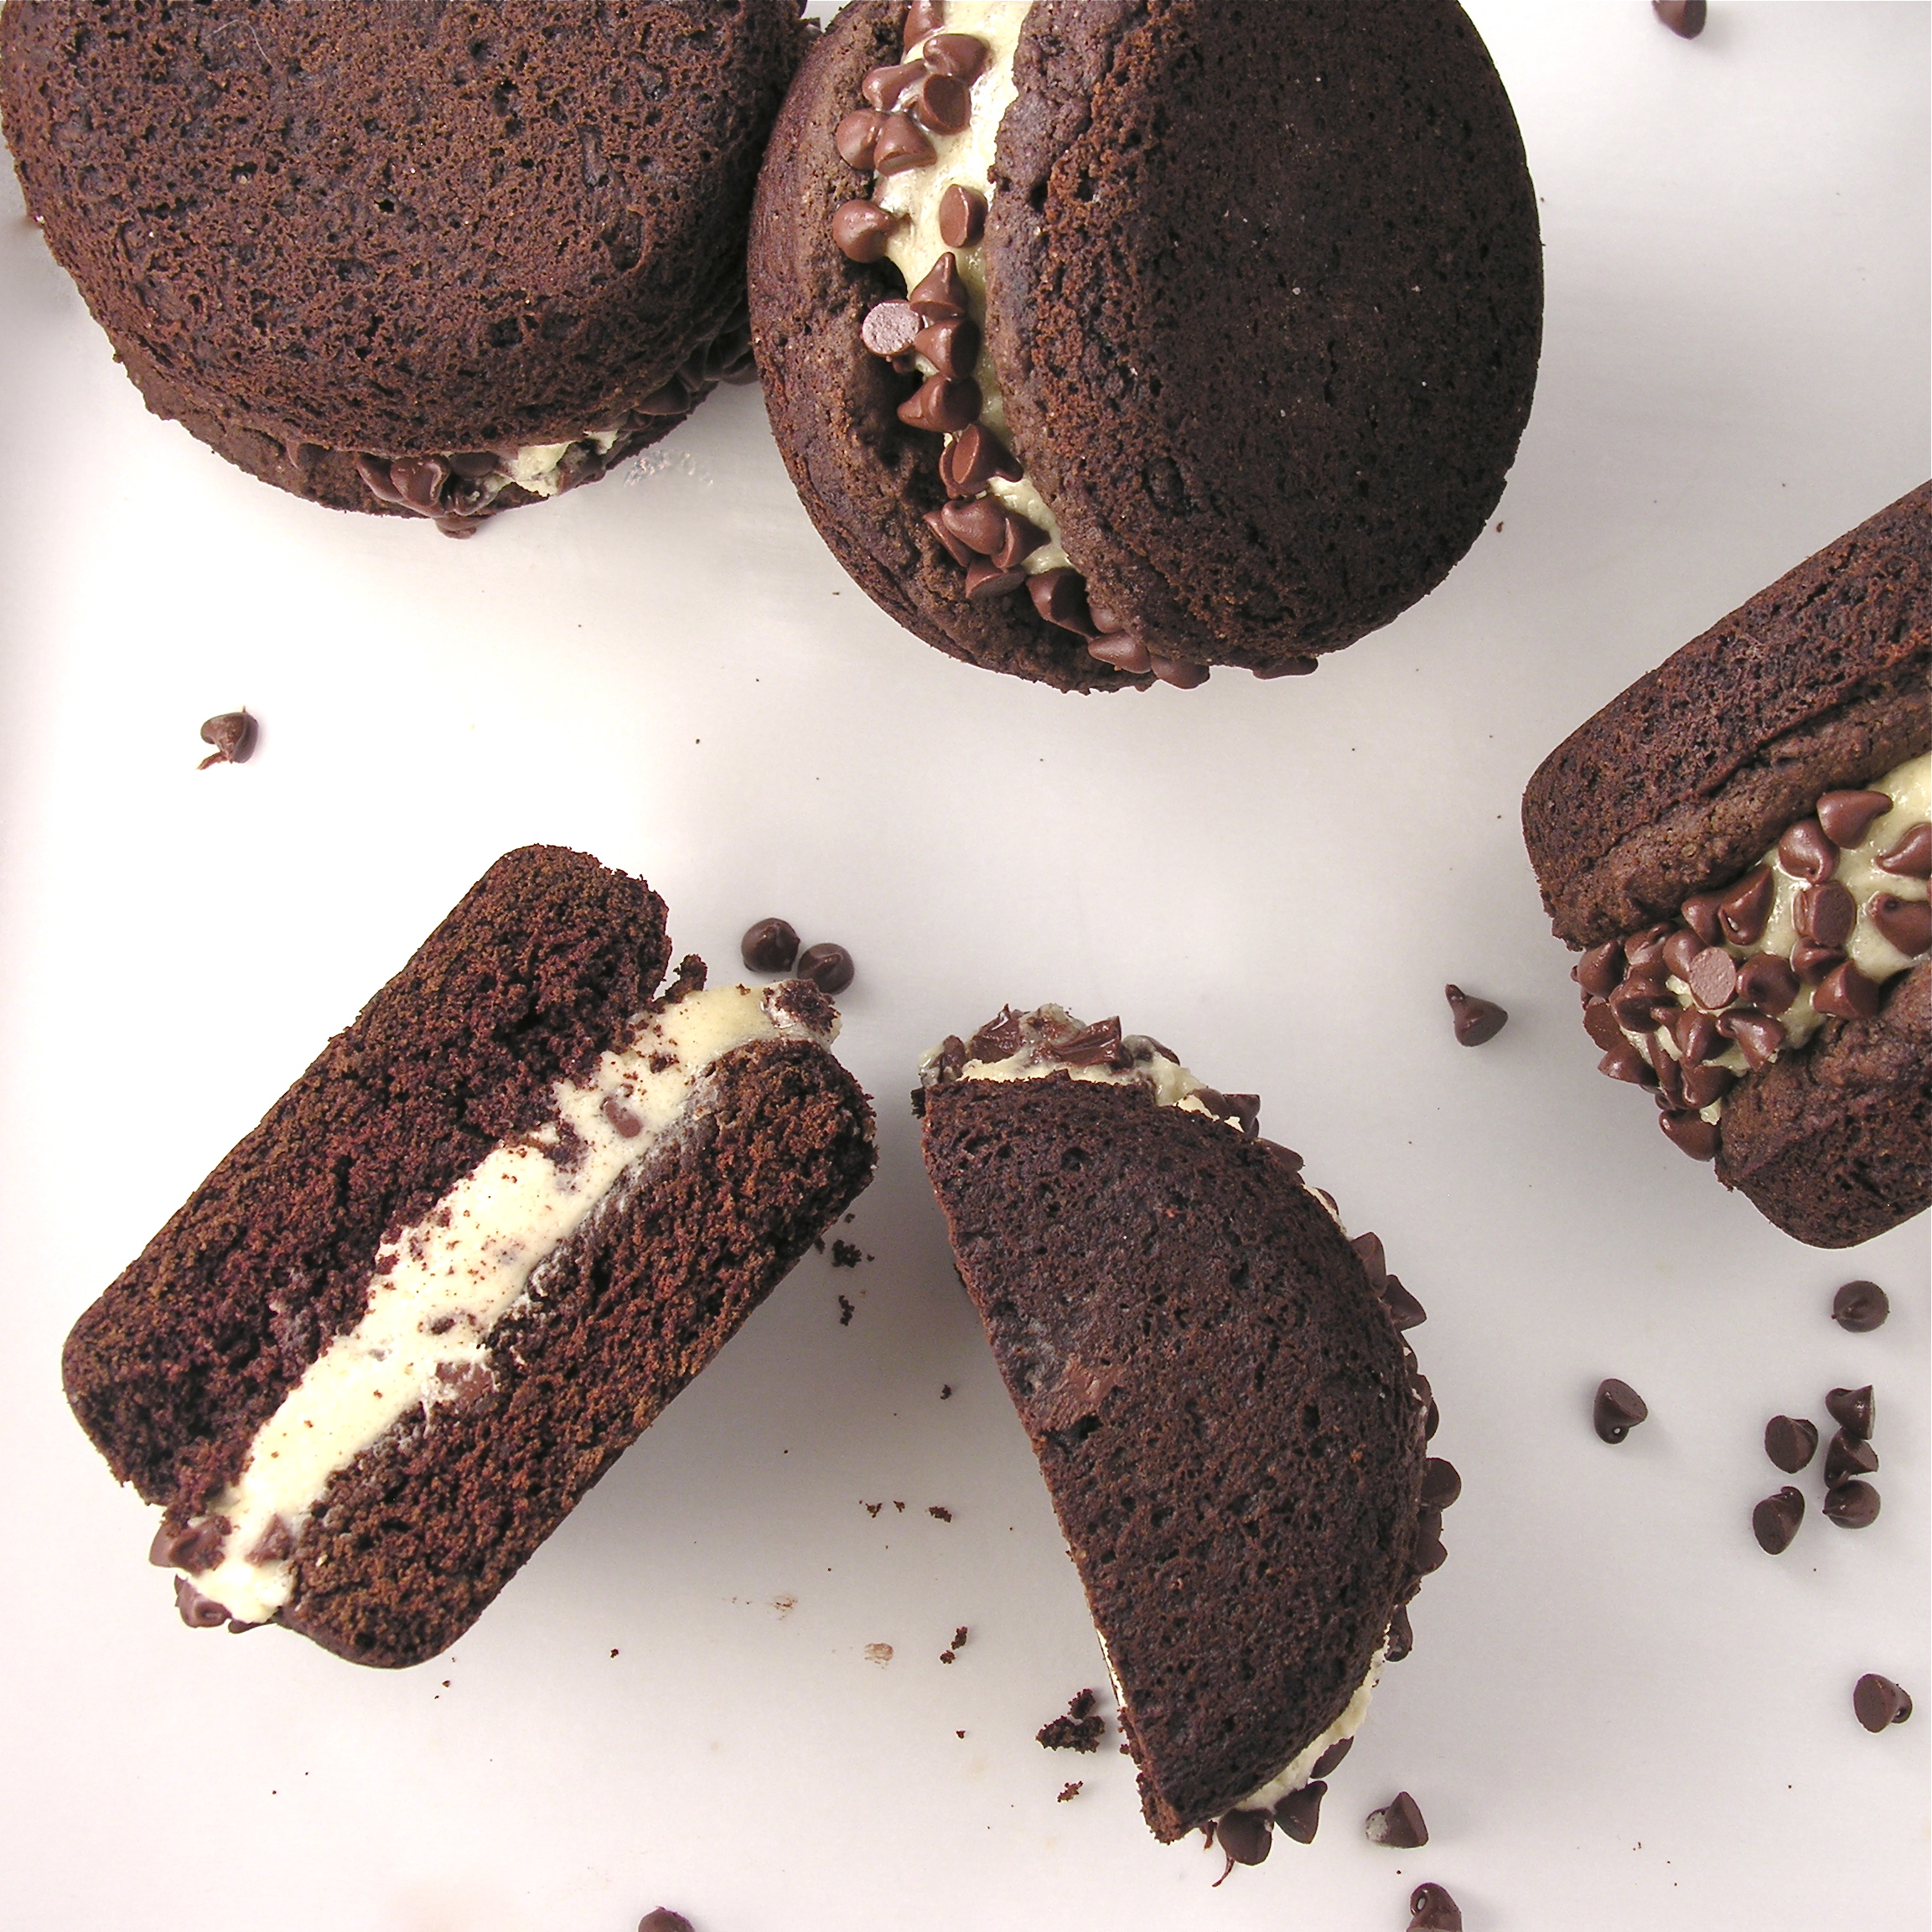
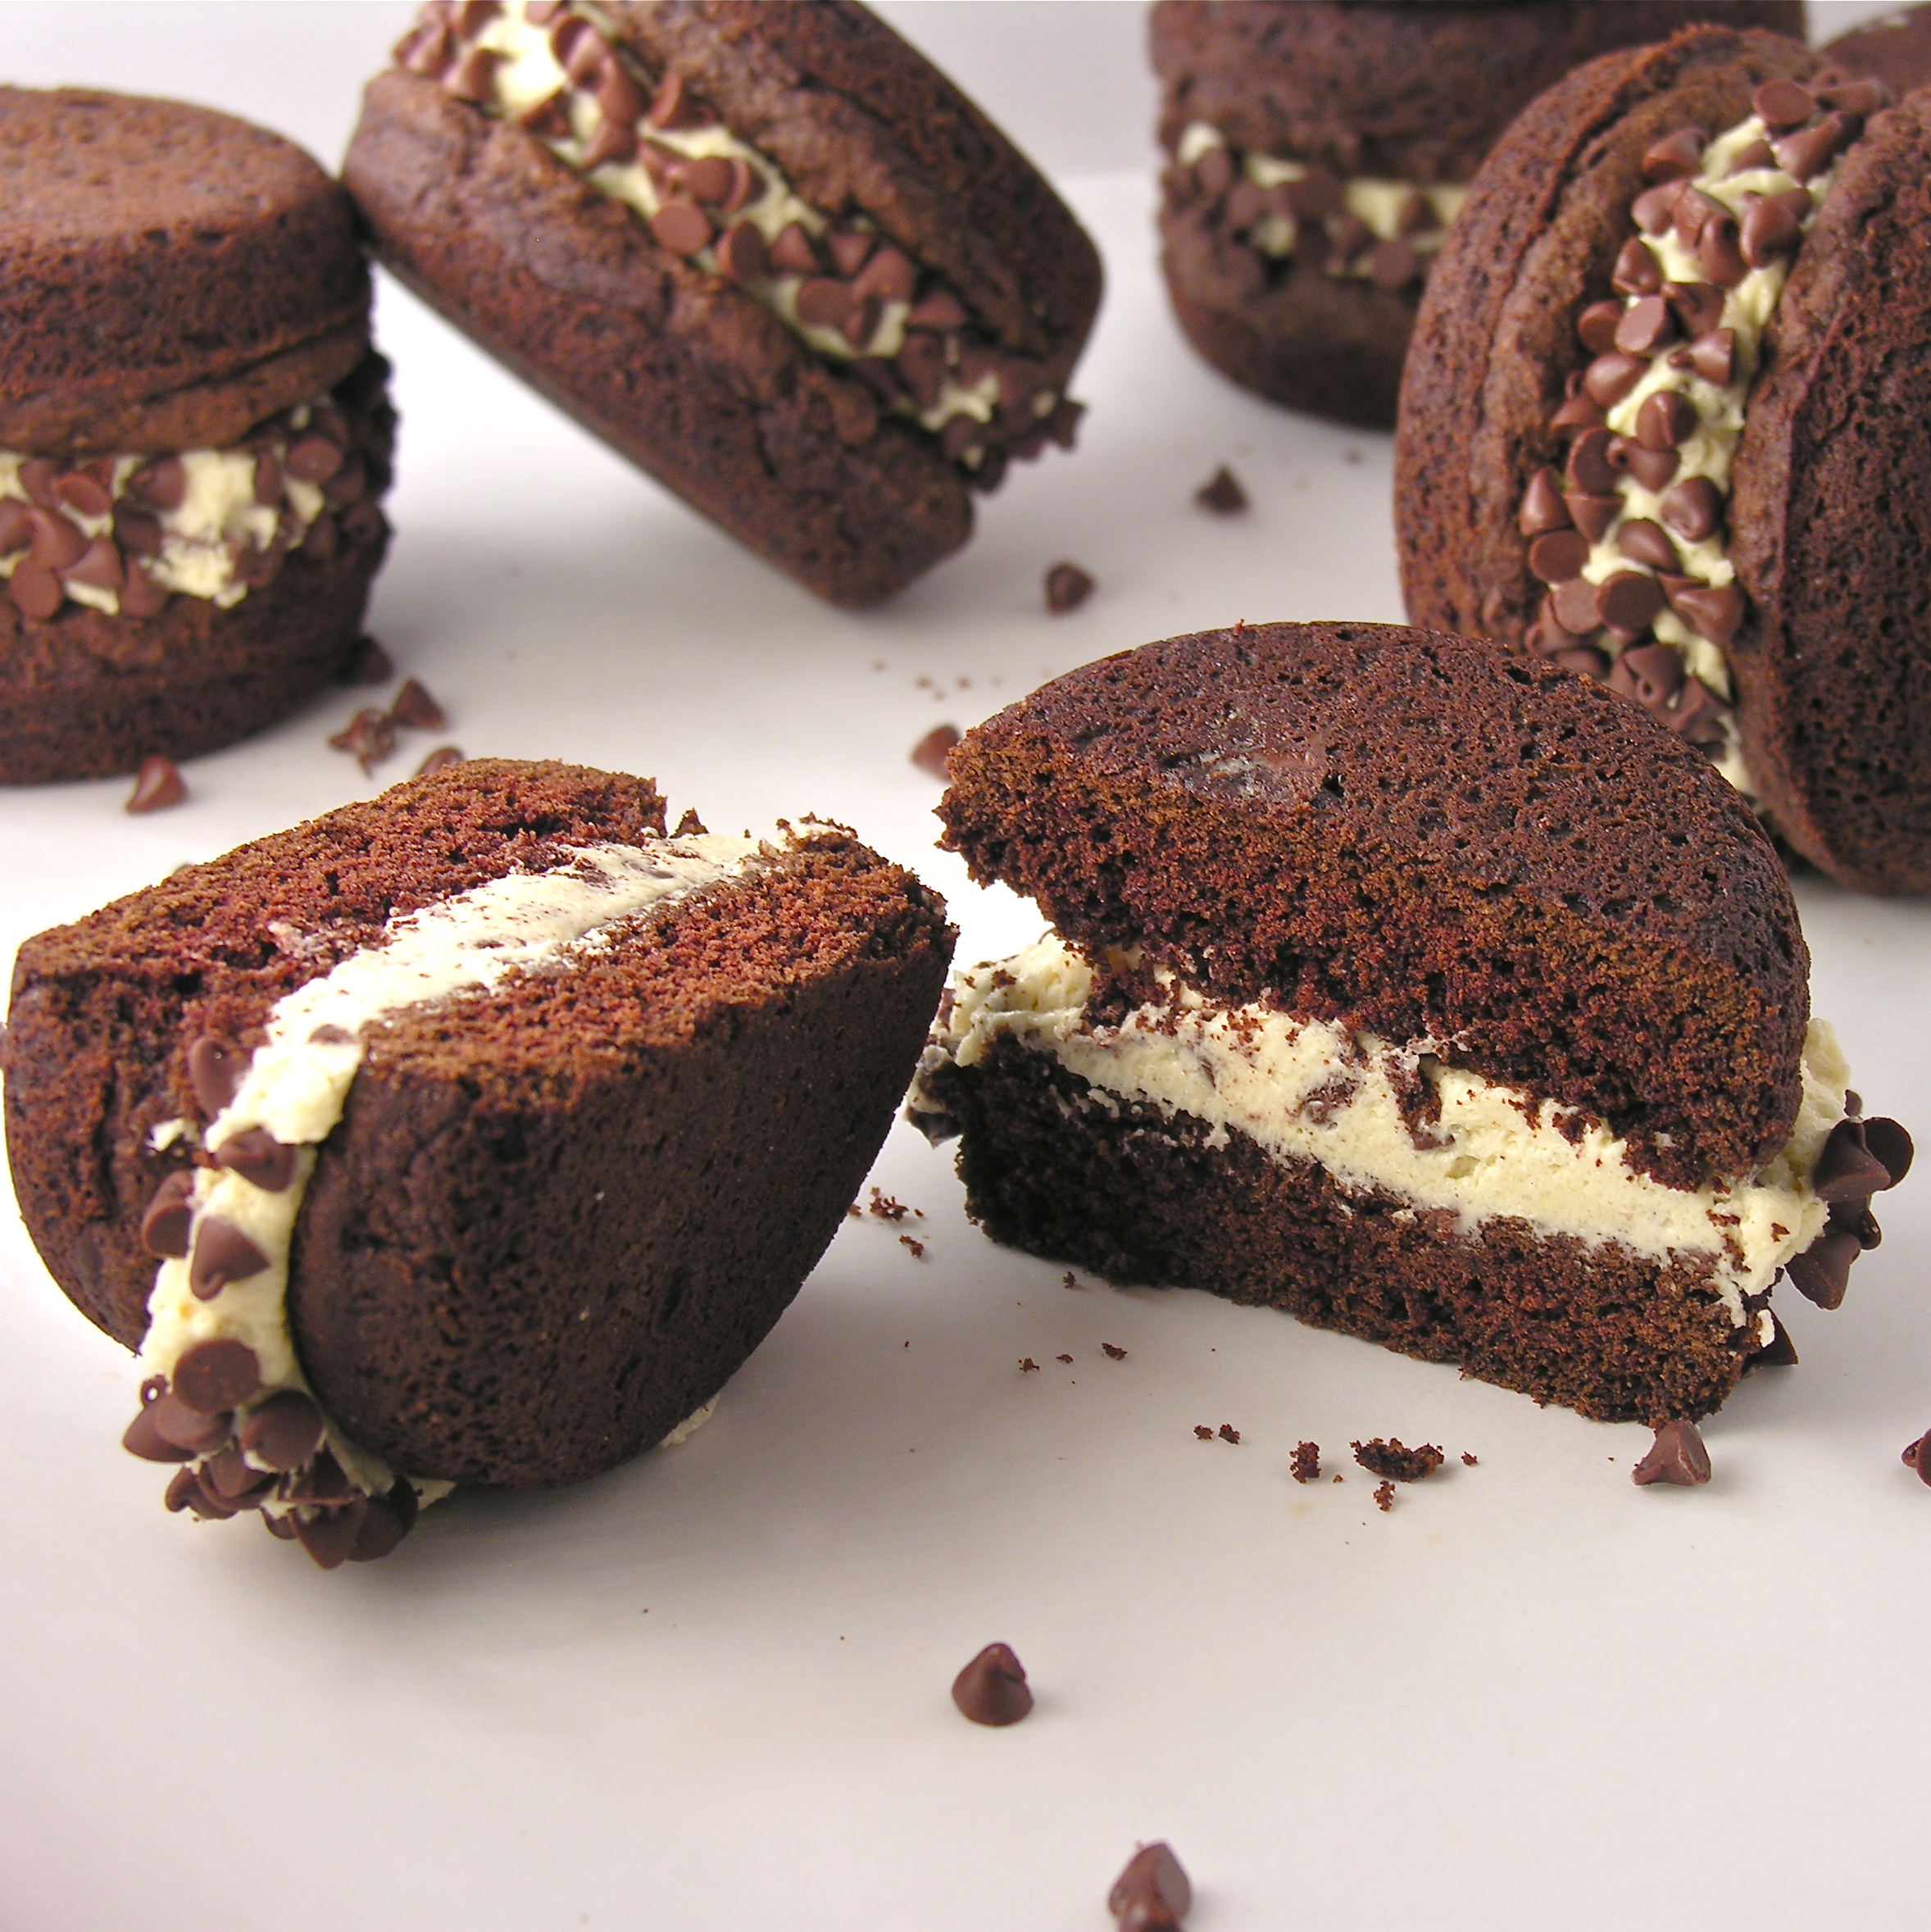
Rich cocoa whoopie pies filled with a creamy cookie dough frosting.  Yum.

One of the benefits of being a food blogger is that all of your friends see cool kitchen stuff and get it for you!  My sweet friend Danielle gave me a Whoopie Pie Pan for my birthday and I had to google what a whoopie pie was because I’d never had one.  Now, I am obsessed with this incredible dessert.  Oh. My. Word.

A few months ago I made a cupcake that is my FAVORITE recipe on this blog (yes, I have a favorite!)  It’s a cookie dough cupcake and I so wanted an excuse to make that frosting again, so I made it for these!  Perfect!  Everyone loves them….and I am eating the leftover frosting out of a bowl while I write this post…really– right out of the bowl {sigh of pure joy}

Whoopie Pies!!!

You know you want to try these….here’s how: (printer friendly recipe)

INGREDIENTS: (makes 16-18 whoopie pies)  

Whoopie Pie:

  • 2 sticks (8 oz) salted butter (softened)
  • 2 cups sugar
  • 2 eggs
  • 1 1/2 cups milk
  • 2 Tablespoons vanilla
  • 3 1/2 cups flour
  • 1 1/2 cups cocoa powder
  • 1 teaspoon salt
  • 1 Tablespoon baking soda
  • 1 teaspoon baking powder

Cookie Dough Filling:

  • 2 sticks (8 oz.) unsalted butter(softened)
  • 2 sticks (8 oz.) salted butter(softened)
  • 2 cups powered sugar
  • 1 cup brown sugar (packed)
  • 3 Tablespoons vanilla
  • 1/3 cup flour
  • 1 12 oz bag of mini chocolate chips.

Directions:

Whoopie Pie:

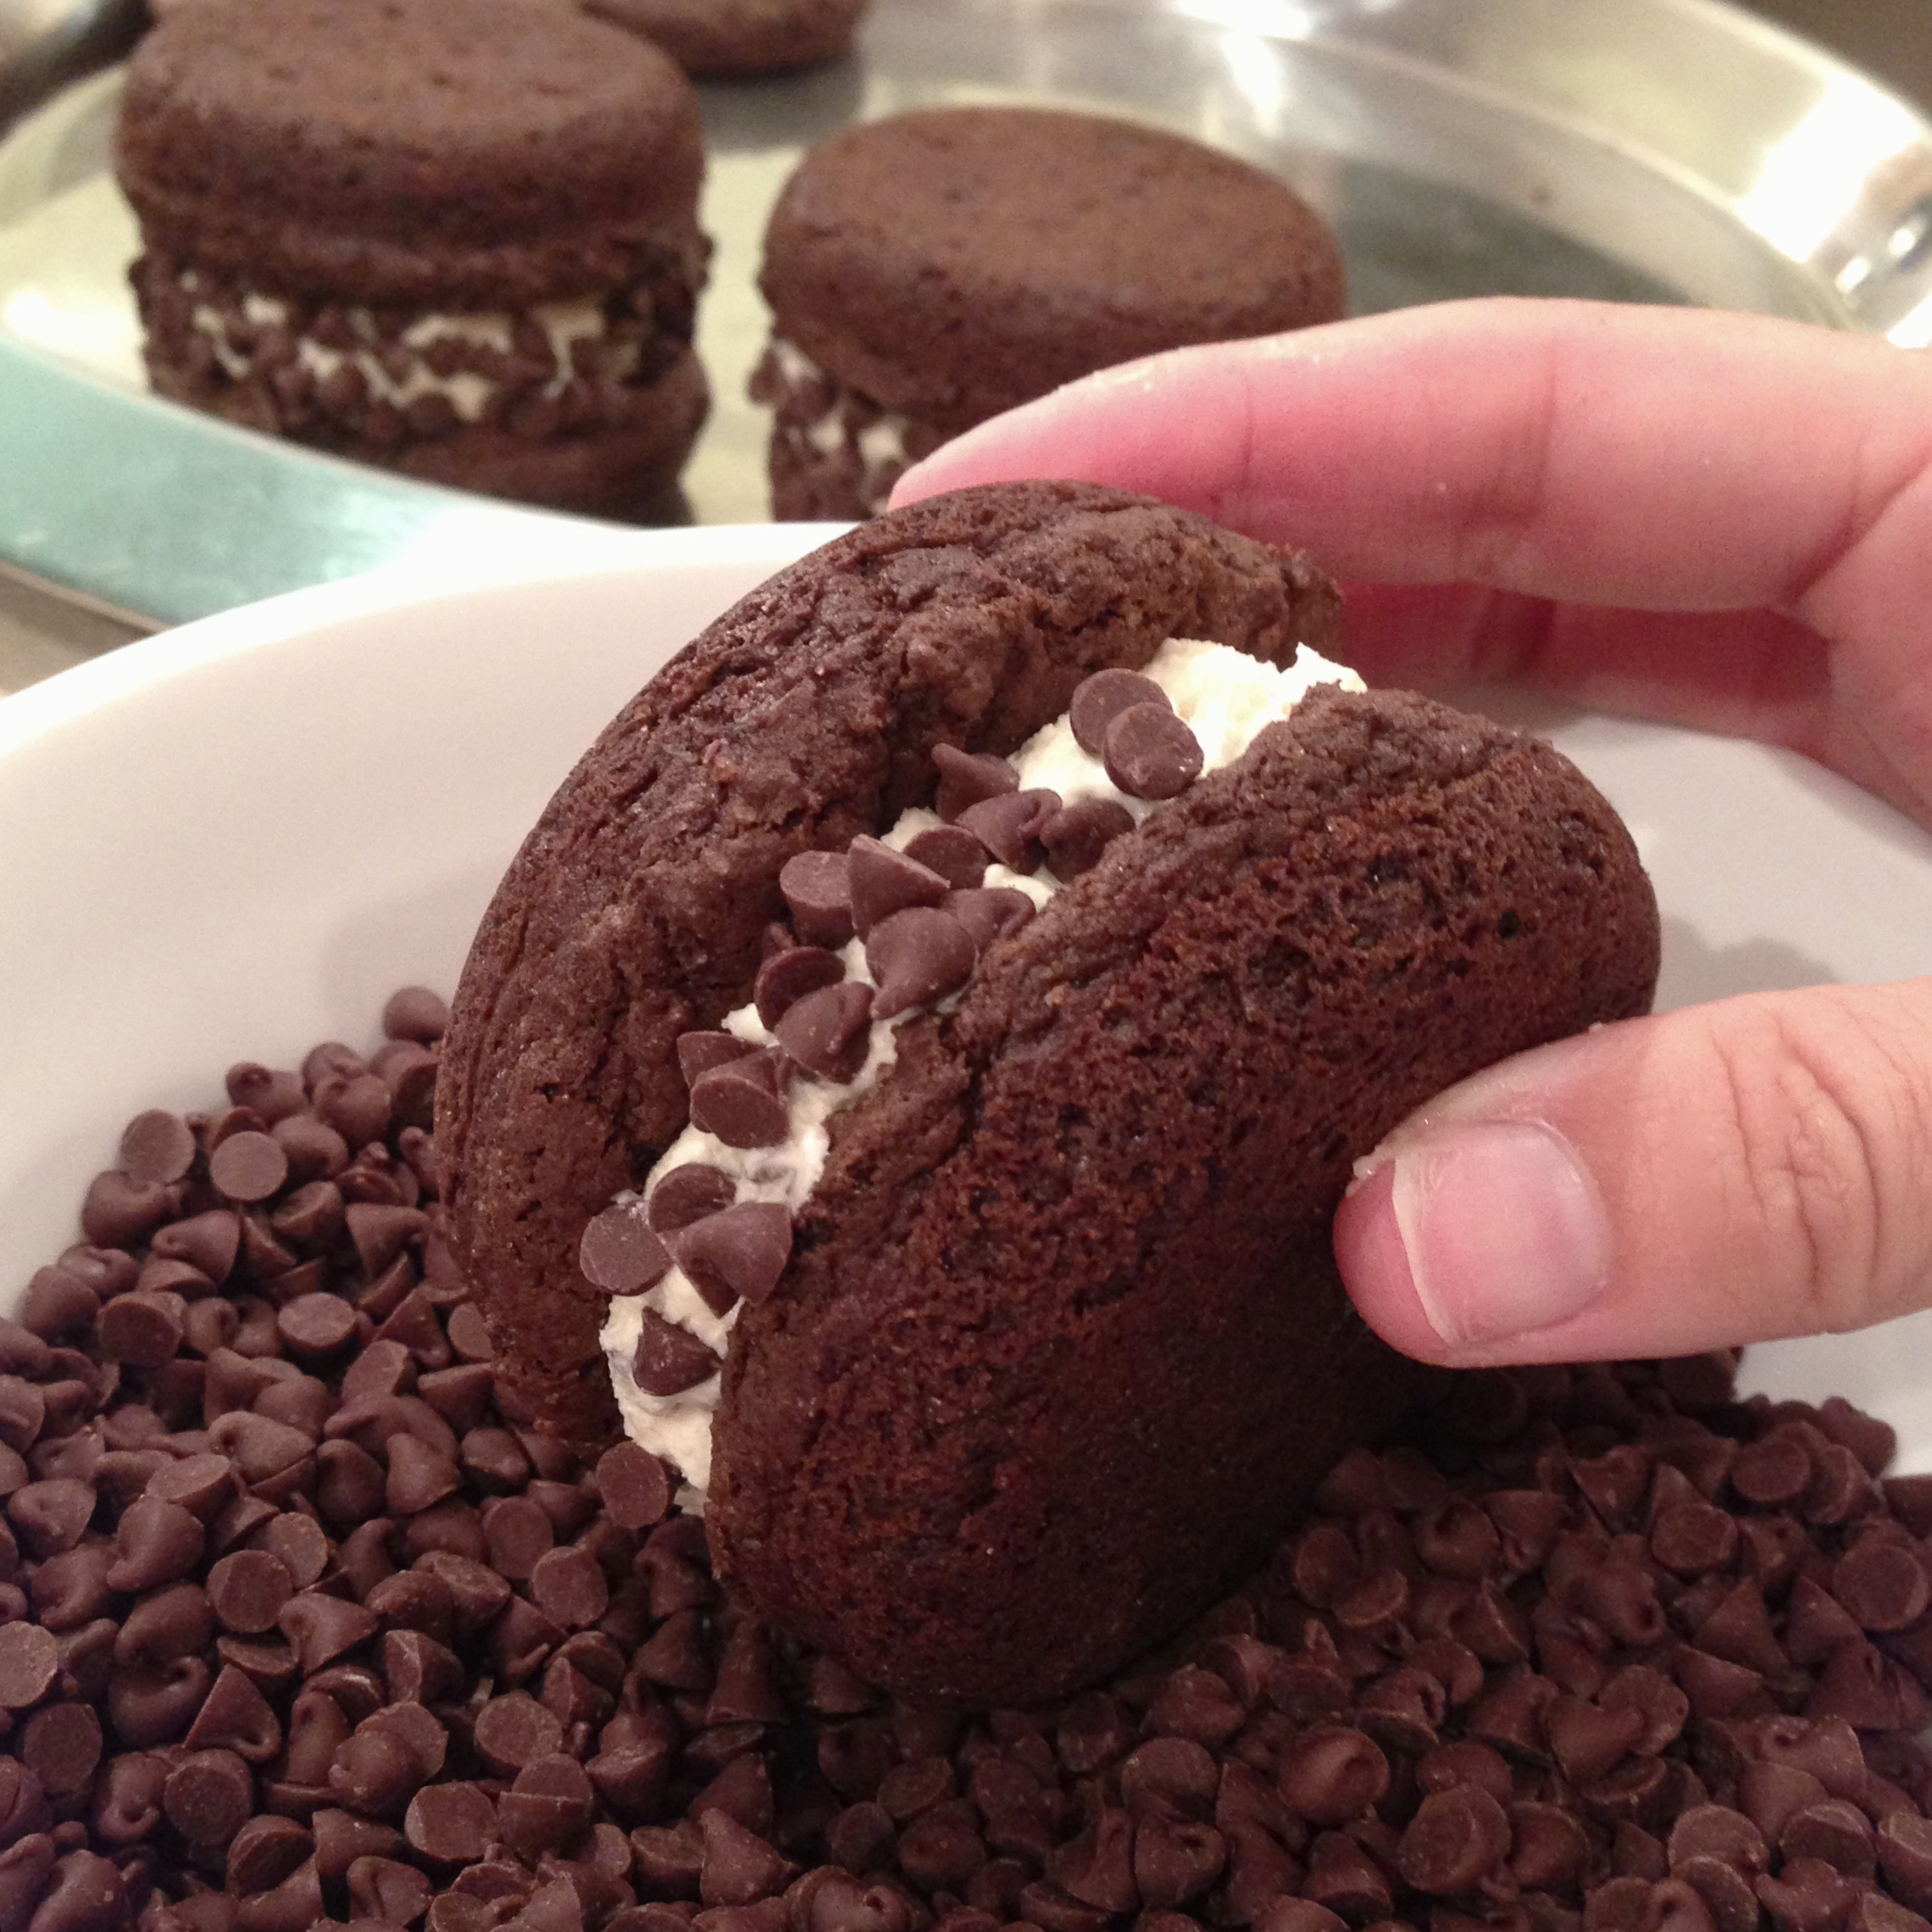
This recipe can be made on a cookie sheet, but to get that perfectly shaped, every-one-is-the-same-size look you really should invest in a Whoopie Pie Pan.  They aren’t terribly expensive and these turn out SO much better if you use one!

  • Preheat oven to 400F degrees
  • Spray a whoopie pie pan with non-stick cooking spray.
  • Use a mixer to cream together butter and sugar.
  • Add milk, eggs and vanilla and beat until combined.
  • Add dry ingredients (add flour last and gradually) and beat until smooth. (My mixer had a hard time with this, as it is a thick cookie-like mixture.  My mixer is 15 years old though and died the next day….so …?  I finished mixing by hand…)
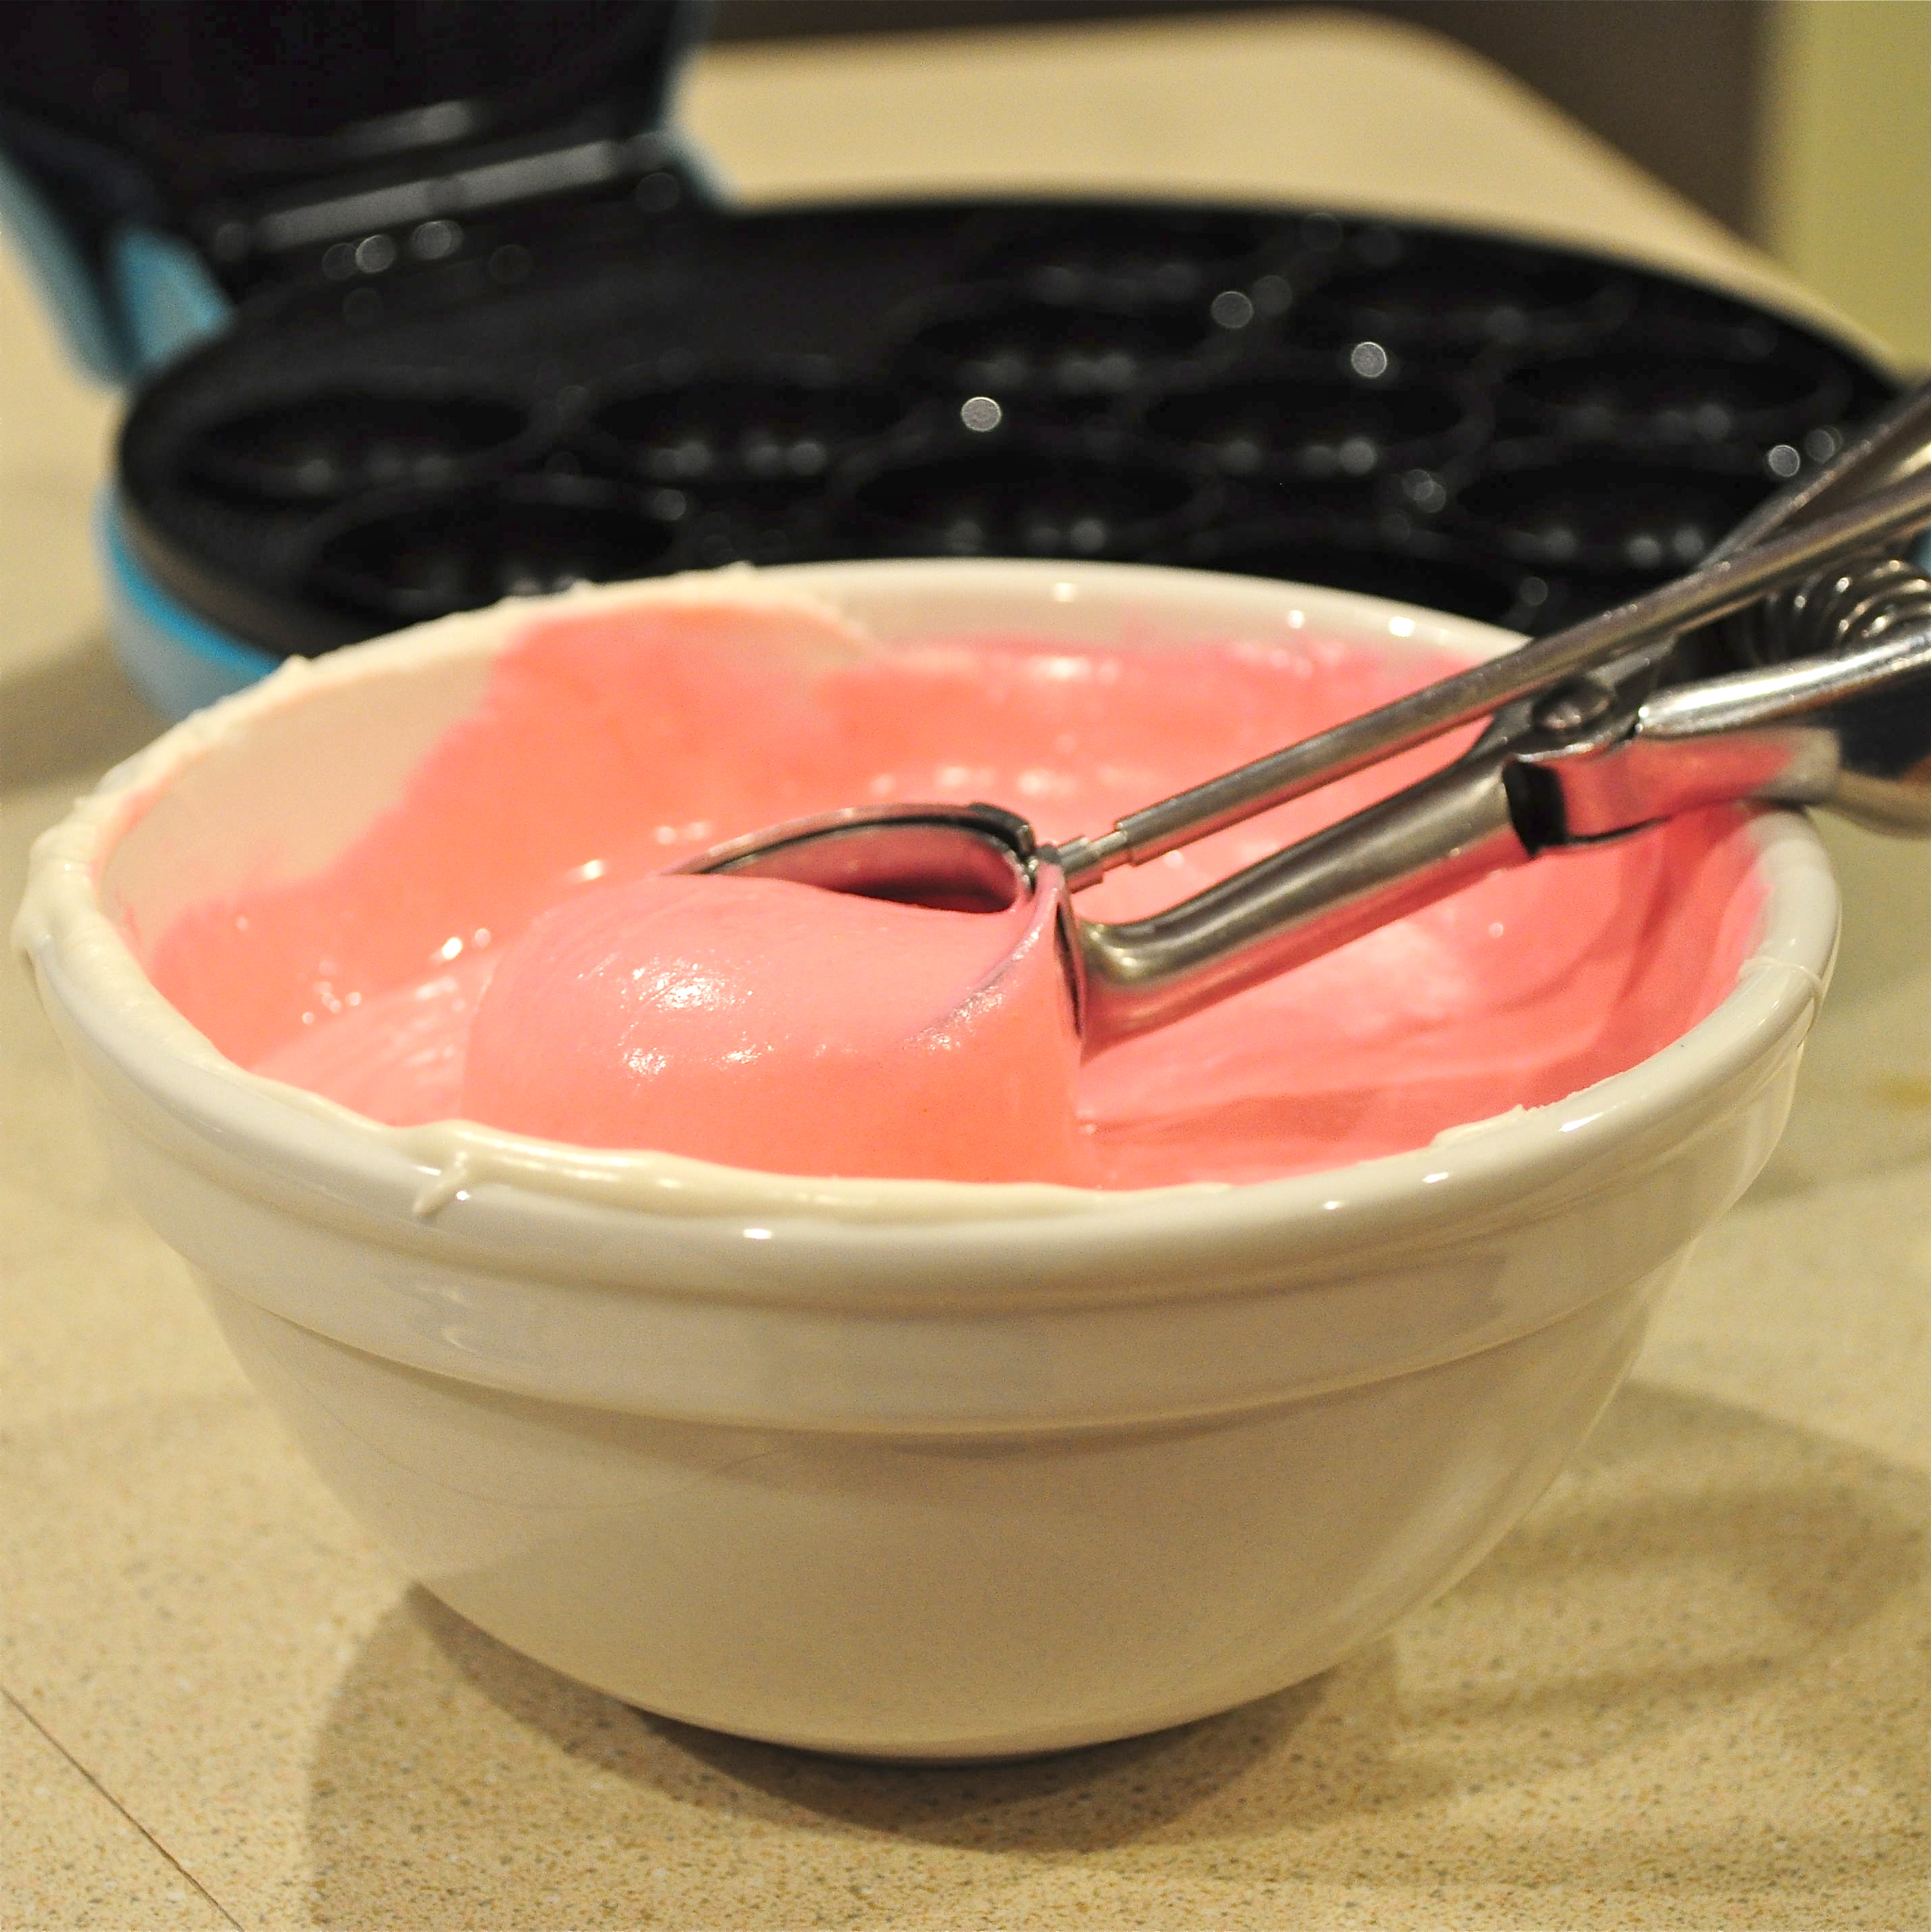
  • Use a large Cookie Scoop (2-3 Tablespoons) to drop dough into each whoopie pie cavity.  Gently press dough into cavity.

Making whoopie pies

  • Bake for 8-10 minutes- don’t overbake- cake should be springy to the touch, not hard like a cookie.
  • Cool on a wire rack.

Filling:

  • Place all filling ingredients except mini chips into a large mixing bowl and beat with mixer on low until combined and then high until light and fluffy.
  • Add half of mini chips and blend in well.
  • Scoop about 2 Tablespoons of filling onto one half of a whoopie pie.  
  • Press the other half on top very gently until filling spreads to edges.
  • Pour remaining mini chips into a bowl and roll edges of filling in them to coat the sides.

Whoopie Pies!!

My thoughts:  These are just exactly right, in my book.  I love the deep cocoa flavor in the cake and that FROSTING….!

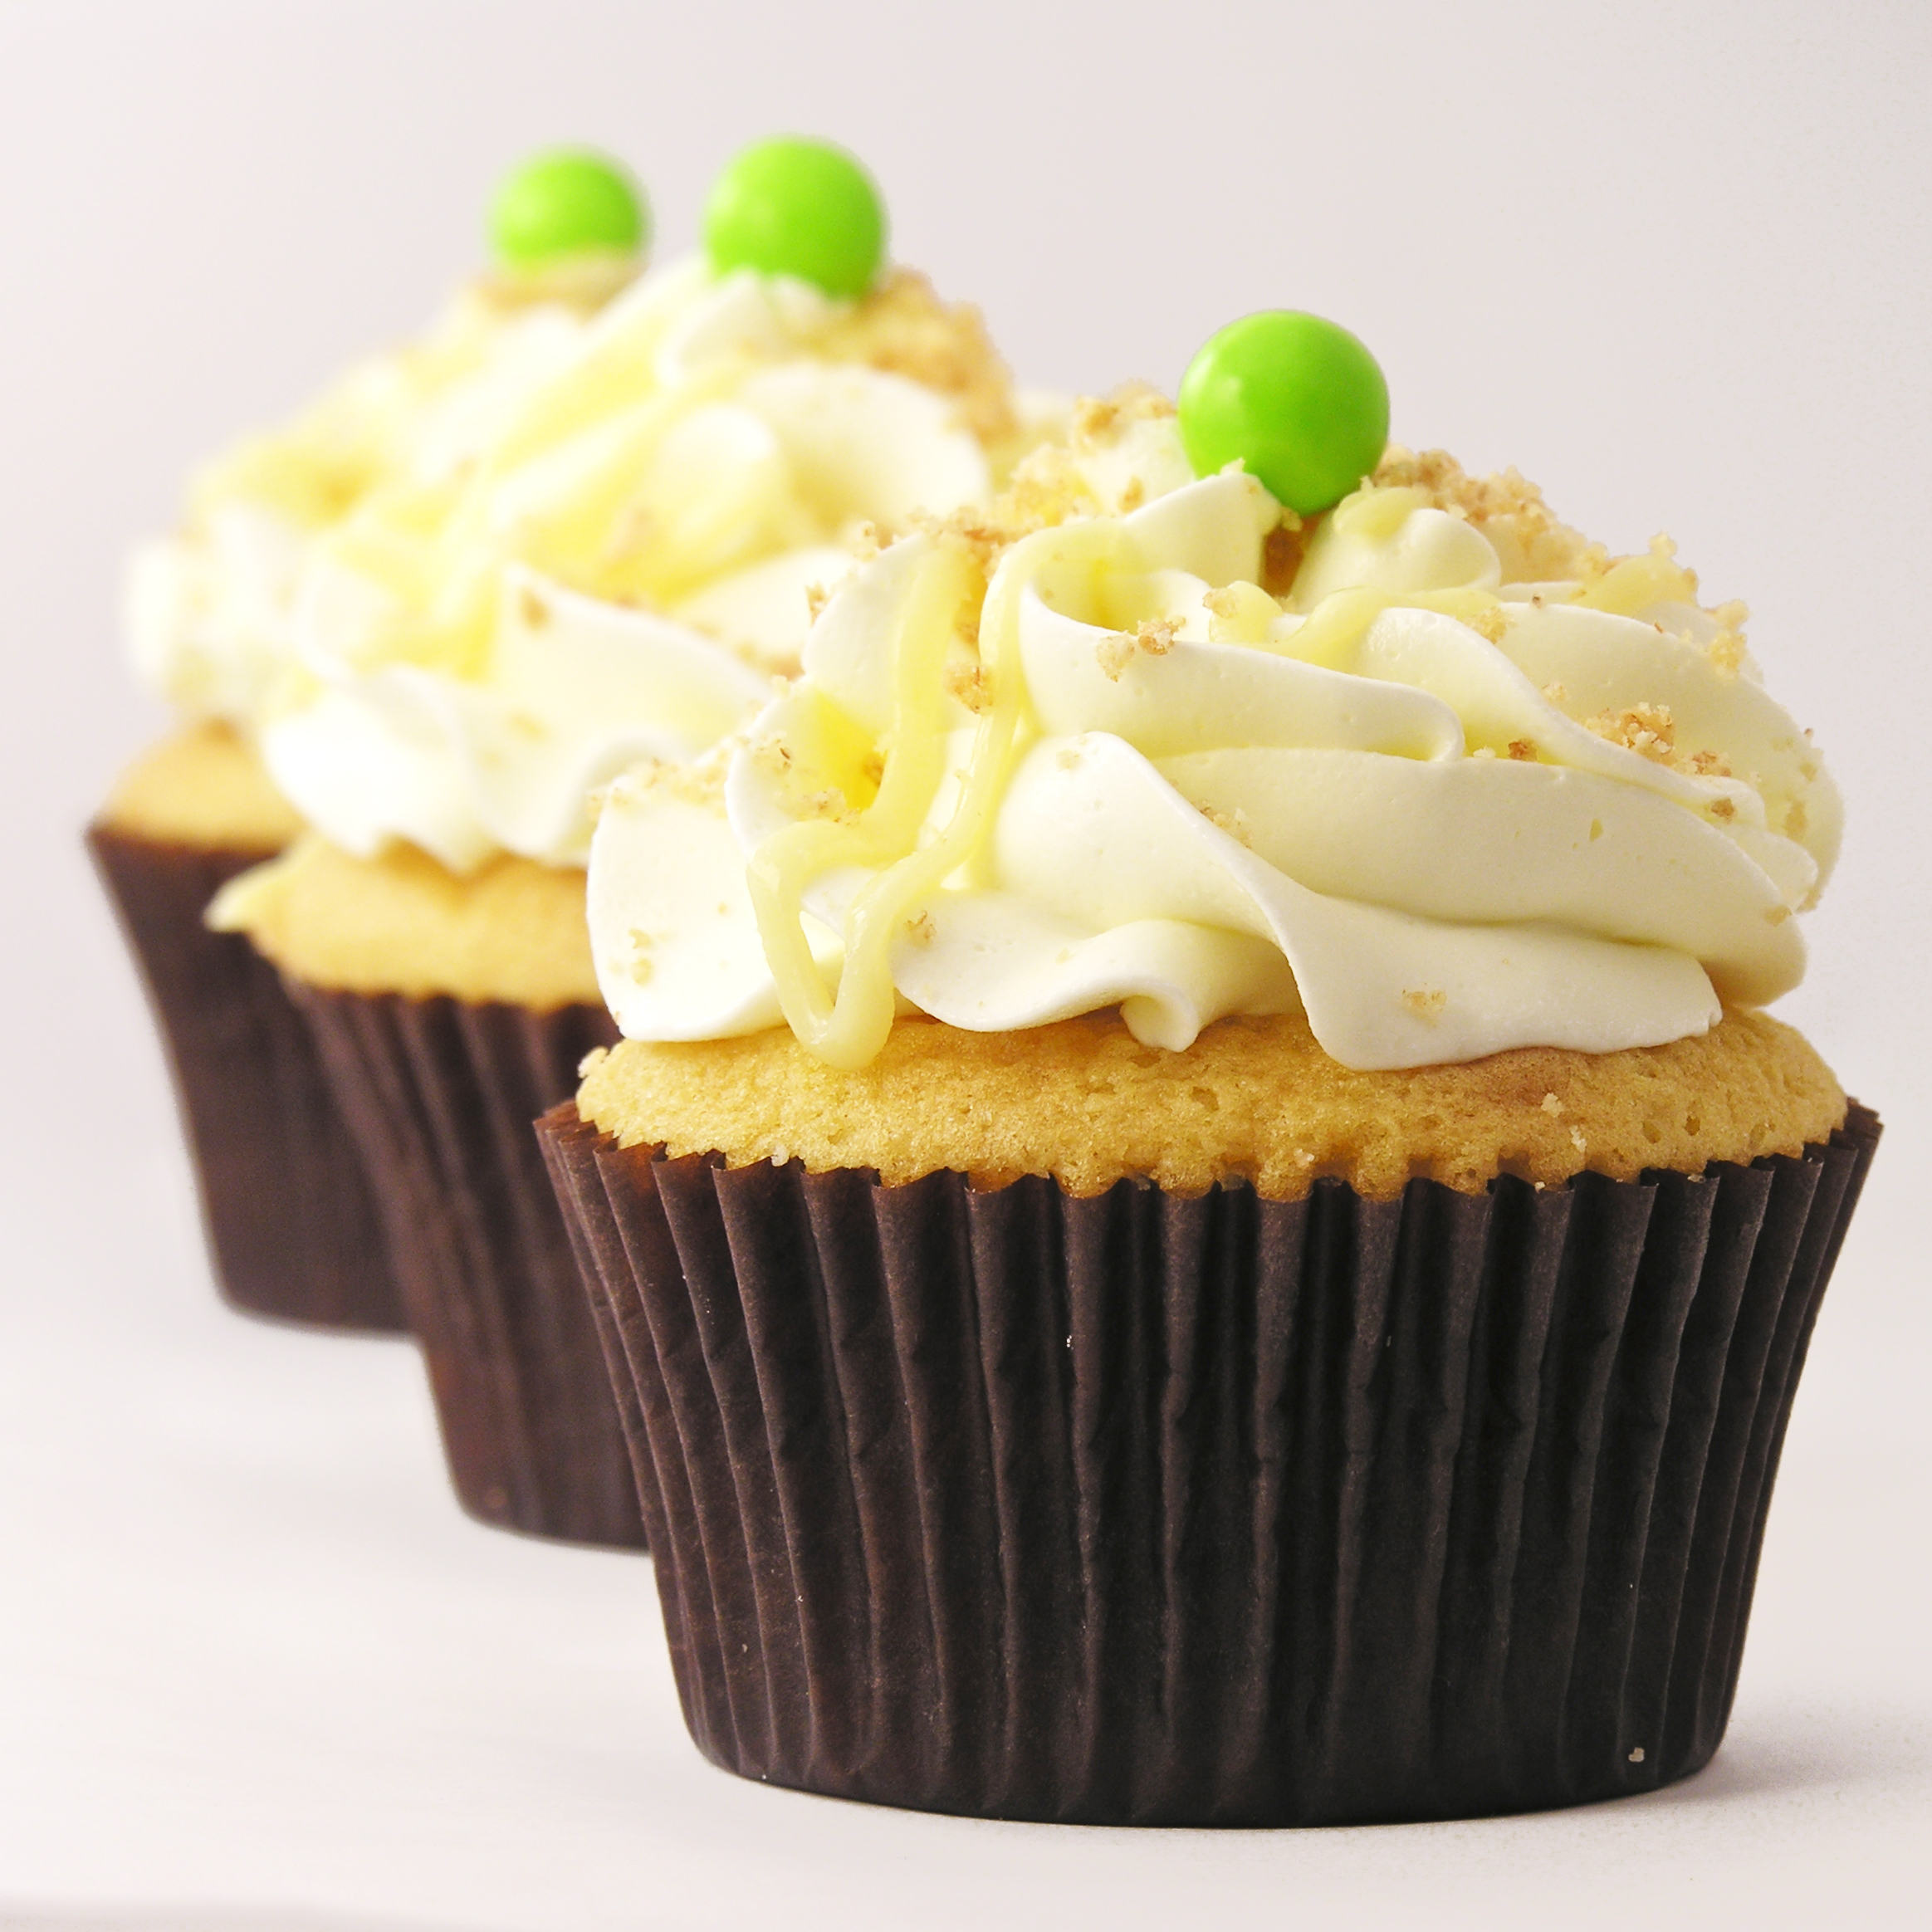
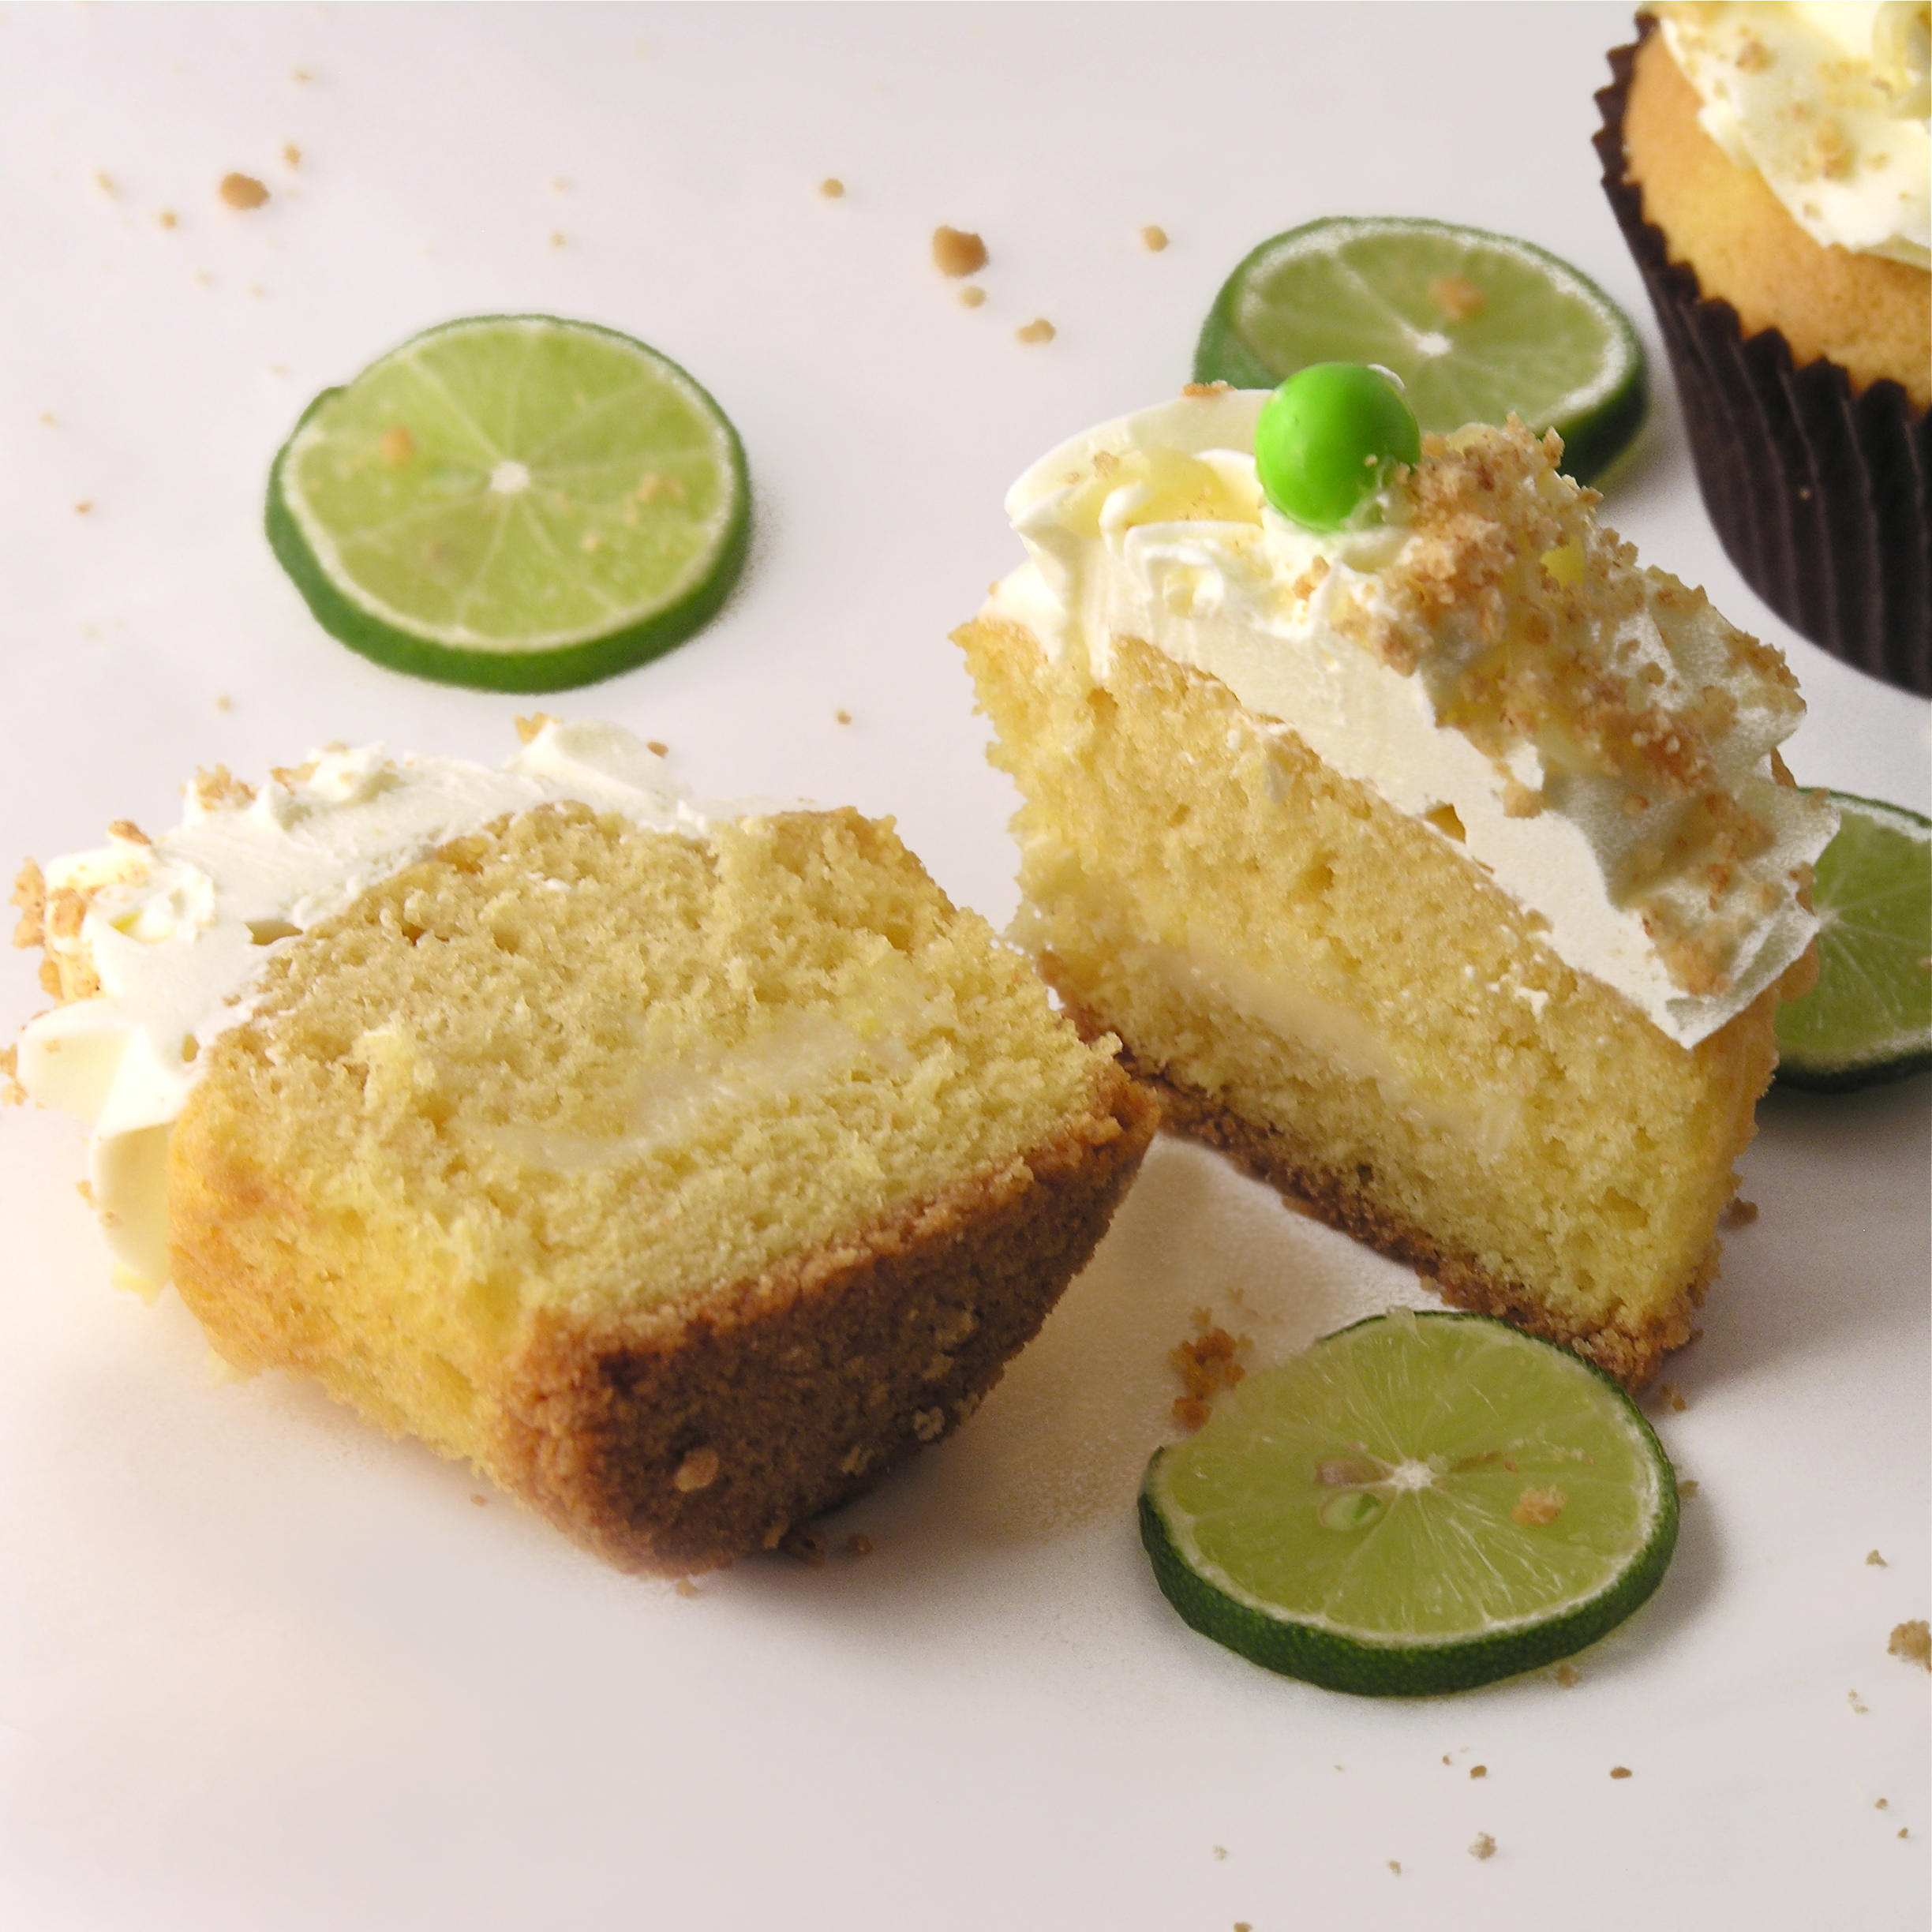
If you want to reduce the amount of filling you can certainly cut the recipe for it in half.  I was very generous with the filling and had just a little left at the end.  I hope you get a chance to try these– and if you want  a similar flavor in smaller bites hop over to the cookie dough cupcake recipe and give them a try.  Happy baking, friends!!!

Cookie Dough Whoopie Pie!

You might also like:

Cake balls filled with cream cheese frostingMango Smoothie PopsBubble Gum Cupcakes!Koolaid truffles!!

Key Lime Cupcakes

Posted on

Key Lime Cupcakes!

These cupcakes are filled with a sweet key lime filling and topped with key lime buttercream…what could be better than that?  Oh, how about a graham cracker crust on the bottom of the cupcake?  This dessert is as close to key lime pie as you can get…without it being a pie!  (printer friendly recipe)

INGREDIENTS: (makes 24 cupcakes)

Filling:

  • 1 cup key lime juice (a labor of love….!)
  • 1 can (14 oz.) sweetened condensed milk
  • 1 egg

DSC_0009

Cupcakes:

  • 2 cups of graham crackers (finely crushed)
  • 3 Tablespoons of butter (melted)
  • 1 boxed yellow cake mix (plus water, oil and eggs to make according to package)

Frosting:

  • 2 sticks (8 oz) salted butter (at room temp)
  • 2 sticks (8 oz) unsalted butter (at room temp)
  • 3 cups of powdered sugar
  • 2 teaspoons vanilla
  • 2 Tablespoons of key lime juice

DIRECTIONS:

Filling:

  • Mix together key lime juice, sweetened condensed milk and egg and pour into a small casserole.
  • Bake at 325F degrees for 15-20 minutes (until center is set)
  • Cool completely.

Cupcakes:

  • Mix crushed graham crackers with melted butter.
  • Spoon about 1 teaspoon of this mixture into 24 cupcake liners in muffin tins (you’ll have a little left to garnish with at the end)
  • Press crumbs firmly into bottom of cup (I find my Mini Tart Shaper to be very useful for this)
  • Make cake mix according to box, and divide batter equally between the 24 cupcake liners.
  • Bake according to directions on box
  • Remove from oven and cool completely.
  • Core cupcakes (I love my Cupcake Plunger– it is so quick to use and saves the core to place back on top of the filling- to see a picture of how it works, click here).
  • Spoon cooled  filling into a zip top bag and clip a corner off.

Spoon Key Lime Filling into a zip top bag!

  • Pipe filling evenly into each cupcake, saving about 1/4 of a cup of filling to drizzle on the top at the end.
  • Place top of core back in place (you can trim some of the bottom off to make room for the filling if you need to)

Frosting:

  • Place butter, powdered sugar, vanilla and 2 Tablespoons of key lime juice into a large bowl.
  • Using a mixer, beat on high until light and fluffy.
  • Pipe frosting on top of cupcakes and drizzle remaining filling on top.
  • Sprinkle with remaining graham crust crumbs and ENJOY!!!!

Key Lime Cupcakes!

My thoughts:  I created these for a graduation party.  The challenge was to create a key lime cupcake for someone who LOVES key lime pie.  Key lime pie is one of my favorite desserts, so it was a fun task.  These were a big hit.  I love the balance between the tart center and the sweet cupcake and frosting.  

It’s spring~ you NEED a key lime cupcake!!!

Key Lime Cupcakes!!

You might also like:

Chocolate molten lava cupcakesCaramel Fudge Brownies!!Sweet Lime TartsTriple Chocolate Cheesecake 3

Alfajores (Peruvian Caramel Cookies)

Posted on

Alfajores- Peruvian Caramel Cookie! These shortbread-like cookies are sandwiched around caramel and topped with chocolate and sugar…yum!

Machu Picchu!

Machu Picchu!

I’m back!  For those of you who follow the comings and goings of Easybaked you know that I spent about 10 days in Peru.  It was a wonderful trip.  I visited my childhood friend Deb in Lima and then the two of us toured Machu Picchu and spent a few days in the Amazon jungle.  The foods were incredible, especially the fresh fruits!  I will add some pictures of our trip at the end….

One of the treats we had in Peru was a cookie called an Alfajore.  The cookie is very subtle- not too sweet- and very dense.  It is served with a caramel filling called Manjarblanco.  I had this filling in a variety of desserts and kept thinking that it tasted like Dulce de Leche.  When I returned home and looked it up I found that it is Dulce de Leche- in a convenient little pouch and ready to eat.

Manjarblanco

Here is my version of this yummy cookie.  If you like things that aren’t overwhelmingly sweet, this is your dessert!

INGREDIENTS:

Cookies (makes about 24 sandwich cookies)

  • 1/2stick (2 oz) butter (softened)
  • 1/4c. sugar
  • 1 whole egg
  • 1 egg yolk
  • 1 tablespoon light corn syrup
  • 2 teaspoons vanilla
  • a few drops of rum (optional)
  • 2 1/2 c. flour
  • 1/2 teaspoon baking soda

Dulce de Leche:

  •  1 can (14 oz) sweetened condensed milk (or Manjarblanco if you live in an area that offers this!)

DIRECTIONS:

{If you can’t purchase ready-made manjarblanco (dulce de leche), you will need to make your own.  Do this before making your cookies as it takes some time and will need to cool.  My favorite method of making dulce de leche involves boiling cans of sweetened condensed milk, and I have detailed instructions if you click here.}

  • Preheat oven to 350F degrees.
  • Cream together sugar and butter.
  • Add eggs, corn syrup, vanilla and rum.
  • Add flour and baking soda last, and knead dough together with clean hands. (The dough will be dry- a little like play-dough in consistency.  You can add a little water to soften it up if necessary.)
  • Roll dough out to about 1/8 inch thick and cut using a 1 1/2 inch or 2 inch cookie cutter.
  • Place on an un-greased cookie sheet and bake for 8-10 minutes until just turning brown on top.
  • Remove from cookie sheet and cool on a rack.
  • Spread cookies with cooled caramel and sprinkle with powdered sugar/ drizzle with a little chocolate if you like.


Alfajores (Peruvian caramel cookie)!

My thoughts:  I love international recipes.  One of my favorite parts of travel is trying new foods and hearing stories about how those foods fit in with the lives of the people I meet.  These cookies are really good, and available all over in Peru.  I hope you enjoy them as much as I did!!!

Alfajores
Alfajores-- yummy dulce de leche filling!

A few glimpses at Peru…such a beautiful country full of kind and beautiful people!

Sunrise at Machu Picchu

Sunrise at Machu Picchu

Stairs up Wayana Picchu

Stairs up Wayana Picchu

Beautiful Machu Picchu!!!

Beautiful Machu Picchu!!!

Amazon Village

Amazon Village

Piranha fishing!!

Piranha fishing!!

Jungle hike...baby ferns

Jungle hike…baby ferns

Fresh watermelon in the market at Iquitos

Fresh watermelon in the market at Iquitos

Sloth cuddles :)

Sloth cuddles 🙂

Anaconda!

Anaconda!

Amazon sampler: Jungle pig, Cayman and Paiche (Arapayma)

Amazon sampler: Jungle pig, Cayman and Paiche (Arapayma)

Deb and I - we've been friends since we were two!  Fun trip!!

Deb and I – we’ve been friends since we were two! Fun trip!!

Frosty Almond Joy Cups

Posted on

Frosty Almond Joy Cups!These adorable frozen cups are layered with chocolate, coconut and almonds.  A new twist on some favorite flavors!!  These use a mini cheesecake pan that is SO much fun, but if you want, you can make these in muffin tins lined with cupcake papers instead.  This recipe makes 12 frozen cups.

INGREDIENTS:

  • 1 1/2 c. of crushed Oreo cookies
  • 1/2 c. semi-sweet chocolate chips
  • 1/4 c. whipping cream
  • About 2 cups of shredded, sweetened coconut
  • About 1 cup of slivered almonds
  • 1 1/2 c. cold milk
  • 1 box (4 servings, 3.9 oz) instant coconut pudding
  • 1 (8 oz) container of Cool Whip (thawed in fridge)
  • 1/4 c. Wilton’s Candy Melts (to drizzle on top as decoration)

DIRECTIONS

  • Crush Oreos into fine crumbs. (I love my KitchenAid food chopper for this job!)
  • Prepare mini cheesecake pan by placing disks into the bottom of each cup.
  • Evenly divide crust mixture into all 12 cups (I used a Mini Tart Shaper to press crumbs firmly into the bottom of each cup).
  • Place semi-sweet chocolate chips and whipping cream into a small bowl and microwave in 30 second increments, stirring in between, until melted and smooth.
  • Spoon chocolate into a zip top bag, cut a tip off and evenly pipe chocolate into the center of each cup, on top of the crust.
  • Sprinkle about a tablespoon of coconut and slivered almonds into each cup

Almond Joy How-to

  • Mix cold milk with pudding on medium speed for 2 minutes. Fold in 1/2 of the Cool Whip container (the rest will be used as topping).
  • Spoon filling into a large zip top bag (and ZIP it or you might have a mess!)  Clip a corner off and pipe pudding into each cup evenly.  Try to pipe it in between the coconut and almonds so that the whole cup is filled.  I did have a little left over (which was really tasty straight out of the bag!)
  • Use a knife to smooth the tops level with the top of the pan.
  • Freeze for at least a couple of hours.
  • Allow the pan to warm just a bit before popping each dessert cup out.  Poke a finger up through the hole in the bottom of the pan and grab that Almond Joy cup by its crust.  Remove the disk from the bottom and you are ready to add topping. 
  • For topping, I just piped a little bit of the left over Cool Whip on each dessert using a decorating tip.  Then I topped it off with a little melted chocolate (Wilton’s candy melts) and a whole almond with some coconut.  You could decorate yours however you want!
  • Serve cold right away– or put them in a sealed container and freeze until you are ready to serve.

Frozen Almond Joy Cups!!My thoughts:  I love Almond Joy candy bars…I love Oreos and anything frozen….so I love these!  These were inspired by an earlier recipe, Frosty S’mores Cups.  I ran across coconut pudding in the store the other day and the wheels started turning.  I think it turned out perfectly– it’s like a coconut cream pie with Almond Joy bars mixed in. mmmmm…….!  I hope you enjoy these little treats!  

Almond Joy cups!
Do you like coconut?  We LOVE it here at Easybaked!  Click on a picture to see other recipes with this yummy ingredient:

Caramel Coconut Creme CupsCoconut Cheesecake BonbonCreamy Coconut CheesecakeLemon Drop Cookies with Coconut

Turtle Brownie Bars

Posted on
Caramel Turtle Bars!!


Everyone loves a good bar dessert.  These are absolutely stuffed full of yummy goodness.  Caramel and three kinds of chocolate mixed with chocolate cake….these will certainly satisfy your sweet tooth!!!!

INGREDIENTS:

  • 1 box of chocolate cake mix
  • 1/3c. oil
  • 2 eggs
  • 1c. each of white chips, semi-sweet chips, milk chocolate chips and dark chocolate chips
  • 1/2 c. margarine or butter
  • 32 unwrapped Kraft caramels
  • 1 (14oz.) can of sweetened condensed milk

DIRECTIONS:

  • Preheat oven to 350 degrees.  Grease a 9x13pan.  
  • Combine cake mix, oil and eggs.  Blend well and stir in all of the chips (mixture will be very thick).  
  • Press half of the mixture into bottom of pan (it will press into a very thin layer).  Bake for 10 minutes and then remove from oven.
  • While this is baking, in a medium saucepan, combine butter, caramels and condensed milk.
  •  Cook over low/medium heat until melted and smooth (stir constantly!)  
  • Spread caramel over partially baked cake mixture.  
  • Top with remaining cake/chip mixture (it will not completely cover, but you can press the mixture flat with your fingers and lay it in small sections over the caramel.)
  • Bake an additional 25 to 30 minutes.  Remove from oven and cool 20 minutes.  
  • Run knife around edges.  Cool completely before cutting. Makes about 20 bars.

Caramel Turtle Bars!!!

My thoughts:  I make this recipe with a variety of cake mix flavors every time I start accumulating odds and ends of chips in my pantry.  When you bake a lot, you end up with lots of almost-empty bags of baking chips in all sort of flavors.  I just use them all up in this recipe!  I’ve made this with yellow, chocolate and caramel cake mix.  I’ve used dark, milk, white, swirled, peanut butter, cinnamon and butterscotch chips.  Each time I make it there’s a whole new flavor and look.  I *love* recipes like that!  It’s like having so many recipes all in one.  I hope you have fun – both following this recipe  AND experimenting with it!  Enjoy!!  ~r

Caramel Turtle Bars!!We love chocolate and caramel here at Easybaked!!  Check out some of our other recipes that use this favorite combination.  Just click on an image to be taken to the recipe.

Turtle CheesecakeSalted Caramel Cookie Cup!!!Caramel Fudge Brownies!!Inside-out Caramel Apple!!

*****SPECIAL NOTE******  Ruthanne will be wandering the Amazon Jungle when this recipe posts.  If you don’t get replies to your comments or questions it is because I have no internet….I’ll be back soon though!!!!

Cream-filled Doughnut Cupcakes

Posted on

Doughnut Cupcakes

These cream-filled, chocolate glazed, doughnut-flavored cupcakes combine two favorites into one incredible dessert!  Use a fun mini-doughnut pan to make adorable decorations to top these yummy cupcakes!

Doughnut Cupcakes!

Ingredients: (makes 16- 18 cupcakes)

Cupcakes:

  • 1/2 c. butter, softened
  • 1/2 c. sugar
  • 1/2 c. brown sugar (packed)
  • 2 t. vanilla
  • 2 eggs
  • 2 1/3 c. flour
  • 2 1/2 t. baking powder
  • 1/2 t. baking soda
  • 1/2 t. salt
  • 1 c. milk

Cream filling:

  • 1 stick (4 oz) butter
  • 3/4 c. powdered sugar
  • 1 t. vanilla

Chocolate glaze:

  • 1 c. dark chocolate chips
  • 6 T. butter

Directions:

  • Preheat oven to 350F degrees
  • In a large mixing bowl, combine butter, both sugars and vanilla.  Beat on medium until combined.
  • Add eggs, one at a time, beating in between.
  • In a medium bowl combine flour, powder, soda and salt and blend.
  • Add flour mixture and milk, alternating between the two and beating well in between.
  • When batter is complete, scoop about 1 c. of batter into a large zip-top bag.
  • Clip corner and pipe into a Wilton Mini Doughnut Pan– fill each doughnut opening a little less than 1/2 full.
  • Bake mini doughnuts for about 5-6 minutes and cool on a rack.
  • Decorate them as desired (cinnamon, powdered sugar…I used a simple powdered sugar/milk glaze with food coloring and sprinkles)
  • Scoop remaining batter into cupcake liners in a cupcake tin, filling them about 2/3 full.
  • Bake at 350F degrees for about 18-20 minutes (test them when they come out, the centers took a little time to bake all through)
  • Cool cupcakes and core them (I use a Cupcake Plunger so that I have nice little circles to set back on top of the filling when I’m done.)
  • Make filling:  Place butter, powdered sugar and vanilla in a medium mixing bowl and beat on high until light and fluffy.
  • Place filling in a zip top bag and pipe evenly into each cupcake.  Place the cut-out top of the cupcake back on.
  • Make glaze by melting the chocolate chips and butter together in the microwave in 30 second increments stirring until smooth and shiny.
  • Cool just a little (so its easy to handle) and spoon or pipe onto top of each cupcake.
  • Before the glaze hardens, place a mini doughnut on top for decoration…so much fun!!!!!
  • Enjoy!

Creme-filled Doughnut Cupcakes!

My thoughts:  These cupcakes are a little work with the filling and the topping (and notice, dear fans, that I did NOT use a cake mix for these!!)  The extra effort really pays off in how good these cupcakes are.  Oh my.  Like doughnuts in cupcake form…perfect!  Enjoy!!!  ~r

Doughnut cupcakes!!

Try some of Easybaked’s other cupcake ideas.  Click on an image to get the recipe:

Cookie Dough CupcakesPile of Cupcakes!Rich Chocolate Ganache Mini Cupcakesblackberry cream cupcake


Cinnamon Roll Cheesecake with Cream Cheese Frosting

Posted on

Cinnamon Roll Cheesecake!!

This rich and creamy cheesecake has bits of cinnamon roll baked inside.  Little pockets of cinnamon and sweet brown sugar make it into nearly every bite.  You will have a hard time stopping at just one piece!!!

When a craving hits I generally create a brand new recipe to satisfy my curiosity.  A craving hit me right in the middle of church last Sunday.  Right in the middle of a great sermon on Romans I suddenly thought~ “I wonder what cinnamon roll and cheesecake would taste like all together”.  I wondered if you could use refrigerated cinnamon rolls as a crust…I wondered if you could swirl a brown sugar/ cinnamon mixture into a cheesecake without getting tons of cracks…I wondered if the cinnamon cream cheese tubs would work…I also listened to the sermon.  I’m fairly good at multi-tasking 🙂

When I got home I decided two things:

1. I am taking a vacation to Peru in a few weeks and I cannot spend any extra money- so the ingredients needed to be already in my house.

2. I would google “cinnamon roll cheesecake” to see what others had done.

The googling resulted in a surprise.  Several blogs featured recipes and they were all the same recipe from the same source!  Every one of the blogs just ranted and raved about the amazing-ness of this recipe.

I looked the recipe up in Culinary Concoctions by Peabody and realized I already had all of the ingredients.

It was meant to be.

Cinnamon Roll Cheesecake!!!!

It is, as all the other blogs out there have said, AMAZING.  Unbelievably good.  Exactly what I was hoping for in a combination of cheesecake and cinnamon roll.

It is also a labor of love.  Regular cheesecakes take some time.  This is a regular cheesecake and a batch of cinnamon rolls…all together.  Set aside some time and several clean mixing bowls!!

Here’s how to make it:

INGREDIENTS:

Cinnamon Roll Batter:

  • 2/3 cup sugar
  • ¼ cup butter, at room temperature
  • 1 egg
  • ½  cup  milk
  • 1 tbsp vanilla extract
  • 2 cups flour
  • 2 tsp baking powder
  • 1/2 tsp salt

Cheesecake filling:

  • 2 pkg. (8 oz. each) cream cheese, at room temperature
  • 1 cup sugar
  • 1 tbsp vanilla extract
  • 2 tbsp flour
  • 3 eggs

Cinnamon Filling:

  • 1/3 cup butter, melted
  • 1 cup brown sugar
  • 3 tbsp cinnamon

Cream Cheese Frosting:

  • 2 ounces cream cheese, at room temperature
  • 3 tbsp butter, at room temperature
  • 2 tsp vanilla
  • 1 cup powdered sugar
  • milk (if needed to thin frosting)

DIRECTIONS:

  • Preheat oven to 350 degrees F.
  • Grease a 9-inch Springform pan.

Cinnamon Roll Batter:

  • Using a mixer,  cream together the butter and sugar.
  • Add egg, milk, and vanilla. Beat for about one minute, scraping down bowl.
  • Add flour, baking powder, and salt to the creamed ingredients. Mix on low speed until throughly combined.

Cheesecake Filling:

  • In a separate bowl, use a mixer to beat cream cheese and sugar for about 2 minutes on medium-high speed.
  • Add the eggs one at a time, beating together scraping down the bowl after each addition.
  • Add the vanilla and flour and beat for another minute.

Cinnamon Filling:

  • In a small bowl, combine the melted butter, cinnamon, and brown sugar. Mix until thoroughly combined.

You have three individual parts to this cheesecake now.  The batter, the cheesecake and the filling.
Here is how to put them together:

  • Spread half of the batter onto the bottom of the Springform pan. It will be sticky and thick so spray your hands with baking spray and press down. It will be a thin layer, but trust me it will rise up during baking.
  • Pour all of the cheesecake batter on top of the cinnamon roll batter that is in the prepared pan.
  • Drop spoonfuls of the cinnamon filling over the entire top of the cheesecake.
  • Take the rest of the base batter and drop spoonfuls over the entire top of cheesecake. Once finished, take a knife to swirl the ingredients together.  I say swirl, but its really just a big yummy chunky mess– just kind of gently mix all the toppings together without digging into the bottom crust.

Cinnamon Roll Cheesecake - steps

  • Bake for about 50-55 minutes, cake will be puffy and lightly browned.
  • Let it cool for 20 minutes at room temperature and then cover and move to fridge for at least 4 hours (or overnight).  
  • Remove cake and let it warm up to room temperature just a bit. While you are waiting, make your cream cheese frosting.

Cream Cheese Frosting:

  • In a clean bowl, beat the cream cheese and butter together for about 2 minutes.
  • Add remaining ingredients and beat until desired consistency is reached. If too thick, thin out with milk.
  • Pipe over the top of chilled cheesecake and serve….so yummy!

Cinnamon Roll Cheesecake!!!!!My thoughts:  If you don’t mind a little extra prep time in the kitchen, this recipe is truly worth every bit of effort.  The best part?  Since it has cinnamon rolls in it you really CAN eat cheesecake for breakfast with no guilty conscience… and I can tell you that a piece of this with a cup of coffee really is a perfect way to start the day!!!!  Enjoy!!!  ~r

Is it cheesecake?  Is it cinnamon roll?It's BOTH!!!!!

Is it cheesecake? Is it cinnamon roll?
It’s BOTH!!!!!

Other cinnamon inspired treats from Easybaked:  Just click on an image to get the recipe!

Cinnamon Cheesecake SundaesMexican Chocolate MilkCinnamon Roll Cupcakes!Pumpkin Pie Dip!

Strawberry Lemonade Cupcakes!!!!

Posted on

Strawberry Lemonade Cupcakes!!!!

Two years ago today, I started a blog.  I had no idea it would blossom into what it is today, and no idea I would have so much fun with it!  I’ve made such great new friends, learned so much about photography and design, and loved every second of the process.

In honor of our anniversary, I chose the recipe that is (by far!) the most visited on the site and re-made it in cupcake form.  Strawberry Lemonade Cake is already on the Easybaked site twice:

Strawberry-Lemonade Layer CakeStrawberry Lemonade Birthday Cake

Strawberry Lemonade Layer Cake                       Strawberry Lemonade Birthday Cake

The Layer Cake is more like a torte, the lemonade mixture is more like a filling than a frosting.

The Birthday Cake has a lemonade frosting, and it is one of my very favorite frostings ever.  It’s soooo creamy and light.

Both recipes top the list of my most popular recipes, together they have been viewed just over 435,000 times (as of today…!)

It seemed fitting that I feature everyone’s favorite recipe to celebrate two years with all of you~ so let me present:  Strawberry Lemonade Cupcakes:

Strawberry Lemonade Cupcakes!!!!!

These are easy to make (much easier than a layer cake, in my opinion) and just the yummiest treat.  I loved the pink wrappers and the paper straws I found for these- I think they would be such a fun shower, picnic or birthday party treat!!

INGREDIENTS:

  • One box of strawberry cake mix (plus oil, water and eggs as directed on box)
  • 2- 8oz. packages of Philadelphia Cream Cheese (softened to room temp.)
  • 1 packet (0.23oz.) of Kool-Aid Lemonade
  • Yellow food coloring  (as desired for color)
  • 1- 7oz. container Jet-Puffed Marshmallow Creme
  • 1/3 c. powdered sugar
  • 8 oz. Cool Whip Topping
  • Confetti sprinkles and paper straws to decorate as desired

DIRECTIONS:

  • Make cake according to box and bake in 24 cupcake liners placed in cupcake tins, as directed.  Cool completely.
  • In a mixing bowl, cream together cream cheese, lemonade and yellow food coloring until smooth.
  • Beat marshmallow creme and powdered sugar into cream cheese mixture and then fold in Cool Whip until completely smooth.  
  • Spoon frosting into a zip top bag that has a piping tip inserted into one corner (I used a Wilton 1M star tip).
  • Pipe frosting on tops of each cupcake- you can be generous, as this recipe makes a lot of frosting and the frosting is so light and fluffy.
  • Decorate as desired.
  • Refrigerate and serve chilled.  
  • Enjoy!!!!!

Strawberry Cupcakes!!!!

My thoughts:  A tried-and-true recipe in a fun new format…what’s not to love about that?!?  I’m incredibly thankful for all of YOU who visit, comment, “like”, rate and (most of all) MAKE the recipes I create!  I had no idea how much I would love hearing from complete strangers that a recipe “made my husband’s birthday perfect” or “made all the kids at the party laugh”.  When I hear how happy a recipe makes you and your family it literally makes my day…and fuels my desire to bake and share more!  Here’s to another year of Easybaked recipes!  Enjoy!  ~r

Strawberry Lemonade Cupcakes Front and Back

06-13-14 Did you know, that this recipe is now available in a set of adorable note cards? With a picture of these cupcakes on the front, the recipe on the back, and lots of space inside to write a note, these are a PERFECT little gift!  Why send just a card, when you can send the gift of a recipe as well?!?  Click here for more information and to order.

Strawberry Lemonade Cupcakes !!!!

A year of easybaked recipes.....

Such a fun year….check out our photo gallery for these and other yummy treats!

Easter Mini-Cheesecakes

Posted on

Easter Cheesecake Cups

These colorful mini-cheesecakes are made with malted milk ball eggs and have a sugar cookie crust…yum!

I love seasonal candy.  I love Cadbury eggs at Easter and Tim Tams at Christmas and conversation hearts at Valentines Day….but the Whopper brand malted milk ball eggs are the best.  Did any of you use the outside shell as colorful “lipstick” as a kid?  So fun!  Crunch them up in a whipped cheesecake and put them in a fun Mini Cheesecake Pan for a dessert that will make everyone smile!

INGREDIENTS: (makes 12 mini cheesecakes)

  • One Nestle Sugar Cookie Dough Bar (the refrigerated dough that is scored into 24 squares)
  • 8 oz. of Philadelphia Cream Cheese (softened)
  • 1/3 c. granulated sugar
  • 2 t. vanilla
  • 1 (8 oz) container of Cool Whip
  • 2 bags (10 oz. each) of Whopper’s Robin Eggs (I used mini’s, but I’m sure the full size would work fine too.)  You could use regular Whopper candies to get the same flavors when the seasonal Robin’s Eggs are not available.

DIRECTIONS:

  • Preheat oven to 350 degrees.
  • Prepare pan by placing the metal disks into each cup (the Mini Cheesecake Pan comes with metal disks that sit at the bottom of each cup- like the bottom of a spring form pan!)
  • Break apart 1/2 of cookie dough bar.  (This recipe makes 12 cheesecakes but the bar contains 24 cookies.  You can double this recipe and make 24 cheesecakes or just make the other 12 cookies another time.)
  • Roll each cookie dough square into a ball and put it into a greased cup in the mini cheesecake pan.
  • Bake at 350 for 12-14 minutes.
  • Cool completely.
  • In a mixing bowl, cream together softened cream cheese and sugar. 
  • Add vanilla.
  • Smash one full bag of Malted Milk Chocolate Eggs.  I put them in a ziplock , placed them on a cutting board and hit them with a hammer until they were in pieces about the size of mini chocolate chips.
  • Fold about 2/3 of Cool Whip and  the one bag of smashed eggs into the cream cheese mixture.
  • Spoon cheesecake mixture into a large zip-top bag.  Clip a large piece of one corner off and pipe filling evenly over each cooled cookie crust.
  • Use a knife or spatula to smooth tops of cheesecakes flat across top of pan.
  • Freeze for about 3-4 hours (or overnight)
  • Remove from freezer, pop cheesecakes out by pushing up on the bottom of each cup. (This took a little practice for me- you have to push it up high enough to grab it by the cookie part.)
  • Remove the metal disk from the crust.
  • Pipe remaining 1/3 of Cool Whip on top of each cheesecake and decorate with  malted milk chocolate eggs as desired
  • Keep refrigerated until serving.

Easter Cheesecake Cups

My thoughts:  These are a yummy, colorful and fun Easter treat!  They go together fast too- which is always a bonus for me.  You can make these in a muffin tin, if you don’t want to invest in the mini-cheesecake pan- but mine has been a great addition to my kitchen- so many fun things to make in it!!!  Hope you enjoy these fun little treats!!!  ~r

Easter Cheesecake Cups!!

Other Easter ideas from Easybaked (click on an image to get the recipe):

Chocolate Easter Eggs with Peanut Butter FillingEasy Easter cut out cookiesOreo pops!!!!!Raspberry Confetti Kisses

Other ways to use your Mini Cheesecake Pan:

frozen s'more cupsMini Pineapple Upside Down CakesMini chocolate chip cookie cheesecakesMini Cookie Dough Cheesecake

Gender Reveal (Surprise!) Cupcakes

Posted on

Gender reveal cupcakes!!!These cupcakes hold a secret—- is it a boy, or is it a girl?  The latest trend of having a gender reveal party is SO much fun when the gender is revealed with a yummy dessert!  Plus, I’ve included free printable cupcake toppers to go along with your party theme!

Gender reveal Cupcakes

A few weeks ago, Easybaked featured  a Polka Dot Cake using a Cake pop maker.  It was so much fun that I couldn’t help but think of other ways to use the idea.  These cupcakes are just wonderful– when you bite in the color is seamless- you can’t even tell that the cake pop was baked ahead.  Want to know how to do this?

Here we go:

INGREDIENTS:

  • 1 white cake mix (for about 18 cupcakes) or 1 white/ one chocolate for a combo and about 36 cupcakes
  • The oil, eggs and water required by your boxed mix(es)
  • Gel food coloring
  • Frosting (I used my buttercream recipe ~double it if you add the second cake mix)

This little chart should help you see how many cupcakes are made with just the white mix and how many are made when you use both a white and chocolate mix (I’m bad with math…I need visuals!!):

Gender reveal cupcakes

DIRECTIONS:

  • Plug in/heat up your cake pop maker
  • Make white cake mix according to box.
  • Take about 3/4 cup (1 1/4 cup for the double batch!) of batter and place it into a smaller bowl.
  • Color the batter using color gel (I like Wilton brand of Gel food coloring because they always come out bright.  Try Aqua or Pink.)
  • Follow the directions on your cake pop maker to use the colored batter to make cake balls.  Helpful hints:  work fast and use a small cookie scoop to evenly spoon batter into cups, and check them- I burnt my 1st batch following the directions!  You should have enough batter to have a practice round and adjust.

Color batter with gelsScoop batter into cake pop maker

  • While cake balls cool, spoon small amounts of your remaining white cake mix into 12-18 cupcake liners in a cupcake tin. (start with 12 and see how much batter you have left for the rest).
  • Spread the batter out along the bottom so you have a thin layer in each liner.
  • Set a cooled cake ball in the center of each liner and carefully scoop batter over the top (I found a medium cookie scoop to make this job MUCH easier!)

    Set cake ball into center of cupcake...Scoop batter over top of cake ball.

  • After your 12 are filled, continue on until you have used up all of your cake batter.
  • Bake at 350F degrees for about 20 minutes.
  • (If you are making the double batch, make your chocolate cake mix while the white cupcakes bake.  Set these up with the cake balls hidden inside the batter and bake for the same amount of time.)
  • Remove from tins immediately and cool on the counter.  Frost and decorate as desired.

Gender reveal cupcakes- two tone frostingPiping two tone icing colors!

Do you see how I piped the two-tone icing colors?  I’m sure there must be a better method than this…I am so not a cake decorator.  It turned out ok- but it was a little fussy to keep equal pressure on both colors at the same time.

The toppers are easy and inexpensive to make.  Simply click here to get a free pdf file of the owl toppers.  Print them on a heavy card stock paper, cut them out and use double sided tape to stick them back to back around a toothpick (one boy owl and one girl, back to back).

It's a boy!!!

It’s a boy!!!

My thoughts:  I love how the final cupcake is….just a cupcake.  It isn’t anything fancy or cream-filled…just a cupcake with a surprise.  These would be fun cupcakes for any party- you could even incorporate them in a game—whoever gets the (__color___) cupcake gets a prize!  I hope these make their way into a party of yours soon!  Enjoy!!! ~r

It's a girl!!!

It’s a girl!!!

Want some other shower ideas from easybaked?  Click on the image to be taken to the recipe.

Gender Reveal CupcakeRaspberry Confetti KissesGender reveal cookiesKool-Aid Truffles!!