Tag Archives: chocolate

Fourth of July Dessert Ideas!

Posted on

Bomb Pop Cupcakes!!!


Bomb Pop Cupcakes!

Oh my, I love the fourth of July! I love the picnics, and pool parties, and cookouts, and fireworks…and the time with family!

My parents have always (like always, for as long as I can remember!) had a giant pool party for the fourth and invited our entire extended family for burgers and brats and volleyball and sunshine….and for a competitive display of our best “at home” fireworks we could find, later in the evening. I have so many fun memories of chasing fireflies and waving sparklers with my cousins (that are all grown with kids of their own now!). This year is different. For starters, mom isn’t here to orchestrate the complexities of the celebration. The house is in boxes and bags- ready to show to whomever might be interested in buying, and the pool and yard are immaculately kept. Pool toys and floats are all deflated and either sold or put away. Sometimes I sit on the back porch and watch the fireflies and remember all the laughter and fun.

I know that these times are not forever over. This year is different, but once dad settles into his new place there will be other celebrations and family times over the fourth. This year though…my heart wasn’t in the “create something new and fun” place. So instead, I thought you might enjoy a collection of some of my previous red-white-and-blue recipes. You can click on the photo or the title, to be taken to the recipe.

American Flag Oreo Pops!!!!

American Flag Oreo Pops

Patriotic Polka Dot Cake!!!!

Patriotic Polka Dot Cake!!!

Patriotic Flip Flop Cookies!!!!

Flip Flop Cookies for the Fourth!

Patriotic Tie-Dye Cake!!!!

Patriotic Tie-Dye Cake!

Stars!!

Stars and Stripes Brownies!

Patriotic Bundt Cake!!!!

Red White and Blue Bundt Cake!

And if you are grilling out for the Fourth, you might need these…

BBQ Grill Cupcakes!!

BBQ Grill Cupcakes!

Hamburger Cookie!

Grilled Burger Cupcakes!

However you celebrate this summer, I hope you have fun making memories with your friends and family~ and I hope you enjoy trying fun, new recipes that become a part of your family traditions! ~r

73090_461339542512_3894329_n

Fishing Pond Cupcakes

Posted on

Fish Pond Cupcakes9

These delicious chocolate cupcakes are filled with a blue frosting “pond” and salty goldfish crackers! A perfect treat for the fish (or fishing!) lovers in your life!

We have a fishing theme on Easybaked these past few weeks. Last week I shared my fishing bobbers and this week a cute little fishing pond! I cannot underestimate the yummy sweet and salty combination of these cupcakes! Those goldfish are a perfect little bite of salt- and simply adorable! These are cute for Father’s day or Birthdays~ and you can even add a few little flower sprinkles for the girls in your life that adore their goldfish!


Fish Pond Cupcakes

These are easy-peasy to make, they use a boxed cake mix and a tub of frosting (although, if you are an over-achiever you certainly could do both from scratch!)

Here’s how we made them: (printable recipe)

INGREDIENTS:

  • One boxed chocolate cake mix (plus water, oil and eggs to make according to package)
  • Two tubs of white frosting
  • About 2 cups of green sugar crystals
  • One bag of Goldfish Baby crackers (they are smaller than the original crackers)
  • Green and blue food coloring gels

DIRECTIONS:

  • Make cake mix according to package and bake in 24 cupcake liners set in a baking tin. Cool completely.
  • Open one tub of frosting, spoon it into a bowl, heat it for about 15 seconds in the microwave to soften it a little and color it green with food color.
  • Open the second tub of frosting spoon it into a bowl, heat it for about 15 seconds in the microwave to soften it a little and color it blue with food color. Spoon it into a zip-top bag and set aside.
  • Pour green sugar into a small bowl.
  • To assemble: Cut a pond-shaped circle hole into the top of each cupcake using a small knife and pull out the core.
  • Dip the top of the cupcake into the green frosting and then into the green sugar, coating it completely.
  • Cut a corner off the bag holding the blue frosting and pipe it into the pond opening on the top of the cupcake.
  • Add a couple of goldfish and flower sprinkles if desired –and enjoy!!!

Fish Pond Cupcakes1Fish Pond Cupcakes8

Fish Pond Cupcakes7Fish Pond Cupcakes6

Fish Pond Cupcakes5Fish Pond Cupcakes10

 My thoughts: How fun!!! I hope you get a chance to make these cute little cupcakes for your next “fishy” get-together ~ maybe this weekend at the lake cottage??? ~Enjoy!!!

Fish Pond Cupcakes

Need some other fun summer ideas? We have lots of them! Click on a photo to see the recipe:

Cheesecake Sundaes frozen s'more cupsRoot Beer Float Cupcakes!!!!Pina Colada Cupcakes!

Banana Split Cupcakes!

Posted on

Banana Split Cupcakes

Do you like banana split sundaes? If so, you will love these little cupcake treats- tasty and oh, so cute!!

I love going out for ice cream- not the soft-serve window kind, but the sit-down in a cute parlor with a million combinations of ice creams and toppings to decide from kind. I usually skip the banana split, because I’m not a huge fan of bananas unless they are in bread (or, in this case a cupcake!). Banana splits are the gold-standard of ice cream though- they have that sundae “look” to them. They are pretty.

I wanted to capture the look, and flavor of a sundae in these cupcakes and I love how they turned out! YUM!!!!

A few months ago I made Root Beer Float Cupcakes using scoops of Cool Whip as ice cream. They were so easy and cute and DELICIOUS, that I used the same idea here~ with banana cupcakes and a yummy strawberry ice-cream-topping filling!

Banana Split Cupcakes2 Want to try them? Here’s how we made them: (printable recipe)

INGREDIENTS:

  • One boxed banana cake mix (I used Duncan Hines), plus water, oil and eggs to make according to box.
  • 1 stick (1/2 cup) of salted butter (softened)
  • 1 stick (1/2 cup) of unsalted butter (softened)
  • 1 1/2 cups of powdered sugar
  • 2 teaspoons of strawberry flavoring
  • 2 tubs of Cool Whip (frozen)
  • One jar of strawberry ice cream topping
  • One bottle of chocolate “shell” ice cream topping
  • 1/2 cup of chopped pecans
  • Sprinkles and spoons (optional)

DIRECTIONS:

  • Make cake mix according to package and bake in 24 cupcake liners in muffin tins.
  • Make frosting by combining butters, powdered sugar and strawberry flavoring in a large bowl and beating on high until light and fluffy. Place in a zip-top bag, fitted with a decorating tip.
  • When cupcakes are cool, remove a core from the center using a knife or a cupcake corer. Spoon about 1 tablespoon of strawberry ice cream topping into the middle (you could use pineapple here too, if you wanted) Place “top” of core back on cupcake.
  • Use a cookie scoop or a small ice cream scoop to scoop frozen Cool Whip onto the top of one cupcake. Immediately pipe frosting around the edges of the scoop to hold it in place. Keep cupcakes chilled as soon as they are frosted, and keep your second tub of Cool Whip in the freezer until ready to use.
  • Once all cupcakes are frosted, drizzle them with chocolate shell- this makes a little bit of a mess, but I just dropped them into a second cupcake liner to catch the drips 🙂

Banana Split CupcakesBanana Split Sundae

  • Immediately sprinkle with nuts and decorations.
  • Keep cupcakes refrigerated until serving.
  • Enjoy!!!

Banana Split Cupcakes

My thoughts: These are a little more time consuming that your average cupcake– but look at how fun they are!! The flavors and textures are just perfect too- that cold Cool Whip and those crunchy nuts with the banana cupcakes… YUM! I really hope you get a chance to try these little treats! ~r

Banana Split Cupcakes

Other ice cream- inspired treats here at Easybaked: (click on a photo to see the recipe)

Butterscotch Ice cream towers!!!!Heath Bar Ice Cream Dessert3Raspberry Lemon Cream Cups!!!Ice Cream Cake

Cupcakes for Puppies!!!

Posted on

Pupcakes

These delicious little peanut butter cupcakes are a yummy treat for puppies and people!

(Just don’t sprinkle the people-ones with dog treats!)

Pupcakes

So, I have this dog named Casper.

He was an answer to prayer 6 years ago and he has been making me smile and cheering my heart ever since. His 6th birthday is coming up in June and I wanted to celebrate with a dessert made just for him. I took my peanut butter cookie recipe (which is delightfully simple, using pup-friendly ingredients) and scooped it into mini-muffin tins to bake. They bake up into adorable little bite-size treats. I topped the puppy ones with whipped cream and puppy treats. Then I added a little chocolate on top of the “human” variety.

Peanut butter cookie cupcakes

Here’s how we made them: (printable recipe)

INGREDIENTS: (makes 24-30 mini cupcakes)

  • 1c. creamy peanut butter
  • 1c. sugar
  • 1 egg

DIRECTIONS:

  • Preheat oven to 350F degrees.
  • Mix peanut butter, sugar and eggs together in a mixing bowl.
  • Use a medium size cookie scoop to scoop dough into mini cupcake liners placed in a mini cupcake tin.
  • Bake at 350 degrees for 12-14 minutes.  Cool completely.
  • Serve plain, or top with a little whipped cream and dog treats (for dogs)
  • I like a little chocolate with my peanut butter (for humans ONLY though- chocolate makes puppies sick!)
  • Enjoy! (and help your pup with that paper wrapper!)

Pupcakes7

Pupcakes1

Just like that, his “pupcake” is gone! (he needed a little help with the paper wrapper…)

Then we played with the extra whipped cream a little bit…just for fun.

Pupcakes6Pupcakes5

Love him!!!!!

My thoughts: Easy, fun and yummy for both you and your furry friends. Casper and I shared these with both human and puppy friends and they were a hit! There are only 3 basic ingredients in these, but you’ll want to make sure that neither dog nor human have allergies to them before serving!  ~Enjoy!!!

Casper and his white-dog cupcakes

Don’t miss Casper’s other recipe feature here: “Cupcakes for Casper”

Chocolate Crossword Cookies

Posted on

Crossword Cookies1

These delicious chocolate cut-out cookies are the perfect way to spell out your love to Mom on Mother’s Day!

Goodness, I love these cut-out cookies. They are one of my very favorite chocolate cookies and they roll out and cut beautifully! I’ve used them often with various projects here on Easybaked.

This Mother’s Day is different. It is my very 1st Mother’s Day without a Mom. For those of you who follow me here at Easybaked, you know that we lost mom very suddenly last Christmas season to cancer. Almost every day feels strange without her here, but I guess Mother’s Day seems even more strange.

I’ve had a lot of people ask me if I would have a recipe this year here in celebration of Moms- and I said, “Yes!”

Moms are such a wonderful gift, and if you have one this weekend– give her a big hug and really enjoy having her in your life. I have no regrets about my time with my mom- we made so many wonderful memories together and I love thinking about all the times we spent talking and laughing in my 44 years.

This idea is for her. She was positively addicted to crossword puzzles, and I know that these cookies would have made her smile.

Crossword Cookies4

My icing skills are not something to be terribly proud of…man, I cannot draw a straight line!!!!

Here’s how we made them: (printable recipe)

INGREDIENTS: (makes about 30, 1 1/2” square cookies)

  • 1 sticks (1/2 cup) butter, softened
  • 3/4 cup sugar
  • 1 egg
  • 1/2 teaspoon vanilla extract
  • 1/3 cup unsweetened cocoa powder
  • 1 1/2 cups flour
  • 1/4 teaspoon salt
  • 1/4 teaspoon baking powder
  • Wilton’s candy melts (to mold or write letters with)

DIRECTIONS:

  • Preheat oven to 350F degrees.
  • Add butter, sugar, eggs, vanilla and cocoa together in  large mixing bowl.
  • Blend on medium speed with a mixer until smooth.
  • Gradually add dry ingredients and mix until smooth (use clean hands at the end, to knead into a soft ball of dough)
  • Roll out cookie dough on floured counter, using a floured rolling pin.
  • Cut into 1 1/2″ squares and place on a parchment-lined baking sheet.  
  • Bake for 8 to 11 minutes until the edges are firm.
  • Gently slide parchment paper off of cookie sheet and onto a flat surface. 
  • Before frosting, make letters by using a candy letter mold in 1″ letters. Pipe melted Wilton’s Candy Melts into the letters you need and allow them to harden completely before tapping to remove. You can also just “write” letters on the frosted cookies using melted chocolate or even use pens designed to write in edible ink.
  • Frost using Royal Icing.  Click here for my printable royal icing recipe and instructions for use.
  • As soon as you frost, lay letters in place before the frosting hardens (if you are “writing” directly on the cookie you will wait until the frosting is very hard 1st).
  • Decorate extra cookies with fun sprinkles.

Crossword Cookies

My thoughts: These are yummy little cut-outs! If you don’t want to go with a crossword theme, you can cut these into any shape and decorate them just for your mom!

Crossword Cookies

I will leave you with a (very!) old picture of my mom and I together. I’m so thankful for all the years between this picture and now.

photo

Happy Mother’s Day!!!

Looking for that perfect gift for moms and grandmas? Get them my cookbook- specially designed to use with kids and grandkids, teaching them both kitchen skills and about God’s love for them! Fun!!!

Life is Sweet Baking DevotionalLife Is Sweet: 12 Baking Devotions for Kids

Bajadera Torte (a recipe from Croatia)

Posted on

Bajadera Torte

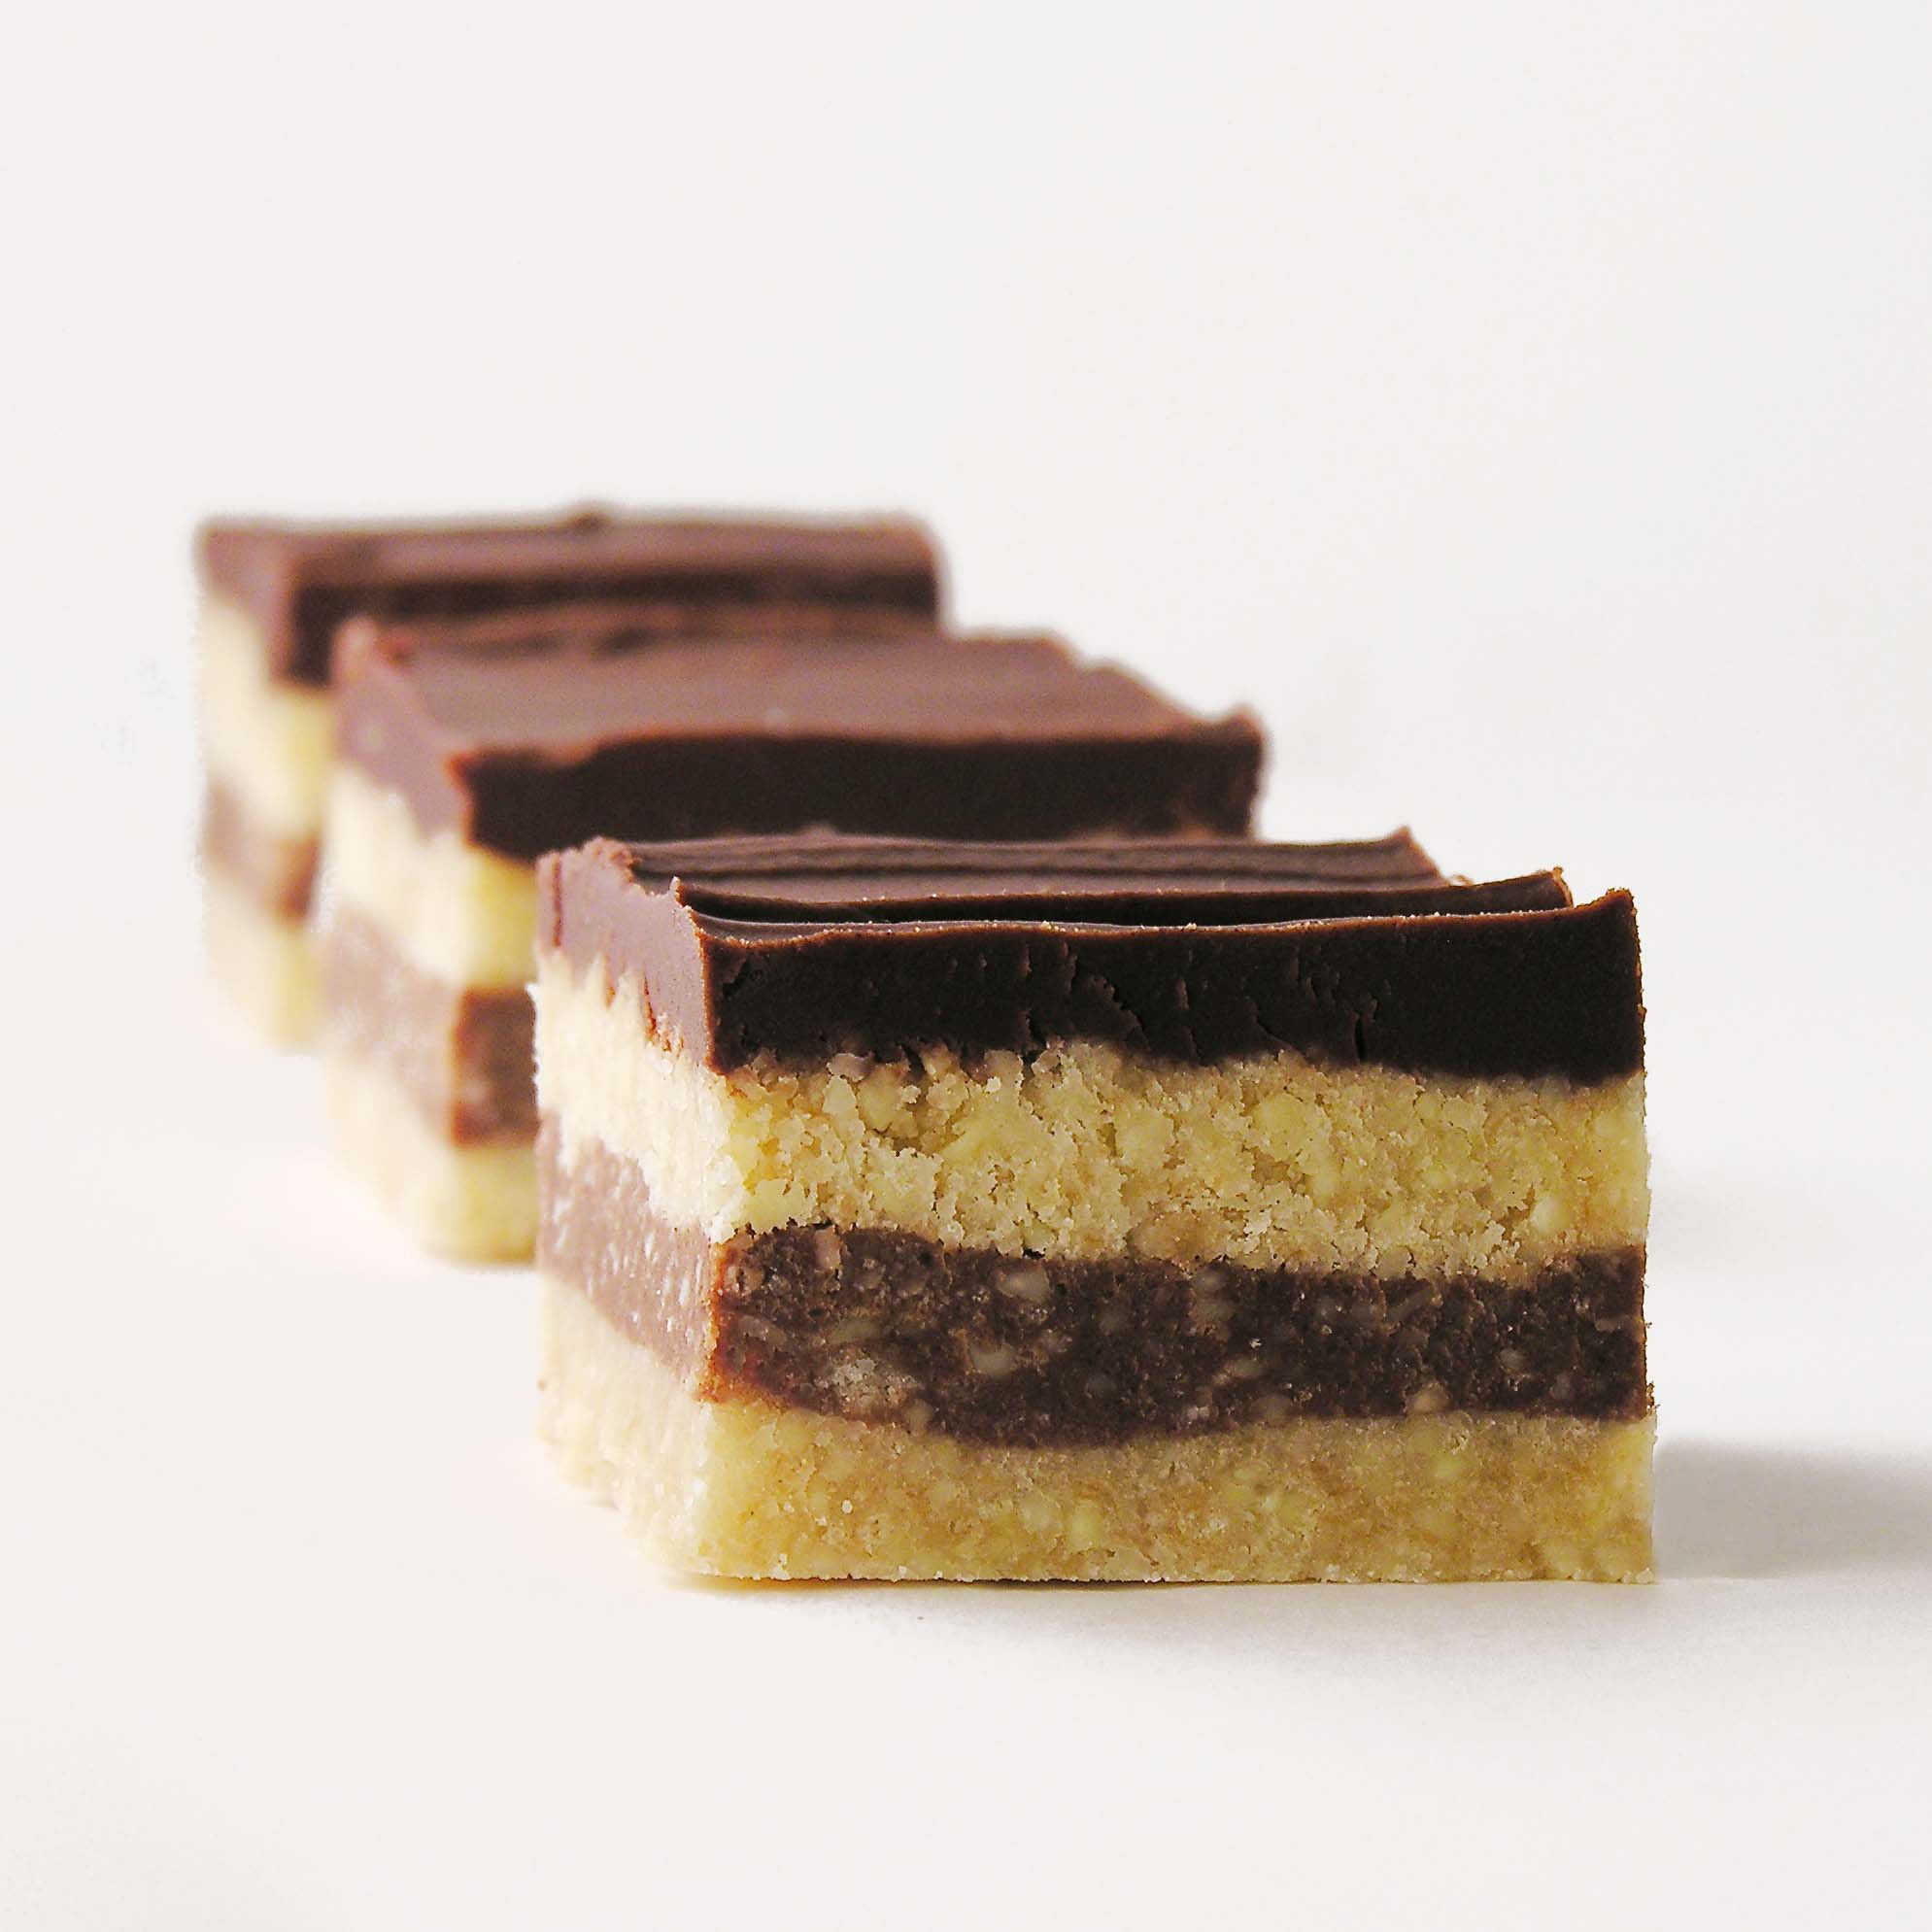
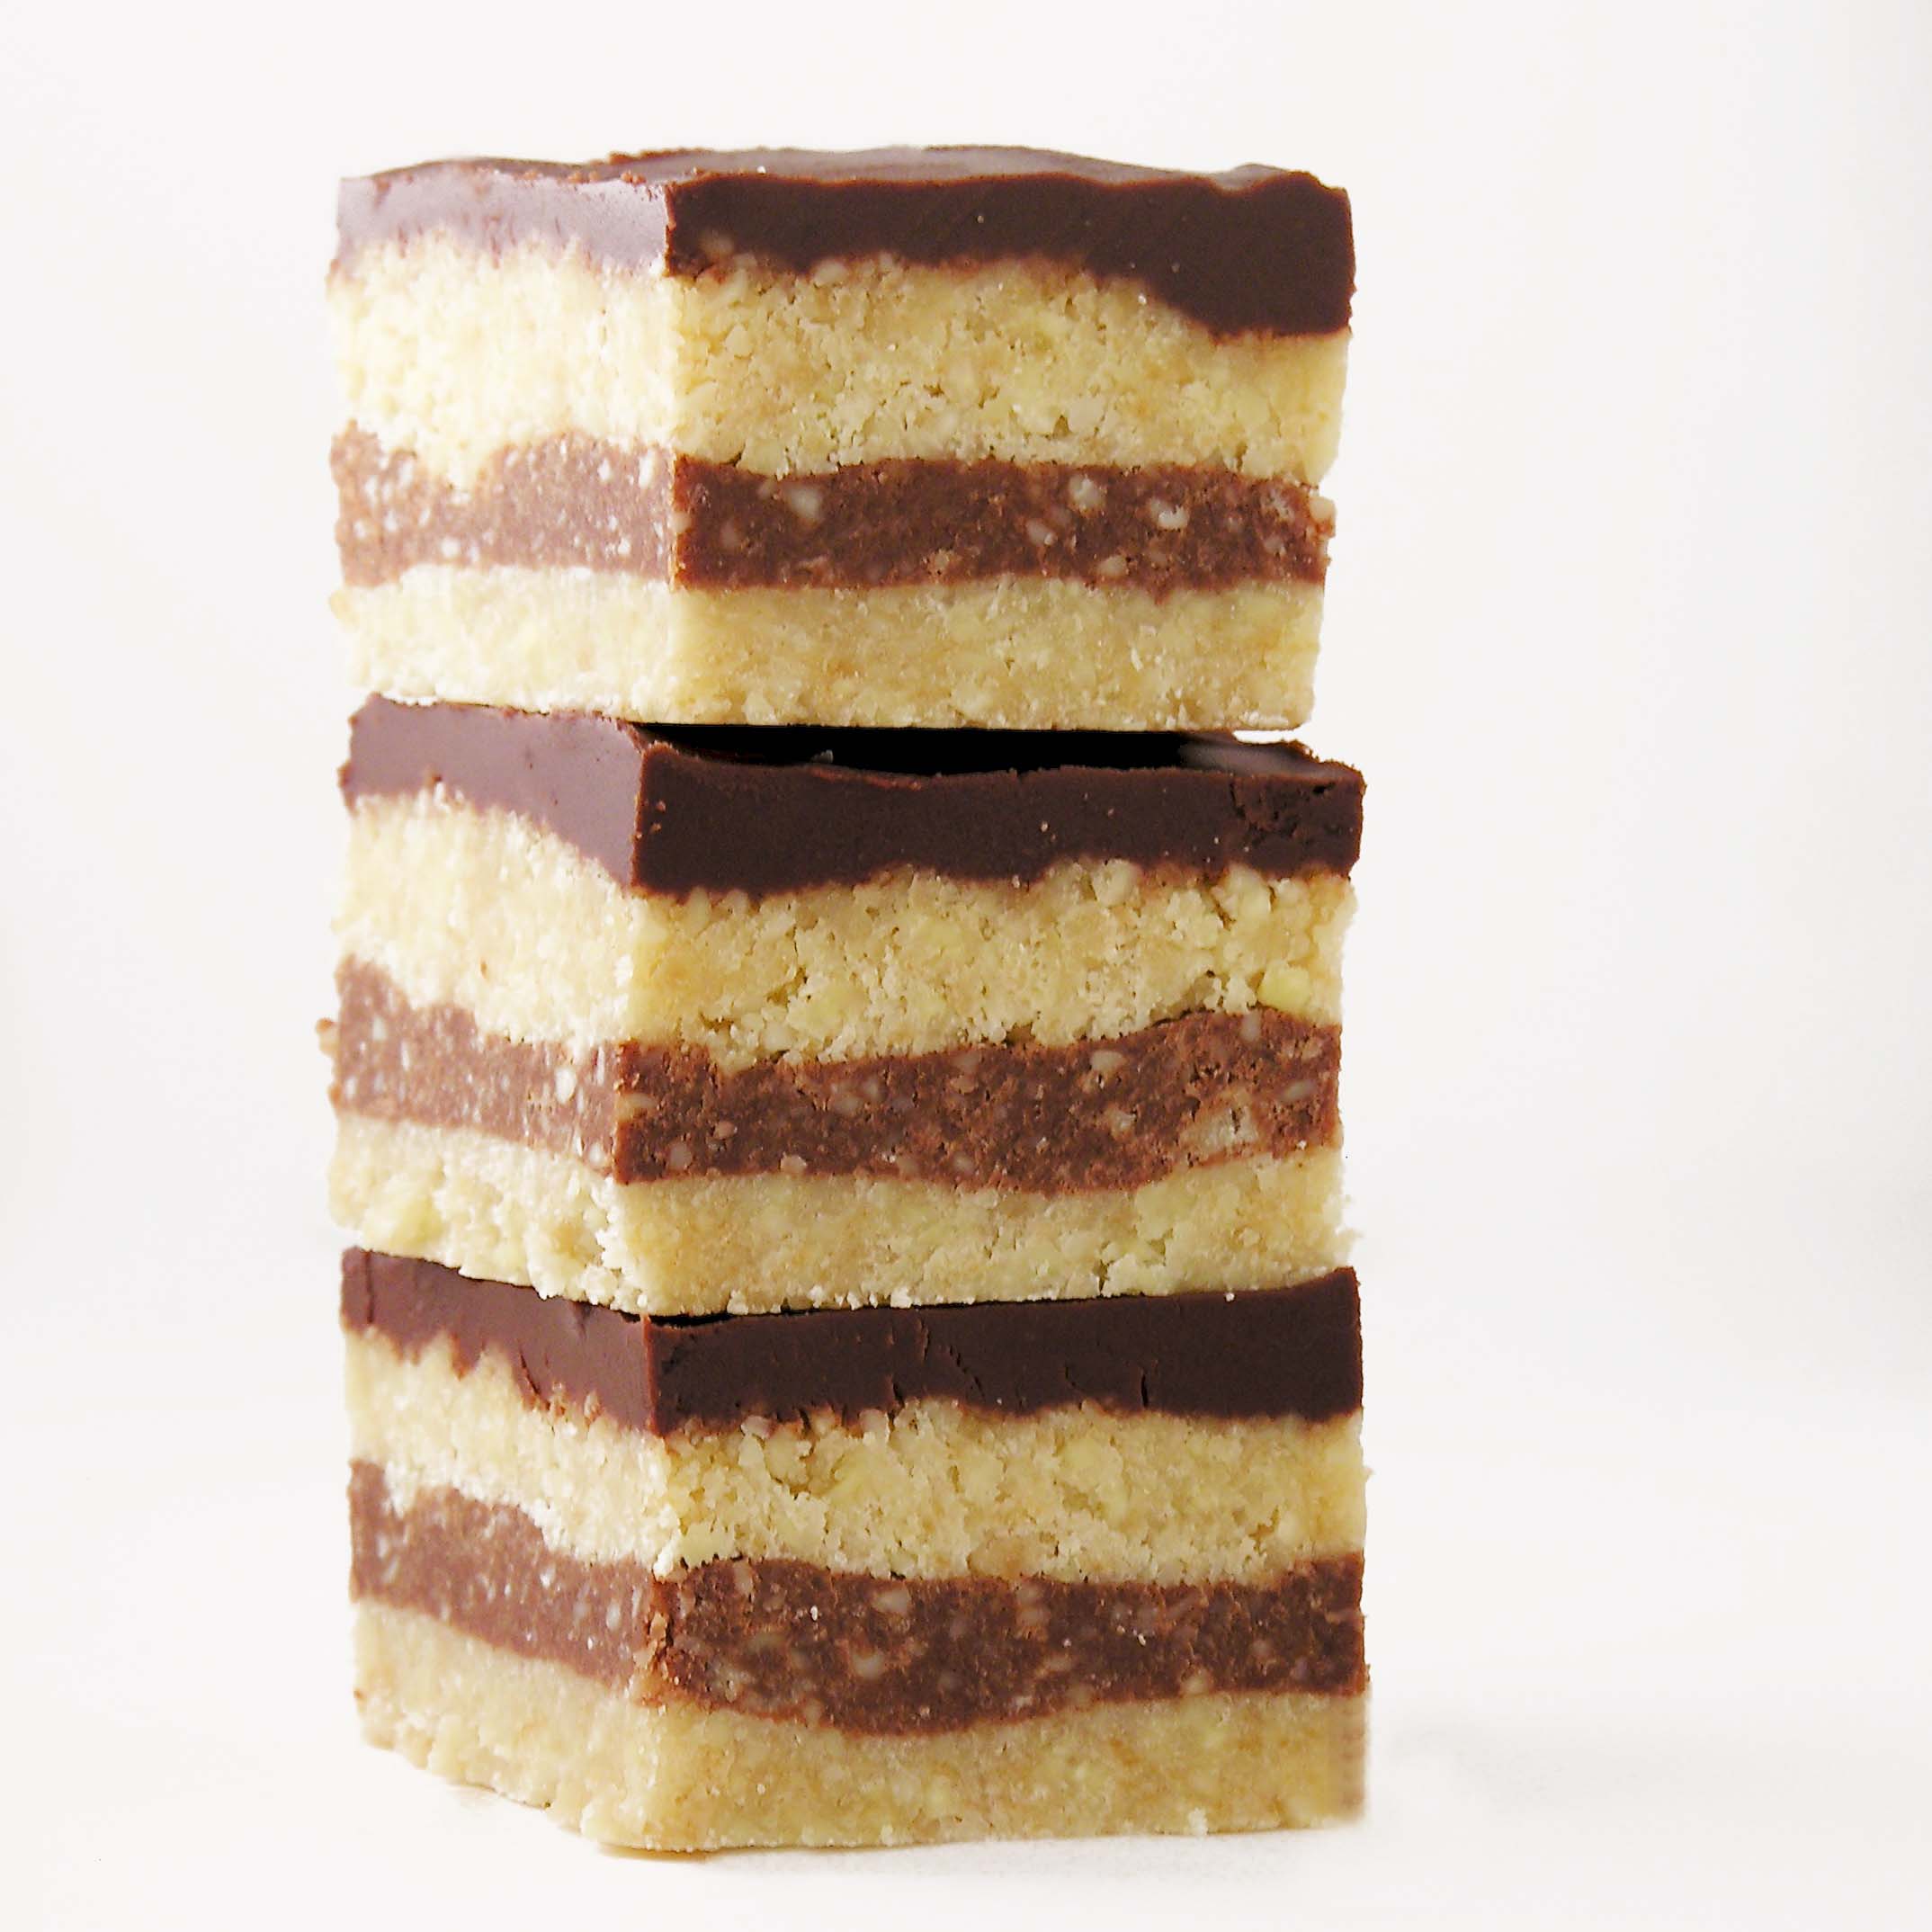
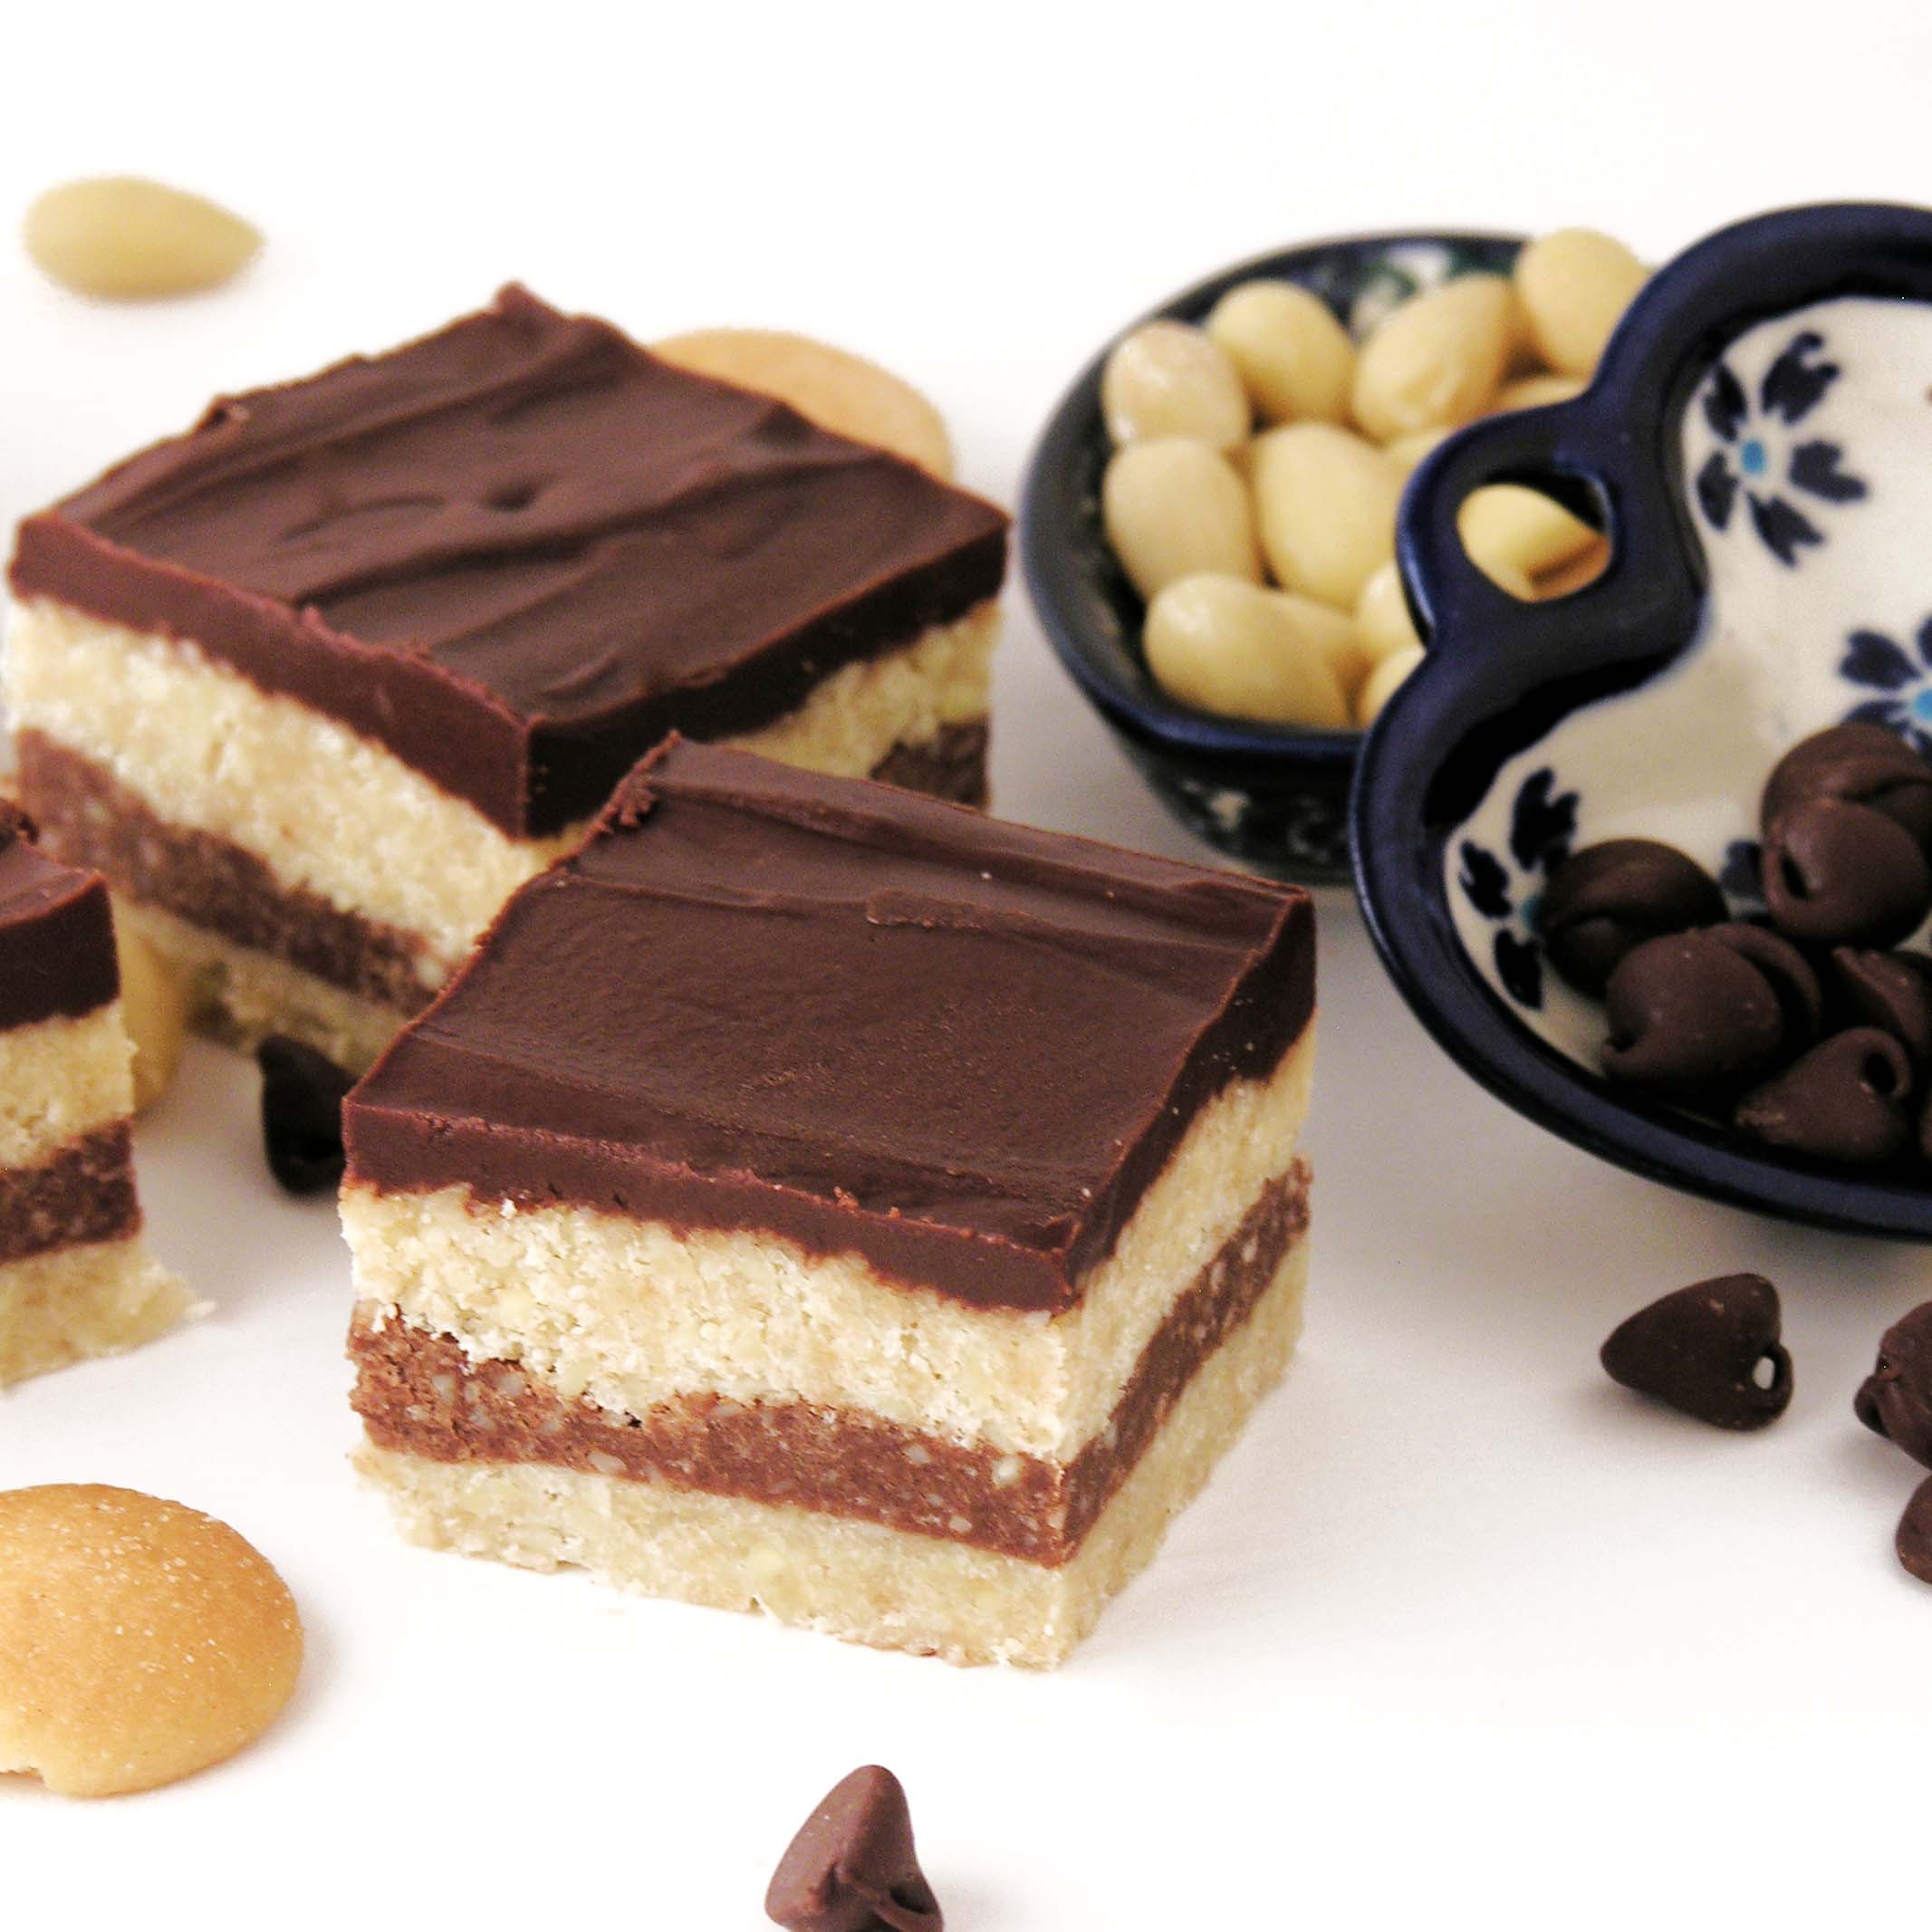
Layers of cookies, almonds, and chocolate make this dessert recipe from the country of Croatia a beautiful, and totally unique treat!

There are so many of you who check in here on Easybaked every week for my latest dessert creation, and I feel like we have become friends, you and I. I follow many of your blogs and I’ve heard about your celebrations and sadnesses.

Blog friendships are a strange thing though. Most of you only know me as a baker. With a cute little white dog. That is a part of who I am, but it is really just a tiny little sliver of my life here on planet earth.

  • Did you know that about 2 years ago I lost my job in Genetics? I’d worked in medicine for 23 years and budget cuts did us in.
  • Did you know that instead of staying in medicine I spent 8 months in Rough Rock Arizona, working as a missionary with a little Navajo church?
  • Did you know that last fall I began raising support to be a full-time missionary with Josiah Venture- reaching out to young people in Eastern and Central Europe with God’s love for them?

Some of you who have faithfully followed Easybaked over the years know bits and pieces about these parts of my life, but the rest of you probably didn’t know those things. Today, I’d like to introduce you to the mission organization I am working with by sharing a recipe from one of the countries we are in: Croatia!

Bajadera Torte

Aren’t those just so much fun? I can tell you, they are absolutely delicious too- very buttery and flakey.

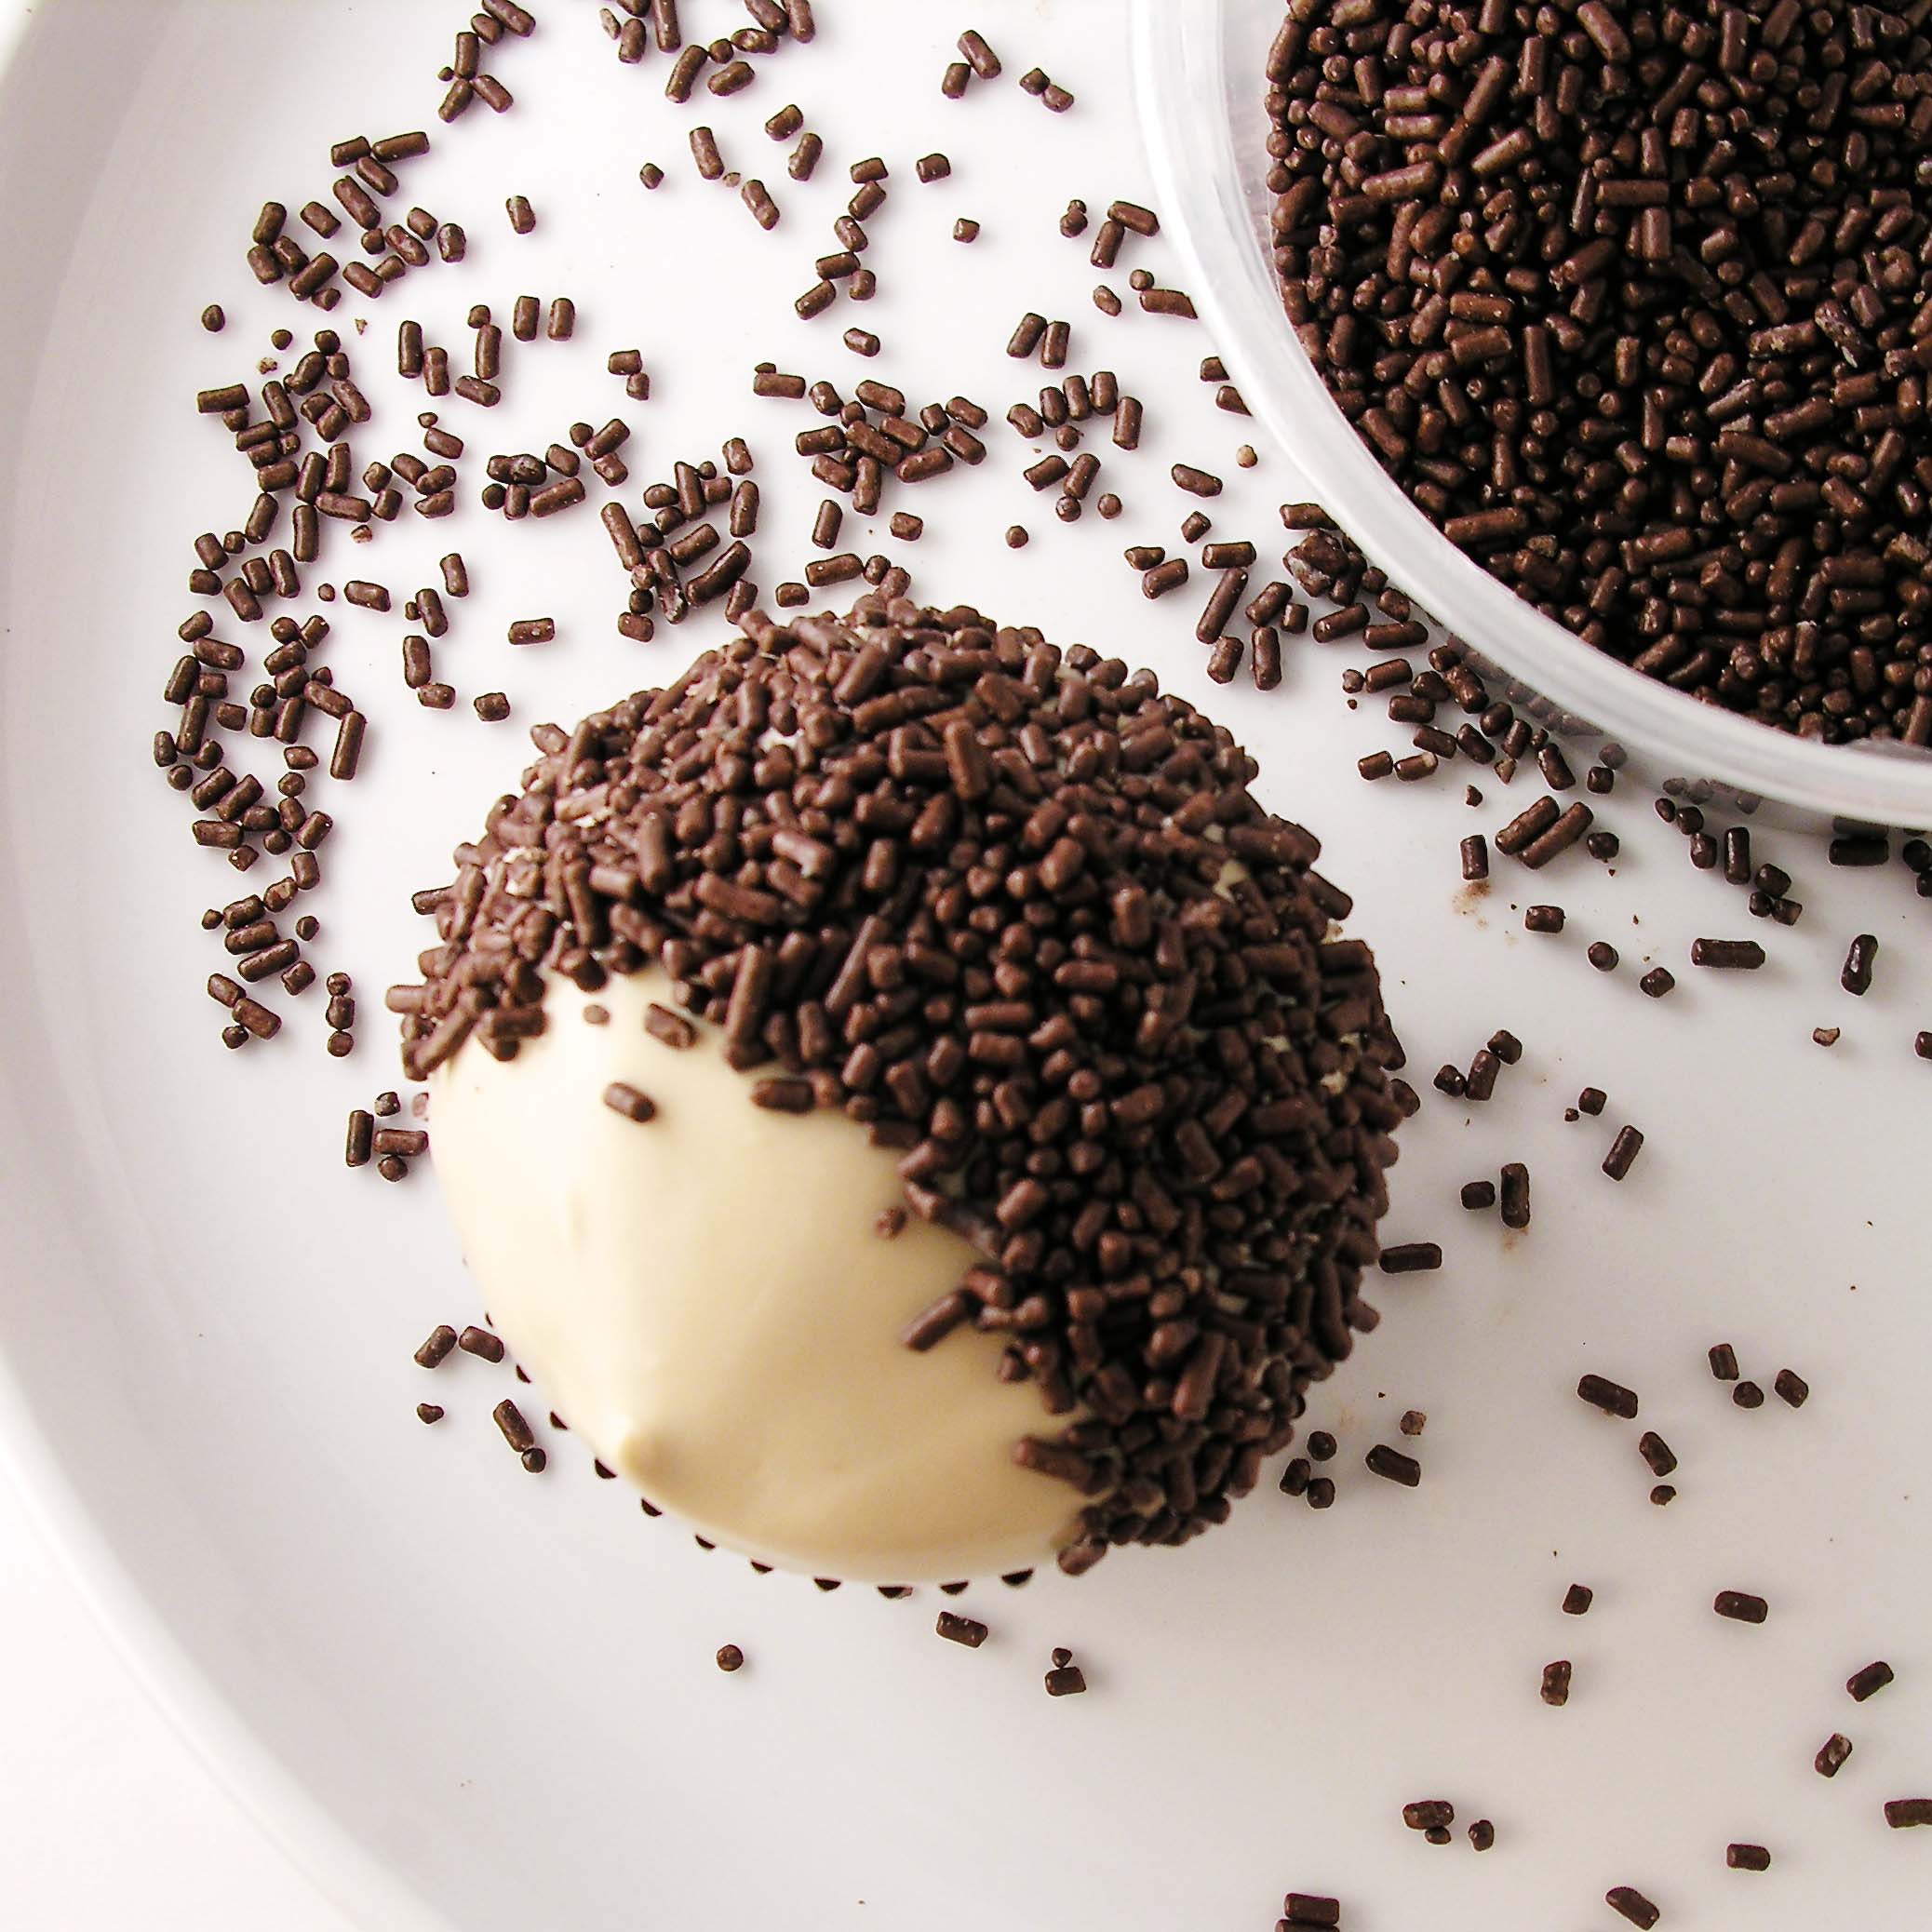
These are a no-bake dessert and I think they are a perfect recipe for kids to help with! I read about 20 recipes for these online and there are a ton of different ways to make these (and lots of opinions about which version is the most authentic!) I will tell you that these are NOT authentic because rather than using “tea biscuits” or “butter cookies” I used good ol’ Nilla Wafers! You can certainly try the recipe with a more European-type cookie base, but I wanted to be practical, and every American family can get their hands on a box of Nilla Wafers!

Here is how we made them: (printable recipe)

INGREDIENTS:

TORTE:

  • 3 cups of vanilla wafers (or another plain tea-biscuit sort of cookie)
  • 1 1/2 cups of blanched, peeled almonds (I found these in produce at my grocery)
  • 1 1/4 cups of sugar
  • 6 Tablespoons of butter
  • 1/4 cup water
  • 1/2 cup of semi-sweet chocolate chips

GLAZE:

  • 1 cup of semi-sweet chocolate chips
  • 6 Tablespoons of butter

DIRECTIONS:

  • Line an 8 inch square pan with aluminum foil.
  • Place vanilla wafers and almonds into the bowl of a food processor or food chopper and pulse until both are finely ground.
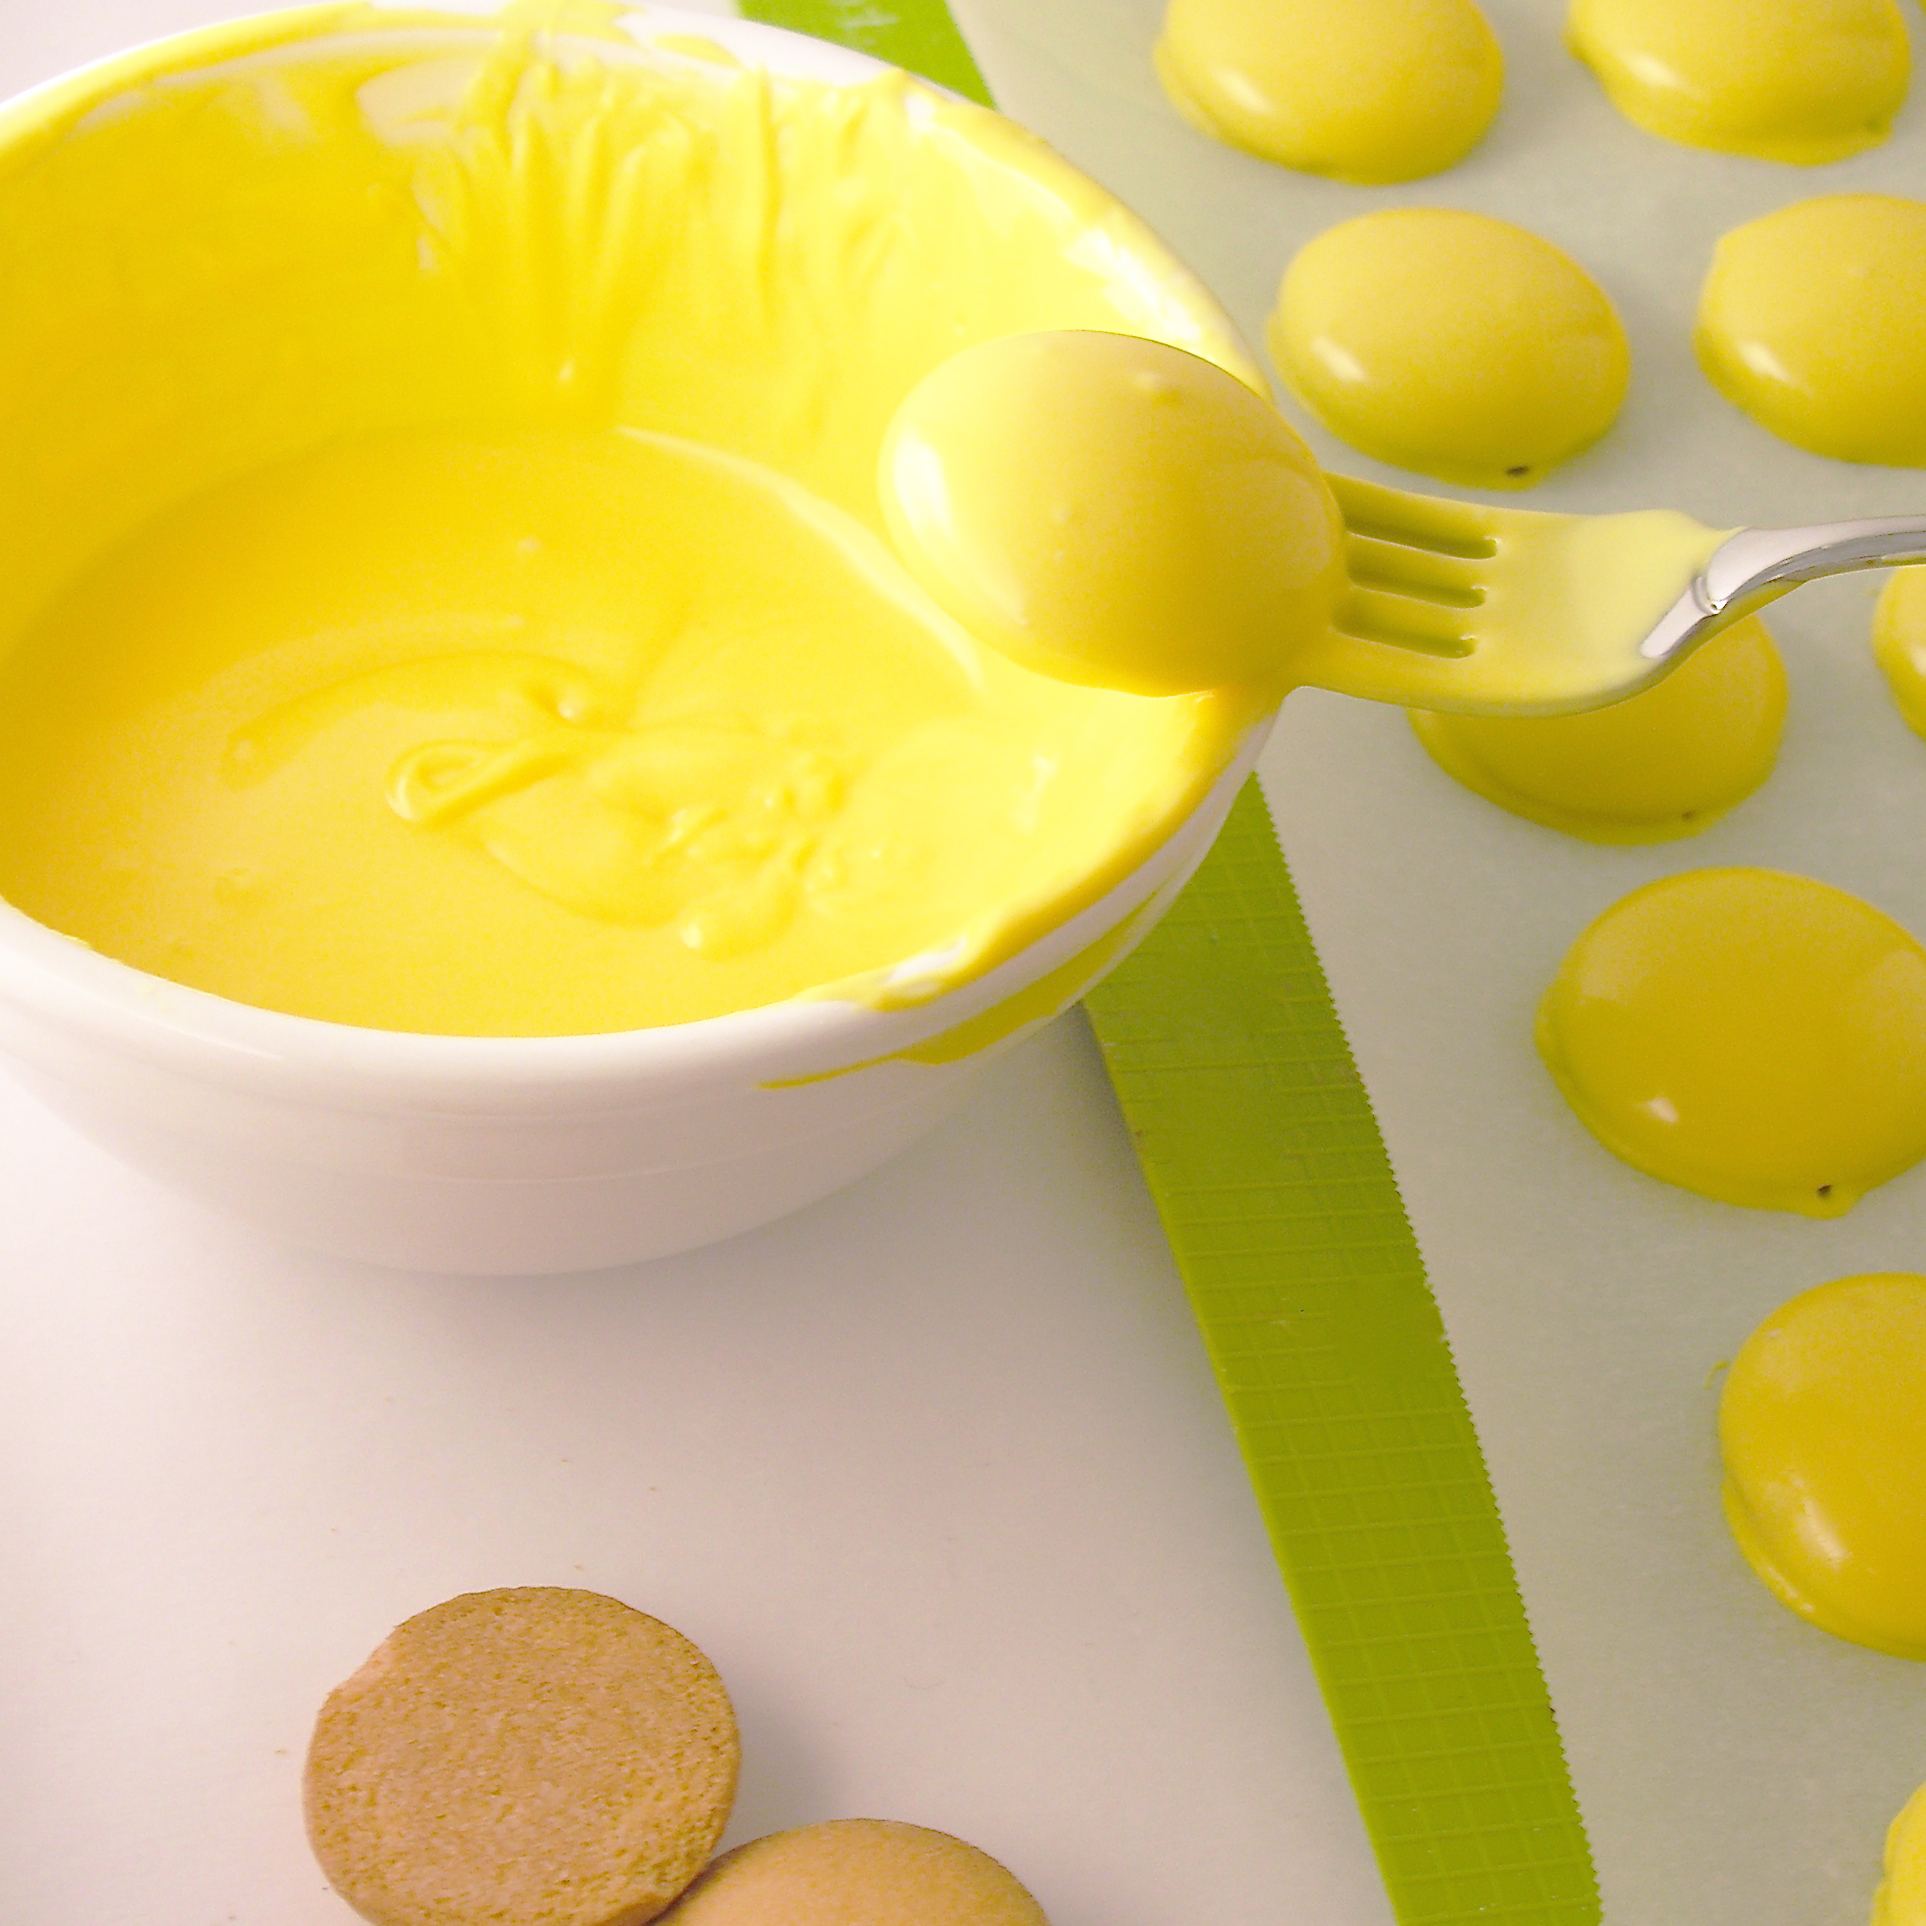
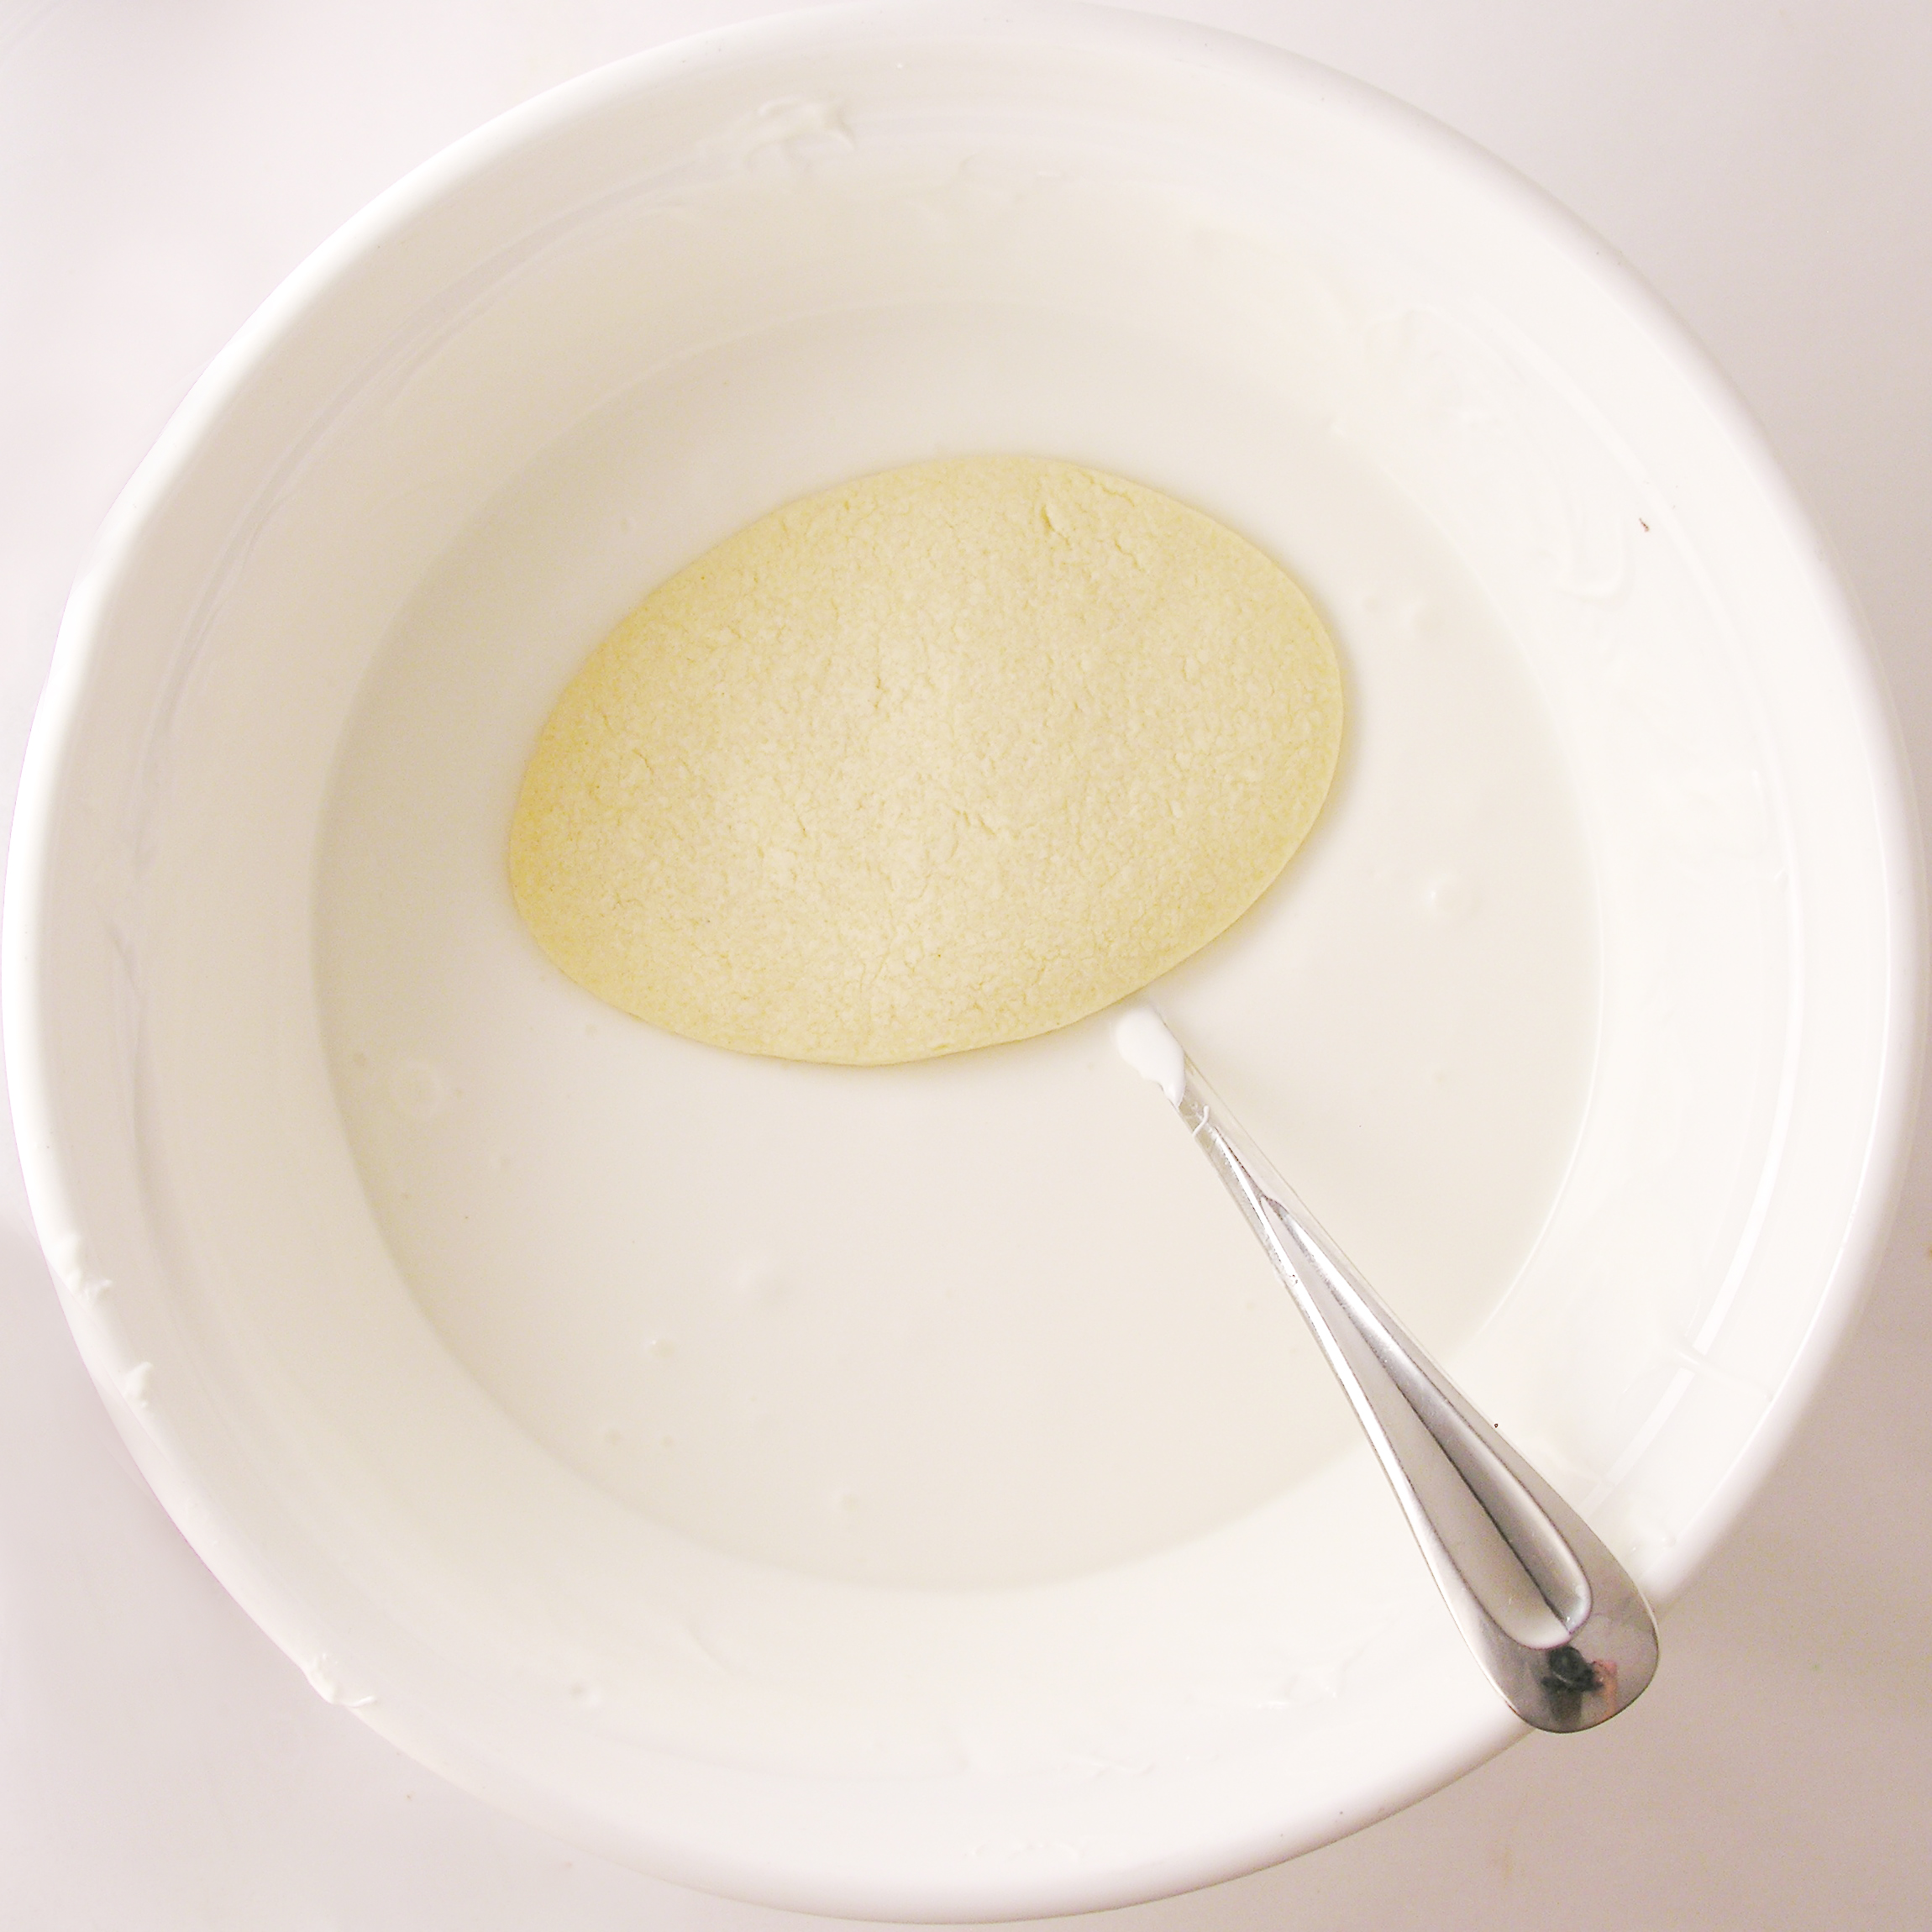
  • In a microwave-safe bowl, add sugar, 6 Tablespoons of butter and water and microwave on high in one minute increments (stirring in between) until butter is melted and sugar is mostly dissolved (mine took about 4 minutes)
  • Pour cookie and nut mixture into bowl with hot sugar mixture and mix well.
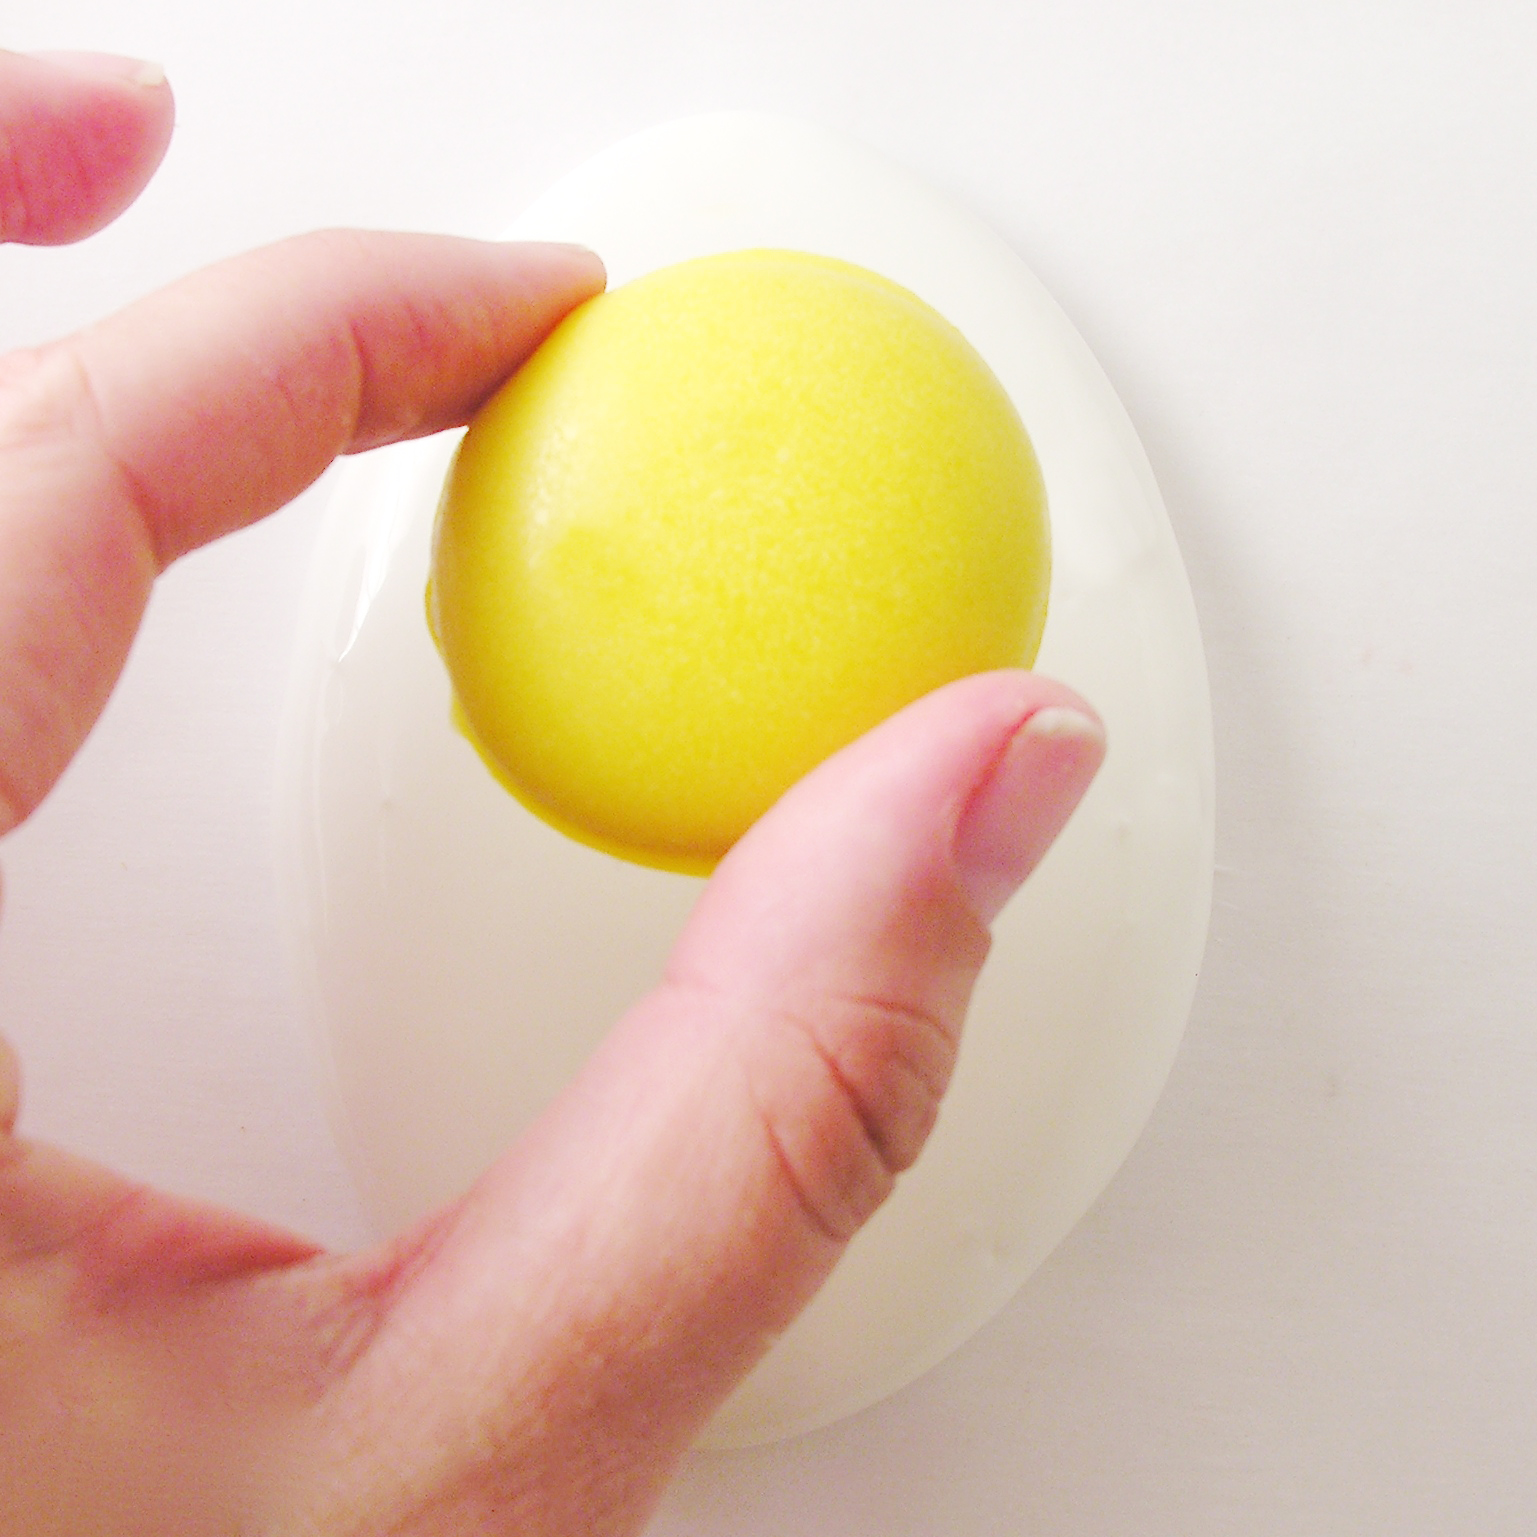
  • Divide out about 1/3 of the dough into a separate bowl.
  • Melt 1/2 cup of chocolate chips in the microwave and stir into 1/3 of the dough.
  • Press half of the “plain” dough into the bottom of the foil-lined pan.
  • Press all of the “chocolate” dough on top.
  • Press remaining “plain” dough on top of the chocolate layer.
  • Make glaze by melting 1 cup of chocolate chips with 6 Tablespoon of butter in the microwave.
  • Stir well and pour over top.
  • Refrigerate until glaze hardens, cut into pieces and enjoy!!!

Bajadera Torte

My thoughts: These are absolutely delicious. If you want your version to be a little less sweet, use bittersweet or dark chocolate instead. Let’s hear it for Croatia, and a perfectly wonderful dessert!

Croatia is just one of 14 countries in Eastern and Central Europe that Josiah Venture is working in. Josiah Venture began just over 20 years ago, and now they have over 300 missionaries in 14 countries. Over half of those missionaries are nationals, because one of Josiah Venture’s firmly held beliefs is that our job is to partner with churches in each country and equip nationals to lead and serve in their own country. The focus is reaching out to young people with the good news that God loves them.

This is done in practical ways that provide for other needs in these countries. Most of these countries have excellent educational systems, but they lack extracurricular activities, like music and sports. Josiah Venture partners with a local church and the school to provide training in those things and to offer, at the same time, information about who God is and how to know Him. This has been, and continues to be, an incredibly effective way to encourage positive activities along with a relationship with God in this young generation.

In 2010 and 2011, I took the college ministry I led over to serve at a Josiah Venture camp in Slovakia, and I just loved meeting the young people who are becoming a positive influence in the lives of others in their country. It was incredible.

When I was preparing to leave the Navajo Nation last fall, I was invited to join Josiah Venture full-time as the coordinator of a program that offers internships to college-age students. We invite young people to spend 3 to 6 months overseas, partnered with one of our missionaries, to see if they might be interested in full-time work with youth overseas.

Amazing Race Josiah Venture

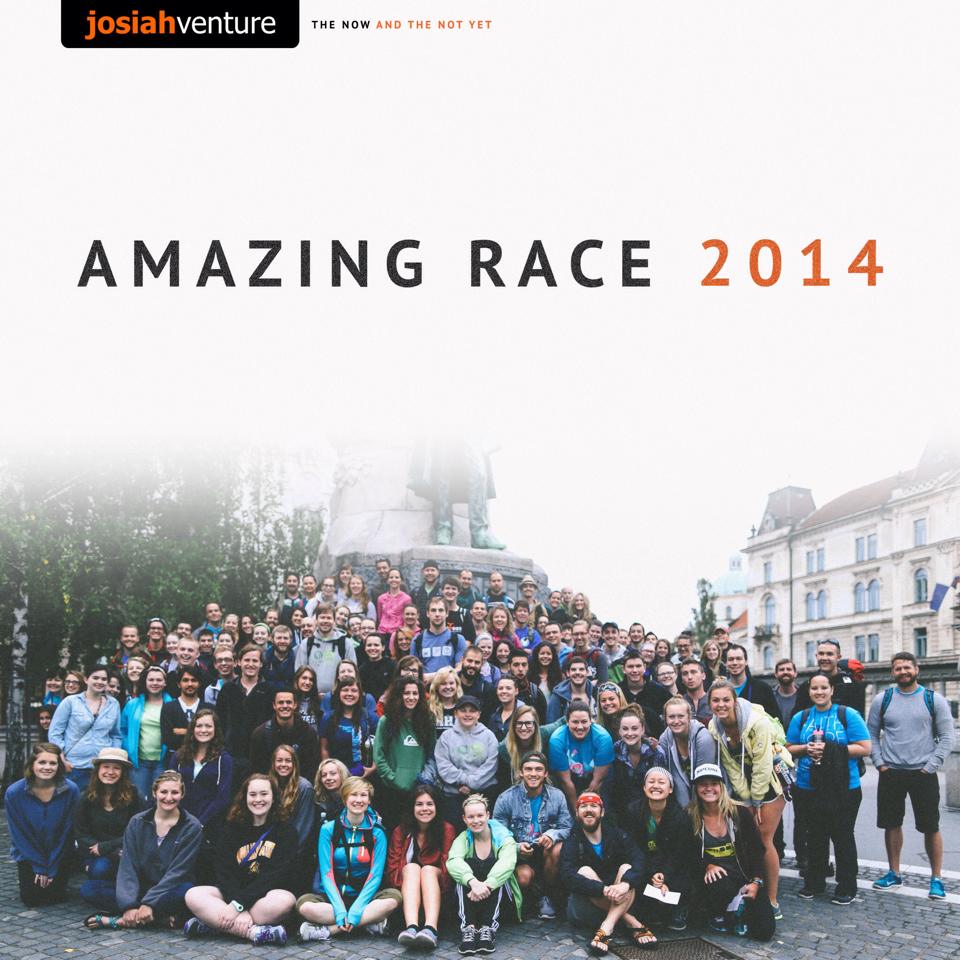
A picture of last year’s interns during training.


I’ve been raising the support I need to begin this position full-time, and I’ve been learning the systems in place for getting these interns prepared to serve overseas. We have just over 90 interns this year, and we are hoping to increase our capacity to invite more!

It’s a really exciting and new part of my life, and I’m really SO thankful for the opportunity to be a part of such an incredible movement of God both here- in the lives of these college students- and overseas.

I know that you are here for a recipe~ but maybe today you are here for more- to learn about what God is doing in another part of the world. There are several ways you can connect with Josiah Venture and with the intern ministry I am helping to lead.

1. The Josiah Venture Website is a wealth of information about each country, each ministry and each missionary.

2. My personal blog began out on the Navajo reservation and has been all about my journey from there to here.

3. My newsletter  sends you updates on what God is doing with my little part of Josiah Venture. It is published monthly.

4. Josiah Venture on Vimeo has incredible videos of what God is doing in the lives of these students.

Hey~thanks for letting me tell you a little about something that really matters to me. Not that desserts don’t matter…but these other things matter for eternity.

Now, settle in with a piece of this beautiful torte and read a little about what God is doing in Croatia, and in all the other countries of Eastern and Central Europe!   Enjoy!! ~r

Bajadera Torte


I usually leave you with links to my favorite recipes here- but today, here are a few memorable moments from the past year: Preparing to leave for Arizona…Lessons from real-life shepherds…Learning about JV…and a Christmas we will never forget.

az-441sheep-squareNavajo392067_10151247110872513_1568830611_n-2


Maple Hedgehog Cupcakes!

Posted on

Hedgehog Cupcakes

Hedgehogs are the MOST adorable things, and these yummy maple cupcakes capture all the cuteness in edible form!

Seems like hedgehogs are all the rage these days. I’ve seen slippers and t-shirts and recently found the MOST adorable hedgehog salt and pepper shakers at Target.

I love them. I think they fall into the category: “so ugly they are cute”, in the animal kingdom…along with the walrus and basset hound…

In any case, I decided that the cupcake world needed a cute (and EASY) version of these, and here they are!

Hedgehog4

Now, the dilemma of every blogger of desserts is this: who do I give these to, so that I don’t eat them all and gain 500 pounds?

I had an obvious answer for these little hedgehogs: Warner Press!

You see, about a year ago at this time I was getting ready for the publication of my first cookbook, and I was partnered with an absolutely WONDERFUL publisher~ Warner Press. Through the process, many of the people I worked with became dear friends. One of those friends HATES hedgehogs. In fact, it is a long-standing office joke that Regina despises the cute little rodents. Obviously, she needed Hedgehog cupcakes~ so I went for a visit!

Warner Press

We had a fun day of cupcakes and catching up- and I promised them I would tell you all about the (adorable!) boxed set of Hedgehog cards that Regina reluctantly approved for publication. She was so convinced that they would be an epic fail, that she agreed to a wager: If the hedgehog cards make it into the top 10 selling items at Warner Press she would take them all out for dinner…and they are close…!

Hedgehog Cards!

I love them, and thought I’d give you all a chance to purchase some (and maybe put them into the top ten best selling items?!?!) They would be a cute gift for Mother’s Day! Click here to see the rest of the fun hedgie pictures and to order.

The cupcakes are as easy as can be! Here’s how we put them together: (printable recipe)

INGREDIENTS:

  • 1 boxed cake mix (plus water oil and eggs to make according to package)
  • 1 tub of pre-made vanilla frosting
  • 2 teaspoons of maple flavoring
  • 1 cup of chocolate jimmies
  • 1/2 cup of Wilton’s Candy Melts in dark chocolate (or you can use mini chocolate chips)
  • 1/4 cup of Wilton’s Candy melts in pink.

DIRECTIONS:

  • Make cake mix according to package and bake as cupcakes for recommended time and temp. Cool completely.
  • Place frosting into a small bowl and heat for just 15-20 seconds in the microwave until soft. Add maple flavoring and stir until combined.
  • Dip tops of cooled cupcakes into frosting and pull into a slight “point” on one end of the cupcake for a little nose (see photo)
  • Immediately (over a plate) pour and pat jimmies into place, opposite the “point”, leaving a small circular section empty for face. Finish all cupcakes this way ( if you use mini chips for eyes you should place them now, before the frosting hardens)

Hedgehog cupcakes 10Hedgehog cupcake11

  • Melt candy melts in the microwave in a small bowl in 30 second increments, stirring in between until smooth.
  • Place each color in a small zip-top bag and seal.
  • Clip a small corner off and squeeze out drops of chocolate for the eyes and pink candy melts for the nose- right on the end of the “point” left by the frosting.
  • Allow cupcakes to harden up.
  • Enjoy!!!!

Hedgehog cupcakes

My thoughts: Cute and easy! Plus that maple frosting is YUM-MY! You certainly could use your own favorite cupcake recipe for these too- I just used a cake mix for simplicity. Such a fun recipe for kids too! Gotta love those hedgehogs– right, Regina?!?  Enjoy!! ~r

Hedgehog2

Other unique cupcakes from Easybaked: (click a photo to see the recipe)

Apple cupcakes filled with seedsPancake Cupcakes!!!!Root Beer Float Cupcakes!!!!Bomb Pop Cupcakes!!!

Mud Pie!

Posted on

Mud Pie!

A layer of dense cake, topped with fudge, chocolate mousse and whipped cream. Yum.

Life is mud right now. At least if you live in the midwest and regularly walk a dog. My pup’s little white paws and belly are just caked in mud after every trip down our walking trail. There’s one kind of mud I don’t mind though- the edible kind!

Have you ever tried Mississippi Mud pie? I feel like there’s not an “official” recipe for this pie- sometimes pudding, sometimes marshmallow…I just put several things I love into an Oreo crust and called it mud. And it is delicious. I really think you’ll like it!

Mud Pie

Here’s how we did it: (printable recipe)

INGREDIENTS:

  • One pre-made Oreo crumb crust

Cake layer:

  • 1/2 bag of Nestle dark chocolate chips (this ends up being just a little less than 1 cup)
  • 2 egg yolks
  • 2 Tablespoons vanilla
  • 3 Tablespoons of heavy cream
  • 3 Tablespoons of powdered sugar

Fudge layer:

  • remaining 1/2 bag of Nestle dark chocolate chips (this ends up being just a little less than 1 cup)
  • 1/2 cup of heavy cream

Chocolate Mousse Layer:

  • 1 Packet of Dream Whip
  • 1/3 cup milk
  • 1/4 cup cocoa
  • 1/2 cup powdered sugar

White whipped topping:

  • 1 packet of Dream Whip
  • 1/2 cup milk

DIRECTIONS:

Cake Layer:

  • Unwrap Oreo crust and preheat oven to 350F degrees
  • Melt chocolate chips in the microwave in 30 second increments, stirring in between until smooth.
  • In a separate bowl combine eggs, cream, vanilla and powdered sugar.
  • Add cream mixture to chocolate and blend well.  Pour into crust and bake for 20 – 25 minutes until center is set. Cool completely.

Fudge Layer:

  • Melt remaining chocolate chips and cream together in microwave in 30 second increments, stirring between until melted and smooth.
  • Pour all but about 1/8 cup over cooled cake and allow this layer to firm up (I placed it in the refrigerator while I made the remaining 2 layers).
  • Pour remaining 1/8 cup into a small zip-top bag to use later for drizzle.

Chocolate Mousse Layer:

  • Add all ingredients to mixing bowl and beat on high for 3-4 minutes until light and fluffy.
  • Spoon on top of fudge layer and spread to edges.

Whipped topping:

  • Add all ingredients to mixing bowl and beat on high for 3-4 minutes until light and fluffy.
  • Spoon on top and spread to edges.
  • Take your small bag with 1/8 cup chocolate fudge filling (The one you set aside earlier), clip corner of bag and drizzle over the top. (I added a little shaved chocolate too)
  • Enjoy!

Mud Pie!

My thoughts: This is really as good as it looks…dense fudge bottom topped with the creamiest chocolate toppings. I usually eat that one bite I take off for a picture and give every bit of the rest away. But I ate the whole piece. Bad day for the diet, but a wonderful day to really savor this rich chocolate dessert. This is on my list of “must-make-again” recipes! I hope you get a chance to try it and enjoy it as much as I did!!!! Enjoy! ~r

Mud Pie!!!

Is chocolate the only way to do dessert in your house? Here are some other incredible chocolate treats from Easybaked~ just click on the photo to see the recipe!

Chocolate Mousse CakeTriple Chocolate Cheesecake 2Brownie Oreo Cookie CupGerman Chocolate Pie

Sunny Side Up Egg Cookies!!!

Posted on

Fried Egg Cookies

Whoever said you can’t have cookies for breakfast never tried these cookies!

A perfect April Fool’s treat!

Tomorrow is April Fool’s Day, and we all know that if you don’t catch people early, they will remember what day it is and call your bluff! That’s why these little “breakfast” cookies are the perfect trick. I served them with bacon (salty and sweet…) and toasted pound cake. They are easy to put together and they are the cutest little things in Easter baskets too!

Egg cookies for EasterTwo holidays covered by one recipe? Perfect.

These are perfectly tasty too~ and so easy to create for yourself! Here’s how we did them (printable recipe)

INGREDIENTS: (makes 24-36 cookies, depending on the size of your cookie cutter)

  • 2 sticks (1 cup) unsalted butter (softened)
  • 1 1/2 cups of granulated sugar
  • 2 eggs
  • 1 teaspoon of vanilla
  • 1 teaspoon of butter flavoring
  • 3 cups of flour
  • 1 teaspoon of baking powder
  • 1/2 teaspoon of salt
  • 3 bags of Wiltons candy melts in white
  • 1 bag of Wilton’s candy melts in yellow
  • 24-36 Nilla Wafers

DIRECTIONS:

  • Preheat oven to 350F degrees.
  • In a large mixing bowl, cream together butter and sugar until smooth.
  • Add eggs, vanilla and butter flavoring and mix well.
  • Add all dry ingredients and mix until able to knead into a firm ball of dough (add additional flour if necessary).
  • Roll out on a floured counter with a flour coated rolling pin to desired thickness.
  • Cut using an egg shaped cookie cutter.
  • Place cookies on ungreased cookie sheets and bake at 350F degrees for 8 to 10 minutes.
  • Slide baked cookies onto parchment paper to cool completely.
  • Melt 1/2 a bag of yellow candy melts in a small bowl in the microwave in 30 second increments, stirring in between, until smooth.
  • Gently dip Nilla wafers into yellow candy melts, covering completely and removing with a fork by tapping on the edge of the bowl and sliding bottom along edge. Place on parchment paper to harden completely. (I placed these in the fridge to harden more quickly so they would be ready to place on the egg “whites”)
  • Melt white candy melts in a larger bowl, using the same technique as melting the yellow ones.
  • Gently dip each cooled egg cookie into the white candy melts, using the same technique as with the Nilla Wafers. 

Fried egg cookieFried Egg Cookie

  • Place on parchment paper to harden, but before white egg hardens completely, place a yellow Nilla Wafer on top as a “yolk”.

Fried eggFried Egg cookies

  • Allow cookie to harden completely and serve up with bacon and toasted pound cake…and maybe coffee?
  • These can be placed into treat bags and put into Easter baskets too! Fun!!!

Fried egg cookie for Easter

My thoughts…oh goodness, I’ve had fun with these. They aren’t hard to make, they are very realistic, and they make everyone laugh! I think they are cute in little treat bags too. Have fun- April Fool’s!!! ~r

Fried egg cookies!We have lots of fun Easter treats here on Easybaked! Check them out by clicking on a photo to see the recipe!

Jelly Bean Cookies!!!!Cadbury Egg Cookie Cups!!!!Easter Cheesecake CupsEasy Easter cut out cookies

Homemade Mallo Cups

Posted on

Mallow Cups

Dark chocolate and toasted coconut cups filled with creamy sweet marshmallow-  YUM!

Last week we featured one use for silicone baking cups, and even gave two sets of them away! This week is another idea for these cups. If you missed the story last week, I was sent a set of these silicone cups to try out as an apology for a designer that stole one of my photos and used it in the product packaging of these cups. The cups I am using are Baketown Girls Silicone Baking Cups, and can be found on Amazon.com.

I was a little doubtful about the practicality of these cups (especially when I thought of doing cupcakes in them), but I’m having fun experimenting with the possibilities! I’m sure this won’t be the last recipe on Easybaked using these silicone cups.

Have you ever had Mallo Cups?

Mallo-Cup-Wrapper-SmallDear me, they are amazing. They are considered the very 1st candy cup created, and they were one of my favorite childhood treats. They are a little hard to find these days, so I thought I’d re-create them. They are actually not very hard to make.

Mallo Cups

Here’s how we put them together. (printable recipe)

INGREDIENTS: (makes about 12 cups)

  • 2 bags of Wilton’s Candy Melts (if you want a little better chocolate, try Country Kitchen chocolate. It’s a touch more expensive, but truly better in flavor (click here). )
  • 1 cup of toasted coconut (to toast refer to instructions here)
  • One large jar (13 oz) of Jet-Puffed Marshmallow Creme

DIRECTIONS:

  • Set 12 silicone liners on a cookie sheet with edges.
  • Melt one bag of candy melts in a bowl in the microwave in 30 second increments, stirring between until smooth.
  • Spoon carefully into a large zip-top bag and seal well.
  • Clip a corner off the bag of chocolate and pipe a little chocolate (about 1 tablespoon) into each cup.
  • Tip and/or tap each cup until chocolate covers the entire bottom of the cup.
  • Refrigerate for about 5 minutes until hard.
  • Carefully spoon marshmallow into a second zip-top bag and seal well.
  • Clip a corner off this bag and pipe a dollop of marshmallow into the center of each cup- do not let it touch the sides.
  • Use bag of melted chocolate to carefully pipe chocolate all the way around each dollop of marshmallow- this seals it into the center and keeps it from leaking out. Melt more chocolate, as needed.
  • Refrigerate for about 5 minutes until chocolate is hardened.
  • Melt remaining chocolate and add finely crushed toasted coconut to it (save a bit out to sprinkle on top later if desired)
  • Spoon this mixture into a zip top bag and seal well.
  • Clip a corner and pipe chocolate/coconut evenly over each cup.
  • Sprinkle with toasted coconut, or any decorative topping you desire.
  • Chill until cup is hardened and then peel away silicone cup and enjoy!

Mallo CupsMallow Cups7Mallow Cups5

Not too difficult- and the end result is so much fun (and delicious!)

Mallow Cups2

My thoughts: These are just fun little treats to put together and they really are so yummy with the crunchy coconut and creamy marshmallow. I even made an Easter batch of them!!! I hope you get a chance to try them! Enjoy!! ~r

Easter Mallow Cups

We love to celebrate spring! Here are some other fun springtime recipes: (click on photo to see recipe)

Koolaid PieFlower Pot OreosRaspberry Lemon Cream Cups!!!Fun fondant cupcake toppers