Tag Archives: recipe

Peanut Brittle

Peanut Brittle!!
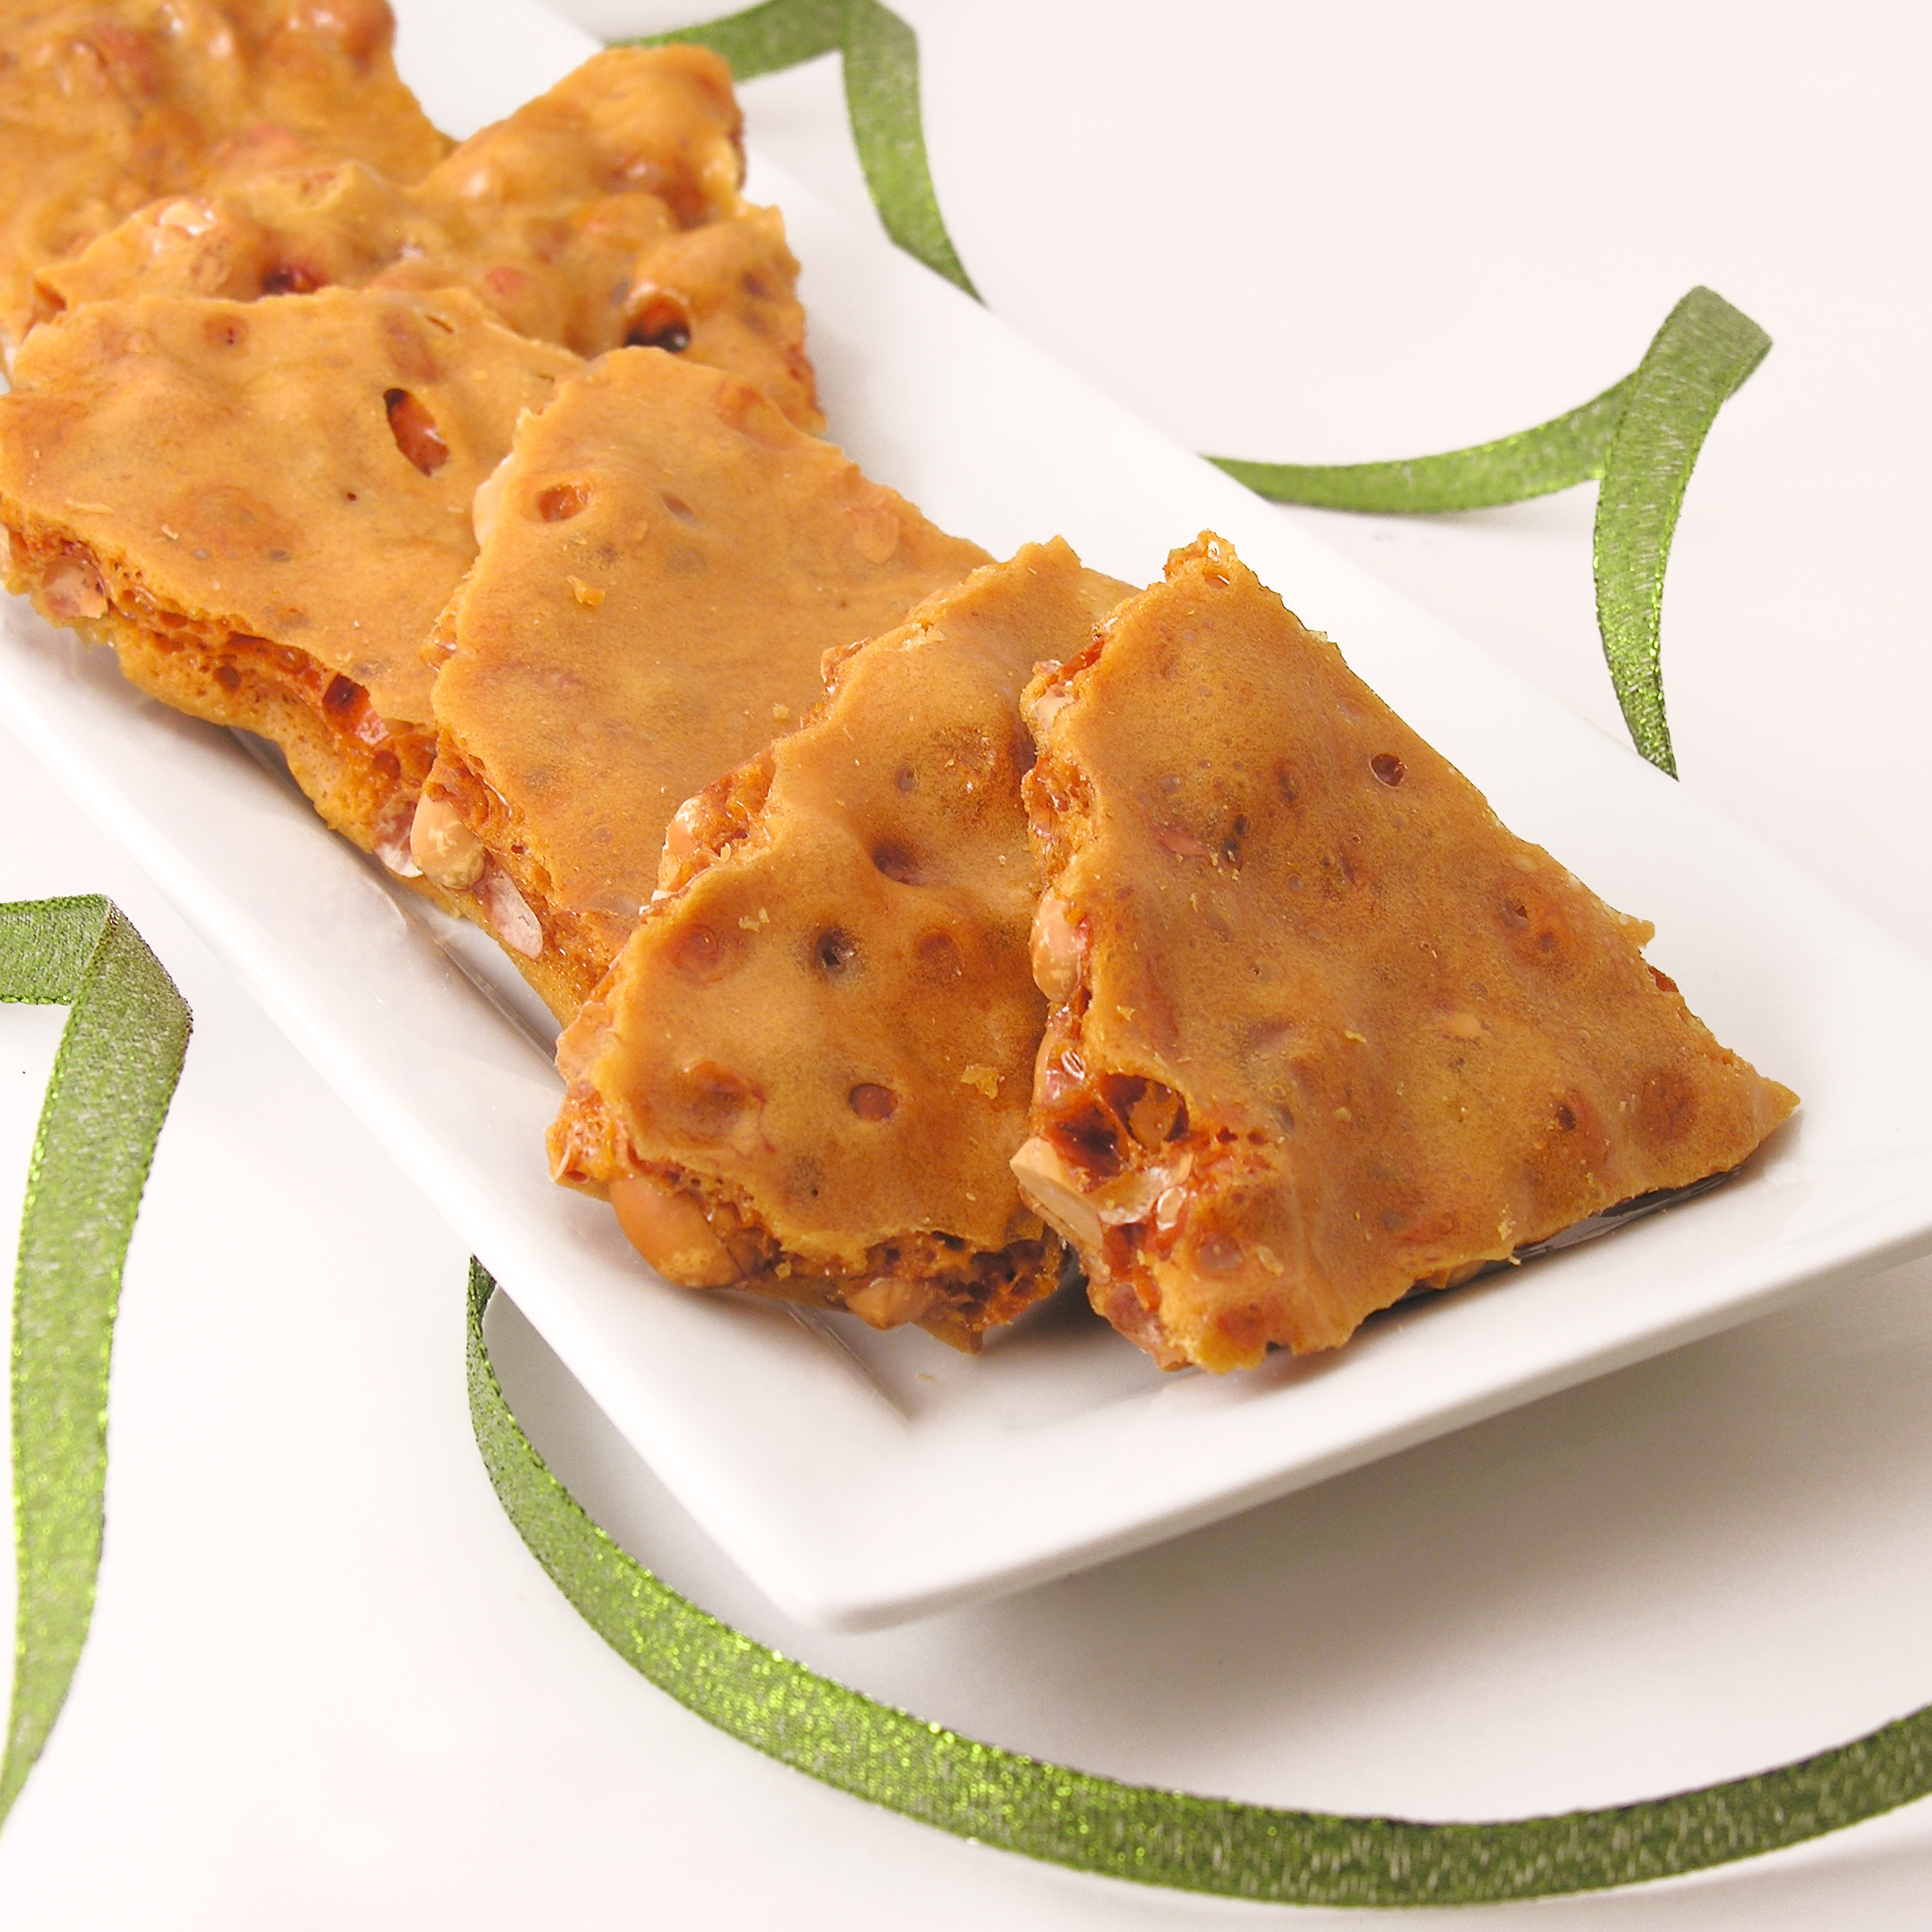
This thick and crunchy peanut brittle just melts in your mouth, and it’s one of our family’s favorite Christmas treats!

This is the best peanut brittle I’ve ever had.  My wonderful Aunt Beth has brought it to our family Christmas celebrations since I was just a tiny girl.  I remember being SO full after dinner and no matter how full I got,  I always had to have a piece of Aunt Beth’s peanut brittle.  I have vivid memories of opening presents one-handed because I had peanut brittle in the other hand.  It is THAT GOOD.

Aunt Beth

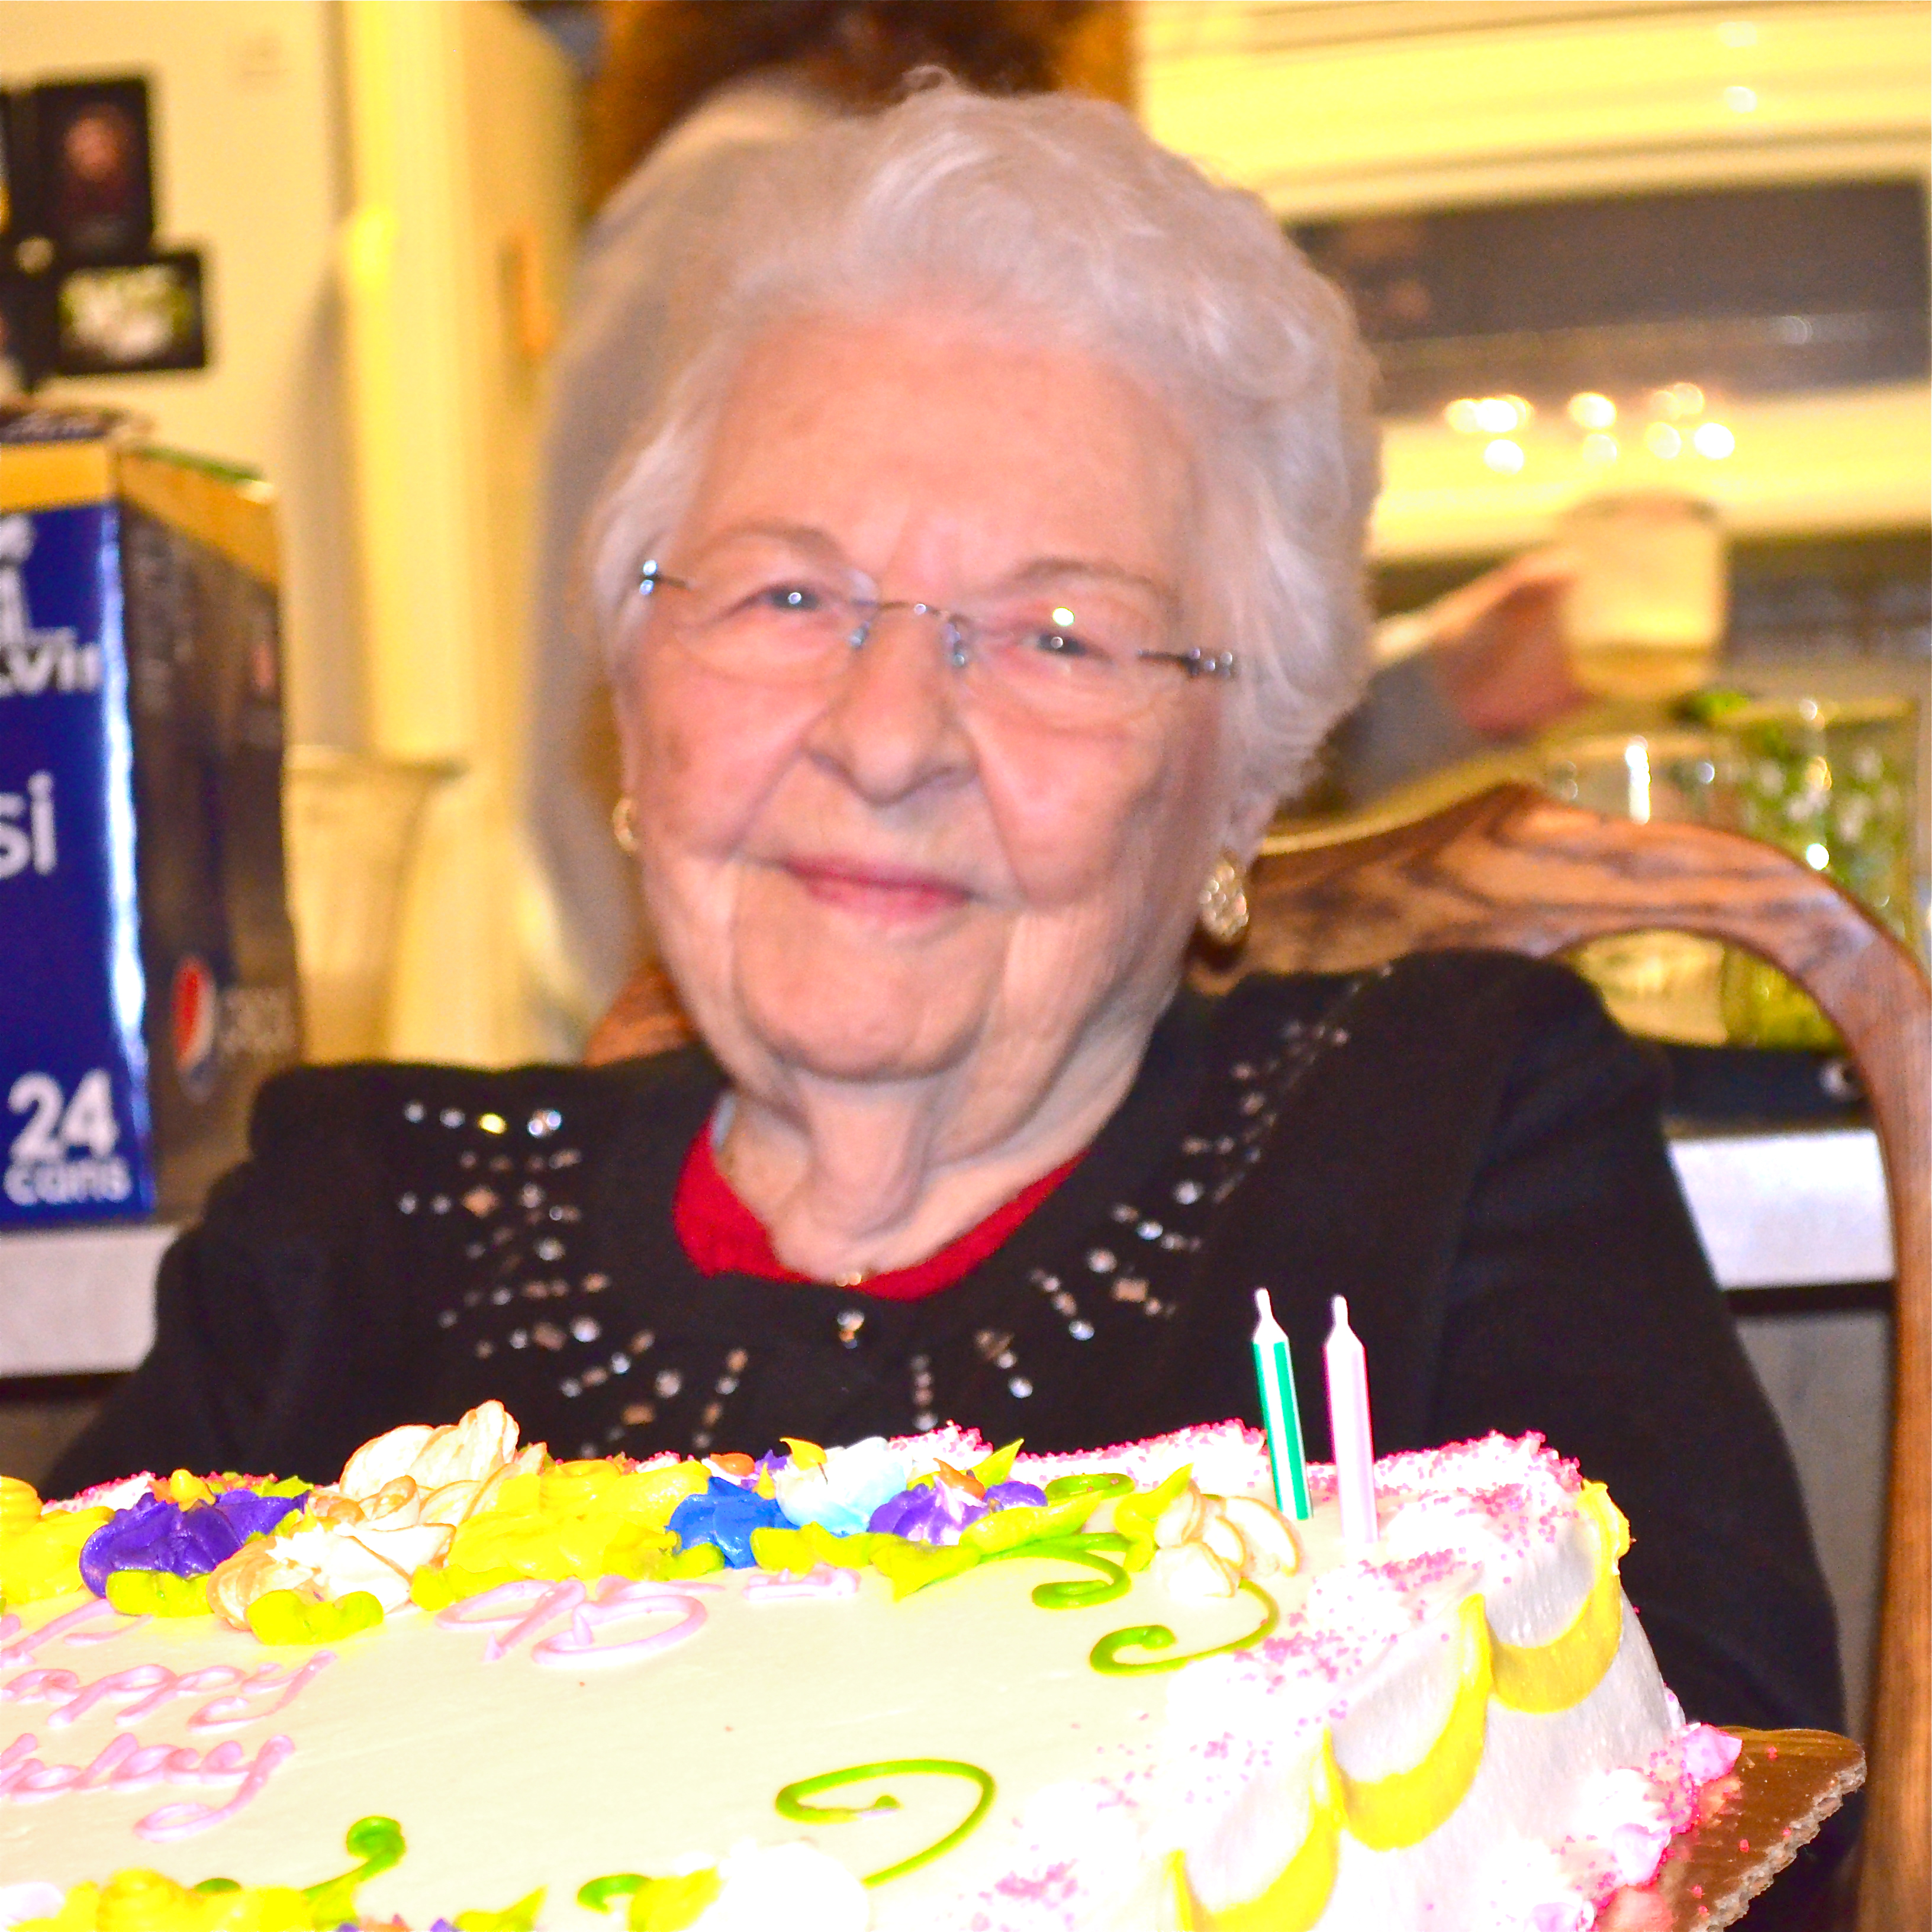
Aunt Beth and Uncle Keith

I think what makes it perfect is that it isn’t really hard to bite into or a “teeth-stuck-together” kind of candy.  It just kind of melts in your mouth…and oh my….

I’d never made it, because there has always been this aura of “impossibly difficult recipe” surrounding it.  First of all, you need a candy thermometer and I think that discourages many a would-be peanut brittle maker.  Second, it takes some stirring time over a hot stove.  This isn’t a quick recipe- but it is so sooooooo worth it!

Aunt Beth issued two warnings to me when I embarked on the mission to try her recipe:

1.  Once you add the peanuts you have to stir constantly or the brittle will burn.

2. Be incredibly careful handling the pans and especially the candy, as it is SO hot and sticky and you could easily burn yourself.  Use caution stirring and pouring.

I put on safety glasses and got out a big pan…..

Ruthanne
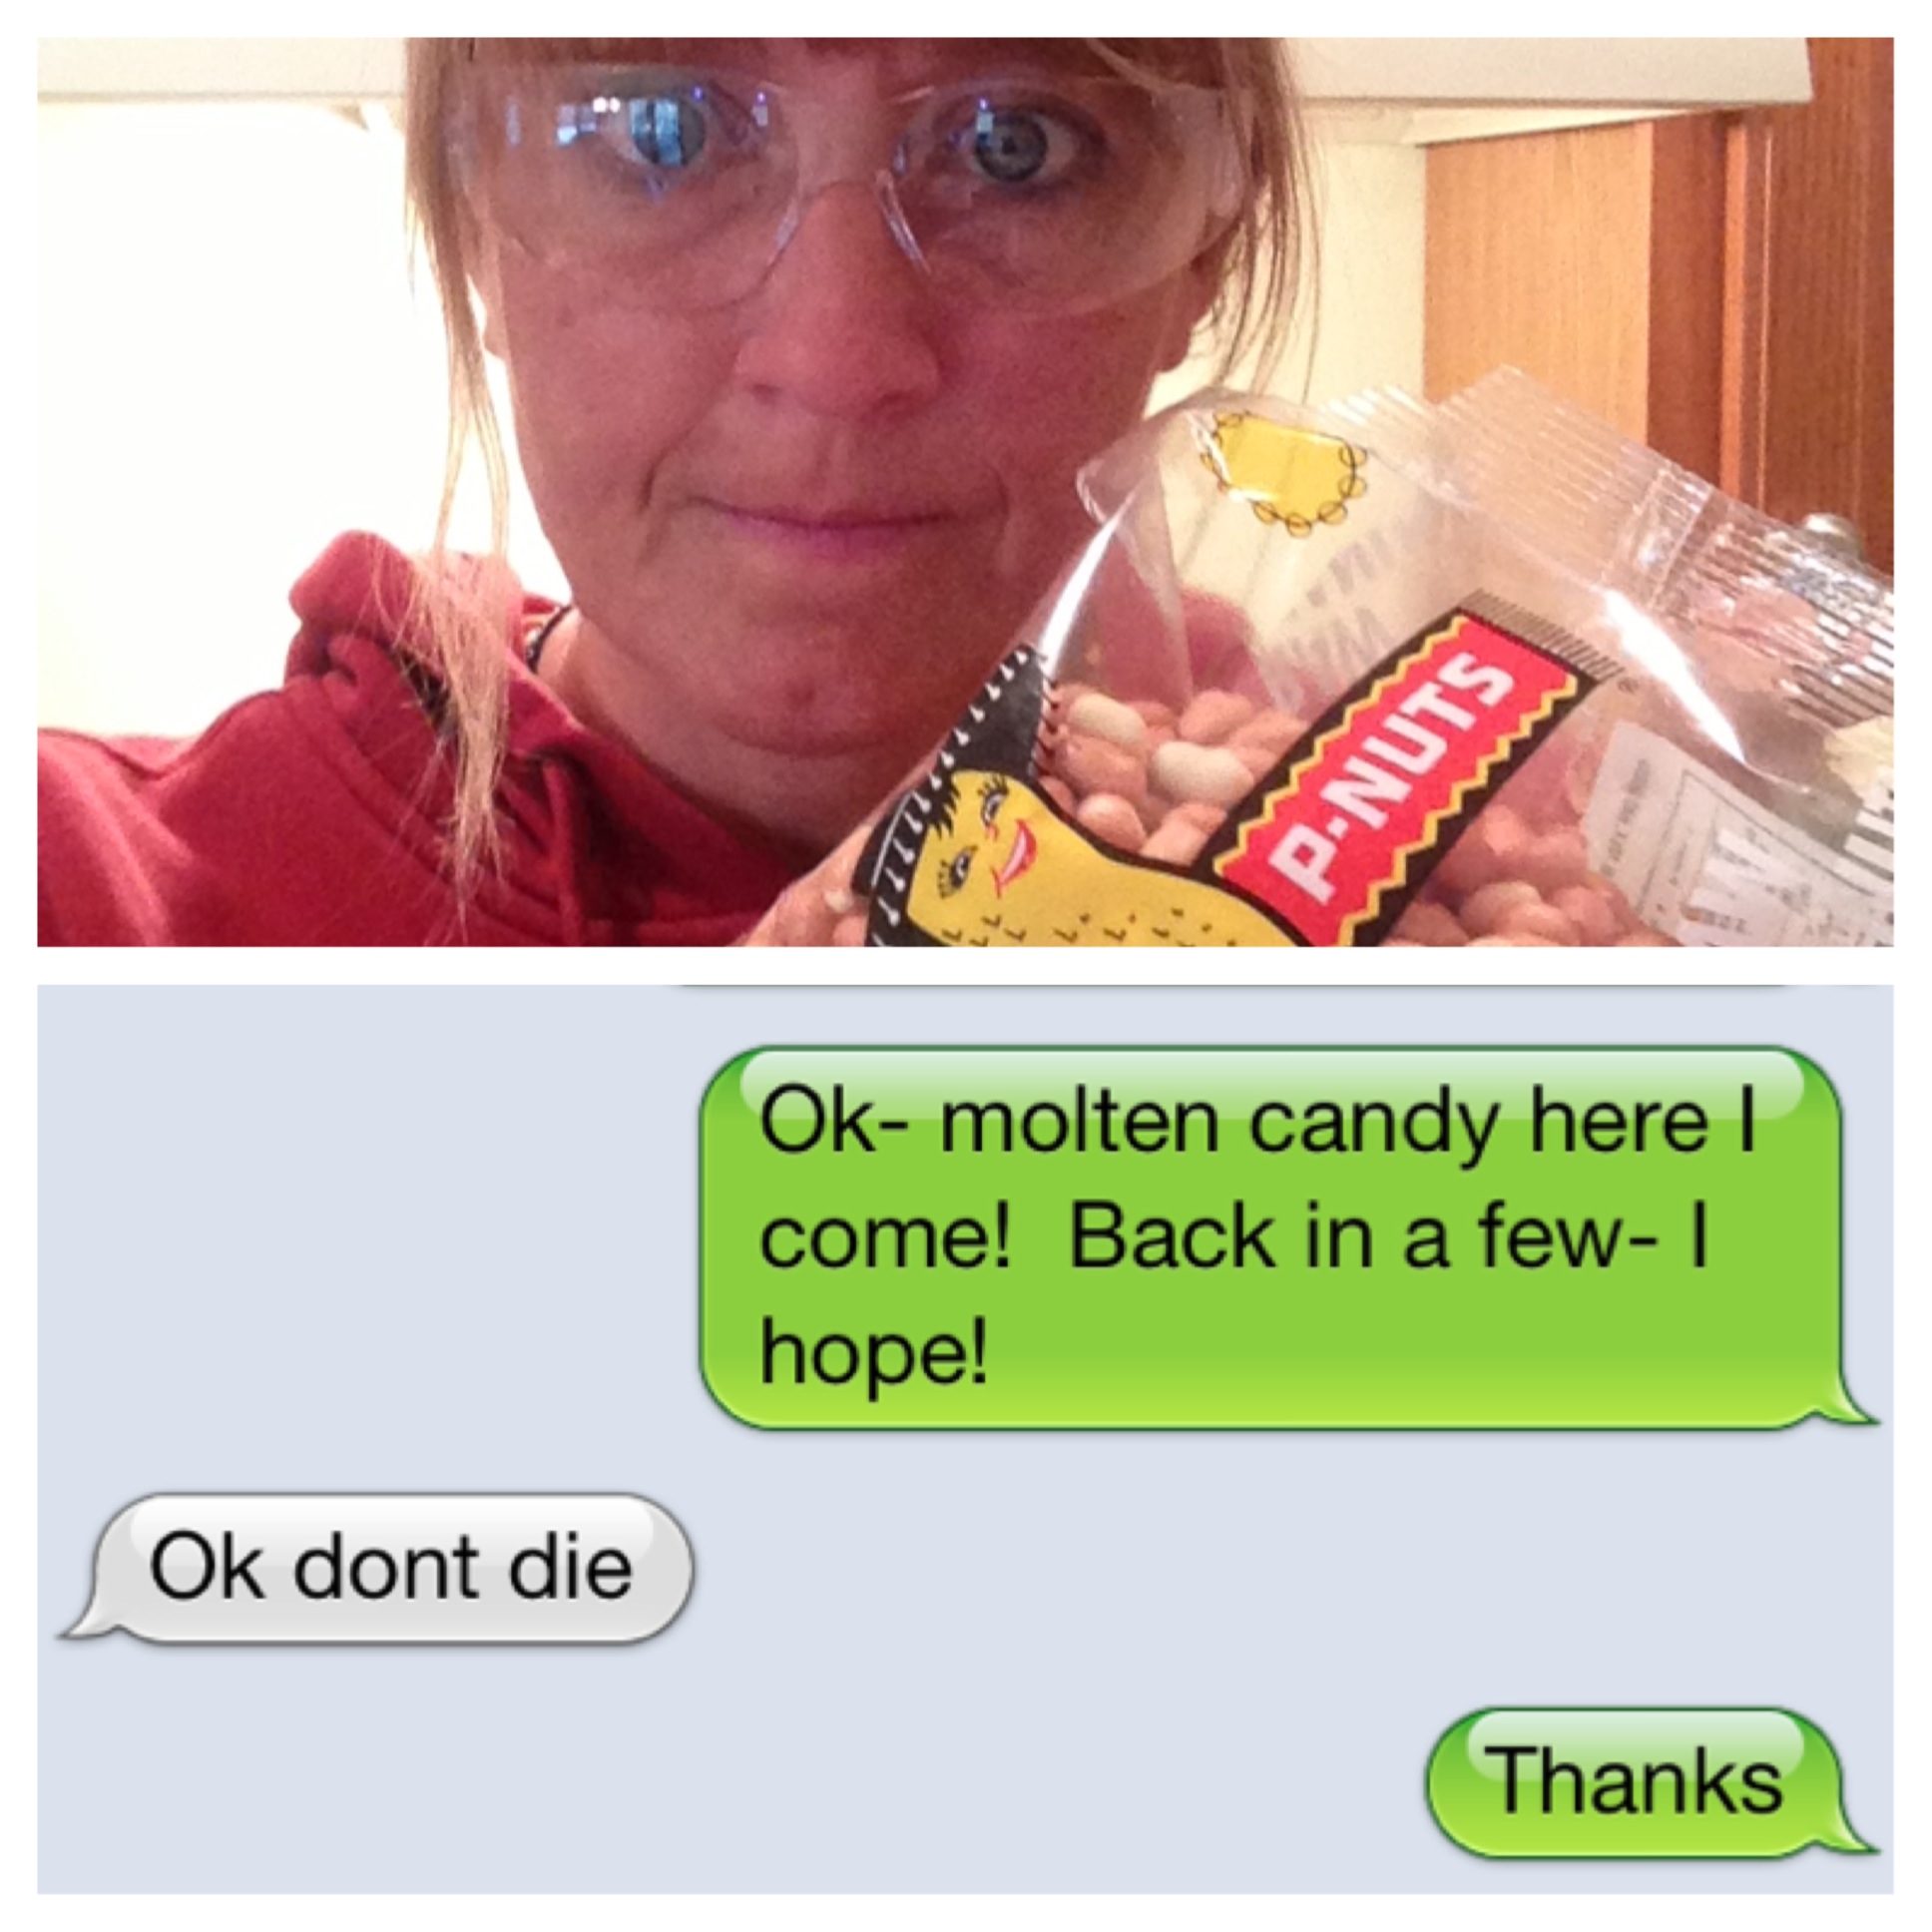
It wasn’t nearly as scary as I thought it would be.  It was actually really fun, and it turned out GREAT!

Ready for the recipe?  Here you go:  (printable recipe)

INGREDIENTS:

  • 1 cup water
  • 1 cup Light Karo Corn Syrup
  • 2 cups granulated sugar
  • 1 lb. raw peanuts (be sure to use raw- I found mine in the produce section of my grocery)
  • 1/4 teaspoon salt
  • 2 Tablespoons butter (plus enough to coat a large jelly roll pan)
  • 2 heaping teaspoons baking soda

DIRECTIONS:

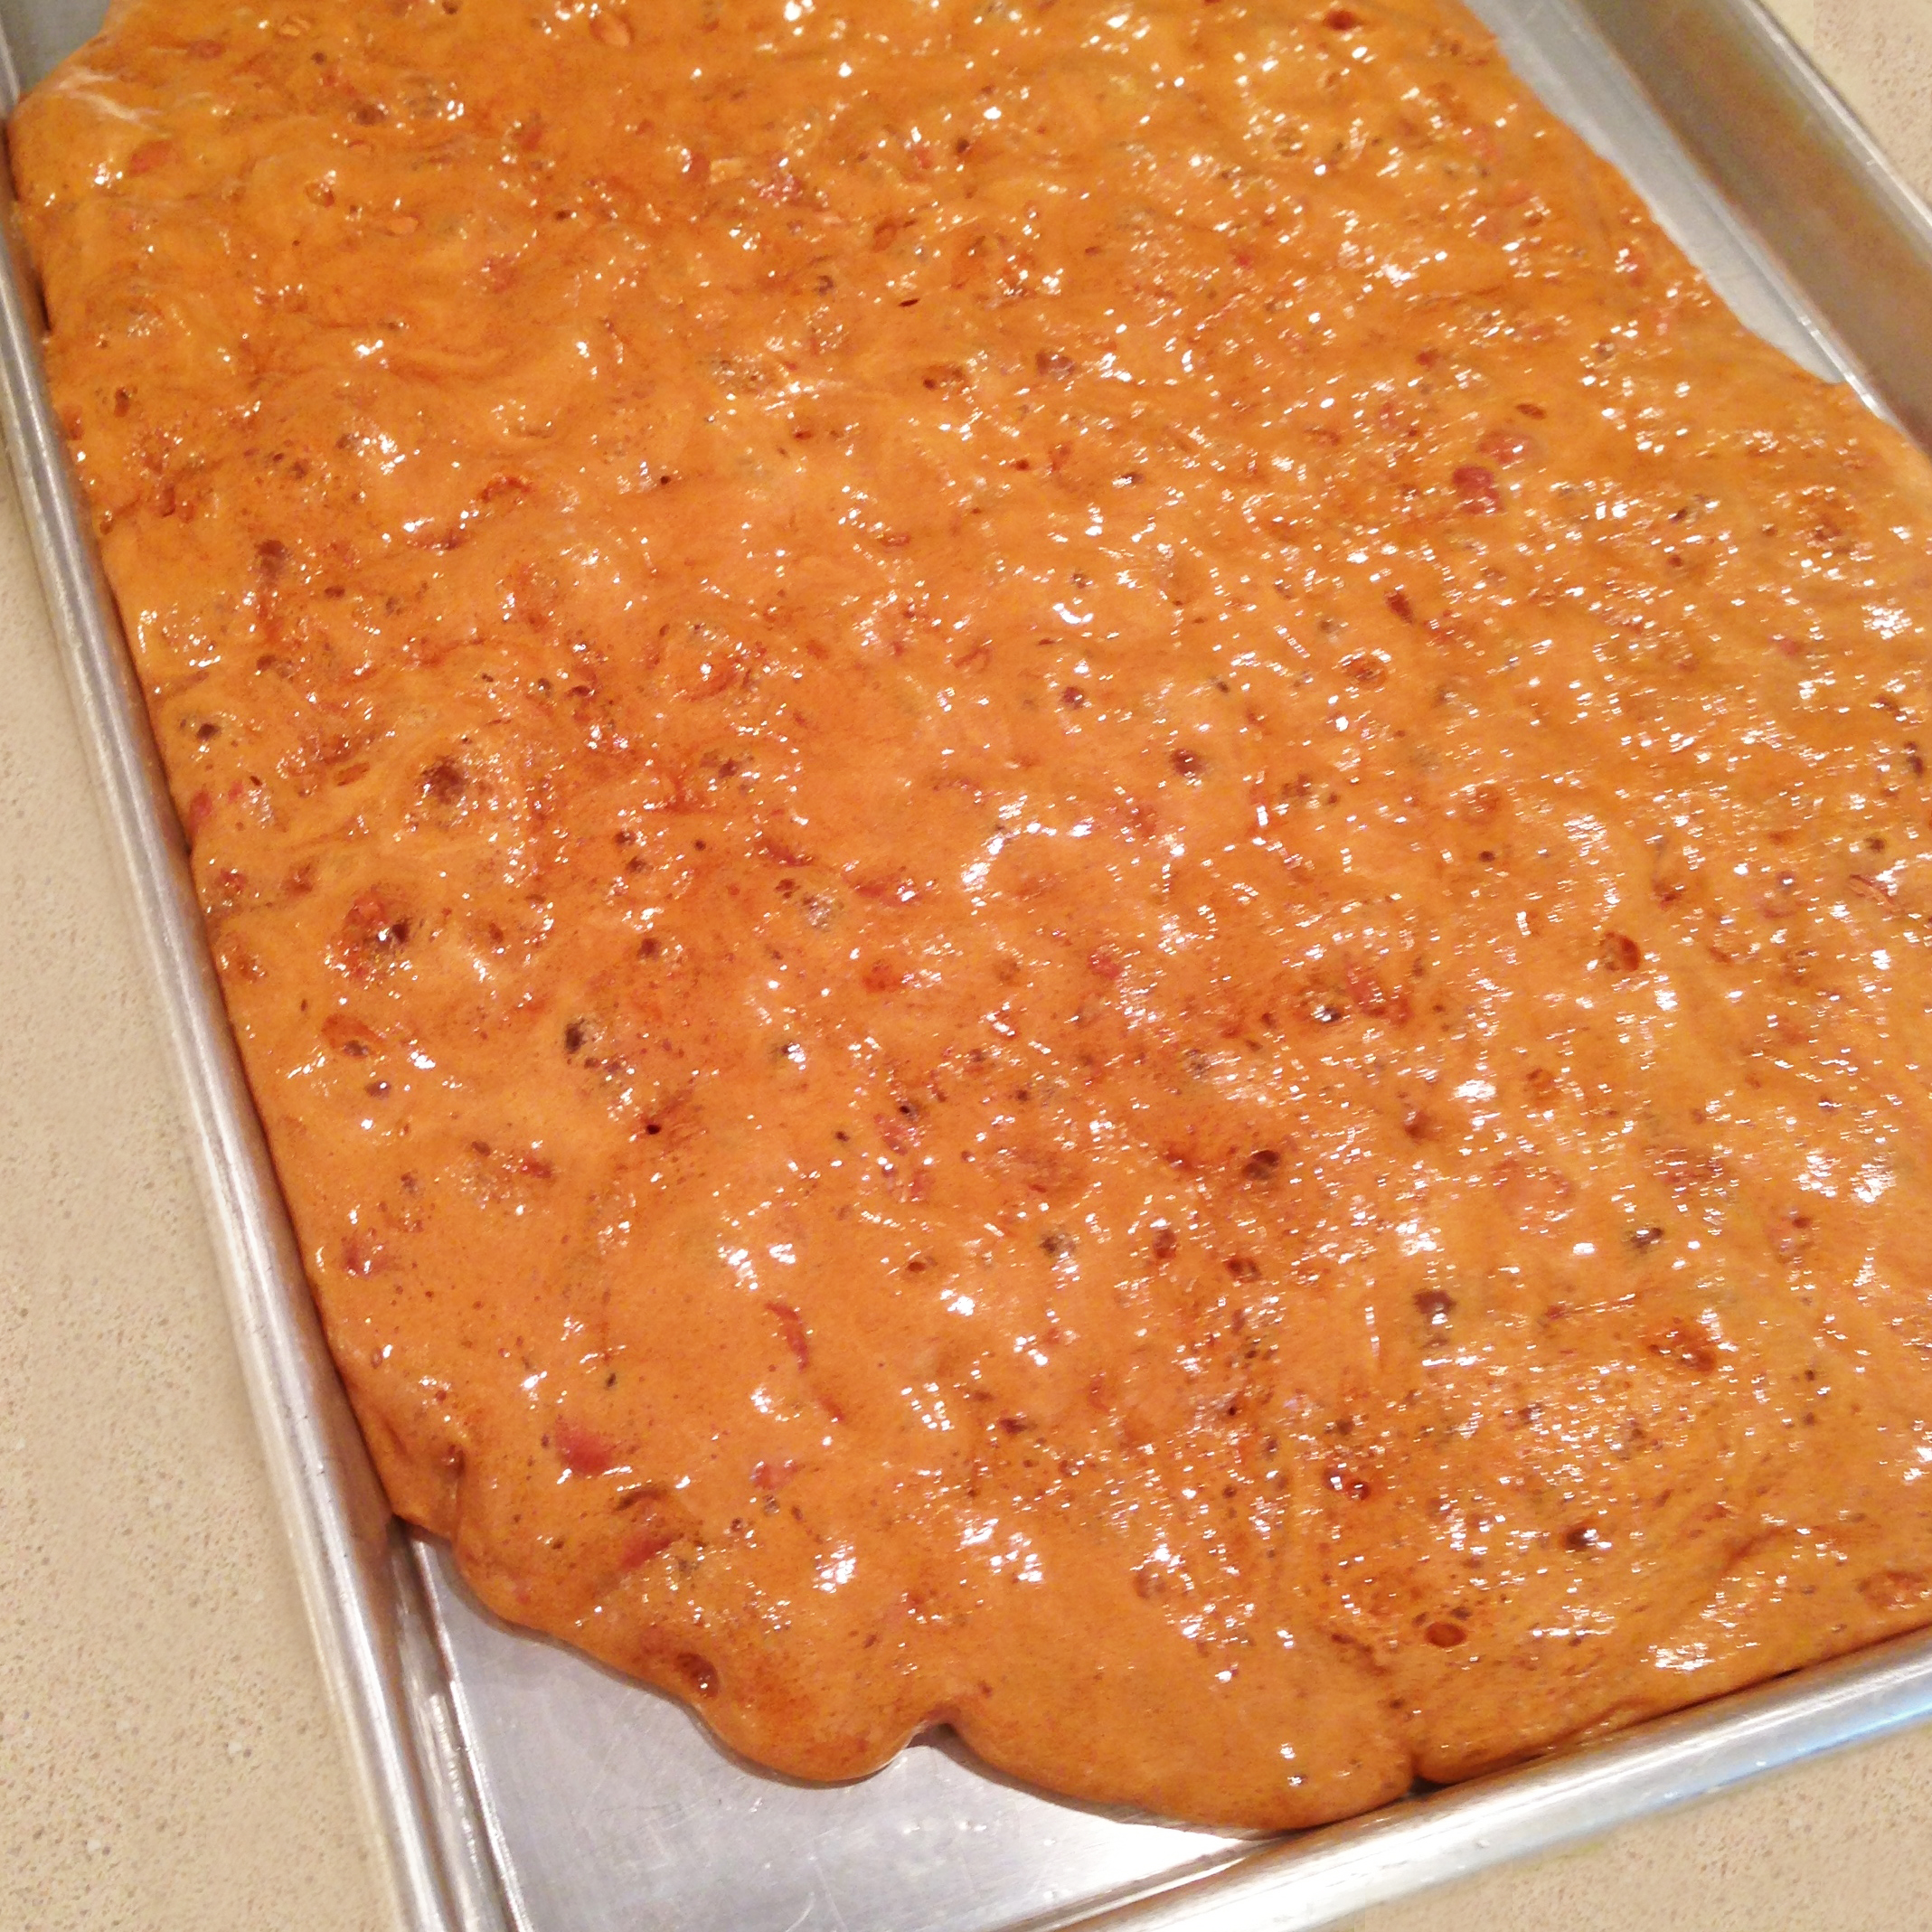
  • Liberally butter a large jellyroll pan (this is just a cookie sheet with sides- the bigger, the better!) and set it on a towel or potholders (it will get very hot when you pour the brittle in).
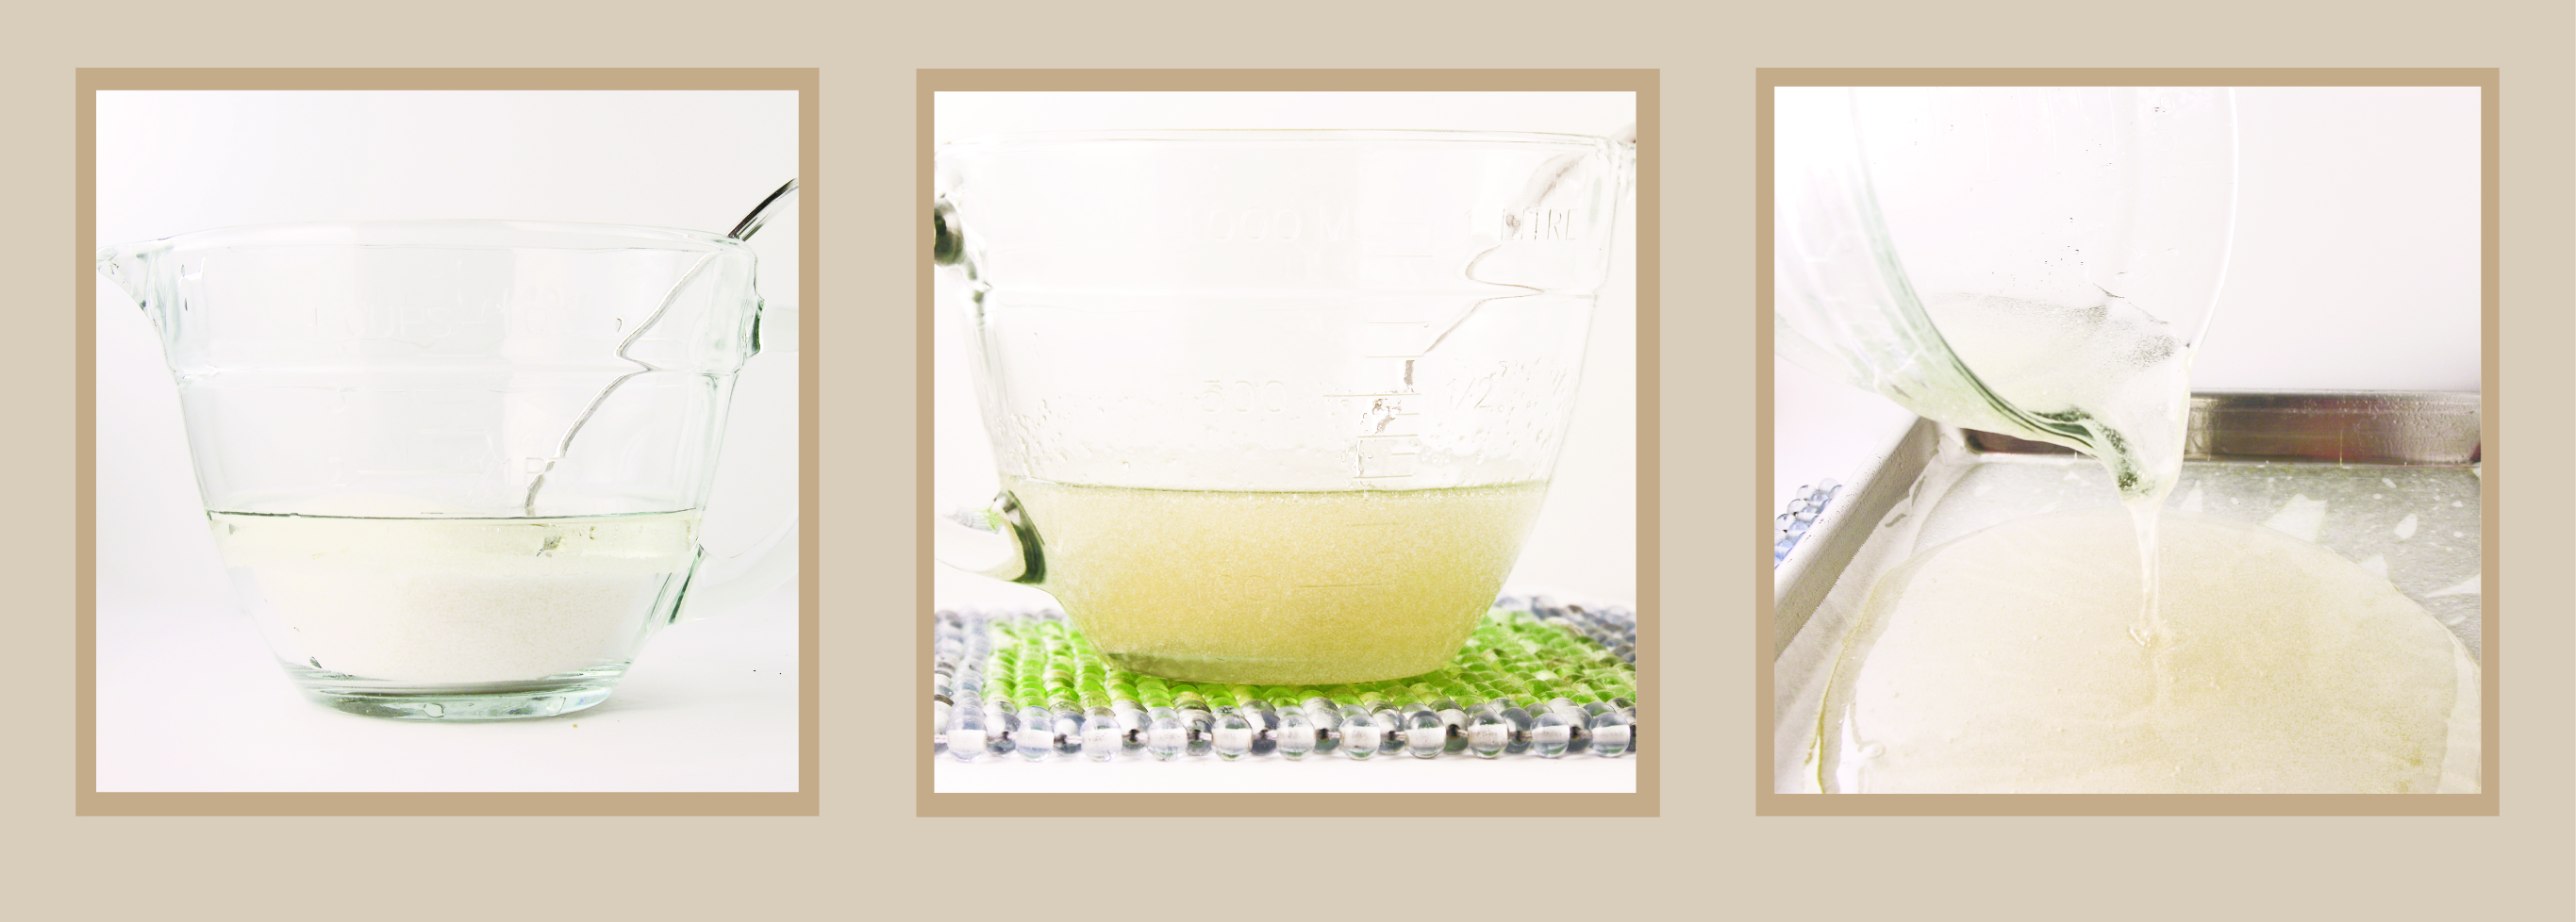
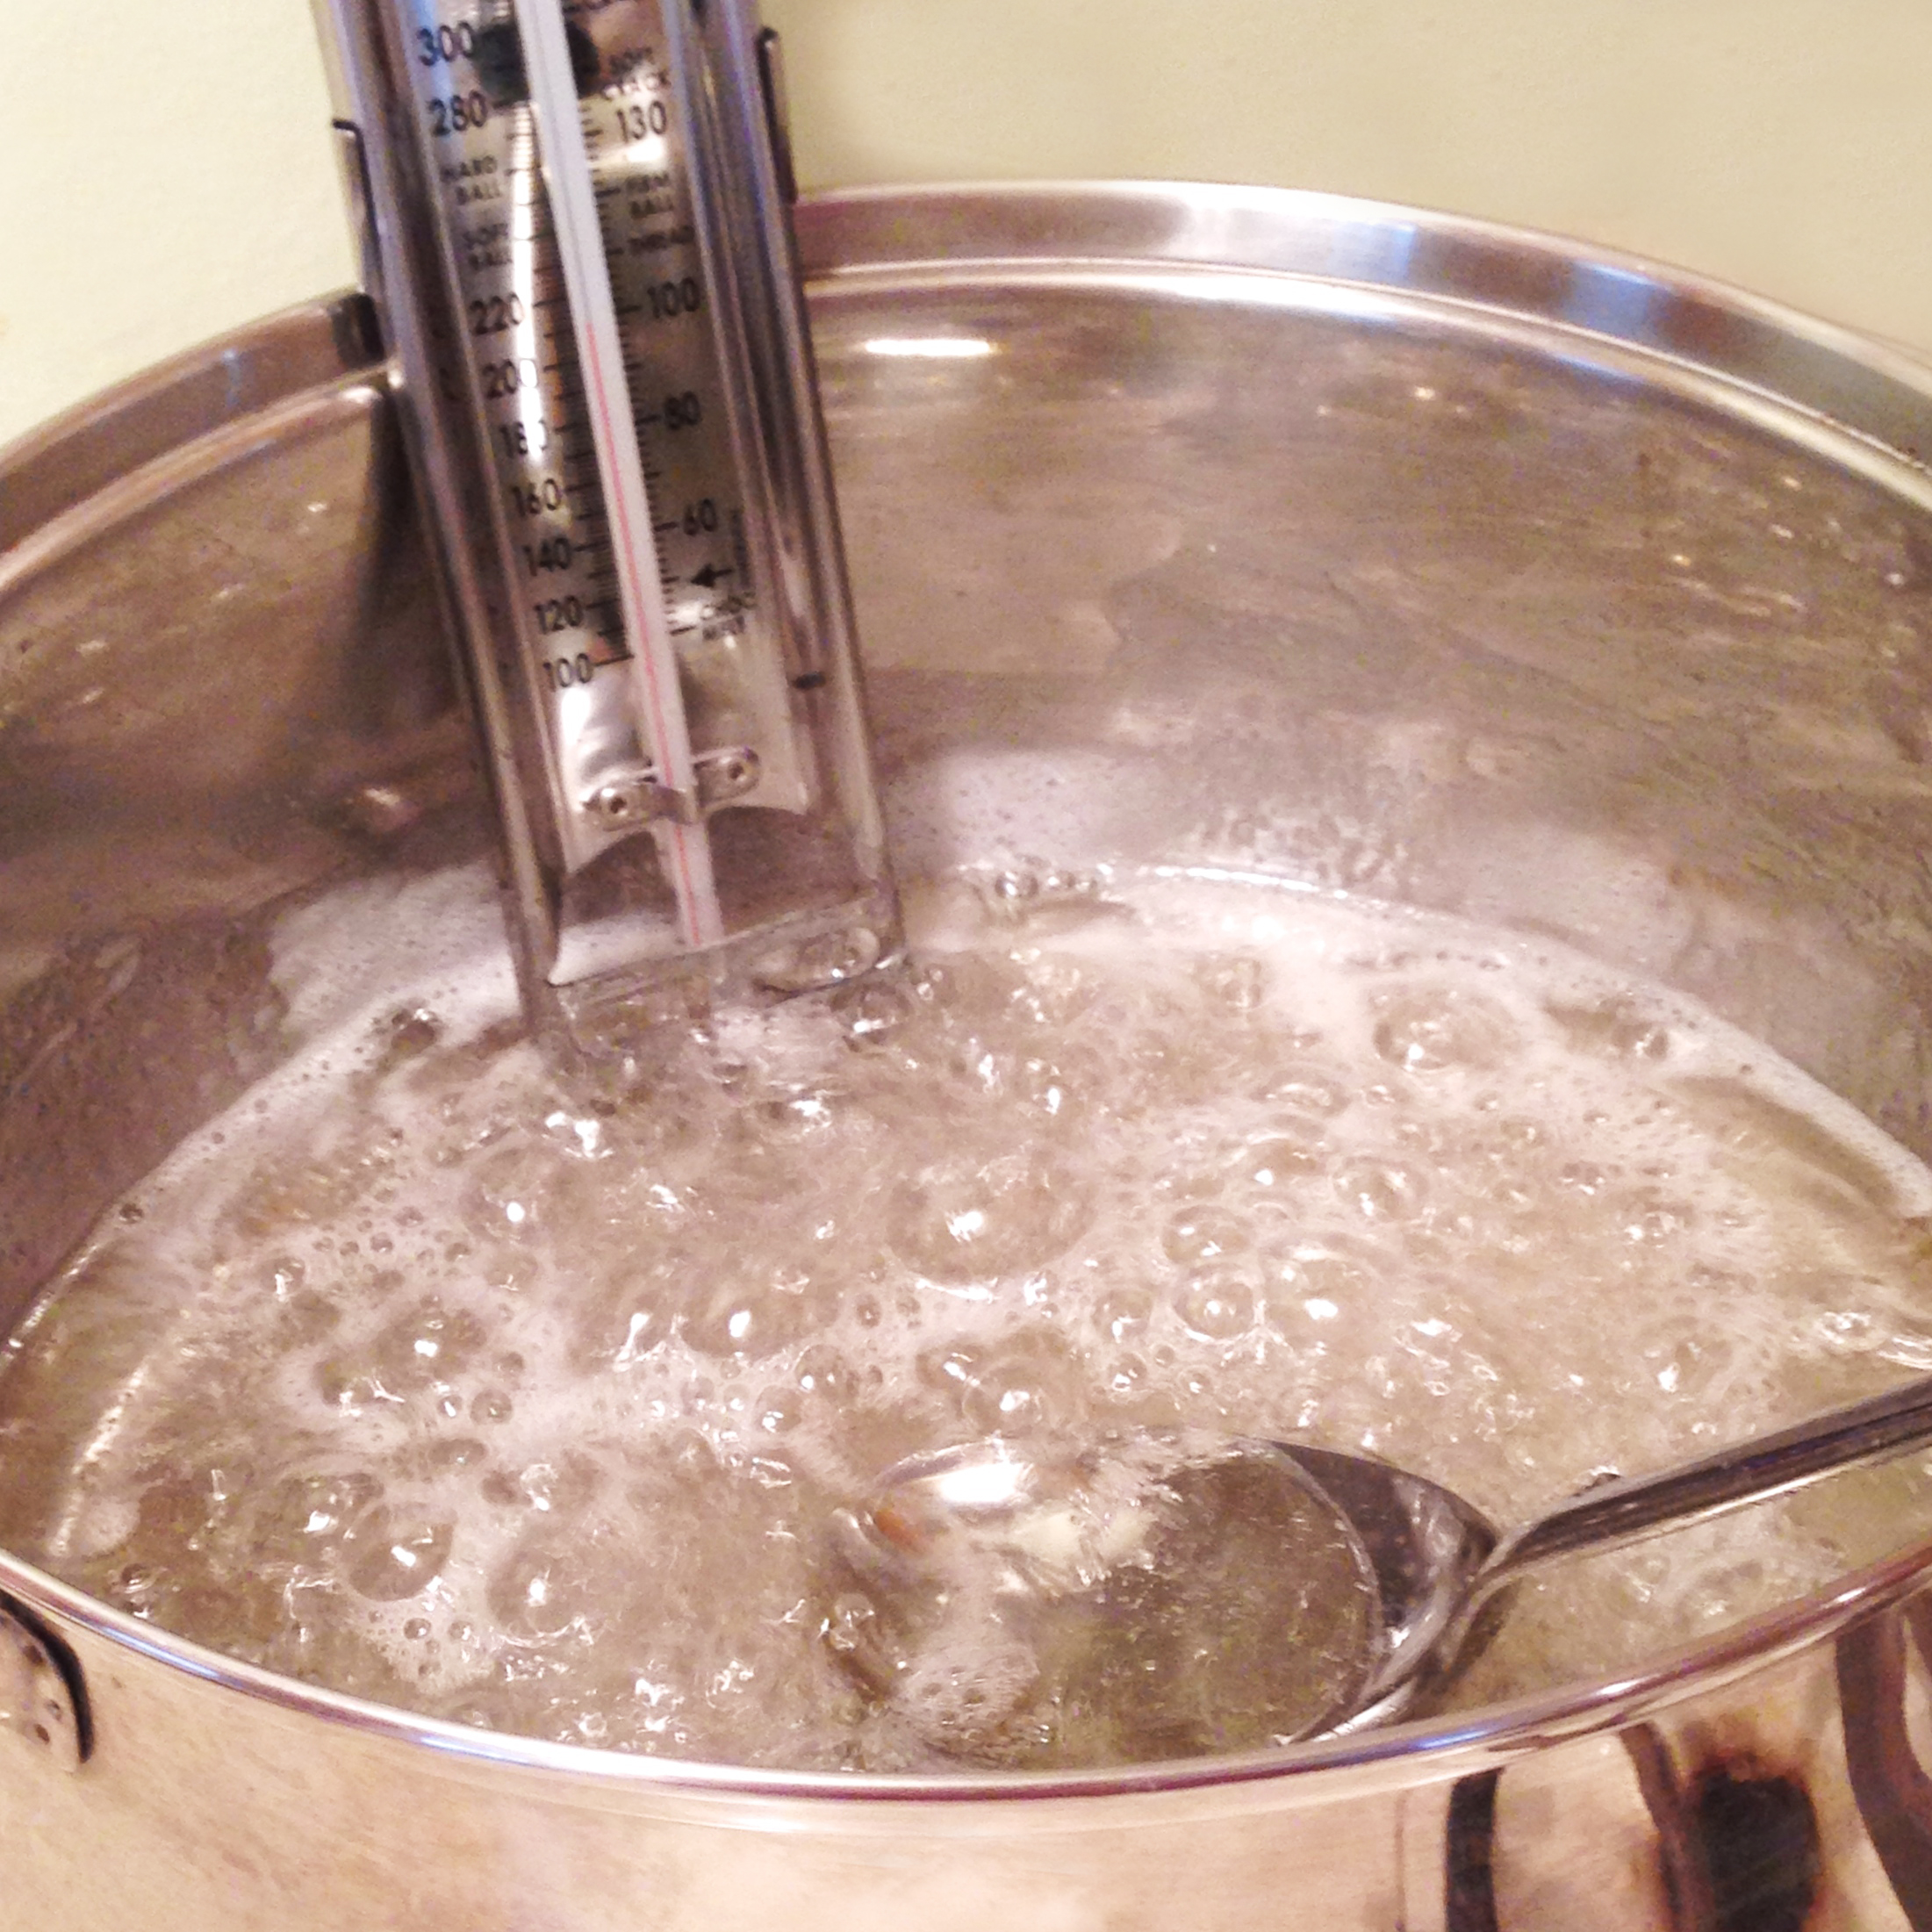
  • In a large saucepan (I used a dutch oven pan) place water, Karo syrup and sugar.
  • Place a candy thermometer in the pan (I clipped mine to the side)
  • Heat on high and boil until soft ball stage (238F degrees), stirring occasionally.
  • While this is boiling, measure out the remaining ingredients and have them ready to add.
  • At 238F degrees, add the peanuts, salt and butter and carefully STIR continually until mixture reaches brittle stage (310F degrees).  This took me about 15-20 minutes.

How-to-make peanut brittleHow-to-make peanut brittle

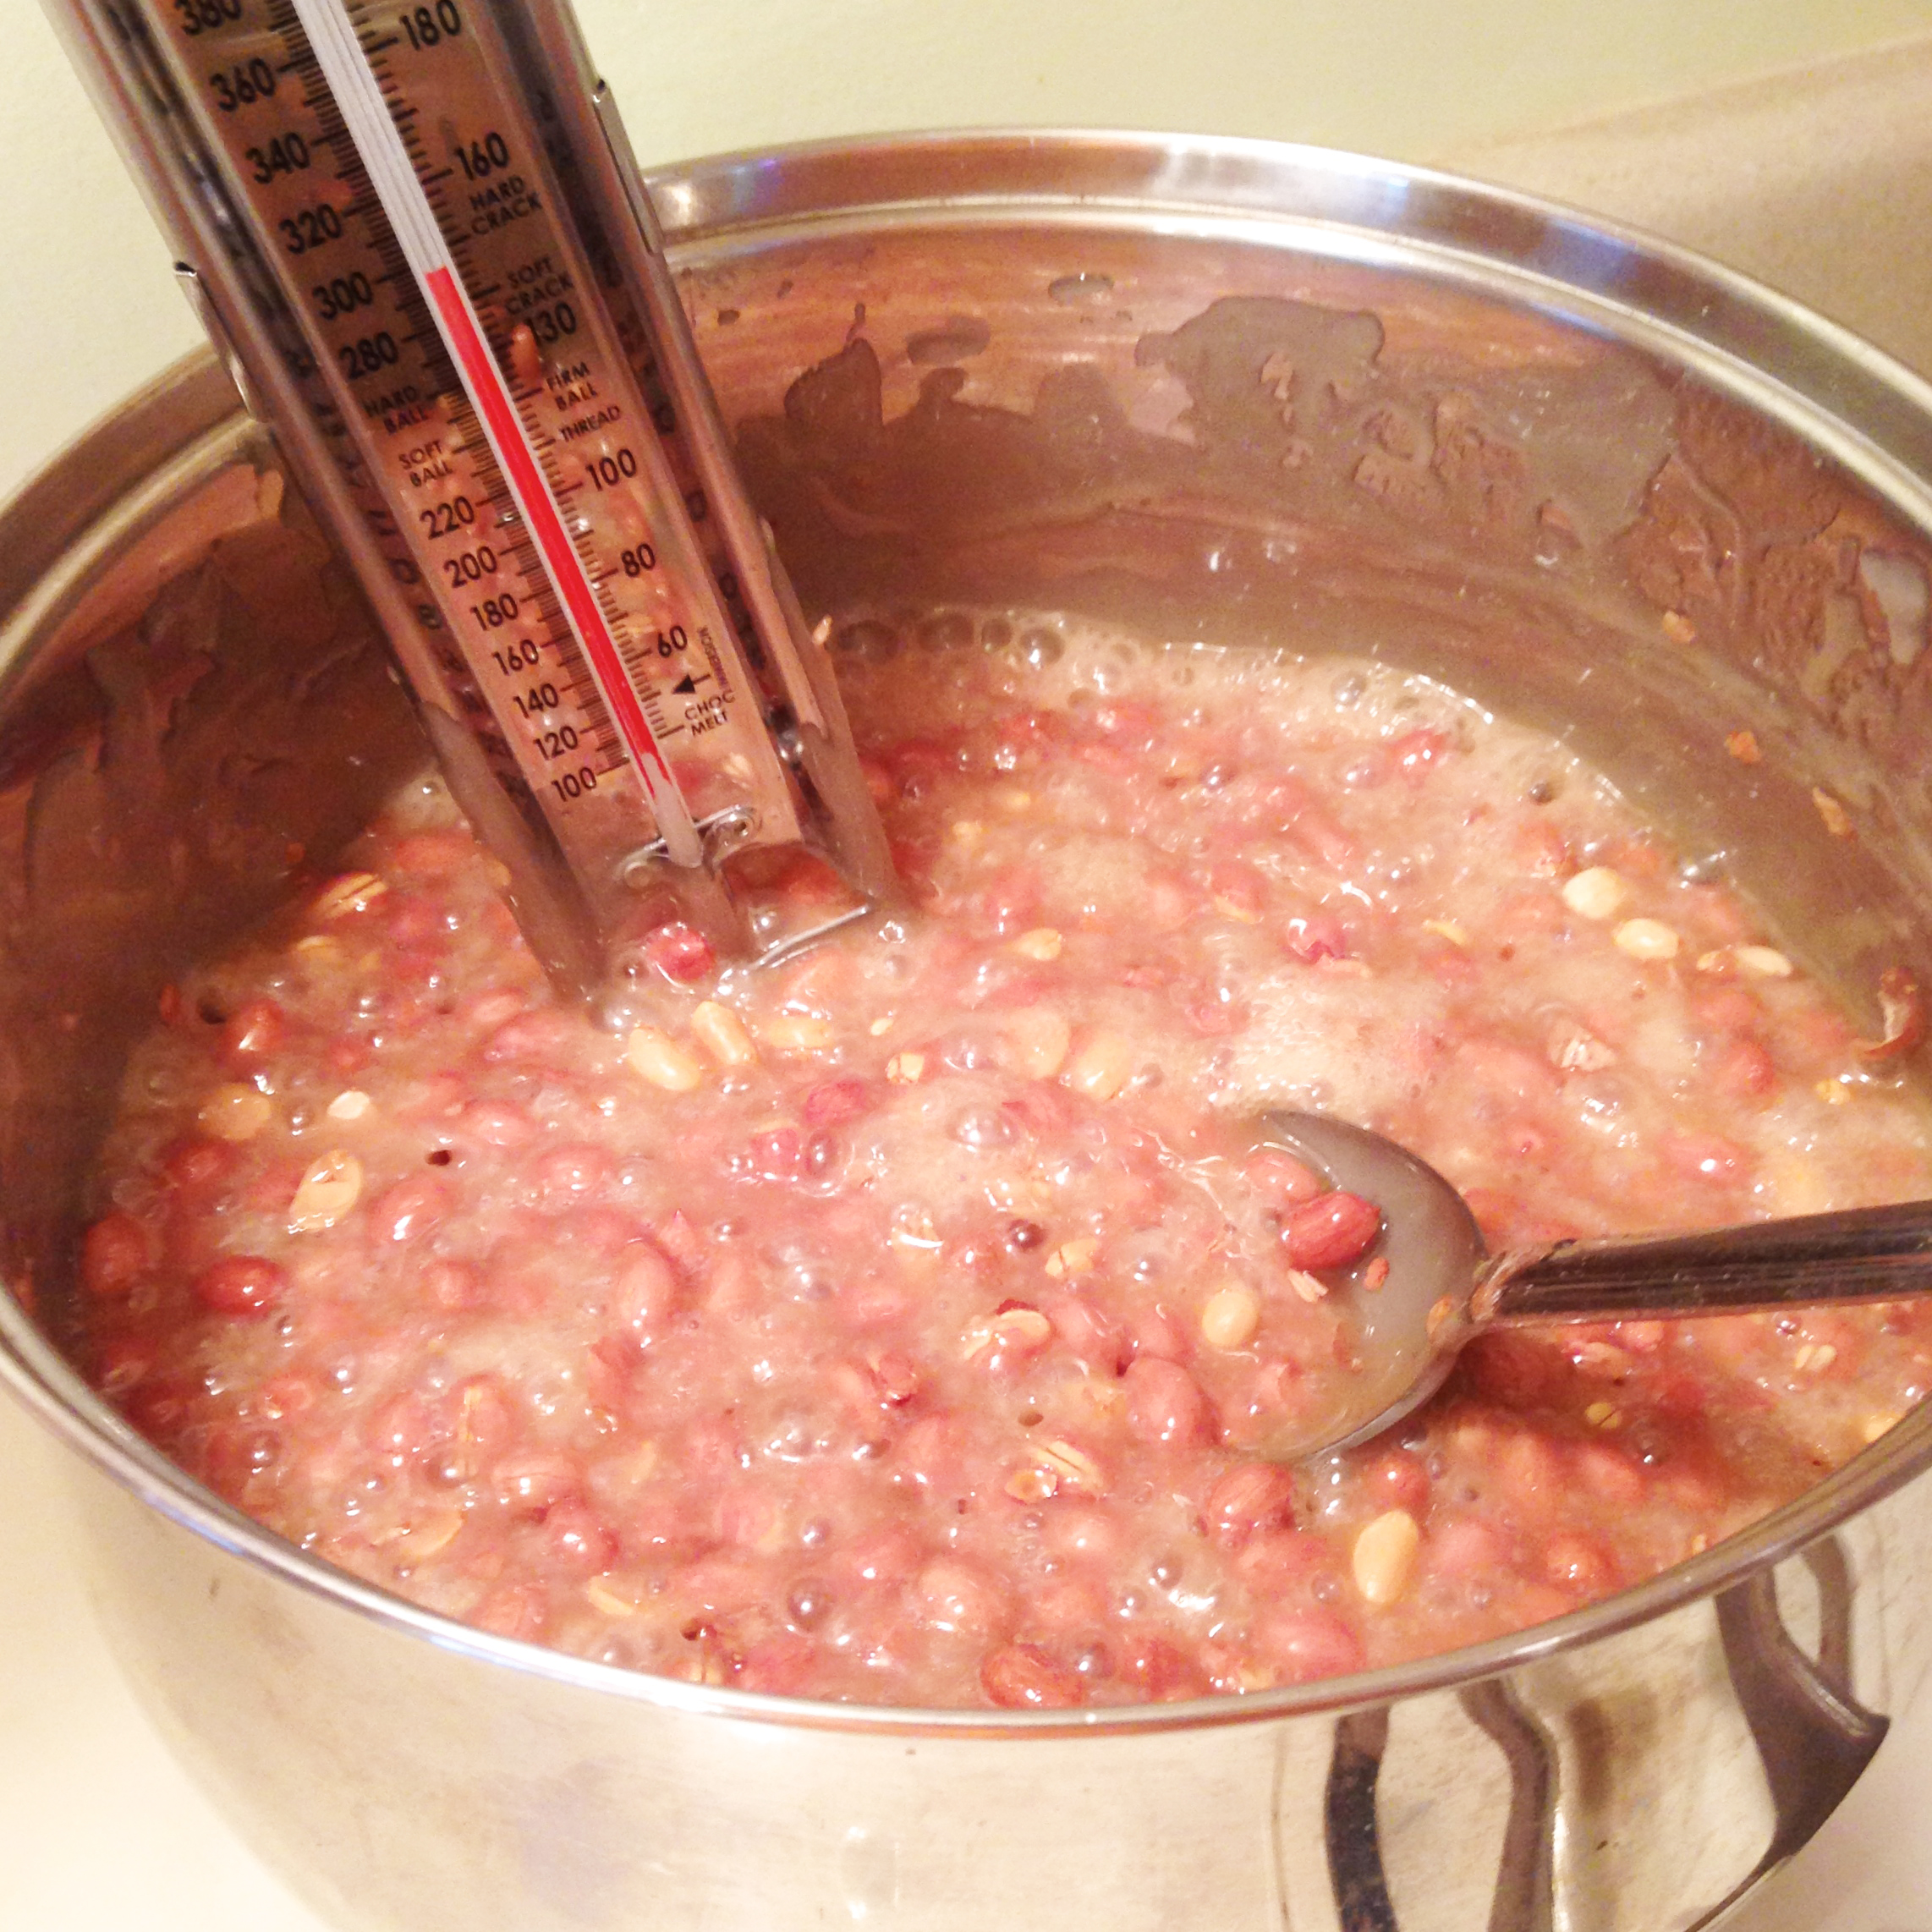
  • Add baking soda and stir until it disappears.  The mixture will foam up and double in size (that’s why you need a big pan!). Give it  few seconds to get nice and foamy.
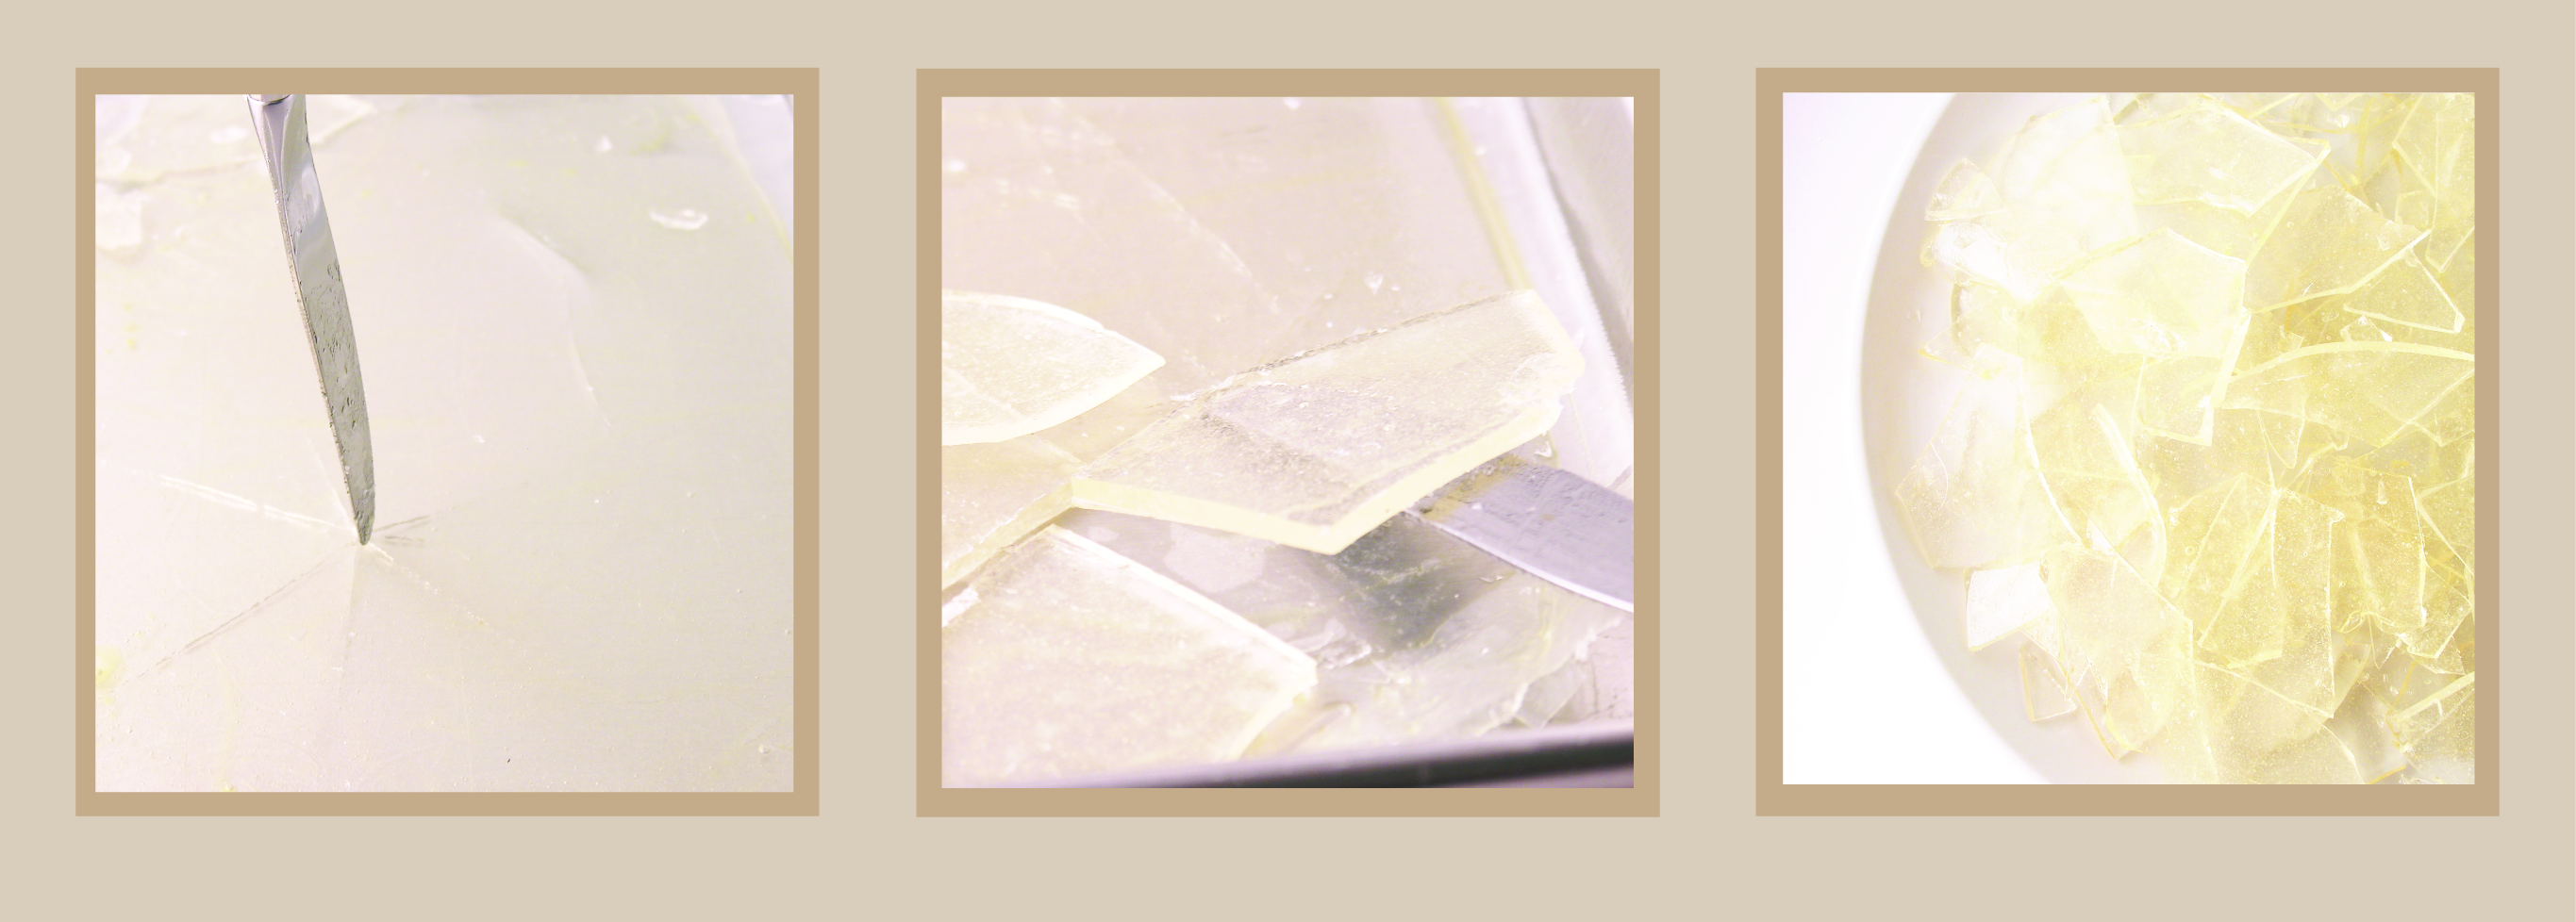
  • CAREFULLY, using oven mitts, pour mixture onto your buttered jelly roll pan.  Do not spread it out, just let it spread it out on its own.  Allow brittle to cool for several hours (don’t rush this part– it is worth the wait!)

How-to-make peanut brittleHow-to-make peanut brittle

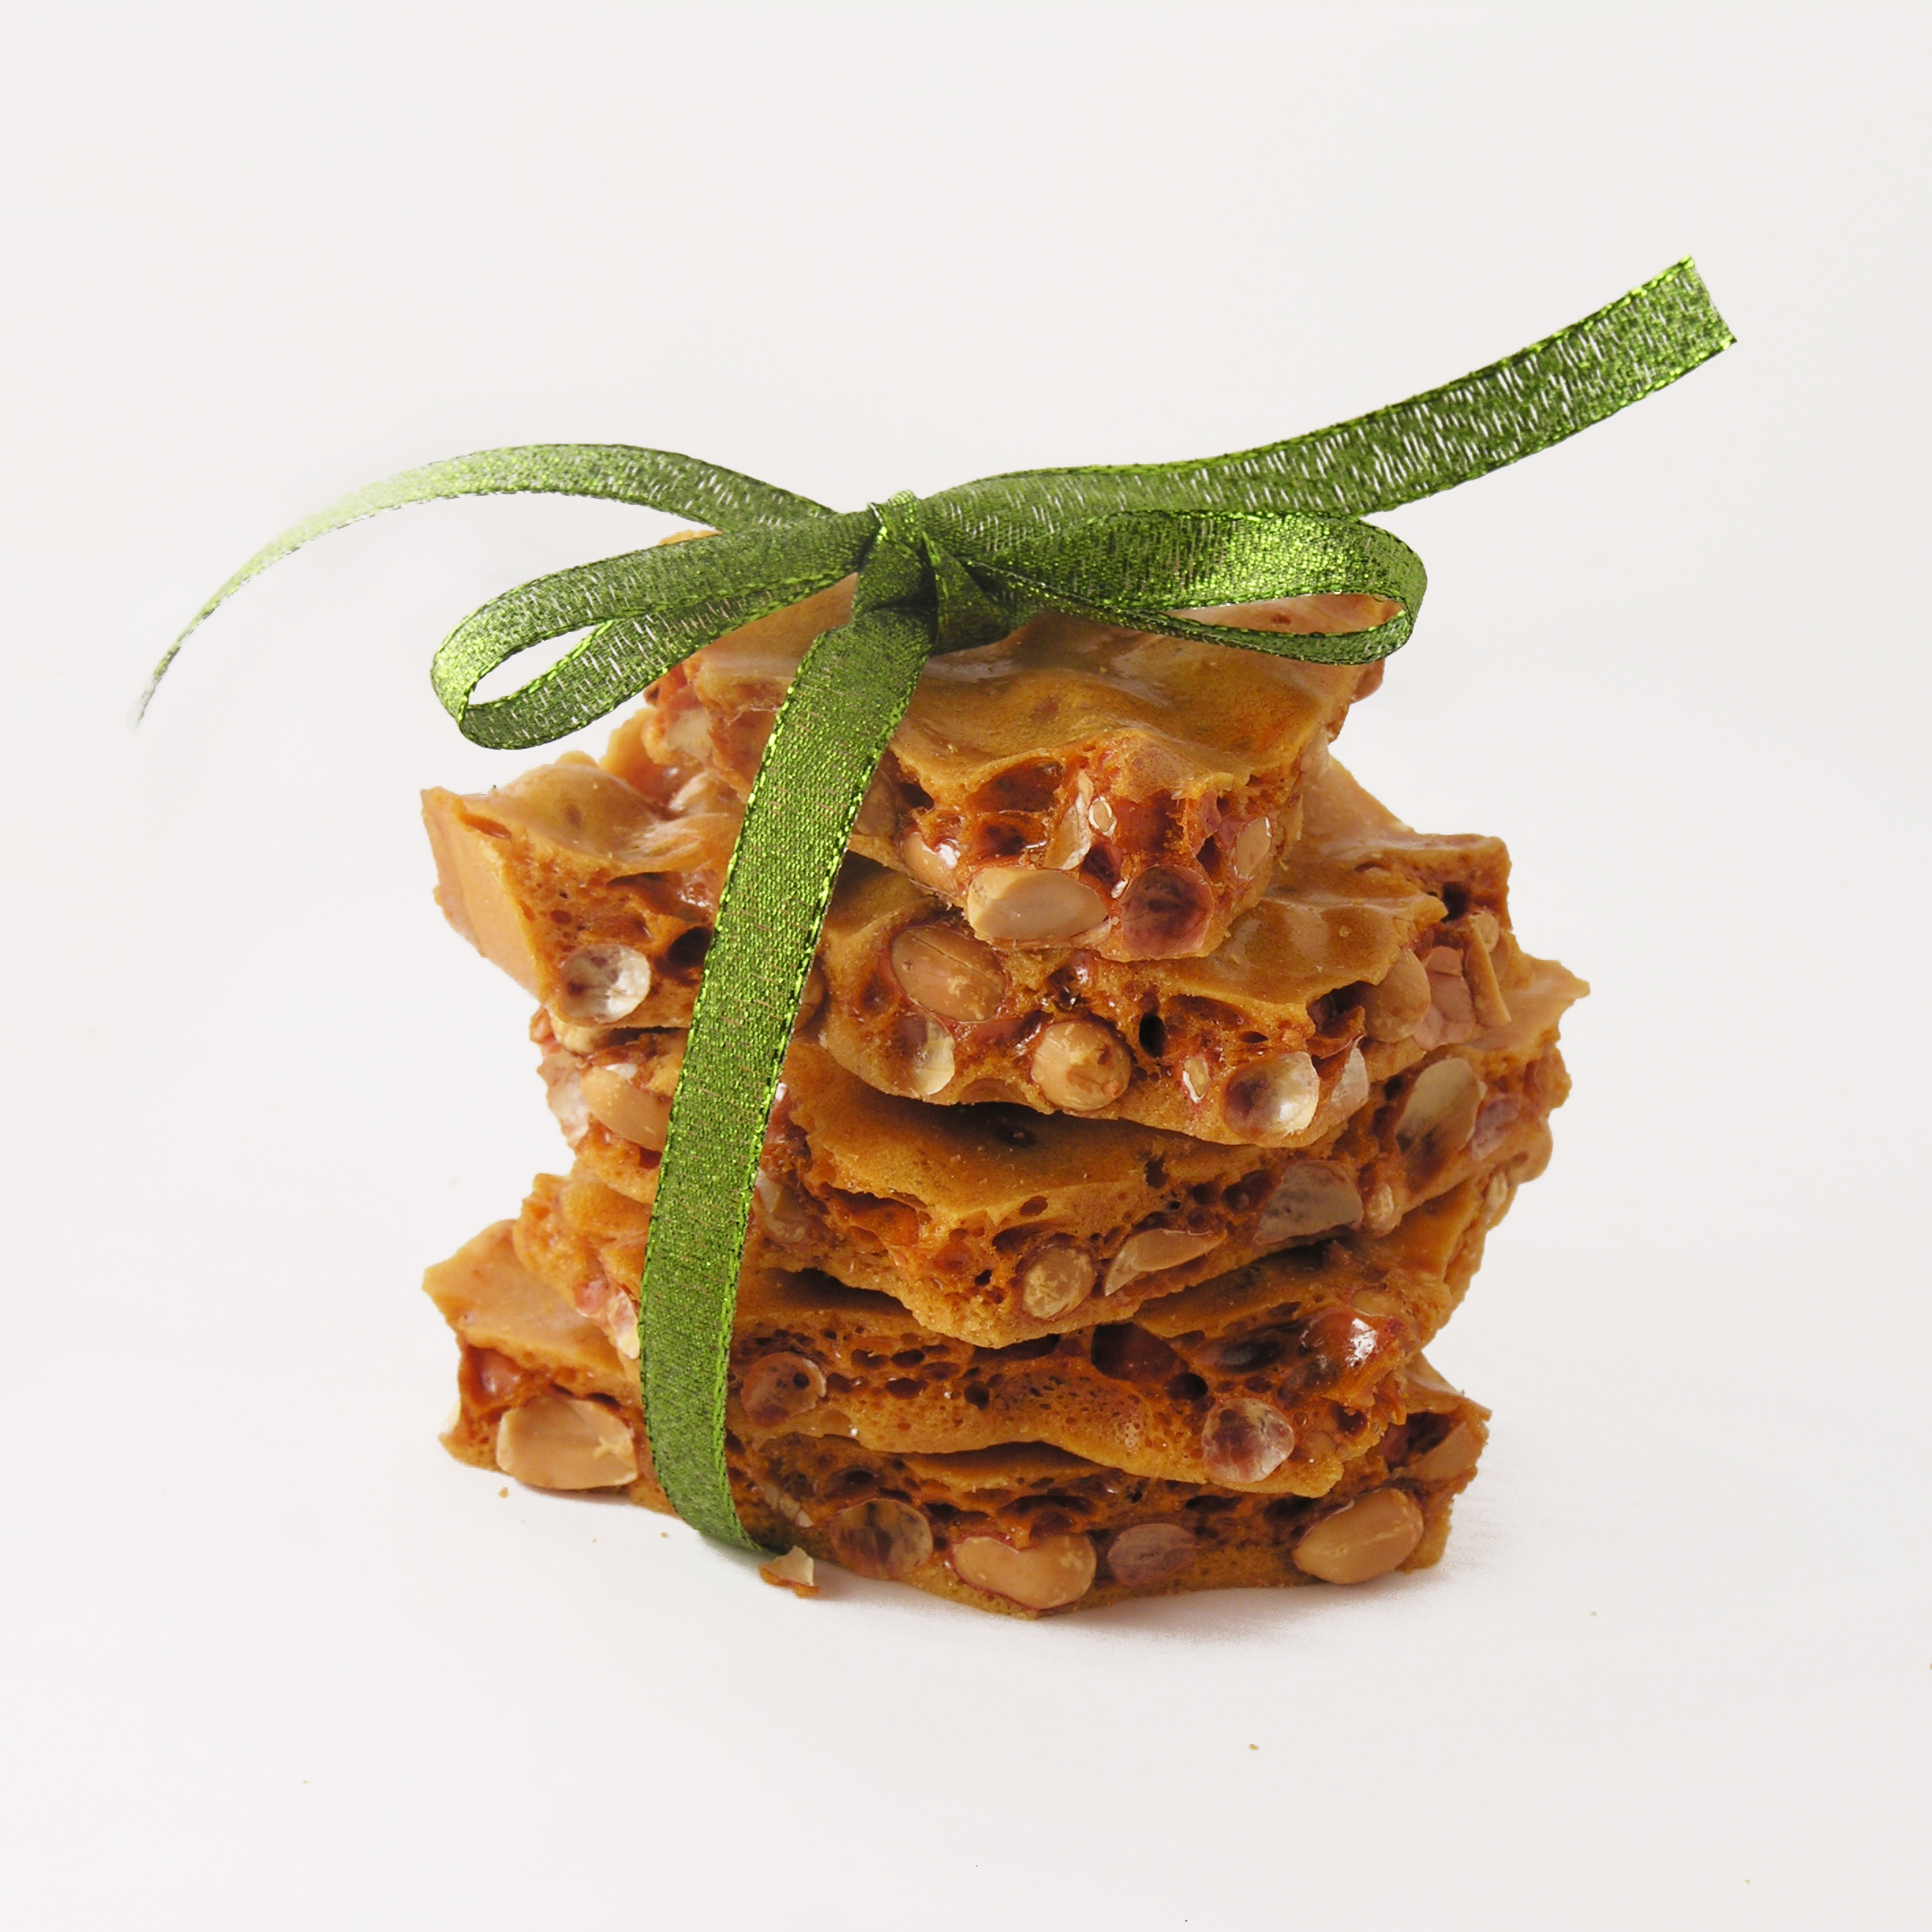
  • Once it is completely cool, break it up into chunks and enjoy!!!!!!

Peanut Brittle!!
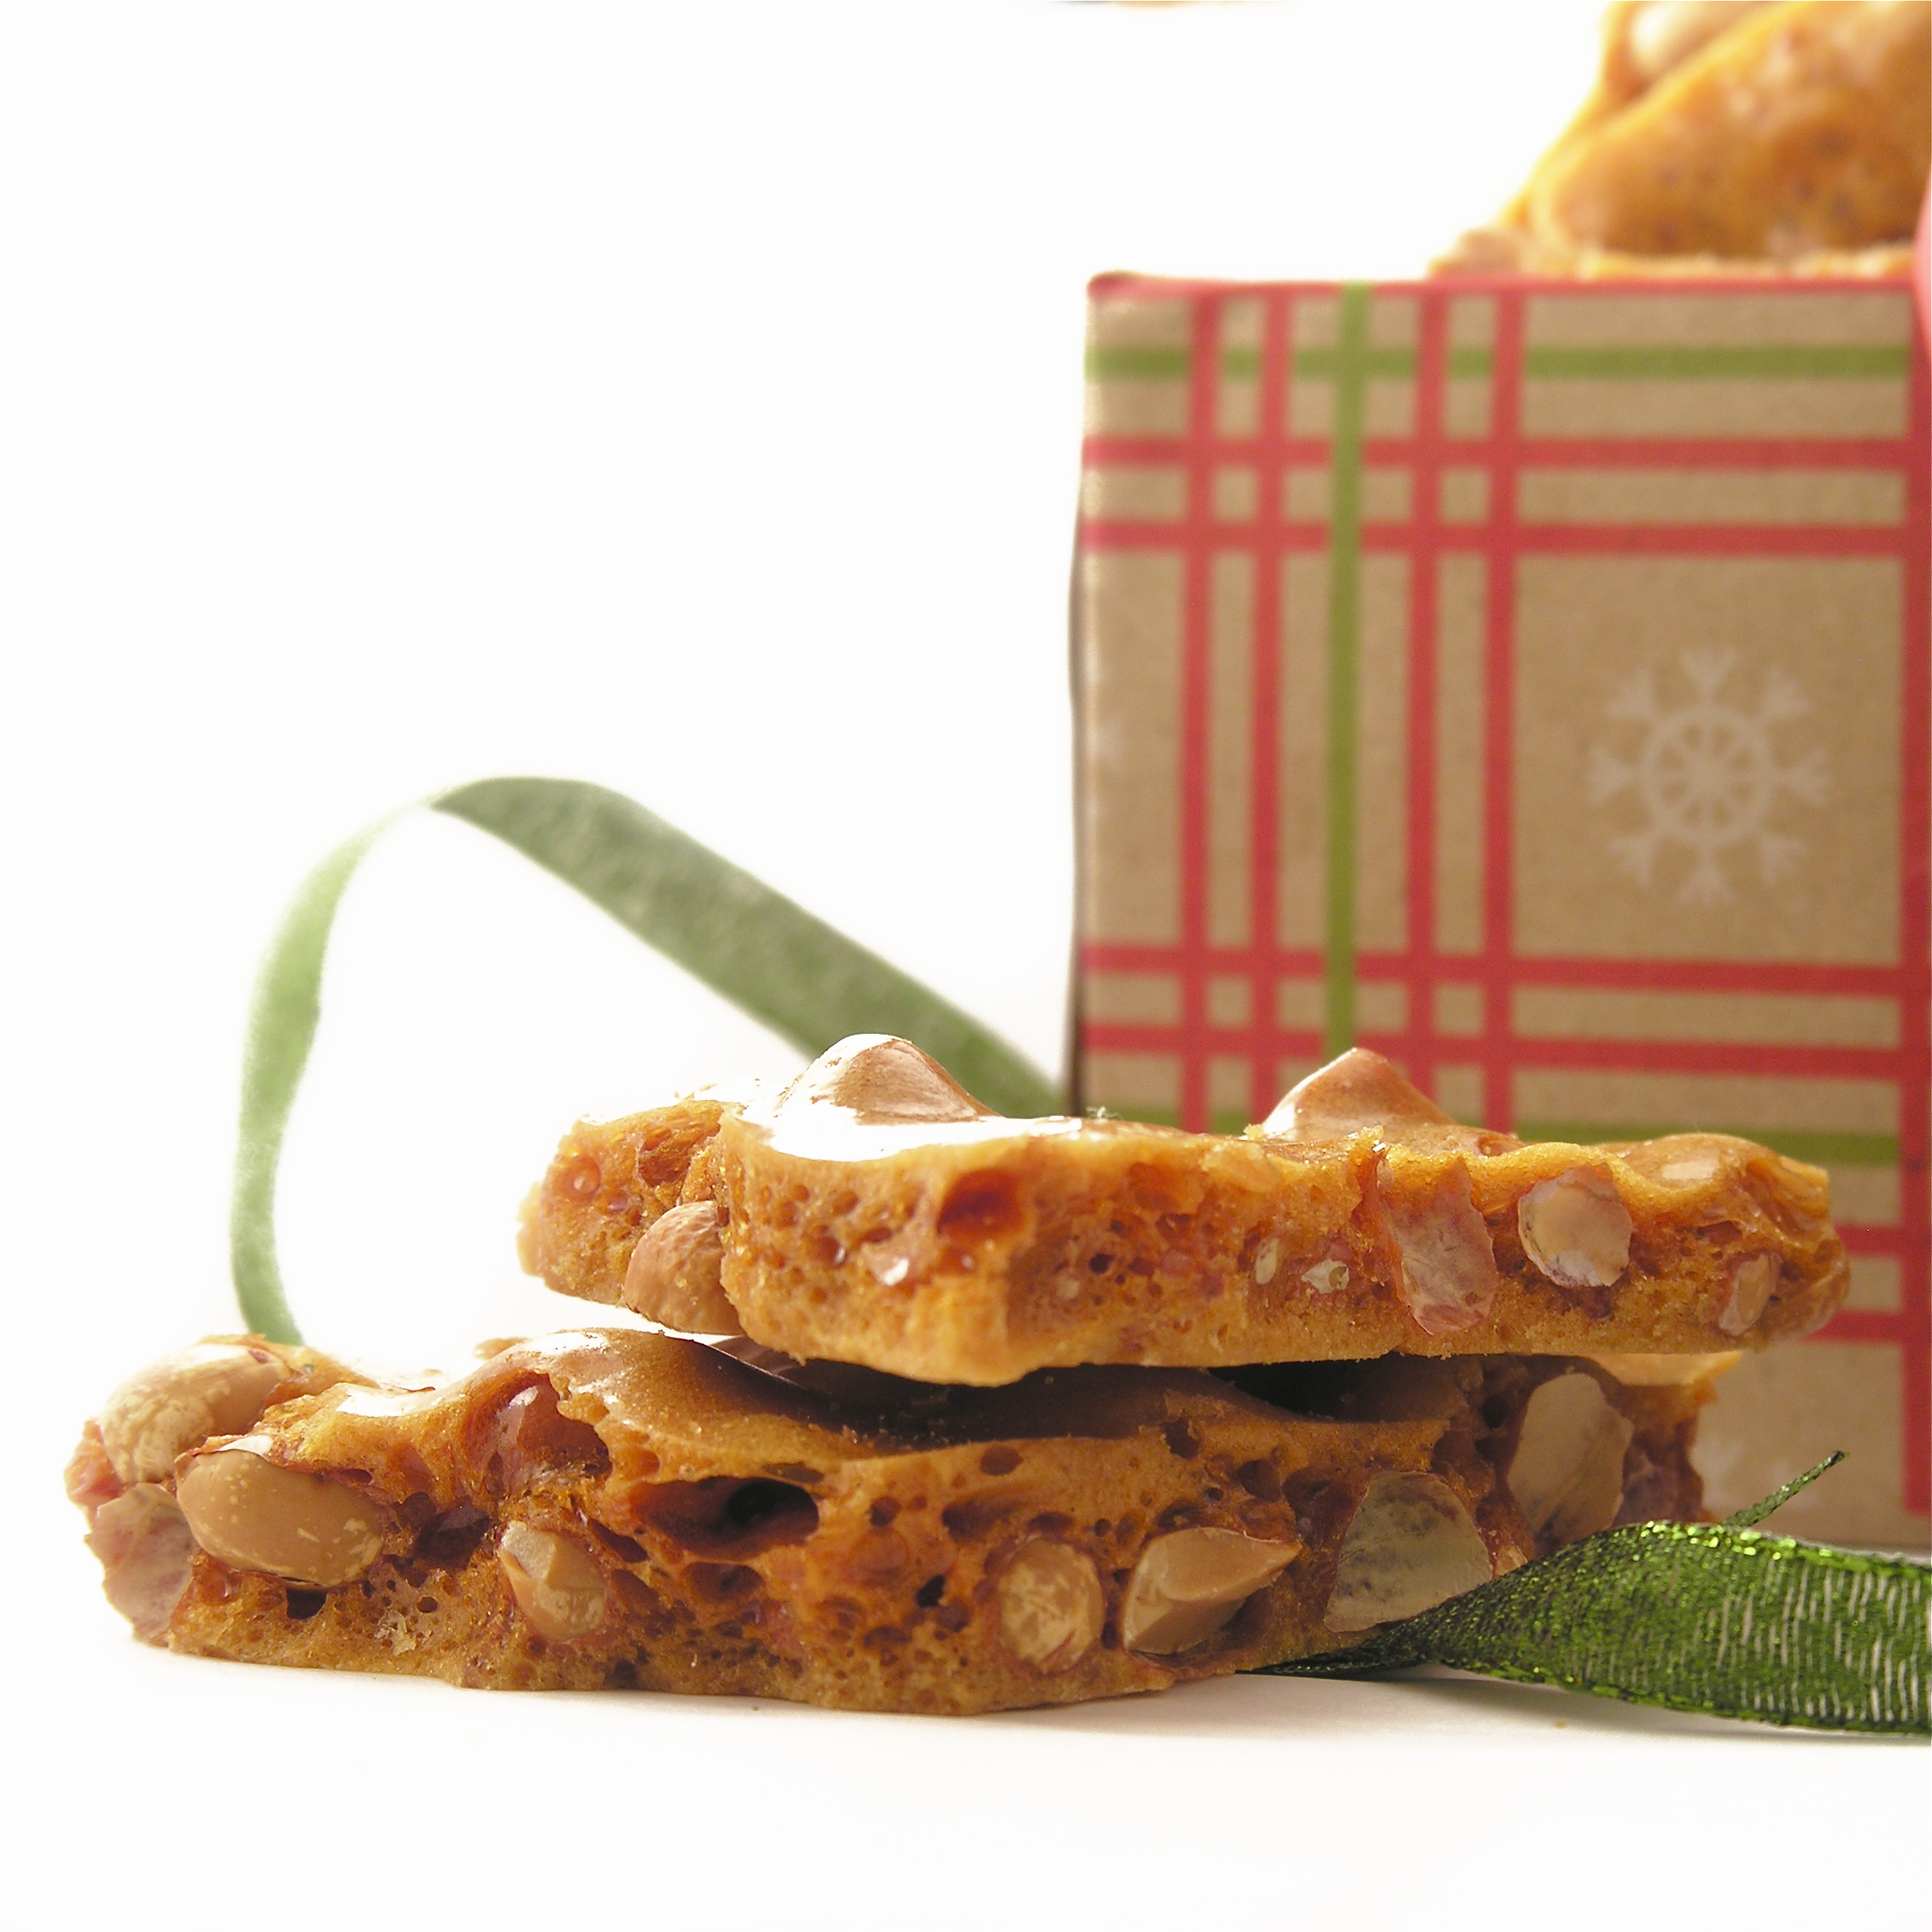
My thoughts: This isn’t a difficult recipe- it is just hot and time consuming.  Now that I’ve made it, I will make it again though- it is SO worth the effort!  I know there are much simpler recipes (even ones in the microwave!) for peanut brittle, and I’m all about simple.  But this is an exception to the rule of keeping things simple.  I really think you will love it!  Thanks so much for sharing your wonderful recipe Aunt Beth!  Love you!  ~R

Peanut Brittle
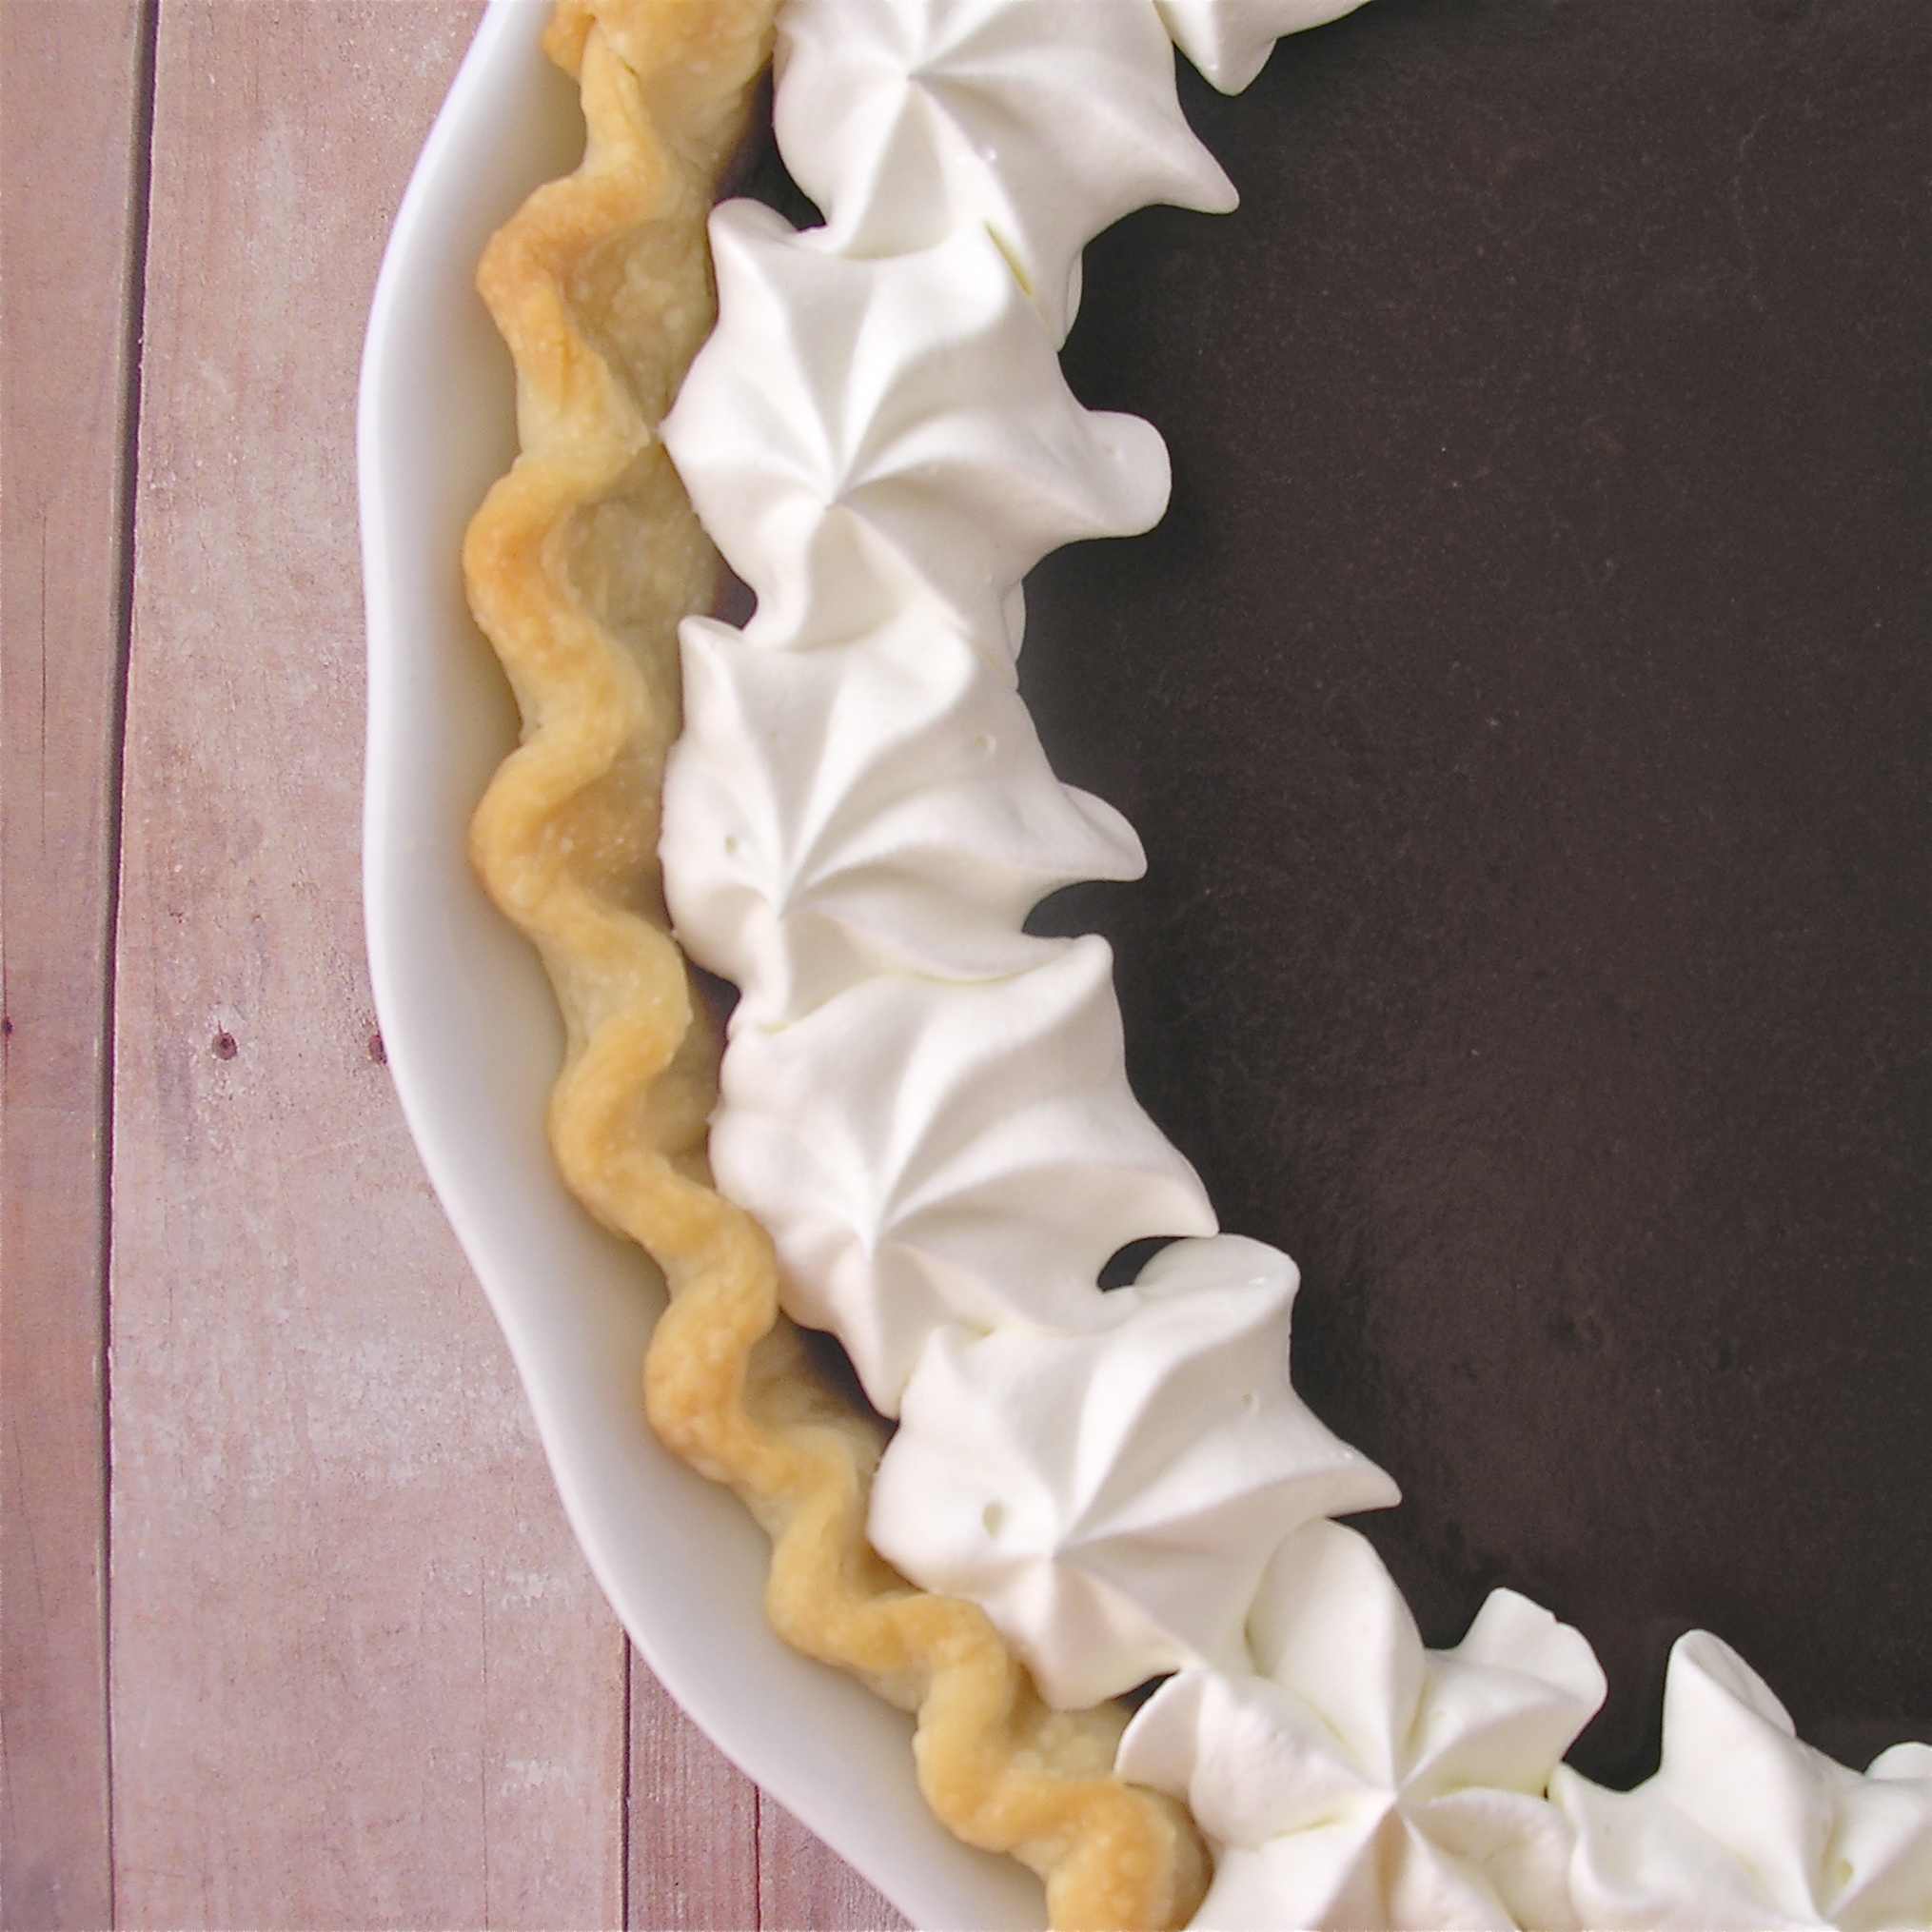
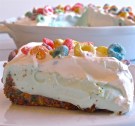
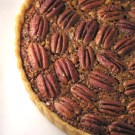
Other Christmas recipe ideas:

Snowman Oreo PopsChocolate Pecan TartChocolate Bon-bonsPeanut butter cup cheesecake

Heath Bar Ice Cream Dessert

Heath Bar Ice cream Dessert2
This recipe is a classic family favorite.  It is one of my grandma’s recipes, and I say “one of” because my grandma is a treasure trove of recipes (especially desserts!)  My cousins and I joke about how many desserts show up at family gatherings.  The conversations go something like this:

“Oh no, we only have 8 desserts today…this could be a disaster.”

“There are 24 of us here…that means we can each only have 1/3 of a dessert.”

“I want to try a little of everything.”

“I get a third of that chocolate cake”

“There’s ice cream?  Does that count as a ninth dessert?”

This is nearly always one of the desserts at our family dinners.  It’s fabulous. Creamy and light and butterscotch-y…oh my.  You’ve got to try this one out with your family!

Heath Bar Dessert!!

Ready for the recipe?  Here you go: (printable version)

INGREDIENTS:

  • 1 stick (1/2 cup) butter, melted
  • 1 package (10 oz) Lorna Doone cookies, crushed (if you can’t get these specific cookies, use 2 cups of another brand of shortbread cookies)
  • 3 packages (3.4 oz) INSTANT vanilla pudding
  • 2 and 3/4 cups milk
  • 1 quart of butter pecan ice cream (softened)
  • 1 (8oz). Cool Whip
  • One bag of Heath Milk Chocolate Toffee Bits (or several crushed Heath bars)

DIRECTIONS:

Crust:

  • Combine  melted butter with crushed shortbread cookies and press into a 9″ by 13″ cake pan (I use glass)

Filling:

  • In a large bowl, combine milk and pudding and beat on high for about two minutes, until pudding becomes thick.
  • Add softened ice cream to pudding and stir by hand until well combined.
  • Pour over crust in pan.

Topping: 

  • Spread Cool Whip topping over the entire dessert.
  • Top this with desired amount of Heath Milk Chocolate Toffee Bits (I used the whole bag!!)
  • Cover dessert tightly with plastic wrap and freeze until serving.  Allow dessert to warm for several hours before serving.
  • Enjoy!

Heath Bar Ice Cream Dessert3
My thoughts: I love toffee and pecans and butterscotch and ice cream…this dessert just makes me smile.  It reminds me of family meals and laughter and love.  You can’t argue with a dessert that does that!  I hope you have a chance to try this recipe with your family!  Thanks for sharing your recipe grandma!  Love you!  ~r

Other yummy treats for your family:

German Chocolate Pie!Chocolate lava cupcakes!Peanut Butter Cup Layer CakePumpkin Roll

Creamy Chocolate Pie

Creamy Chocolate Pie
This is a new take on a chocolate pudding pie.  So incredibly rich in chocolate flavor that you will never go back to just plain pudding!

This week’s family recipe comes to us from Florida…or Yellowstone…or Peru….or wherever my wonderful adventurous Aunt Paula might be.  She and my Uncle Jim have literally travelled the world and done the most interesting things.  They are great story tellers and a family meal with them is a treasure.

4769_1062312648969_4724662_n

I had never tried this recipe before, but Paula and Jim submitted it to our family cookbook and titled it “The Best Chocolate Pie in the World”.  How can you resist trying a pie with a name like that?!??

Paulas Pie 4
The chocolate flavor in this pie filling is extraordinarily good.  Very rich and dark.  I’m really not a pie person (check the rest of this blog….not too many pies…) but this one is worth trying, it’s very yummy!

Here’s is the recipe: (printable version)

INGREDIENTS:

  • 1 1/2 cups sugar
  • 2 tablespoons cornstarch
  • 5 tablespoons of cocoa
  • 3 egg yolks, beaten
  • 2 cups hot milk
  • 1 stick (1/2 cup) butter. melted
  • 1 1/2 teaspoons of vanilla

DIRECTIONS:

  • Prepare a graham cracker or a plain baked pie crust.  Since I rarely make pie, I just used a refrigerated pie crust and baked it according to the package.  If you have a favorite crust recipe, now’s the time.
  • In a large, heavy saucepan, combine dry ingredients together.
  • Heat milk over stove or in the microwave and add it gradually to the dry ingredients, stirring as you add.

Not-so-homemade pie crustAdd hot milk slowly...

  • Add butter and egg yolks and mix well.
  • Cook on stove over low heat until thickened, stirring constantly. (I did not allow mine to cook long enough the first time I made this and it didn’t firm up very well.  Cook it until it is a very thick custard like consistency.  Mine actually boiled before it thickened enough.)
  • Remove from heat
  • Mix in vanilla.
  • Pour into prepared pie crust and chill several hours or overnight.
  • Enjoy!

Creamy Chocolate Pie!


My thoughts: Such an easy way to get your chocolate fix!  This pie is  soooo good with a cup of coffee and a little whipped cream on top…YUM!  Thank you for sharing your wonderful dessert with us Aunt Paula!  Enjoy your latest Caribbean adventure!! ~r  

The other lonely (yet yummy!) pie recipes of Easybaked:

Fruit Loop Pie!German Chocolate PiePecan and chocolate pieRaspberry Truffle Tart

Chocolate Ganache Brownies

Posted on

Ganache Brownies
These dense chocolate brownies are topped with a rich chocolate ganache.  You won’t be able to eat just one!!

It’s November.  Time for turkey and thankfulness.  One of the things I am incredibly thankful for is my wonderful family.  We are spread over many states and have many interests, but one thing we all love:  dessert.  This month I am going to feature some of our family’s best dessert recipes– just to get you all ready to bring some mouthwatering treats to your Thanksgiving feast!

This brownie recipe is from my Aunt Sara.  She’s known in our family for her wonderful layered salad, but since this is a blog about sweets, that recipe will have to wait for another day.

Aunt Sarah and her granddaughter Sierra

Aunt Sarah and her granddaughter Sierra

Several years ago I asked everyone in our family to submit recipes to compile into a family cookbook.  SO many wonderful things (with the exception of “Feline Delight”, submitted by my Uncle Keith and my dad, involving a stew made from the family pet…. a joke, of course!)  My Aunt Sara turned in this brownie recipe and I’ve always wanted to try it but just hadn’t taken the time until right now.

The verdict:  AMAZING.  These are the most fudge- like brownies I’ve ever had.  If you prefer cake-like brownies just stop reading right here….because these are rich, heavy, delicious bits of chocolate joy.

Ganache Brownies
So, lets get you the recipe so you can try these yummy treats! (printable version)

INGREDIENTS:

Brownie:

  • 1 stick (1/2 cup) butter
  • 2/3 cup chocolate (I used Nestle’ dark chocolate chips)
  • 4 eggs
  • 1/4 teaspoon salt
  • 2 cups granulated sugar
  • 1 teaspoon vanilla
  • 1 cup flour
  • 1 cup chopped nuts (optional)

Frosting:

  • 1/2 cup whipping cream
  • 1 cup chocolate (Aunt Sara uses Ghiradelli, I just used the rest of the Nestle’ dark chips)

DIRECTIONS:

Brownie:

  • Preheat oven to 325F degrees
  • Place butter and chocolate into a microwave safe bowl and melt in 30 second increments, stirring between, until melted and smooth.
  • Beat eggs and salt until they turn a light yellow color.
  • Add sugar to egg mixture gradually, and then beat until thick and creamy (about 15 minutes).
  • Fold in melted chocolate/butter mixture.
  • Add flour and vanilla and beat until smooth.
  • Fold in nuts.
  • Lightly spray a 9×13 pan with cooking spray and pour batter in.
  • Bake at 325F degrees for 25-30 minutes.  Toothpick should not come out clean- if you over-bake them they will be dry.

Frosting:

  • Place chocolate (either chips, or chopped up) into a bowl.
  • Bring whipping cream to a boil over the stove.
  • Pour hot cream over chocolate and whisk until smooth.
  • Refrigerate about 20 minutes, until thick enough to spread, but not completely set.
  • Spread over brownies and enjoy!!!

Ganache Brownies
My thoughts:  These are wonderfully gooey and rich- my perfect kind of brownie!  The only downside of these is having to beat the eggs for 15 minutes.  If you have a stand mixer you won’t mind it, but I have a hand mixer…seemed like an eternity!  Once I tasted them, it was worth every second though!  Thanks for the wonderful recipe Aunt Sara!!  Love you!  ~r

Other brownie recipes to fill your November with yummy goodness:

Caramel Fudge Brownies!!Fudge Brownie!Mint Creme Brownie CupsBrownie Oreo Cookie Cup

Frosty Fall Pudding Treats

Posted on

Frosty Candy Corn Dessert!
Who says you can’t do frozen treats for Halloween??  These yummy little frosty pudding cups have a Golden Oreo crust and are decorated like fun candy corn treats!

I’m back with a recipe in my Chicago Metallic Mini Cheesecake Pan.
For those of you who haven’t gotten one of these yet, they are SO much fun.  I’ve done some of my favorite desserts in this little pan.  You can do this particular dessert in cupcake liners placed in muffin tins, but they are just SO cute in the mini cheesecake pan.

Here’s how the pan works:  You get a pan that looks just like a muffin tin but each cup has a hole in the bottom.  You also get 12 little metal disks that fit perfectly in each cup, covering up that hole.  You make, bake, freeze, etc. your dessert and then just push up through that hole in the bottom and the disk pushes out with your little dessert on top.  I love fun individual desserts, so this is pretty much the perfect idea, in my opinion!

These are really easy, but they need to freeze for several hours/overnight, so make them ahead.

Frosty Fall Pudding Treat!!

Here’s the recipe: (printable version)

INGREDIENTS:

  • One package of Golden Oreos
  • 1 package (4 servings, 3.3 oz.) of Jell-O Instant White Chocolate Pudding
  • 1 1/2 cups of cold milk
  • 1 (8 oz.) container of Cool-Whip topping (thawed in refrigerator)
  • Food colorings in yellow and orange
  • Fall sprinkles

DIRECTIONS:

  • Crush about 2/3 package of Golden Oreos in a food processor or large food chopper.
  • Add orange food coloring until desired shade of orange is reached and mix on high until cookie bits and color are well combined.
  • Place metal disks into cheesecake pan and spoon cookie crumbs evenly into all 12 wells of mini- cheesecake pan (or cupcake liners), and press firmly into bottom (I use a Mini Tart Shaper– and I love it!)
  • In a large mixing bowl, mix cold milk with pudding for 2 minutes.
  • Add yellow food coloring to get desired shade and mix until well combined.
  • Fold in 1/2 of the Cool Whip (the rest will be used as topping- keep it refrigerated until use)
  • Spoon pudding mixture into a large zip-top bag (and zip it tight).
  • Cut a corner of the bag off and pipe pudding mixture into each cup, all the way to  the top.
  • Use a knife to smooth the tops flat and cover entire pan with plastic wrap.
  • Freeze until serving (at least a few hours)
  • Before serving, remove pan from freezer and allow it to warm up a little bit before popping desserts out.
  • Press a finger up through the hole in the bottom of the pan, pushing each dessert up- grab it by the crust and take metal disk off the bottom.
  • Serve immediately, or place in a sealed container back in the freezer until ready to serve.
  • Pipe remaining Cool Whip on top of each little dessert cup and decorate as desired.
  • Enjoy!!

Frosty Fall Pudding Treats!!!My thoughts:  There are two things that make a dessert perfect in my mind.  Taste and the amount of smiles that happen when you serve them.  These are really yummy (how can you go wrong with pudding and Oreos???) and the number of smiles….?  Well, you are just going to have to make them to see that for yourself!  Enjoy!! ~R

Other mini-cheesecake pan recipes you will love:

Mini chocolate chip cookie cheesecakesFrozen S'mores CupsMini Cookie Dough CheesecakeRaspberry Lemon Cream Cups!!!

Halloween Cookie Swirls!

Posted on

Halloween Swirl Cookies!!!
These festive, fun cookies are made with refrigerated cookie dough, and are SO easy!  A little chocolate on the bottom and you have not only cute cookies, but really yummy ones as well!!!!

I keep seeing these swirled cookies online and I decided I simply had to try them in halloween colors this year.  They were a little time consuming, simply because you need to color your cookie dough and then blend the colors together.  Not hard at all– but set aside a little prep time.

Want to see how to put these together?  Here’s the recipe: (printable version)

INGREDIENTS:

  • 1 tube refrigerated cookie dough (I used Pillsbury)
  • Gel food coloring in the colors you desire
  • 1 bag of Wiltons dark chocolate candy melts.

DIRECTIONS:

  • Divide cookie dough into 4 equal parts and color each part using food color gels. (I recommend wearing food-prep gloves to save your hands from being colored along with the dough!   Also, start with the lightest color 1st)
  • Starting with the lightest color, divide each part of dough into small balls (about the size of a small grape)
  • Take one ball of each color in your hand, and gently squeeze it into a 4-color ball.

Halloween Cookies How-to2Halloween Cookies How-to3

  • Roll each ball out into a long strip and then gently coil it together into a cookie.  Tuck end under cookie and gently place on parchment paper on a cookie sheet.

Halloween Cookies How-to4Halloween Cookies How-to6

  • Bake at 350F degrees for time recommended on cookie dough tube.
  • Remove from oven by sliding parchment paper off cookie sheet and on to a flat surface.
  • Cool cookies completely
  • Melt Wiltons candy melts in 30 second increments in the microwave, stirring between until smooth.
  • Spoon a bit of melted chocolate on a clean piece of parchment paper- make it about the size of one cookie.
  • Gently press a cookie on top of the chocolate until you can see it around the edges.
  • Allow chocolate to cool and harden.
  • Peel away parchment paper and ENJOY your cute cookies!!!!

Halloween Swirl Cookies!!!
My thoughts:  These were a fun Halloween baking project.  I really enjoyed how each cookie looked so unique and I learned as I went how to swirl them most effectively (so that all the colors can be seen on top).  I loved using the pre-made cookie dough, that saved a lot of time!  I hope you get a chance to try these!!!  Enjoy!!  ~r


Halloween Swirl Cookies!!!!Halloween Swirl Cookie!!!!
Other fun Halloween ideas from Easybaked:

Halloween Bundt CakeGinger Maple CookiesSpider Cupcakes!Pumpkin Roll

Creepy Broken Glass Cupcakes!

Posted on

Broken glass Cupcakes!!!
These delicious Red Velvet cupcakes with smooth cream cheese icing are topped with all the makings of a horror movie (or, according to my friend Ricky, a Stephen King novel!).  These are just in time for your creepy October festivities!!

[and if you aren’t a fan of the decorations, they are an amazing cupcake all by themselves!]

Ok.  These were really fun to make.  I’d seen SO many examples of these online– this is not an original idea.  However, I made it my goal to create these in the easiest possible way, with the fewest steps and NO candy thermometers!  Not original, but EASY!!!

Broken glass Cupcakes 2
Note:  I did a cake mix fix by swapping out the water and oil for milk and butter and adding one extra egg.  It was SO good!  (Thanks for the idea Rex!) Heavy and moist cupcakes with exceptional flavor.  I highly recommend it, but you can certainly make the mix as directed for these cupcakes.

Here’s how they are made: (printable recipe)

INGREDIENTS:

The cupcakes:

  • One boxed Red Velvet cake mix
  • Milk (in the same amount as the water required by the mix)
  • Eggs (in the same amount as required by the mix PLUS one extra egg)
  • Butter (twice the amount of oil required by mix- for example if the box calls for 1/2 cup of oil you would use 1 cup of butter).  Measure and then melt before adding to mix.

The icing:

  • 1 package (8 oz) cream cheese (softened)
  • 1/2 cup of butter (softened)
  • 1 teaspoon vanilla
  • dash of salt
  • 4 cups powdered sugar
  • 1 cup white chocolate chips (melted)

The glass candy:

  • 1 cup of granulated sugar
  • 1/2 cup of light corn syrup
  • 1 teaspoon of clear flavoring (I used raspberry)

The edible blood:

  • 1 (14 oz.) can of sweetened condensed milk
  • Red gel food coloring
  • Black gel food coloring
  • 1 teaspoon of clear flavoring (I used raspberry)

DIRECTIONS:

I recommend making the decorations 1st (the glass and “blood”) and keeping them until just before your party to decorate with.  They will both keep for several days, so you can make them ahead of time.

Candy Glass:

  • Cover a cookie sheet with wax paper and spray the wax paper liberally with non-stick spray.
  • Place granulated sugar and corn syrup into a microwave safe bowl and mix them together.
  • Cover bowl with plastic wrap.
  • Microwave on high for 3 minutes.
  • Remove from Microwave and CAREFULLY remove plastic  wrap (beware of hot steam!)
  • Stir well and re-cover with fresh plastic wrap.
  • Microwave on high for another 3 minutes, but watch mixture after about 2 minutes. Because microwaves vary, you need to watch it to make sure it doesn’t start to turn color.  If you cook it too long it will be an amber color instead of the nice clear glass you want.  My microwave was perfect at 2 and 1/2 minutes.
  • CAREFULLY remove from microwave and CAREFULLY remove plastic wrap.
  • This is soooo hot and sticky– using caution to not touch any of the hot candy, pour it out over the greased wax paper and allow it to sit and harden completely (at least a couple of hours)

Candy Glass How-To Pics

  • When candy glass is hard, tap a knife tip into glass to break it into sharp pieces.  
  • Carefully (the pieces are actually sharp!) push pieces up off of wax paper and onto a plate.
  • Candy glass can be kept in a zip top bag or an air tight container for about a week. Moisture (including the moisture from the frosting on the cupcakes) will eventually start to break the glass down.

Candy Glass How-To

Edible Blood:

  • Place sweetened condensed milk into a small bowl and mix in red food color gel and flavoring until you get a brilliant red color.  Add a TINY bit of black (use a toothpick- black goes a long way!).
  • Mix and adjust until you get a nice dark red color.
  • Spoon “blood” into a zip-top bag and seal TIGHTLY.  Keep refrigerated until use.

Edible Blood!Cupcakes:

  • Make cake mix according to box (swapping in cake mix “fix” ingredients if desired)
  • Divide equally into 24 cupcake liners in cupcake tins.
  • Bake at 350F degrees according to times on box.
  • Remove cupcakes from oven and cool completely.

Frosting:

  • On medium speed, beat together cream cheese, butter, vanilla, and salt until creamy.
  • Gradually add powdered sugar, beating until smooth.
  • Melt white chocolate chips in the microwave in 30 second increments, stirring between, until smooth.
  • Add melted white chocolate to icing and beat on low until completely combined.
  • Place in a zip-top bag fitted with a decorating tip and pipe frosting on top of cooled cupcakes.

Decorating:

  • Put parchment paper on a counter to protect it from all that red food coloring. 
  • [or- use a large platter or tray that you will serve the cupcakes on- blood splatter and all!]
  • Place frosted cupcakes on protected surface and press 2 to3 pieces of glass into the top of each.
  • Clip the corner on the bag of edible blood and drizzle over the top of the glass and the cupcakes, allowing it to drip down the sides of both.
  • Serve the same day after decorating.
  • Use care transporting and serve with plates and forks, or you will all have red fingers!!

Broken Glass Cupcakes3

My thoughts: These are such yummy cupcakes all by themselves.  But the decorating was SO much fun!  My friend Amber helped and we both were a little in awe of how realistic they looked…and how yummy they tasted!  I wasn’t sure how the sweetened condensed milk would taste on the cupcakes, but I added a little raspberry flavor and oh my…so good!

Setting up for photos was fun too…splattering fake blood everywhere and letting it drip off my cupcake stand was interesting…not my typical cupcake photo shoot!

I really hope you get a chance to try these– even if you just go for the yummy cupcake recipe minus the drama!

I will leave you with a little insiders look at my picture-taking experience:

Broken glass cupcakes-- food photography at its finest....lol!

So fun!!!

Here are some other fun “creepy” October recipes to try:

Mummy Oreo Pops!Spider Cupcakes!MISfortune cookies with caramel apple cupcakesHalloween Bundt Cake

Salty Caramel Cheesecake Bars

Caramel Cheesecake6

Creamy caramel cheesecake over a pretzel crust is topped with a layer of dulce de leche and dark chocolate.  Sweet and salty perfection!

I’ve been craving caramel lately.  Maybe because it’s fall now and caramel seems to be a fall treat.  Whatever the reason, I went on a hunt for caramel cheesecake and found this one at Bon Appetite.  I wanted to add salty to the recipe, so I used a pretzel crust instead of grahams and added dark chocolate.  It is really good.  A subtle caramel flavor with just a hint of salt from the crust.

Caramel Cheesecake5

Want to know how these are made?  Here you go:  (Printable recipe)

INGREDIENTS: (makes 24 cheesecake squares)

Crust:

  • 3 cups of crushed pretzels
  • 2 Tablespoons of sugar
  • 1  stick (1/2 cup) of butter

Cheesecake:

  • 3 packages of cream cheese (8 oz.), softened to room temperature.
  • 1 cup sugar
  • 3 eggs
  • 2 teaspoons of vanilla
  • 1 can (13.4 oz) of Nestle La Lechera Dulce de Leche (or 1 cup of your own- find recipe here)

Topping:

  • 1 bag (10 oz.) Nestle Dark Chocolate Morsels.
  • 12 Tablespoons of butter

DIRECTIONS:

  • Preheat oven to 325F degrees.
  • Make crust by combining crushed pretzels, butter and sugar together and pressing into a greased 9×13 pan.
  • Bake at 325F for about 10 minutes.  Cool completely.
  • In a large bowl, cream together sugar with cream cheese.
  • Add eggs, one at a time, beating on low speed between each one.
  • Add vanilla and 1/2 of the can (about 1/2 cup) of Dulce de Leche.
  • Beat on medium until completely combined.
  • Pour cheesecake over cooled crust and bake at 325F for 45 minutes. (Until center is set)
  • Cool at room temperature.
  • Carefully spread remaining Dulce de Leche over the top of the cooled cheesecake.
  • Melt 12 Tablespoons of butter with dark chocolate chips until smooth.
  • Pour over top, carefully spreading chocolate to cover entire cheesecake.
  • Carefully set pretzels on top of chocolate.  Each one will be in the center of one piece when it is cut, so place them according to how big you want your pieces.
  • Lightly sprinkle with coarse salt.
  • Refrigerate overnight.
  • Before serving, allow cheesecake to warm a little and then using a sharp knife, cut into squares with a pretzel centered in each.
  • Enjoy!

Salted Caramel Cheesecake

My thoughts:  These are really so yummy.  My only problem?  The crust was a little crumbly (you can see in the pictures).  I’m almost positive I didn’t get my pretzels chopped fine enough.  Make sure you chop/food process them into FINE bits- not coarse.

If you don’t want a salty crust just use graham crackers– or Oreos…oh my, caramel cheesecake over Oreos?  Yes, please!  The cheesecake is delicious.  It would be good over any crust.  I hope you enjoy trying it!!!  ~r

Salted Caramel Cheesecake!

Other caramel desserts you might enjoy:

Salted Caramel Cookie Cups (2)Inside-out Caramel Apple!!Caramel Fudge Brownies!!Turtle Cheesecake

Lady Bug Oreo Pops!!

Ladybug Oreo Pops!
What could be better than a cute ladybug cookie on a stick?  Biting in and finding an OREO!!!!!

These cookies are such a fun treat!  Perfect as favors and prizes at parties- they just make you smile.

We’ve done lots of Oreo Pops here at Easybaked.  The technique is the same for these as for our Original Oreo pops.  To see the how-to photos and technique, click here.

Here’s what you will need for about 24 Oreo Pops.

INGREDIENTS:

  • One box of Double Stuff Oreos
  • One 12 oz. bag of Wiltons candy melts in yellow
  • One 12 oz. bag of Wiltons candy melts in red
  • One 12 oz. bag of Wiltons candy melts in dark chocolate.
  • One bag of mini M&Ms.
  • 24 lollipop sticks
  • Candy Eyes (if desired)

Oreo Pops!

DIRECTIONS:

  • Carefully twist apart all of the Oreo cookies.
  • Using one of the pop sticks, make an indentation in the white filling of each cookie.
  • Melt the red Candy Melts in the microwave in 30 second increments, stirring until completely melted and smooth.
  • Dip the end of one stick into the melted candy melts, drizzle a little in the center of the white cookie filling and then gently press it into the indentation made.
  • Place the top of the cookie back on and allow white chocolate to harden (5 minutes or so), cementing the cookie back together with a stick inside.
  • Holding the stick, lower the entire Oreo into the bowl of melted red chocolate, spooning it over the top and sides to cover it completely.
  • Allow the excess chocolate to drain off and gently place covered Oreo on a piece of parchment paper to harden.  
  • Add two brown mini M&Ms to each half of the pop (use the photos as a guide– leave room for the top to be dipped in chocolate and for a line to be drawn down the middle.)
  • Dip half of the pops in the red chocolate and then melt the yellow chocolate and repeat the process with the 2nd half of the pops.
  • When candy melts have completely hardened, melt a the dark chocolate melts.  
  • Use a spoon to gently scoop chocolate over the top tip of the cookie, making a head on your ladybug.
  • Set each pop on parchment paper and add candy eyes (if desired) before chocolate hardens.  
  • After dipping the tops of all pops, and placing eyes, spoon remaining chocolate into a small ziptop bag and clip a corner.
  • Pipe a line from the head of the ladybug across the top toward the stick.  (use photos as a guide).
  • Allow pops to harden completely.
  • Enjoy!!!

Ladybug Oreo Pops!!!
My thoughts:  I’m addicted to Oreos.  I keep making Oreos into pops because it gives me an excuse to eat the extra Oreos that break.  

True confession.  

The other reason: they make people smile.  It never fails, you hand one of these crazy fun pops to anyone and they smile.  Even if they can’t or won’t eat dessert….they smile.  These pops are like puppies.  They make people happy!  Every few months I feel an overwhelming urge to make a different variety to share with you….so I hope that you enjoy them– and that you smile 🙂  ~r

Lady bug Oreo Pops!
Other Oreo Pop ideas we have tried:

Original Oreo pops!!!!!Mummy Oreo Pops!Snowman Oreo PopsPatriotic Oreo Pops- yum!!!

Red Chocolate Cream Cake

Grandma's Chocolate Cream Cake


This dense chocolate cake is filled with a wonderful cream (think twinkies!) and covered in a rich fudge frosting.  Every bite is soooo delicious!

This recipe is a little slice of my past (no pun intended).  This is my grandmother’s Red Chocolate Cream Cake.  It is the cake I’ve had nearly every birthday of my life.  Every time I eat it I remember being a little girl at grandma’s house.  It is definitely an old-school recipe.  Don’t file this one under “easy”, but it is worth every minute of effort in putting it together.  I just love family recipes!

Red chocolate cream cake!

Ruthanne at 6!!Yep- that’s my cute little six-year-old self with a birthday cake from grandma!  Fun memories!

Want to know how to make this?  Here we go:   (printable recipe)

INGREDIENTS:

Cake

  • 1/4 cup Crisco
  • 1/4 cup salted butter (at room temp)
  • 1 1/2 cups sugar
  • 2 unbeaten eggs
  • 2 1/4 cups cake flour
  • 3/4 teaspoon salt
  • 1 cup buttermilk
  • 2 squares (1 oz. each) of unsweetened baking chocolate (melted and cooled)
  • 1 teaspoon red food coloring
  • 1 teaspooon baking soda
  • 1 Tablespoon vinegar

Cream Filling:

  • 2 Tablespoons flour
  • 1/2 cup milk
  • 1/4 cup Crisco
  • 1/4 cup salted butter (at room temp)
  • 3/4 cup sugar
  • 1/2 teaspoon vanilla
  • pinch of salt

Icing:

  • 1/2 cup milk
  • 1/4 cup salted butter (cut into cubes)
  • 1 cups semi sweet chocolate chips
  • 1 teaspoons vanilla
  • 2 1/4 cups powdered sugar

DIRECTIONS:

Cake:

  • Preheat oven to 350F degrees.
  • Cream shortening and butter together and add sugar.  Mix well.
  • Add eggs, one at a time, beating on low between each one.  Beat until creamy.
  • Sift flour and salt together.
  • Add flour/salt, alternating with buttermilk, beating on low speed.  Do not over-beat.
  • Add food coloring and warm (not hot!) melted chocolate.  Mix on low speed.
  • Lastly, in a small cup mix together baking soda and vinegar and add to the batter while foamy.
  • Mix but do not over-beat.
  • Divide into two 9-inch pans that have been sprayed with cooking spray and have a circle of parchment paper set in the bottom.
  • Bake at 350F degrees for 25-30 minutes.  Check at 25 by inserting a toothpick.  When it comes out clean, cake is finished.
  • Remove cakes from oven and allow them to set in pans for 5-10 minutes.
  • Tip cakes out of pans on a cake rack and cool completely.

Filling:

  • While cake is baking, start to make filling.
  • In a small saucepan, cook flour and milk together on stove, stirring often until thick and smooth. Cool completely.
  • Add the rest of ingredients to a mixing bowl and cream together.
  • Add cooled flour mixture and beat on high until a light whipped cream consistency (about 5 to 8 minutes).
  • Trim layers of cooled cake and place filling between the two layers.

Icing:

  • In a saucepan on the stove, heat milk, butter (cut into cubes) and chocolate until completely melted and smooth.
  • Cool completely.  Add powdered sugar and vanilla and beat on high.  Frost top and sides of cake.
  • Enjoy!!!

Grandma's Red Chocolate Cream Cake!
My thoughts:  I have a lot of thoughts… At the front of my mind is this:  My grandma Ann is 95 years old and she made this cake well into her late 80’s for us.  At age 42 I am barely able to keep track of all these steps…I am very impressed by her baking and multi-tasking abilities!!!  Wow.

Chocolate Cream Cake!

Ok- other thoughts:  This cake tends toward dry.  Mine turned out great this time, but sometimes it’s a bit dry.  Be meticulous with your measurements and err toward less rather than more with the dry ingredients.  I also read that you can add a bit of oil to any cake recipe to moisten it up.  Might be worth trying?  That said- the flavor of this cake is out of this world- really, no other cake I’ve had tastes like this one.  It’s wonderful!

The filling….beat it FOREVER.  The biggest mistake I’ve made with this cake over the years is the cream filling.  You really do need to beat it for 5-10 minutes.  For a girl without a stand mixer this is an ETERNITY of beating filling, but you really have to.  It is soooooooooo good.  I think I need to double it next time, I like it so much.

The frosting is a glaze-type frosting.  It is very soft at first.  The best thing to do is to refrigerate about half of it until it is spreadable, frost the tops and sides, and then pour the remaining soft frosting over the top and just smooth it over the whole thing.  Eventually all of it hardens into a spectacular smooth fudge icing.  You will love it!

Grandma's chocolate cake!!

I hope you get a chance to try this incredible cake!  

Many thanks to grandma Ann for the wonderful recipe (and for celebrating my birthday by making this cake for so many years!)~  Love you!!

Grandma!

Celebrating grandma’s 95th birthday this year!

Cakes!!!  Other fun cake recipes!!!

Tie-Dye Cake with Blue Raspberry Frosting!Key Lime CakeStrawberry layer cakeChocolate Mousse Cake