Tag Archives: dessert

Ladybug Cake!

Posted on

Ladybug Cake!!
It’s my Birthday today!  Yay!  Birthdays were always a huge celebration as I was growing up.  My mom had a big yellow box of recipe cards from Betty Crocker that had tons of fun ideas.  One of the categories was “Children’s Parties” and it was full of card-after-card of fun cakes.

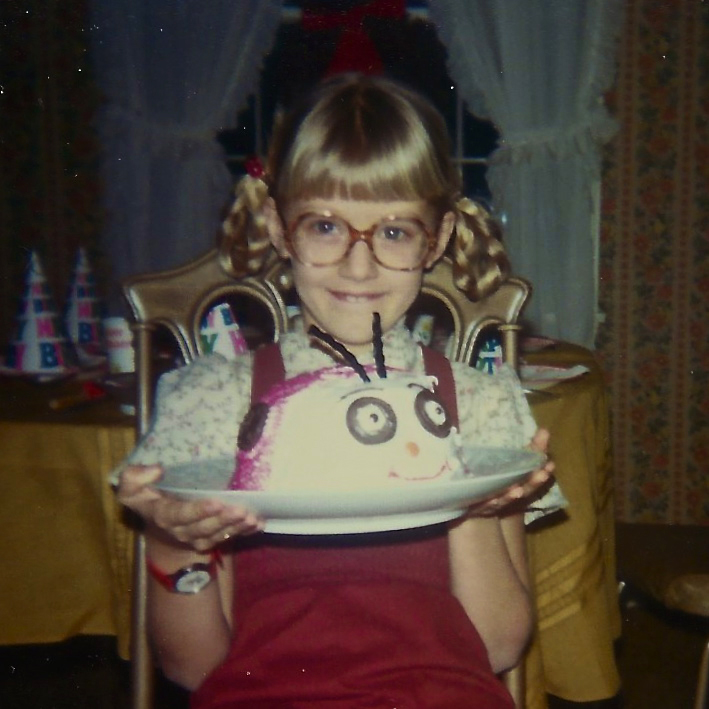
Every year, mom would tell my brother and I that we could pick ANY cake out and she would make it for our birthday party (this, I believe, is where my great love of beautiful desserts began!)  I had all sorts of cakes- a Panda bear, an Igloo….and one year, a giant ladybug.  I loved it!

So, this year we are taking a trip down memory lane, back to the mid-70’s, for this retro recipe that made me smile then and now.

ThenNow

Betty Crocker 70's recipe card- Lady Bug Cake!

The Original Betty Crocker Recipe Card

INGREDIENTS: (original Betty Crocker recipe can be found here)

  • 1 box of cake mix, any flavor, plus water, oil and eggs to make according to package.
  • 2 sticks (1 cup) of salted butter
  • 2 sticks (1 cup) of unsalted butter
  • 3 cups of powdered sugar
  • 2 teaspoons of clear vanilla flavoring
  • Red food coloring gel
  • York Peppermint Patties
  • Wilton candy melts in red and dark chocolate (just a few!)
  • Mini M&MS

DIRECTIONS:

  • Preheat oven to 350F degrees
  • Generously grease and flour a 2 quart oven-proof bowl.
  • Make cake mix according to package, and pour into prepared bowl.
  • Bake at 350F degrees for 50-55 minutes, or until a toothpick inserted in the center comes out clean.
  • Allow cake to cool for a few minutes and then run a knife around edges and tip upside down on a cake rack to cool completely.
  • Make icing by combining butters, powdered sugar and vanilla and beating on high until light and fluffy, about 2-3 minutes.
  • Place cake on serving plate and spread a smooth layer of frosting over entire dome of cake.
  • Refrigerate about 10-15 minutes to harden 1st layer of frosting.
  • Use red food coloring gel to color about 2/3 of remaining frosting.
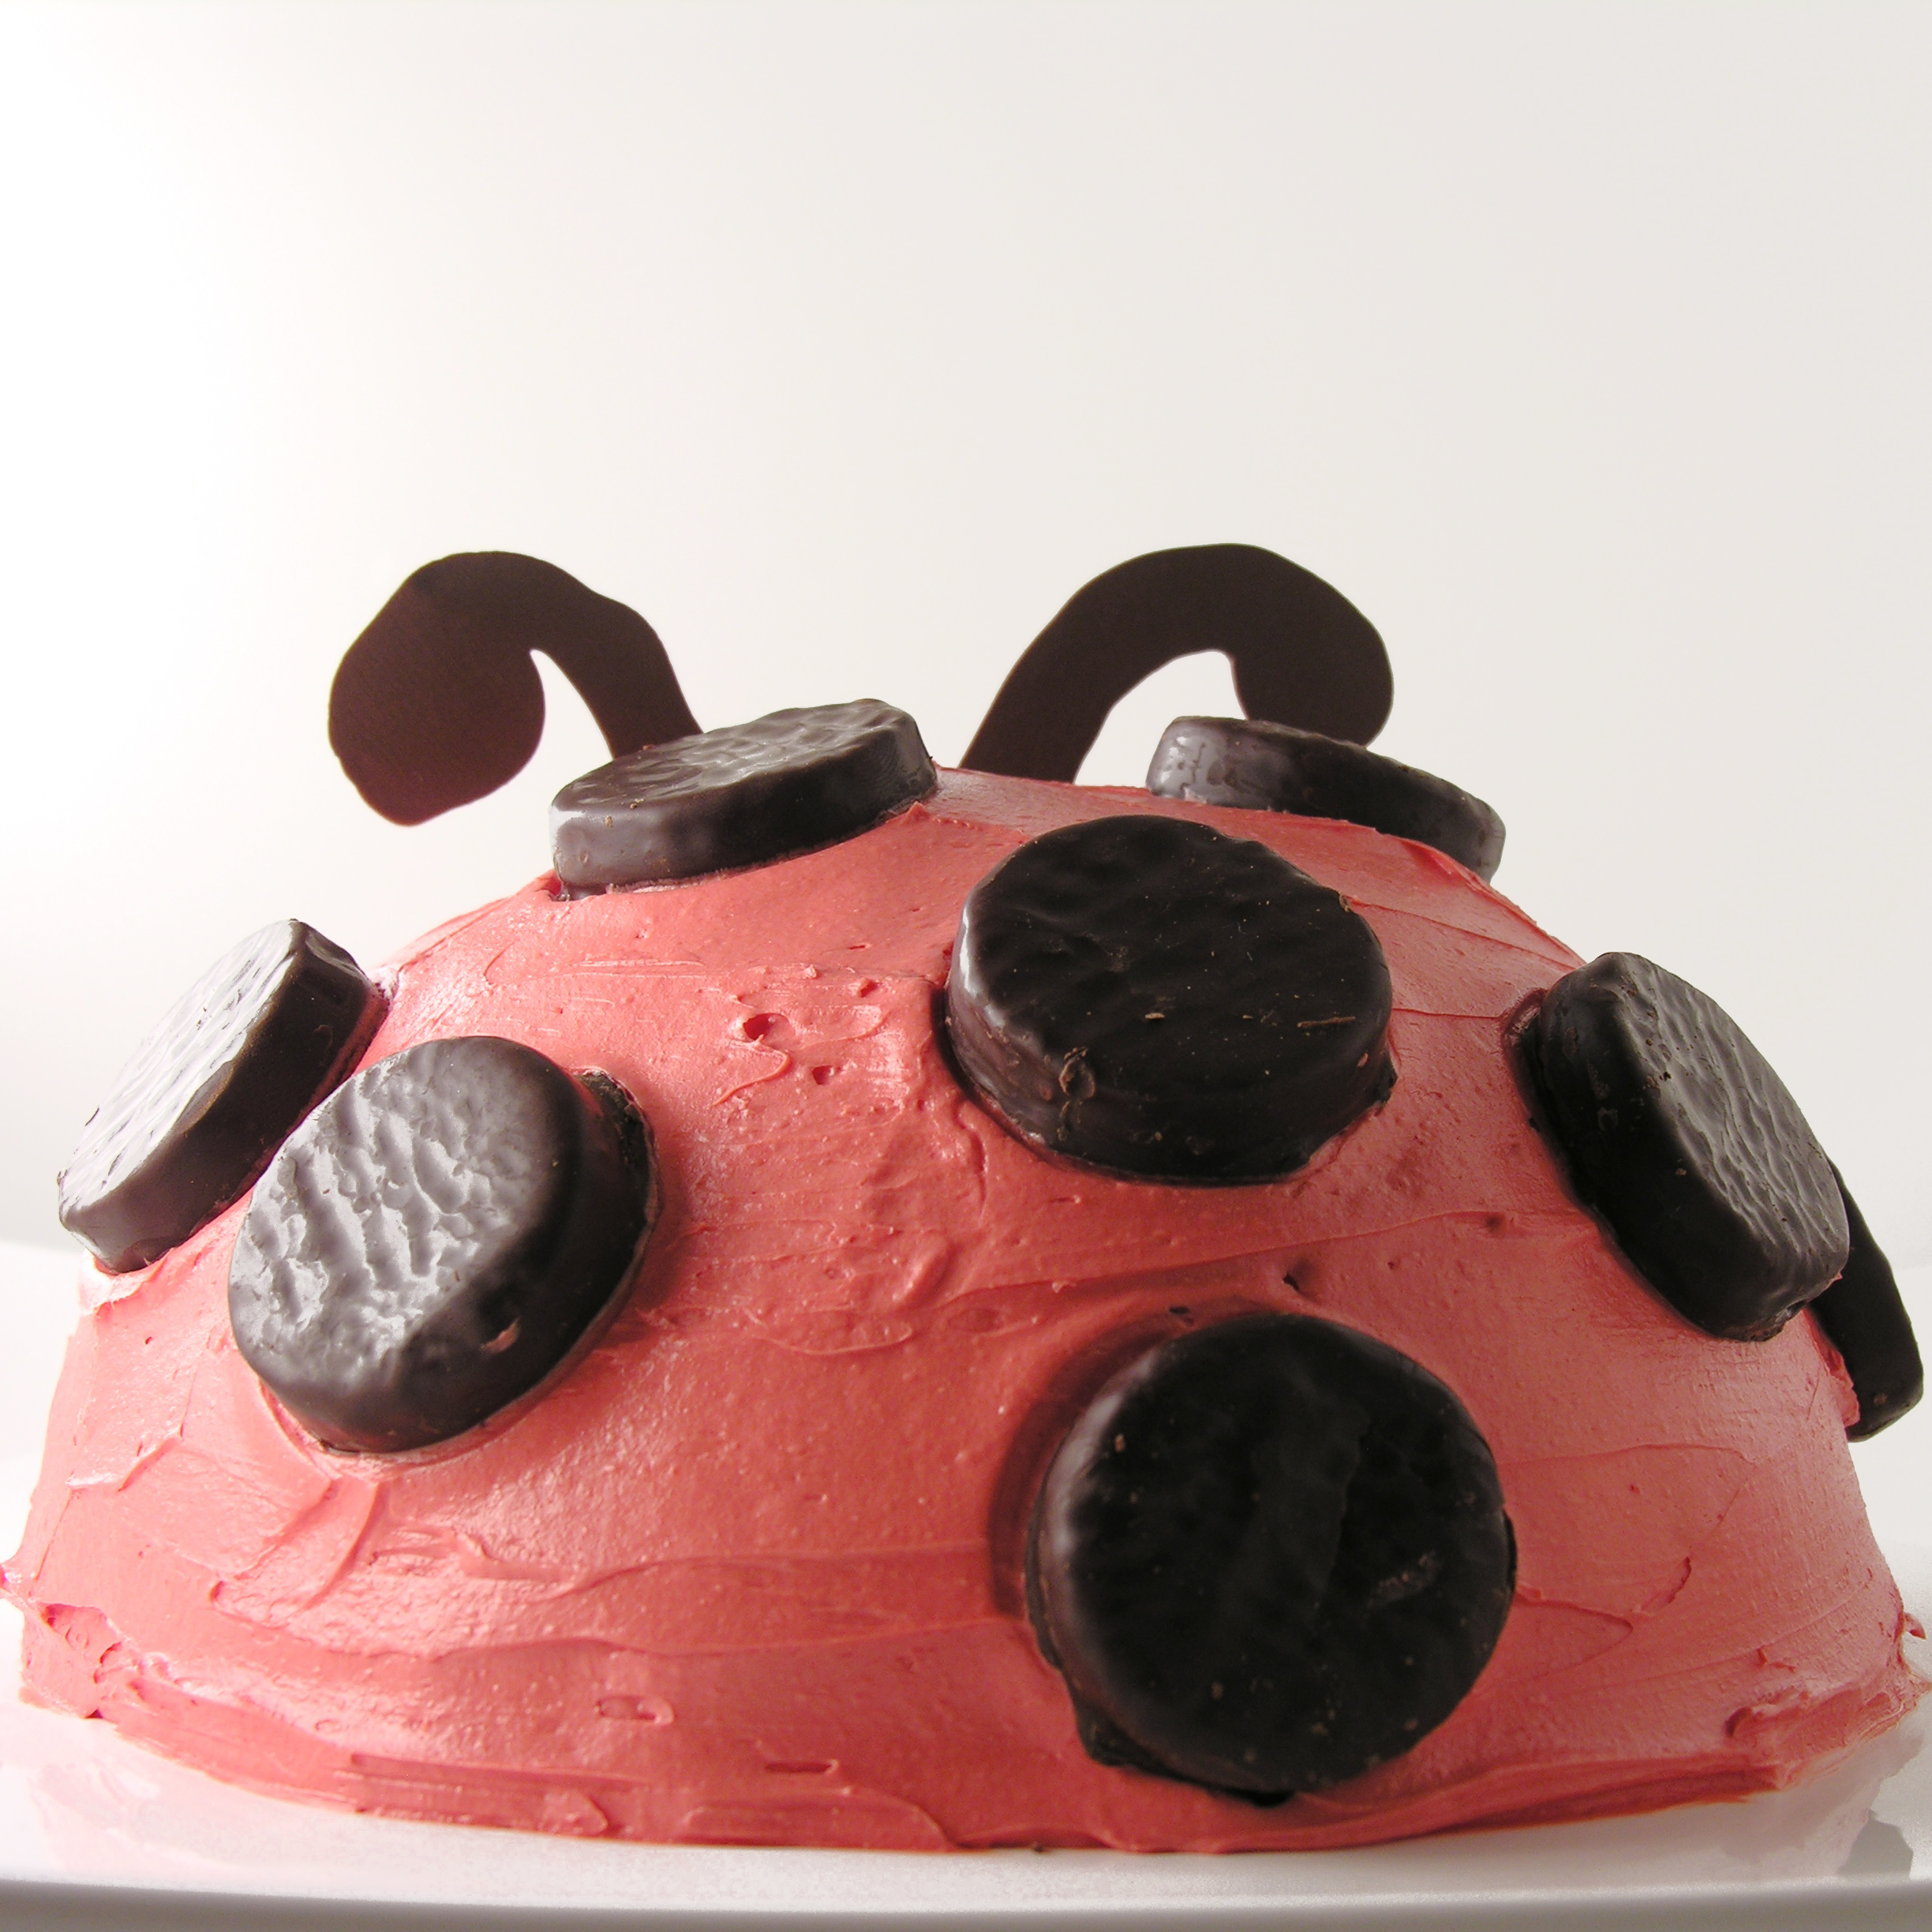
  • Frost over 1st layer with white over the front 1/3 of cake and red over the back 1/3.
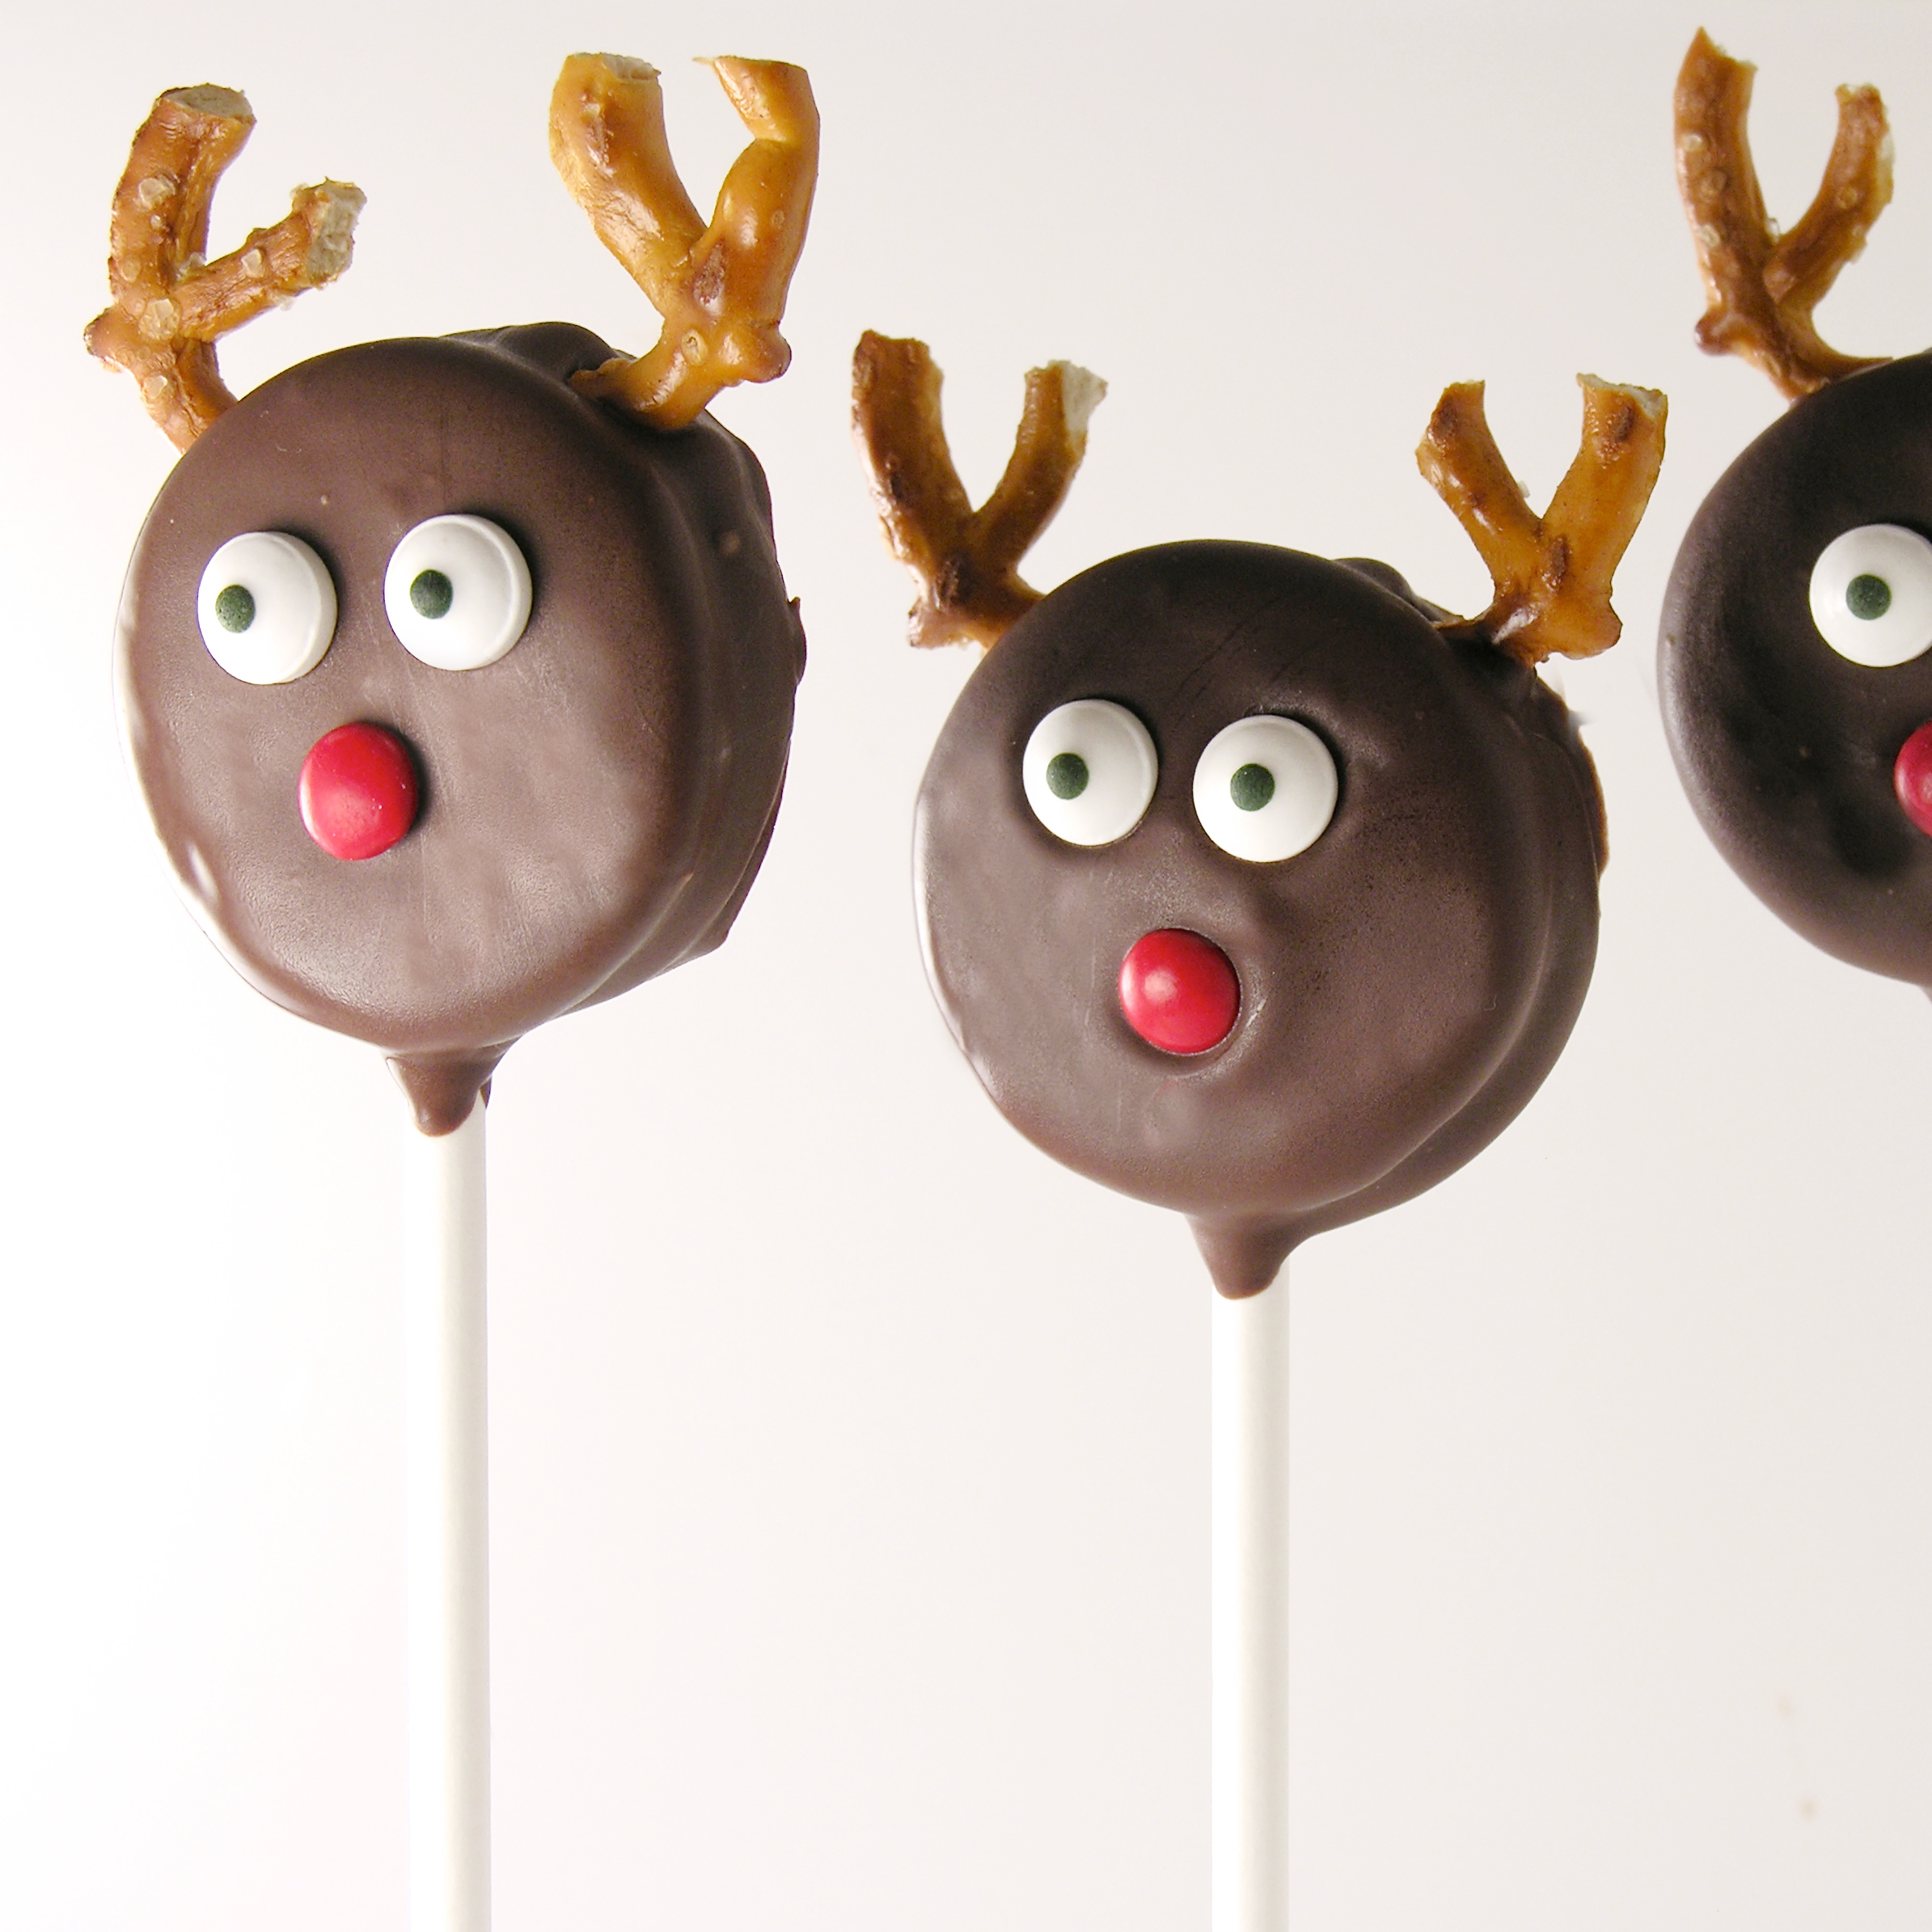
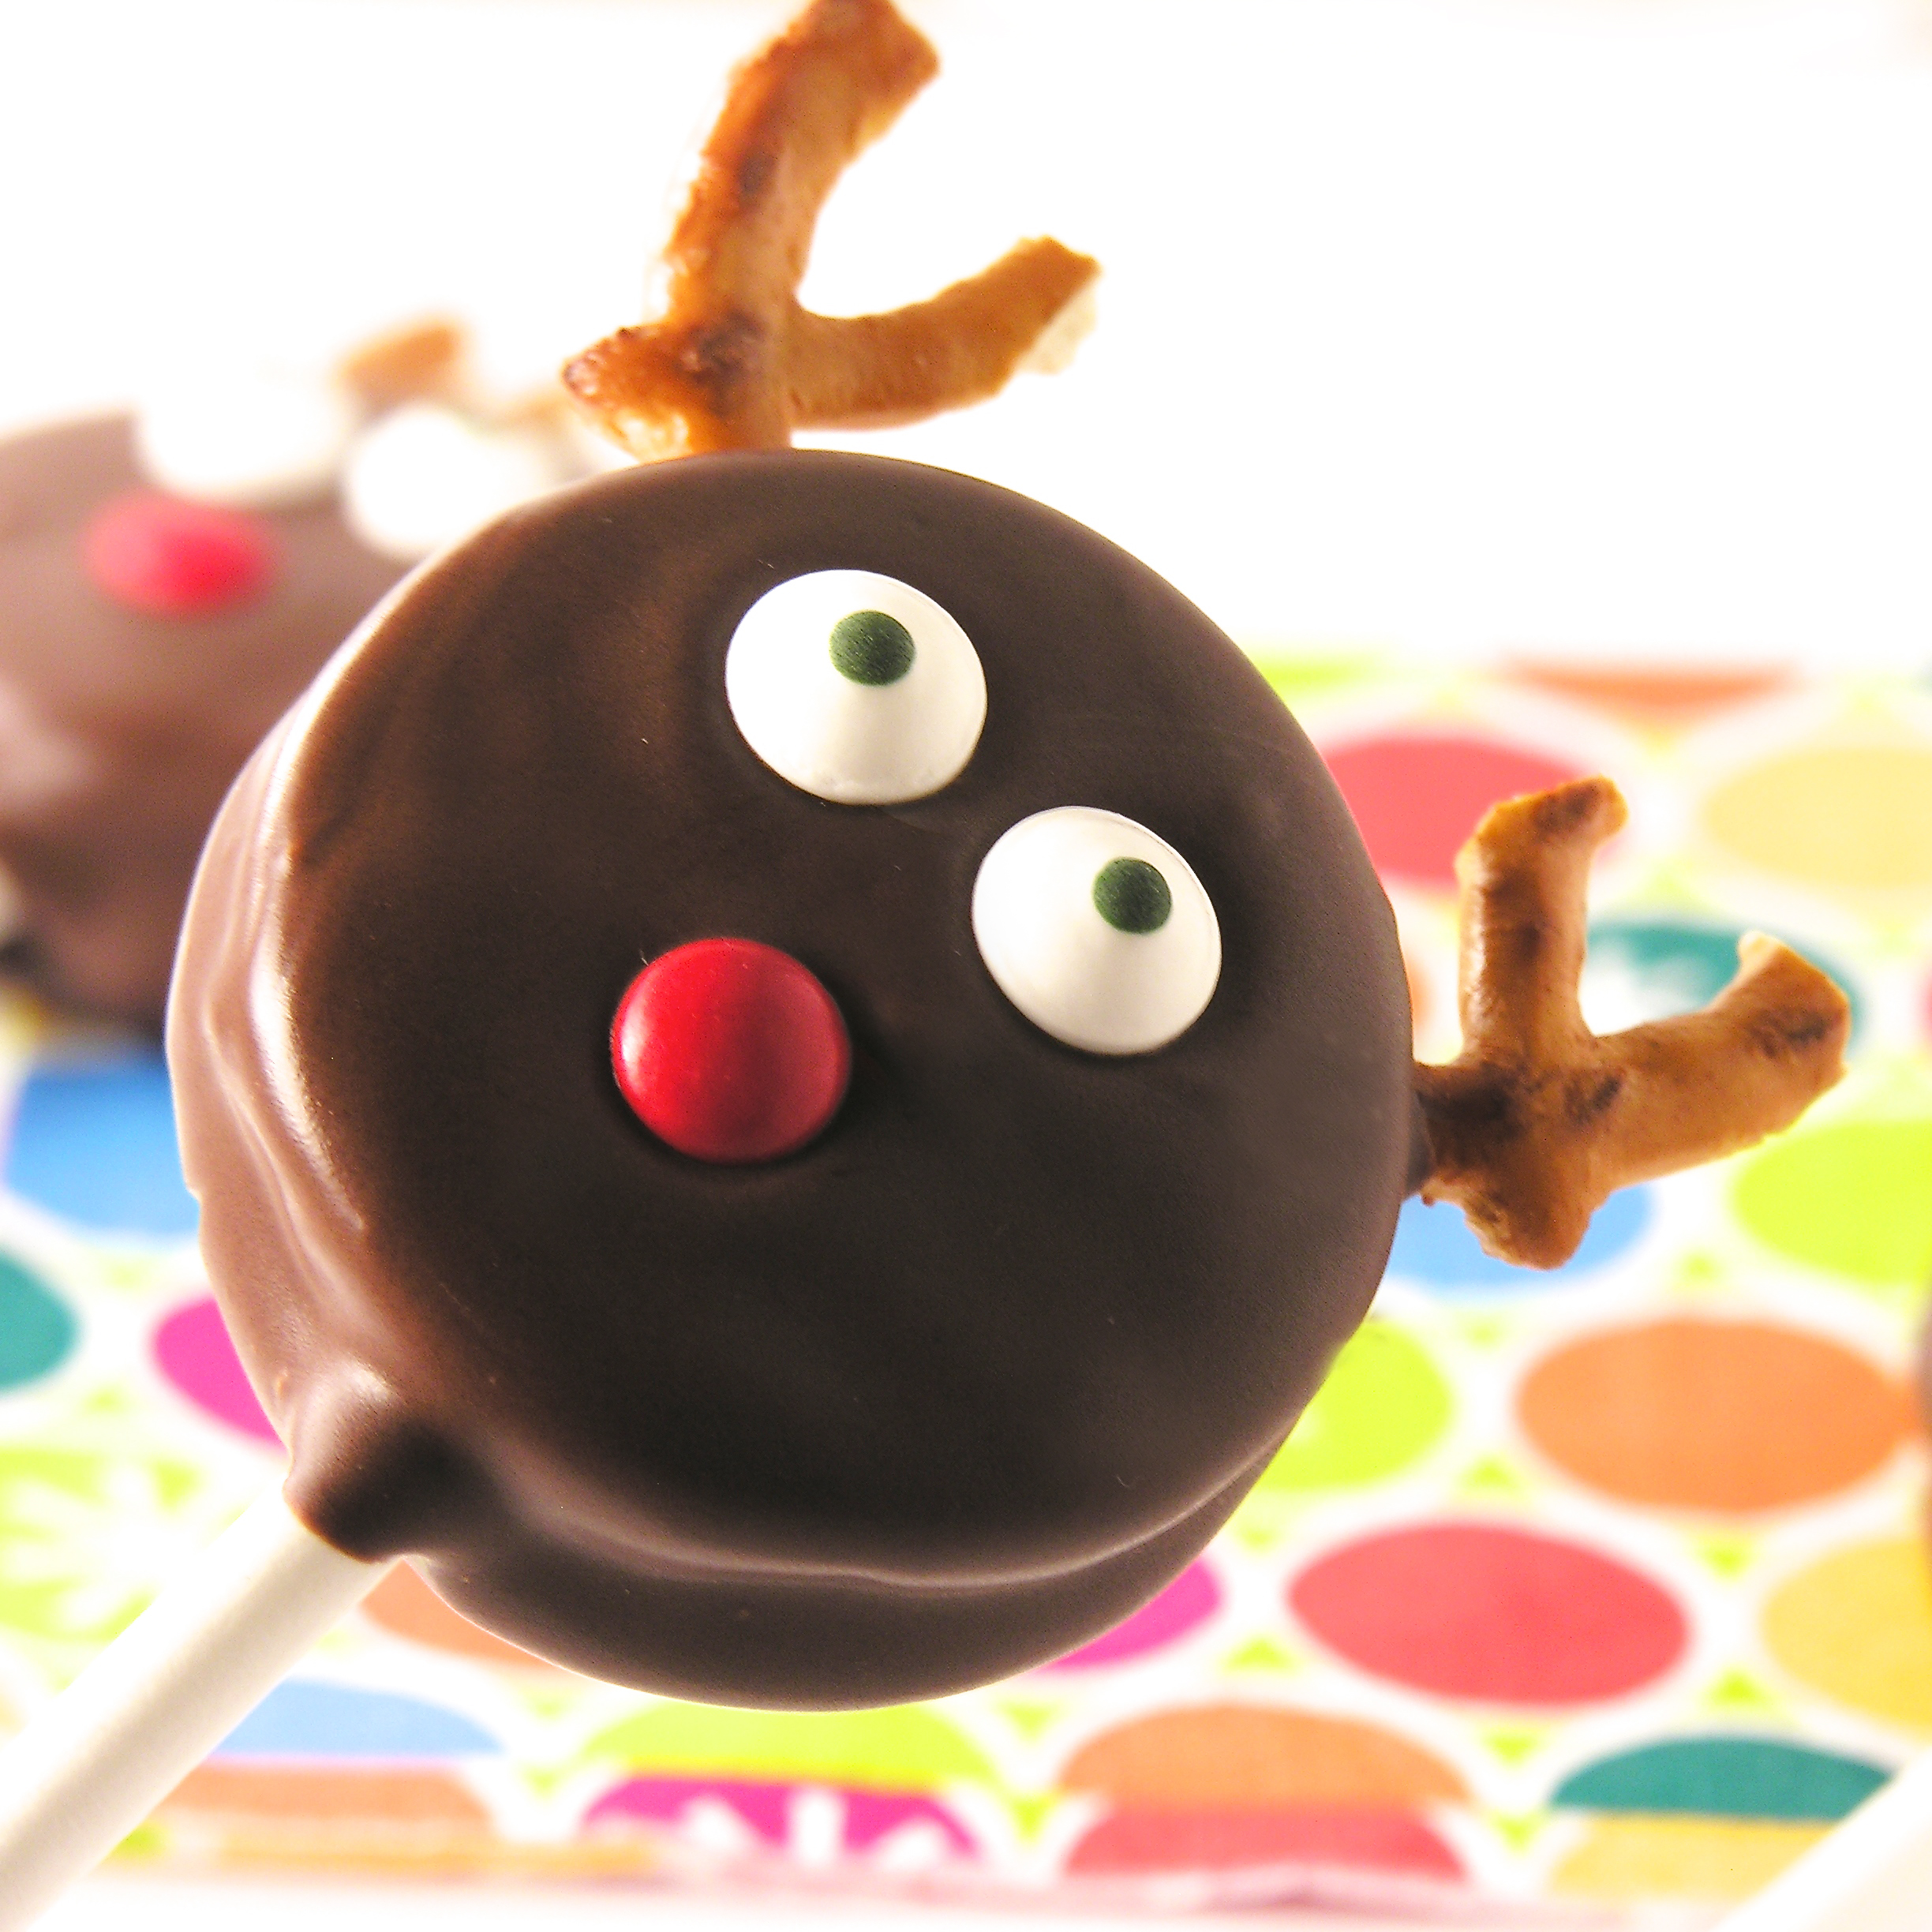
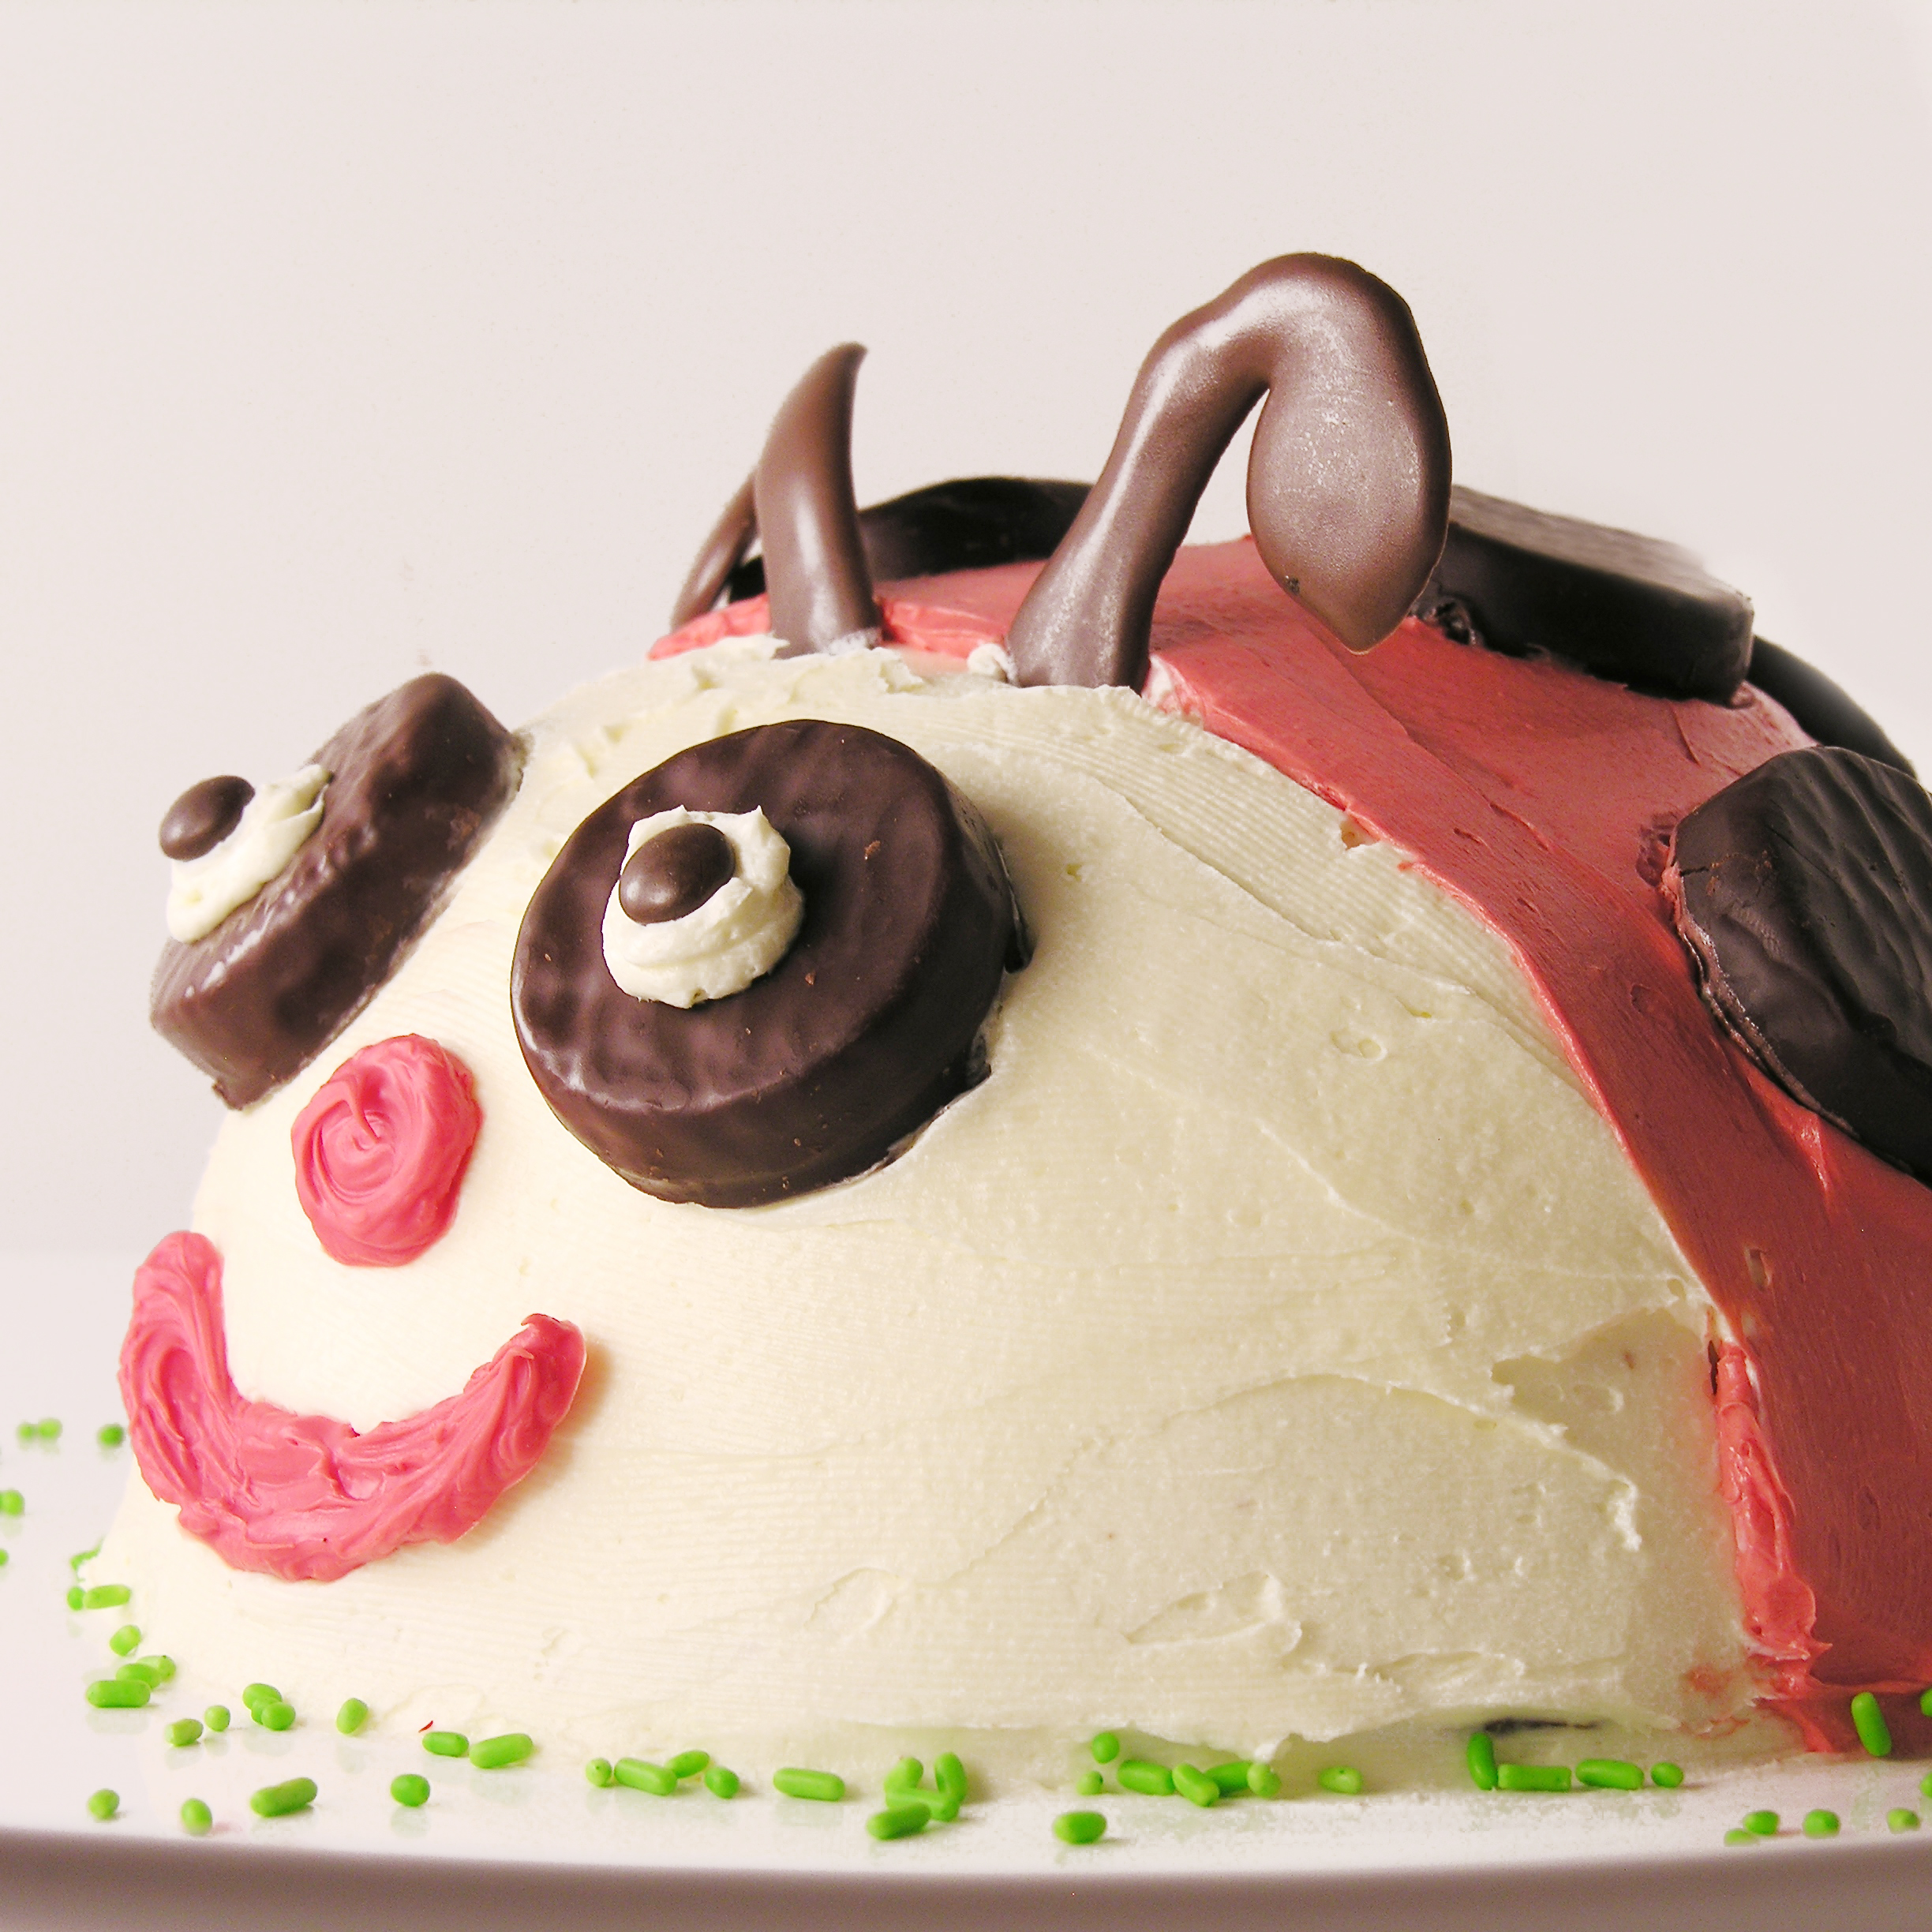
  • Decorate with peppermint patties, icing and M&Ms.  You can use licorice for the antennae, nose and mouth, but I just piped colored candy melts into the shapes I wanted.
  • Enjoy!!

Ladybug Cake2
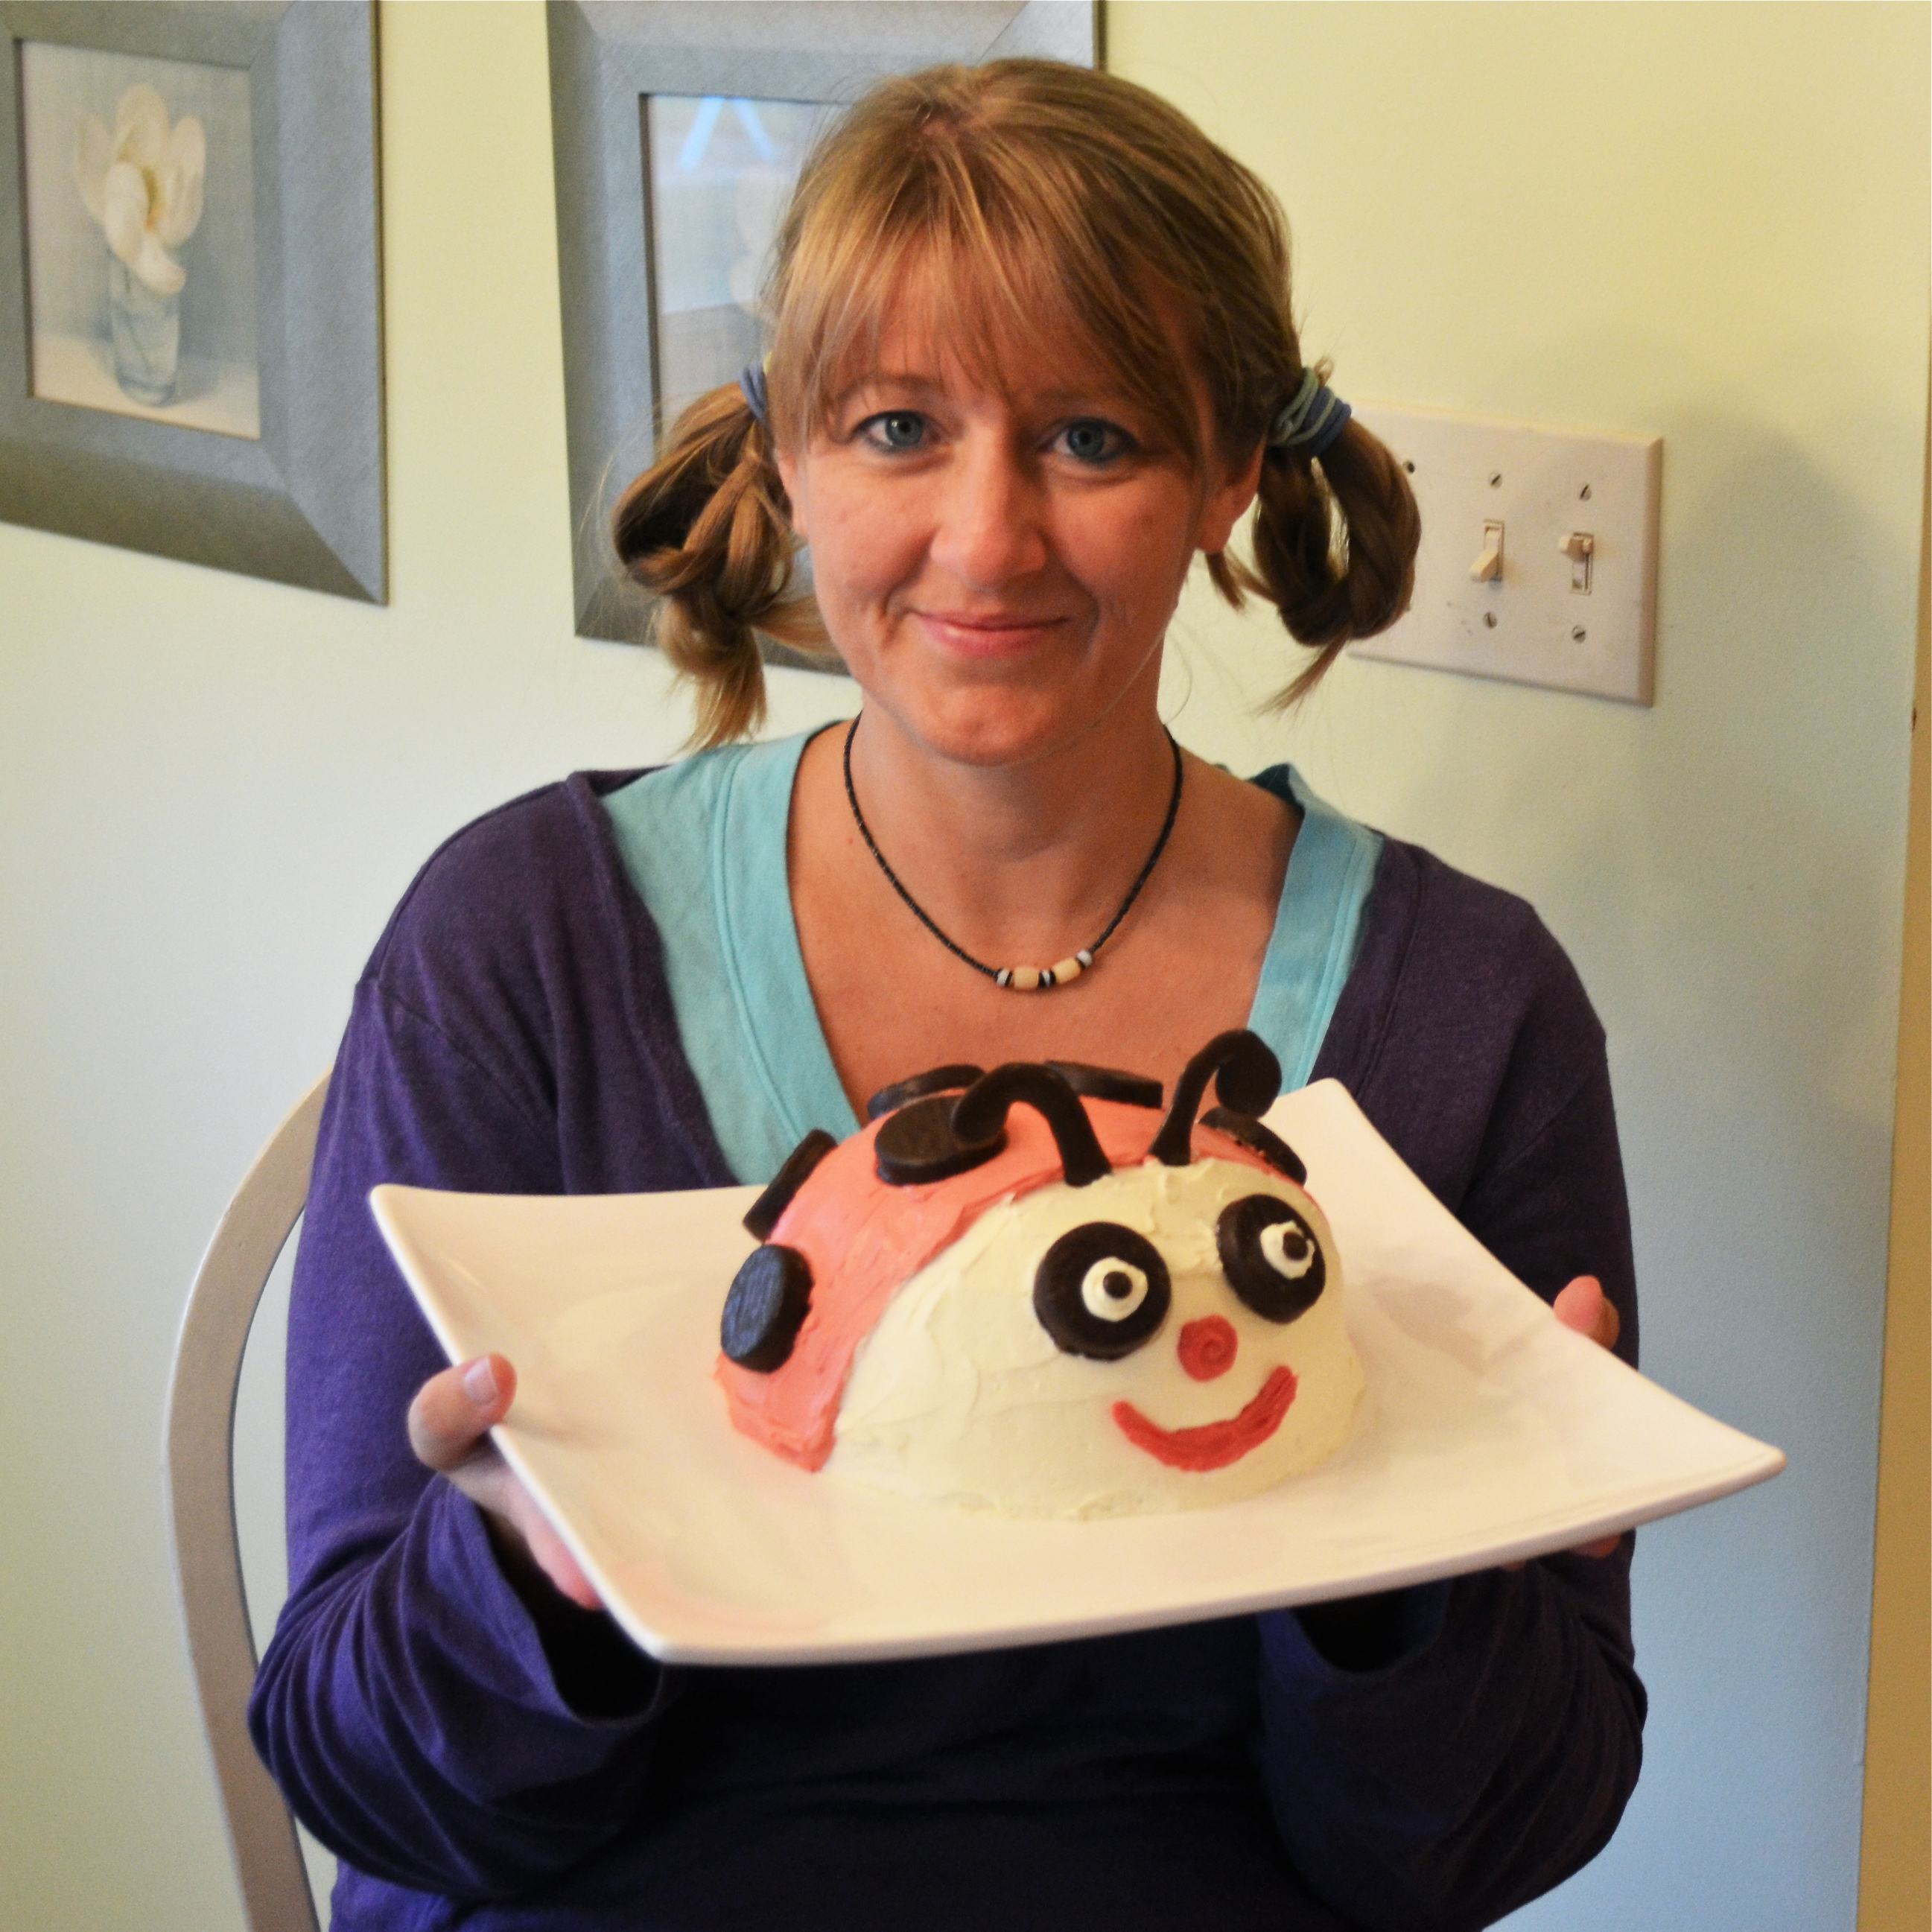
My thoughts:You really can use any items you want to decorate this cake.  You can see that Betty Crocker used gummy candies and black string licorice.  Making this cake brought back great memories of being a kid.  Many thanks to my wonderful mom for making childhood so much fun!  

One of my favorite parts of this site is being able to give you creative recipes to surprise your family with on their special days!  Here’s to many Happy Birthdays for you and yours in this coming year!  Enjoy! ~r

Ladybug cake!!!!!
Other fun birthday recipe ideas:

Polka Dot Cake!!!!!!Cookie Dough CupcakesPile of Cupcakes!Tie-Dye Cake with Blue Raspberry Frosting!

Pink Champagne and Raspberry Cupcakes!

Pink Champagne Cupcakes1
These cheery pink cupcakes are made like a 7-Up cake, but with sweet pink champagne instead! Topped with a raspberry buttercream, they are a perfect way to bring in the New Year!!!

INGREDIENTS: (printable recipe)

Cupcakes:

  • 3 1/4 cups flour
  • 1/2 teaspoon salt
  • 3/4 cup sweet champagne or bubbly wine (I used Barefoot Bubbly, and wished it had been sweeter)
  • 5 eggs
  • 1 teaspoon vanilla
  • 2 sticks (1 cup) butter, softened
  • 1/2 cup vegetable shortening
  • 3 cups granulated sugar

Frosting:

  • 2 sticks (1 cup) butter, softened
  • 1 1/2 cups powdered sugar
  • 2 tablespoons raspberry extract
  • pink food coloring gel (as desired for coloring both cupcakes and frosting)
  • fun sprinkles! (I used edible star glitter and pearls—love them!!!)

DIRECTIONS:

  • Preheat oven to 350F degrees
  • Place 24 cupcake liners into muffin tins
  • In a medium bowl, combine champagne, eggs, and vanilla
  • In a second medium bowl, mix together flour and salt
  • Use an electric mixer to beat together 2 sticks of softened butter, shortening and granulated sugar.
  • Beat until light and fluffy, about 2 minutes
  • With the mixer on low speed, add about 1/3 of the flour mixture, followed by 1/3 of the champagne mixture.
  • Alternate the flour and champagne, mixing until well combined.
  • Add a little bit of pink food coloring gel if you want a pink tint to your cupcakes and combine well.
  • Spoon batter evenly into cupcake liners
  • Bake at 350F degrees for 20-25 minutes, until a toothpick inserted into a cupcake comes out clean.
  • Allow cupcakes to cool completely.
  • When cupcakes are cool, you can add a little extra champagne taste by poking holes in the top of each cupcake with a toothpick and brushing the tops of each cupcake with champagne. 
  • Make frosting by combining all of the frosting ingredients in a large mixing bowl and beating on low until combined and then on high until light and very fluffy (about 2-3 minutes).
  • Pipe frosting on tops of cooled cupcakes and decorate with sprinkles as desired.
  • ENJOY!!

Pink Champagne Cupcakes2
My thoughts:  These are just fun little cupcakes.  Use the sweetest sparkling wine/champagne you can though.  For an alcohol-free treat use sparkling grape juice.  I made a valiant attempt at including the champagne in the frosting, but it was TERRIBLE.  Simple buttercream with a touch of raspberry flavor was perfect instead.

Happy New Year!!!!!

~r

Pink Champagne Cupcakes
Other fun New Years recipe ideas:

Raspberry Confetti KissesCheesecake Sundaes Strawberry Lemonade Cupcakes!!!!!Polka Dot Cake!!!

Christmas Eve Caramel Pecan Pie!

Caramel Pecan Pie3

This easy pecan pie is full of warm and creamy caramel and nuts.  A Christmas tradition at our house, it’s sure to be a big hit with your family!

Our family has had some odd Christmas eve traditions.  Most notable among them: eating dinner at Arby’s before the Christmas Eve service at church.  I’m not sure how that one got started, but it just wasn’t Christmas Eve without a roast beef sandwich in a cold and relatively lonely Arbys.  Looking back, it was a little depressing I guess… empty restaurant, workers ready to go home, elevator-style Christmas music… but as a kid it was magical.  Our whole family together on the eve of so many exciting things… eating roast beef.

After I left for college, my parents got new neighbors and this wonderful lady would knock on our door every year on Christmas Eve and bring us this pie, piping hot and oozing caramel.  It became a new tradition and we all called it “Christmas Eve Pie”.

The neighbors have since moved, but whenever I taste this pie I am transported to happy memories of Christmas Eves past, enjoying this dessert with my family around me, watching “It’s a Wonderful Life” by the fire. As you enjoy your Christmas traditions with your family, I pray you are blessed with beautiful memories and delicious food!  Merry Christmas dear friends!!!! Caramel Pecan Pie!!!
Here’s the recipe: (printable version)
INGREDIENTS:

  • one pie crust (use your own or get pre-made)
  • 2/3 cup granulated sugar
  • 1/4 cup (1/2 stick) butter (melted)
  • 3 eggs
  • 1 (12 oz) jar of caramel topping
  • 1 1/2 cups (8 oz) pecan halves

DIRECTIONS:

  • Preheat oven to 350F degrees
  • Press pie crust into pie plate
  • In a large mixing bowl, beat eggs slightly with a fork.
  • Add sugar, stirring until dissolved
  • Stir in caramel topping and butter
  • Stir in pecan halves
  • Pour filling into pie shell
  • Bake at 350F degrees for 45 minutes, or until a knife inserted off-center comes out clean.
  • Serve warm, but chill to store.

Caramel Pecan Pie!!
Other Christmas recipes at Easybaked:

Gingerbread menDecorated bonbonsChristmas Cut-outsPeppermint Hot Chocolate Cupcakes!!!

Cinnamon Upside Down Cakes

Cinnamon Upside Down Cakes!!
These little mini cinnamon cakes are the perfect make-ahead treat.  Perfect as dessert and such a sweet and yummy breakfast!  Dripping with sweet glaze, these will be a new family favorite, and the best part?  They use a cake mix and they are SO easy!!!

Ready to make these fun little cakes? Click here for the printable recipe.

INGREDIENTS:

  • 2 cups brown sugar (packed)
  • ½ cup butter (melted)
  • 2 tablespoons cinnamon
  • 36 pecan halves (optional)
  • One boxed yellow cake mix
  • Water, oil and eggs to make mix according to box
  • 1 cup of powdered sugar
  • 1 to 2 tablespoons of milk
  • ½ teaspoon of vanilla

DIRECTIONS:

  • Preheat oven to 350F degrees
  • Spray two muffin tins with non-stick cooking spray
  • Place brown sugar, cinnamon and melted butter into a small bowl and mix until well combined.
  • Spoon sugar mixture evenly into all 24 cups of the muffin tins.
  • Use a mini tart shaper or a wooden spoon to press sugar mixture flat into the bottom of each cup.
  • Place 3 pecans on top of sugar.
  • Make cake mix according to box instructions.
  • Scoop batter over the top of sugar and pecans.  Fill each cup about 2/3 full.

Cinnamon Upside Down Cakes!!Cinnamon Upside Down Cakes2

  • Bake at 350F degrees for 18-20 minutes.
  • Remove from oven and quickly run a small knife around the edge of each cup.
  • Using oven mitts, place a wire cake rack on top of the muffin tin and flip the pan and rack over so that cakes are upside down on the rack.
  • Gently lift the muffin tin up and allow the cakes to pop out. Some sugar will remain in the bottom of each cup, which is fine.
  • While cakes cool, make a glaze by mixing milk, vanilla and powdered sugar together in a small bowl.  Add extra milk or powdered sugar to make glaze a thick frosting consistency- not very runny.
  • Spoon glaze into a small zip-top bag and seal the top.
  • Clip a corner of the bag and drizzle glaze over the tops of each little cake.
  • ENJOY!

Cinnamon Upside Down Cakes!!
My thoughts: These are really easy little treats and they are gobbled up fast!  I’ve made them twice now and everyone asks for the recipe. I made my second batch without the pecans on half of them.  They were still wonderful and make this recipe yummy for even people who don’t like or can’t have nuts. Keep them covered up and they last a few days- a perfect make-ahead Christmas morning treat!  

Cinnamon Upside Down Cakes!!!
Other yummy ideas from easybaked:

Cinnamon Roll Cheesecake!!Cinnamon Roll Filling in a yummy cupcake!Brownie Oreo Cookie CupSpiced Mocha and Tim Tam Slams!

Reindeer Oreo Pops!

Posted on

Reindeer Oreo Pops!!!
These chocolate covered Oreos are so full of holiday cheer!  Wrap them in little cello bags for a quick and fun Holiday gift!

I confess.  I am addicted to making Oreo pops.  I can’t stop.  They are so easy and fun.  They give me an excuse to buy a package of my favorite cookies.  They make people smile.

Original Oreo pops!!!!!Mummy Oreo Pops!Snowman Oreo PopsLadybug Oreo Pops!

I have the art of “stick-placing” and “dipping” Oreos to coat them in chocolate down.

Click here for a printable sheet that takes you through the basic process step by step.

INGREDIENTS:

  • 1 package of Double Stuff Oreos
  • 2 bags (12oz each) of milk chocolate candy melts (I use Wilton’s)
  • 24 lollipop sticks
  • 1 small bag of mini-pretzels
  • Candy eyes
  • Mini M&Ms

DIRECTIONS:

  • Gently twist apart Oreos.  Some will break.  No stress.  Eat them.
  • Break apart pretzels by using a sharp knife to carefully cut them top to bottom through the center.  Then cut the round tops off, leaving a “Y” shape.
  • Put eyes and red mini M&Ms into small bowls, ready to use.
  • Place candy melts into a bowl.
  • Melt candy melts in the microwave in 30 second increments, stirring between, until completely melted and smooth.
  • Press a lollipop stick into white filling, making an indentation.
  • Dip stick into melted chocolate and spread chocolate on top of white filling.
  • Place stick into indentation and set top of cookie back on, cementing the cookie back together around the stick.
  • Allow chocolate to harden.  If you set cookies on a large plate as you put them together, you can place the entire plate into the fridge to speed the hardening process up.
  • Once hardened, pick the cookie up using the lollipop stick and set into melted chocolate.
  • Spoon melted chocolate over the Oreo to coat it.
  • Gently tap the stick on the bowl’s edge to allow excess chocolate to drip off.
  • Slide bottom of cookie along edge of bowl to remove excess chocolate.
  • Set cookie on parchment or waxed paper.
  • Put pretzel “antlers” into the top of the Oreo, and set two eyes and a nose on the front of the Oreo.
  • Allow chocolate to harden completely.
  • Serve as-is, or tie up in cello treat bags to give as gifts!

Reindeer Oreo Pops!!!
My thoughts:  What to do you get when you combine an Oreo with melted chocolate and salty pretzels?  Deliciousness!!!!!!  Use them as place settings on each plate for Christmas! Make reindeer, snowmen and red/green sprinkle Oreo pops and create a bouquet of pops in a cute Christmas planter for your Christmas celebration!  Use them as stocking stuffers or teacher gifts….the possibilities are endlessly fun!  Enjoy!  ~r


Reindeer Oreo Pops

Peanut Brittle

Peanut Brittle!!
This thick and crunchy peanut brittle just melts in your mouth, and it’s one of our family’s favorite Christmas treats!

This is the best peanut brittle I’ve ever had.  My wonderful Aunt Beth has brought it to our family Christmas celebrations since I was just a tiny girl.  I remember being SO full after dinner and no matter how full I got,  I always had to have a piece of Aunt Beth’s peanut brittle.  I have vivid memories of opening presents one-handed because I had peanut brittle in the other hand.  It is THAT GOOD.

Aunt Beth

Aunt Beth and Uncle Keith

I think what makes it perfect is that it isn’t really hard to bite into or a “teeth-stuck-together” kind of candy.  It just kind of melts in your mouth…and oh my….

I’d never made it, because there has always been this aura of “impossibly difficult recipe” surrounding it.  First of all, you need a candy thermometer and I think that discourages many a would-be peanut brittle maker.  Second, it takes some stirring time over a hot stove.  This isn’t a quick recipe- but it is so sooooooo worth it!

Aunt Beth issued two warnings to me when I embarked on the mission to try her recipe:

1.  Once you add the peanuts you have to stir constantly or the brittle will burn.

2. Be incredibly careful handling the pans and especially the candy, as it is SO hot and sticky and you could easily burn yourself.  Use caution stirring and pouring.

I put on safety glasses and got out a big pan…..

RuthanneIt wasn’t nearly as scary as I thought it would be.  It was actually really fun, and it turned out GREAT!

Ready for the recipe?  Here you go:  (printable recipe)

INGREDIENTS:

  • 1 cup water
  • 1 cup Light Karo Corn Syrup
  • 2 cups granulated sugar
  • 1 lb. raw peanuts (be sure to use raw- I found mine in the produce section of my grocery)
  • 1/4 teaspoon salt
  • 2 Tablespoons butter (plus enough to coat a large jelly roll pan)
  • 2 heaping teaspoons baking soda

DIRECTIONS:

  • Liberally butter a large jellyroll pan (this is just a cookie sheet with sides- the bigger, the better!) and set it on a towel or potholders (it will get very hot when you pour the brittle in).
  • In a large saucepan (I used a dutch oven pan) place water, Karo syrup and sugar.
  • Place a candy thermometer in the pan (I clipped mine to the side)
  • Heat on high and boil until soft ball stage (238F degrees), stirring occasionally.
  • While this is boiling, measure out the remaining ingredients and have them ready to add.
  • At 238F degrees, add the peanuts, salt and butter and carefully STIR continually until mixture reaches brittle stage (310F degrees).  This took me about 15-20 minutes.

How-to-make peanut brittleHow-to-make peanut brittle

  • Add baking soda and stir until it disappears.  The mixture will foam up and double in size (that’s why you need a big pan!). Give it  few seconds to get nice and foamy.
  • CAREFULLY, using oven mitts, pour mixture onto your buttered jelly roll pan.  Do not spread it out, just let it spread it out on its own.  Allow brittle to cool for several hours (don’t rush this part– it is worth the wait!)

How-to-make peanut brittleHow-to-make peanut brittle

  • Once it is completely cool, break it up into chunks and enjoy!!!!!!

Peanut Brittle!!
My thoughts: This isn’t a difficult recipe- it is just hot and time consuming.  Now that I’ve made it, I will make it again though- it is SO worth the effort!  I know there are much simpler recipes (even ones in the microwave!) for peanut brittle, and I’m all about simple.  But this is an exception to the rule of keeping things simple.  I really think you will love it!  Thanks so much for sharing your wonderful recipe Aunt Beth!  Love you!  ~R

Peanut Brittle
Other Christmas recipe ideas:

Snowman Oreo PopsChocolate Pecan TartChocolate Bon-bonsPeanut butter cup cheesecake

Heath Bar Ice Cream Dessert

Heath Bar Ice cream Dessert2
This recipe is a classic family favorite.  It is one of my grandma’s recipes, and I say “one of” because my grandma is a treasure trove of recipes (especially desserts!)  My cousins and I joke about how many desserts show up at family gatherings.  The conversations go something like this:

“Oh no, we only have 8 desserts today…this could be a disaster.”

“There are 24 of us here…that means we can each only have 1/3 of a dessert.”

“I want to try a little of everything.”

“I get a third of that chocolate cake”

“There’s ice cream?  Does that count as a ninth dessert?”

This is nearly always one of the desserts at our family dinners.  It’s fabulous. Creamy and light and butterscotch-y…oh my.  You’ve got to try this one out with your family!

Heath Bar Dessert!!

Ready for the recipe?  Here you go: (printable version)

INGREDIENTS:

  • 1 stick (1/2 cup) butter, melted
  • 1 package (10 oz) Lorna Doone cookies, crushed (if you can’t get these specific cookies, use 2 cups of another brand of shortbread cookies)
  • 3 packages (3.4 oz) INSTANT vanilla pudding
  • 2 and 3/4 cups milk
  • 1 quart of butter pecan ice cream (softened)
  • 1 (8oz). Cool Whip
  • One bag of Heath Milk Chocolate Toffee Bits (or several crushed Heath bars)

DIRECTIONS:

Crust:

  • Combine  melted butter with crushed shortbread cookies and press into a 9″ by 13″ cake pan (I use glass)

Filling:

  • In a large bowl, combine milk and pudding and beat on high for about two minutes, until pudding becomes thick.
  • Add softened ice cream to pudding and stir by hand until well combined.
  • Pour over crust in pan.

Topping: 

  • Spread Cool Whip topping over the entire dessert.
  • Top this with desired amount of Heath Milk Chocolate Toffee Bits (I used the whole bag!!)
  • Cover dessert tightly with plastic wrap and freeze until serving.  Allow dessert to warm for several hours before serving.
  • Enjoy!

Heath Bar Ice Cream Dessert3
My thoughts: I love toffee and pecans and butterscotch and ice cream…this dessert just makes me smile.  It reminds me of family meals and laughter and love.  You can’t argue with a dessert that does that!  I hope you have a chance to try this recipe with your family!  Thanks for sharing your recipe grandma!  Love you!  ~r

Other yummy treats for your family:

German Chocolate Pie!Chocolate lava cupcakes!Peanut Butter Cup Layer CakePumpkin Roll

Creamy Chocolate Pie

Creamy Chocolate Pie
This is a new take on a chocolate pudding pie.  So incredibly rich in chocolate flavor that you will never go back to just plain pudding!

This week’s family recipe comes to us from Florida…or Yellowstone…or Peru….or wherever my wonderful adventurous Aunt Paula might be.  She and my Uncle Jim have literally travelled the world and done the most interesting things.  They are great story tellers and a family meal with them is a treasure.

4769_1062312648969_4724662_n

I had never tried this recipe before, but Paula and Jim submitted it to our family cookbook and titled it “The Best Chocolate Pie in the World”.  How can you resist trying a pie with a name like that?!??

Paulas Pie 4
The chocolate flavor in this pie filling is extraordinarily good.  Very rich and dark.  I’m really not a pie person (check the rest of this blog….not too many pies…) but this one is worth trying, it’s very yummy!

Here’s is the recipe: (printable version)

INGREDIENTS:

  • 1 1/2 cups sugar
  • 2 tablespoons cornstarch
  • 5 tablespoons of cocoa
  • 3 egg yolks, beaten
  • 2 cups hot milk
  • 1 stick (1/2 cup) butter. melted
  • 1 1/2 teaspoons of vanilla

DIRECTIONS:

  • Prepare a graham cracker or a plain baked pie crust.  Since I rarely make pie, I just used a refrigerated pie crust and baked it according to the package.  If you have a favorite crust recipe, now’s the time.
  • In a large, heavy saucepan, combine dry ingredients together.
  • Heat milk over stove or in the microwave and add it gradually to the dry ingredients, stirring as you add.

Not-so-homemade pie crustAdd hot milk slowly...

  • Add butter and egg yolks and mix well.
  • Cook on stove over low heat until thickened, stirring constantly. (I did not allow mine to cook long enough the first time I made this and it didn’t firm up very well.  Cook it until it is a very thick custard like consistency.  Mine actually boiled before it thickened enough.)
  • Remove from heat
  • Mix in vanilla.
  • Pour into prepared pie crust and chill several hours or overnight.
  • Enjoy!

Creamy Chocolate Pie!


My thoughts: Such an easy way to get your chocolate fix!  This pie is  soooo good with a cup of coffee and a little whipped cream on top…YUM!  Thank you for sharing your wonderful dessert with us Aunt Paula!  Enjoy your latest Caribbean adventure!! ~r  

The other lonely (yet yummy!) pie recipes of Easybaked:

Fruit Loop Pie!German Chocolate PiePecan and chocolate pieRaspberry Truffle Tart

Chocolate Ganache Brownies

Posted on

Ganache Brownies
These dense chocolate brownies are topped with a rich chocolate ganache.  You won’t be able to eat just one!!

It’s November.  Time for turkey and thankfulness.  One of the things I am incredibly thankful for is my wonderful family.  We are spread over many states and have many interests, but one thing we all love:  dessert.  This month I am going to feature some of our family’s best dessert recipes– just to get you all ready to bring some mouthwatering treats to your Thanksgiving feast!

This brownie recipe is from my Aunt Sara.  She’s known in our family for her wonderful layered salad, but since this is a blog about sweets, that recipe will have to wait for another day.

Aunt Sarah and her granddaughter Sierra

Aunt Sarah and her granddaughter Sierra

Several years ago I asked everyone in our family to submit recipes to compile into a family cookbook.  SO many wonderful things (with the exception of “Feline Delight”, submitted by my Uncle Keith and my dad, involving a stew made from the family pet…. a joke, of course!)  My Aunt Sara turned in this brownie recipe and I’ve always wanted to try it but just hadn’t taken the time until right now.

The verdict:  AMAZING.  These are the most fudge- like brownies I’ve ever had.  If you prefer cake-like brownies just stop reading right here….because these are rich, heavy, delicious bits of chocolate joy.

Ganache Brownies
So, lets get you the recipe so you can try these yummy treats! (printable version)

INGREDIENTS:

Brownie:

  • 1 stick (1/2 cup) butter
  • 2/3 cup chocolate (I used Nestle’ dark chocolate chips)
  • 4 eggs
  • 1/4 teaspoon salt
  • 2 cups granulated sugar
  • 1 teaspoon vanilla
  • 1 cup flour
  • 1 cup chopped nuts (optional)

Frosting:

  • 1/2 cup whipping cream
  • 1 cup chocolate (Aunt Sara uses Ghiradelli, I just used the rest of the Nestle’ dark chips)

DIRECTIONS:

Brownie:

  • Preheat oven to 325F degrees
  • Place butter and chocolate into a microwave safe bowl and melt in 30 second increments, stirring between, until melted and smooth.
  • Beat eggs and salt until they turn a light yellow color.
  • Add sugar to egg mixture gradually, and then beat until thick and creamy (about 15 minutes).
  • Fold in melted chocolate/butter mixture.
  • Add flour and vanilla and beat until smooth.
  • Fold in nuts.
  • Lightly spray a 9×13 pan with cooking spray and pour batter in.
  • Bake at 325F degrees for 25-30 minutes.  Toothpick should not come out clean- if you over-bake them they will be dry.

Frosting:

  • Place chocolate (either chips, or chopped up) into a bowl.
  • Bring whipping cream to a boil over the stove.
  • Pour hot cream over chocolate and whisk until smooth.
  • Refrigerate about 20 minutes, until thick enough to spread, but not completely set.
  • Spread over brownies and enjoy!!!

Ganache Brownies
My thoughts:  These are wonderfully gooey and rich- my perfect kind of brownie!  The only downside of these is having to beat the eggs for 15 minutes.  If you have a stand mixer you won’t mind it, but I have a hand mixer…seemed like an eternity!  Once I tasted them, it was worth every second though!  Thanks for the wonderful recipe Aunt Sara!!  Love you!  ~r

Other brownie recipes to fill your November with yummy goodness:

Caramel Fudge Brownies!!Fudge Brownie!Mint Creme Brownie CupsBrownie Oreo Cookie Cup

Frosty Fall Pudding Treats

Posted on

Frosty Candy Corn Dessert!
Who says you can’t do frozen treats for Halloween??  These yummy little frosty pudding cups have a Golden Oreo crust and are decorated like fun candy corn treats!

I’m back with a recipe in my Chicago Metallic Mini Cheesecake Pan.
For those of you who haven’t gotten one of these yet, they are SO much fun.  I’ve done some of my favorite desserts in this little pan.  You can do this particular dessert in cupcake liners placed in muffin tins, but they are just SO cute in the mini cheesecake pan.

Here’s how the pan works:  You get a pan that looks just like a muffin tin but each cup has a hole in the bottom.  You also get 12 little metal disks that fit perfectly in each cup, covering up that hole.  You make, bake, freeze, etc. your dessert and then just push up through that hole in the bottom and the disk pushes out with your little dessert on top.  I love fun individual desserts, so this is pretty much the perfect idea, in my opinion!

These are really easy, but they need to freeze for several hours/overnight, so make them ahead.

Frosty Fall Pudding Treat!!

Here’s the recipe: (printable version)

INGREDIENTS:

  • One package of Golden Oreos
  • 1 package (4 servings, 3.3 oz.) of Jell-O Instant White Chocolate Pudding
  • 1 1/2 cups of cold milk
  • 1 (8 oz.) container of Cool-Whip topping (thawed in refrigerator)
  • Food colorings in yellow and orange
  • Fall sprinkles

DIRECTIONS:

  • Crush about 2/3 package of Golden Oreos in a food processor or large food chopper.
  • Add orange food coloring until desired shade of orange is reached and mix on high until cookie bits and color are well combined.
  • Place metal disks into cheesecake pan and spoon cookie crumbs evenly into all 12 wells of mini- cheesecake pan (or cupcake liners), and press firmly into bottom (I use a Mini Tart Shaper– and I love it!)
  • In a large mixing bowl, mix cold milk with pudding for 2 minutes.
  • Add yellow food coloring to get desired shade and mix until well combined.
  • Fold in 1/2 of the Cool Whip (the rest will be used as topping- keep it refrigerated until use)
  • Spoon pudding mixture into a large zip-top bag (and zip it tight).
  • Cut a corner of the bag off and pipe pudding mixture into each cup, all the way to  the top.
  • Use a knife to smooth the tops flat and cover entire pan with plastic wrap.
  • Freeze until serving (at least a few hours)
  • Before serving, remove pan from freezer and allow it to warm up a little bit before popping desserts out.
  • Press a finger up through the hole in the bottom of the pan, pushing each dessert up- grab it by the crust and take metal disk off the bottom.
  • Serve immediately, or place in a sealed container back in the freezer until ready to serve.
  • Pipe remaining Cool Whip on top of each little dessert cup and decorate as desired.
  • Enjoy!!

Frosty Fall Pudding Treats!!!My thoughts:  There are two things that make a dessert perfect in my mind.  Taste and the amount of smiles that happen when you serve them.  These are really yummy (how can you go wrong with pudding and Oreos???) and the number of smiles….?  Well, you are just going to have to make them to see that for yourself!  Enjoy!! ~R

Other mini-cheesecake pan recipes you will love:

Mini chocolate chip cookie cheesecakesFrozen S'mores CupsMini Cookie Dough CheesecakeRaspberry Lemon Cream Cups!!!