Tag Archives: dessert

Easy Cinnamon Roll Cupcakes with Cream Cheese Frosting~ and a GIVE AWAY!!!!

Posted on

Cinnamon Roll Cupcakes

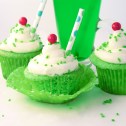
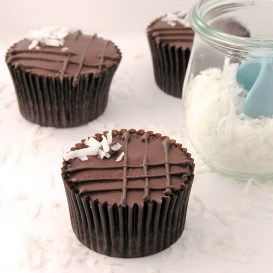
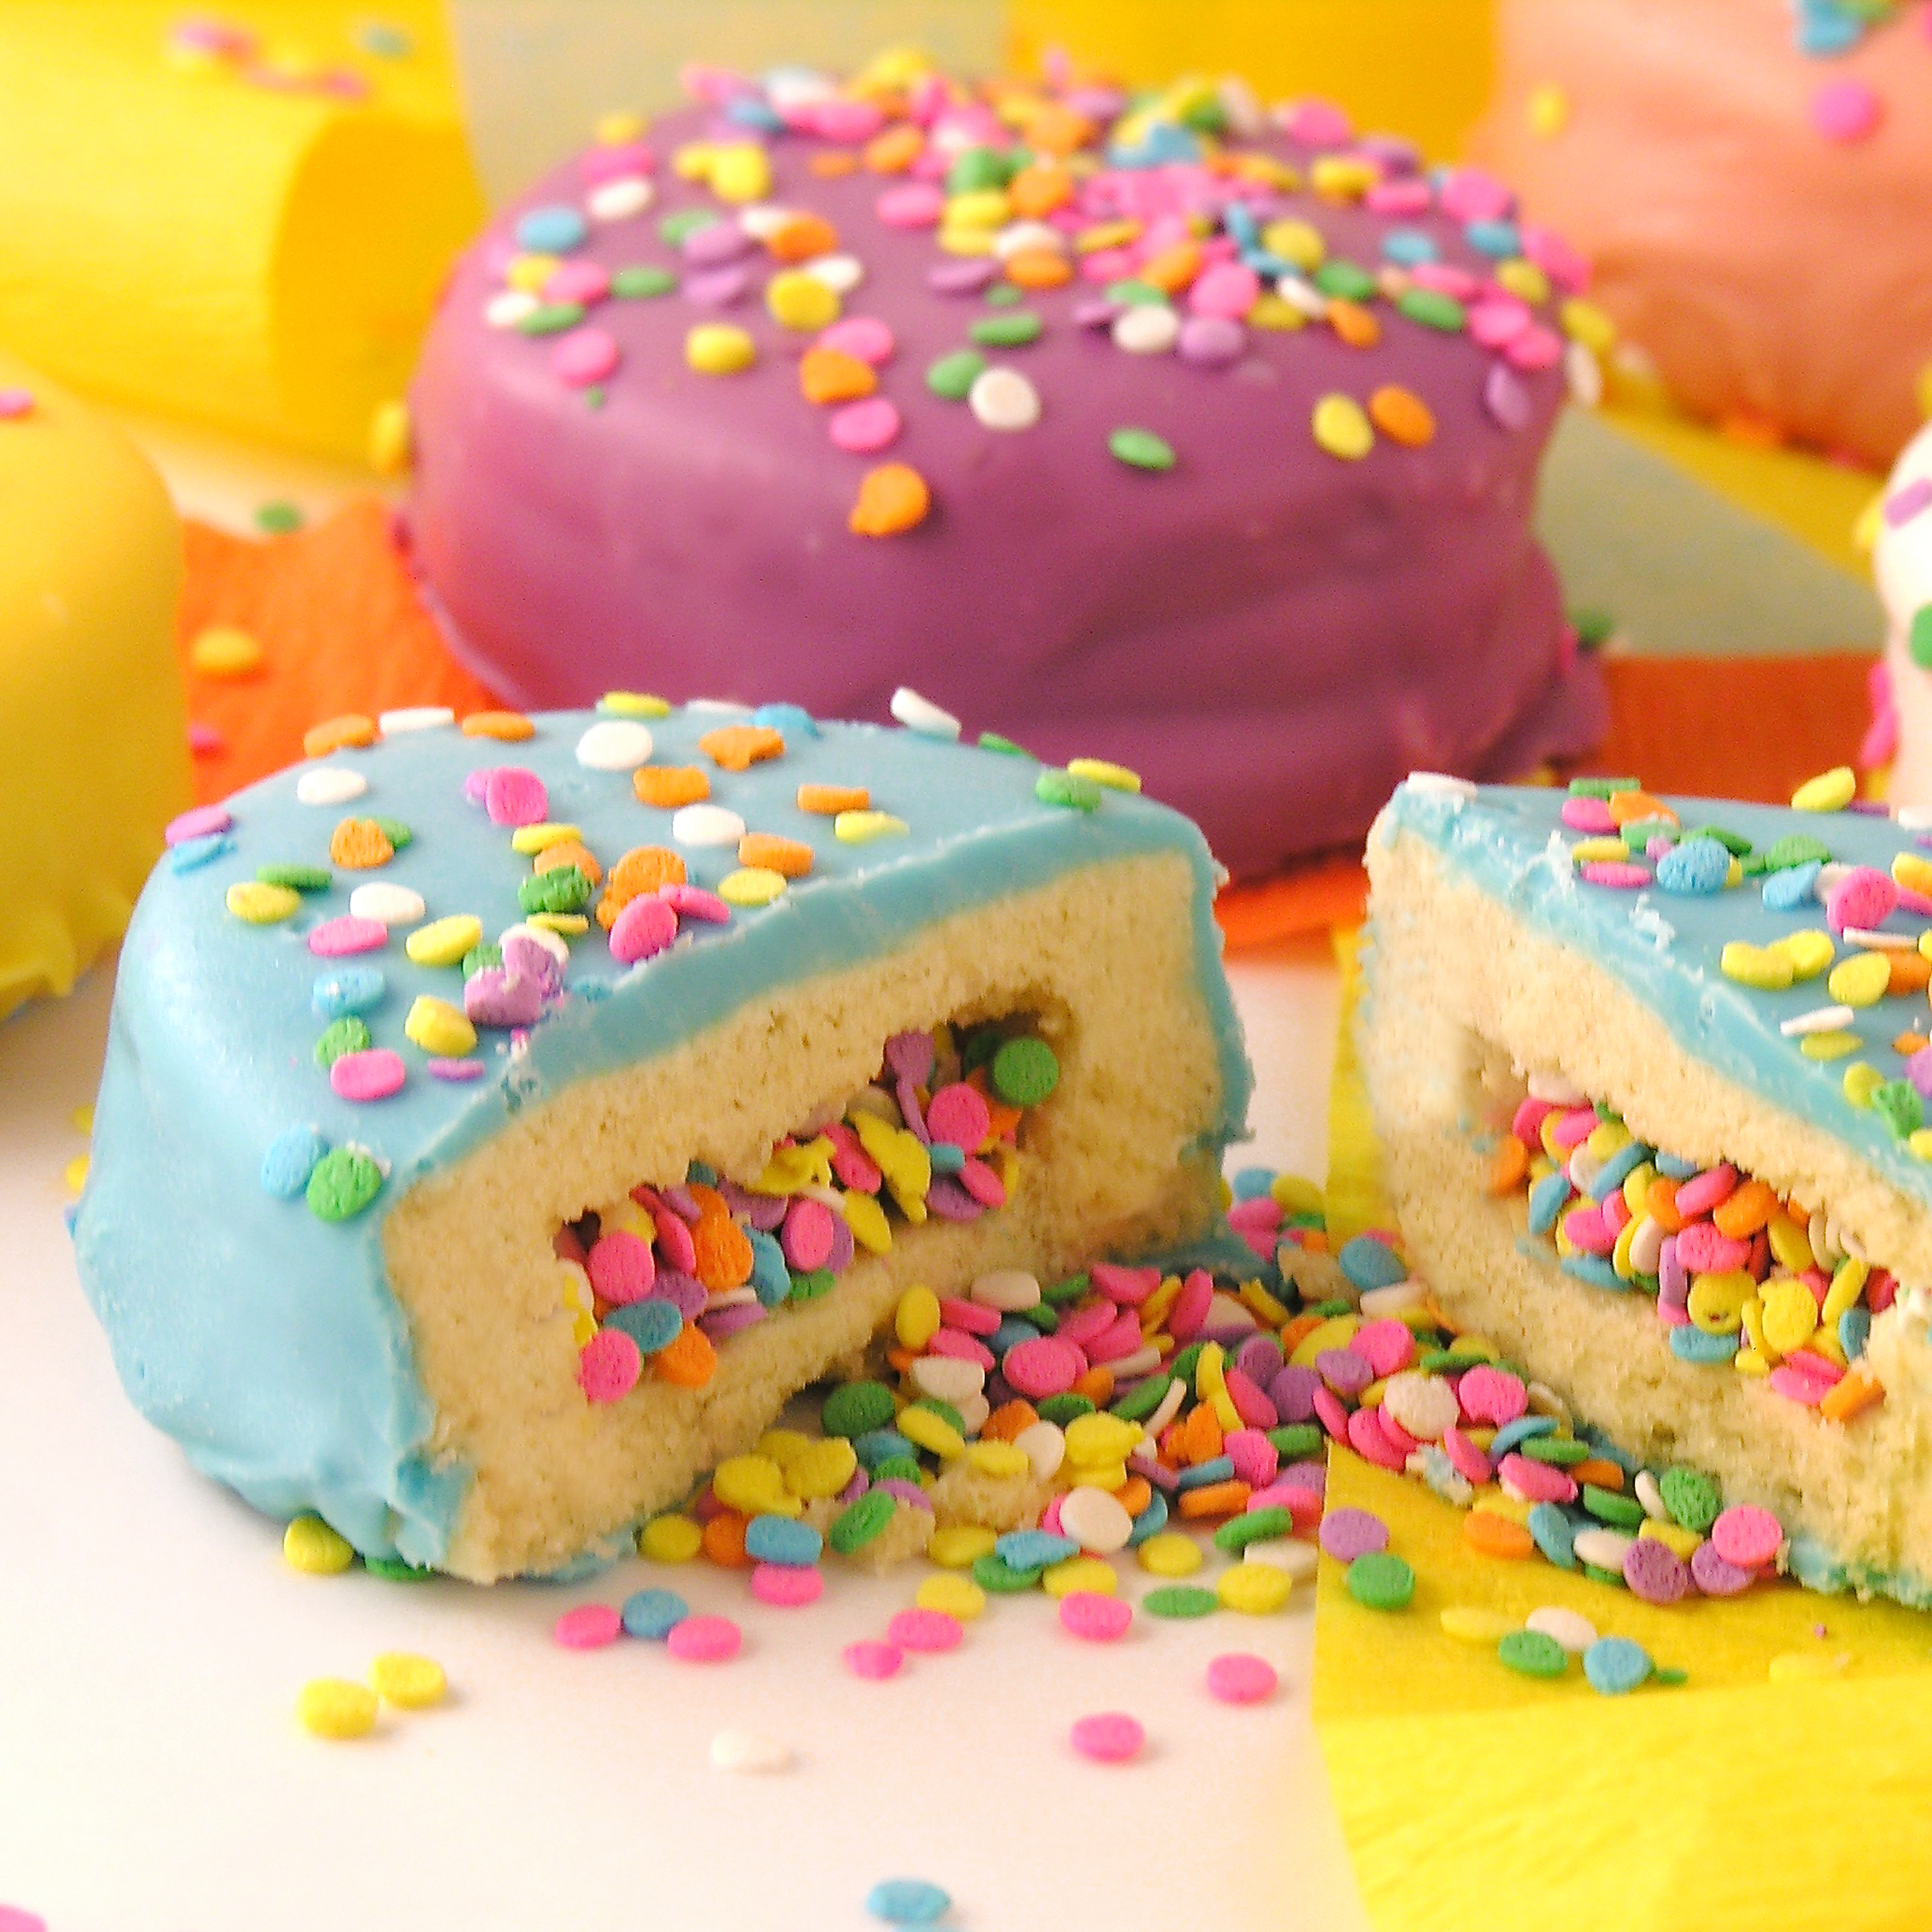
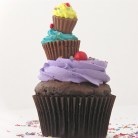
The easiest “cupcakes” you’ll ever make- plus the yummiest cream cheese frosting ever!

This recipe has a story (and my very first give-away on easybaked!!!)

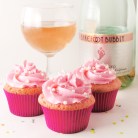
Awhile back, a lovely lady named Karin emailed me with a dilemma. She had recently started a business called Baketown Girls, making products for use in the kitchen. She hired a designer to create her logo and product labels, but a short time after receiving her product she was googling “cupcakes” and immediately saw a photo of our Strawberry Lemonade Cupcakes, and realized that her designer had stolen my photo for use on her product. Sigh. I cannot even tell you how many times that photo (in particular) has been stolen- people email me all the time about seeing it on products and logos. I’ve thought about slapping watermarks across all of my photos, but that’s just so SAD. I just shake my head and wish the world was a better, more honest place.

Strawberry Lemonade Cupcakes!!!!!Cinnamon Roll Cupcakes1

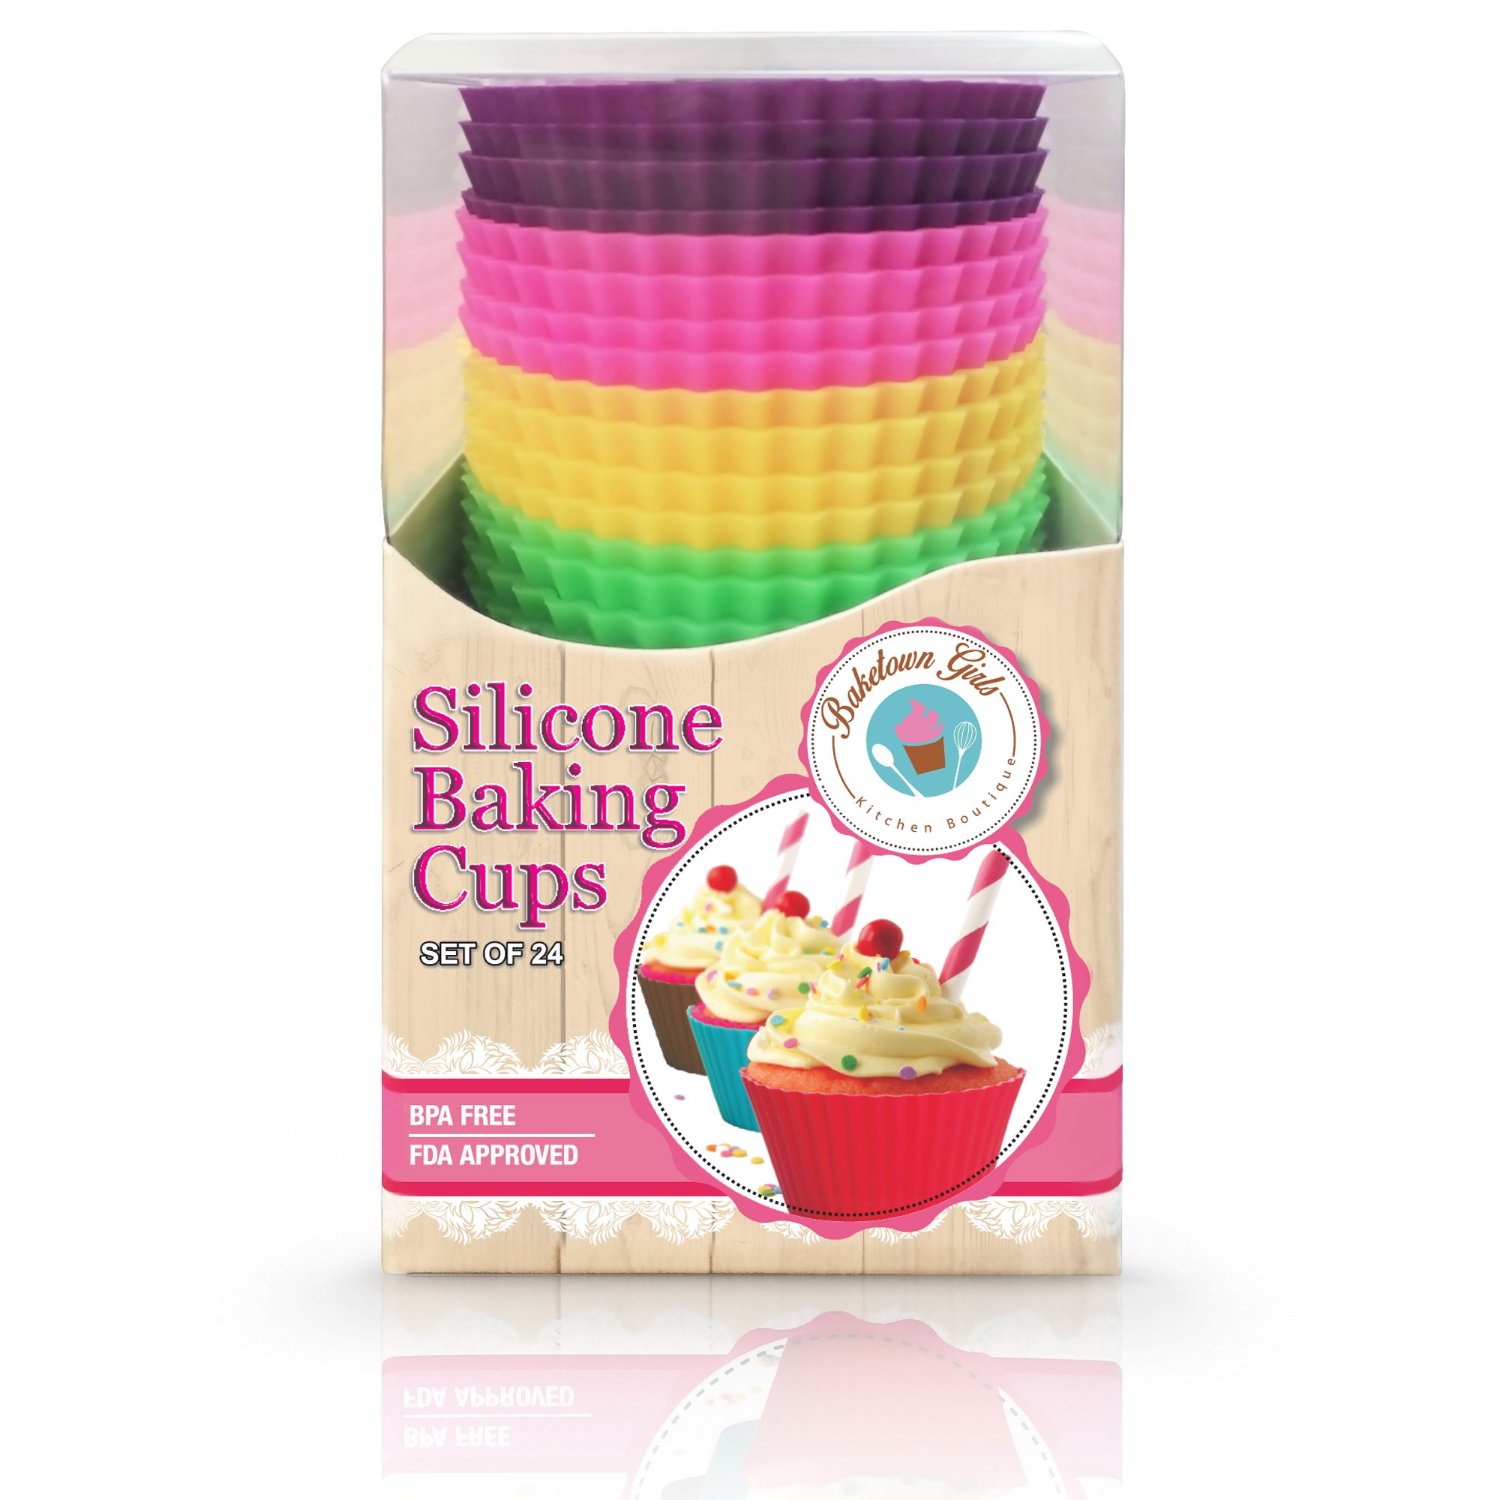
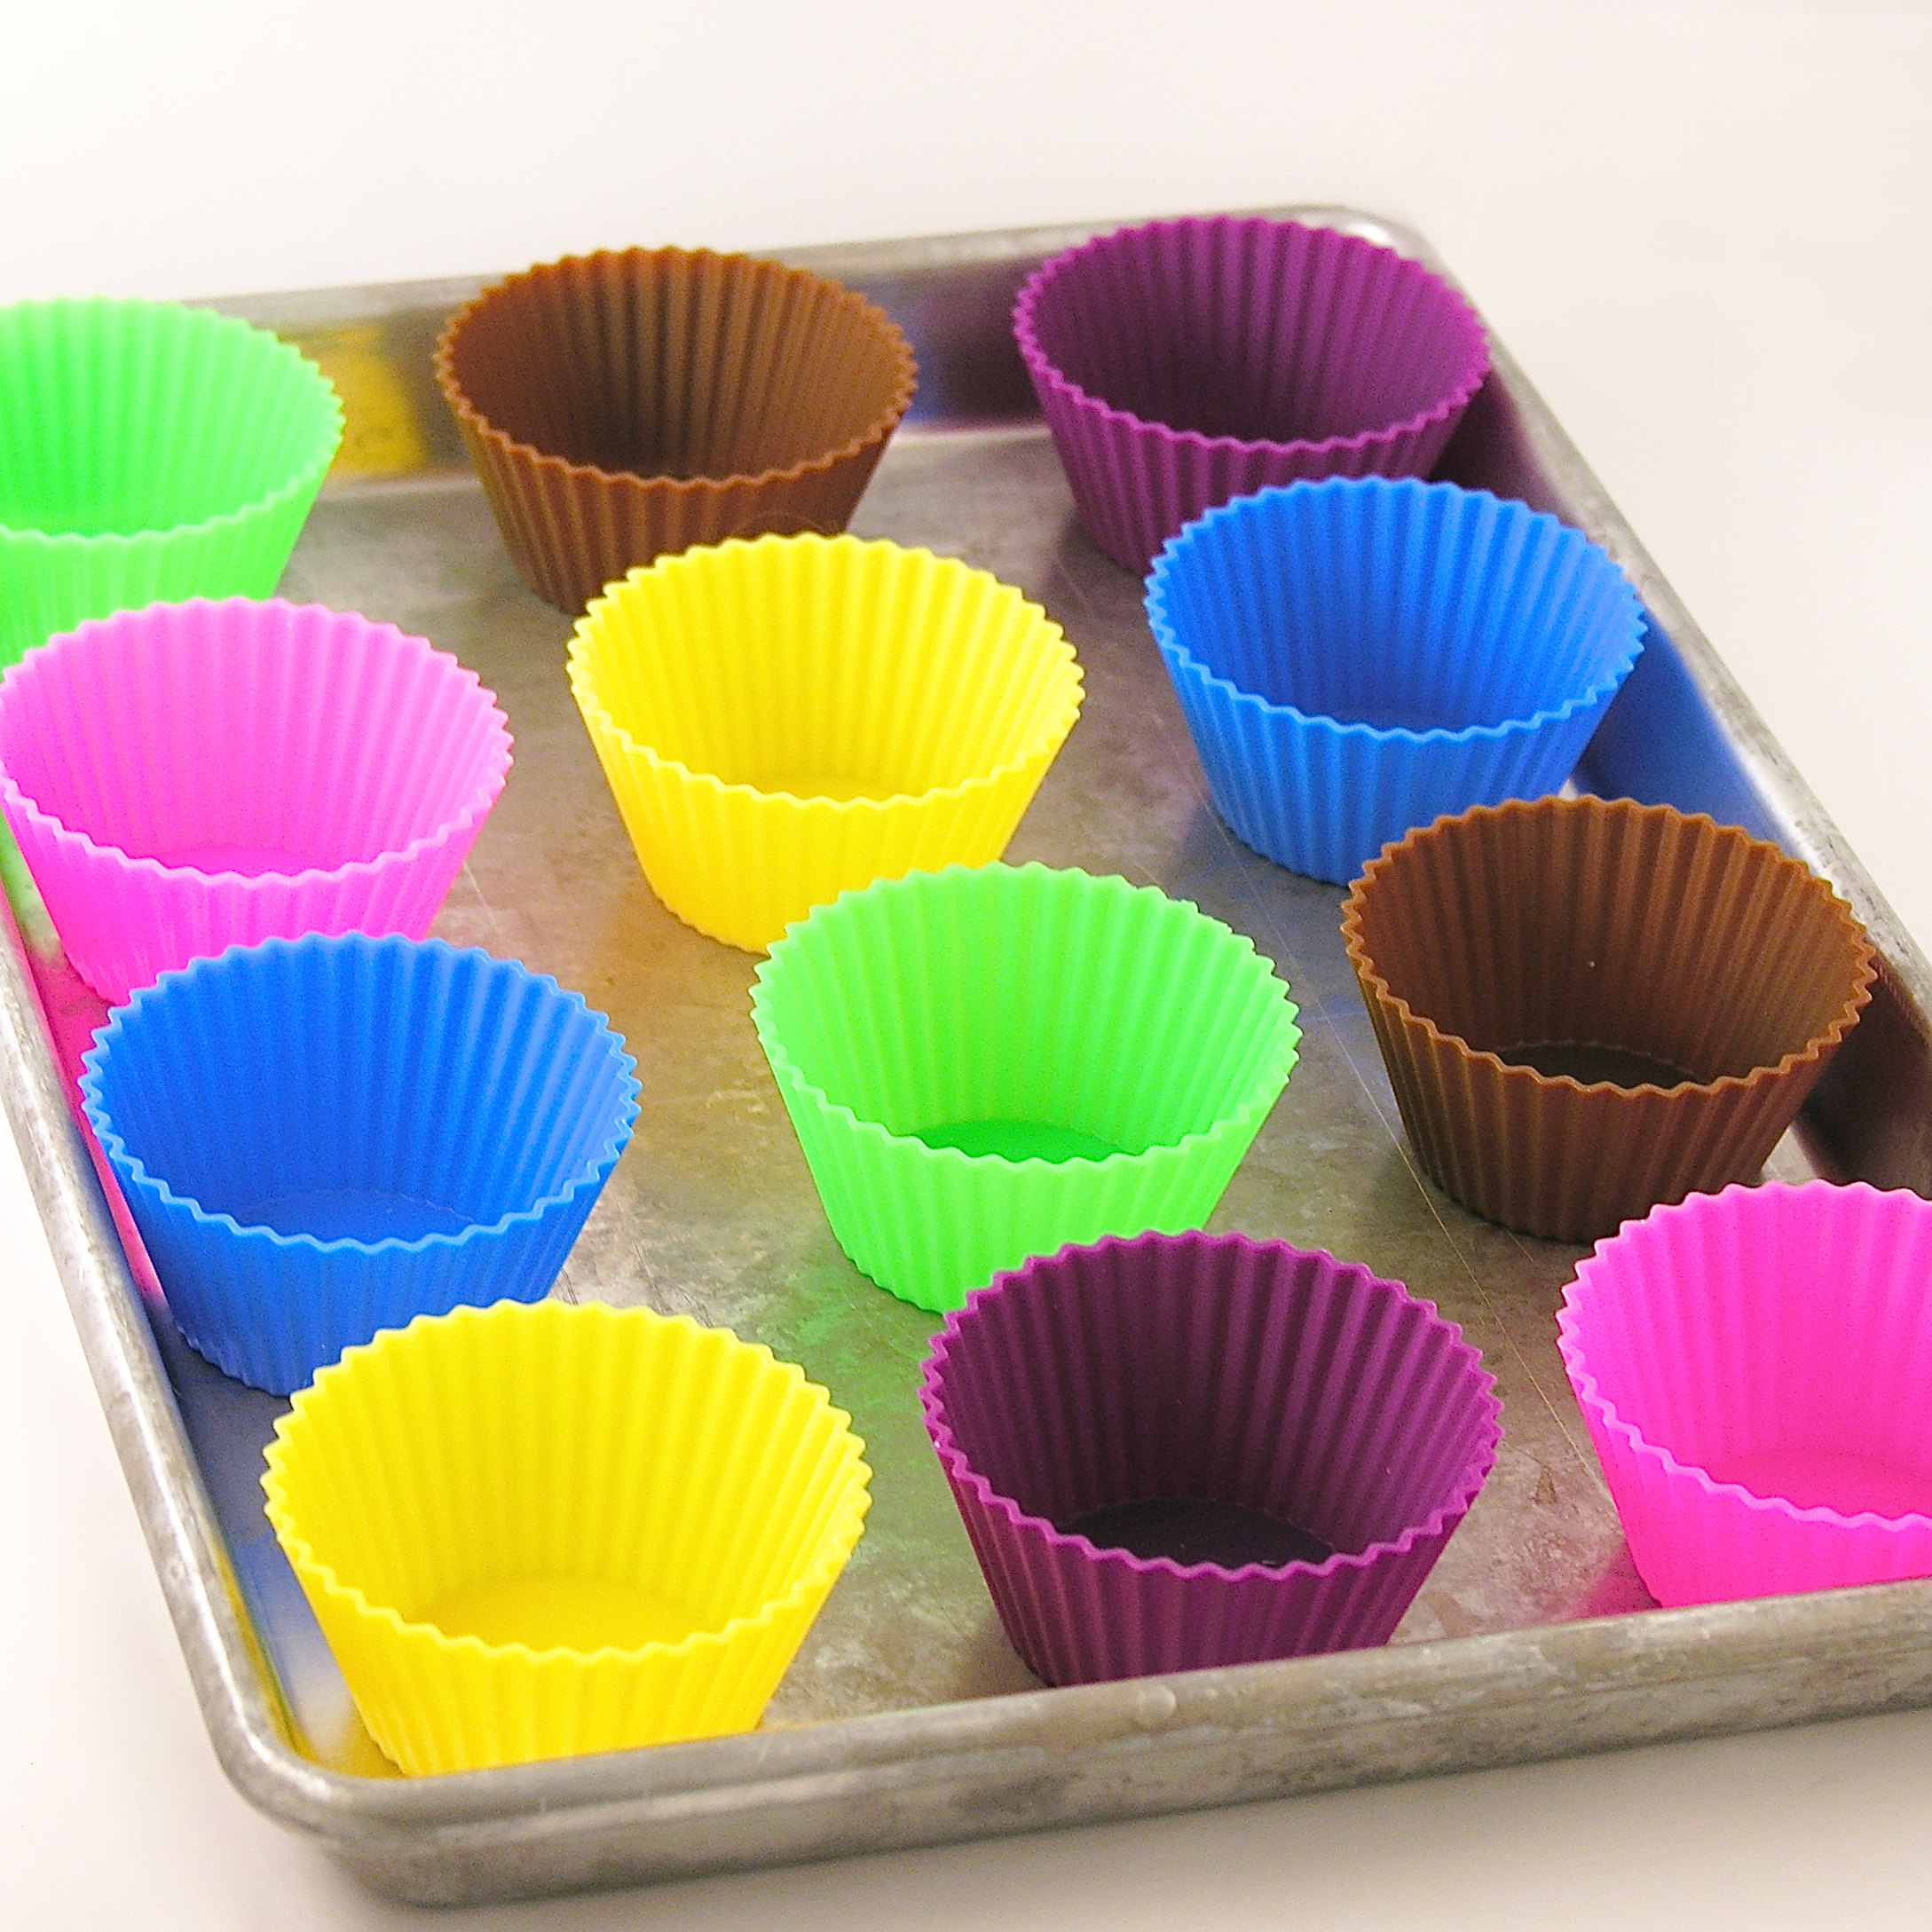
In any case, Karin felt bad, and offered to send me her product to try out. I’ve never use silicone cups (and actually never understood why you would use silicone cups), so I agreed.

About a week later, I got a box with 3 sets- one for me and 2 sets to give away to you all! More about that later.

I didn’t know how I would use them. I figured I could try making cupcakes in them, but (to be honest) my favorite part of cupcakes is matching fun liners with the cupcake recipe and these came in 6 colors which meant that no matter what, I’d be stuck with a variety of those colors. My other question- how do you give these away? I give away 99% of my blog desserts. Do I give away unwrapped cupcakes? That seems odd. And messy.

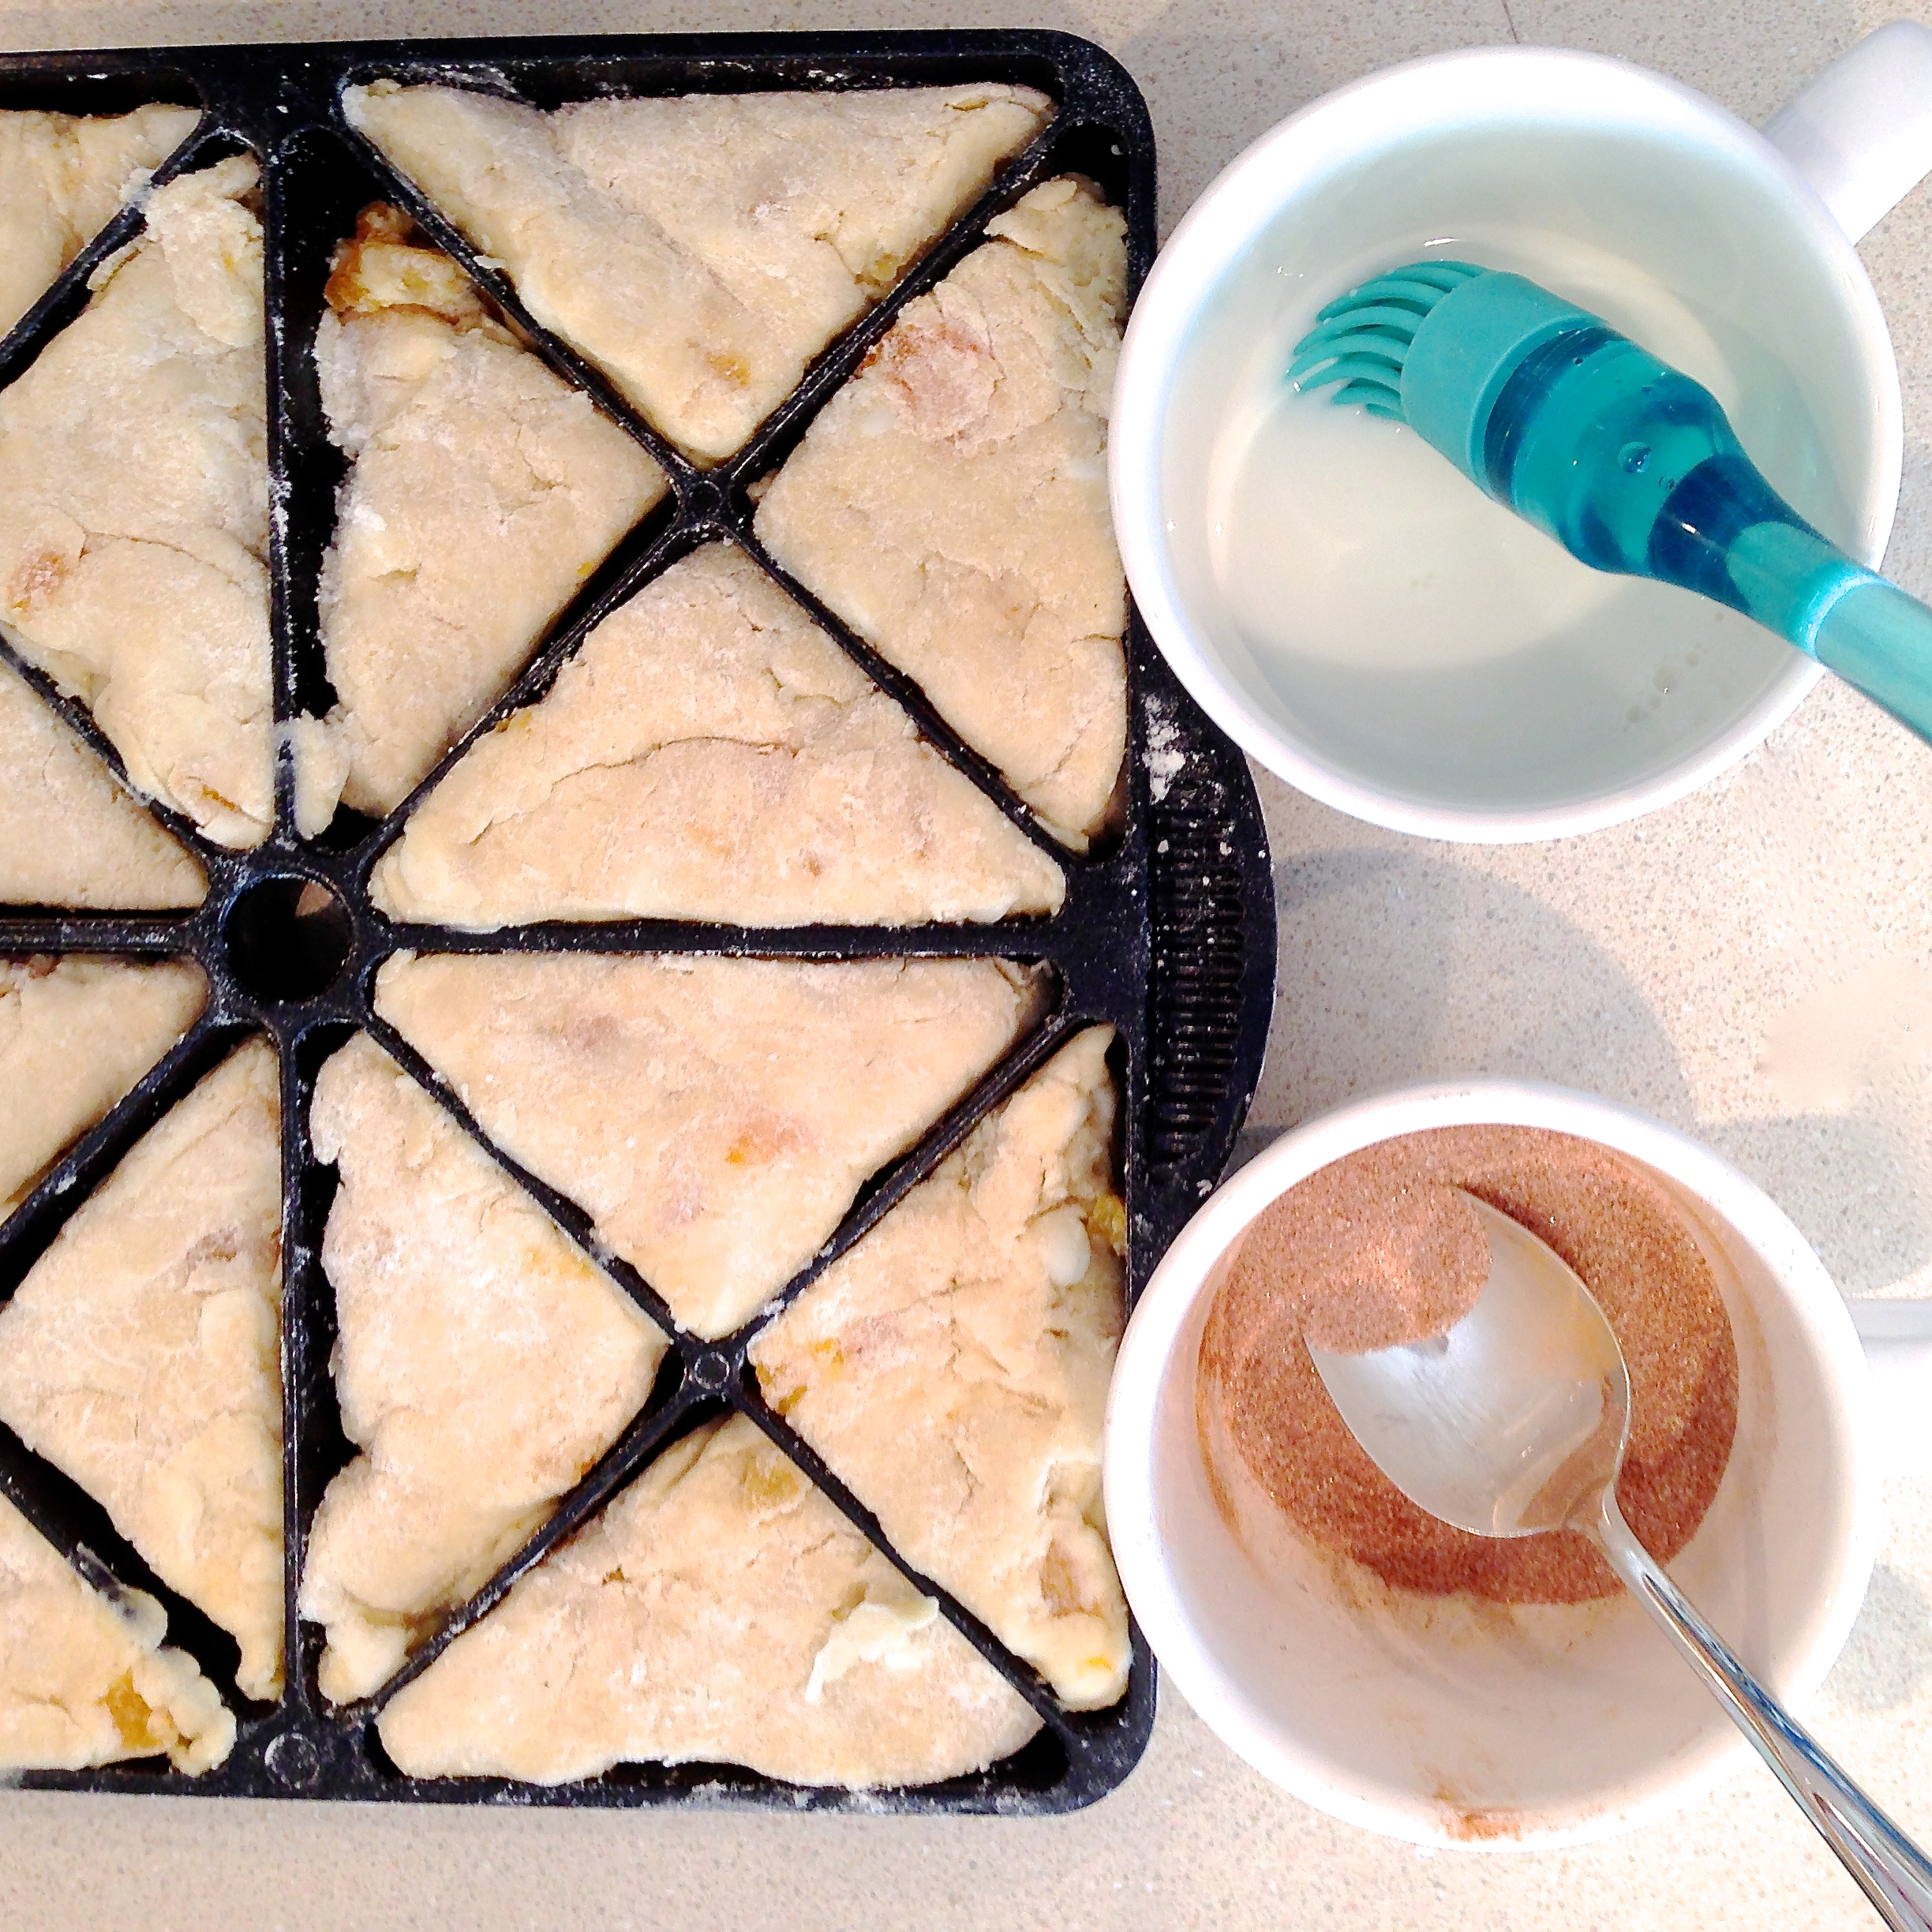
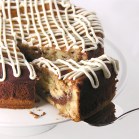
The day after I received this package of silicone cups I needed to make a batch of cinnamon rolls from one of those refrigerated tubes. I opened it (which is always a traumatic experience when it explodes open) and was ready to set them on a cookie sheet when I thought, “I should bake these in those silicone cups”. I sprayed 10 cups with non-stick spray and squeezed each roll into a circumference that would sit in the bottom of each cup and baked them according to the package.

Cinnamon CupcakesCinnamon Cupcakes

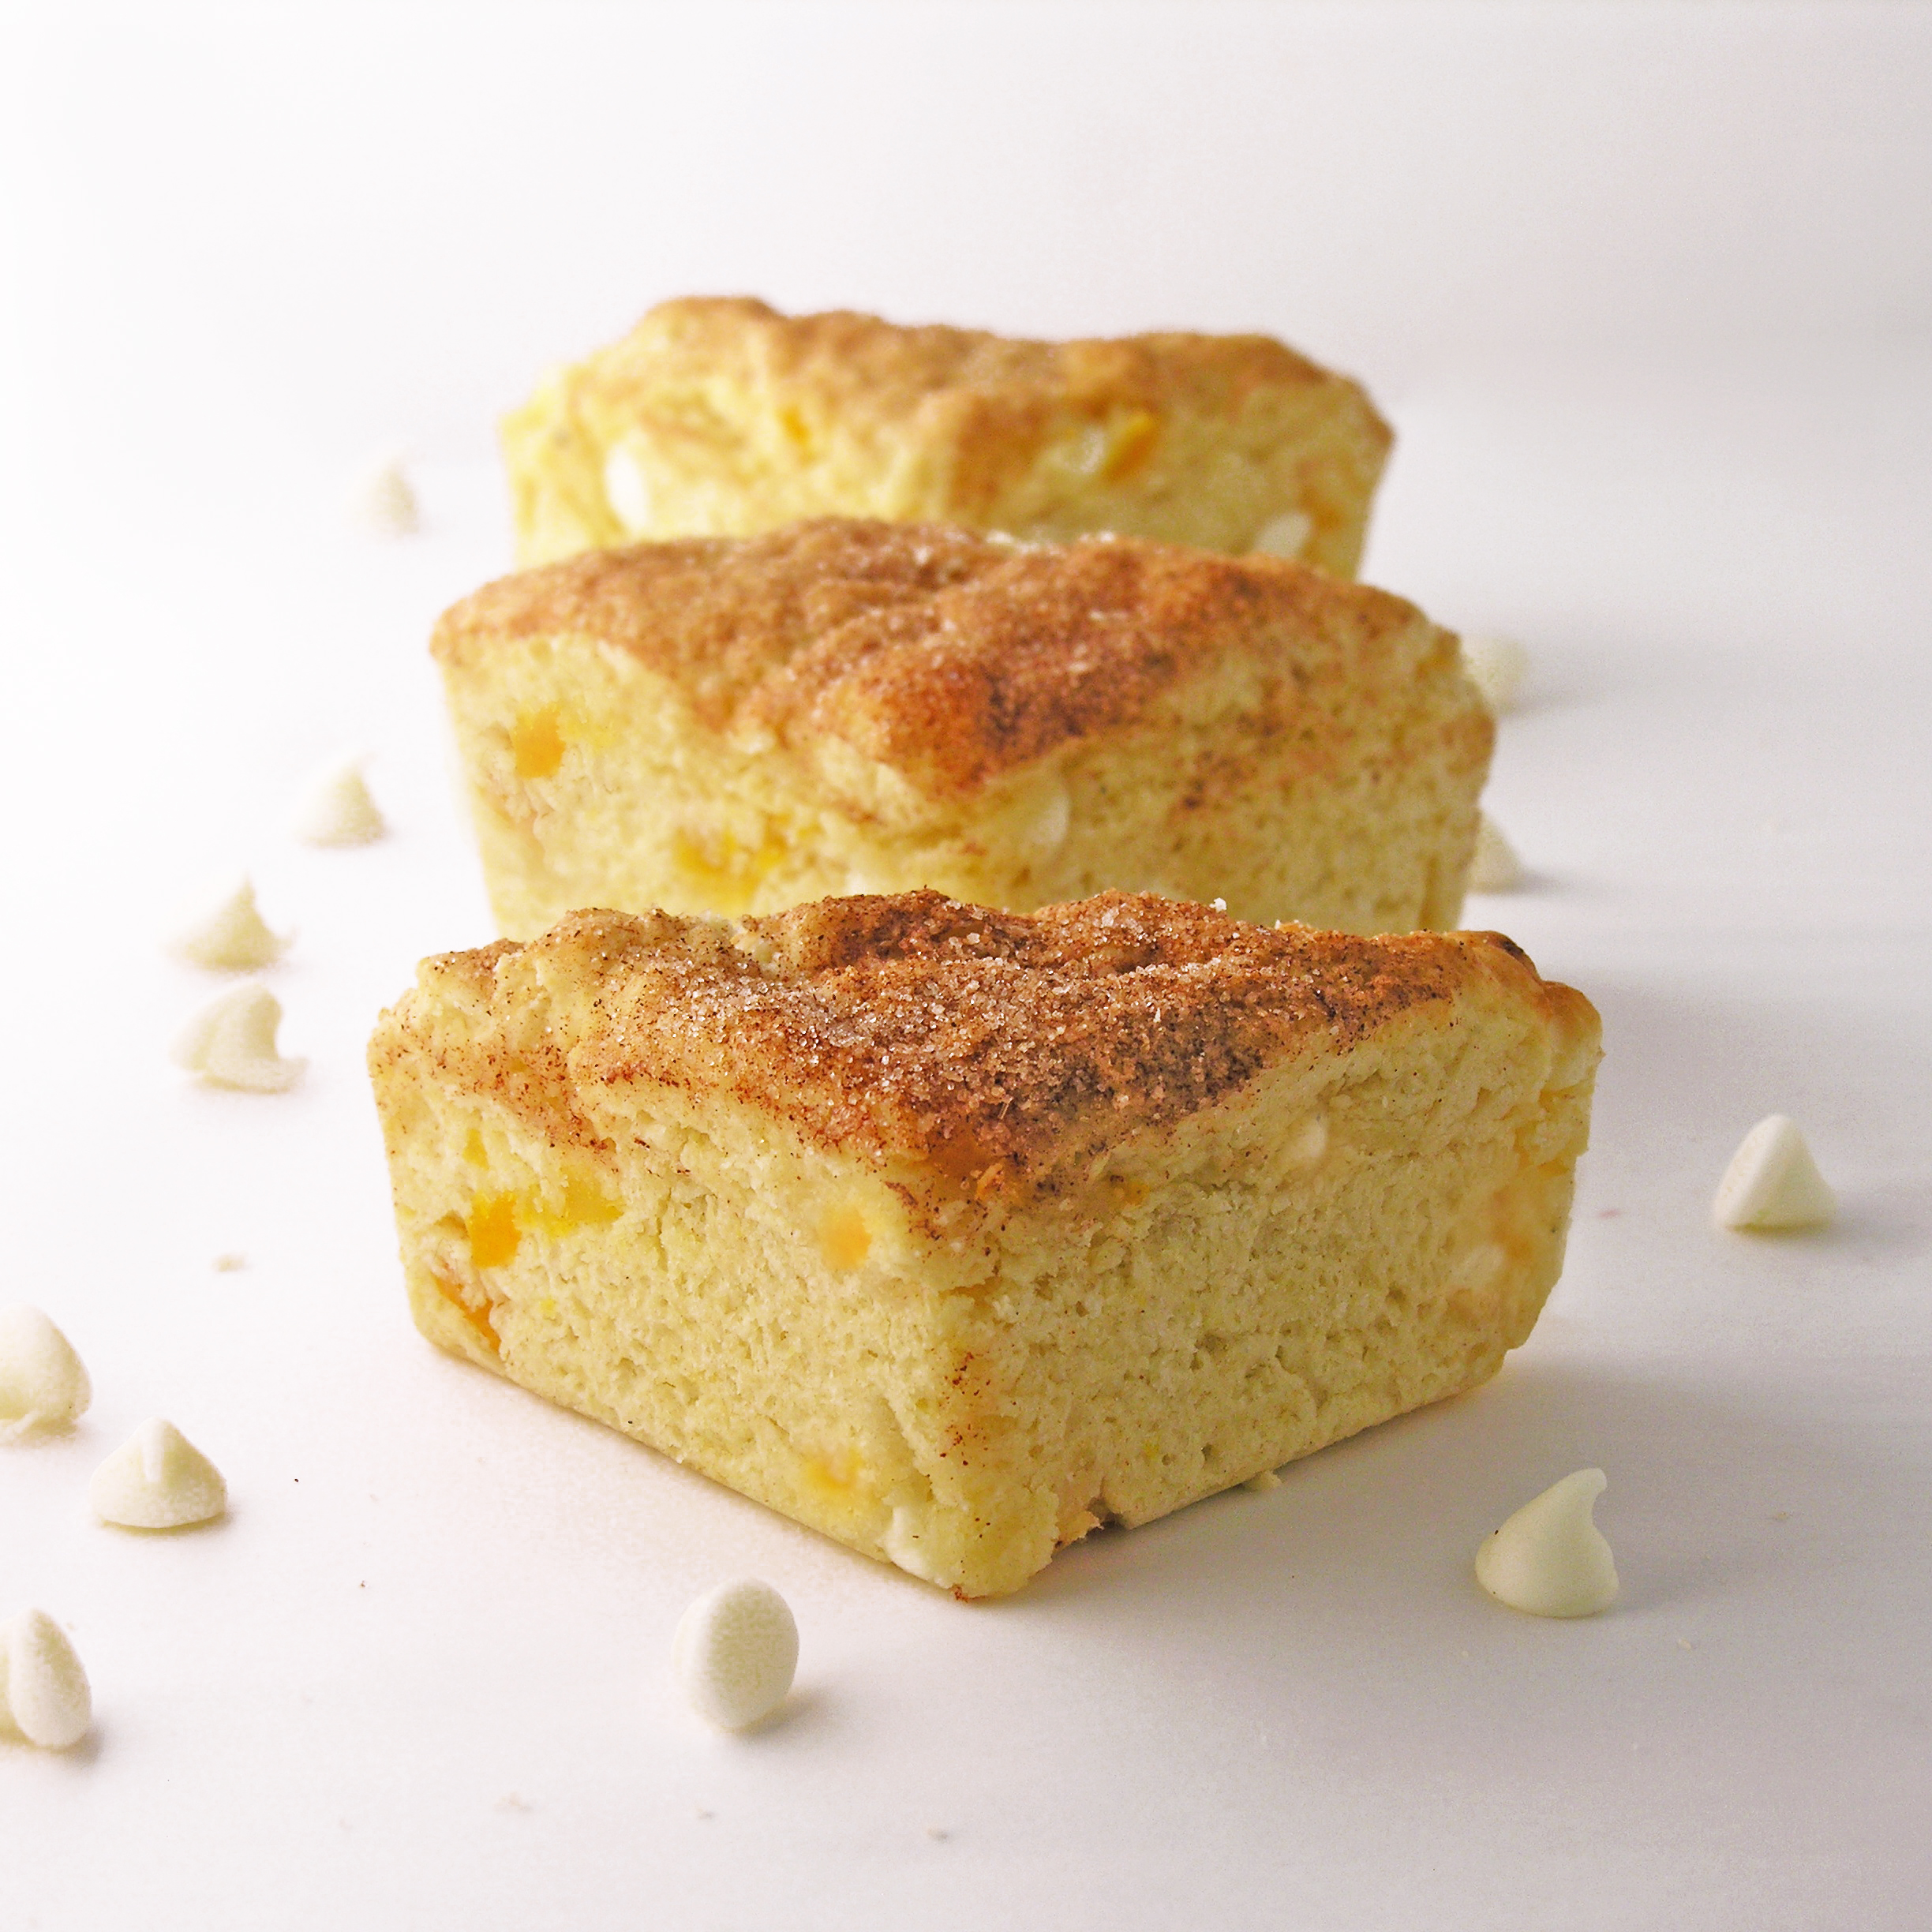
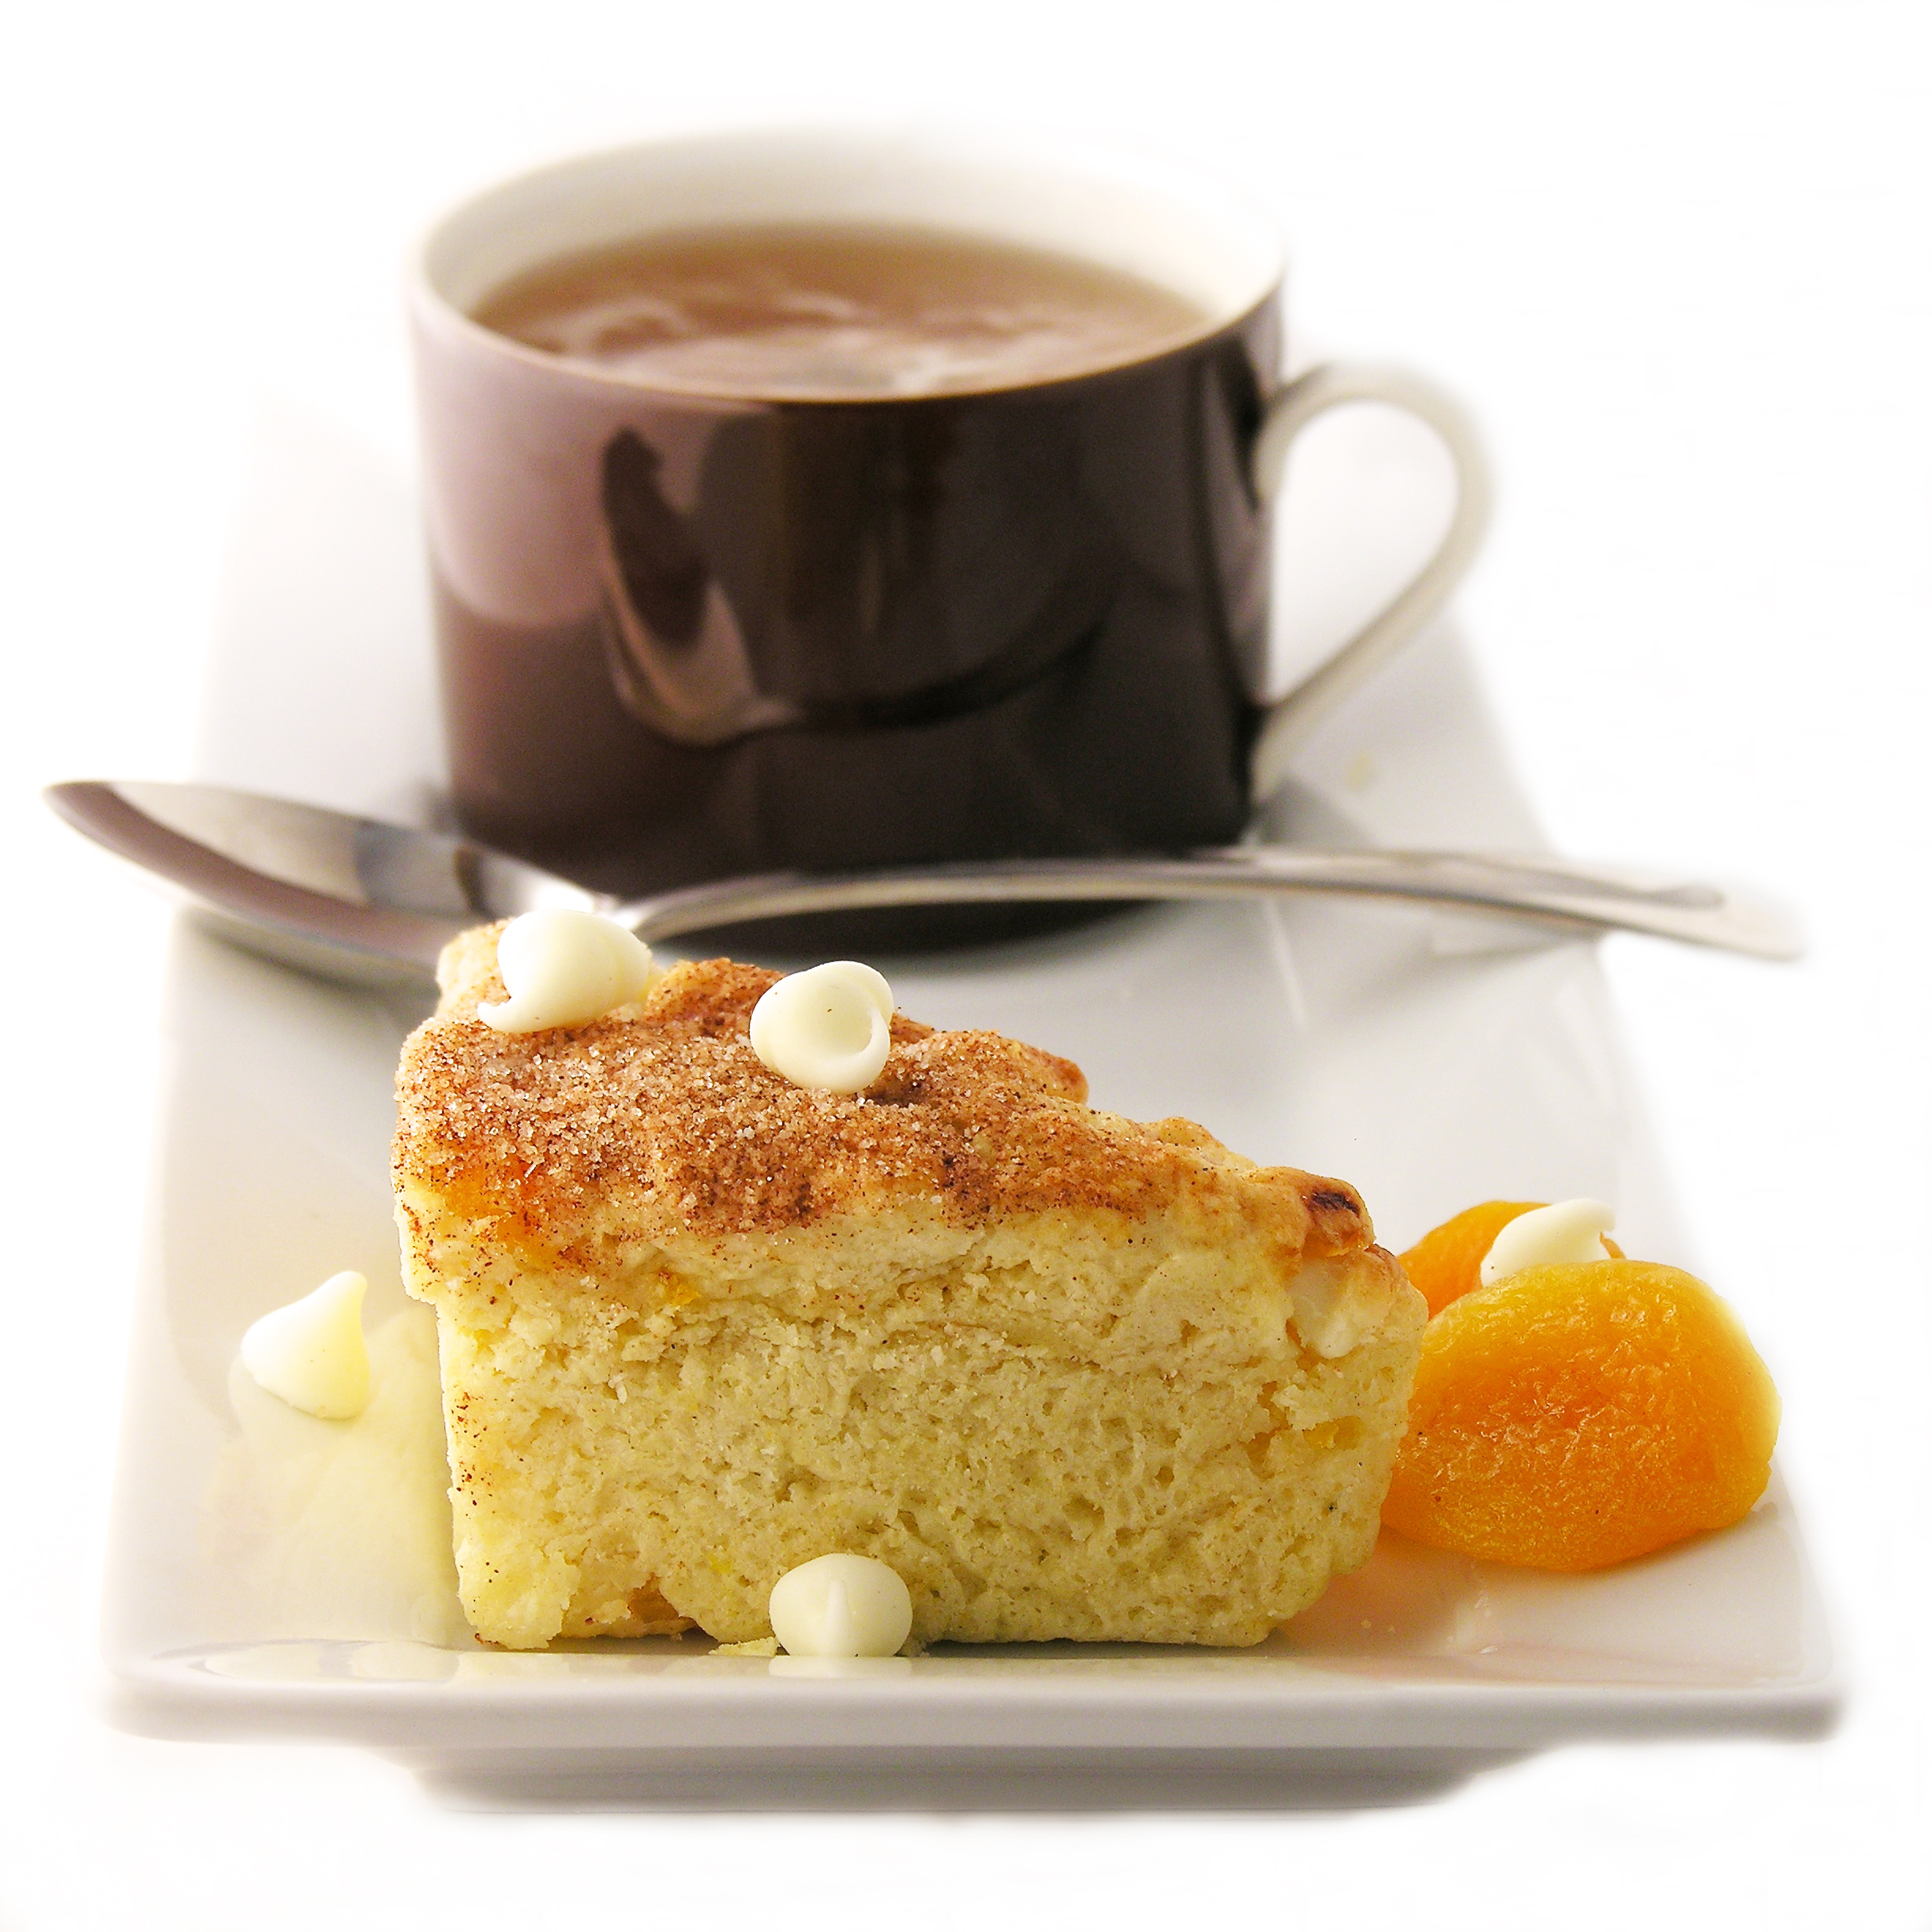
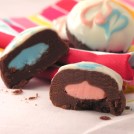
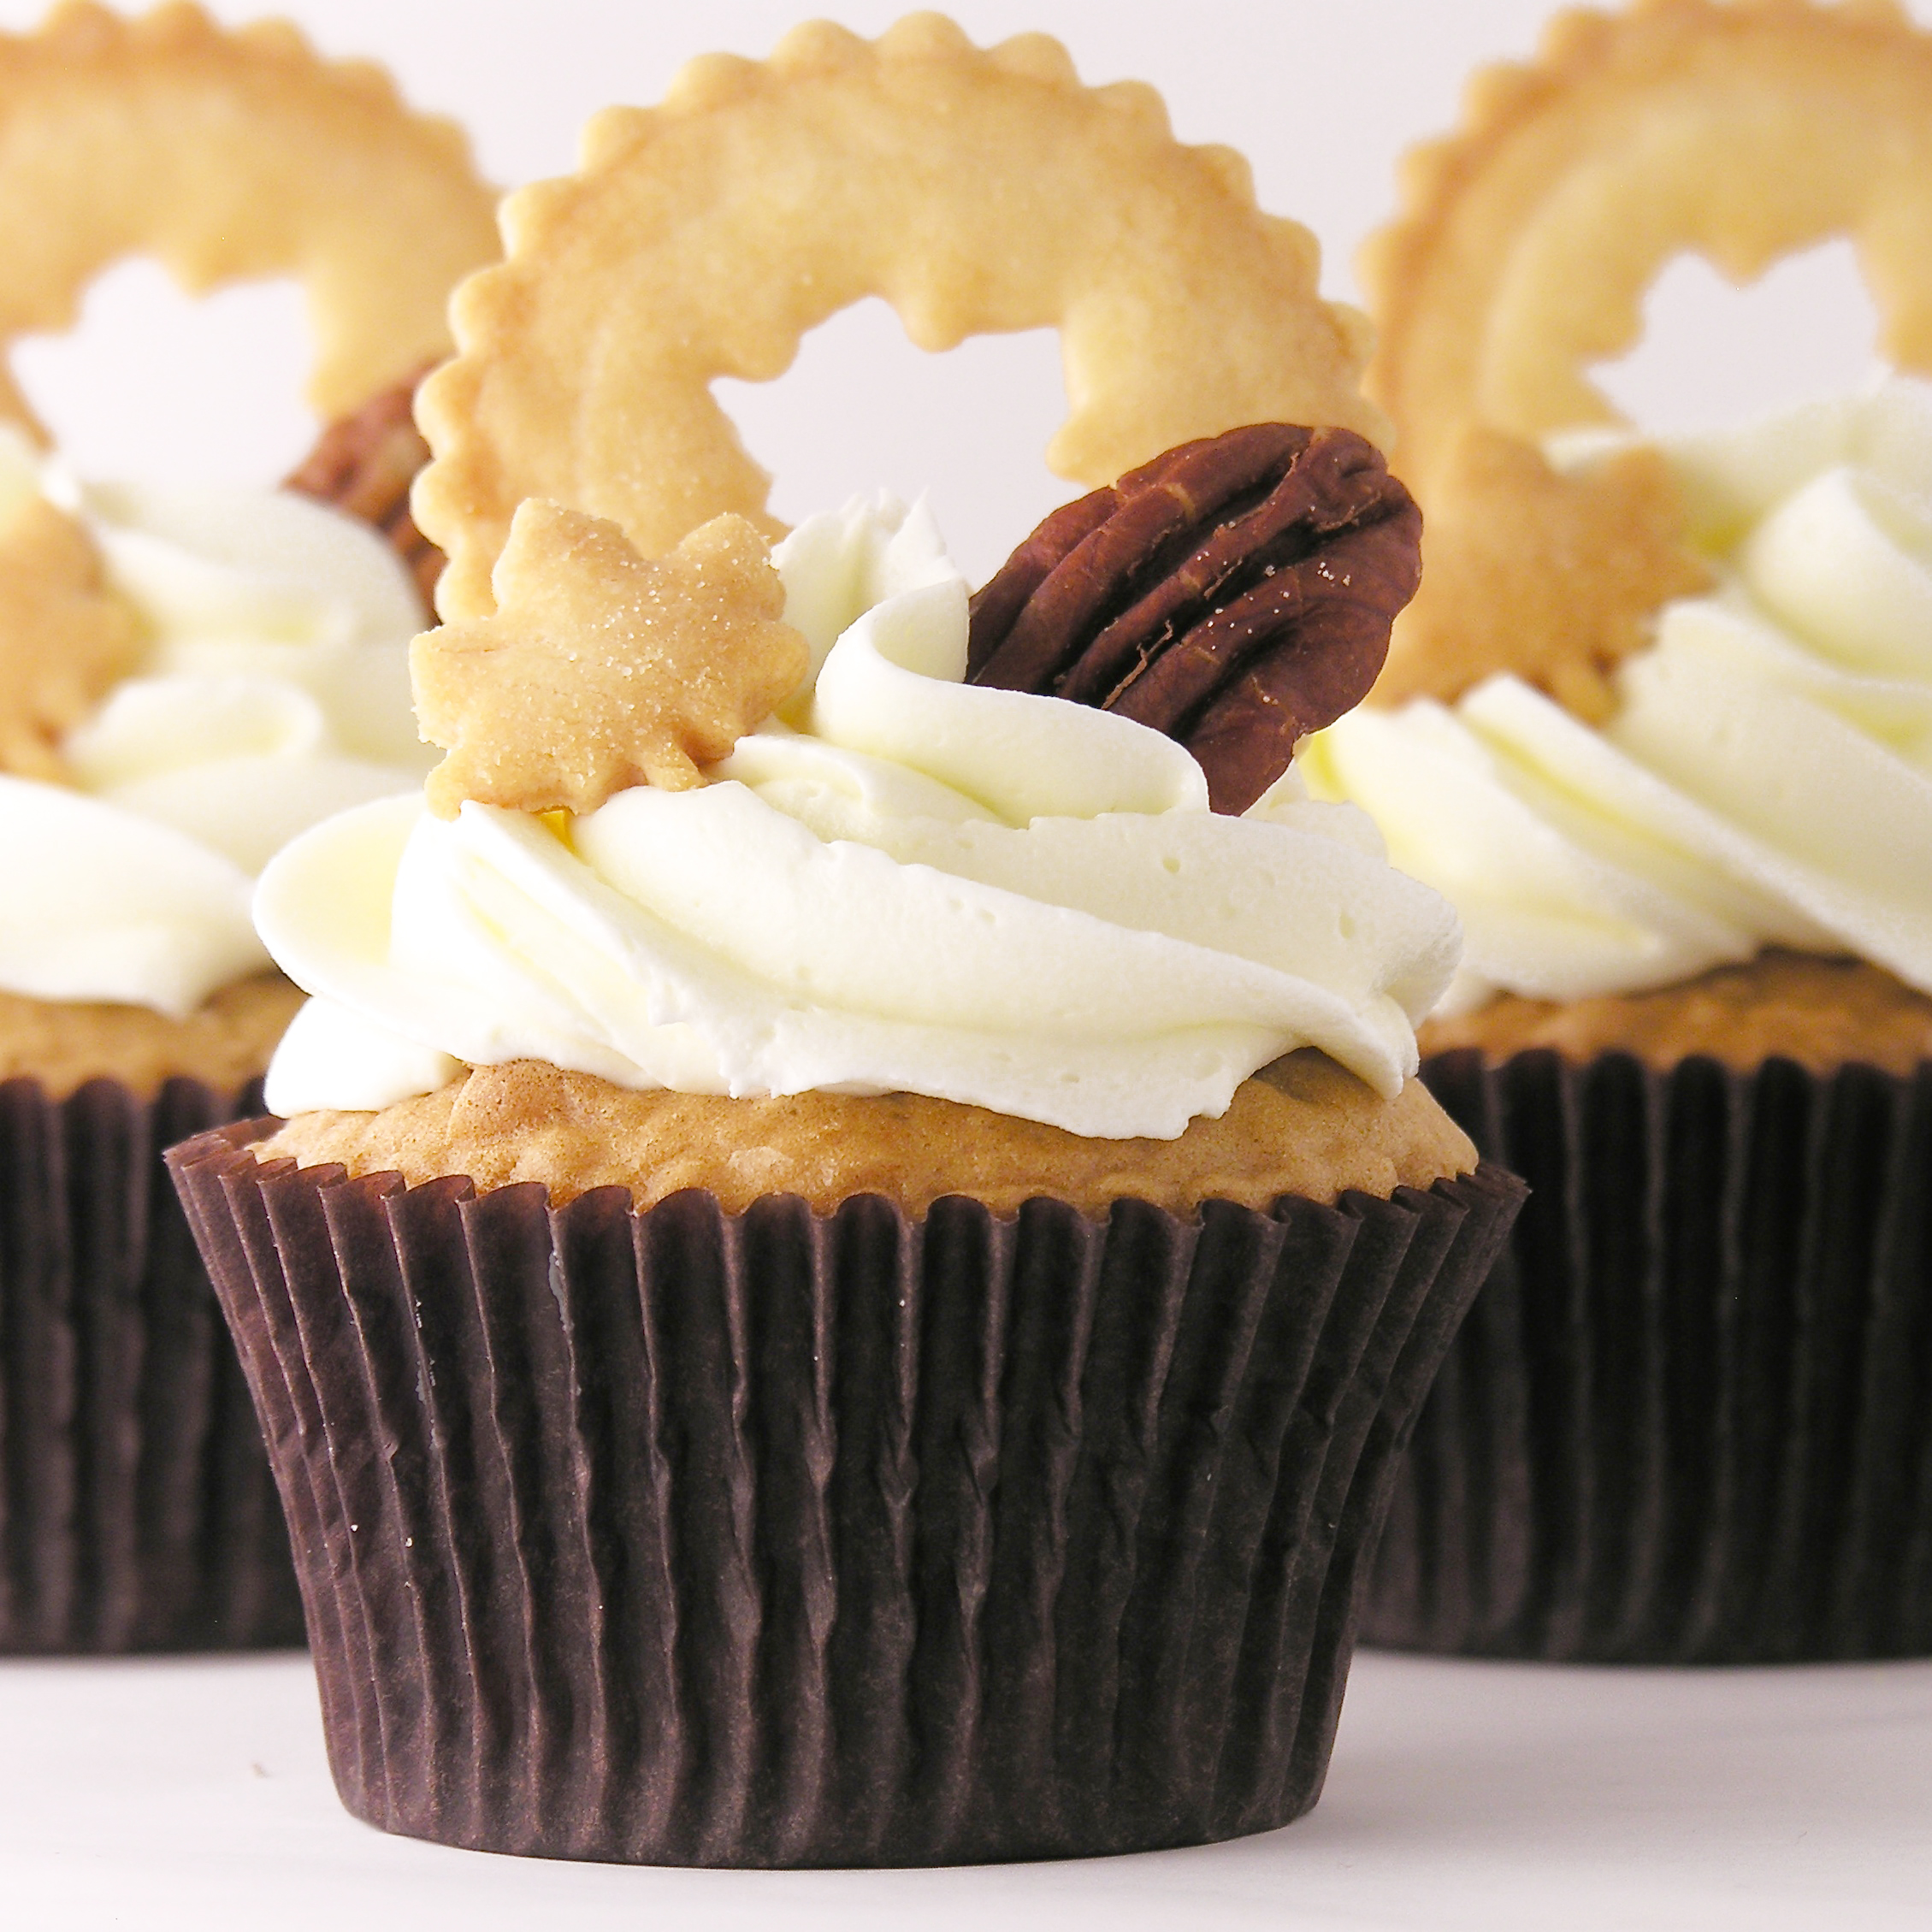
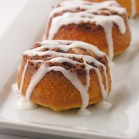
They were AMAZING! They came out looking like little cupcakes and they were so much more moist than when they are baked on a cookie sheet.

Cinnamon Roll Cupcakes

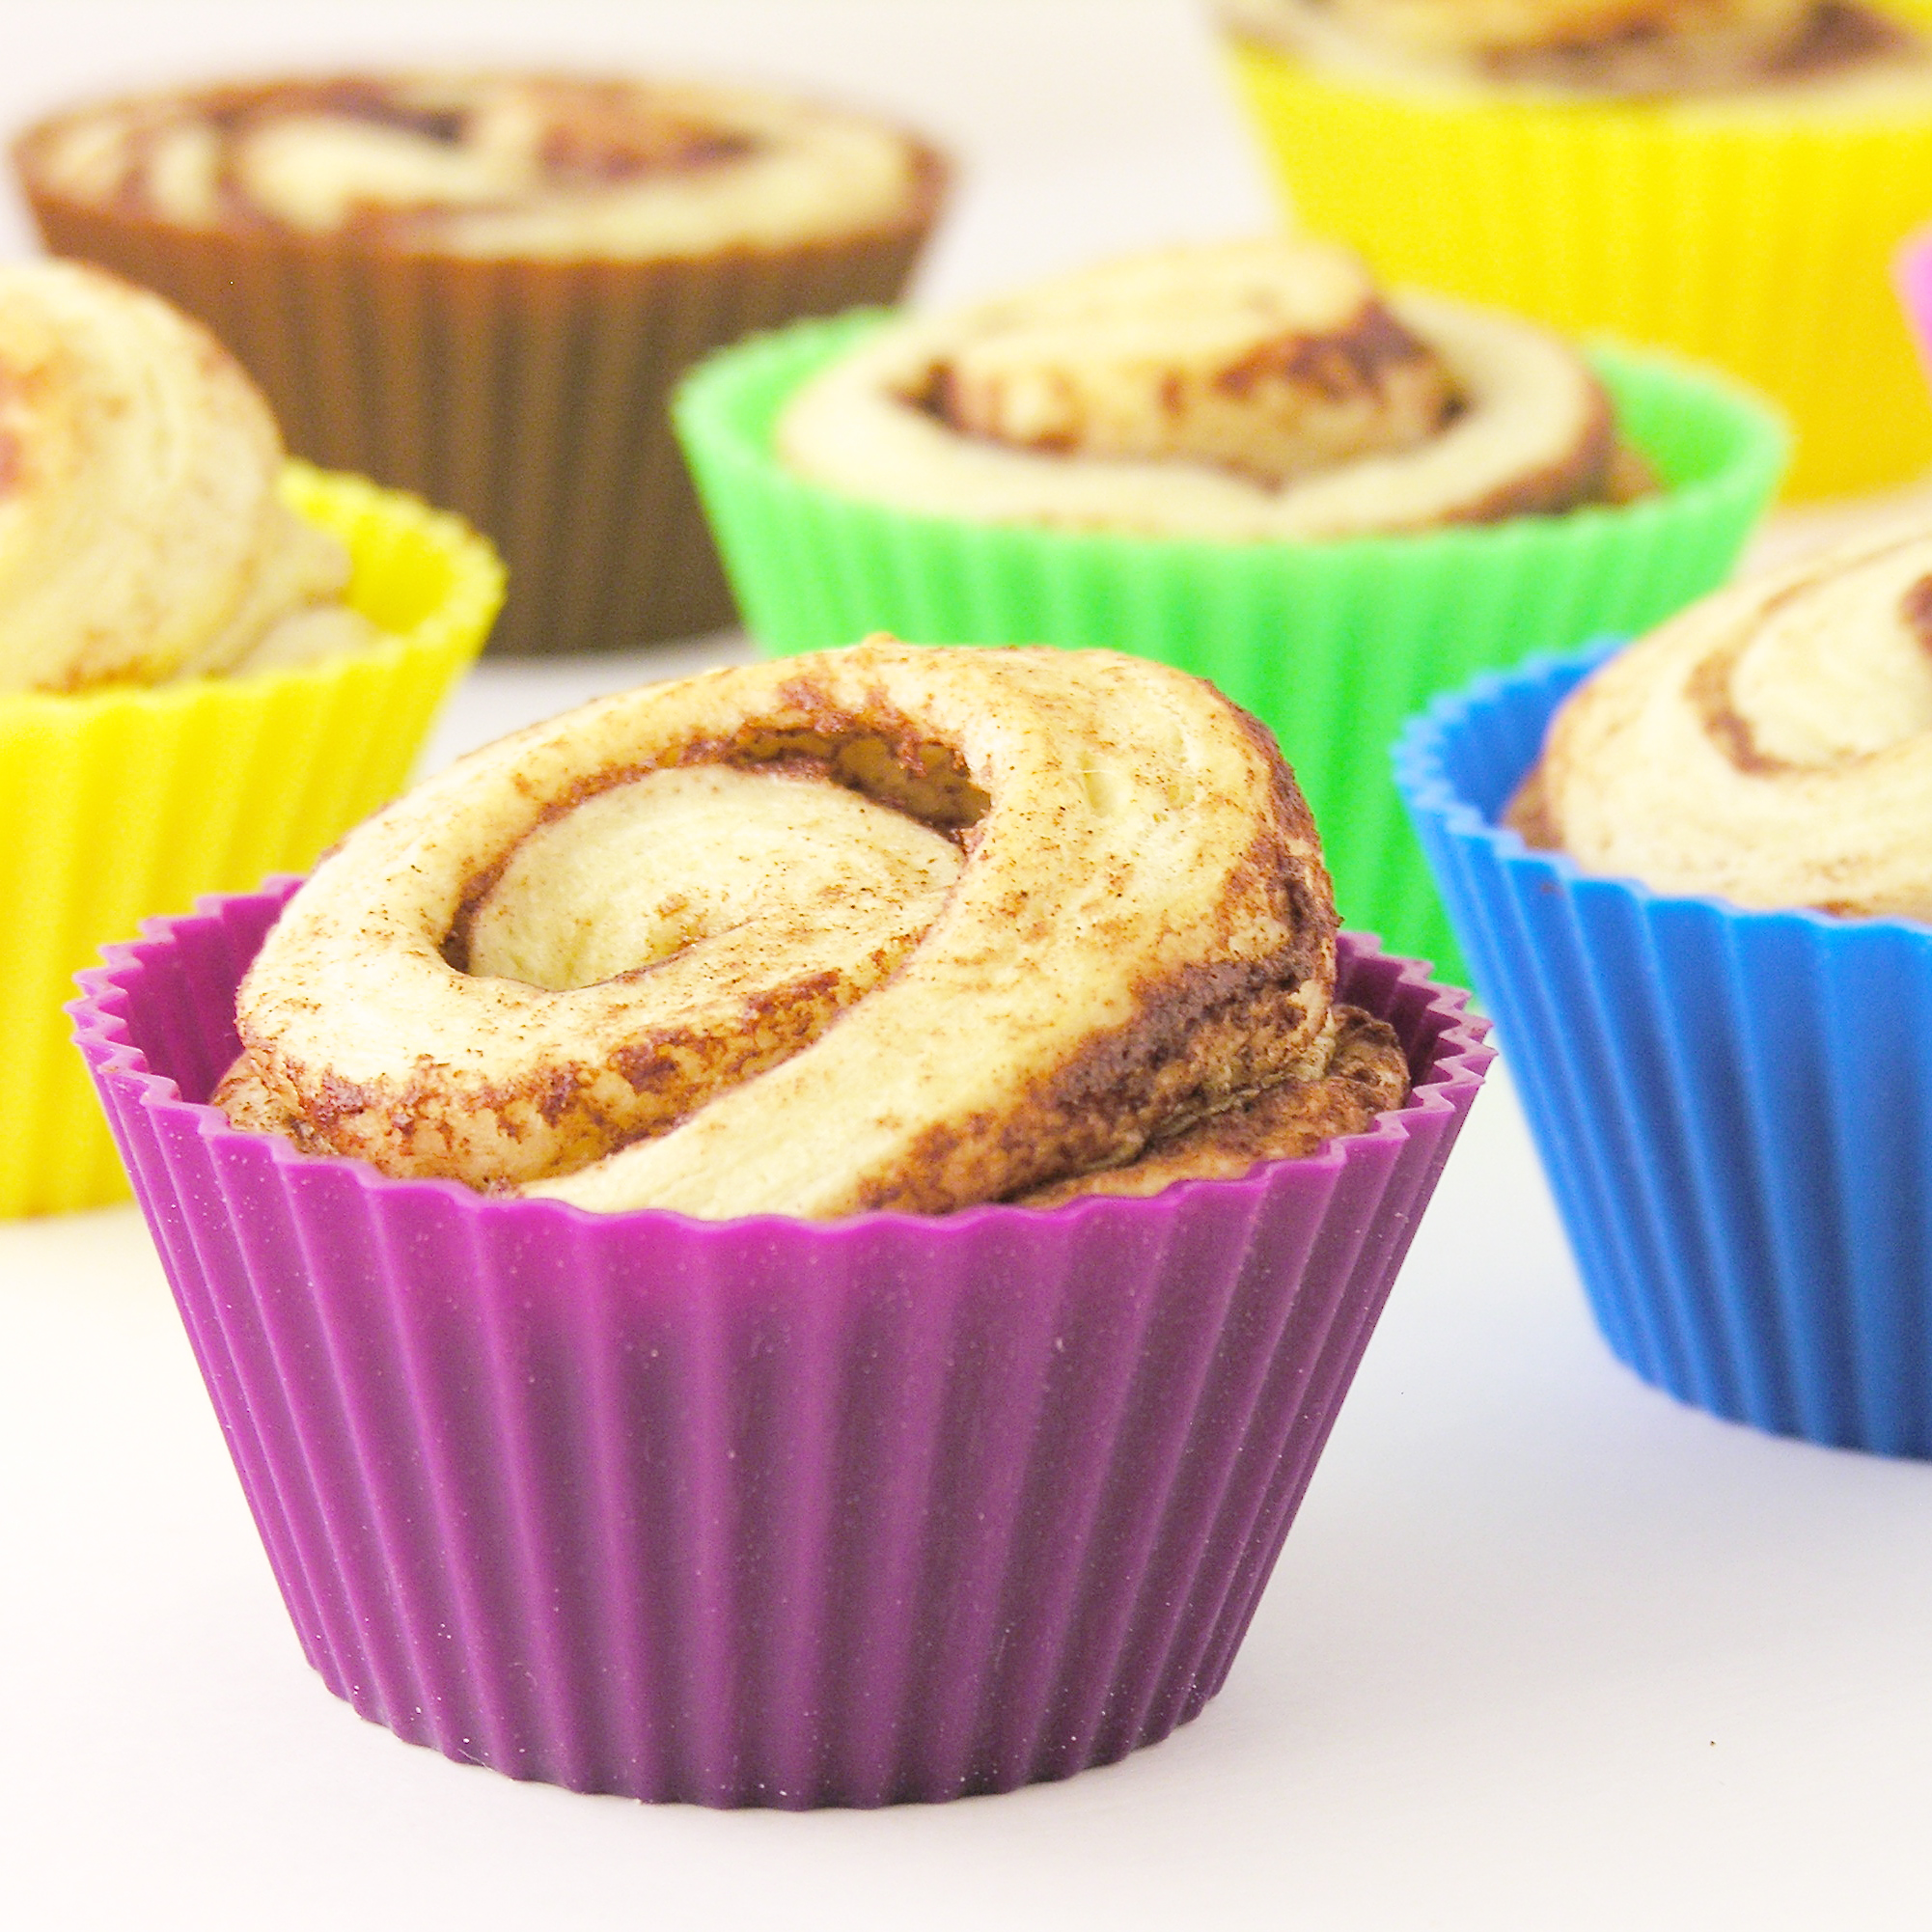
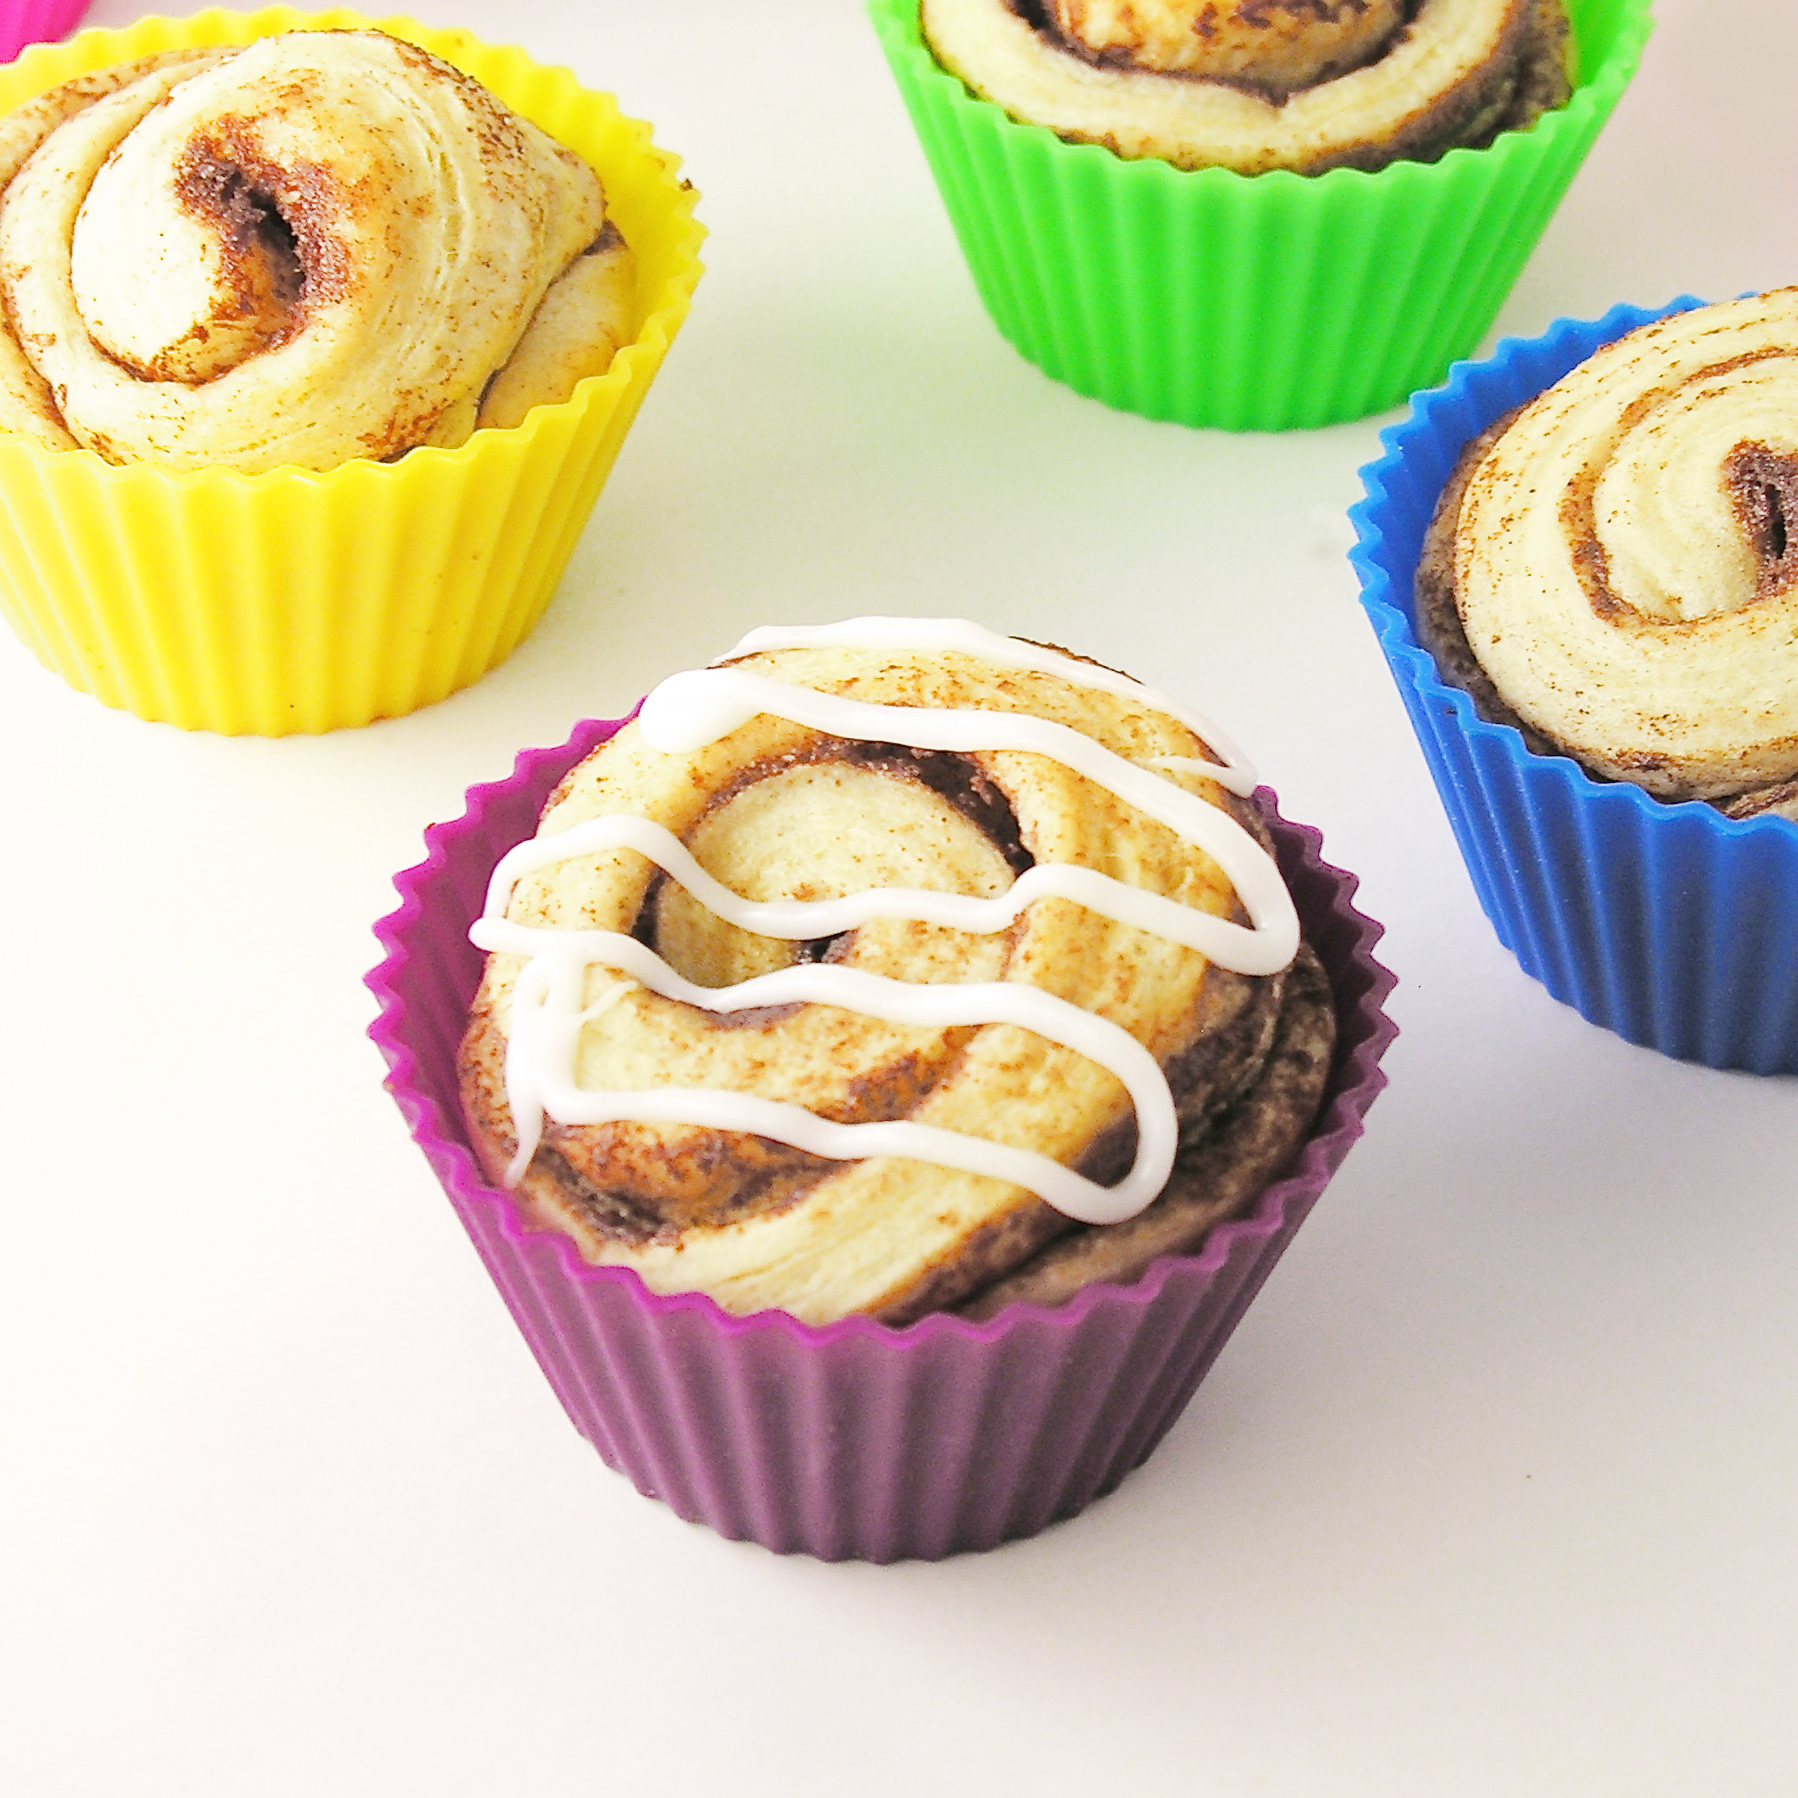
I was genuinely surprised. I removed them from the cups, drizzled them with the provided icing and took them along with me to the event I was attending. People loved them.

Cinnamon Cupcakes8

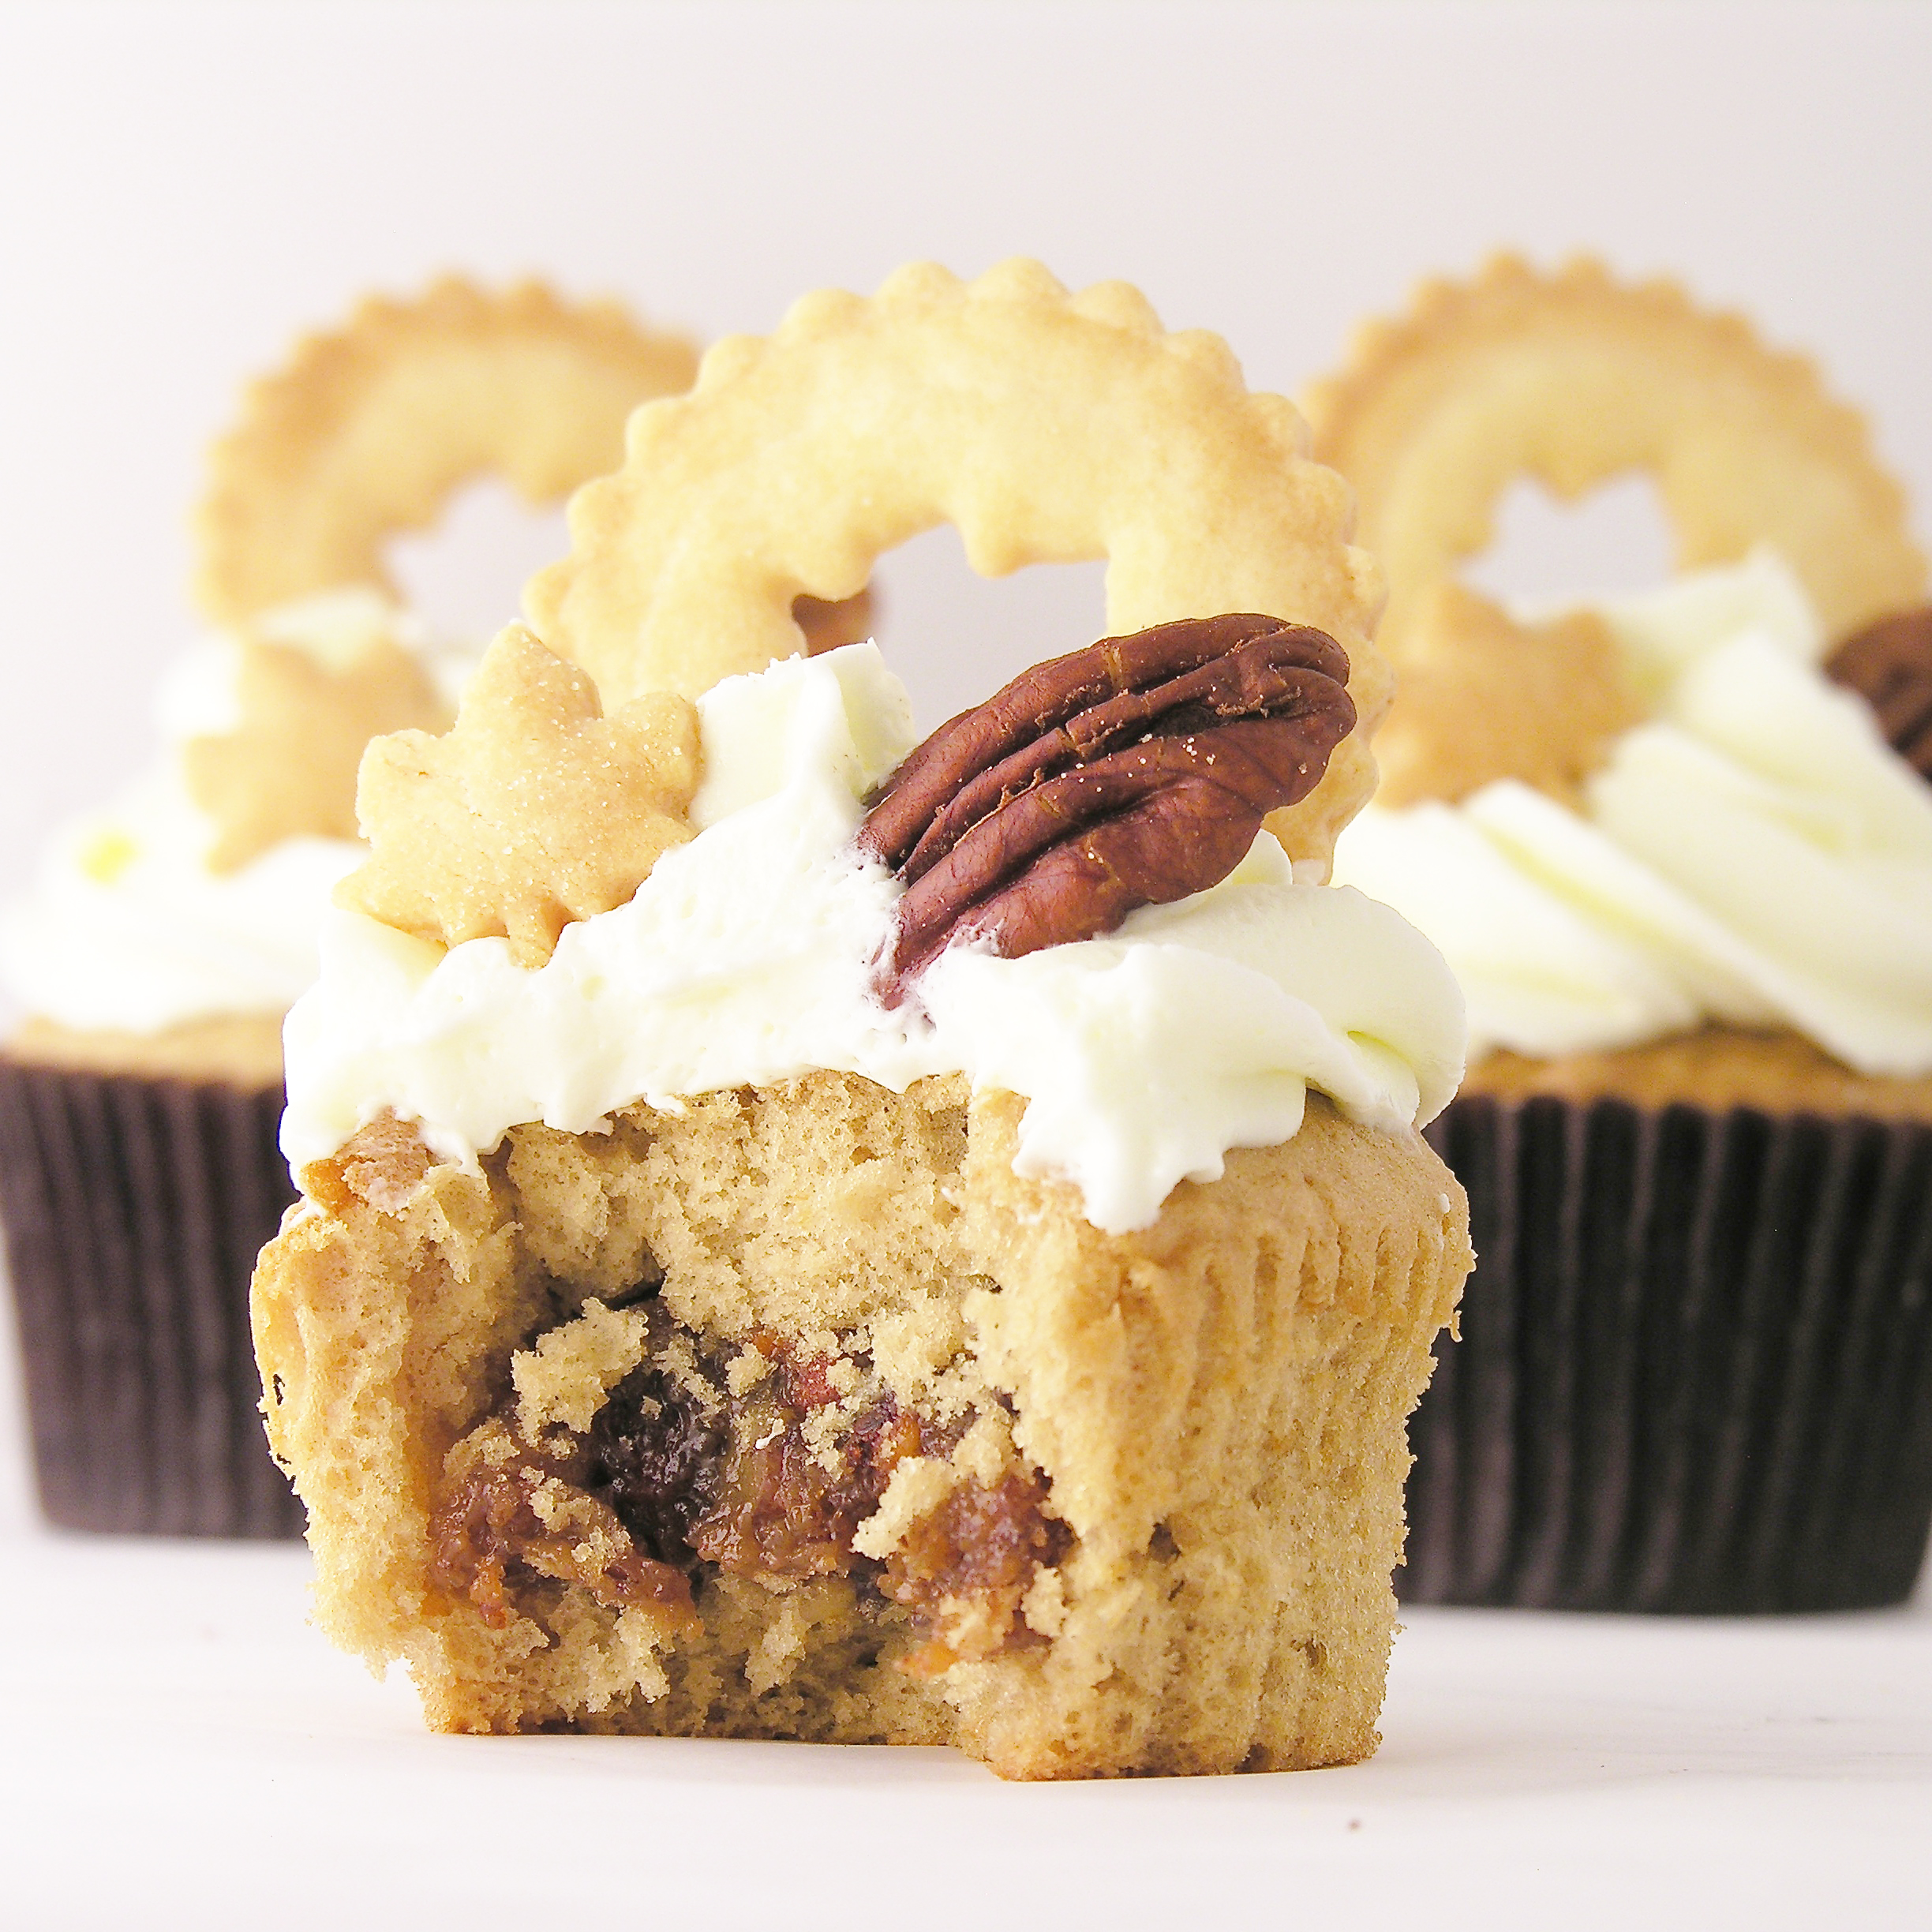
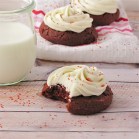
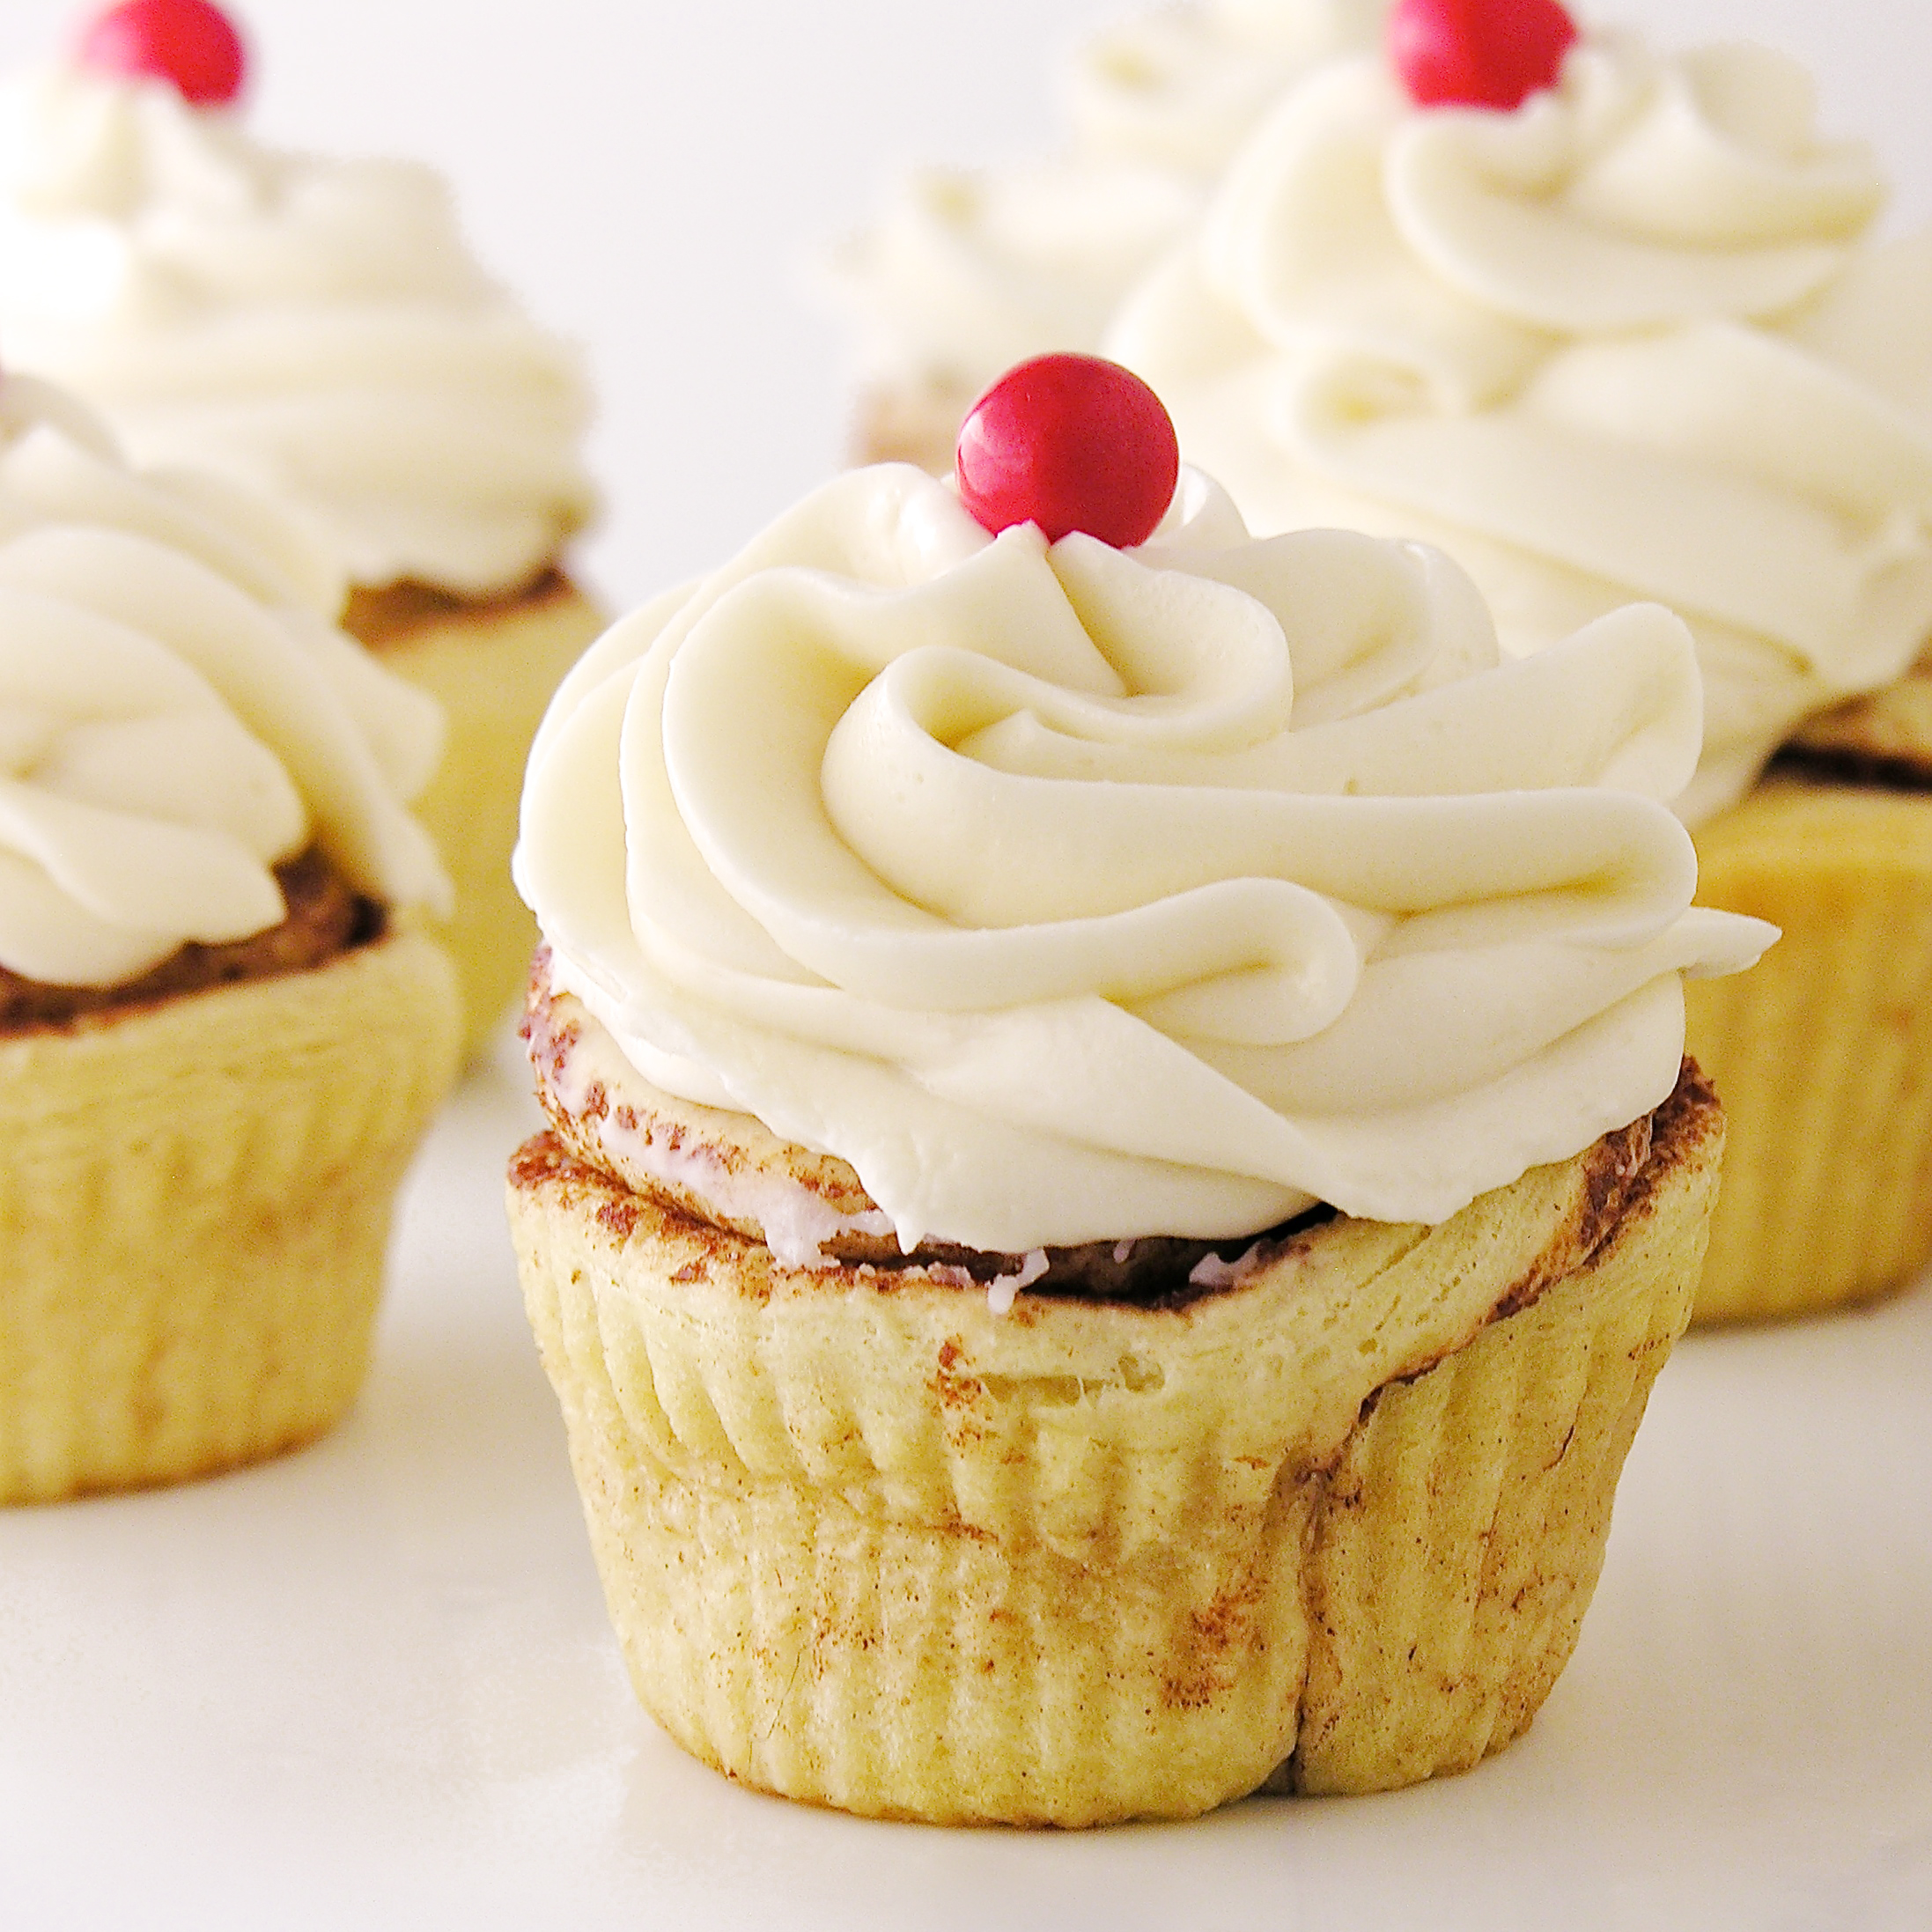
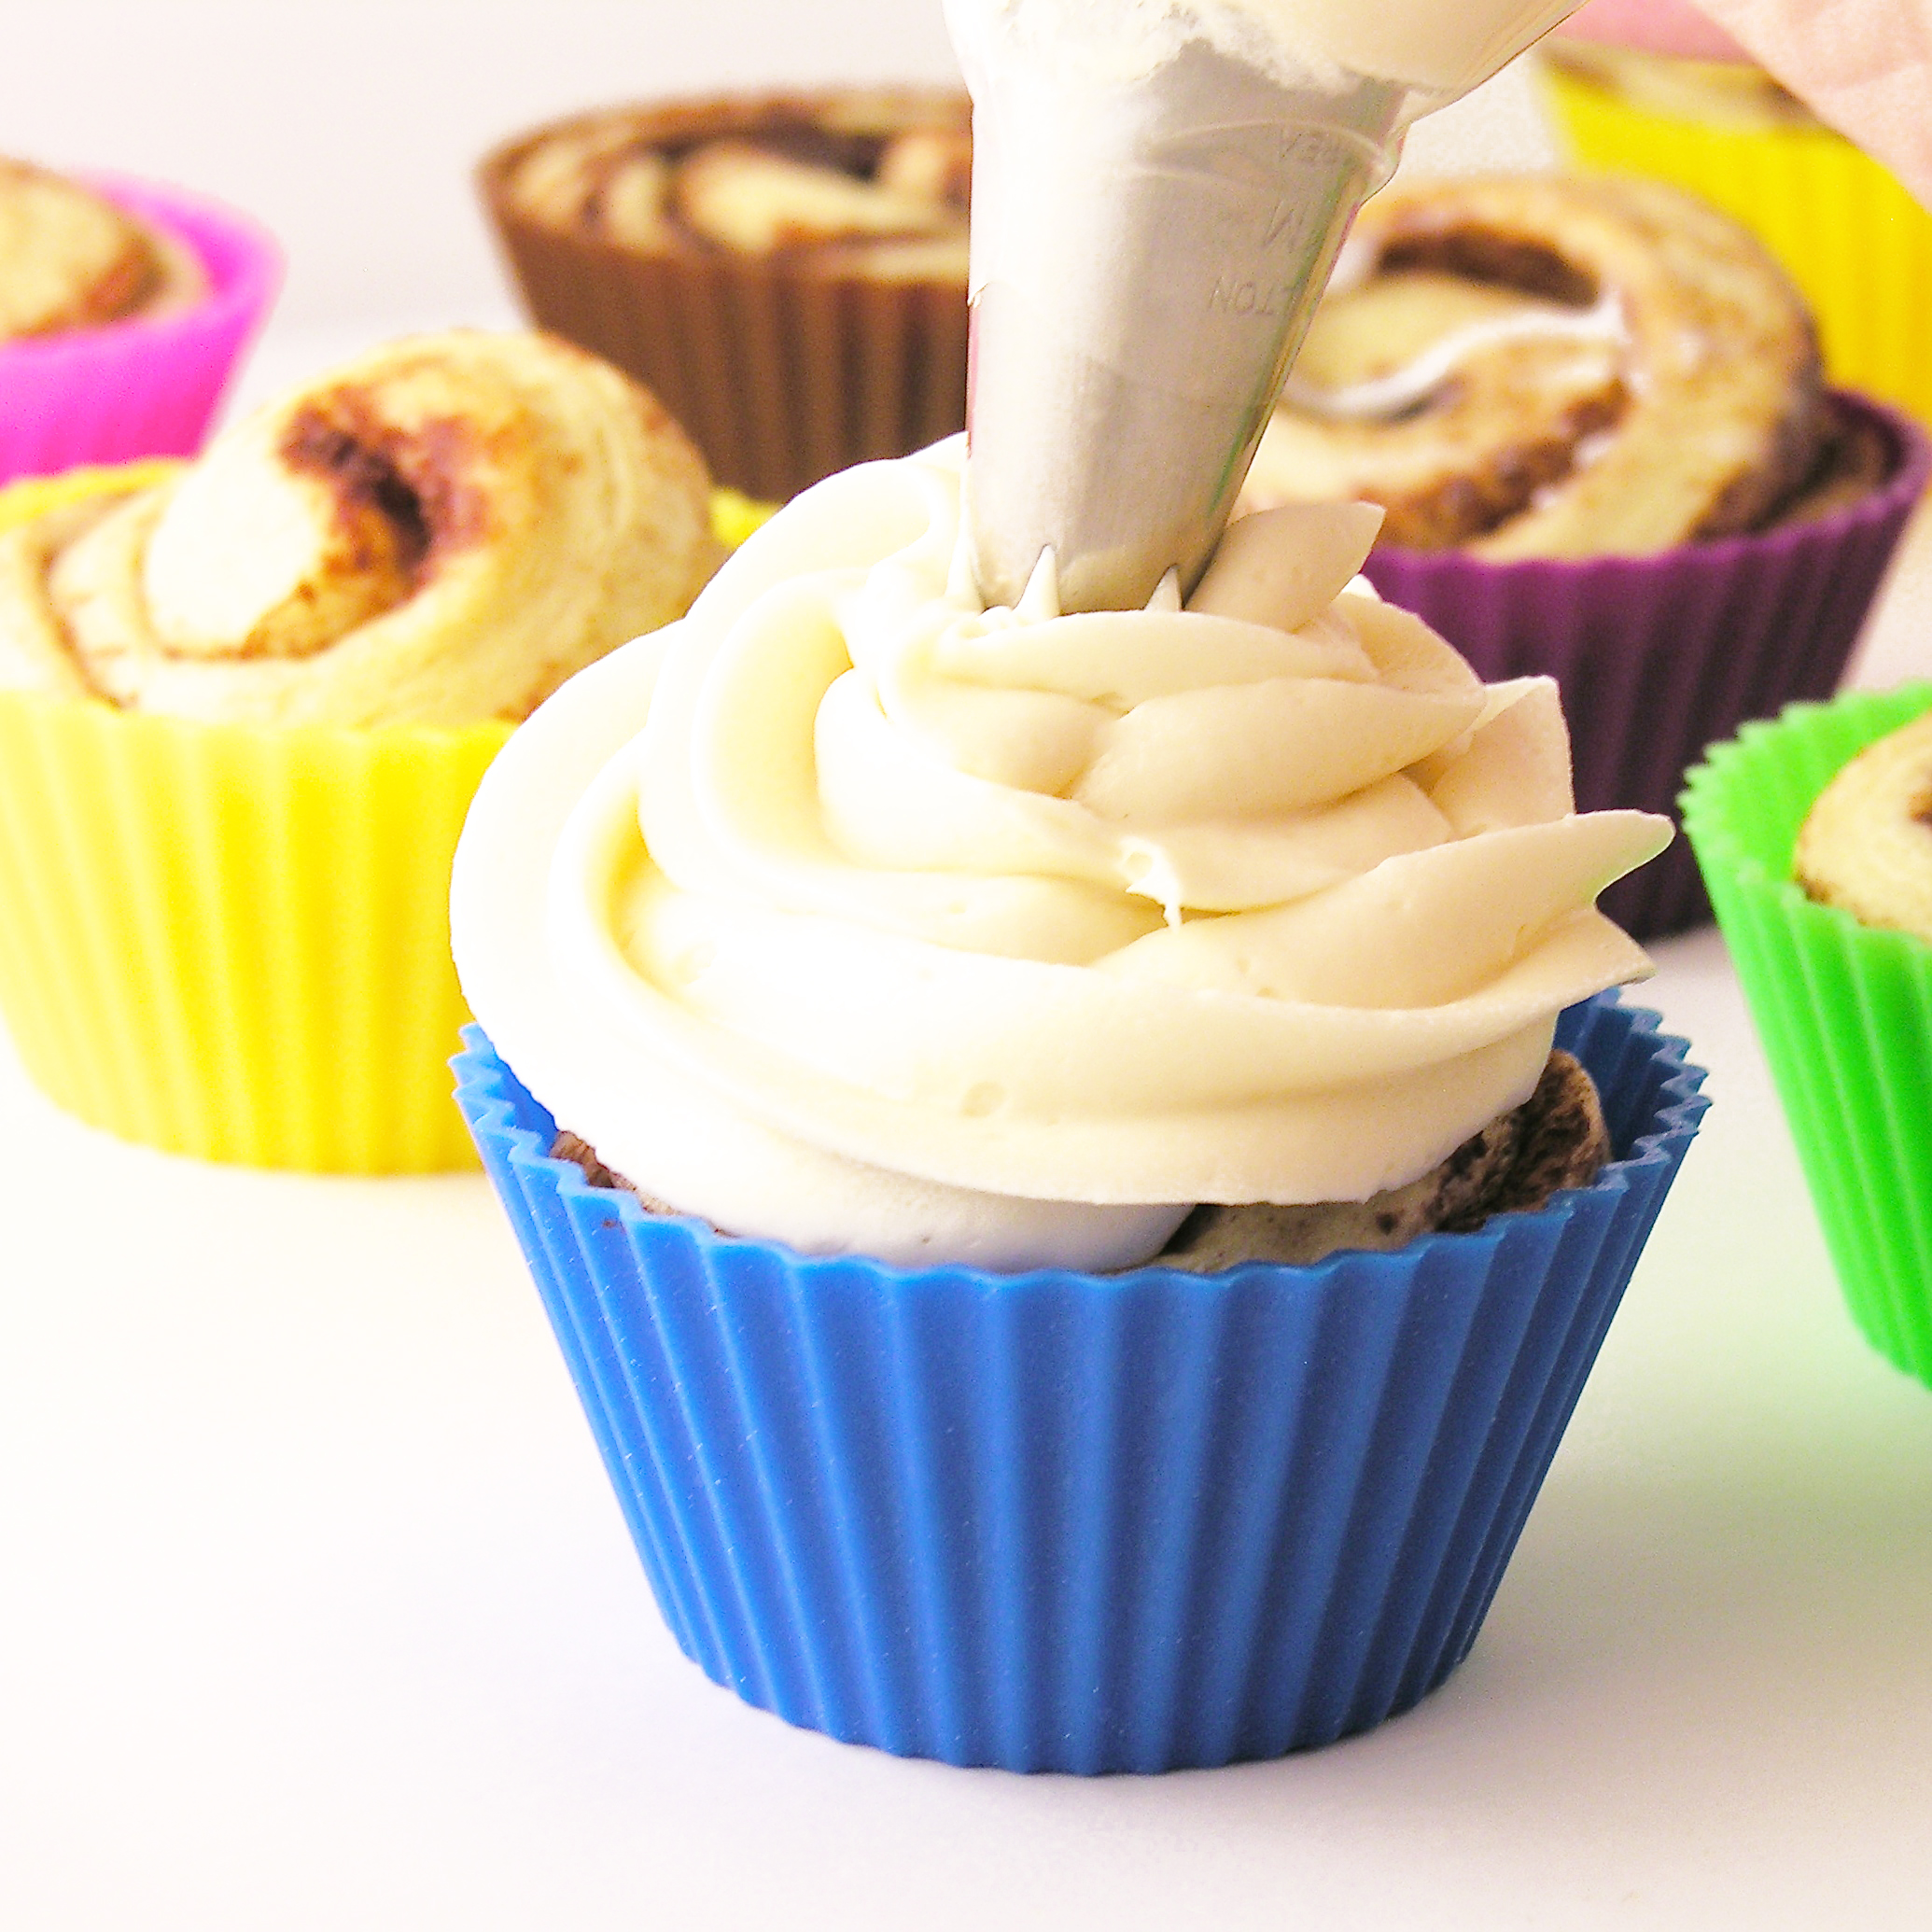
I knew that if I added my favorite cream cheese icing on top that they would be even better….

Cinnamon Cupcakes

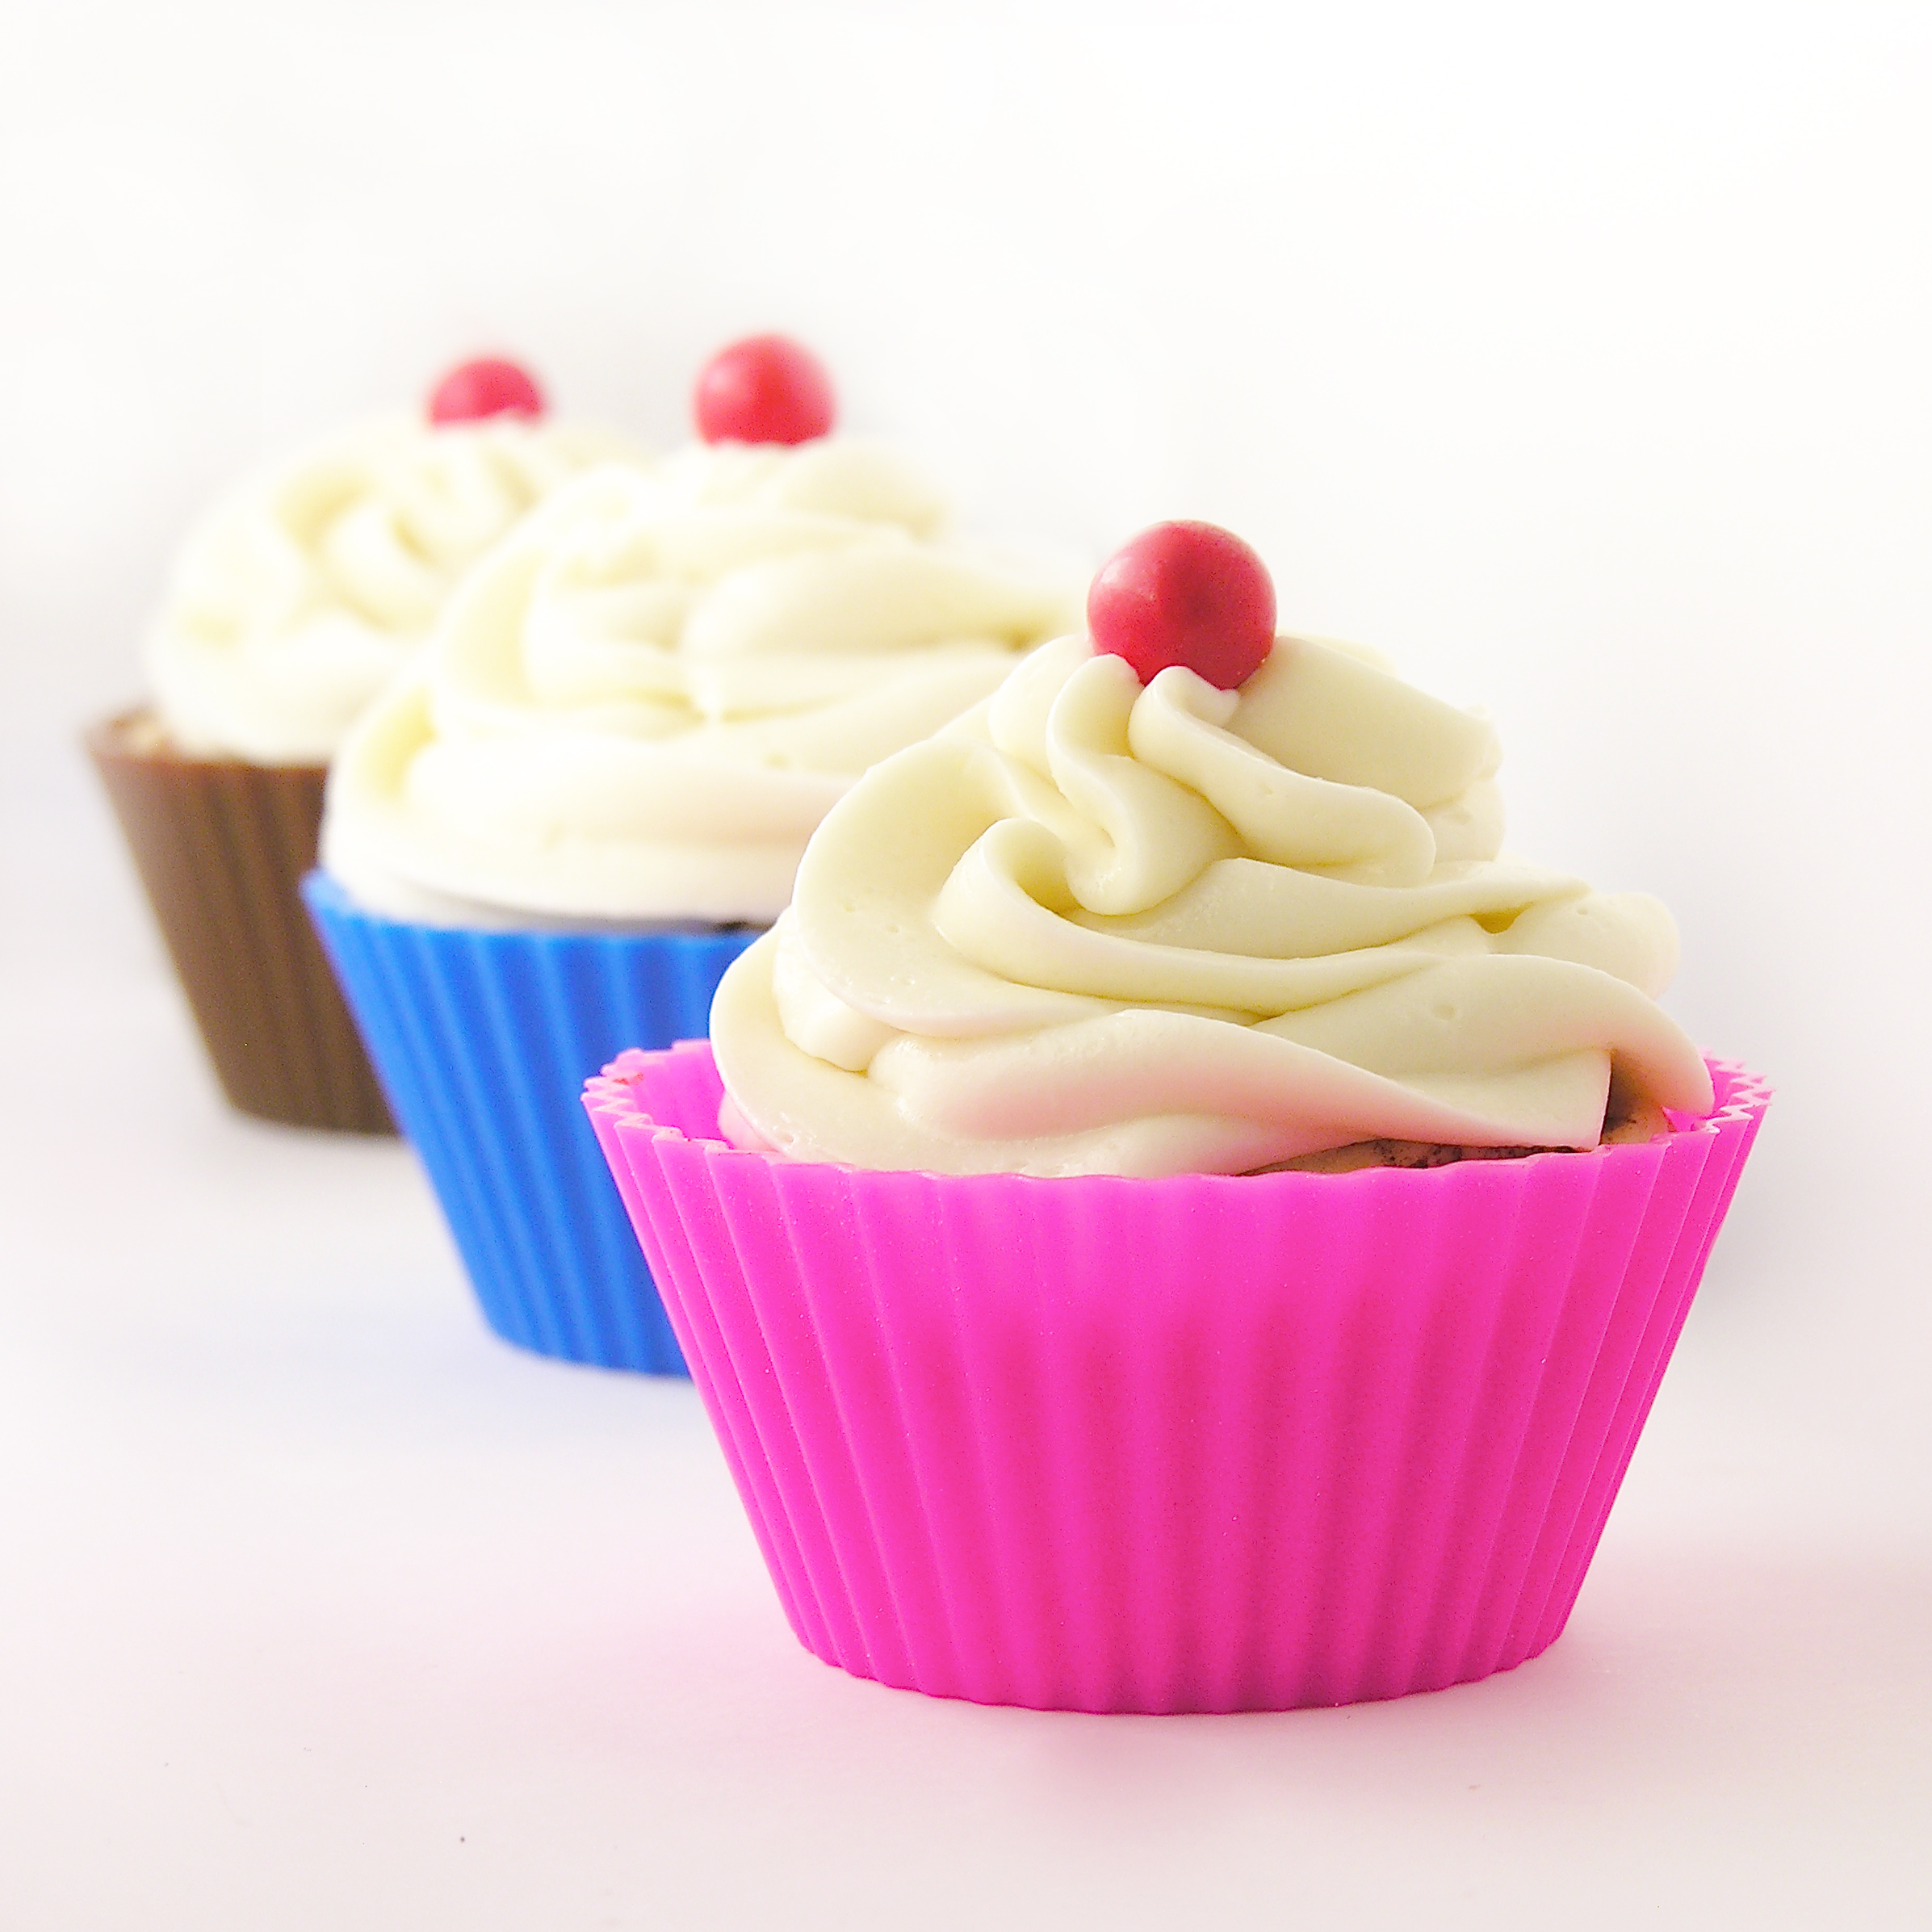
They are cute in the colorful cups, but easily lift right out and can be served without the cups too. I’m a big fan of that, because I can bring them to events and not worry about tracking down my silicone cups.

Cinnamon Cupcake

Here’s how we made these cute little treats:

INGREDIENTS:

  • 2 tubes of refrigerated cinnamon rolls- just the basic kind- not the super-sized jumbo rolls (makes 16-20 rolls, depending on the brand you use. I tried 2 brands, Pillsbury and a generic store brand, and both worked great) 
  • 4 oz (1/2 package) cream cheese (softened)
  • 1/4 cup of butter (softened)
  • 1/2 teaspoon vanilla
  • dash of salt
  • 2 cups powdered sugar
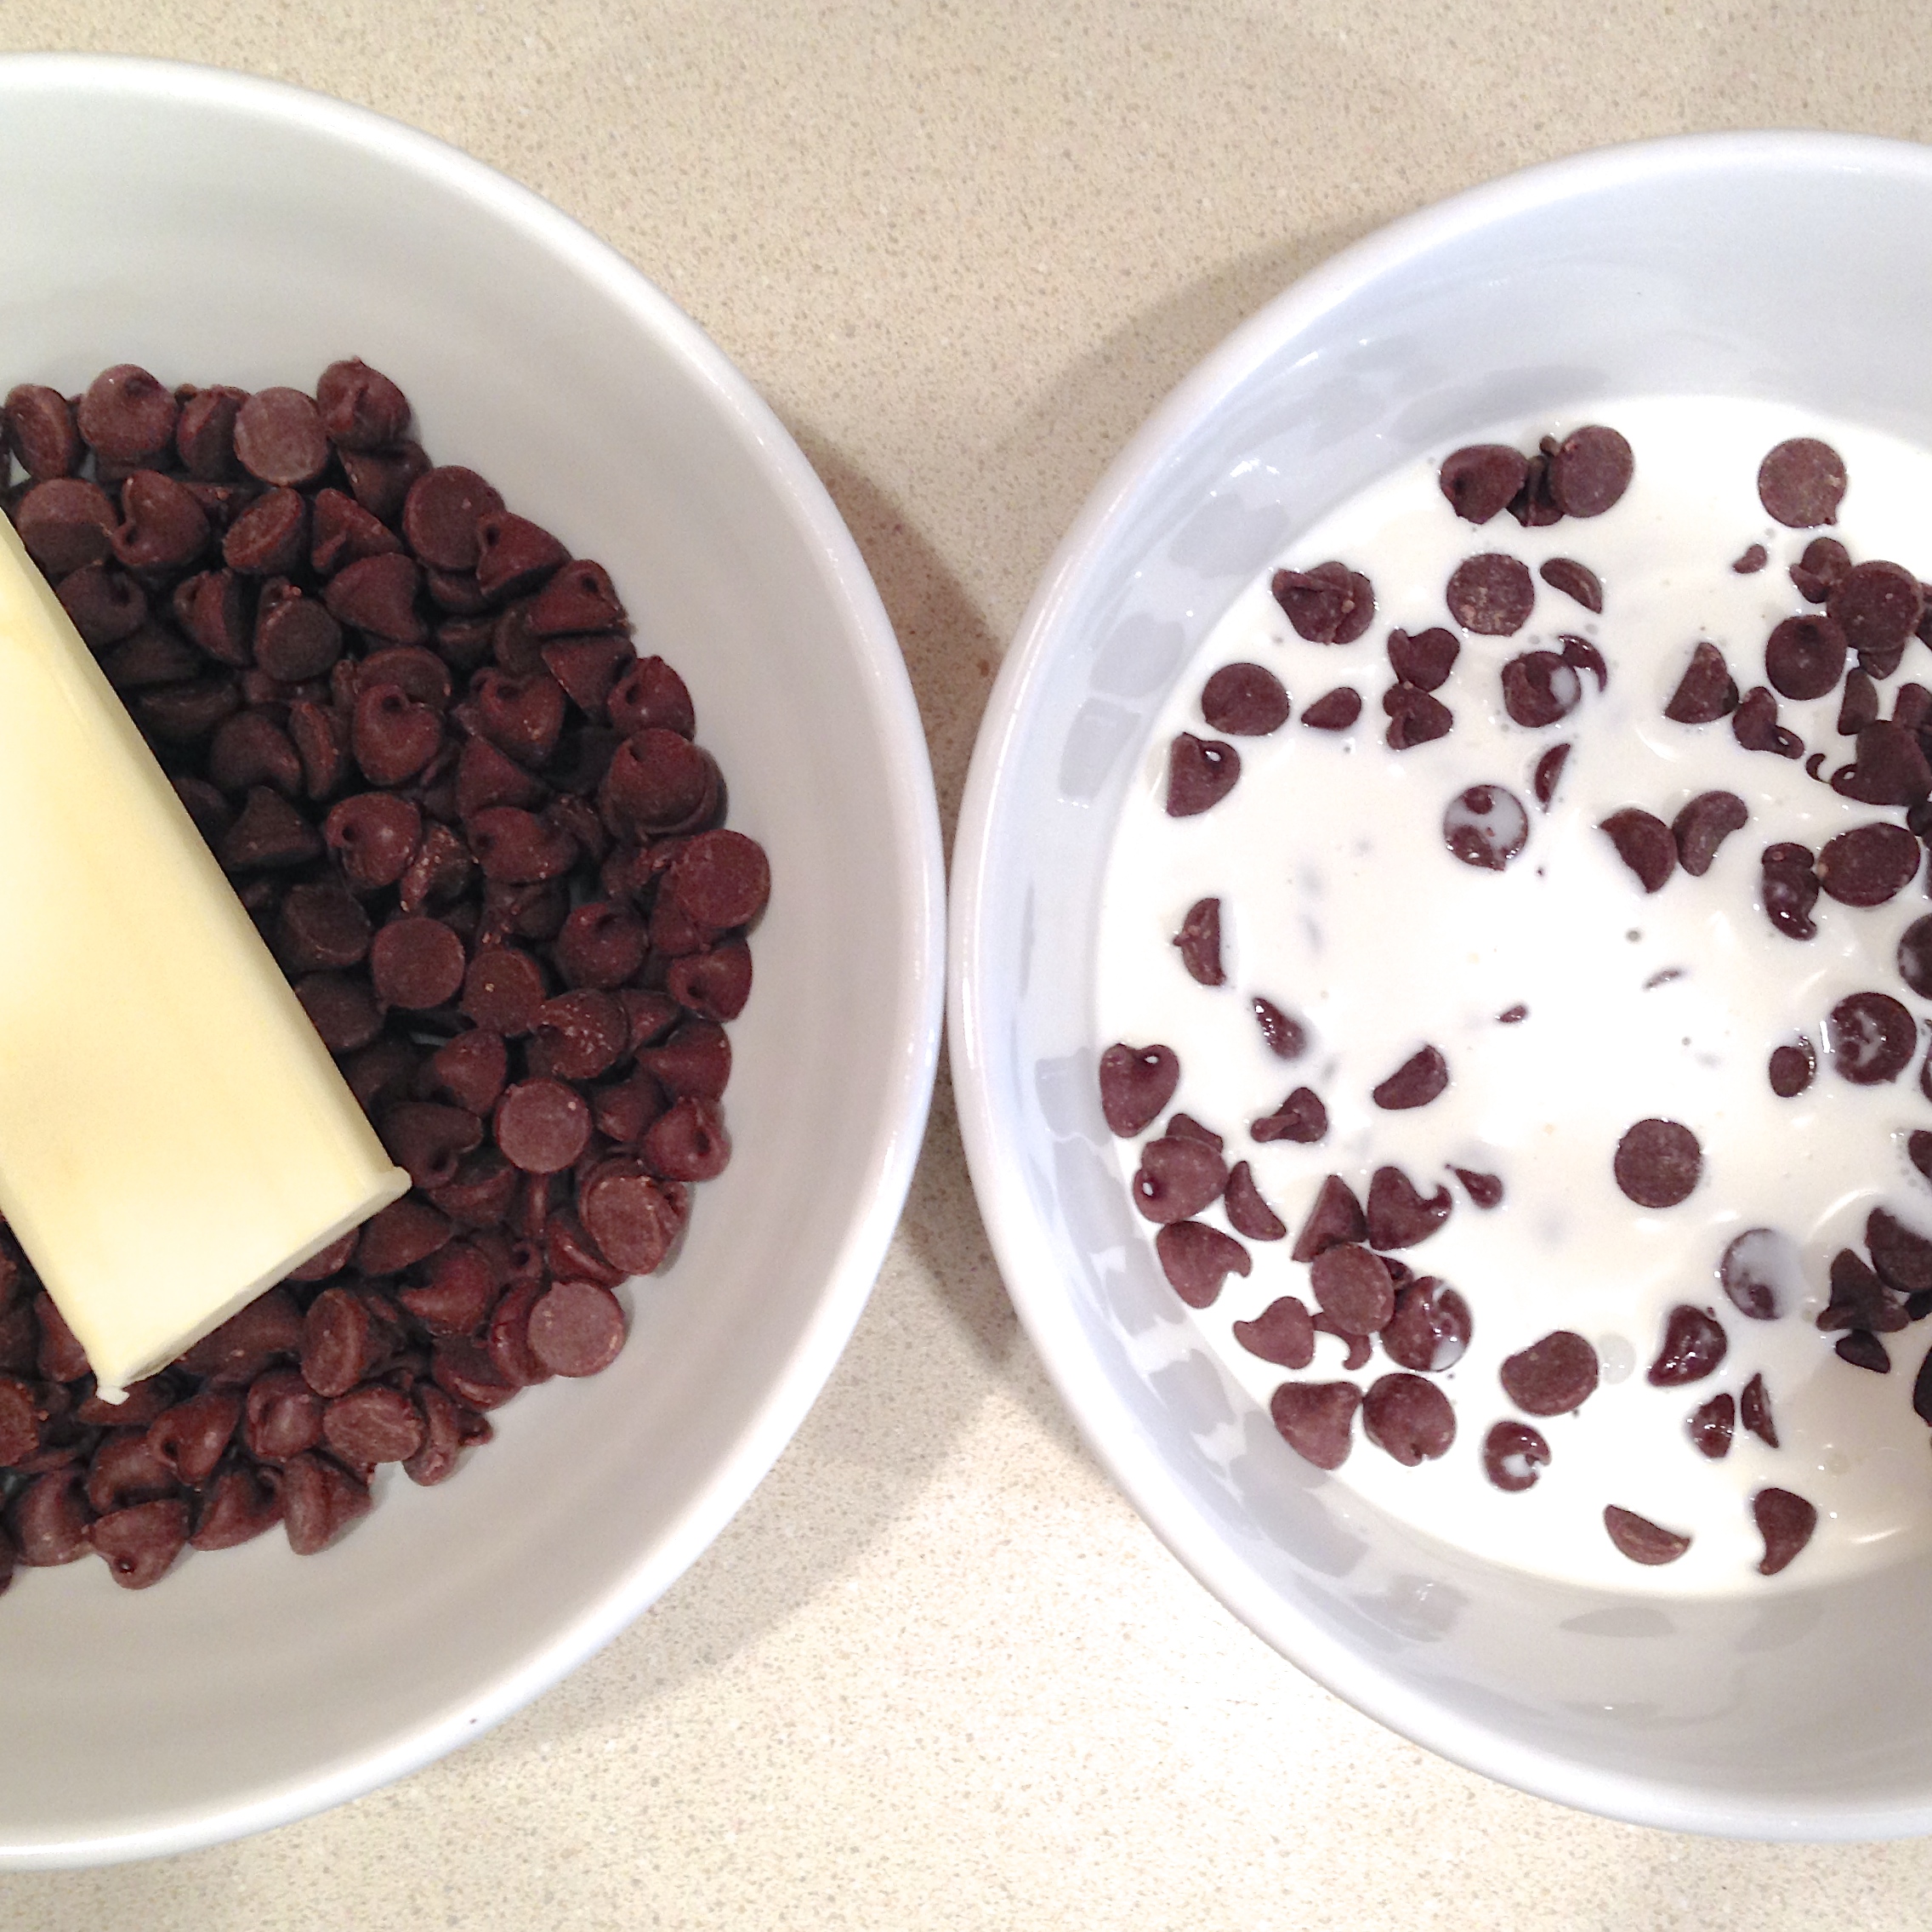
  • 1/2 cup white chocolate chips (melted)

DIRECTIONS:

  • Preheat oven to temperature required by package of rolls.
  • Set appropriate number of silicone cups on a cookie sheet with edges, and spray lightly with non-stick  spray.
  • Open tubes of dough and squeeze each roll into a taller, smaller diameter size so that it will sit flat on the bottom of each cup.
  • Set each roll into individual cups.
  • Bake according to package (watch to make sure you don’t over-bake)
  • Serve warm with provided icing drizzled on top, OR cool and top with cream cheese icing:
  • On medium speed, beat together cream cheese, butter, vanilla, and salt until creamy.
  • Gradually add powdered sugar, beating until smooth.
  • Melt white chocolate chips in the microwave in 30 second increments, stirring between, until smooth.
  • Add melted white chocolate to icing and beat on low until completely combined.
  • Place in a zip-top bag fitted with a decorating tip and pipe frosting on top of cooled cinnamon rolls.
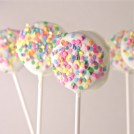
Cinnamon Cupcakes

Aren’t they fun?!?

Ok- so I have 2 extra sets of cups that I’d love to share with my readers! I looked into the various “raffle” sites available to host give-aways and they all seemed so complicated. I decided I will just do this myself.

Only 2 things I’d love to have you do (I can’t require them, but it would make me super happy!!):

1. Follow Easybaked here, by subscribing in the sidebar.

2. “Like” Easybaked on Facebook (here)- and COMMENT under this recipe. I will choose my winners (TWO of them) randomly from comments on Facebook under this recipe- so you actually do have to comment to be entered).

This is available for all readers in the United States (or readers who can have these cute little cups shipped to a US address).

The contest begins NOW and ends on Monday, 3-23-15 at 11pm.  Good luck!!

PLEASE NOTE: THIS CONTEST IS FINISHED 🙂 Cups have already been given away!

Cinnamon Cupcakes

A special thanks to Karin for providing us with these fun cups to give away. Stay tuned for another fun use of these next week here on Easybaked!

If you don’t end up winning, you can find them at this link on Amazon.com:Baketown Girls Silicone Baking Cups.

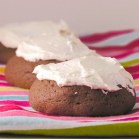
Love cinnamon? So do we! Try some of our other yummy cinnamon recipes by clicking on a photo:

Cinnamon Upside Down Cakes!!Cinnamon Roll Cheesecake!!Cinnamon Cheesecake SundaesCinnamon Roll Cupcakes!

Leprechaun Truffles

Posted on

Green Apple Truffles

These fun truffles are made with green apple (or lime!) Kool Aid filling and they are SO yummy!

It’s the time of year when all things green are made. One of my favorite truffle fillings is made with Kool Aid, which makes the flavors limited only to what little packets of flavor you can find! I made these with green apple Kool Aid, but I’ve made them with lime before too- and they are delicious! This tart fruit filling is SO creamy and smooth. I absolutely love it!

Green Apple Truffles

Here’s how we made these delicious little green treats: (printable recipe)

INGREDIENTS:

  • 1 (8 oz) package of cream cheese (softened to room temperature!)
  • 3 cups of powdered sugar
  • 3 cups of white chocolate chips
  • 1 tsp vanilla
  • 1 (0.16oz) packet of Kool-Aid drink mix (any flavor- I used green apple)
  • 2 bags of Wiltons Candy Melts (in whatever colors you wish)

DIRECTIONS:

  • Cream together cream cheese, powdered sugar and Kool-Aid in a large mixing bowl.
  • Melt white chocolate chips in the microwave in 30 second increments (stirring in between) until smooth and creamy.
  • Add melted chips and vanilla to cream cheese mixture and combine until completely smooth.
  • Refrigerate for at least 30 minutes.
  • Remove mixture from refrigerator and use a small cookie scoop or melon baller to make small balls of filling (I placed these on a plate and put them back in the fridge to chill while I prepared my chocolate to dip)
  • Melt the Wilton’s Candy Melts in the microwave in 30 second increments, stirring until smooth and creamy.
  • Dip chilled balls of filling in the melted chocolate, draining away excess and placing on parchment paper to harden (if you want pictures of how I dip things click here for a previous recipe) The balls of filling need to stay cold, so keep them in the fridge until you are ready to dip them.
  • Decorate with drizzles of fun colored chocolate. 
  • Enjoy!

Green Apple Truffles

My thoughts: Aren’t they cute? They are SO yummy too… my only recipe tip is to make sure those balls of filling are chilled and your melted candy isn’t super hot. I allowed my candy melts to cool a bit before I dipped. You just don’t want that soft filling to start melting while you dip.

Green Apple Truffles

These are as fun as can be using all sorts of fillings, which makes them a good treat for any holiday!

Kool-Aid Truffles!!

Here they are in other fun flavors. Click on the photo to see how I did them!

Finally, one of our most popular recipes on Easybaked is a St. Patricks Day treat! Bailey’s cupcakes are everyone’s favorite! You should probably try them. 🙂 Again, click on the photo to see the (oh so yummy!) recipe:

Baileys Irish Cream Cupcakes

Lucky Charms Truffles

Posted on

Lucky Charm Truffles

If you like Lucky Charms Cereal, you will love these chocolate-covered treats!

I was walking down the cereal aisle and a box of Chocolate Lucky Charms jumped into my cart and begged me to make a dessert with it.

That’s almost how it happened…! I love Lucky Charms and I adore the chocolate version. Did you know that just before St. Patrick’s Day they have a limited time version full of shamrocks and pots of gold. Too cute!

I had actually been wondering if the oft-used technique of Oreos + Cream Cheese, rolled into a ball and covered in chocolate would work with cereal. Perfect opportunity to try!

These are yummy little chocolate-y and marshmallow-y treats that are SO cute for the month of March!

Lucky Charm Truffle

Here’s how we put them together: (printable recipe)

INGREDIENTS: (makes 24-36 truffles, depending on how big you make them)

  • 4 cups of Lucky Charms Chocolate cereal (marshmallows and all)
  • 1 bar of Philadelphia Cream Cheese (at room temp)
  • 1 bag of Wilton’s candy melts (in any color you like- I used up some leftover bags in a variety of colors)

DIRECTIONS:

  • Finely crush cereal into crumbs (I used a food-chopper).
  • Combine with cream cheese until it forms a soft ball of dough.
  • Roll dough into small balls.
  • Melt candy melts in the microwave in 30 second increments, stirring between, until melted and smooth.
  • Use a fork to dip balls of cereal into the melted candy. Tap the fork on the side of the bowl to drain off excess melted candy, and slide fork along edge of bowl to remove excess.
  • Place each truffle on parchment paper to harden. Top with marshmallow bits from the cereal, or sprinkles.
  • Allow them to harden completely.

Lucky Charm Truffles

My thoughts: Aren’t they cute? They are pretty yummy too. I thought the consistency was a little weird, but once they are covered in chocolate it’s not as noticeable. I got a thumbs up from friends who tried them and kids LOVED them. Just a fun little St. Patricks Day project! Enjoy! ~r

Other yummy St. Patrick’s Day treats here on Easybaked: (click on image to see recipe)

Andes Mint CupcakesKey Lime CakeLime Soda Cupcakes!!!!Baileys Irish Cream Cupcakes

Caramel Turtle Bundt Cake

Turtle Bundt Cake

Swirls of caramel and chocolate cake, topped with caramel sauce and pecans, make this a beautiful and decadent dessert!

I love bundt cakes. They are just so pretty and fun to serve. This one is a combination of caramel and chocolate in a memorably beautiful and tasty display of yumminess!

Turtle Bundt3

This uses cake mixes and Kraft caramels, so it is a quick and easy dessert to put together, and it serves a ton of people, 14-16 at least.

Here’s how we made it: (printable recipe)

INGREDIENTS:

  • One box of chocolate cake mix (plus water, oil and eggs to make according to box)
  • One box of caramel cake mix- I use Duncan Hines- (plus water, oil and eggs to make according to box)
  • 32 Kraft Caramels (unwrapped)
  • 1 can (14 oz.) of sweetened condensed milk
  • 1 stick (1/2 cup) of butter
  • Whole Pecans (as many as you want to sprinkle on top)
  • Mini chocolate chips (as many as you want to sprinkle on top)
  • I also added some Kraft caramel bits as sprinkles because I had them and they sounded fun- those are the little round caramel bits you see in my photos.

DIRECTIONS:

  • Preheat oven to 350F degrees.
  • Make up both cake mixes according to package.
  • Alternate pouring them into a well-greased bundt pan. Fill the pan only 3/4 full. You will have a little cake mix left at the end, since both mixes don’t fully fit in the pan.
  • Place on a cookie sheet (just in case of overflow) and bake for 40-50 minutes. A cake tester or skewer should come out clean when cake is fully baked.
  • Allow cake to cool for 5-10 minutes in pan, and then tip onto a wire cake rack to finish cooling.
  • While cake cools, make caramel.
  • Place unwrapped caramels into a medium saucepan with sweetened condensed milk and butter.
  • Heat on medium/high, stirring constantly, until caramels are completely melted and smooth.
  • Place cake on serving plate.
  • Pour caramel sauce over the bundt cake, allowing it to run down the sides.
  • Immediately sprinkle with nuts and chocolate chips. If you wait these will not stick to the caramel as it hardens.
  • Allow topping to cool and firm up before cutting.
  • Enjoy!

Turtle Bundt5

My thoughts: This is such a moist cake, and if you aren’t a big fan of frosting this is perfect- no frosting at all- just a soft caramel. It’s a perfect fancy dessert that is so quick to make, and fun to serve!

Turtle Bundt2

One more…

Turtle BundtOther yummy caramel desserts you’ll love (just click on photo to be taken to recipe):

Caramel Fudge Brownies!!Salted Caramel Cookie Cup!!!Dulce de Leche caramel sauce form a canAlfajores- Peruvian Caramel Cookie!

Learning to make Scones

Chocolate Chip Scone4These dense, rich scones can be made with a variety of flavors, and they are SO good!

One month ago I could say that I had never even tasted a scone before, much less made one. Today I made nearly 80 of them and they are one of my new favorite treats!

About a month ago, I offered to help with a baby shower for my friend Heather. I asked if they needed help with food, thinking cake or cupcakes or fancy cookies- typical shower requests. Heather’s mom Sharla explained that they were having an English tea for Heather and could I please make scones?

Scones…? I agreed and started to read up on scones. They sounded difficult. They sounded dry and crumbly and b-o-o-o-ring…. yawn.

Apricot Scones1

I started with a basic recipe for chocolate chip scones. I won’t tell you where I got it, because it wasn’t very good. At the time, I thought it must just be how scones are supposed to be (since I’d never tasted one before). Yuck.

I was explaining my dislike for scones in a group of friends one night, and one family started protesting that they make the best scones ever. The mom (my friend Beth), got the recipe from her mother-in-law, who sold them in a tea shop she ran years ago.

It sounded promising, and Beth sent me home armed with the recipe, tips and two scone pans (I didn’t even know those existed, but I LOVE them!).

I started with Apricot White Chocolate Scones, and the rest is history. I love them. They are easier than cookies and so much yummier!

Apricot Scone

Here is how to make them: (printable recipe)

You really need to have a pastry cutter (you can cut cold butter in with a knife, but it is SO much harder). You might also want to consider a scone pan. Those links will take you to products on Amazon, and if you get them I will get like 6% of what you spend. And then I will buy a scone pan for myself. *smile* If you want, you can cut the scones and bake them on a cookie sheet too- but they aren’t quite as moist and amazing that way.

 INGREDIENTS:

  • 2 1/2 cups of all-purpose flour
  • 2 tablespoons of sugar
  • 4 teaspoons of baking powder (fresh!)
  • 1/4 teaspoon salt
  • 1 cup of dried fruit, chocolate chips, nuts, or any combination of those three
  • 1 stick (1/2 cup) of cold butter
  • 2 eggs (beaten)
  • 3/4 cup of whipping cream
  • Milk (as needed)
  • Sugar/ Cinnamon to sprinkle on top.

DIRECTIONS:

  • Preheat oven to 400 degrees F, and spray pan (or sheet) liberally with cooking spray.
  • In a large mixing bowl combine flour, sugar, baking powder, and salt.
  • Add stick of butter and cut into crumb-like pieces using the pastry cutter.
  • Add nuts or chips (if using) and toss together with dry mixture until coated.
  • In a medium mixing bowl, mix together whipping cream and eggs until well combined.
  • Add dried fruit (if using) and toss together with wet mixture until coated.
  • Make a “well” in the center of the dry ingredients and pour the wet ingredients into it.
  • Combine and then gently knead with hands until it holds together in a ball. Add milk if mixture is too dry (this is most often the case when no fruit is added). Don’t over-knead this dough (you’ll melt all those little pieces of butter with the heat of your hands!)

IMG_0122IMG_0127IMG_0128

  • If using a scone pan, set aside about 1/4 of the dough to bake in a second batch. I overfilled my pan and they rose too high (as you can see in my pictures). When I made them for the shower, I used less dough and it was perfect!
  • Press remaining dough into a square on a floured counter and cut into triangles as shown (I used a pizza cutter and a knife- both worked fine).
  • Set into pan (or on cookie sheet) and brush tops with milk. Sprinkle with sugar (I used cinnamon and sugar).
  • Bake at 400 degrees F for 12-15 minutes.

IMG_0135IMG_0137IMG_0142

  • Allow them to cool in pan for about 5 minutes and pop out with forks.
  • Enjoy!!!

Apricot Scones3

My thoughts: Goodness…this sounds complicated, doesn’t it? I thought so too, but now that I’ve made a bunch of them I really do think they are easier than cookies! Today for the shower I made 4 kinds. I added white chocolate chips and apricots to the first (I cut the dried apricots into smaller pieces using kitchen scissors).  I added dried berried (cherries, blueberries and cranberries) to the second. I added mini chocolate chips to the third, and I added Hershey’s cinnamon chips to the fourth.

DSC_0894Here’s Heather, the beautiful mom-to-be at her English tea baby shower- SO much fun!  Enjoy!!~r

Other fun shower desserts here at Easybaked (click on a photo to see the recipe):

Gender reveal cookiesOriginal Oreo pops!!!!!Cotton Candy Fizz Gender reveal cupcakes

Raspberry Fudge Layer Cake

Raspberry Fudge Layer Cake1Layers of pound cake, chocolate and raspberry are sure you make your Valentine smile this year!

You know those desserts that look incredibly difficult and are super easy? This is one of those. The cake is simply a frozen pound cake sliced and stacked with chocolate and raspberries. Makes you smile, doesn’t it?

Raspberry Fudge Layer CakeHere’s how we made it: (printable recipe)

INGREDIENTS:

  • One frozen pound cake
  • 1 bag of semi-sweet chocolate chips
  • 1 cup of red raspberry jam
  • 1 cup of sliced red raspberries
  • 1 stick of butter
  • 1/2 cup of whipping cream

IMG_0147DIRECTIONS:

  • Remove pound cake from packaging and use a large serrated knife to slice it into 3 or 4 layers
  • Divide the bag of chocolate chips into 2 separate microwave-safe bowls.
  • Add the stick of butter to one, and the whipping cream to the other.
  • Melt each bowl of chocolate, one at a time, in the microwave, stirring every 30 seconds until melted and smooth.
  • Set aside the butter/chocolate glaze.
  • Lay the bottom layer of the pound cake on a baking rack set over a cookie sheet.
  • Spread chocolate/whipping cream mixture generously on the top of this layer and sprinkle with fresh raspberries.
  • On the “bottom” of the next layer, spread raspberry jam and then gently place (jam side down) on top of the raspberries.

IMG_0150IMG_0153IMG_0156

  • Repeat this process until all layers are used.
  • Refrigerate until layers firm up a little (10 minutes or so)
  • Pour remaining chocolate/butter glaze over the top and sides of cake, allowing excess to run through the baking rack and onto the cookie sheet below.
  • Refrigerate until glaze firms up.
  • Cut into slices and enjoy!!!

Raspberry Fudge Layer Cake5My thoughts: This is so easy. A tiny bit messy with all of that melted chocolate, but once it is made, it stores well for a couple of days and makes a beautiful layered dessert. I think you could fill these layers with so many different things for different times of the year. Yum. Enjoy!!! Happy Valentine’s Day! ~r

Raspberry Fudge Layer Cake3

Other fun (and creative!) Valentine’s treats, just click on a picture for the recipe:

White Chocolate Strawberry Cookies!!Chocolate covered strawberry Cake roll!!Frog Oreos!!Creamy cheesecake with sour cream topping

Chocolate Chip Cookie Dough Brownies!

Posted on

Cookie Dough BrownieThese soft brownies topped with cookie dough and fudge are an easy family favorite!!

I’m back! Thanks for your patience this past month. This was the 1st break I’ve taken from Easybaked in nearly 4 years, but there are just some times in life that knock you over and even your favorite things (like baking and blogging!) hold no appeal.

We lost my beautiful mom very quickly last month to aggressive cancer. She is woven through this collection of recipes in so many ways. She taught me how to bake, she shared her best dessert ideas, and she helped me brainstorm new and creative ways to remake a recipe.

She was my biggest fan. As I post this recipe later this week, I will miss her text; “Honey, I loved your blog post- are you bringing those home this weekend? They look so good!”

 1934081_25483287512_9140_nThese cookie dough brownies are mom’s recipe- with a new twist. Mom made these all the time, with mint filling. They have been featured here on Easybaked many times- with all kinds of different fillings. If you’d like to see these other recipes, just click on the photo!

Mint Creme Brownie CupsCaramel Fudge Brownies!!Coconut Brownie Cups!!!Peanut Butter Fudge Brownies!!!!!

As you can see, almost any filling is a wonderful addition to these dense, rich brownies. Cookie dough is no exception- it is WONDERFUL, cuts beautifully into squares, and can be kept refrigerated for three to four days or frozen for up to a month. (I love make-ahead desserts!!!) Want to know how to make these? Here you go: (printable recipe)

INGREDIENTS:

Brownie:

  • Two sticks (1 cup) butter
  • 2 cup sugar
  • 3 eggs
  • 2 teaspoons vanilla
  • 1/2 cup cocoa
  • 1/2 teaspoon salt
  • 2 cups flour
  • 1 cup milk

Filling:

  • 4 cups of powdered sugar
  • 1 stick (1/2 cup) of butter, melted
  • 1 tablespoon of vanilla
  • 1 cup of brown sugar
  • 1 cup of flour
  • 1/4 cup of water (more or less, to desired consistency)
  • 1 bag of mini chocolate chips

Chocolate Topping:

  • 12oz. semi-sweet chocolate chips
  • 12 tablespoons butter

DIRECTIONS:

Brownie:

  • Preheat oven to 350.
  • Cream butter and sugar together. 
  • Beat in eggs, cocoa, vanilla and salt.
  • Add flour and milk (alternating them and mixing well in between)
  • Pour batter into a jellyroll pan (12 1/2 x 17 1/2 x 1″)
  • Bake at 350 degrees for 14-16 minutes or until done in center and pulling slightly away from sides.
  • Cool.  

Filling:

  • Place powdered sugar and melted butter into a large mixing bowl, and use a mixer to beat on medium until crumbly.
  • Add vanilla, brown sugar and flour and continue mixing.
  • Add water, a little at a time, until a thick but spreadable consistency is reached.
  • Beat on high until smooth and creamy
  • Add bag of mini chocolate chips, and stir in on low until well blended.
  • Spoon over (cooled!!) brownies, and spread until evenly distributed over entire brownie top. (I used clean hands to press the dough into corners, and then I placed wax paper over the entire top and used my hands to press into a flat, even layer)
Chocolate Topping:
  • Melt butter and chocolate together in the microwave in 30 second increments, stirring in between until completely melted and smooth.
  • Pour over cookie dough filling and spread evenly over top
  • Chill until top layer is hard.
  • Cut into squares. Serve immediately, or stack in an air-tight container with parchment paper between each layer. Refrigerate for several days, or freeze for up to a month. (They are actually really yummy right out of the freezer!!)
  • Enjoy!


Cookies Dough Brownie My thoughts: These are as good as they look. If you like sneaking cookie dough out of the bowl, these are for you! This recipe makes quite a few brownies, and I love that they can be made ahead and some of them frozen for a later date. Enjoy!!

Cookie Dough Brownies

This one’s for you mom. I love you!

More of mom’s recipes here on easybaked:

Ice cream pie!!!!Chocolate drop cookies!Pumpkin RollChocolate Chip Cake

Peppermint ice cream pieone of our summer favorites!  Chocolate drop cookiesone of my first recipes with mom.  Pumpkin roll- people always asked her to bring this to family celebrations.  Chocolate chip cakeher go-to recipe for winning a bake off.

Have you ever visited Immeasurably More? It’s about my non-baking self and all the ways God is directing my steps. Stop by sometime by clicking the link below.

JV blog header

Confetti Sugar Cookies!

Confetti cookies!What better way to celebrate the New Year than with confetti? Especially the edible kind that pours out of the center of a delicious sugar cookie? So. Much. Fun!!!!

These sugar cookies are a fun and festive surprise that are sure to make your guests smile as you ring in 2015! These are easy to put together and a creative addition to any celebration!

Here’s how we made these fun treats: (printable recipe)

INGREDIENTS: (makes about 24 cookies)

  • 2 sticks (1 cup) unsalted butter (softened)
  • 1 1/2 cups of granulated sugar
  • 2 eggs
  • 1 teaspoon of vanilla
  • 1 teaspoon of butter flavoring
  • 3 cups of flour
  • 1 teaspoon of baking powder
  • 1/2 teaspoon of salt
  • 1 teaspoon cinnamon
  • 2 bags of Wilton Candy Melts in any colors you wish to use
  • 2-3 cups of small confetti sprinkles

DIRECTIONS:

  • Preheat oven to 350F degrees.
  • In a large mixing bowl, cream together butter and sugar until smooth.
  • Add eggs, vanilla and butter flavoring and mix well.
  • Add all dry ingredients and mix until able to knead into a firm ball of dough (add additional flour if necessary).
  • Roll out on a floured counter with a flour coated rolling pin to desired thickness.
  • Cut about 72 circles using a cookie cutter (I used a 2″ cookie cutter)
  • Use a slightly smaller circle cutter to cut out a center circle from 24 of these cookies.
  • Place cookies on cookie sheets covered in parchment paper and bake at 350F degrees for 8 to 10 minutes.
  • Slide baked cookies and parchment paper together onto a counter to cool completely.

Confetti Cookies!

  • Melt about 1/4 of a cup of candy melts (I used white, but you can use whatever colors you’ve chosen) in the microwave for 30 second increments, stirring between until completely melted and smooth. Place the melted candy in a small zip top bag and cut one corner off.
  • Pipe around the bottom of the “ring” cookie and place it on a “solid” cookie. 
  • Fill the open center of the “ring” cookie with confetti sprinkles.
  • Pipe melted candy melts around the top of the “ring” cookie and set another “solid” cookie on top.
  • Allow these cookies to harden completely (I placed mine in the fridge for about 20 minutes).

Confetti CookiesConfetti CookieConfetti Cookies

  • Melt remaining candy melts in the microwave in 30 second increments until completely melted and smooth.
  • Dip cookie into melted candy and cover completely, using a spoon. Use a fork to lift out and tap against side of bowl until excess melted candy falls away. Slide bottom of cookie against side of bowl and gently slide onto parchment paper to harden.
  • Immediately sprinkle with confetti or other decorations before candy melts harden.

Confetti Cookies10Confetti Cookies9

    • Package up in a tightly sealed container or in cello bags.
    • Wait until midnight and celebrate with the BEST  confetti ever– the edible kind!!!

Confetti Cookies!!

My thoughts: these look complicated to make, but they really went together quickly and it was so fun to see people’s surprise at all that confetti inside. I did warn them to take that 1st bite over a plate- haha- I guess that just depends on how messy you want your floors during that NYE party!  Enjoy!!!


Confetti cookie3 Other fun NYE treats:

Koolaid Pie5Pink Champagne Cupcakes1Pile of Cupcakes!Raspberry Confetti Kisses

12/19/14: On a personal note: I blog my recipes ahead, and I prepared this post (and scheduled it to publish) several weeks ago. Since that time, my mom has been diagnosed with very, very aggressive cancer and admitted to Hospice. I just wanted to ask for all of you who have followed this little blog and enjoyed these recipes to keep our family in your prayers as we say good bye to her during this Christmas and New Year season. Because of this, and because I am in the process of starting a new job, I will be taking a few weeks off from publishing recipes here. May this New Year bring great hope and joy to you and your family! God Bless! Back in a few weeks.  *Hugs* ~Ruthanne

Caramel Pecan Pie Cupcakes

Pecan Pie Cupcake3

If you like pecan pie, you will go nuts over these cupcakes! With caramel pecan pie filling in the middle and crisp pie crust decorating the top, these say Happy Thanksgiving in a fun new way!

There’s nothing more yummy than a warm caramel pecan pie in the fall. I have a favorite- and it’s here already on Easybaked as my Christmas Eve Caramel Pecan Pie. These cupcakes take that pie up a notch and they turned out better than I even imagined they would~yum!

Pecan Pie Cupcakes

There are a couple of steps to this recipe, so it is a little more time consuming, but well worth the effort~ I promise!

Here’s how we made them: (printable recipe)

INGREDIENTS:

Cupcakes:

  • One boxed caramel cake mix (plus water, oil and eggs to make according to box)

Pie filling:

  • 2/3 cup granulated sugar
  • 1/4 cup (1/2 stick) butter (melted)
  • 3 eggs (these are in addition to the eggs used for cake mix)
  • 1 (12 oz) jar of caramel topping
  • 2  cups chopped pecans (plus 24 pecan halves for decorating if desired)

Frosting and pie crust toppers:

  • One refrigerated pie crust
  • 1 cup (2 sticks) of salted butter
  • 1 cup (2 sticks) of unsalted butter
  • 3 cups of powdered sugar
  • 2 teaspoons of clear vanilla flavoring

DIRECTIONS:

Pie Filling:

  • Make pie filling 1st. Start by preheating oven to 350F degrees
  • In a large mixing bowl, beat 3 eggs together lightly with a fork.
  • Add sugar, stirring until dissolved
  • Stir in caramel topping and butter
  • Stir in chopped pecans
  • Pour into a greased casserole dish and bake for 50-60 minutes.
  • Cool completely (I placed this in the fridge to cool more quickly)

Cupcakes:

  • As the pie filling bakes, make cake mix according to directions on boxed mix and divide evenly among 24 cupcake liners placed in a tin.
  • Once pie filling is finished, bake cupcakes according to box.
  • Remove cupcakes from oven and tins and allow them to cool completely.

Frosting and pie crust toppers:

  • Unroll pie crust onto counter and use any cookie cutter you like to cut into 24 pieces. I used a fall leaf Linzer cookie cutter and added the leaf cut-outs on the cupcakes too.
  • Place pie pieces on a cookie sheet and spray lightly with non-stick spray.
  • Bake until slightly browned and crispy. Cool.

Pecan Pie Crust Cut-outs

  • Make frosting by combining butter, powdered sugar and vanilla in a large mixing bowl and beating on high for 3 to 4 minutes until light and fluffy.

Assembling Dessert:

  • To assemble cupcakes, make sure everything has cooled. Use a cupcake corer to remove a core out of the center of each cupcake.
  • Scoop or spoon some pie filling into each cupcake and replace the top of the core back on top of the filling.

Pecan Pie Cupcake1Pecan Pie Cupcake2

  • Place frosting into a zip-top bag fitted with a decorating tip and pipe swirls of frosting on the top of each cupcake.
  • Add a pie crust topper and a pecan half and ENJOY!!!!

Pecan Pie Cupcakes

My thoughts: These really do capture the delicious flavor of pecan pie. They were a big hit with everyone who tried them. I really liked the pie crusts on top- so yummy in that buttercream frosting! I hope you have a chance to try this recipe out!  Enjoy! ~r
Pecan Pie Cupcakes

Love pecans? We do too!  Here are some other yummy pecan recipes. Just click on a photo to see the recipe!

Turtle Cheesecake SquareCaramel Turtles!!!Caramel Pecan CookiesToffee Pecan Crunch!!!!!!

Need a fun and unique gift idea? Easybaked has adorable boxed sets of notecards. They have an Easybaked dessert photo on the front and a recipe on the back! The come in a cute box and the best part? They are ON SALE for Christmas, include free shipping and the site that is hosting them offers $10 off a $50 purchase! Enjoy!!! (Click on photo for more information)

Easybaked Card sale


Pumpkin Pie Spice Cookies

Pumpkin Pie Cutout cookies!

These cute little pumpkin cutout cookies are chock-full of pumpkin spices and capture the tastes of fall in every bite!

I really dislike pumpkin pie. This time of year it is found everywhere! I’ve discovered that it is truly the pumpkin I dislike though- not the spices. These cookies offer all the yummy spices of pumpkin pie without a hint of actual pumpkin… plus they are cute as can be! These cookies can be cut into any shape you like and decorated accordingly. I had a hard time not eating them all up before  I decorated them- so use frosting…or don’t…. maybe just cut them in circles and add a few sugar sprinkles to make them really easy!

Pumpkin Pie Cutout CookiesHere’s how we made the cookies- and how we decorated them. (printable recipe)

INGREDIENTS:

  • 2 sticks (1 cup) unsalted butter (softened)
  • 1 1/2 cups of granulated sugar
  • 2 eggs
  • 1 teaspoon of vanilla
  • 1 teaspoon of butter flavoring
  • 3 cups of flour
  • 1 teaspoon of baking powder
  • 1/2 teaspoon of salt
  • 2 Tablespoons of pumpkin spice seasoning

DIRECTIONS:

  • Preheat oven to 350F degrees.
  • In a large mixing bowl, cream together butter and sugar until smooth.
  • Add eggs, vanilla and butter flavoring and mix well.
  • Add all dry ingredients and mix until able to knead into a firm ball of dough (add additional flour if necessary).
  • Roll out on a floured counter with a flour coated rolling pin to desired thickness.
  • Cut using a large (I used a 6″) round cookie cutter
  • Use a knife or pizza cutter to divide circle into even triangle “pie” pieces.
  • Place cookies on ungreased cookie sheets and bake at 350F degrees for 8 to 10 minutes.
  • Slide baked cookies onto parchment paper to cool completely.
  • To decorate, use royal icing (so it will harden into a firm shell) my recipe for that is here.
  • Use thicker icing to outline the shape of the cookie and then flood the inside of the outline with thinner icing.

Pumpkin Pie Cut-out CookiesPumpkin Pie Cutouts CookiesPumpkin Pie Cutout cookies

  • Allow icing to harden up and then make the “crust” by using royal icing colored to match the cookies and swirling a loose “m” pattern across the end of each cookie.
  • Use a star tip to add a little white icing as “whipped cream”

Note: I wanted to add some cute factor to these yummy cookies and saw sugar cookies done as slices of pie on a REALLY fun blog called sweetsugarbelle.com. She does a GREAT job of showing the decorating process step-by-step, and I highly recommend you visit her site if you decide to make these cookies in slice form. The hardest part is the crust. I’m NOT a cake decorator and I really had to practice to get the crust to look acceptable. Her pictures and instruction were a big help! Plus the rest of this site is so addictive. Beautiful creations! Love it!

Slice of Pumpkin Pie CutoutsMy thoughts: YUM. Seriously yummy cookies. If you are up for a challenge make them into pie slices, but if you just want some simply delicious and EASY cookies just cut these into fun fall or Christmas shapes and sprinkle with a little colored sugar. Don’t omit that butter flavoring- you can find it with other flavors and extracts at the grocery- it adds such a yummy flavor!  Hope you get a chance to try these!!! Enjoy! ~r


Pumpkin Spice CookiesOther fun Thanksgiving recipe ideas~ click on a photo to see the recipe:

Cinnamon Upside Down Cakes!!Red velvet cookies with cream cheese icing!!Cinnamon Roll Cheesecake!!Brownie Oreo Cookie Cup