Category Archives: Candy

Turtle Cookie Cups

Posted on

Turtle Cookie Cup

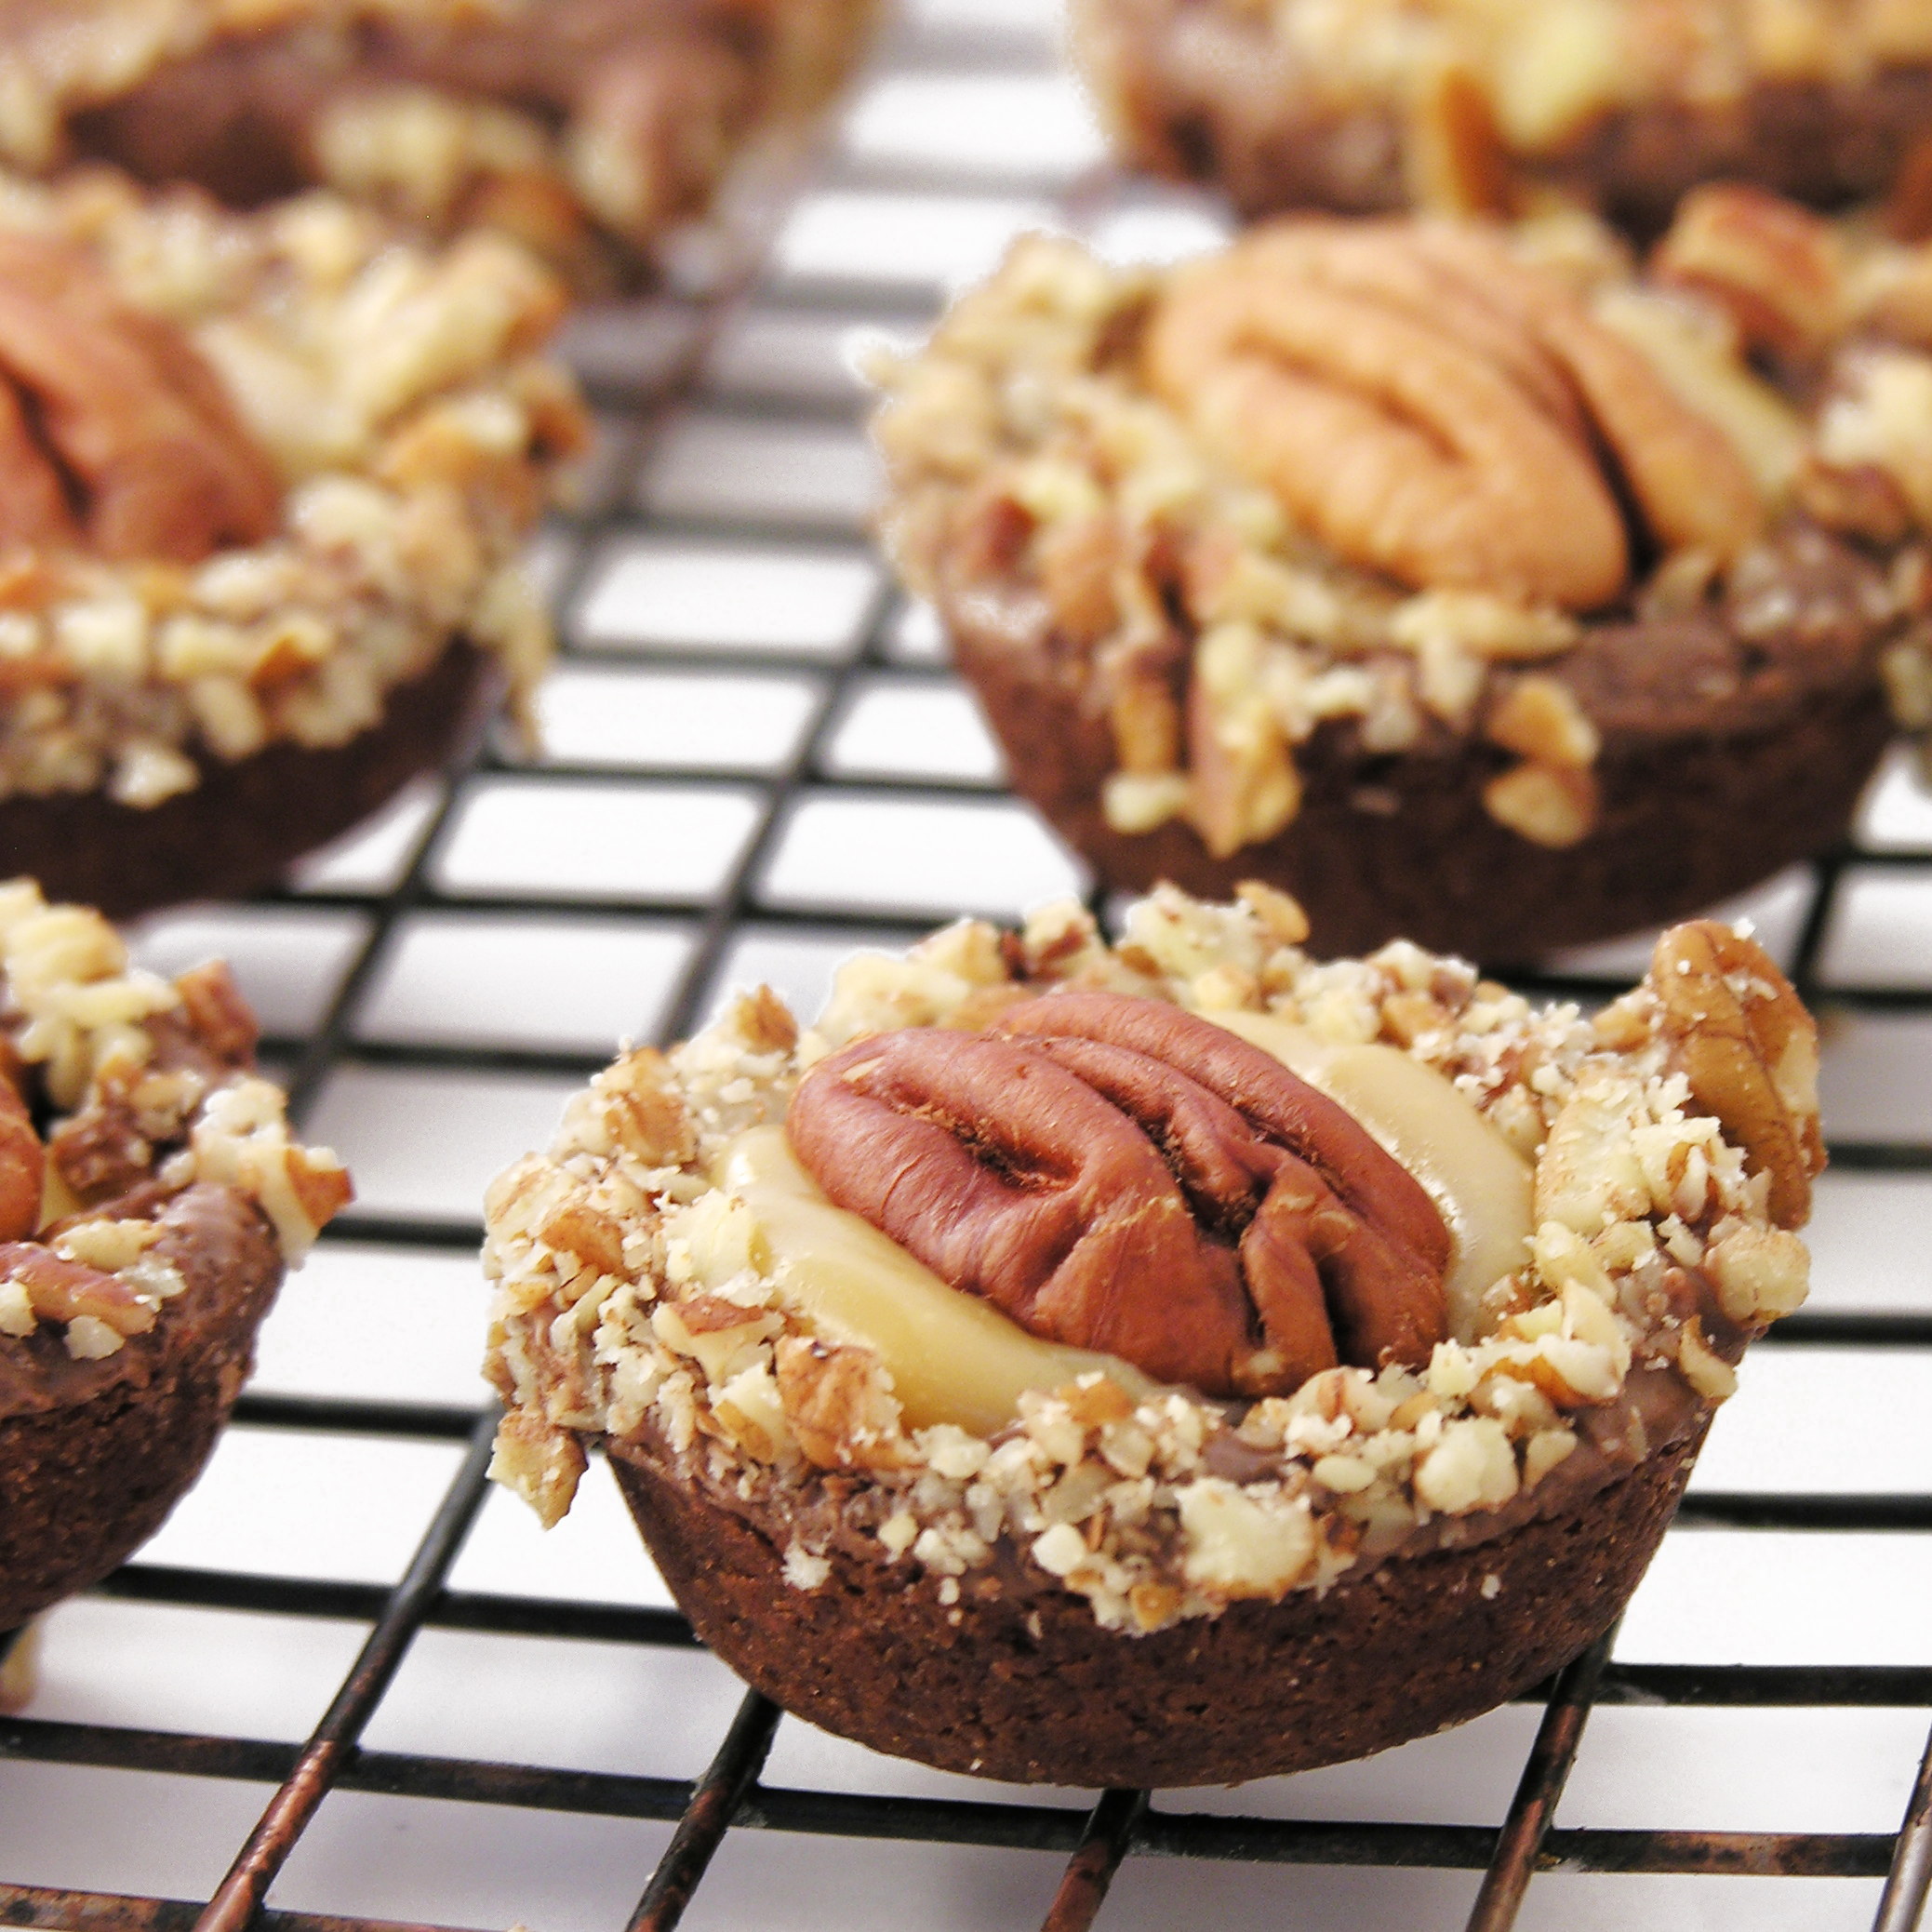
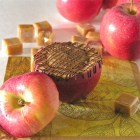
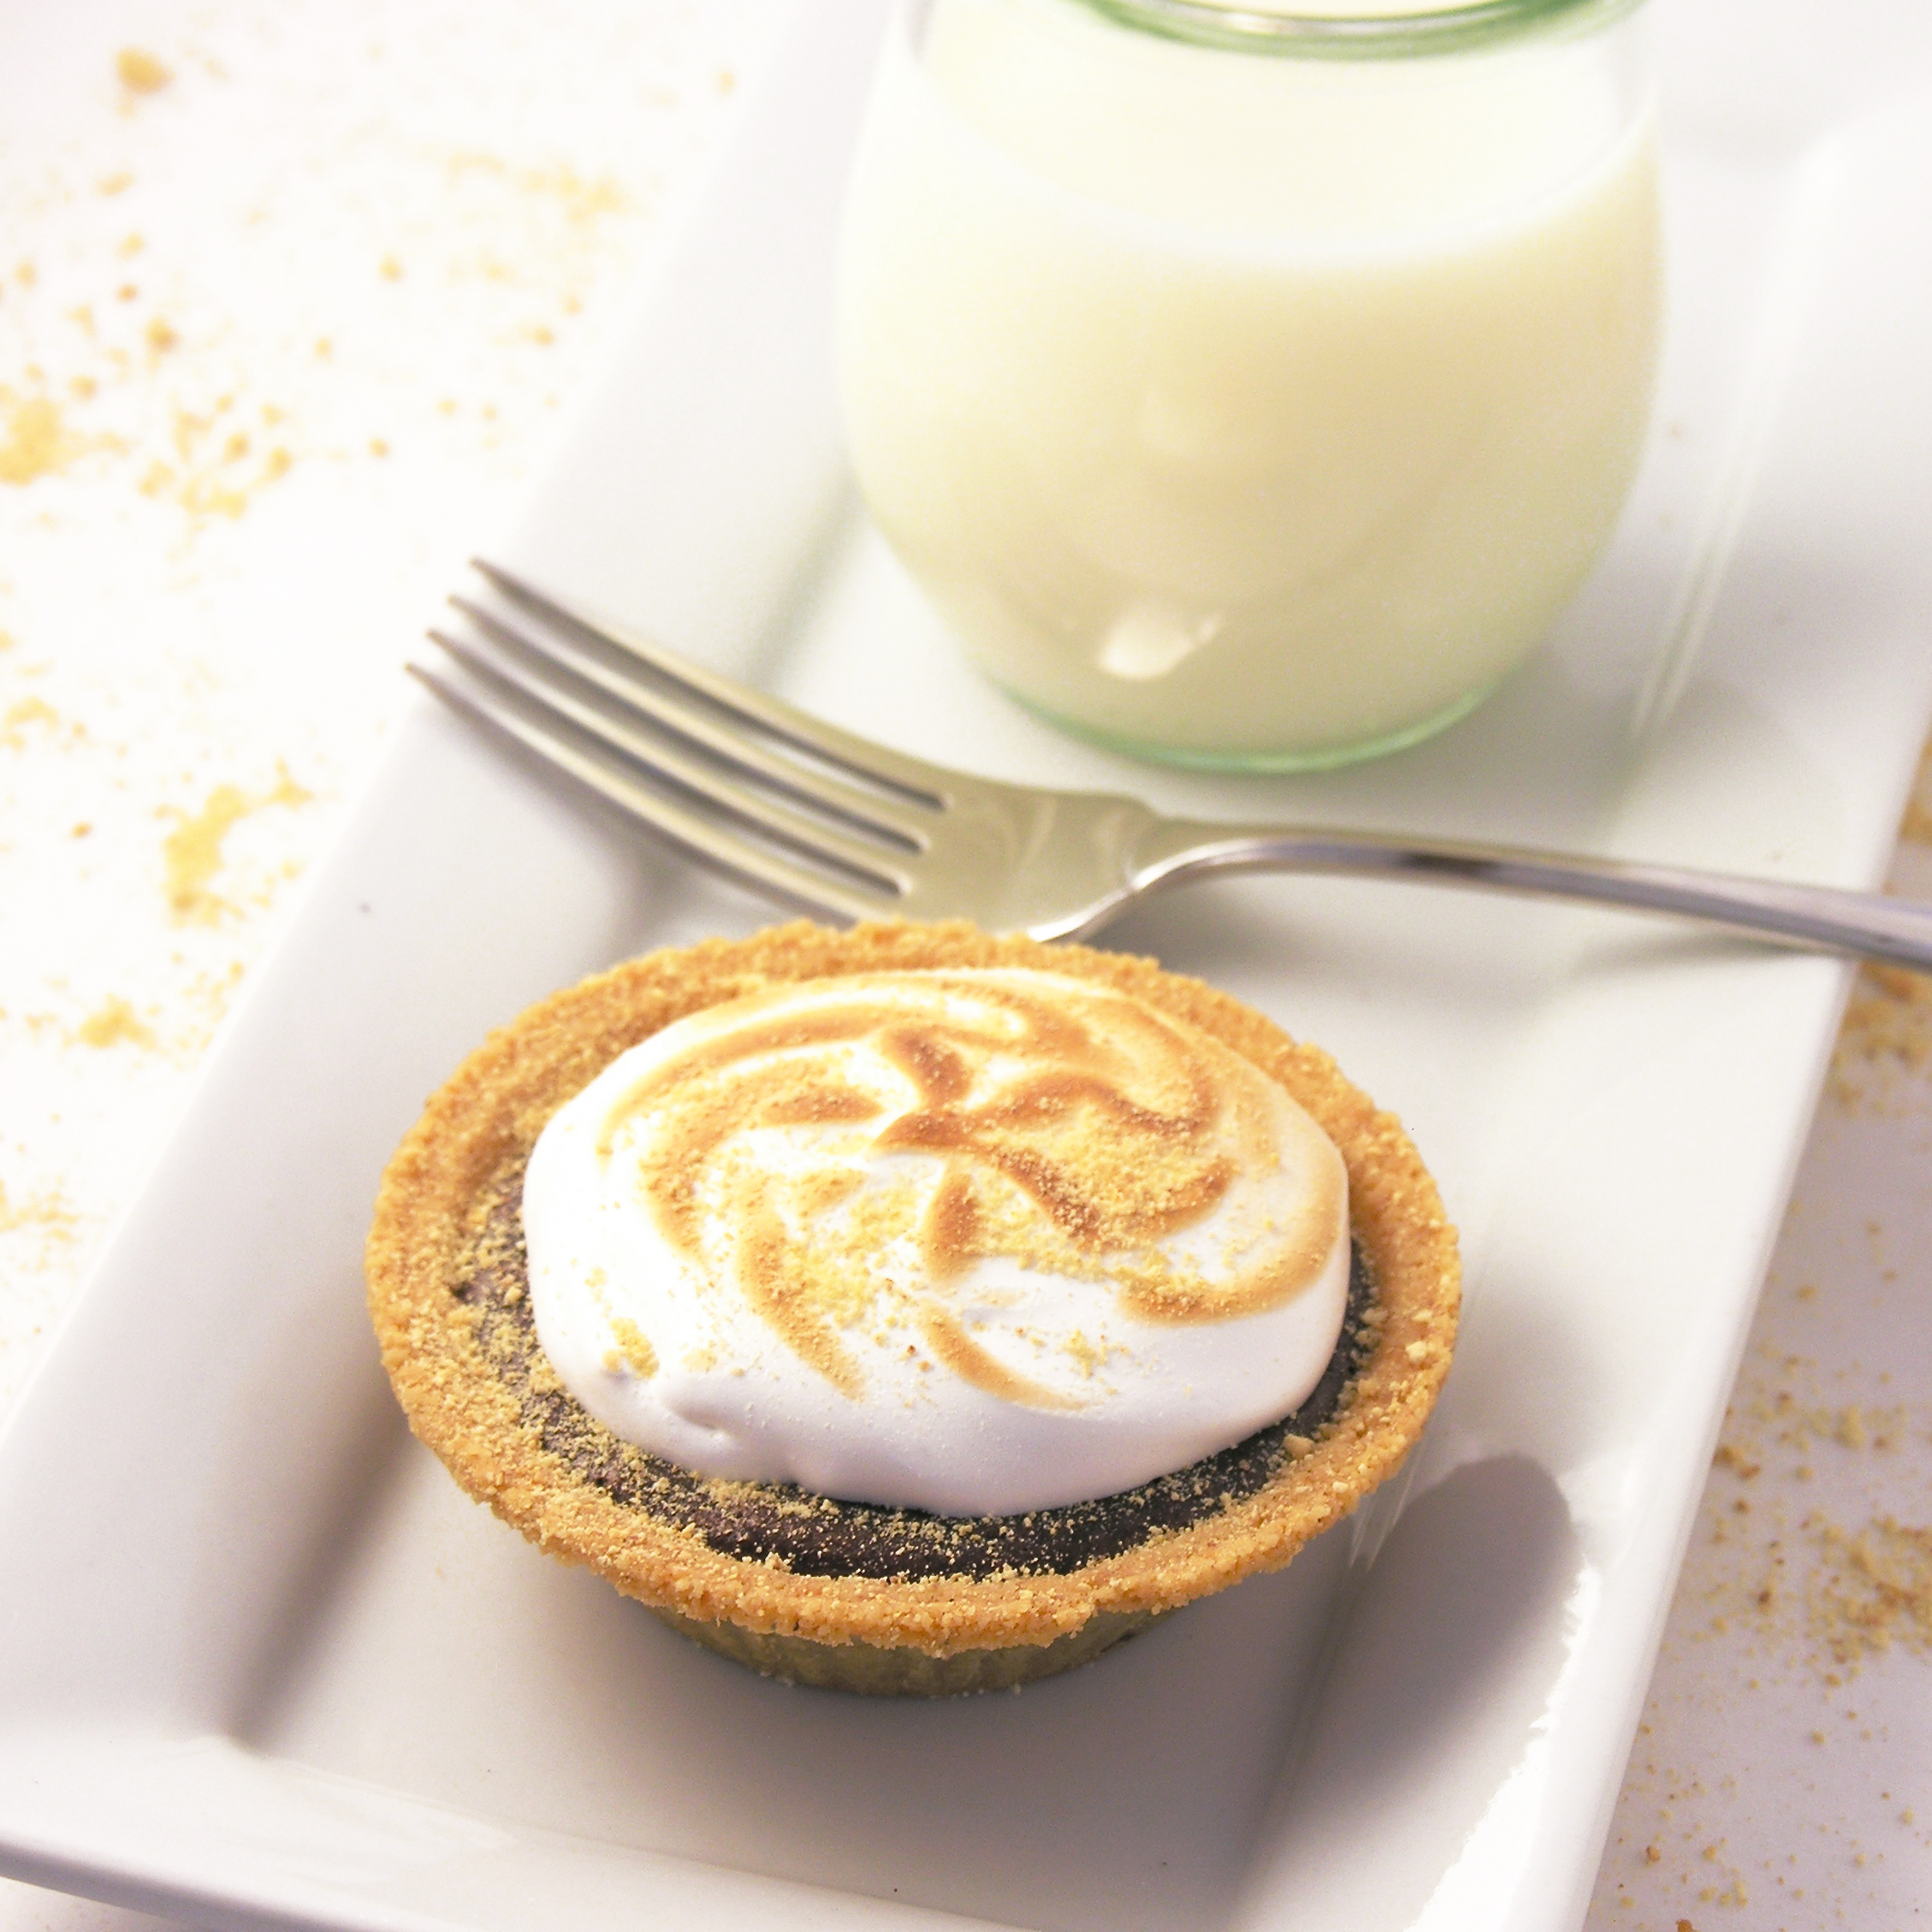
Chocolate cookie cups full of creamy caramel, chocolate and pecans.  So many fun fall flavors in one little dessert!

There’s something about November that makes me think caramel and pecans. Comfort food, maybe? Thanksgiving?  I’m not sure, but these yummy little treats hit the spot!  They are fun to make, and a pretty mini dessert for all those November and December get-togethers.

Here’s how they are made: (printable recipe)

INGREDIENTS:

Cookies:

  • 2 sticks (one cup) butter (softened)
  • 1 ½ cups sugar
  • 2 eggs
  • 1 teaspoon of vanilla extract
  • 2/3 cup unsweetened cocoa powder
  • 3 cups flour
  • ½ teaspoon salt
  • ½ teaspoon baking powder

Toppings:

  • 1 bag of Wilton’s candy melts in milk chocolate
  • 2 cups of chopped pecans and about 60 whole pecans
  • 32 Kraft caramels (unwrapped)
  • 1 can (14oz) sweetened condensed milk
  • 1 stick (1/2 cup) butter

DIRECTIONS:

Cookies:

  • Preheat oven to 350 degrees
  • Add butter, sugar, eggs and vanilla together in a large mixing bowl
  • Blend on medium speed with a mixer until smooth
  • Gradually add dry ingredients and mix until smooth (use clean hands at the end, and knead into a soft ball of dough
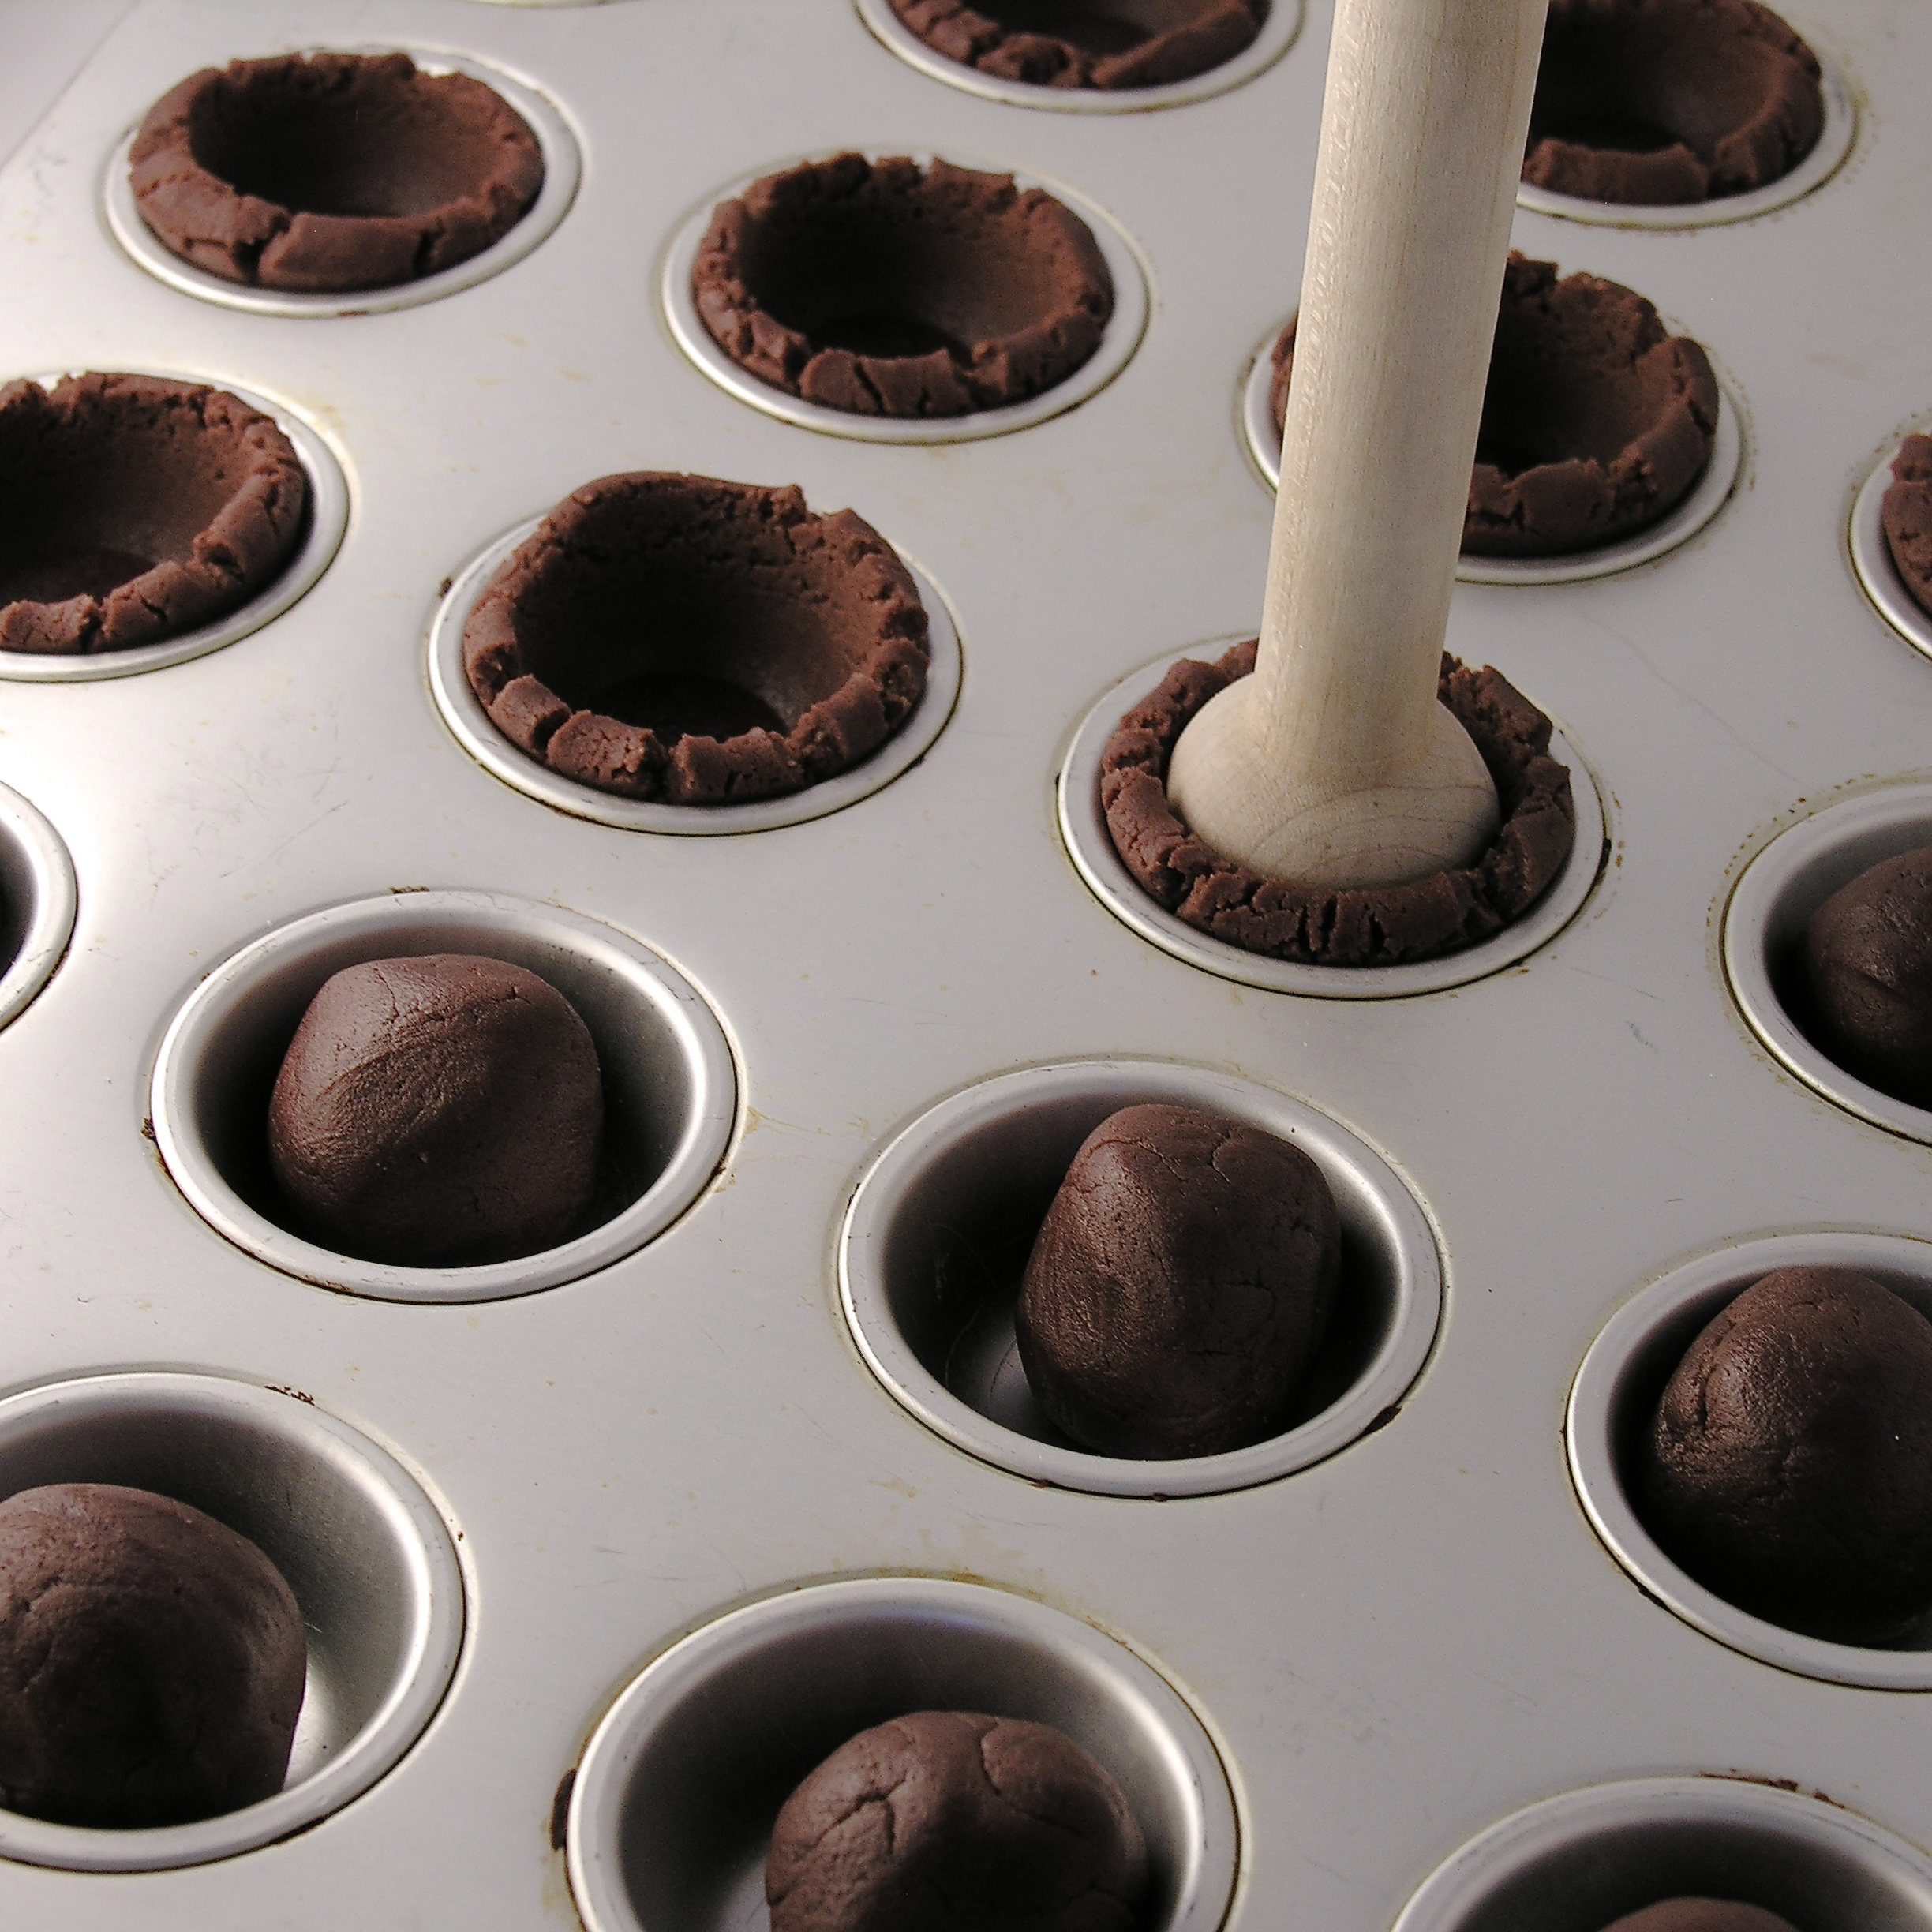
  • Use a small cookie scoop (I used one that holds ½ tablespoon of batter) to portion your dough into mini muffin tins that have been sprayed with non-stick spray
  • Use a tart shaper, or a wooden spoon to press the dough into a cup shape.

Making cookie cups

  • Bake at 350F degrees for 7-8 minutes and remove from oven.
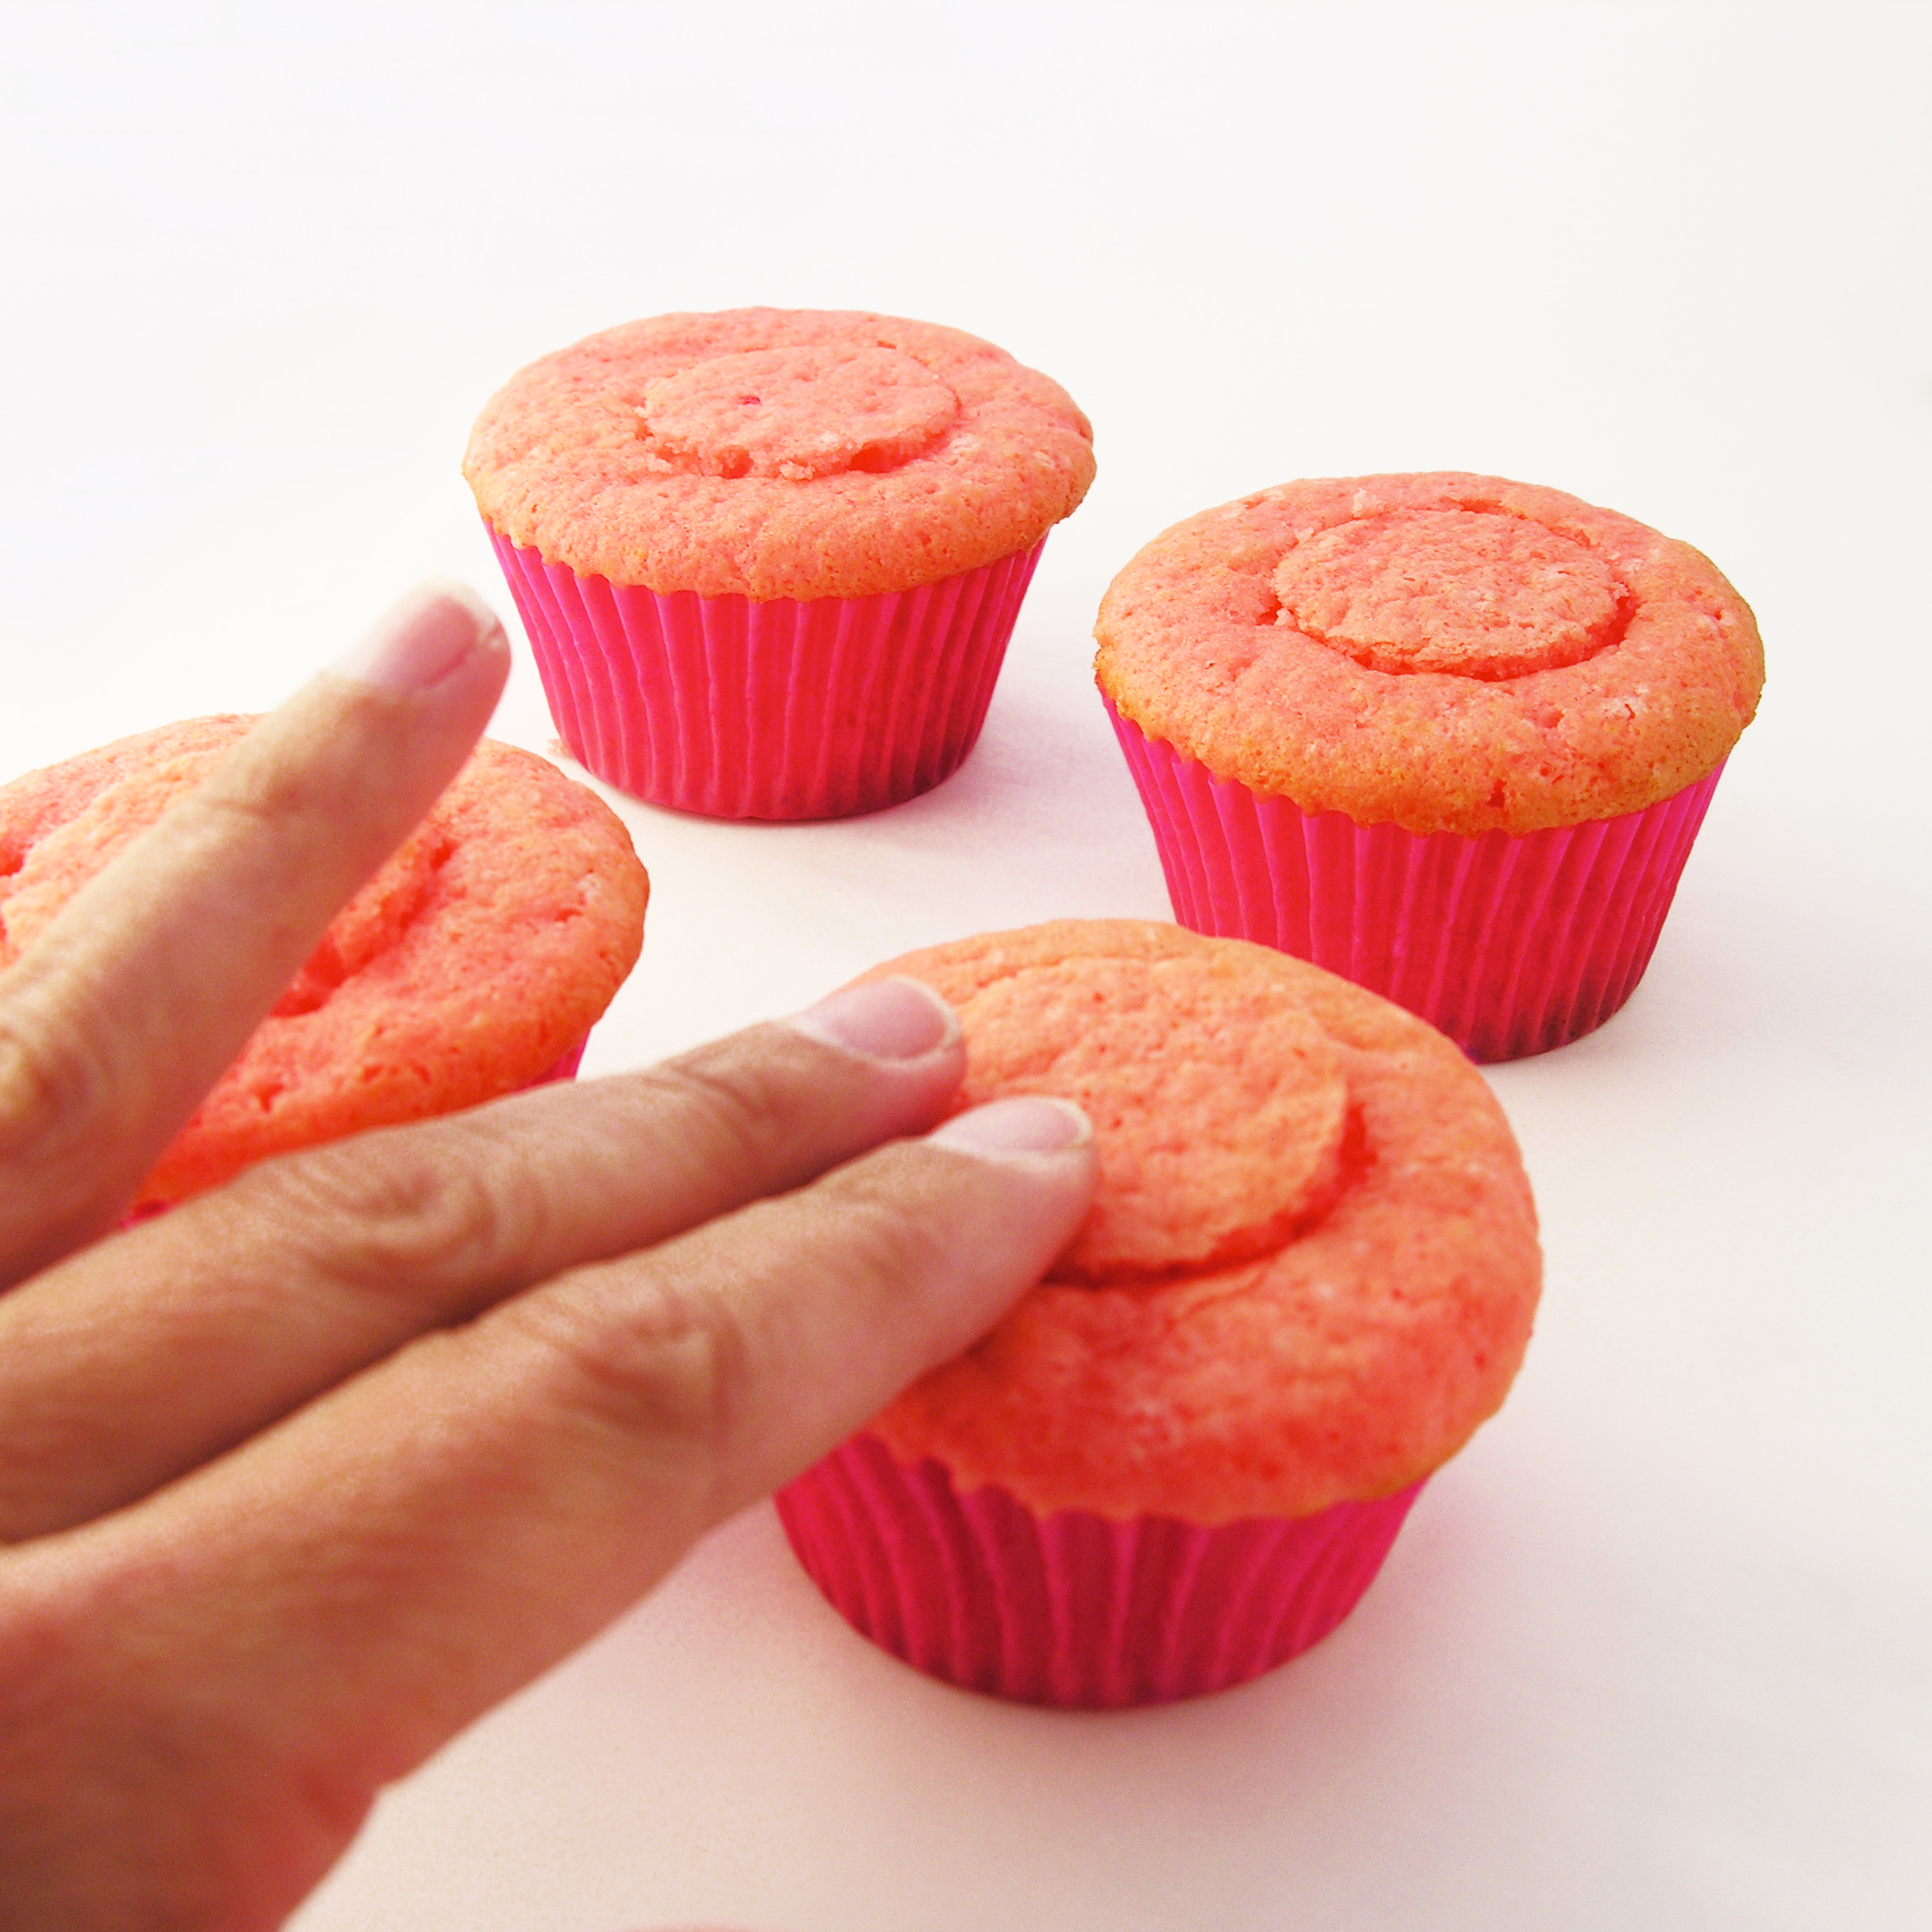
  • Press centers in a second time and allow cups to cool for just a couple of minutes.
  • Use a small paring knife to pop each cup out and allow them to cool on the counter.

Toppings:

  • Place caramels, sweetened condensed milk and butter into a medium saucepan and heat on medium over the stove until all of the caramels are melted.
  • Heat milk chocolate candy melts in the microwave in 30 second increments until melted and smooth.
  • Place chopped pecans into a small bowl.
  • To assemble, dip top edge of cup in candy melts and then in chopped nuts.

Dipping tops of cookie cups in chocolate

  • Place caramel sauce into a sturdy zip top bag and clip a corner.
  • Pipe caramel into each cup until filled completely and top with a whole almond.
  • Allow caramel and chocolate to firm up.
  • Store in an airtight container for 2-3 days.
  • Enjoy!

Turtle Cookie Cup2

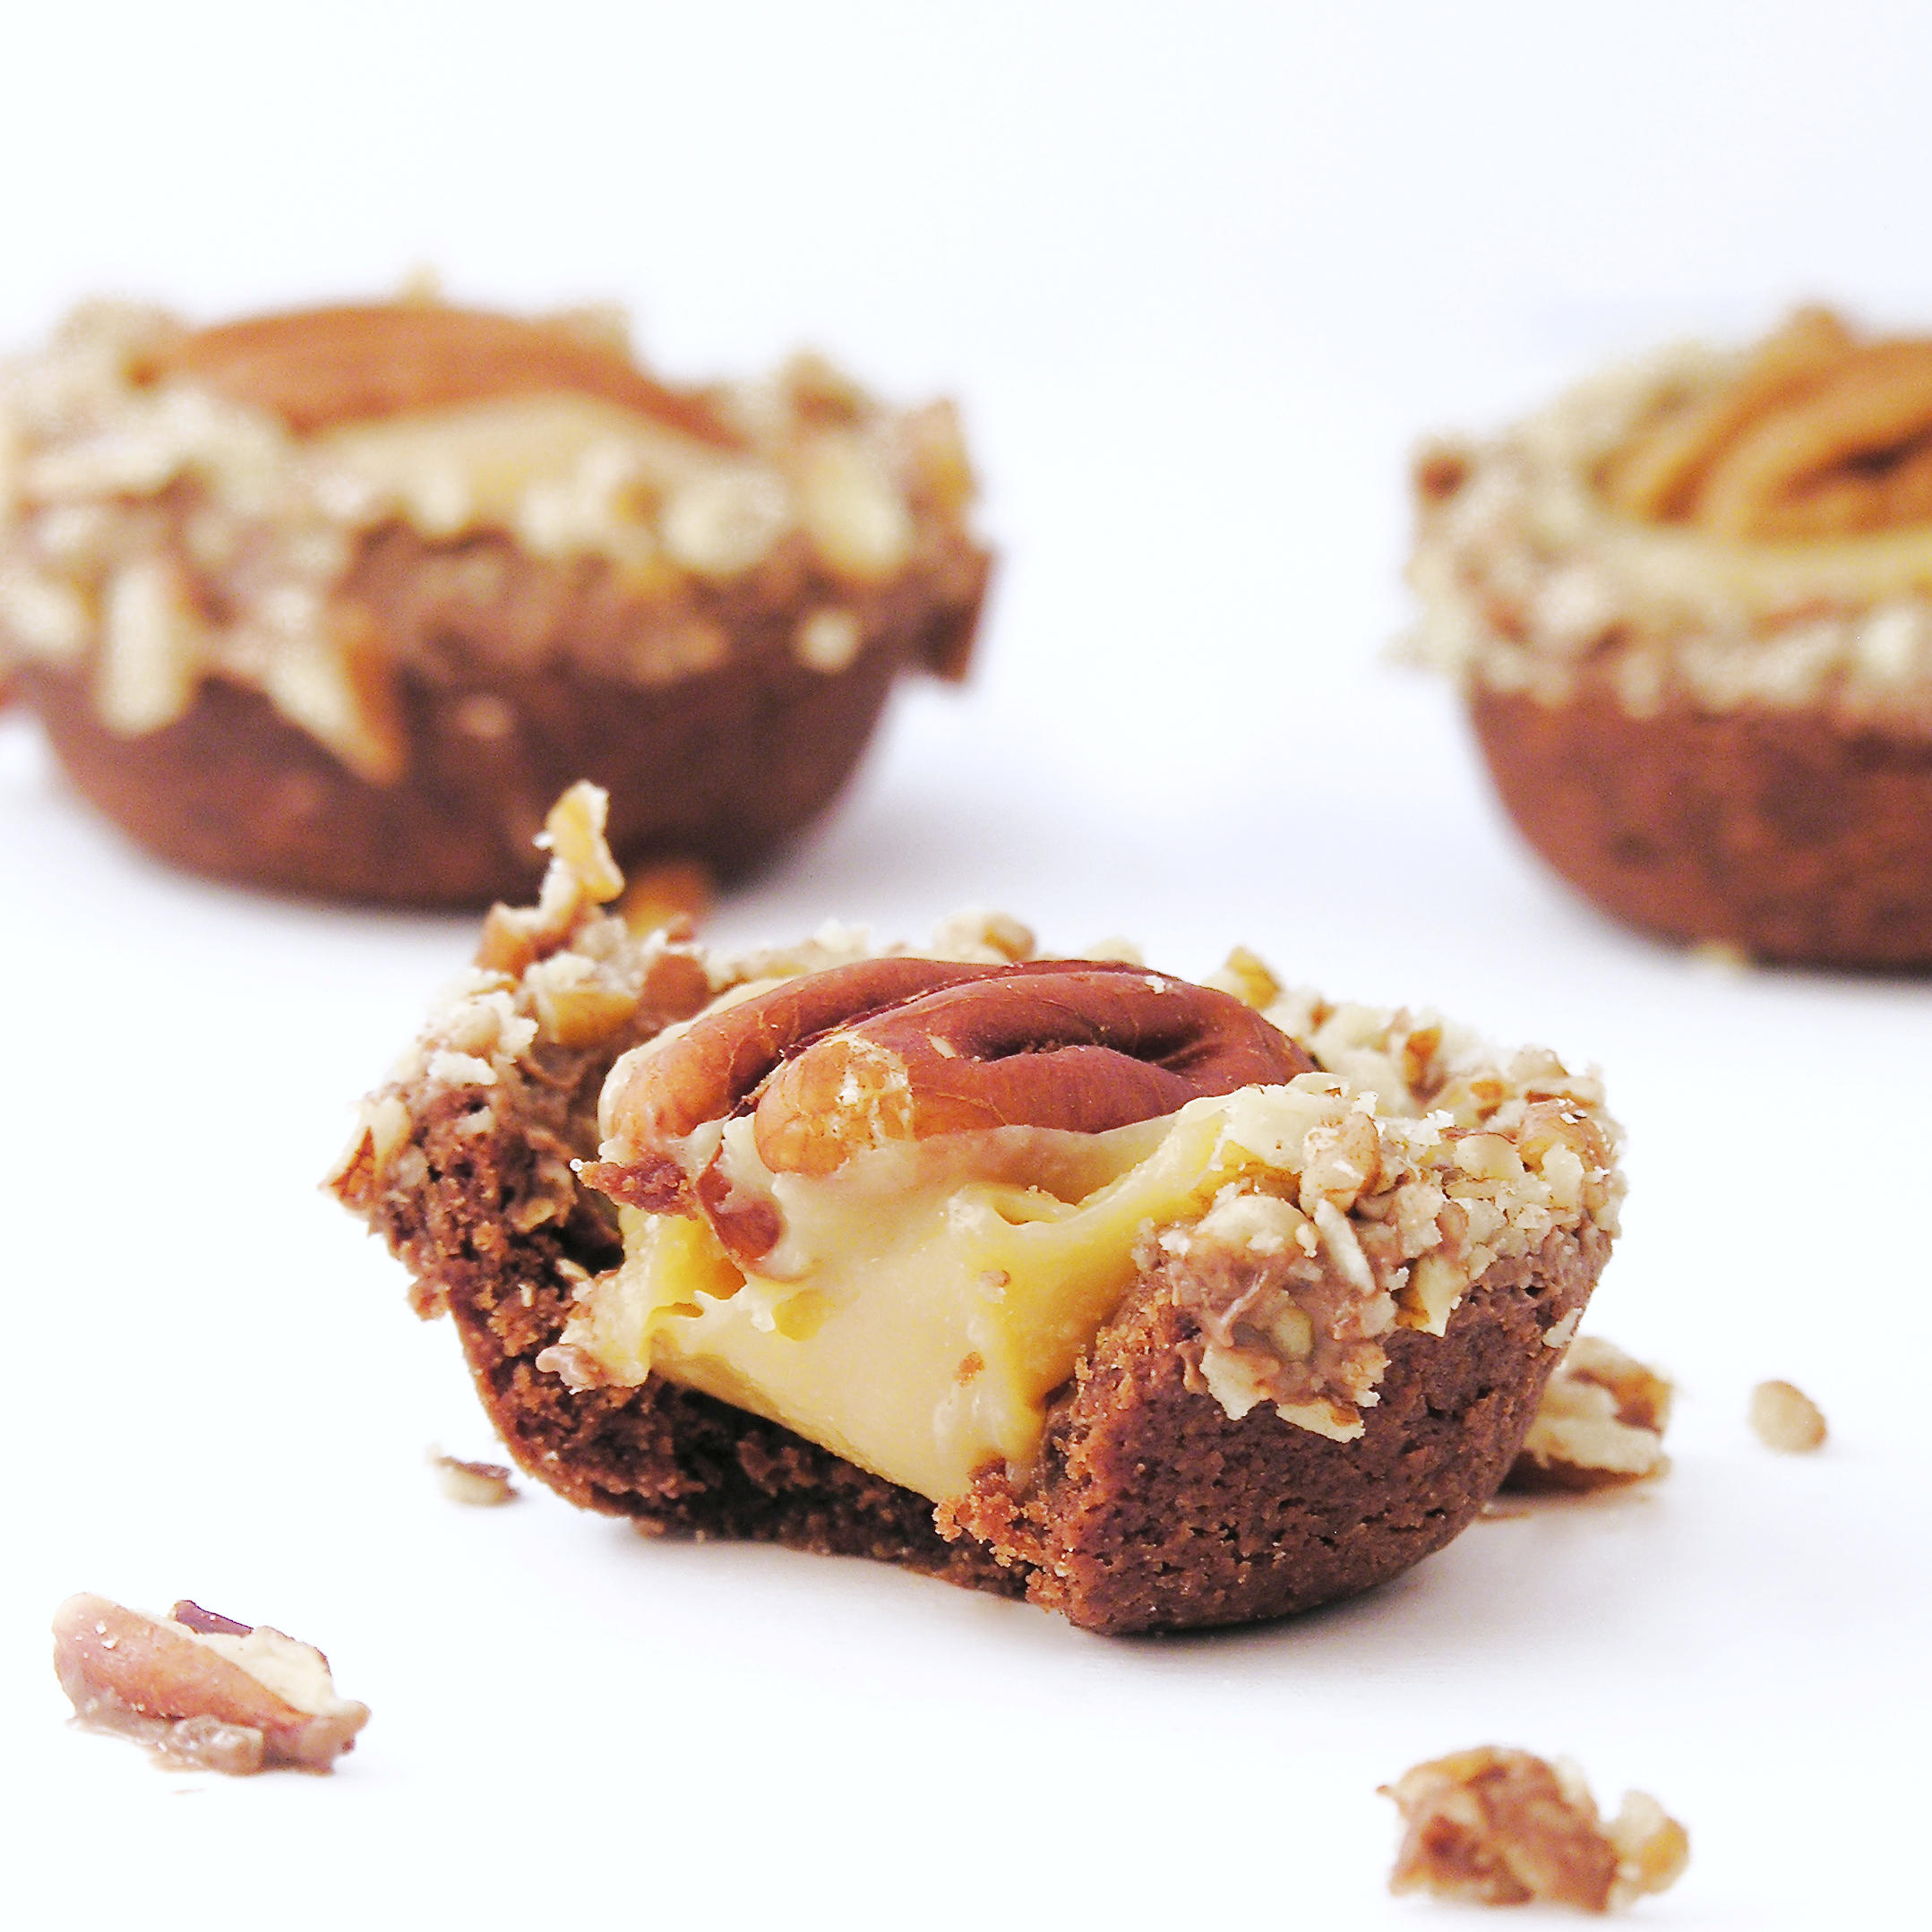
My thoughts: These are a little time-consuming to make, but sooooo yummy. They are a perfect mini-dessert for any of the upcoming holidays, and they got RAVE reviews in my little world! That caramel….!!!! Enjoy! ~r

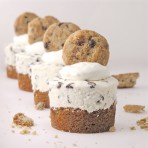
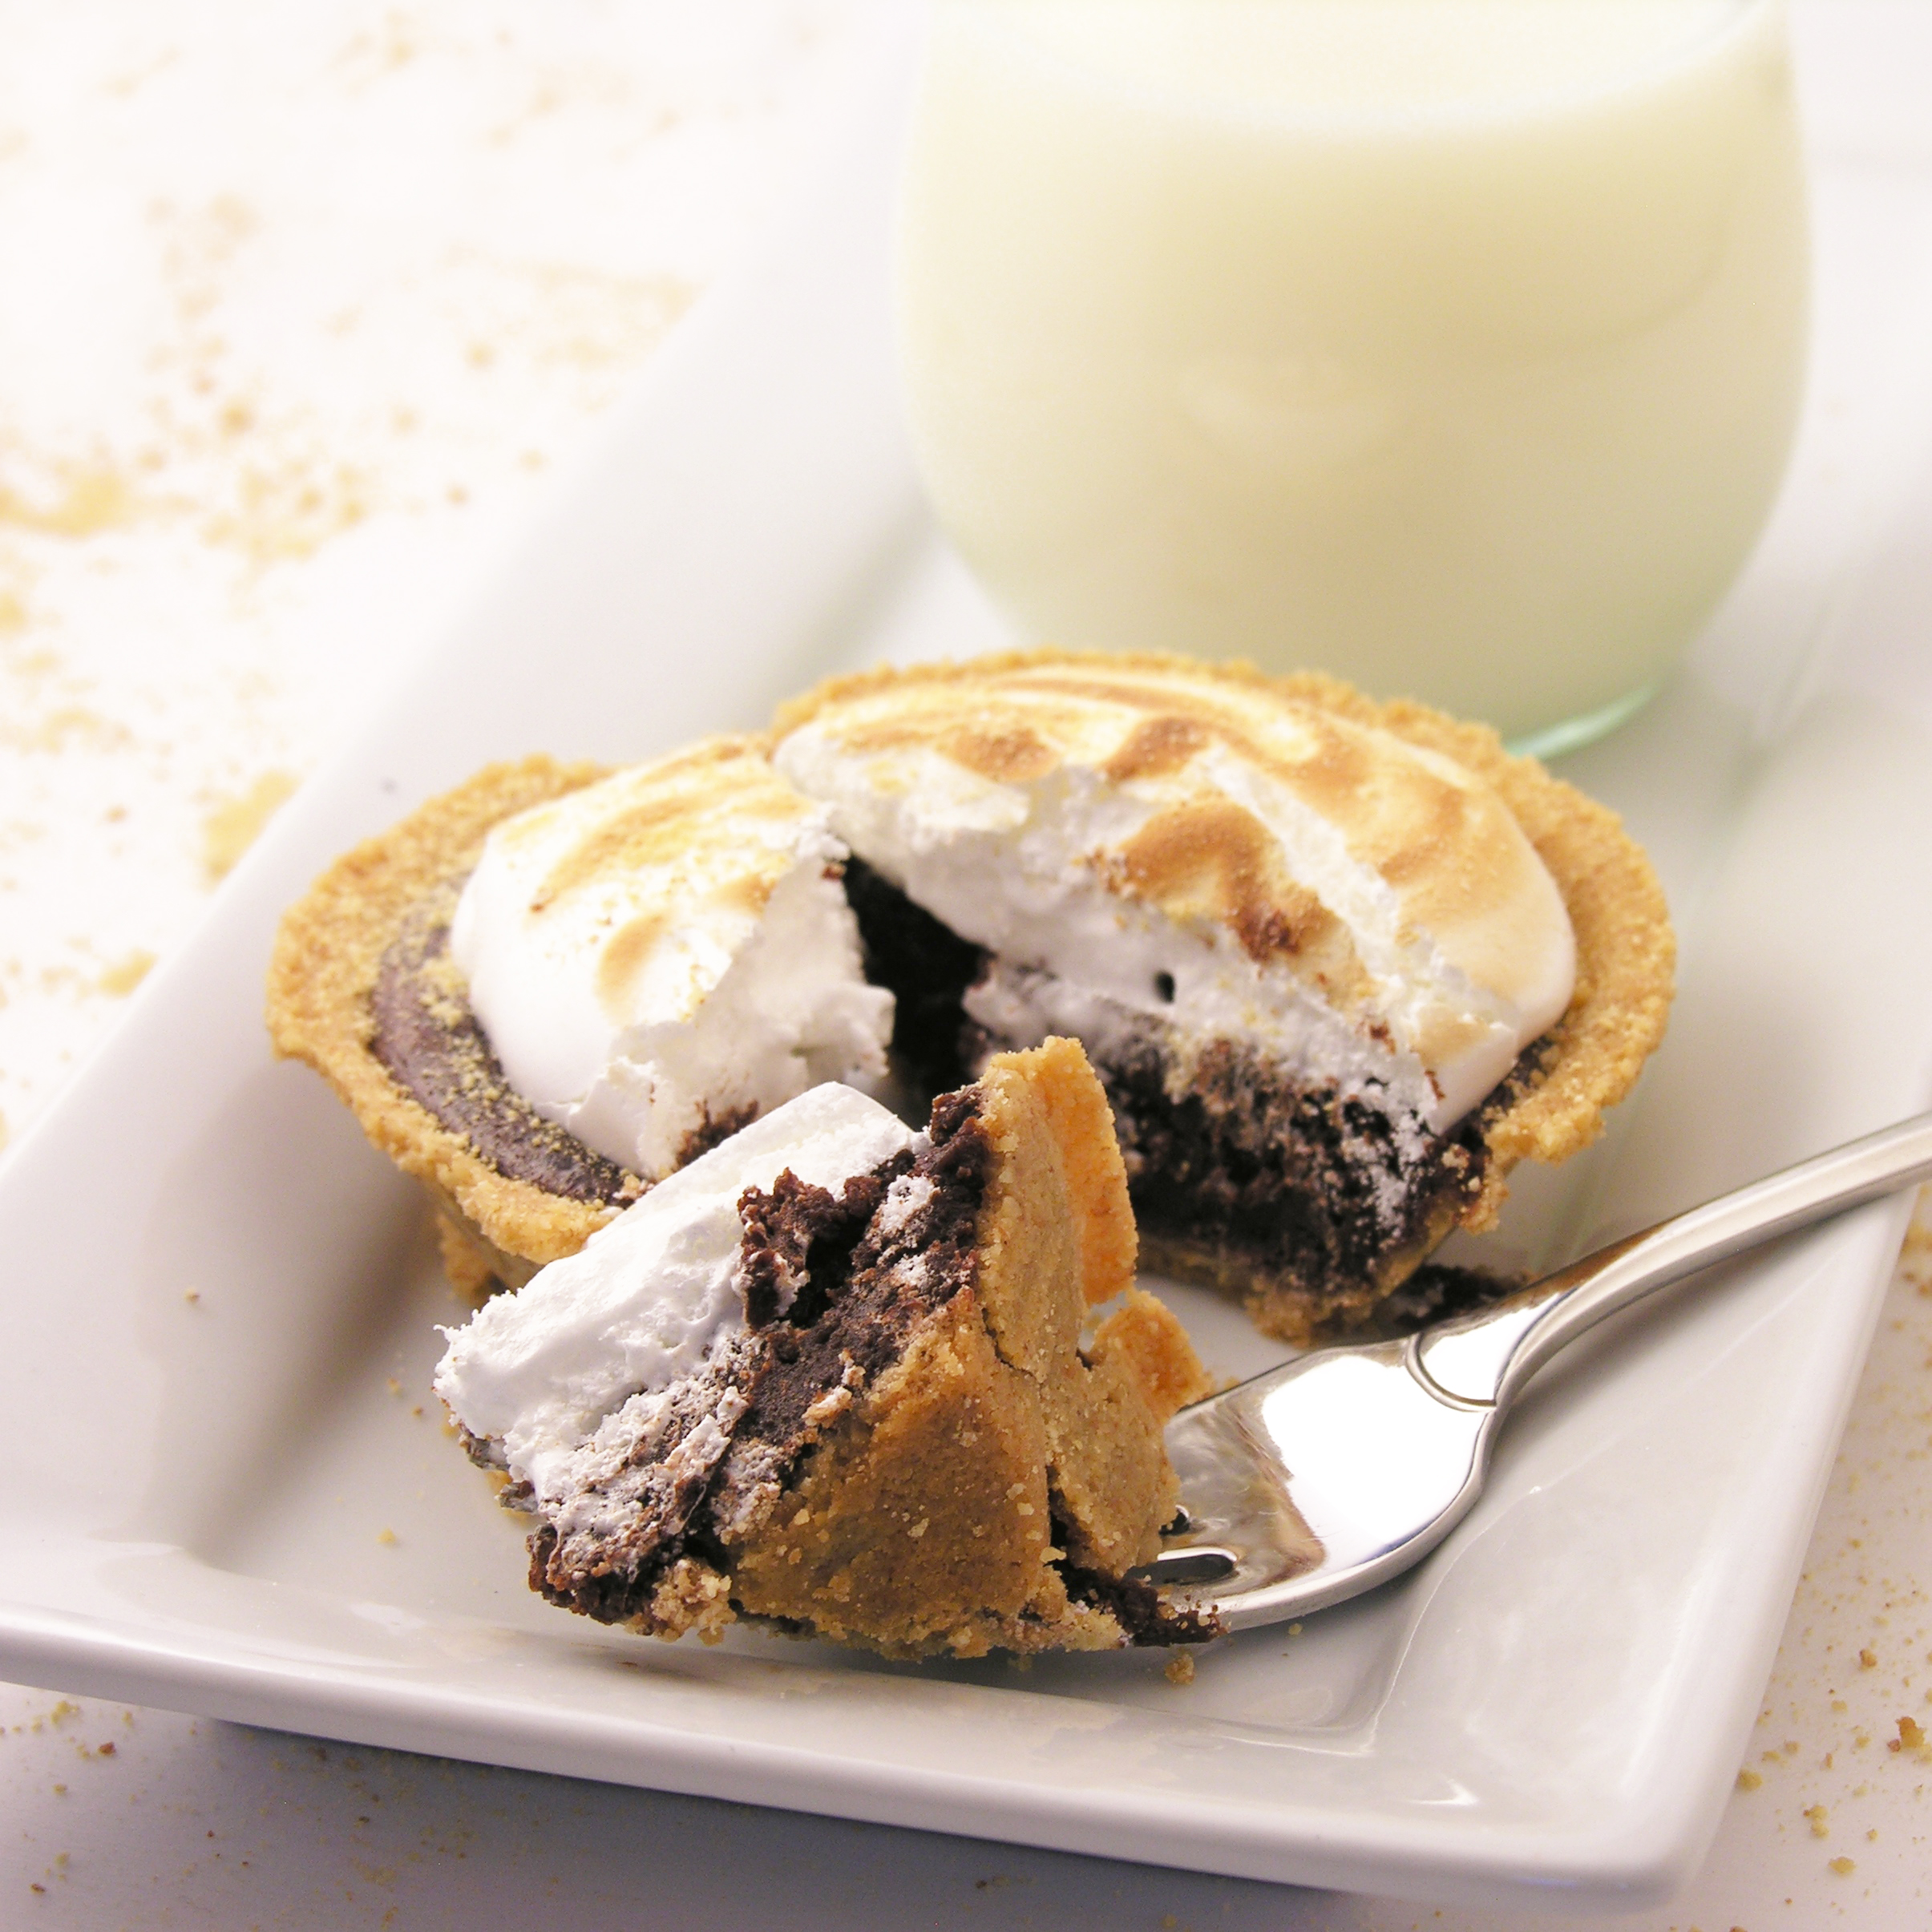
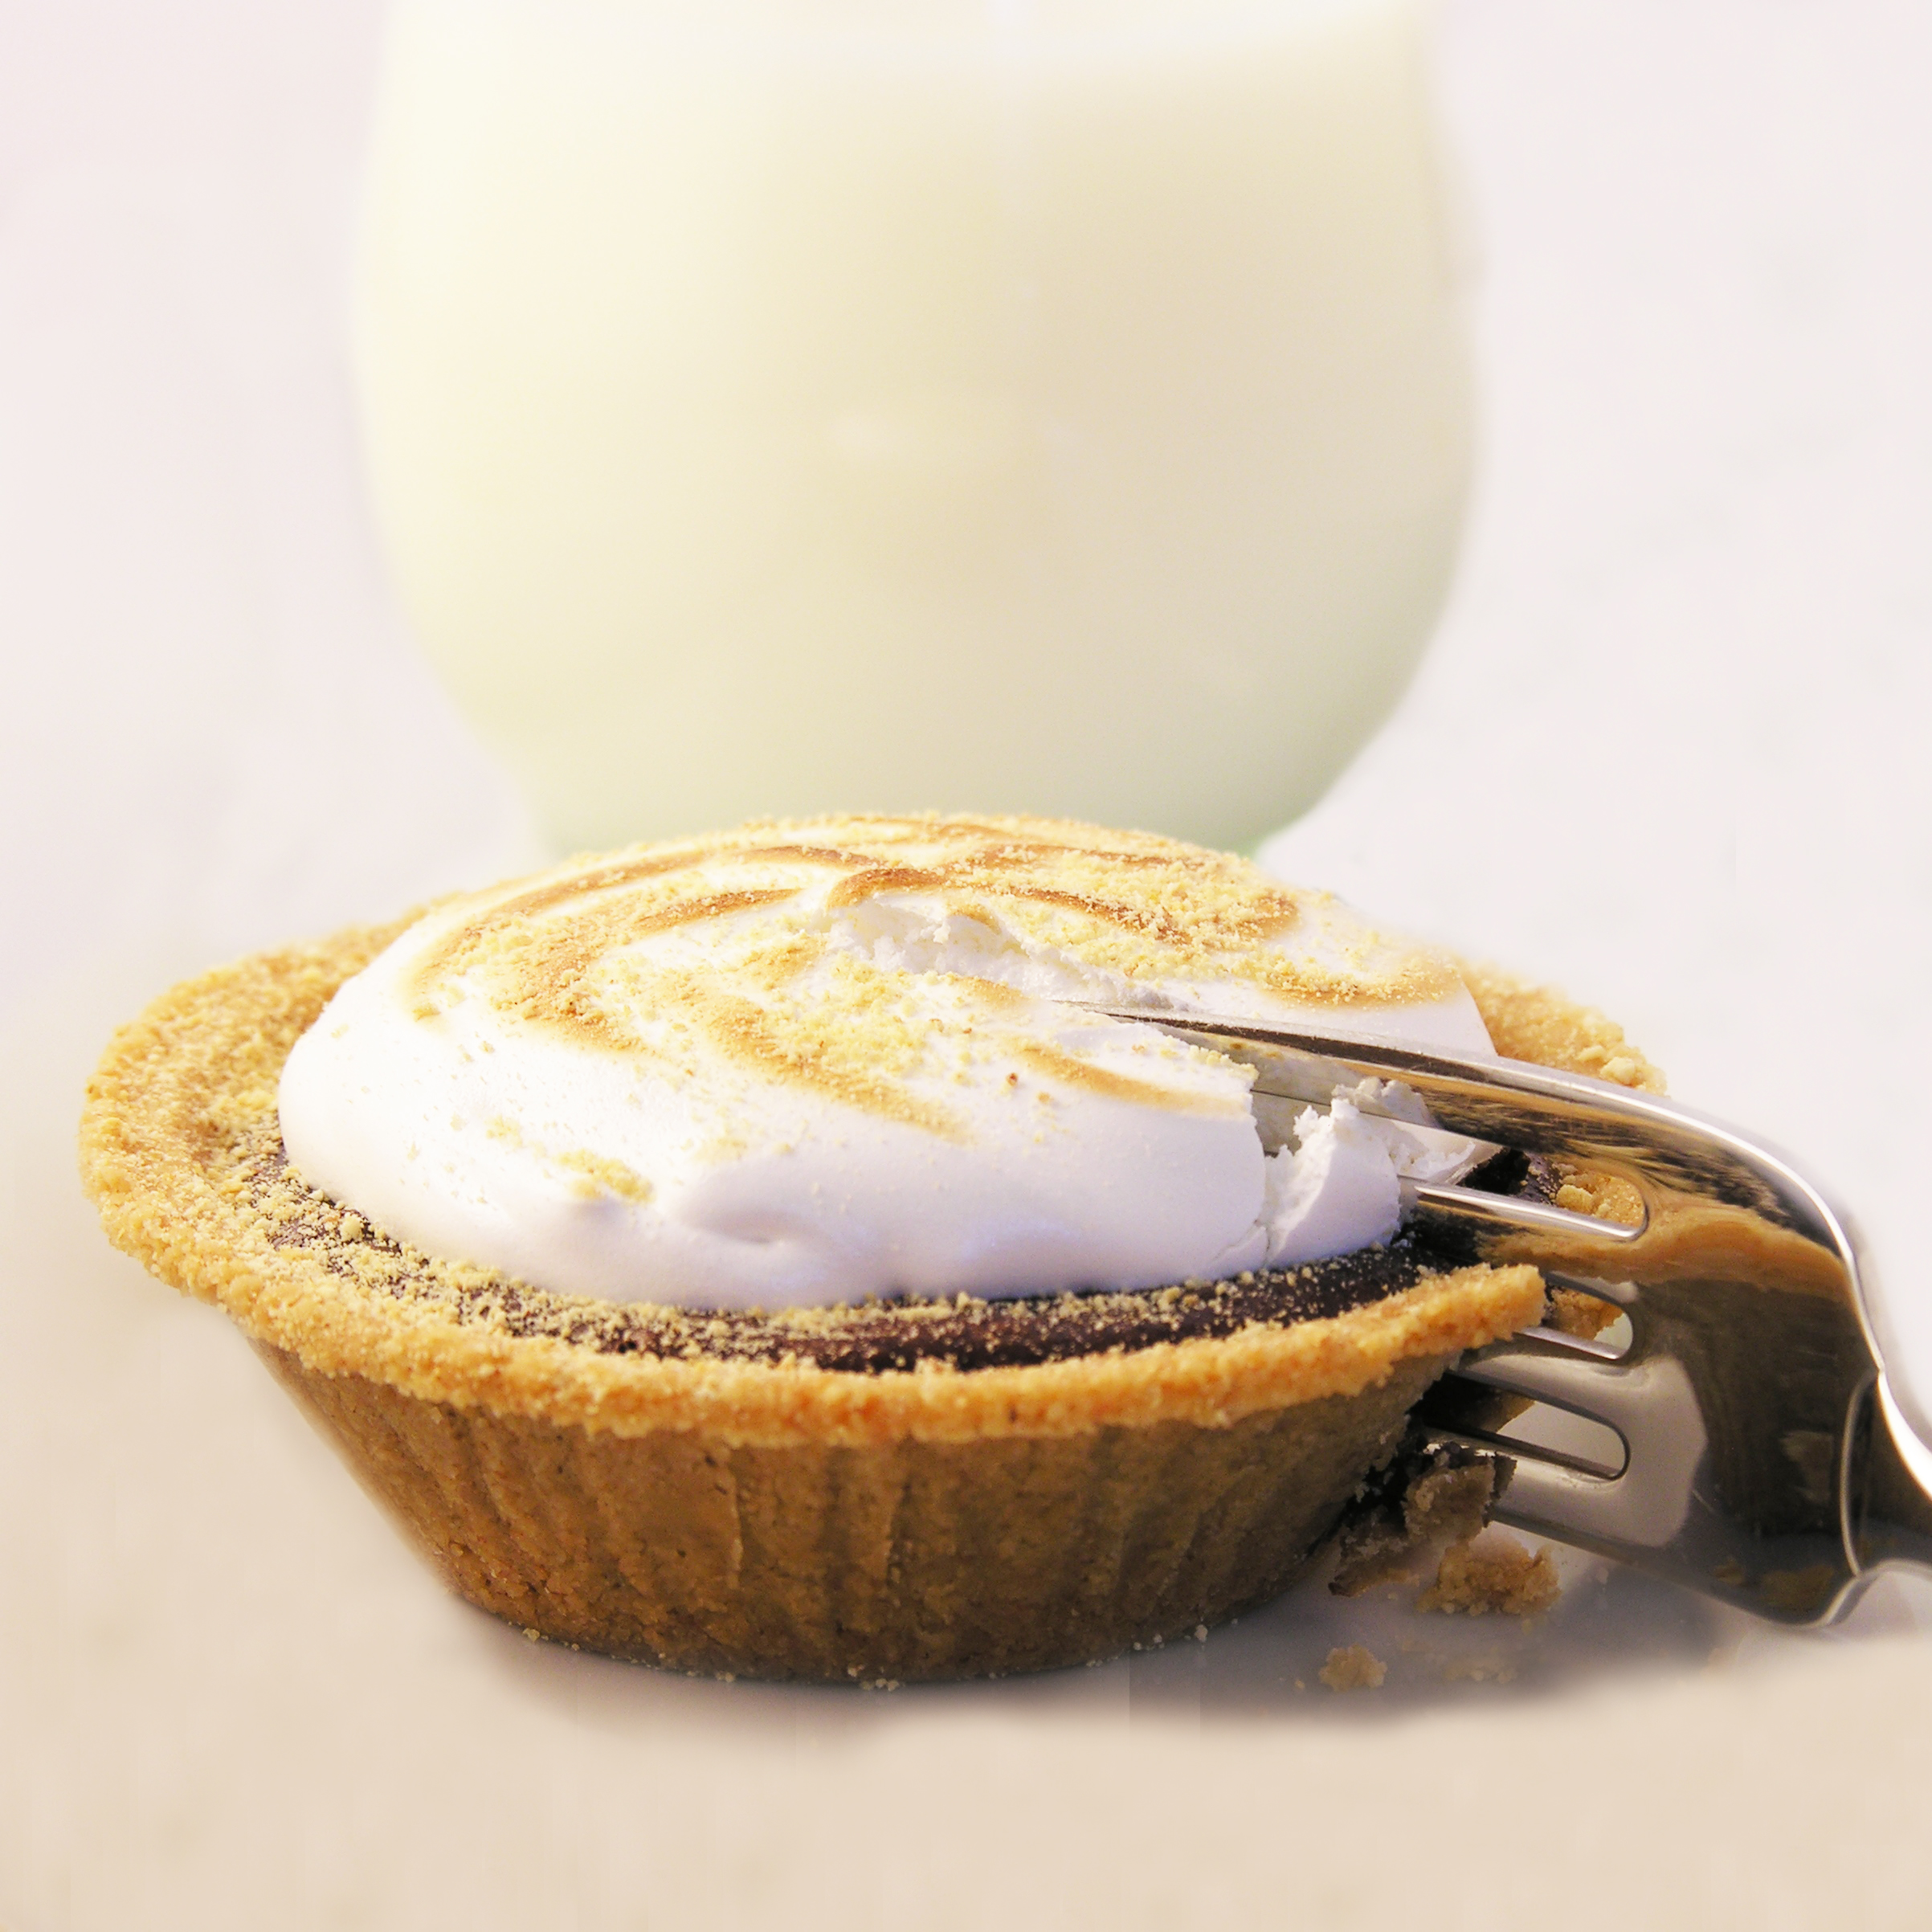
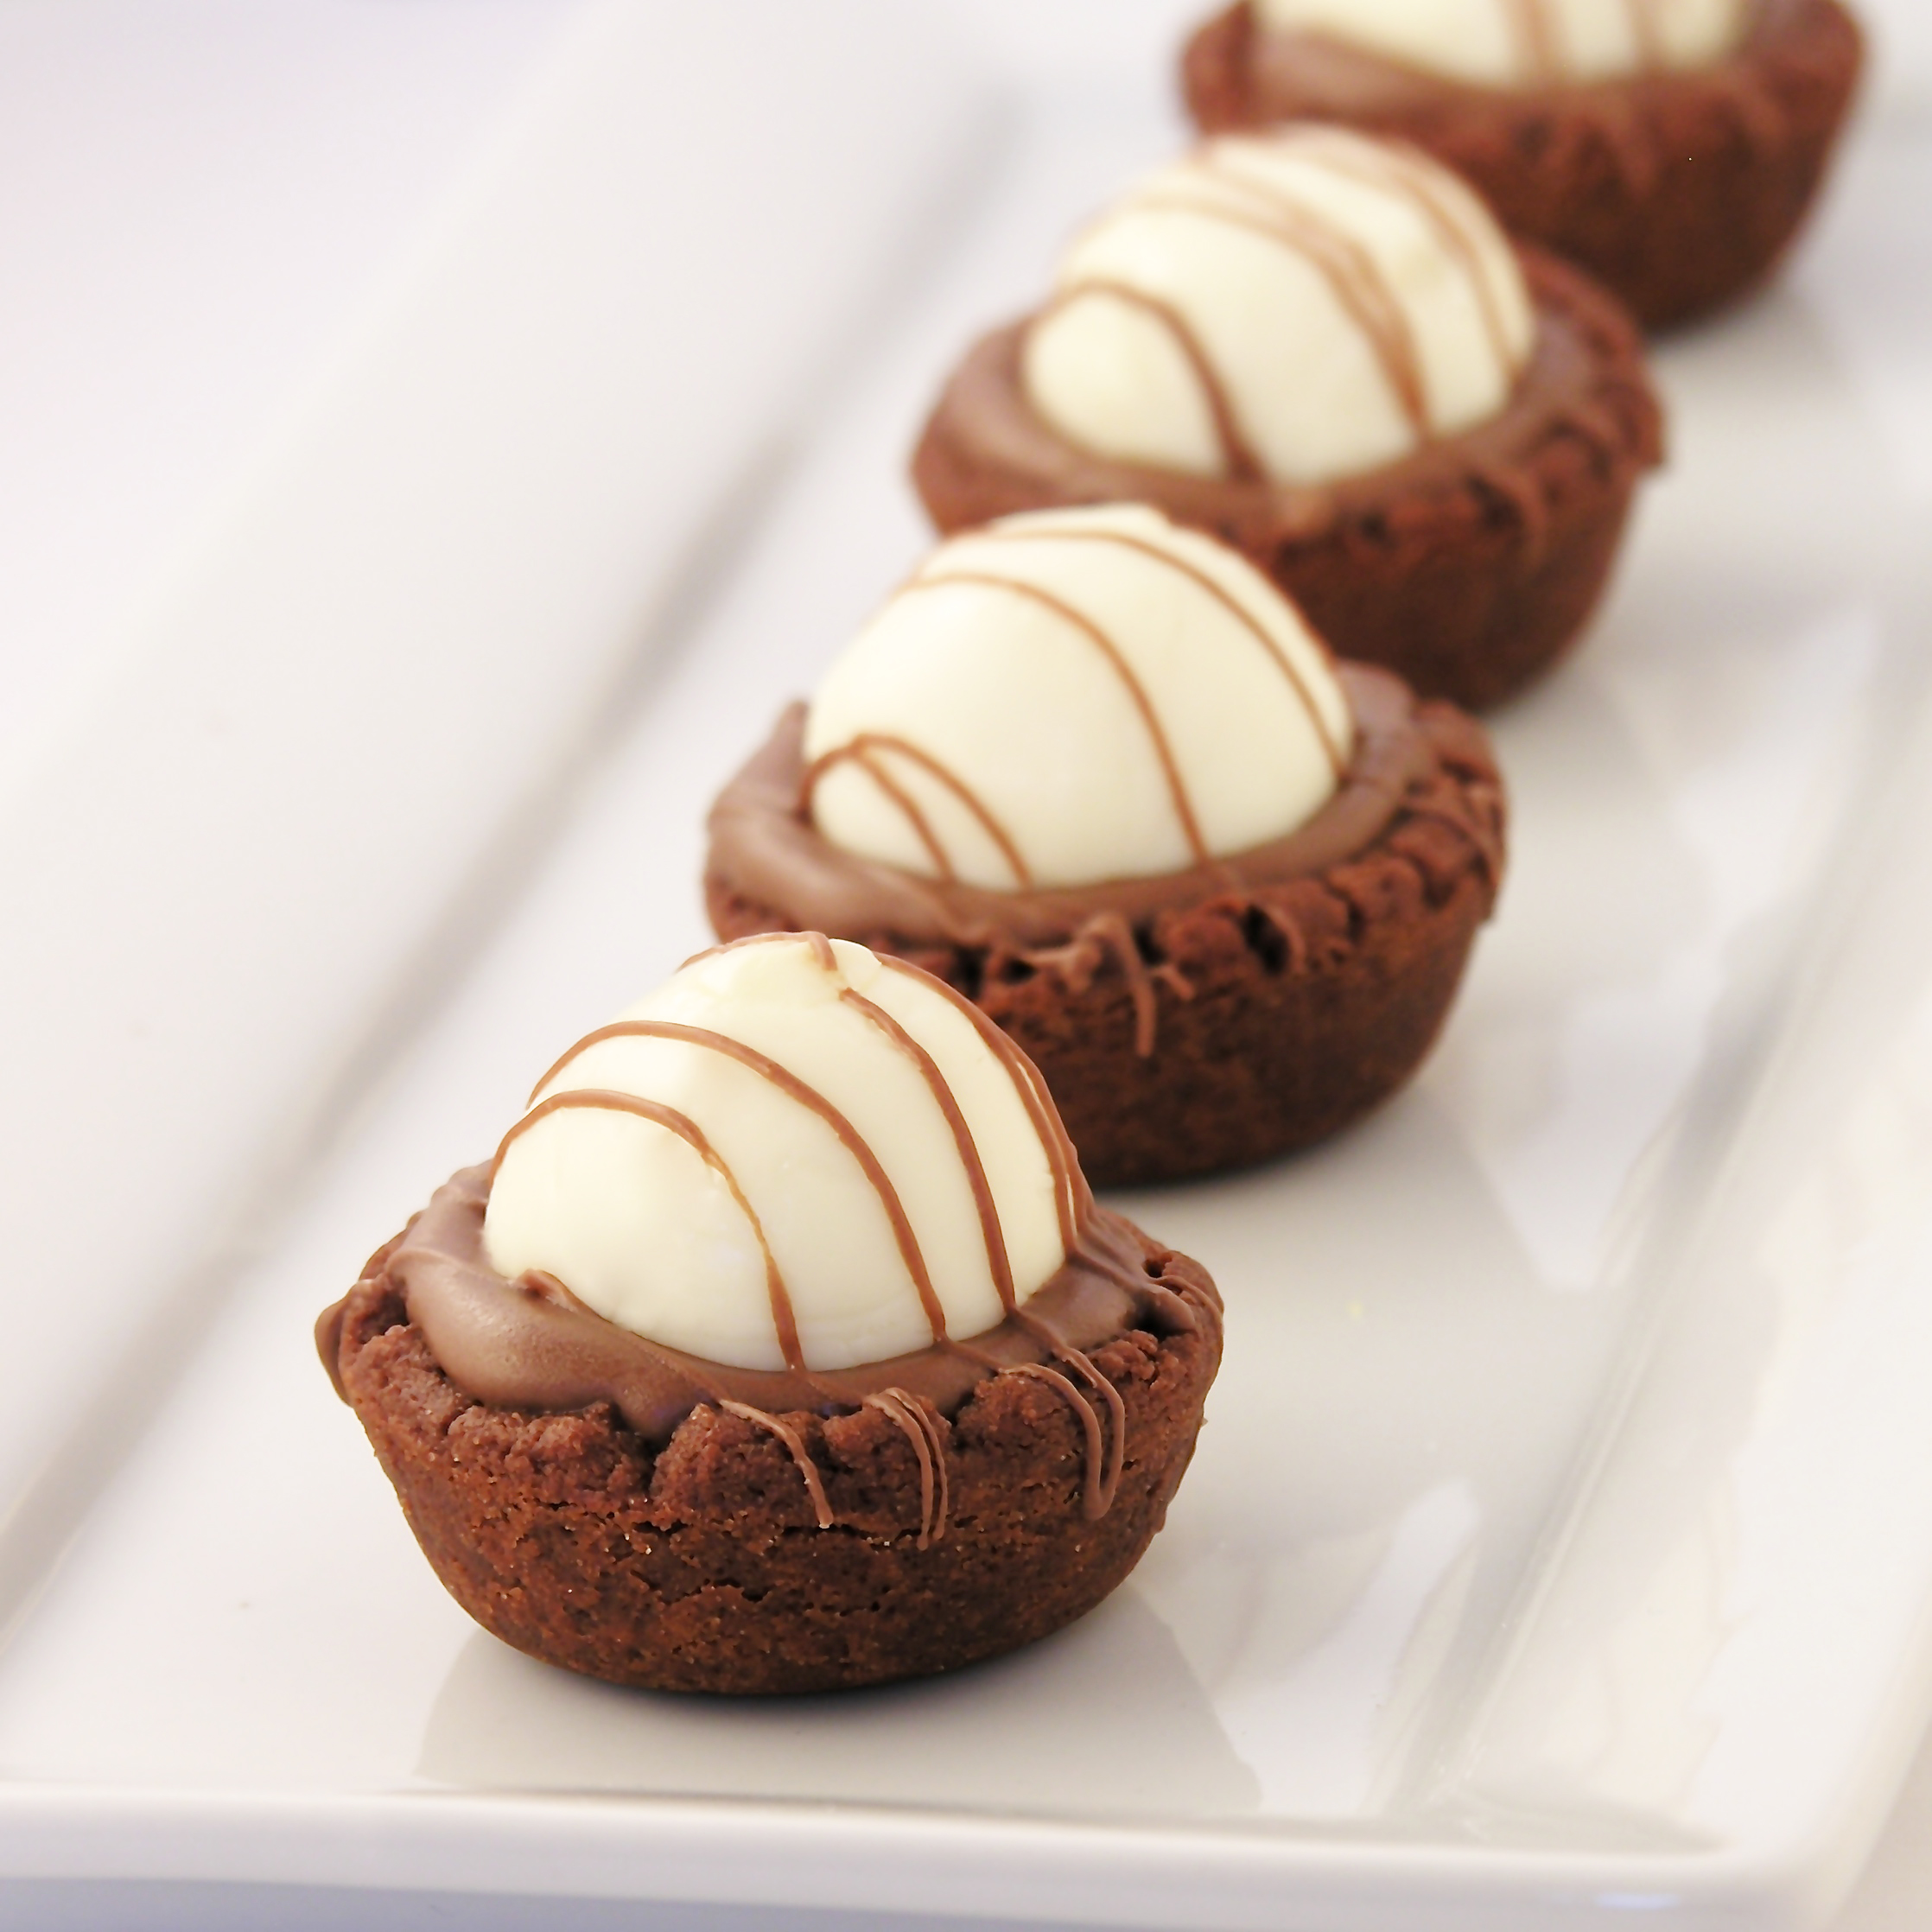
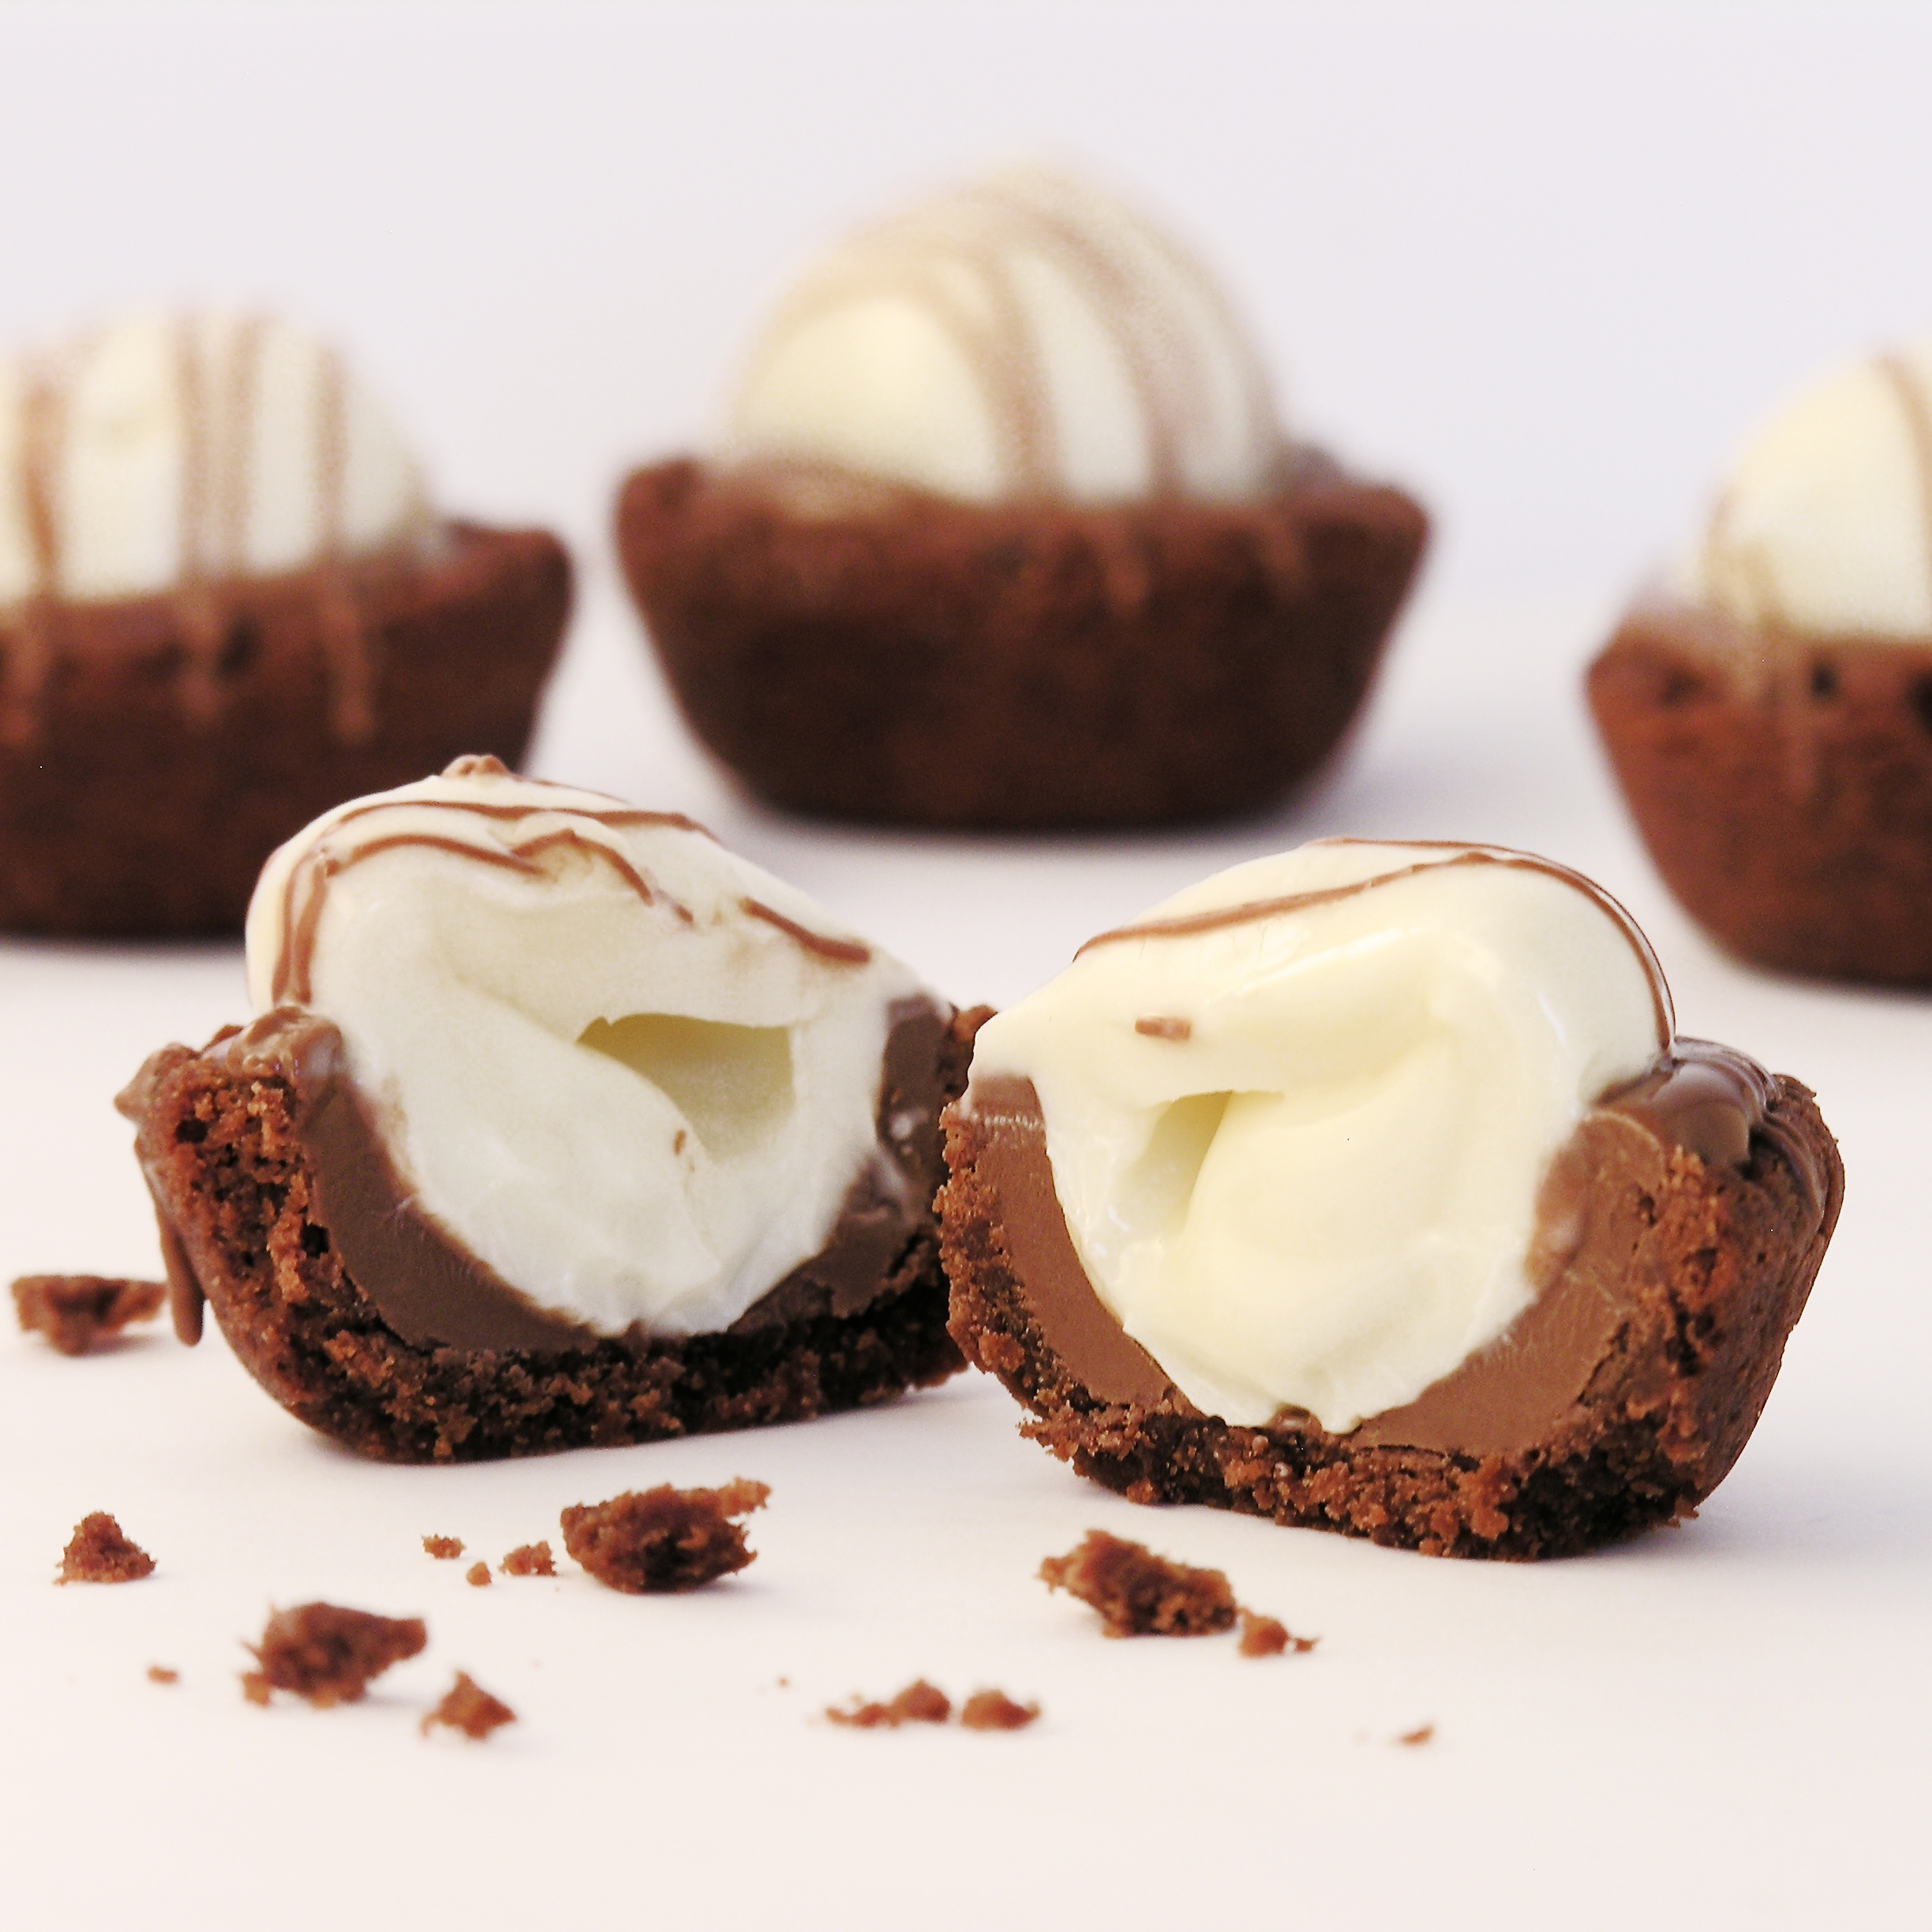
Other fun mini desserts here at Easybaked (click on a photo to see the recipe)

Cheesecake Sundaes Mint Creme Brownie CupsCake balls filled with cream cheese frostingMini chocolate chip cookie cheesecakes

Jeepers Creepers Oreo Pops!

Posted on

Scary Oreo popsThese scared little pretzel monster Oreo pops are not only adorable but a perfect salty and sweet combination!

Because I love desserts and I obviously blog about them all the time, my friends are often pointing out cute ideas they find online. That was the case with these cute little pretzel monsters. A friend found them in Family Fun Magazine and posted a picture on my Facebook wall. As soon as I saw them I knew they belonged on an Oreo pop!  Aren’t they so cute?!?

Monter Oreo PopsThey are also very easy, and a great make-ahead treat for fall parties!

Here’s how to create them for yourself: (printable recipe)

INGREDIENTS: (makes about 26-30 pops)

  • One box of Oreo Double Stuff cookies
  • 30 lollipop sticks
  • 1 bag of Wilton’s Candy Melts in black or purple (or both, if you want both colors!)
  • Small amounts of Wilton’s Candy Melts in other halloween colors (for the “eyes”)
  • Round sprinkles
  • 30 Flipz white chocolate covered pretzels

DIRECTIONS: (Need a visual for making Oreo pops?  Click here.)

  • Make pretzel monsters first by laying all 30 Flipz out on a piece of parchment paper.
  • Melt a small amount (maybe 1/3 cup) of any Candy Melt color for the eyes, and spoon into a small zip top bag.
  • Zip bag closed and clip a corner off.  Pipe color into top two holes of pretzel and gently set a sprinkle “iris” in place.
  • Repeat with other colors and allow eyes to harden completely.
  • For Oreo pops, carefully twist apart all of the Oreo cookies
  • Using one of the lollipop sticks, make an indentation in the white filling of each cookie.
  • Melt the about 1/4 of the black or purple Candy Melts in the microwave in 30 second increments, stirring until completely melted and smooth.
  • Dip the end of one stick into the melted candy, drizzle a little in the center of the cookie filling and then gently press it into the indentation made.
  • Place the top of the cookie back on and allow candy melts to harden (20 minutes or so), cementing the cookie back together with a stick inside. (Freeze for 5-10 minutes to speed this process up)
  • Melt remaining black or purple Candy Melts in the same manner.
  • Holding the stick, lower the entire Oreo into the bowl of melted Candy Melt, spooning it over the top and sides to cover it completely.
  • Allow the excess to drain off and gently place covered Oreo on a piece of parchment paper.
  • Immediately place a pretzel monster on top and allow the Oreo to harden completely.

Alien Oreo Pops!

My thoughts: These are cute and yum yum yummy!  I like the cute little surprised looks on the pretzel monsters, and they taste GREAT! Wrap these up in cello bags with cute ribbons and you have a fun party treat to share!  Enjoy!  ~r

Jeepers Creepers Oreo Pops

A few other October treats here on Easybaked (click on photo to see recipe):

Inside-out Caramel Apple!!Peanut butter caramel Sundae- yum!Sweet Tart and Pixie Stix CakeHalloween Bundt Cake

Oreo Flower Pops!

Posted on


Oreo Flower Pops!These cheery little Oreo Pops are sure to brighten anyone’s day, and they are SO easy to put together!

I know…another Oreo Pop!!!  I can’t stop sharing them with you– they are just so fun!  I have another one in the works for a few weeks from now too!  I’m in love with these fun little treats!

If you’ve been a fan of Easybaked for any time at all, you have seen (and maybe tried!) lots of these little bits of happiness on a stick, but if you are new here, let me share with you a pdf that will help you make the perfect Oreo Pop:  How to make an Oreo Pop.

Flower Oreo Pop

Here (once again!) is the recipe: (printable version)

INGREDIENTS:

  • One box of Double Stuff Oreos
  • Two bags of Wilton’s candy melts in any colors you choose
  • M&Ms (I used the pastel kind- but any will work!)
  • Mini chewy Sweet Tarts (or any other small candy for the center of the flower)
  • 24 lollipop sticks

DIRECTIONS: 

  • Carefully twist apart all of the Oreo cookies
  • Using one of the lollipop sticks, make an indentation in the white filling of each cookie.
  • Melt the Candy Melts in the microwave in 30 second increments, stirring until completely melted and smooth.
  • Dip the end of one stick into the melted Candy Melts, drizzle a little in the center of the white cookie filling and then gently press it into the indentation made.
  • Place the top of the cookie back on and allow Candy Melts to harden (10 minutes or so), cementing the cookie back together with a stick inside.
  • Holding the stick, lower the entire Oreo into the bowl of melted Candy Melts, spooning it over the top and sides to cover it completely.
  • Allow the excess  to drain off and gently place covered Oreo on a piece of parchment paper.
  • Before the Candy Melts harden, place M&Ms and Sweet Tarts on top in a flower pattern.
  • Allow Oreo Pop to harden completely
  • Cover in a treat bag and tie with a ribbon
  • Enjoy!!

Flower Pot Oreo Pops

My thoughts: These are easy to make, beautiful to share, and yummy to eat!  Don’t they look cute in a bouquet?  Fall is almost here, celebrate the last bits of summer with these cheery little treats!  Enjoy! ~r

More fun recipes from easybaked:

Chocolate cut-out cookiesCookie Dough Whoopie Pies!Cinnamon Roll Cheesecake!!German Chocolate Pie

Mini S’mores Pies

Posted on

S'mores Pie!!!Rich dark chocolate pie in a graham crust, topped with marshmallow meringue.  S’mores with a new, fun look!

Everyone loves these flavors together.

Don’t they?

It just occurred to me that someone might hate s’mores.

Ok, well I don’t personally know anyone who doesn’t just adore this flavor combination.  I LOVE them, and crave them, and sometimes cheat by making them in the microwave when it’s snowing and a campfire is out of the question!

These little pies capture the flavor of a s’more, but add a rich chocolate flavor that is incredibly delicious, and can’t be had with just 2 squares of Hershey’s chocolate.  Or four squares… sometimes I use four.  Don’t tell.

S'mores Pie!!!

Here’s how these simple little treats are made: (printable version)

INGREDIENTS: (makes 12 mini pies)

  • 12 pre-made mini graham cracker crusts.
  • 1 cup of Ghirardelli Bittersweet chocolate chips (melted)
  • 1 cup of Ghirardelli Semi-sweet chocolate chips (melted)
  • 8 eggs (divided)
  • 5 Tablespoons of heavy whipping cream
  • 2 Tablespoons of vanilla
  • 2 cups of granulated sugar
  • 1/4 teaspoon of cream of tartar

DIRECTIONS:

  • Preheat oven to 350F degrees.
  • Divide eggs, keeping ALL of the 8 egg whites and only 5 of the yolks.
  • Place the melted chocolate, 5 egg YOLKS, whipping cream and vanilla in a large mixing bowl and stir until well combined.
  • Evenly divide among all twelve mini pie crusts.
  • Bake (I put them all on a baking sheet) for 14-16 minutes, until the middle of each pie is set.
  • Make meringue while these bake, by adding all of the 8 egg WHITES, sugar and cream of tartar together in a medium heat-proof bowl that will sit on the top of a sauce pan of boiling water without touching the water.  (I had to experiment a bit to find a good fit.)
  • Bring water to a boil in the saucepan and set the bowl on top.
  • Whisk ingredients together for about 3-4 minutes.  Sugar will be dissolved and egg whites should be heated to 145F degrees.
  • Remove bowl from top of sauce pan and beat on low until the mixture thickens a little, then beat on high for about 10 minutes.  The meringue will become the most beautiful, white, glossy mixture.  It should form stiff peaks before you stop beating it.
  • Spoon all that wonderful marshmallow yumminess into a bag fitted with a decorating tip.
  • Once mini pies are removed from the oven, let them cool completely.
  • Pipe marshmallow meringue on the top of each pie and toast it with a kitchen torch.
  • Add a few graham cracker crumbs if you want, and enjoy!!!!


S'mores Pies!!!!My thoughts:  These are delicious. You can see from my pictures that I didn’t beat my meringue as long as I should have.  The are not the tall swirls of happiness I wanted them to be….  it was only my second time making meringue though, so I guess I won’t beat myself up too much.  My 1st time was perfect.  If you want to see how fluffy it SHOULD be, click here.  I LOVE this meringue.  When you read the instructions you might think it is too hard to make- but once you do it, you will realize that it isn’t hard at all.  Just a lot of time with a mixer in your hands.  I hope you get a chance to try this recipe out!  Enjoy! ~r
S'mores Pie!!!

We like our chocolate and marshmallow here at easybaked… here are other recipes that feature that yummy combo:

frozen s'more cupsMelted Smores cupRocky Road Cupcakes!!!!Baked Alaska Cupcakes!!


Triple Chocolate Truffle Cups

Posted on


Triple Chocolate Truffle Cups

Delicious dark chocolate cookie cups filled with melted milk chocolate and a white chocolate truffle.  Yum.

I love little mini desserts.  I used to work for a hospital and they would have a big, fancy Christmas party every year.  My favorite part was all the adorable little desserts at the end.  You can try like 8 of them for the calorie price of one big dessert!

This is an adorable (easy to make!) mini dessert.  Perfect for showers, receptions, tea parties and any occasion that calls for a little bit of “fancy” dessert.

The cookie cups use my favorite chocolate cut-out cookie recipe (pressed into a cup!), melted chocolate and a Lindt White Chocolate Truffle. Quick, easy, and delicious!

Triple Chocolate Truffle Cookie Cups!

Here’s the recipe: (printable version)

INGREDIENTS: (makes about 48 mini desserts)

  • 1 stick (1/2 cup) butter, softened
  • 3/4 cup of granulated sugar
  • 1 egg
  • 1/2 teaspoon vanilla extract
  • 1/3 cup of unsweetened cocoa powder
  • 1 1/2 cups flour
  • 1/4 teaspoon salt
  • 1/4 teaspoon baking powder
  • 1 bag of Wilton’s milk chocolate Candy Melts (if you want to melt higher end chocolate for this, feel free!)
  • Approximately 48 Lindt White Chocolate Truffles (Walmart has them in large boxes of 60, for a reasonable price)

DIRECTIONS:

  • Preheat oven to 350F degrees.
  • Make cookies by combining butter, sugar, egg, vanilla and cocoa powder and beating until completely combined.
  • Add other dry ingredients gradually, mixing with beaters until too heavy to beat. Use clean hands to knead dough into a soft ball.
  • Use a small cookie scoop (I used a scoop that holds 1/2 Tablespoon of batter) to portion out your dough into mini muffin tins that have been sprayed with non-stick spray.
  • Use a tart shaper or a wooden spoon to press the dough into a cup shape (really, the tart shaper works best for this and you will use it again- I use mine all the time!)

Making cookie cups

  • Bake at 350F degrees for 7 to 8 minutes and remove from oven.
  • Press centers in a second time with the tart shaper and allow them to cool for just a couple of minutes.
  • Use a small paring knife to pop each cup out and allow them to cool completely on the counter.
  • Melt candy melts in a microwave safe bowl, in the microwave, in 30 second increments, stirring in between until melted and smooth.  
  • Pour melted chocolate into a sturdy zip-top bag.  Zip it closed and clip a corner off.
  • Unwrap all of your Lindt truffles.
  • Carefully pipe warm chocolate into each cookie cup, filling each one about half way.
  • Gently press a truffle into the center of each chocolate-filled cup, allowing the warm chocolate to squeeze up around the edges (yum!)
  • Drizzle any left-over chocolate over the tops of the mini-desserts and allow them to cool and harden completely.
  • Enjoy!!!

Triple Chocolate Truffle Cookie Cups!!!My thoughts: Well, you can see for yourself what happens when you bite into this little dessert. Pure deliciousness!!!! Those truffles are so good.  Mine got a little melted before I cut one in half– but all that soft white chocolate….!!! They make this dessert a touch pricey- but they are SO worth the cost!  If you want to make a smaller batch just cut the cookie recipe in half.  I hope you get a chance to try these- I am filing this recipe away for the next time I need something little for favors or a mini dessert table.  These are perfect for both!  Enjoy!!!!  ~r

Triple Chocolate Truffle Cups

Other mini desserts you might enjoy:

Melted Smores cupDark Chocolate Ganache CupcakesKoolaid truffles!!Mini Pineapple Upside Down Cakes

American Flag Oreo Pops

Posted on

American Flag Oreo Pops!!!!Put a little red white and blue on your Oreos and celebrate the Fourth of July!

These are an easy treat that will make you (and everyone else) smile.  Plus there’s an Oreo inside- perfect!

I’ve said it before, and I will say it again– I’m addicted to Oreo Pops.  Most of you know that I’m living in Arizona for eight months with the Navajo.  I love it here, and the Navajo people are incredibly gracious about sharing life with me and teaching me all about their culture and traditions.  I had a hard time a couple of weeks ago though.  A puppy that I recently took in became very ill and the vet diagnosed her with parvovirus, a deadly disease that can be prevented with puppy vaccinations.  Most people here cannot afford to vaccinate (or spay and neuter) their dogs, so this puppy and all of her litter mates had to be put down.

Oreo...

Oreo…

So. Incredibly. Sad.  My little puppy was named Oreo, for her adorable black and white Oreo markings.

One of my friends here suggested we sell things at a local flea market this week, and I decided to make 100 Oreo Pops in a variety of forms to make money to help spay and neuter Oreo’s parents, and to vaccinate other puppies in the area.

I made ALL SORTS of Oreo pops, and these were one of my “new” designs.  I love how patriotic they are!

American Flag Oreo Pops!!!!!So, in honor of this wonderful, beautiful country that we all call home….Oreo Pops- in Red, White and Blue!!!

Here’s the recipe: (printable version)

INGREDIENTS:

  • One box of Double Stuff Oreos
  • One bag of Wilton’s candy melts in Red
  • One bag of Wilton’s candy melts in Blue
  • One jar of flower sprinkles (the white ones look like stars…?) 
  • 24 lollipop sticks

DIRECTIONS: (Need a visual?  Click here.)

  • Carefully twist apart all of the Oreo cookies
  • Using one of the lollipop sticks, make an indentation in the white filling of each cookie.
  • Melt the Red Candy Melts in the microwave in 30 second increments, stirring until completely melted and smooth.
  • Dip the end of one stick into the melted red chocolate, drizzle a little in the center of the white cookie filling and then gently press it into the indentation made.
  • Place the top of the cookie back on and allow red chocolate to harden (10 minutes or so), cementing the cookie back together with a stick inside.
  • Holding the stick, lower the entire Oreo into the bowl of melted red chocolate, spooning it over the top and sides to cover it completely.
  • Allow the excess red chocolate to drain off and gently place covered Oreo on a piece of parchment paper to harden and cool completely
  • Melt Blue candy melts in the same manner that you melted the red.
  • Allow the candy melts to cool just a bit before dipping (so that it doesn’t melt the red candy underneath).
  • Spoon a bit of blue chocolate over just the top end of the Oreo.  Tap to drain away excess blue chocolate and wipe back across a clean paper towel to remove any drips or splatter of blue.
  • Place on a clean piece of parchment paper to cool, and immediately place a few white “stars” on the blue.
  • Allow pop to harden completely.
  • Remove from paper and serve- or place in a small treat bag, tied with pretty ribbon.
  • Enjoy!

American Flag Oreo Pops!!!!
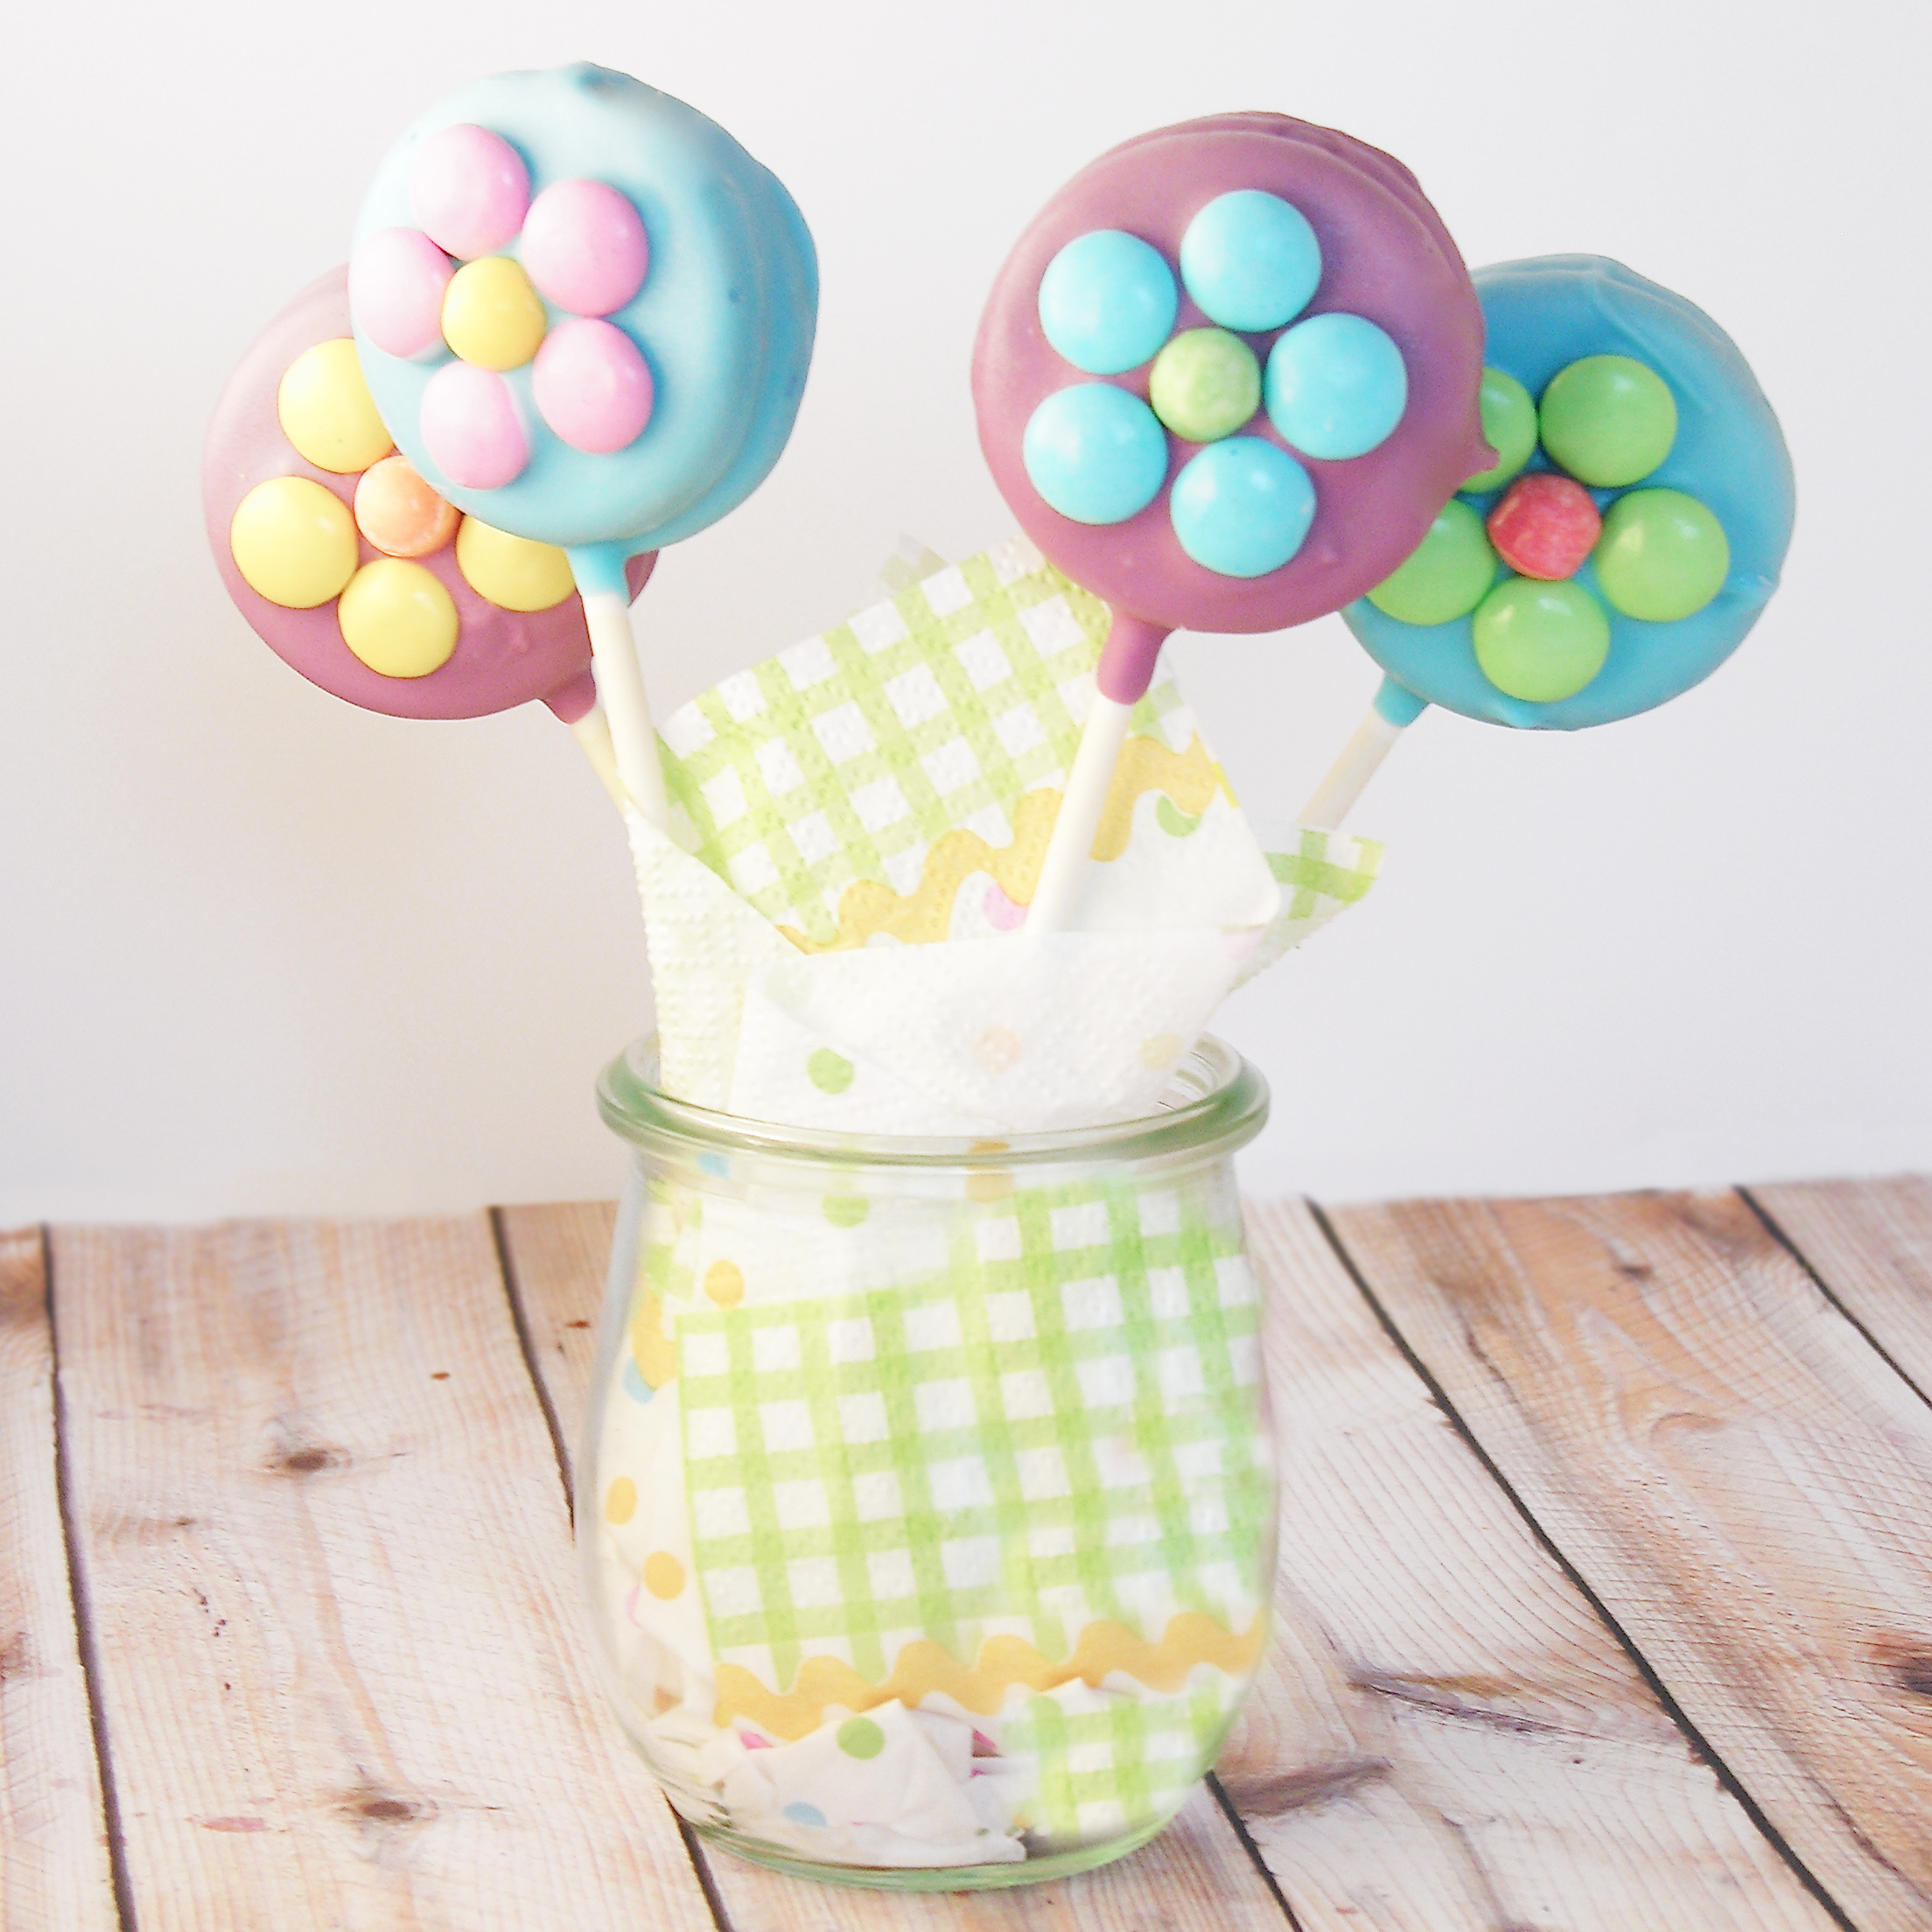
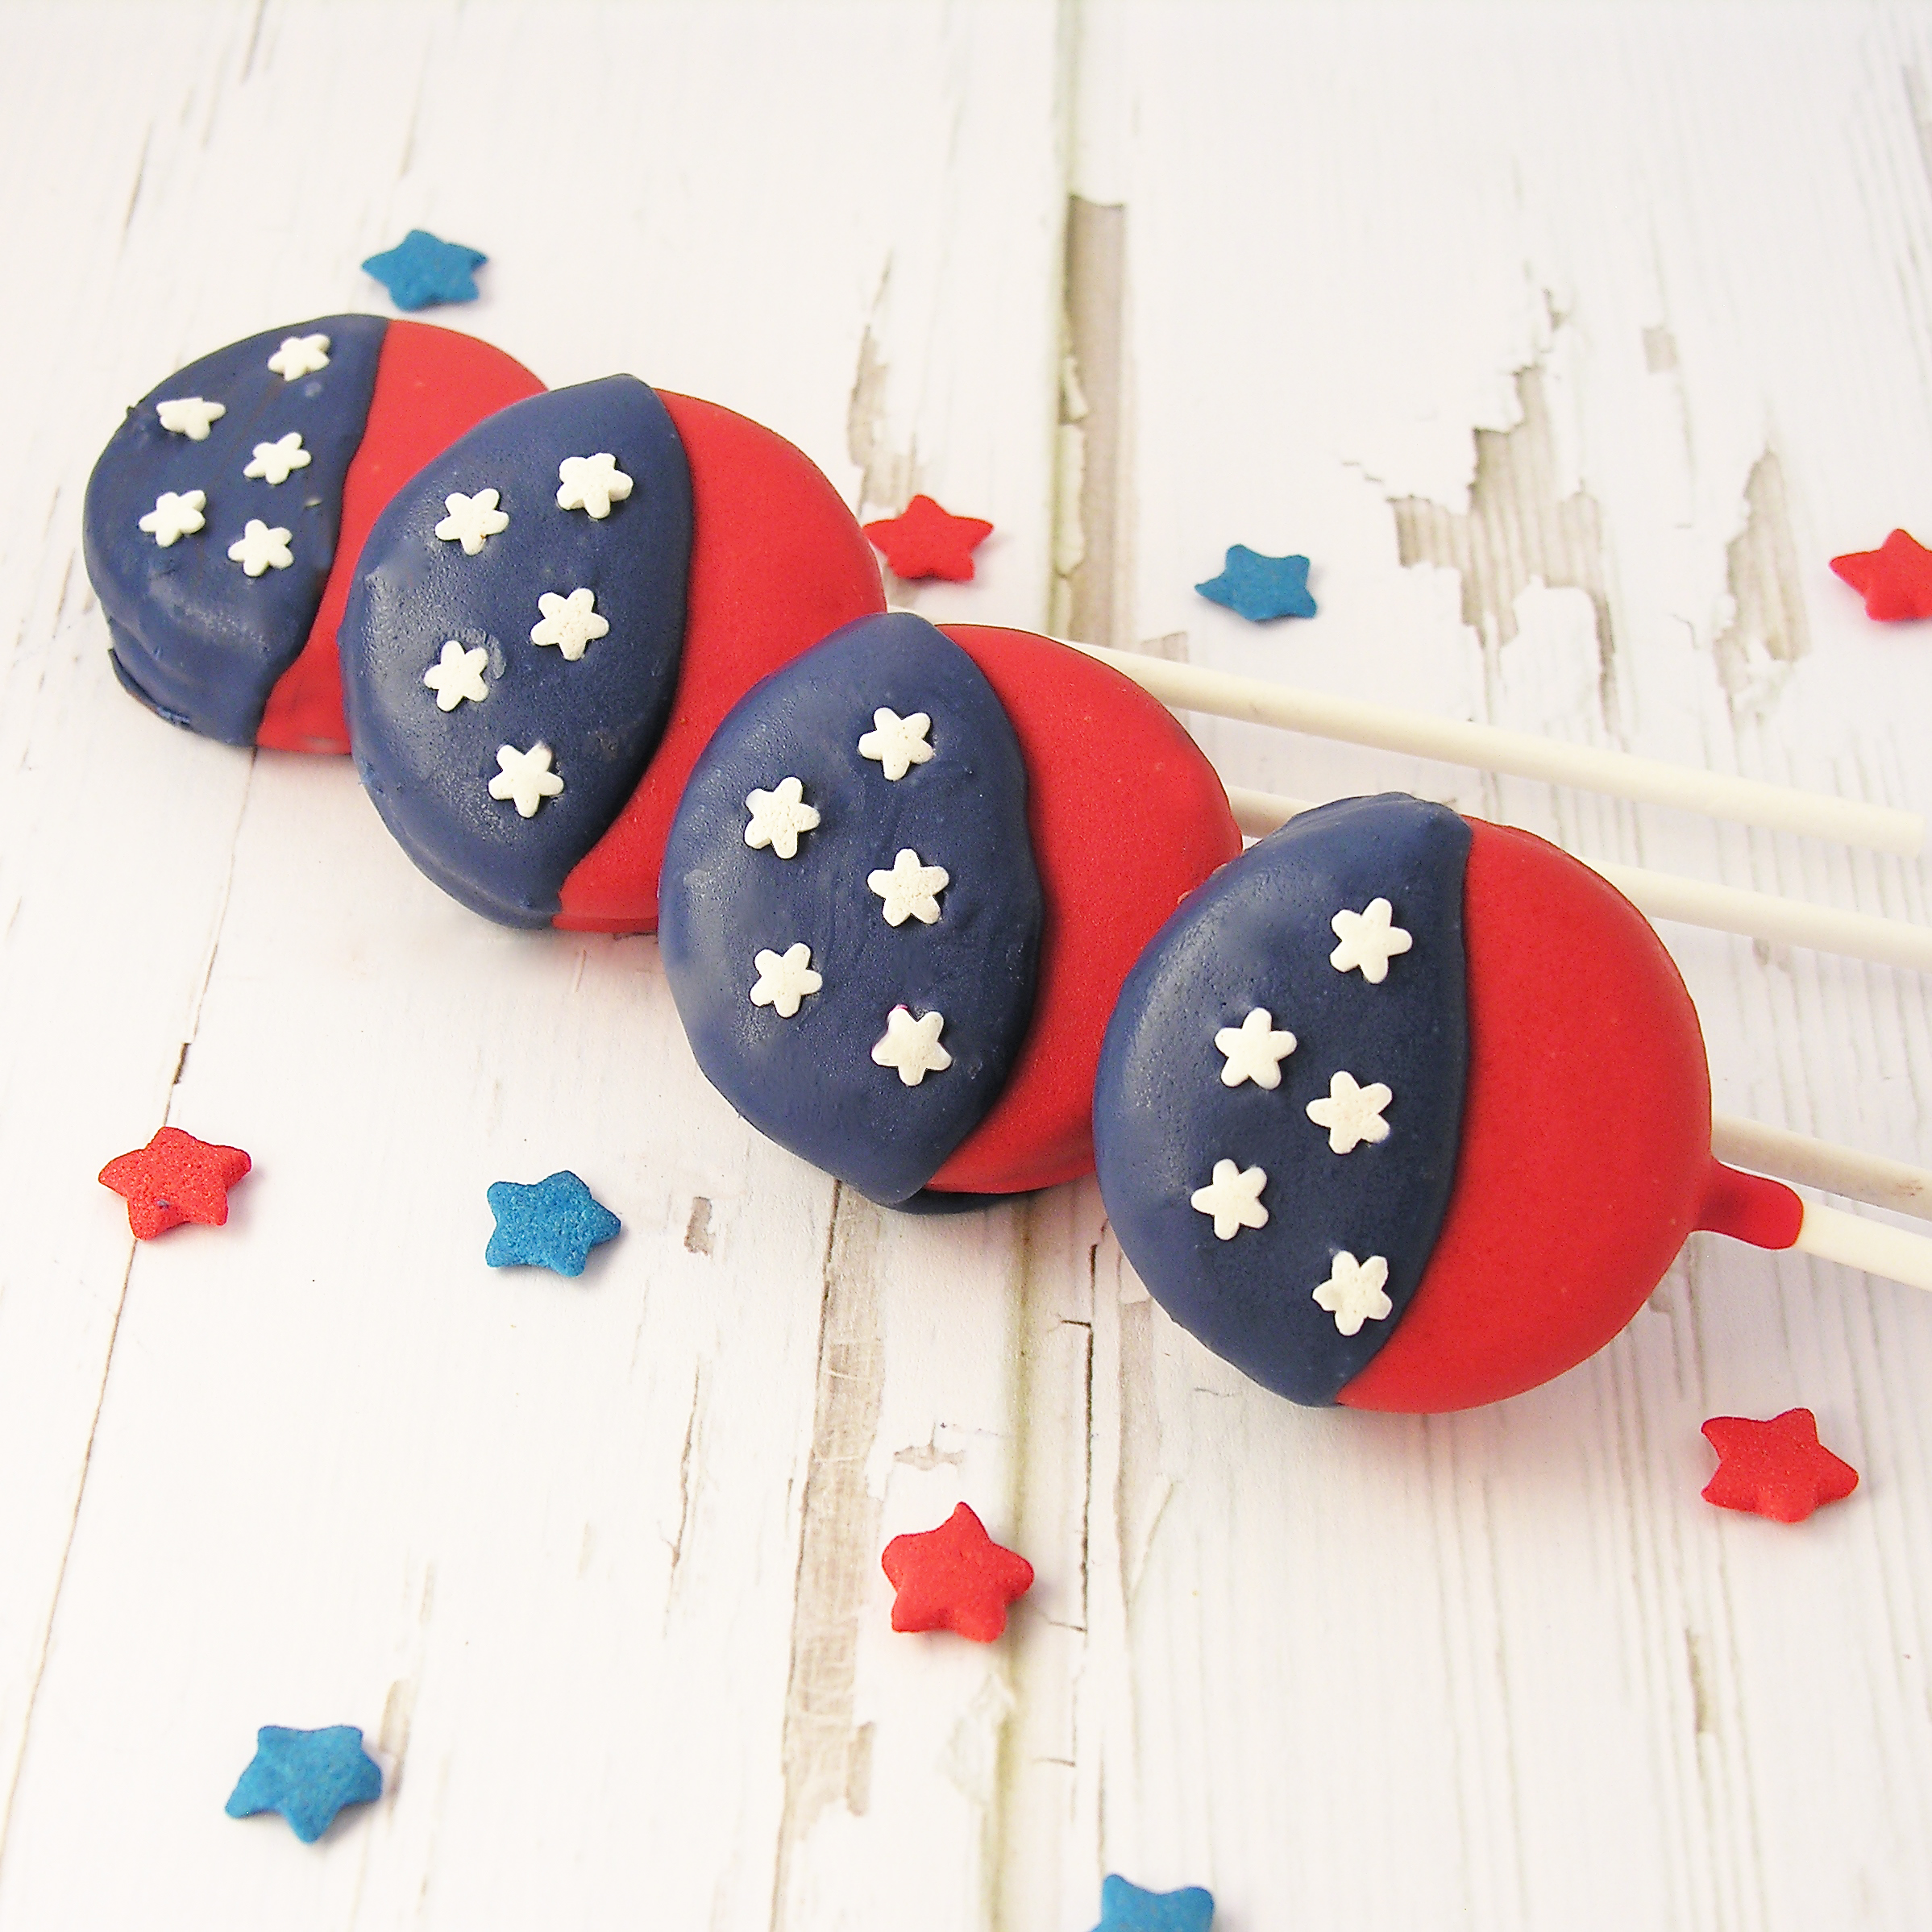
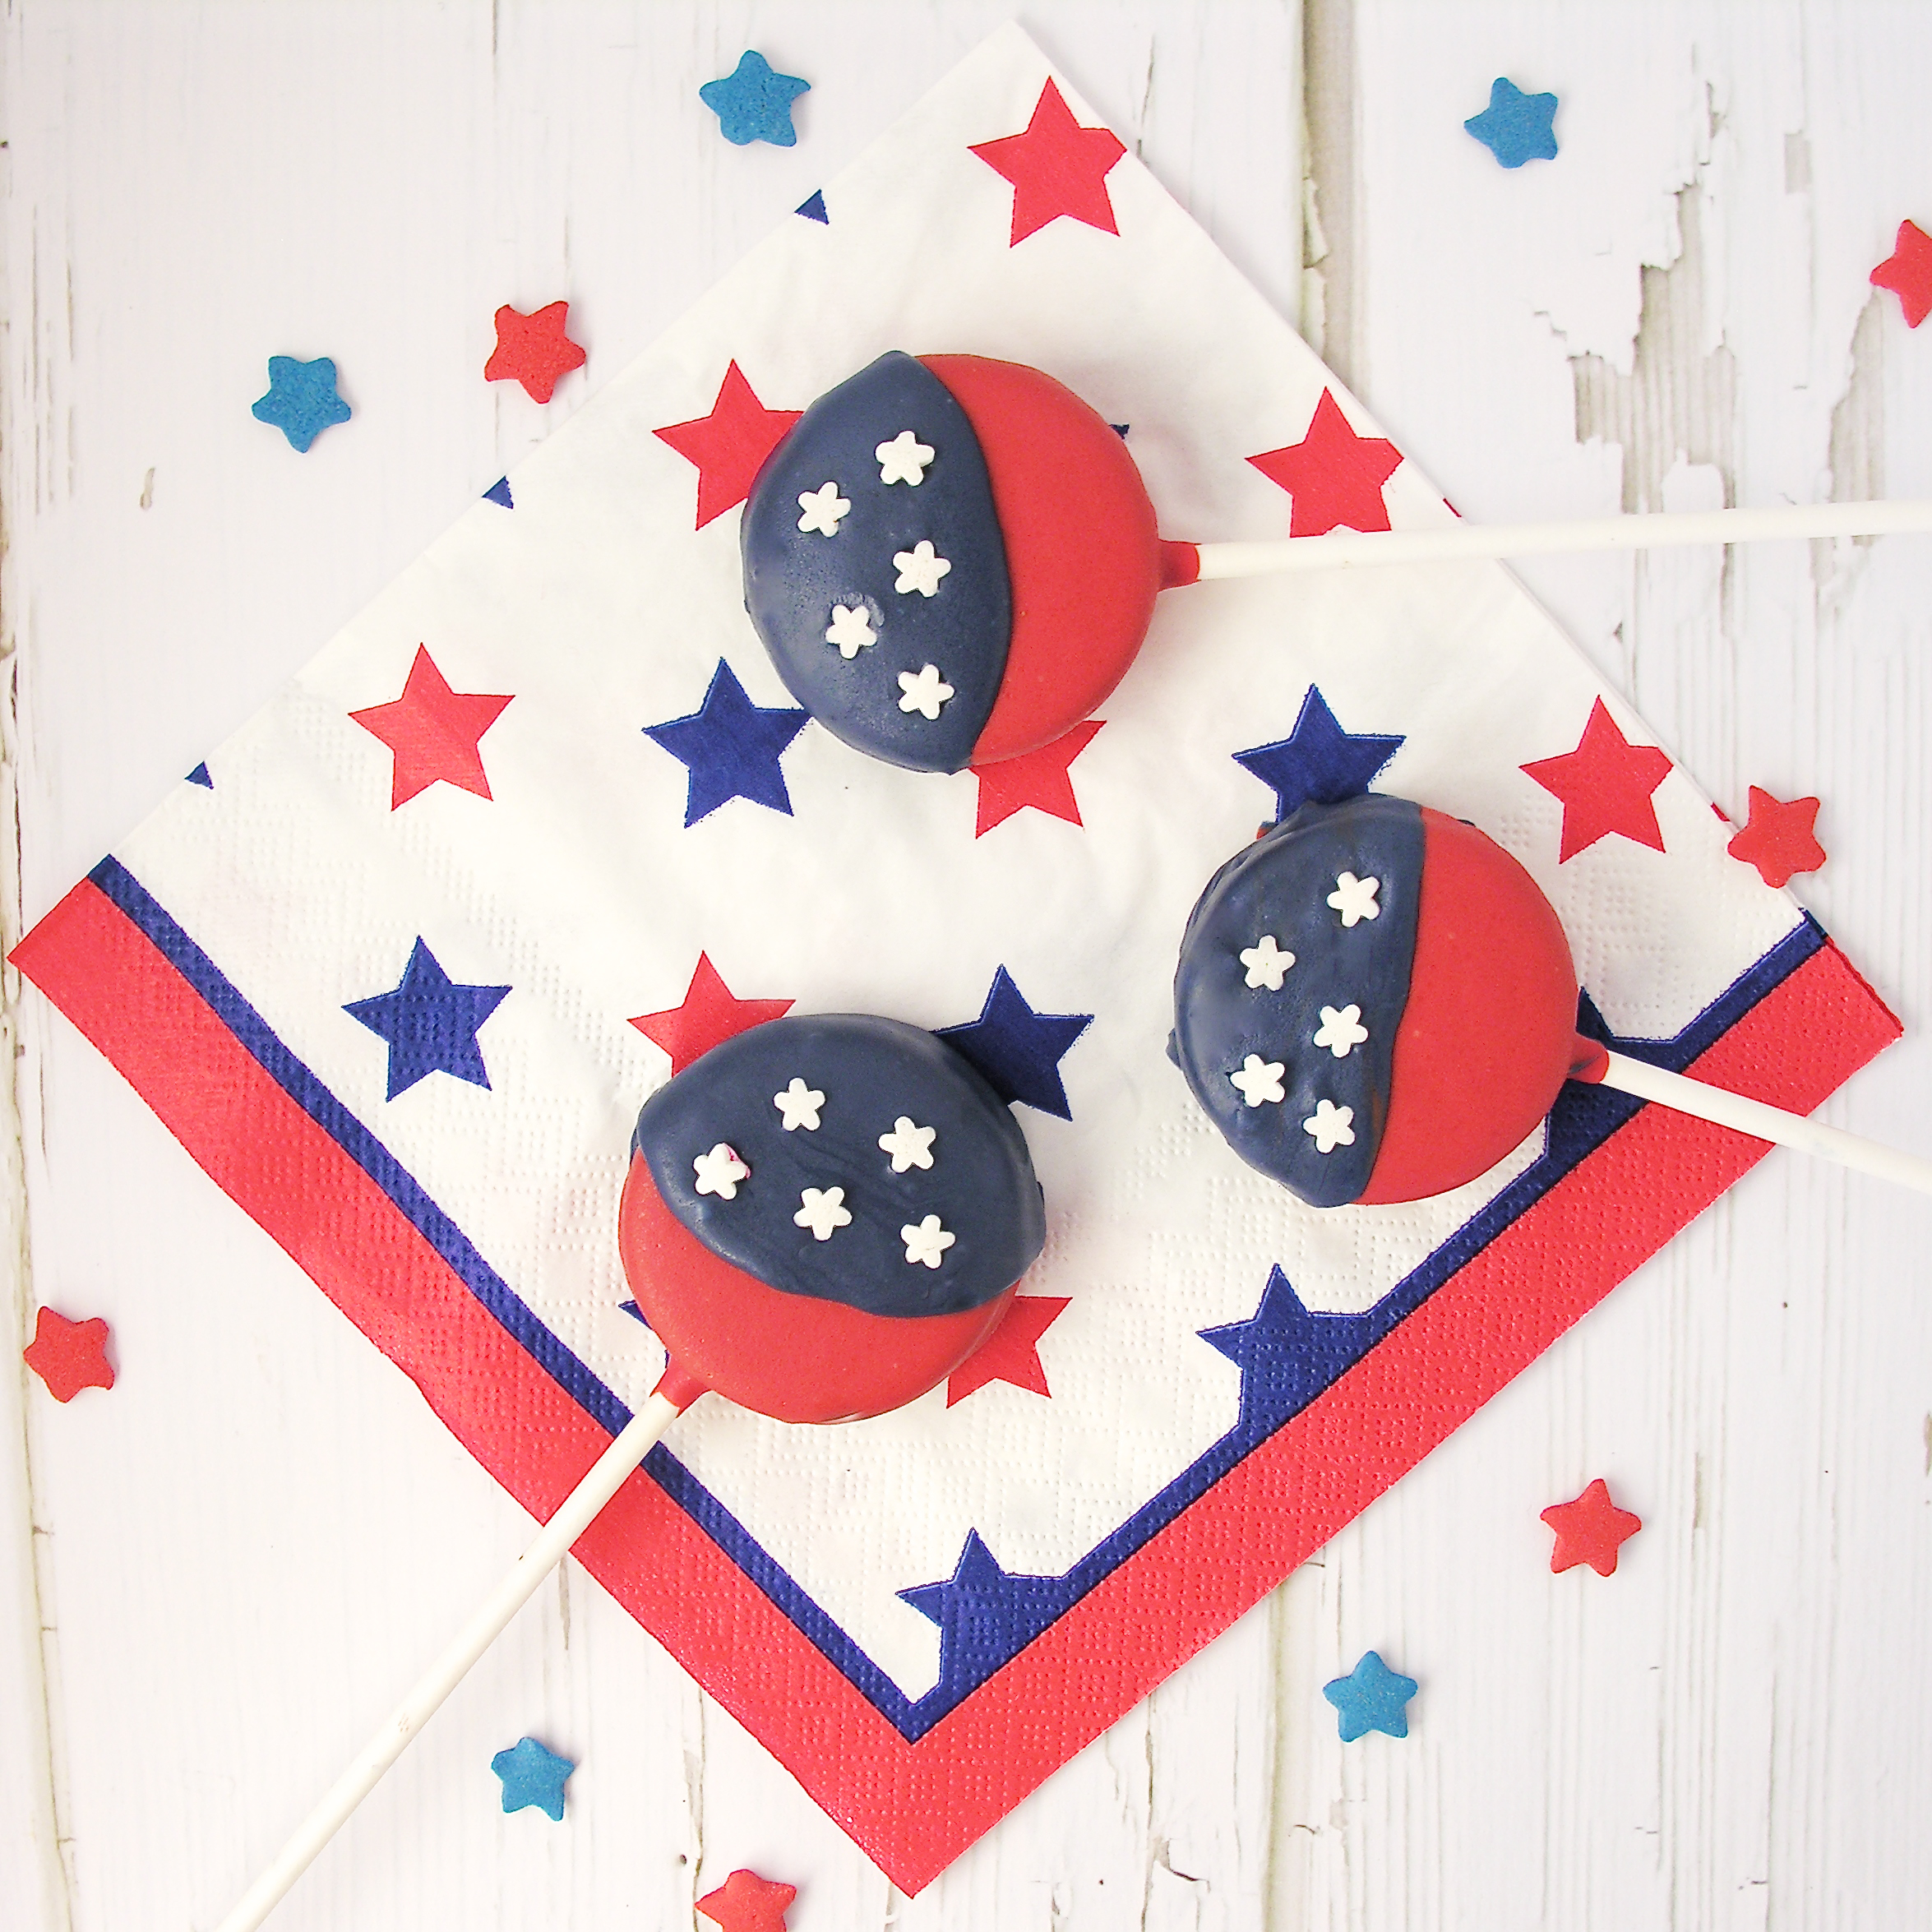
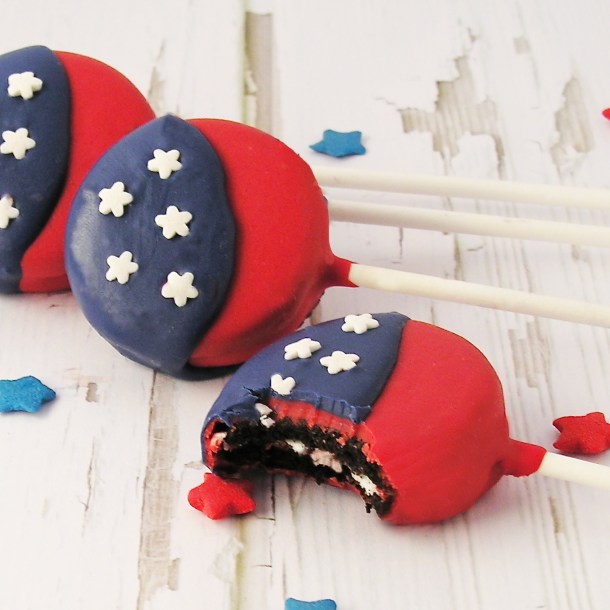
My thoughts:  These are easy and fun to put together, and just so CUTE!  Happy Fourth of July!!!!!  ~r

Other fun (and very patriotic!) desserts to try here at Easybaked:

Patriotic Flip Flop Cookies!!!!Patriotic Bundt Cake!!!!Patriotic Polka Dot Cake!!!!Chocolate covered brownie stars


Gone Fishing Oreo Pops!

Posted on

Goldfish Oreo Pops!

These adorable Goldfish Oreo Pops are as tasty as they are cute!  A little salty, a little sweet.  Perfect, and just in time for Father’s Day!

We had fun announcing our new recipe cards to you this morning!!! Here’s another big Friday surprise!

A few weeks ago I told you all that I had big news to share~ well, today I’d like to announce the publication of my first cookbook!  Many of you have asked about if and when I would publish a cookbook, and last fall I was asked by Warner Press Publishing to write a cookbook devotional for kids.  This isn’t a traditional cookbook (sorry to those of you hoping for that!) but I am SO excited about this project!  I will include more about it at the end of this post.

This is one of the recipes featured in the cookbook.  It’s a fun hands-on project for kids to do with parents, grandparents or Sunday school teachers.  In the book, it includes a devotional about being “fishers of men” to do after the treats are made.

You know how I am about Oreo Pops. Addicted.

Goldfish Oreo pops!

These are really fun and the salty crackers are AMAZING with the sweet cookies!

Here’s the recipe: (printable version)

INGREDIENTS:

  • One package of Double Stuff Oreos
  • 2 (12 oz.) bags of Wiltons Candy Melts in light blue
  • 1 (12 oz.) bag of Wiltons Candy Melts in white (optional)
  • 24 Lollipop sticks
  • 24 goldfish crackers
  • ¼ c. brown sugar
  • Small pearl decorating sprinkles
  • Small treat bags and ribbon, if you want to package them up to give away.

DIRECTIONS: (Need a little visual help?  Click here.)

  • Carefully twist apart all Oreo cookies.  Do this slowly and gently- and expect that some will break. 
  • Melt about ½ cup white candy melts using a microwave-safe bowl in the microwave in 30 second increments, stirring between until completely melted and smooth.

Note: I use white to match the white Oreo filling, if you aren’t particular about the inside of your Oreo being blue, you can just melt a little of the blue to use inside.

  • Use a lollipop stick to make an indentation in the white filling of an Oreo.
  • Dip the end of the stick into the candy melts, spread a little on top of the white filling and then press the stick into the indentation.
  • Place the top of the Oreo back on and allow the candy melts to harden and cement the cookie back together with the stick inside.
  • While you wait, melt your blue candy melts in the same manner as you melted the white, stirring until completely smooth.
  • Once the cookies are firmly hardened back together, pick one up (using the stick) and dip it into the bowl of blue candy melts. 
  • Spoon candy melts over the top and sides.
  • Gently lift the Oreo out of the candy melts, and tap the stick on the side of the bowl to allow the excess melts to drip off.
  • Slide the bottom of the Oreo against the edge of the bowl to remove excess candy melts.
  • Gently set the coated Oreo on clean parchment or wax paper.
  • Immediately, set a goldfish in the center of the cookie, sprinkle brown sugar at the bottom, and place little pearl “bubbles” over the goldfish.  Use my photos to help you with decorating.
  • Do this with each cookie and then allow them to harden completely.
  • Serve as-is, or package up for giving away by sliding each cookie into a little treat bag and tying with a ribbon.

Goldfish Oreo Pop!

My thoughts: I will forever be presenting you with new Oreo Pop ideas.  I love them.  These just make me smile. ~Enjoy!!!!!

Now, about this cookbook… 🙂

Life is Sweet!!!It is a little surreal to see my name as an author of a book- and SO exciting!  Two of my biggest passions are my love of God and my love of baking, and this cookbook combines them both!  I’m traveling to Atlanta in a week to attend the ICRS convention and debut the book.  It will be available to purchase on the 1st of July.

This is a book that brings truths from the Bible into the kitchen- it is such a perfect book for parents, grandparents, Sunday School teachers and other mentors to use with kids.  I’ve done several recipes with kids here on the Navajo Nation and we have had SO much fun.  I still hear kids talking about the lessons they learned during those times in the kitchen.  Even the boys had fun~ with recipes about ugly cookies and rabbit poop, there’s lots of laughter!

To pre-order the book on Amazon, just click here. To order on Warner Press, see a demo video, or learn how to promote this at your church, visit:

http://warnerpress.org/books/lifeissweet/.

We are also opening a “Store” page here on the site, to make it easy for you to find the products that feature Easybaked recipes and photography.  Just check the tabs at the top of the site!

When I started this blog 3 years ago I would never have guessed how many opportunities would come from it.  I’m so thankful to each of you for being a part of this community, and so thankful to God for opening up opportunities I couldn’t have even imagined existed for me!

Now go make fish cookies!  {hugs} ~r

Warner Press Copyright Statement

Caramel Pecan Marshmallow Pops

Posted on


Marshmallow Turtle Pops!

  Big marshmallows covered in creamy caramel and chocolate are dipped in pecans to make an incredibly decadent treat!

These are unbelievably good.  I was visiting my friend Andreya in San Diego last weekend and we passed a store while window shopping in La Jolla that had all sorts of dipped marshmallows.  I started craving them and had to try this.   These are like yummy caramel apples- but with a soft marshmallow inside, instead of an apple.  If you are looking for a really unique treat that is easy to put together, this is your recipe!!!  I couldn’t believe how easy and yummy  these were.

Caramel Pecan Dipped Marshmallows

Here’s the recipe: (printable version)

INGREDIENTS:

  • 2 bags of jumbo marshmallows (24 marshmallows)
  • 24 lollipop sticks
  • 32 Kraft caramels, unwrapped
  • 1 (14 oz) can of sweetened condensed milk
  • 1/2 cup of butter
  • 1 bag of dark chocolate Wilton’s candy melts
  • 2 cups of chopped pecans

DIRECTIONS:

  • Set marshmallows out on parchment paper and stick one lollipop stick into the flat side of each one.
  • In a medium saucepan, melt together caramels, butter and sweetened condensed milk, stirring constantly, until completely smooth (takes about 5 minutes)
  • Pour caramel mixture into a bowl.
  • Using stick, carefully dip each marshmallow into caramel, coating it to the top.  Gently tap stick against side of bowl to remove excess caramel and then slide bottom of marshmallow along bowl’s edge to remove most of caramel.  (It is ok if you remove it down to the marshmallow- the chocolate will cover this up!
  • Place upright on a sheet of parchment paper and cool.
  • Place chocolate candy melts into a bowl, and melt them in the microwave in 30 second increments, stirring in between, until completely melted and smooth.
  • Lay a fresh sheet of parchment paper out before beginning next step.
  • Place pecans in a small bowl.
  • Gently peel a marshmallow away from the parchment paper. This is a little tricky, as it will still be a bit gooey.  I held the stick, lifted, and peeled the paper away from the marshmallow.
  • Dip bottom of marshmallow into melted chocolate and slide bottom along edge of bowl to remove excess.
  • Dip bottom of coated marshmallow into pecans and set on fresh parchment paper to harden.

Once these are hardened up, you can serve them up on a pretty plate, or wrap them in cello bags to use as gifts or favors.
If you aren’t serving them right away, be sure to cover them so the marshmallows don’t harden up.

Caramel Pecan Marshmallow Pops!

My thoughts: These are a recipe I will make again.  I had fun putting them together and everyone who tried them asked me to make them again.  Easy. Yummy. Beautiful.  My kind of recipe!  Enjoy!! ~r

Other unique recipes you might enjoy:

Fruit Loop Pie!Raspberry Lemon Cream Cups!!!Cookie Dough Whoopie Pie!Doughnut cupcakes!!

Flower Pot Cupcakes

Posted on


Flower Pot Cupcakes!!!


These cheery garden cupcakes have delicious raspberry cream filling

and fun flowers made of M& Ms!!!

HAPPY MOTHER’S DAY!!!!  This bit of cheer goes out especially to my mom this week.  I’m so far from home this year, that we will have to celebrate from a distance.

Aren’t these the cutest cupcakes ever?  I cannot take credit for the M&M flower idea, it was an idea I originally saw on a cute blog called Sara’s Shoebox.  She was copying the idea from a cookbook called “What’s New Cupcake“.  I do not own this cook book, but it is a sequel to one of my favorites, “Hello, Cupcake!”, by the same author.  In any case, Sara made hers with mini Oreos and I simply could not get mine to work with those..?  SO, I had seen marshmallows in pink lemonade flavor (who can walk by THAT without picking up a bag?) and I decided to use them instead.  They were a tiny bit too small, so I am going to recommend that you use full-size marshmallows for these.  I had to fiddle around with them awhile to get them to all stick.  I’m positive they will be easier on a full-size marshmallow!!

The cupcakes are an original though- I used a pink velvet cake mix, but you can use any flavor you like!  I filled them with a yummy raspberry cream and topped them with scoops of butter cream and either coconut or Oreos (um…I had a few of those left over from the flower attempt!)  Are you ready for a recipe for these???  Here you go: (printable version)

INGREDIENTS:

  • One boxed cake mix (in any flavor, with oil, water and eggs to make according to box)
  • One packet of Dream Whip
  • 1 cup of heavy whipping cream
  • 1/4 cup of berry jelly or jam
  • 2 sticks of salted butter (at room temp)
  • 2 sticks of unsalted butter (at room temp)
  • 3 cups of powdered sugar
  • 2 teaspoons of vanilla
  • 2 cups of shredded coconut (died green with food coloring) -OR- 2 cups of crushed Oreo Cookies
  • 24 pretzel sticks
  • Pastel M&Ms
  • 12 marshmallows
  • 1/2 cup of white Wilton’s candy melts

DIRECTIONS:

Flowers: I recommend making these ahead and storing them covered until you make your cupcakes.  They aren’t hard to make, but a little time consuming.

  • Take 12 marshmallows and cut them in half with clean kitchen scissors. Lay them on the counter with the cut side up to keep them from sticking to things.
  • Take a pretzel stick and wiggle it up into the side of each marshmallow.  
  • Melt candy melts in the microwave in 30 second increments, stirring between until completely melted and smooth.
  • The technique that worked best for me here was to lay my M&Ms out in a flower pattern (minus the center) on parchment paper, cover the sticky side of the marshmallow with candy melts and lay it (candy melt side down) on the flower until it dries.  Then I used a little of the candy melts to stick my center on.  Here’s some photos.

Flower Pot Cupcakes Flower Pot Cupcakes Flower Pot CupcakesFlower Pot Cupcakes

Just let those cute little flowers dry, and you are all set to make your cupcakes!

Cupcakes:

  • Make cake mix according to box and divide batter among 24 cupcake liners in muffin tins.
  • Bake according to box, remove from oven and cool completely.
  • Make filling by putting Dream whip powder and whipping cream in a bowl.  Mix on high until stiff peaks form.
  • Add jam or jelly and beat until well combined.  Place filling in a large zip top bag and keep refrigerated until use.
  • Core cooled cupcakes with a small knife or a cupcake corer.  I HIGHLY recommend the corer- it is super cheap and will save you time!
  • Cut a corner off the filling bag and squeeze filling into each cupcake.  
  • Place top of “core” that was removed back on top of cupcake.

Flower Pot Cupcakes Flower Pot Cupcakes Flower Pot Cupcakes

  • Make buttercream frosting by beating butters, powdered sugar and vanilla together in a large bowl on high until it is light and fluffy and smooth.
  • Use a scoop to place a mound of frosting on each cupcake.
  • Turn cupcake upside down in either coconut or crushed Oreo to coat the frosting.
  • Now pop a cute flower in, and you have an adorable treat for all sorts of occasions!!


Flower Pot Cupcakes!!!
My thoughts:  These brought smiles to so many faces!  I often share my blog creations with various families and organizations here on the Navajo Nation.  These went to the Easter party at the Senior Citizen Center here.  I got many hugs and thank yous (Ahéhee’)
 from the recipients.  I also got to watch almost 100 seniors literally running to a huge Easter egg hunt!  So fun!!!

Happy Easter!!On a recipe note:  These are little time consuming, but so worth the effort!  I made my flowers ahead and I was glad I did.  I really hope you enjoy these!

And to the best mom ever: a bouquet of M&M flowers!  I love you!!!!  ~r

M&M flower bouquet!!!
Other recipe ideas for Mother’s day:

Creamy cheesecake with sour cream toppingEspresso Cookies!!!Strawberry Lemonade Cupcakes!!!! Brownie Oreo Cookie Cup

Jelly Bean Cookies

Posted on

Jelly Bean Cookies!!!!These cookies deliver a big Easter surprise~ jelly beans in the middle!  Pretty on the outside and sweet surprises on the inside?  These are a must-try Easter treat!

These really are just the cutest thing…but fair warning: I brought these to church and overheard the following conversation between an 8 year old and a 6 year old:

“There’s jelly beans in the middle!”
“And the cookie tastes like Play-Doh!!”
“I want another one!”

So…maybe this is a bigger hit with the under 12 set…?

I thought they tasted ok.  The cookies are very dense and full of white chocolate, but colored like Play-Doh…I can see the connection.  I really don’t like jelly beans either…so I wasn’t a very objective taste-tester.  But they are super cute…

Jelly Bean5In any case, if you are up for an adventure and you have lots of kids to entertain with something new….here’s the recipe: (printable version)

INGREDIENTS: (makes about 36 cookies)

  • One bag of Nestle white chocolate morsels.
  • One can (14oz.) of sweetened condensed milk
  • 2 teaspoons of vanilla
  • 2 cups of flour
  • Food coloring gels
  • One bag of large jelly beans (I used Brach’s Classic Jelly Bird Eggs)
  • One bag of Wilton’s white chocolate candy melts
  • Sprinkles

DIRECTIONS:

  • Carefully melt Nestle morsels in the microwave in 30 second increments, stirring between until completely melted and smooth.
  • Add sweetened condensed milk and vanilla, mixing until well combined.
  • Add flour and mix, eventually using clean hands to knead dough into a ball.
  • Divide dough into parts and knead in food color gels until you get the colors you want.
  • *Note* This dough is very oily, because of all that white chocolate.  This is ok.  Just keep a paper towel handy to wipe your hands on during this process.
  • Preheat oven to 350F degrees.
  • Take about a tablespoon of dough and roll it into a ball.  Then press it flat, lay two jelly beans on it and pull dough up around the jelly beans to cover them.  Pinch cracks and seams closed and then roll into a ball again to make it smooth.

Making jelly bean cookiesMaking Jelly Bean cookiesMaking Jelly Bean CookiesMaking Jelly Bean Cookies

  • Place on a cookie sheet that has been covered in parchment paper.  These don’t spread, so you can place cookies very close together.
  • Bake at 350F degrees for 10-12 minutes.
  • Remove from oven and slide parchment paper (cookies and all!) off the sheet and onto a counter to cool.  There will be oil from the white chocolate on the paper- this is ok.
  • After cookies have cooled completely, melt white candy melts in the microwave in 30 second increments, stirring between until completely melted and smooth.
  • Lay a fresh sheet of parchment paper on the counter, and get a clean paper towel.
  • If needed, dab the bottom of each cookie on the paper towel to remove any excess oils. Then, dip the top of the cookie into the candy melts, set on the clean parchment paper and sprinkle with decorations before the chocolate hardens.
  • Enjoy!!!

Jelly Bean Cookies!!!!

My thoughts:  I’m not sure what to say about these…I asked for honest opinions from the adults that tried them and they all said they loved them.  Then I caught one person chucking his out the back door….so much for honesty…!  If you like jelly beans (and apparently Play-Doh…) you should give these a try.  They are a little time consuming, but not difficult at all.  Who knows?  It might be a new family Easter favorite?  Or maybe just a good laugh…?  Enjoy!!!! ~r

Jelly Bean Cookies!!!

Other Easter treats I would wholeheartedly recommend:

Coconut Cupcakes!!Easy Easter cut out cookiesChocolate Easter Eggs with Peanut Butter FillingRaspberry Lemonade Truffles