Tag Archives: baking

Cheesehead Cupcakes!

Cheesehead Cupcakes!!!!!
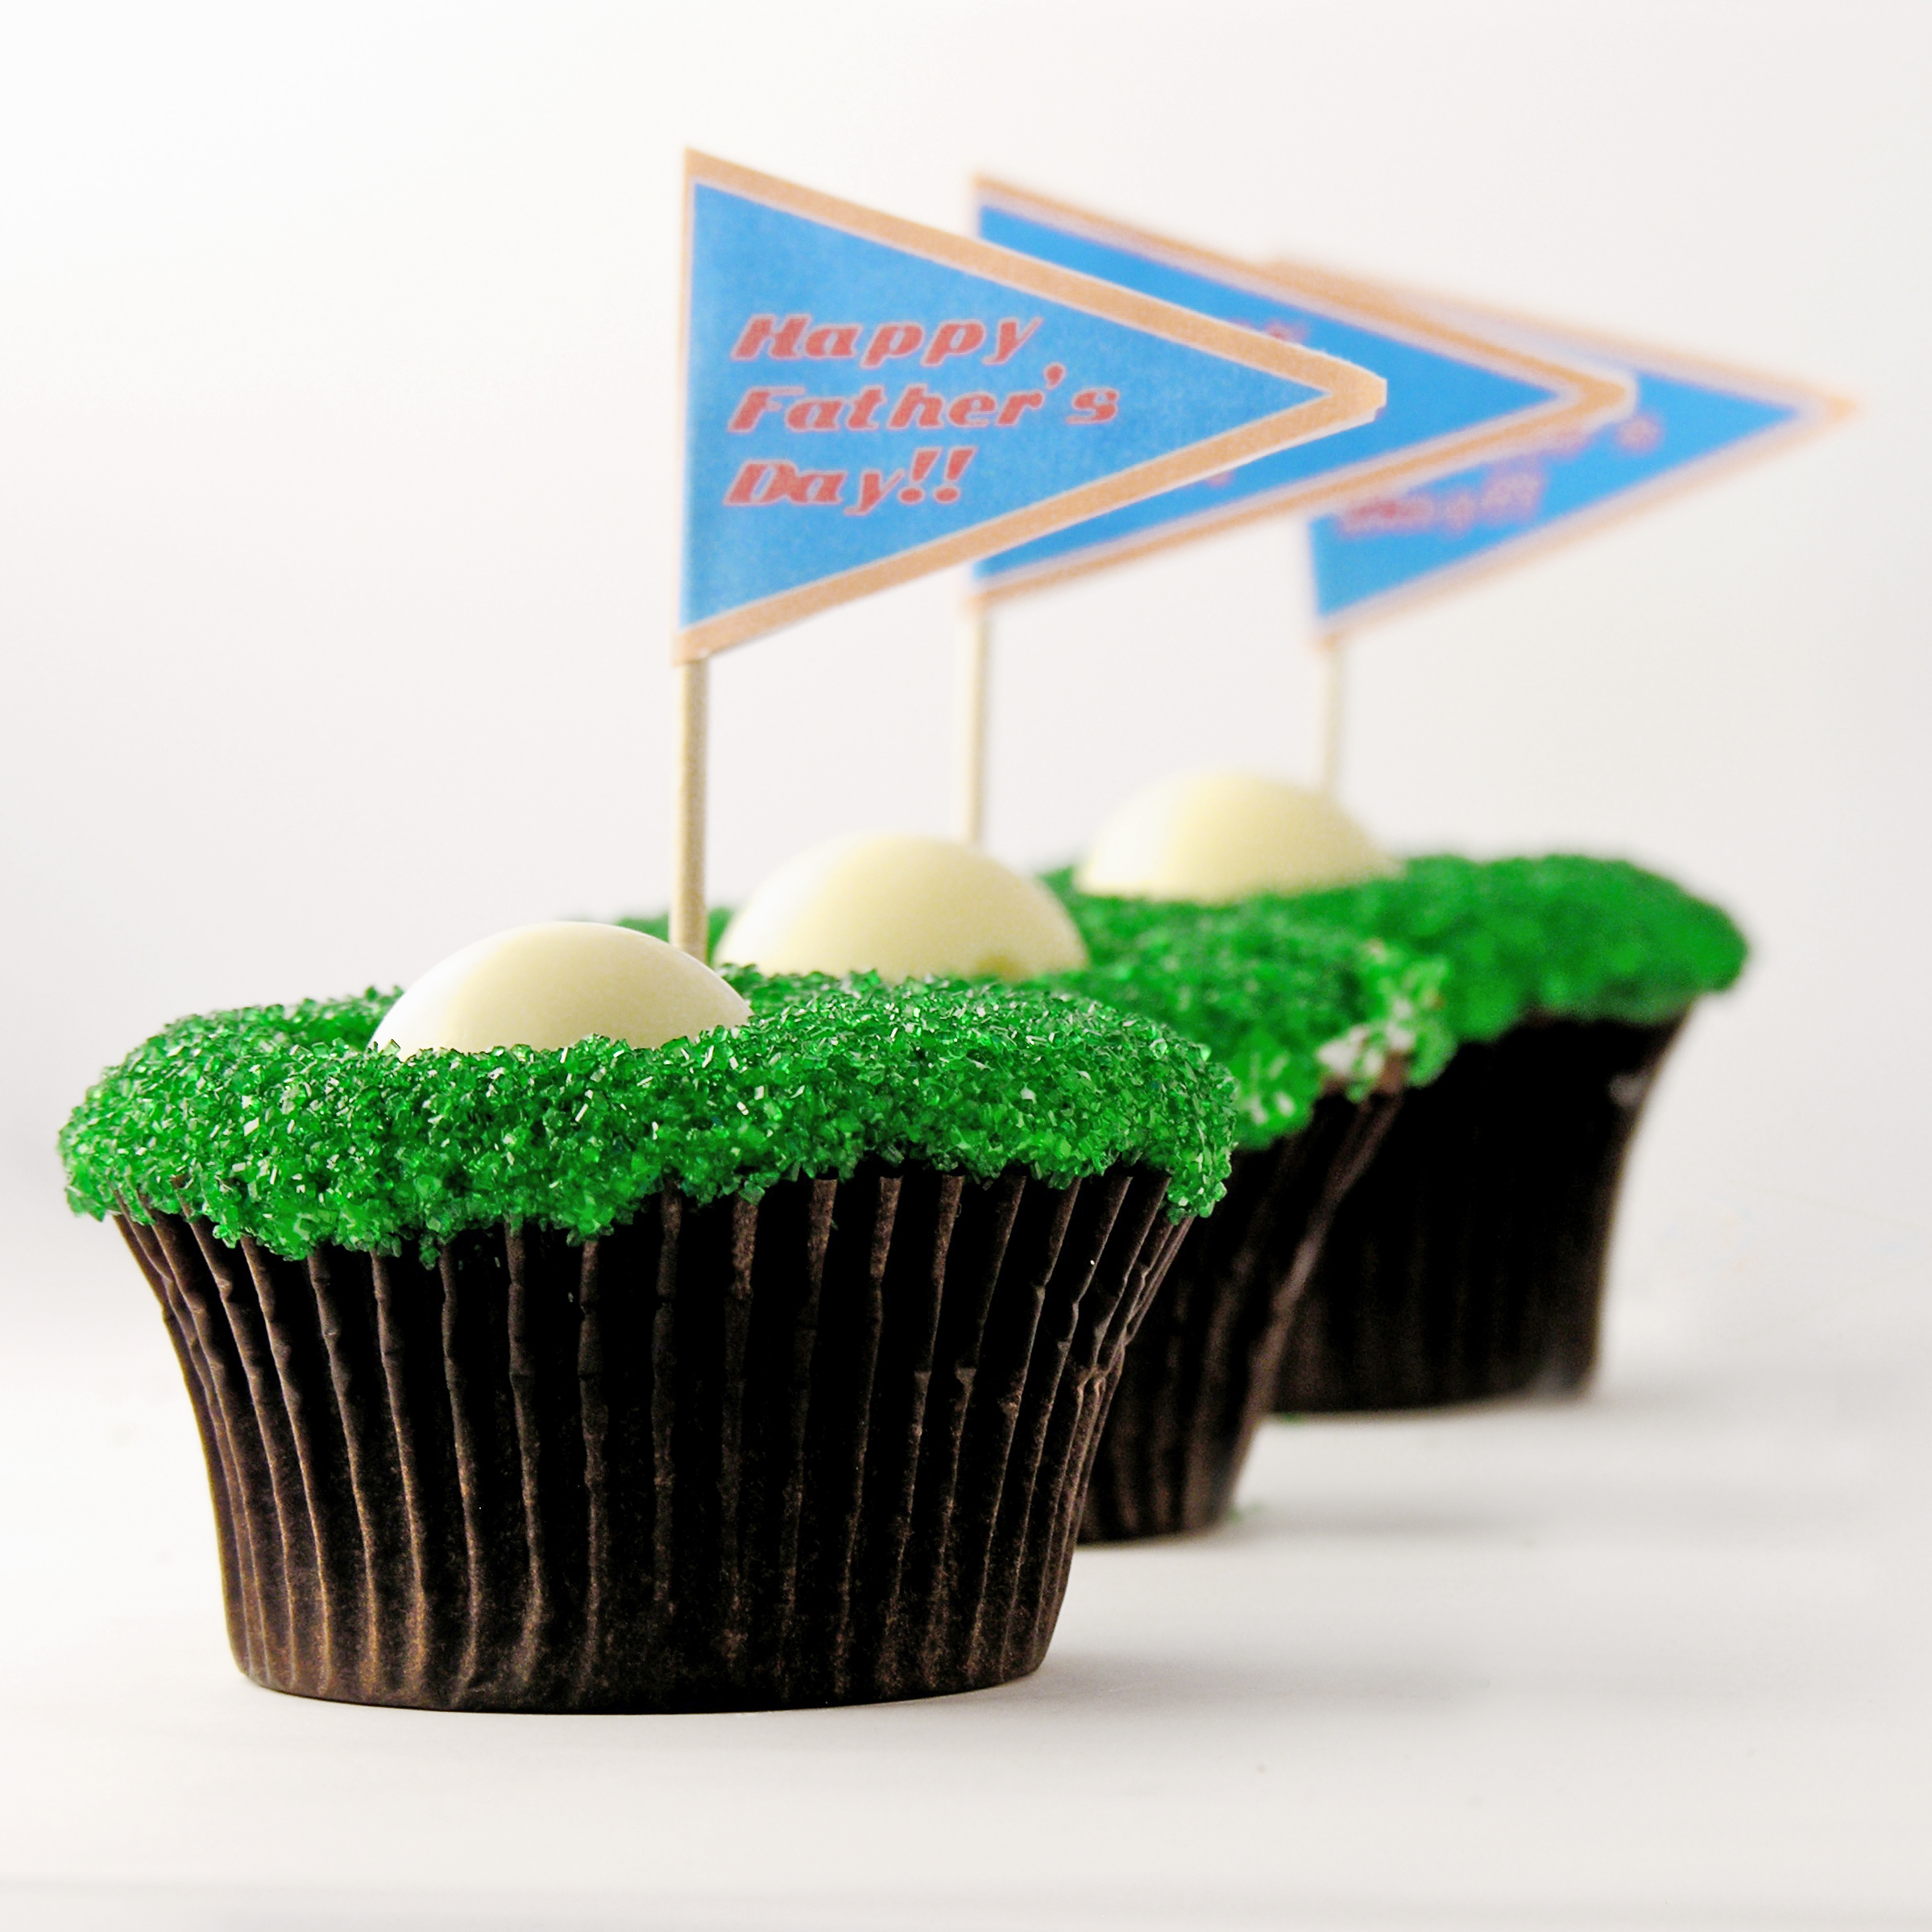
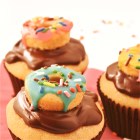
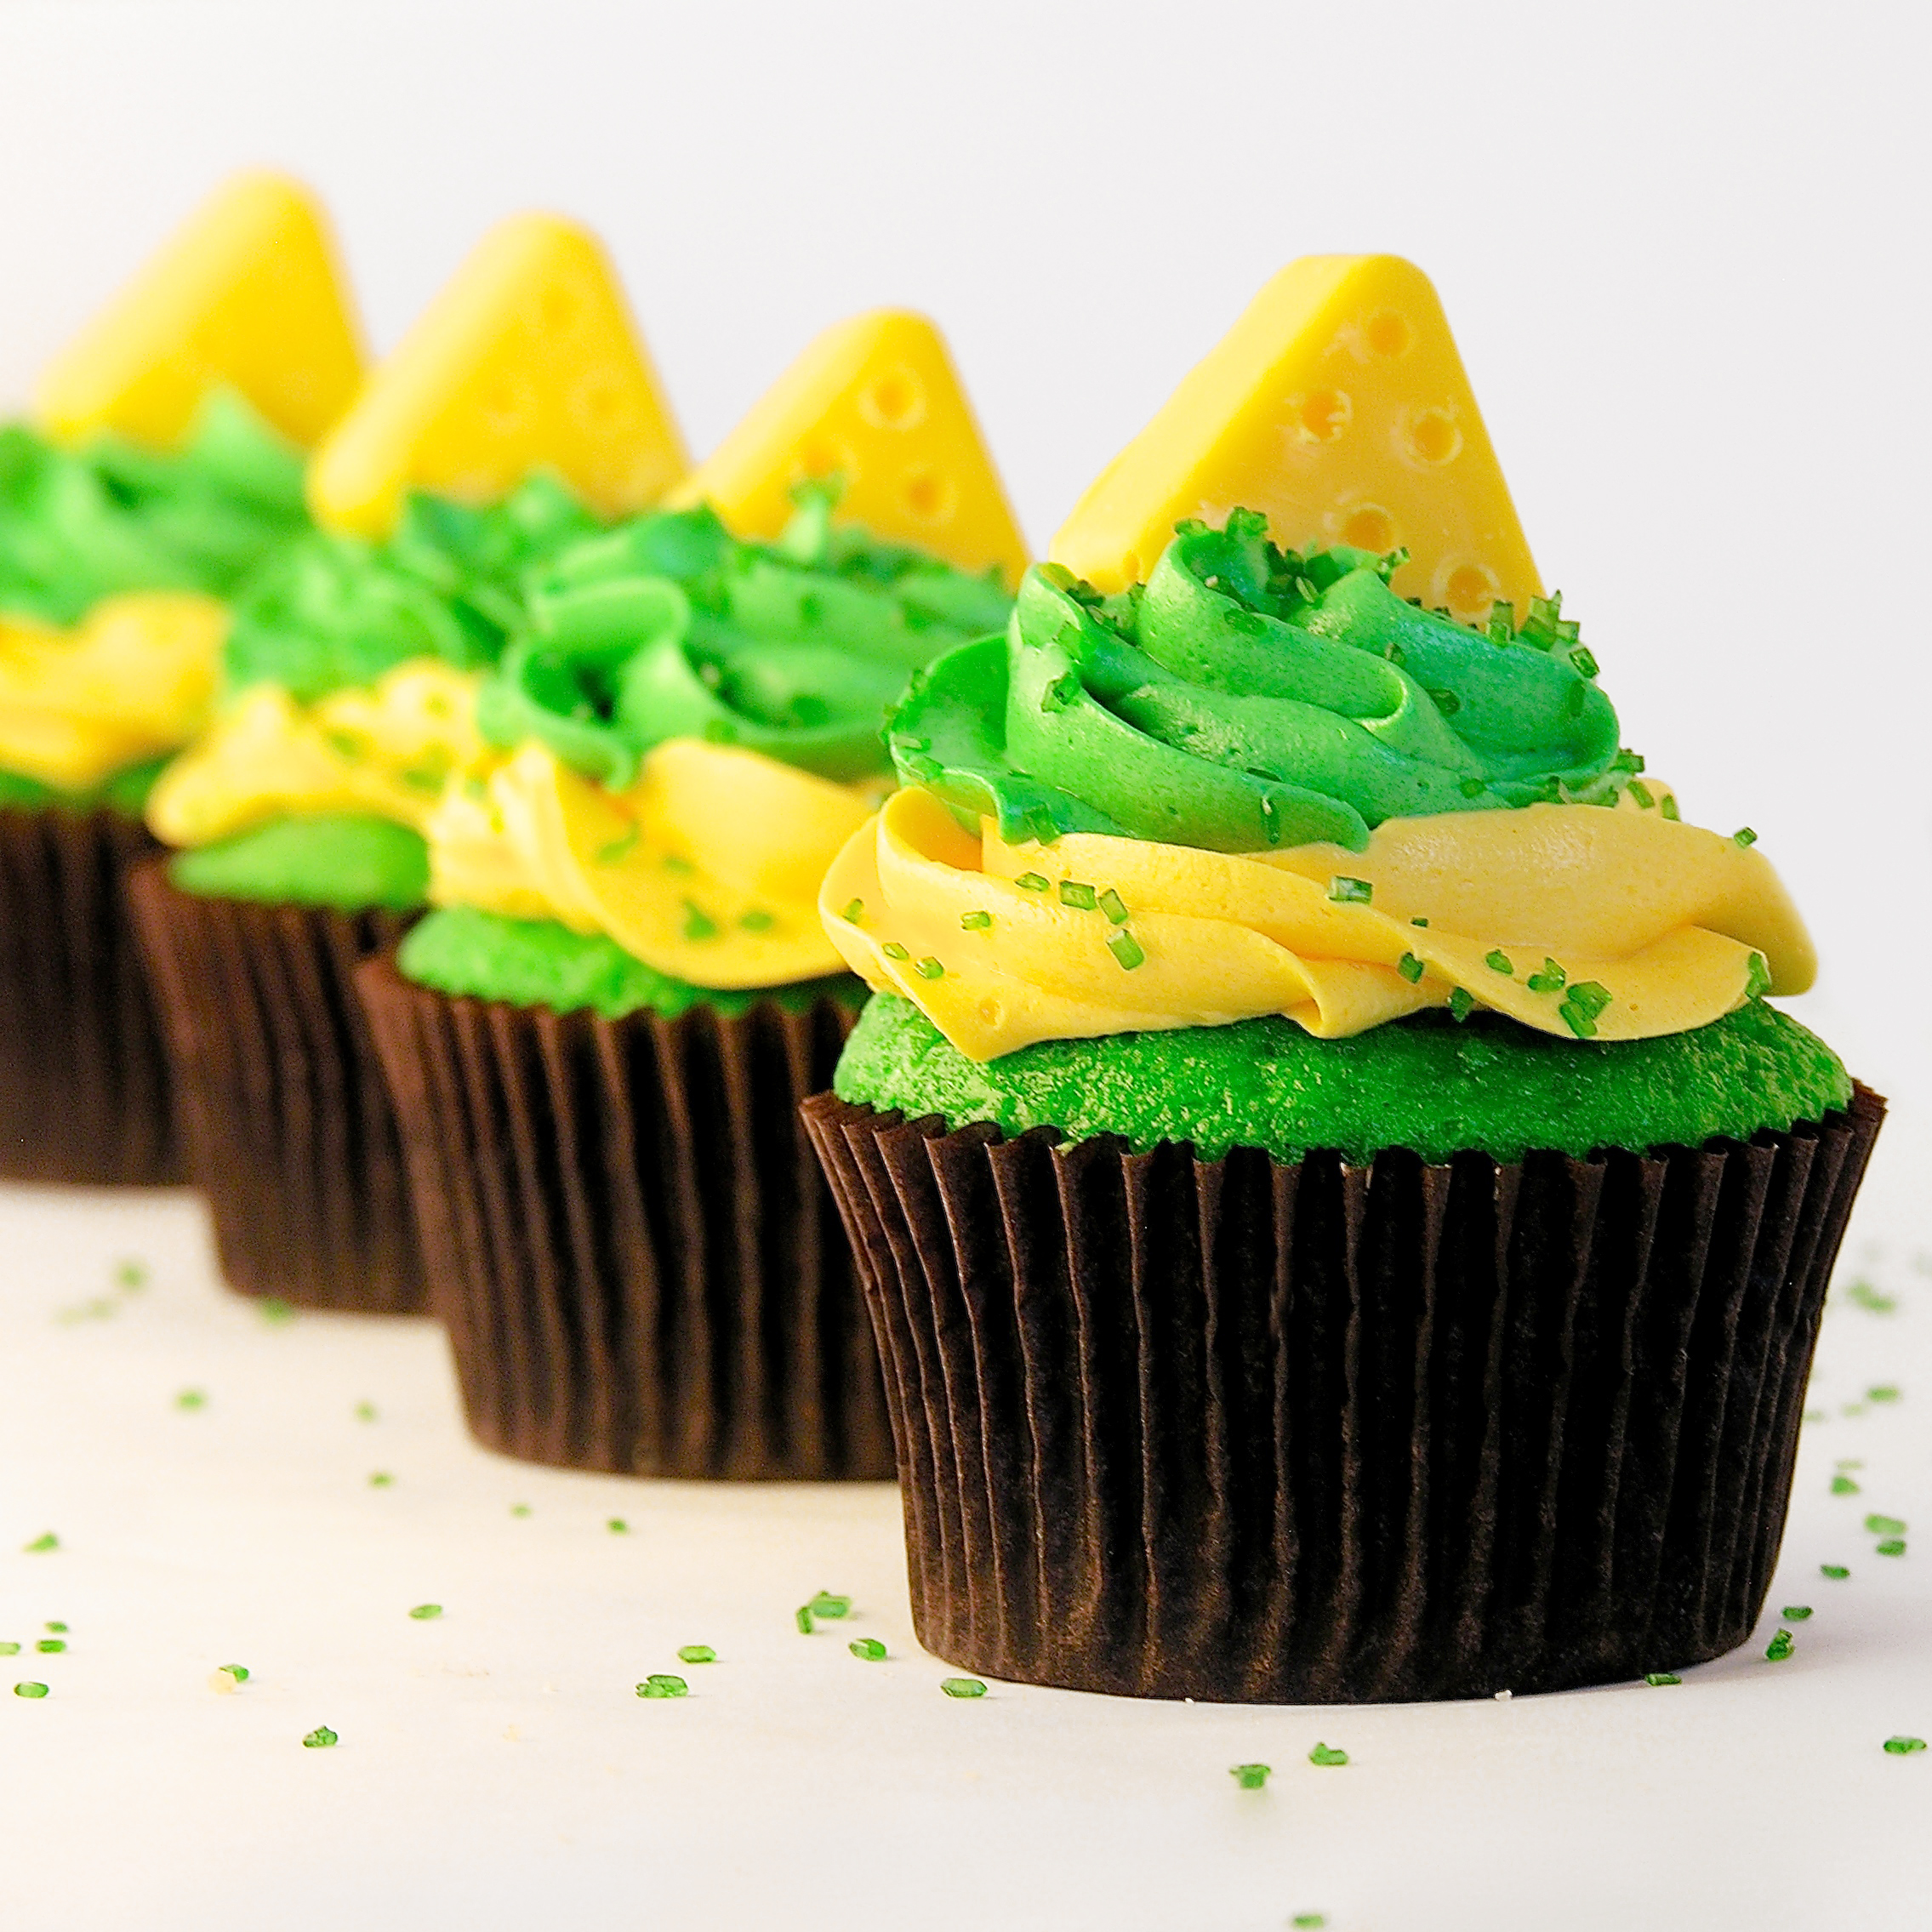
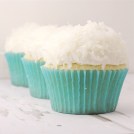
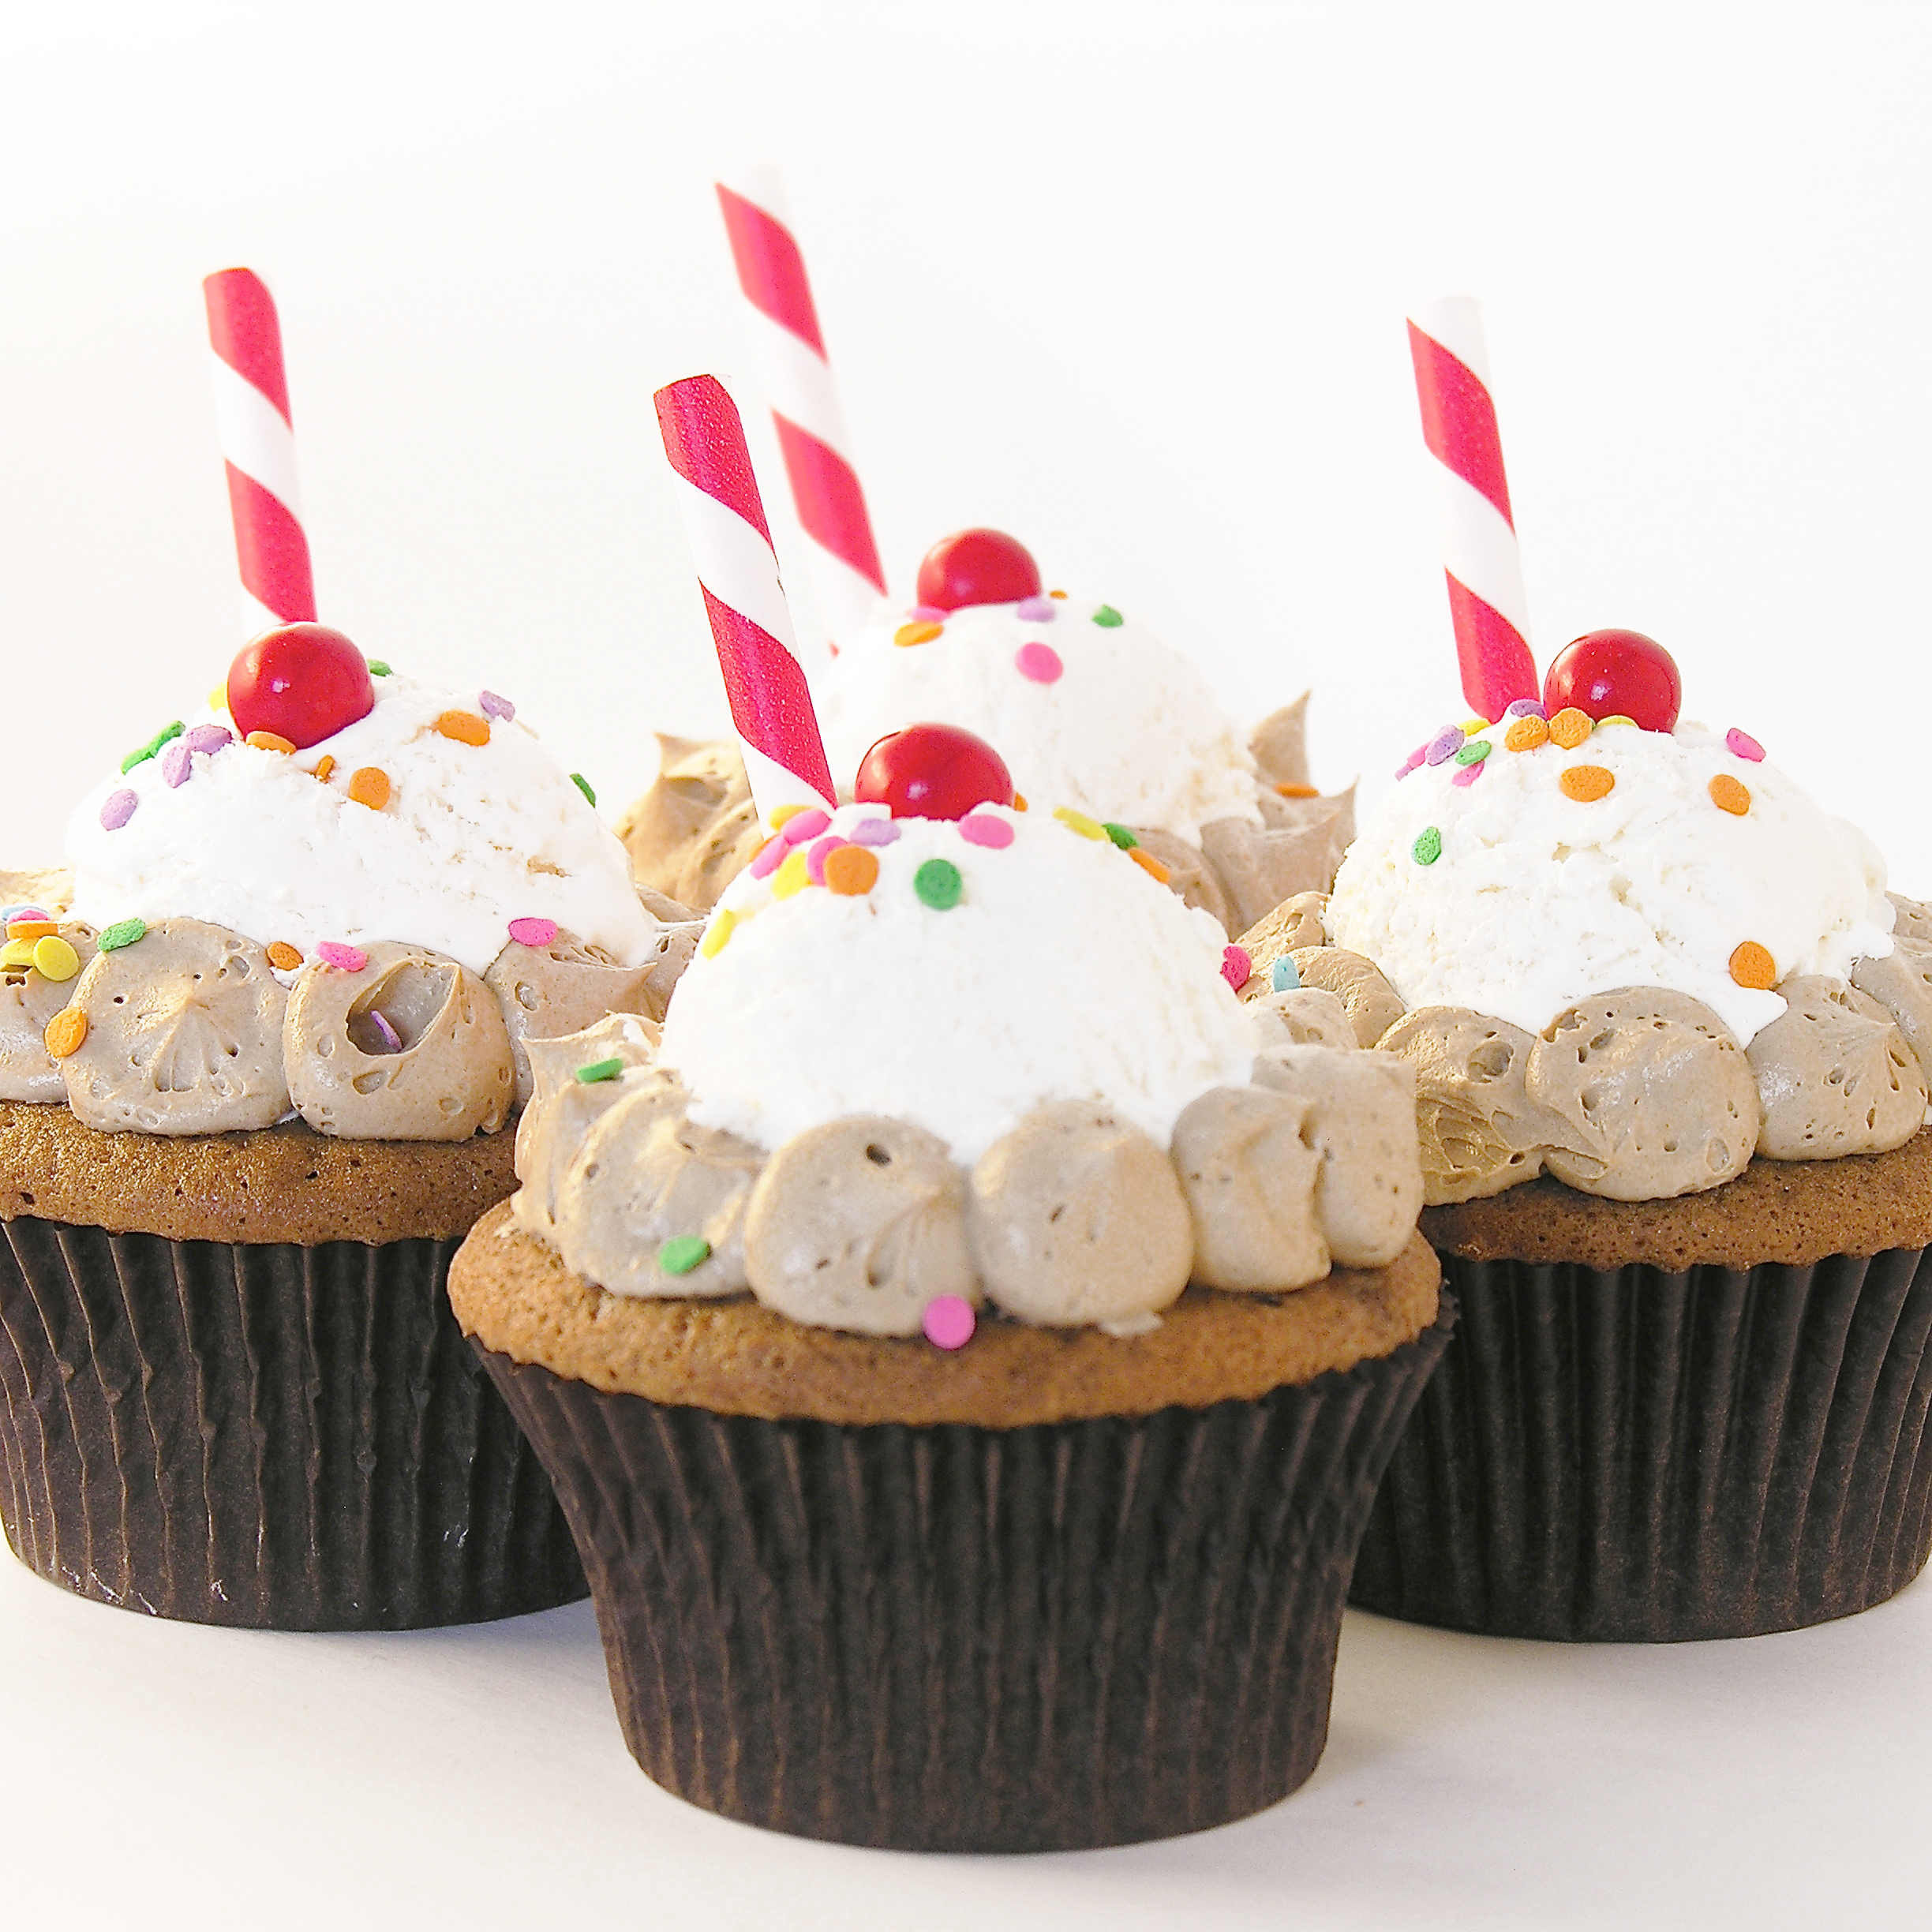
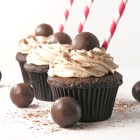
These colorful Green Bay Packer CHEESEHEAD cupcakes are the perfect treat for game day!!!  Make them in YOUR team colors and start the season off with some fun!

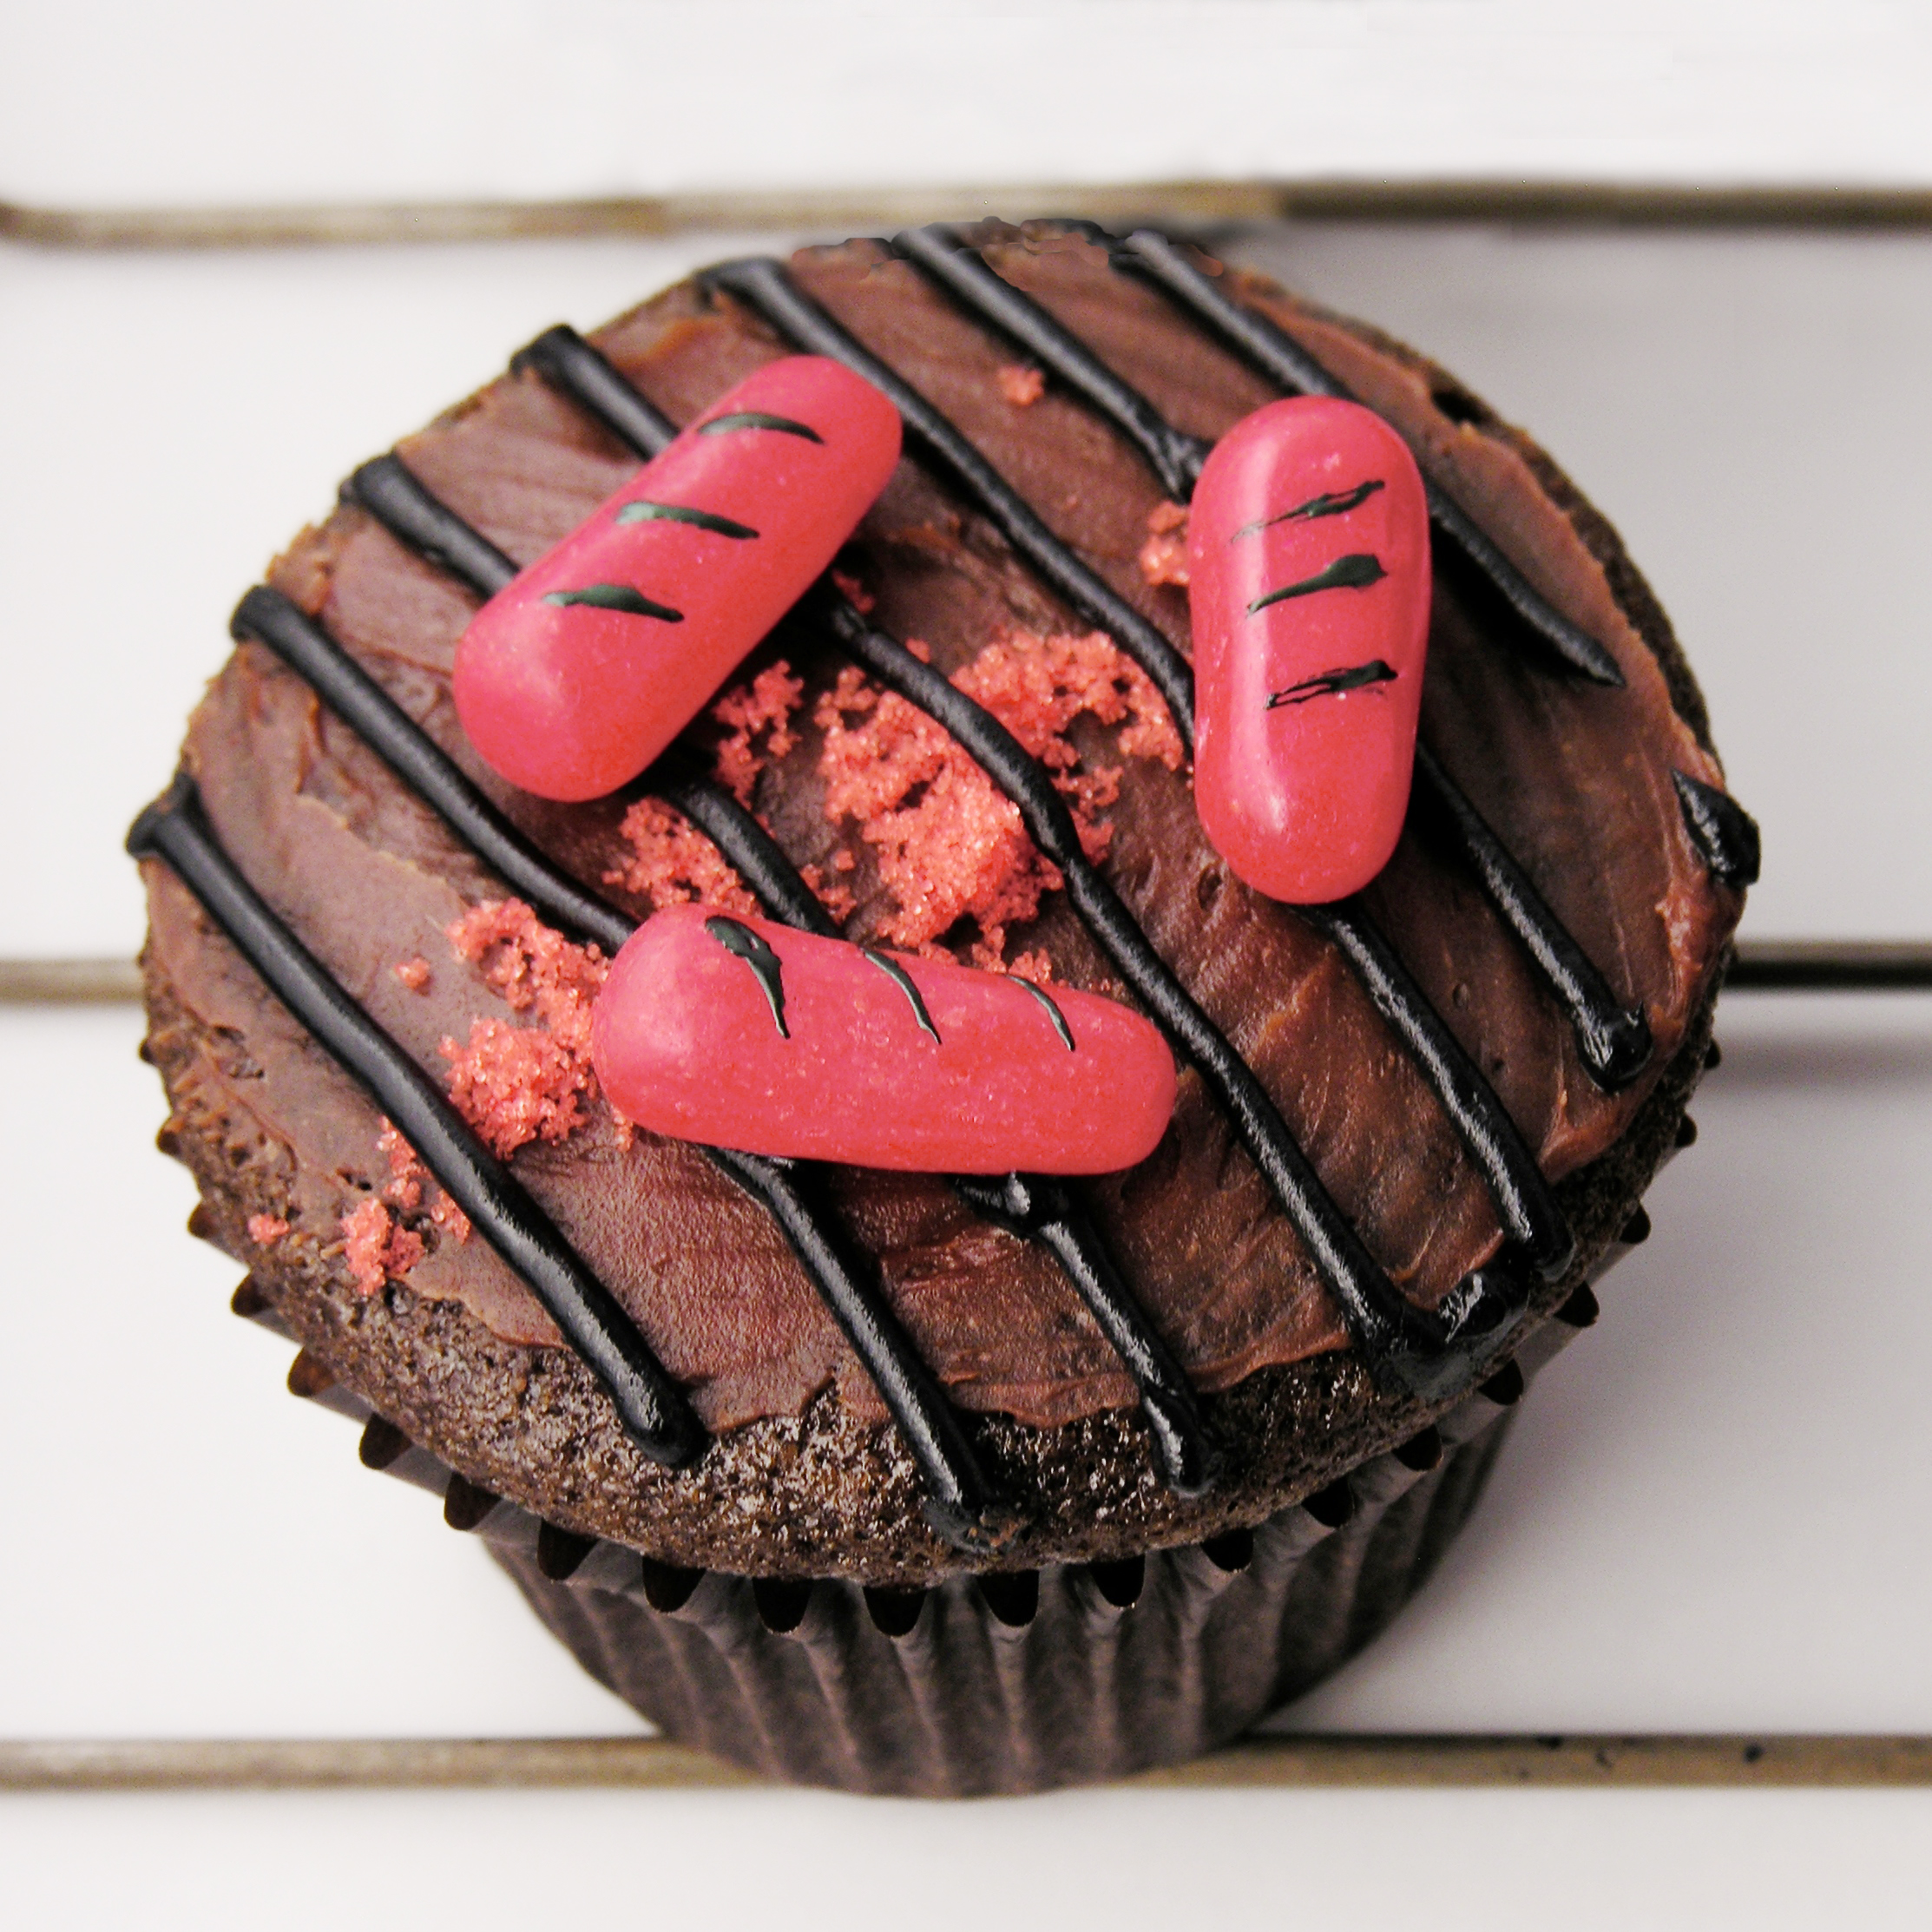
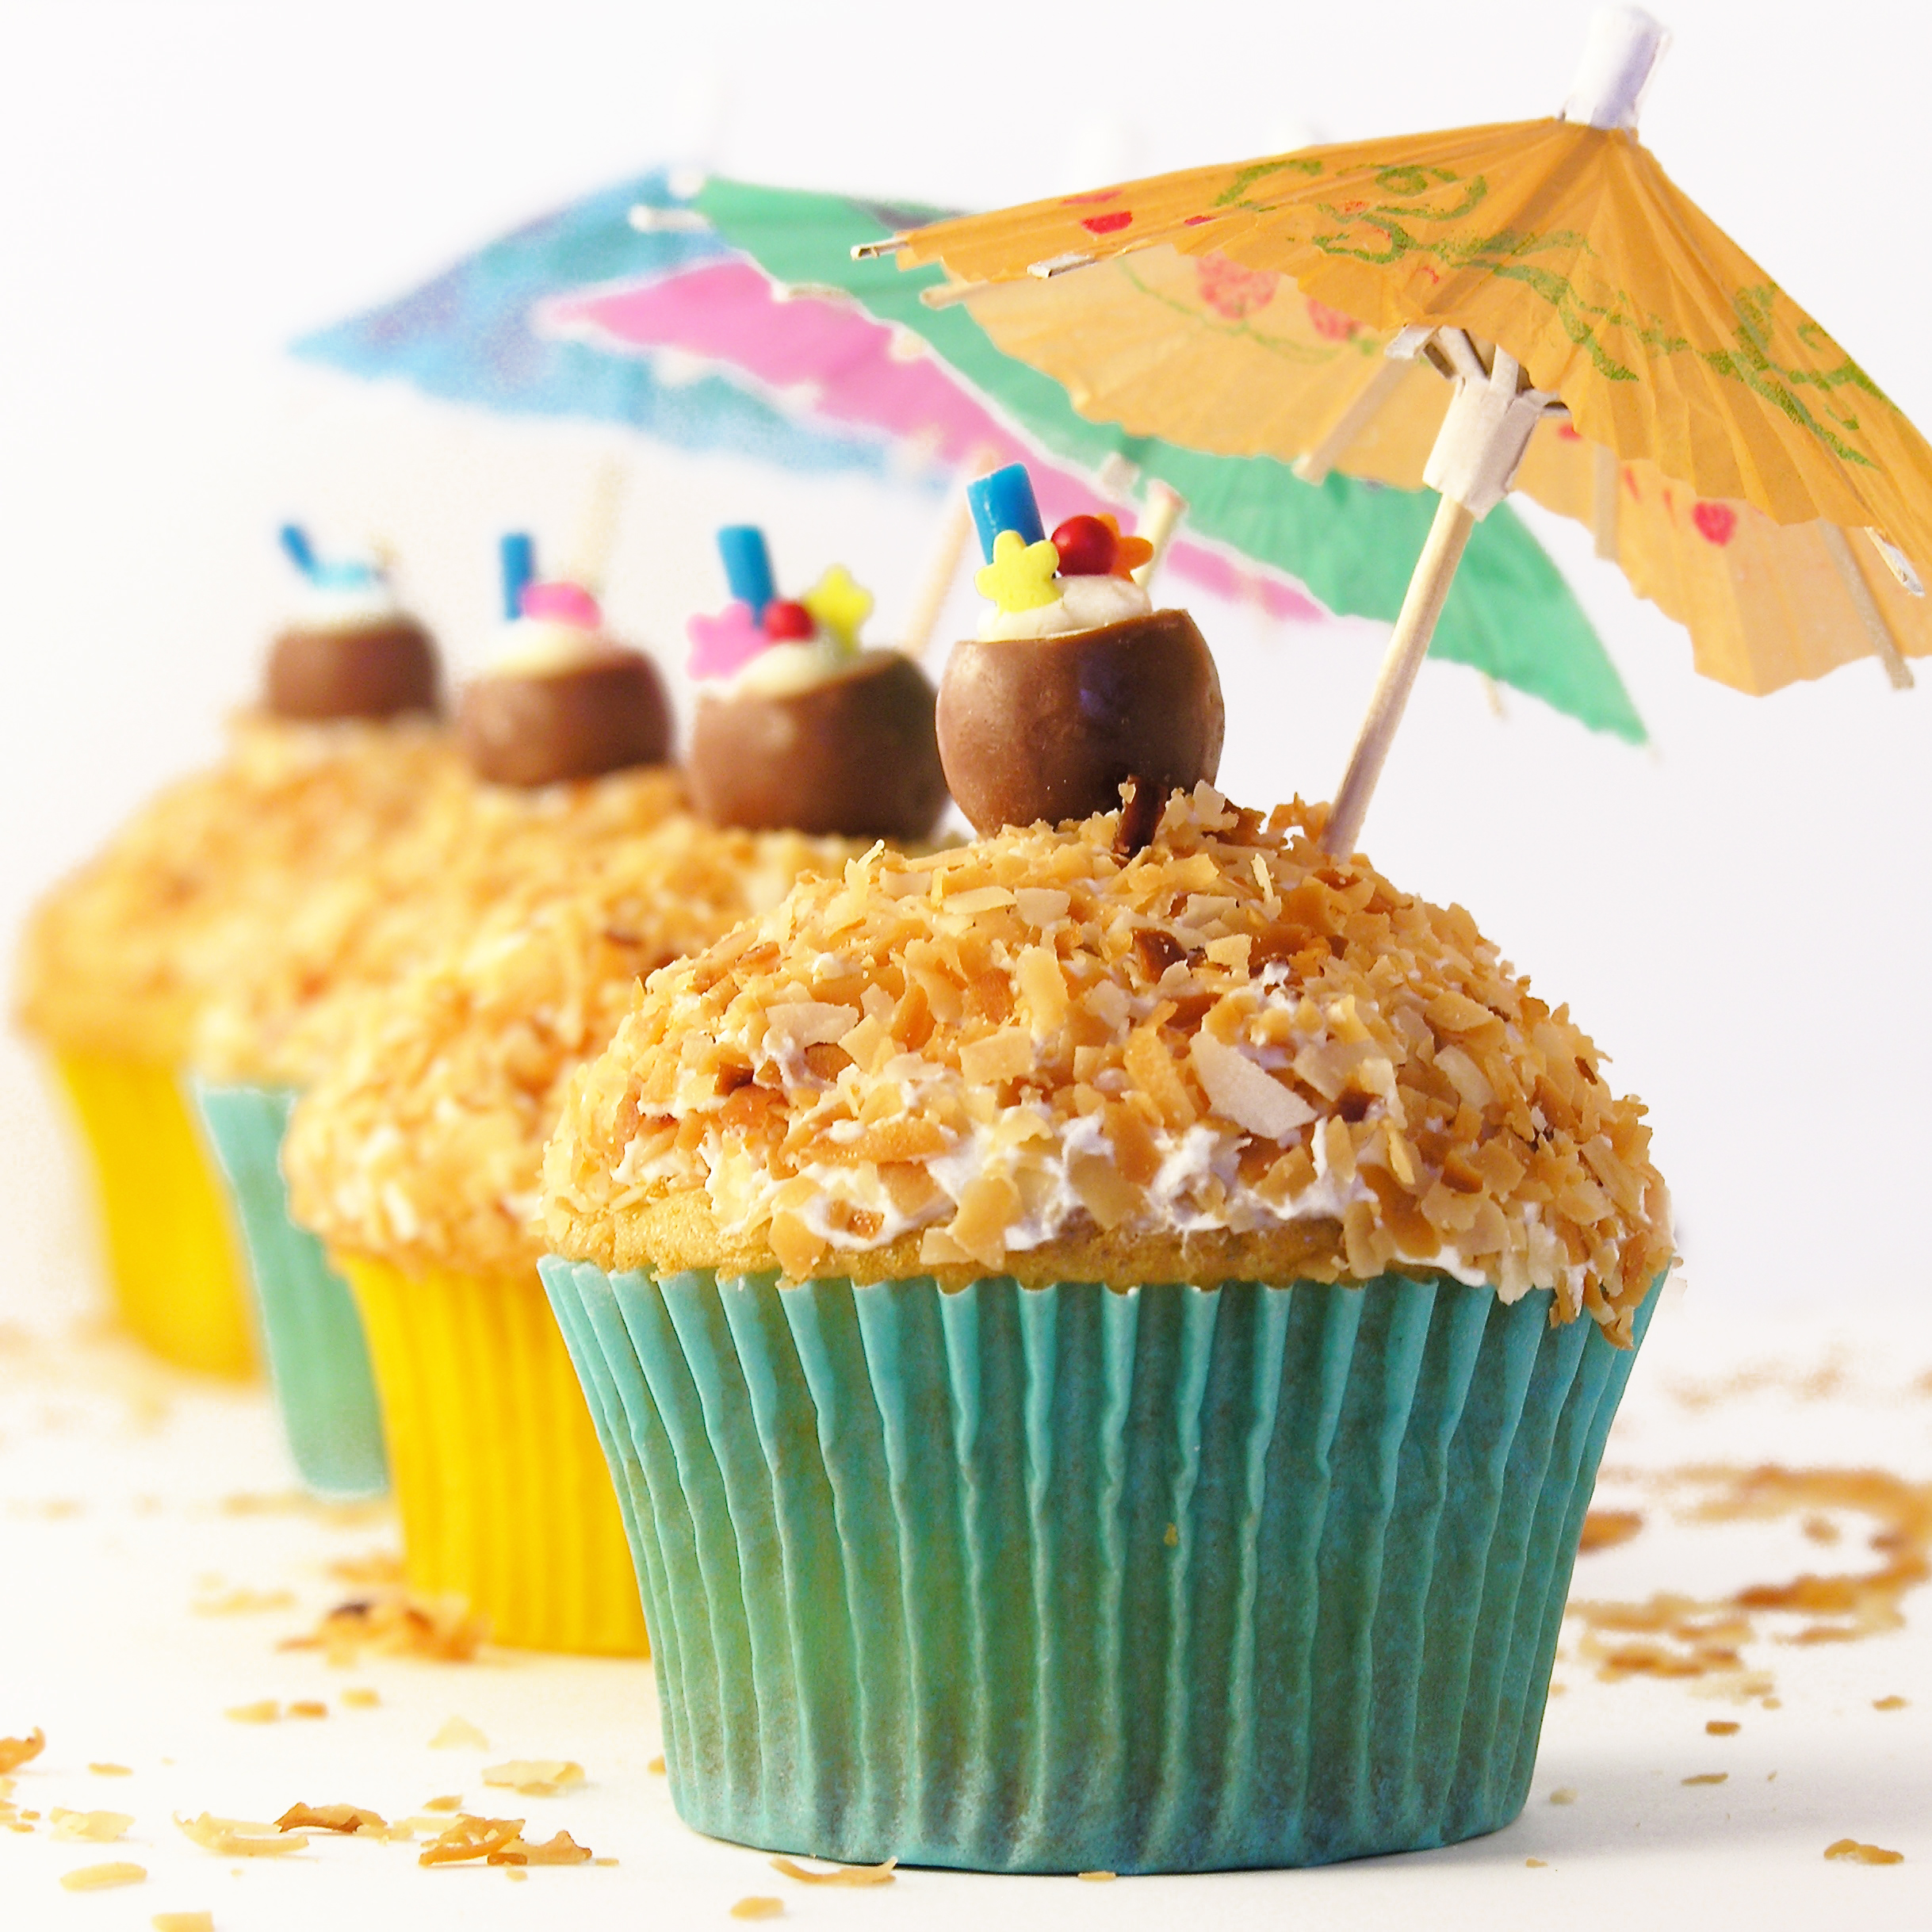
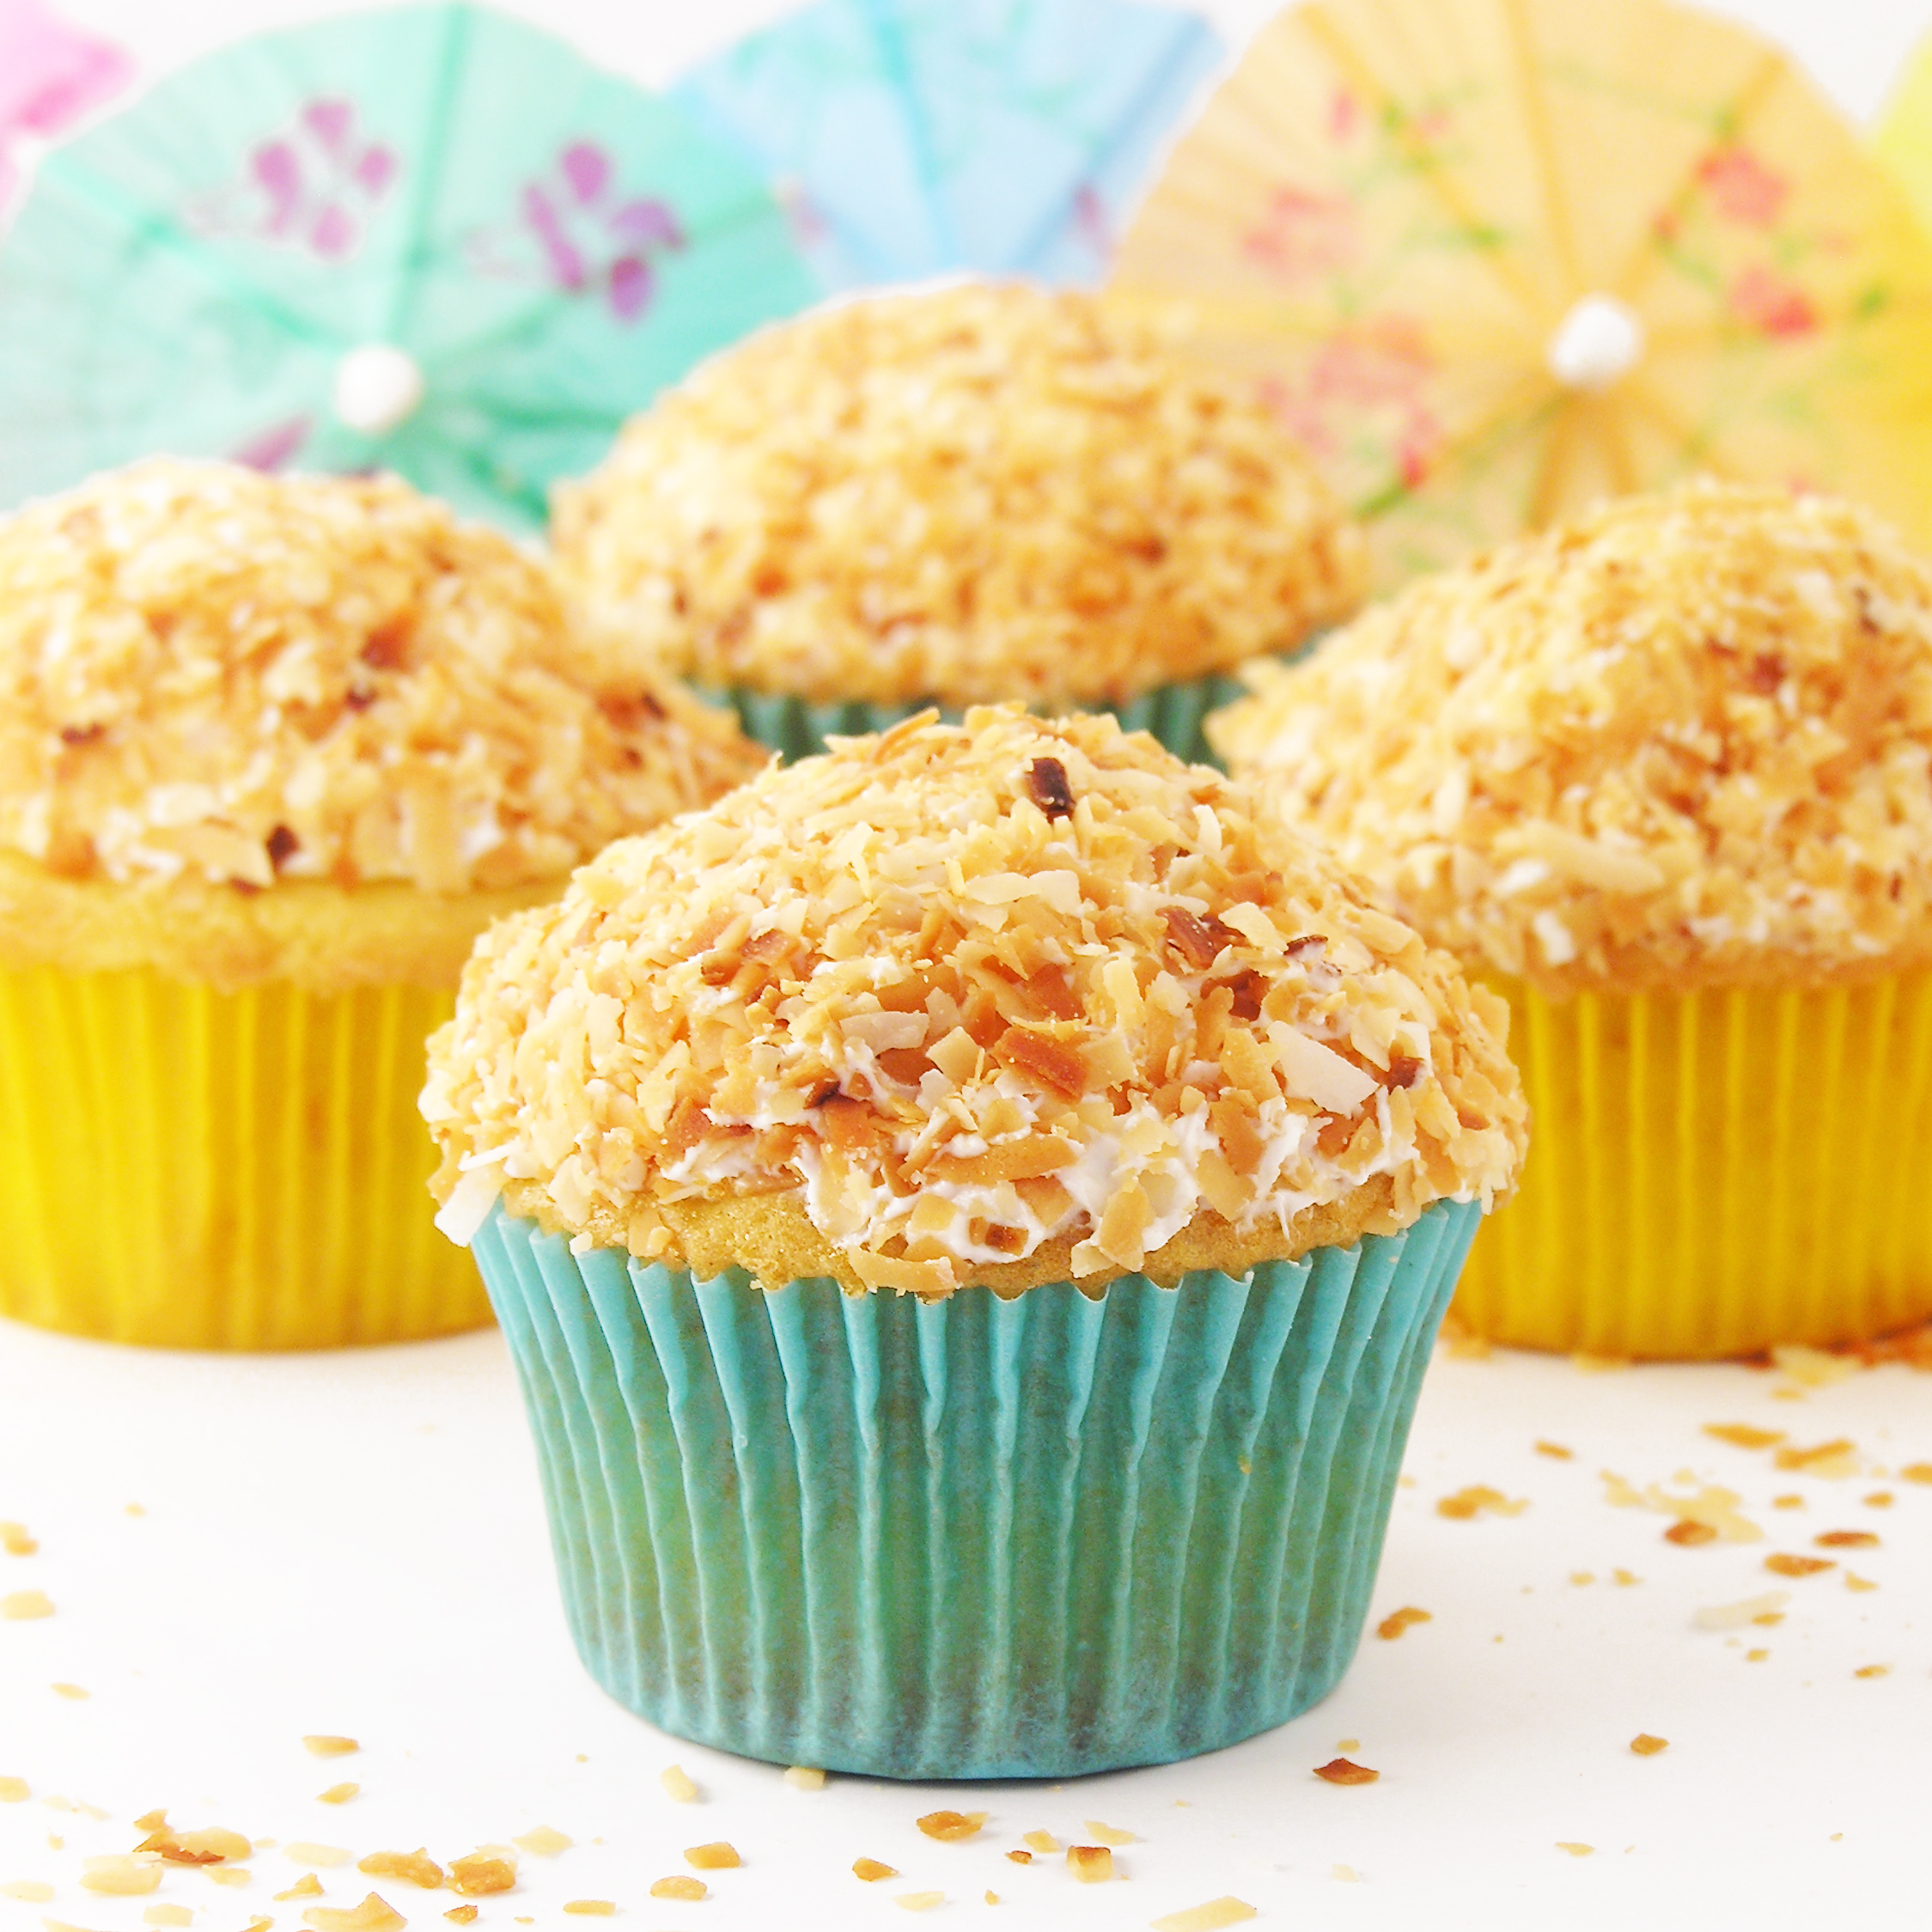
Today is the day!!!!  NFL football season starts!!!!  Tonight it’s the Packers vs. Seattle (GO PACK GO!!!!!!!), and I had to add some cheese on these fun little cupcakes to make them just perfect!

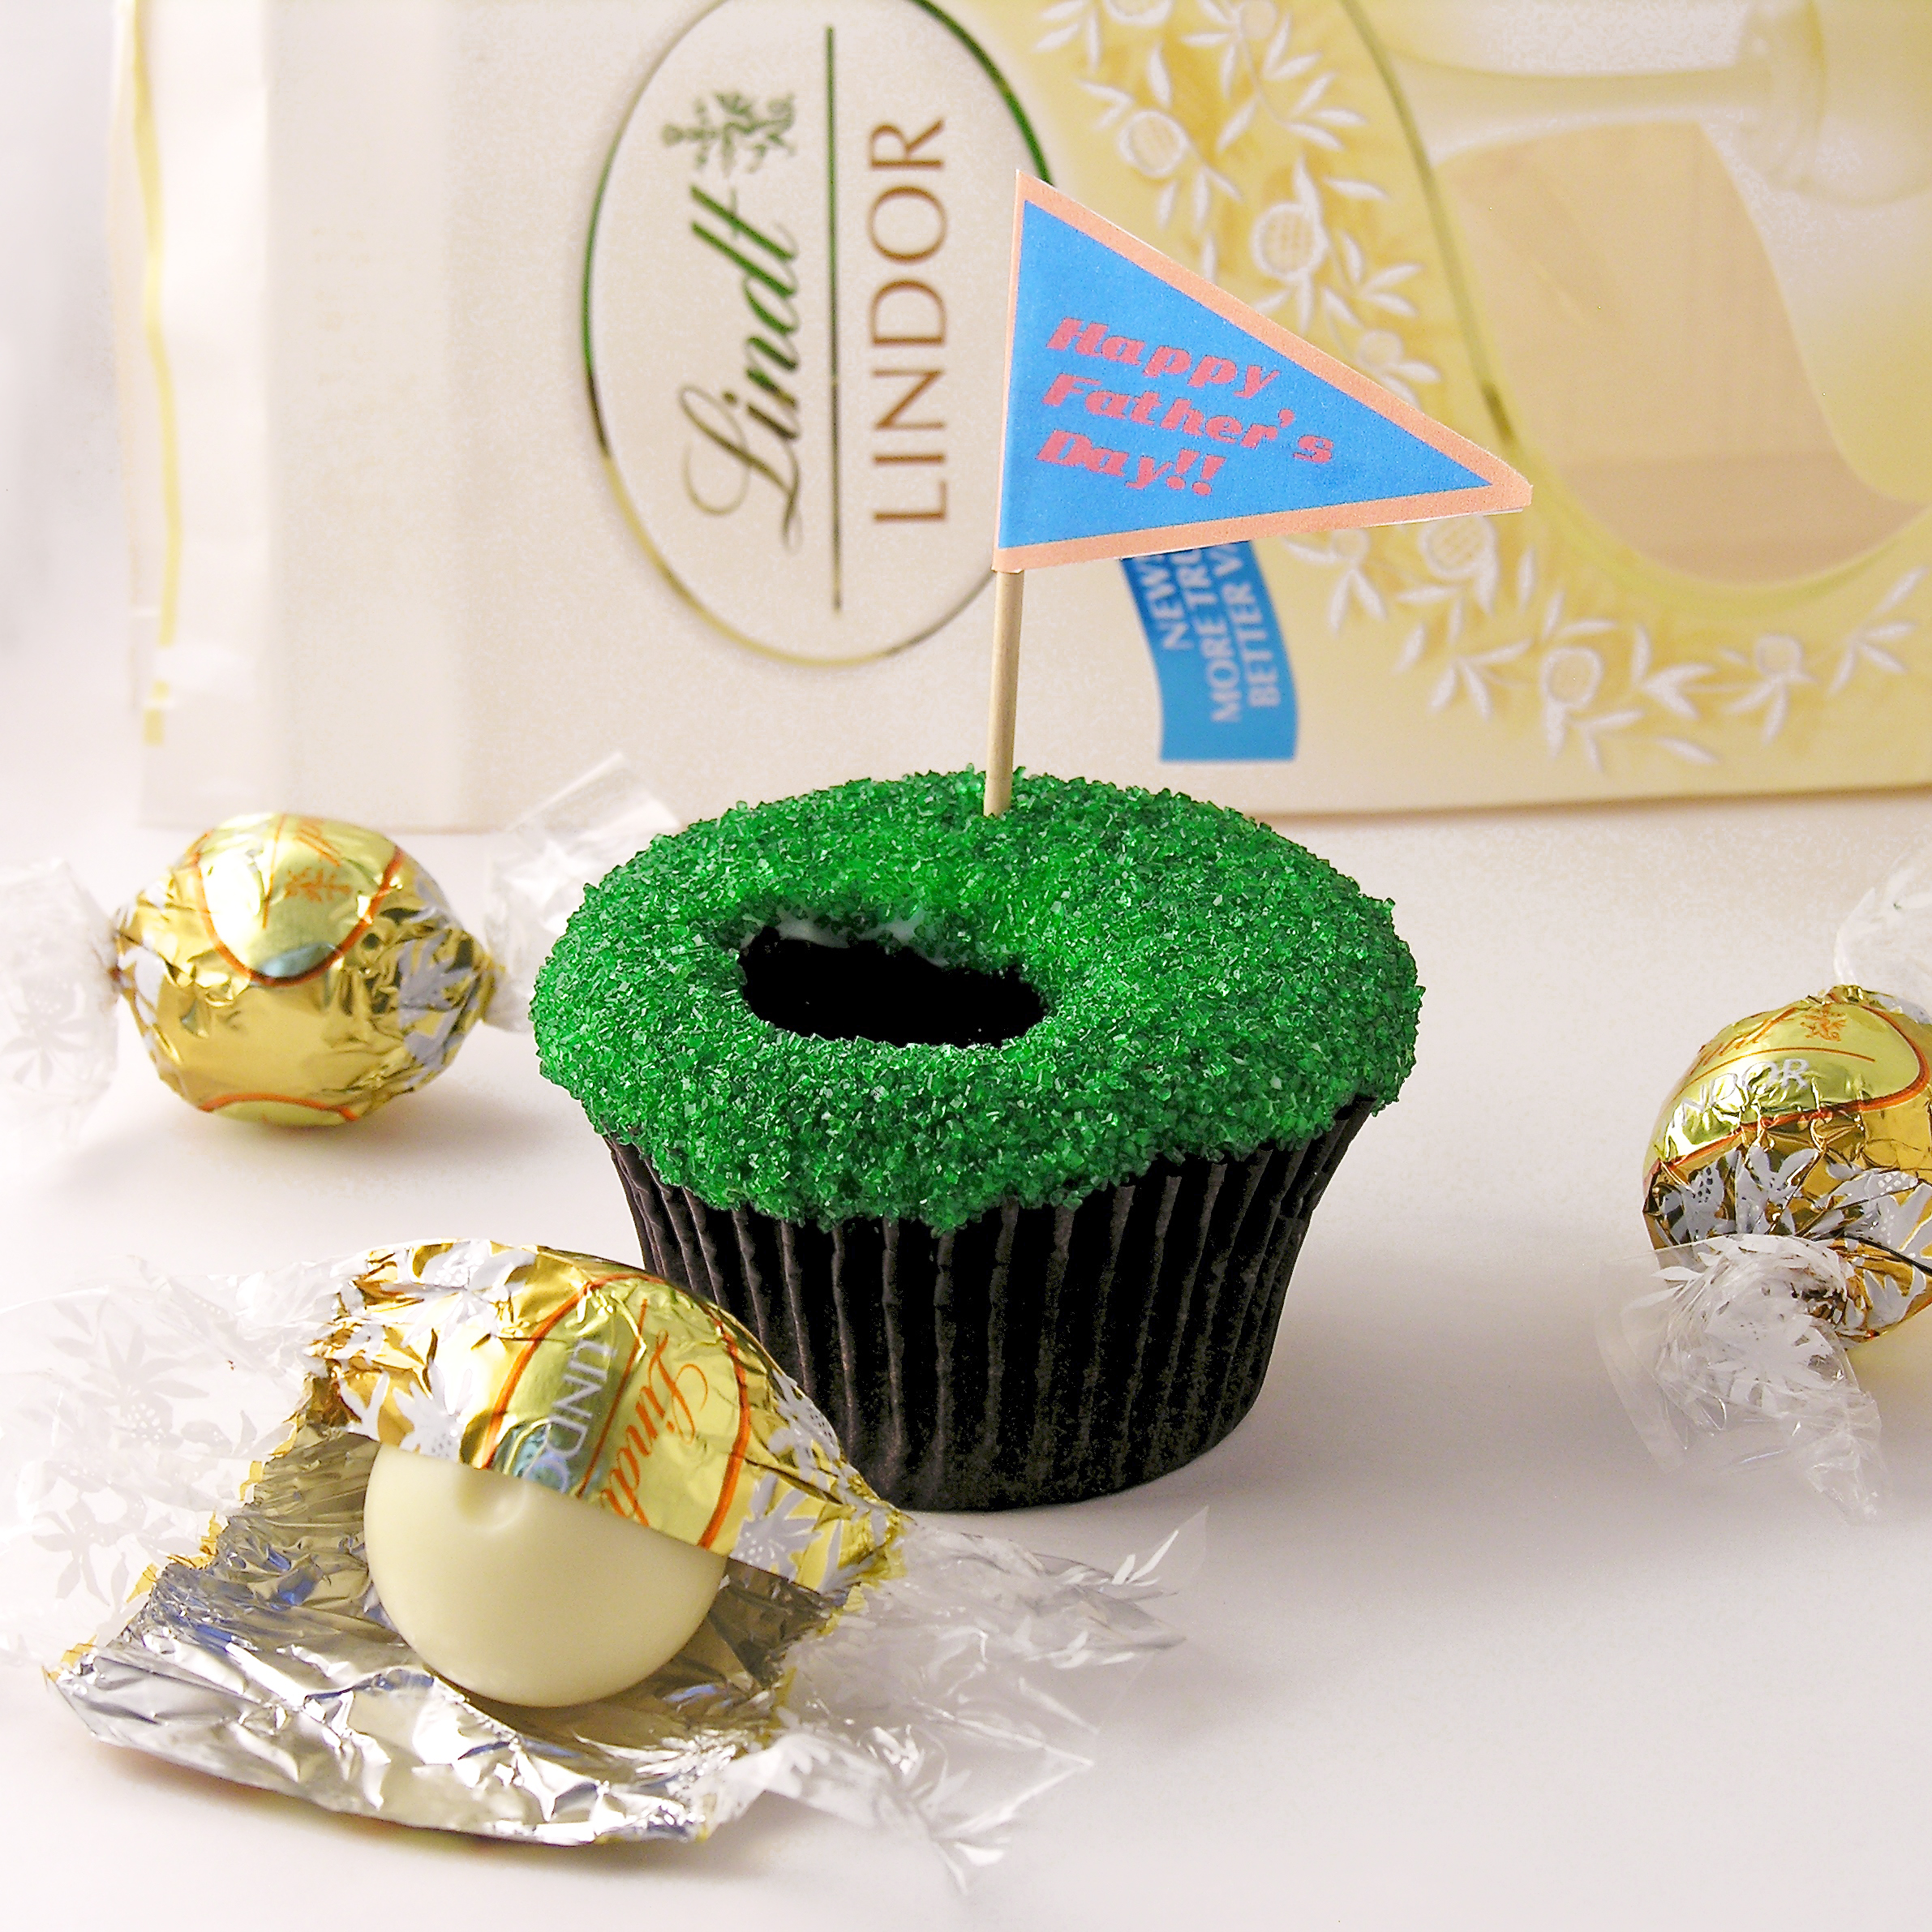
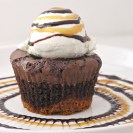
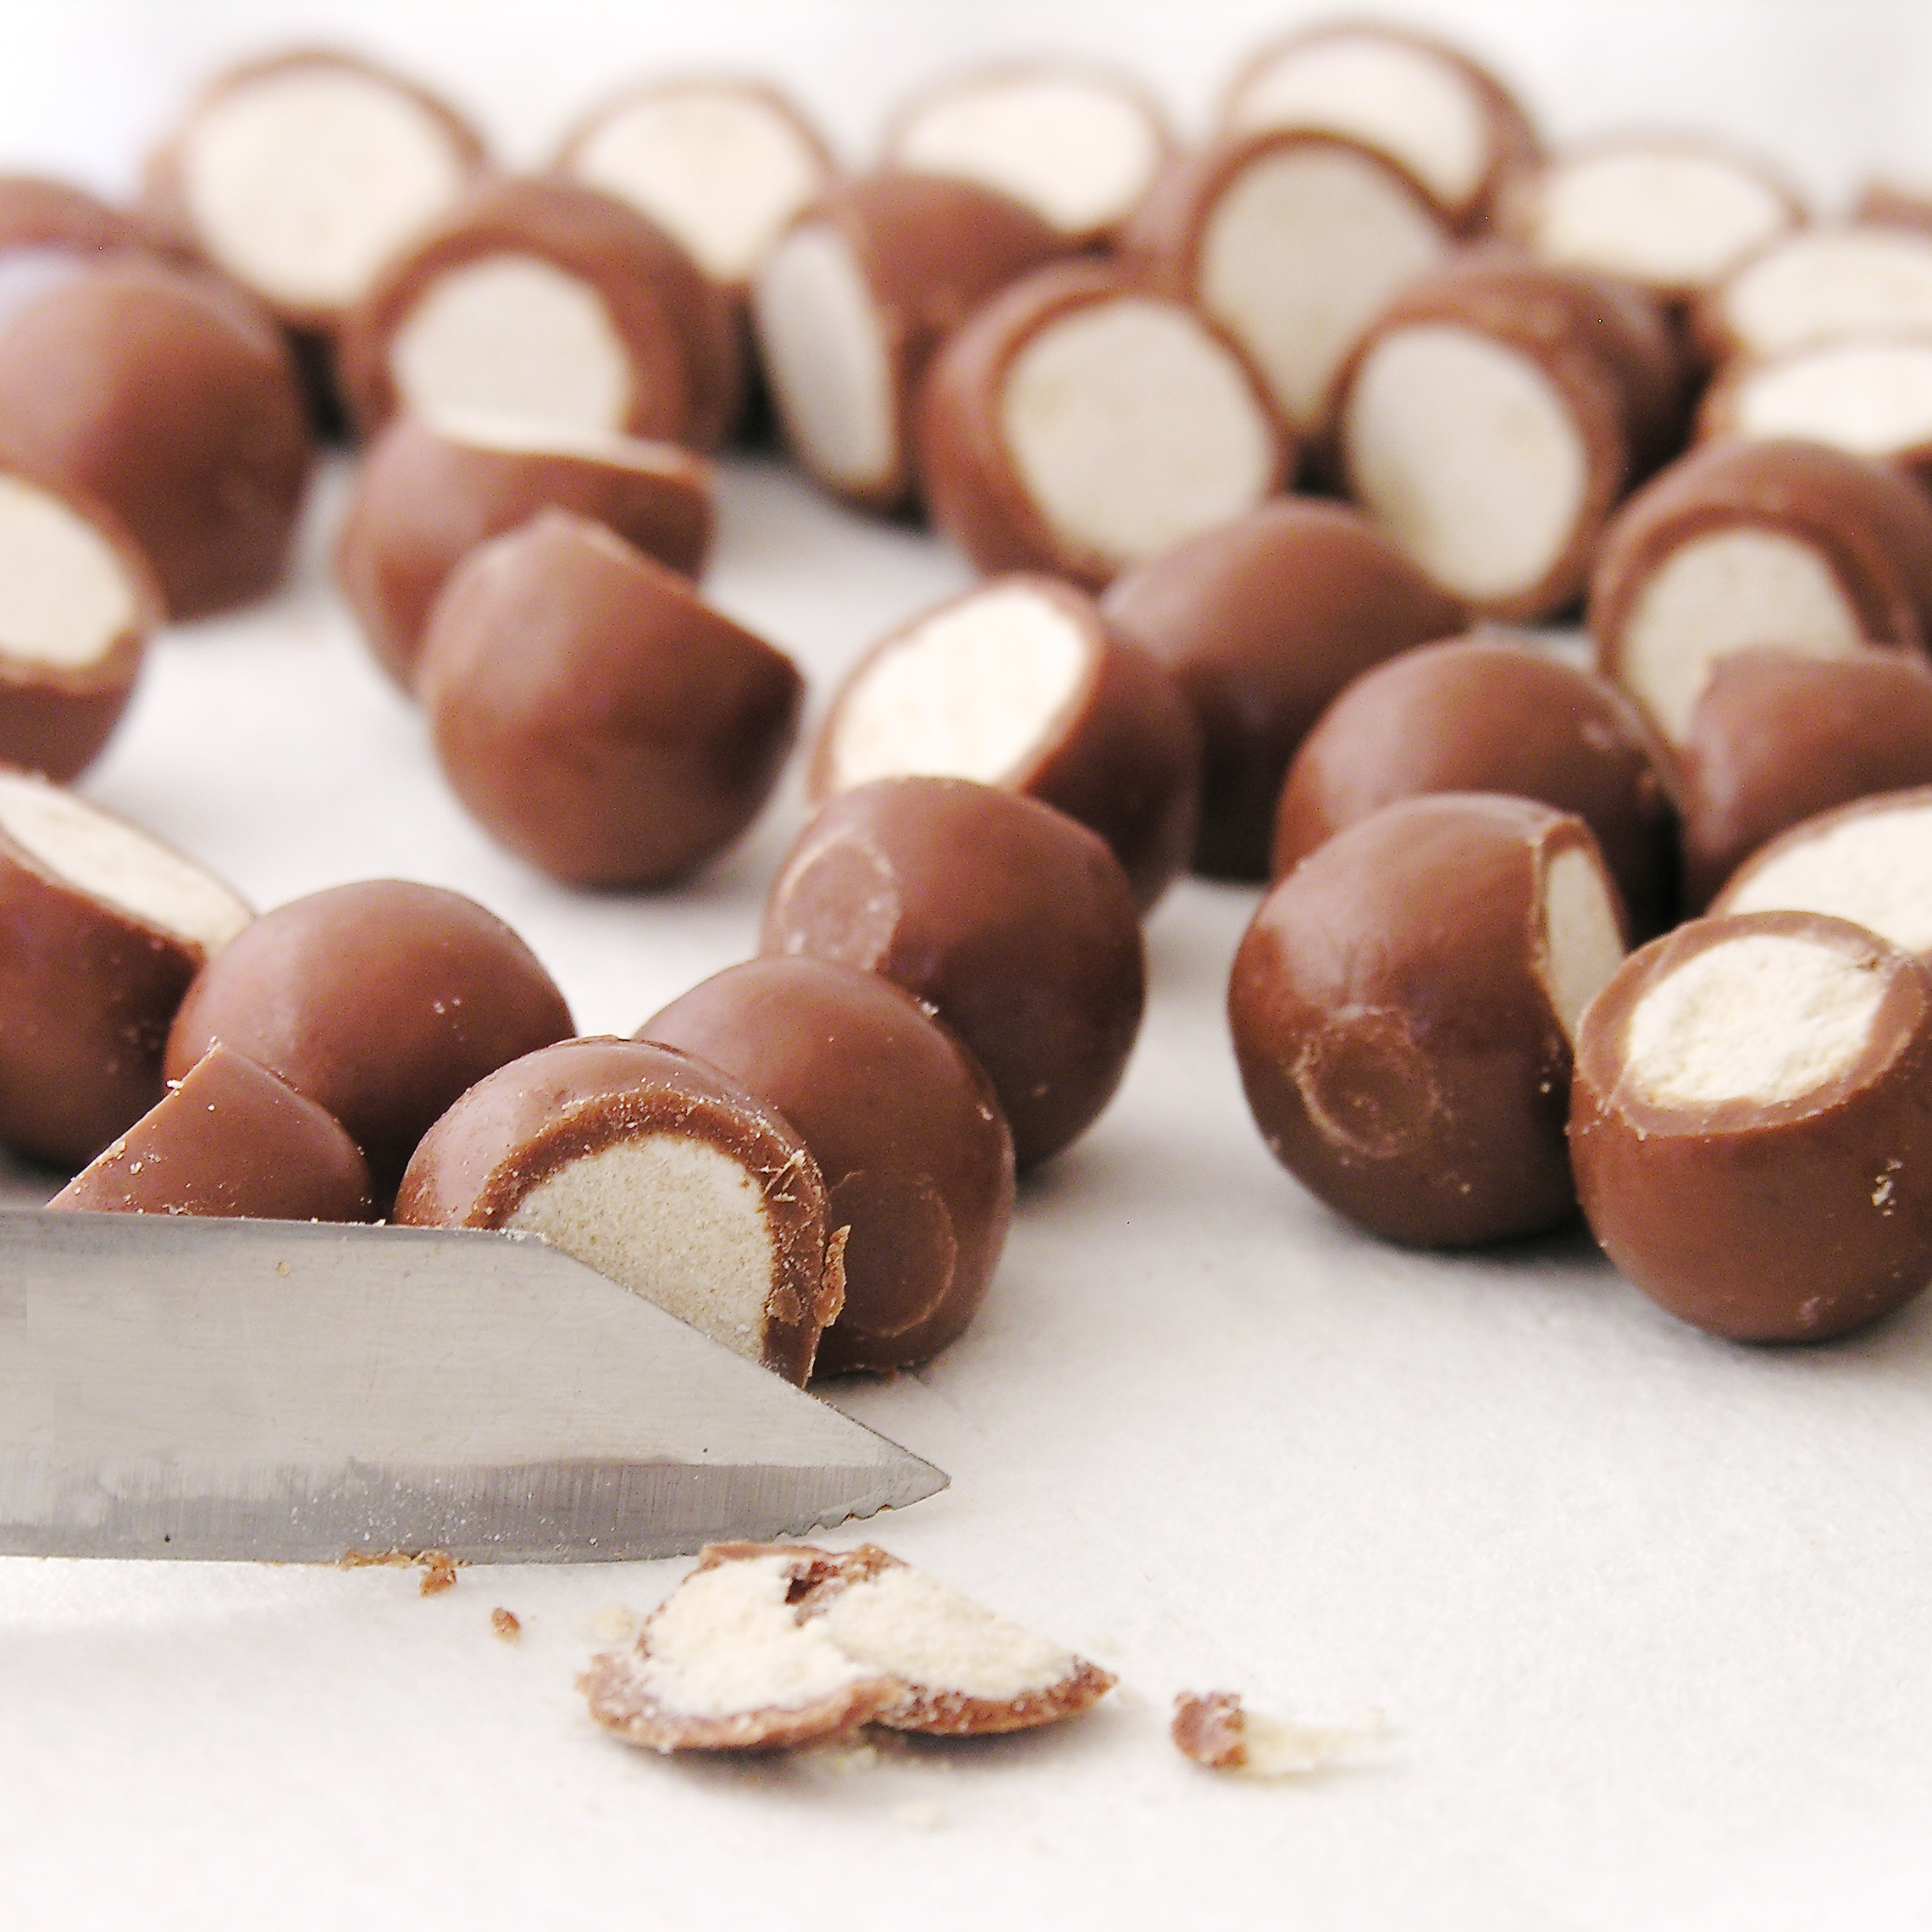
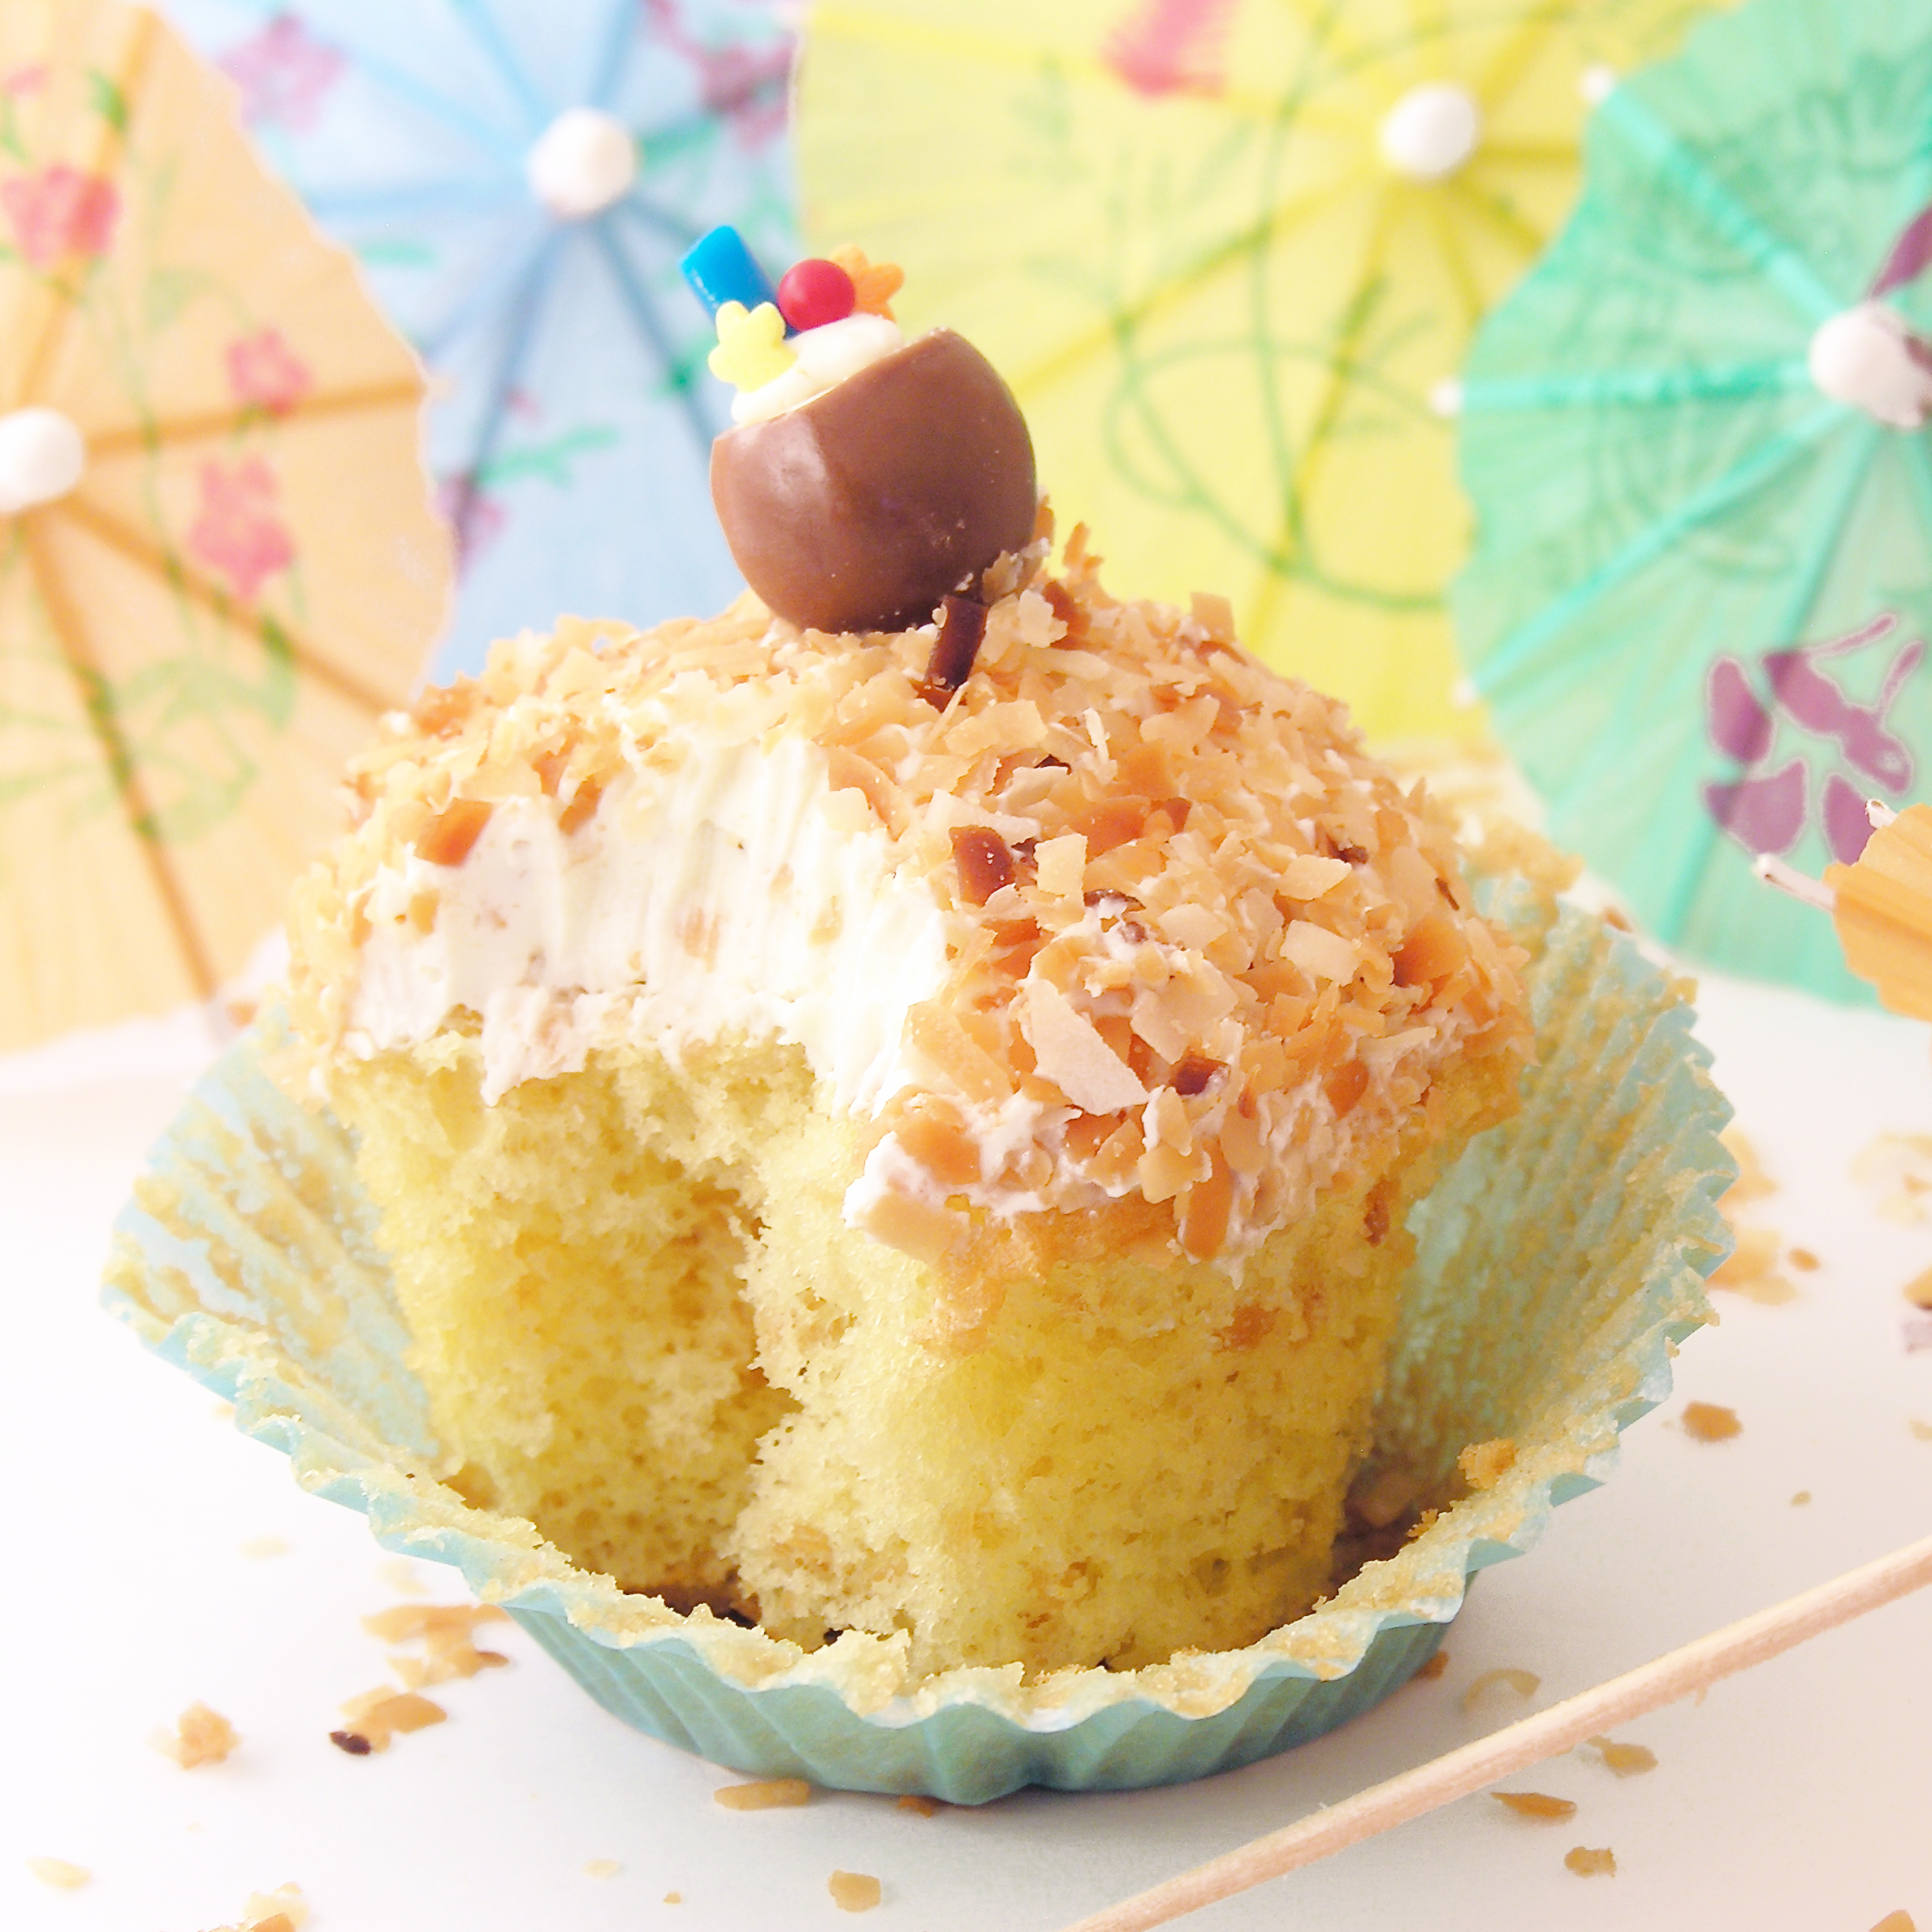
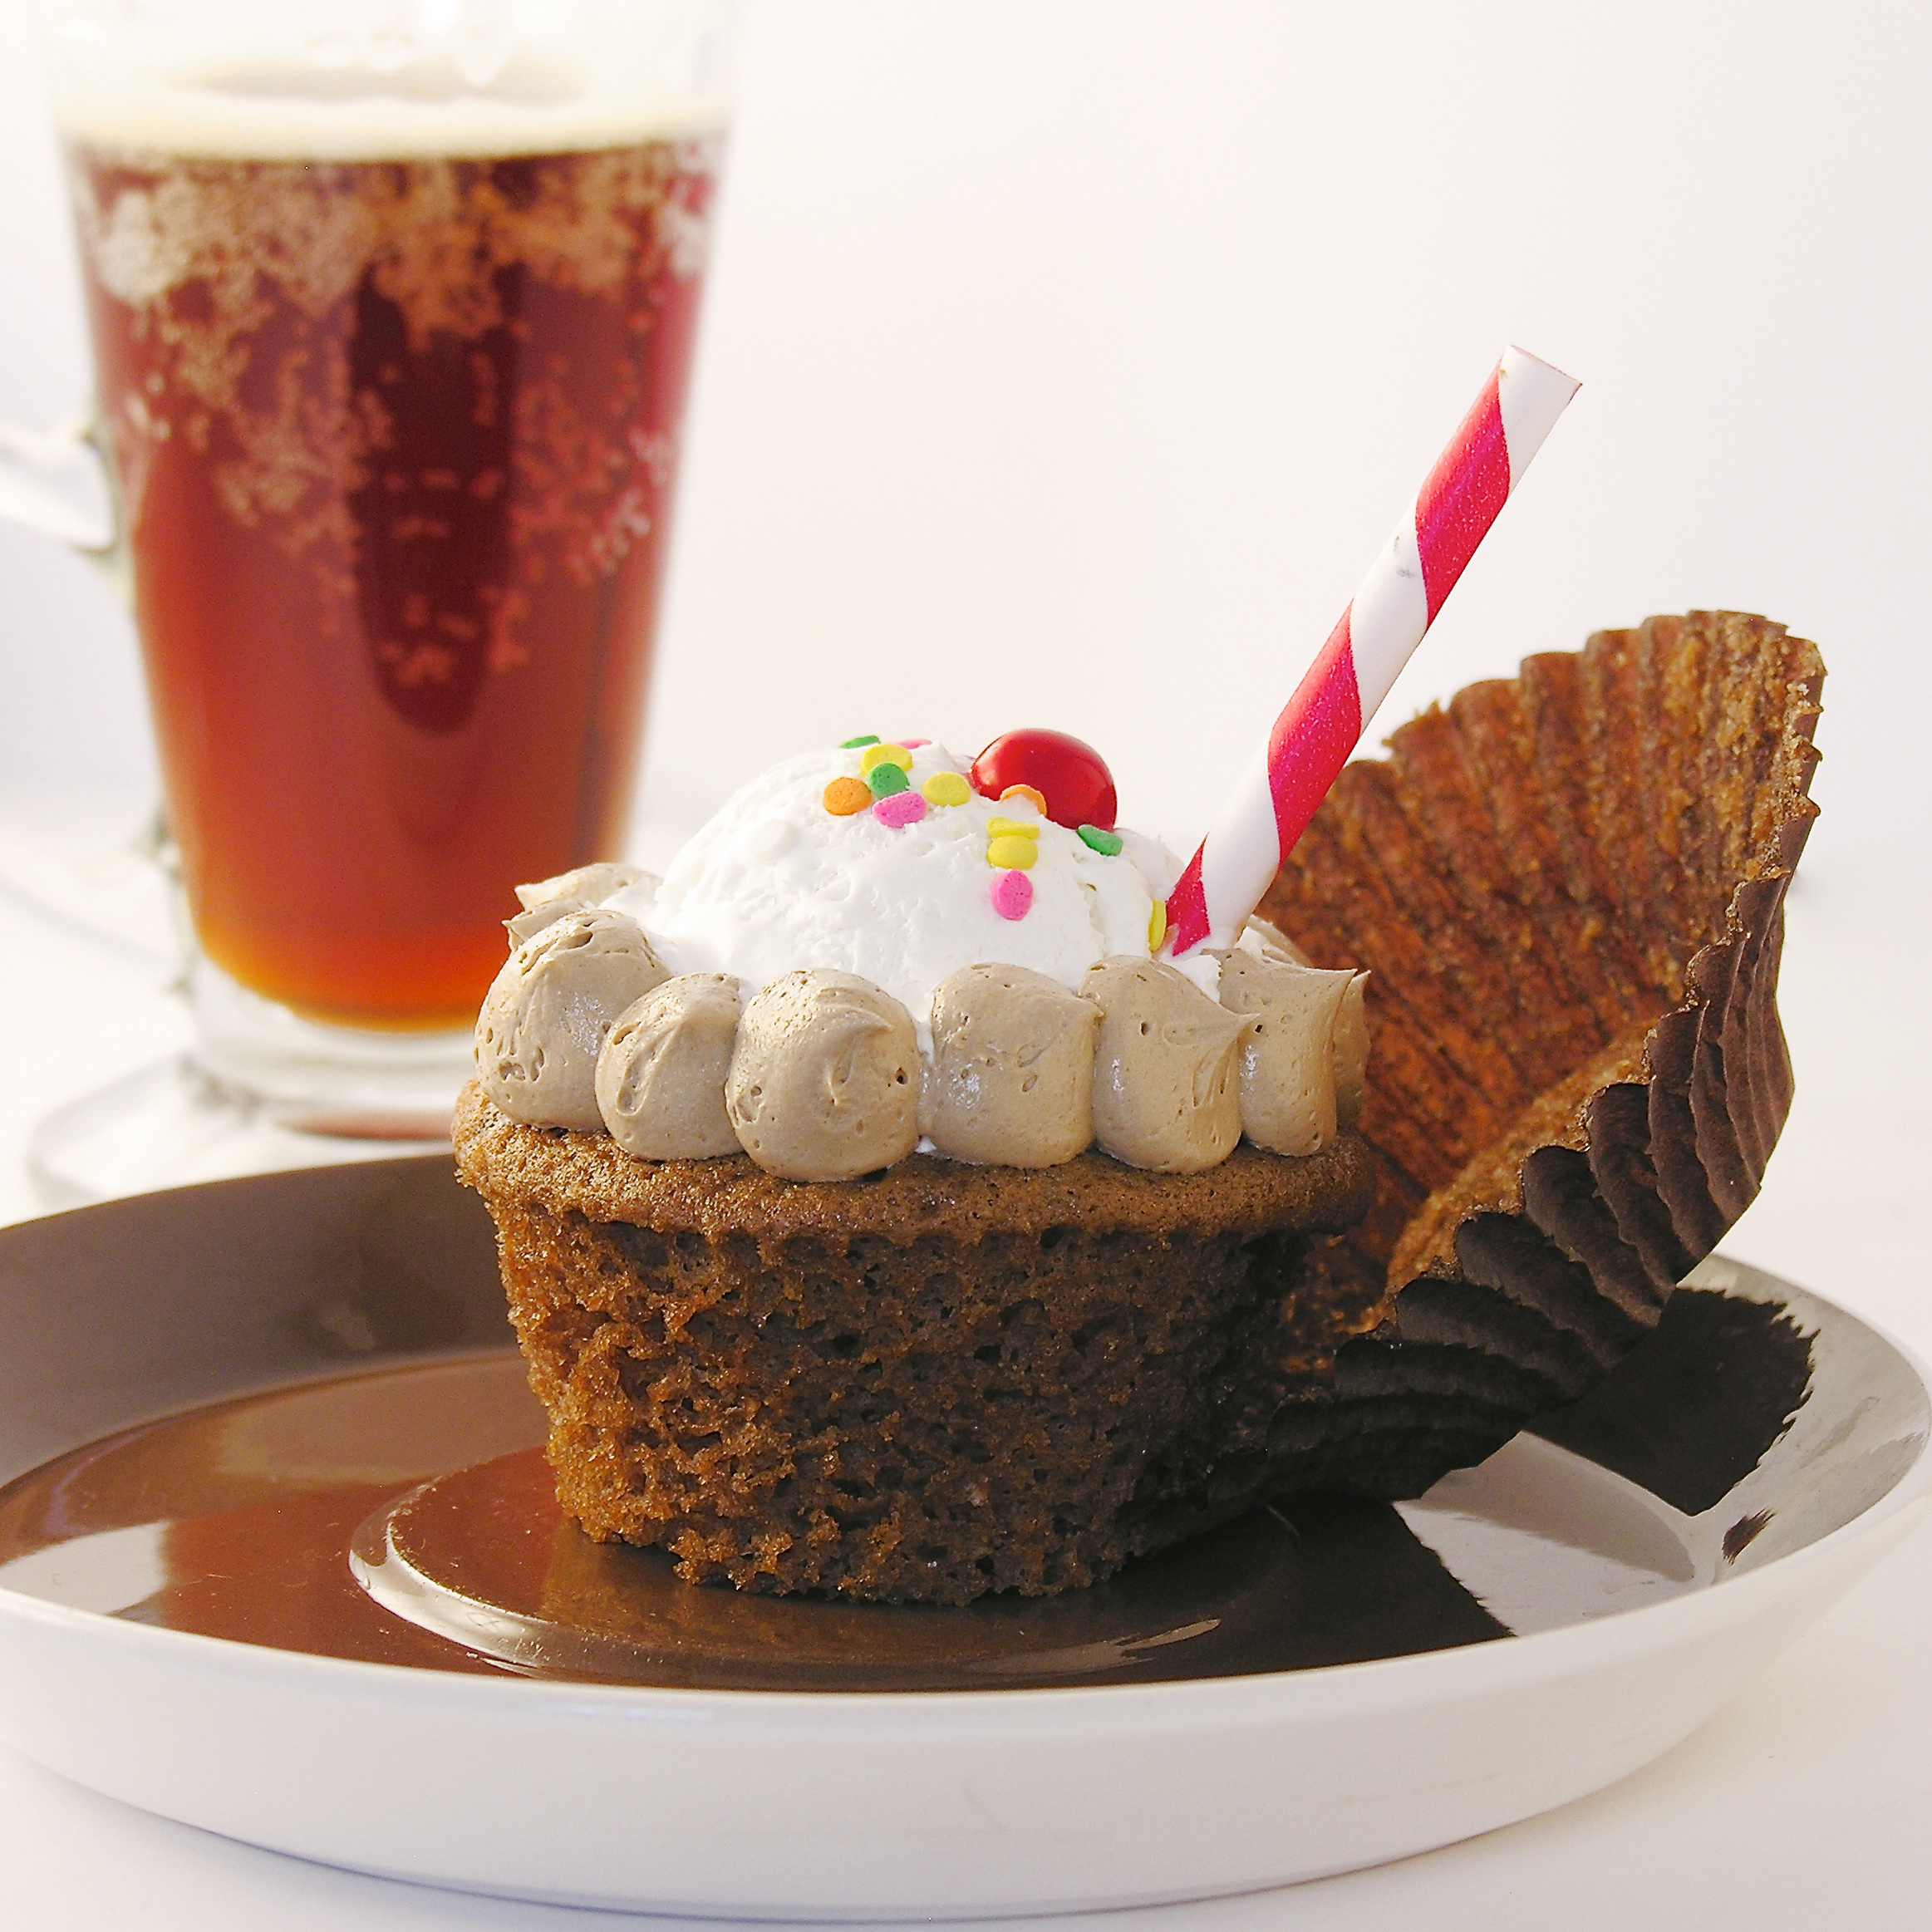
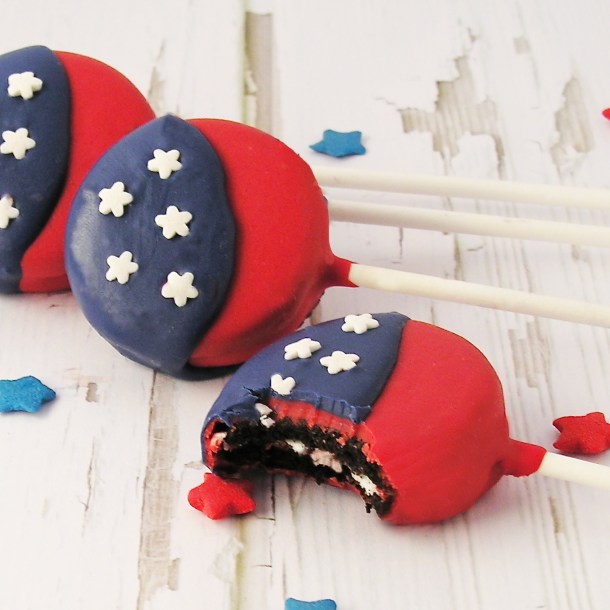
Wait— what’s inside?  That’s what makes these so much fun!!!!!

Green Bay Packer Cupcakes!
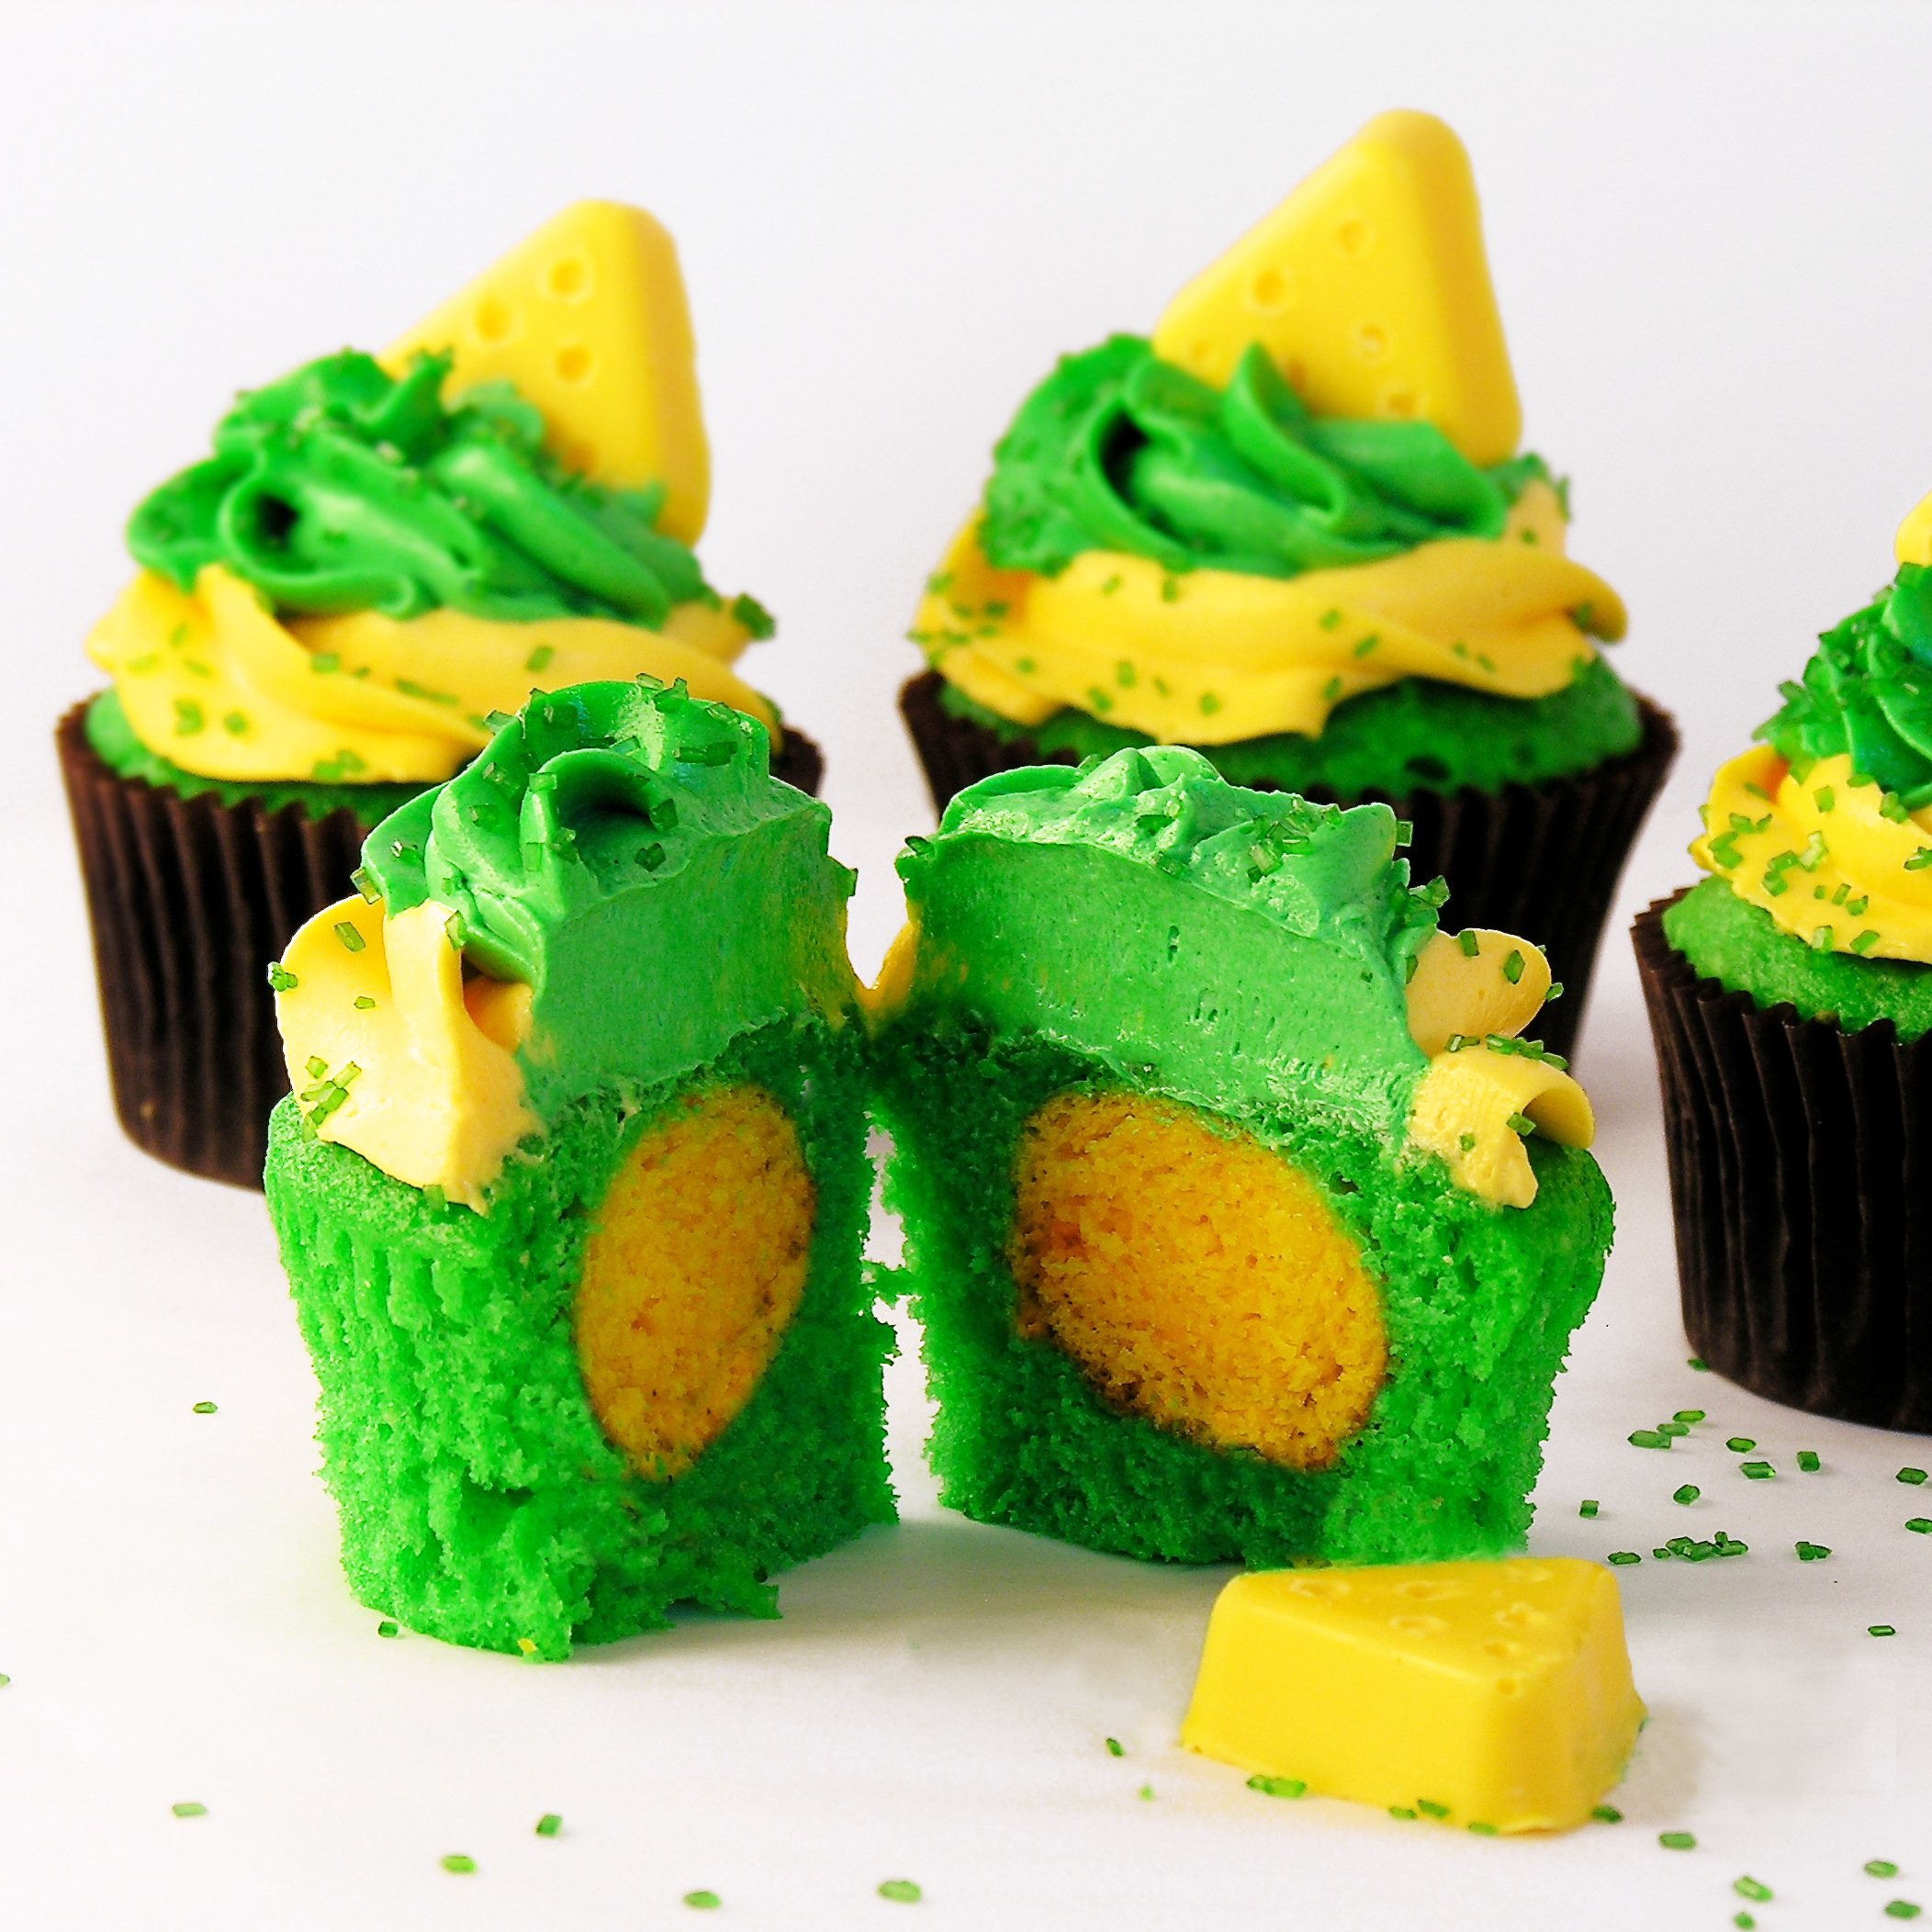
A little splash of team color hidden in the middle.  You can make these in any team colors you want- but if you make them for the Chicago Bears or the Detroit Lions you will need this tutorial here to make your cupcake toppers. 🙂

Here is how we made these: (printable recipe)

INGREDIENTS:

  • One boxed white cake mix (plus water, oil and eggs to make according to box)
  • Green and gold food color gels (or your team colors)
  • 2 sticks (1 cup) of salted butter, softened
  • 2 sticks (1 cup) of unsalted butter, softened
  • 3 cups of powdered sugar
  • 1 teaspoon of vanilla (or any flavoring you’d like to add to your frosting)
  • 1 bag of Wilton’s candy melts in yellow (if you want cheesehead toppers!!)  You will also need little triangle chocolate molds for these.

DIRECTIONS:

  • Make cake mix as directed on box, and take about 1/4 of the batter and mix it with yellow food color gel.
  • Using a cake pop maker or a small mini muffin tin, make 24 small, baked balls of cake in yellow. (click here for pictures of how to make these cake balls)
  • Color remaining batter with green food color gel.
  • Preheat oven to 350F degrees.
  • Spoon a little bit of green batter into 24 cupcake liners placed in muffin tins.
  • Place one cake ball in each cavity in the center of the green batter.

Cheesehead Cupcakes!!!

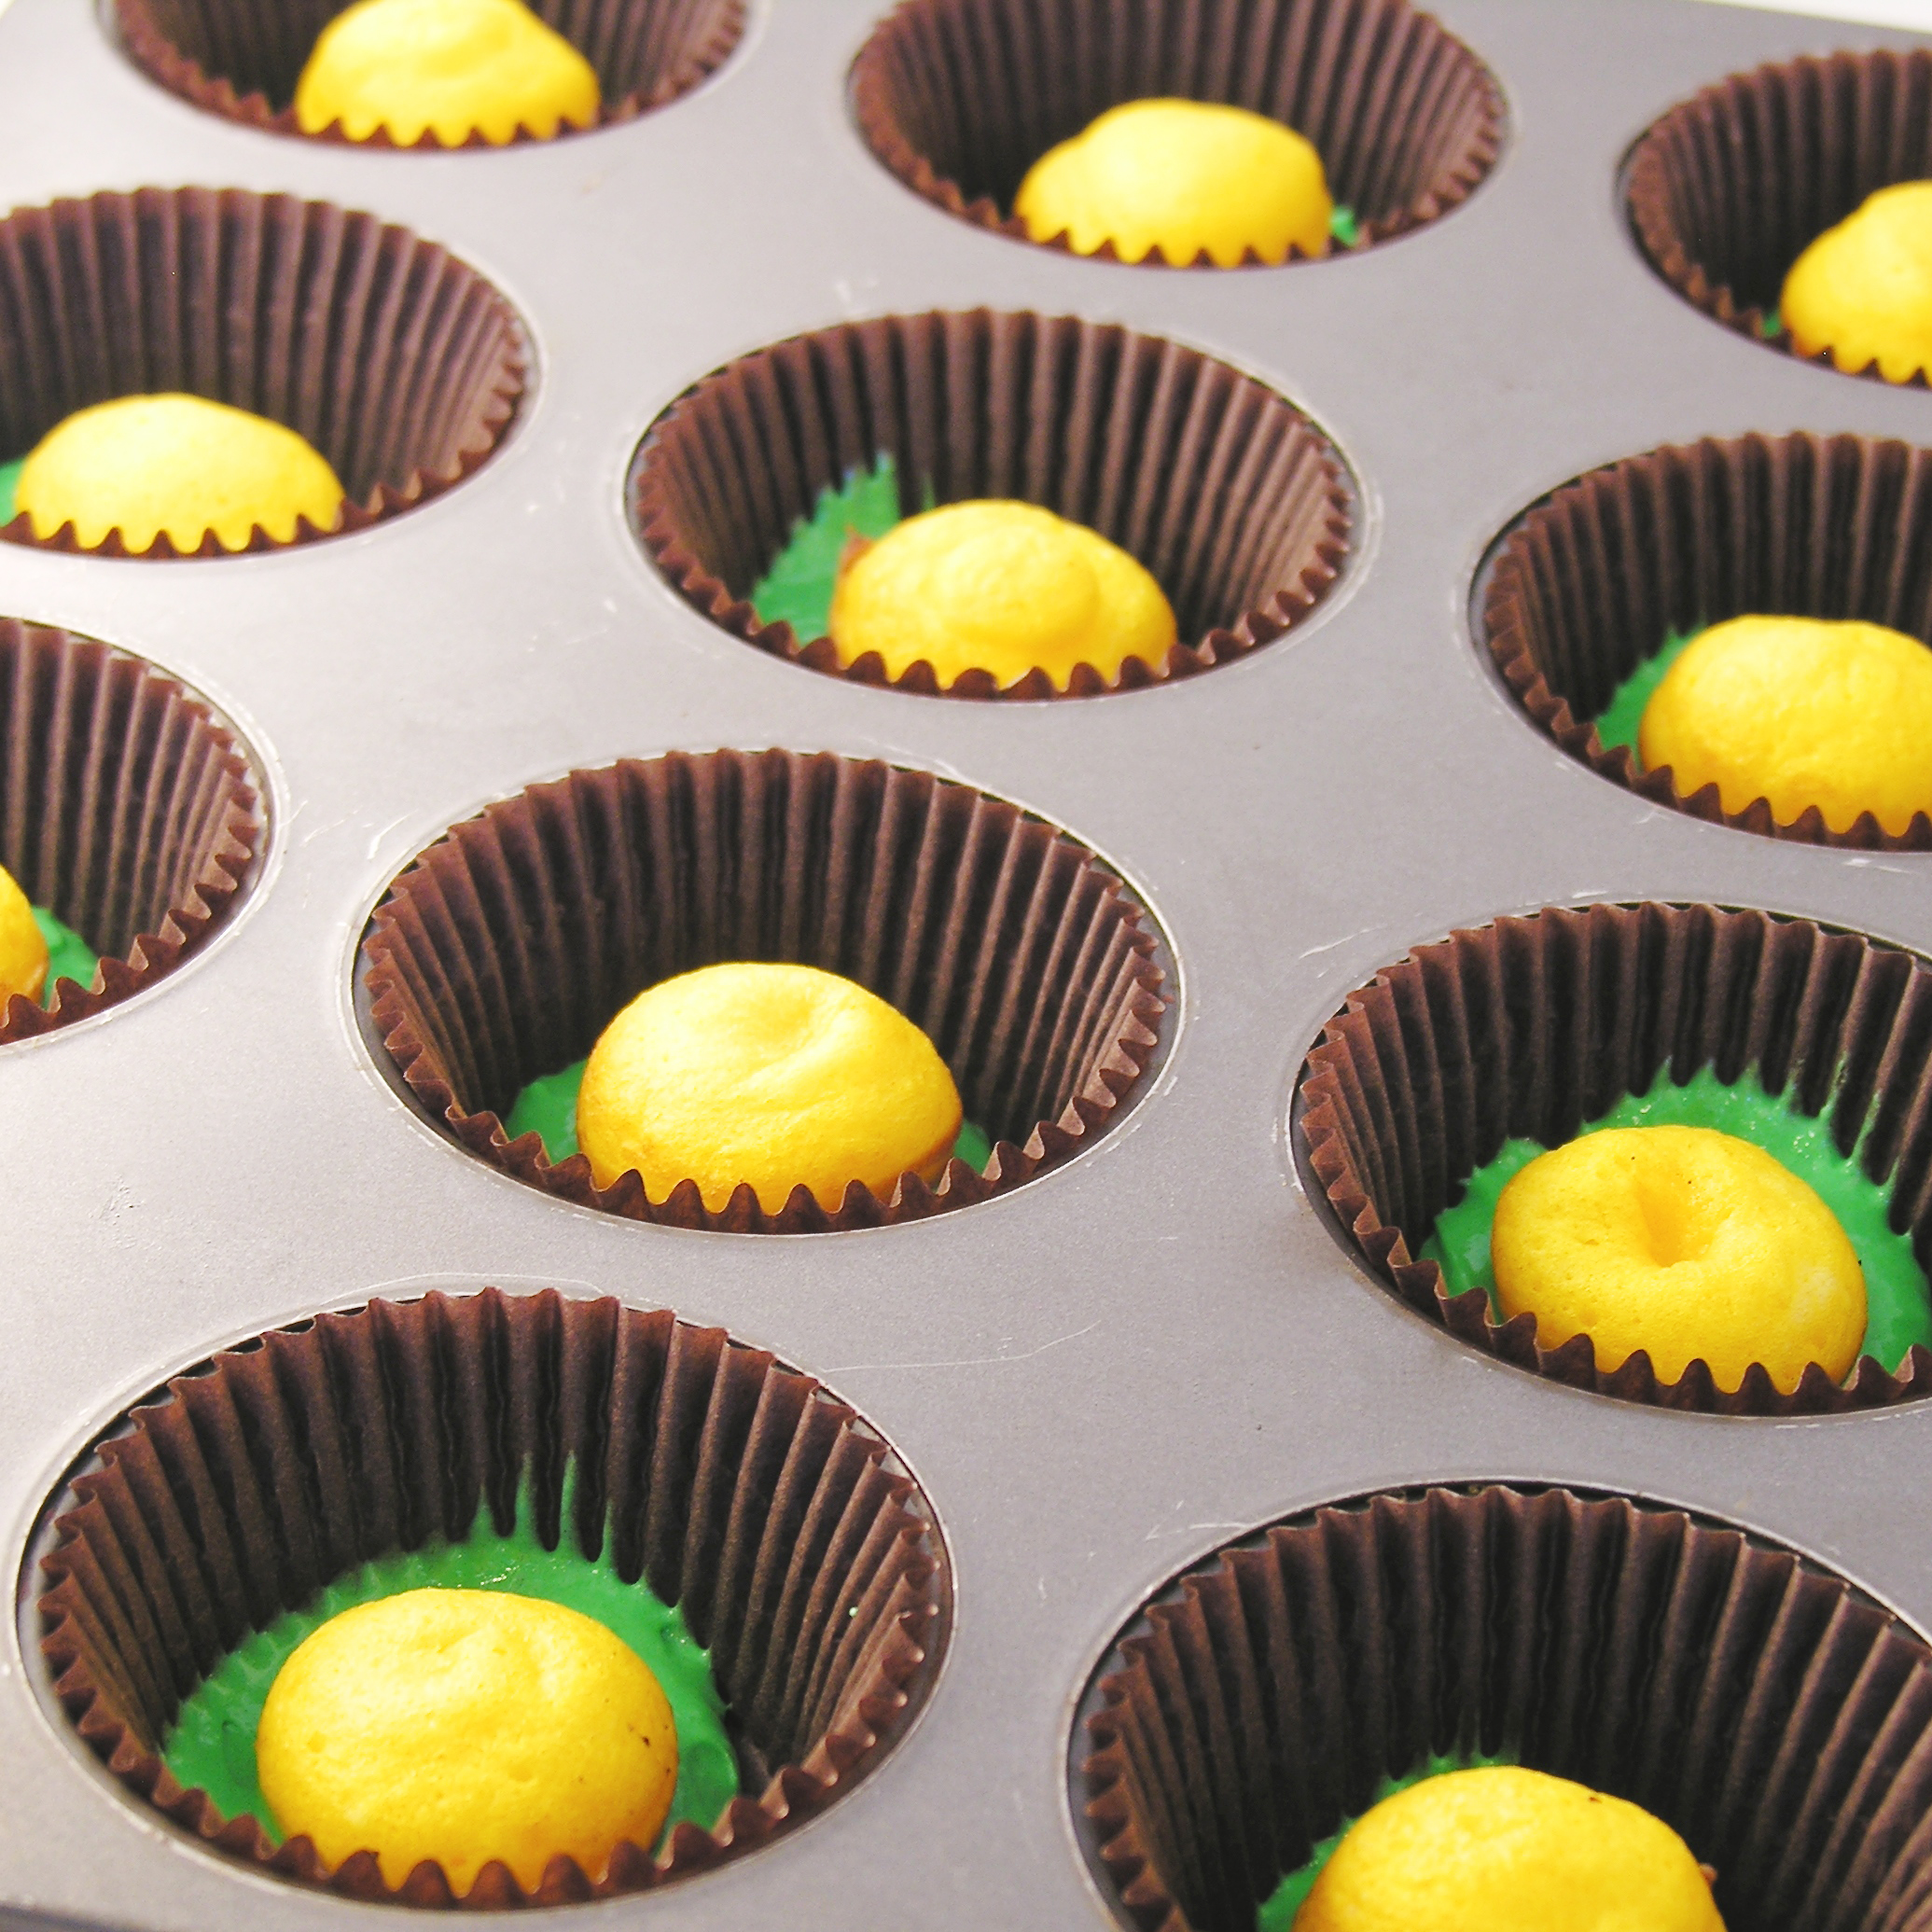
  • Carefully spoon more green batter over the top of each yellow cake ball, filling each cup only 2/3 to 3/4 full (be careful to not over-fill. That is easy to do when you are focused on covering up that cake ball!)
  • Bake at 350F degrees for 15-18 minutes.
  • Allow cupcakes to cool completely.
  • Make frosting by placing butters, powdered sugar and vanilla in a large bowl and beating on high for 3-4 minutes until light and fluffy.
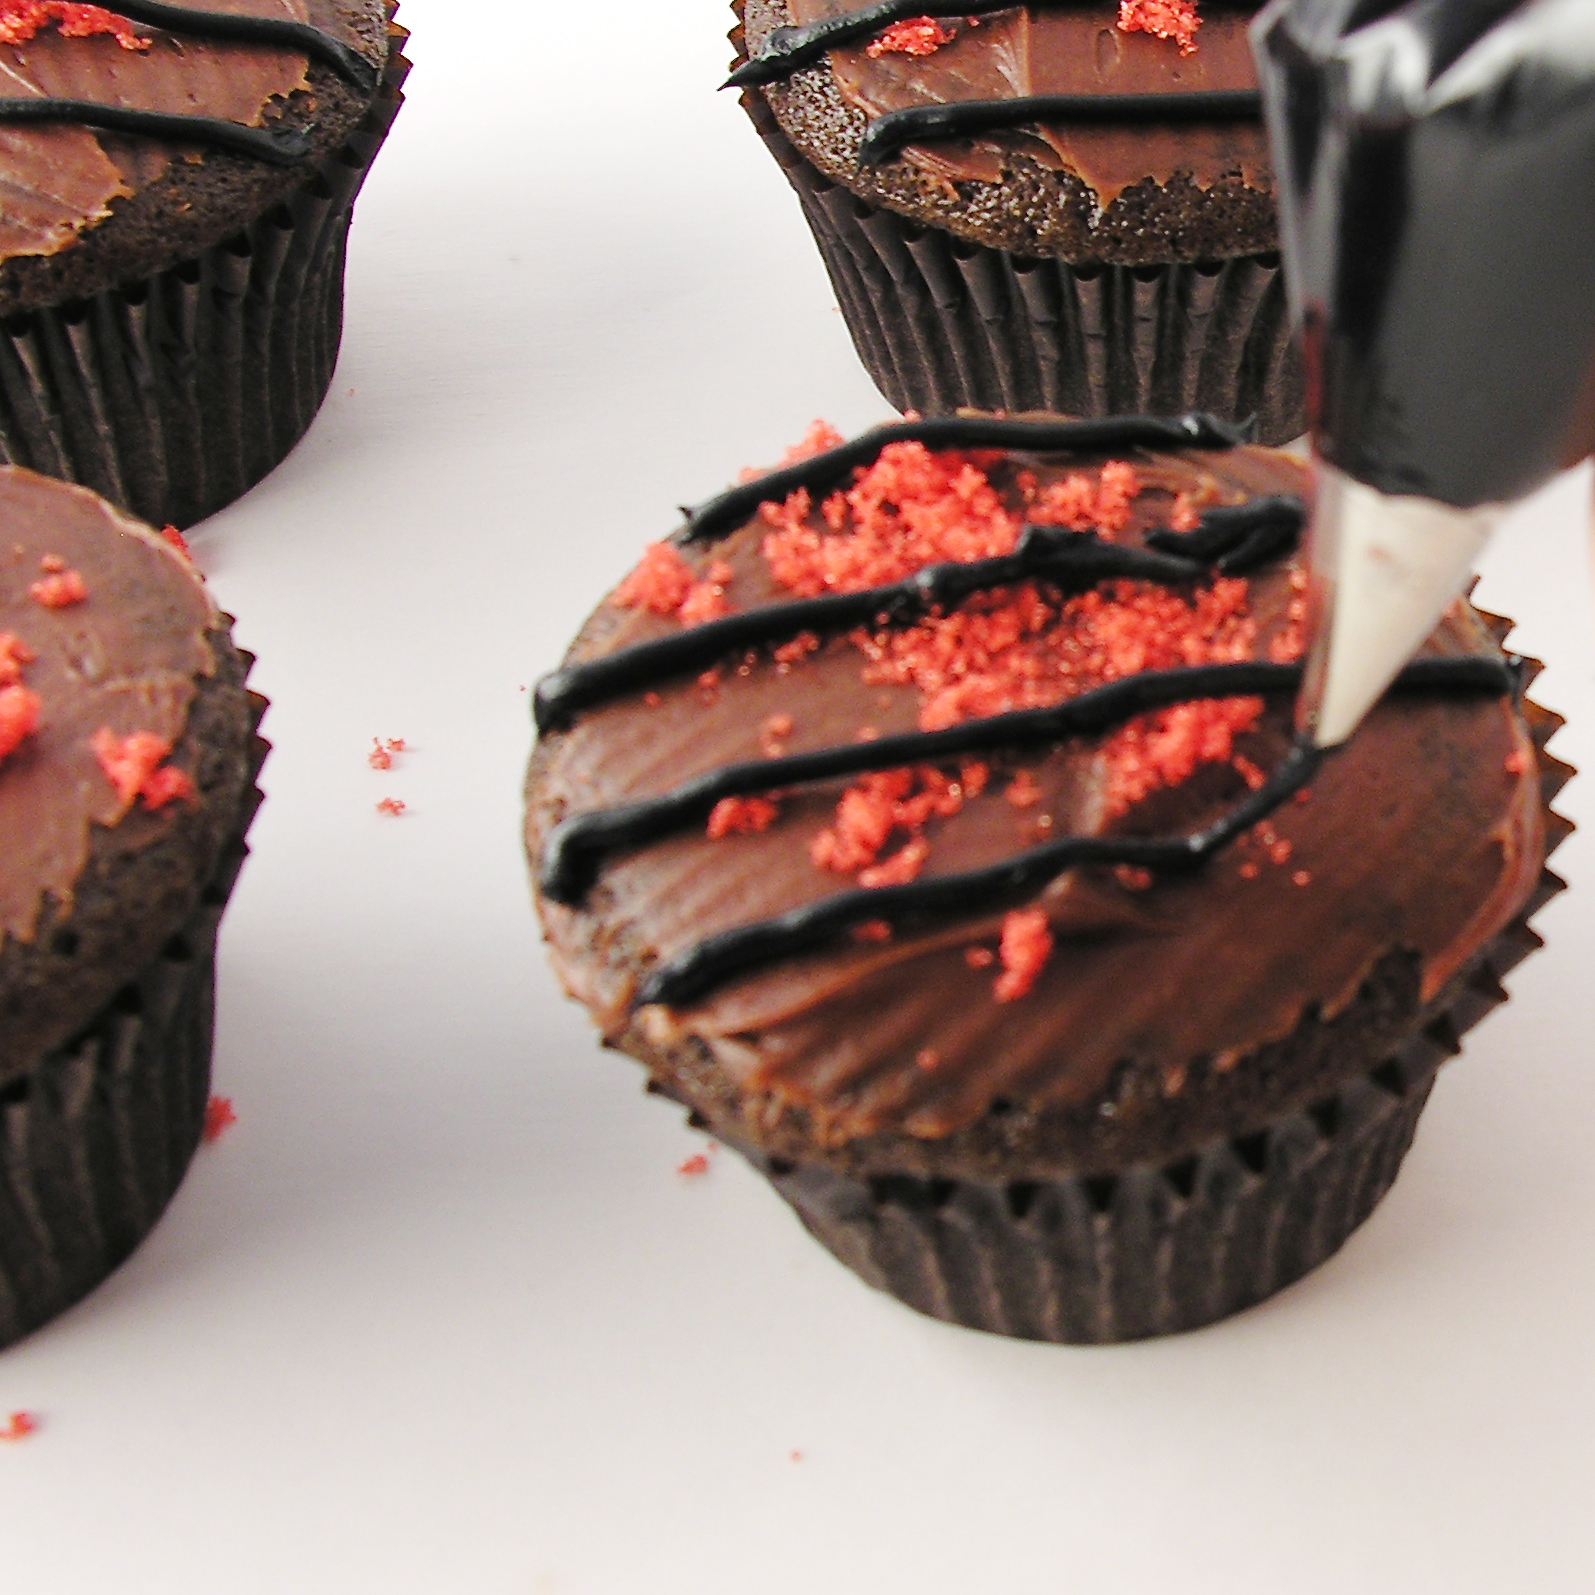
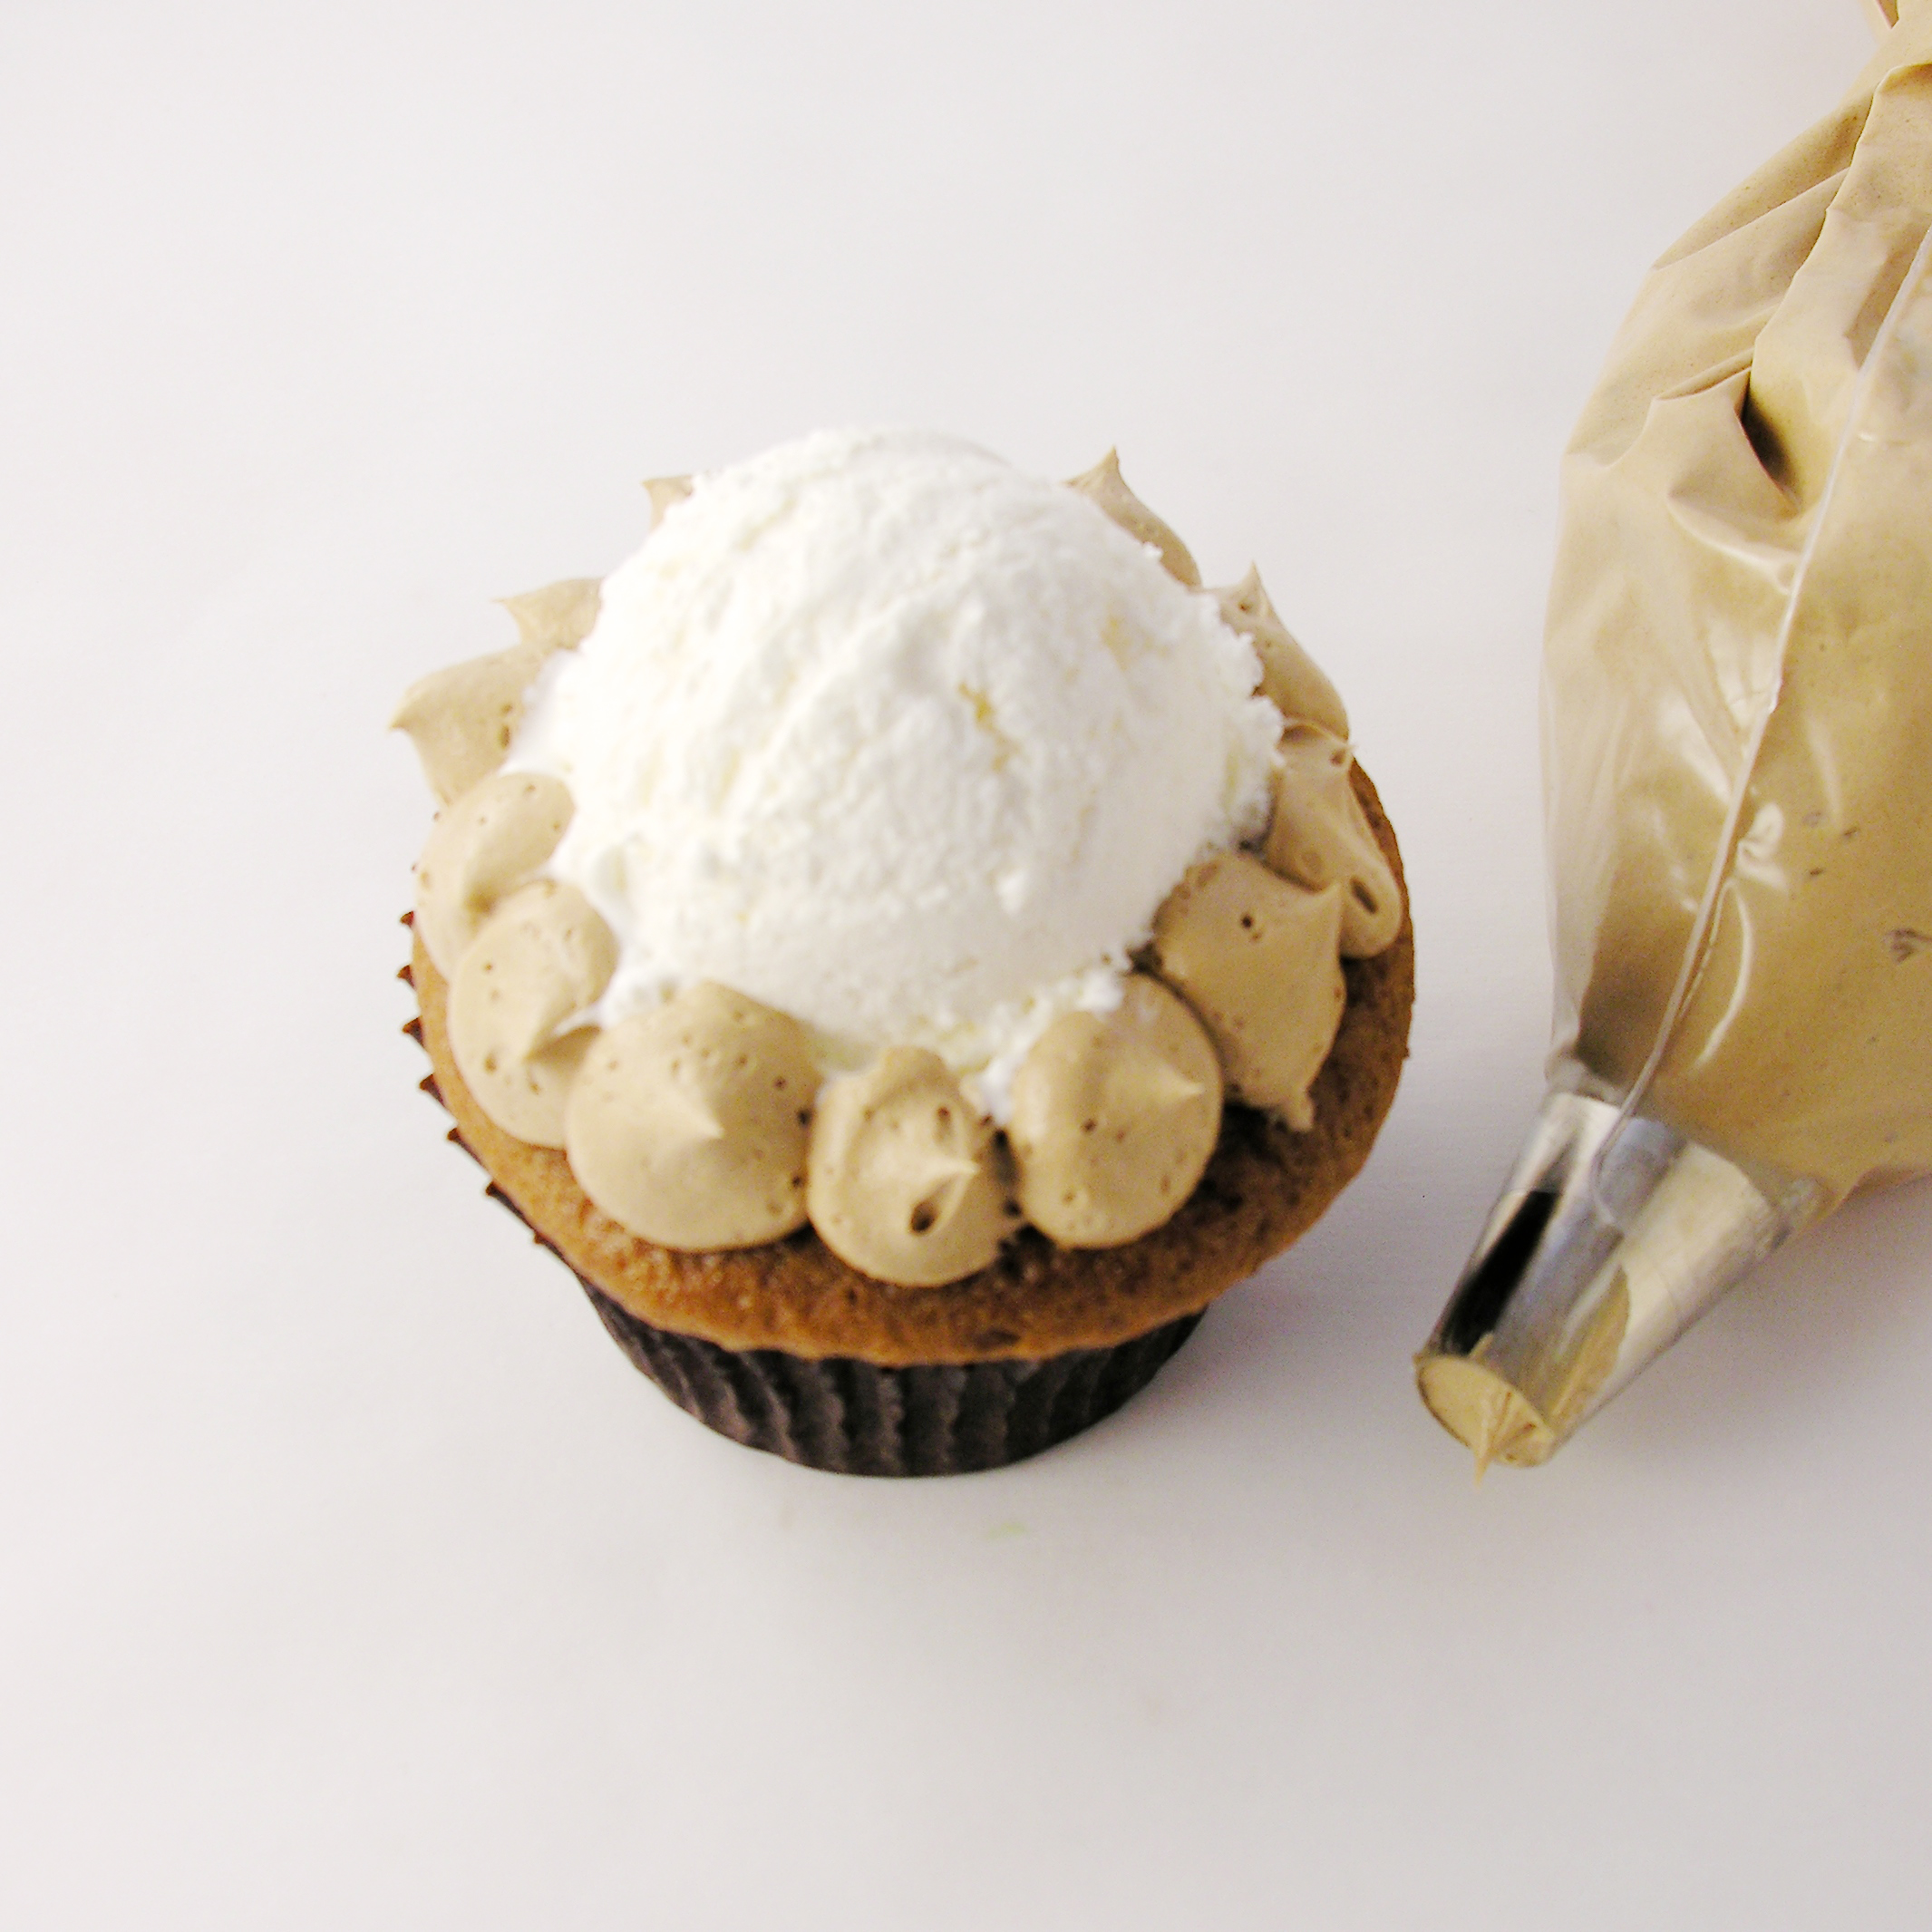
  • Divide frosting in half and color one half gold and the other half green. Place each color in a zip top bag that has been fitted with a decorating tip.
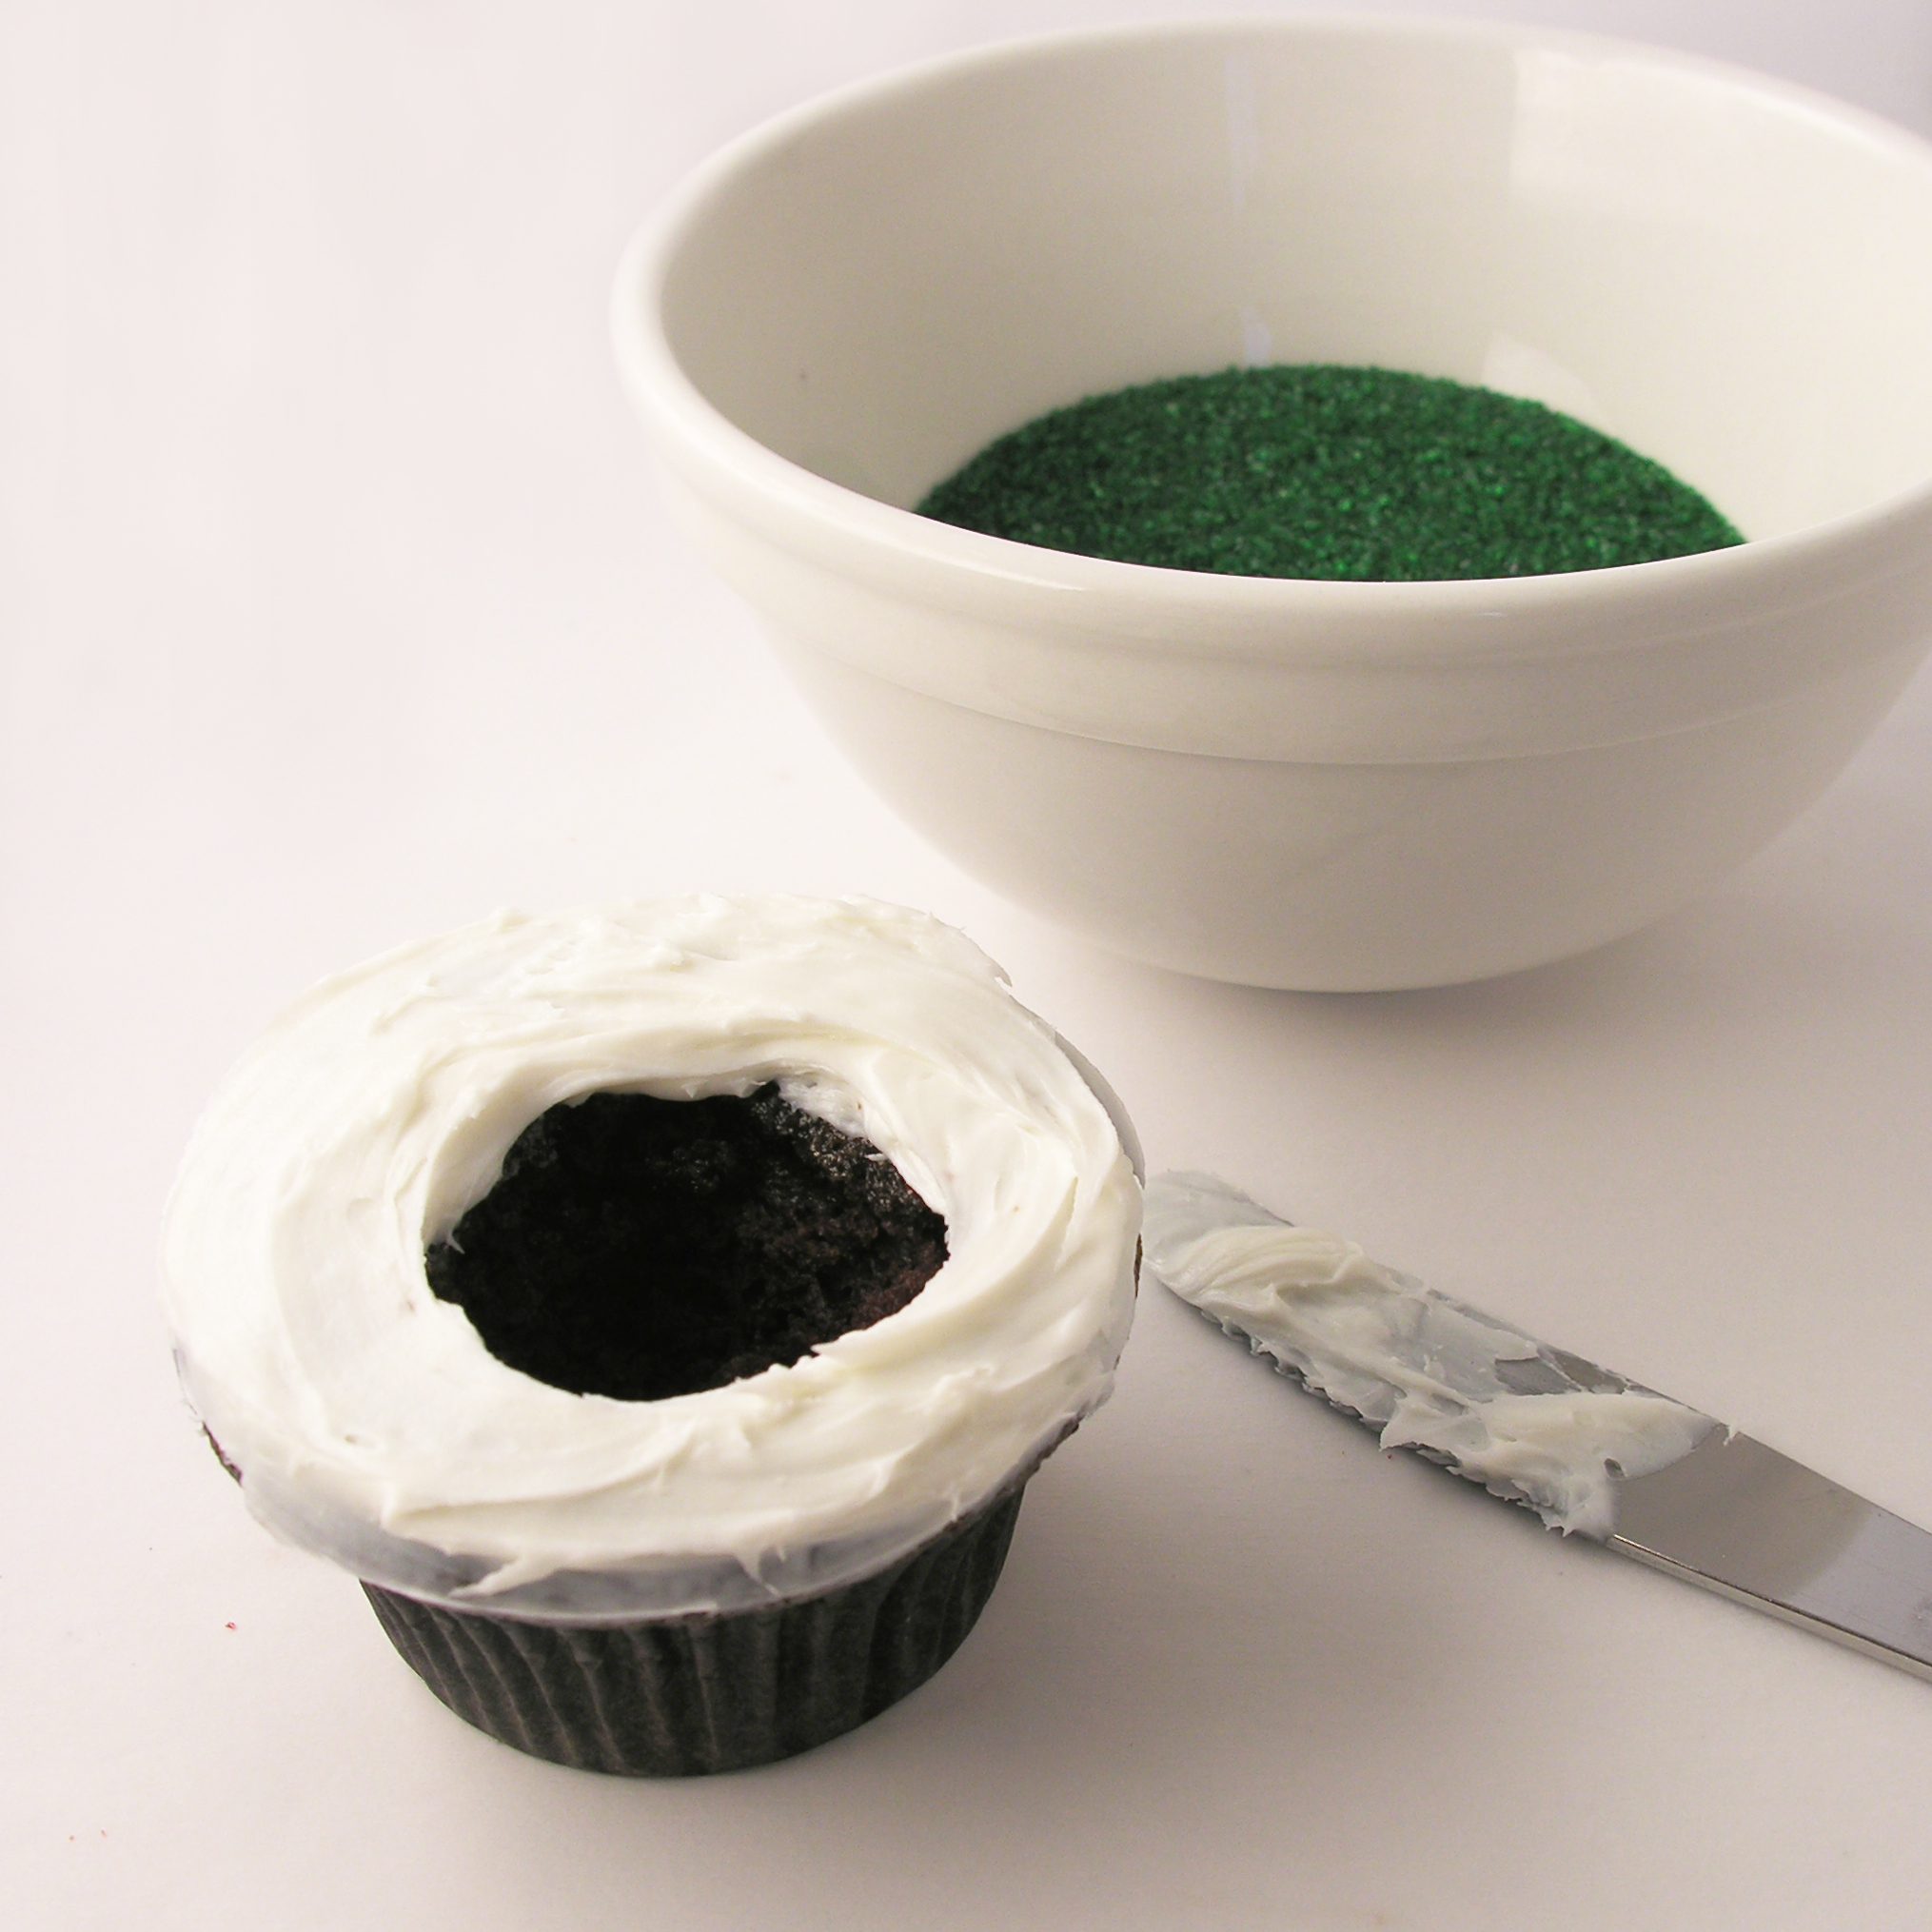
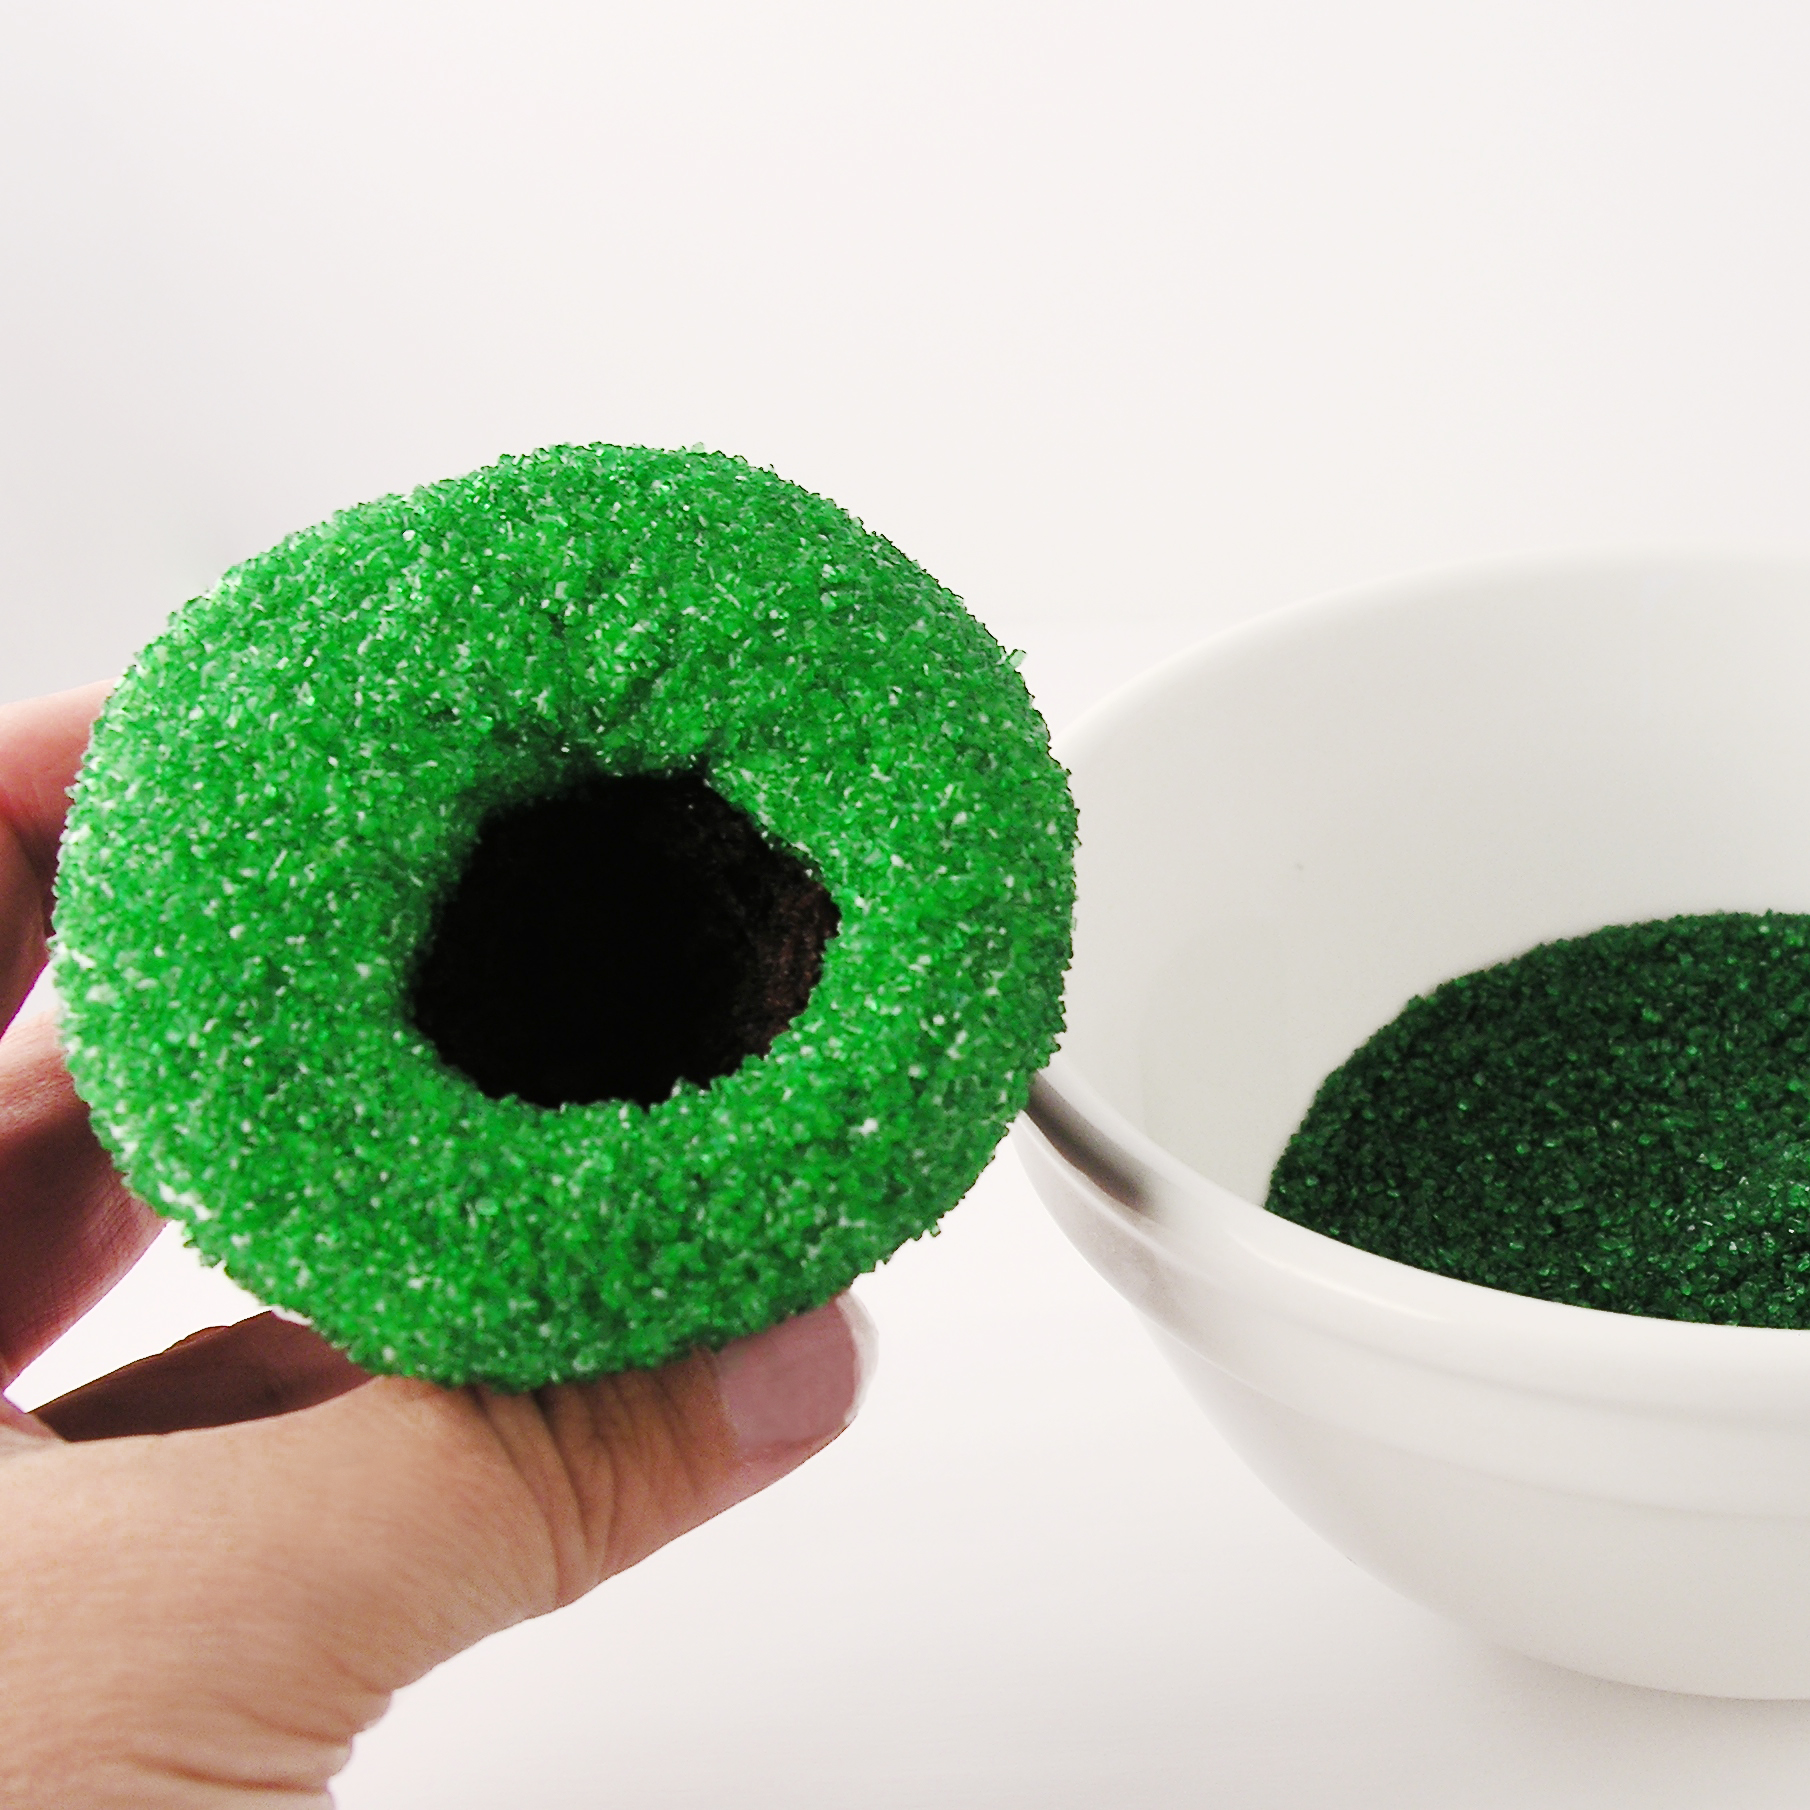
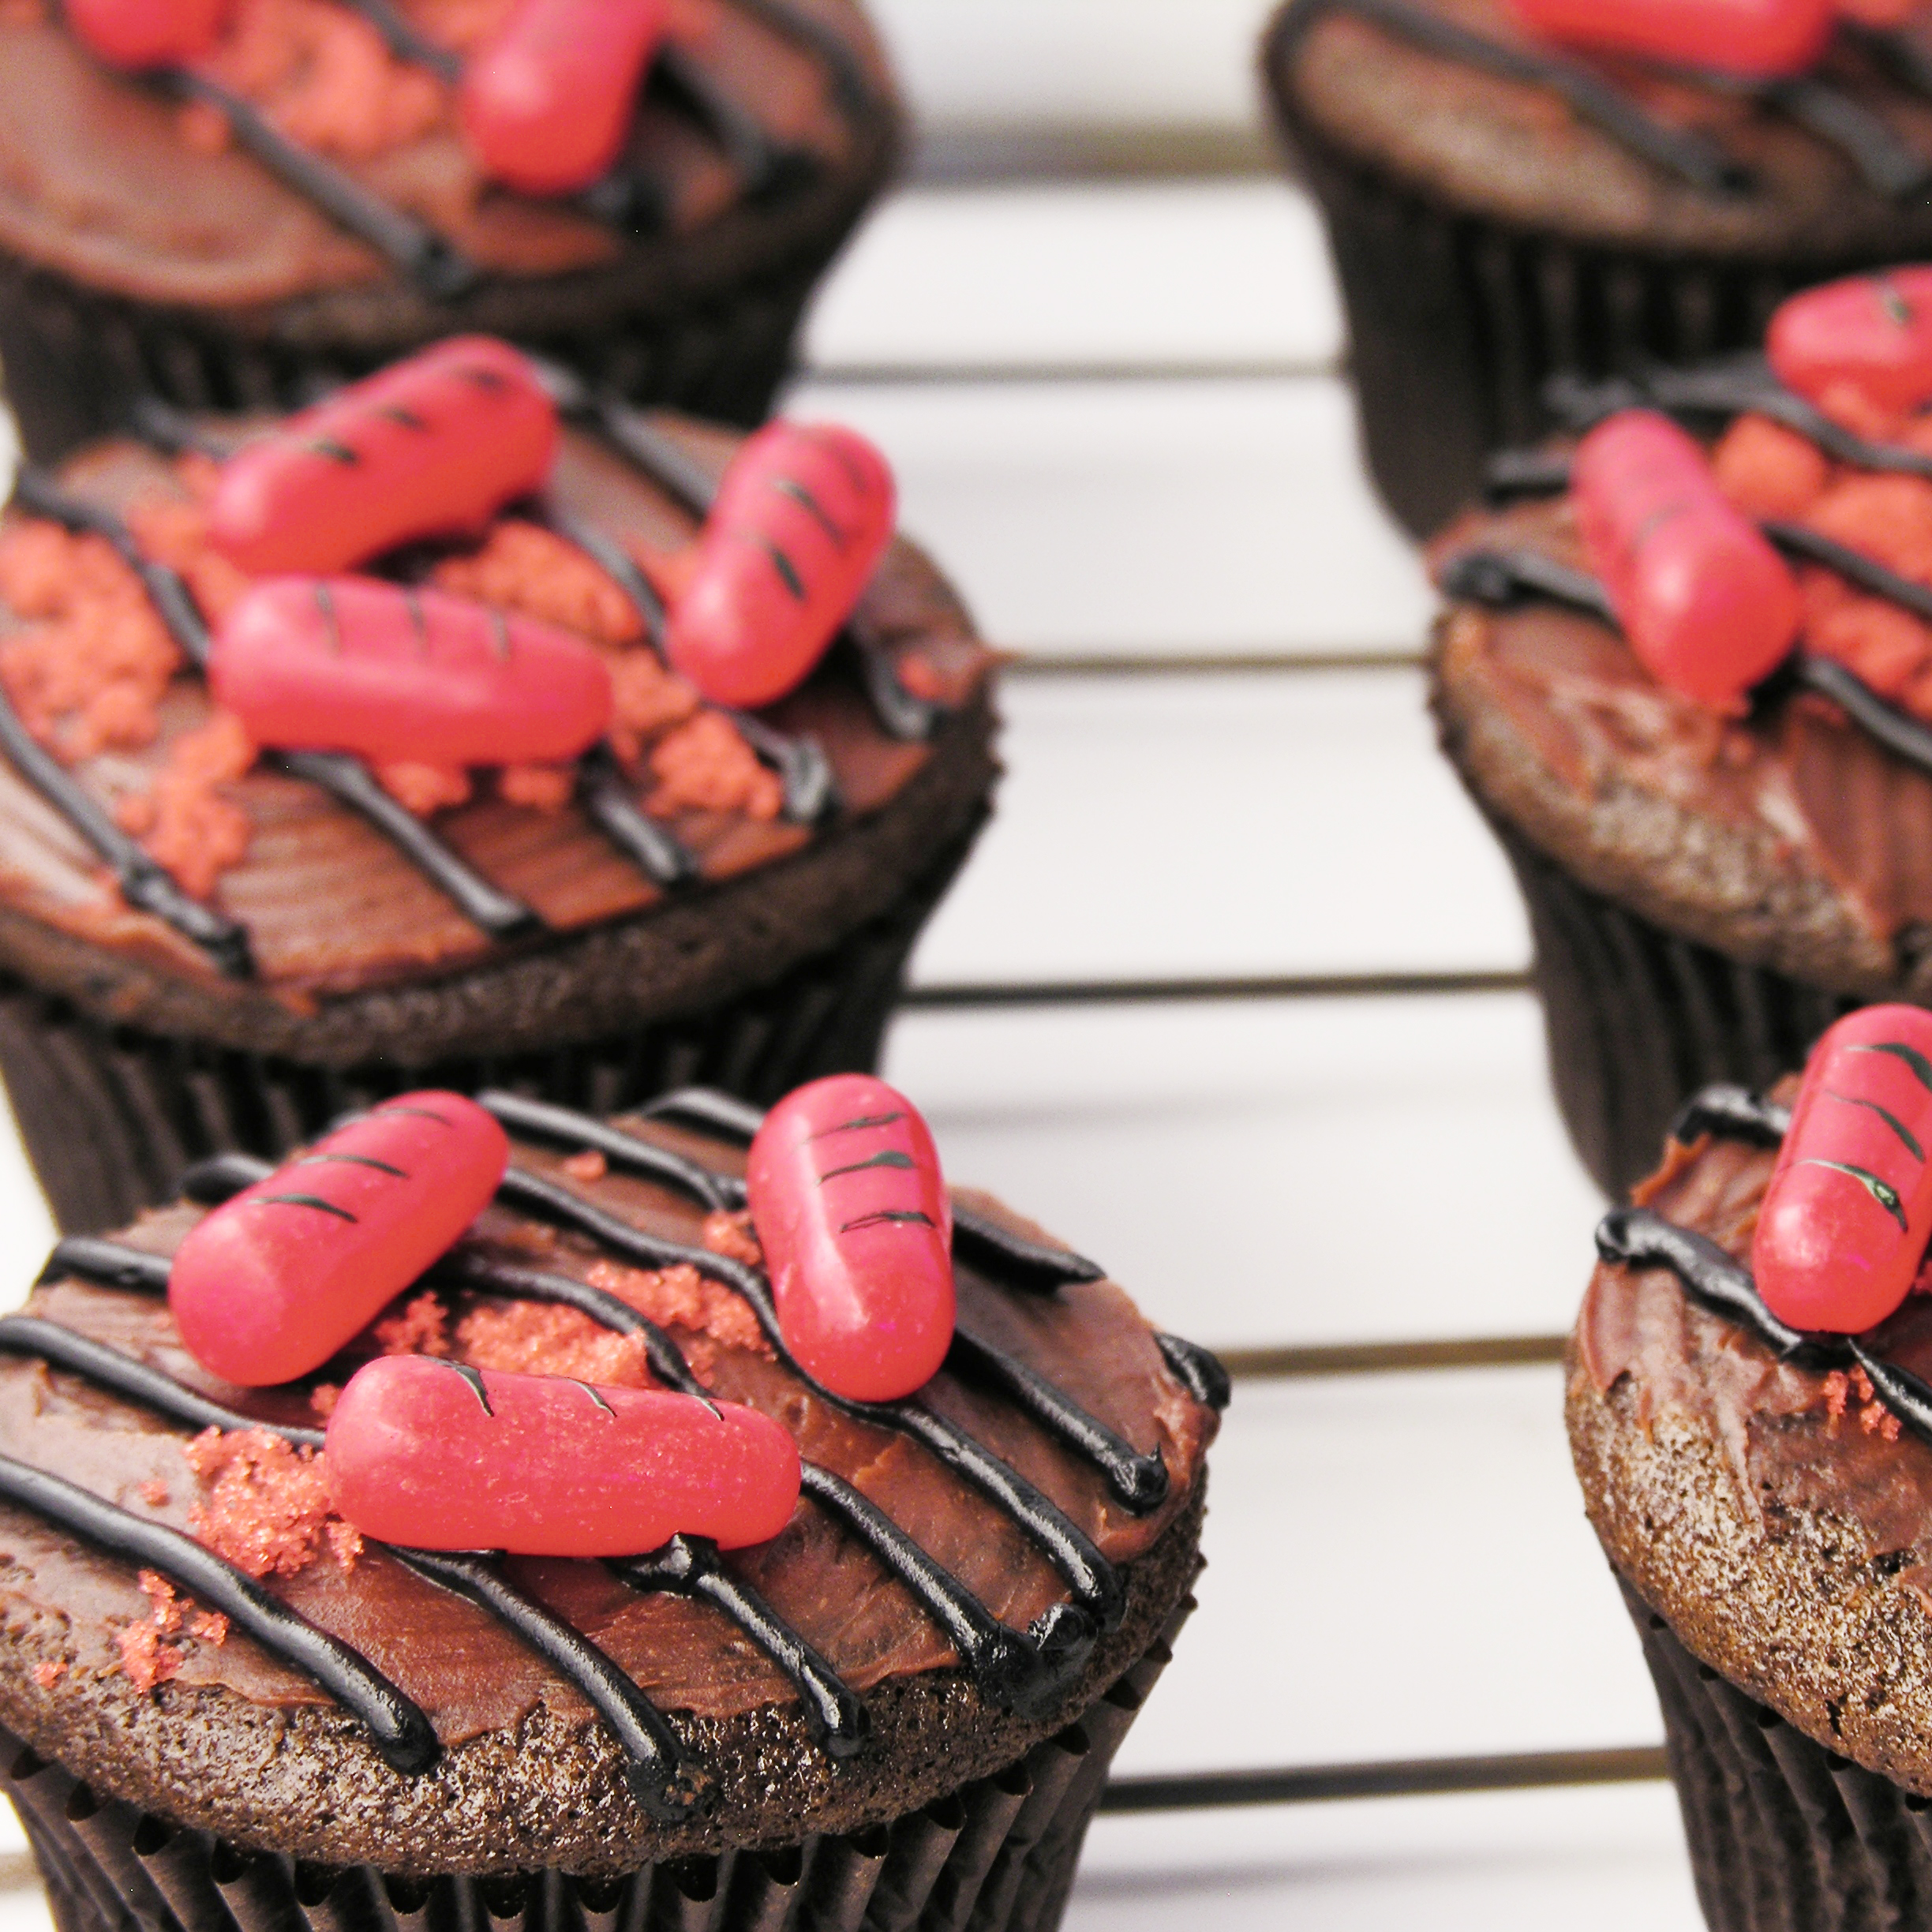
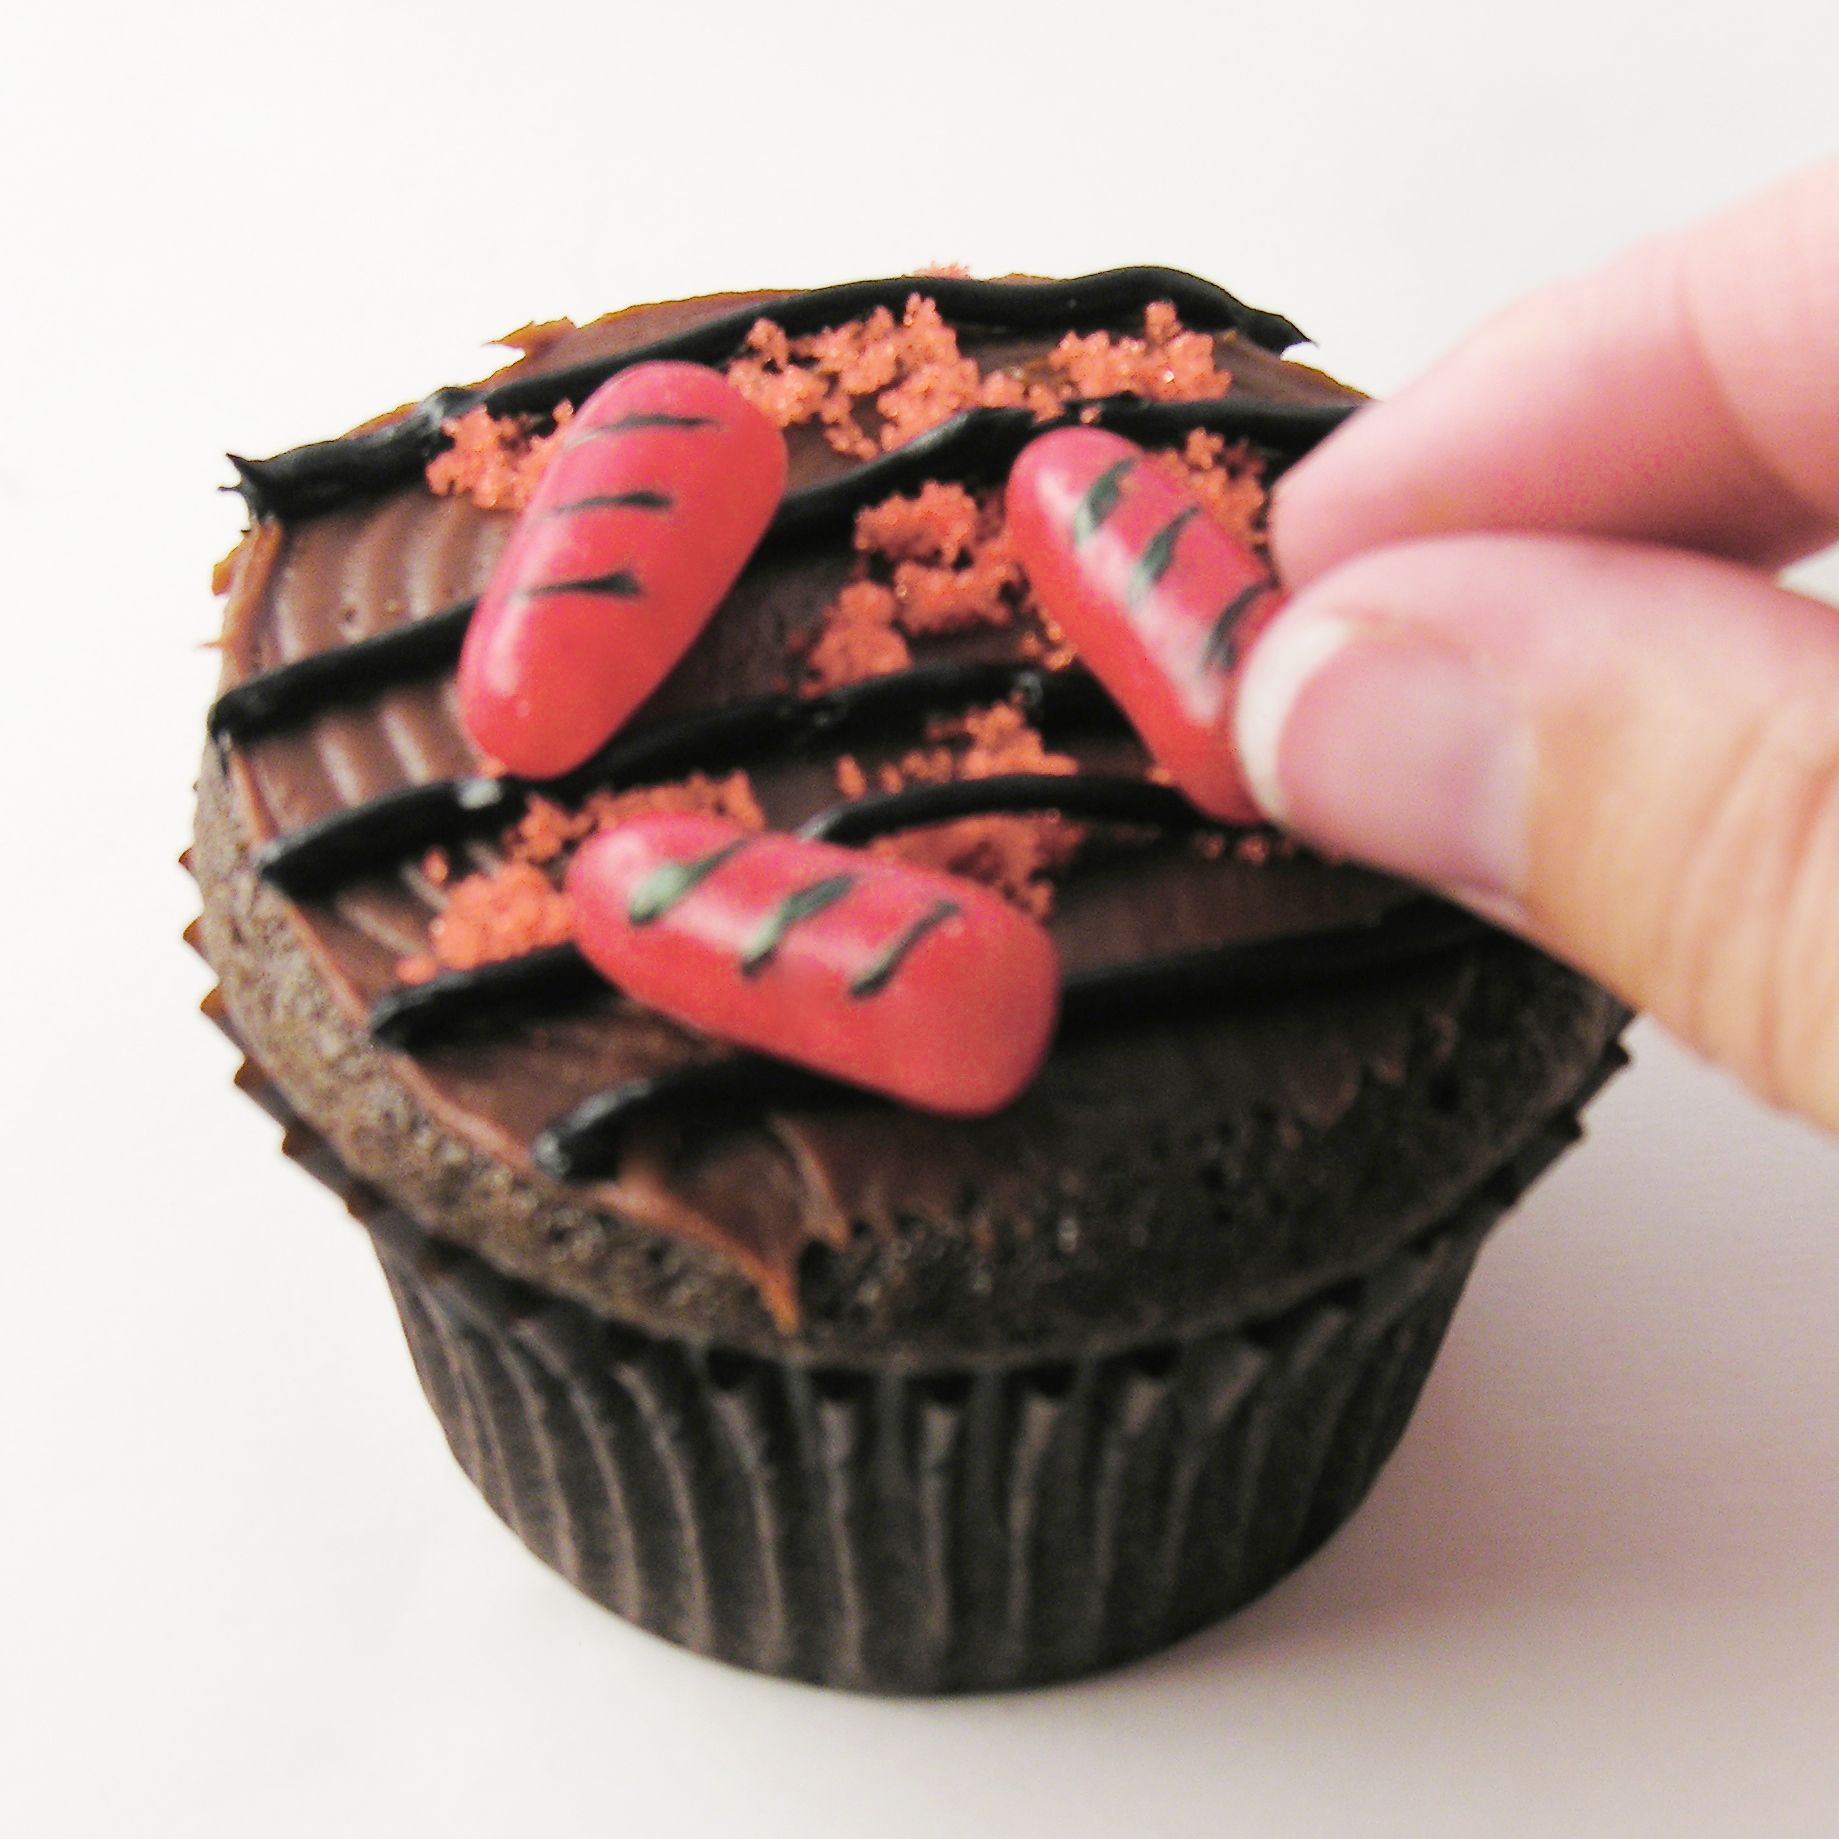
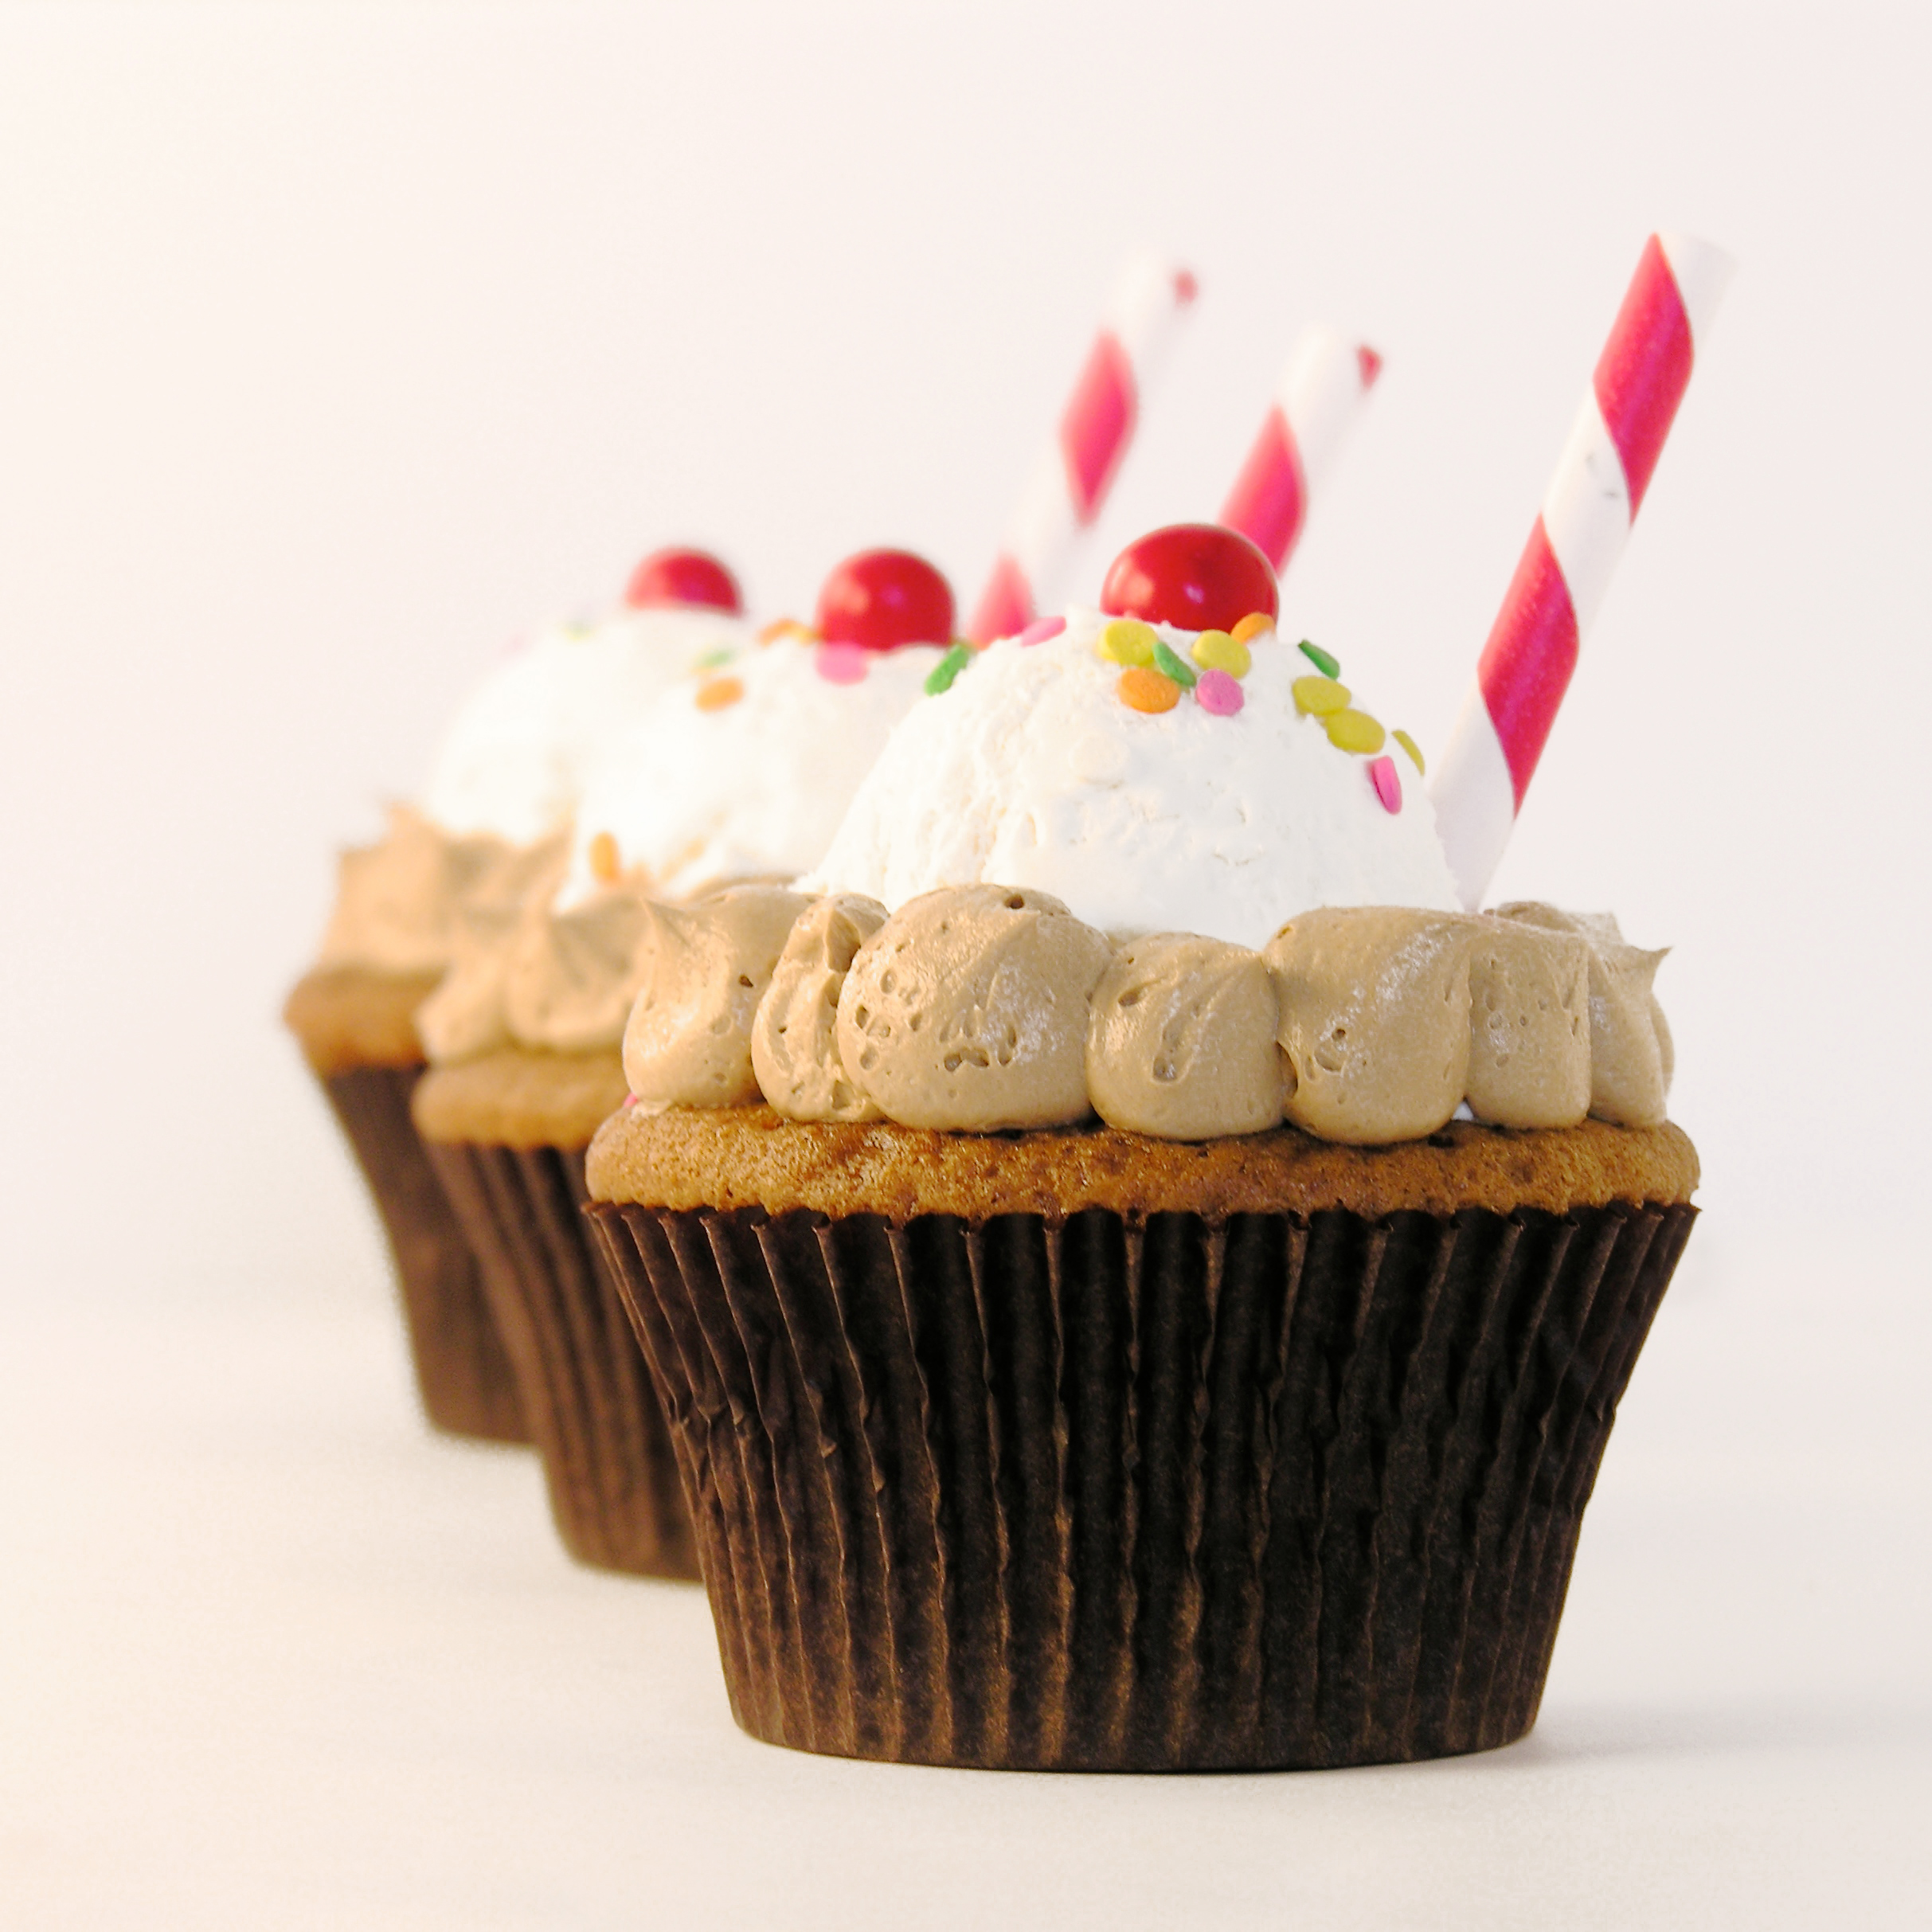
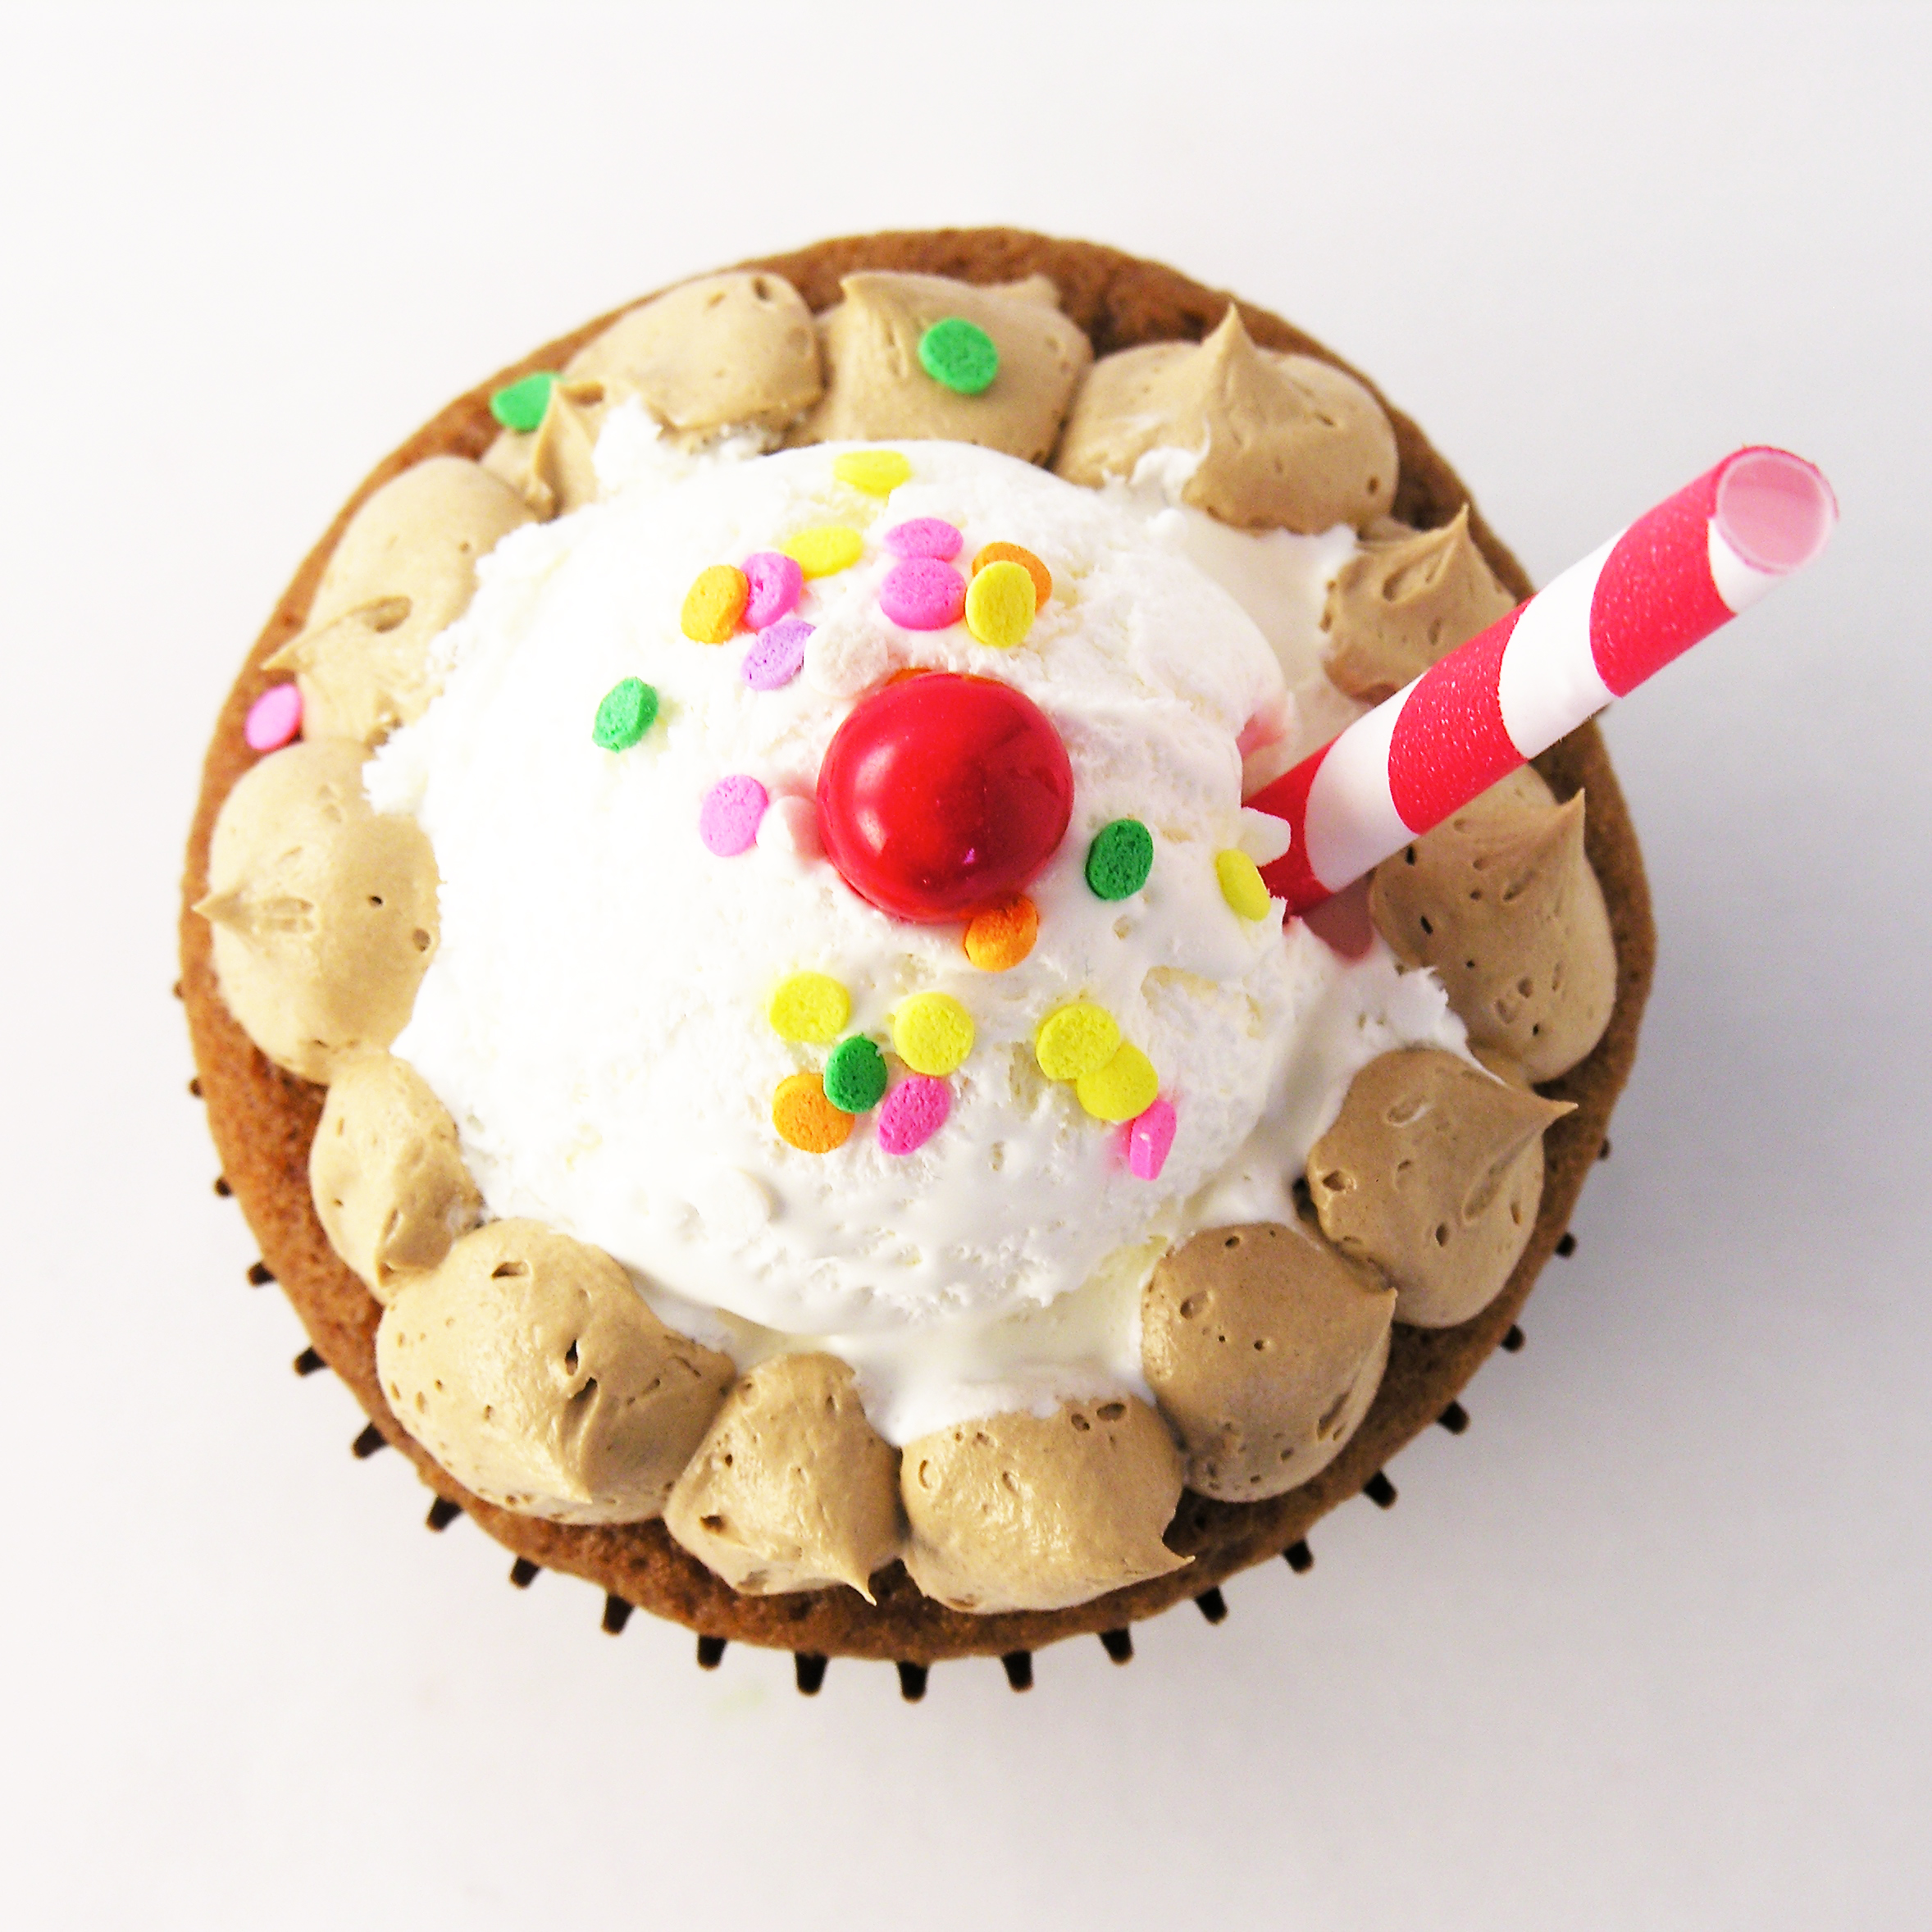
  • Pipe yellow icing on 1st followed by green and top with a bit of cheese!!!!!

Cheesehead Cupcakes!!!!!
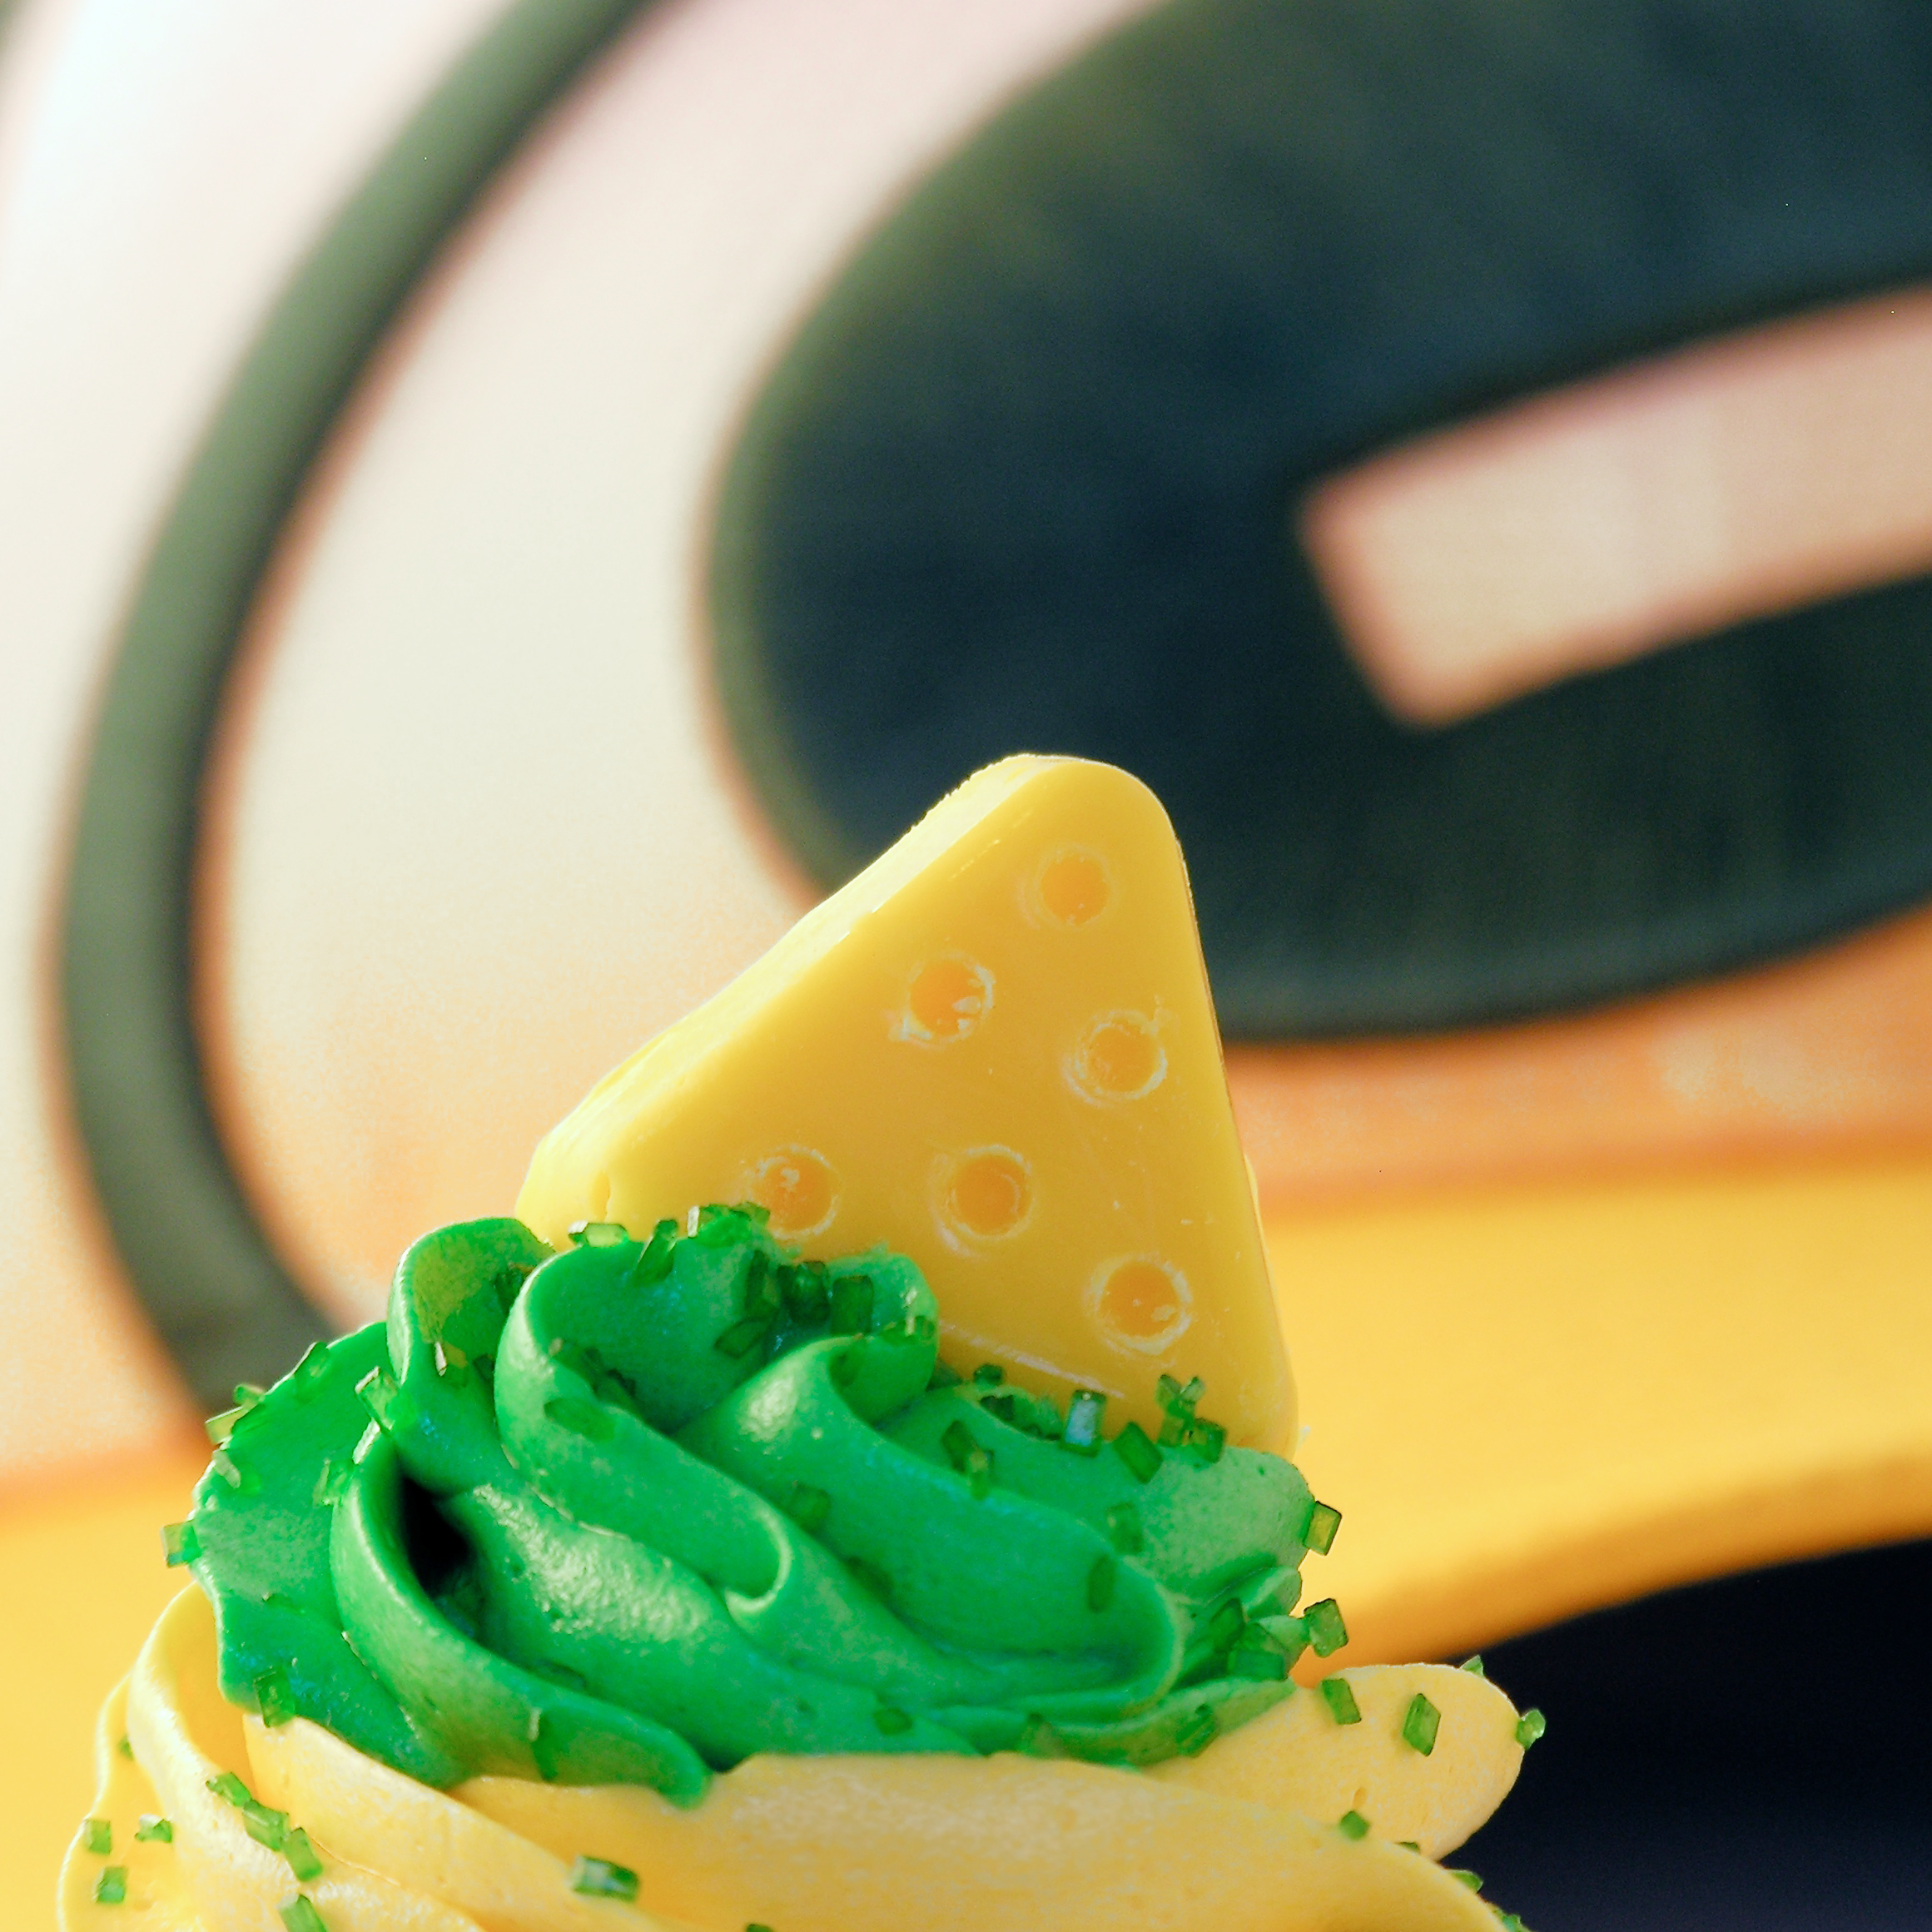
To make little cheese head cupcake toppers:

Say Cheese!!!!

Yes, that is a tire pressure gauge…..

  • Melt yellow candy melts in a microwave-safe bowl, in the microwave, in 30-second increments, stirring in between.
  • Put candy melts into a sturdy zip top bag, clip a corner and pipe into triangle candy molds.
  • Tap on counter to remove bubbles, and place in the freezer for 5 minutes, or until completely hardened.
  • Turn mold upside down and tap on counter to remove chocolate.
  • Repeat this process.
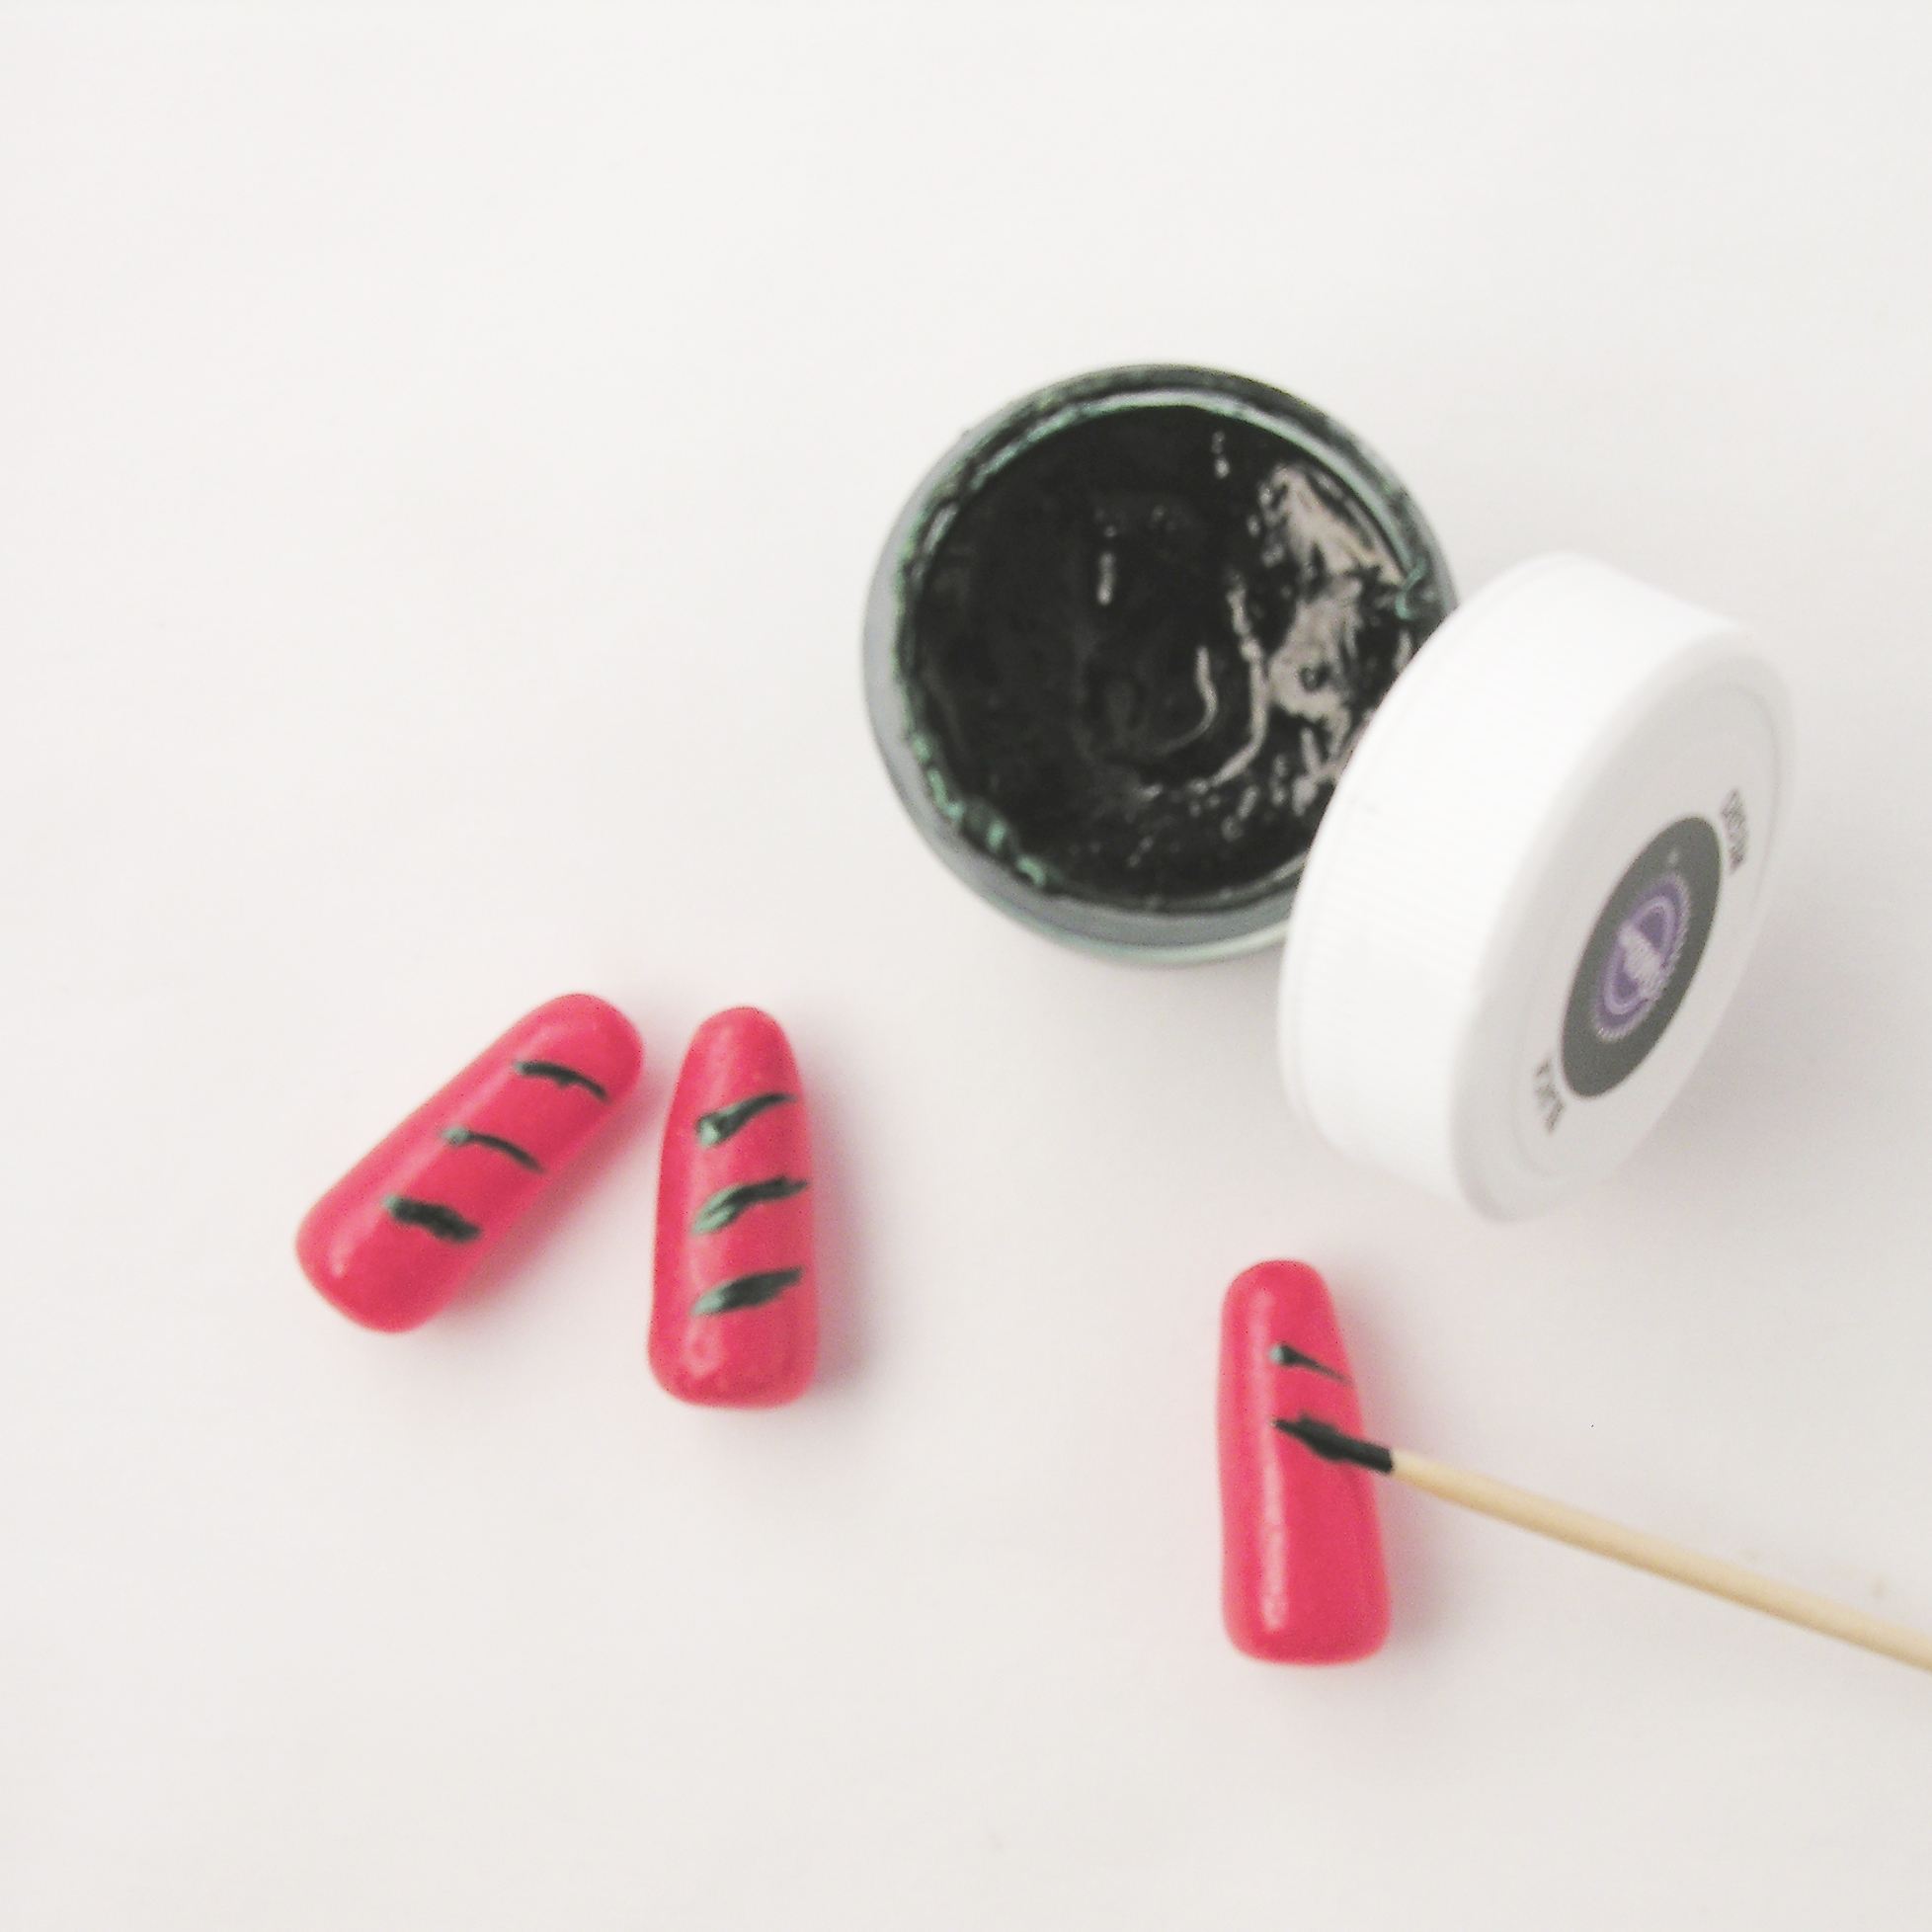
  • Allow the triangle chocolates to return to room temperature, and use whatever you find handy to put “holes” in your cheese.  I used a (cleaned in hot soapy water) tire pressure gauge for mine.  Let’s hear it for problem solving in the kitchen!!!!!!

Green Bay Packer Cupcakes!

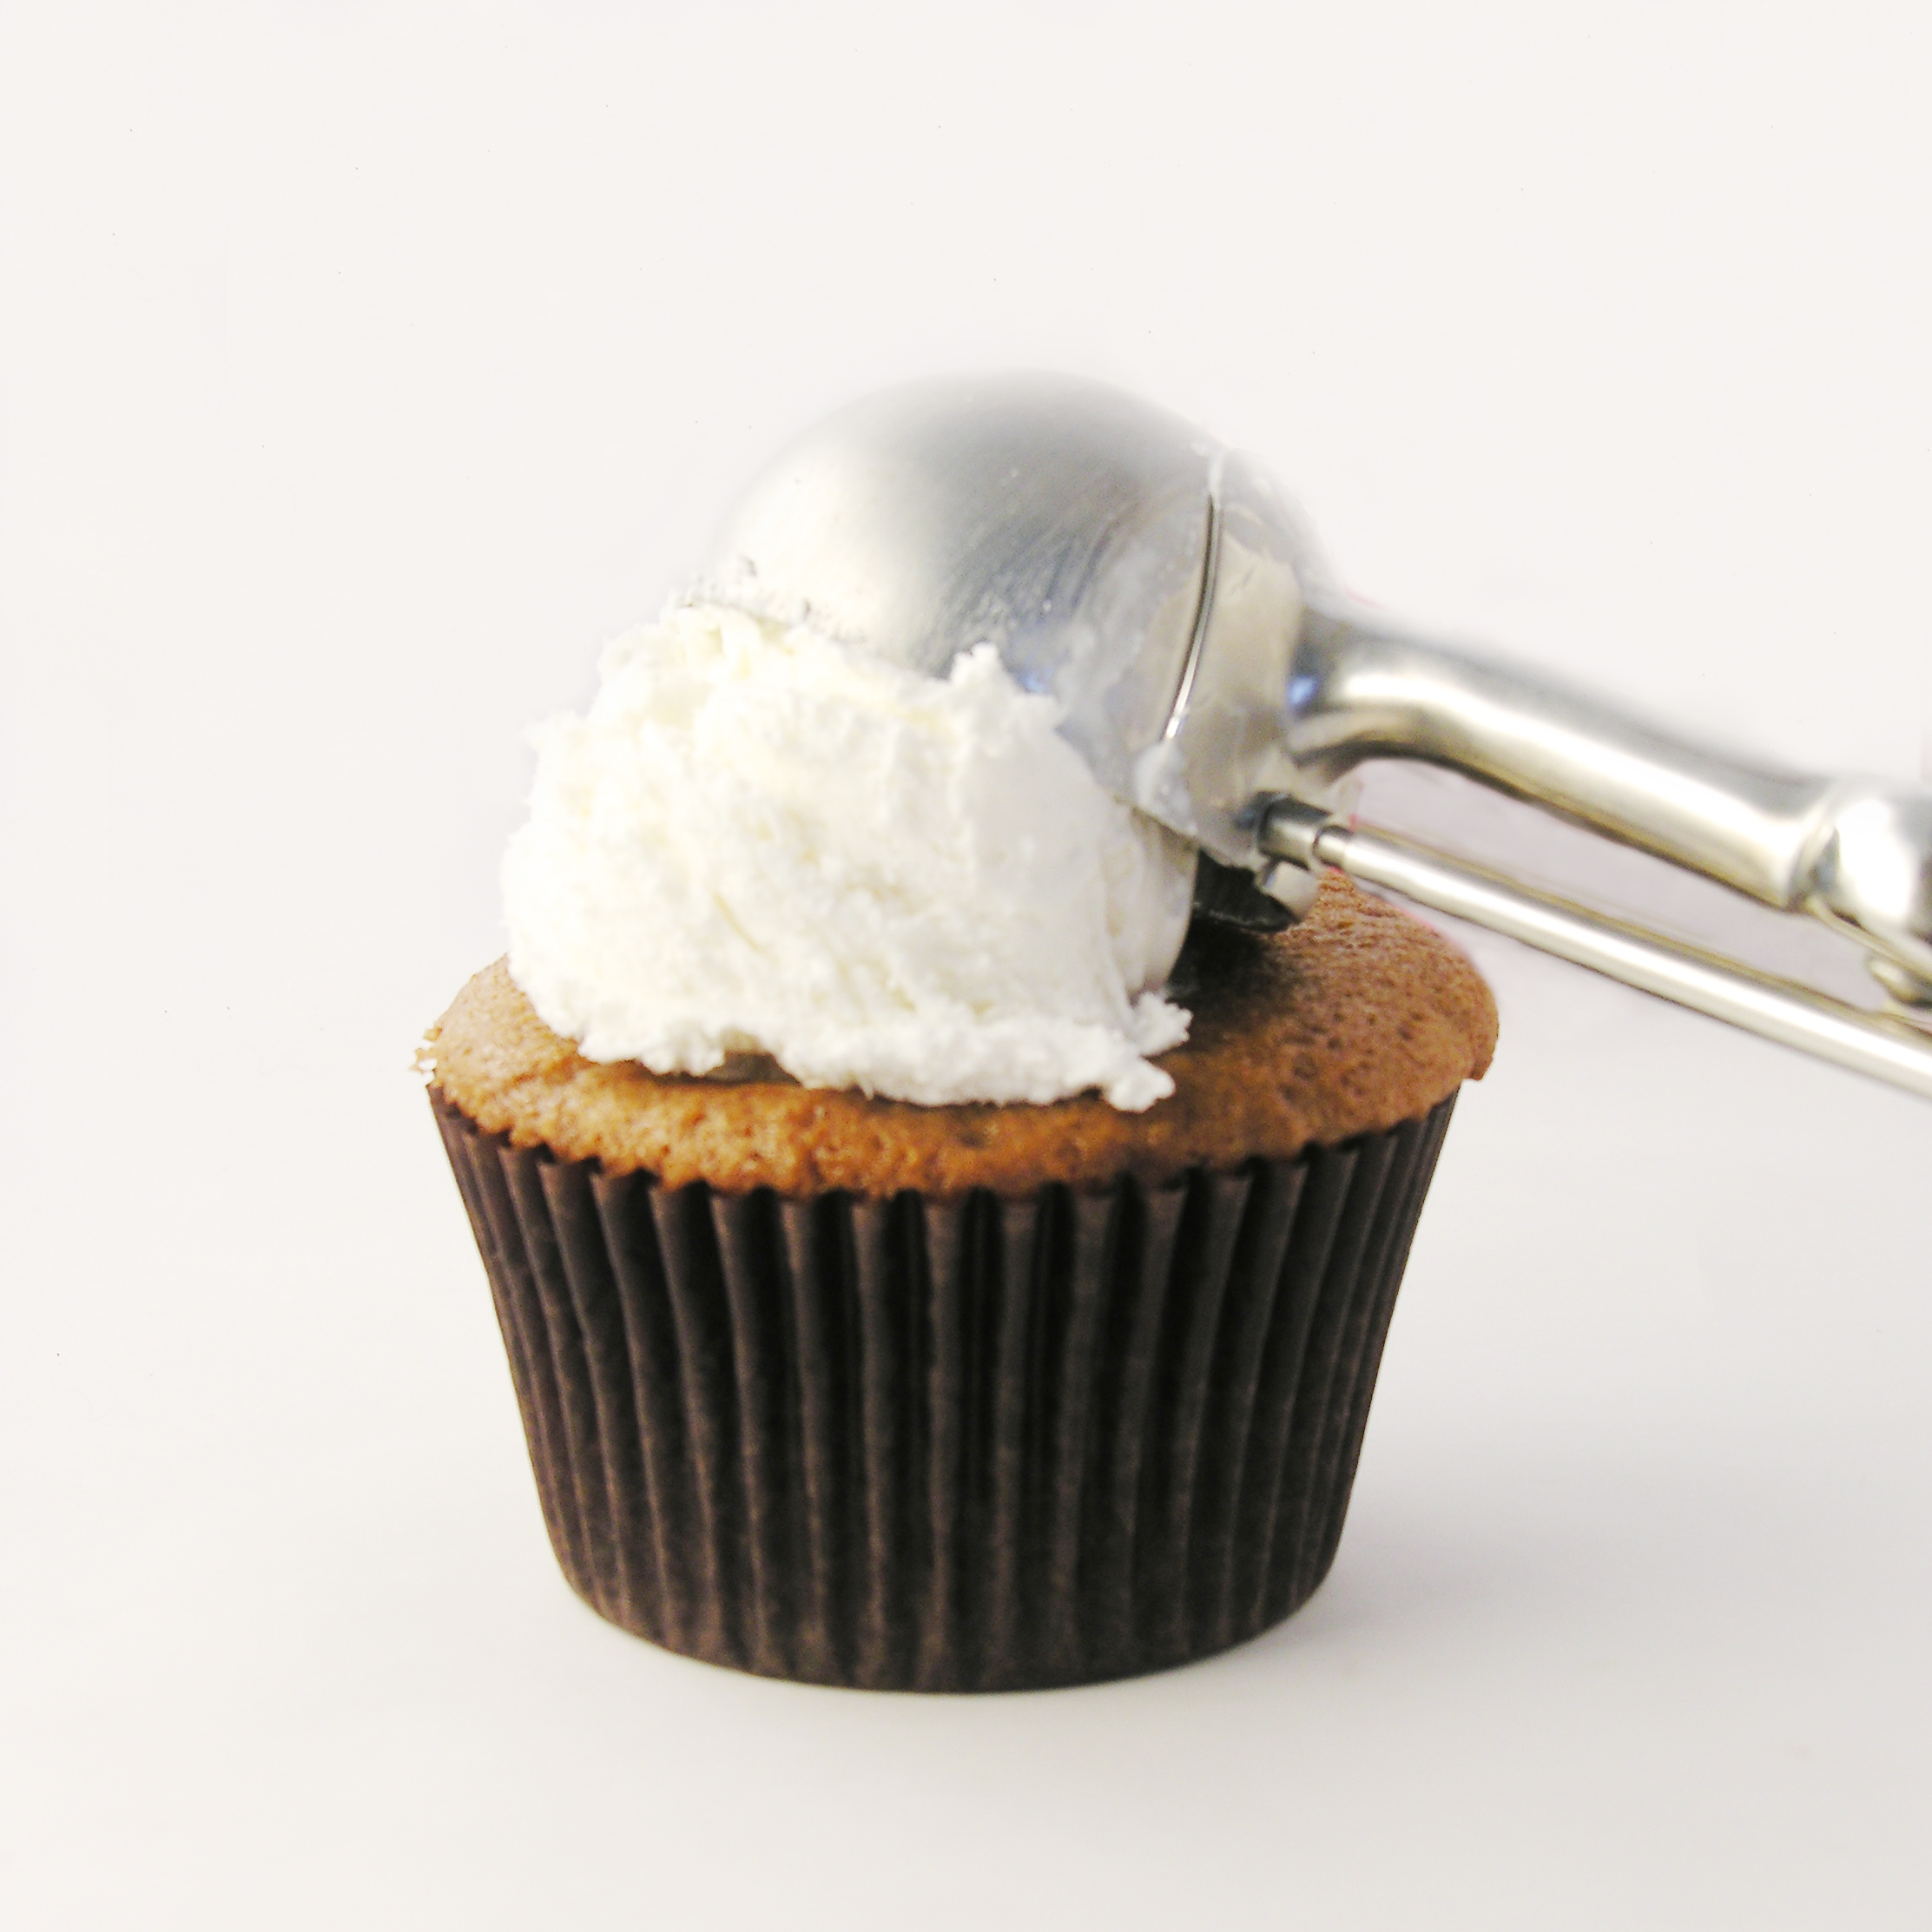
My thoughts:  These are just plain fun.  I recommend using a cake pop maker for the center circles.  It really does take less time and it makes the most adorably round little cake balls.  Plus you can make a Polka-Dot cake with it too!!!  I hope you get a chance to celebrate your team with these fun and colorful cupcakes!!!  IT’S FOOTBALL SEASON!!!!!!


Cheesehead Cupcakes!!!

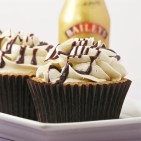
Other fun cupcake recipes you might enjoy:

Peanut Butter Cupcakes!!Coconut Cupcakes!!!Brownie Oreo Cookie CupPile of Cupcakes!

Chocolate Football Cookies!

Chocolate Football Cookies!

These soft and chewy chocolate cut-out cookies make the perfect little footballs!  Are you ready for the season to start?  Kick it off with these adorable treats!

NFL football starts this week with a Thursday night game against the Packers (GO PACK GO!!!!!!) and Seattle.  Let the season of fun tailgating and snacking begin!!!

These are seriously the yummiest chocolate cookies ever, and the PERFECT, not-sticky, dough for cookie cutters.  I’ve used this recipe SO many times here on easybaked.  When I thought about making football cookies I automatically defaulted to this wonderful family recipe. I promise, you will love it!!!

Here’s how they are made: (printable recipe)

INGREDIENTS:

  • 2 sticks (1 cup) butter, softened
  • 1 1/2 cups sugar
  • 2 eggs
  • 1 teaspoon vanilla extract
  • 2/3 cup unsweetened cocoa powder
  • 3 cups flour
  • 1/2 teaspoon salt
  • 1/2 teaspoon baking powder

DIRECTIONS:

  • Preheat oven to 350F degrees.
  • Add butter, sugar, eggs, vanilla and cocoa together in  large mixing bowl.
  • Blend on medium speed with a mixer until smooth.
  • Gradually add dry ingredients and mix until smooth (use clean hands at the end, to knead into a soft ball of dough)
  • Roll out cookie dough on floured counter.  I roll mine thick, so I get nice and chewy cookies.
  • Cut into football shapes using a football cookie cutter and place on a parchment-lined baking sheet. Leave a little room for the cookies to spread.
  • Bake for 10 to 14 minutes until the edges are firm.
  • Gently slide parchment paper off of cookie sheet and onto a flat surface.  Cool completely before moving- this allows the cookie to “set”.  
  • Frost as desired.  I used royal icing in a zip-top bag with a corner clipped off to decorate these.  You can click here for my royal icing recipe and instructions for use.  You could also use regular icing or even melted white chocolate.
  • Allow icing to harden up before stacking.

Football Cookies!!!

My thoughts: These are so cute, and so yummy that I kept wandering by the table just took look at them while they hardened up. I couldn’t help but smile every time….and eat one.  Which was bad, because I’ve eaten too much fry bread here on the Navajo Nation and I need to diet!  They are irresistibly good…so I quickly have given them all away!  Happy football season everyone!!!  Bring on the fun!!!!!  ~r

Football Cookies!!!!!Other desserts that use this cookie recipe:

Chocolate cut-out cookiesTriple Chocolate Truffle CupsEspresso Cookies!!!Cadbury Egg Cookie Cups!!!!


Piña Colada Cupcakes!

Posted on

Pina Colada Cupcakes!

 These pineapple cupcakes are full of coconut and rum flavored happiness.  A perfect pool party treat!

Aren’t these just the cutest little things?  I love the flavor combination of coconut and pineapple, it is such a refreshing taste!  The light whipped frosting on these, combined with the crunch of toasted coconut makes them such a delicious summer treat!  I even added a cute little edible coconut drink topper that I found on Party Pinchers.  So. much. fun!!!!

Pina Colada Cupcakes!!

INGREDIENTS: (printable recipe here)

  • 1 boxed pineapple cake mix (I used Duncan Hines), plus water, oil and eggs to make according to box directions.
  • 5 cups of shredded, sweetened coconut
  • 3 teaspoons of rum flavoring (divided)
  • 2 teaspoons of coconut flavoring
  • 2 sticks (1 cup) salted butter (softened to room temperature)
  • 2 sticks (1 cup) of unsalted butter (softened to room temperature)
  • 3 cups of powdered sugar
  • Decorations (as desired)

DIRECTIONS:

  • Preheat oven to 325F degrees
  • Spread 5 cups of coconut out on a large baking sheet that has edges.
  • Toast in 5 minute increments, stirring with a big spoon to evenly toast (It usually takes me about 20 minutes)
  • Allow coconut to cool, then place in a large zip-top bag, and crush into smaller pieces.
  • Make cake mix according to directions on box, and after it is made, add one cup of crushed, toasted coconut and mix completely into batter.
  • Add 2 teaspoons of rum flavoring and stir completely into batter.
  • Divide batter evenly into 24 cupcake liners placed into tins.
  • Bake according to package directions and cool completely.
  • To make frosting, place butters, coconut flavoring, remaining rum flavoring, and powdered sugar into a large mixing bowl and beat on high for 3 or 4 minutes until very light and fluffy.  Add one cup of crushed, toasted coconut and stir until well blended.
  • Use a spoon or a cookie scoop to place a rounded scoop of frosting on the top of each cupcake.  
  • Place the rest of the crushed coconut into a small bowl, and turn each cupcake upside down into it, pressing coconut into the top and sides of each scoop of frosting.
  • Decorate as desired. I found these cute little edible “coconut cups” on a site called Party Pinching, and I couldn’t resist making them for my pina colada cupcakes!  You just cut the tops off of a Whoppers malted milk ball, put a dab of melted white chocolate and add little flower sprinkles and a bit of string licorice.  FUN!

Pina Colada Cupcakes!Pina Colada Cupcakes!

My thoughts: I really thought these captured the flavors of coconut and pineapple in a perfect combination.  I loved the little crunchy bits of coconut in the cake and frosting.  These are such a festive cupcake and make a perfect refreshing summer or vacation dessert for all ages! 
Pina Colada Cupcakes!Other fun cupcake recipes:

Malted Milkshake CupcakesKey Lime Cupcakes!Brownie Oreo Cookie CupButter beer cupcakes


Mini S’mores Pies

Posted on

S'mores Pie!!!Rich dark chocolate pie in a graham crust, topped with marshmallow meringue.  S’mores with a new, fun look!

Everyone loves these flavors together.

Don’t they?

It just occurred to me that someone might hate s’mores.

Ok, well I don’t personally know anyone who doesn’t just adore this flavor combination.  I LOVE them, and crave them, and sometimes cheat by making them in the microwave when it’s snowing and a campfire is out of the question!

These little pies capture the flavor of a s’more, but add a rich chocolate flavor that is incredibly delicious, and can’t be had with just 2 squares of Hershey’s chocolate.  Or four squares… sometimes I use four.  Don’t tell.

S'mores Pie!!!

Here’s how these simple little treats are made: (printable version)

INGREDIENTS: (makes 12 mini pies)

  • 12 pre-made mini graham cracker crusts.
  • 1 cup of Ghirardelli Bittersweet chocolate chips (melted)
  • 1 cup of Ghirardelli Semi-sweet chocolate chips (melted)
  • 8 eggs (divided)
  • 5 Tablespoons of heavy whipping cream
  • 2 Tablespoons of vanilla
  • 2 cups of granulated sugar
  • 1/4 teaspoon of cream of tartar

DIRECTIONS:

  • Preheat oven to 350F degrees.
  • Divide eggs, keeping ALL of the 8 egg whites and only 5 of the yolks.
  • Place the melted chocolate, 5 egg YOLKS, whipping cream and vanilla in a large mixing bowl and stir until well combined.
  • Evenly divide among all twelve mini pie crusts.
  • Bake (I put them all on a baking sheet) for 14-16 minutes, until the middle of each pie is set.
  • Make meringue while these bake, by adding all of the 8 egg WHITES, sugar and cream of tartar together in a medium heat-proof bowl that will sit on the top of a sauce pan of boiling water without touching the water.  (I had to experiment a bit to find a good fit.)
  • Bring water to a boil in the saucepan and set the bowl on top.
  • Whisk ingredients together for about 3-4 minutes.  Sugar will be dissolved and egg whites should be heated to 145F degrees.
  • Remove bowl from top of sauce pan and beat on low until the mixture thickens a little, then beat on high for about 10 minutes.  The meringue will become the most beautiful, white, glossy mixture.  It should form stiff peaks before you stop beating it.
  • Spoon all that wonderful marshmallow yumminess into a bag fitted with a decorating tip.
  • Once mini pies are removed from the oven, let them cool completely.
  • Pipe marshmallow meringue on the top of each pie and toast it with a kitchen torch.
  • Add a few graham cracker crumbs if you want, and enjoy!!!!


S'mores Pies!!!!My thoughts:  These are delicious. You can see from my pictures that I didn’t beat my meringue as long as I should have.  The are not the tall swirls of happiness I wanted them to be….  it was only my second time making meringue though, so I guess I won’t beat myself up too much.  My 1st time was perfect.  If you want to see how fluffy it SHOULD be, click here.  I LOVE this meringue.  When you read the instructions you might think it is too hard to make- but once you do it, you will realize that it isn’t hard at all.  Just a lot of time with a mixer in your hands.  I hope you get a chance to try this recipe out!  Enjoy! ~r
S'mores Pie!!!

We like our chocolate and marshmallow here at easybaked… here are other recipes that feature that yummy combo:

frozen s'more cupsMelted Smores cupRocky Road Cupcakes!!!!Baked Alaska Cupcakes!!


Root Beer Float Cupcakes!

Posted on

Root Beer Float Cupcakes!!!!These cupcakes capture all the summer flavors of a root beer float~ all you need is a frosty mug!

People ask me a lot about if I would ever open a bakery, and I always say no.  I can’t imagine making hundreds of the same thing every day.  My favorite part of baking is the process of creating something new.

I thought about this recipe for a long time.  I wanted root beer in the cupcake and root beer in the frosting, but how to create that “scoop of ice cream” flavor without actually using ice cream?  I sometimes cheat in my photos by using scoops of frozen cool whip instead of ice cream.  It melts slower and keeps a scoop shape longer under the heat of my photography lights.  I decided to try Cool Whip as my scoop of ice cream for these cupcakes.

Oh my.  If I could jump up and down and point giant neon arrows toward this cupcake recipe I would.  These are so, sooooooooooo good. You need to make these!!!  They even use a cake mix, so they aren’t horribly complicated.  That Cool Whip…with the root beer buttercream…. perfect.

Root Beer Float Cupcakes!!!Here’s the recipe: (printable version)

INGREDIENTS: (makes 24-26 cupcakes)

  • One boxed white cake mix, plus water, oil and eggs to make according to package.
  • 1 cup of root beer
  • 5 teaspoons of root beer concentrate (divided)
  • 1 stick (1/2 cup) of salted butter (softened)
  • 1 stick (1/2 cup) of unsalted butter (softened)
  • 1 1/2 cups of powdered sugar
  • 2 tubs of Cool Whip (frozen)
  • Sprinkles and straws (optional)

DIRECTIONS:

  • Make white cake mix as directed on box.
  • After beating cake, add root beer and 3 teaspoons of root beer concentrate. Mix well until combined.
  • Place cupcake liners in muffin tins and fill each one only about 1/2 full (these cupcakes rise a bit higher than just a plain mix)
  • Bake according to package directions, remove from oven and cool completely.
  • Make buttercream by adding both butters, powdered sugar and 2 teaspoons of root beer concentrate to a mixing bowl and beating on high for 4-5 minutes until very light and fluffy.
  • Place frosting into a sturdy zip-top bag that has been fitted with a large round decorating tip in one corner.
  • Assemble cupcakes one at a time.
  • Use a medium cookie scoop and place a ball of frozen Cool Whip in the center of a cupcake.
  • Pipe round “bubbles” around it immediately, by squeezing the frosting out into a circle and then pulling straight out.

Root Beer Float CupcakesRoot Beer Float Cupcakes

  • Only have one container of Cool Whip out at a time, and if it starts to get soft, switch it back into the freezer to harden up.
  • Keep these chilled until you serve them.
  • Just before serving, add some sprinkles and a straw for a root beer float feel!
  • Enjoy!!

Root Beer Float Cupcakes!!My thoughts:  Such a fun summer dessert.  It is actually very light and not too sweet because a lot of the topping is just Cool Whip.  I was really happy with how this experiment came out and I can’t wait to make them again!  Enjoy!!!!!

Root Beer Float Cupcakes!!

Our very first cookbook is available for purchase this week!!!  Check it out in our new “Store” tab.  You can also find our greeting cards from Warner Press and our fun new recipe notecards distributed by Trifle Recipe Cards there.

These aren’t our first cupcakes that recreate a yummy beverage!  Try these other fun recipes:

Lime Soda Cupcakes!!!!Malted Milkshake CupcakesStrawberry Lemonade Cupcakes!!!!Baileys Irish Cream Cupcakes

American Flag Oreo Pops

Posted on

American Flag Oreo Pops!!!!Put a little red white and blue on your Oreos and celebrate the Fourth of July!

These are an easy treat that will make you (and everyone else) smile.  Plus there’s an Oreo inside- perfect!

I’ve said it before, and I will say it again– I’m addicted to Oreo Pops.  Most of you know that I’m living in Arizona for eight months with the Navajo.  I love it here, and the Navajo people are incredibly gracious about sharing life with me and teaching me all about their culture and traditions.  I had a hard time a couple of weeks ago though.  A puppy that I recently took in became very ill and the vet diagnosed her with parvovirus, a deadly disease that can be prevented with puppy vaccinations.  Most people here cannot afford to vaccinate (or spay and neuter) their dogs, so this puppy and all of her litter mates had to be put down.

Oreo...

Oreo…

So. Incredibly. Sad.  My little puppy was named Oreo, for her adorable black and white Oreo markings.

One of my friends here suggested we sell things at a local flea market this week, and I decided to make 100 Oreo Pops in a variety of forms to make money to help spay and neuter Oreo’s parents, and to vaccinate other puppies in the area.

I made ALL SORTS of Oreo pops, and these were one of my “new” designs.  I love how patriotic they are!

American Flag Oreo Pops!!!!!So, in honor of this wonderful, beautiful country that we all call home….Oreo Pops- in Red, White and Blue!!!

Here’s the recipe: (printable version)

INGREDIENTS:

  • One box of Double Stuff Oreos
  • One bag of Wilton’s candy melts in Red
  • One bag of Wilton’s candy melts in Blue
  • One jar of flower sprinkles (the white ones look like stars…?) 
  • 24 lollipop sticks

DIRECTIONS: (Need a visual?  Click here.)

  • Carefully twist apart all of the Oreo cookies
  • Using one of the lollipop sticks, make an indentation in the white filling of each cookie.
  • Melt the Red Candy Melts in the microwave in 30 second increments, stirring until completely melted and smooth.
  • Dip the end of one stick into the melted red chocolate, drizzle a little in the center of the white cookie filling and then gently press it into the indentation made.
  • Place the top of the cookie back on and allow red chocolate to harden (10 minutes or so), cementing the cookie back together with a stick inside.
  • Holding the stick, lower the entire Oreo into the bowl of melted red chocolate, spooning it over the top and sides to cover it completely.
  • Allow the excess red chocolate to drain off and gently place covered Oreo on a piece of parchment paper to harden and cool completely
  • Melt Blue candy melts in the same manner that you melted the red.
  • Allow the candy melts to cool just a bit before dipping (so that it doesn’t melt the red candy underneath).
  • Spoon a bit of blue chocolate over just the top end of the Oreo.  Tap to drain away excess blue chocolate and wipe back across a clean paper towel to remove any drips or splatter of blue.
  • Place on a clean piece of parchment paper to cool, and immediately place a few white “stars” on the blue.
  • Allow pop to harden completely.
  • Remove from paper and serve- or place in a small treat bag, tied with pretty ribbon.
  • Enjoy!

American Flag Oreo Pops!!!!
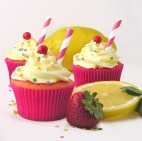
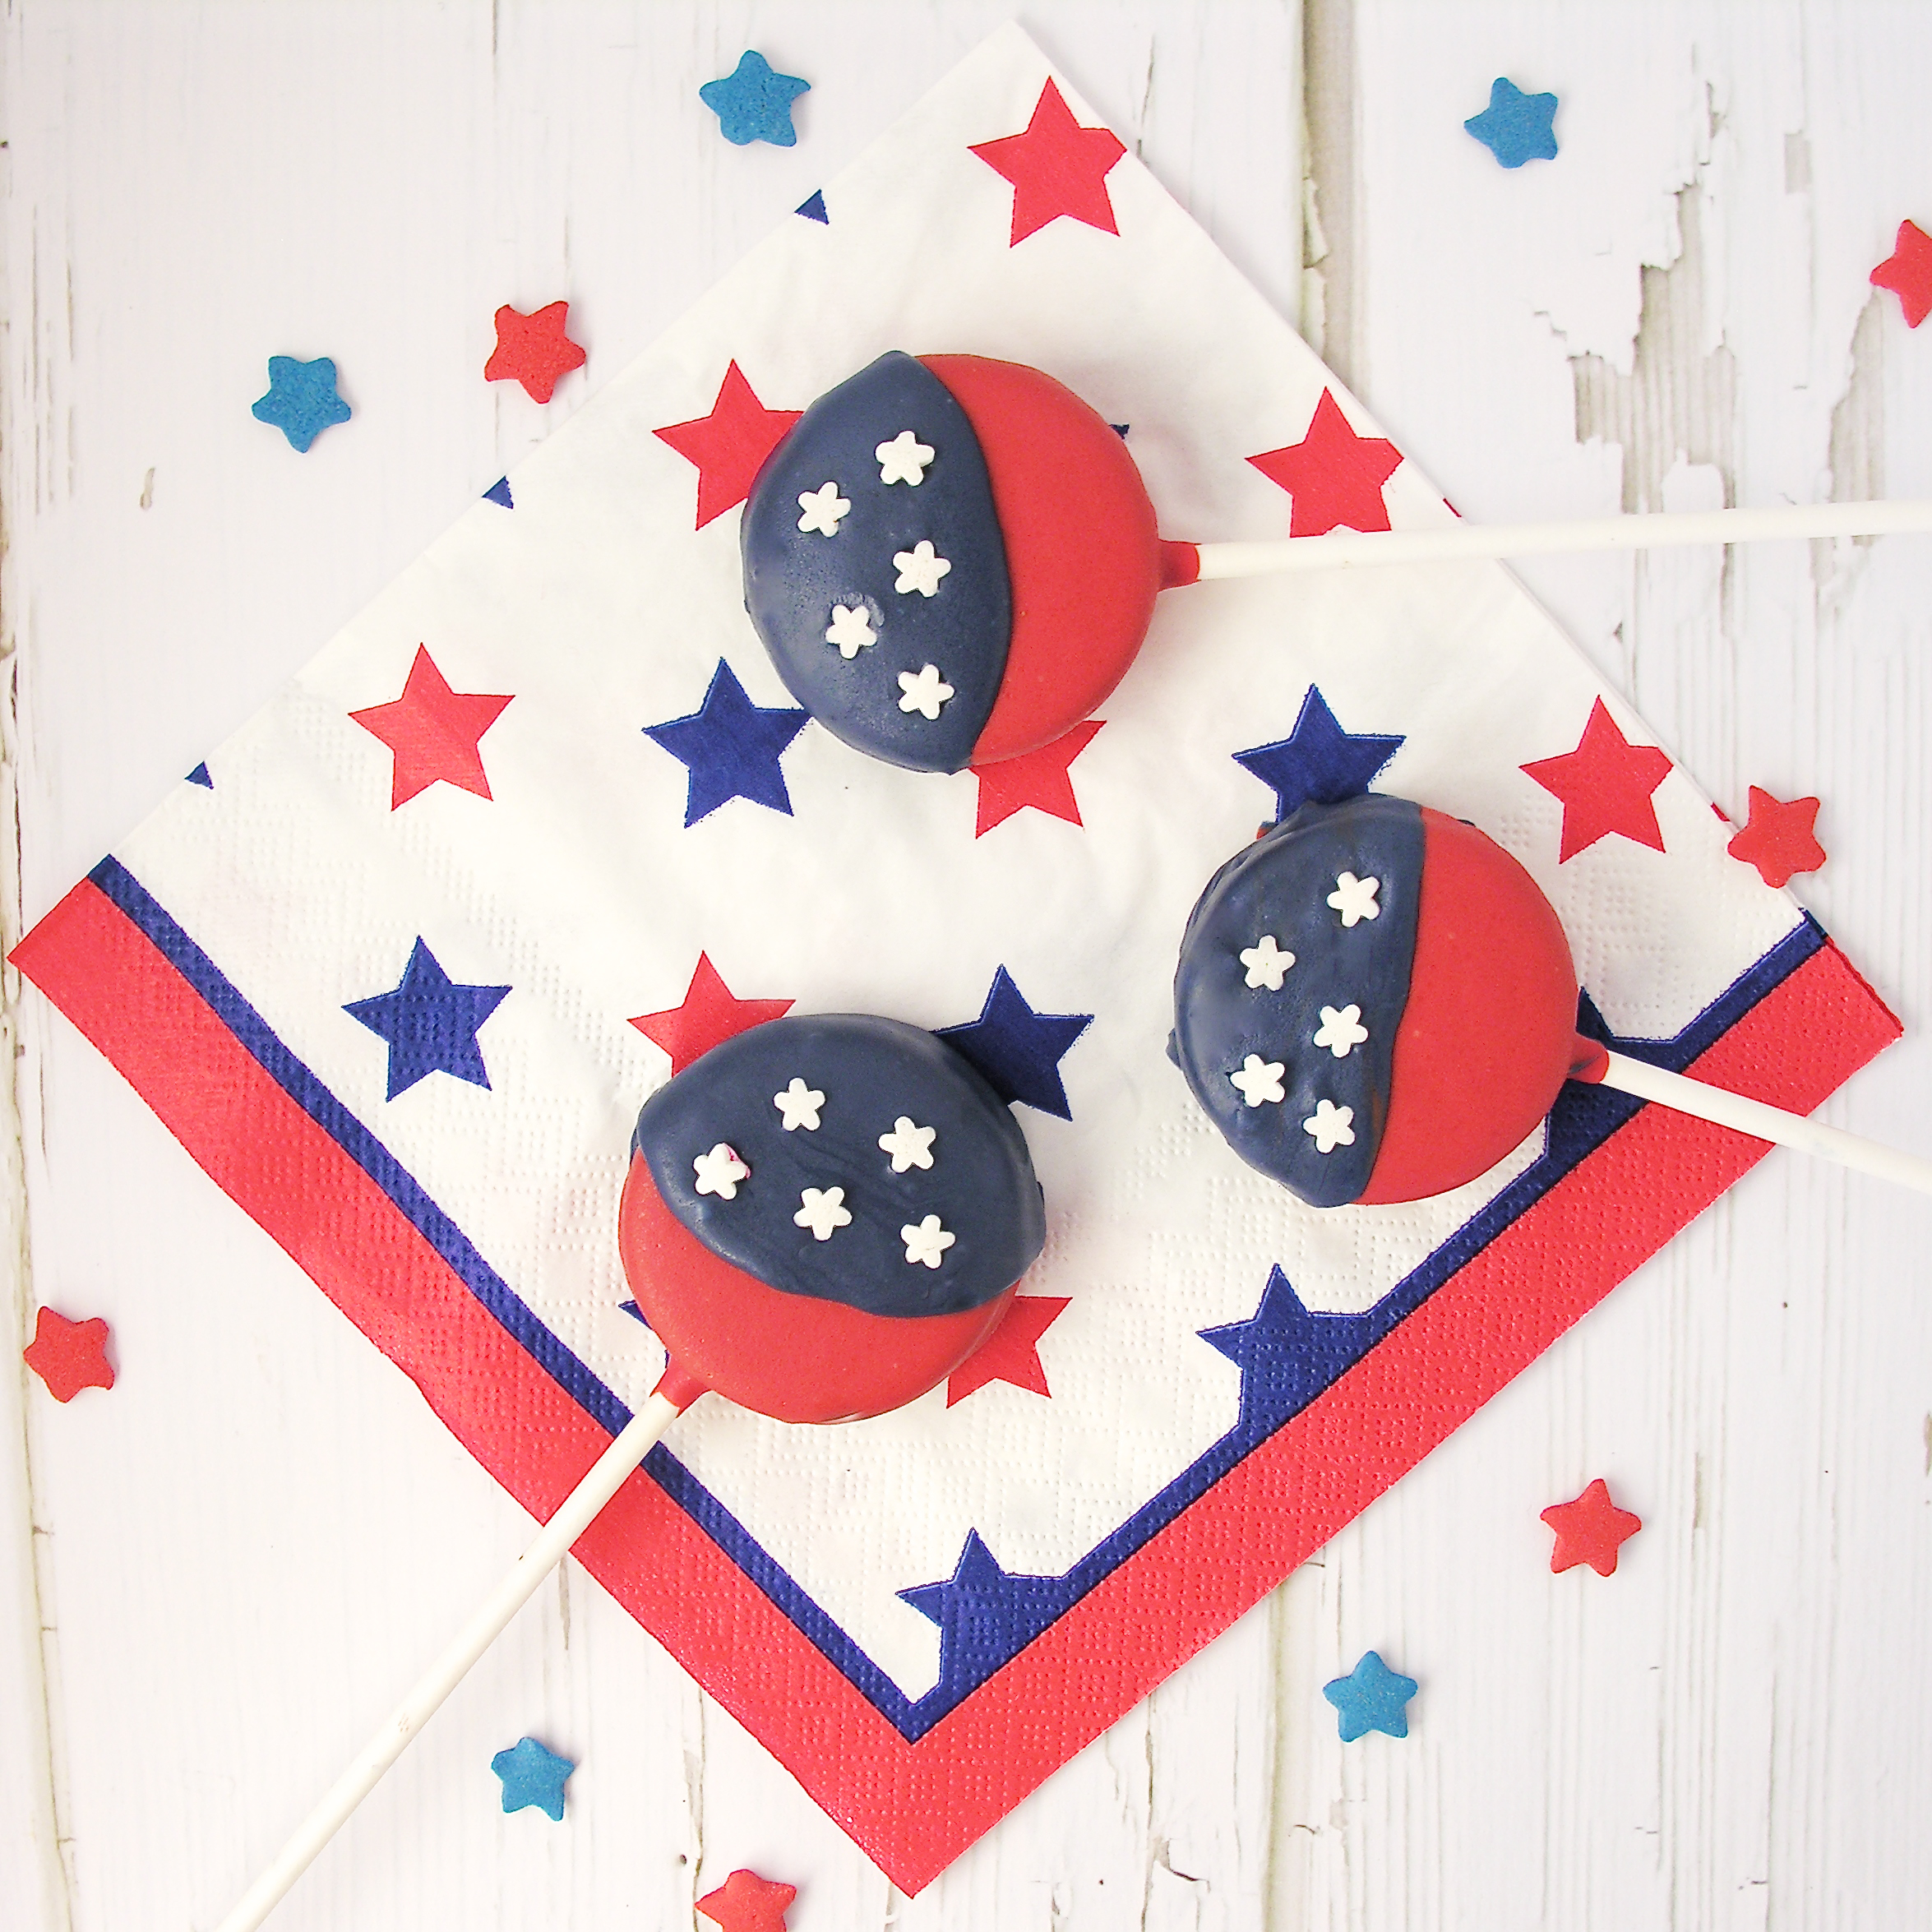
My thoughts:  These are easy and fun to put together, and just so CUTE!  Happy Fourth of July!!!!!  ~r
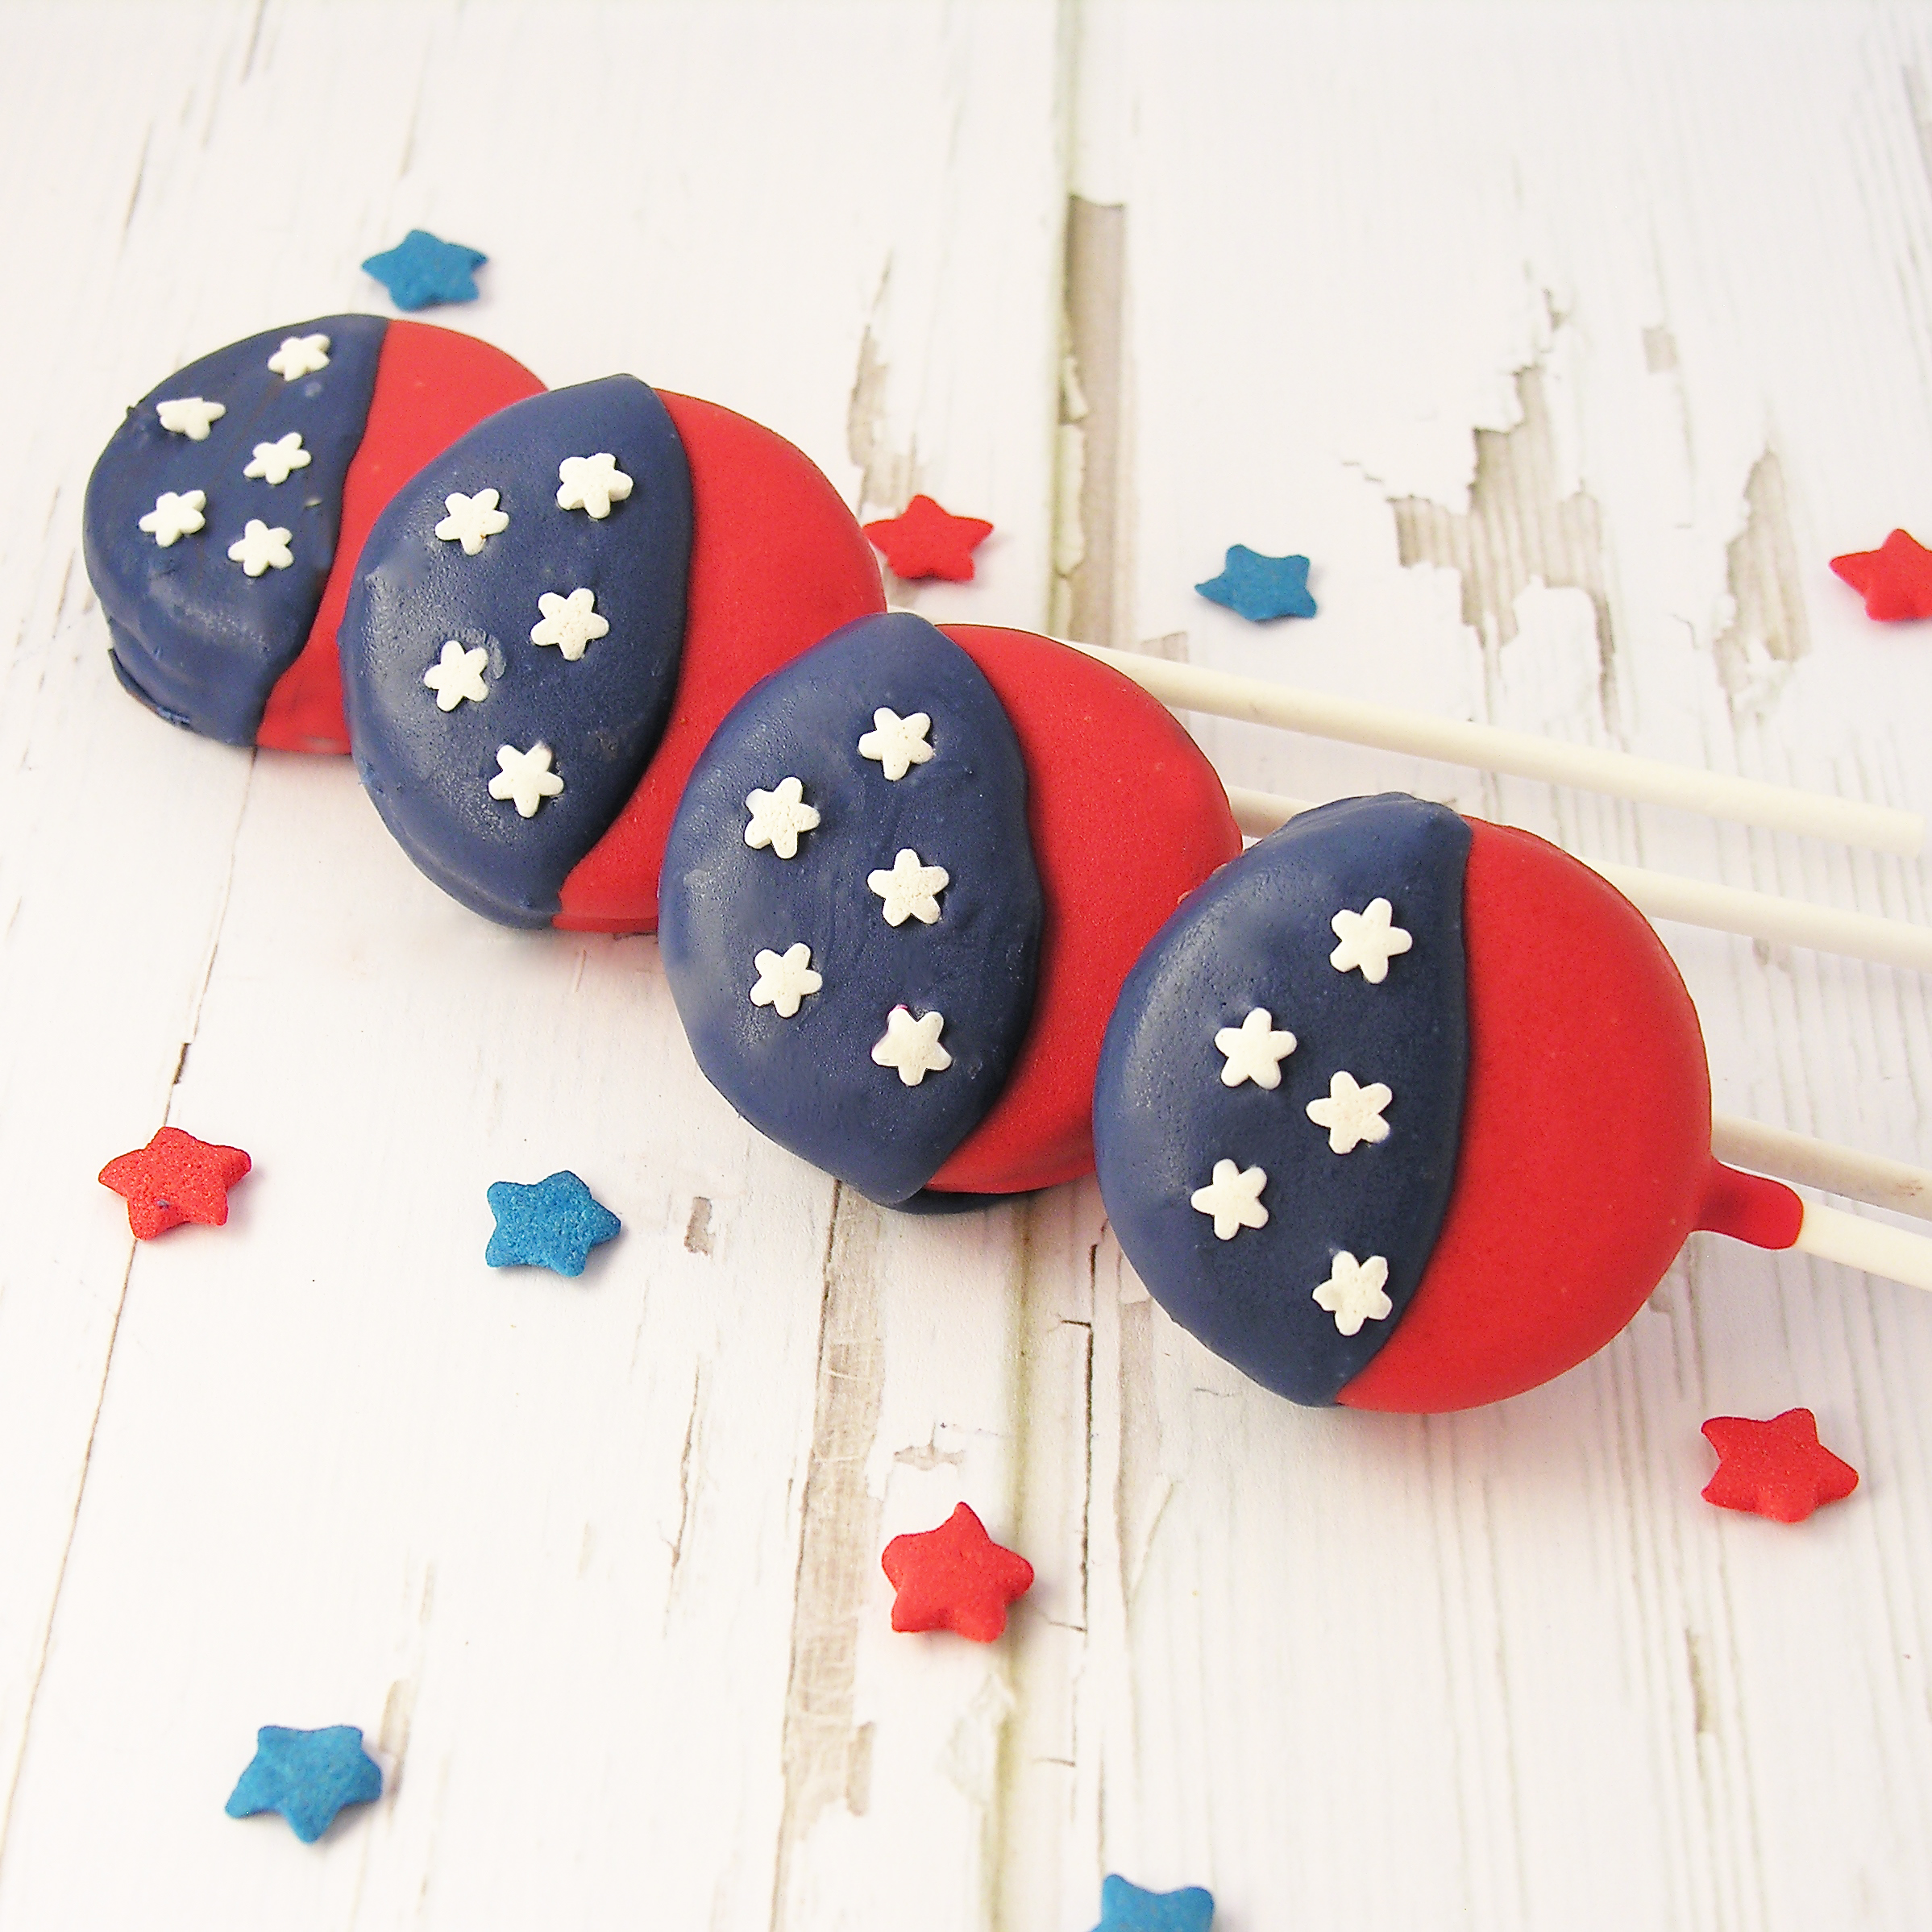
Other fun (and very patriotic!) desserts to try here at Easybaked:

Patriotic Flip Flop Cookies!!!!Patriotic Bundt Cake!!!!Patriotic Polka Dot Cake!!!!Chocolate covered brownie stars


Hole in One Cupcakes!!

Posted on

Hole in One Cupcakes!!What do you get if you cut a hole in a cupcake and fill it with a Lindt white chocolate truffle?   A perfect Father’s Day treat!!!

These are guaranteed to make any golf-loving Father smile on his special day!  This one’s for you dad!  I can’t wait to see you in 2 weeks and go “golfing” (aka losing cute golf balls in ponds).

How is such incredible cuteness created, you ask?  EASY!  Make a chocolate cupcake, cut a hole in the top, and pop a Lindt white chocolate truffle inside!

Golf Cupcakes!!How fun and easy is that?  Here are the details (Printable recipe)

INGREDIENTS:

  • One boxed chocolate cake mix (plus oil, water and eggs to make according to package)
  • One tub of white frosting
  • One container (about 1 cup) of green sugar sprinkles
  • 24 Lindt White chocolate Truffles (I got 2 (5.1oz) bags that each had 12 truffles)

DIRECTIONS:

  • Make cake according to package and divide evenly into 24 cupcake liners placed in muffin tins.
  • Bake according to package.
  • Use a cupcake corer or a small knife (use a corer to get that perfectly round cut!) to cut a hole in the center of each cupcake.
  • Use a knife to carefully frost the top of each cupcake around the hole.
  • Press top of frosted cupcake into green sugar to coat it.
  • Place a truffle into “hole”.

Golf CupcakeGolf CupcakeGolf Cupcake


  • Place a flag in each cupcake- you can print these on heavy paper and use double-sided tape to secure them to toothpicks.  Here are 2 files- Happy Father’s Day, and Blank (write your own message) flags.

Click on a picture to be taken to the printable pdf:

Father's Day FlagsGolf Cupcake- DIY Flags

My thoughts: I’ve used a cupcake corer on so many cupcakes to add fillings, and the last time I did it, this idea popped into my head!  I wasn’t sure how it would turn out, but as soon as I coated my 1st cupcake in that green sugar I knew it would be perfect!  Happy Father’s Day to all the dads out there- especially mine!!!!

Golf Cupcakes!!!!

Want another reason to get a cupcake corer? Here’s four……..

Key Lime Cupcakes!Cinnamon Roll Filling in a yummy cupcake!Radioactive Cupcakes filled with SLIME!Peppermint Hot Chocolate Cupcakes!!!

BBQ Cupcakes!!!

Posted on

BBQ Grill Cupcakes!!These chocolate cupcakes are topped with all the fixings for a grill out!  A perfect treat for Father’s Day or even a tailgate party (and as a Packer fan, I have lots of experience with those fun events!!!)

My dad is the best at grilling things.  Some of my favorite times are our family cookouts with dad at the grill.  I guess that’s why I smiled when I saw these on Pinterest the other day.  There are a ton of variations on these- they are all over the web.  There are steaks and burgers made out of caramels and candy bars.  There are shish-kabobs made out of Dots candy and Starburst.  I even saw goldfish crackers on the “grill”!  LOVE IT!

I stayed with Hot Tamales as little hot dogs, and they make me smile.  These are easy and fun, fun, FUN!!

BBQ Grill Cupcakes!!!Want to know how to make them?  Here’s the recipe: (printable version)

INGREDIENTS:

  • 1 box of Hot Tamales candies (if you hate cinnamon, you can use Mike&Ikes candy, but you’ll have to pick out the cherry ones).
  • Black gel food coloring
  • 1 cake mix (plus water, oil and eggs needed to make it according to the package)
  • 1 tub of chocolate frosting
  • Red sugar crystals 

DIRECTIONS:

  • Make cake mix according to package and divide into 24 cupcake liners placed in muffin tins.
  • Bake according to package, remove from oven and cool completely.
  • While cake is baking, use a toothpick and black food color gel to draw grill lines on the hot tamales.  I placed them on a paper towel to dry, so they wouldn’t roll.
  • Take about 1/3 of frosting out of tub, place it in a separate bowl, and add black food coloring gel  to make the frosting black.  Place this frosting into a small zip-top bag fitted with a small round decorating tip.
  • Once cupcakes have cooled, use a knife to frost a thin, smooth layer of the chocolate icing onto each cupcake.
  • Sprinkle a little red sugar in the middle of the cupcake frosting.
  • Pipe black frosting on in even lines to make the grill.
  • Set Hot Tamales on the “grill” top.
  • Enjoy!

BBQ CupcakesBBQ Cupcakes!BBQ Hotdog Cupcakes!!!

My thoughts: These are SO easy to put together.  Adding other grill items would increase your time commitment, but with just hotdogs, these went together fast!  Of course, you can use your own favorite cupcake recipe and frosting recipe with these if you don’t want to go pre-made.  I was in a hurry this week, with lots of things on my plate: BIG NEWS coming soon!  So excited to tell you all what I’ve been up to!  In the meantime, make yourself (and your dad!) some little cupcake grills!  Enjoy!!!!  ~r

BBQ Grill Cupcakes!!!

You might also enjoy:

Hamburger Cookie!Malted Milk Cupcakes!!!New Zealand Chocolate cookiesChocolate molten lava cupcakes


Peanut Butter Fudge Brownies

Posted on

Peanut Butter Fudge Brownies!!!!

These aren’t your average brownie- they are full of creamy peanut butter filling and topped with a layer of fudge! Unbelievably delicious!

Peanut butter and chocolate are a timeless combination.  These brownies have the perfect blend between the two, and they cut into beautifully layered bars that are fun to serve at any occasion!  These are a variation on a brownie recipe that my mom makes all the time with mint filling.  This brownie recipe has appeared on Easybaked many times, and in many forms:

Coconut Brownie Cups!!!Caramel Fudge Brownies!!Mint Creme Brownie CupsChocolate covered brownie stars

But adding peanut butter?  Oh my goodness….. a definite show-stopper!

Peanut Butter Fudge Brownies!!!!!

Here’s the recipe: (printable version)

INGREDIENTS

Brownie:

  • 1 cup butter
  • 2 cups sugar
  • 3 eggs
  • 2 teaspoons vanilla
  • 2 cups flour
  • 1/2 cup cocoa
  • 1/2 teaspoons salt
  • 1 cup milk

Peanut butter filling:

  • 5 cups powdered sugar
  • 1/2 cup softened butter
  • 1 cup of creamy peanut butter

Fudge topping:

  • One bag (12 oz) of chocolate chips
  • 12 Tablespoons of butter (do not substitute margarine here!)

DIRECTIONS:

Brownie:

  • Preheat oven to 350.
  • Cream butter and sugar together. 
  • Beat in eggs, cocoa, vanilla and salt.
  • Add flour and milk (alternating them and mixing well in between)
  • Pour batter into a jellyroll pan (12 1/2 x 17 1/2 x 1″)  that has been sprayed with non-stick spray.
  • Bake at 350F degrees for 8-10 minutes.
  • Cool.  

Peanut butter filling:

  • Combine softened butter with peanut butter, mixing on low until completely smooth.
  • Add powdered sugar, mixing until combined. 
  • Add a little water to make filling a thick, but spreadable consistency.
  • Spread over cooled brownies.

Fudge topping:

  • Melt chocolate chips and butter together in the microwave in 30 second increments, stirring in between until completely melted and smooth.
  • Pour over peanut butter filling and use a spoon to push topping over entire top of brownies.
  • Decorate with sprinkles or by drizzling a little white chocolate on top.
  • Refrigerate for several hours.
  • Cut brownies when the top layer is firm, but not hard.  Your knife should go through it easily without cracking it. If your top has chilled too long, simply let it sit at room temp for a little while until it softens up.
  • Store these in a large air-tight container, in layers separated with parchment paper or wax paper to avoid sticking.
  • These can be frozen really well (I like to eat them frozen, in fact!)


Peanut Butter Fudge Brownies!!!!!My thoughts: This brownie recipe is so versatile and fun.  Really, there are so many possibilities!  I love the addition of a peanut butter layer- they are so pretty and mmmm…so good!  Do you want to make a design on the top of yours like I did?  There’s a step-by-step example from when I 1st posted this recipe in mint.  You can see it here.  I hope you get a chance to try at least ONE of the easybaked variations on this brownie recipe.  I guarantee you will be back to experiment with your own flavor combinations!  Enjoy!! ~r
What? You like peanut butter?  So do we!!!! Try one of these other yummy recipes:
Peanut Butter Cupcakes!!Peanut Butter Cup Layer CakePeanut butter cup cheesecakePeanut butter Acorn Cookies!


Caramel Pecan Marshmallow Pops

Posted on


Marshmallow Turtle Pops!

  Big marshmallows covered in creamy caramel and chocolate are dipped in pecans to make an incredibly decadent treat!

These are unbelievably good.  I was visiting my friend Andreya in San Diego last weekend and we passed a store while window shopping in La Jolla that had all sorts of dipped marshmallows.  I started craving them and had to try this.   These are like yummy caramel apples- but with a soft marshmallow inside, instead of an apple.  If you are looking for a really unique treat that is easy to put together, this is your recipe!!!  I couldn’t believe how easy and yummy  these were.

Caramel Pecan Dipped Marshmallows

Here’s the recipe: (printable version)

INGREDIENTS:

  • 2 bags of jumbo marshmallows (24 marshmallows)
  • 24 lollipop sticks
  • 32 Kraft caramels, unwrapped
  • 1 (14 oz) can of sweetened condensed milk
  • 1/2 cup of butter
  • 1 bag of dark chocolate Wilton’s candy melts
  • 2 cups of chopped pecans

DIRECTIONS:

  • Set marshmallows out on parchment paper and stick one lollipop stick into the flat side of each one.
  • In a medium saucepan, melt together caramels, butter and sweetened condensed milk, stirring constantly, until completely smooth (takes about 5 minutes)
  • Pour caramel mixture into a bowl.
  • Using stick, carefully dip each marshmallow into caramel, coating it to the top.  Gently tap stick against side of bowl to remove excess caramel and then slide bottom of marshmallow along bowl’s edge to remove most of caramel.  (It is ok if you remove it down to the marshmallow- the chocolate will cover this up!
  • Place upright on a sheet of parchment paper and cool.
  • Place chocolate candy melts into a bowl, and melt them in the microwave in 30 second increments, stirring in between, until completely melted and smooth.
  • Lay a fresh sheet of parchment paper out before beginning next step.
  • Place pecans in a small bowl.
  • Gently peel a marshmallow away from the parchment paper. This is a little tricky, as it will still be a bit gooey.  I held the stick, lifted, and peeled the paper away from the marshmallow.
  • Dip bottom of marshmallow into melted chocolate and slide bottom along edge of bowl to remove excess.
  • Dip bottom of coated marshmallow into pecans and set on fresh parchment paper to harden.

Once these are hardened up, you can serve them up on a pretty plate, or wrap them in cello bags to use as gifts or favors.
If you aren’t serving them right away, be sure to cover them so the marshmallows don’t harden up.

Caramel Pecan Marshmallow Pops!

My thoughts: These are a recipe I will make again.  I had fun putting them together and everyone who tried them asked me to make them again.  Easy. Yummy. Beautiful.  My kind of recipe!  Enjoy!! ~r

Other unique recipes you might enjoy:

Fruit Loop Pie!Raspberry Lemon Cream Cups!!!Cookie Dough Whoopie Pie!Doughnut cupcakes!!