Tag Archives: cupcakes

BBQ Cupcakes!!!

Posted on

BBQ Grill Cupcakes!!
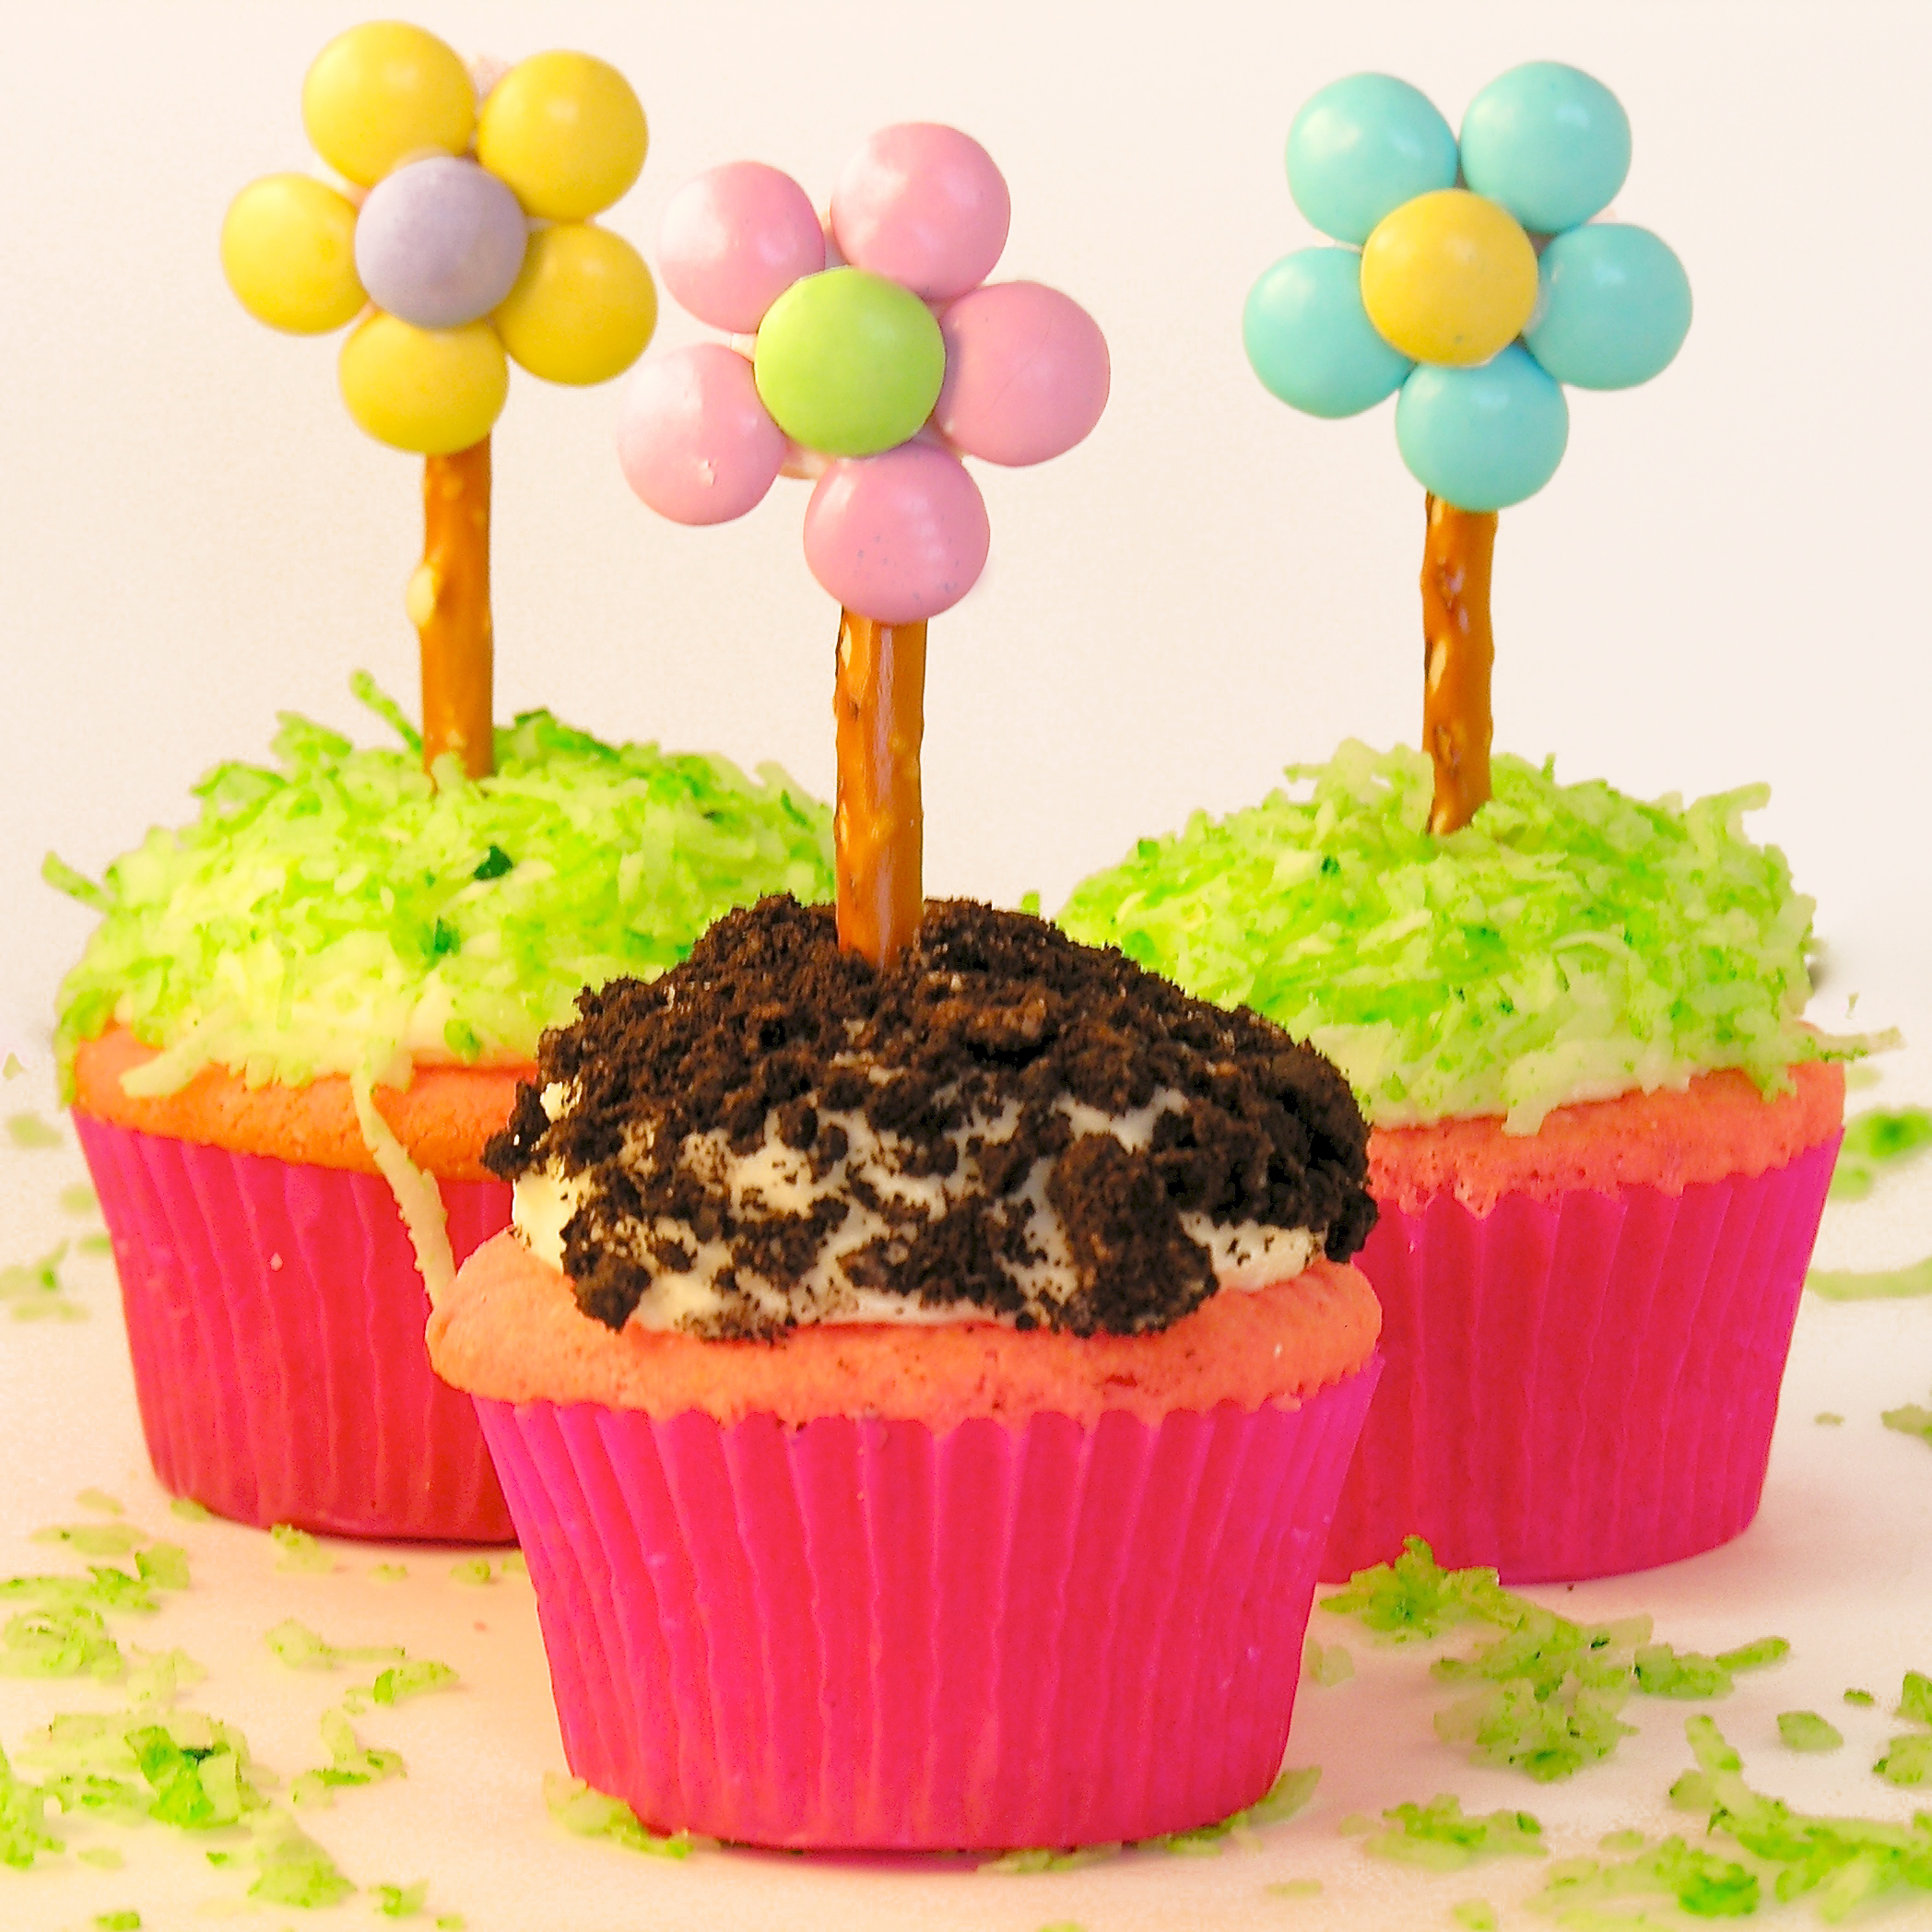
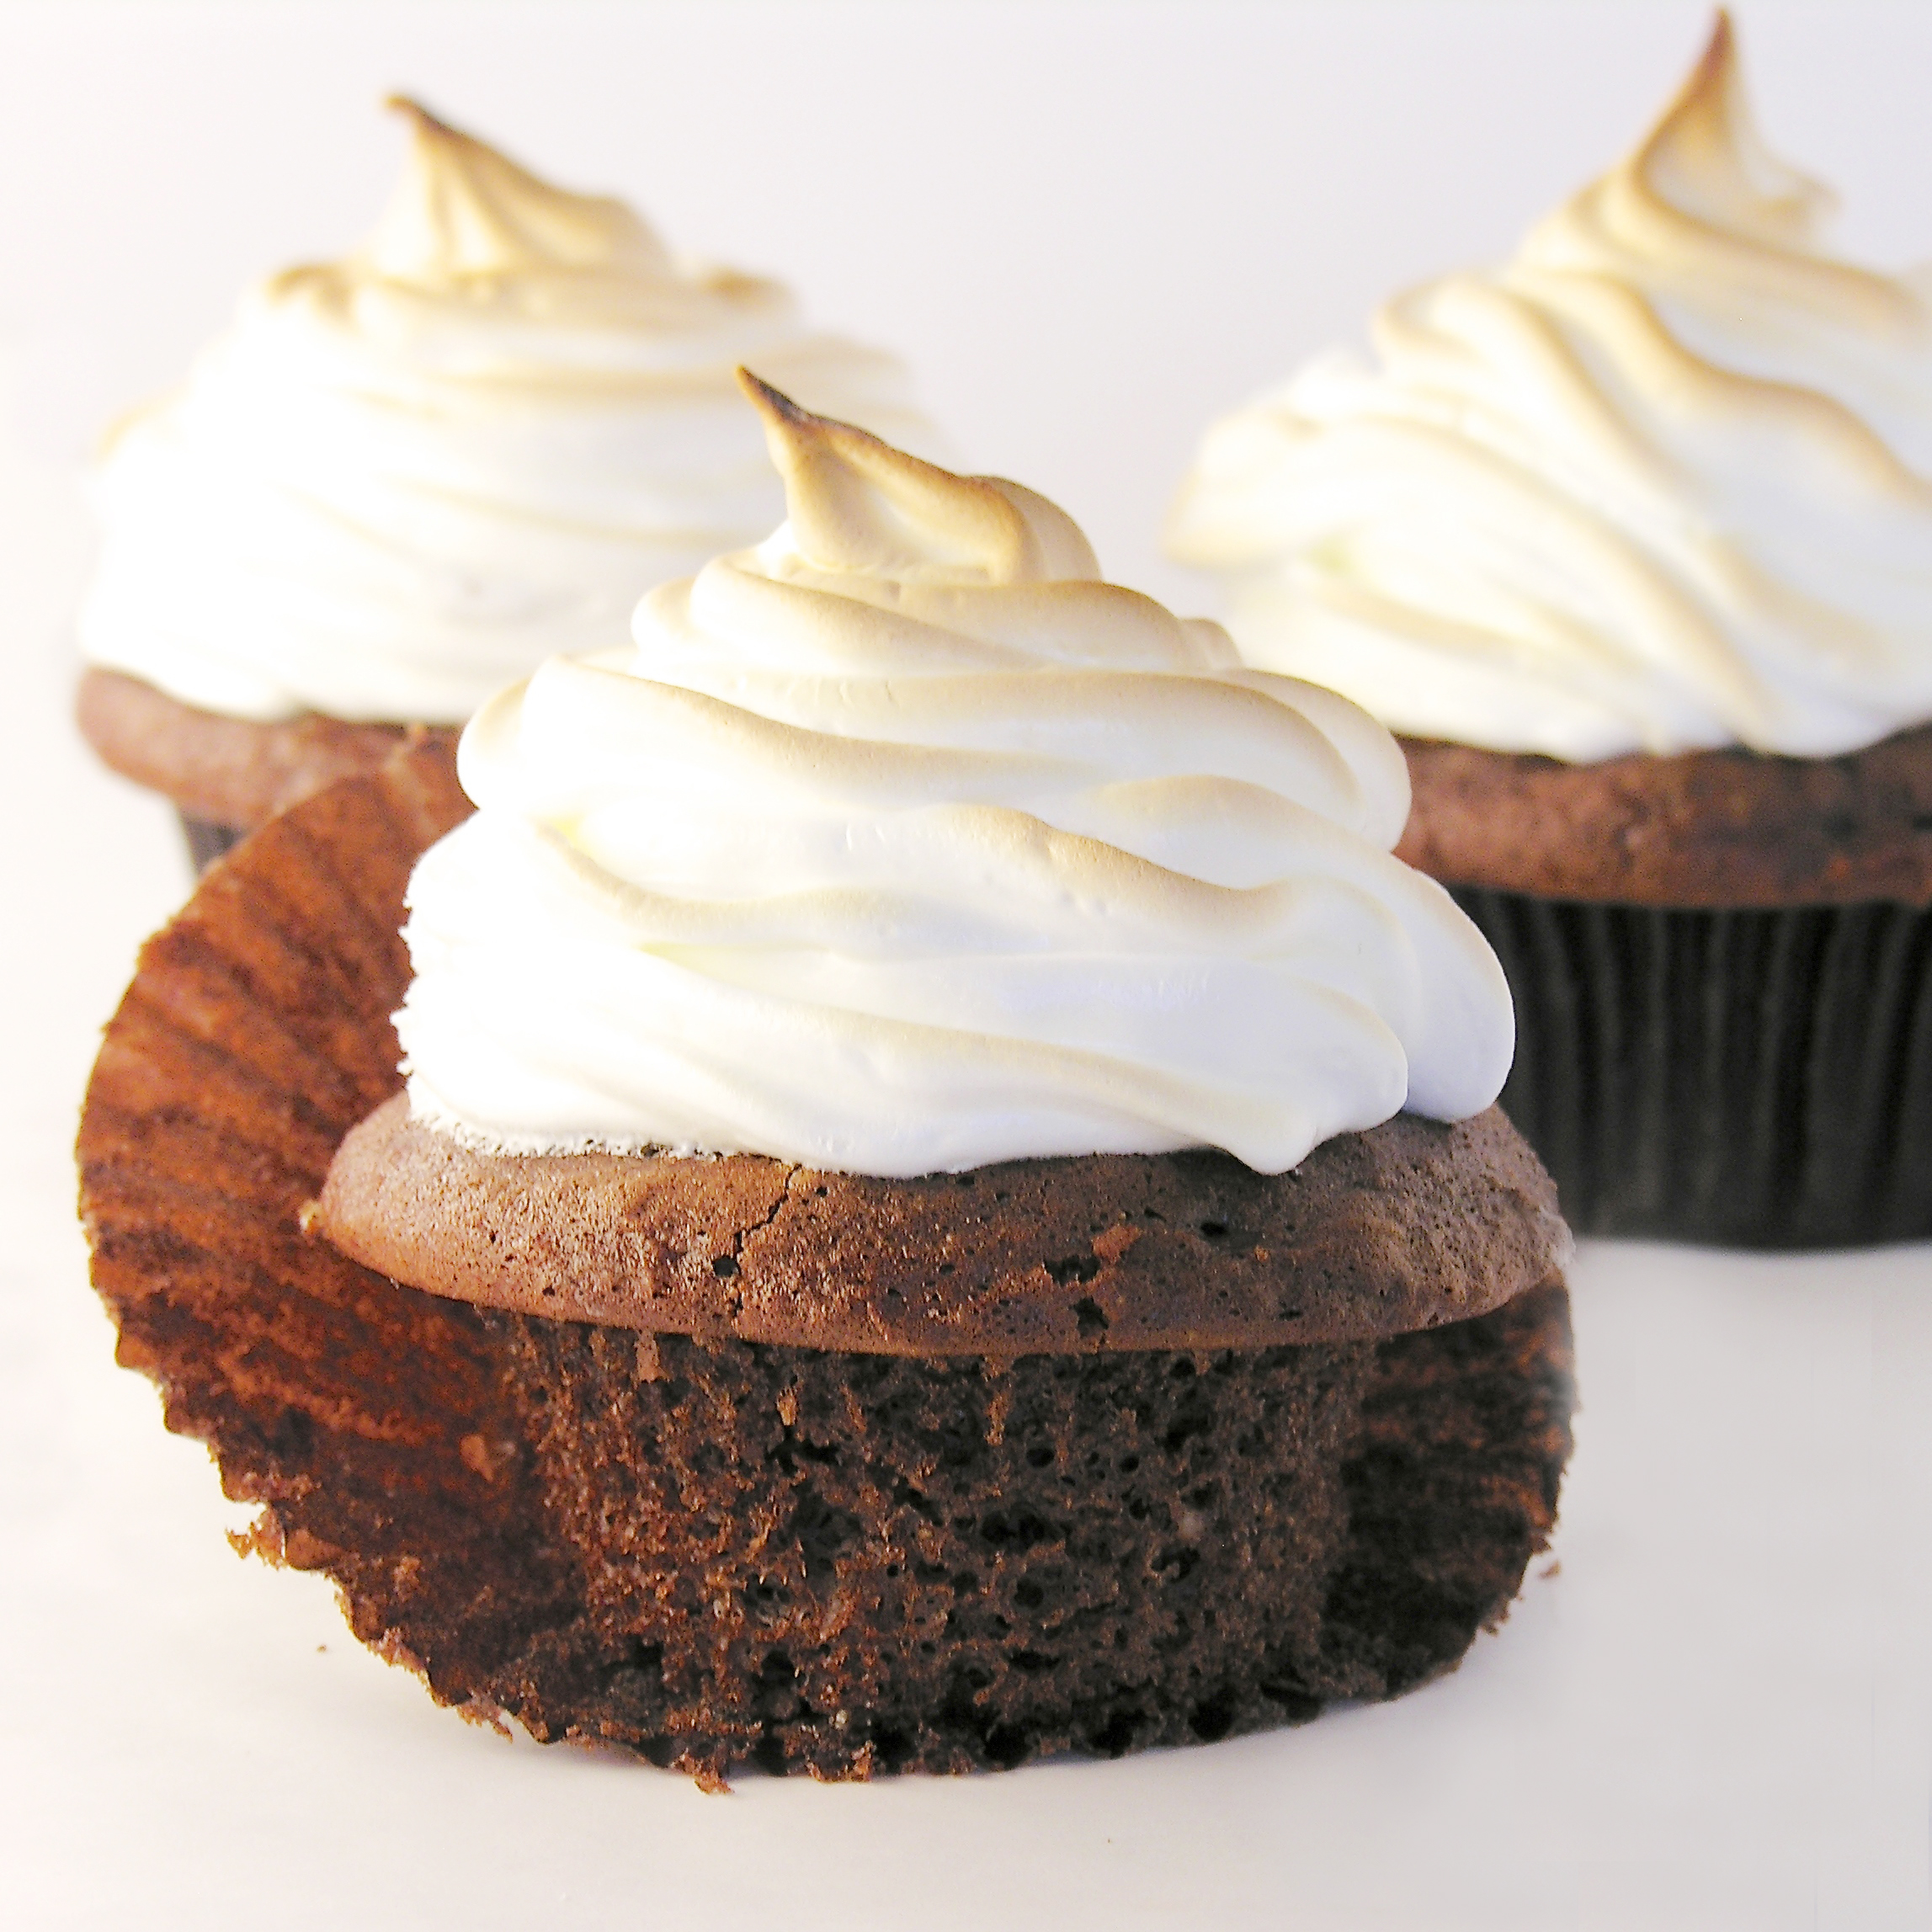
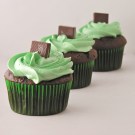
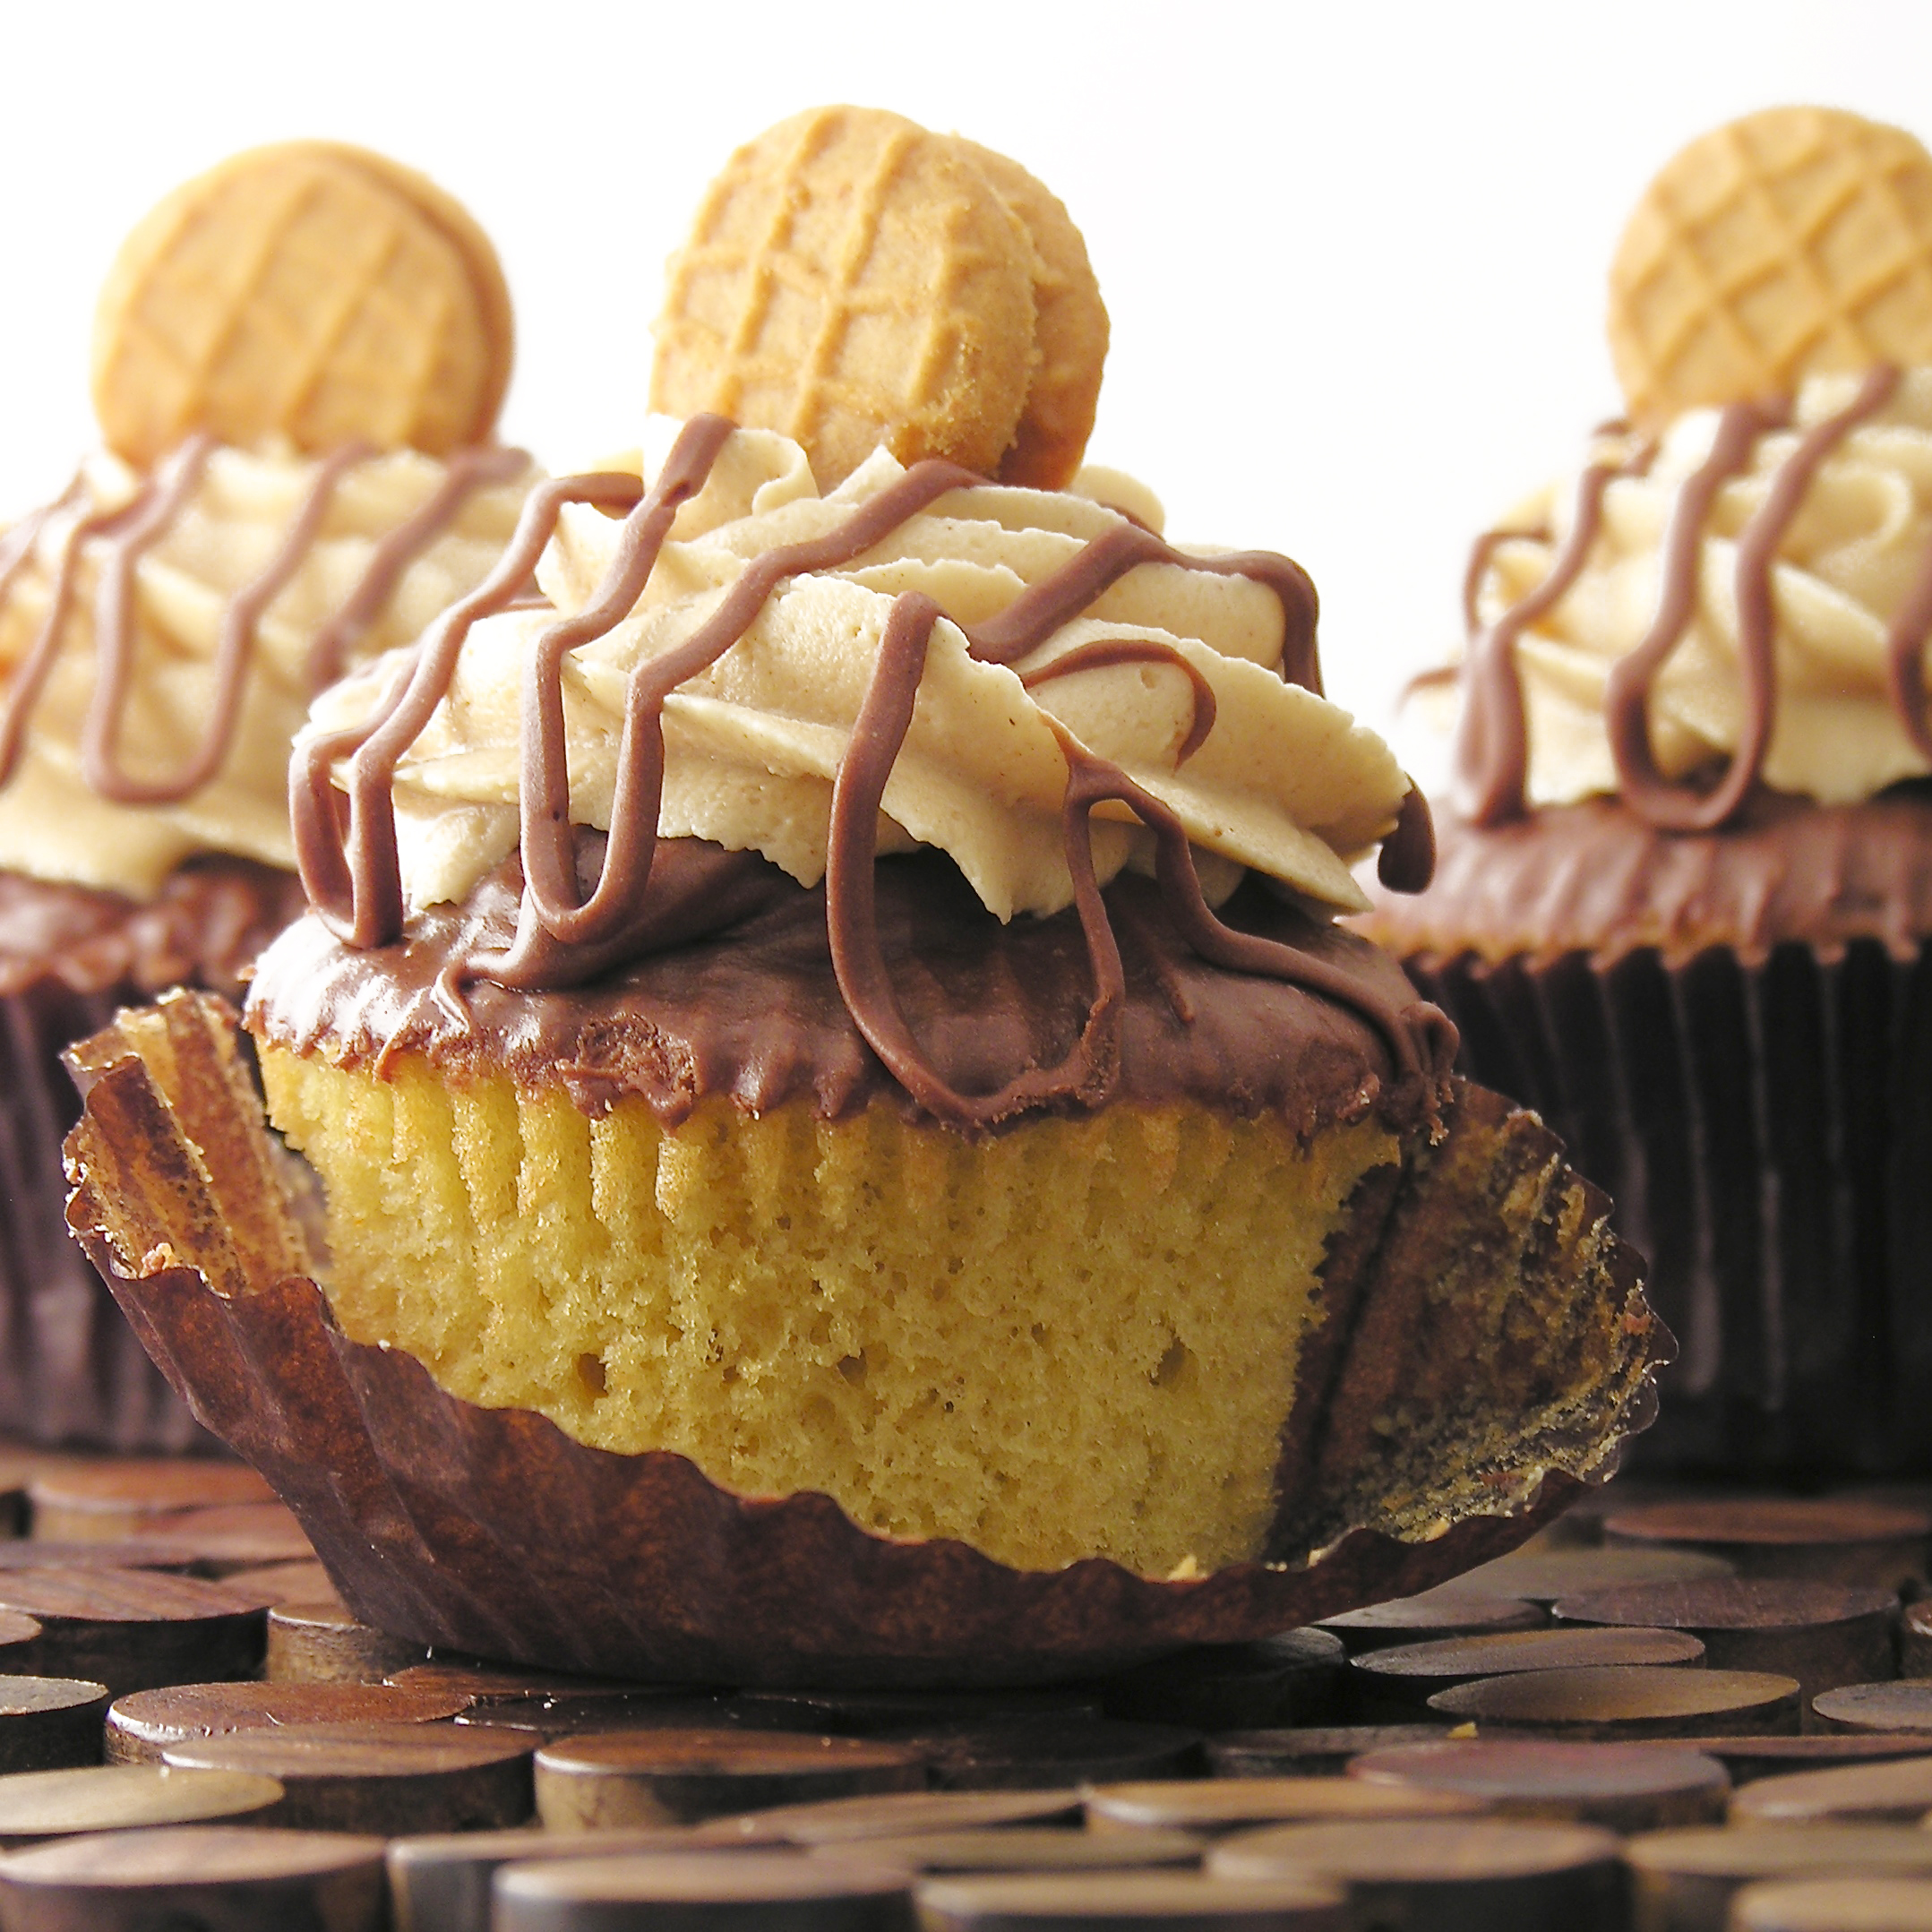
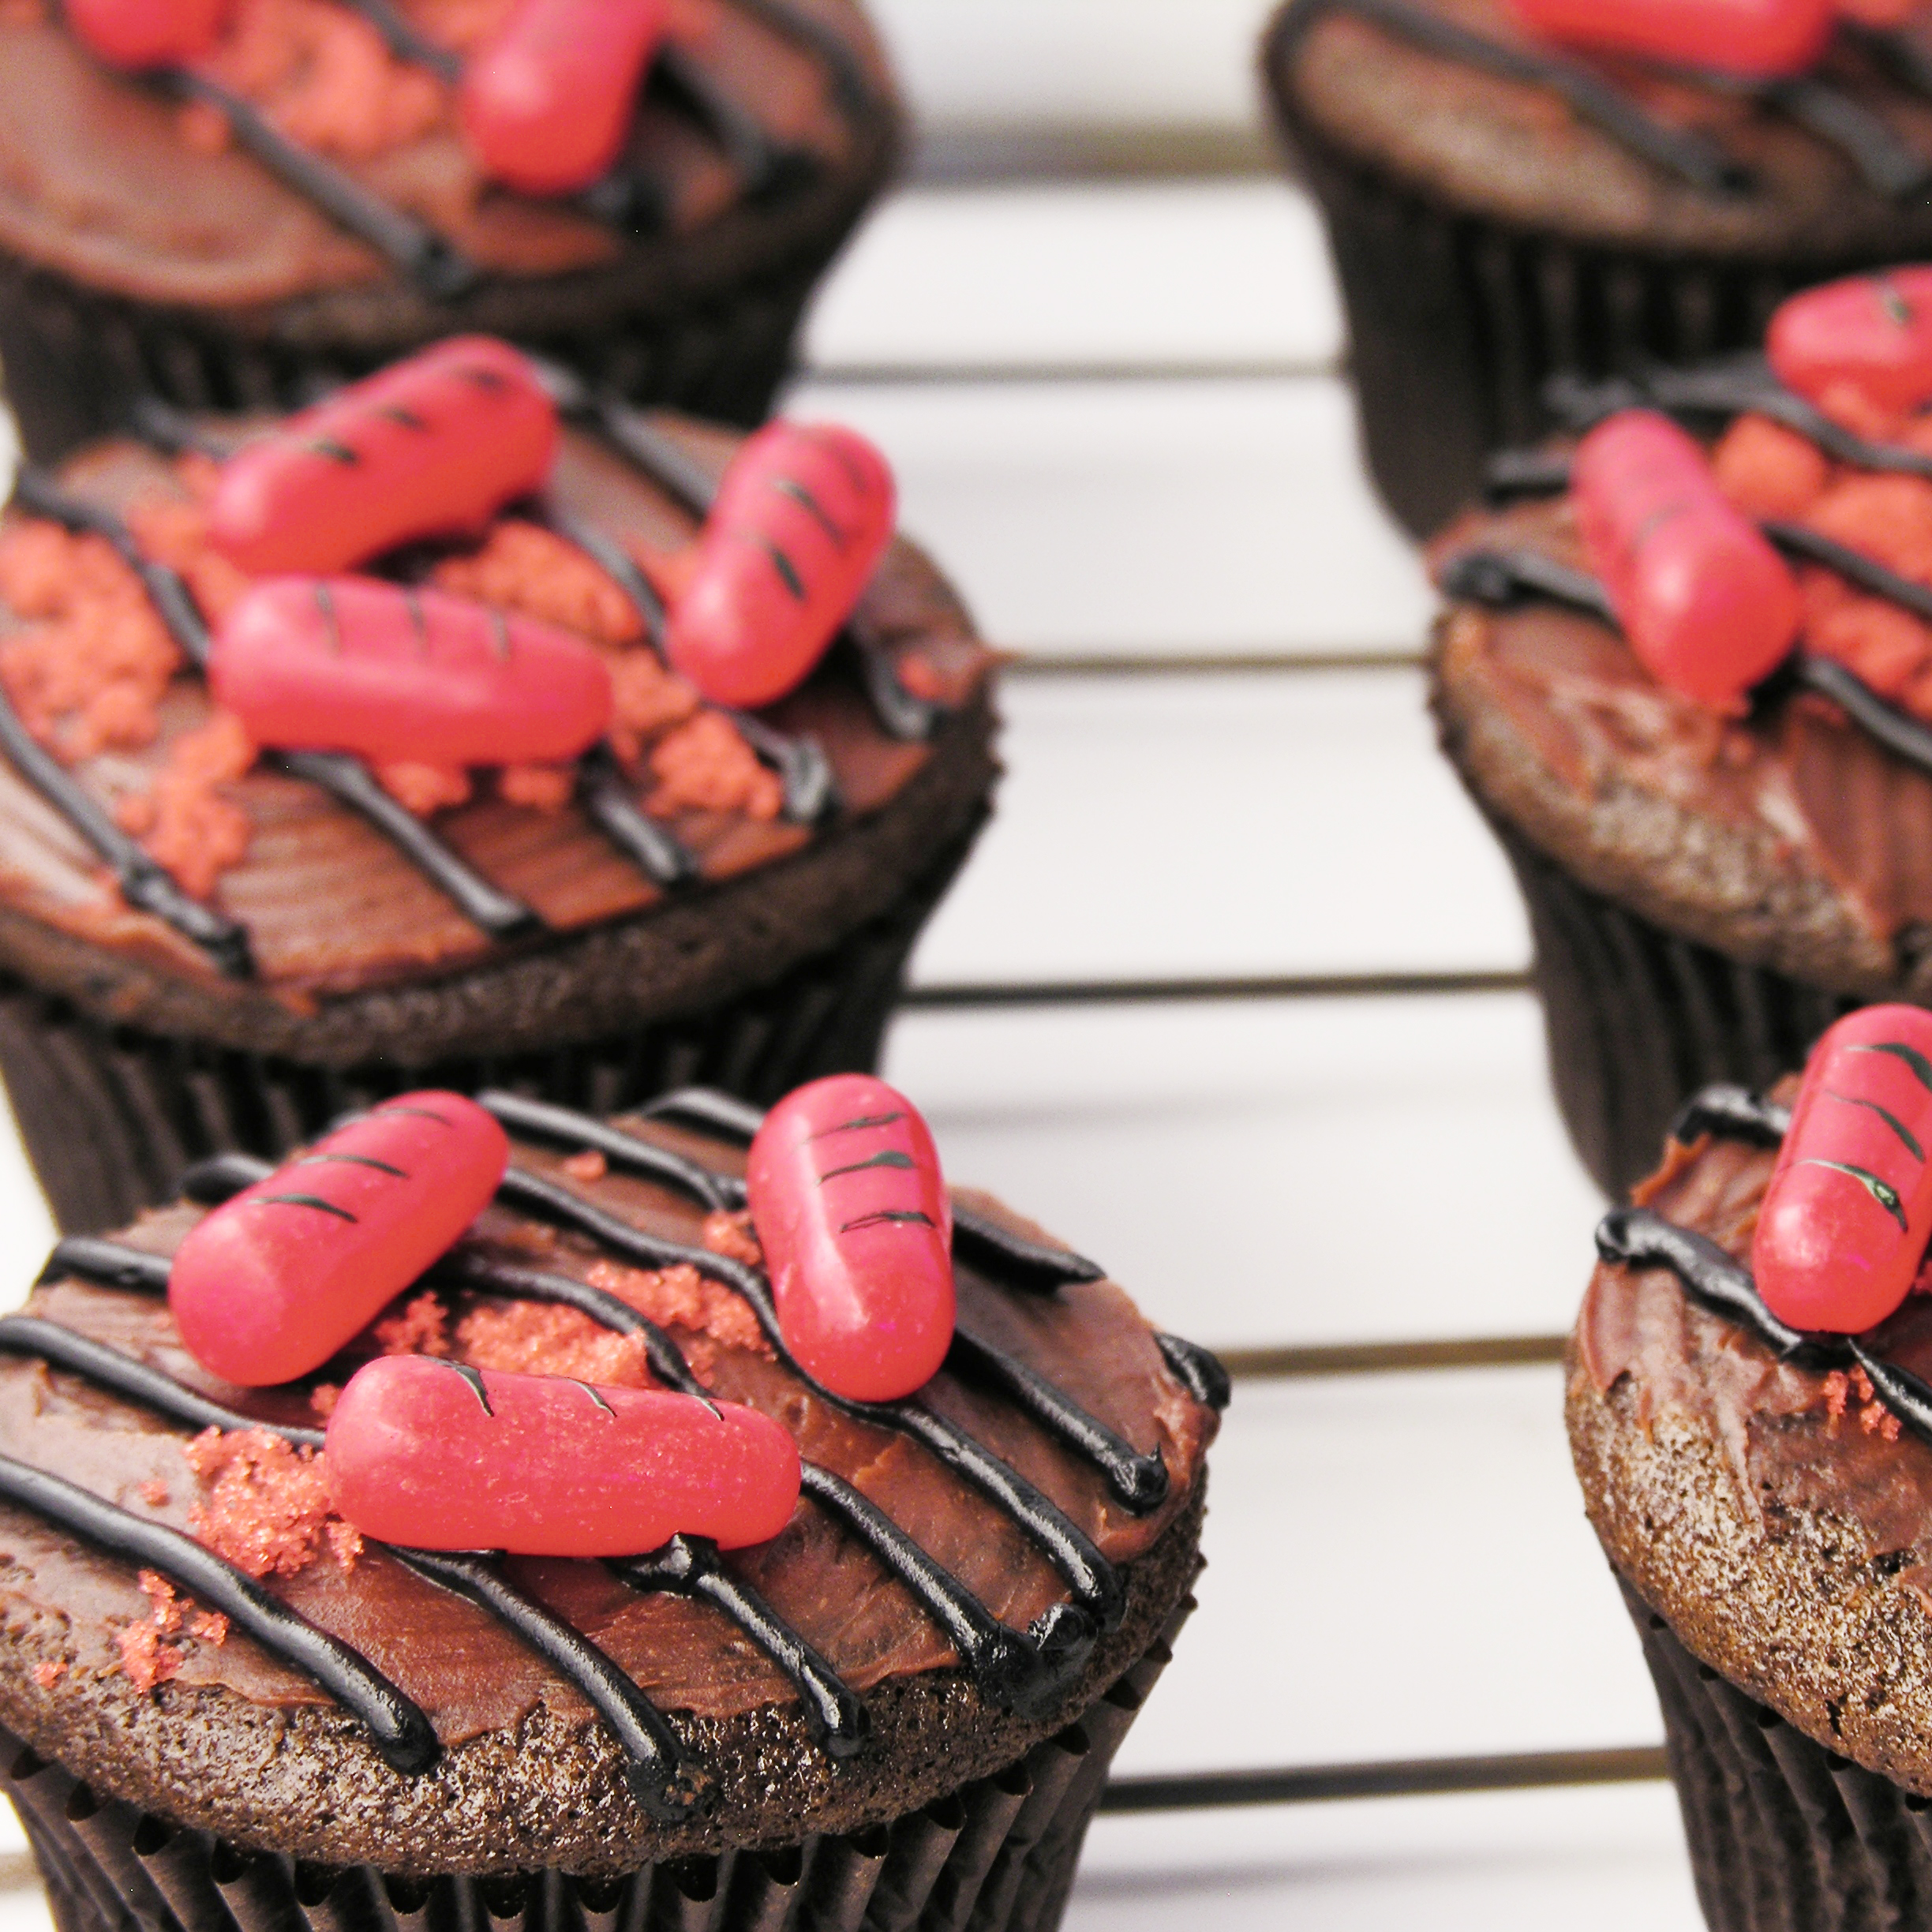
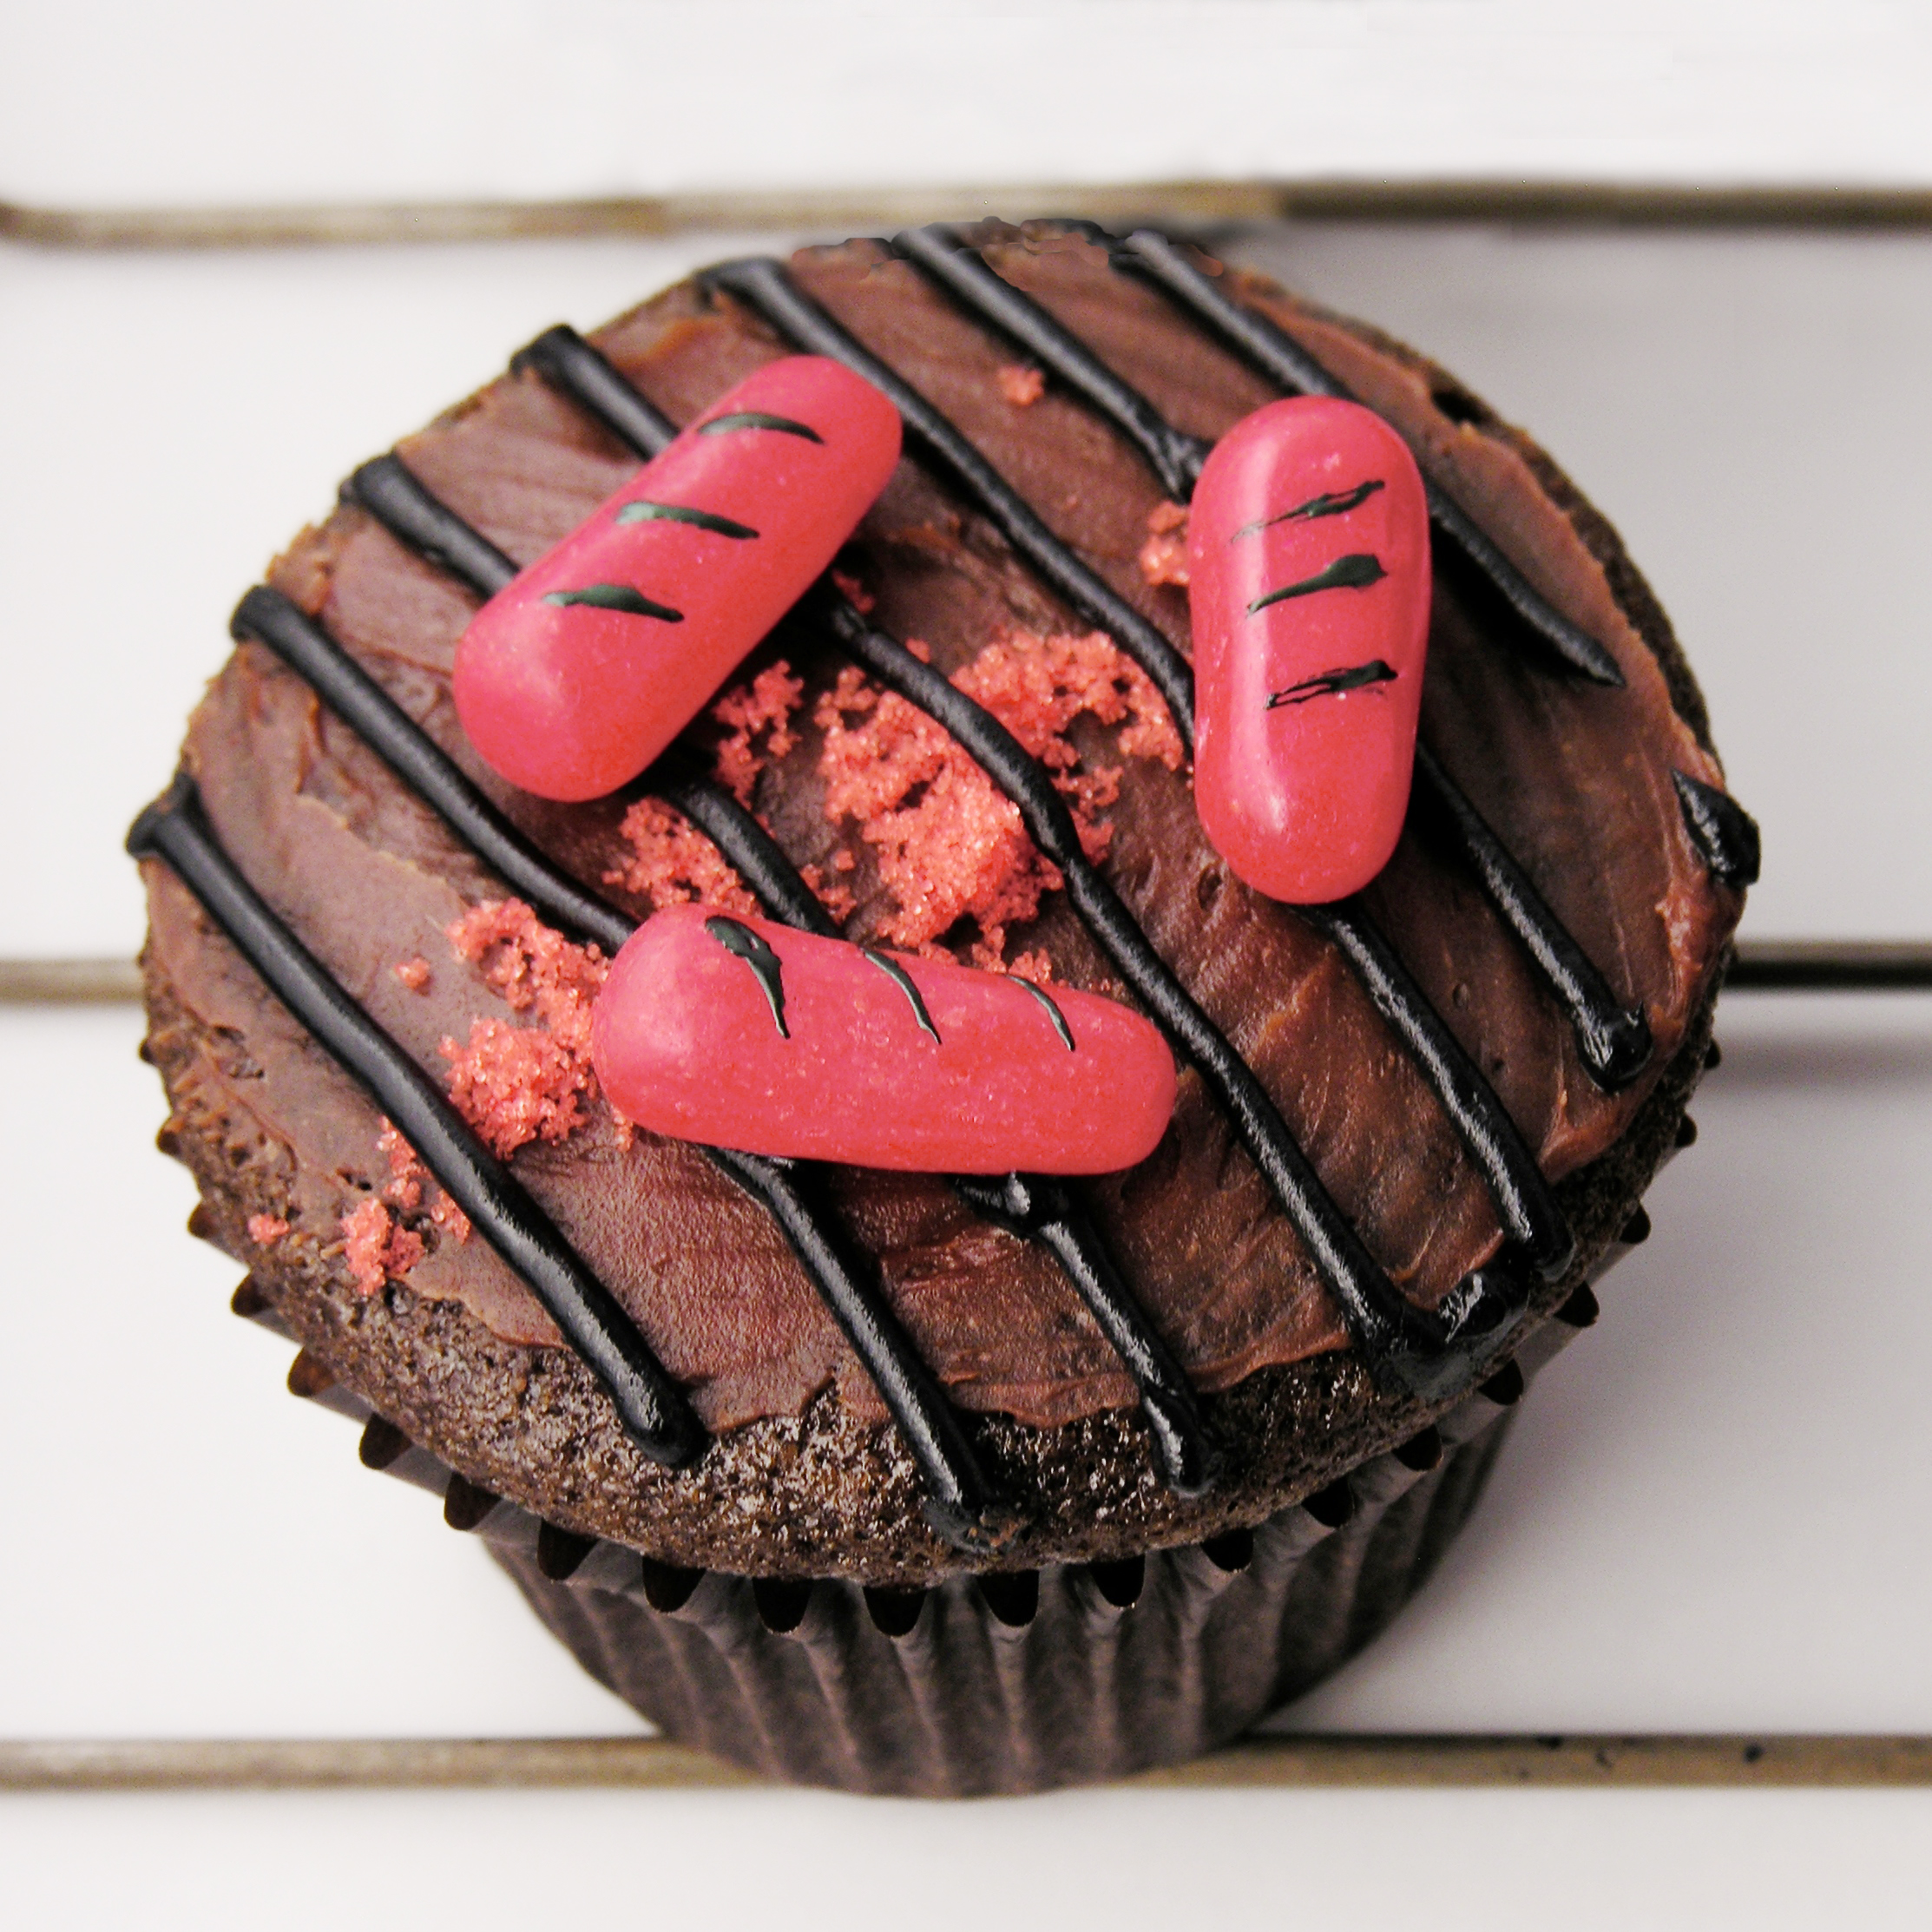
These chocolate cupcakes are topped with all the fixings for a grill out!  A perfect treat for Father’s Day or even a tailgate party (and as a Packer fan, I have lots of experience with those fun events!!!)

My dad is the best at grilling things.  Some of my favorite times are our family cookouts with dad at the grill.  I guess that’s why I smiled when I saw these on Pinterest the other day.  There are a ton of variations on these- they are all over the web.  There are steaks and burgers made out of caramels and candy bars.  There are shish-kabobs made out of Dots candy and Starburst.  I even saw goldfish crackers on the “grill”!  LOVE IT!

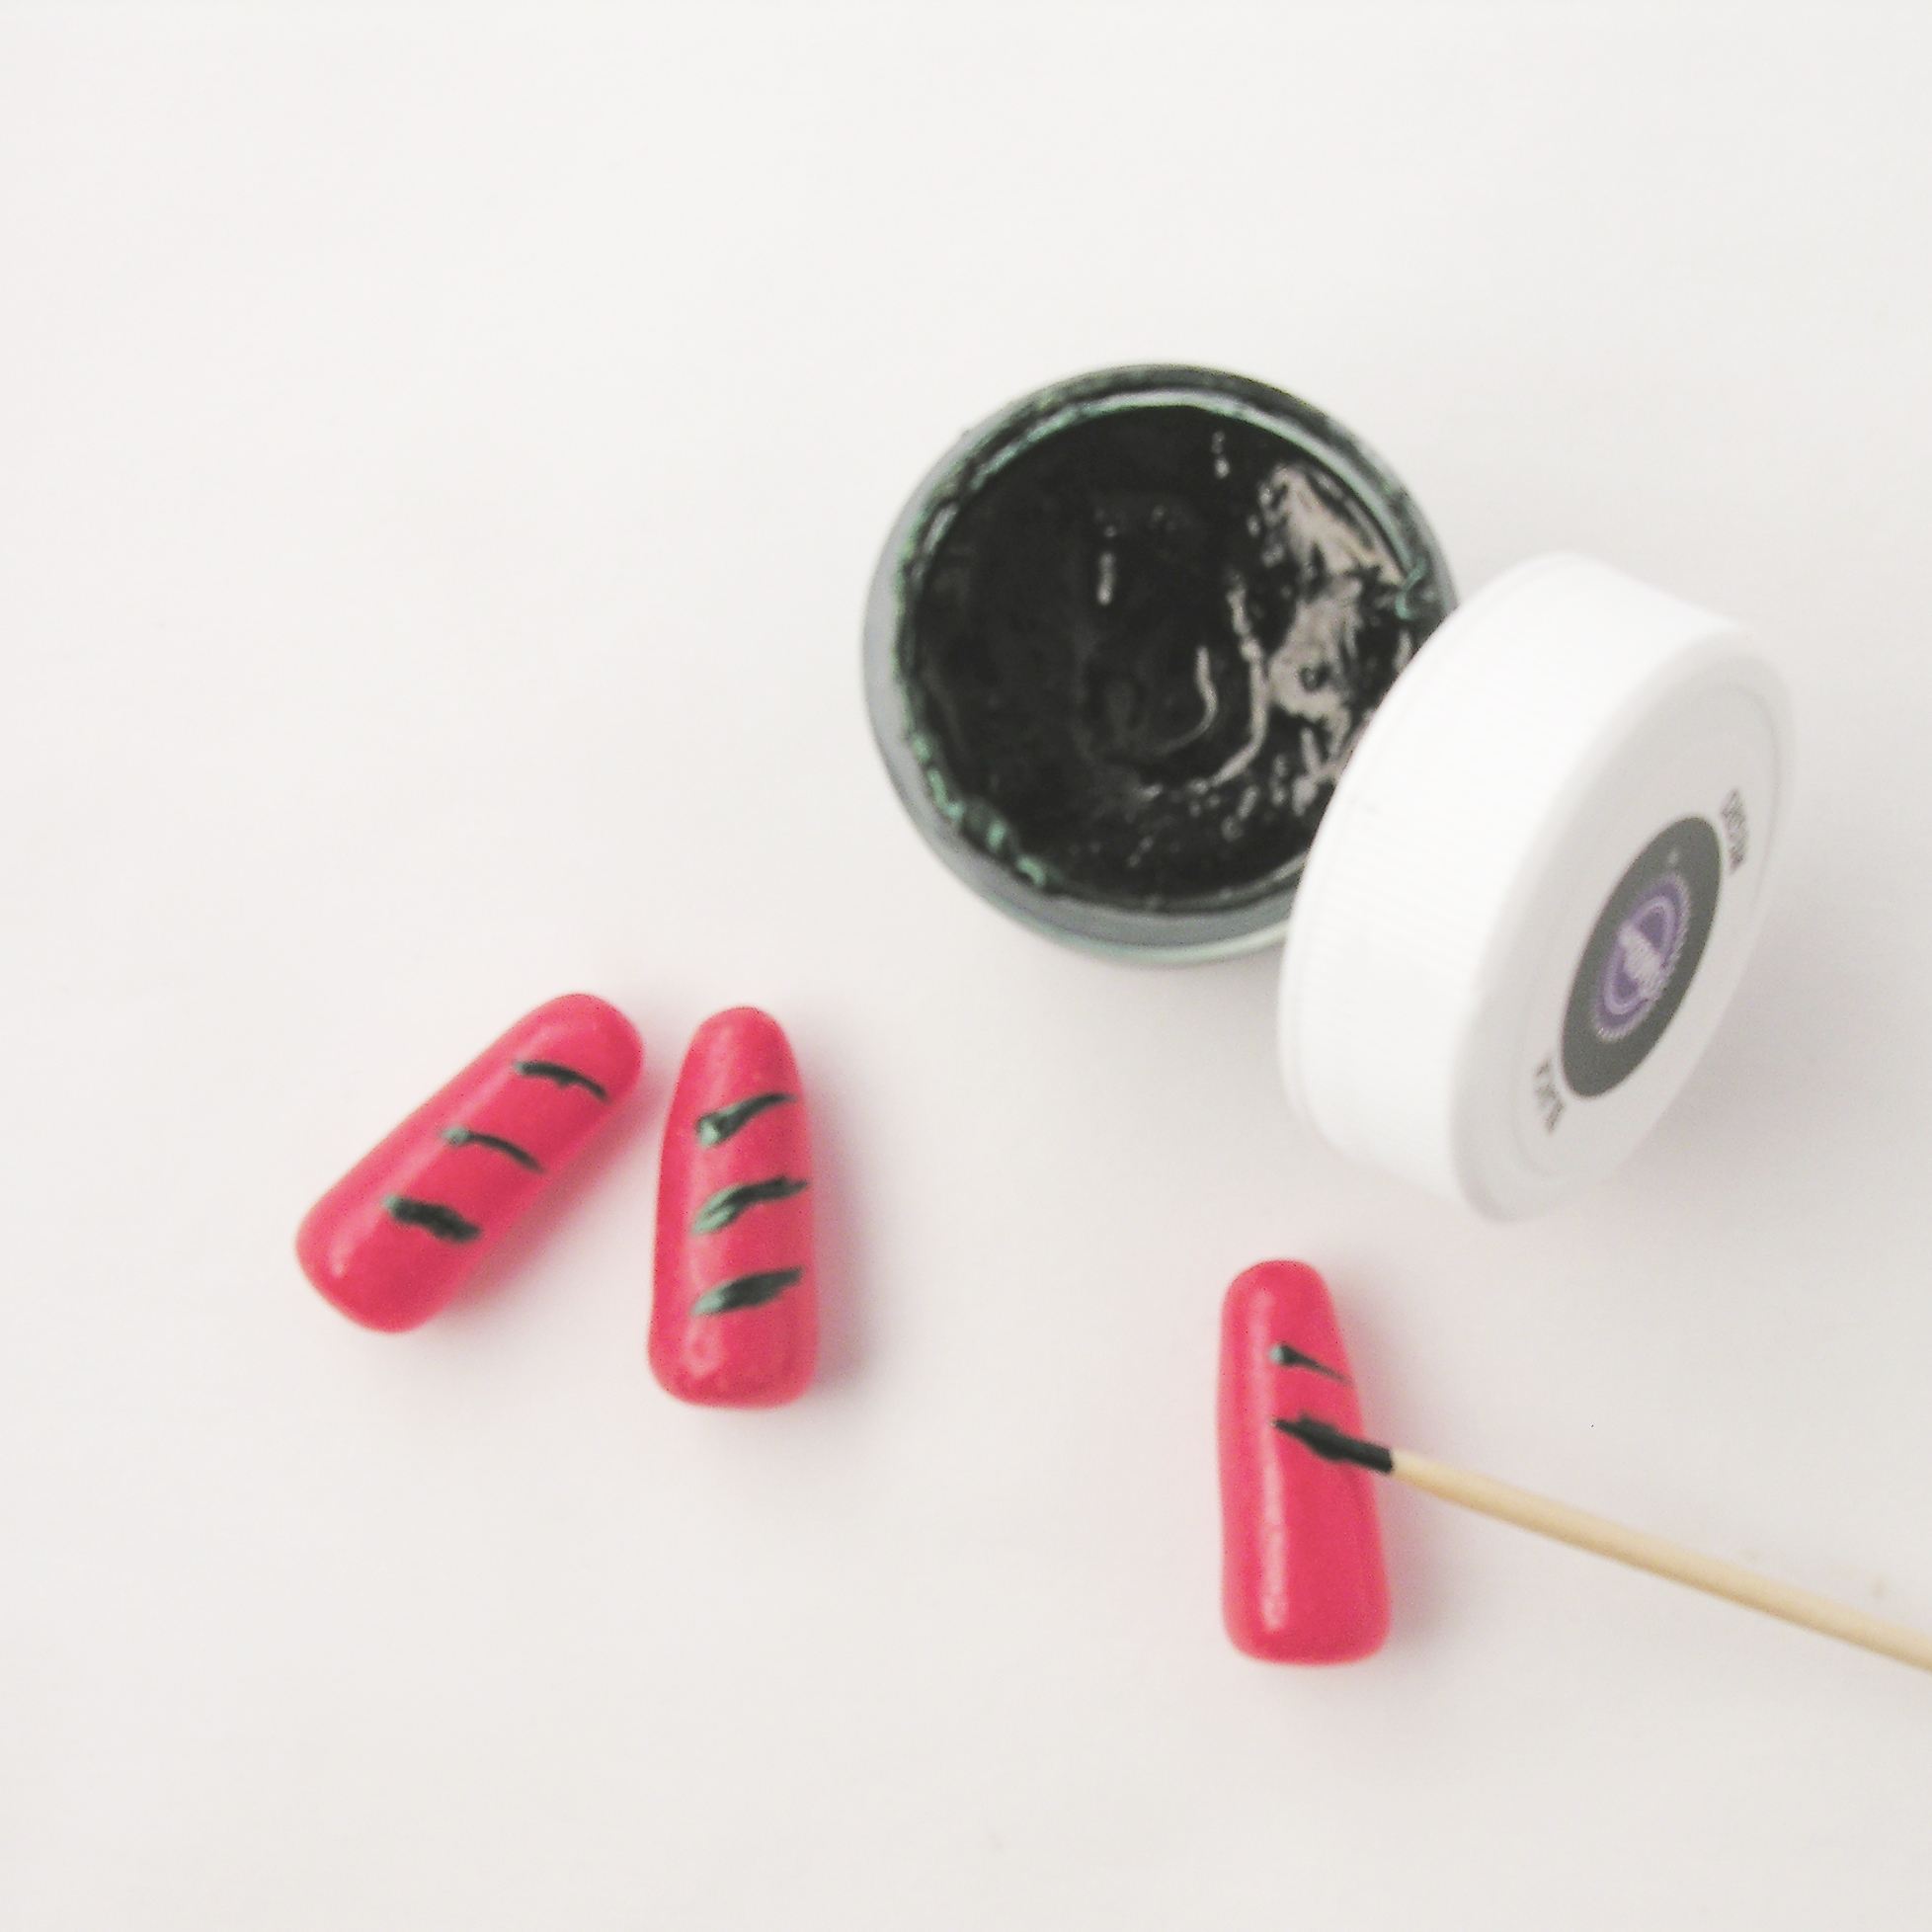
I stayed with Hot Tamales as little hot dogs, and they make me smile.  These are easy and fun, fun, FUN!!

BBQ Grill Cupcakes!!!
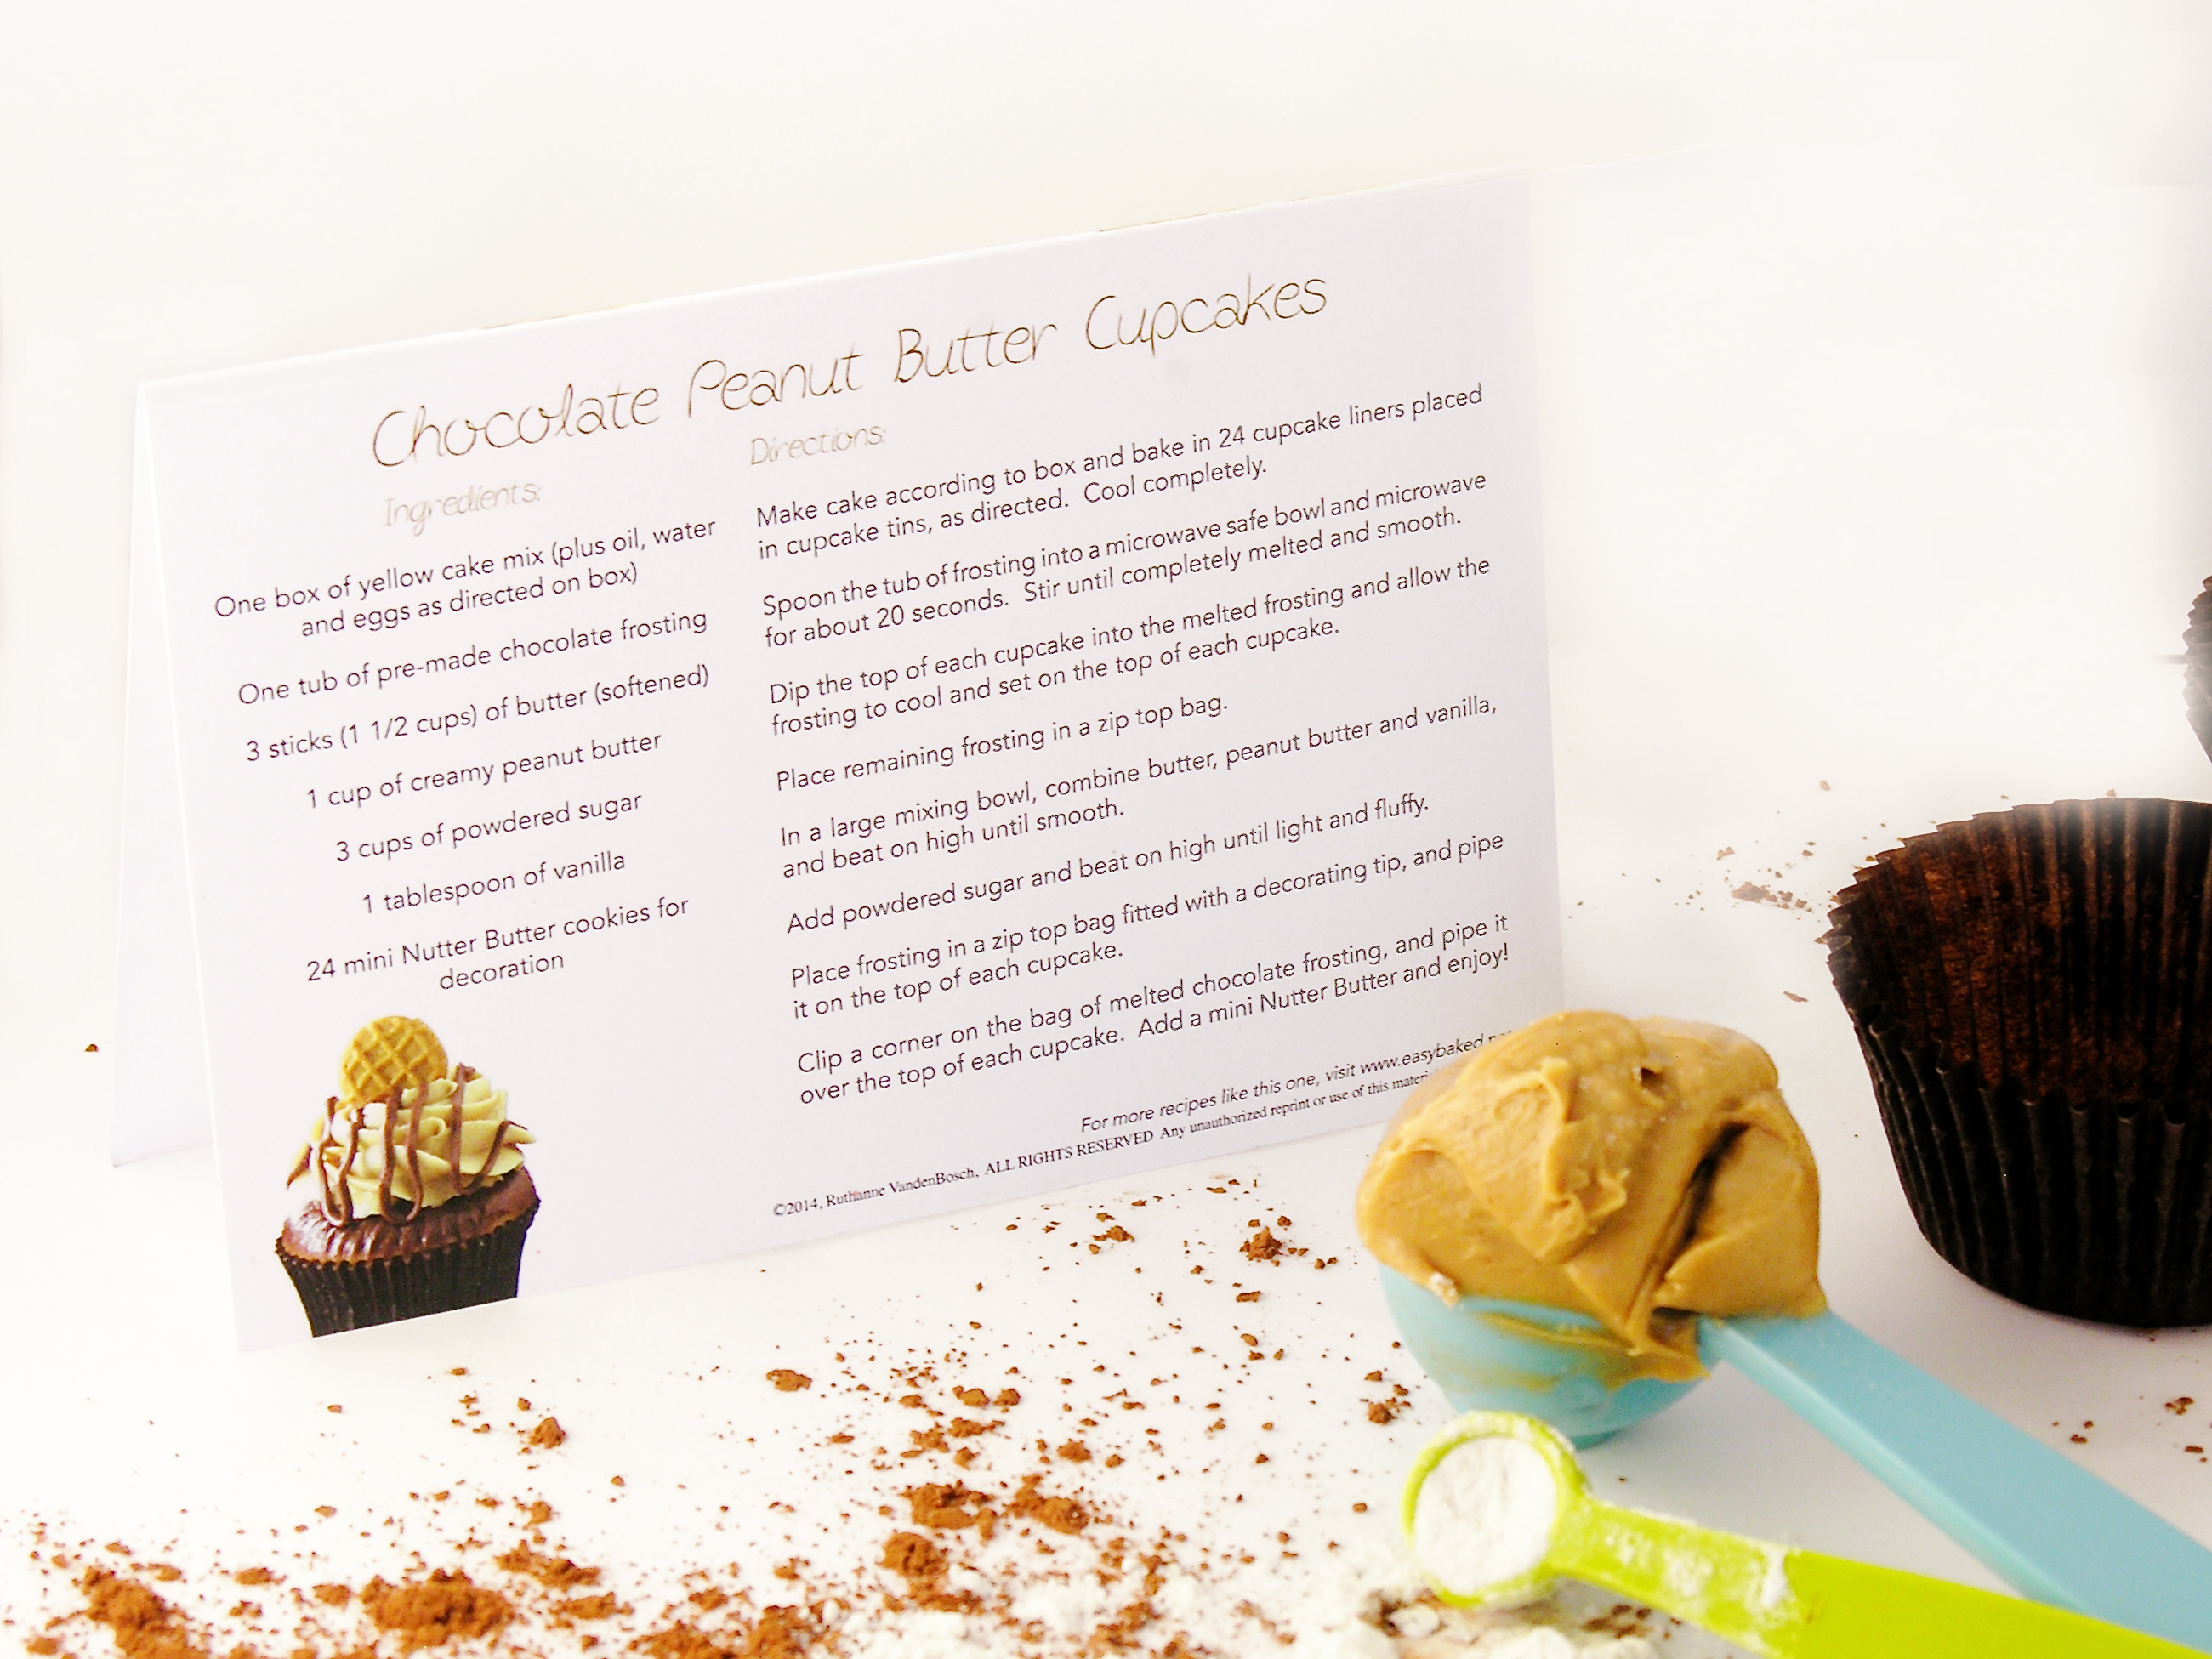
Want to know how to make them?  Here’s the recipe: (printable version)

INGREDIENTS:

  • 1 box of Hot Tamales candies (if you hate cinnamon, you can use Mike&Ikes candy, but you’ll have to pick out the cherry ones).
  • Black gel food coloring
  • 1 cake mix (plus water, oil and eggs needed to make it according to the package)
  • 1 tub of chocolate frosting
  • Red sugar crystals 

DIRECTIONS:

  • Make cake mix according to package and divide into 24 cupcake liners placed in muffin tins.
  • Bake according to package, remove from oven and cool completely.
  • While cake is baking, use a toothpick and black food color gel to draw grill lines on the hot tamales.  I placed them on a paper towel to dry, so they wouldn’t roll.
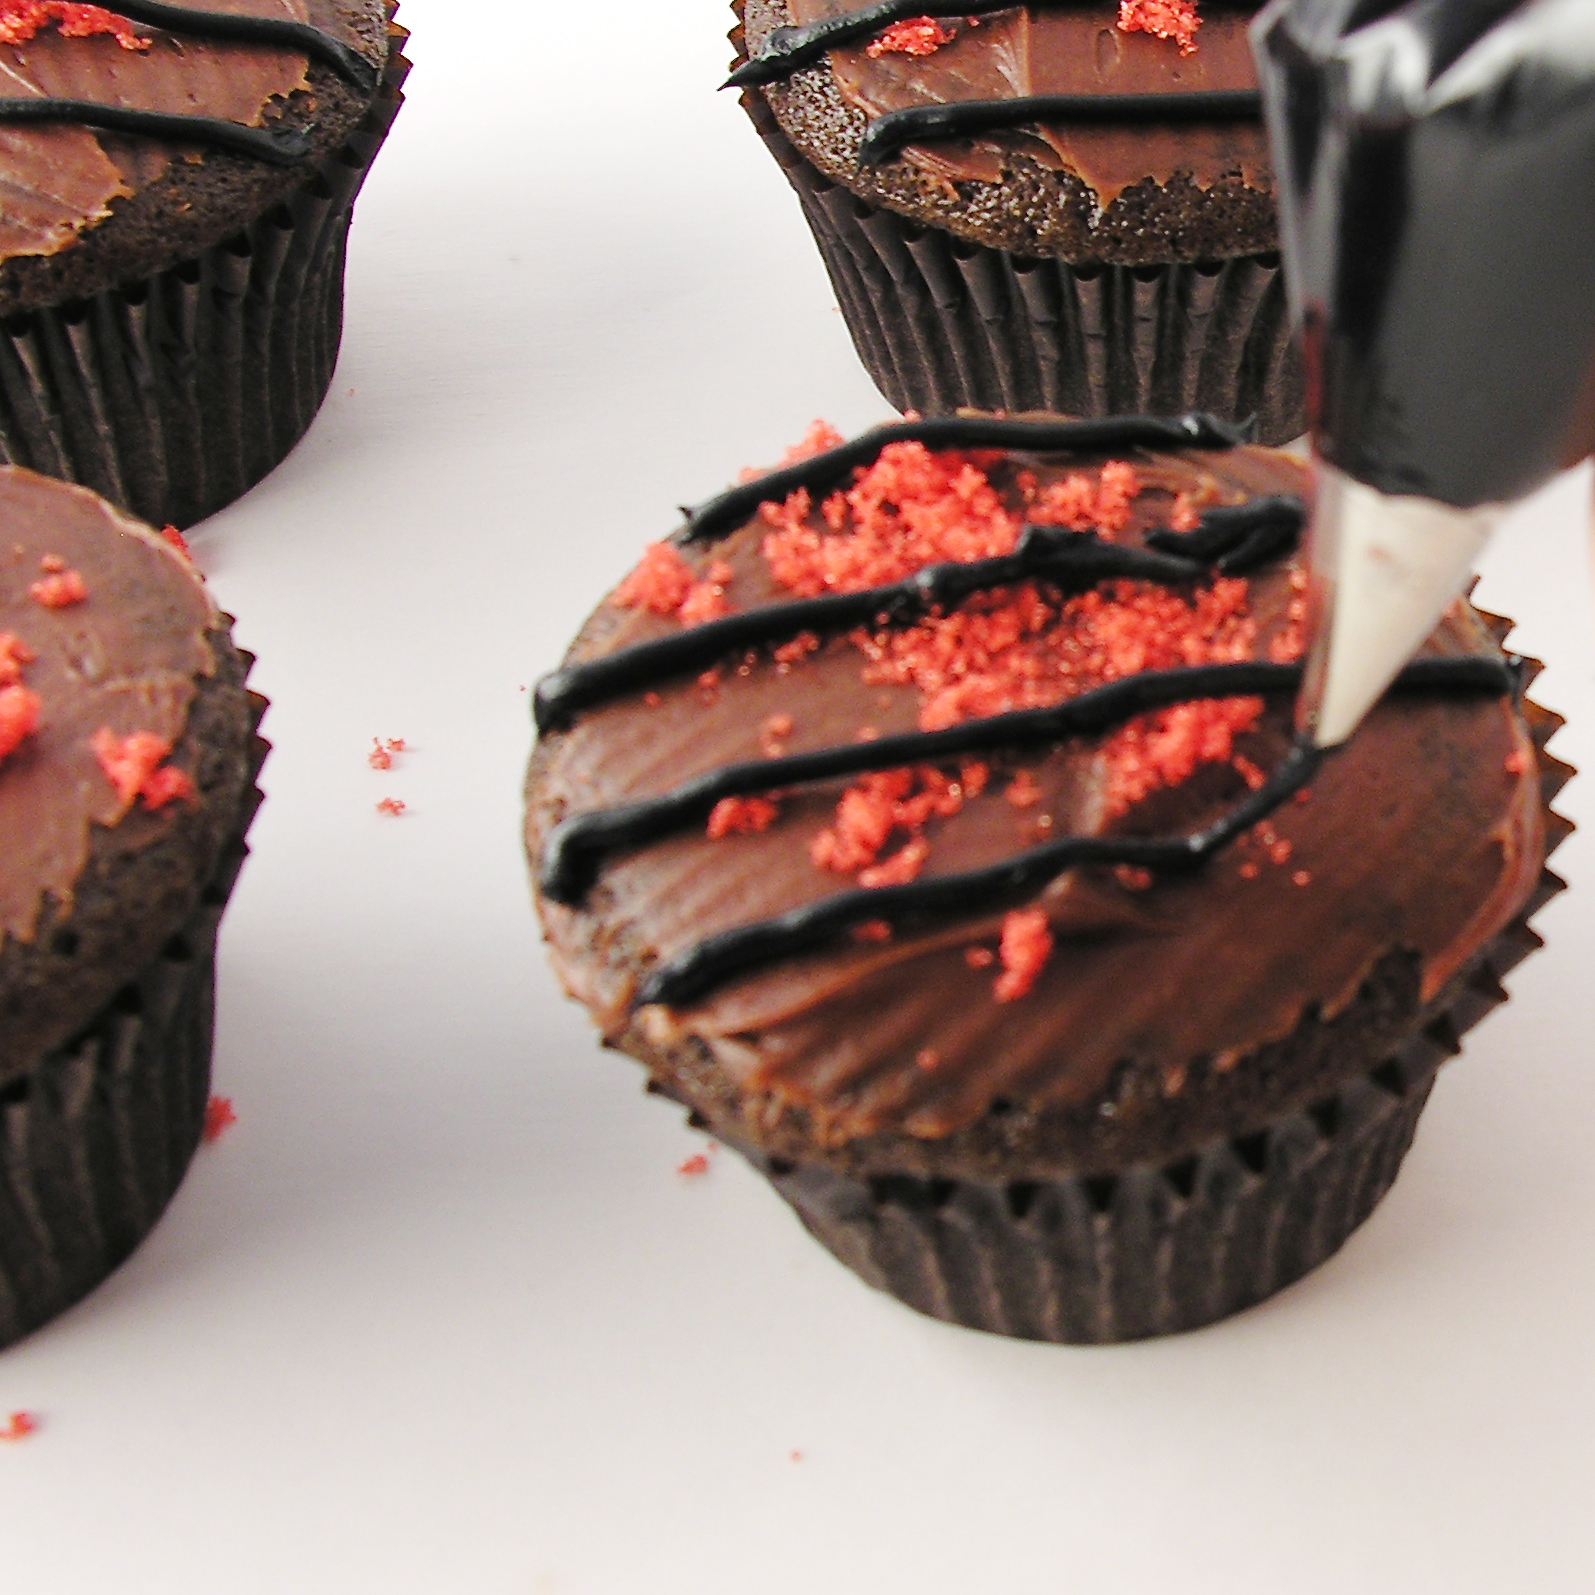
  • Take about 1/3 of frosting out of tub, place it in a separate bowl, and add black food coloring gel  to make the frosting black.  Place this frosting into a small zip-top bag fitted with a small round decorating tip.
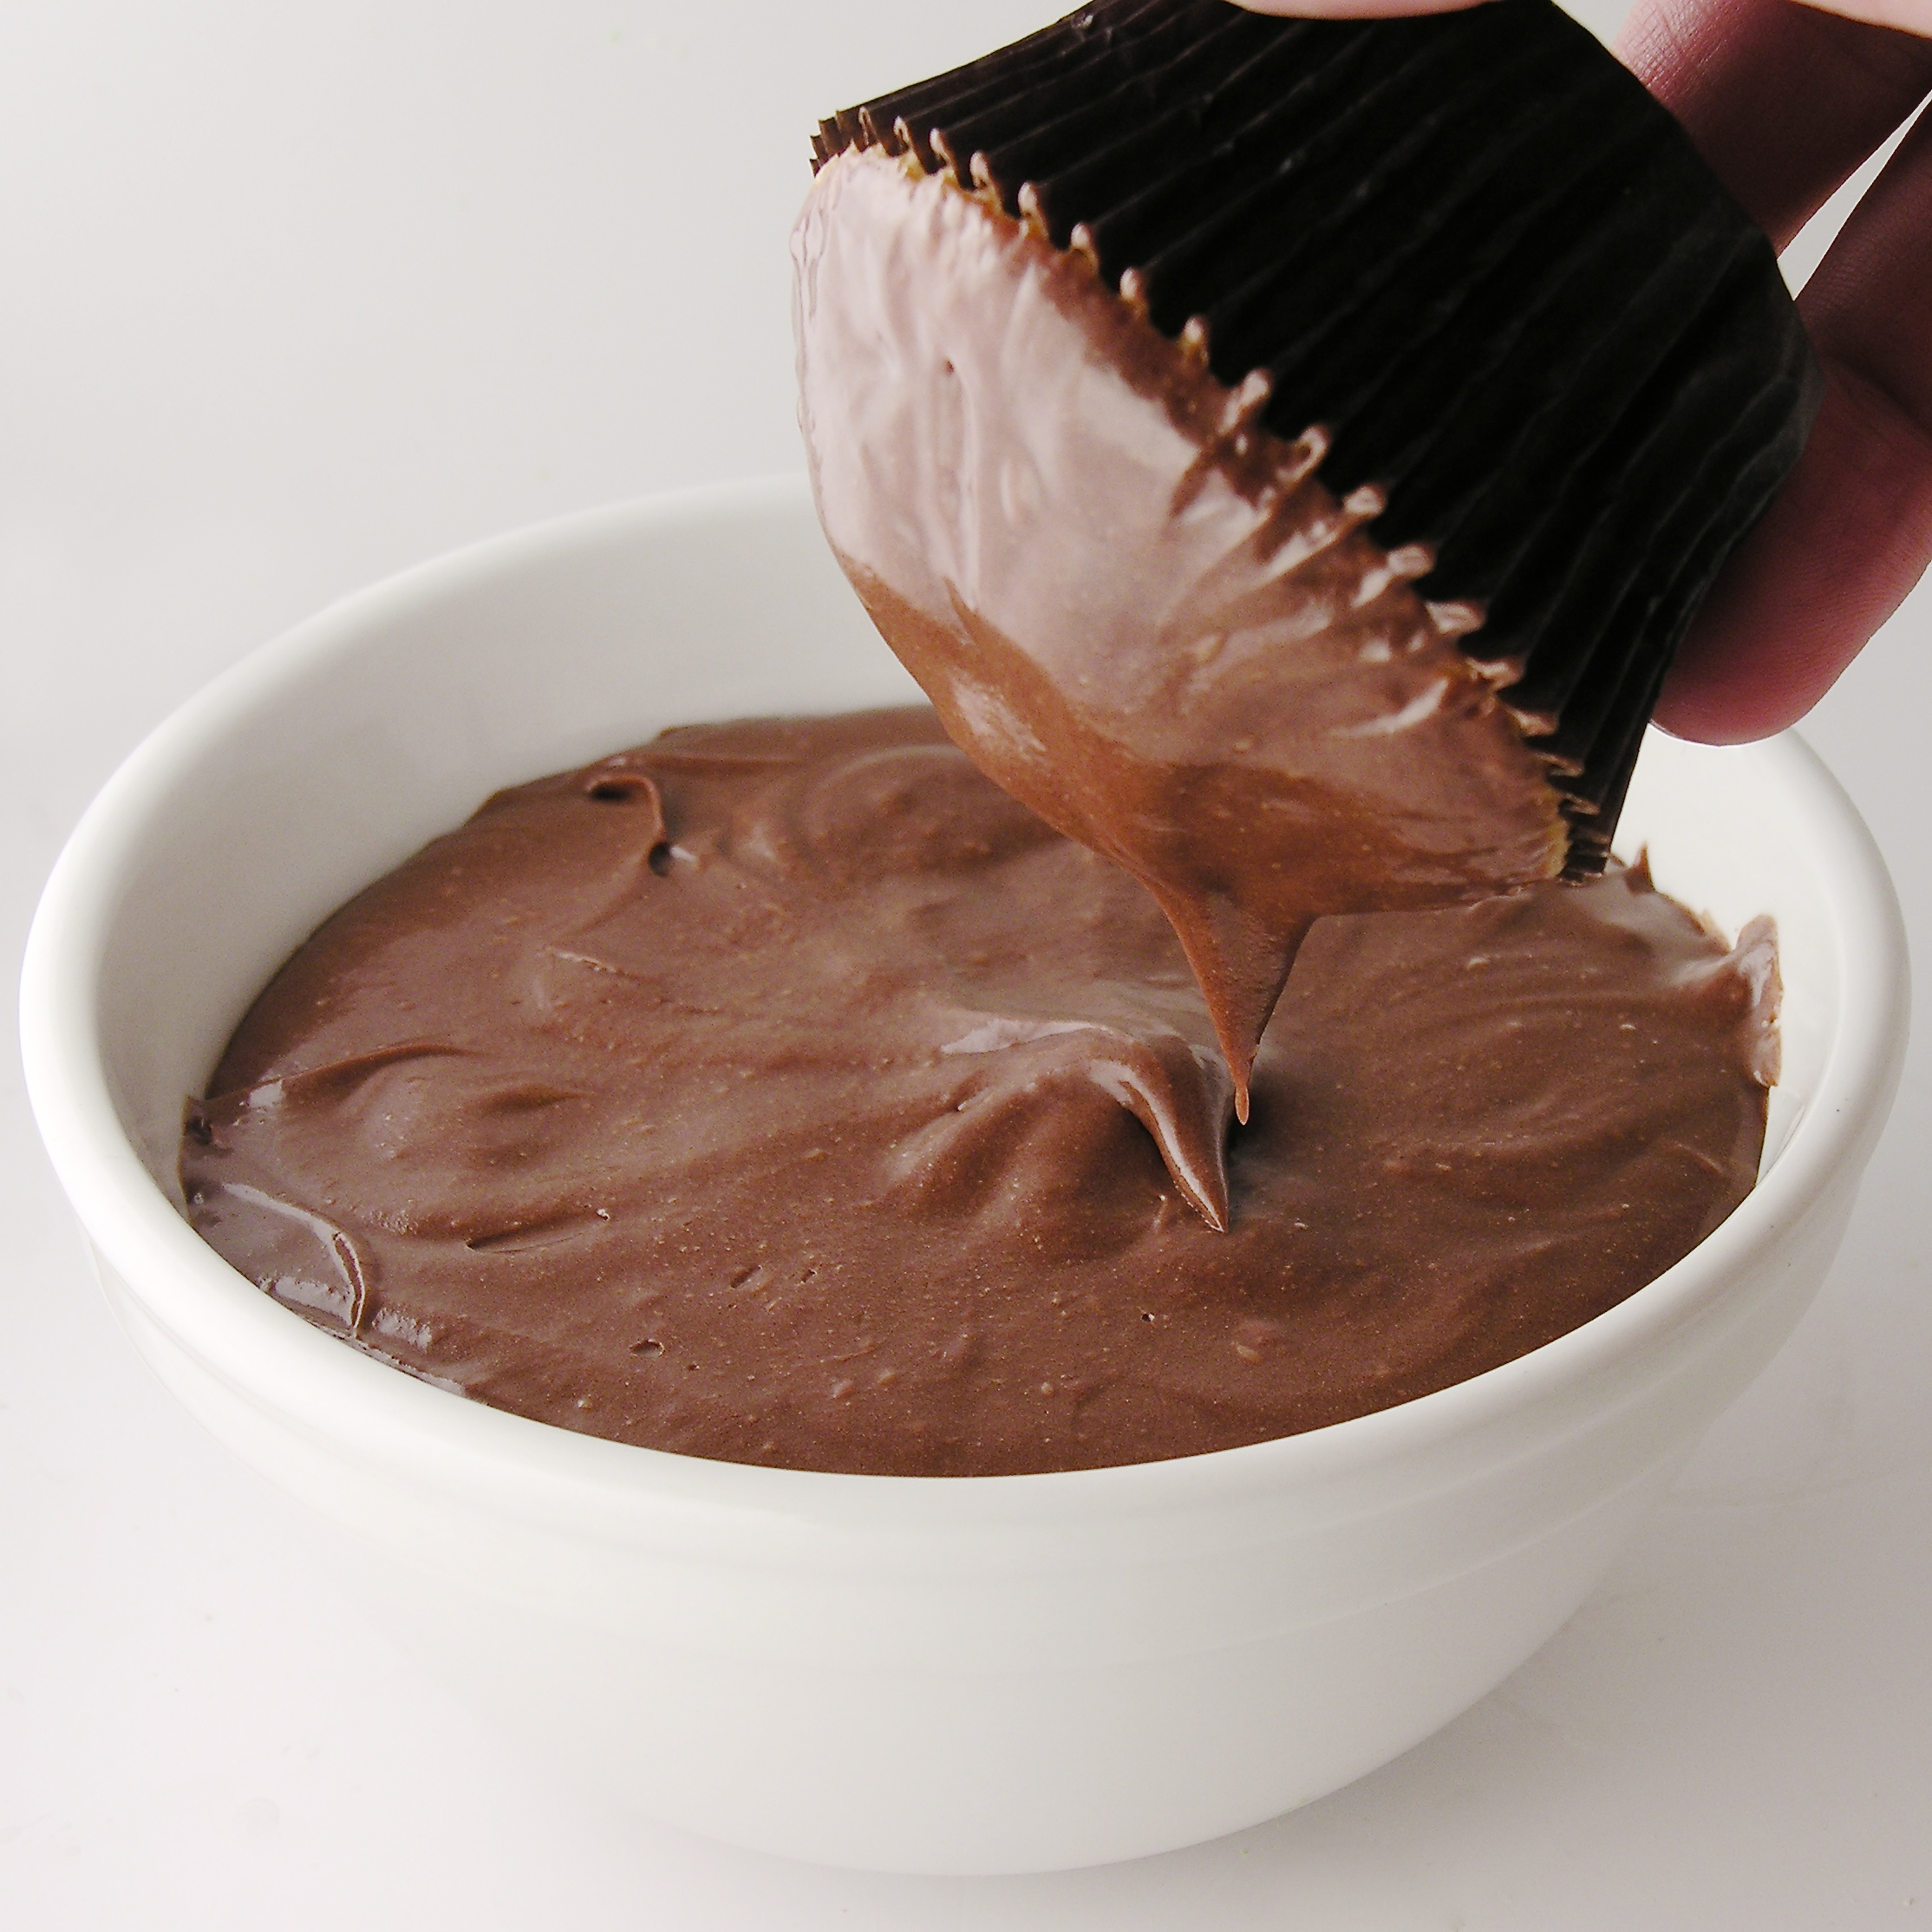
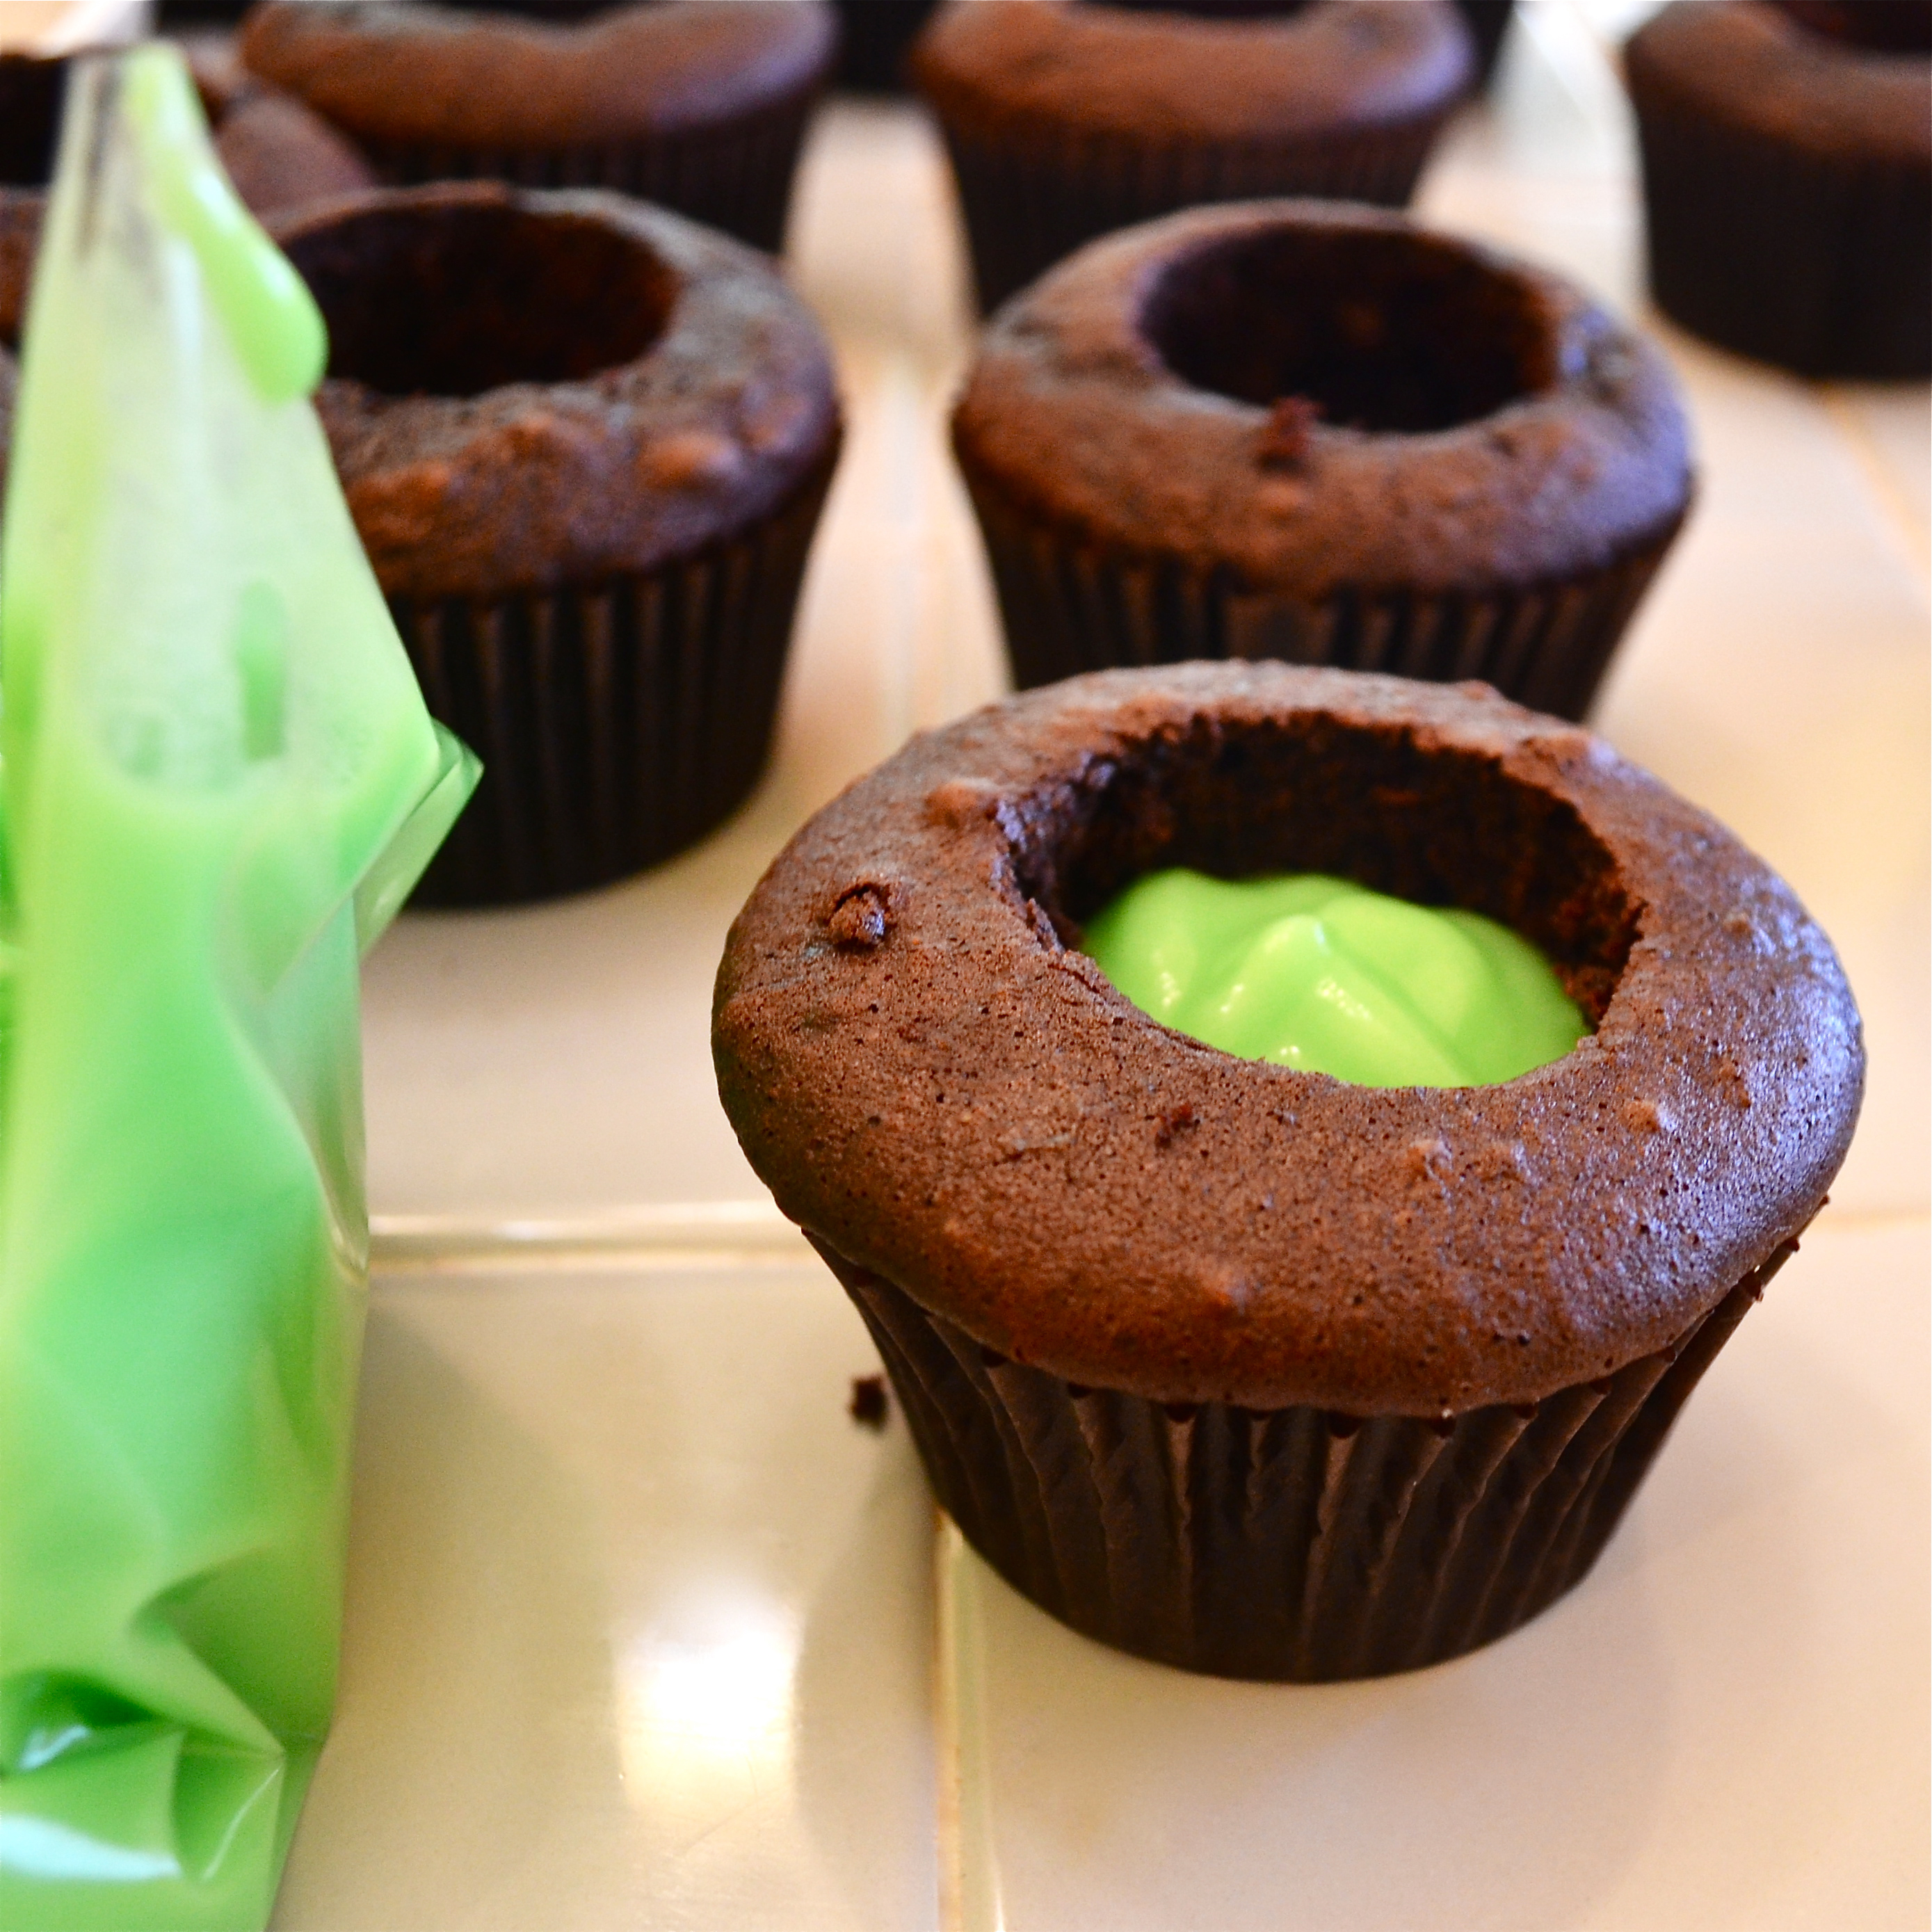
  • Once cupcakes have cooled, use a knife to frost a thin, smooth layer of the chocolate icing onto each cupcake.
  • Sprinkle a little red sugar in the middle of the cupcake frosting.
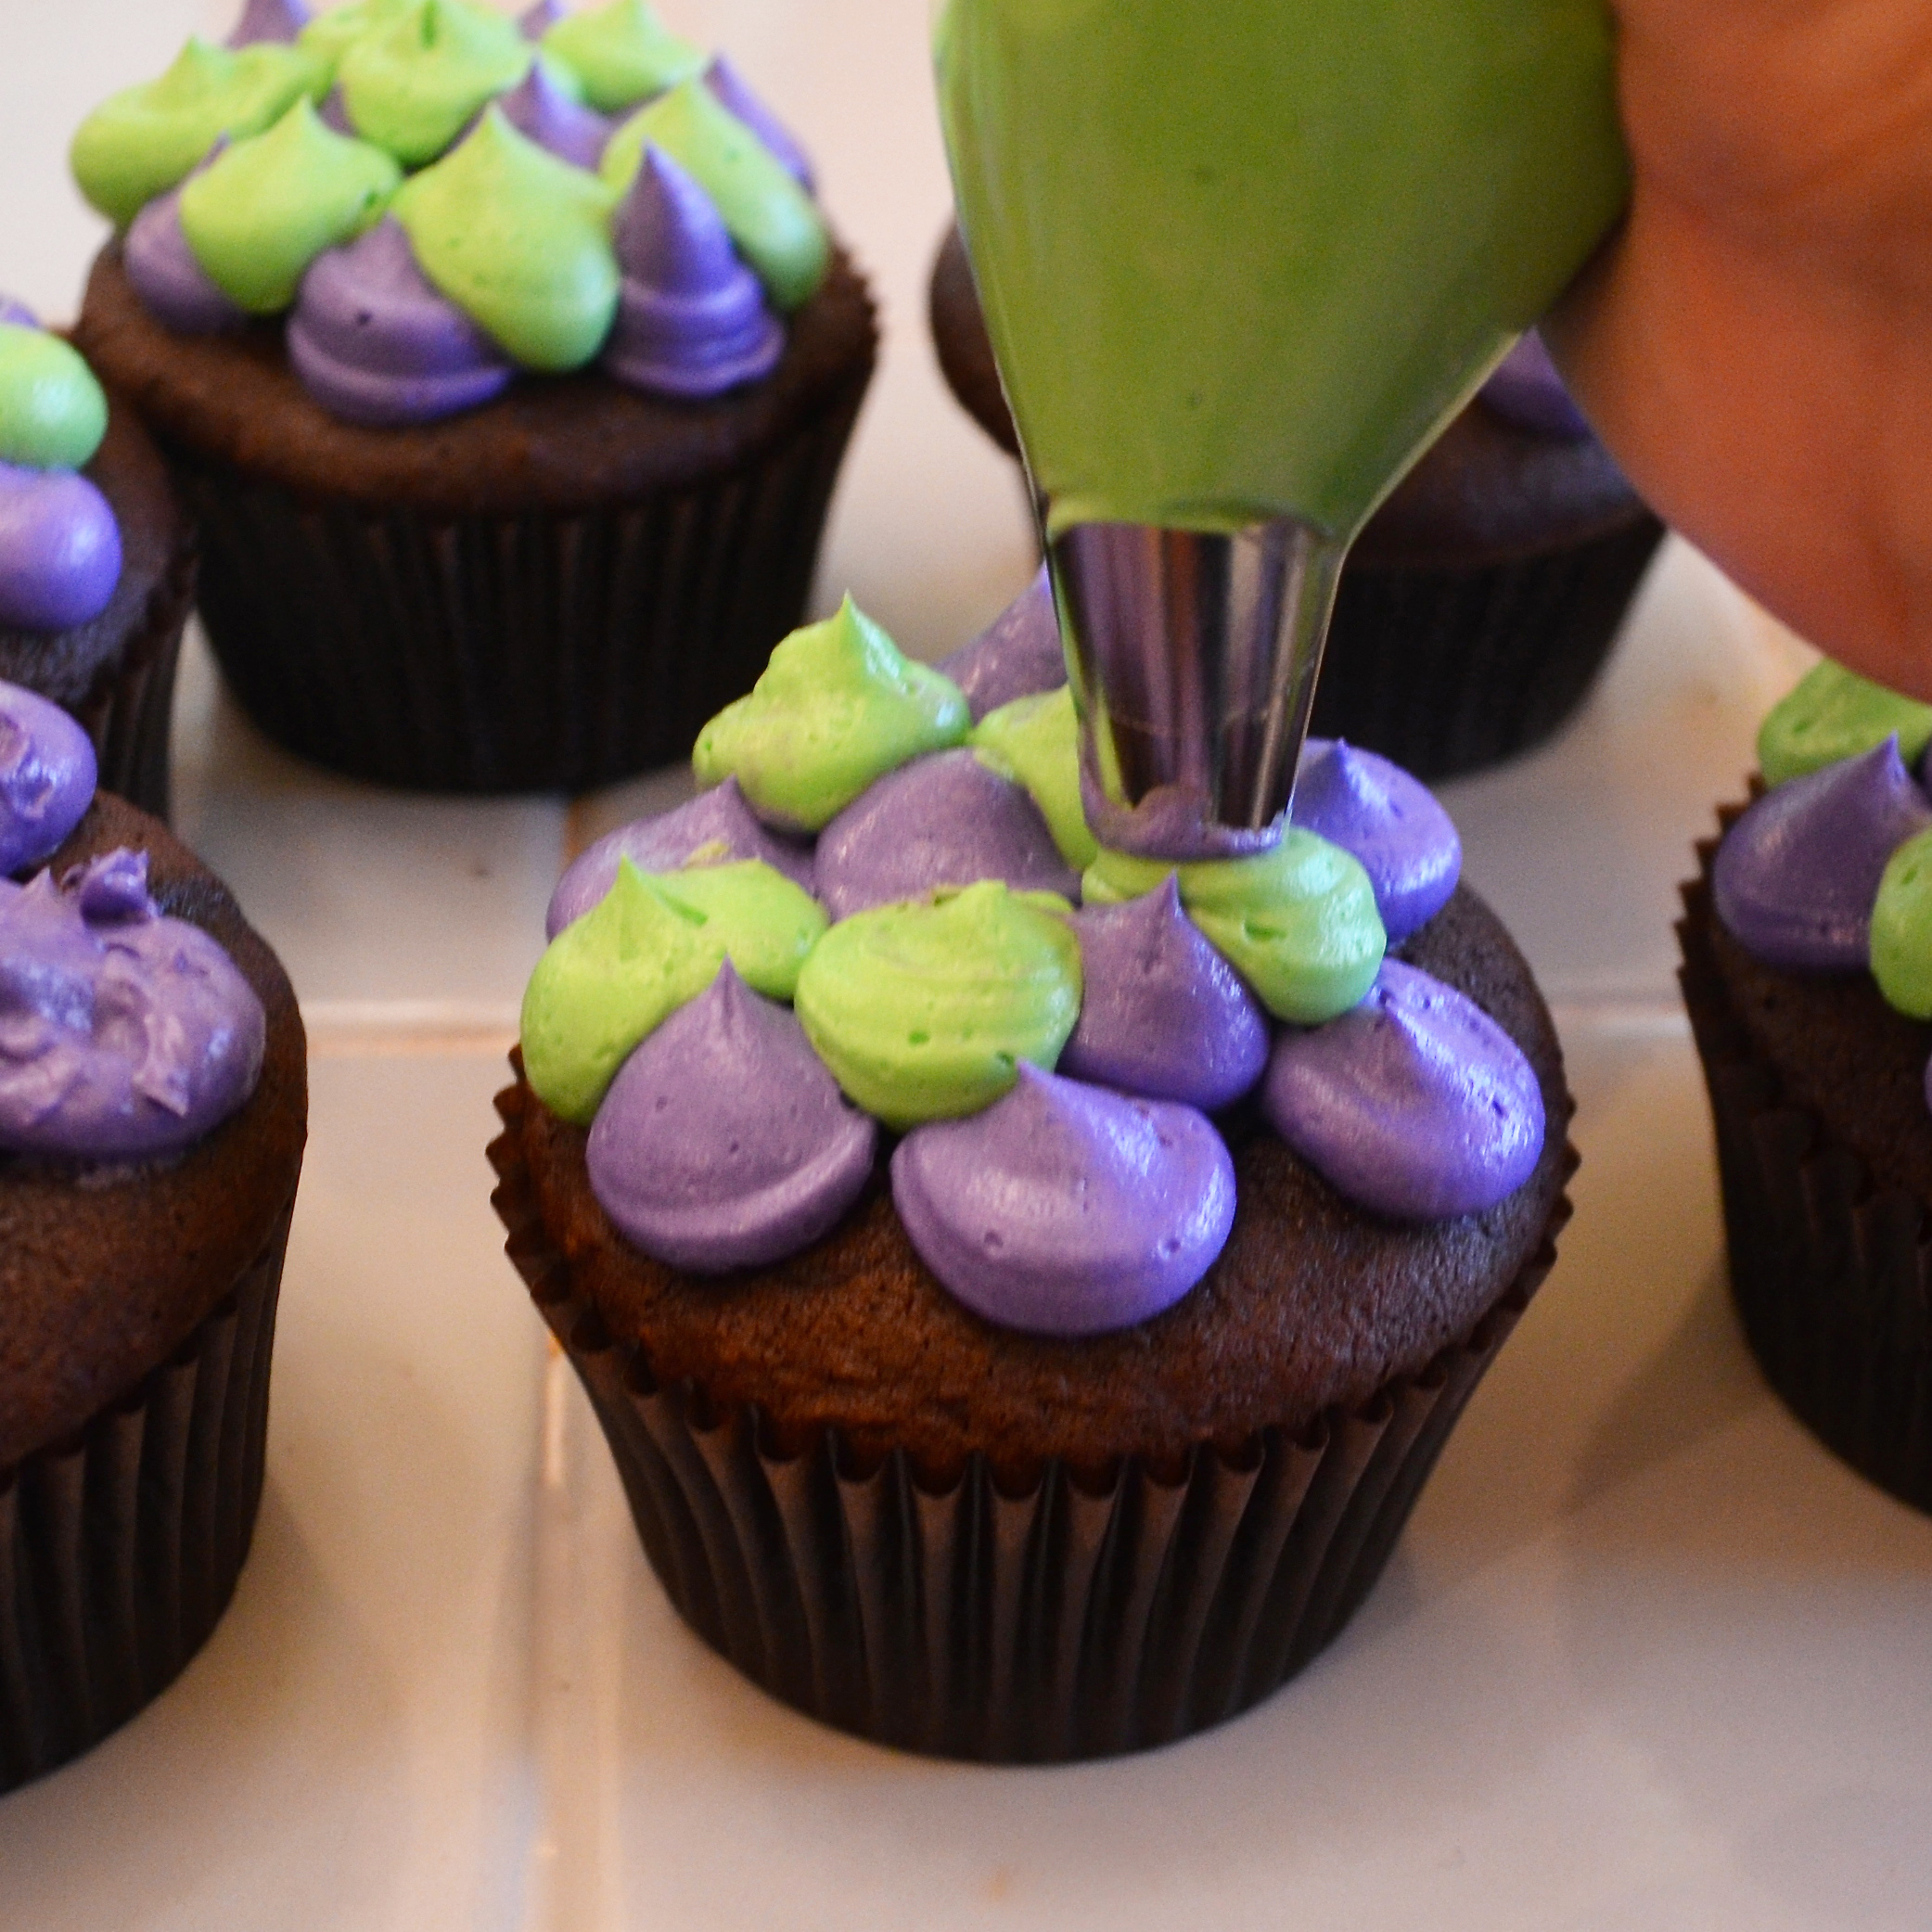
  • Pipe black frosting on in even lines to make the grill.
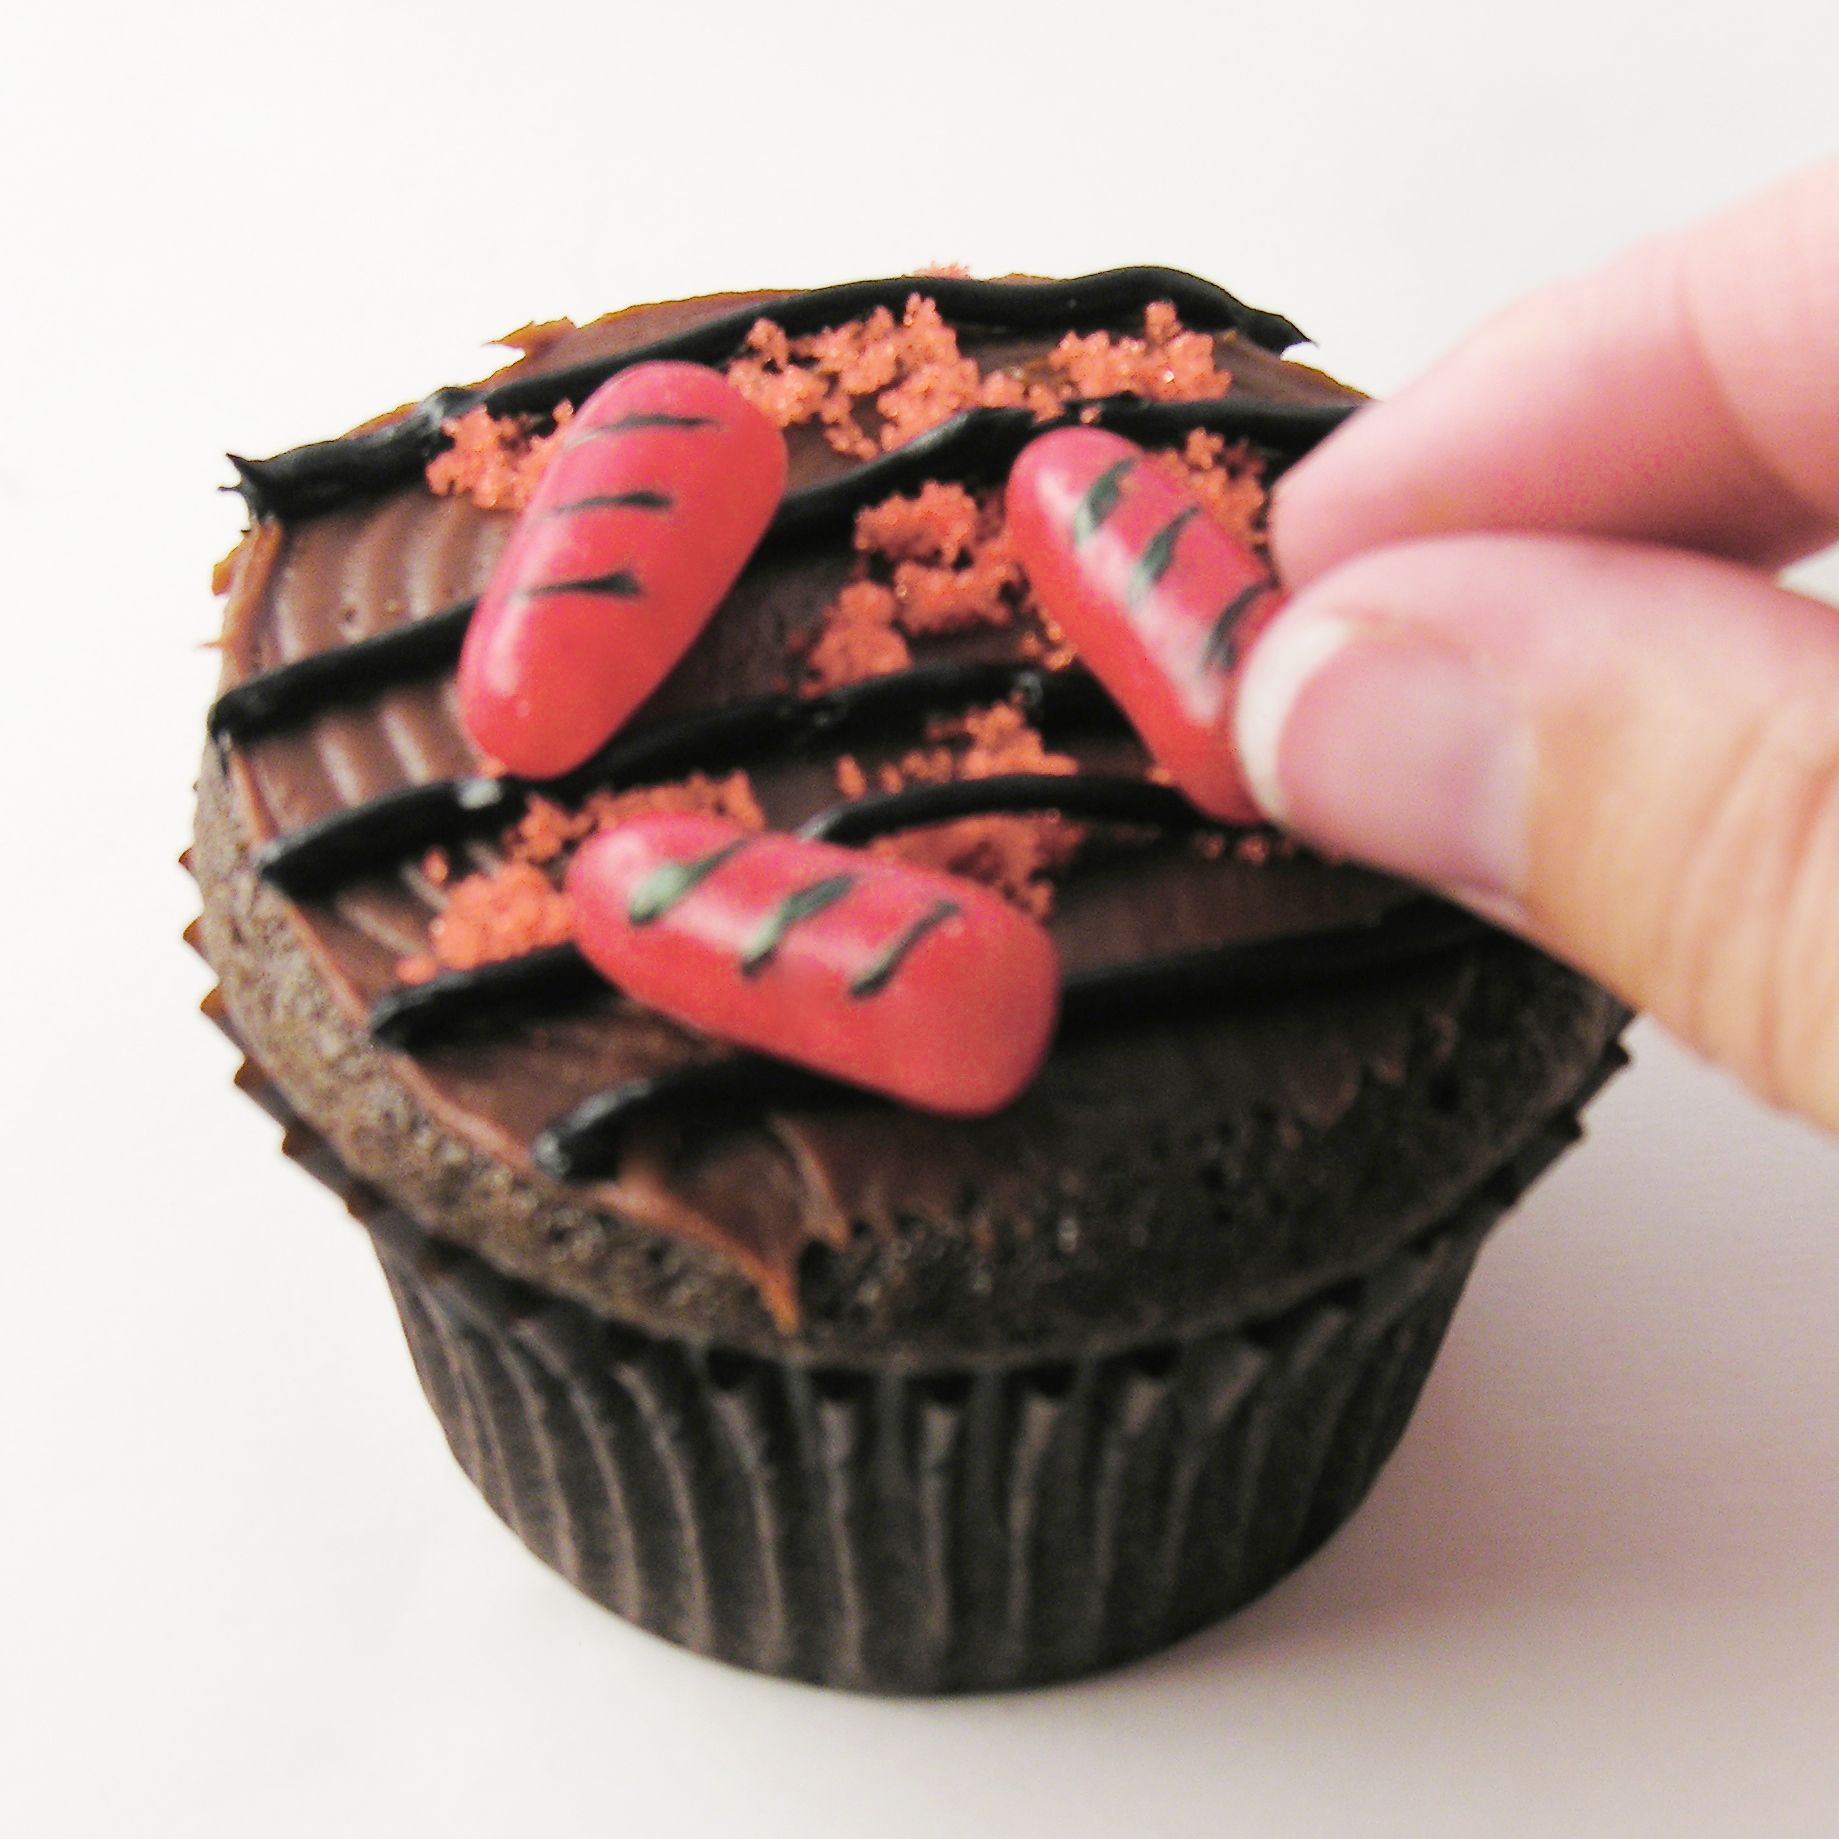
  • Set Hot Tamales on the “grill” top.
  • Enjoy!

BBQ CupcakesBBQ Cupcakes!BBQ Hotdog Cupcakes!!!

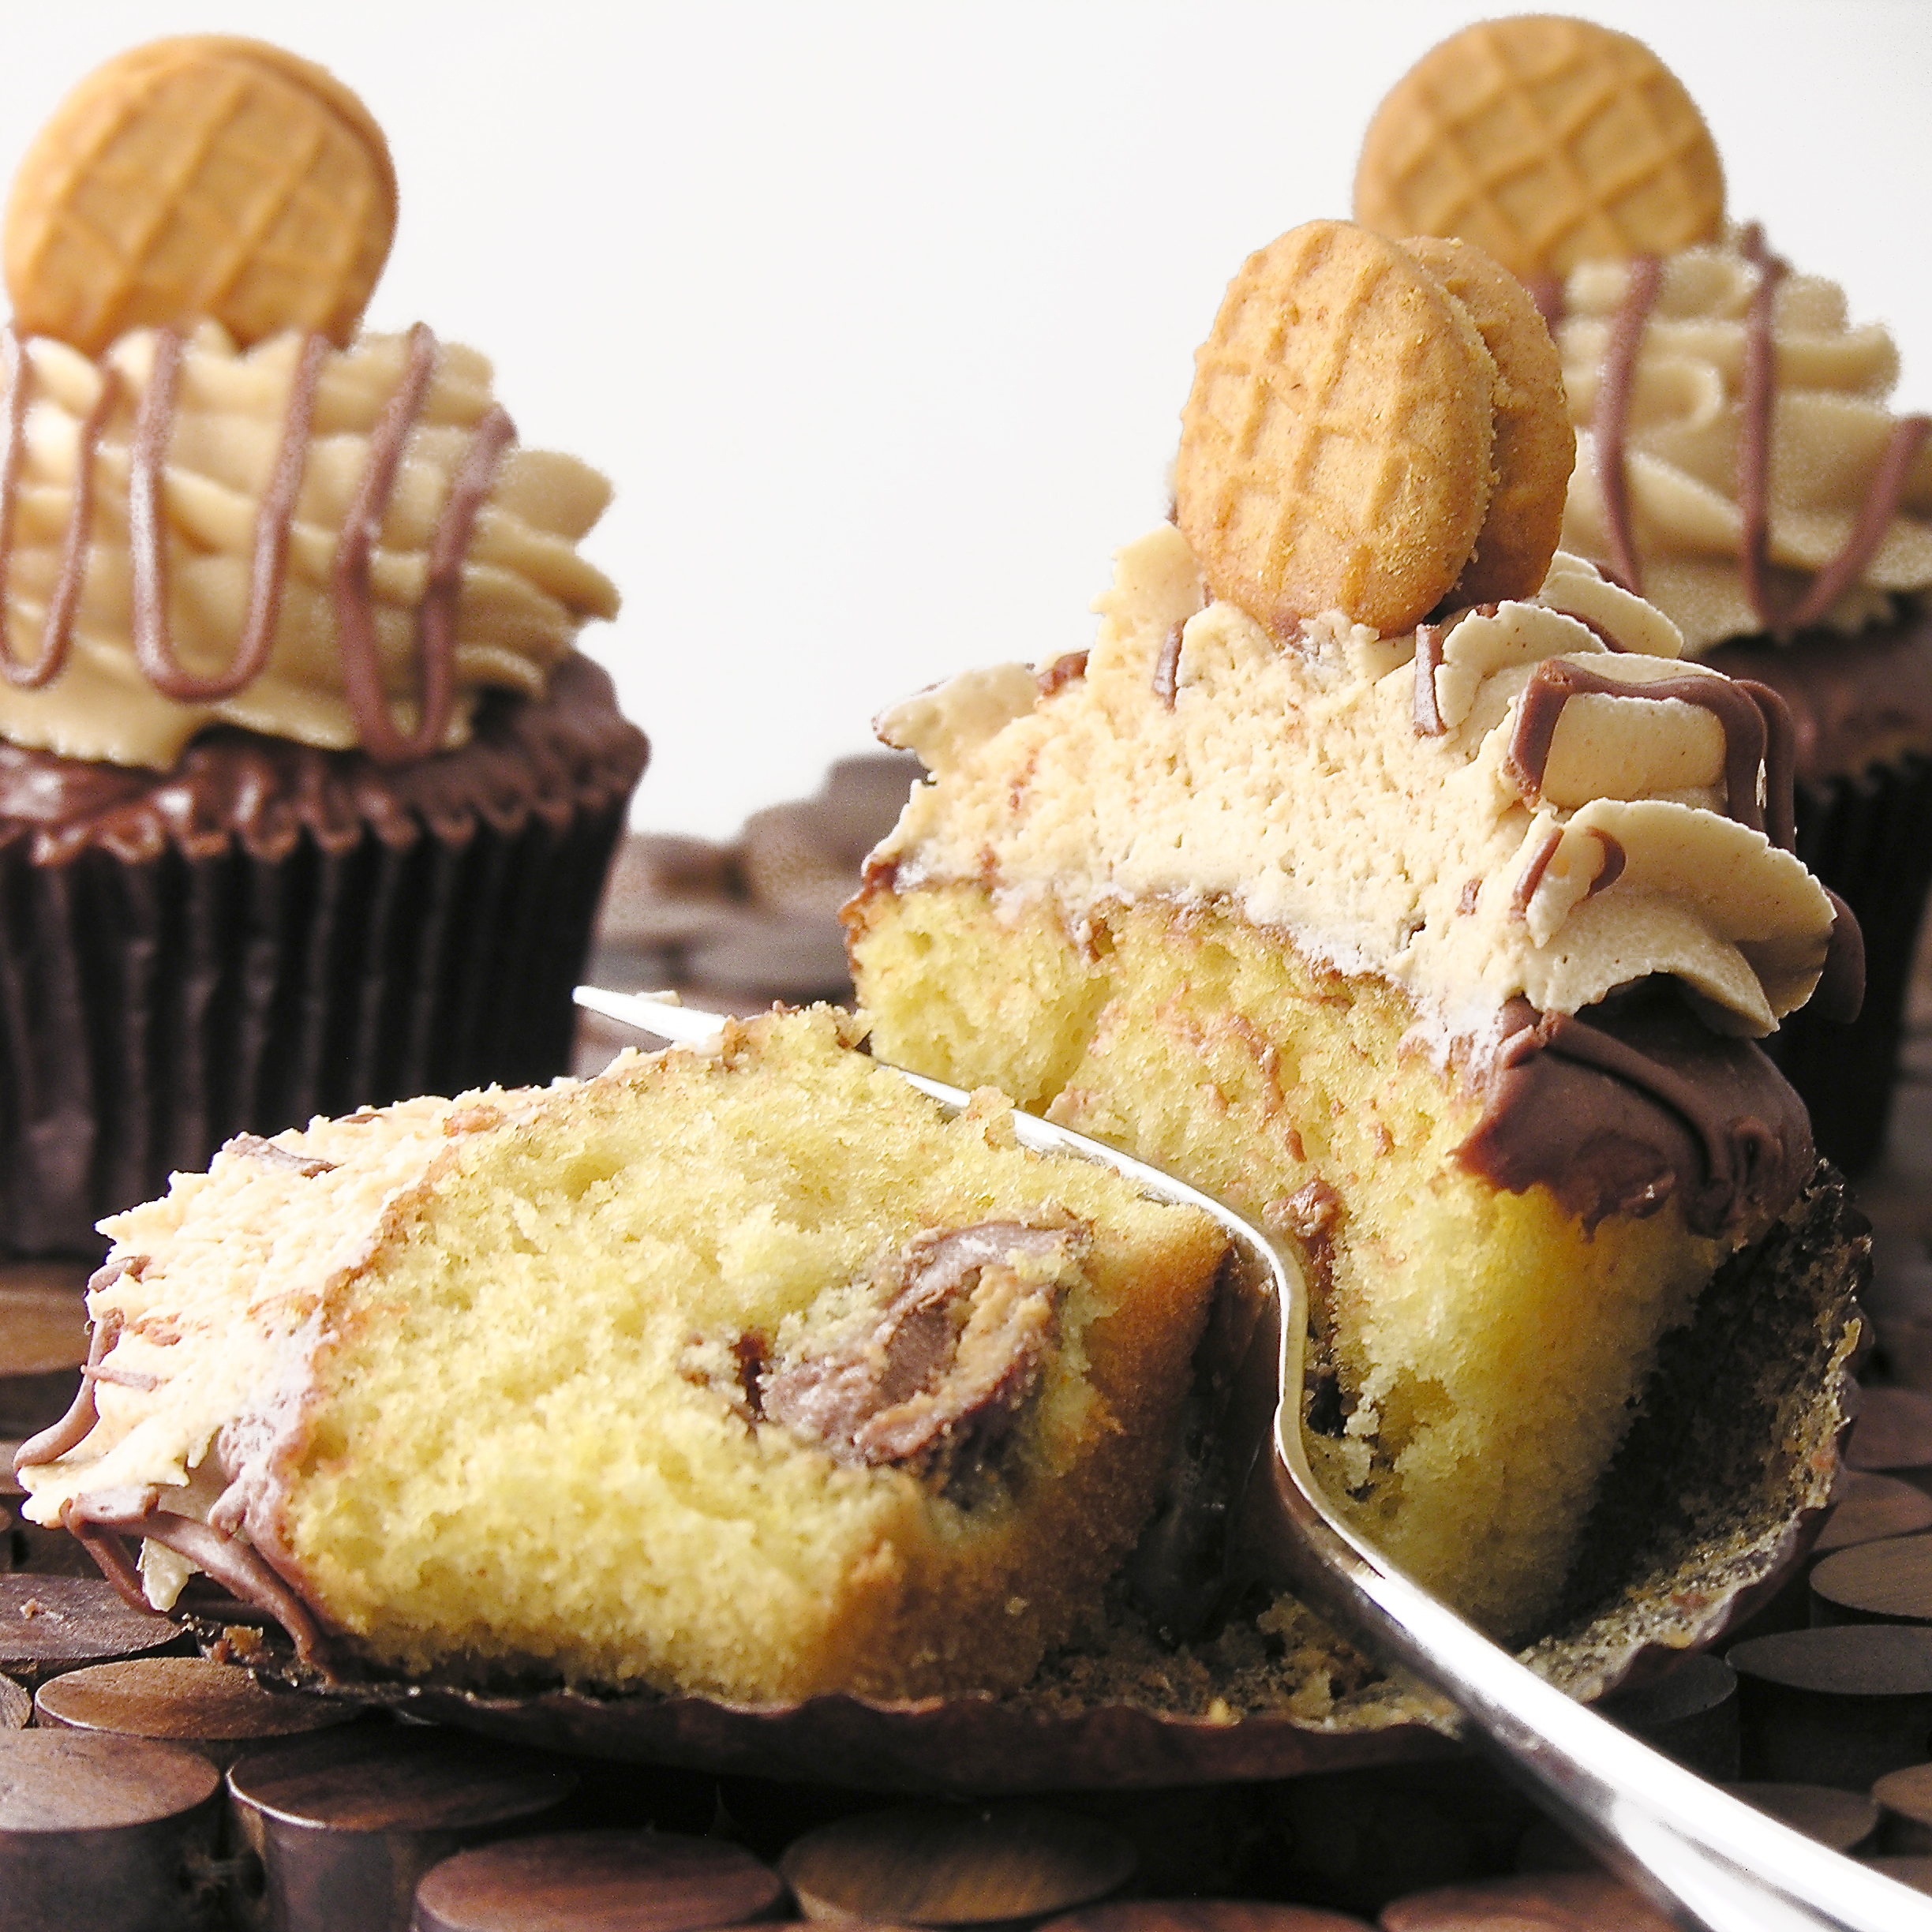
My thoughts: These are SO easy to put together.  Adding other grill items would increase your time commitment, but with just hotdogs, these went together fast!  Of course, you can use your own favorite cupcake recipe and frosting recipe with these if you don’t want to go pre-made.  I was in a hurry this week, with lots of things on my plate: BIG NEWS coming soon!  So excited to tell you all what I’ve been up to!  In the meantime, make yourself (and your dad!) some little cupcake grills!  Enjoy!!!!  ~r

BBQ Grill Cupcakes!!!

You might also enjoy:

Hamburger Cookie!Malted Milk Cupcakes!!!New Zealand Chocolate cookiesChocolate molten lava cupcakes


Flower Pot Cupcakes

Posted on


Flower Pot Cupcakes!!!


These cheery garden cupcakes have delicious raspberry cream filling

and fun flowers made of M& Ms!!!

HAPPY MOTHER’S DAY!!!!  This bit of cheer goes out especially to my mom this week.  I’m so far from home this year, that we will have to celebrate from a distance.

Aren’t these the cutest cupcakes ever?  I cannot take credit for the M&M flower idea, it was an idea I originally saw on a cute blog called Sara’s Shoebox.  She was copying the idea from a cookbook called “What’s New Cupcake“.  I do not own this cook book, but it is a sequel to one of my favorites, “Hello, Cupcake!”, by the same author.  In any case, Sara made hers with mini Oreos and I simply could not get mine to work with those..?  SO, I had seen marshmallows in pink lemonade flavor (who can walk by THAT without picking up a bag?) and I decided to use them instead.  They were a tiny bit too small, so I am going to recommend that you use full-size marshmallows for these.  I had to fiddle around with them awhile to get them to all stick.  I’m positive they will be easier on a full-size marshmallow!!

The cupcakes are an original though- I used a pink velvet cake mix, but you can use any flavor you like!  I filled them with a yummy raspberry cream and topped them with scoops of butter cream and either coconut or Oreos (um…I had a few of those left over from the flower attempt!)  Are you ready for a recipe for these???  Here you go: (printable version)

INGREDIENTS:

  • One boxed cake mix (in any flavor, with oil, water and eggs to make according to box)
  • One packet of Dream Whip
  • 1 cup of heavy whipping cream
  • 1/4 cup of berry jelly or jam
  • 2 sticks of salted butter (at room temp)
  • 2 sticks of unsalted butter (at room temp)
  • 3 cups of powdered sugar
  • 2 teaspoons of vanilla
  • 2 cups of shredded coconut (died green with food coloring) -OR- 2 cups of crushed Oreo Cookies
  • 24 pretzel sticks
  • Pastel M&Ms
  • 12 marshmallows
  • 1/2 cup of white Wilton’s candy melts

DIRECTIONS:

Flowers: I recommend making these ahead and storing them covered until you make your cupcakes.  They aren’t hard to make, but a little time consuming.

  • Take 12 marshmallows and cut them in half with clean kitchen scissors. Lay them on the counter with the cut side up to keep them from sticking to things.
  • Take a pretzel stick and wiggle it up into the side of each marshmallow.  
  • Melt candy melts in the microwave in 30 second increments, stirring between until completely melted and smooth.
  • The technique that worked best for me here was to lay my M&Ms out in a flower pattern (minus the center) on parchment paper, cover the sticky side of the marshmallow with candy melts and lay it (candy melt side down) on the flower until it dries.  Then I used a little of the candy melts to stick my center on.  Here’s some photos.

Flower Pot Cupcakes Flower Pot Cupcakes Flower Pot CupcakesFlower Pot Cupcakes

Just let those cute little flowers dry, and you are all set to make your cupcakes!

Cupcakes:

  • Make cake mix according to box and divide batter among 24 cupcake liners in muffin tins.
  • Bake according to box, remove from oven and cool completely.
  • Make filling by putting Dream whip powder and whipping cream in a bowl.  Mix on high until stiff peaks form.
  • Add jam or jelly and beat until well combined.  Place filling in a large zip top bag and keep refrigerated until use.
  • Core cooled cupcakes with a small knife or a cupcake corer.  I HIGHLY recommend the corer- it is super cheap and will save you time!
  • Cut a corner off the filling bag and squeeze filling into each cupcake.  
  • Place top of “core” that was removed back on top of cupcake.

Flower Pot Cupcakes Flower Pot Cupcakes Flower Pot Cupcakes

  • Make buttercream frosting by beating butters, powdered sugar and vanilla together in a large bowl on high until it is light and fluffy and smooth.
  • Use a scoop to place a mound of frosting on each cupcake.
  • Turn cupcake upside down in either coconut or crushed Oreo to coat the frosting.
  • Now pop a cute flower in, and you have an adorable treat for all sorts of occasions!!


Flower Pot Cupcakes!!!
My thoughts:  These brought smiles to so many faces!  I often share my blog creations with various families and organizations here on the Navajo Nation.  These went to the Easter party at the Senior Citizen Center here.  I got many hugs and thank yous (Ahéhee’)
 from the recipients.  I also got to watch almost 100 seniors literally running to a huge Easter egg hunt!  So fun!!!

Happy Easter!!On a recipe note:  These are little time consuming, but so worth the effort!  I made my flowers ahead and I was glad I did.  I really hope you enjoy these!

And to the best mom ever: a bouquet of M&M flowers!  I love you!!!!  ~r

M&M flower bouquet!!!
Other recipe ideas for Mother’s day:

Creamy cheesecake with sour cream toppingEspresso Cookies!!!Strawberry Lemonade Cupcakes!!!! Brownie Oreo Cookie Cup

Rocky Road Cupcakes!

Posted on

Rocky Road Cupcakes!!!!These chocolate cupcakes are filled with creamy marshmallow and topped with a rich ganache frosting, marshmallows and almonds! YUM!!!!!

These are fork-eating cupcakes!  You’ll love that combination of rocky road flavors in these rich and messy-to-eat cupcakes.

Rocky Road Cupcakes4I absolutely love this frosting.  I have used ganache for many recipes, but I’d never taken the time to whip it up into a frosting.  Now that I’ve tried it, I will be back for more- this frosting is so rich and chocolatey!!! Ready for a recipe?

Here you go: (printable version)

INGREDIENTS:

  • One box of chocolate cake mix (with oil, water and eggs to make according to package)
  • One large jar (13 oz) of Jet-Puffed Marshmallow Creme
  • One bag of semi-sweet chocolate chips *
  • 1/2 cup of whipping cream *

(*double these two ingredients if you want to pile your frosting high like mine is)

  • One bag of mini-marshmallows
  • 1 cup of slivered or sliced almonds
  • a little white chocolate to drizzle on top, if desired

DIRECTIONS:

  • Start your frosting first, as it needs to chill before you beat it, and double the recipe if you want piles of frosting like mine.  I went a little overboard for fun pictures!! 🙂
  • Place 1/2 cup of whipping cream into a medium saucepan and heat it on the stove until the cream starts to bubble just a bit on the edges, stirring as it heats.  Turn off the heat, add the chocolate chips and cover for 5 minutes.
  • Stir melted chocolate and warm cream together until completely smooth (a “ganache”).  Put it in a medium bowl and refrigerate until it is a cool, spoonable consistency (30 minutes to an hour).
  • Make cake mix according to box, and divide equally into 24 cupcake lines placed in a muffin tin.
  • Bake as directed on box, and cool completely.
  • Core cupcakes using a small knife, or a cupcake corer.  I used the Chicago Metallics one, and for $4 there is just no reason to not get one- it makes filling cupcakes SOOOO easy!  Isn’t your birthday coming up???

So easy to core cupcakes!

  • Spoon entire jar of marshmallow fluff into a gallon-size zip-top bag and clip a corner off with scissors.  Squeeze the marshmallow into the middle of each cupcake and then trim a little of the core you removed and place the “lid” back on top of the filling.
  • Remove cooled chocolate ganache from refrigerator and beat on high until light and fluffy.
  • Place icing in a gallon size zip-top bag that has been fitted with a decorating tip in one corner, and pipe icing onto the cupcakes.
  • Decorate with almonds, and mini marshmallows.  I also added some mini chocolate chips (because I had some leftovers from another recipe) and I melted some white chocolate to drizzle on top.  Be creative and make these little marshmallow-y cupcakes irresistible!!!!


Rocky Road Cupcakes!!!!!


My thoughts:  These are FABULOUS cupcakes.  I love the gooey marshmallow creme surprise in the middle!  And that frosting….. oh my.  A few tips:  the frosting does harden up, so get those almonds and marshmallows placed in it as soon as you are done piping the frosting on.  This is good, because it holds all those yummy toppings in place!  Also, store these all sealed up.  You know what happens when you leave the bag of marshmallows open?  Yucky, rubbery, dried up marshmallows!  The same will happen if you just let these set out. 

I hope you love these little yummy desserts!!!!  ~r

Rocky Road Cupcakes with marshmallow filling!!!!Want some other ideas for that new cupcake corer?  We love filled cupcakes here at Easybaked!  Here’s a few of our favorites:

Cinnamon Roll Filling in a yummy cupcake!Peppermint Hot Chocolate Cupcakes!!!Toxic Slime-filled Cupcakes!Mocha caramel filled cupcakes3

Baked Alaska Cupcakes

Posted on

Baked Alaska Cupcakes!!!!Rich chocolate cupcakes topped with a scoop of ice cream and a cloud of toasted marshmallow meringue. Best. Dessert. Ever!!!!!

Every year for Christmas our family goes out to an incredible restaurant near Marshall, MI called Win Schulers. They have the most amazing prime rib…oh my.  Anyway, within a week of Christmas it is my birthday, my mom’s birthday and my sister-in-law’s birthday.  Schuler’s gives you a Baked Alaska for your birthday….so it’s a feast of Baked Alaska and it is SO good.  About 2 weeks ago I was craving it and suddenly was struck by the idea of making it in cupcake form.  A.M.A.Z.I.N.G.  Just go and make these.  Use your favorite ice cream.  You will love them…!

Baked Alaska Cupcakes!

Here’s the recipe: (printable version)

INGREDIENTS:

  • One boxed chocolate cake mix (plus the oil, water and eggs to make according to package)
  • One quart of your favorite ice cream (I used mint chip)
  • 8 egg whites
  • 2 cups of granulated sugar
  • 1/4 teaspoon of cream of tartar

DIRECTIONS:

  • Make cake mix according to box directions and divide equally into 24 cupcake liners in cupcake tins.
  • Bake according to package.
  • Cool completely (I refrigerated mine to get them nice and cold before adding the ice cream)
  • While they are baking and cooling, make the marshmallow meringue (I got my recipe here)

(Don’t be afraid….I was afraid to try this, it sounded complicated, but it isn’t hard- it just takes time with a mixer in your hand if you are like me and not fortunate enough to have a stand mixer!  It is actually kind of fun!  Make sure your bowl and beaters are free of any oils.  I swiped mine with a little lemon juice 1st)

  • Place egg whites, sugar and cream of tartar in a medium heat-proof bowl that will set on the top of a sauce pan of boiling water without touching the water.  (I had to experiment a bit to find a good fit)
  • Bring water to a boil in the saucepan and set the bowl on top.
  • Whisk ingredients together for about 3-4 minutes.  Sugar will be dissolved and egg whites should be heated to 145F degrees.
  • Remove bowl from top of sauce pan and beat on low until the mixture thickens a little, then beat on high for about 10 minutes.  The meringue will become the most beautiful, white, glossy mixture.  It should form stiff peaks before you stop beating it.
  • Spoon all that wonderful marshmallow yumminess into a bag fitted with a decorating tip.
  • Assemble one cupcake at a time, and then pop it into the freezer immediately.
  • Take a cupcake, use a small cookie scoop or melon baller and place a scoop of ice cream in the center of the cupcake.  Pipe meringue all around it, being careful to seal up all the ice cream at the bottom and them working your way up to a swirled top!

Marshmallow Meringue!Marshmallow Meringue!Marshmallow Meringue!!

  • When all cupcakes are prepared and in the freezer, use a kitchen torch
    to toast the marshmallow just before serving.
  • These are best served within a couple of hours of making them.  

Since they are a fork-eating-cupcake anyway, I see no harm in adding hot fudge….

Baked Alaska Cupcakes!!My thoughts: I loved them.  They satisfied my craving for a baked Alaska plus they have the cute factor of a cupcake!  Fun, fun, FUN!!!!! Enjoy!!!  ~r

Baked Alaska Cupcakes!!!Other yummy cupcakes:

Peanut Butter Cupcakes!!Key Lime Cupcakes!Doughnut cupcakes!!Chocolate molten lava cupcakes

Lime Soda Cupcakes!

Posted on

Lime Soda Cupcakes!!Sweet lime cupcakes topped with a swirl of marshmallow buttercream.
A perfect flavor combination!

A while back, I shared with you an impossibly difficult (but amazingly yummy!) candy recipe from my friend Gail.  It was a recipe for Opera Creams passed down to her from her grandmother.  We spent the entire day together, candy making. For lunch we ran up to a little soda fountain from the 50s that is still in business. (Arnolds Drive In, for you folks that live near Indiana)  They have burgers and fries— and yummy soda fountain drinks.  Gail recommended the “Ole Green River” and I got the most wonderful lime phosphate topped with marshmallow cream.  It was beautiful and as that marshmallow dissolved into the drink…?  Unbelievably good.  Here’s my Instagram record of it:

Ole' Green River at Arnold's Drive-InI’m not sure what brought it to mind the other day, but I decided to use those flavors to create a cupcake version of that yummy Ole Green River.  I think they turned out great.  Nice and green for St. Patricks Day!!!

Lime Soda Cupcakes!!

Here’s the recipe: (printable version)

INGREDIENTS (makes 24 cupcakes)

  • One boxed white cake mix, plus oil, water and eggs to make according to box.
  • One small packet of Lime Jell-O.
  • 4 sticks of salted butter (at room temperature)
  • 2 teaspoons of clear vanilla
  • 3 cups of powdered sugar
  • 2 jars (7 oz. each) of Jet-puffed marshmallow creme
  • White food coloring (optional- only if you want that bright white marshmallow color.)
  • Sprinkles and decorations as desired.

DIRECTIONS:

  • Make cake mix according to box, but add Jell-O along with other ingredients.
  • Divide batter evenly into 24 cupcake liners in muffin tins.
  • Bake according to box, a toothpick inserted into the center of one should come out clean.
  • Allow cupcakes to cool while you prepare frosting.
  • Combine (room temperature) butter, vanilla, and powdered sugar in a large mixing bowl and beat on low until combined.
  • Beat on high for several minutes until light and fluffy.
  • (optional) add white food coloring at this point, to whiten up all that butter- I did not have any, so you can see my icing is more of an ivory color.
  • Add marshmallow creme to frosting and beat until completely incorporated.
  • Spoon frosting into a large zip top bag that has been fitted with a decorating tip, and pipe frosting over cupcakes.
  • Decorate as desired (paper straws are fun!!!!!!)
  • Enjoy!

Lime Soda Cupcakes!!!!My thoughts: I really loved these flavors together.  Marshmallow and lime.  So yummy.  The cupcakes are very moist because of the Jell-O, so take care unwrapping them, they are a little more likely to fall apart than other cupcakes.  I experimented with the marshmallow butter cream, just adding the fluff to my usual buttercream recipe, and I thought it was fabulous.  The marshmallow flavor was not lost!  I hope you enjoy these little treats, and if you’re ever near a soda shop that has lime phosphates on the menu, ask for one with marshmallow cream on the top!  Enjoy!  ~r

Lime Soda Cupcakes!!Other fun St. Patrick’s Day treats you might want to try:

Grasshopper Mint CupcakesRainbow Cake RollMint Creme Brownie CupsBaileys Irish Cream Cupcakes

Peanut Butter Cupcakes

Posted on

Peanut Butter Cupcakes!!!!!!Moist cupcakes filled with a creamy peanut butter cup and topped with peanut butter cream icing and a mini peanut butter cookie.  This is a peanut butter lover’s dream come true!

I was determined to get mini peanut butter cups into the center of these cupcakes.  I did some of them plain, and tossed some in flour 1st and all of them sank to the bottom.  Sad me.  I think the only alternative is to either eat them on the bottom (still yummy!!) or invest in one of those fun little pans that hold candy in the middle.  Have you seen them?  Click here if you want to check them out.  Now that I’m in the middle of the Navajo Nation, I seriously doubt I will be coming across one- lol!  Maybe I will order one once I have an address to send it to!!

Peanut Butter Cupcakes!!!!

These happy little cupcakes use melted frosting on the tops—I’m addicted to melting frosting now!!!  Make me stop!!!

Here’s the recipe (printable version)

INGREDIENTS:

  • One boxed yellow cake mix (plus water, oil and eggs to make according to directions)
  • 24 Mini Reese peanut butter cups
  • 1 tub of chocolate frosting
  • 3 sticks (1 1/2 cups) butter (softened to room temperature)
  • 1 cup of creamy peanut butter
  • 3 cups powdered sugar
  • 1 Tablespoon vanilla
  • 24 mini Nutter Butter cookies for decoration

DIRECTIONS:

  • Preheat oven to 350F degrees.
  • Make cake mix according to box directions and divide equally into 24 cupcake liners placed in tins.
  • Place a mini peanut butter cup on the top of each cup full of batter

Peanut Butter Cupcake3

  • Bake according to box directions, remove from oven and cool completely.
  • Spoon tub of chocolate frosting into a microwave-safe bowl and microwave for about 30 seconds.  Stir until well mixed.
  • Dip the top of each cupcake in the chocolate frosting and allow them to cool, and to harden a little.

Peanut Butter Cucpake2

  • Place remaining melted frosting in a small zip top bag and zip it closed.
  • To make peanut butter frosting, place butter, vanilla, and peanut butter into a large bowl and mix on high until smooth (about a minute)
  • Add powdered sugar and beat on low until combined and then on high until light and fluffy.
  • Place frosting in a zip-top bag fitted with a decorating tip and pipe on top of each cooled cupcake.
  • Clip a corner off of the bag filled with the melted chocolate frosting and drizzle over the top of each cupcake.
  • Top with a mini Nutter Butter cookie.

Peanut Butter Cupcakes!!!!

My thoughts:  YUM!  These are perfect if you love peanut butter.  I love the fudgy layer of melted frosting on the top– when I shared these with friends they all loved that part.  You could dip cupcakes into all sorts of melted frostings– so many flavor possibilities!!!! FUN!!!!   I hope you really enjoy these!!! ~r

Chocolate Peanut Butter Cupcakes6-13-14: Did you know, that this yummy recipe is available on adorable blank note cards?  With a picture of the cupcakes on the front, the recipe on the back, and plenty of room inside for a message, these make the PERFECT gift.  Why send just a card, when you can send the gift of a recipe instead??  Click here for more information and to order.

Peanut Butter Cupcakes!!

I usually give you other similar fun recipe to try on easybaked at this point, but my internet is so slow that I’m skipping it this week!!  🙂 The photo gallery is always a fun spot to shop for recipe ideas… since your internet is likely faster than mine this week, I will let you hunt for treasures on your own!!!  Have a good one!!!!! ~r

Pink Champagne and Raspberry Cupcakes!

Pink Champagne Cupcakes1
These cheery pink cupcakes are made like a 7-Up cake, but with sweet pink champagne instead! Topped with a raspberry buttercream, they are a perfect way to bring in the New Year!!!

INGREDIENTS: (printable recipe)

Cupcakes:

  • 3 1/4 cups flour
  • 1/2 teaspoon salt
  • 3/4 cup sweet champagne or bubbly wine (I used Barefoot Bubbly, and wished it had been sweeter)
  • 5 eggs
  • 1 teaspoon vanilla
  • 2 sticks (1 cup) butter, softened
  • 1/2 cup vegetable shortening
  • 3 cups granulated sugar

Frosting:

  • 2 sticks (1 cup) butter, softened
  • 1 1/2 cups powdered sugar
  • 2 tablespoons raspberry extract
  • pink food coloring gel (as desired for coloring both cupcakes and frosting)
  • fun sprinkles! (I used edible star glitter and pearls—love them!!!)

DIRECTIONS:

  • Preheat oven to 350F degrees
  • Place 24 cupcake liners into muffin tins
  • In a medium bowl, combine champagne, eggs, and vanilla
  • In a second medium bowl, mix together flour and salt
  • Use an electric mixer to beat together 2 sticks of softened butter, shortening and granulated sugar.
  • Beat until light and fluffy, about 2 minutes
  • With the mixer on low speed, add about 1/3 of the flour mixture, followed by 1/3 of the champagne mixture.
  • Alternate the flour and champagne, mixing until well combined.
  • Add a little bit of pink food coloring gel if you want a pink tint to your cupcakes and combine well.
  • Spoon batter evenly into cupcake liners
  • Bake at 350F degrees for 20-25 minutes, until a toothpick inserted into a cupcake comes out clean.
  • Allow cupcakes to cool completely.
  • When cupcakes are cool, you can add a little extra champagne taste by poking holes in the top of each cupcake with a toothpick and brushing the tops of each cupcake with champagne. 
  • Make frosting by combining all of the frosting ingredients in a large mixing bowl and beating on low until combined and then on high until light and very fluffy (about 2-3 minutes).
  • Pipe frosting on tops of cooled cupcakes and decorate with sprinkles as desired.
  • ENJOY!!

Pink Champagne Cupcakes2
My thoughts:  These are just fun little cupcakes.  Use the sweetest sparkling wine/champagne you can though.  For an alcohol-free treat use sparkling grape juice.  I made a valiant attempt at including the champagne in the frosting, but it was TERRIBLE.  Simple buttercream with a touch of raspberry flavor was perfect instead.

Happy New Year!!!!!

~r

Pink Champagne Cupcakes
Other fun New Years recipe ideas:

Raspberry Confetti KissesCheesecake Sundaes Strawberry Lemonade Cupcakes!!!!!Polka Dot Cake!!!

Toxic Slime-filled Cupcakes!

Posted on


Toxic Slime-filled Cupcakes!
Fudge cupcakes filled with toxic green slime!  Yummy white chocolate pudding makes the slime and fun buttercream and bones complete this mad-scientist dessert.  Print some free radioactive cupcake toppers and you have such a fun October treat!!

These cupcakes are delicious…..  I know the green slime might throw you off, but that slime is the creamiest pudding filling….oh my.  It is like a custard filled doughnut…but better.

I’m a scientist in my day job, so when thinking creepy I tend toward the blood and guts variety more than ghosts and monsters.  I knew I wanted green slime, so I looked up recipes for ideas (realistic slime….it needed to be realistic….)  and I came across an adorable blog with the idea of using plain old pudding with green food coloring– easy! Plus I loved her frosting “blob” technique, so a few parts of this recipe are borrowed from ideas on Make Bake Celebrate.

I also created some free printable “radioactive” cupcake toppers for you.  Just click here for the link, print 2 pages on card stock, cut them out and use double-sided tape to stick them back-to-back over a toothpick.    Easy-peasy and a perfect finish on these!  Aren’t they fun?!???

Radioactive Cupcakes3
Lets make these cute little cupcakes together!  (printable recipe)

INGREDIENTS:

  • One boxed cake mix (plus water, oil and eggs to make according to box)
  • One box (3.3 oz.) Jello Brand White Chocolate Pudding (instant)
  • Milk (to make pudding according to package)
  • Green food coloring gel
  • Purple food coloring gel
  • 2 sticks (1 cup) salted butter
  • 2 sticks (1 cup) unsalted butter
  • 1 teaspoon clear vanilla
  • 3 cups powdered sugar
  • Sprinkles/ decorations for tops of cupcakes  (I used Wilton Bones Sprinkles)

DIRECTIONS:

  • Preheat oven to 350F degrees.
  • Make cupcakes according to box and divide evenly into 24 cupcake liners placed in cupcake tins.
  • Bake according to times given on boxed mix.
  • Remove from oven and cool completely.
  • Make pudding according to package and at the end add green food color gel (I used Leaf green by WIlton ) until it looks like radioactive slime!!!  Carefully spoon into a zip-top bag.
  • Core your cooled cupcakes- you can use a paring knife to just remove a core, but a cupcake corer is much faster and more uniform.  I use the Chicago Metallic Cupcake Plunger and it is cheap and small and perfect for the job!
  • Carefully clip a corner of your green slime (pudding) bag and fill each cupcake cavity about half full of “slime”.
  • Trim a little off the bottom of the “core” you removed and place it back on top of the filling- like a little cupcake cork!

Filling Cupcakes with Slime!Filling cupcakes with slime!

  • Make frosting by combining butters, powdered sugar and vanilla in a large mixing bowl and beating it on high until light and fluffy.
  • Divide frosting in half and mix green into one half and purple into the other half until fully combined.
  • Place each color of frosting in a bag that has been fitted with a Wilton 2A round decorating tip.  Pipe round dots of frosting in alternating colors all over each cupcake top.

Frosting creepy cupcakes!

  • Add sprinkles, bones, skulls, eyeballs…. any cool and creepy decorations you want!
  • Top each cupcake with a free printable topper and ENJOY!!!!

Radioactive Cupcakes filled with SLIME!
My thoughts:  I would make these again in a heartbeat.  I might make them again this weekend.  Yes, they are super fun, but the pudding is really SO good inside!  I feel like every cupcake should have pudding inside…!  I always love to watch the reactions when people bite into things for the first time– and these don’t disappoint!!!  Lots of laughter and smiles at this yummy green slime!  Enjoy!!!!!! ~r

Radioactive Cupcakes!!!

Other fun Halloween treats to try!!

Sweet Tart and Pixie Stix CakePeanut Butter Caramel SauceHalloween Bundt CakeFall acorn cupcakes!

Peanut Butter Fudge Cupcakes

Peanut Butter Fudge Cupcakes
These mini fudge cupcakes are topped with the creamiest peanut butter frosting ever!  If you like peanut butter and chocolate together you will LOVE this recipe!!

Ah peanut butter… I just crave it sometimes!  Add chocolate and you pretty much have achieved perfection in the dessert world (at least in my humble, not-allergic-to-peanuts, view).  These cupcakes are easy to make and they won’t last long!  Here’s how to make them: (printable recipe)

Peanut Butter Fudge Cupcakes!!!

INGREDIENTS: (makes about 40 mini cupcakes)

Cupcakes:

  • 1 1/2 cups of dark chocolate chips
  • 1 stick (4 oz.) salted butter
  • 2 T. cocoa powder
  • 4 egg yolks
  • 6 egg whites
  • pinch of salt
  • 1/2 c. sugar

Frosting:

  • 3 sticks (1 1/2 cups) butter (softened to room temperature)
  • 1 cup of creamy peanut butter
  • 3 cups powdered sugar
  • 1 Tablespoon vanilla 
  • One bag of mini Reese cups (optional for decoration)

DIRECTIONS:

  • Preheat oven to 350 degrees
  • In a microwave safe bowl, melt chocolate with butter in 30 second increments, stirring between until smooth and creamy.
  • Whisk cocoa powder into melted chocolate.
  • Add egg YOLKS and whisk until smooth.  Set aside.
  • Add a pinch of salt to the egg whites and whisk until foamy.
  • Add sugar gradually to egg whites while beating on high until medium peaks form.
  • Add 1/3 of egg whites to chocolate and mix well- until completely combined and smooth.
  • Add remainder of egg whites and fold in gently until completely incorporated.
  • Spoon batter into mini-cupcake liners in tins (fill about 3/4 full) and bake at 350 degrees for 10-12 minutes.
  • Remove from oven and cool completely.
  • To make frosting, place butter, vanilla, and peanut butter into a large bowl and mix on high until smooth (about a minute)
  • Add powdered sugar and beat on low until combined and then on high until light and fluffy.
  • Place frosting in a zip-top bag fitted with a decorating tip and pipe on top of each cooled cupcake.
  • Top each cupcake with a mini Reese Cup and a sprinkle of cocoa powder (as desired)
  • Enjoy!

Peanut Butter Fudge Cupcakes!!
My thoughts:  Yum….!  Yep, that pretty much sums up my thoughts…mmmmm….!  I hope you enjoy these as much as I am right now!!!

Other peanut butter-y recipes you will love:

Peanut Butter Cup Layer CakePeanut butter cup cheesecakePeanut butter Acorn Cookies!Peanut Butter Caramel Sauce

K-cup Cupcakes

Posted on

K-cup cupcakes!!

These  mini vanilla cupcakes are topped with the yummiest fondant and decorated like Keurig K-cups!  So fun!!!

My friend and coworker Mary just got a new job.  When I was thinking about her going-away party I just kept wondering how I could make a dessert that looked like a K-cup coffee pod.  Mary is known in our lab as the K-cup supplier.  Anyone who finds themselves without a coffee pod can find one in Mary’s supply…she literally orders by the case online and at any given time she has maybe 10 different flavors.  Now that she’s gone we really miss her (and her coffee!)
This is less of a recipe and more of an “idea” post.  It was a good chance for me to practice with the fondant recipe my friend Megan gave me a couple of months ago and a fun little art project to challenge my (terrible!) painting skills!
K-cup cupcakes!!!!

(It was also really a fun project to take pictures of!!!)
Want to know how to do this crazy edible art project?
Here it is:

  • Make thick buttercream icing and fondant first.  It’s easiest if I just send you to my original fondant recipe for the tutorial and directions.  Just click here to open that page.
  • For the cupcakes just use your favorite cupcake recipe (which for me was a white cake mix!)
  • I used little cocktail nut cups as my cupcake liners, because they look like the sides of the K-cup pods, but you could certainly use mini white cupcake liners.
  • Place the liners in mini muffin tins and fill about halfway up with cake batter (under-fill them a little, so that the tops bake relatively flat and not mounded up like a typical cupcake)
  • Bake according to your recipe.  My mini cupcakes baked for 12 minutes at 350F degrees.
  • Color fondant as desired and roll it flat.  Cut it into circles that are the size of the cupcake tops.  I used a small round cookie cutter.
  • Use thick buttercream to frost a smooth layer on the top of a cooled cupcake and then immediately press a fondant circle on top of the buttercream.
  • Cut colored fondant into any shapes you might need on top and use a small amount of water  to attach these  shapes to the top of the fondant circle.

K-cup cupcakeK-cup cupcakes!

  • Once those extra pieces are attached, use a small brush to wipe away excess powdered sugar and then use gel food coloring and a fine tipped brush to paint on the fondant.  I used an actual pod as a model to paint from.

Paint cupcake with food color gels.

(note: you might need to add a little white food coloring to the dark colors to make them show up- otherwise your dark blues and greens will look like black when used as paint.)

Be creative and use your imagination!  I just pulled all of my pod flavors out and tried to pick ones that were fun – but also ones I thought I could handle copying!  I wanted to do a Starbucks pod- but that logo…!  Yikes.  No way I could paint anything that looked like that!!

K-cup cupcakes!!!!K-cup cupcakes!!

My thoughts:  These aren’t what I would qualify as easy, but they are really a fun afternoon project.  Very relaxing.  I’m POSITIVE you all can paint better than I, and if you like to just create and paint and color you will love this project!  Take your time and enjoy the process. (and don’t actually try to brew one- lol!  I had someone ask me about that and I had to explain that the above picture is simply a creative presentation of a cupcake!!)

I’m dedicating this post to you Mary!!  I miss working with you and I hope your new coworkers realize how lucky they are to have you!!!

This is also a shout out to Keurig and the genius of those delicious little coffee pods– you make every morning so much happier for me!!!  Lots of love from Easybaked to all of you!  ~r

K- cup cupcakes!!!

Other mini desserts you might enjoy:

Cookie Dough CupcakesChocolate Raspberry Mini CupcakesRich Chocolate Ganache Mini CupcakesMint Creme Brownie Cups